Desserts

- 1 cup all-purpose flour - 1 tablespoon granulated sugar - 2 tablespoons unsalted butter - 1 teaspoon baking powder - 2 large eggs These main ingredients make the dough for churro poppers. All-purpose flour gives structure. Granulated sugar adds sweetness. Unsalted butter brings richness. Baking powder helps them rise. Eggs bind everything together. - 1 teaspoon vanilla extract - 1/2 teaspoon salt - Oil for frying Vanilla extract adds a warm flavor. Salt balances the sweetness. Use vegetable or canola oil for frying. It needs to be hot for perfect results. - 1/2 cup granulated sugar - 1 tablespoon ground cinnamon - Chocolate sauce - Caramel sauce The cinnamon sugar mixture gives churro poppers their classic taste. Roll each popper in the mix while warm. Chocolate and caramel sauces are perfect for dipping. They add a fun touch to each bite. {{ingredient_image_2}} Combining Liquid Ingredients Start by placing water, butter, and vanilla extract in a medium saucepan. Heat this over medium heat. Stir gently until the mixture boils and the butter melts. Mixing Dry Ingredients Remove the pan from heat. Quickly add flour, sugar, salt, and baking powder all at once. Use a wooden spoon to mix until the dough forms a smooth ball. It should pull away from the sides of the pan. Incorporating Eggs Let the dough cool for about 5 minutes. Add eggs one at a time, mixing well after each egg. Keep stirring until the dough is smooth and shiny. Heating Oil to the Right Temperature In a deep fryer or heavy pan, heat oil to 350°F (175°C). Make sure there's enough oil for the poppers to float as they fry. Piping the Dough into the Oil Fit a piping bag with a large star tip. Pipe small rounds of dough, about 1 inch wide, into the hot oil. Avoid overcrowding the pan. Monitoring Frying Time for Perfect Color Fry the churro poppers for about 2-3 minutes on each side. They should turn golden brown. Use a slotted spoon to gently lift them out. Rolling in Cinnamon Sugar While the poppers are warm, roll each one in a mix of sugar and cinnamon. Make sure they are fully coated for the best flavor. Serving Suggestions Serve the churro poppers warm. Pair them with chocolate sauce or caramel sauce for dipping. Garnishing Tips For an extra touch, arrange the poppers on a nice platter. Place a small bowl of dipping sauce in the center. Dust a little cinnamon sugar on top for flair. To make great churro poppers, you need the right dough. The dough should be thick and smooth. If it's too runny, your poppers will not hold shape. If it’s too thick, they will be dense. Aim for a soft, pliable dough that pulls away from the sides of the pan. When frying, heat your oil to 350°F (175°C). This temperature is key for crispiness. If the oil is too hot, the outside cooks too fast. If it's too cool, the poppers absorb oil. Fry in small batches. This way, they cook evenly and get that nice golden color. Plating is part of the fun! Arrange your churro poppers on a colorful platter. Add a bowl of chocolate sauce or caramel sauce in the center. This makes for a great dipping experience. A light dusting of cinnamon sugar on top adds charm and flavor. For pairings, think about fresh fruit. Sliced strawberries or bananas work well. They add a fresh touch to the sweet poppers. You can also serve with whipped cream for extra indulgence. Always be careful when handling hot oil. Use long tongs or a slotted spoon to avoid burns. Keep a close eye on the oil temperature. If it gets too hot, it can cause splatters. Avoid overcrowding the frying pan. This can lower the oil temperature and lead to soggy poppers. Fry just a few at a time. This way, you ensure they cook perfectly and stay crispy. Pro Tips Use Room Temperature Eggs: Ensure your eggs are at room temperature for better incorporation into the dough, leading to a smoother and fluffier texture. Monitor Oil Temperature: Use a thermometer to keep the oil at a steady 350°F (175°C) to achieve perfectly golden churro poppers without burning. Don’t Overcrowd the Pan: Fry in batches to avoid lowering the oil temperature, which can result in soggy churro poppers instead of crispy ones. Experiment with Dipping Sauces: While chocolate and caramel are classic choices, try adding flavored sauces like raspberry or dulce de leche for a unique twist. {{image_4}} You can have fun with churro poppers by adding different flavors. Here are three tasty ideas: - Chocolate-filled Churro Poppers: Add chocolate ganache to the center. Pipe the dough, leaving space for chocolate. This gives a sweet surprise when you bite in. - Pumpkin Spice Churro Poppers: Mix pumpkin puree and spices in the dough. Use cinnamon, nutmeg, and ginger to give it that fall taste. These are perfect for cozy gatherings. - Matcha Churro Poppers: Blend matcha powder into the dough. This adds a unique green color and a fresh taste. Pair them with a sweet dipping sauce for a fun twist. You can change up the coatings for churro poppers, too. Here are some ideas: - Nut-based Coatings: Try ground nuts instead of sugar. Almonds or hazelnuts can add a crunchy texture and a nutty flavor. Just mix them with a little sugar for a sweet touch. - Swapping the Sugar Blend: Instead of regular sugar, use brown sugar or coconut sugar. These options add a deeper flavor and can make the poppers more interesting. The right sauce can make churro poppers even better. Here are some fun dipping options: - Spiced Honey Sauce: Mix honey with a dash of cinnamon and cayenne. This sauce gives a sweet and spicy kick that pairs well with the churros. - Fruit-based Sauces: Use fresh fruit purees, like strawberry or raspberry. These add a fruity taste that contrasts nicely with the warm churro poppers. To keep your churro poppers fresh, let them cool first. You should place them on a plate lined with paper towels. This helps absorb any extra oil. Once they are cool, wrap them in plastic wrap or place them in an airtight container. Store them in the fridge for up to three days. To enjoy your churro poppers again, you want them crispy. The best way is to use an oven. Preheat your oven to 350°F (175°C). Place the churro poppers on a baking sheet in a single layer. Bake for about 5-7 minutes or until warm. This method keeps them nice and crispy. If you want to save churro poppers for later, freezing is a great option. First, let them cool completely. Then, place them in a single layer on a baking sheet. Freeze them for about an hour until they are firm. After that, transfer them to a freezer bag or container. They can be frozen for up to two months. To thaw, take them out and let them sit at room temperature for about 30 minutes before reheating. To make churro poppers crispy, focus on a few key techniques: - Fry at the right temperature: Heat oil to 350°F (175°C). This helps create a crispy outer layer. - Avoid overcrowding: Fry in small batches. This keeps the oil hot and ensures even cooking. - Cool the dough: Let the dough rest after mixing. This helps improve the texture. - Drain excess oil: Place fried poppers on paper towels to remove extra oil. Following these steps makes churro poppers delightfully crispy and golden. Yes, you can use different types of flour for churro poppers. Here are some options: - Whole wheat flour: This gives a nutty flavor and adds fiber. - Rice flour: This can make the poppers lighter and gluten-free. - Almond flour: This adds a subtle taste and is great for low-carb diets. Experimenting with these flours lets you create unique flavors while still enjoying churro poppers. You can find churro poppers in various places: - Local restaurants: Many Mexican or dessert places serve churro poppers as a special treat. - Food trucks: Look for food trucks that focus on desserts. They often have fresh churro poppers. - Grocery stores: Some stores sell frozen churro poppers that are easy to prepare at home. These options make it easy to enjoy churro poppers, whether dining out or cooking at home. Churro poppers are simple and fun to make. We covered the key ingredients, from all-purpose flour to yummy dipping sauces. I shared step-by-step instructions for preparing, frying, and serving them. Plus, I offered tips for perfecting your treat and creative variations. Now, you can enjoy these tasty desserts any time. Use the ideas here to impress friends and family with your cooking skills. Happy frying!
Churro Poppers Tasty Treats for Any Occasion
Get ready to indulge in irresistible Churro Poppers! These tasty bites are perfect for any event, from birthday parties to cozy family nights. With a
To make these delightful beignets, gather these key ingredients: - 1 cup all-purpose flour - 2 tablespoons granulated sugar - 1 teaspoon baking powder - ½ teaspoon salt - 1 large egg - ½ cup whole milk - 1 teaspoon pure vanilla extract - 2 tablespoons unsalted butter, melted and slightly cooled - Oil for frying (vegetable or canola recommended) - Powdered sugar, for a delightful dusting These ingredients form a soft and fluffy dough that puffs up beautifully when fried. Each one plays an important role in achieving the perfect texture and flavor. You can make your beignets even more special with these add-ins: - Cinnamon for a warm spice - Nutmeg for a hint of earthiness - Chocolate chips for a sweet surprise - Citrus zest for a fresh twist Feel free to experiment with these flavors. Each one can add a unique touch to your beignet recipe. To prepare your beignets, you'll need a few essential tools: - A large mixing bowl - A whisk for blending ingredients - A spatula or wooden spoon for mixing - A deep pot or heavy skillet for frying - A slotted spoon for flipping and removing beignets - A thermometer to check oil temperature Having the right equipment makes the cooking process smooth and fun. It ensures your beignets turn out just right! {{ingredient_image_2}} Start by gathering your ingredients. In a large bowl, mix the flour, sugar, baking powder, and salt. Whisk them together until they blend well. This step is key for tasty beignets. In another bowl, crack the egg and beat it lightly. Add the milk, vanilla, and melted butter. Whisk this mixture until it is smooth. Next, pour the wet mix into the dry mix. Stir gently with a spatula until just combined. It's fine to have a few lumps; this keeps your beignets light and fluffy. Now, it's time to heat the oil. Use a deep pot or heavy skillet for this step. Pour in enough oil to let the beignets float. Heat the oil over medium heat until it reaches 360°F (182°C). Use a thermometer for accuracy. This temperature is crucial for perfect frying. Too hot can burn the beignets, while too cool makes them greasy. Once the oil is ready, it's time to fry. Use a spoon or small cookie scoop to drop tablespoon-sized balls of batter into the hot oil. Fry only a few at a time to avoid crowding. This helps them cook evenly. Let them fry for 2-3 minutes on one side. They should puff up and turn golden brown. Flip them with a slotted spoon to fry the other side. When golden and cooked through, remove them carefully. Place them on a plate lined with paper towels to drain excess oil. Finally, dust them generously with powdered sugar before serving. Enjoy your delicious beignets! To get fluffy beignets, mix the batter gently. Over-mixing can make them tough. Aim for a smooth mix but keep some lumps. This keeps the beignets light. Also, check your oil temperature. If it’s too low, the beignets will soak up oil. If it’s too high, they will burn. A good range is 360°F (182°C). Use a thermometer for accuracy. One common mistake is overcrowding the pot. Fry only a few beignets at a time. This helps them cook evenly and puff up. Another mistake is not letting the oil heat properly. Always wait for the right temperature before frying. Lastly, don’t skip the dusting of powdered sugar. It adds a sweet touch that makes them special. Serve your beignets warm on a lovely plate. For a fun twist, add a drizzle of chocolate sauce or fruit sauce for dipping. Fresh berries on the side can also brighten the dish. If you want to impress, sprinkle extra powdered sugar on top. This adds a nice visual and sweet touch. Pro Tips Heat the Oil Properly: Make sure the oil is at the correct temperature (360°F/182°C) before frying. If the oil is too cool, the beignets will absorb excess oil, making them greasy. If it's too hot, they will burn on the outside before cooking through. Keep the Batter Light: Avoid overmixing the batter. A few lumps are okay; overmixing can lead to denser beignets. The goal is to keep them airy and fluffy! Don't Overcrowd the Pan: Fry only a few beignets at a time. Overcrowding can lower the oil temperature and cause the beignets to cook unevenly. Dust Just Before Serving: For the best presentation, dust the beignets with powdered sugar right before serving. This keeps the sugar from dissolving into the warm beignets and maintains that beautiful snowy finish. {{image_4}} You can add a sweet twist to your beignets. After frying, dip them in melted chocolate. Dark, milk, or white chocolate works great. Let the excess drip off before placing them on parchment paper. You can even sprinkle nuts or sea salt on top for a fun crunch. Kids and adults love this treat! For a fruity surprise, you can fill your beignets. Use a piping bag to add fruit preserves or pie filling after frying. Raspberry, strawberry, or even lemon curd are fantastic choices. This variation adds flavor and a burst of color. Make sure to dust the outside with powdered sugar for a nice finish. You can make beignets gluten-free by swapping the all-purpose flour. Use a gluten-free all-purpose blend instead. Make sure it contains xanthan gum for the best texture. The rest of the recipe stays the same. This way, everyone can enjoy these fluffy treats! To keep your beignets fresh, store them in an airtight container. Place parchment paper between layers to prevent sticking. This method helps them stay soft and tasty. Keep the container in a cool place, away from direct sunlight. If the weather is warm and humid, consider refrigerating the container for extra freshness. When you're ready to enjoy leftovers, you can quickly reheat beignets. The best way is to preheat your oven to 350°F (175°C). Place the beignets on a baking sheet and warm them for about 5-7 minutes. This method keeps them soft while restoring their delightful texture. You can also microwave them for 10-15 seconds, but they may lose that crispy exterior. If you want to save beignets for later, freezing is a good option. First, let them cool completely. Then, arrange them in a single layer on a baking sheet and freeze for about an hour. Once frozen, transfer them to a freezer-safe bag or container. Label it with the date and use within three months for the best taste. When ready to eat, thaw them in the fridge overnight and reheat as described above. Enjoy your beignets at any time! French beignets have roots in France. They date back to the 16th century. These sweet treats were often served during Carnival. The name "beignet" means "to be soaked" in French. They are warm, fluffy, and often dusted with sugar. In New Orleans, beignets became famous thanks to their unique style. They are now a staple in many cafes and bakeries. Yes, you can! While all-purpose flour is best, you can try others. For a gluten-free option, rice flour or almond flour works well. These flours can change the texture and taste, so be ready for that. If you use whole wheat flour, your beignets will have a nuttier flavor. Just remember to adjust the liquid a bit if needed. To boost flavor, you can add spices or extracts. Try cinnamon or nutmeg for a warm touch. You can also mix in citrus zest for a fresh kick. If you want a chocolate taste, add cocoa powder to the batter. Another idea is to fill them with jam or cream before frying. The options are endless! The best temperature is 360°F (182°C). This heat allows the beignets to puff and brown nicely. If the oil is too hot, they will burn. If it’s too cool, they will soak up oil and become greasy. Use a kitchen thermometer to check the temperature. Fry a small test beignet to see if it cooks perfectly before frying the rest. You learned how to make vanilla French beignets. We covered key ingredients, step-by-step cooking, and tips for great results. I shared ways to add flavors and even make gluten-free options. We also discussed storing and reheating beignets for later. Remember, practice makes perfect. Don’t rush the frying! Enjoy exploring different flavors. Beignets are versatile and fun to make. I hope this guide inspires you to create your own delicious treats. Happy frying!
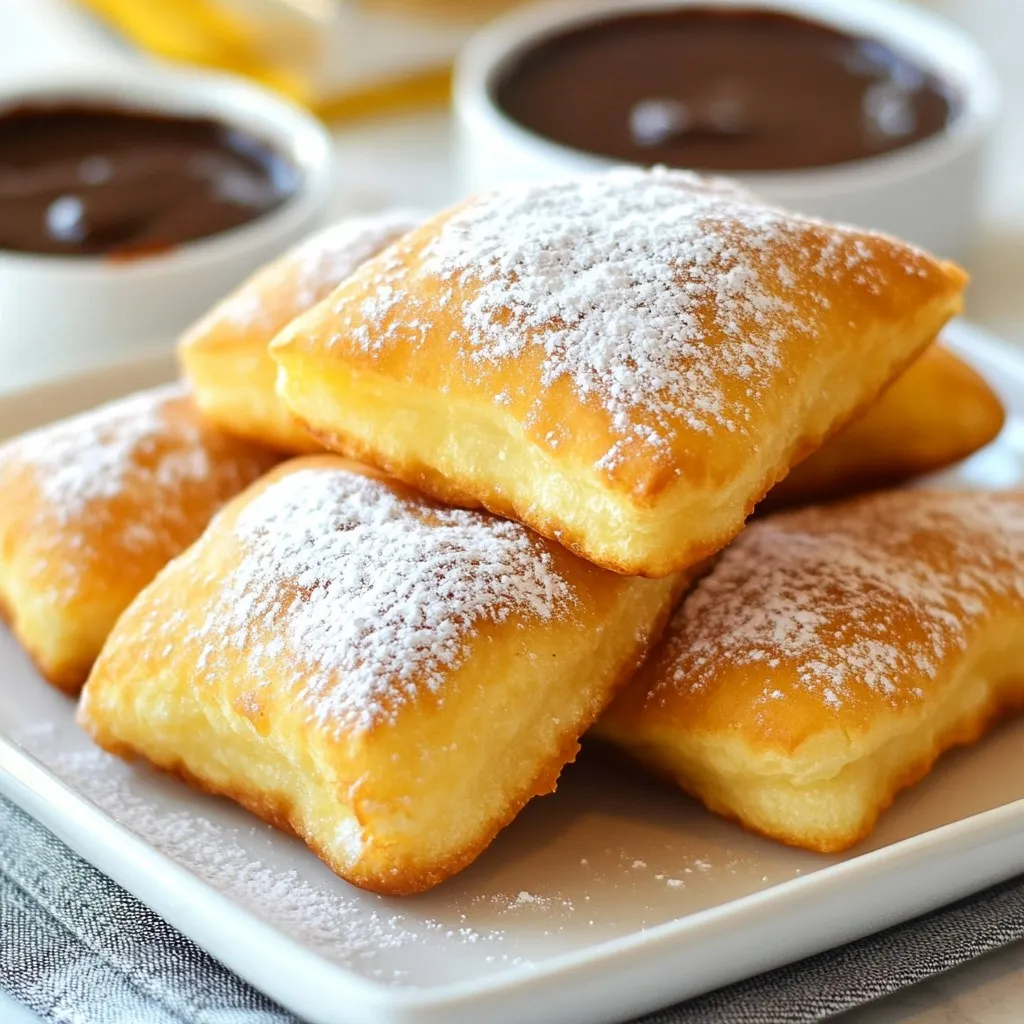
Vanilla French Beignets Delightful and Easy Recipe
If you love sweet treats, you’ll adore these Vanilla French Beignets! In this easy recipe, I’ll show you how to make soft, pillow-like beignets that
For a delightful single-serve apple crumble, gather these simple ingredients: - 1 medium apple (Granny Smith or Honeycrisp), peeled and diced - 1 tablespoon brown sugar - 1/2 teaspoon ground cinnamon - 1 tablespoon fresh lemon juice - 2 tablespoons rolled oats - 1 tablespoon all-purpose flour - 1 tablespoon cold butter or coconut oil, cubed - A pinch of salt - A scoop of vanilla ice cream (optional, for serving) You can swap ingredients based on what you have. Use any apple type, like Fuji or Gala. If you want a different sweetener, granulated sugar or maple syrup works too. For a dairy-free option, replace butter with coconut oil or vegan butter. If you need gluten-free ingredients, use gluten-free flour instead of all-purpose flour. Using fresh ingredients makes a big difference in flavor. Fresh apples are crisp and juicy. They create a tasty filling. Pre-packaged ingredients, like canned apples, may save time but can lack texture. If you choose canned apples, ensure to drain them well to avoid a soggy crumble. Fresh is always best for this dessert! {{ingredient_image_2}} Start by peeling and dicing one medium apple. I like using Granny Smith or Honeycrisp for their sweet and tart balance. In a small bowl, add the diced apple, one tablespoon of fresh lemon juice, one tablespoon of brown sugar, and half a teaspoon of ground cinnamon. Toss everything well. This mix gives the apples a great flavor. Pour the apple mix into a small oven-safe ramekin. Spread it evenly across the bottom for even baking. In another bowl, combine two tablespoons of rolled oats, one tablespoon of all-purpose flour, and a pinch of salt. Then, add one tablespoon of cold butter or coconut oil, cubed. Use your fingers or a fork to mix until the texture looks crumbly, like coarse sand. This topping adds a crunchy texture that contrasts nicely with the soft apples. Evenly distribute this crumble over the apples, covering them completely. Preheat your oven to 350°F (175°C). Once the oven is ready, place the ramekin inside. Bake for 25 to 30 minutes. Keep an eye on it; the apples should get tender and the topping should turn golden brown. After baking, take the ramekin out and let it cool for a few minutes. This cooling time keeps you from burning your mouth. For a tasty treat, add a scoop of vanilla ice cream right before serving! When picking apples, I suggest using Granny Smith or Honeycrisp. These apples give a nice tartness and hold their shape well when baked. Look for apples that feel firm and have a smooth skin. Avoid apples with bruises or soft spots, as they may spoil quickly. Fresh apples make your crumble taste great and add texture. This single-serve apple crumble is delightful on its own, but I love pairing it with vanilla ice cream. The warm crumble and cold ice cream create a lovely contrast. You can also add a sprinkle of cinnamon or a drizzle of caramel sauce on top. If you want a drink, try serving it with hot apple cider or a warm cup of tea. Both enhance the cozy feel of this dessert. If you have dietary needs, it’s simple to modify this recipe. For a vegan option, swap the butter for coconut oil. Use a plant-based ice cream if you want to keep it dairy-free. If you need a gluten-free version, replace the all-purpose flour with almond flour or a gluten-free blend. These changes keep the flavors rich while meeting dietary needs. Pro Tips Choose the Right Apple: Opt for tart varieties like Granny Smith or Honeycrisp for a perfect balance of sweetness and acidity. Keep It Cold: Use cold butter or coconut oil to achieve a flaky and crunchy crumble topping. This prevents the fat from melting too quickly. Don’t Skip the Lemon Juice: The acidity from lemon juice not only enhances the flavor but also prevents the apples from browning too quickly. Experiment with Spices: Feel free to add nutmeg or ginger to the crumble for an extra layer of warmth and flavor. {{image_4}} You can change the apple in your crumble for other fruits. Try pears, peaches, or berries. Each fruit brings a new taste. Mixing fruits can add layers of flavor. For example, apple and raspberry work great together. Just keep the same amount of fruit. The cooking time may stay the same or change a little. Want a vegan version? Swap the butter for coconut oil. Use gluten-free flour instead of regular flour. These small changes keep the dessert tasty while meeting your diet needs. There are many gluten-free flours to choose from, like almond or oat flour. They work well in this recipe. Nuts can give a nice crunch. Try adding chopped walnuts or almonds to the crumble topping. They add texture and flavor. You can also add spices like nutmeg or ginger for warmth. A little pinch can go a long way. Just be careful not to overpower the apple taste. These tweaks make your single-serve apple crumble even more special! To store leftover apple crumble, let it cool first. Cover it with plastic wrap or place it in an airtight container. Store it in the fridge for up to three days. This way, you keep the flavors fresh and the texture nice. When you're ready to enjoy it again, preheat your oven to 350°F (175°C). Take the crumble out of the fridge and place it in an oven-safe dish. Heat it for about 10-15 minutes. This warms it up and makes the topping crispy again. You can also microwave it for about 30-45 seconds if you're in a hurry. Just be careful not to overheat it. You can freeze apple crumble for later too! Allow it to cool completely, then wrap it tightly in plastic wrap. Place it in a freezer-safe bag or container. It stays good for up to three months. When you're ready to eat it, thaw it in the fridge overnight. Then, reheat it in the oven. This makes for a quick and tasty dessert anytime! Yes, you can prepare the apple mixture ahead of time. Just mix the diced apples, lemon juice, brown sugar, and cinnamon. Store this mixture in the fridge until you are ready to bake. The crumble topping can also be made in advance. Keep it in an airtight container. When you are ready to bake, simply combine both parts and follow the baking steps. This will save time and let you enjoy fresh apple crumble quickly! If you need a substitute for brown sugar, you can use white sugar. To mimic the flavor of brown sugar, add a little molasses. Use one tablespoon of white sugar and half a teaspoon of molasses. Mix them well until they blend together. You can also try coconut sugar or maple sugar. Both will provide a nice taste to your apple crumble. You can make this apple crumble on the stovetop. Use a small skillet with a lid. Start by cooking the apple mixture over medium heat until the apples soften. Stir occasionally to prevent sticking. While this cooks, prepare the crumble topping. Once the apples are tender, sprinkle the topping over them. Cover the skillet with a lid and let it cook for about ten minutes. This method gives you a warm and tasty dessert without needing an oven! This blog post covered how to make a delicious apple crumble. We looked at the key ingredients, including fresh options and smart substitutions. I shared simple steps for preparing the apple mixture and making the crumble topping, along with baking tips. We discussed variations and how to customize the recipe for dietary needs. Lastly, I explained storage tips to keep your dessert fresh. Enjoying this treat is simple and fun. You can make it your own!
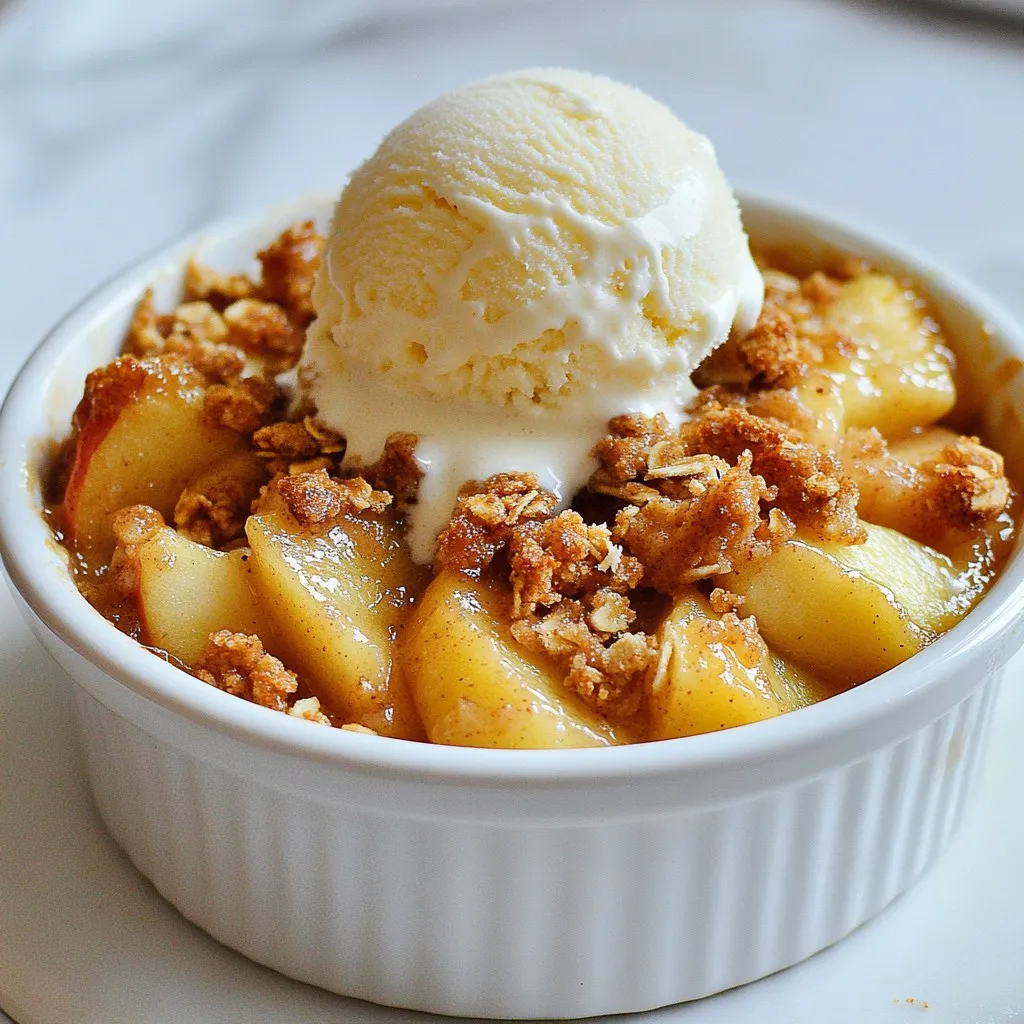
Single-Serve Apple Crumble Tasty and Simple Dessert
Are you craving a sweet treat that’s easy to make? Look no further! This Single-Serve Apple Crumble is the perfect dessert for one. You can
- 1 cup creamy peanut butter (natural, no sugar added) - 1/2 cup honey or maple syrup - 1 cup rolled oats - 1 cup protein powder (choose either chocolate or vanilla) - 1/4 cup unsweetened cocoa powder - 1/2 cup dark chocolate chips (use dairy-free if preferred) - 1/4 teaspoon salt - 1/4 cup crushed peanuts (for topping) The heart of these Copycat Reese's Protein Peanut Butter Bars lies in its simple yet rich ingredients. First, creamy peanut butter gives the bars their nutty flavor. I always choose natural peanut butter with no sugar added. It keeps the bars healthy and tasty. Next, I add honey or maple syrup for sweetness. Both work well, but I prefer honey for its rich flavor. Rolled oats provide a chewy texture and help bind everything together. They also add some fiber, making these bars more filling. Protein powder is a key player. You can choose chocolate or vanilla based on your taste. I like using chocolate for an extra boost of flavor. The unsweetened cocoa powder adds a deep chocolate taste, balancing the sweetness of the honey. Dark chocolate chips enhance the bars further. They melt slightly and create little pockets of joy in every bite. A pinch of salt balances the flavors and enhances the sweetness. Finally, I sprinkle crushed peanuts on top. They add a nice crunch and more peanut flavor. With these ingredients, you get a delicious treat that packs a protein punch! {{ingredient_image_2}} - In a medium saucepan, combine 1 cup of creamy peanut butter with 1/2 cup of honey or maple syrup. - Heat on low for about 2-3 minutes. Stir continuously until the mixture is smooth. - In a large mixing bowl, add 1 cup of rolled oats, 1 cup of protein powder, 1/4 cup of cocoa powder, and 1/4 teaspoon of salt. - Mix these dry ingredients well until they are evenly combined. - Pour the warm peanut butter mixture into the bowl with the dry ingredients. - Stir with a spatula until the mixture is uniform. Then, gently fold in 1/2 cup of dark chocolate chips. - Prepare an 8x8 inch baking dish by lining it with parchment paper. Leave some paper hanging over the edges. - Pour the mixture into the dish and press down firmly. Make sure it forms an even layer. - Place the dish in the refrigerator for at least 1 hour. This helps the bars set properly. - Once firm, lift the bars out using the parchment paper. Cut them into squares or bars with a sharp knife. To get the best bars, use high-quality ingredients. Natural peanut butter works best without sugar. Fresh oats also help create a chewy texture. When mixing, press the mixture firmly into the dish. This helps the bars hold together well after chilling. You can add extra flavor to your bars. Try adding a scoop of vanilla extract or a pinch of cinnamon. Drizzling melted chocolate on top makes them even better. This extra touch adds a nice finish and makes them look pretty. Serve these protein bars on a nice plate. You can stack them high for a fun display. To keep them fresh, store your bars in an airtight container. This keeps them tasting great for up to a week. Pro Tips Use Natural Peanut Butter: Opt for natural peanut butter with no added sugars or oils for a healthier and more authentic flavor. Experiment with Sweeteners: Feel free to substitute honey with maple syrup or agave for a vegan alternative; just keep in mind that the taste may vary slightly. Chill for Best Results: Allow the bars to chill longer than the recommended hour if you prefer a firmer texture; overnight chilling works wonders! Customize Your Add-ins: Add your favorite nuts, seeds, or dried fruits for an extra nutritional boost and flavor variety. {{image_4}} To make these bars vegan, swap honey for maple syrup. Maple syrup adds sweetness without any animal products. Next, choose a vegan protein powder. Many brands offer great flavors like chocolate or vanilla. This keeps your bars plant-based and still tasty! Make sure all your ingredients are gluten-free. Check your oats, as some may contain gluten. You can use certified gluten-free oats for peace of mind. This way, you can enjoy these bars without any worries. Want to mix things up? Add spices like cinnamon for a warm touch. A sprinkle of cinnamon can elevate the flavor. You can also switch the chocolate type. Use white or milk chocolate chips if you prefer. This gives you a chance to create a new favorite! To keep your Copycat Reese's Protein Peanut Butter Bars fresh, store them in an airtight container. This will lock in their flavor and texture. Use a container that fits the bars snugly to prevent movement. You can also wrap each bar in plastic wrap for extra protection. This helps avoid any drying out. If you want to save some bars for later, freezing is the way to go. Start by cutting the bars into squares. Then, wrap each square tightly in plastic wrap. Place the wrapped bars in a freezer-safe bag or container. Make sure to label it with the date. This keeps track of freshness. When you’re ready to enjoy a bar, take it out of the freezer. Let it thaw in the fridge for a few hours or overnight. You can also leave it at room temperature for about 30 minutes. This way, you’ll have a delicious treat ready to eat! Each bar has about 180 calories. The total calories come from the ingredients used. Here’s a quick breakdown: - Creamy peanut butter (1 cup): 1,500 calories - Honey or maple syrup (1/2 cup): 300 calories - Rolled oats (1 cup): 300 calories - Protein powder (1 cup): 200 calories - Cocoa powder (1/4 cup): 50 calories - Dark chocolate chips (1/2 cup): 400 calories - Crushed peanuts (1/4 cup): 200 calories Total calories: 2,900. Dividing by 12 bars gives you about 242 calories per bar. Adjust these numbers based on your chosen ingredients. Yes, you can swap some ingredients easily. Here are common substitutes: - Peanut butter: Use almond or cashew butter for a different flavor. - Honey: Maple syrup works well for a vegan option. - Protein powder: Choose a flavor you like, such as vanilla or chocolate. - Dark chocolate chips: Use milk chocolate or leave them out for less sweetness. - Oats: Rolled oats can be replaced with quick oats or gluten-free oats. Substitutes may change the texture and taste, but they can still be tasty. These bars stay fresh in the fridge for about one week. Make sure to store them in an airtight container. To keep them from sticking together, you can place parchment paper between layers. For longer storage, you can freeze them. They last up to three months in the freezer. Thaw in the fridge overnight before eating. This blog post covered how to make delicious peanut butter protein bars. We explored the key ingredients, like creamy peanut butter and rolled oats, and went through each step, from heating the mixture to chilling the bars. You learned tips for achieving the best texture and how to customize flavors. With options for vegan and gluten-free versions, there's a recipe for everyone. Store your bars properly for best results. Now you have a tasty snack that fuels your day! Enjoy making and sharing these healthy treats.
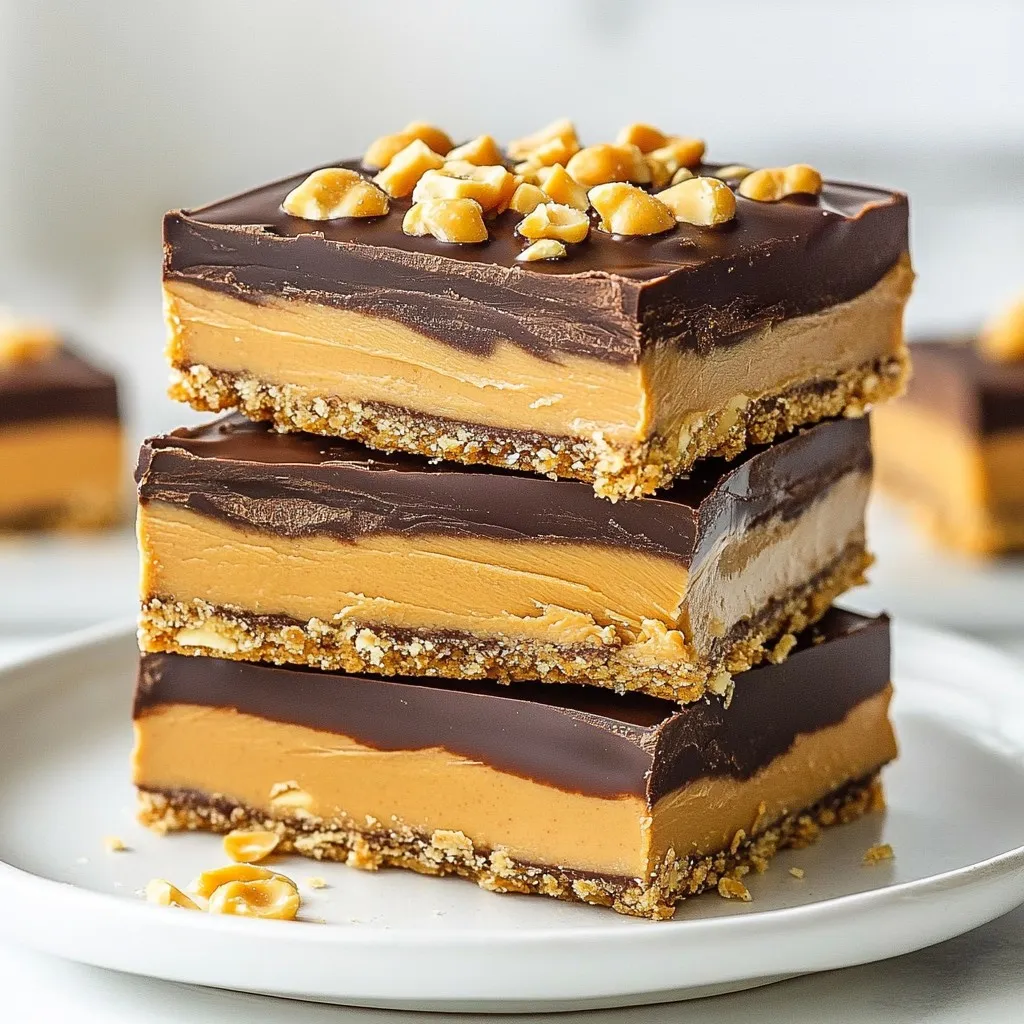
Copycat Reese’s Protein Peanut Butter Bars Delight
Craving that delicious mix of chocolate and peanut butter but want a healthy twist? I’ve got you covered with my Copycat Reese’s Protein Peanut Butter
Here’s what you need for the cinnamon swirl banana bread. Gather these simple items: - 3 ripe bananas, thoroughly mashed - 1/3 cup unsalted butter, melted - 1 teaspoon baking soda - A pinch of salt - 3/4 cup granulated sugar - 1 large egg, lightly beaten - 1 teaspoon pure vanilla extract - 1 teaspoon ground cinnamon - 1 1/2 cups all-purpose flour - 1/4 cup packed brown sugar (for the swirl) - 1 teaspoon ground cinnamon (for the swirl) Using ripe bananas is key. They add natural sweetness and moisture. The unsalted butter brings richness to the bread. Baking soda helps it rise, while a pinch of salt enhances the flavors. Granulated sugar sweetens the batter. The egg binds everything together, and vanilla adds a lovely aroma. Ground cinnamon brings warmth, making every bite cozy. All-purpose flour gives structure, while the brown sugar and cinnamon mixture creates that delicious swirl. These ingredients work together to make a moist and flavorful bread. Enjoy gathering them! {{ingredient_image_2}} First, set your oven to 350°F (175°C). This heat will make your bread rise just right. Next, take a 9x5 inch loaf pan and grease it well. You can use butter or nonstick spray. This helps the bread come out easily later. In a big bowl, mash three ripe bananas. Mix in 1/3 cup of melted unsalted butter. Stir until the mix is smooth. Then, add 1 teaspoon of baking soda and a pinch of salt. Now, add 3/4 cup of granulated sugar, one lightly beaten egg, and 1 teaspoon of pure vanilla extract. Mix well until everything is smooth and blended. Next, slowly sprinkle in 1 teaspoon of ground cinnamon. This gives your bread a warm flavor. Now, add 1 1/2 cups of all-purpose flour. Mix carefully until just combined. Don’t overmix, or your bread might be too dense. In a small bowl, make the swirl mixture. Combine 1/4 cup of packed brown sugar and 1 teaspoon of ground cinnamon. Stir it well. This mix will create a sweet cinnamon ribbon in your bread. Pour half of the banana bread batter into the greased pan. Smooth it out evenly. Then, take half of the cinnamon sugar mix and sprinkle it over the batter. Pour the rest of the batter on top, spreading it out. Finally, sprinkle the remaining cinnamon sugar on top. Use a knife or toothpick to swirl it gently. Make a figure-eight motion to create a beautiful marbled look. Now, place the loaf pan in the oven. Bake for 60-65 minutes. To check if it’s done, insert a toothpick into the center. If it comes out clean, your bread is ready. Once it's baked, take it out and let it cool in the pan for about 10 minutes. Then, move the loaf to a wire rack to cool completely before slicing. To get soft and fluffy banana bread, avoid overmixing the batter. When you mix the flour, only combine it until you don’t see any dry bits. Overmixing can make your bread tough. Also, always use room temperature ingredients. This helps the batter mix better. Cold ingredients can lead to uneven baking. Let your eggs and butter sit out for a while before starting. You can make your banana bread even tastier by adding nuts or chocolate chips. Chopped walnuts or pecans give a nice crunch. If you love chocolate, mini chocolate chips blend well with the banana flavor. Don’t be afraid to experiment with spices! Besides cinnamon, try nutmeg or allspice for a unique taste. A pinch can change the whole profile of your bread. To create a beautiful swirl, pour half of your batter into the pan first. Then sprinkle half of the cinnamon swirl mixture on top. When you add the rest of the batter, spread it gently. Use a knife or toothpick to swirl the layers. Make a simple figure-eight motion. This will create a lovely marbled effect without mixing everything together. Pro Tips Use Overripe Bananas: The riper the bananas, the sweeter and more flavorful your bread will be. Look for bananas with brown spots for the best results. Don’t Overmix: Mix until the ingredients are just combined to ensure a light and fluffy texture. Overmixing can lead to dense bread. Add Nuts or Chocolate Chips: For added texture and flavor, consider folding in some chopped walnuts, pecans, or chocolate chips into the batter. Cool Completely Before Slicing: Allow the bread to cool completely on a wire rack before slicing to prevent it from becoming gummy. {{image_4}} To make cocoa cinnamon swirl banana bread, add cocoa powder to the batter. Start with 1/4 cup of unsweetened cocoa powder. This will give your bread a rich, chocolate flavor. Combine it with the dry ingredients, mixing well. The cocoa pairs perfectly with the banana and cinnamon. You will enjoy a delightful chocolate twist. If you love nuts, try adding walnuts or pecans. Chop the nuts coarsely for good texture. Add 1/2 cup to the batter before you mix in the flour. This adds crunch and nutty flavor. Nuts also boost the bread's nutrition. You can use any nut you like. Almonds or hazelnuts work well too. For a gluten-free version, swap all-purpose flour with a gluten-free flour blend. Look for a blend that works for baking. Measure it out the same way as regular flour. Remember to check that your other ingredients are gluten-free too. This way, everyone can enjoy your tasty banana bread! To keep your banana bread fresh, store it properly. For room temperature storage, wrap the bread in plastic wrap or foil. Place it in an airtight container. This will help keep it soft for up to three days. If you want to store it longer, the fridge is an option. Wrap the bread, then place it in a container. It can last about a week in the fridge. Freezing banana bread is easy. First, let the bread cool completely. Then, wrap it tightly in plastic wrap. Follow this with aluminum foil or a freezer bag. This helps prevent freezer burn. You can freeze it for up to three months. When you’re ready to eat it, just thaw it in the fridge overnight. To reheat banana bread, use the oven or microwave. For the oven, set it to 350°F (175°C). Place the bread on a baking sheet for about 10 minutes. This keeps the outside crisp while warming the inside. If using a microwave, slice the bread and heat it for 10-15 seconds. This will keep it soft and warm, perfect for enjoying with butter. To ripen bananas fast, place them in a brown paper bag. This traps ethylene gas, speeding up the process. You can also put them in a warm spot in your kitchen. If you need them really quick, bake unpeeled bananas at 300°F (150°C) for 15-20 minutes. Let them cool before using. Yes, you can swap out some ingredients. For butter, use coconut oil or applesauce for a healthier option. If you're low on flour, almond or oat flour can work too. For sugar, try honey or maple syrup. Just adjust the amount since these are sweeter. Besides the toothpick test, look for a golden-brown color on top. The bread should spring back when you gently press it. Also, listen for a slight hollow sound when you tap the bottom. If it looks wet, give it a few more minutes in the oven. Cinnamon swirl banana bread stays fresh for about 3-4 days at room temperature. Store it in an airtight container. In the fridge, it can last up to a week. If you freeze it, it can last up to three months. Just wrap it well. Yes, frozen bananas can work great! Just thaw them and drain any excess liquid. Mash them as usual before mixing with the other ingredients. They will add moisture and sweetness to your bread. This is a perfect way to use overripe bananas! You learned how to make delicious banana bread with a cinnamon swirl. We covered the must-have ingredients, simple steps, and helpful tips. Remember to avoid overmixing for the best texture. You can also try variations, like adding nuts or cocoa. Proper storage keeps your bread fresh and tasty. Enjoy your baking journey, and feel free to experiment for your perfect loaf. Happy baking!
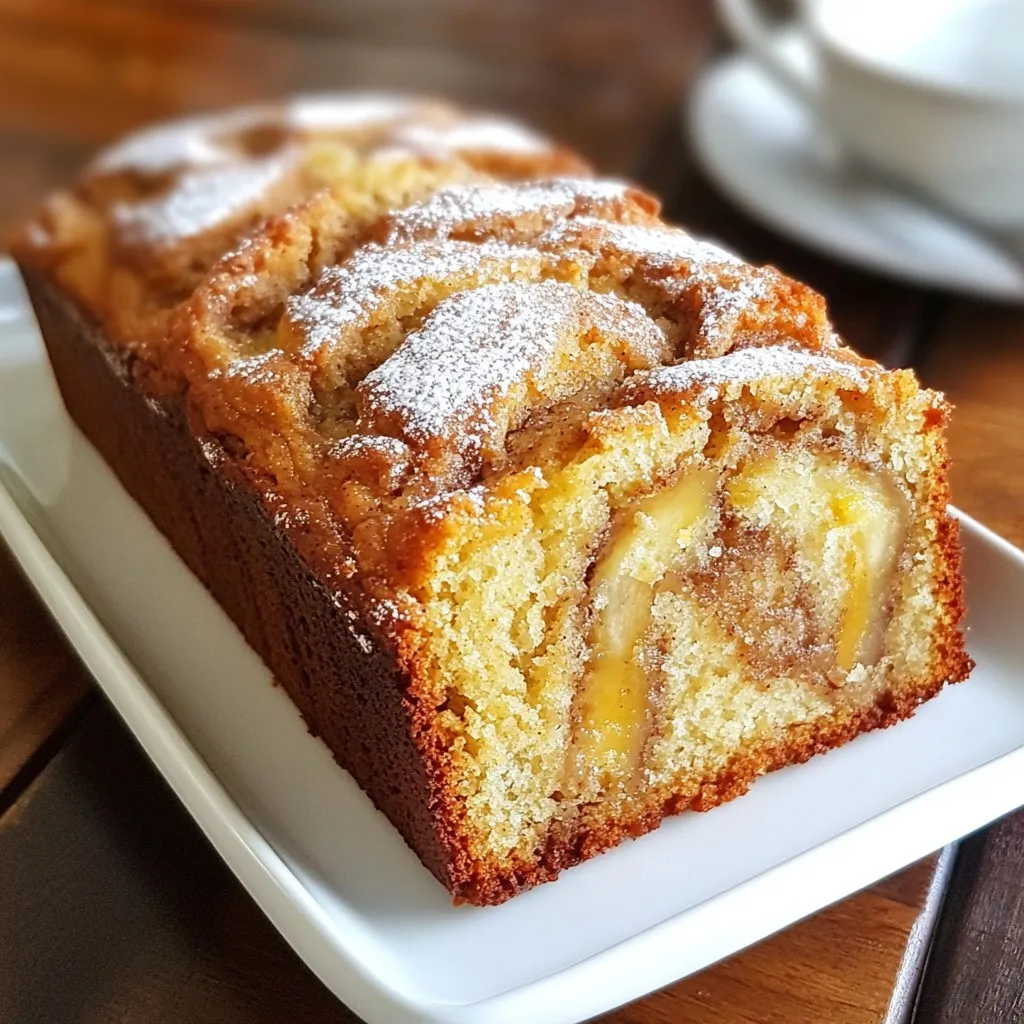
Cinnamon Swirl Banana Bread Delightfully Simple Recipe
Looking for a simple yet delicious treat? This Cinnamon Swirl Banana Bread recipe is perfect for you! With just a few ripe bananas and a
- 1 cup rolled oats - 1 cup natural peanut butter - ½ cup honey or maple syrup - ½ cup chocolate protein powder - ¼ cup unsweetened cocoa powder - ½ cup dark chocolate chips - ¼ teaspoon salt - 1 teaspoon vanilla extract - Dairy-free chocolate chips for vegan option - Additional toppings (e.g., shredded coconut, chopped nuts) To make these bars, you need simple ingredients that pack a punch. The rolled oats give them a hearty base. Natural peanut butter adds creaminess and flavor. Honey or maple syrup sweetens the mix, while chocolate protein powder boosts nutrition. Unsweetened cocoa powder gives a rich, chocolatey taste without extra sugar. Dark chocolate chips add bursts of chocolate goodness. Just a pinch of salt enhances all the flavors, and vanilla extract adds a warm note. If you want a vegan twist, swap honey for maple syrup and use dairy-free chocolate chips. You can also add fun toppings like shredded coconut or chopped nuts for texture. These ingredients make the bars both tasty and healthy! {{ingredient_image_2}} Start by grabbing a large bowl. Add 1 cup of rolled oats, ½ cup of chocolate protein powder, ¼ cup of unsweetened cocoa powder, and ¼ teaspoon of salt. Use a whisk or a spoon to mix all the dry ingredients well. Make sure there are no clumps. This step is key to a smooth texture. In another bowl, mix 1 cup of natural peanut butter, ½ cup of honey or maple syrup, and 1 teaspoon of vanilla extract. Stir continuously until the mixture becomes smooth. You want it to blend well. This mix adds great flavor and binds the bars. Pour the peanut butter mix into the bowl with the dry ingredients. Use a spatula or wooden spoon to mix everything together. Keep stirring until it forms a sticky dough. It should be thick and uniform, which means all ingredients are well blended. Next, gently fold in ½ cup of dark chocolate chips. Make sure they spread evenly throughout the mixture. This adds a sweet and rich flavor to each bite, making your bars even more delicious. Line an 8x8-inch baking dish with parchment paper. Leave some overhang for easy removal later. Transfer the mixture into the lined dish. Use your spatula to press it down evenly and pack it firmly. This helps the bars hold together. Put the baking dish in the refrigerator. Chill for 1-2 hours. This step sets the bars and helps the flavors blend. The longer they chill, the better they taste. Once chilled, lift the bars out using the parchment overhang. Cut them into bars or squares based on your preference. Store the bars in an airtight container in the fridge. They stay fresh for up to one week. Mixing is key for good bars. Start with dry ingredients: oats, protein powder, cocoa, and salt. Use a whisk to blend them well. Make sure no clumps are left. This step helps your bars have a smooth texture. It also ensures even distribution of flavors. A clump-free mix makes for better bars. Consistency matters in your bars. If they are too dry, add a bit more peanut butter. If they feel too sticky, try less syrup. You want a dough that holds together but isn’t hard to mix. It should be thick and easy to press into the dish. Adjusting these ingredients helps you get it just right. Want to boost the flavor? Add a pinch of cinnamon to the mix. It gives a warm and cozy taste. You can also swap in your favorite nut butter. Almond butter or cashew butter works well too. These small changes can make your bars unique and fun. Pro Tips Storage Tip: For maximum freshness, store the bars in an airtight container in the fridge. This helps maintain their texture and flavor for up to a week. Ingredient Swap: Feel free to customize the protein powder or nut butter according to your dietary needs or flavor preferences. Sunflower seed butter is a great alternative for those with nut allergies. Chilling Time: Allow the bars to chill for longer than 2 hours if possible; this helps them firm up more and makes them easier to cut into neat squares. Flavor Boost: Add a pinch of cinnamon or a scoop of your favorite superfood powder for an extra nutritional punch and enhanced flavor profile. {{image_4}} You can easily make a vegan version of these bars. Just swap honey for maple syrup. Also, use dairy-free chocolate chips instead of regular ones. This way, everyone can enjoy them! Want to mix things up? Try using almond butter or sunbutter instead of peanut butter. Each nut butter gives a unique taste. You might find a new favorite flavor! Add-ins can boost the texture and flavor of your bars. Consider mixing in chopped nuts, seeds, or dried fruits. They add crunch and extra nutrients. Just be sure to keep the mix balanced so the bars stay firm. Keep the bars in an airtight container in the fridge. This helps them stay fresh. I always recommend using a glass or plastic container with a tight seal. These bars are best consumed within one week for optimal freshness. After that, they may dry out or lose flavor. You can freeze the bars for later. To do this, wrap each bar in plastic wrap. Then, place them in a freezer-safe bag. When you want to eat one, thaw it in the fridge overnight. Enjoy your tasty treat any time! Yes, you can substitute peanut butter. If you or someone has a nut allergy, use sunflower seed butter. This works well and adds a nice flavor. You can also try soy nut butter or tahini. Both alternatives give a similar texture and taste. Just make sure the substitute is smooth, so it blends well. If you want sweeter bars, add a bit more honey or maple syrup. You can also use mashed bananas or applesauce for natural sweetness. Another option is to mix in a bit of stevia or monk fruit sweetener. These options add sweetness without extra sugar. Start with a small amount and adjust to your taste. Yes, you can use regular protein powder. Just note that flavors may change. If you use a flavored powder, it can alter the taste of the bars. You may need to adjust the amount of cocoa powder or sweetener to balance the flavors. Stick to the same amount to keep the texture right. These no-bake bars are simple and tasty. We combined oats, nut butter, and protein powder for nutrition. You can adjust sugar and flavors to suit your taste. Whether you enjoy them as snacks or a post-workout treat, these bars are versatile. Store them in the fridge for freshness, or freeze them for later. Experiment with different nut butters or toppings for fun twists. Enjoy creating your perfect little snack, and share your favorite variations!
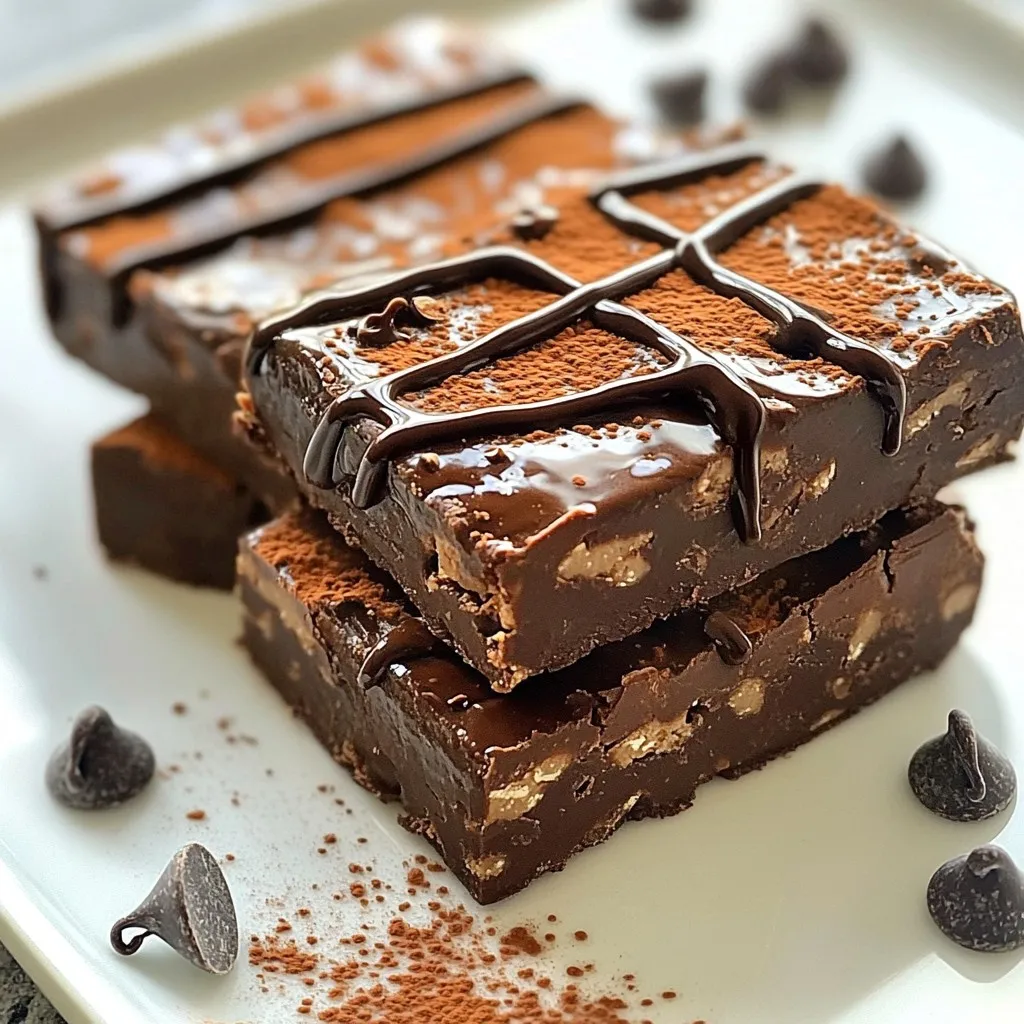
No Bake Chocolate Peanut Butter Protein Bars Recipe
If you’re looking for a quick and healthy snack, you’ll love these No Bake Chocolate Peanut Butter Protein Bars! Packed with protein and delightful flavors,
To make these tasty caramel apple cheesecake bars, you will need: - 2 cups graham cracker crumbs - 1/2 cup unsalted butter, melted - 1/4 cup granulated sugar - 2 (8-ounce) packages cream cheese, softened - 1 cup powdered sugar - 1 teaspoon pure vanilla extract - 2 large eggs, at room temperature - 2 cups apples, peeled, cored, and diced (preferably Granny Smith) - 1 teaspoon ground cinnamon - 1/2 cup caramel sauce (store-bought or homemade) - Optional: chopped nuts (such as pecans or walnuts) for topping You can easily swap some ingredients if needed. Here are some ideas: - Use coconut oil instead of butter for a dairy-free option. - If you don't have graham crackers, any plain cookie will work, like digestive biscuits. - For a lower sugar option, you can use a sugar substitute in the filling. - Any tart apple variety can replace Granny Smith, like Honeycrisp or Braeburn. Toppings can add a special touch. Try these options: - Drizzle extra caramel sauce on top for more sweetness. - Sprinkle chopped nuts for a nice crunch. - Add a dollop of whipped cream on each bar before serving. - A sprinkle of sea salt can enhance the caramel flavor. These small changes can make your dessert unique and fun! {{ingredient_image_2}} Start by preheating your oven to 350°F (175°C). This step is key for even baking. Next, take a 9x13 inch baking dish and line it with parchment paper. Make sure some paper hangs over the edges. This helps you lift the bars out later. In a medium bowl, mix 2 cups of graham cracker crumbs with 1/2 cup of melted butter and 1/4 cup of granulated sugar. Stir until it looks like wet sand. Press this mix firmly into the bottom of your baking dish. You want it smooth and even. In a larger bowl, beat 2 packages of softened cream cheese with an electric mixer. Mix it until it’s smooth and creamy. Slowly add 1 cup of powdered sugar and 1 teaspoon of pure vanilla extract. Keep mixing until it’s fluffy and well combined. Take 2 cups of diced apples and toss them in 1 teaspoon of ground cinnamon. This adds a warm flavor. Gently fold this apple mix into the cheesecake batter. Be careful not to overmix. You want to keep the nice chunks of apple. Pour the apple cheesecake mix over the cooled crust. Spread it evenly with a spatula. Next, drizzle 1/2 cup of caramel sauce over the top. Use a toothpick to swirl the caramel into the cheesecake. Bake it in the oven for 30 to 35 minutes. The center should have a slight jiggle when done. Once baked, let it cool completely. Then, refrigerate for at least 3 hours before cutting. To get a smooth cheesecake, make sure your cream cheese is soft. Let it sit out for about 30 minutes before mixing. Beat the cream cheese well until it is fluffy. Add eggs one at a time, mixing well after each. This helps to keep the batter light and airy. Granny Smith apples work best for this recipe. They are tart and hold their shape well when baked. You can also try Honeycrisp apples for a sweeter touch. Always peel and core the apples. Then, dice them into small pieces. This ensures every bite has apple goodness. When you drizzle caramel over the cheesecake, use a light hand. Pour it in a zigzag pattern across the top. Then take a toothpick or knife to swirl it. Don’t over-swirl; you want to see both caramel and cheesecake. This creates a stunning marbling effect. Pro Tips Use Room Temperature Ingredients: Ensure your cream cheese and eggs are at room temperature before mixing. This helps achieve a smoother and creamier batter without lumps. Choose the Right Apples: Granny Smith apples are ideal for this recipe due to their tartness, which balances the sweetness of the caramel and cheesecake. Swirl the Caramel: When swirling the caramel into the cheesecake layer, use a gentle hand to create beautiful marbled patterns without overmixing the batter. Chill Before Serving: For best texture and flavor, refrigerate the cheesecake bars for at least 3 hours or overnight. This allows the bars to set properly and enhances the taste. {{image_4}} You can make mini versions of these bars. Use a mini muffin tin to create bite-sized treats. Press the graham cracker crust into each cup. Fill them with the cheesecake mixture and diced apples. Bake just like the bars, but for a shorter time. These bites are perfect for parties or snacks. If you want to change the flavor, try adding nutmeg or cloves. Just a pinch will add depth. Mix these spices into the apple mixture or the cheesecake batter. This small change can give your bars a whole new taste. It’s a fun way to switch things up! To make these bars gluten-free, swap out the graham crackers. Use crushed gluten-free cookies or almond flour mixed with melted butter. This will give you a tasty crust without gluten. It’s a simple swap that keeps the joy of these caramel apple cheesecake bars. To keep your caramel apple cheesecake bars fresh, store them in the fridge. Use an airtight container to prevent drying out. Make sure they are fully cooled before covering them. These bars will stay tasty for about five days in the fridge. You can freeze these bars for up to three months. First, cut them into squares. Wrap each piece in plastic wrap. Then, place them in a freezer-safe bag or container. This way, they stay fresh and ready for a sweet treat anytime. When you are ready to enjoy your frozen cheesecake bars, take them out of the freezer. Move them to the fridge and let them thaw overnight. If you're in a hurry, you can leave them at room temperature for about 30 minutes. Once thawed, serve them chilled. They taste best when cold, and you can add more caramel or nuts if you like! Caramel Apple Cheesecake Bars can last about 5 days in the fridge. Make sure to store them in an airtight container. This keeps them fresh and tasty. If you want them to last longer, you can freeze them. They can stay good in the freezer for up to 3 months. Yes, you can use store-bought caramel sauce. It saves time and still tastes great. Just drizzle it over the cheesecake before baking. If you prefer a homemade touch, you can also make your own caramel sauce. Both options work well for this recipe. To cut cheesecake bars, use a sharp knife. Dip the knife in hot water for a few seconds, then wipe it dry. This helps create clean cuts. You can also score the cheesecake lightly before cutting. This guide makes cutting easier and neater. Yes, you can make these cheesecake bars ahead of time. They are perfect for parties or gatherings. Make them a day before and chill them overnight. This allows the flavors to blend well and the bars to set properly. To sum up, this post covered all you need to make delicious Caramel Apple Cheesecake Bars. You learned about key ingredients and how to substitute them. I shared step-by-step instructions to guide you through baking. The tips and tricks help ensure your bars have the perfect texture. Additionally, I provided fun variations to try and storage tips for fresh treats. Enjoy your baking adventure! It’s time to impress your friends and family.
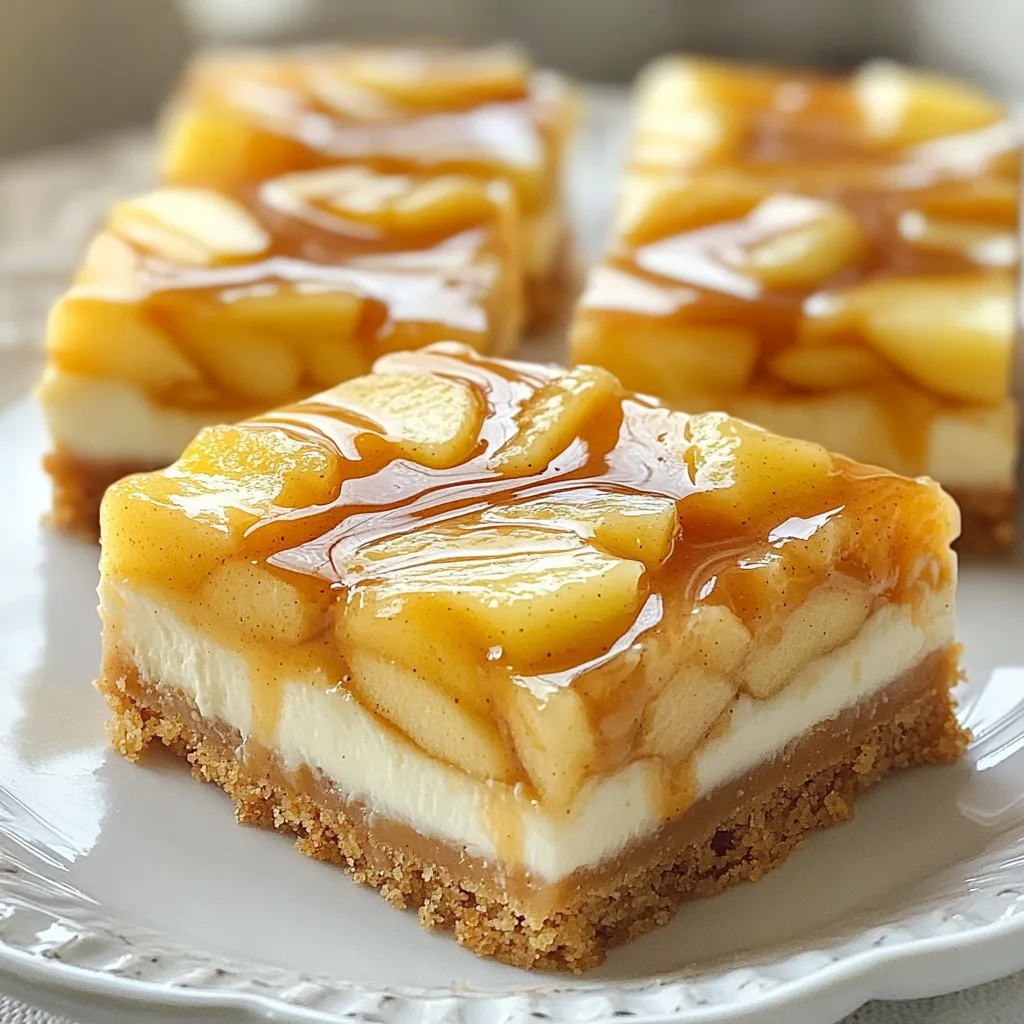
Caramel Apple Cheesecake Bars Delicious and Easy Treat
Are you ready to dive into a sweet treat that blends creamy cheesecake with the crispiness of apples? These Caramel Apple Cheesecake Bars are a
To make these tasty fritters, you will need: - 2 medium apples, peeled and diced into small cubes - 1 cup all-purpose flour - 1/4 cup granulated sugar - 1 teaspoon baking powder - 1/2 teaspoon ground cinnamon - 1/4 teaspoon ground nutmeg - 1/4 teaspoon salt - 1/2 cup milk (whole or 2%) - 1 large egg, beaten - 1 teaspoon vanilla extract - 1 tablespoon unsalted butter, melted - Cooking spray for greasing - Optional: For the glaze - 1 cup powdered sugar mixed with 2 tablespoons milk You can swap some ingredients if needed: - If you want to avoid gluten, use gluten-free flour instead of all-purpose flour. - For a dairy-free option, use almond milk or oat milk in place of regular milk. - If you are out of eggs, a flax egg (1 tablespoon ground flaxseed mixed with 2.5 tablespoons water) works well. - Instead of vanilla extract, you can use almond extract for a different flavor. To make this recipe gluten-free, use gluten-free all-purpose flour. Ensure that all other ingredients are also gluten-free. Always check labels to avoid hidden gluten in processed foods. You can still enjoy delicious fritters without gluten! {{ingredient_image_2}} Start by peeling and dicing 2 medium apples into small cubes. In a large bowl, mix the diced apples with 1 cup of all-purpose flour, 1/4 cup of granulated sugar, 1 teaspoon of baking powder, 1/2 teaspoon of ground cinnamon, 1/4 teaspoon of ground nutmeg, and 1/4 teaspoon of salt. Stir gently. This helps coat the apples and blend the dry ingredients well. In a medium bowl, whisk together 1/2 cup of milk, 1 large beaten egg, 1 teaspoon of vanilla extract, and 1 tablespoon of melted unsalted butter. Mix until smooth. Now, pour this wet mixture into the dry apple mixture. Stir lightly until just combined. It’s okay if some lumps remain. Overmixing can make the fritters tough. Preheat your air fryer to 350°F (175°C) for about 5 minutes. Lightly spray the air fryer basket with cooking spray. Use a tablespoon to scoop the fritter batter and drop dollops into the basket. Leave some space between each fritter. Air fry for 10-12 minutes, flipping them halfway through. Look for a golden brown color. If you like glaze, mix 1 cup of powdered sugar with 2 tablespoons of milk until smooth. Drizzle the glaze over warm fritters right after they come out. Enjoy your tasty treat! To make your fritters just right, follow a few key steps. First, ensure your apples are diced small. This helps them cook evenly. Mix the dry ingredients well, coating the apples nice and even. When you add the wet mix, stir gently. Overmixing makes the fritters tough. It's okay to have some lumps. One common mistake is using too much batter. Make sure to scoop out small dollops. Leave space between each fritter in the air fryer. This helps them expand and cook through. Also, don't skip preheating the air fryer. It ensures the fritters start cooking right away, giving them a nice golden brown color. For even cooking, flip the fritters halfway through. This helps both sides get that crisp texture. If your air fryer has a basket, shake it gently during cooking. This lets hot air circulate better. Finally, always check for doneness. A toothpick should come out clean when they are ready. Pro Tips Fresh Apples Matter: Choose firm, fresh apples for the best flavor and texture. Varieties like Granny Smith or Honeycrisp work wonderfully. Don’t Overmix: When combining wet and dry ingredients, mix gently. Overmixing can lead to tough fritters, so it's okay if there are a few lumps. Perfect Air Frying: Ensure your air fryer is preheated for even cooking. This helps achieve a golden-brown color and a crispy exterior. Glaze While Warm: Drizzle the glaze on the fritters while they are still warm. This allows the glaze to soak in slightly, enhancing the sweetness. {{image_4}} You can change your apple fritters with seasonal flavors. For fall, try adding pumpkin spice. Use 1 teaspoon of pumpkin spice instead of cinnamon and nutmeg. This gives your fritters a warm, cozy taste. It feels just like autumn in every bite. Want to mix it up? Add extra ingredients! Chopped nuts like walnuts or pecans give a nice crunch. You can also add raisins for sweetness. If you love chocolate, try mini chocolate chips. Just mix in 1/2 cup of your choice with the batter. These additions make your fritters even more fun and tasty. You can easily make these fritters gluten-free. Simply swap the all-purpose flour for a gluten-free blend. Check the label to ensure it works for baking. For a vegan version, use almond milk or oat milk instead of regular milk. Replace the egg with 1/4 cup of applesauce or a flax egg. This way, you can enjoy delicious fritters no matter your diet. To keep leftover fritters fresh, let them cool first. Place them in an airtight container. Store them in the fridge for up to three days. If you want to keep them longer, freezing is a great option. When you want to enjoy your fritters again, take them out of the fridge. Preheat your air fryer to 350°F (175°C). Place the fritters in the basket for about 5 minutes. This will make them warm and crispy again. You can also use a microwave, but they may not be as crispy. To freeze fritters, first make sure they are cool. Lay them flat on a baking sheet and freeze for about two hours. Once frozen, transfer them to a zip-top bag or container. Label the bag with the date. They can stay in the freezer for up to three months. When you're ready to eat, follow the reheating instructions above. Yes, you can use different types of apples for fritters. I like using Granny Smith apples for their tartness. Their crisp texture adds a nice bite. Honeycrisp or Fuji apples also work well. They give a sweet flavor that complements the spices in the fritters. Just make sure to peel and dice them into small cubes. This uniform size helps them cook evenly. Making the glaze is simple and quick. You need just two ingredients: powdered sugar and milk. Start with 1 cup of powdered sugar. Add 2 tablespoons of milk. Mix them together in a small bowl until smooth. If you want a thicker glaze, add more sugar. For a thinner glaze, add a little more milk. Drizzle this over warm fritters for a sweet finish. To make sure your fritters are cooked through, follow a few simple steps. First, set your air fryer to 350°F (175°C) and preheat it for about 5 minutes. This helps cook the fritters evenly. Next, air fry them for 10-12 minutes. Flip them halfway through to ensure even cooking. Check for a golden-brown color on the outside. You can also insert a toothpick into the center. If it comes out clean, the fritters are done! You now have all the tools to make delicious air fryer apple fritters. We covered ingredients, substitutes, and dietary options. I shared the steps to prepare and air fry them perfectly. Remember the tips to avoid mistakes and ensure even cooking. You can explore fun variations and learn how to store extras for later. With this knowledge, you're ready to impress your friends and family. Enjoy making these treats!
Air Fryer Apple Fritters Easy and Tasty Delight
Are you ready to dive into a heavenly treat? Air fryer apple fritters are quick, simple, and a true delight! With crispy outsides and soft,
To make these cookies, you'll need a few simple items: - 1 cup almond flour - 1/2 cup unsweetened shredded coconut - 1/4 cup keto-friendly sweetener (like erythritol or monk fruit) - 1/2 cup smooth natural almond butter - 1/2 teaspoon vanilla extract - 1/4 teaspoon salt - 2 tablespoons melted coconut oil These ingredients combine to create a tasty and healthy treat. The almond flour gives a nice texture, while the coconut adds flavor and nutrition. The sweetener keeps it keto-friendly. If you want to mix things up, consider these options: - 1/4 cup unsweetened cocoa powder (for chocolate flavor) - 1/4 cup unsweetened dark chocolate chips (for topping) Adding cocoa powder makes these cookies rich and chocolaty. The dark chocolate chips on top add a sweet crunch. Feel free to get creative with these options! Each serving has about: - Calories: 120 - Fat: 10g - Protein: 4g - Carbohydrates: 5g - Fiber: 2g - Net Carbs: 3g These cookies provide healthy fats and low carbs, perfect for a keto diet. You can enjoy them without guilt! {{ingredient_image_2}} Start by getting a large mixing bowl. Add 1 cup of almond flour. Next, put in 1/2 cup of unsweetened shredded coconut. Then, add 1/4 cup of keto-friendly sweetener, like erythritol or monk fruit. If you want a chocolate flavor, add 1/4 cup of unsweetened cocoa powder. Finally, sprinkle in 1/4 teaspoon of salt. Mix well to ensure even distribution. Take a smaller bowl and combine 1/2 cup of smooth natural almond butter, 2 tablespoons of melted coconut oil, and 1/2 teaspoon of vanilla extract. Whisk until you get a smooth and silky mixture. This will be the base for your cookie dough. Now, slowly pour the wet mixture into the bowl with the dry ingredients. Use a spatula or your hands to combine everything. Stir until all parts come together. The dough should feel a little sticky yet hold its shape when pressed. Grab a tablespoon to scoop even amounts of dough. Roll each scoop into a small ball. If you like, flatten them into discs for a classic cookie look. Place the cookies on a parchment-lined baking sheet or a plate. If you want, sprinkle dark chocolate chips on top for extra flavor. Put the cookies in the fridge for about 30 minutes. This helps them firm up, making them ready to enjoy! To get the best texture for your Minute Keto No-Bake Cookies, use smooth almond butter. It helps create a creamy dough that holds well. If your dough feels too dry, add a bit more coconut oil. If it's too sticky, sprinkle in a bit more almond flour. Chilling the cookies is key. It firms them up nicely, making them easier to bite. Taste is personal, so adjust the sweetness. Start with 1/4 cup of your keto-friendly sweetener. After mixing, taste a small bit of the dough. If it’s not sweet enough, add a little more sweetener. Remember, the sweetener's flavor can change a bit when chilled. So, don’t be shy to adjust it before you chill the cookies. Store your cookies in an airtight container to keep them fresh. They last about a week in the fridge. If you want to keep them longer, try freezing them. Place parchment paper between layers to avoid sticking. To enjoy them, just take a few out and let them thaw for a few minutes. They’ll taste great even after freezing! Pro Tips Use Fresh Ingredients: Ensure all your ingredients, especially the almond butter and coconut oil, are fresh for the best flavor and texture in your cookies. Customize Sweetness: Adjust the amount of keto-friendly sweetener to suit your taste. Start with less, as you can always add more if needed! Chill for Better Texture: Allowing the cookies to chill for a full 30 minutes helps them firm up and enhances their chewiness. Experiment with Flavors: Feel free to add in extras like nuts, seeds, or different extracts to create your own unique cookie variations! {{image_4}} To make a chocolate version, simply add cocoa powder. Use 1/4 cup unsweetened cocoa powder with your dry mix. This gives the cookies a rich, chocolatey taste. You can also add dark chocolate chips for extra flavor. Just sprinkle them on top before chilling. This variation is just as easy and delicious! For a nice crunch, consider adding nuts or seeds. Chopped almonds, walnuts, or pecans work well. You can also use pumpkin or sunflower seeds. Add about 1/4 cup of your choice to the dough. This adds texture and boosts nutrition. You can switch up the sweetener based on your taste. Erythritol is great, but monk fruit or stevia are also good options. Each sweetener has its own unique flavor. Adjust the amount to your liking, as some are sweeter than others. This way, you can customize the sweetness to fit your needs. To keep your Minute Keto No-Bake Cookies fresh, store them in an airtight container. Place parchment paper between layers to avoid sticking. This method helps maintain their texture. Keep them in the fridge for up to two weeks. If you want to keep them longer, consider freezing. Freezing is a great way to extend the life of your cookies. First, let the cookies cool completely. Then, place them in a single layer on a baking sheet. Freeze them for about an hour. After they are firm, transfer them to a freezer bag. Remove as much air as possible before sealing. These cookies can last up to three months in the freezer. If your cookies have been in the fridge or freezer, you can revive them. For chilled cookies, simply let them sit at room temperature for about 10 minutes. If they are frozen, take them out and let them thaw for about 15-20 minutes. This will help restore their texture. Enjoy your treats as if they were freshly made! Yes, you can use any nut butter you like. Peanut butter or cashew butter works well. Just make sure it's smooth and natural. This change can add a new flavor to your cookies. These cookies can last up to one week in the fridge. Keep them in an airtight container. If you want them to last longer, you can freeze them for up to three months. If you don’t have almond flour, you can use coconut flour. However, use less coconut flour since it absorbs more moisture. You may need to adjust the wet ingredients if the dough is too dry. Yes, they are great for meal prep! You can make a batch ahead of time. Just store them in the fridge or freezer for quick snacks later on. To make these cookies vegan, replace the honey with a vegan sweetener. You can also use a nut-free butter, like sunflower seed butter. This way, everyone can enjoy them! These Minute Keto No-Bake Cookies are simple to make and tasty. You learned about key ingredients and how to mix them for great flavor. We shared tips for perfect texture and sweet taste. With easy variations, you can find a style you love. Proper storage keeps them fresh longer. Enjoy trying these cookies and making them your own. Get creative with your ingredients and have fun!
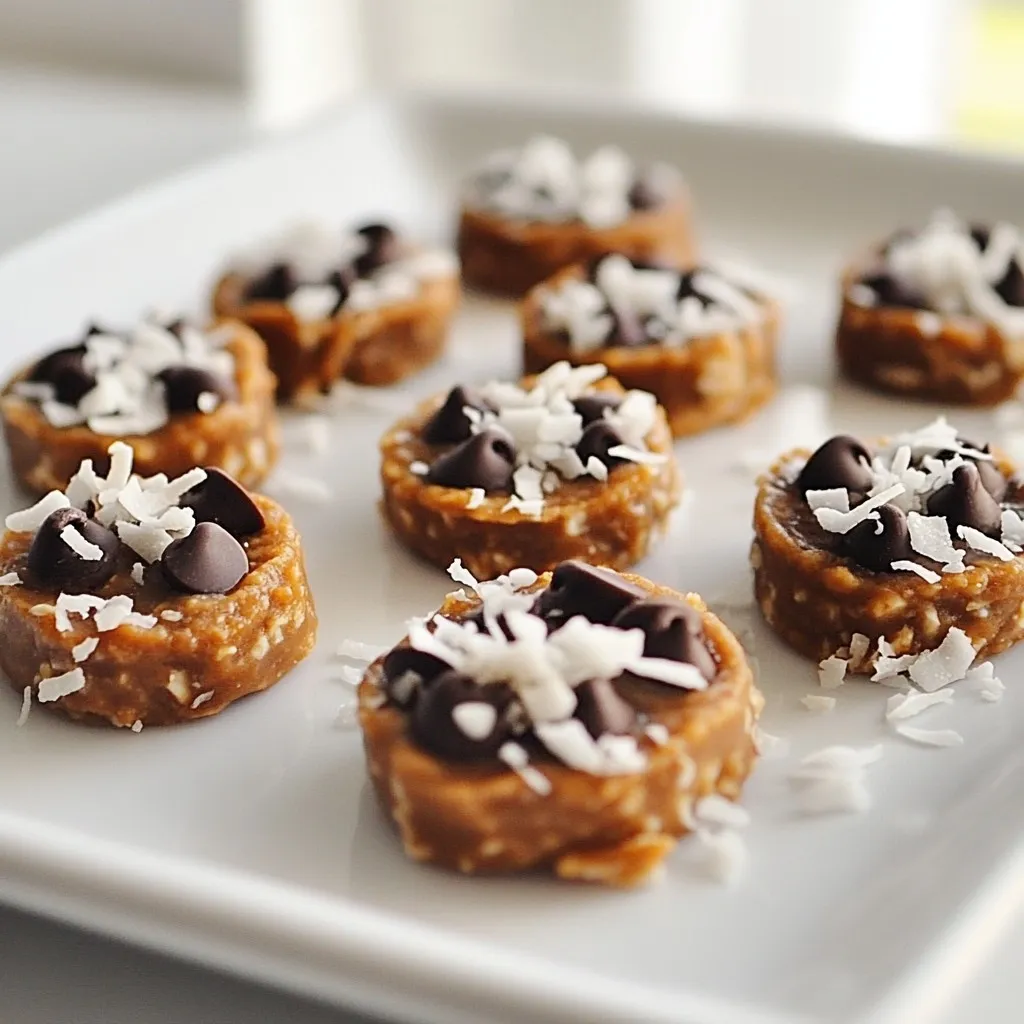
Minute Keto No-Bake Cookies Quick and Easy Treat
Looking for a sweet treat that won’t derail your keto diet? Try my Minute Keto No-Bake Cookies! They’re super quick to make, require no baking,
- Ripe bananas - Coconut oil - Brown sugar - Ground cinnamon - Salt - Use 3 ripe bananas for this recipe. - Melt 2 tablespoons of coconut oil. - Measure 1 tablespoon of brown sugar. - Use 1 teaspoon of ground cinnamon. - Add a pinch of salt for flavor. - Try using honey or maple syrup as sweeteners. - Swap coconut oil for olive oil or avocado oil if you like. {{ingredient_image_2}} Peel your ripe bananas carefully. Slice them thinly into rounds. Aim for about 1/8 inch thick. Thinner slices help create crispy chips. If the slices are too thick, they may not crisp well. In a small bowl, mix the brown sugar and ground cinnamon. Add a pinch of salt. Stir until everything blends well. Salt enhances the sweetness and flavor of the bananas. This mixture will coat the banana slices perfectly. In a large bowl, pour the melted coconut oil over the banana slices. Toss gently to coat them in oil. Sprinkle the cinnamon sugar mixture over the bananas. Toss again to ensure each slice is evenly covered. This creates a sweet, crunchy layer. Preheat your air fryer to 350°F (175°C). This step ensures even cooking. Once heated, arrange the banana slices in a single layer in the basket. Make sure to give them space. This helps them cook evenly and become crispy. Air fry the banana chips for about 10-12 minutes. Shake the basket halfway through cooking. This promotes even browning and crispiness. Keep an eye on them towards the end. They should turn golden and crispy, but not burnt. Remove the chips from the air fryer once they finish cooking. Let them cool for a few minutes. Cooling helps them crisp up even more. Enjoy them on their own or dip them in yogurt. These treats are a great snack anytime! To get the best crunch from your banana chips, slicing is key. Aim for thin rounds, about 1/8 inch thick. Thinner slices cook faster and crisp up nicely. Use a sharp knife or a mandoline for even cuts. When using your air fryer, preheat it to 350°F (175°C) before adding the banana slices. This helps them cook evenly from the start. Arrange the slices in a single layer, leaving space between them. This allows hot air to circulate and crisp every chip. If your banana chips come out chewy, it may be due to thick slices or too much moisture. Try slicing thinner next time. You can also air fry them a little longer. Keep an eye on them to avoid burning. To prevent burnt chips, shake the basket halfway through cooking. This helps them brown evenly. If you see them darkening too fast, lower the temperature slightly. Want to spice it up? Consider adding nutmeg or a splash of vanilla to your cinnamon sugar mix. You can also try cardamom for a unique twist. For dipping, these banana chips pair well with creamy yogurt or a chocolate sauce. A sprinkle of sea salt can also bring out the flavors. Enjoy experimenting with different combinations! Pro Tips Slice Thickness Matters: Ensure your banana slices are about 1/8 inch thick to achieve the best crispy texture. Even Coating is Key: Make sure to coat each banana slice evenly with the coconut oil and cinnamon sugar mixture for balanced flavor and texture. Don't Overcrowd the Air Fryer: Arrange the banana slices in a single layer with space between them to ensure even cooking and crispiness. Watch Closely Towards the End: Keep an eye on the chips during the last few minutes of cooking to prevent burning; they can go from golden to burnt quickly. {{image_4}} You can make banana chips healthier with a few easy changes. First, try using less sugar. Instead of one tablespoon of brown sugar, use just half a tablespoon. This reduces the sweetness while still making them tasty. You can also explore natural sweeteners, like maple syrup or honey, to add flavor without too much sugar. Adding nuts or seeds is another great option. Chopped almonds or sunflower seeds can give your banana chips a nice crunch. They also add healthy fats and protein. Just sprinkle some on top of the banana slices before air frying. For a fun twist, you can add a chocolate drizzle after cooking. Melt some dark chocolate and drizzle it over the cooled chips. This adds a rich flavor that pairs well with the sweetness of the bananas. You can also try different spice blends. Instead of just cinnamon, mix in nutmeg or ginger for a warm flavor. You can even use chili powder for a spicy kick. Experimenting with spices can make your snack even more exciting! If you don’t have an air fryer, you can bake the banana chips in the oven. Set your oven to 350°F (175°C). Place the banana slices on a baking sheet lined with parchment paper. Bake for about 15-20 minutes, flipping halfway through. This method may take longer, but you will still get tasty chips. Using a dehydrator is another option. Dehydrators let you dry the banana slices slowly, making them chewy instead of crispy. For crunchy chips, set the dehydrator to 135°F (57°C) and let them dry for 6-8 hours. You’ll have a different texture, but they will still taste great! To keep your banana chips fresh, use an airtight container. Glass jars or plastic containers work best. Store them in a cool, dry place. This helps keep them crispy for about a week. If you live in a humid area, consider refrigerating them. This can extend their freshness. If your banana chips lose their crunch, don’t worry! You can easily revive them. Simply place them back in the air fryer. Heat them at 350°F (175°C) for about 3-5 minutes. Keep a close eye on them to prevent burning. This method works well after storing. Freezing banana chips is a great way to save them for later. To prepare them for freezing, let the chips cool completely. Then, spread them out on a baking sheet. Freeze them for about an hour. Once frozen, transfer them to a freezer bag. Remove as much air as possible before sealing. When you’re ready to eat them, take out the desired amount. Thaw them at room temperature for about 30 minutes. You can also pop them back in the air fryer for a quick re-crisping. This keeps them tasty and enjoyable! You can use unripe bananas, but they may taste different. Unripe bananas have more starch and less sugar. This means they won’t be as sweet as ripe bananas. The texture will also be firmer and less crunchy. For the best flavor and crunch, stick to ripe bananas. Look for a golden color and crisp texture. The chips should not be soft or chewy. When you shake the basket halfway through, the chips should move freely. If they stick together, they need more time. Keep a close watch as they finish cooking. Yes, you can! Apples, pears, and sweet potatoes work well too. Slice them thin, just like the bananas. Use the same cinnamon sugar coating for a tasty twist. Each fruit will have its unique flavor and texture. Air fryers use less oil than traditional frying. This can lower the calories and fat in your snacks. Air frying also keeps more nutrients in the food. It helps maintain the taste and crunch without extra grease. Start by unplugging the air fryer. Let it cool down completely. Remove the basket and wash it with warm, soapy water. Use a soft sponge to avoid scratches. Wipe the inside with a damp cloth. Make sure everything is dry before using it again. In this post, we explored how to make delicious banana chips using simple ingredients like ripe bananas, coconut oil, and brown sugar. We covered the steps for preparation, coating, and air frying to achieve that perfect crisp. Remember, adjusting spices and add-ins can elevate your chips. Now you're ready to enjoy a tasty snack that's easy to make and good for you. Try these tips, and don't hesitate to experiment with flavors! Your homemade banana chips will impress everyone.
Air Fryer Cinnamon Sugar Banana Chips Crunchy Snack
If you’re looking for a tasty and crunchy snack, try these Air Fryer Cinnamon Sugar Banana Chips! They’re easy to make and perfect for satisfying