Desserts

To make Brown Sugar Pop Tart Cookies, you need simple and easy-to-find items. These ingredients create delicious cookies that everyone will love. - 1 cup all-purpose flour - 1/2 cup unsalted butter, softened - 1/2 cup packed brown sugar - 1/4 cup granulated sugar - 1 large egg - 1 teaspoon pure vanilla extract - 1/2 teaspoon baking powder - 1/4 teaspoon fine salt - 1/2 teaspoon ground cinnamon - 1/2 cup powdered sugar (for icing) - 1-2 tablespoons milk (for icing) - Colorful sprinkles (for decoration) I like to use fresh brown sugar for the best flavor. It adds a rich taste to the cookies. Make sure your butter is softened. This helps in mixing the ingredients well. You can also use a mixer to get the right texture. When mixing the dry ingredients, ensure they are well combined. This step helps in getting even cookies. I love to add colorful sprinkles on top of the icing. It makes the cookies look fun and festive. For the icing, adjust the milk until it is just right for drizzling. This way, you get a nice finish on your cookies. For the full recipe, you can find it [here](#). Enjoy baking these delightful treats! 1. Preheat the oven to 350°F (175°C). This helps the cookies bake evenly. 2. In a large bowl, cream together the softened butter, brown sugar, and granulated sugar. Use a mixer or whisk until it’s light and fluffy. 3. Next, add in one large egg and one teaspoon of vanilla extract. Mix until smooth and well combined. 1. In another bowl, whisk together one cup of flour, half a teaspoon of baking powder, a quarter teaspoon of salt, and half a teaspoon of ground cinnamon. This gives the cookies a warm flavor. 2. Gradually add the dry mix to the wet mix. Stir gently until just combined. It’s okay if the dough is a bit lumpy; avoid over mixing. 1. Scoop out portions of dough, about one inch in diameter. Roll them into balls and space them on your baking sheet. 2. Gently flatten each ball with your palm to form thick discs, about half an inch tall. This helps them cook evenly. 3. Place the baking sheet in the oven and bake the cookies for 10-12 minutes. Look for lightly golden edges. Enjoy the aroma that fills your kitchen while they bake! For the full recipe, check back to the beginning of this article. To get the best cookie texture, avoid over mixing. When you mix the wet and dry ingredients, stir gently. This keeps the cookies soft and chewy. Over mixing makes them tough. Cooling times matter too. After baking, let cookies sit on the sheet for five minutes. This helps them set up. Then, move them to a wire rack. Let them cool completely. The right cooling time helps prevent them from being too soft or crumbly. For icing, aim for a smooth, drizzle-able consistency. Mix powdered sugar with milk slowly. Add milk one teaspoon at a time until it flows easily. The right consistency is key for a pretty finish. Get creative with your sprinkles! Use colorful ones for a fun look. You can even match the sprinkles to special occasions. Try using themed sprinkles for holidays or parties. Serve your cookies on a decorative plate. Add a glass of cold milk beside them for a classic touch. For extra fun, add mini pop tart pieces on the side. This creates a whimsical display that everyone will love. {{image_4}} You can change the flavor of your Brown Sugar Pop Tart Cookies easily. Adding chocolate chips makes them richer. Just mix in half a cup of chocolate chips when you blend the dough. The sweet chocolate pairs well with brown sugar. Consider trying different icing flavors, too. You might like a maple icing or even a fruity glaze. This can give your cookies a fun twist and surprise your taste buds. If you need gluten-free cookies, use a gluten-free flour blend instead of all-purpose flour. Just make sure it has a good binding agent. This way, you can enjoy these treats without worry. For vegan cookies, swap the butter for coconut oil or a vegan butter. Use a flax egg instead of a chicken egg. Just mix one tablespoon of ground flaxseed with two and a half tablespoons of water. Let it sit for five minutes to thicken. Get creative with your favorite Pop-Tart flavors! Try using strawberry or blueberry Pop-Tart bits in the dough. This adds more flavors and makes your cookies unique. You can also layer ingredients for extra taste. For example, add a layer of jam in the middle of the dough before baking. This creates a fun surprise when you bite into the cookie. For the full recipe, check out the Brown Sugar Pop Tart Cookies section above! To keep your Brown Sugar Pop Tart Cookies fresh, use an airtight container. This helps lock in moisture and flavor. Store the cookies at room temperature. Avoid placing them in the fridge, as this can dry them out. If you keep them properly, they will stay soft and tasty for days. You can freeze cookie dough for later use. To do this, scoop the dough into balls and place them on a baking sheet. Freeze until firm, then transfer them to a freezer-safe bag. When you want to bake, just take them out. You can bake them straight from frozen. Just add a minute or two to the baking time. Typically, these cookies last about one week at room temperature. If you store them correctly, they can last even longer in the freezer. Watch for signs of spoilage, like a dry texture or strange smells. If you notice these, it's best to toss them. Enjoy your cookies fresh for the best taste! To make these cookies, start by mixing butter and sugars. Cream them until light and fluffy. Add an egg and vanilla next. In another bowl, whisk flour, baking powder, salt, and cinnamon. Combine both mixtures gently. Scoop and shape dough balls, then flatten them. Bake at 350°F for about 10-12 minutes. Let them cool before icing. Yes! You can use any Pop-Tart flavor you like. Strawberry, blueberry, or chocolate can change the taste. Each flavor adds its own fun twist. Mix and match for a unique treat. Your kids will love trying different options! If your dough is sticky, try chilling it. Place it in the fridge for 15-30 minutes. This will make it easier to handle. You can also add a little flour to help. Just be careful not to add too much. These cookies stay fresh for 5-7 days when stored in an airtight container. Keep them at room temperature. For longer storage, freeze them. They can last up to 3 months in the freezer. Just thaw them before enjoying! Absolutely! These cookies are fun and easy to make with kids. They can help mix, scoop, and decorate. The colorful sprinkles make them extra tempting. Serve these cookies with milk for a delightful snack. Kids will love their sweet taste and fun shapes. Check out the Full Recipe for more details! In this post, we explored how to make tasty Brown Sugar Pop Tart Cookies. You learned about the key ingredients needed, step-by-step baking instructions, and tips for the best cookie texture. We also discussed creative decorating ideas and storage methods. Remember, baking is fun and offers room for your own twists. Try different flavors or toppings to make it your own! Happy baking, and enjoy your delicious cookies!
Brown Sugar Pop Tart Cookies Delightful and Easy Treat
Are you ready to bake something delightful? Brown Sugar Pop Tart Cookies are a fun and easy treat that will make your taste buds dance!
To make fried pineapple rings, you'll need a few simple ingredients. Here’s the complete list of what you need: - Fresh Pineapple - All-Purpose Flour - Baking Powder - Ground Cinnamon - Salt - Coconut Milk - Shredded Coconut - Vegetable Oil - Optional Sweeteners (Honey or Maple Syrup) Fresh pineapple gives the best flavor and texture. You can use canned pineapple, but it won't taste as good. The other ingredients help create a crispy outer layer. The coconut adds a nice twist. Use coconut milk for a rich flavor. If you prefer, you can drizzle honey or maple syrup on top for added sweetness. When you have all your ingredients ready, you can start cooking. It's a fun process, and the result is a tasty snack. Just the thought of those warm, crispy pineapple rings should make your mouth water! Check the [Full Recipe](#) for detailed cooking steps. Slicing and Coring Start with a fresh pineapple. Peel it carefully, then slice it into rings. Each ring should be about 1/2 inch thick. After slicing, use a knife to remove the core from each ring. Drying the Rings Next, pat the pineapple rings dry with a paper towel. This step is key. It helps the batter stick better. Too much moisture can make the batter slide off when frying. Mixing Dry Ingredients In a medium bowl, combine the dry ingredients. Use 1 cup of all-purpose flour, 1 teaspoon of baking powder, 1/2 teaspoon of ground cinnamon, and 1/4 teaspoon of salt. Whisk them together well. Combining Wet and Dry Ingredients Now, slowly add 1 cup of coconut milk to the dry mix. Stir until you form a smooth batter. The batter should coat the pineapple rings evenly. It should not be too thick or too runny. Heating the Oil In a deep skillet, pour in enough vegetable oil for about 1 inch of depth. Heat the oil over medium heat. Aim for a temperature of 350°F (175°C). A tip: drop a small amount of batter into the oil. If it sizzles, your oil is ready! Coating the Rings Take one pineapple ring and dip it into the batter. Make sure it is fully coated. For an extra touch, sprinkle shredded coconut over the top while the batter is still wet. Frying Process Carefully place the coated rings into the hot oil. Fry them in small batches to avoid crowding the pan. Cook for about 2-3 minutes on each side. You want them golden brown and crispy. After frying, transfer the rings to a plate lined with paper towels to drain excess oil. This helps keep them crispy. Enjoy your delicious Fried Pineapple Rings! For the complete recipe, check the [Full Recipe]. - Oil Temperature Tips To get that perfect crispiness, heat your oil to about 350°F (175°C). You can check if it’s ready by dropping a small bit of batter in it. If it sizzles, you’re good to go! Keeping the oil at this temperature helps the batter cook fast and stay crispy. - How to Prevent Batter Slippage Dry your pineapple rings well before dipping them in the batter. The drier they are, the better the batter will stick. If the batter does slip, your rings may end up soggy. Aim for a thick batter but not too thick that it clumps. - Garnishing Ideas Serve your fried pineapple rings on a platter. Add fresh mint leaves for color and a burst of freshness. You can also sprinkle some extra shredded coconut on top for a fun touch. - Pairing with Desserts or Drinks These rings taste great with a scoop of vanilla ice cream. The warm pineapple pairs well with cold ice cream. You can also serve them with a sweet dipping sauce like honey or maple syrup. - Overcrowding the Pan Fry in small batches. If you add too many rings, the oil temperature will drop. This can lead to greasy, soggy rings instead of crispy ones. Fry just a few at a time for the best results. - Incorrect Batter Consistency If your batter is too runny, it won’t coat the pineapple well. If it’s too thick, it won’t spread. Aim for a smooth batter that clings nicely to the rings. Adjust with a bit more milk or flour as needed. Follow these tips for the best fried pineapple rings! For a complete recipe, check out the Full Recipe. {{image_4}} You can make fried pineapple rings more exciting. Try adding spices like nutmeg or vanilla. A pinch of nutmeg gives a warm kick, while vanilla adds sweetness. You can also change the coating. Instead of using regular flour, try panko breadcrumbs. Panko creates a light and crisp texture that many love. Mixing sweet and savory can elevate your dish. One great idea is bacon-wrapped fried pineapple. The salty bacon balances the sweet pineapple. Just wrap a slice of bacon around each ring before frying. You can also serve spicy dipping sauces. A sweet chili sauce pairs well and adds a fun twist. If you want a lighter version, consider low-calorie batter options. You can use almond flour or whole wheat flour for a healthier choice. Another idea is to use an air fryer. This method cuts down on oil and still gives you that crispiness. You can enjoy fried pineapple rings without the guilt! For more details, check the Full Recipe. To keep your fried pineapple rings fresh, follow these tips: - Refrigeration Guidelines: Place the cooled fried pineapple rings in an airtight container. They will last about 3 days in the fridge. Make sure the container is completely sealed to avoid moisture. - Freezing Instructions: If you want to keep them longer, freeze the rings. Lay them flat on a baking sheet to freeze for 1-2 hours. Once they are solid, transfer them to a freezer-safe bag. They can last up to 3 months in the freezer. To enjoy your fried pineapple rings again, reheating them right is key. Here’s how to keep them crispy: - Best Practices for Maintaining Crispiness: Use an oven to reheat. Preheat your oven to 375°F (190°C). Place the rings on a baking sheet lined with parchment paper. Bake for 10-15 minutes until hot and crispy. Avoid microwaving as it can make them soggy. Knowing how long your fried pineapple rings last helps reduce waste: - How Long They Last in the Fridge or Freezer: In the fridge, they stay good for about 3 days. In the freezer, they can last up to 3 months. Always check for any signs of spoilage before eating. To know if the oil is hot, use a thermometer. Aim for 350°F (175°C). If you don't have one, drop a small amount of batter into the oil. If it sizzles and bubbles, the oil is ready. This ensures a crispy surface on your fried pineapple rings. Yes, you can use canned pineapple. However, fresh pineapple gives a better taste and texture. Canned pineapple often has added syrup, which may make the batter too sweet. If you choose canned, make sure to drain it well and pat it dry. Fried pineapple rings can be made gluten-free. Simply replace all-purpose flour with a gluten-free flour blend. This swap keeps the crispy texture while making it safe for those with gluten sensitivities. Fried pineapple rings are a tasty treat but can be high in calories and sugar. One serving generally has around 200 calories. They also provide some vitamins from the pineapple, like vitamin C. For a healthier option, consider reducing the amount of sweetener or using less oil in the frying process. To make vegan fried pineapple rings, use plant-based milk, like almond or oat milk, instead of cow's milk. Ensure your flour is also vegan-friendly. You can skip the honey or maple syrup if you prefer, as the natural sweetness of the pineapple is enough. Check the Full Recipe for more details! You can make delicious fried pineapple rings with fresh ingredients and easy steps. We covered how to prepare the pineapple, make the batter, and fry the rings. You learned tips for crispiness and ideas for serving. Remember, variations can add fun flavors, and proper storage keeps them fresh. Enjoy trying this recipe for snacks or treats. Just follow the steps, avoid common mistakes, and have fun in the kitchen!
Fried Pineapple Rings Crispy and Tasty Snack Idea
Are you ready to elevate your snack game? Fried pineapple rings offer a crispy, sweet treat that’s hard to resist. With just a few simple
- 2 cups all-purpose flour - 1 tablespoon baking powder - ½ teaspoon baking soda - 1 teaspoon ground cinnamon - ¼ teaspoon ground nutmeg - ½ teaspoon salt - ¾ cup packed brown sugar - 1 cup buttermilk (or substitute with milk + vinegar) - 2 large eggs - 1 teaspoon pure vanilla extract - 1 cup apples, peeled, cored, and finely diced (Granny Smith for tartness works best) - ½ cup granulated sugar (for coating) - 1 teaspoon ground cinnamon (for coating) - Oil, for frying (vegetable or canola oil works well) You need a waffle maker to cook the batter into waffles. A deep fryer or heavy deep pan is essential for frying the donuts. Make sure to have a donut cutter or two round cookie cutters for shaping the donuts. Have cooking spray handy to prevent sticking in the waffle maker. {{ingredient_image_2}} Start by gathering your ingredients. You need 2 cups of all-purpose flour, 1 tablespoon of baking powder, and ½ teaspoon of baking soda. Add 1 teaspoon of ground cinnamon, ¼ teaspoon of ground nutmeg, and ½ teaspoon of salt. In a large bowl, whisk the dry ingredients together until they blend well. In another bowl, mix ¾ cup of packed brown sugar with 1 cup of buttermilk, 2 large eggs, and 1 teaspoon of pure vanilla extract. Whisk these wet ingredients until smooth. This step is important for a good texture. Now, slowly pour the wet mixture into the dry mixture. Stir gently until they just combine. Overmixing will make your donuts tough, so be careful. Next, fold in 1 cup of finely diced apples. Use Granny Smith apples for a tart kick. Make sure the apples are evenly spread in the batter. Preheat your waffle maker according to its instructions. While it heats up, lightly grease the waffle plates so the batter doesn’t stick. Pour enough batter to cover the plates. Close the lid and cook for about 3-4 minutes. The waffles should be golden brown and cooked through. Once done, remove them and keep warm. In a deep fryer or heavy pan, heat oil to 350°F (175°C). This temperature is key for perfect frying. If the oil is too cool, the donuts will soak up grease. Use a donut cutter or two round cookie cutters to cut out ring shapes from leftover batter. Carefully drop the donuts into the hot oil, frying them for 1-2 minutes on each side. Once they are golden, place them on paper towels to drain excess oil. In a small bowl, mix ½ cup of granulated sugar and 1 teaspoon of ground cinnamon for the coating. Once the donuts cool a bit, roll each one in the sugar mix. For an extra treat, serve the waffle donuts warm with a drizzle of glaze made from powdered sugar and a splash of milk. Arrange them on a plate, drizzle with glaze, and sprinkle a bit of cinnamon. Enjoy your delicious Apple Fritter Waffle Donuts! To make fluffy donuts, avoid overmixing the batter. Mix just until combined. This helps keep the air in the dough. Use cold buttermilk to help create a lighter texture. Make sure your waffle maker is preheated for even cooking. Choose Granny Smith apples for their tart flavor. Their crunchiness adds great texture to the fritters. If you like sweeter donuts, you might mix in some Fuji or Honeycrisp apples. Always pick firm apples without bruises. This ensures the best taste and texture. Heat your oil to 350°F (175°C). Use a thermometer for accuracy. If the oil is too hot, the donuts will brown too fast. If it’s too cool, they will soak up oil and become greasy. Fry in small batches to keep the temperature steady. Serve the waffle donuts on a colorful plate. Drizzle a simple glaze over them for a nice finish. Sprinkle extra cinnamon on top for added flavor. You can also stack them high for a fun display. Pair them with fresh fruit for a bright touch. Pro Tips Choose the Right Apples: Using Granny Smith apples adds a perfect tartness to balance the sweetness of the batter. Don’t Overmix: Mix the wet and dry ingredients just until combined to ensure your waffles and donuts remain light and fluffy. Check Oil Temperature: Use a kitchen thermometer to ensure your oil is at 350°F (175°C) for perfectly cooked donuts without excess grease. Glaze for Extra Flavor: For a delightful finishing touch, drizzle a simple glaze made from powdered sugar and milk over the warm waffle donuts. {{image_4}} You can make these apple fritter waffle donuts gluten-free. Simply swap the all-purpose flour for a gluten-free blend. Look for blends that work cup-for-cup with regular flour. This way, you keep the taste and texture while making it safe for those with gluten sensitivities. To enhance flavors, add caramel or chocolate. For caramel, drizzle it on top after frying. You can mix in chocolate chips into the batter for a rich twist. Dark chocolate pairs well with apples too! Experimenting with these flavors can bring a new joy to your donut experience. If you want a healthier option, consider baking instead of frying. Use the waffle maker to bake your donuts. Just pour the batter in and let it cook as usual. This method cuts down on oil and calories but still gives you that delightful taste. You can also reduce sugar to make them lighter while keeping the flavor intact. To keep your Apple Fritter Waffle Donuts fresh, place them in an airtight container. This helps lock in moisture and flavor. You can store them at room temperature for up to two days. If you want to keep them longer, the fridge is a better option. Just make sure to wrap them well to avoid drying out. When you want to enjoy these tasty treats again, reheating is key. The best way to do this is in a toaster oven. Set it to a low temperature and warm them for about 5 minutes. This keeps them crisp on the outside while warming the inside. You can also use a microwave, but they may lose some crunch. Heat for about 15-20 seconds for best results. If you want to save some for later, freezing works well. Wrap each donut in plastic wrap and then place them in a freezer bag. They can last for up to three months in the freezer. When you’re ready to eat them, let them thaw in the fridge overnight. Reheat as explained above for a fresh taste. Yes, you can make these donuts ahead of time. Prepare the batter and store it in the fridge for up to 24 hours. This keeps the flavors fresh. You can cook the waffles and fry the donuts when you are ready to enjoy them. To glaze the donuts, mix powdered sugar with a splash of milk. Stir until smooth. Drizzle this glaze over your warm donuts for a sweet finish. It adds a nice touch and makes them look great. Yes, you can use regular milk mixed with vinegar. Use 1 cup of milk and add 1 tablespoon of vinegar. Let it sit for 5 minutes. This creates a buttermilk substitute that works well in the recipe. To avoid greasy donuts, make sure your oil is hot enough. Heat the oil to 350°F (175°C) before frying. Fry them in small batches. This helps maintain the right temperature and keeps the donuts light and crispy. Absolutely! You can try using pears or berries. Just make sure to chop them small. This will help them cook evenly and blend well with the batter. Each fruit will give a unique flavor to your donuts. In this post, we covered the key ingredients and steps for making delicious Apple Fritter Waffle Donuts. We explored tips for fluffy donuts and ways to store them. You learned about variations for special diets and flavor options. Making these treats can be fun and rewarding. You can impress your friends and family with your skills. Enjoy the process and the tasty results. Happy cooking!
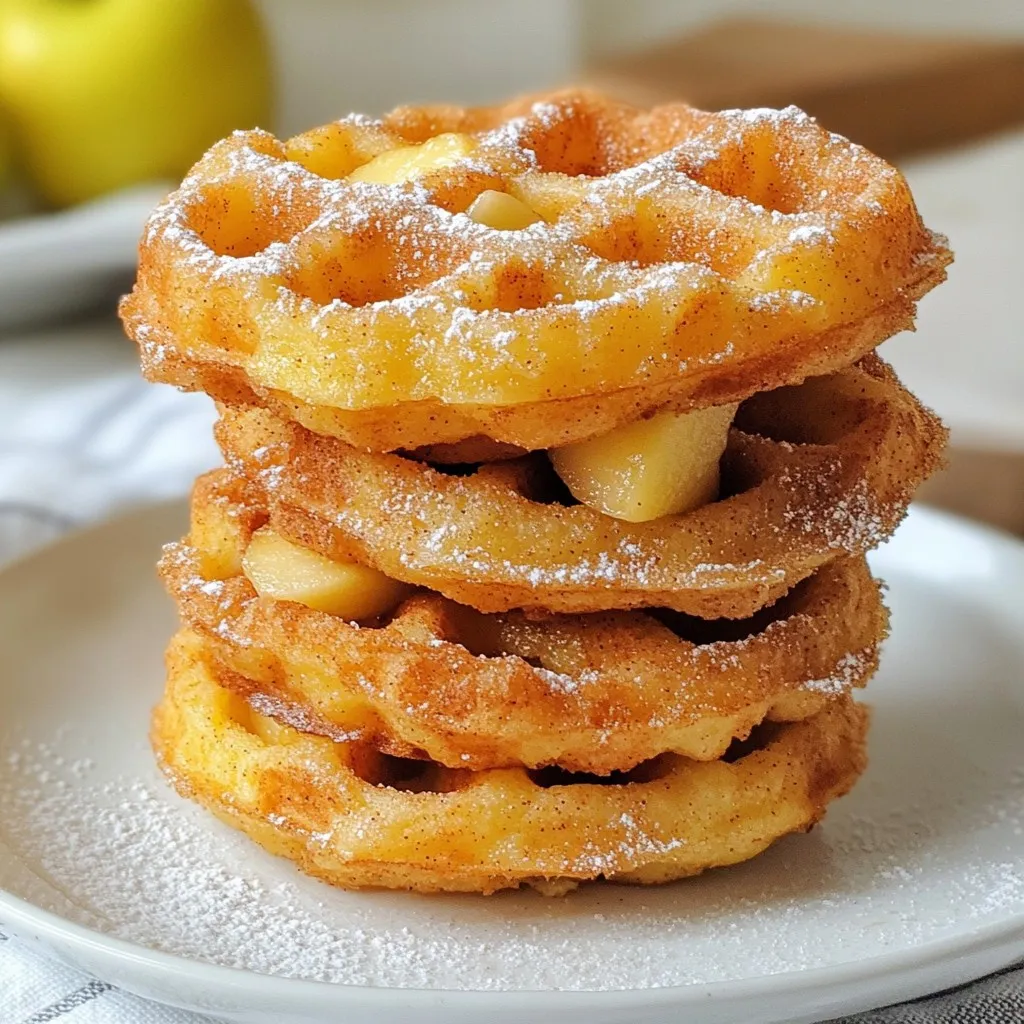
Apple Fritter Waffle Donuts Irresistible Treat Recipe
Craving something sweet that’s both fluffy and crispy? Try my Apple Fritter Waffle Donuts! This treat combines the best of two worlds—classic apple fritters and
Here’s a simple list of the key ingredients you need for your oatmeal peanut butter energy bites: - 1 cup rolled oats - 1/2 cup natural peanut butter - 1/3 cup honey or maple syrup - 1/4 cup ground flaxseed - 1/2 cup dark chocolate chips (optional) - 1/4 cup unsweetened shredded coconut - 1/2 teaspoon pure vanilla extract - A pinch of salt These ingredients blend to create a tasty snack. The oats give a nice base. Peanut butter adds creaminess and protein. Honey or maple syrup brings sweetness. Ground flaxseed boosts nutrition with fiber. Dark chocolate chips add a fun twist. Shredded coconut gives a chewy texture. Vanilla extract adds flavor, while salt balances it all. You can customize this mix based on your taste. Want a nutty twist? Swap peanut butter for almond butter. Need a vegan option? Use maple syrup instead of honey. Each choice changes the bites in a fun way. Enjoy experimenting! {{ingredient_image_2}} Start with a big mixing bowl. Add 1 cup of rolled oats, 1/4 cup of ground flaxseed, and a pinch of salt. Mix these dry items well. This helps the flavors blend nicely. In another bowl, combine 1/2 cup of natural peanut butter, 1/3 cup of honey or maple syrup, and 1/2 teaspoon of pure vanilla extract. Stir them together until smooth. This mixture will add sweetness and creaminess. Now, add chocolate chips and shredded coconut to the wet mix. Use 1/2 cup of dark chocolate chips and 1/4 cup of shredded coconut. Gently fold them in. Then, take small portions of the mix and roll them into balls. Aim for golf ball size. Place the bites on a baking sheet lined with parchment paper, leaving space between each. Chill in the fridge for about 30 minutes. This helps them firm up and makes them easy to enjoy later. To make great energy bites, stickiness and compactness are key. This mixture needs to hold together well. If it is too dry, add a bit more peanut butter or honey. If it is too wet, add more oats or flaxseed. The right balance makes the bites easy to roll and keeps them from falling apart. Adding spices or nut extracts can take these bites to the next level. Consider adding: - Cinnamon for warmth - Nutmeg for a cozy touch - A splash of almond extract for a nutty flavor These small additions can really make your energy bites pop! Presentation matters, even with snacks. Here are some fun ideas: - Serve the energy bites in a small mason jar for a charming look. - Arrange them on a colorful plate to brighten up your table. - Tie a ribbon around the jar for a cute gift. Pair these bites with some fresh fruit or yogurt for a complete snack. Enjoying them with a glass of milk can also make for a satisfying treat! Pro Tips Storage Solution: Keep the energy bites in an airtight container in the refrigerator for optimal freshness and to maintain their chewy texture. Customize Your Flavor: Experiment with different nut butters or add spices like cinnamon for a unique flavor twist. Make It Vegan: Substitute honey with maple syrup or agave nectar to make these energy bites completely vegan-friendly. Batch Prep: Double the recipe and freeze half of the energy bites for a quick and easy snack option later on. {{image_4}} You can make these bites work for your needs. Try using almond butter instead of peanut butter. It adds a nice nutty twist. If you have nut allergies, sunflower seed butter is a great choice. It keeps the flavor and makes it safe for everyone. Want to change things up? Add different mix-ins! Dried fruits like raisins or cranberries can add sweetness. Nuts like walnuts or almonds give a nice crunch. You can also toss in seeds such as pumpkin or sunflower seeds for extra texture and flavor. To make your energy bites even healthier, consider adding protein powder. It packs a punch of protein, which is great after workouts. Chia seeds are another smart choice. They add fiber and healthy fats, making your snack even more nutritious. Store your oatmeal peanut butter energy bites in an airtight container. This keeps them fresh and tasty. They can last up to one week at room temperature. If you want to keep them longer, put them in the fridge. They can stay good for about two weeks when chilled. To freeze your energy bites, first, place them in a single layer on a baking sheet. Put the sheet in the freezer for one hour. This helps them freeze without sticking together. Once frozen, transfer the bites to a freezer-safe bag. They can last for up to three months in the freezer. When you want to eat a frozen energy bite, take it out of the bag. Let it sit at room temperature for about 15 minutes. This will make it soft and ready to eat. You can also microwave it for a few seconds if you're in a hurry. Enjoy your snack! These energy bites last up to one week when stored properly. Keep them in an airtight container. For longer freshness, store them in the fridge. You can also freeze them. They stay good for about three months in the freezer. Just thaw them in the fridge before eating. Yes, you can easily make these bites vegan. Instead of honey, use maple syrup. It gives the same sweetness without animal products. For butter, choose almond butter or sunflower seed butter. Both options work well and keep the bites creamy and tasty. If you run out of ground flaxseed, use chia seeds. They offer similar health benefits and add a nice crunch. You can also use unsweetened applesauce as a binder. This will change the texture a bit but keeps your bites moist. This blog post covered how to make easy oatmeal peanut butter energy bites. You learned about the key ingredients, preparation steps, and tips for a great result. We explored different flavor variations and storage methods. My final thoughts: these bites are healthy, tasty, and versatile. You can enjoy them as snacks or add fun twists to fit your taste. Try making them your own!
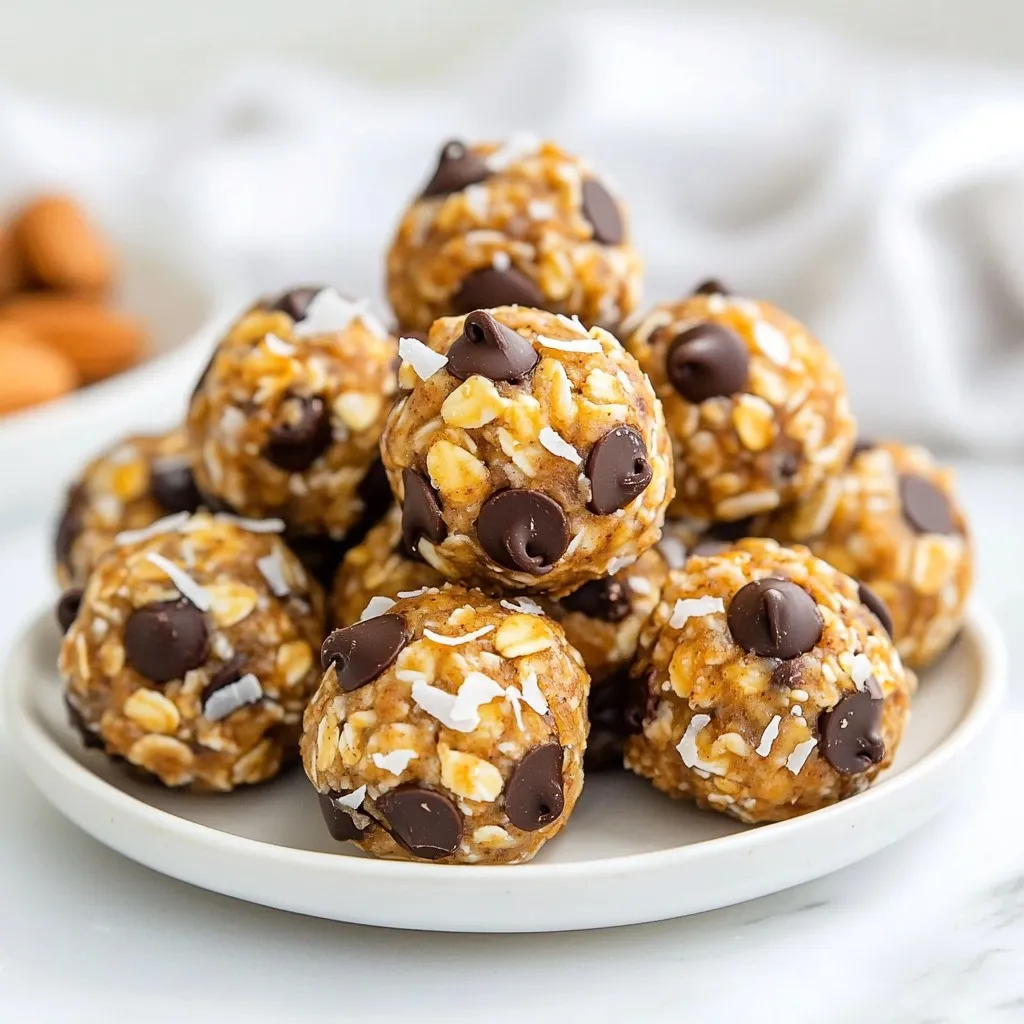
Oatmeal Peanut Butter Energy Bites Quick and Easy Snack
Looking for a quick and easy snack that packs a punch? These Oatmeal Peanut Butter Energy Bites are just what you need! With a handful
- 1 cup fresh strawberries, hulled and sliced - 1 cup plump blueberries, washed - 1 cup kiwi, peeled and diced - 1 cup pineapple, diced - 1 cup cream cheese, softened - 1/2 cup Greek yogurt, plain - 1/4 cup powdered sugar - 1 teaspoon pure vanilla extract - Zest of 1 fresh lemon - 1/4 cup crushed graham crackers - Fresh mint leaves for garnish When making this cheesecake fruit salad, fresh fruits are vital. I love using strawberries, blueberries, kiwi, and pineapple. They bring bright colors and sweet flavors. Strawberries add a juicy burst, while blueberries offer a slight tang. Kiwi brings a lovely tartness, and pineapple provides sweetness. Each fruit complements the creamy cheesecake mixture beautifully. The cheesecake mixture is where the magic happens. I use softened cream cheese and Greek yogurt for a rich texture. Mixing these two creates a smooth base. I add powdered sugar for sweetness and vanilla for flavor. The lemon zest brightens the mix and gives it a fresh kick. This mixture coats the fruit and makes each bite creamy and delightful. For a crunchy topping, I use crushed graham crackers. They add a nice texture contrast to the creamy fruit salad. Fresh mint leaves are the final touch. They not only look pretty but also add a refreshing scent. You can find the complete recipe above. Enjoy making this delicious and colorful treat! 1. Start by taking a large mixing bowl. Add the softened cream cheese and Greek yogurt into the bowl. 2. Use a hand mixer or a whisk to blend them. Mix until the texture is smooth and creamy. 3. Next, add the powdered sugar, vanilla extract, and lemon zest into the bowl. Continue mixing until all ingredients are well combined. 1. Grab a separate medium-sized bowl. Place the fresh fruits in this bowl. 2. Carefully toss the strawberries, blueberries, kiwi, and pineapple together. Use a spatula to mix gently. Be cautious not to mash any of the soft fruit. 1. With gentle hands, fold the cheesecake mixture into the bowl of mixed fruits. 2. Use a spatula to combine them carefully. Ensure the creamy mixture coats the fruit without breaking them apart. 3. When fully mixed, transfer the vibrant fruit salad into a serving dish or parfait bowls. For the full recipe, refer to the previous section. Enjoy creating your Cheesecake Fruit Salad! To get the best creamy texture, always use room temperature cream cheese. Cold cream cheese is hard to mix. A smooth blend makes the salad taste better. Adjust the powdered sugar based on your taste. If you like it sweeter, add more sugar. If you prefer less sweetness, reduce it. This way, you can customize the flavor to your liking. Choosing the right fruits is key. Use the best seasonal fruits for the best taste. Fresh berries, ripe kiwi, and juicy pineapple work well. If you want to swap fruits, you can. Try peaches, mangoes, or even grapes. The goal is to use fruits that you enjoy. Mixing different colors also makes the salad more appealing. Presentation matters when serving food. Use clear glass bowls to show off the colorful fruits. This makes the salad look fresh and inviting. A nice garnish can elevate your dish. Add fresh mint leaves for a pop of green. You can also add extra fruit slices on top. This not only looks great but adds more flavor. {{image_4}} To make your cheesecake fruit salad even better, try adding extracts. Almond or coconut extracts bring a fun twist. You can also use spices like cinnamon or nutmeg. These spices add warmth and depth to the flavors. Switching up the fruits keeps things fresh. Try using seasonal fruits like peaches or mangoes. They bring sweetness and a tropical vibe. You can also mix different berries. A blend of strawberries, blueberries, and raspberries gives a beautiful look and taste. If you want a lighter version, use low-fat cream cheese or yogurt. This keeps the dish creamy without all the fat. You can also add nuts or seeds for extra crunch. Chopped almonds or sunflower seeds work great and boost nutrition. For the full recipe, visit the Cheesecake Delight Fruit Salad section. To store leftover cheesecake fruit salad, place it in an airtight container. This keeps it fresh and prevents odors from other foods. Glass containers work well since they don’t stain or hold smells. Make sure the lid fits tightly to create a good seal. You can keep cheesecake fruit salad in the fridge for up to three days. After this time, it may lose its freshness. Signs that the salad has gone bad include a sour smell or a change in color. If the fruit looks mushy or the cream mixture separates, it’s best to toss it out. You can freeze cheesecake fruit salad, but the texture may change. The fruits can become mushy when thawed. If you want to freeze it, scoop portions into freezer-safe bags. To thaw, place the bag in the fridge overnight. This helps maintain some texture. Enjoy your salad within a week for the best taste! Yes, you can prepare Cheesecake Fruit Salad ahead of time. This salad tastes even better after chilling. Make the cheesecake mixture and cut the fruits the day before. Keep them in separate containers in the fridge. Just mix them together right before serving. This way, the fruit stays fresh and crisp. The best fruits for Cheesecake Fruit Salad are strawberries, blueberries, kiwi, and pineapple. These fruits add a sweet and tart balance. You can also use peaches, mangoes, or raspberries for variety. Choose any seasonal fruit that you enjoy. The key is to mix colors and flavors for a vibrant dish. To create a vegan Cheesecake Fruit Salad, swap cream cheese and yogurt for vegan options. Use cashew cream or coconut yogurt instead. For sweetness, maple syrup or agave works well. Make sure to use vegan graham crackers for the topping. This way, you can enjoy the same creamy and fruity delight without animal products. In this blog post, we explored how to make a delicious Cheesecake Fruit Salad. We covered fresh fruits, a creamy cheesecake mixture, and tasty toppings. I shared step-by-step instructions and helpful tips to perfect your salad. Remember, you can mix and match fruits or flavors to suit your taste. With the right ingredients, this dish can be a hit for any occasion. Enjoy creating this sweet, creamy treat that everyone will love!
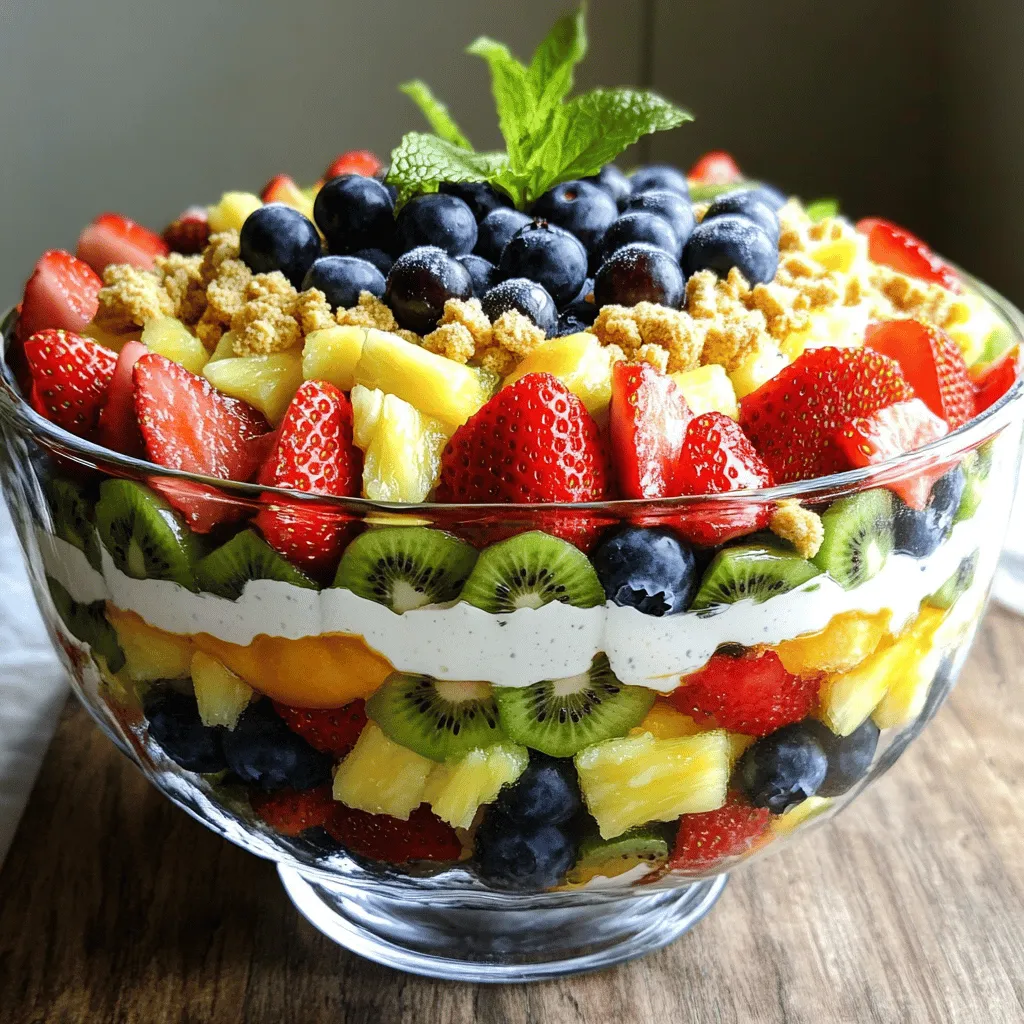
Cheesecake Fruit Salad Refreshing and Flavorful Treat
Looking for a sweet treat that’s easy and refreshing? Look no further than Cheesecake Fruit Salad! This colorful dish combines fresh fruits with a creamy
To make delicious lemon cream cheese muffins, gather these ingredients: - 1 ½ cups all-purpose flour - ½ cup granulated sugar - 1 tablespoon freshly grated lemon zest (from about 1 medium lemon) - 1 teaspoon baking powder - ½ teaspoon baking soda - ½ teaspoon fine sea salt - 4 ounces cream cheese, softened - 1 large egg, at room temperature - ¼ cup unsalted butter, melted - ½ cup plain Greek yogurt, preferably full-fat - ¼ cup fresh lemon juice (from about 2 medium lemons) - 1 teaspoon pure vanilla extract - Optional: Powdered sugar for dusting Each ingredient plays a key role in flavor and texture. Here are some notes: - Flour: I use all-purpose flour. You can try whole wheat flour for added fiber. - Sugar: Granulated sugar gives sweetness. You can use brown sugar for a richer flavor. - Lemon Zest and Juice: Fresh zest and juice add brightness. Bottled juice lacks the same taste. - Cream Cheese: Use full-fat cream cheese for the best creaminess. Neufchâtel is a lighter option. - Greek Yogurt: This adds moisture. You can swap it with sour cream if needed. - Butter: Unsalted butter allows you to control the salt. You can use coconut oil for a dairy-free option. Fresh ingredients make a big difference. Here’s how to pick the best: - Lemons: Choose firm, bright lemons. They should feel heavy for their size. This shows they are juicy. - Eggs: Look for eggs that are clean and uncracked. Check the sell-by date for freshness. - Cream Cheese: Buy cream cheese close to its expiration date for the best flavor. - Yogurt: Look for full-fat yogurt with no added sugars. This helps keep muffins rich. Using fresh ingredients gives you the best lemon cream cheese muffins. For the full recipe, follow the steps carefully. Enjoy baking! Start by preheating your oven to 350°F (175°C). Line a muffin tin with paper liners or grease the cups to prevent sticking. In a medium bowl, mix the dry ingredients: all-purpose flour, granulated sugar, lemon zest, baking powder, baking soda, and sea salt. Whisk them together until no lumps remain. In a larger bowl, beat the softened cream cheese with a hand mixer until smooth. Gradually add the melted butter and mix until well combined. Next, add the egg, Greek yogurt, fresh lemon juice, and vanilla extract to the cream cheese mixture. Whisk until smooth. Now, carefully fold the dry ingredients into the wet mixture using a spatula. Be gentle to keep the muffins light. The batter should still have some lumps. Fill each muffin cup about two-thirds full with batter. This allows room for them to rise while baking. Place the muffin tin in the preheated oven and bake for 18 to 22 minutes. The tops should turn lightly golden. Use a toothpick to check if they are done; it should come out clean when inserted into the center. After baking, let the muffins cool in the tin for about five minutes. Then, carefully transfer them to a wire rack to cool completely. If you like, dust the tops with powdered sugar for a sweet touch. For a lovely display, serve them on a tiered cake stand. You can add lemon slices or curls of lemon zest for extra flair. This simple and tasty recipe makes for a delightful treat! For the full recipe, check out the complete instructions! To keep your muffins tender and moist, use room temperature ingredients. This means letting your egg and cream cheese sit out before mixing. The yogurt also adds moisture. If your yogurt is too thick, you can add a splash of milk. Also, avoid overmixing the batter. Mix just until the dry and wet ingredients come together. This helps keep the muffins light and fluffy. One common mistake is forgetting to measure ingredients correctly. Use dry measuring cups for flour and sugar, and liquid measuring cups for yogurt and lemon juice. Another mistake is baking at the wrong temperature. Always preheat your oven before baking. Lastly, don’t skip the cooling time. Letting muffins cool on a wire rack prevents sogginess. To boost lemon flavor, use fresh lemons instead of bottled juice. The zest adds a bright taste and lovely aroma. Grate the zest finely for the best results. For even more flavor, consider adding a splash of lemon extract. If you want a sweeter taste, you can mix in a bit of lemon curd. For a full guide, check out the Full Recipe for Lemon Cream Cheese Muffins. {{image_4}} You can give lemon cream cheese muffins a fun twist. Here are some great ideas: - Blueberries: Add 1 cup of fresh or frozen blueberries. They pair well with lemon. - Chopped nuts: Walnuts or pecans add a nice crunch. Use about ½ cup. - Chocolate chips: For a sweet touch, mix in ½ cup of white or dark chocolate chips. - Dried fruits: Try adding ½ cup of dried cranberries or apricots for a chewy texture. These add-ins make the muffins more exciting and flavorful. Feel free to mix and match based on your taste. If you have dietary needs, you can still enjoy these muffins. For gluten-free muffins, substitute all-purpose flour with a 1:1 gluten-free blend. Make sure it contains xanthan gum for better texture. For a dairy-free option, replace cream cheese with dairy-free cream cheese. You can also use coconut yogurt instead of Greek yogurt. These swaps keep the muffins moist and tasty. You can change the flavor of your muffins to match the seasons. In spring, add fresh strawberries or raspberries for a fruity kick. In fall, try pumpkin puree and spices like cinnamon and nutmeg for a cozy treat. In winter, consider adding chopped cranberries and a hint of ginger to warm up your taste buds. These variations make every batch special and fun to bake. For the full recipe, check out the complete guide above! To keep your Lemon Cream Cheese Muffins fresh, store them in an airtight container. This helps lock in moisture and keeps them soft. You can leave them at room temperature for up to three days. If you want to keep them longer, consider refrigerating them. Just make sure to wrap them in plastic wrap to prevent drying. Freezing muffins is a great way to save them for later. Allow the muffins to cool completely first. Next, wrap each muffin in plastic wrap. Place them in a freezer bag or container. They can last up to three months in the freezer. When you're ready to enjoy, just take out what you need. To reheat your muffins, you can use the microwave or the oven. For the microwave, place a muffin on a plate and heat for about 15-20 seconds. Check if it's warm enough. If using the oven, preheat it to 350°F (175°C). Wrap the muffin in foil and heat for 10 minutes. This keeps them soft and tasty. Enjoy your delicious, fresh muffins! For the complete recipe, check the Full Recipe. You can try using ricotta or mascarpone. Both will give a creamy texture. However, they have different flavors. Ricotta is lighter, while mascarpone is richer. Adjust the sugar if using mascarpone, as it's sweeter. Overall, cream cheese gives the best flavor in these muffins. To make these muffins healthier, consider these simple swaps: - Use whole wheat flour instead of all-purpose flour. - Substitute Greek yogurt with a low-fat version. - Reduce the sugar by up to half. - Add fruits like blueberries or nuts for fiber and nutrients. These changes keep the muffins tasty while adding health benefits. To freshen stale muffins, place them in a microwave with a cup of water. Heat for 10 to 15 seconds. The steam helps restore moisture. Alternatively, you can wrap them in a damp paper towel and microwave them. For a crunchy top, bake them in the oven at 350°F for about 5 minutes. This method gives them a fresh taste. Remember, fresh muffins always taste best! For more ideas, check out the Full Recipe. This article shared tips for great muffins, covering ingredients, preparation, baking, and storage. Remember, fresh ingredients matter for the best flavor. Follow step-by-step instructions for the perfect muffin batter and baking. Use the tips to avoid common mistakes for moist muffins. Explore variations for your unique taste and store them for later. With these insights, you can bake muffins that impress. Enjoy your baking journey and the delightful treats ahead!
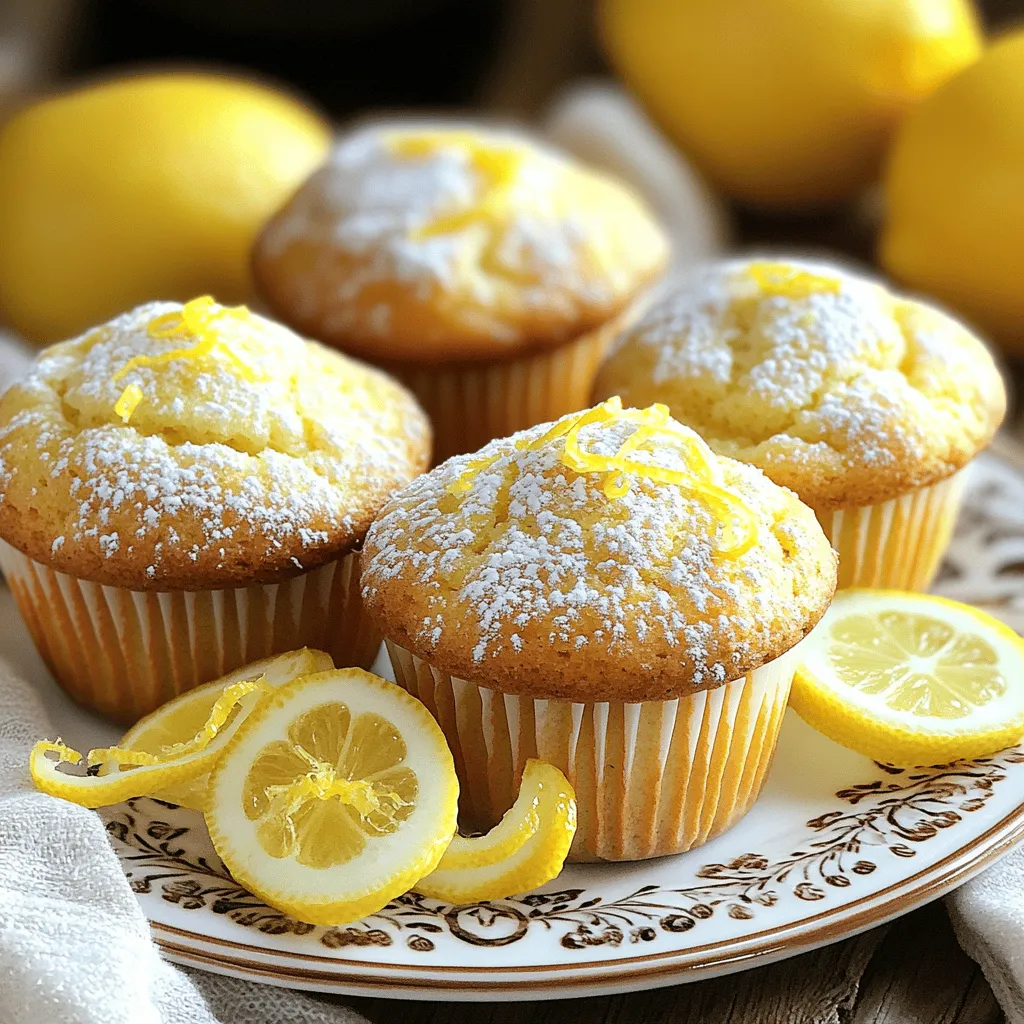
Lemon Cream Cheese Muffins Simple and Tasty Recipe
If you’re craving a bright burst of flavor, my Lemon Cream Cheese Muffins will hit the spot! This simple recipe blends zesty lemon with rich
- Large flour tortillas - Peanut butter (creamy or crunchy) - Ripe banana - Honey - Ground cinnamon - Chopped walnuts or almonds - Mini chocolate chips - Non-stick skillet - Cooking spray or butter - Serving plate Gathering fresh ingredients is key for a tasty peanut butter quesadilla. Start with large flour tortillas. They give a great base and hold the filling well. Then, grab your favorite peanut butter. Creamy or crunchy, it’s all good! A ripe banana adds natural sweetness and texture. For optional ingredients, think about honey. It adds a sweet touch. Ground cinnamon gives warmth and flavor. If you like nuts, chopped walnuts or almonds add a nice crunch. Mini chocolate chips can make this dish even sweeter. You need some cooking supplies too. A non-stick skillet helps cook the quesadilla evenly. Using cooking spray or butter keeps it from sticking. Finally, a serving plate makes for a nice presentation when you serve. For the complete recipe, check the Full Recipe. - Preheat a non-stick skillet over medium heat. - Lightly coat the skillet with cooking spray or butter to prevent sticking. - Grab two large flour tortillas. - Spread 1/4 cup of peanut butter on each tortilla. Cover the whole surface. - On one tortilla, layer banana slices evenly. - Drizzle honey over the banana slices. - Sprinkle ground cinnamon on top for flavor. - If you want, add chopped walnuts or mini chocolate chips for some crunch and sweetness. - Place the second tortilla on top, peanut butter side down. - Place the quesadilla in the preheated skillet. - Cook it for about 2-3 minutes on each side. - Look for a golden brown color on the tortillas. - The peanut butter should become gooey and warm. - Once done, take it out and let it cool for one minute. - Cut the quesadilla into wedges for easy serving. Enjoy your peanut butter quesadilla warm! For more details, check the Full Recipe. To get the best texture, use fresh tortillas. They should be soft but not too thick. For a perfect bite, spread the peanut butter evenly. This helps it melt just right. If you want more sweetness, add extra honey. You can also adjust the ground cinnamon. A little more can enhance the flavor. If you like crunch, add chopped nuts. They give a nice contrast to the creamy peanut butter. When serving, cut the quesadilla into wedges. Arrange them on a colorful plate. For a fun touch, add honey in a small bowl for dipping. You can also sprinkle some chopped nuts on top. This makes your dish look fancy and inviting. Be careful not to overcook the quesadilla. If you do, it may burn and taste bitter. Keep an eye on it while cooking. Also, don't skip the optional crunch elements. They add texture and make your quesadilla more exciting. If you leave them out, the dish may feel flat and boring. {{image_4}} You can switch up the flavor by using almond butter instead of peanut butter. Almond butter gives a nutty taste and is tasty. You can also try adding fruits like strawberries or apples. These fruits add fresh flavors and colors. Just slice them thin and layer them on the quesadilla. If you follow a vegan diet, use plant-based options. Swap honey for maple syrup or agave nectar. You can also choose gluten-free tortillas. Many stores sell these, and they taste great. Check the labels to find the best ones for your needs. You can enjoy this quesadilla for breakfast by adding eggs. Scramble or fry eggs, then place them inside the quesadilla before cooking. It makes a filling meal! For dessert, serve the quesadilla with ice cream or whipped cream. Drizzle chocolate sauce on top for a sweet treat. For the Full Recipe, check out the details to create your own delicious version! After you make your peanut butter quesadilla, you can store it in the fridge. Wrap it in plastic wrap or place it in an airtight container. This keeps it fresh and tasty. You should eat it within 2-3 days for the best flavor. When you want to reheat it, use a skillet on medium heat. Heat each side for 1-2 minutes. This keeps the quesadilla crispy and warm. You can also use a microwave, but it may get a bit soft. You can freeze your quesadillas for later. Wrap each one in plastic wrap, then put them in a freezer-safe bag. They can stay good for up to 3 months. To thaw, place the frozen quesadilla in the fridge overnight. Once thawed, reheat in a skillet as mentioned before. This way, you’ll enjoy the same great taste! Leftovers can last about 2-3 days in the fridge. Always check for signs of spoilage before eating. If you see mold or a bad smell, throw it away. If the quesadilla feels slimy or has an off-taste, do not eat it. Keeping track of how long your food sits in the fridge helps you stay safe. Enjoy your peanut butter quesadilla delight! For a full recipe, check out the [Full Recipe]. If you have allergies or want a change, try these spreads: - Almond butter - Sunflower seed butter - Cashew butter - Soy nut butter These options give you a similar taste and texture. Each spread has its own unique flavor. Yes, you can prepare this quesadilla in advance. Here’s how: - Assemble the quesadilla but do not cook it. - Wrap it tightly in plastic wrap or foil. - Store it in the fridge for 1-2 days. - To cook, heat it in a skillet until golden brown. This makes for an easy meal when you're busy! Boost the nutrition with these healthy ideas: - Sliced strawberries or apples - Chia seeds or flaxseeds - Greek yogurt on the side Adding these ingredients makes your quesadilla even more delicious and healthy. You can mix and match to find your favorites! This blog post explored how to make a delicious peanut butter quesadilla. We covered key ingredients like flour tortillas, peanut butter, and bananas. You learned how to prepare, assemble, and cook your quesadilla. Tips and tricks helped you avoid common mistakes and presented new ways to serve. Variations offered creative spins, while storage info gave guidance on leftovers. With this recipe, you can enjoy a tasty treat any time. Happy cooking!
Peanut Butter Quesadilla Tasty Twist Recipe
Looking for a quick and fun snack? Try this Peanut Butter Quesadilla! It’s easy to make with just a few tasty ingredients like flour tortillas,
- 2 ripe bananas, sliced into rounds - 1 can (20 oz) crushed pineapple, undrained - 1 cup strawberry pie filling - 1 box yellow cake mix (15.25 oz) - 1 cup unsalted butter, melted - 1 cup chopped walnuts or pecans (optional) - 1 cup shredded coconut (optional) - 1 cup chocolate syrup - Whipped cream (for serving) - Maraschino cherries (for garnish) I love using these simple ingredients. They come together to create a fun and tasty dessert. The bananas bring a soft, sweet flavor. The crushed pineapple adds a juicy, tangy kick. Strawberry pie filling gives it a bright, fruity taste. The yellow cake mix provides a fluffy base. - 9x13 inch baking dish - Mixing bowl - Measuring cups and spoons - Greasing spray or butter With these tools, making this dessert is a breeze. A 9x13 inch baking dish is perfect for this cake. A mixing bowl helps combine the ingredients easily. Measuring cups and spoons ensure you get the right amounts. Greasing spray or butter prevents sticking. - Substitute bananas with other fruits - Gluten-free cake mix alternatives Feel free to switch things up! If you don’t have bananas, try using peaches or apples. You can also find gluten-free cake mixes at the store. These options keep the recipe fun and open to new flavors. For the full recipe, check below. - Preheat the oven to 350°F (175°C). - Grease the baking dish with butter or cooking spray. - Spread crushed pineapple evenly in the dish. - Layer sliced bananas over the pineapple. - Add strawberry pie filling evenly on top. - Sprinkle yellow cake mix over the layered fruits. - Drizzle melted butter over the cake mix. - Optionally, sprinkle chopped nuts and shredded coconut before baking. - Bake for 45-50 minutes until golden brown. - Allow the cake to cool for 10 minutes before serving. - Layer the ingredients evenly. This helps the cake bake well. - Keep an eye on the cake in the last minutes. This way, it won’t overcook. - Serve each piece with whipped cream and a maraschino cherry on top. - For extra flavor, drizzle some chocolate syrup over the cake. - Use fresh mint leaves to garnish each slice. This adds a pop of color and freshness. - Choose colorful dessert plates to make your dish even more appealing. These tips will help you make your Banana Split Dump Cake a hit. You can find the full recipe to guide you through every step. {{image_4}} You can play with tastes in the banana split dump cake. Try a tropical version. Use mango and coconut. The sweet mango pairs well with bananas. Coconut adds a nice crunch. You can also make a chocolate banana split dump cake. Just use chocolate cake mix instead. This change gives it a rich, deep flavor. If you want a lighter dessert, there are easy swaps. Use low-fat butter to cut calories. You can also use alternative sweeteners like stevia or monk fruit. They keep the sweetness without extra sugar. For a lower-carb option, substitute the cake mix with almond flour. This option gives you a tasty cake without the carbs. Make it fun for kids by adding gummy candies. They can sprinkle them on top before baking. Kids love the fun colors and chewy texture. You can also incorporate other flavored pie fillings. Blueberry or peach can add a twist to the cake. These flavors pair nicely with bananas and make it exciting. Explore the [Full Recipe](#) for more delicious ideas! Store your banana split dump cake covered at room temperature. It will stay fresh for up to 3 days. Make sure to keep it in a cool, dry spot. This helps maintain its taste and texture. If you want to keep it longer, refrigerate the cake for up to 1 week. This keeps it safe from spoiling. You can also freeze individual portions for up to 2 months. Just wrap them tightly in plastic wrap or foil to prevent freezer burn. To enjoy your banana split dump cake warm, you can reheat it. Use the oven or microwave until it is heated through. If using the oven, set it to 350°F and warm it for about 10 minutes. For the microwave, heat each slice for about 30 seconds. This way, you can savor that gooey goodness all over again. Look for a golden brown color and bubbly edges. This shows the cake is baked well. When you see these signs, it’s ready to come out of the oven. Yes, you can prepare the layers and bake on the same day. This way, you can enjoy fresh cake when you are ready to serve it. You can use other fruits like peaches or mixed berries. These fruits bring their own flavor and can make the cake your own. To make it nut-free, simply omit the chopped nuts. The cake will still taste great without them. Yes, variations such as chocolate or spice cake mix work well too. Each mix brings a unique taste to your cake, so feel free to experiment. For the full recipe, check out the detailed steps above. This dump cake recipe combines simple ingredients for a delicious treat. You learned how to layer fruits and cake mix for a tasty dessert. Remember, you can swap ingredients to fit your taste. This dish is easy to make and perfect for sharing. Store leftovers at room temperature or in the fridge. Experiment with variations to keep it fun and exciting. Enjoy baking and sharing this sweet delight!
Banana Split Dump Cake Rich and Simple Dessert
Craving a dessert that’s easy, rich, and full of flavor? Try my Banana Split Dump Cake! This delightful treat layers ripe bananas, crushed pineapple, and
To make the best banana bread cinnamon rolls, you need the following main ingredients: - 2 ripe bananas, thoroughly mashed - 1/3 cup unsalted butter, melted - 1/2 cup packed brown sugar - 1/4 cup granulated sugar - 1 large egg - 1 teaspoon vanilla extract - 1 teaspoon baking soda - 1/2 teaspoon fine sea salt - 1 1/2 cups all-purpose flour - 1 tablespoon ground cinnamon These ingredients work together to create a soft, sweet dough that is perfect for rolls. The ripe bananas add moisture and flavor, while the sugars give a lovely sweetness. You can customize your rolls with these optional add-ins for more flavor: - 1/4 cup chopped walnuts (optional) - 1/4 cup raisins or chocolate chips (optional) Adding these ingredients can enhance the texture and taste. Walnuts add crunch, while raisins or chocolate chips provide a sweet surprise in every bite. To make a creamy icing for your rolls, you will need: - 1 cup powdered sugar - 2 tablespoons milk - 1/2 teaspoon vanilla extract This icing is easy to whip up and adds a sweet finish to your rolls. The milk gives it a nice consistency, while the vanilla brings in extra flavor. For the complete guide, don’t forget to check the Full Recipe. First, preheat your oven to 350°F (175°C). This step is key for even baking. While the oven heats, grab a 9x9 inch baking dish. Grease it well with cooking spray or butter. This will keep your rolls from sticking. Next, take a large mixing bowl. Add 2 ripe bananas that you’ve mashed well. Pour in 1/3 cup of melted unsalted butter and mix. Use a fork or whisk to blend until smooth. Now, add 1/2 cup of packed brown sugar and 1/4 cup of granulated sugar. Stir them in until fully mixed. Crack in 1 large egg and drizzle in 1 teaspoon of vanilla extract. Mix until you have a smooth batter. Then, sprinkle in 1 teaspoon of baking soda and 1/2 teaspoon of fine sea salt. Stir gently. Slowly add 1 1/2 cups of all-purpose flour. Mix just until combined. Be careful not to over-mix; the batter should still be slightly lumpy. Now, lightly flour a clean surface. Roll your dough out into a rectangle, about 1/4 inch thick. Brush melted butter over the surface. Next, sprinkle 1 tablespoon of ground cinnamon on top. If you want, add 1/4 cup of chopped walnuts and 1/4 cup of raisins or chocolate chips. From one short edge, roll the dough tightly into a log shape. Pinch the seam to seal it well. With a sharp knife, cut the log into 1-inch thick slices. Place these slices upright in your greased baking dish. Make sure they fit snugly but aren’t too crowded. Bake these rolls in your preheated oven for 20-25 minutes. They should turn golden brown and rise nicely. While they bake, you can prepare the icing. In a small bowl, whisk together 1 cup of powdered sugar, 2 tablespoons of milk, and 1/2 teaspoon of vanilla extract. This will create a smooth and creamy icing. Once the rolls are baked, take them out and let them cool for a few minutes. Then, drizzle the icing over the warm rolls. Enjoy your delightful Banana Bread Cinnamon Rolls! For the complete recipe, check out the Full Recipe section. When making banana bread cinnamon rolls, some common mistakes can spoil your fun. First, don't skip the ripe bananas. They add natural sweetness and flavor. Next, be careful not to over-mix the dough. Over-mixing can lead to tough rolls. Also, ensure your oven is preheated. Baking in a cold oven can lead to uneven cooking. Finally, avoid cutting the rolls too thin. Thick rolls bake better and stay moist. To get the best results with your rolls, focus on a few key steps. Use very ripe bananas for a rich taste. The batter should be slightly lumpy. This keeps the rolls fluffy. If you want a twist, add nuts or chocolate chips to the filling. They enhance the flavor and texture. After rolling the dough, pinch the seam well. This stops the filling from leaking during baking. Lastly, give them space in the dish. Snug is good, but overcrowded rolls won't rise well. Icing can make or break your banana bread cinnamon rolls. Always ice them while they are warm. This allows the icing to melt into the rolls. For a smooth icing, whisk the ingredients well. If it's too thick, add a drop more milk. Use a spoon to drizzle the icing over the rolls. This gives a beautiful look. For a fun touch, add a sprinkle of cinnamon on top. It adds color and a hint of spice. You can find the full recipe to make these delicious rolls and enjoy! {{image_4}} You can change the flavor of your banana bread cinnamon rolls by adding different fruits. Try using ripe peaches or apples for a fresh twist. Both fruits add natural sweetness and moisture. Chopped strawberries or blueberries can also work well. Just make sure to adjust the sugar if the fruit is very sweet. These additions can make your rolls even more exciting and tasty. If you want a vegan version, replace the egg with a flaxseed egg. Mix one tablespoon of flaxseed meal with three tablespoons of water and let it sit for five minutes. For gluten-free rolls, use a gluten-free flour blend. Make sure the blend contains xanthan gum to help with texture. These changes keep the rolls soft and delicious while meeting dietary needs. Spice up your rolls with different flavors. Nutmeg adds warmth and depth, while cardamom gives a nice floral note. You can mix these spices into the dough or the filling. A pinch of ginger can also add a nice kick. Experiment with these spices to find your favorite blend. Each will bring a new layer of flavor to your already delightful banana bread cinnamon rolls. To keep your leftover cinnamon rolls fresh, let them cool first. Then, place them in an airtight container. This helps to keep them soft and moist. You can also wrap them in plastic wrap before putting them in the container. If you want to save some for later, freezing is a great option. Wrap each roll in plastic wrap, then place them in a freezer-safe bag. They can last up to three months in the freezer. When you’re ready to eat, simply take them out. Let them thaw overnight in the fridge. For a quick heat-up, pop them in the microwave for about 20 seconds. Choose glass or plastic containers with tight-fitting lids. These keep out air and moisture. Glass containers are great because they won’t stain. If you use plastic, select BPA-free options for safety and health. If you stack your rolls, add parchment paper between layers to avoid sticking. Yes, you can prepare these rolls ahead of time. You can mix the dough and fill it with cinnamon. After rolling, cut the rolls and place them in your baking dish. Cover the dish tightly with plastic wrap. Store it in the fridge overnight. When you are ready, let them rise for about 30 minutes before baking. This way, you have fresh rolls in the morning with minimal work. If you don't have ripe bananas, you can use applesauce. It gives similar moisture and sweetness. You can also use mashed sweet potatoes or pumpkin. Each option will change the flavor slightly, but they still taste great. Just be mindful of the texture, as it may differ from the original recipe. To keep your rolls from getting soggy, avoid overmixing the dough. Overmixing can create too much moisture. Bake the rolls until they are golden brown. This ensures they have a nice crust. Let them cool slightly before drizzling with icing. This helps keep the icing from soaking in too much. Enjoy your tasty, fluffy rolls without the sogginess! You learned about the main ingredients, steps, and tips for making banana bread cinnamon rolls. You explored variations and storage options, too. These rolls are not just tasty—they're easy to customize. Experiment with fruits or flavors to make them your own. Storing them correctly keeps every bite fresh. Enjoy your baking and share these delightful treats with others. They'll love each roll as much as you do!
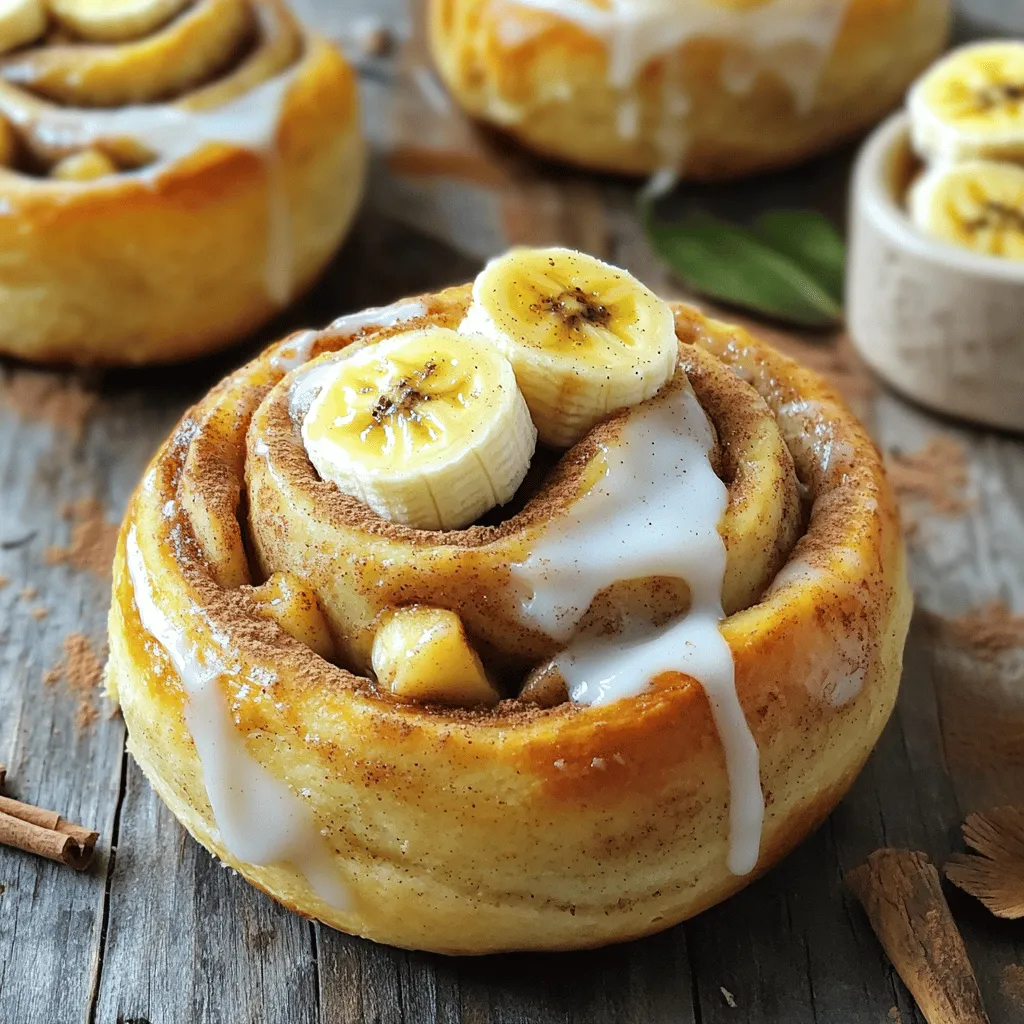
Irresistible Banana Bread Cinnamon Rolls Recipe
If you’re craving a treat that combines the softness of bread with the sweetness of cinnamon rolls, look no further! My Irresistible Banana Bread Cinnamon
To create the Fried Strawberry Cheesecake Sandwiches, gather the following ingredients. Each one plays a key role in making this treat delicious. - 8 slices of rich brioche bread - 1 cup cream cheese, softened to room temperature - 1/2 cup powdered sugar - 1 teaspoon pure vanilla extract - 1 cup fresh strawberries, hulled and thinly sliced - 1/2 teaspoon ground cinnamon - 1/4 teaspoon ground nutmeg - 2 large eggs - 1 cup whole milk - 1 cup all-purpose flour - 1 cup breadcrumbs (preferably panko for extra crunch) - Vegetable oil for frying (enough for about 1 inch depth) - Whipped cream for serving (optional, but recommended) Each ingredient contributes to the creamy filling and the crispy outside. The brioche bread gives the sandwich a sweet taste. Cream cheese adds richness. Strawberries provide a burst of fruitiness. The spices add warmth and depth. When you have all your ingredients ready, you can dive into making these yummy sandwiches. For the detailed process, check the Full Recipe. First, you need to make the filling. In a medium bowl, combine the cream cheese, powdered sugar, and vanilla. Mix these together until they are smooth and creamy. This will create a great base for your cheesecake. Now, gently fold in your sliced strawberries. This step is key; you want to keep the strawberries whole, so they add a nice texture. Next, grab your brioche bread. Lay out four slices on a clean surface. Spread a generous layer of the strawberry cheesecake filling on each slice. Make sure to cover it well! Then, take another slice of brioche and place it on top. Press down lightly to help seal the sandwiches. This will keep all that yummy filling inside when you fry them. Now, let's get the coatings ready. In a shallow dish, whisk together the eggs and milk until it is frothy. This will help the bread get a nice golden color. In another dish, mix the all-purpose flour, ground cinnamon, and ground nutmeg. This spice blend adds warmth and flavor. Finally, set up a third shallow dish with breadcrumbs. Panko works best for a crispy finish. You are almost there! In a deep skillet, heat about 1 inch of vegetable oil over medium heat. You want the oil to reach about 350°F (175°C) for frying. Carefully take each sandwich and coat it in the flour mixture first. Then dip it in the egg mixture, letting the excess drip off. Finally, coat it in the breadcrumbs, pressing gently to help it stick. Fry the sandwiches in batches of 2-3. Cook each side for about 2-3 minutes until they turn golden brown and crispy. Once done, place them on paper towels to absorb extra oil. After frying, let the sandwiches cool a bit. Slice them in half to show off the filling. Dust with powdered sugar for a sweet touch. If you like, add a dollop of whipped cream on the side. This makes for a perfect treat that everyone will love. For the full recipe, check the earlier sections. Enjoy your delicious creation! To get that perfect crunch, you need to control the oil temperature. Heat the oil to about 350°F (175°C). Use a thermometer if you have one. If the oil is too hot, the outside burns before the inside cooks. Too low, and you get soggy sandwiches. To avoid soggy sandwiches, make sure to coat them well. Dip in flour, then in egg, and finish with breadcrumbs. This creates a barrier. It keeps moisture in the filling and crispiness on the outside. You can prepare the filling in advance. Mix the cream cheese, sugar, and strawberries, then store it in the fridge. This saves time on busy days. Store the filling separately from the bread. Assemble the sandwiches just before frying. This keeps them fresh and tasty. Pair these sandwiches with fresh fruits. Strawberries, blueberries, or even a fruit sauce work well. A drizzle of chocolate sauce adds a nice touch. For a fun presentation, cut the sandwiches into triangles or halves. Serve them on a colorful plate. Add a sprinkle of powdered sugar on top for flair. You can also serve whipped cream on the side for dipping. For the full recipe, check the earlier section. Enjoy your cooking! {{image_4}} You can change the fruit in this recipe. Blueberries, raspberries, and bananas work great. Each fruit brings its own flavor. This way, you can enjoy different tastes each time. When using sweeter fruits, you may need less sugar in the filling. Adjust the sweetness to match your fruit choice. Taste as you go to find the best mix for you. Want to make your sandwiches even better? Consider adding chocolate chips or nuts to the filling. Both give a nice crunch and flavor boost. You can also infuse spices like cardamom for a warm touch. These small changes can transform your sandwiches into a new treat. Be creative and make them your own! If you have special diet needs, do not worry! You can make gluten-free or vegan options. For gluten-free, use gluten-free bread and flour. For a vegan version, swap cream cheese for a plant-based alternative. Use a mix of ground flaxseed and water instead of eggs. These easy swaps help you enjoy this delicious treat while sticking to your diet. To keep your fried strawberry cheesecake sandwiches fresh, place them in an airtight container. Store them in the fridge for up to three days. When you want to enjoy them again, heat them gently in a skillet over low heat. This way, you keep the crispy texture while warming the filling. If you want to save some sandwiches for later, freeze them before frying. Wrap each sandwich in plastic wrap and then in foil. They can last for about a month in the freezer. When you're ready to eat, remove them from the freezer and let them thaw in the fridge overnight. To reheat, heat some oil in a skillet. Fry the thawed sandwiches for about 2-3 minutes on each side, until they are golden and crispy. Enjoy the delight of this tasty treat any time! For the full recipe, check out the Fried Strawberry Cheesecake Sandwiches section above. Yes, you can! To prepare ahead, make the filling first. Mix the cream cheese, sugar, and vanilla together. Fold in the fresh strawberries. You can store this filling in the fridge for up to two days. When you are ready, assemble the sandwiches. Spread the filling between the slices of brioche bread. Then, coat and fry them just before serving. This way, they stay crispy and fresh. If you cannot find brioche, do not worry. You have some tasty options. You can use challah bread, which is also rich and soft. White sandwich bread will work too, but it may not be as sweet. For a healthier choice, whole wheat bread can be used. Just keep in mind that it will change the flavor a bit. To keep your sandwiches crispy, follow these tips. First, use fresh bread that is not too soft. Second, coat them well with flour and breadcrumbs. This coating helps create a barrier against moisture. When frying, make sure the oil is hot enough. If the oil is too cool, the sandwiches will soak up oil. Fry in small batches and do not crowd the pan. Absolutely! These sandwiches are a great breakfast option. They combine sweet and creamy flavors that kids love. You can serve them alongside fresh fruit or yogurt. They can also be a fun brunch treat for adults. Enjoy them with coffee or tea for a delightful morning snack. This blog post provided a tasty recipe for Fried Strawberry Cheesecake Sandwiches. We covered the ingredients, step-by-step instructions, and tips for perfect frying. You learned how to make variations with different fruits and dietary options. I shared how to store leftovers and answered common questions. Now, you have everything to create this delicious treat. Enjoy making it for breakfast or dessert. Your kitchen is ready for a sweet adventure!
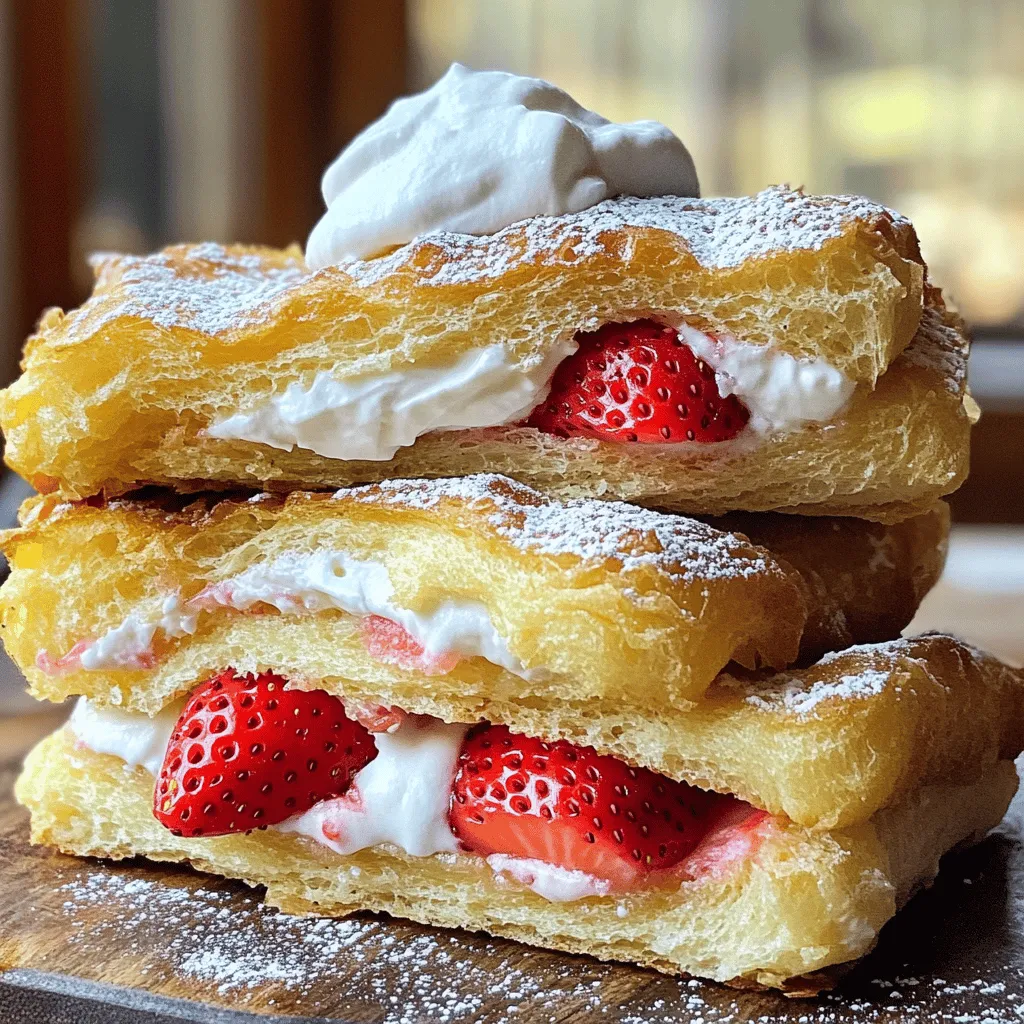
Fried Strawberry Cheesecake Sandwiches Delicious Treat
Get ready for a sweet twist on dessert with Fried Strawberry Cheesecake Sandwiches! This treat combines creamy cheesecake and fresh strawberries between warm, crispy brioche.