Desserts
Fresh Peach Cobbler Simple and Delicious Dessert Treat
If you’re craving a sweet and warm dessert, fresh peach cobbler is a must-try! This simple recipe captures the juicy goodness of ripe peaches and
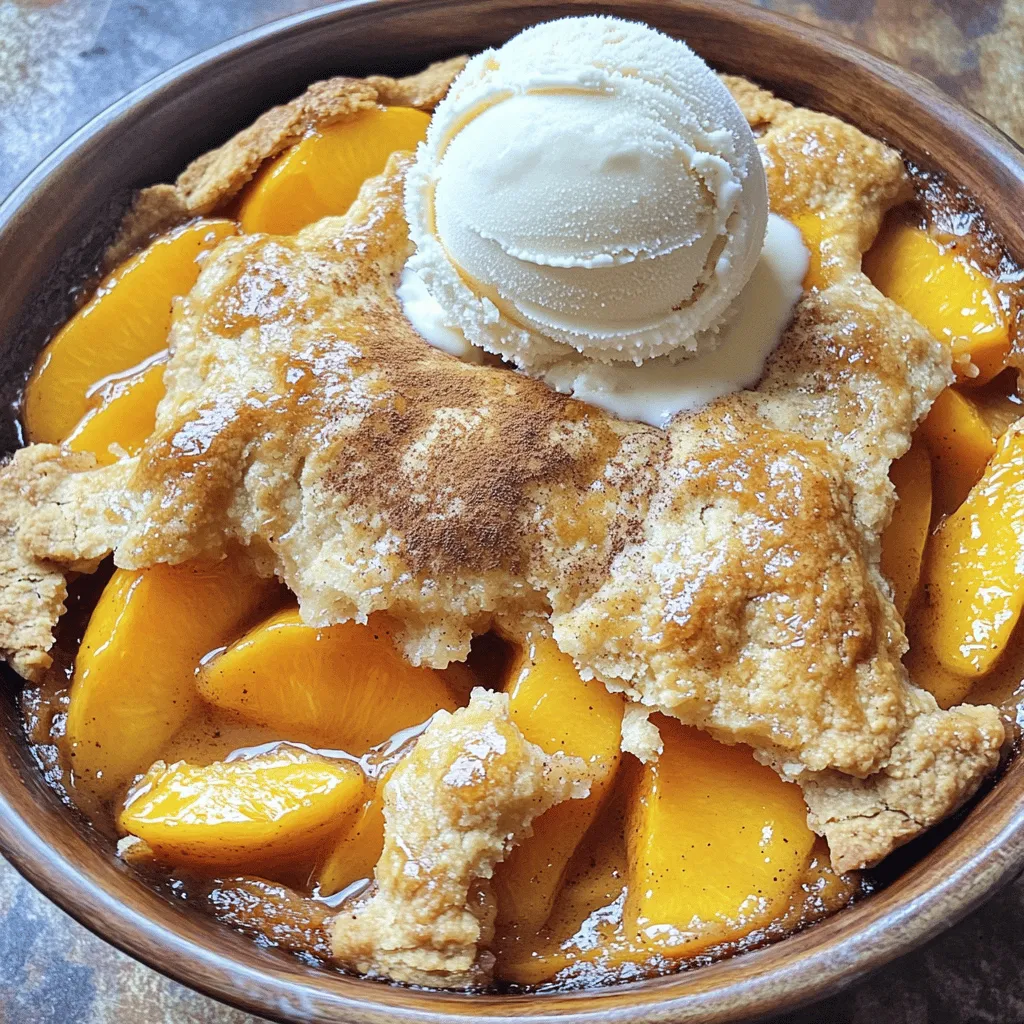
![To make a healthy peach crumble, you need fresh and wholesome ingredients. Here’s what you will need: - 4 ripe peaches, sliced into wedges - 1 tablespoon honey or pure maple syrup - 1 teaspoon ground cinnamon - 1 tablespoon freshly squeezed lemon juice - 1 cup rolled oats - 1/2 cup whole wheat flour - 1/4 cup almond meal or finely ground almonds - 1/4 cup coconut oil, melted and slightly cooled - 2 tablespoons brown sugar or coconut sugar - A pinch of fine salt Using ripe peaches is key. They add natural sweetness and flavor to the dish. You can use honey or maple syrup as your sweetener. Both options provide a unique taste and help balance the tartness of the peaches. The ground cinnamon and lemon juice enhance the flavors. Cinnamon gives warmth, while lemon juice brightens the dish. For the crumble topping, rolled oats, whole wheat flour, and almond meal create a nutritious base. Coconut oil keeps it moist, while brown sugar adds just the right amount of sweetness. The pinch of salt brings all the flavors together. This combination of ingredients makes the crumble not just tasty, but also nutritious. You can find the full recipe to see how to bring these ingredients together. 1. Preheating the Oven Start by preheating your oven to 350°F (175°C). This step is key for even baking. 2. Preparing the Peach Mixture In a medium bowl, mix the sliced peaches with honey (or maple syrup), ground cinnamon, and lemon juice. Gently toss it all together. Make sure every peach slice is coated well. Then, transfer this mixture to a greased 8x8-inch baking dish, spreading it evenly. 3. Making the Crumble Topping In another bowl, mix rolled oats, whole wheat flour, almond meal, melted coconut oil, brown sugar, and a pinch of salt. Use a fork to stir until the mixture is crumbly and well combined. This topping adds a nice crunch to the dessert. 1. Assembling the Dish Carefully spread the crumble topping over the peach layer in the baking dish. Make sure to cover all the peaches. This helps seal in the flavor and keeps the fruit moist. 2. Baking Time and Temperature Place the dish in your preheated oven. Bake for 25-30 minutes. Look for a golden brown topping and bubbly peaches beneath. 3. Cooling and Serving Suggestions Once baked, take the crumble out and let it cool for a few minutes. This settling time allows the flavors to mix. Serve warm, with a scoop of creamy vanilla yogurt or whipped coconut cream. Add a sprig of fresh mint on top for a pretty finish. Enjoy every bite of this delicious treat! For the complete recipe, check out the Full Recipe section. Achieving the Right Crunch To get the perfect crunch, mix your dry ingredients well. Use rolled oats, whole wheat flour, and almond meal. The combination gives a great texture. Melted coconut oil binds everything together. When you bake, the top will crisp up nicely. If it seems too dry, add a tiny bit more oil. This keeps the crumble from being too crumbly. Adjusting Sweetness to Taste Sweetness can change based on your peaches. Taste your peach mix before adding more sweetener. If you want it sweeter, drizzle in honey or maple syrup. Remember, the topping also adds some sweetness. So, taste often and find what you like best! Vegan Options If you want a vegan crumble, swap honey for maple syrup. This keeps the flavor rich and sweet. Use coconut oil as your fat. It’s plant-based and gives a nice coconut flavor. You can also use a flax egg instead of regular eggs if a recipe calls for them. Gluten-Free Alternatives For a gluten-free option, replace whole wheat flour with almond flour or gluten-free flour mix. Make sure your oats are labeled gluten-free. This ensures they have no cross-contamination. The crumble will still be tasty and satisfying! Feel free to experiment with these tips and substitutions. Enjoy creating your Healthy Peach Crumble! Want the full recipe? Check out the [Full Recipe]. {{image_4}} Adding Nuts or Seeds You can boost the crunch by adding nuts or seeds to the crumble topping. Walnuts, almonds, or pumpkin seeds work great. Chop them up and mix them in with the oats and flour. This adds healthy fats and protein. It also gives you a nice texture. You can even sprinkle some on top before baking for extra crunch. Incorporating Other Fruits If you want to mix flavors, feel free to add other fruits. Berries, apples, or plums can pair well with peaches. Just remember to adjust the sweetener based on the fruits you choose. For example, apples may need a bit more honey or maple syrup. Experimenting with fruits keeps it fun and fresh. Low-Fat Modifications You can lower the fat content by replacing coconut oil with unsweetened applesauce. This keeps the crumble moist while cutting calories. You could also use less oil or a light cooking spray. This makes it lighter without losing flavor. Sugar-Free Options For a sugar-free version, you can use mashed bananas or pureed dates in place of honey or maple syrup. These natural sweeteners add flavor and keep it healthy. You can also use sugar substitutes like stevia or monk fruit. This way, you can enjoy your dessert without the extra sugar. For complete details, check the Full Recipe. Refrigeration Tips To keep your healthy peach crumble fresh, store it in the fridge. Use an airtight container for best results. This will help maintain its flavor and texture. It can last about 3 to 5 days in the refrigerator. When you want to serve it, just take it out and let it sit at room temp for a bit. Freezing Instructions If you want to save some for later, freezing is a great option. Wrap the crumble tightly in plastic wrap, then place it in a freezer bag. Make sure to squeeze out any air before sealing. It can stay good for 2 to 3 months in the freezer. When you're ready to eat, just thaw it overnight in the fridge. Methods for Keeping the Crumble Crispy To reheat your peach crumble and keep it crispy, use the oven. Preheat it to 350°F (175°C). Place the crumble in a baking dish and cover it lightly with foil. Bake for about 15 to 20 minutes. This method warms it up without making the topping soggy. You can also microwave it, but the oven is best for crispiness. Enjoy your delicious dessert warm! Can I use frozen peaches? Yes, you can use frozen peaches for this recipe. Just thaw and drain them before mixing. This keeps the crumble from getting too watery. How long does the healthy peach crumble last? The crumble lasts about 3 to 5 days in the fridge. Store it in an airtight container to keep it fresh. Can I make this crumble ahead of time? Absolutely! You can prepare the peach mixture and crumble topping in advance. Just bake it before serving for a warm dessert. Serving Size and Calorie Count This healthy peach crumble serves six. Each serving has about 180 calories. This is a guilt-free treat that still satisfies your sweet tooth. Health Benefits of Key Ingredients - Peaches: Rich in vitamins A and C, peaches boost your immune system. - Oats: They provide fiber, which is great for digestion. - Almond meal: It adds protein and healthy fats, keeping you full longer. - Coconut oil: This oil can help improve heart health when used in moderation. For the complete details on how to make this delicious dish, check out the Full Recipe. You learned how to make a healthy peach crumble with simple steps and tasty ingredients. From ripe peaches to a crunchy topping, this dessert is simple to prepare. Remember to adjust sweetness and try variations for fun twists. Don’t forget the best storage tips to keep your crumble fresh. Now, you can enjoy this treat any day! Happy baking!](https://meltedrecipes.com/wp-content/uploads/2025/06/755217f9-0094-4593-9261-9826593af894.webp)
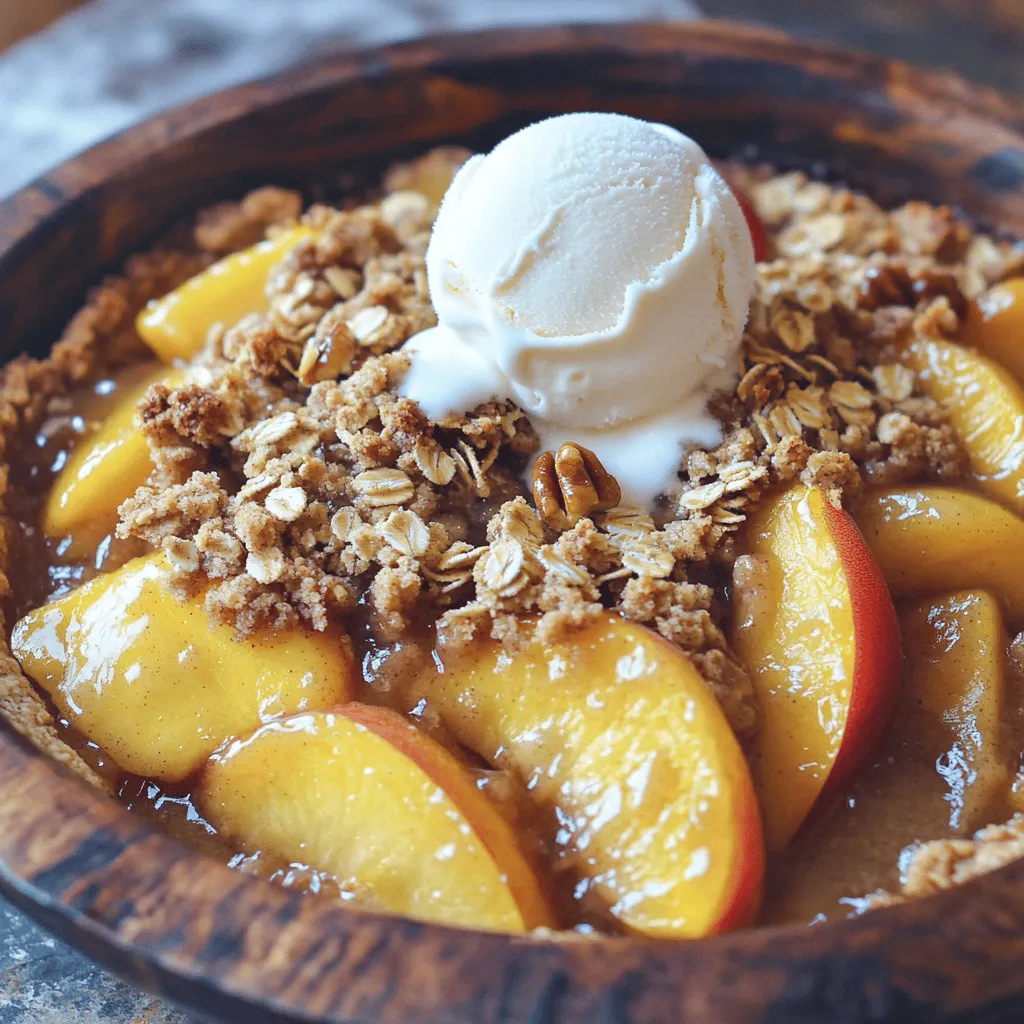
Healthy Peach Crumble Flavorful and Nutritious Dessert
Looking for a delicious dessert that’s both flavorful and nutritious? You’ve found it! This Healthy Peach Crumble is a tasty twist on a classic treat.
Best Peach Pie Ever Deliciously Simple Recipe
If you love the taste of sweet summer peaches, you’re in for a treat! In this article, I’ll show you how to make the best
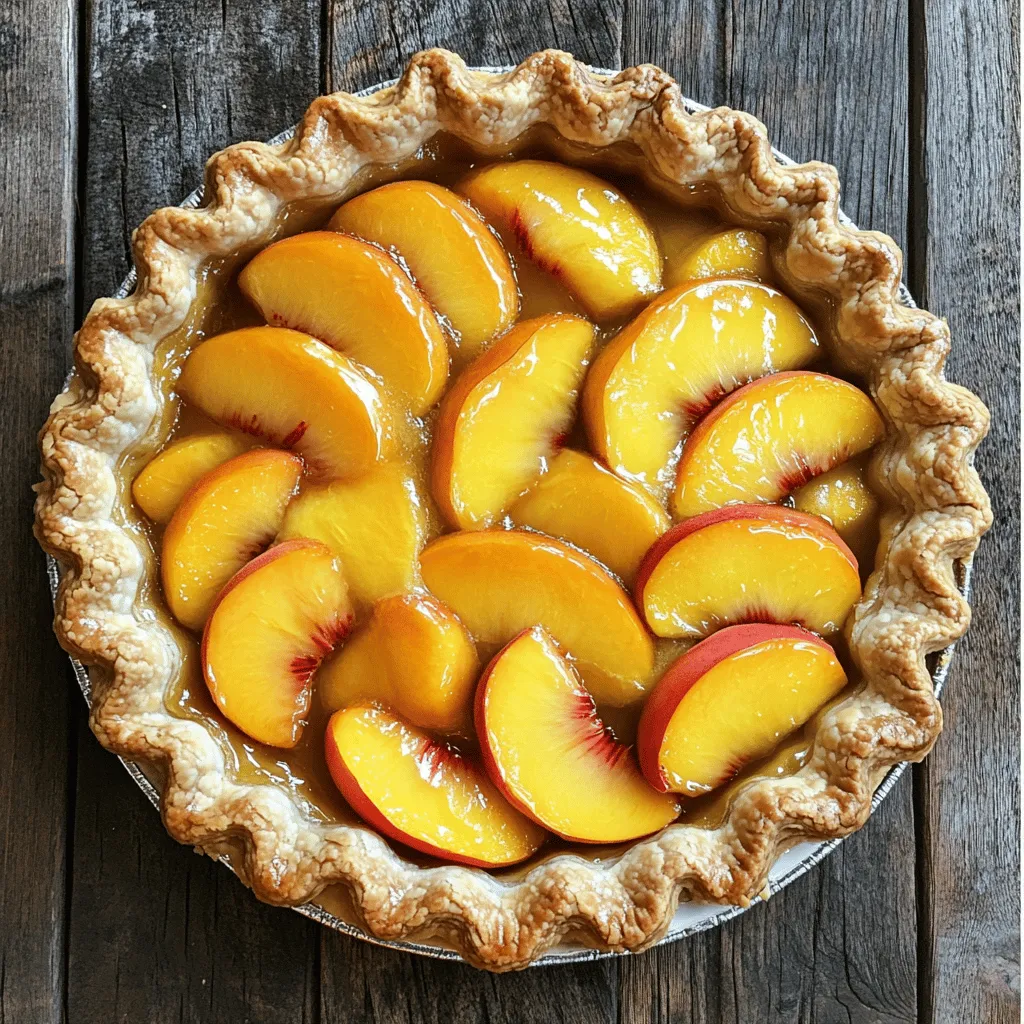
![- 4 cups fresh peaches, peeled and sliced - 1 cup granulated sugar (¾ cup + ¼ cup) - 1 tablespoon freshly squeezed lemon juice - 1 teaspoon vanilla extract - 1 teaspoon ground cinnamon - 1½ cups all-purpose flour - 1 tablespoon baking powder - ½ teaspoon salt - ½ cup unsalted butter, melted - 1 cup whole milk To make a super easy peach cobbler, you need fresh ingredients. Fresh peaches give the best flavor and texture. You can use ripe, juicy peaches. The sugar sweetens the fruit and balances the flavors. Lemon juice adds a nice zing. Vanilla and cinnamon bring warmth to the dish. The dry mix is just as important. The flour gives the cobbler its body. Baking powder helps it rise and become fluffy. Be sure to measure your ingredients well. Salt enhances the sweetness and balances the taste. Melted butter adds richness, while whole milk keeps the batter moist. This simple mix is the backbone of your cobbler. - Ground nutmeg for extra flavor - Almond extract instead of vanilla - Fresh berries to mix with peaches You can change up the flavors with optional ingredients. A pinch of nutmeg adds warmth and spice. Almond extract gives a nice twist instead of vanilla. If you want, toss in fresh berries with the peaches. This makes your cobbler even more fruity and fun. This peach cobbler recipe is flexible. You can easily customize it to fit your taste. For the full recipe, check the section above. - Preheat oven to 350°F (175°C). - Prepare the peach mixture by mixing peaches, ¾ cup sugar, lemon juice, vanilla, and cinnamon. Let it sit for 10 minutes. This step helps the peaches soak up the sweetness. - In a separate bowl, mix flour, baking powder, salt, and ¼ cup sugar. Whisk until combined. - Combine melted butter and whole milk into the dry mix. Stir gently until just combined. It’s okay if there are some lumps; they will bake out. - Grease a 9x13-inch baking dish well. Pour the batter into the dish, spreading it evenly. - Layer the marinated peaches over the batter. Make sure the batter stays below the peaches for a great texture. - Place the dish in the preheated oven. Bake for 40-45 minutes. - Check doneness with a toothpick. If it comes out clean, your cobbler is ready. For the full recipe, you can refer to the earlier section. Enjoy making this simple and delightful peach cobbler! How to select ripe peaches Choose peaches that feel slightly soft. Look for a rich gold color. A sweet smell is a good sign too. Avoid peaches with bruises or dark spots. Best practices for measuring ingredients Use dry measuring cups for flour and sugar. Spoon flour into the cup, then level it off with a knife. For liquids, use a clear measuring cup to see the line. This helps you get the right amounts. Use canned or frozen peaches Canned or frozen peaches save time. They are still tasty and juicy. Just drain canned peaches well before use. If using frozen, thaw them first and pat dry. Make ahead of time and reheat You can prepare this cobbler a day early. Store it in the fridge after it cools. Reheat in the oven to keep the crust nice. Serve with vanilla ice cream A scoop of vanilla ice cream on warm cobbler is perfect. The cold ice cream melts into the warm fruit. This creates a delicious mix of flavors. Garnish with fresh mint or whipped cream A sprig of mint adds a pop of color. Whipped cream brings extra creaminess. Both make your peach cobbler look fancy and inviting. For the complete recipe, check out the [Full Recipe]. {{image_4}} You can switch peaches for other fruits easily. Berries like blueberries or strawberries work great. Apples also add a nice crunch. Just chop them up like you do with peaches. If you want fun, mix different fruits together. A mixed fruit cobbler can surprise your taste buds. It’s a fun twist on the classic recipe. If you need a gluten-free cobbler, don't worry! Use gluten-free all-purpose flour instead of regular flour. This will keep the texture nice. You can also swap out sugar for alternative sweeteners. Honey or maple syrup can add a unique flavor, too. Just make sure to adjust the amount for sweetness. Want a vegan version? It's simple! Replace the butter with coconut oil. This gives a lovely flavor and keeps it moist. For milk, use non-dairy milk like almond or oat. You can also add an egg replacer to bind the ingredients. This way, everyone can enjoy this delicious treat. Check out the Full Recipe for more details to get started! To keep your leftover cobbler tasty, let it cool completely first. Store it in an airtight container. This helps keep it fresh and moist. You can also cover it tightly with plastic wrap or foil. It stays good for up to three days in the fridge. Want to save some for later? You can freeze peach cobbler! First, let it cool down. Cut it into pieces and place them in a freezer-safe container. You can also wrap each piece tightly in plastic wrap. This helps prevent freezer burn. When you’re ready to eat, thaw the cobbler overnight in the fridge. The best way to reheat your cobbler is in the oven. Preheat your oven to 350°F (175°C). Place the cobbler in an oven-safe dish and cover it with foil. Warm it for about 15-20 minutes. If you’re in a hurry, you can also use a microwave. Just heat a piece for 30 seconds, checking often. Enjoy your warm, delicious treat! Peach cobbler can last for a few days in the fridge. It stays fresh for about 3 to 5 days. Make sure to cover it well with plastic wrap or foil. For longer storage, you can freeze it. In the freezer, peach cobbler can last for up to 3 months. Thaw it in the fridge before reheating. Yes, you can use frozen peaches for your cobbler. Just make sure to thaw them first. Drain any excess liquid before mixing with sugar and spices. This helps keep your cobbler from getting too watery. Follow the same steps as the Full Recipe, and you'll have a tasty treat! Cobbler and crisp are both fruit desserts, but they differ in texture. A cobbler has a soft, biscuit-like topping. It usually covers the fruit filling. A crisp, on the other hand, has a crumbly topping made from oats, butter, and sugar. This gives it a crunchy texture. Both are delicious, but the choice depends on your mood! This blog covers how to make a simple, delicious peach cobbler. I shared the key ingredients and step-by-step instructions for a perfect bake. Tips help you pick ripe peaches and save time. You can also explore variations like gluten-free and vegan options. Lastly, I provided storage methods to keep your cobbler fresh longer. Enjoy baking and sharing this tasty treat with others. You’ll impress friends and family with ease!](https://meltedrecipes.com/wp-content/uploads/2025/06/6dac9c9c-e223-432d-ba89-72407110518e.webp)
Super Easy Peach Cobbler Delightful and Simple Treat
Craving a sweet treat that’s simple to make? This Super Easy Peach Cobbler is just what you need! With fresh peaches and a few pantry
The Best Zucchini Bread Comfort Food Recipe
If you’re craving a warm slice of comfort, you’ve found the best zucchini bread recipe! This dish is moist, flavorful, and easy to make. I’ll
Simple Peach Crisp Delicious and Easy Dessert Recipe
Looking for an easy dessert that impresses? You’ll love this Simple Peach Crisp! With juicy peaches and a crisp topping, it’s a treat that anyone
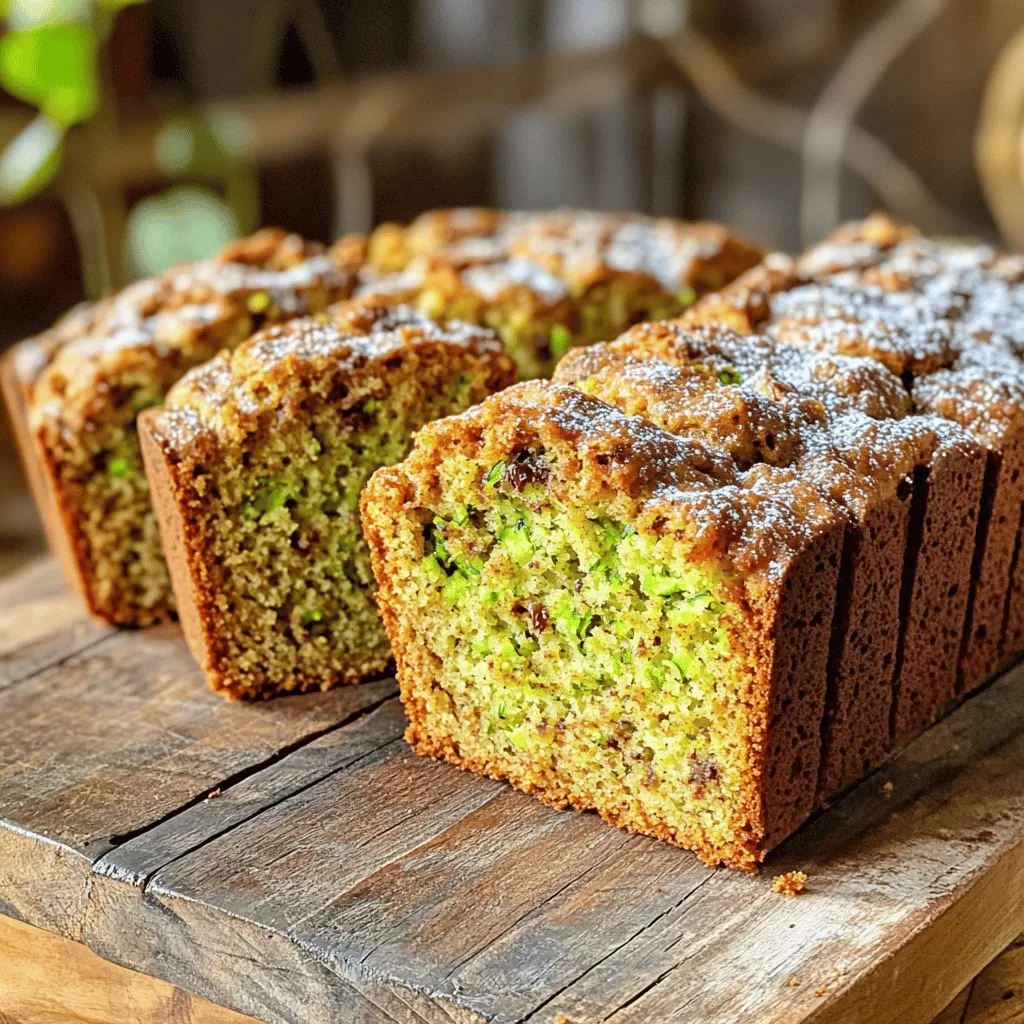
![- 1 cup ripe bananas, mashed (about 2-3 medium bananas) - 1 cup grated zucchini, with excess moisture squeezed out - 1/2 cup packed brown sugar - 1/2 cup granulated sugar Ripe bananas give the muffins their natural sweetness. I always choose bananas that are brown and soft. Grated zucchini adds moisture and a mild flavor. Make sure to squeeze out the excess water to avoid soggy muffins. Using both brown and granulated sugar gives a rich taste and a nice texture. - 1/2 cup chopped walnuts or pecans (optional) - 1/2 cup chocolate chips (optional) You can add chopped nuts for a nice crunch. Walnuts or pecans work great. If you love chocolate, toss in some chocolate chips. They melt and create gooey pockets of goodness. These add-ins make the muffins even more exciting. - 1 1/2 cups all-purpose flour - 1 teaspoon baking soda - 1/2 teaspoon baking powder - 1 teaspoon ground cinnamon - 1/2 teaspoon salt All-purpose flour is the base of the muffins. Baking soda and baking powder help them rise. Ground cinnamon gives a warm flavor that pairs well with bananas and zucchini. A pinch of salt brings out all the flavors in the muffins. For the full recipe, including steps and baking time, refer to the [Full Recipe]. 1. Preheat the oven: First, set your oven to 350°F (175°C). This helps the muffins bake evenly. 2. Prepare the muffin tin: Line a muffin tin with paper liners or grease each cup lightly. This will help you take the muffins out easily. 3. Mix wet ingredients: In a large bowl, combine the mashed bananas, grated zucchini, vegetable oil, brown sugar, and granulated sugar. Use a whisk to mix until smooth and well blended. This step adds moisture and flavor to your muffins. 4. Sift and mix dry ingredients: In another bowl, sift together the all-purpose flour, baking soda, baking powder, salt, and ground cinnamon. Sifting helps to mix these ingredients well and adds air for fluffiness. 5. Fold dry into wet without overmixing: Gradually add the dry mixture into the wet ingredients. Use a spatula or a wooden spoon to fold gently. Mix just until combined. It's okay if the batter has some lumps; overmixing can make your muffins tough. 6. Fill muffin cups and bake: Use a spoon or ice cream scoop to divide the batter into the prepared muffin cups. Fill each cup about two-thirds full. This allows room for rising. Bake in your preheated oven for 18-20 minutes. You can check if they’re done by inserting a toothpick in the center of a muffin. It should come out clean or with just a few moist crumbs. 7. Cooling down muffins: When baked, take the muffins out of the oven. Let them cool in the pan for about 5 minutes. Then, transfer them to a wire rack to cool completely. This helps them keep their shape and texture. For the complete recipe, refer to the [Full Recipe]. Enjoy your baking! To keep your muffins moist, use ripe bananas. They add natural sweetness and moisture. Squeeze out excess water from the zucchini. This step prevents soggy muffins. Mix wet ingredients well, but don't overmix the batter. A few lumps are fine. Overmixing makes muffins tough, and nobody wants that. You can add spices to boost flavor. Try cinnamon or nutmeg for warmth. If you want less sugar, use honey or maple syrup. These sweeteners add a nice touch. Feel free to mix in different add-ins for texture. Chopped nuts or dried fruits work well. You can also play with chocolate chips for a sweet surprise. For a lovely display, serve muffins warm on a wooden board. Top with extra chocolate chips or a sprinkle of cinnamon. Garnish with fresh banana slices or mint leaves. This adds color and freshness. Showcasing your muffins this way impresses guests. They will enjoy the look as much as the taste! For the complete baking process, check the Full Recipe. {{image_4}} You can make your muffins healthier by using whole wheat flour instead of all-purpose flour. Whole wheat adds fiber and nutrients. It gives your muffins a nice, nutty flavor. For sugars, try using maple syrup or honey. These natural sweeteners add a unique taste and are less processed. Adding fruits like blueberries or cranberries can brighten up your muffins. They add a burst of flavor and color. You can also mix in spices like nutmeg or ginger. These spices give your muffins a warm, cozy taste. They make each bite more exciting. If you want a vegan option, you can replace eggs with flaxseed meal. Mix one tablespoon of flaxseed with three tablespoons of water. Let it sit for a few minutes to thicken. For gluten-free muffins, try almond flour or oat flour. These options keep your muffins soft and tasty while being gluten-free. Check out the Full Recipe for more details on how to create these delicious muffins! To keep your savory banana zucchini muffins fresh, store them at room temperature. Place them in an airtight container. This container helps keep moisture in and air out. Your muffins will stay soft for about three days. If you want them to last a bit longer, put them in the fridge. Just remember to keep them in a sealed container. This way, they stay moist and tasty for up to a week. If you want to save muffins for later, freezing is a great option. First, cool the muffins completely. Then, wrap each muffin tightly in plastic wrap. After that, place them in a freezer-safe bag. This helps prevent freezer burn. Muffins can be frozen for up to three months. When you're ready to enjoy them, take out the muffins and thaw them. Leave them in the fridge overnight or let them sit at room temperature for a few hours. To reheat your muffins, the oven works best. Preheat your oven to 350°F (175°C). Place the muffins on a baking sheet and cover them with foil. This keeps them from drying out. Heat for about 10 minutes until warm. If you're in a hurry, you can use the microwave. Heat each muffin for about 15–20 seconds. Just be careful not to overheat them. This can make the muffins tough. Enjoy your warm muffins just like when they were fresh from the oven! For the full recipe, check out the earlier section. Yes, you can use applesauce instead of oil. This swap adds moisture and cuts fat. However, it may change the texture a bit. Applesauce makes the muffins lighter and less rich. If you want a healthier option, go for it! Your muffins are done when they look golden on top. A toothpick test helps, too. Insert a toothpick into a muffin. If it comes out clean or with a few crumbs, they’re ready. This usually takes about 18-20 minutes. Yes, mini muffins are a fun twist! Just use a mini muffin tin. Bake them for about 10-12 minutes. Keep an eye on them, as they can bake faster than regular muffins. You can make these muffins gluten-free! Use a gluten-free flour blend instead of all-purpose flour. Look for blends that include xanthan gum to help with texture. This way, you can enjoy the muffins without gluten. To make your muffins less sweet, cut down on the sugars. Try using 1/4 cup of brown sugar and 1/4 cup of granulated sugar. You can also use a sugar substitute if you want. This keeps the muffins tasty without too much sweetness. In this article, we explored the key ingredients for banana zucchini muffins. We covered essential items like ripe bananas and grated zucchini, along with optional add-ins such as nuts and chocolate chips. You learned about preparation steps and baking tips to achieve moist muffins. Variations for healthier options and dietary adjustments were also discussed. Muffins are versatile and fun to make. I encourage you to try different flavors. Happy baking!](https://meltedrecipes.com/wp-content/uploads/2025/06/d9adc430-0146-45e1-a420-7c7a244c700e.webp)
Savory Banana Zucchini Muffins Easy and Wholesome Bake
Are you ready to bake something delicious and healthy? These Savory Banana Zucchini Muffins are the perfect treat for breakfast or a snack! Made with
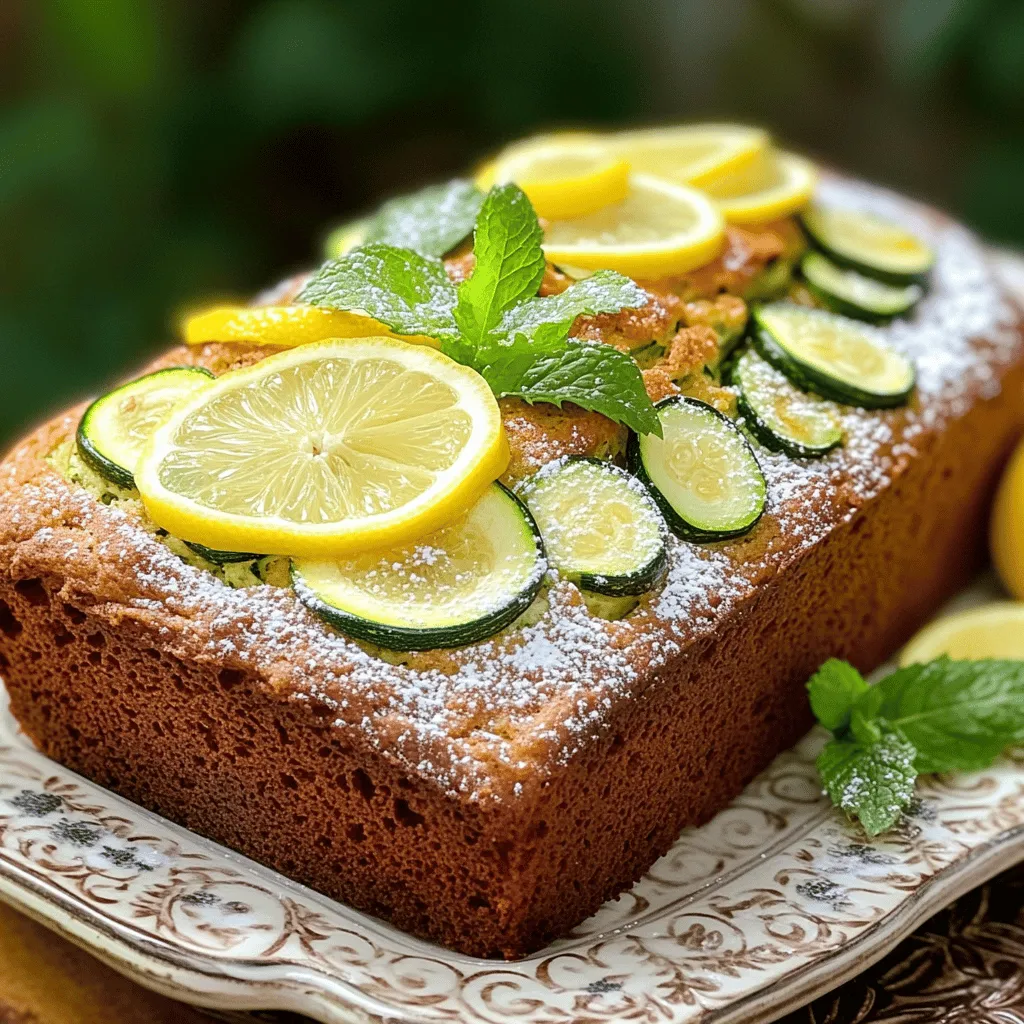
Lemon Zucchini Bread Fresh and Flavorful Recipe
Are you ready to whip up a treat that’s both fresh and flavorful? My Lemon Zucchini Bread recipe combines the zesty brightness of lemon with
Easy Peach Crisp Recipe Perfect for Any Occasion
Looking for a simple yet delightful dessert? My Easy Peach Crisp Recipe is perfect for any occasion! This tasty treat combines sweet peaches with a
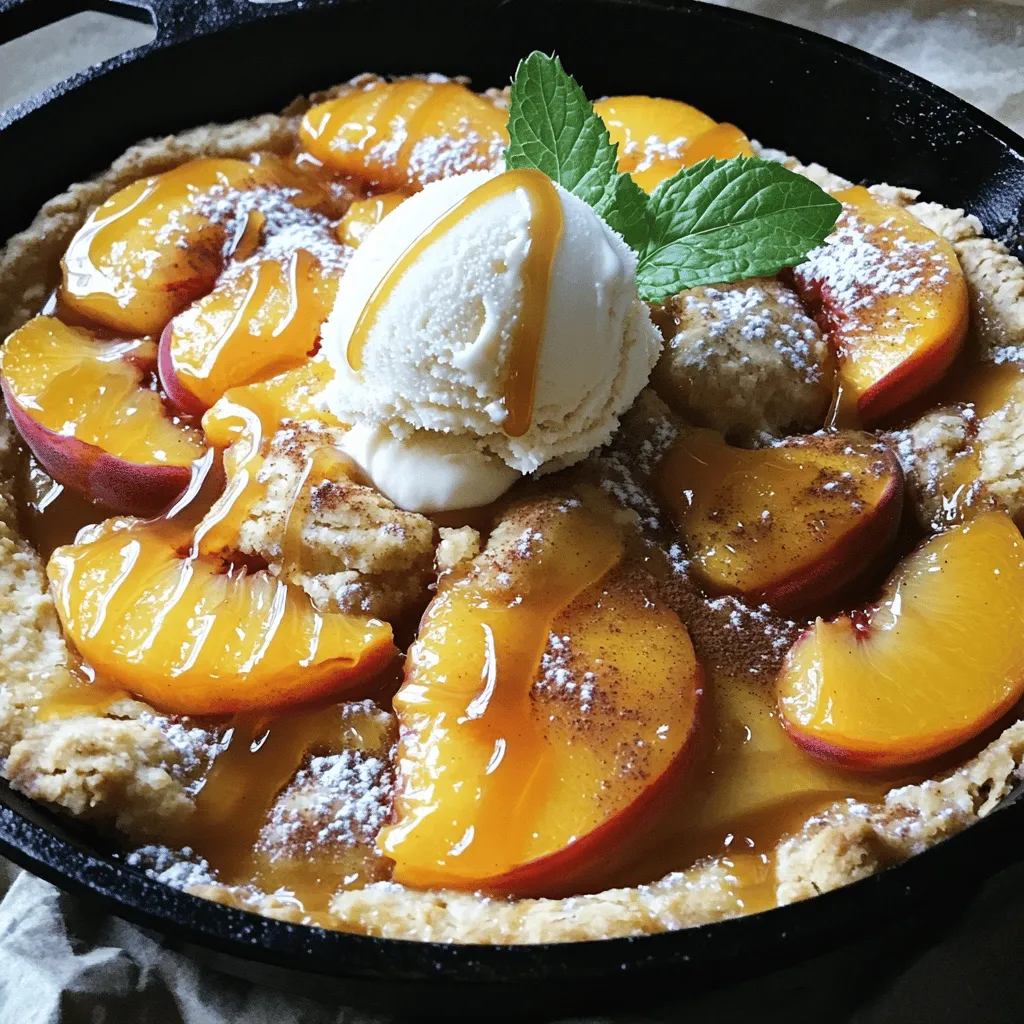
Southern Peach Cobbler in a Cast Iron Skillet Delight
Are you ready to create a delicious Southern peach cobbler in a cast iron skillet? This recipe is simple, fun, and full of juicy flavor.