Desserts
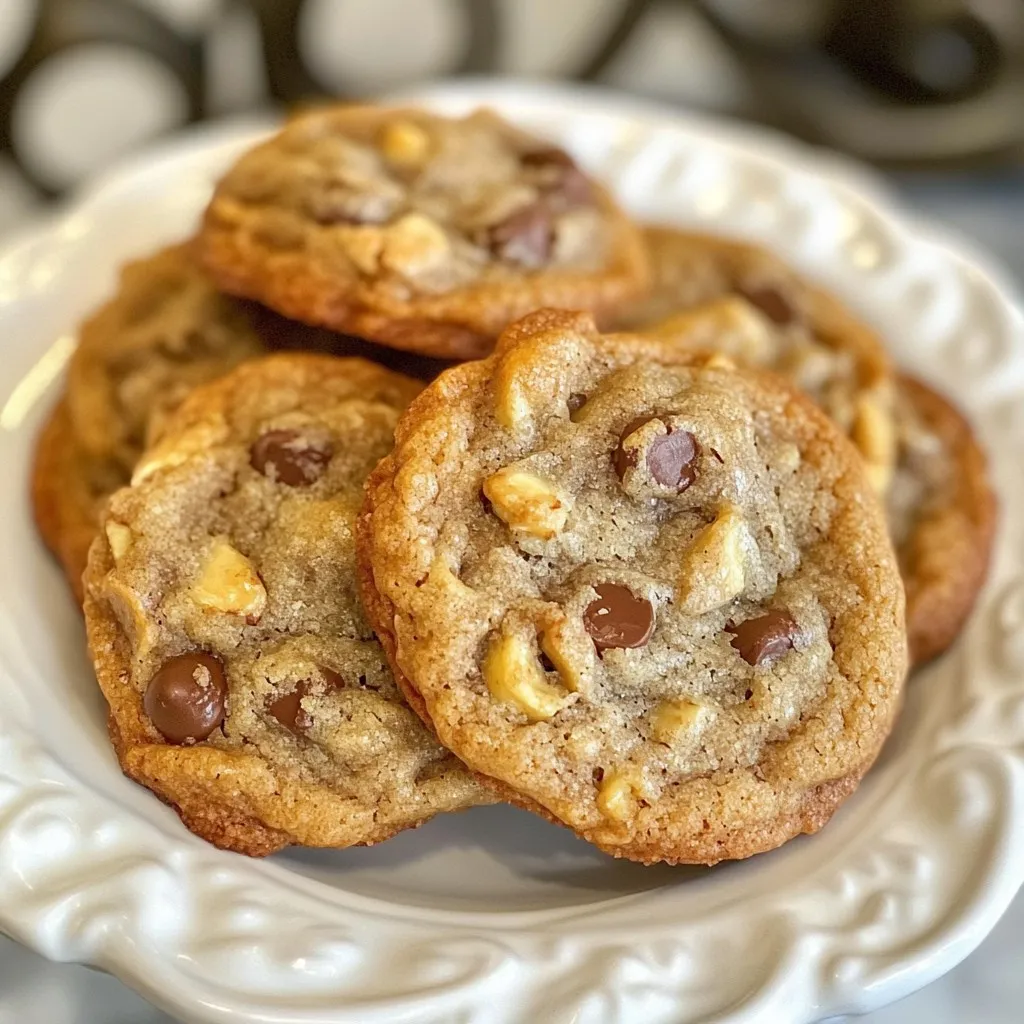
Crumbl Banana Bread Cookies Tasty and Easy Treat
If you love cookies and bananas, you need to try Crumbl Banana Bread Cookies! They blend the best of both worlds into one tasty treat.
. To keep your zucchini brownies fresh, follow these simple steps: - Cool Completely: Let the brownies cool completely in the pan. - Wrap Well: Use plastic wrap or aluminum foil to wrap them tightly. This keeps moisture in. - Use an Airtight Container: Store the wrapped brownies in an airtight container. This helps prevent drying out. - Keep in a Cool Place: Store in a cool, dry place away from sunlight. Freezing is a great way to save your brownies for later. Here’s how: - Slice Before Freezing: Cut brownies into squares for easy serving later. - Wrap Individually: Wrap each square in plastic wrap. This protects them from freezer burn. - Store in a Freezer Bag: Place the wrapped brownies in a freezer-safe bag. Label it with the date. - Reheat: To enjoy, let them thaw in the fridge overnight. You can warm them in the microwave for a few seconds if you like them warm. How long can you keep zucchini brownies? - At Room Temperature: They stay fresh for about 3-4 days in an airtight container. - In the Fridge: They can last up to a week when stored properly. - In the Freezer: You can freeze them for about 2-3 months without losing quality. With these tips, you can enjoy your zucchini brownies anytime! For the full recipe, check out the earlier section. Yes, you can use yellow squash. It works well in zucchini brownies. Yellow squash has a similar texture and moisture level. However, it may add a slight sweetness. This change won't harm the taste but might make the brownies a bit more delicate. Just remember to grate it finely and squeeze out excess moisture. To check if your brownies are done, look for a few signs. The top should look set and slightly cracked. Insert a toothpick into the center. If it comes out with a few moist crumbs, your brownies are ready. If it’s wet, they need more time. Bake them for 25 to 30 minutes in a preheated oven. If you want to make vegan zucchini brownies, there are great egg substitutes. You can use: - 1/4 cup unsweetened applesauce - 1/4 cup mashed banana - 1 tablespoon ground flaxseed mixed with 3 tablespoons water (let it sit for 5 minutes) These options help bind the ingredients and keep the brownies moist. Just remember to adjust the flavors slightly to match your choice. We covered how to make delicious zucchini brownies. You learned the key ingredients, the steps to bake them, and helpful tips to enhance your baking. You saw how to adapt the recipe for gluten-free or vegan diets, making it versatile for everyone. Remember, proper storage keeps your brownies fresh longer. Whether you add nuts or spices, the choices are endless. Enjoy your baking journey and the tasty treats that follow!](https://meltedrecipes.com/wp-content/uploads/2025/07/94061957-1608-4f5a-a606-7458ca768498.webp)
Zucchini Brownies Moist and Simple Chocolate Treat
Looking for a moist and simple chocolate treat? Zucchini brownies are your answer! These delicious bites blend healthy zucchini with rich cocoa, creating a dessert
![- 1 cup grated zucchini (approximately 1 medium-sized zucchini, moisture squeezed out) - 1 cup all-purpose flour - 1/2 cup unsweetened cocoa powder - 1/2 teaspoon baking soda - 1/4 teaspoon baking powder - 1/4 teaspoon sea salt - 1/2 cup granulated sugar - 1/2 cup packed brown sugar - 1/2 cup unsalted butter, melted and slightly cooled - 1 large egg - 1 teaspoon pure vanilla extract - 1/2 cup semi-sweet chocolate chips - 1/4 cup chopped walnuts (optional, for added crunch) I love using grated zucchini in these cookies. It adds moisture and nutrients. Be sure to squeeze out excess moisture. This step keeps the cookies from being too wet. Next, all-purpose flour gives cookies their structure. Cocoa powder provides that rich chocolate flavor. Baking soda and baking powder help the cookies rise. A little sea salt balances the sweetness. For sweetness, I combine granulated sugar and brown sugar. The brown sugar adds a nice depth of flavor. The melted butter makes the dough rich and smooth. Don't forget the egg and vanilla extract! They add flavor and help bind everything together. Semi-sweet chocolate chips bring a delicious burst of chocolate in every bite. If you like a crunch, add chopped walnuts. They give extra texture and flavor. This mix of ingredients makes these cookies both tasty and unique. You can find the full recipe details in the [Full Recipe]. - Preheat oven to 350°F (175°C). - Prepare baking sheet with parchment paper. To start, I preheat the oven to 350°F. This step is key. It makes sure your cookies bake evenly. While the oven heats, I line my baking sheet with parchment paper. It helps prevent the cookies from sticking and makes cleanup easier. - Combine zucchini, melted butter, sugars, egg, and vanilla. Next, I grab a medium bowl. Into this bowl, I add grated zucchini, melted butter, and both sugars. I crack in a large egg and pour in some pure vanilla extract. Then, I whisk everything together. This creates a smooth and creamy mixture. It’s where the magic starts! - Sift flour, cocoa powder, baking soda, baking powder, and salt. In another bowl, I sift together the dry ingredients. This includes all-purpose flour, cocoa powder, baking soda, baking powder, and sea salt. Sifting breaks up clumps and makes sure everything mixes well. It’s a simple step, but it’s very important for the texture of our cookies. - Gradually mix dry ingredients into wet ingredients. Now, I take the dry mix and slowly add it to the wet mix. I stir gently, just until combined. It’s important not to over-mix. If you do, the cookies can turn dense and tough. We want them soft and chewy! - Fold in chocolate chips and walnuts. Next, I fold in semi-sweet chocolate chips and chopped walnuts if I want a bit of crunch. Folding is gentle. It helps keep the air in the batter. This makes the cookies lighter and more delicious. - Shape cookies and bake for 10-12 minutes. Now comes the fun part! I use a cookie scoop or a spoon to drop rounded spoonfuls of the batter onto the prepared baking sheet. I leave about 2 inches of space between each one. This allows them to spread as they bake. I pop the sheet in the oven for 10 to 12 minutes. The cookies should be set around the edges but still soft in the middle. Once done, I let them cool on the sheet for a few minutes before moving them to a wire rack to cool completely. Make sure to check out the Full Recipe for all the details you need! - Make sure to squeeze the grated zucchini well. This removes excess water and keeps cookies from being too wet. - Avoid over-mixing the batter. Stir just until combined. This helps keep your cookies soft. - Dust the cookies with powdered sugar. This adds a nice touch and makes them look fancy. - Serve them with cold milk. This combination is delicious and very satisfying. - Aim for a soft center with set edges. This means they will be chewy and tasty. {{image_4}} You can easily make these cookies gluten-free. Just substitute all-purpose flour with a gluten-free flour blend. This swap works well and keeps the cookies soft. Many blends on the market mimic regular flour. Check the package to ensure it works for baking. Making this recipe vegan is simple too. Replace the egg with a flax egg. To make a flax egg, mix one tablespoon of ground flaxseed with two and a half tablespoons of water. Let it sit for a few minutes until it thickens. Also, use plant-based butter instead of regular butter. This way, everyone can enjoy these delicious cookies. You can add more flavor to your cookies with spices. Try mixing in cinnamon or nutmeg for warmth. These spices give a cozy taste. You can also play with different types of chocolate. Use white or dark chocolate instead of semi-sweet for a twist. This makes the cookies even more delightful. For the full recipe, check out the details above! Store your chocolate zucchini cookies in an airtight container at room temperature. This keeps them fresh and soft. Make sure the container is sealed tightly to avoid air exposure. Enjoy them within a week for the best taste. To keep your cookies longer, freeze them for up to three months. Place them in a freezer-safe bag or container. When you're ready to eat them, simply thaw them at room temperature. This helps maintain their yummy flavor and texture. If your cookies lose some softness, don’t worry! You can reheat them in the oven for a few minutes. Set the oven to a low temperature, around 300°F (150°C). This will bring back their warm, chewy goodness without drying them out. Enjoy your cookies fresh and warm! You can use grated carrots in place of zucchini. They add sweetness and moisture. Applesauce is also a great choice, making cookies soft and tasty. Another option is mashed banana, which gives a nice flavor and texture, too. Each substitute may change the flavor slightly, but they work well. The cookies are done when the edges look set. They should still feel soft in the center. A toothpick inserted should come out with a few moist crumbs, not wet batter. Baking them too long can make them dry, so keep an eye on the time. Yes, you can add many mix-ins for extra flavor. Chopped nuts like pecans or almonds add crunch. Dried fruits like raisins or cranberries give sweetness. You can also try different chocolate types, like white chocolate or dark chocolate. Each mix-in will change the cookie’s taste and texture. Each cookie has about 120 calories. They contain around 18 grams of carbs and 5 grams of fat. The exact numbers can vary based on your ingredients. Using less sugar or butter can reduce calories and fat. Enjoy these cookies as a treat without too much worry! For the full recipe, check the section above. This article covered how to make delicious chocolate zucchini cookies. You learned the key ingredients, from grated zucchini to chocolate chips. I shared easy steps and helpful tips for baking. We also discussed fun variations for gluten-free or vegan options. Keep these tips in mind to create great cookies. Enjoy them fresh or store them for later. Baking is all about enjoying the process and sharing your treats with others. Happy baking!](https://meltedrecipes.com/wp-content/uploads/2025/07/1a44515f-7b76-405f-948b-efafa63831da.webp)
Chocolate Zucchini Cookies Delightful and Easy Recipe
Looking for a fun, tasty way to sneak veggies into your treat? Try my Chocolate Zucchini Cookies! This delightful and easy recipe combines rich chocolate
![- 2 cups fresh peaches, pitted and sliced - 2 tablespoons brown sugar - 1 teaspoon ground cinnamon - 1 tablespoon fresh lemon juice - 1 1/2 cups graham cracker crumbs - 1/4 cup unsalted butter, melted - 1 tablespoon granulated sugar - 3 (8 oz) packages cream cheese, softened at room temperature - 1 cup granulated sugar - 1 teaspoon pure vanilla extract - 3 large eggs, at room temperature - 1 cup sour cream To make a great roasted peach cobbler cheesecake, you need fresh peaches. They add a sweet and juicy flavor. Brown sugar enhances the peach's taste when roasted. Ground cinnamon and lemon juice bring warmth and brightness to the dish. The graham cracker crumbs create a crunchy crust, while melted butter helps bind them. You also need cream cheese for a rich and creamy filling. Eggs help the cheesecake set nicely, while sour cream adds a slight tang. This combination gives you a smooth and delicious cheesecake. You can find the full recipe at the end for easy reference. - Whipped cream for garnish - Caramel sauce for drizzling Whipped cream is a great choice for topping. It adds a light and airy finish. Caramel sauce can bring extra sweetness and richness. Drizzling it over your cheesecake makes it look extra special. - Using other fruits instead of peaches - Alternative sweeteners options If you can't find peaches, feel free to use other fruits. Apples and berries work well in this recipe. You can also swap out the sweeteners. Try honey or maple syrup for a different flavor. These options help you customize the cheesecake to your taste. Prepping the Oven and Mixing Ingredients First, preheat your oven to 400°F (200°C). Grab your fresh peaches, and slice them. In a bowl, mix the sliced peaches with brown sugar, ground cinnamon, and lemon juice. Toss until each slice is coated. Roasting Duration and Temperature Spread the peaches on a parchment-lined baking sheet. Roast them for 20-25 minutes. The peaches will get tender and caramelized. Once they are done, take them out and let them cool. Mixing the Crust Ingredients In a medium bowl, combine graham cracker crumbs, melted butter, and sugar. Mix until everything is well combined. Proper Baking Techniques Press this mixture into the bottom of a 9-inch springform pan. Make sure it’s even. Bake the crust at 350°F (175°C) for 10 minutes. After baking, let it cool completely. Beating the Cream Cheese In a large bowl, use an electric mixer to beat the softened cream cheese. Mix it on medium speed until smooth and creamy. Incorporating Sugars and Eggs Gradually add granulated sugar and vanilla. Mix until well combined. Add the eggs one at a time, mixing well after each. Finally, fold in sour cream gently. This creates a creamy filling. For the full recipe, check out the link! For the best texture, use room temperature ingredients. This means letting your cream cheese and eggs sit out for about 30 minutes. Cold ingredients mix poorly, leading to lumps. To avoid cracks, do not overbake your cheesecake. It should set around the edges but remain slightly jiggly in the center. Cooling slowly helps too. After baking, leave the cheesecake in the oven with the door ajar. This gradual cooling prevents sudden temperature changes. Spices can take your cheesecake up a notch. Consider using nutmeg or cardamom for a warm touch. A hint of vanilla also brightens the flavor. Roasted peaches pair well with cream cheese. They bring out the sweet and tangy notes. You can also add a scoop of vanilla ice cream for a delicious contrast. Serving your cheesecake attractively is easy. Top it with whipped cream and a few reserved peach slices. A drizzle of caramel sauce adds a lovely touch too. For garnishing, use fresh mint leaves or crushed graham crackers. Fresh ingredients make your dessert pop. They add color and freshness, making your cheesecake more inviting. For the complete recipe, visit the Full Recipe section. {{image_4}} You can boost the flavors in your Roasted Peach Cobbler Cheesecake easily. - Adding Vanilla or Almond Extract: A splash of vanilla or almond extract adds depth. Use about one teaspoon to enhance the peach flavor. Mix it well into your cheesecake filling for a smooth taste. - Nut-Based Crust Options: Instead of graham crackers, try using ground nuts. Almonds or pecans work well. This gives your crust a richer flavor and a nice crunch. Don’t hesitate to swap out the peaches for other fruits. - Using Apples or Berries: Apples bring a tartness, while berries add a sweet touch. Both fruits can replace peaches in the recipe. Just make sure to adjust the sugar based on the fruit's sweetness. - Tips for Adjusting Cooking Times: Different fruits may cook at different rates. Keep an eye on your cheesecake. If you use firmer fruits like apples, you might need to roast them longer. You can easily adapt this cheesecake for different dietary needs. - Gluten-Free Versions: Use gluten-free graham crackers or nuts for the crust. This keeps the flavors intact while making it safe for gluten-sensitive eaters. - Dairy-Free Alternatives: For a dairy-free option, use vegan cream cheese. Coconut cream can substitute sour cream. This way, everyone can enjoy a slice of this delightful cheesecake. Explore the [Full Recipe] for all the details and to create your own version! To keep your roasted peach cobbler cheesecake fresh, store it carefully. Place it in an airtight container. If you don't have one, cover it tightly with plastic wrap. This helps prevent it from drying out or absorbing other smells in the fridge. The best storage temperature is between 32°F and 40°F (0°C to 4°C). To freeze your cheesecake for long-term storage, follow these steps: - First, chill the cheesecake completely in the fridge. - Next, wrap it tightly in plastic wrap, and then in aluminum foil. - This double wrap keeps it safe from freezer burn. - You can freeze it for up to three months. When you're ready to enjoy it, thaw the cheesecake in the fridge overnight. This helps maintain its creamy texture. Avoid microwaving it, as this can change its texture and taste. Roasted peach cobbler cheesecake lasts about five to seven days in the fridge. To tell if it’s spoiled, check for off smells or changes in texture. If it looks dry or has mold, it’s best to toss it. Always remember, when in doubt, throw it out! Yes, you can make Roasted Peach Cobbler Cheesecake ahead of time. This dessert tastes even better after chilling. Here are some tips for preparing ahead of time: - Bake and Chill: Make the cheesecake a day before you plan to serve it. - Cover Properly: Wrap it tightly with plastic wrap to keep it fresh. - Add Toppings Later: Wait to add whipped cream or fresh peaches until serving. If you want a lighter cheesecake, there are good substitutes for cream cheese. Here are some options: - Greek Yogurt: Use full-fat Greek yogurt for a creamy texture. - Ricotta Cheese: Blend ricotta for a light and fluffy filling. - Cottage Cheese: Puree cottage cheese for a low-fat option. Cracks in the cheesecake often happen due to a few common issues. Here’s what to check: - Overmixing: Mixing too fast can add air and cause cracks. - Baking Temperature: If the oven is too hot, it can bake unevenly. - Cooling Too Fast: Letting it cool too quickly can lead to cracks. To fix cracks, you can cover them with whipped cream or fruit. In this post, we explored how to make a delicious roasted peach cobbler cheesecake. We covered ingredients like fresh peaches, cream cheese, and crust options. I shared tips for texture, flavor enhancements, and presentation to elevate your dessert. You can even modify recipes for dietary needs. By following these steps, you can enjoy a tasty treat. Remember, the key is using quality ingredients and proper techniques. Now, get ready to impress your family and friends with this delightful cheesecake!](https://meltedrecipes.com/wp-content/uploads/2025/07/bfc42322-02ab-4ee4-9823-a9b15898738e.webp)
Roasted Peach Cobbler Cheesecake Delightful Dessert Treat
Are you ready to elevate your dessert game? This Roasted Peach Cobbler Cheesecake is a creamy, dreamy treat that brings together the joy of fresh
![- 1 ½ cups freshly grated zucchini - 2 large eggs - ½ cup vegetable oil (or melted coconut oil) - 1 teaspoon pure vanilla extract - 1 cup all-purpose flour - ½ cup unsweetened cocoa powder - 1 teaspoon baking soda - ½ teaspoon baking powder - ½ teaspoon sea salt - ½ cup granulated sugar - ½ cup packed brown sugar - 1 cup semi-sweet chocolate chips (plus additional for topping) Using fresh ingredients makes a big difference in taste. Grating the zucchini helps it blend in well. The moisture from the zucchini keeps the bread moist and rich. Eggs add structure and help it rise. Vegetable oil or melted coconut oil gives a nice texture. Adding vanilla extract boosts the flavor. For dry ingredients, cocoa powder is key for that deep chocolate taste. Baking soda and baking powder help the bread rise as it bakes. Sea salt enhances all the flavors. Using both granulated and brown sugar adds sweetness and depth. Optional chocolate chips bring extra flavor and richness. You can add more on top for a nice touch. For the full recipe, check the [Full Recipe]. - Preheat the oven to 350°F (175°C). - Grease or line a 9x5-inch loaf pan. - Mix grated zucchini with sea salt and rest for 10 minutes. - Squeeze out excess moisture using a kitchen towel. - Combine dry ingredients in one bowl. - Mix wet ingredients in a separate bowl. - Incorporate dry and wet mixtures, then fold in zucchini and chocolate chips. - Pour batter into prepared pan. - Bake for 45-50 minutes, checking for doneness. Following these steps will help you create a moist and rich Double Chocolate Zucchini Bread. Trust me, the extra effort to squeeze the zucchini pays off! You can find the full recipe above to ensure you have all the details needed for success. To make your double chocolate zucchini bread just right, start with the zucchini. Grate it and mix it with a pinch of sea salt. Let it sit for ten minutes. This helps draw out extra moisture. After that, you must squeeze it well in a clean kitchen towel. This step is key to getting a nice, dense bread. Next, mix your batter carefully. Overmixing can lead to tough bread. Combine your wet and dry ingredients gently. Stir until they just come together. You want a light and fluffy texture, not a heavy one. When your zucchini bread is ready, you can dust it with powdered sugar. This simple touch adds a nice look and a hint of sweetness. Serve it warm with whipped cream or soft butter. Both pair well with the chocolate. You can enjoy it with a cold glass of milk or your favorite warm drink. For a richer taste, use melted coconut oil instead of vegetable oil. This small change can elevate the flavor of your bread. You can also play with chocolate chip varieties. Dark chocolate or white chocolate chips can add a new twist. Mix and match to find your favorite combination. {{image_4}} You can make this bread a bit healthier. Try these ideas: - Substitute whole wheat flour for a nuttier flavor. - Use honey or maple syrup instead of granulated sugar. These swaps give the bread a unique taste. Whole wheat flour adds fiber, while honey or maple syrup brings natural sweetness. You can enjoy the same delicious bread with a boost in nutrients. Want to enhance the taste even more? Here are some fun options: - Add a teaspoon of cinnamon or espresso powder. - Mix in nuts or dried fruit for added texture. Cinnamon and espresso add warmth and depth. Nuts give a nice crunch, while dried fruit adds sweetness bites. These flavors can take your double chocolate zucchini bread to a new level. Need to adjust for special diets? No problem! Try these options: - Use almond flour or coconut flour for a gluten-free bread. - Swap eggs for flax eggs and use plant-based milk for a vegan option. These changes keep the bread tasty while meeting dietary needs. Enjoy a slice without worry, whether you're gluten-free or vegan. Each version remains rich and chocolatey, making it a treat for everyone. Store your double chocolate zucchini bread in an airtight container. It will stay fresh at room temperature for up to 3 days. This keeps it moist and tasty for your daily snack or breakfast. For longer storage, refrigerate the bread. It lasts up to a week in the fridge. If you want to keep it even longer, freeze the slices. Wrap each slice in plastic wrap and store in a freezer bag. You can freeze them for up to 3 months. This way, you always have a delicious treat ready! When you're ready to enjoy a slice, you can heat it up easily. Use the microwave for a few seconds to warm it. If you prefer a crispy edge, toast it for a few minutes. Both methods bring out the rich chocolate flavor. For the full recipe, check out the delightful details above! Yes, you can use frozen zucchini. Just thaw it first. After that, squeeze out any extra water. This step helps keep your bread from getting soggy. To check if the bread is done, use a toothpick. Insert it into the center of the loaf. If it comes out clean or with a few moist crumbs, your bread is ready. Double Chocolate Zucchini Bread is great with many things. I love it with a glass of milk. Coffee also pairs well. For a sweet treat, add a scoop of ice cream on the side. Yes, you can make mini loaves. Just use smaller pans. Bake for about 25-30 minutes. Keep an eye on them to make sure they don’t overbake. In this post, we explored how to make delicious Double Chocolate Zucchini Bread. We covered fresh and dry ingredients, step-by-step instructions, and tips for the best results. Consider trying different flavors and healthier alternatives to suit your taste. Remember to store leftovers properly for later enjoyment. This recipe is simple yet enjoyable, making it perfect for any baker. Don’t hesitate to experiment and make this bread your own!](https://meltedrecipes.com/wp-content/uploads/2025/07/0ba18eae-1fb8-4e1c-b0b7-5c5299df9b44.webp)
Decadent Double Chocolate Zucchini Bread Recipe
Craving a treat that’s both rich and sneaky healthy? Look no further than my Decadent Double Chocolate Zucchini Bread Recipe! Packed with moist zucchini and
![- 1 medium zucchini, grated (about 1 cup) - 1/2 cup unsweetened applesauce - 1/2 cup pure maple syrup or honey - 1/2 cup almond milk (or your choice of milk) - 1 teaspoon pure vanilla extract - 1 cup whole wheat flour - 1/2 cup unsweetened cocoa powder - 1 teaspoon baking soda - 1/2 teaspoon baking powder - 1/2 teaspoon sea salt These ingredients make up the base of your healthy chocolate zucchini bread. The grated zucchini adds moisture while keeping it light. Unsweetened applesauce acts as a natural sweetener and keeps the loaf tender. Maple syrup or honey brings in sweetness without refined sugar. - 1/2 cup dark chocolate chips - 1/4 cup chopped nuts (like walnuts or pecans) - 1/2 teaspoon ground cinnamon (optional) If you want to kick up the flavor, add dark chocolate chips. They melt beautifully and create a rich taste. Chopped nuts give a nice crunch and extra nutrition. A dash of cinnamon adds warmth and complements the chocolate perfectly. For the full recipe, check out the [Full Recipe]. 1. Preheating the Oven Set your oven to 350°F (175°C). This temperature works well for baking. Preheating is key to even baking. 2. Preparing the Loaf Pan Use a 9x5 inch loaf pan. Lightly grease it with oil, or line it with parchment paper. This step helps the bread come out easily. 1. Combining Zucchini and Applesauce Mixture In a large bowl, grate one medium zucchini. You need about one cup. Add half a cup of unsweetened applesauce. This keeps the bread moist. 2. Incorporating Sweeteners and Milk Next, mix in half a cup of pure maple syrup or honey. Then, pour in half a cup of almond milk. Add one teaspoon of pure vanilla extract for flavor. Stir until smooth. 1. Whisking Together the Dry Ingredients In a separate bowl, whisk one cup of whole wheat flour with half a cup of cocoa powder. Add one teaspoon of baking soda, half a teaspoon of baking powder, and half a teaspoon of sea salt. If you like, include half a teaspoon of ground cinnamon. This helps mix everything evenly. 1. Method for Mixing Without Overmixing Gradually add the dry ingredients into the wet mixture. Stir gently. Stop mixing when just combined. It’s fine if the batter has a few lumps. 2. Folding in Chocolate Chips and Nuts Now, fold in half a cup of dark chocolate chips and, if you want, a quarter cup of chopped nuts. Do this carefully to keep the chips whole. You want them spread evenly. 1. Pouring Batter into the Loaf Pan Pour your batter into the prepared loaf pan. Use a spatula to spread it evenly. This makes sure it bakes nicely. 2. Baking Times and Doneness Check Place the pan in the oven. Bake for 50 to 60 minutes. To check if it’s done, insert a toothpick into the center. It should come out clean or with a few moist crumbs. This recipe gives you a moist and tasty treat. For the full recipe, check the detailed instructions above. To make this chocolate zucchini bread even healthier, try swapping sweeteners. Instead of maple syrup, use agave syrup or mashed ripe bananas. Both options can cut sugar and add flavor. For flours, you can use almond flour or oat flour. These choices boost nutrition. If you want a dairy-free version, use nut milk, like almond or cashew milk. You can also opt for coconut yogurt instead of regular yogurt. These swaps keep the bread moist and tasty while catering to dietary needs. The key to a great texture is not overmixing. Mix the batter until just combined. A few lumps are okay! This keeps the bread light and fluffy. To ensure moistness, add a little extra grated zucchini. If you like, you can also include a splash of additional almond milk. This makes each slice soft and delicious. For serving, slice the loaf on a wooden board. It looks rustic and inviting. You can dust the top with a bit of powdered sugar for a pretty touch. This bread pairs well with nut butter. Spread almond or peanut butter on warm slices. You can also add sliced bananas or fresh berries on top for extra flavor. Enjoy this delicious treat anytime! {{image_4}} You can make this healthy chocolate zucchini bread even better by choosing different flours. Here are some great options: - Gluten-Free Options: Use almond flour or coconut flour. These flours add nice flavors and are gluten-free. Just remember to mix them well with other dry ingredients. Adjust the liquid as needed. - Other Whole Grain Choices: Try spelt flour or oat flour. Both add fiber and nutrients. They also give a unique taste. You can mix them with whole wheat flour for a balanced result. Adding different flavors can make your zucchini bread special. Here are some fun ideas: - Adding Different Spices or Extracts: You can add cinnamon or nutmeg for warmth. Vanilla or almond extract can give a lovely aroma. Just a teaspoon can change the whole taste. - Using Various Types of Chocolate: Instead of dark chocolate chips, try milk chocolate or white chocolate. Each type brings a new twist. You can even mix different kinds for a chocolate lover’s dream! Enhancing your bread with healthy extras is easy. Consider these add-ins: - Additional Fruits or Nut Combinations: You can add chopped apples or mashed bananas. They add moisture and sweetness. Nuts like walnuts or pecans bring crunch and healthy fats. - Incorporating Seeds for Extra Nutrition: Flaxseeds or chia seeds can boost the nutrition. They add omega-3s and fiber. Just a couple of tablespoons can make a big difference. For the full recipe, check out the [Full Recipe]. To keep your Healthy Chocolate Zucchini Bread fresh, start with room temperature storage. Place the bread in an airtight container. This method works well for up to 3 days. If you want it to last longer, consider refrigerating. Wrap the bread tightly in plastic wrap or foil first. Then store it in a sealed bag. This can help it stay fresh for about a week. Freezing is a great way to save your bread for later. First, slice the bread into pieces. This makes it easy to thaw just what you need. Wrap each slice in plastic wrap. Then place the wrapped slices in a freezer bag. This method keeps the bread good for about 3 months. When you're ready to eat it, just take out what you need. Let it sit at room temperature for a few hours. If you want it warm, pop it in the oven for a few minutes. To maintain freshness, avoid exposing your bread to air. Use an airtight container or a sealed bag. This keeps moisture in and prevents drying out. For the best results, store your bread in a cool, dark place. A pantry or bread box works well. If you use the fridge, make sure to eat it within a week. By following these tips, you can enjoy your Healthy Chocolate Zucchini Bread longer. For the complete recipe, check out the Full Recipe section! What can I substitute for zucchini? If you don’t have zucchini, you can use applesauce or pumpkin puree. Both add moisture. They also blend well with the chocolate flavor. You might need to adjust the sugar if using applesauce. Can this recipe be made vegan? Yes! You can make this bread vegan easily. Just use plant milk and replace honey with maple syrup. Also, choose dairy-free chocolate chips. This way, you keep it tasty and friendly for all diets. How do I check if the bread is done? Insert a toothpick into the center of the bread. If it comes out clean or with a few moist crumbs, it’s done. If it has wet batter on it, bake a bit longer. What are the health benefits of zucchini in baking? Zucchini adds moisture without extra fat. It’s low in calories and high in fiber. This helps keep you full and aids digestion. Plus, it includes vitamins A and C, which are good for skin and eyes. How many calories are in a slice of this bread? Each slice contains around 150 calories. This can vary based on your ingredients. If you use less sugar or skip nuts, it can be lower too. What to do if the bread is too dry? If the bread turns out dry, try adding a bit more applesauce or milk next time. You could also reduce the baking time slightly. This helps keep the moisture locked in better. How to fix an overly dense loaf? A dense loaf may mean you overmixed the batter. Next time, mix gently and just until combined. You can also make sure your baking soda and powder are fresh. This ensures they rise properly. In this post, I covered how to make Healthy Chocolate Zucchini Bread with simple steps. We explored key ingredients, from grated zucchini to sweeteners, and variations like chocolate chips. I shared tips for perfect texture and serving ideas. Remember, small changes can boost nutrition without losing flavor. Enjoy baking this delicious treat, and don't hesitate to experiment with ingredients. Your kitchen adventure is just starting, and these tips will guide you!](https://meltedrecipes.com/wp-content/uploads/2025/07/d2de9f7a-ae47-4e56-be3f-37d3f034384e.webp)
Healthy Chocolate Zucchini Bread Moist and Delicious Treat
Looking for a tasty way to sneak veggies into your diet? This Healthy Chocolate Zucchini Bread is your answer! It’s moist, chocolatey, and packed with
. Gluten-free baking can be tricky, but I have some tips for you. Use a good gluten-free all-purpose flour. Look for blends with xanthan gum. This helps mimic gluten's stretch. Always measure your flour correctly. Use a spoon to fill your measuring cup, then level it. This ensures you don’t add too much flour. Keep in mind that gluten-free flours absorb more liquid. You may need to adjust your wet ingredients slightly. When making these muffins, be gentle. Overmixing can lead to tough muffins. After adding wet ingredients to dry, stir just until combined. You want a few lumps to stay. This keeps your muffins light and fluffy. Fold in the zucchini and any mix-ins softly. A spatula works best for this. Remember, the goal is to keep air in the batter. You can customize the sweetness of these muffins. If you like it sweeter, add a bit more honey or maple syrup. Start with an extra tablespoon. You can also use flavored applesauce for added sweetness. If you prefer, reduce the sugar a bit. The zucchini adds natural sweetness too. Taste the batter before baking, but keep in mind it will taste slightly less sweet after baking. For a unique twist, try adding a pinch of salt to balance the flavors. For the full recipe, check the link above! {{image_4}} You can boost flavor by adding fruits or nuts to your muffins. Try adding 1/2 cup of blueberries or shredded apples. These fruits bring a burst of sweetness and moisture. If you prefer crunch, mix in 1/2 cup of walnuts or pecans. They add texture and a nutty flavor that pairs well with zucchini. For a savory twist, skip the sweeteners and spices. Instead, use 1/2 cup of grated cheese, like cheddar or feta. Add herbs like thyme or rosemary for extra flavor. These savory muffins work well for breakfast or brunch. They can also be a great side for soups and salads. To make these muffins vegan, replace the eggs with flaxseed meal. Mix 1 tablespoon of flaxseed meal with 3 tablespoons of water. Let it sit for five minutes to thicken. Use maple syrup instead of honey for sweetness. This keeps the muffins moist and delicious while meeting vegan needs. For the full recipe, refer to the recipe section. Store your leftover muffins in an airtight container. This keeps them fresh and moist. You can keep them at room temperature for up to three days. If you want them to last longer, it's best to refrigerate them. Just remember to let them cool completely before storing. Freezing your muffins is easy. Wrap each muffin tightly in plastic wrap. Then, place them in a freezer-safe bag. They will stay fresh for about three months. When you are ready to enjoy them, simply take out what you need. Let them thaw at room temperature or in the fridge overnight. To reheat your muffins, you can use the microwave or oven. If using the microwave, heat for about 15-20 seconds. Check if they are warm enough. If not, heat in short bursts. For the oven, preheat it to 350°F. Place the muffins on a baking sheet and warm them for about 5-10 minutes. This will bring back that fresh-baked taste. For a special treat, you can add a bit of butter on top while they warm up. Enjoy your delicious Gluten-Free Zucchini Muffins! For the full recipe, refer to the section above. No, regular flour contains gluten. This is a problem for those with gluten issues. Gluten-free flour blends help create a nice texture while keeping the muffins safe to eat. To keep muffins moist, use fresh zucchini and applesauce. Also, don’t overbake them. Check them at 20 minutes to avoid dryness. You can use flaxseed meal or chia seeds. Mix 1 tablespoon of either with 2.5 tablespoons of water. Let it sit for a few minutes to thicken. These muffins can last for about 3 days at room temperature. If you refrigerate them, they can last up to a week. Yes, you can make the batter the night before. Just store it in the fridge. Bake the muffins fresh in the morning for a warm treat. You can find the full recipe [here](#). Enjoy making these tasty gluten-free zucchini muffins! This article covered the ingredients, steps, and tips for making gluten-free zucchini muffins. You learned how to mix wet and dry elements to create a tasty batter. We discussed storage options, variations, and answered common questions. These muffins are easy to bake and great for all diets. I hope you enjoy trying this recipe and experimenting with different add-ins. Enjoy delicious muffins today!](https://meltedrecipes.com/wp-content/uploads/2025/07/315a1b28-ac2c-48fd-ac44-6f9e229363f4.webp)
Gluten-Free Zucchini Muffins Simple and Tasty Treat
If you crave a tasty snack that’s gluten-free, you’ve come to the right place! These Gluten-Free Zucchini Muffins are simple to make, and they’re packed

Lemon Rhubarb Loaf Fresh and Flavorful Delight
If you love fresh, tart flavors, you’re in for a treat with this Lemon Rhubarb Loaf. This delightful recipe combines zesty lemon and vibrant rhubarb
. {{image_4}} You can switch up your flours for more flavor and texture. Use spelt or oat flour for a nutty taste. You might mix in some rye flour for a heartier loaf. Just keep the total flour amount the same. Experimenting with flours can change the flavor profile of your bread. It makes each loaf unique and fun to bake! If you want less sugar, try maple syrup or honey. These natural sweeteners add a nice flavor. You can also use coconut sugar for a lower glycemic option. Adding fruits like diced apples or crushed pineapple gives extra sweetness. For a savory twist, try adding herbs like rosemary or thyme. Making this bread vegan is easy. Just swap yogurt for almond or soy yogurt. Use a flaxseed meal or chia seed mix instead of eggs. For gluten-free bread, use a gluten-free flour blend. Make sure to add a binding agent like xanthan gum. This keeps the bread from falling apart. These options let everyone enjoy this tasty treat! To keep your sourdough zucchini bread fresh, wrap it well in plastic wrap. This helps prevent it from drying out. You can also place it in an airtight container. Store the bread at room temperature for up to three days. If you want to keep it longer, consider freezing it. To freeze your bread, slice it first. This makes it easier to thaw just what you need. Wrap each slice in plastic wrap, then place them in a freezer bag. This method can keep the bread fresh for up to three months. To thaw, simply take out a slice and leave it at room temperature for about 30 minutes. For the best taste, reheat your bread in the oven. Preheat the oven to 350°F (175°C). Place the slices on a baking sheet and heat for about 10 minutes. This will make the crust crisp and the inside warm. You can also use a toaster for single slices if you prefer. Enjoy your warm, tasty bread! You can tell when your sourdough zucchini bread is done by checking it with a toothpick. Insert the toothpick into the center of the bread. If it comes out clean, your bread is ready. The top should look golden brown, and the bread should feel firm to the touch. The edges may pull away from the pan slightly, which is another sign of doneness. Yes, you can use other types of zucchini. Yellow squash works well and gives a similar taste. You can also use small, tender zucchini for a sweeter flavor. Just remember to grate the zucchini finely, no matter which type you choose. This helps it blend well into the batter and keeps the bread moist. Sourdough zucchini bread tastes great on its own, but you can elevate it even more. Try serving it with a dollop of yogurt or a drizzle of honey for sweetness. You can also pair it with fresh fruit or a sprinkle of cinnamon for added flavor. For a savory touch, cream cheese or herb spread works well. Enjoy it warm or at room temperature! Sourdough zucchini bread combines fresh ingredients, careful mixing, and handy tips for success. You can customize it with different flours or sweeteners. Storing leftovers correctly keeps it fresh for later. Always avoid common mistakes to enjoy the best texture and flavor. With these insights, you'll bake delicious bread every time. Happy baking!](https://meltedrecipes.com/wp-content/uploads/2025/07/2a3edbd5-2db4-44cb-8360-91bd3a912bd4.webp)
Sourdough Zucchini Bread Flavorful and Easy Recipe
If you’ve been searching for a tasty way to use up summer zucchini, this Sourdough Zucchini Bread recipe is just what you need! Packed with
![- 1 cup grated zucchini - 1 cup finely grated carrots - 1/2 cup unsweetened applesauce - 1/2 cup packed brown sugar - 1/4 cup honey - 1/4 cup vegetable oil - 2 large eggs, at room temperature - 1 teaspoon pure vanilla extract - 1 1/2 cups all-purpose flour - 1 teaspoon baking powder - 1/2 teaspoon baking soda - 1 teaspoon ground cinnamon - 1/2 teaspoon ground nutmeg - 1/4 teaspoon ground ginger - 1/4 teaspoon salt - 1/2 cup chopped walnuts or pecans - 1/4 cup raisins or dried cranberries This spiced zucchini carrot bread uses fresh, simple ingredients. The zucchini and carrots add moisture and flavor. Applesauce keeps the bread soft and healthy. Brown sugar and honey add sweetness without being too strong. The eggs help bind everything together, creating a nice texture. In the dry ingredients, flour gives structure. Baking powder and baking soda help the bread rise. Spices like cinnamon, nutmeg, and ginger bring warmth and depth to each bite. You can add nuts or dried fruits for extra texture and flavor. If you want to see the full recipe, just click here. Enjoy making this delicious bread! - Preheat the oven to 350°F (175°C). - Grease a 9x5-inch loaf pan well to avoid sticking. - In a large bowl, combine the grated zucchini, finely grated carrots, and wet ingredients. - Whisk until smooth and well mixed. - In another bowl, whisk together the all-purpose flour, baking powder, baking soda, ground cinnamon, ground nutmeg, ground ginger, and salt. - Make sure everything mixes evenly. - Gently add the dry mixture to the wet mixture. - Mix gently; don’t overmix. Small lumps are okay. - If you want, fold in the chopped nuts and dried fruits. - Pour the batter into the prepared loaf pan. - Bake for 50-60 minutes. Check with a toothpick. It should come out clean. - Cool the bread in the pan for 10 minutes. - Transfer it to a wire rack to cool completely before slicing. To get the best flavor from zucchini and carrots, you need to grate them finely. Use a box grater or a food processor for this task. Make sure you spread the vegetables evenly across the grater. This helps you get uniform pieces. After grating, it's key to squeeze out excess moisture. Too much liquid can make your bread soggy. Place the grated zucchini in a clean towel and twist it tightly. This will remove much of the water. You can change the sweetness of your bread to suit your taste. If you want a less sweet loaf, cut back on the sugar or honey. Start by reducing the amount by a few tablespoons. You can also try using maple syrup or agave nectar instead. Both of these options give a nice flavor. If you want to go sugar-free, consider using ripe bananas or pureed dates. These will add natural sweetness without refined sugars. Getting the right texture in your zucchini carrot bread is important. First, ensure you mix the wet and dry ingredients just enough. Overmixing can lead to tough bread. Stir gently until you see no dry flour. A few lumps are okay! Also, don't forget to check the consistency of your batter. It should be thick but pourable. If it seems too dry, add a splash of milk or water. This will help create a moist, fluffy loaf. {{image_4}} If you want a gluten-free version, swap all-purpose flour with a gluten-free blend. Many brands offer a mix that works well in baking. Look for one that has xanthan gum in it. This helps mimic the texture of regular flour. You can also use almond flour or coconut flour. Just remember, these flours absorb more moisture. You may need to adjust liquid amounts in your recipe. Get creative with spices! You can try adding cardamom, cloves, or even allspice. These warm spices will give your bread a unique twist. Just a pinch can change the flavor profile. If you are a fan of spice, try adding a bit more cinnamon or nutmeg as well. This makes each bite more exciting. Want to enhance your bread? Consider adding fruits! Apples and bananas work great. Grate them finely and mix them in. This adds extra moisture and sweetness. You can also use crushed pineapple for a tropical vibe. Dried fruits like apricots or dates can add chewy texture. Each fruit brings its own flavor, making the bread even more delightful. For the full recipe, check out the details above. To store your spiced zucchini carrot bread at room temperature, wrap it tightly in plastic wrap or foil. This helps keep it fresh and moist. Place it in a cool, dry spot, away from direct sunlight. Your bread will stay tasty for about 2 to 3 days this way. If you want to keep it longer, consider freezing it. For long-term storage, freezing is the best option. First, let the bread cool completely. Then, wrap it tightly in plastic wrap, followed by aluminum foil. This double layer prevents freezer burn. You can freeze it for up to 3 months. When you’re ready to eat, just thaw it in the fridge overnight or on the counter for a few hours. To reheat your bread and keep it moist, preheat your oven to 350°F (175°C). Unwrap the bread and place it on a baking sheet. Cover it loosely with foil to avoid drying out. Heat for about 10 to 15 minutes. If you want to warm individual slices, use a toaster or a microwave. Just add a tiny bit of water to a bowl and cover it with a damp paper towel. This helps keep the bread soft while reheating. Enjoy the warm, spiced goodness! Yes, you can try using shredded carrots or apples instead of zucchini. Both options add sweetness and moisture. You might also use finely grated butternut squash for a unique flavor. Just remember to squeeze out the excess moisture, just like with zucchini. This bread can stay fresh for about 3 to 5 days at room temperature. For best results, store it in an airtight container. If you want it to last longer, you can freeze it. Just wrap it well in plastic wrap and foil. This bread pairs well with butter, cream cheese, or even a light spread of honey. You can also enjoy it with a cup of tea or coffee. If you want to make it a meal, serve it with yogurt or cottage cheese for some protein. Yes, you can make this recipe vegan. Swap the eggs with flax eggs or applesauce. Use plant-based oil and maple syrup instead of honey. This way, you can enjoy the same great taste while keeping it vegan-friendly. For the complete spiced zucchini carrot bread recipe, check out the [Full Recipe]. This blog post detailed how to make delicious spiced zucchini carrot bread. We covered the main and dry ingredients, along with optional add-ins to enhance flavor. Step-by-step instructions made it easy to follow the process, from mixing wet and dry ingredients to baking. Tips for perfecting texture, adjusting sweetness, and variations helped you customize your bread. Remember, this bread is not just tasty; it can be modified to suit your needs! Enjoy baking, and have fun experimenting!](https://meltedrecipes.com/wp-content/uploads/2025/07/7f74c365-d36c-4eb3-8194-f92985743c6d.webp)
Spiced Zucchini Carrot Bread Irresistible Flavor Recipe
Are you ready to delight your taste buds? This Spiced Zucchini Carrot Bread is a game-changer! With its blend of fresh zucchini, sweet carrots, and