Desserts

- 1 cup granulated sugar - 1 cup light corn syrup - 1 cup smooth or chunky peanut butter - 6 cups Rice Krispies cereal - 1 cup semisweet chocolate chips - 1 cup butterscotch chips - 1 teaspoon pure vanilla extract - A pinch of flaky sea salt To make the best Scotcheroos, you need key ingredients. The granulated sugar and light corn syrup create a sweet and sticky base. Peanut butter adds rich flavor and creaminess. Rice Krispies provide that delightful crunch. The chocolate and butterscotch chips are the stars on top, giving extra sweetness. Vanilla extract lifts the flavors, and flaky sea salt adds a nice finish. Each ingredient plays a vital role in making this treat special. - Additional toppings (chopped peanuts, extra chocolate drizzle) - Flavor variations (adding different types of nuts or cereals) If you want to jazz up your Scotcheroos, consider optional toppings. Chopped peanuts add a crunchy bite. An extra drizzle of chocolate makes them look fancy. You can also try different flavors. Swap in your favorite nuts or cereals for a twist. These small changes can make your Scotcheroos unique. Explore and have fun with this recipe! {{ingredient_image_2}} 1. Heating sugar and corn syrup mixture In a large pot over medium heat, mix 1 cup of granulated sugar with 1 cup of light corn syrup. Stir constantly. Watch for the mixture to boil. This keeps it from sticking to the pot. 2. Incorporating peanut butter When it reaches a rolling boil, take it off the heat. Add in 1 cup of peanut butter. Mix until it is fully melted and smooth. 3. Mixing in Rice Krispies Gently fold in 6 cups of Rice Krispies. Make sure each piece gets coated. Be careful not to crush the cereal as you mix. 1. Preparing the baking dish Grab a 9x13 inch baking dish. Line it with parchment paper, leaving some hanging over the edges. This helps when lifting out the Scotcheroos. 2. Pressing the mixture into the dish Pour the Rice Krispies mixture into the dish. Press it down evenly. Use the back of a spatula or your hands for a smooth surface. 3. Melting the chocolate and butterscotch topping In a microwave-safe bowl, combine 1 cup of semisweet chocolate chips and 1 cup of butterscotch chips. Add a pinch of flaky sea salt. Microwave in 30-second bursts, stirring until smooth. 1. Cooling the Scotcheroos Pour the melted topping over the pressed mixture. Spread it out evenly. Let them cool at room temperature for about 1 hour. You want the topping to be set and firm. 2. Cutting and serving Once cooled, carefully lift the Scotcheroos out using the parchment paper. Use a sharp knife to cut them into squares or bars, sized as you like. Enjoy your sweet treat! To get that perfect Scotcheroo texture, start by mixing the Rice Krispies gently. Ensure each piece gets a good coating of the peanut butter mix. If you crush the cereal, your bars won’t have the right crunch. Use a spatula or your hands to fold the cereal in, taking care to keep it whole. This helps create a delightful bite. When it comes to melting chocolate and butterscotch, patience is key. Heat them in a microwave-safe bowl in 30-second bursts. Stir between each interval until the mixture is smooth and glossy. This method prevents burning and ensures an even melt. For a shiny finish, add a pinch of flaky sea salt to the melted topping. It not only adds flavor but also enhances the look. To keep your Scotcheroos fresh, store them in an airtight container at room temperature. They stay tasty for about a week. For serving, arrange the bars on a decorative platter. You can drizzle extra melted chocolate and butterscotch on top for a fancy touch. Sprinkle some chopped peanuts or a light dusting of sea salt to make them even more appealing. Pro Tips Use Fresh Ingredients: Ensure your peanut butter and chocolate chips are fresh for the best flavor and texture. Perfectly Measure Rice Krispies: For the best results, use a measuring cup to accurately measure your Rice Krispies, ensuring even distribution. Cooling Time Matters: Allow the Scotcheroos to cool completely at room temperature to ensure the chocolate topping sets properly. Customize Your Topping: Feel free to mix in some chopped nuts or sprinkles into the chocolate layer for added crunch and color. {{image_4}} You can add fun twists to your Scotcheroos. One popular option is the chocolate-peanut butter version. Simply mix cocoa powder into the peanut butter before heating. This adds a rich chocolate flavor to the bars. Another idea is to use different types of nut butters. Almond butter or cashew butter can change the taste. You still get that delightful crunch with Rice Krispies. For those with dietary needs, there are great options. You can use gluten-free cereal to make your Scotcheroos safe for everyone. Brands like Gluten-Free Rice Krispies work well. If you're vegan, substitute the butter and chocolate with plant-based options. Use vegan chocolate chips and maple syrup instead of corn syrup. These swaps keep the bars tasty while accommodating dietary choices. Make your Scotcheroos festive with seasonal toppings. For Halloween, add orange and black sprinkles. For Christmas, drizzle red and green chocolate over the top. Think of themed presentation ideas for events too. Use fun molds to shape them for parties. You can even cut them into holiday shapes with cookie cutters. These small changes make your treats stand out! To keep your Scotcheroos fresh, store them in an airtight container. This method keeps them moist and tasty. Place a piece of parchment paper between layers to avoid sticking. For short-term storage, keep them at room temperature. They will stay good for up to one week this way. If you want to store them for a longer time, try the fridge. Just remember to wrap them well to prevent drying out. For long-term storage, freeze your Scotcheroos. Cut them into squares before freezing. Lay the squares on a tray, freeze for an hour, then place them in a freezer bag. They can last up to three months in the freezer. At room temperature, Scotcheroos last about a week. Store them in a cool, dry place for the best results. Check for any signs of moisture or hardening. If you freeze your Scotcheroos, they will keep well for up to three months. To thaw, simply move them to the fridge overnight. This method helps retain their texture and taste. Enjoy your sweet treats anytime! Scotcheroos are no-bake treats made with Rice Krispies, peanut butter, and chocolate. They are loved for their chewy texture and sweet flavor. This dessert is popular at parties and gatherings. The mix of peanut butter and butterscotch is the star of the show. Kids and adults both enjoy these tasty bars. Yes, you can make Scotcheroos ahead of time! They keep well for several days. To prepare them in advance, follow these tips: - Store the bars in an airtight container to keep them fresh. - You can make them up to a week ahead of time. - If you want to freeze them, cut into squares and wrap tightly in plastic wrap. If your Scotcheroos don't turn out right, here are some solutions: - Broken bars: If they crumble, they may need more binding. Try adding a bit more peanut butter next time. - Uneven topping: To fix this, spread the melted chocolate and butterscotch evenly with a spatula. If it sets unevenly, gently reheat it and smooth it out. With these tips, your Scotcheroos will be a hit every time! Scotcheroos are fun and easy to make. We covered their key ingredients, like peanut butter and chocolate chips. You learned how to prepare, assemble, and store them. With tips for perfect texture and topping, you’re set for success. Try the tasty variations to keep things exciting. Remember, these treats are best when shared and enjoyed fresh. Now, get creative and make your own batch of Scotcheroos. You won't regret it!
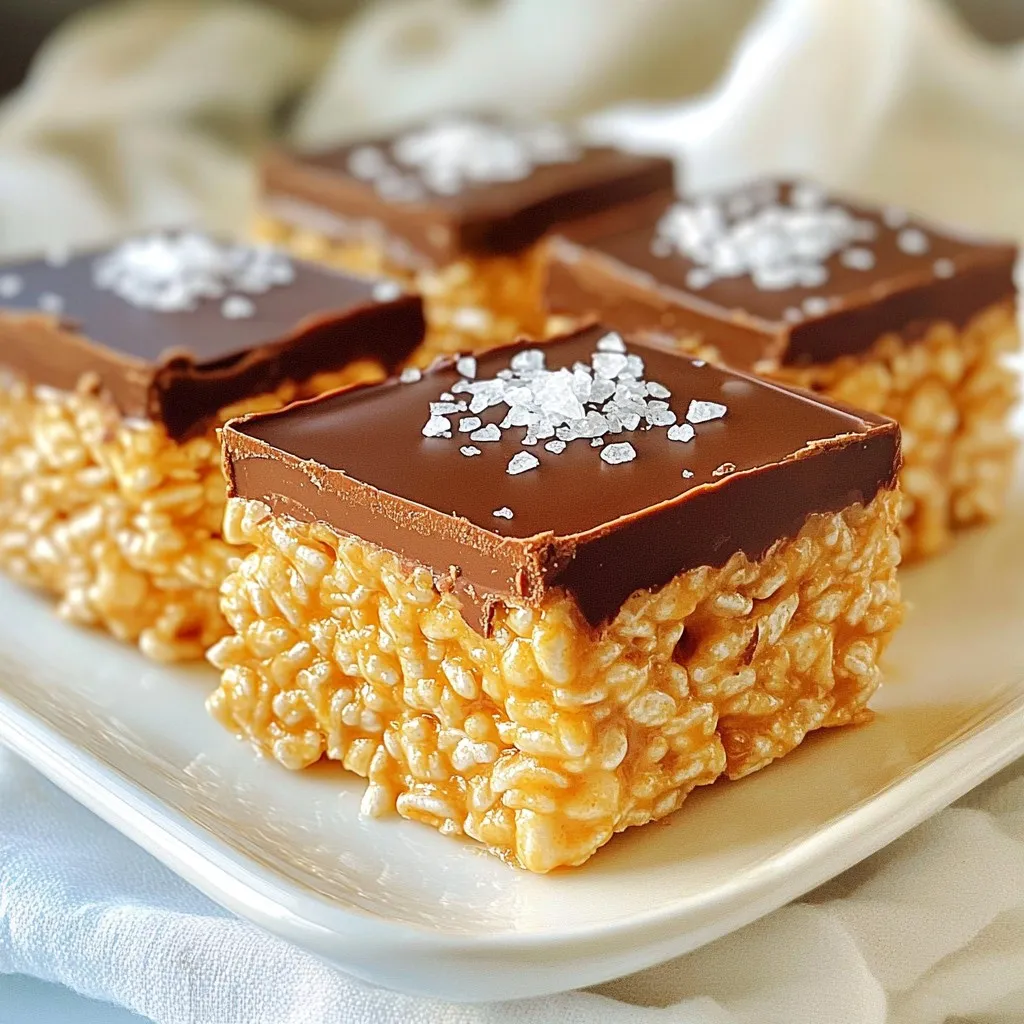
Best Ever Scotcheroos Delicious No-Bake Treat Recipe
If you crave a sweet, chewy treat that’s quick to make, you’re in the right place! My Best Ever Scotcheroos recipe is a no-bake delight
- 9 cups of Rice Chex cereal - 1 cup of semi-sweet chocolate chips - ½ cup of creamy peanut butter - ¼ cup of unsalted butter - 1 teaspoon of vanilla extract - 1½ cups of powdered sugar - 1 cup of assorted Halloween-themed candies (like candy corn, gummy worms, or chocolate spiders) - ¼ teaspoon of sea salt (optional, for garnish) Gathering these ingredients is really fun! Rice Chex cereal gives a great crunch. The chocolate chips and peanut butter create a rich, sweet coating. Unsalted butter adds creaminess, while vanilla extract enhances the flavor. Powdered sugar gives that sugary finish we all love. Choose your favorite Halloween candies to mix in. They add color and extra fun! You can even use sea salt for a nice touch. This is where your creativity shines! For the full recipe, you can follow the steps I’ve outlined. Each ingredient plays a key role in making your Halloween Muddy Buddies a tasty snack. Enjoy the process, and let your imagination run wild! First, measure 9 cups of Rice Chex cereal. You can use a measuring cup to get it right. Once you have the cereal, set it aside. This will be the base for our muddy buddies. Next, grab a microwave-safe bowl. Combine 1 cup of semi-sweet chocolate chips, ½ cup of creamy peanut butter, and ¼ cup of unsalted butter in the bowl. Microwave this mixture in 30-second intervals. Stir after each interval until it is smooth. This step is crucial for a great texture. Once your chocolate is melted, add 1 teaspoon of vanilla extract. This will give your treat a lovely flavor. Pour the chocolate mixture over the Rice Chex cereal. Use a spatula to gently fold the mixture together. Make sure every piece of cereal gets coated well. Now, take a large resealable bag or a container. Pour the cereal mixture into it. Add 1½ cups of powdered sugar to the bag. Seal it tightly and shake until all the cereal is covered. It is fun to watch the sugar coat the cereal! After shaking, spread the coated mixture onto a baking sheet or into a big bowl. Let it cool completely. While it cools, feel free to mix in your favorite Halloween-themed candies. This adds a fun and festive twist to your muddy buddies. If you want, sprinkle some sea salt on top for extra flavor. For the full recipe, check the details above. Enjoy making this spooky treat! To make the best Halloween Muddy Buddies, start by mixing well. Ensure the chocolate coats every piece of cereal. This step makes every bite tasty. Using fresh ingredients is key. Fresh chocolate chips and creamy peanut butter enhance flavors. Stale ingredients can ruin the fun. Make your Halloween Muddy Buddies shine at your party. Serve them in a spooky bowl filled with colorful candies. For an extra treat, pack them in clear bags. Tie the bags with bright ribbons for a fun look. Your guests will love these festive favors! For the full recipe, check out the detailed instructions above. {{image_4}} You can switch things up with your Halloween Muddy Buddies. For a nutty twist, swap creamy peanut butter for almond butter or sunbutter. Both options add unique flavors without losing that creamy texture. If you're a chocolate lover, try using dark chocolate chips or white chocolate chips instead of semi-sweet chocolate. Each type of chocolate brings its own taste, making your muddy buddies exciting and new. Make your muddy buddies festive for any season! Use holiday-themed candies like red and green M&Ms for Christmas or pastel candies for Easter. For Halloween, mix in candy corn, gummy worms, or chocolate spiders. You can also customize the colors of your muddy buddies. Add food coloring to your melted chocolate for a spooky green or orange hue. This way, your treat stands out at any party or gathering! To keep your Halloween Muddy Buddies fresh, store them in an airtight container. I recommend using a glass jar with a lid or a plastic container. These options prevent air and moisture from ruining your treat. Make sure the container is clean and dry before adding the muddy buddies. For extra freshness, layer parchment paper between the treats to avoid sticking. At room temperature, your Halloween Muddy Buddies last about a week. They taste best when fresh, so enjoy them within this time. If you want to keep them longer, freezing is an option. To freeze, place the muddy buddies in a freezer-safe bag. Remove any air before sealing. When you're ready to eat them, let them thaw at room temperature. This method helps maintain their crunchy texture. The prep time for Halloween Muddy Buddies is 15 minutes. The total time to make them is 30 minutes. This recipe serves about 8 to 10 people, making it perfect for a small party or gathering. Yes, you can make Halloween Muddy Buddies ahead of time. They stay fresh for several days when stored properly. Keep them in an airtight container at room temperature. This way, you can save time on the day of your event. You can easily customize your Halloween Muddy Buddies! Here are some fun ideas: - Swap vanilla for almond extract for a nutty twist. - Add crushed pretzels for some crunch. - Try different types of chocolate, like white or dark chocolate. - Mix in seasonal candies like gummy bats or pumpkin-shaped chocolates. Experiment with flavors to make them your own! For the full recipe, refer back to the main section. You now have all you need to make tasty Halloween Muddy Buddies. Start with simple ingredients like Rice Chex, chocolate, and candy. Follow the steps carefully to melt and mix well. Remember to play with flavors, and get creative for your Halloween parties. Store them right for lasting freshness. Enjoy these treats with friends and family. Making Halloween special can be easy and fun!
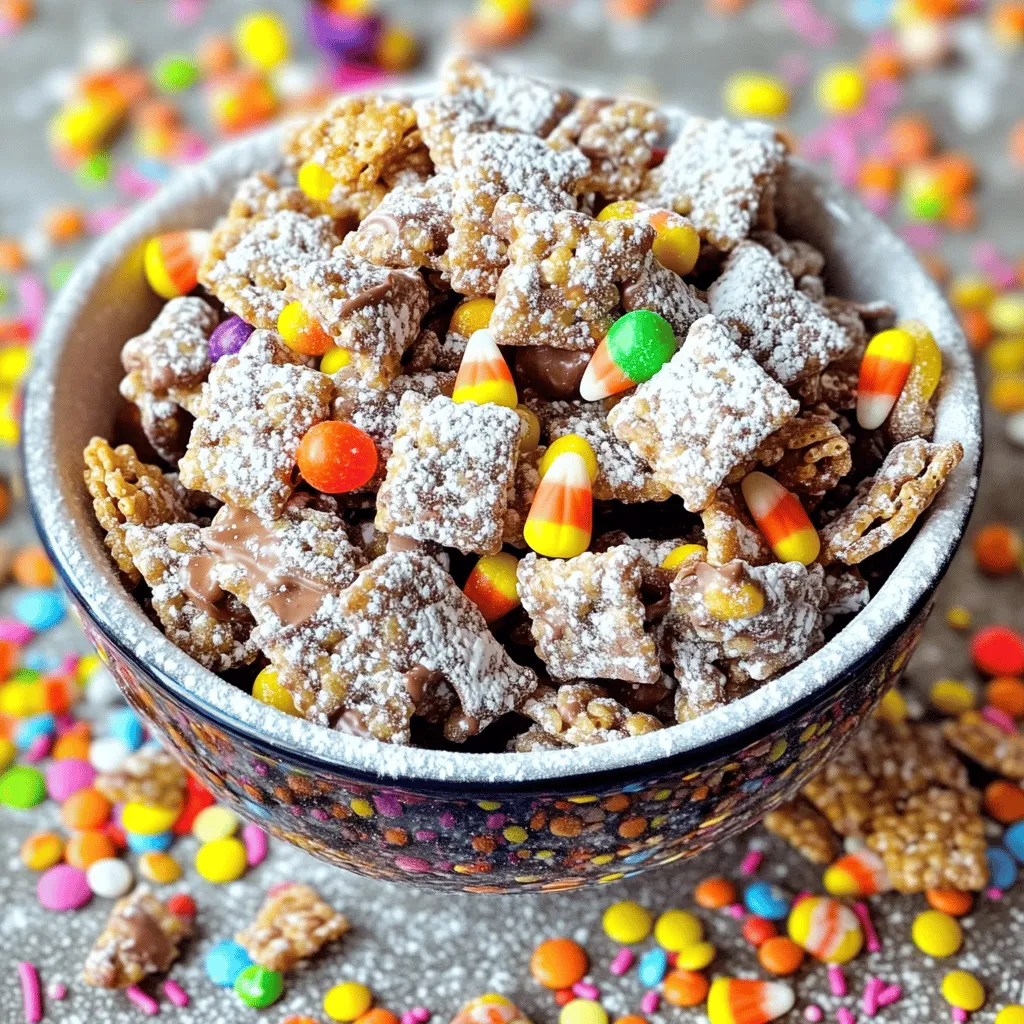
Halloween Muddy Buddies Tasty and Fun Treat
Welcome to the fun world of Halloween Muddy Buddies! If you’re looking for a tasty treat that blends spooky and sweet, you’ve come to the
- 1 cup unsalted butter, softened to room temperature - 1/2 cup powdered sugar, sifted - 2 cups all-purpose flour - 1/4 cup unsweetened cocoa powder - 1/2 teaspoon fine sea salt - 1 teaspoon pure vanilla extract - Zest of 1 large orange (about 1 tablespoon) - 1/2 cup dark chocolate chips (dairy-free if preferred) - 1 tablespoon freshly squeezed orange juice These ingredients blend to create a rich, flavorful cookie. The unsalted butter gives a creamy texture. The powdered sugar adds sweetness and helps with the cookie's structure. All-purpose flour forms the base, while cocoa powder gives a deep chocolate flavor. Fine sea salt enhances the taste, balancing the sweetness. Pure vanilla extract adds warmth to the flavor. Orange zest and juice bring bright, citrus notes that pair perfectly with dark chocolate. Lastly, dark chocolate chips melt into gooey pockets of bliss. For the full recipe, check the detailed instructions above. Each element plays a key role in making your Dark Chocolate Orange Shortbread Cookies truly special. 1. Preheat your oven to 350°F (175°C). This step ensures even baking for your cookies. 2. Prepare a baking sheet by lining it with parchment paper. This keeps the cookies from sticking. 3. In a large bowl, cream 1 cup of softened unsalted butter with 1/2 cup of sifted powdered sugar. Use an electric mixer or a wooden spoon. Beat the mixture until light and fluffy, about 2-3 minutes. 4. Add 1 teaspoon of pure vanilla extract and the zest of 1 large orange to the butter mixture. Mix well until combined. 5. In another bowl, whisk together 2 cups of all-purpose flour, 1/4 cup of unsweetened cocoa powder, and 1/2 teaspoon of fine sea salt. Gradually add this dry mix to the butter mixture. Stir gently until a smooth dough forms. 6. Carefully fold in 1/2 cup of dark chocolate chips and 1 tablespoon of freshly squeezed orange juice. Make sure they are evenly spread throughout the dough. 7. Transfer the dough to a lightly floured surface. Shape it into a log, about 2 inches in diameter. Wrap the log tightly in plastic wrap and refrigerate for at least 30 minutes. This helps the cookies keep their shape. 8. After chilling, remove the dough from the fridge. Slice it into uniform 1/4-inch thick rounds. Place the slices on the prepared baking sheet, leaving about 1 inch of space between each cookie. 9. Bake the cookies for 12-15 minutes. The edges should be firm, and the centers will look slightly soft. This gives the cookies a tender texture once cooled. 10. Let the cookies cool on the baking sheet for about 5 minutes. Then, transfer them to a wire rack to cool completely. Enjoy making these delightful Dark Chocolate Orange Shortbread Cookies! For the complete guide, refer to the Full Recipe section. To achieve the right texture, focus on your butter. Make sure it is softened but not melted. It should be creamy when you mix it with sugar. This helps create a light and crumbly cookie. Baking time can vary based on your oven. I suggest checking your cookies at the 12-minute mark. The edges should be firm, and the centers should look soft. If they seem too soft, give them a minute or two more. Remember, they will firm up as they cool. You can use different types of chocolate to change the flavor. Milk chocolate gives a sweeter taste. Semi-sweet chocolate offers a rich flavor. You can also try dark chocolate with a higher cocoa content for a bold bite. For more flavor, think about adding spices. A pinch of cinnamon or nutmeg can add warmth. You can also try using lemon or lime zest instead of orange for a fresh twist. For serving, arrange your cookies on a colorful plate. You can also stack them in a clear jar. This adds a nice touch and shows off their beauty. Dust them lightly with powdered sugar for an elegant look. If you want to gift your cookies, consider wrapping them in pretty paper. Place them in a decorative tin with a festive ribbon. This makes for a thoughtful gift. {{image_4}} You can make these cookies a bit healthier. For butter, use coconut oil or applesauce. These options cut down on fat. They add moisture too. For sugar, swap half with honey or maple syrup. This change adds natural sweetness. If you need gluten-free cookies, use almond flour or oat flour. Both give a nice texture. For a dairy-free version, use dairy-free chocolate chips. These small swaps keep the flavor while making the cookies fit your diet. You can play with flavors in many ways. Try using lemon or lime zest instead of orange. This adds a bright twist to the taste. You can also mix in nuts like walnuts or pecans for a crunch. Chopped nuts add texture and flavor. Adding spices can give your cookies a warm touch. Try a pinch of cinnamon or nutmeg. You can even add a dash of chili powder for a spicy kick. Each choice creates a unique cookie experience. To enhance flavors, think about adding extracts. A bit of almond or orange extract can deepen the taste. You can also layer flavors by using both orange zest and juice. This gives a fresh, bold flavor. For a fun twist, coat the cookies in melted dark chocolate. Dip each cookie halfway for a rich finish. You can sprinkle sea salt on top to balance the sweetness. These ideas make each bite special and memorable. You can find the full recipe for these cookies [here]. To keep your Dark Chocolate Orange Shortbread Cookies fresh, follow these tips: - Cool Completely: Let the cookies cool fully on a wire rack before storing. - Use Airtight Containers: Place cookies in a container that seals tightly to lock in moisture. - Layer with Parchment Paper: If stacking, use parchment paper between layers to prevent sticking. - Keep in a Cool, Dry Place: Store cookies away from heat and humidity to maintain their crispness. For best taste, enjoy your cookies within a week. Freezing cookies is a great way to save some for later. Here’s how to do it correctly: - Wrap Each Cookie: Wrap each cookie tightly in plastic wrap to keep air out. - Use Freezer Bags: Place the wrapped cookies in a freezer-safe bag. Squeeze out as much air as possible before sealing. - Label and Date: Write the date on the bag. This helps you remember when you froze them. To enjoy, thaw cookies at room temperature. Alternatively, you can warm them slightly in the oven. This makes them taste fresh again! Can I use milk chocolate instead of dark chocolate? Yes, you can use milk chocolate. It will taste sweeter and less rich. I prefer dark chocolate for its bold flavor. Dark chocolate pairs well with orange zest and juice. How long do these cookies last? These cookies can last about one week. Store them in an airtight container. They stay fresh and tasty this way. Why is my dough too crumbly? If your dough is crumbly, it may need more moisture. Add a teaspoon of orange juice. Mix it well until the dough holds together. What can I do if my cookies spread too much? Chill the dough longer before baking. This helps the cookies hold their shape. You can also try adding a bit more flour to the mix. Are dark chocolate orange shortbread cookies suitable for gifting? Absolutely! These cookies make great gifts. Package them in a nice tin. They look and taste impressive. What beverages pair well with these cookies? I recommend serving these cookies with tea or coffee. Their rich flavor matches well with both. You could also enjoy them with a glass of milk. For the complete recipe, check out the Full Recipe section. We explored the key ingredients for delicious dark chocolate orange shortbread cookies, like butter, sugar, and cocoa. I shared steps for mixing and baking them to perfection. Plus, I provided handy tips for flavor, presentation, and storage. Keep these ideas in mind as you bake. Experiment with flavors to make the recipe your own. These cookies can delight friends and family, so enjoy every bite! Happy baking and savoring!
Delicious Dark Chocolate Orange Shortbread Cookies
Craving a delightful treat that perfectly blends rich dark chocolate with zesty orange? Look no further! These Dark Chocolate Orange Shortbread Cookies are simple to
- 1 box of yellow cake mix - 1 can (15 oz) of pumpkin puree - 4 large eggs - 1/2 cup vegetable oil - 1 teaspoon ground cinnamon - 1/2 teaspoon ground nutmeg - 1 cup brown sugar, firmly packed - 1 can (12 oz) evaporated milk - 1 cup whipped topping - 1/2 cup cream cheese, softened - 1/4 cup powdered sugar - 1/2 cup caramel sauce (for drizzling) - Chopped pecans (for garnish, optional) When I make this cake, I start with simple ingredients. The yellow cake mix gives the cake a light and fluffy base. Pumpkin puree adds moisture and flavor, making it perfect for fall. I use four large eggs and vegetable oil for richness. Next, I add spices. Ground cinnamon and nutmeg bring warmth and depth. The brown sugar sweetens and adds a lovely caramel note. For the soaking and topping, I use evaporated milk mixed with brown sugar. This mixture seeps into the cake, making it super moist. I top it with whipped topping, cream cheese, and powdered sugar for a creamy finish. Finally, I drizzle caramel sauce on top. Chopped pecans add a nice crunch. This cake is truly a crowd-pleaser. You can find the full recipe for all the delightful details! - Preheat the Oven: Start by preheating your oven to 350°F (175°C). Generously grease and flour a 9x13-inch baking dish to prevent sticking. - Mix the Base Ingredients: In a large bowl, combine one box of yellow cake mix, one can of pumpkin puree, one teaspoon of ground cinnamon, half a teaspoon of ground nutmeg, four large eggs, and half a cup of vegetable oil. Use an electric mixer on medium speed. Mix until the batter is smooth and well combined. - Bake the Cake: Pour the batter into the greased baking dish. Spread it evenly with a spatula. Bake in the preheated oven for about 30 to 35 minutes. Check with a toothpick; it should come out clean when done. - Whisking the Evaporated Milk and Brown Sugar: While the cake bakes, take a separate bowl. Whisk together one can of evaporated milk and one cup of packed brown sugar. Mix until the sugar is fully dissolved and the mixture is smooth. - Poking the Cake Holes: Once the cake is baked, remove it from the oven. Let it cool for about 10 minutes. While still warm, use a fork or skewer to poke holes all over the cake's surface. - Soak the Cake with Milk Mixture: Slowly pour the evaporated milk mixture over the warm cake. Make sure it seeps into the holes, allowing the cake to absorb the liquid. - Prepare the Cream Cheese Frosting: In a mixing bowl, combine one cup of whipped topping, half a cup of softened cream cheese, and a quarter cup of powdered sugar. Beat on medium speed until smooth and creamy. - Frost and Garnish the Cake: After the cake has cooled completely, spread the cream cheese frosting evenly over the top. Drizzle half a cup of caramel sauce on top, letting it flow down the sides. If you like, sprinkle chopped pecans for added crunch and flavor. For the full recipe, check out the detailed steps above. Enjoy making this delicious dessert! - Ensuring Even Baking: For even baking, make sure your oven is preheated. Use an oven thermometer to check the temperature accuracy. Rotate the cake halfway through baking. This helps avoid hot spots and ensures a uniform bake. - The Importance of Using Room Temperature Ingredients: Room temperature ingredients mix better and create a smoother batter. Take your eggs and cream cheese out of the fridge at least 30 minutes before you start. This small step makes a big difference in the final texture. - Achieving a Smooth Frosting Finish: To get a smooth frosting, use a spatula or a knife. Start from the center and spread outwards. Keep your frosting at room temperature for easier spreading. If it’s too thick, add a little milk to loosen it. - Options for Decorating Beyond Caramel: While caramel sauce is classic, try using chocolate ganache or a fruit glaze. You can also top the cake with whipped cream, fresh fruits, or even a sprinkle of cinnamon for extra flair. - Adding More Spice or Flavor Variations: To elevate the flavor, add extra spices like ginger or cloves. You could also mix in chocolate chips or nuts for added texture. Experimenting with flavors can make this cake even more special. - Using Different Types of Cake Mix: Instead of yellow cake mix, try using spice cake mix or chocolate cake mix. Each variation gives a different vibe to the cake. This lets you tailor the cake to your taste or the season. For the full recipe, check out the detailed instructions and ingredient list. {{image_4}} You can switch up the cake mix to make it new. A spice cake mix adds warm, cozy flavors. It will give your cake a nice autumn feel. A chocolate cake mix adds richness and depth. Both options taste amazing with the pumpkin. Want a guilt-free treat? Use sugar substitutes like stevia or monk fruit. They work well with the cake. You can also try non-dairy whipped toppings. They are tasty and keep it lighter. These swaps make the dessert more friendly for diets. Add fall fruits to make the cake even better. Diced apples or cranberries give a burst of flavor. You can also mix in nuts or seeds. Walnuts or pumpkin seeds will add crunch and nutrition. These simple changes make every slice a fun surprise! To keep your cake fresh, start with refrigeration. Place any leftover cake in an airtight container. If you don't have one, cover the cake tightly with plastic wrap. This keeps it moist and prevents it from absorbing other smells. For long-term storage, you can freeze the cake. Cut it into slices or keep it whole. Wrap it well in plastic wrap and then in aluminum foil. This helps prevent freezer burn. Label the wrap with the date. You can store it for about three months in the freezer. When stored properly in the fridge, your cake lasts about 4 to 5 days. After that, the taste and texture may change. Look for signs of spoilage, such as a sour smell or mold. If you see any of these signs, it’s best to throw the cake away. Trust your senses to keep things safe. To reheat your cake and keep it fresh, the best method is the microwave. Place a slice on a microwave-safe plate. Heat it for about 15 to 20 seconds. Check if it's warm enough. You don’t want it too hot, just warm. After freezing, let it thaw in the fridge overnight. Once thawed, you can reheat it the same way. Serve the cake with a drizzle of caramel sauce or a dollop of whipped topping for extra delight. The name may sound funny, but it fits! This cake is rich and creamy. It has a soft texture that melts in your mouth. The layers of flavors mix so well, you will crave more. Each bite gives you warmth from the pumpkin and spices. The cream cheese frosting and caramel add a sweet finish. It truly is a dessert delight that wins hearts. Yes, homemade pumpkin puree is great! It gives a fresh taste that canned pumpkin may lack. Making it at home allows you to control the flavor. Plus, you can pick the best pumpkins in season. Just roast, blend, and strain for a smooth puree. This extra step enhances your cake's flavor and makes it special. Yes! You can adapt this cake for special diets. For a gluten-free version, use gluten-free cake mix. If you want a vegan cake, swap eggs with applesauce or flaxseed. Also, use plant-based whipped topping and cream cheese. These changes make the cake work for many diets while keeping it tasty. Adjusting the serving size is easy! To make more cake, double the ingredients. Use a larger baking dish and check the baking time. For fewer servings, cut the ingredients in half. You can still use the same pan but keep an eye on the time. Always test with a toothpick to ensure it’s done. You now have a clear path to make Pumpkin Better Than Sex Cake. This recipe is simple yet packed with flavor. The mix of pumpkin, warm spices, and sweet toppings creates a delightful treat. Remember, you can adapt the cake to suit your taste or needs. Whether you choose to add fruits or use a different cake mix, the possibilities are endless. Enjoy making this cake and impress your family and friends with your baking skills. Your kitchen will be filled with happiness and delicious smells!
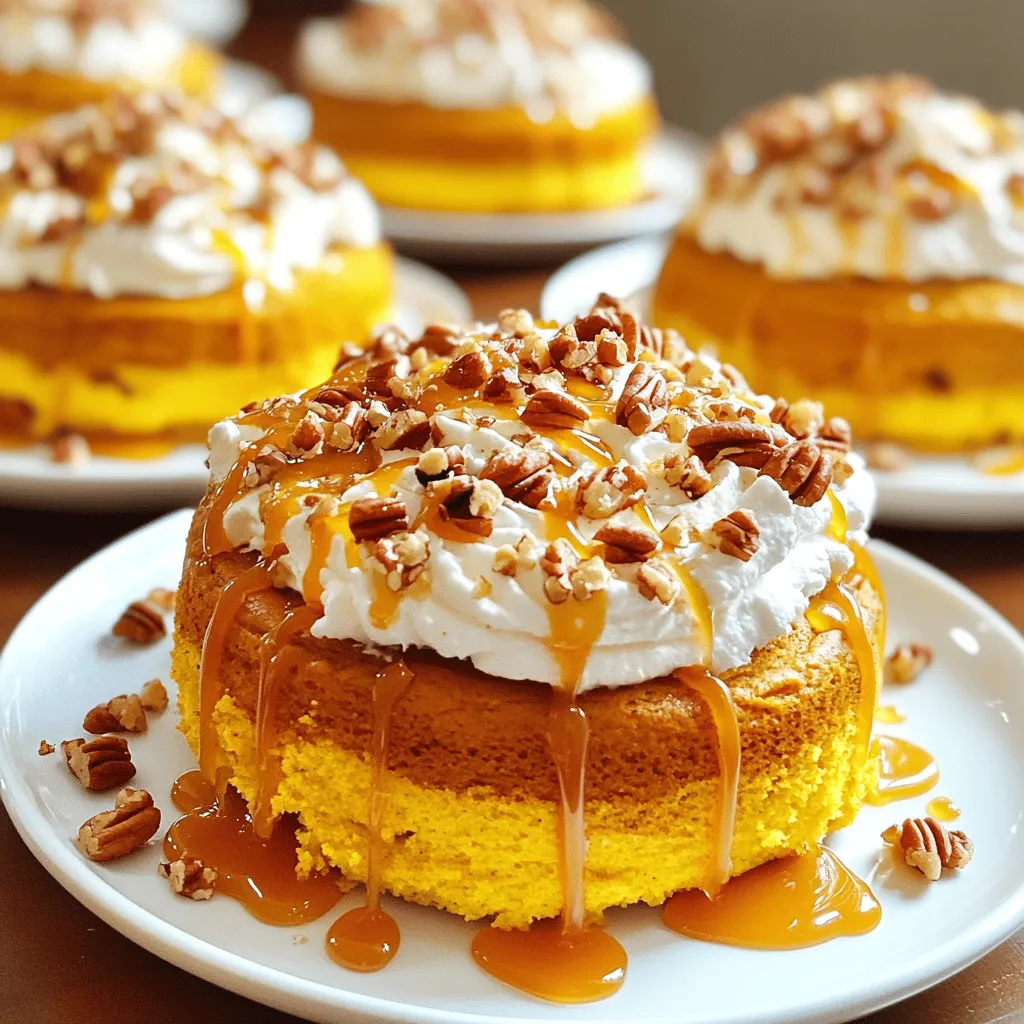
Pumpkin Better Than Sex Cake Irresistible Dessert Delight
Ready to elevate your dessert game? Meet the Pumpkin Better Than Sex Cake, a treat so rich and delicious, it may just outshine every cake
- 2 cups mashed sweet potatoes - 1/4 cup packed brown sugar - 1/4 cup granulated sugar - 1/2 cup vegetable oil or melted coconut oil - 2 large eggs - 1 teaspoon pure vanilla extract - 2 cups all-purpose flour - 1 teaspoon baking soda - 1 teaspoon baking powder - 1/2 teaspoon fine salt - 2 teaspoons ground cinnamon - 1/4 teaspoon freshly grated nutmeg - 1/2 cup chopped walnuts or pecans (optional) Gathering these ingredients is the first step to making your sweet potato cinnamon bread. You can use fresh or canned sweet potatoes, but I love the taste of freshly mashed ones. They add a warm, earthy flavor to the bread. The mix of sugars gives it a nice sweetness, while the oil keeps it moist. The spices are key to this recipe. Ground cinnamon brings warmth, and nutmeg adds a hint of depth. If you like crunch, toss in some walnuts or pecans; they add great texture. - Calories per slice: About 180 calories. - Macronutrient breakdown: - Carbohydrates: 24g - Fats: 8g - Proteins: 3g Sweet potatoes are full of good stuff. They are high in vitamins A and C. They also have fiber, which is great for digestion. This bread not only tastes great but also helps you feel good! You can enjoy it for breakfast or a snack. For the full recipe, check out the detailed steps to make your sweet potato cinnamon bread. - Preheat oven to 350°F (175°C). - Grease or line a 9x5-inch loaf pan. Start by getting your oven hot. This helps the bread rise well. Greasing the pan keeps the bread from sticking. Parchment paper is a great option if you want easy removal. - Combine sweet potatoes, sugars, oil, eggs, and vanilla extract. In a large bowl, mix mashed sweet potatoes with sugars. Add in the oil, eggs, and vanilla. Use a whisk or mixer to blend everything. You want a smooth and creamy mixture. The sweet potatoes add moisture and flavor. - Whisk flour, baking soda, baking powder, salt, cinnamon, and nutmeg. In another bowl, whisk together the flour and leavening agents. Add salt, cinnamon, and nutmeg. This mix gives your bread a warm and spicy flavor. It’s key for that homey taste. - Fold the dry mixture into the wet mixture until just combined. Now, gently add the dry ingredients to the wet mix. Use a spatula to fold them together. Be careful not to overmix. This keeps your bread soft and fluffy. If you like, fold in nuts for a nice crunch. - Pour batter into the loaf pan. - Bake for 50-60 minutes. Pour your batter into the prepared pan. Spread it evenly with a spatula. Place it in the oven and bake for 50 to 60 minutes. Check for doneness with a toothpick; it should come out clean. - Cool in the pan for 10 minutes. - Transfer to wire rack to cool completely. Once baked, let the bread cool in the pan for 10 minutes. This helps it set. Then, move it to a wire rack to cool fully. This way, it stays moist and tasty. You can find the full recipe for more details. - Avoid overmixing for a light texture: This helps keep your bread fluffy. Mix just until combined. - Use room temperature eggs: This allows the batter to mix more evenly, giving better rise. - Mixing bowls: Use two sizes for wet and dry ingredients. - Loaf pan: A 9x5-inch pan works best for this recipe. - Whisk: This tool helps mix the wet ingredients smoothly. - Spatula: Use this to fold dry ingredients into the wet mix gently. - Top with butter or honey: This adds a rich flavor that complements the bread. - Pair with coffee or tea: The warmth of drinks enhances the bread's sweetness. For the full recipe, check out the Sweet Potato Cinnamon Bread Delight. {{image_4}} You can make sweet potato cinnamon bread even more fun. Try adding chocolate chips or cranberries. Both will bring a touch of sweetness and a bit of chew. You can also experiment with spices like ginger or cardamom. These spices will add a warm, cozy flavor. If you need gluten-free bread, use almond or coconut flour instead of regular flour. This will make the bread light and fluffy. For a vegan version, swap regular eggs for flax eggs and use plant-based oil. This will keep your bread moist and tasty. Want to make your bread more exciting? Incorporate seeds like chia or sunflower seeds. These add a nice crunch and boost nutrition. You can also mix in raisins or other dried fruit. They will add sweetness and chewiness, making each bite special. For more details, check out the Full Recipe for sweet potato cinnamon bread. To keep your sweet potato cinnamon bread fresh, store it in an airtight container at room temperature. This method keeps the bread soft for a few days. If you want it to last longer, place it in the fridge. The cold air will help preserve it but may change the texture slightly. If you want to save some for later, wrap the bread tightly in plastic wrap. After that, wrap it again in aluminum foil. This double layer helps to keep out air and moisture. When it's time to enjoy, thaw the bread in the fridge overnight for the best texture. You can also leave it out at room temperature for a few hours. For a taste like it just came out of the oven, reheat slices in the oven. Set it to 350°F (175°C) and warm for about 10 minutes. If you're in a hurry, the microwave works too! Heat individual slices for about 15 to 20 seconds. Just be careful not to overheat, as it can get tough. You can tell the bread is done when a toothpick comes out clean. It should not have wet batter on it. If you see a few moist crumbs, that is fine. The top should look golden brown. You can also gently press on the top. If it springs back, it is ready. Yes, you can substitute many ingredients. For instance, you can use brown sugar instead of granulated sugar. You can also swap vegetable oil for melted coconut oil. If you want, you can replace all-purpose flour with a gluten-free flour mix. Just check each substitute to ensure it works well. The best way to mash sweet potatoes is to cook them first. You can boil, steam, or bake them until soft. After cooking, let them cool slightly. Then, use a potato masher or fork to mash them until smooth. For an even creamier texture, use a food processor. Sweet potato cinnamon bread can last for about 3 to 5 days at room temperature. Store it in an airtight container to keep it fresh. If you want it to last longer, you can refrigerate it for up to a week. For even longer storage, consider freezing it. Yes, you can make mini loaves! Just divide the batter into smaller loaf pans. Adjust the baking time to about 25-35 minutes. Check for doneness with a toothpick. The smaller loaves will bake faster than a large loaf. You can use leftover sweet potato bread in many ways. Try making French toast for a tasty breakfast. You can also toast slices and spread them with cream cheese or nut butter. Another idea is to make bread pudding for a sweet treat. This blog post covered all you need to bake sweet potato cinnamon bread. We discussed ingredients, step-by-step instructions, and various tips for perfect results. This bread is delicious and healthy. You can even make it gluten-free or vegan. Remember to store any leftovers properly to enjoy later. I hope you try this recipe. Happy baking!
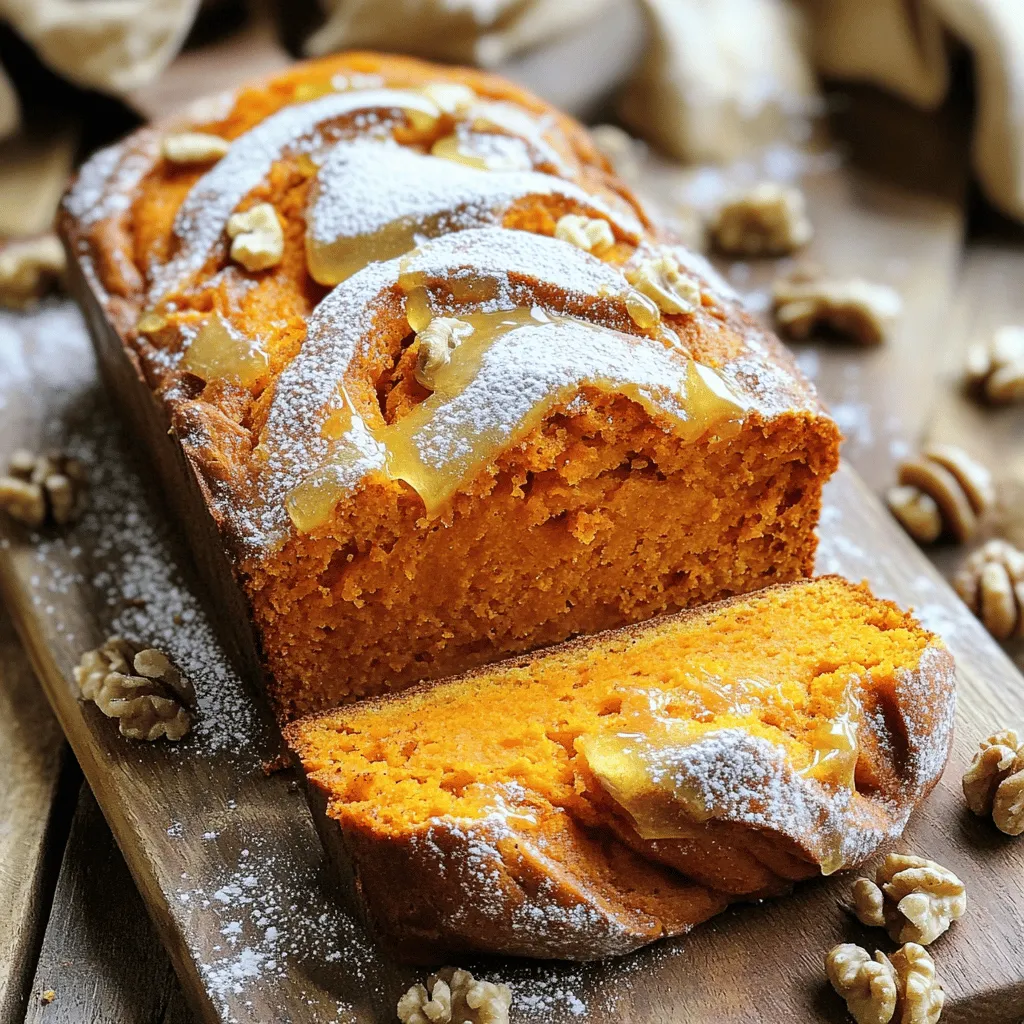
Sweet Potato Cinnamon Bread Flavorful and Easy Recipe
Are you ready to delight your taste buds with a warm slice of sweet potato cinnamon bread? In this post, I’ll share a quick and
- 2 ripe bananas - 1 cup Greek yogurt - 1/4 cup salted caramel sauce - 1 tablespoon honey - 1/4 cup granola - 2 tablespoons chopped nuts - A pinch of sea salt - Flavored Greek yogurt (plain vs. vanilla) - Other toppings (coconut, chocolate chips) This bowl packs a punch. Each serving has around 350 calories. Here's a quick breakdown: - Protein: 15 grams from Greek yogurt and nuts. - Carbs: 45 grams mainly from bananas and granola. - Fat: 10 grams from nuts and caramel. This dish is rich in nutrients and has a good balance of energy. The bananas provide potassium, while the yogurt gives calcium. The nuts add healthy fats. Enjoy this treat without guilt! For the full recipe, check out the details above. 1. Start with a bowl. Place 1 cup of Greek yogurt at the bottom. For a sweeter taste, mix in 1 tablespoon of honey. This adds a nice flavor. 2. Next, take 2 ripe bananas. Slice them into rounds. Spread the banana slices over the yogurt evenly. This way, every bite has banana goodness. 3. Now, it’s time for the star of the show. Drizzle 1/4 cup of salted caramel sauce over the banana slices. Let some caramel drip into the yogurt. You want that sweet taste in every layer. 1. Add some crunch! Sprinkle 1/4 cup of granola over the bananas and yogurt. This gives a nice texture contrast and a delightful crunch. 2. Boost nutrition by adding 2 tablespoons of chopped nuts. Walnuts or pecans work great. They add healthy fats and a bit more crunch. 3. To elevate the flavors, finish with a pinch of sea salt. This small touch enhances the sweet and salty mix. 1. For a pretty look, use clear glass bowls. This shows off the layers. Just before serving, top with a banana slice and more caramel. 2. This bowl is great for breakfast, a snack, or dessert. It suits any time you want something tasty and satisfying. For the complete recipe, see the [Full Recipe]. How to choose ripe bananas When picking bananas, look for ones with a few brown spots. These spots show the bananas are sweet. Avoid bananas that are too green or too brown. Green bananas may taste starchy, while black ones may be overripe. For the best flavor, choose firm bananas that are yellow with some brown spots. Selecting quality Greek yogurt Choose a Greek yogurt that is thick and creamy. Look at the label for live cultures, which are good for your gut. Check the sugar content; plain yogurt is often best. You can pick plain or vanilla based on your taste. The plain yogurt has less sugar, while vanilla adds a hint of sweetness. Store-bought vs. homemade recipe You can use store-bought caramel sauce for ease. It saves time and tastes good. Look for brands that use real sugar, not high-fructose corn syrup. If you want to make your own, combine sugar and water in a pan. Cook until it melts and turns golden brown, then stir in cream and a pinch of salt. This homemade option gives a fresh flavor, but store-bought works great too. Tips for extra crunch Add granola for a satisfying crunch. Choose a mix with nuts or seeds for added texture. You can also use toasted coconut or crushed cereal for more variety. If you want even more crunch, sprinkle chopped nuts, like walnuts or pecans, on top. Suggestions for balancing sweetness To balance sweetness, add a pinch of sea salt on top. This salt makes the sweet flavors pop. If you find it too sweet, add fresh fruit or a sprinkle of cinnamon. These additions can enhance the taste and make the bowl more exciting. For the full recipe, make sure to check out the Salted Caramel Banana Yogurt Bowl recipe! {{image_4}} You can make this bowl fit many diets. If you want a vegan option, use plant-based yogurt. Almond or coconut yogurt works great. These choices keep the dish creamy without dairy. Also, look for gluten-free granola if you need it. Many brands now offer tasty options that fit the bill. Check the label to be sure it meets your needs. Want to spice things up? Try adding a sprinkle of cinnamon. It adds warmth and depth to the bowl. You could also mix in a splash of vanilla extract. This can boost the flavor in a lovely way. Seasonal fruits can take this dish to the next level. Fresh berries, peaches, or apples can all add a burst of taste. They also make the bowl look colorful and fun. If you have guests, you can easily adjust the recipe. Just double or triple the amounts of yogurt, bananas, and caramel. This way, everyone gets their own bowl of joy. For a fancy touch, make parfait-style servings. Layer the yogurt, bananas, and caramel in clear cups. This way, each layer shows off the beautiful colors. It makes for a lovely dessert or breakfast treat. For the full recipe, check out the main section. To store leftovers, place your bowl in an airtight container. This helps keep everything fresh. You can store it in the fridge for up to two days. The bananas may brown a bit, but they will still taste good. The Greek yogurt and granola will stay fresh too. For best results, keep granola separate until you are ready to eat. This keeps it crunchy. You don’t need to reheat this bowl. Enjoy it cold to keep the flavors bright. If you want a warm treat, try warming the yogurt slightly. Stir it gently and enjoy a warm yogurt experience. You can freeze the bananas if you have extras. Just slice them and place them in a freezer bag. Remove as much air as you can. Frozen bananas work great for smoothies later. However, do not freeze the yogurt or caramel sauce. They will change texture once thawed. Use fresh yogurt and sauce for the best taste in your bowl. Yes, you can prep the Salted Caramel Banana Yogurt Bowl in advance. To do this, layer the yogurt and bananas in a bowl. Keep the granola and caramel sauce separate until you are ready to eat. This way, the granola stays crunchy and the bananas don’t brown. You can store the yogurt and bananas in the fridge for up to a day. When you're ready, add the caramel and granola just before serving. Greek yogurt is the best choice for this recipe. You can use plain or vanilla. Plain yogurt has a tangy taste, while vanilla adds sweetness. Both options work well. If you prefer lighter yogurt, you can also try low-fat Greek yogurt. Just make sure to choose one that you enjoy. To make this bowl healthier, consider these swaps: - Use unsweetened Greek yogurt to cut down on sugar. - Skip the honey if you want to reduce calories. - Choose a low-sugar granola or make your own to control the sweetness. - Add more fruits like berries or nuts for extra nutrients without added sugar. For the full recipe, check out the earlier section. This blog post shared how to make a tasty Salted Caramel Banana Yogurt Bowl. You learned about the main ingredients and optional choices to suit your taste. We discussed layering tips, serving ideas, and how to store leftovers. You now know how to adjust the recipe for various diets too. Enjoy creating your yogurt bowl. Experiment with flavors. Make it your own! A simple recipe can impress friends or treat yourself. Happy cooking!
Salted Caramel Banana Yogurt Bowl Simple and Luscious
Indulging in a Salted Caramel Banana Yogurt Bowl is a treat you won’t want to miss. This recipe combines the creamy texture of Greek yogurt
To create delicious brown butter pumpkin cinnamon rolls, you will need the following ingredients: - 1/2 cup unsalted butter (plus 2 tablespoons for browning) - 1/2 cup whole milk, warmed - 1/4 cup white sugar - 1/4 cup brown sugar, packed - 1/2 teaspoon salt - 2 1/4 teaspoons active dry yeast (1 packet) - 1 large egg, room temperature - 1 cup pumpkin puree (fresh or canned) - 3 1/2 cups all-purpose flour (plus more for dusting) - 1 tablespoon ground cinnamon - 1/2 teaspoon ground nutmeg - 1/4 teaspoon ground ginger - 1/4 teaspoon ground cloves - 1 cup powdered sugar (for frosting) - 2-3 tablespoons milk (for frosting) If you need to make changes, here are some options: - Use coconut oil instead of butter for a dairy-free version. - Almond milk can replace whole milk for a lighter touch. - Maple syrup works great as a substitute for white sugar. - You can use whole wheat flour instead of all-purpose flour for a healthier roll. Gather these tools to make your baking easy: - Mixing bowls for wet and dry ingredients - A whisk for combining ingredients - A rolling pin to roll out the dough - A baking dish to hold your rolls - A sharp knife or dough cutter for slicing the rolls - A warm place for dough rising, like near your oven Having these ingredients and tools ready will make your baking process smooth and enjoyable. You can find the full recipe to guide you through each step. Start by melting 1/2 cup of unsalted butter in a small pot over medium heat. Stir often to prevent burning. Keep cooking until the butter turns golden brown and gives off a nutty smell. This usually takes about five minutes. Once it's ready, take it off the heat and let it cool slightly. In a separate bowl, mix 1/2 cup of warm milk, 1/4 cup of white sugar, and 2 1/4 teaspoons of active dry yeast. Let this sit for about 5 to 10 minutes. You will know it's ready when it becomes foamy on top. This step wakes up the yeast and gets it ready for the dough. Now, add the brown butter, one large room-temperature egg, 1 cup of pumpkin puree, and 1/2 teaspoon of salt to the yeast mixture. Use a whisk to mix everything until it is smooth. This creates a rich and flavorful base for your rolls. Gradually add in 2 cups of all-purpose flour, 1 tablespoon of ground cinnamon, 1/2 teaspoon of ground nutmeg, 1/4 teaspoon of ground ginger, and 1/4 teaspoon of ground cloves. Mix well after each addition. Continue adding flour until the dough is soft but not sticky. Flour your work surface lightly and turn the dough out onto it. Knead the dough for about 5 to 7 minutes. You want the dough to feel smooth and elastic. If it sticks to your hands, sprinkle a bit more flour as you knead. Place the dough in a greased bowl. Cover it with a damp cloth or plastic wrap. Let it rise in a warm place for about 1 hour. The dough should double in size during this time. In a small bowl, combine 1/4 cup of packed brown sugar, 1 tablespoon of ground cinnamon, and 2 tablespoons of melted non-browned butter. Mix these well to create a sweet filling for your rolls. After the first rise, punch down the dough to release air. Roll it out on a floured surface into a rectangle about 14 by 18 inches. Aim for an even thickness throughout. Spread the filling evenly over the rolled-out dough. Starting at one edge, carefully roll the dough into a tight log. Cut this log into 12 equal pieces. Place the rolls in a greased baking dish with the cut sides up. Cover the rolls loosely with a cloth and let them rise for another 30 minutes. They should puff up and look fluffy. Preheat your oven to 350°F (175°C). Bake the rolls for 25 to 30 minutes. They should turn lightly golden brown on top when they are ready. While the rolls bake, mix 1 cup of powdered sugar with 2 to 3 tablespoons of milk in a bowl. Whisk until you get a smooth, drizzling consistency. Once the rolls are out of the oven, let them cool slightly. Drizzle the frosting over the warm rolls. Serve them warm for the best flavor experience. Enjoy your delicious Brown Butter Pumpkin Cinnamon Rolls! You can find the Full Recipe for detailed measurements and steps. One common mistake is not browning the butter enough. You want it a deep golden color. If it stays too light, you miss the nutty flavor. Another mistake is not letting the dough rise fully. If it doesn’t double in size, your rolls will be dense. Also, avoid over-kneading the dough. This can make it tough. For perfect dough, use the right amount of flour. Start with 3 1/2 cups, but add more as needed. The dough should be soft but not sticky. A soft touch helps keep it fluffy. If it sticks to your hands, add small amounts of flour. Knead until smooth, about 5-7 minutes. Baking at 350°F (175°C) is key. Set your timer for 25-30 minutes. Check for a light golden color on top. If you poke a roll, it should spring back. Let the rolls cool for a few minutes. This helps the frosting stick better. You can find the full recipe above for more details. {{image_4}} You can change the flavor by using different spices. Try adding cardamom for a floral note. Allspice gives a warm, rich taste. You can also use pumpkin pie spice for added warmth. Just mix it into the dough or filling. Each spice brings its own flavor twist. Experiment to find your favorite blend! Want to make these rolls vegan? It’s easy! Substitute the egg with flaxseed meal. Mix one tablespoon of flaxseed meal with three tablespoons of water. Let it sit for five minutes to thicken. Use plant-based butter instead of regular butter. You can also use almond or oat milk. These swaps keep the rolls soft and tasty while being friendly to a vegan diet. To make these rolls gluten-free, switch the flour. Use a gluten-free all-purpose flour blend. Make sure it contains xanthan gum for the right texture. You might need to adjust the liquid a bit. Start with less, then add more as needed. This keeps the dough from becoming too sticky. Enjoy the same flavors without gluten! For full details on making these delicious rolls, check out the Full Recipe. After you enjoy your Brown Butter Pumpkin Cinnamon Rolls, store leftovers properly. Place them in an airtight container. Keep the container at room temperature for up to three days. If you want to keep them longer, use the freezing method. To freeze your rolls, first let them cool completely. Wrap each roll tightly in plastic wrap. Then, place the wrapped rolls in a freezer-safe bag. They can stay frozen for up to three months. When you're ready to eat, just thaw them overnight in the fridge. Reheat the rolls for the best taste and texture. You can use the oven or microwave. For the oven, preheat to 350°F (175°C). Place your rolls on a baking sheet and warm for about 10 minutes. If using the microwave, heat each roll for about 15-20 seconds. Enjoy your warm, gooey treat! Yes, you can use store-bought pumpkin puree. It saves time and works well. Just make sure it is pure pumpkin, not a pie filling. Homemade puree can taste fresher, but the store-bought version still gives great flavor. You will know the rolls are done when they turn light golden brown. If you tap the top, it should sound hollow. The rolls should also feel firm and spring back lightly when pressed. Yes, you can make the dough ahead of time. After kneading, place it in the fridge for up to 24 hours. Just let it come to room temperature before the first rise. This can add more flavor. If you don’t want to use brown butter, melted regular butter works. You can also use coconut oil or any neutral oil. These options will change the flavor but still give you soft rolls. To make rolls without cinnamon, simply leave it out of the filling. You can add other spices like nutmeg or cardamom for flavor. You can also use vanilla or orange zest for a different twist. For the full recipe, check out Brown Butter Pumpkin Cinnamon Rolls. This blog post covered how to make delicious rolls with easy steps and helpful tips. You learned about key ingredients, tools, and how to store leftovers. I shared ways to avoid common mistakes and adapt the recipe for different diets. As you bake, remember that practice makes perfect. Enjoy the process and create your own tasty variations! These rolls can be a special treat for any occasion.
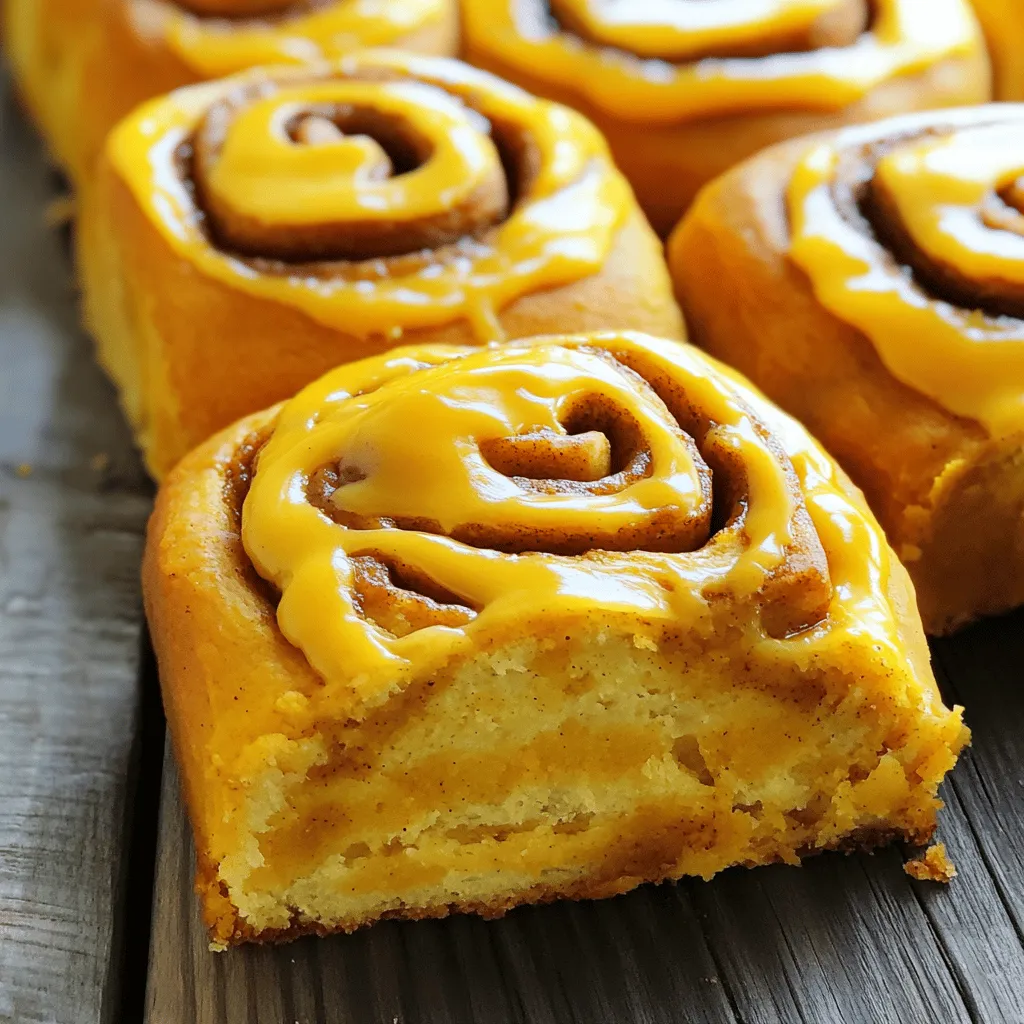
Brown Butter Pumpkin Cinnamon Rolls Delightful Treat
If you’re craving a warm, cozy treat, these Brown Butter Pumpkin Cinnamon Rolls are for you! I’ll guide you step-by-step through the easy process, starting
- 2 large apples (Granny Smith or Honeycrisp), peeled and diced - 1 teaspoon fresh lemon juice - 1 teaspoon ground cinnamon - ½ cup packed brown sugar - 1 tablespoon cornstarch - 1 package of puff pastry (thawed) - 1 egg (beaten, for egg wash) - 2 tablespoons granulated sugar (for sprinkling) - Caramel sauce (optional, for drizzling) Gathering the right ingredients is key for great apple pie bites. You can choose Granny Smith apples for a tart flavor, or Honeycrisp apples for sweetness. The lemon juice adds brightness and keeps the apples from browning. Ground cinnamon is a must for that classic apple pie taste. The brown sugar brings rich sweetness, while cornstarch thickens the filling. Puff pastry creates a flaky, buttery shell. Finally, the egg wash helps the bites turn golden brown. You can drizzle caramel sauce on top for a sweet finish. All these elements work together to make a delightful treat. Grab your ingredients and get ready to create this tasty snack! First, heat your oven to 400°F (200°C). This step is key for crispiness. Line a baking sheet with parchment paper. This will help your bites not stick. In a bowl, mix diced apples with lemon juice, cinnamon, brown sugar, and cornstarch. Toss gently until all the apples are coated. Let the mixture rest for about 10 minutes. This allows the apples to release their natural juices, making them extra tasty. On a floured surface, roll out your thawed puff pastry. Smooth out any creases. Cut the pastry into squares that are about 3 inches wide. This size works best for holding the filling. Place a tablespoon of the apple mixture in the middle of each pastry square. Don’t overfill them! Fold each corner toward the center, creating a sealed pocket. Pinch the edges to make sure the filling stays inside. Brush the tops of the sealed bites with the beaten egg. This gives them a nice golden color. Sprinkle some granulated sugar on top for added sweetness. Place them in the oven and bake for 15-20 minutes. Look for a puffed and golden appearance. Let the bites cool on a wire rack for a few minutes. If you like, drizzle some caramel sauce on top before serving. These bites look great on a plate, especially with a bowl of caramel for dipping. Enjoy your delicious snacks! I recommend using Granny Smith or Honeycrisp apples. These apples are tart and crispy. They hold their shape well when baked. The tartness balances the sweetness of the brown sugar. For a sweeter bite, try Fuji or Gala apples. Mixing different apples can add a nice depth of flavor. To get that lovely golden color, brush the bites with an egg wash. Use a beaten egg and a pastry brush. This adds shine and color. Make sure to sprinkle granulated sugar on top too. It caramelizes while baking, giving a sweet crunch. You can add more spices for flavor. Consider nutmeg or allspice to deepen the taste. For a twist, try adding raisins or chopped nuts. A splash of vanilla extract can also boost the flavor. If you love caramel, drizzle some on top before serving. This makes each bite even more special. For the full recipe, check online for detailed instructions. {{image_4}} You can mix things up with other fruits. Try pears, peaches, or berries. Each fruit adds a fresh taste. For a twist, use a mix of fruits. Combine apples with blueberries or cranberries for a unique flavor. Just remember to adjust the sugar based on the fruit's sweetness. While puff pastry is great, you can try other options. Consider using crescent rolls for a fun shape. They give a warm, flaky bite. You can also use phyllo dough for a lighter, crispier texture. Just be sure to layer it well to avoid tearing. If you want a healthier version, swap regular sugar for honey or maple syrup. You can also use whole wheat pastry for added fiber. To reduce fat, try using a mixture of applesauce and yogurt instead of butter in the filling. These changes make the dessert lighter but still tasty. Feel free to explore these variations and make the recipe your own! To keep your apple pie bites fresh, place them in an airtight container. This helps prevent them from drying out. You can store them at room temperature for up to two days. For longer storage, put them in the fridge. They can last for about four days when chilled. To enjoy your apple pie bites again, preheat your oven to 350°F (175°C). Place the bites on a baking sheet. Heat them for about 10 minutes or until warm. This method keeps the pastry crisp and delicious. You can also use a microwave, but the bites may become soft. If you want to save some for later, freezing is a great option. First, let the bites cool completely. Then, place them in a single layer on a baking sheet. Freeze them for about one hour. Once frozen, transfer them to a freezer bag or container. They can stay good for up to three months. When ready to eat, bake them directly from the freezer, adding a few extra minutes to the cooking time. Yes, you can use store-bought apple filling. It saves time and still tastes great. Just make sure to check the flavor and sugar level. You might want to adjust spices like cinnamon or add lemon juice to enhance it. Apple pie bites can last about three days in the fridge. Store them in an airtight container to keep them fresh. If you notice them getting soggy, reheat them in the oven for a crisp finish. You can make apple pie bites ahead of time. Prepare the filling and pastry, then assemble them. Keep the bites in the fridge before baking. Just remember to bake them right before serving for the best taste. Serve apple pie bites warm. They taste best when fresh out of the oven. You can add a drizzle of caramel sauce on top for extra sweetness. A scoop of vanilla ice cream on the side is also a great idea. If you want to follow the full recipe, check online for detailed instructions. This will ensure you get all the tips and tricks for perfect apple pie bites! You now have a complete guide to making delicious apple pie bites. We covered ingredients, step-by-step instructions, and helpful tips. Remember to choose the best apples for great flavor. Explore variations and storage options to enjoy these bites longer. Keep this recipe handy for your next gathering. You will impress friends and family with your tasty treat. Enjoy baking and sharing your apple pie bites!
Apple Pie Bites Tasty and Simple Dessert Snack
Craving a sweet treat that’s easy to make? Let me introduce you to Apple Pie Bites! These little snacks pack all the yummy flavor of
To make these Soft Batch Apple Cider Gingersnap Cookies, you'll need: - 2 cups all-purpose flour - 1 teaspoon baking soda - 1 teaspoon ground cinnamon - 1 teaspoon ground ginger - 1/2 teaspoon ground nutmeg - 1/2 teaspoon salt - 1/2 cup unsalted butter, softened - 1/2 cup granulated sugar - 1/2 cup brown sugar, packed - 1 large egg - 1/4 cup non-alcoholic apple cider - 1 teaspoon vanilla extract - 1/4 cup molasses - 1/2 cup coarse sugar (for rolling) You can swap some ingredients if needed. Here are a few options: - Butter: Use coconut oil for a dairy-free version. - Granulated Sugar: Try coconut sugar for a lower glycemic index. - Apple Cider: If you prefer, use apple juice instead. - Molasses: Maple syrup can be a nice alternative for flavor. Using high-quality ingredients makes a big difference. Fresh spices add more flavor. Fresh apple cider gives a nice, crisp taste. Good butter or oil helps the cookies stay soft. Always choose ingredients with care. Quality ingredients lead to tasty cookies you will love. Start by setting your oven to 350°F (175°C). This temperature works well for soft cookies. Line two baking sheets with parchment paper. This step keeps cookies from sticking and makes cleanup easier. In a medium bowl, combine the flour, baking soda, cinnamon, ginger, nutmeg, and salt. Whisk these together until they blend well. This mix adds flavor and helps cookies rise. Set this bowl aside so the flavors can mingle. In a large bowl, beat the softened butter, granulated sugar, and brown sugar. Mix until the mixture is light and fluffy. This usually takes about two to three minutes. This process adds air to the cookies, giving them a soft texture. Now, add the egg, apple cider, vanilla extract, and molasses to the butter-sugar mix. Stir well until everything is combined. Then, slowly add your dry ingredients to this mix. Stir gently until just combined. Overmixing can make cookies tough, so be careful here. Cover your dough and place it in the fridge for about 30 minutes. Chilling helps the dough firm up, making it easier to handle. It also enhances the flavors, giving your cookies that warm, spiced taste. Once chilled, scoop about a tablespoon of dough and roll it into small balls. Roll each ball in coarse sugar for a sweet crunch. Place the balls on your baking sheets, leaving space in between. Bake for 10 to 12 minutes. The edges should feel firm, but the center should look soft. Allow cookies to cool for five minutes on the sheets. Then, transfer them to a wire rack to cool completely. Enjoy these warm and delicious treats! To get soft cookies, start with room temperature butter. Cream the butter with sugars until fluffy. This adds air and helps them rise. Chilling the dough for 30 minutes is key. It helps the cookies hold their shape and stay soft. Bake them just until the edges firm up. The centers should look slightly underbaked. This will ensure a soft bite. To stop cookies from spreading, you must chill the dough. Always use cold dough when placing it on the baking sheet. Another tip is to make sure you measure your flour correctly. Too little flour can lead to spreading. Use the spoon and level method for accuracy. Make sure your oven is at the right temperature, too. An oven thermometer can help with this. When rolling cookies in sugar, use coarse sugar for a great crunch. Roll each ball so it’s fully coated. This adds a nice sparkle and flavor. If the dough feels sticky, chill it a bit longer. You can also lightly dust your hands with flour to prevent sticking. This ensures even coverage and a beautiful finish. For more fun, try mixing spices into the sugar for added flavor. For the Full Recipe, don't forget to check the complete steps and measurements! {{image_4}} You can change the flavor of your cookies by adding spices. Cloves and allspice can add warmth and depth. Start with a half teaspoon of each. Mix them in with the dry ingredients. This will give your cookies a bold and cozy taste. Feel free to adjust the amounts to fit your taste. If you need gluten-free cookies, you can use gluten-free flour. Look for a blend that works for baking. Replace the all-purpose flour with the same amount of gluten-free flour. It will help keep the texture you want. You may need to add a bit more liquid. This helps the dough hold together. You can switch the sugars for natural sweeteners. Honey or maple syrup can work well. Use about 1/2 cup of either, but reduce the liquid slightly. This helps keep the dough right. Each sweetener will give a different taste. Honey adds a floral note, while maple syrup adds a rich flavor. Enjoy experimenting to find your favorite! For the Full Recipe, check the main article. To keep your Soft Batch Apple Cider Gingersnap Cookies fresh, store them in an airtight container. This prevents air from making them hard. Place a piece of bread in the container too. The bread adds moisture and keeps the cookies soft. You can freeze these cookies for later. First, let them cool completely. Then, arrange them in a single layer on a baking sheet. Freeze them for about an hour. Once frozen, place the cookies in a zip-top bag. Make sure to remove all the air. They will stay fresh for about three months. These cookies last about one week at room temperature. If you keep them in the fridge, they can last longer, up to two weeks. But remember, the longer they sit, the less soft they become. Enjoy them fresh for the best taste! If you want to find the Full Recipe for these delightful cookies, check out the recipe section above. Yes, you can use whole wheat flour. It gives cookies a nutty flavor and a denser texture. Start by replacing half of the all-purpose flour with whole wheat. This keeps cookies soft while adding health benefits. Look for the edges to be firm and the center a bit soft. The cookies will continue to bake on the tray after you take them out. They should not look wet or shiny in the middle. If your dough is sticky, chill it in the fridge for about 30 minutes. This helps the dough firm up and makes it easier to handle. If it's still sticky, add a little more flour, one tablespoon at a time. To reheat gingersnap cookies, place them on a baking sheet and warm them in a 300°F oven for about 5-8 minutes. This keeps them soft and enhances their flavor. You can also use a microwave for 10-15 seconds, but they may get chewier. You can find the Full Recipe for Soft Batch Apple Cider Gingersnap Cookies in the article above. It has all the details you need to make these tasty treats! We covered a lot about making great cookies. We talked about choosing the best ingredients and how to prepare them. Step-by-step instructions helped you understand each part of baking. Tips showed you how to make soft cookies and avoid spreading. We even explored fun variations and storage tips. Baking cookies can be simple and fun. With the right methods, you’ll create tasty treats every time. Enjoy sharing these cookies and make new memories with each batch!
Soft Batch Apple Cider Gingersnap Cookies Tasty Treat
If you love cozy fall flavors, you’ll adore these Soft Batch Apple Cider Gingersnap Cookies. They’re soft, chewy, and bursting with warm spices and sweet
- 1 cup all-purpose flour - 1/2 cup whole wheat flour - 1 teaspoon baking powder - 1/2 teaspoon baking soda - 1 teaspoon ground cinnamon - 1/2 teaspoon ground nutmeg - 1/4 teaspoon ground ginger - 1/4 teaspoon salt - 1/2 cup granulated sugar - 1/4 cup packed brown sugar - 1/2 cup vegetable oil or melted coconut oil - 2 large eggs - 1 cup canned pumpkin puree (ensure it's not pumpkin pie filling) - 1 teaspoon pure vanilla extract - 1/2 cup chopped walnuts or pecans (optional for crunch) - 1/2 cup chocolate chips (optional for sweetness) You can make your muffins even more special! Here are some ideas: - Nuts: Chopped walnuts or pecans add a great crunch. - Chocolate Chips: For a sweet touch, mix in chocolate chips. - Dried Fruits: Raisins or cranberries give a fruity burst. - Spices: Try adding cloves or allspice for more depth. Each muffin has about: - Calories: 180 - Protein: 3g - Fat: 8g - Carbohydrates: 27g - Fiber: 1g - Sugar: 10g These muffins are not only tasty but also packed with flavor. Enjoy making them! For the full recipe, check out my detailed instructions. Start by gathering all your ingredients. You'll need flour, sugar, spices, and pumpkin. I love using both all-purpose and whole wheat flour for added depth. First, preheat your oven to 350°F (175°C). This step is key to getting those muffins just right. While the oven heats, line your muffin tin with paper liners or grease it lightly. In a medium bowl, whisk the dry ingredients. Combine the all-purpose flour, whole wheat flour, baking powder, baking soda, cinnamon, nutmeg, ginger, and salt. Make sure they mix well. Set this bowl aside. In a large bowl, mix the granulated sugar and brown sugar with the oil. Whisk until smooth. This mixture should feel light and fluffy. Next, add the eggs, pumpkin puree, and vanilla extract. Whisk this mixture until creamy and well combined. Gradually fold the dry mix into the wet mix. Use a spatula to combine gently. It's important not to overmix here, as this keeps your muffins soft. If you want, you can add nuts or chocolate chips for more texture and flavor. Now it’s time to bake! Divide your batter evenly among the muffin cups, filling each about two-thirds full. This gives them room to rise. Place the muffin tin in your preheated oven. Bake for 18 to 20 minutes. You’ll want to keep an eye on them. The smell will be amazing! When they’re done, a toothpick inserted into a muffin should come out clean. If it has batter on it, give them a few more minutes. After baking, take the muffin tin out of the oven. Let the muffins cool in the tin for about 5 minutes. This helps them set before you transfer them. Then, move the muffins to a wire rack to cool completely. To check for doneness, look for a golden-brown top and a firm texture. If they bounce back when you touch them, they are ready! These steps will ensure you have perfect pumpkin muffins every time. For detailed ingredient lists and instructions, see the Full Recipe. When making pumpkin muffins, I see a few common mistakes. First, using pumpkin pie filling instead of pure pumpkin puree can change the taste. Always check your can. Second, overmixing the batter can lead to tough muffins. Mix just until combined for a light texture. Lastly, don’t skip preheating your oven. It helps the muffins rise well. To get the best texture, use room-temperature eggs. Cold eggs can make the batter clumpy. Also, weigh your flour if possible. Too much flour makes muffins dry. Use a light hand when folding in the dry mix. Aim for a few lumps; it’s okay! This keeps the muffins soft and fluffy. For a delightful touch, serve your muffins warm. Add a sprinkle of powdered sugar on top. You can also pair them with whipped cream or cream cheese frosting. For a fun twist, try a scoop of vanilla ice cream on the side. It makes a great dessert for any occasion. These tips will help you master pumpkin muffins and impress your friends and family. For more detailed steps, check out the Full Recipe for Pumpkin Spice Delight Muffins. {{image_4}} You can make gluten-free pumpkin muffins easily. Start by using gluten-free flour blends. Look for blends that have xanthan gum for the best results. You can mix one cup of gluten-free flour with a quarter cup of almond flour. This adds a nice texture. Follow the same steps in the full recipe. The muffins will still be moist and full of flavor. To make vegan pumpkin muffins, replace the eggs with flaxseed meal. Use one tablespoon of flaxseed meal mixed with three tablespoons of water for each egg. Let it sit to thicken. For the oil, use unsweetened applesauce instead. This keeps the muffins moist and adds natural sweetness. You can also use plant-based milk instead of regular milk if needed. Want to give your muffins a fun twist? Try adding espresso powder for that pumpkin spice latte taste. Just mix in one teaspoon of espresso powder with the dry ingredients. You can also add a touch of vanilla extract for extra depth. For a sweet surprise, fold in some chocolate chips or white chocolate chunks. These small changes will create an exciting flavor profile. To keep your pumpkin muffins fresh, store them in an airtight container. This helps keep moisture in and prevents drying out. If you have leftover muffins, let them cool fully first. You can place a paper towel in the container to absorb excess moisture. This simple step can extend their freshness. Freezing muffins is easy and great for later use. Wrap each muffin in plastic wrap or foil. Then, place them in a freezer bag. Squeeze out as much air as possible. Label the bag with the date. Your muffins can last up to three months in the freezer. When you want one, just thaw it in the fridge overnight. To enjoy warm muffins again, use your oven or microwave. For the oven, preheat it to 350°F (175°C). Place the muffins on a baking sheet for about 10 minutes. This warms them up nicely and keeps them soft. If using a microwave, heat each muffin for 15-20 seconds. Enjoy them warm for the best taste. You can find the full recipe for these delightful muffins in the article above. To make pumpkin muffins from scratch, follow these steps. First, gather your ingredients. You will need flour, sugar, eggs, and pumpkin puree. Next, mix the dry and wet ingredients in separate bowls. Then, combine them gently. Bake the muffins in a preheated oven at 350°F for about 20 minutes. You can find the complete process in the Full Recipe. Yes, you can substitute some ingredients in this recipe. For example, you can use almond flour instead of all-purpose flour for a gluten-free option. If you don’t have brown sugar, use coconut sugar instead. You can also swap vegetable oil for applesauce for a healthier choice. Just remember that each change may alter the texture or taste a bit. The best toppings for pumpkin muffins include a sprinkle of cinnamon sugar or crushed nuts. You can also try adding a drizzle of maple glaze for sweetness. For a fun twist, add cream cheese frosting on top. These toppings enhance the flavor and make your muffins look great! You learned how to make the best pumpkin muffins from scratch. We covered the key ingredients, simple steps, and helpful tips. Variations show you can customize your muffins to fit dietary needs. We also discussed storage methods to keep them fresh and tasty. Remember, each muffin can spark joy and warmth. Embrace your creativity with flavors and textures. Enjoy your baking journey, and share these treats with others!
Best Pumpkin Muffins Simple and Flavorful Treat
Are you ready to bake the best pumpkin muffins ever? These delicious treats are simple, flavorful, and perfect for any occasion. Whether you need a