Desserts

When making a Witches’ Brew Cheesecake, having the right ingredients is key. Here’s what you need: - 1 1/2 cups graham cracker crumbs - 1/4 cup unsweetened cocoa powder - 1/2 cup unsalted butter, melted - 2 cups cream cheese, softened to room temperature - 1 cup granulated sugar - 3 large eggs, at room temperature - 1 teaspoon vanilla extract - 1 cup sour cream - 1/4 cup green food coloring - 1/2 teaspoon black food coloring (optional, for a deeper tone) - 1/2 cup chocolate chips (optional, for added texture) - Edible glitter (for a magical decoration) Gathering all these ingredients sets you up for success. The graham cracker crumbs and cocoa powder create a rich crust. Cream cheese gives that smooth texture. The food coloring makes it look spooky and fun. If you want a little extra crunch, add chocolate chips. And don’t forget the edible glitter for that final magic touch. All these elements come together in my full recipe. - Set oven to 325°F (163°C). - Prepare your springform pan by greasing it well. - Combine 1 1/2 cups of graham cracker crumbs and 1/4 cup of cocoa powder in a bowl. - Add 1/2 cup of melted butter and mix well. Press this mixture into the bottom of the pan. - Bake the crust for 10 minutes. Let it cool completely on a wire rack. - In a large mixing bowl, beat 2 cups of softened cream cheese with 1 cup of granulated sugar. Mix until smooth. - Add 3 large eggs, one at a time. Mix until each egg is blended in. - Stir in 1 teaspoon of vanilla extract and 1 cup of sour cream until smooth. - Gradually add 1/4 cup of green food coloring to the cream cheese mixture. - Optionally, add 1/2 teaspoon of black food coloring for depth. - If you want, fold in 1/2 cup of chocolate chips for extra flavor. - Pour the filling over the cooled crust in the springform pan. - Smooth the top with a spatula. Bake for 55-60 minutes, until the edges are set. - After baking, turn off the oven. Leave the cheesecake inside for about an hour. - Transfer it to the fridge and chill for at least 4 hours. Overnight is best for flavor. - When ready to serve, remove the cheesecake from the springform pan. - Sprinkle edible glitter on top for a magical touch. Slice and enjoy your Witches' Brew Cheesecake! For full details on how to make this delightful dessert, check out the Full Recipe. Using room temperature ingredients is key. Cold cream cheese can lead to lumps. Let your cream cheese and eggs sit out for about an hour. This simple step helps blend them better. Mix on low speed to avoid air bubbles. Air can cause cracks in your cheesecake. Cooling your cheesecake slowly is very important. After baking, turn off the oven but leave the door slightly open. Let it sit for one hour. This helps it cool down evenly. For extra safety, you can use a water bath. Place the springform pan in a larger pan filled with hot water. This method adds moisture and helps prevent cracks. To make your cheesecake even more fun, use a themed plate. Black or purple plates add to the spooky vibe. You can also add a dollop of whipped cream or crushed candy. Edible glitter is a great touch. It gives your cheesecake a magical look. For more ideas, check the Full Recipe for decorating tips! {{image_4}} You can change the flavor of your cheesecake easily. One fun option is to swap cream cheese for mascarpone. This gives your cheesecake a richer, creamier taste. You can also add flavored extracts. Try almond for a nutty twist or mint for a refreshing kick. If you need a gluten-free version, don't worry! You can use gluten-free graham crackers instead of regular ones. They work just as well. Another option is to make a crust with almond flour. This adds a nice nutty flavor and keeps it gluten-free. Decorating can make your cheesecake even more fun! For seasonal themes, you can change the color. Use red for Christmas or orange for Halloween. You can also add playful toppings for a kids' party. Think sprinkles, candy eyes, or whipped cream ghosts. They make the dessert look extra special and spooky! To keep your Witches’ Brew Cheesecake fresh, store it in the fridge. Place the cheesecake in an airtight container. This helps prevent it from absorbing other odors. You can also cover it tightly with plastic wrap. It is best to refrigerate leftovers within two hours of serving. If you want to keep the cheesecake longer, you can freeze it. Slice the cheesecake first for easy serving later. Wrap each slice in plastic wrap, then place them in a freezer-safe bag or container. When you're ready to enjoy, thaw the cheesecake in the fridge overnight. This method keeps the texture nice and creamy. In the fridge, your cheesecake will last about five days. You can keep it longer if you freeze it, up to three months. To maintain the flavor and texture, avoid leaving it out at room temperature for long periods. Always store it covered to keep it moist and delicious. To stop cracks, follow these tips: - Use room temperature cream cheese. Cold cheese mixes poorly. - Beat the mixture until smooth, but avoid too much air. - Bake at a low temperature. Too much heat causes cracks. - Cool slowly in the oven with the door slightly open. This helps keep the texture even. Yes, you can make this cheesecake a day in advance. - Bake it and let it cool completely. - Wrap it well in plastic wrap. - Store it in the fridge until you're ready to serve. This gives the flavors time to blend, making it even tastier! If you want natural colors, try these options: - Spinach puree gives a green hue. - Beet juice can add a lovely red tone. - Turmeric offers a bright yellow shade. These options keep your cheesecake fun and colorful without artificial dyes. Yes, this cheesecake is great for kids! - The ingredients are safe and tasty. - You can skip the food coloring if you prefer. - Add fun toppings, like gummy worms or candy eyes. This makes it a perfect treat for Halloween or any festive occasion! You can create a delicious Witches' Brew Cheesecake by following simple steps. Start with your ingredients and prepare the crust. Then, mix the filling and add fun colors. Baking is key, so cool it right. Add decorations for a spooky theme, and explore flavor variations to make it yours. Remember to store properly for freshness. Enjoy experimenting and impressing friends with your tasty treats!
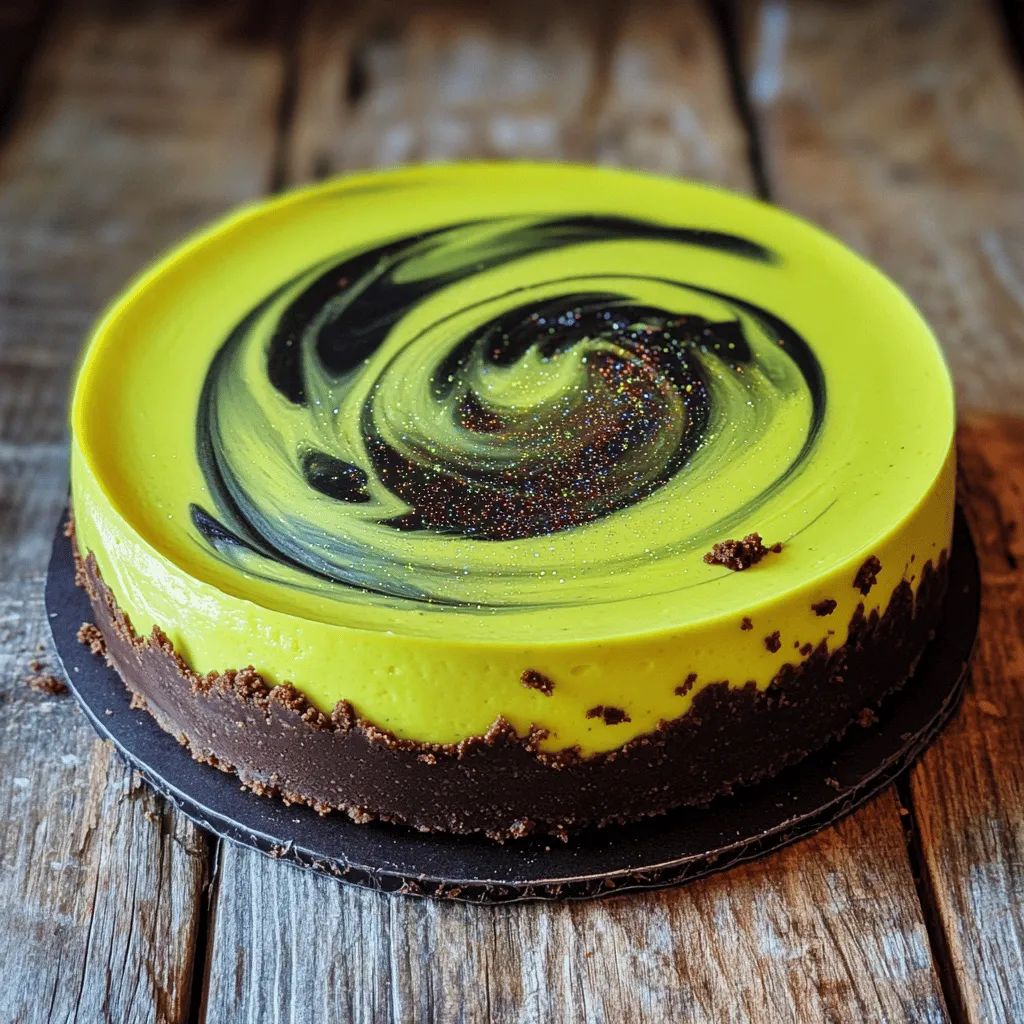
Witches’ Brew Cheesecake Tempting and Spooky Dessert
Are you ready to whip up a dessert that’s both spooky and delicious? This Witches’ Brew Cheesecake combines creamy sweetness with a splash of Halloween
- 1 cup strong brewed coffee or espresso - 1 cup milk (whole, almond, or oat) - 2 tablespoons caramel sauce (plus for drizzling) - 1 tablespoon granulated sugar (for the brûlée topping) - 1/4 teaspoon flaky sea salt - Whipped cream (for topping) - Optional spices: pinch of ground cinnamon or nutmeg To create a Salted Caramel Brûlée Latte, gather these ingredients. Start with strong brewed coffee or espresso. This forms the base of your drink. Choose your milk, whether it’s whole, almond, or oat. Each one adds a unique touch. You will need two tablespoons of caramel sauce. This sweet sauce gives your latte its rich flavor. Don’t forget to save some for drizzling on top. The granulated sugar will create the crispy brûlée layer. A sprinkle of flaky sea salt enhances the sweet notes. Whipped cream acts as a delicious crown for your latte. If you want, you can add a pinch of ground cinnamon or nutmeg for extra warmth. This blend of ingredients makes each sip a delightful treat. For the full recipe, check the Salted Caramel Brûlée Latte section. Enjoy crafting this flavorful drink! - Brew the Coffee: Start by brewing a cup of strong coffee or espresso. I recommend using freshly ground beans for the best taste. - Set Aside to Cool: Let the coffee cool for a few minutes. This helps the flavors blend better later on. - Using a Small Saucepan: Pour your milk into a small saucepan. You can choose whole, almond, or oat milk. - Whisking to Froth: Heat the milk over medium-low. Whisk it constantly until it becomes warm and frothy. Don’t let it boil, or you’ll lose that creamy texture. - Stirring in Caramel Sauce and Sea Salt: Add two tablespoons of caramel sauce and a pinch of flaky sea salt to the warmed milk. Stir well to combine. This mix adds a sweet and salty flavor. - Combining with Brewed Coffee: Pour the caramel milk into the cup with your brewed coffee. Stir gently to mix the layers without losing the froth. - Sprinkling Granulated Sugar: Take one tablespoon of granulated sugar and sprinkle it evenly over the whipped cream on top of your latte. This sugar will create the brûlée crust. - Caramelizing with a Kitchen Torch or Broiler: Use a kitchen torch to caramelize the sugar. Aim for a golden crust. If you don’t have a torch, place the latte under a broiler for a few minutes. Keep an eye on it to prevent burning. - Pouring Layers Together: Carefully pour the caramel-infused milk into the coffee. This creates a lovely marbled effect. - Topping with Whipped Cream and Caramel: Finish by adding a generous dollop of whipped cream on top. Drizzle some extra caramel sauce and sprinkle a pinch of flaky sea salt for that irresistible touch. To make your Salted Caramel Brûlée Latte, follow the [Full Recipe] for complete details. Enjoy every sip! To make the best froth, heating the milk is key. Heat it slowly in a small saucepan. Whisk the milk the whole time. This keeps the milk creamy and helps it froth. Avoid boiling it, or your froth will collapse. You can also use a frother for a quick fix. If you want dairy-free options, almond or oat milk works great. Both create a nice froth and add unique flavors. Almond milk has a nutty taste, while oat milk is creamy. Each brings a special touch to your latte. Adding spices can take your latte to the next level. A pinch of ground cinnamon or nutmeg brings warmth. These spices pair wonderfully with caramel and coffee. Try them to make your drink even more inviting. When caramelizing the sugar, keep an eye on it. Use a kitchen torch for control. If you don't have one, broil the sugar in your oven. Watch closely to avoid burning. The goal is a golden crust that adds crunch. You can adjust the sweetness to your taste. If you like it sweeter, add more caramel sauce. Try different types of sugar too, like brown sugar for a deeper flavor. For those needing dairy-free options, stick to almond or oat milk. They create a rich taste without the dairy. You can enjoy a delightful latte that's also friendly for your diet. For the full recipe, check out the Salted Caramel Brûlée Latte above! {{image_4}} You can easily make a dairy-free Salted Caramel Brûlée Latte. Choose almond or oat milk instead of regular milk. Almond milk adds a nutty taste, while oat milk gives a creamy feel. Both options work well with the caramel and coffee flavors. Simply follow the same steps in the recipe, swapping regular milk for your chosen alternative. If you're watching your sugar intake, try low-calorie sweeteners. Options like stevia or monk fruit can replace granulated sugar. You can mix them into your caramel sauce, or sprinkle them over the whipped cream. This way, you still enjoy the sweet taste without the extra calories. Just remember to adjust the amount to fit your taste. You can change up the flavor based on the season. In fall, try adding pumpkin spice to your latte. Mix in a teaspoon of pumpkin spice when you add the caramel. The warm spices enhance the cozy feeling of fall. For winter, add a mint flavor. A few drops of peppermint extract can give your latte a festive twist. These variations keep your drink fun and exciting all year round. After making your Salted Caramel Brûlée Latte, you might have some left. Here’s how to store it. - Refrigerating Prepared Latte: Pour the latte into an airtight container. Seal it tight and put it in the fridge. It will stay fresh for up to 2 days. - Best Practices for Reheating: When you want to enjoy it again, heat it gently. Use the microwave or a small pot. Stir well and check the temperature before sipping. Knowing how long your ingredients last is key to keeping your latte tasty. - Freshness of Milk and Cream: Dairy products can spoil quickly. Always check the expiration date. Use milk within a week after opening. Cream should also be used quickly for best taste. - Storage of Caramel Sauce: Store caramel sauce in a cool, dark place. Once opened, keep it in the fridge. It lasts up to a month when stored properly. These tips will help you enjoy your latte and its flavors longer. For the full recipe, check out the Salted Caramel Brûlée Latte instructions above. You can easily make this latte vegan. Use almond or oat milk instead of regular milk. Both options create a creamy texture while keeping it dairy-free. For the whipped cream, choose a vegan brand or make your own using coconut cream. This swap keeps all the rich flavors of the Salted Caramel Brûlée Latte while being kind to animals. Yes, you can use instant coffee. However, the taste may change. Instant coffee often lacks the depth and richness of brewed coffee. If you use instant, mix it with hot water per the package instructions. This will give you a quick fix, but the flavor might not be as bold or satisfying. You have many options for sweetening. Caramel sauce adds a rich sweetness and pairs well with the coffee. For a lighter touch, try maple syrup or agave nectar. You can also use regular sugar or a sugar alternative like stevia. Each option changes the flavor slightly, so feel free to experiment! You can find this drink at many coffee shops. Chains like Starbucks often serve it, especially during the fall and winter months. Local cafes may have their own versions too. Check their seasonal menus or ask the barista for a similar drink. Enjoying this latte from a café can be a delightful treat! You learned how to make a delicious Salted Caramel Brûlée Latte at home. We covered the ingredients, preparation steps, and tips for perfecting the drink. Customization options allow you to create dairy-free or seasonal flavors to match your taste. Storing leftovers and understanding ingredient freshness ensures you enjoy this treat for longer. Explore your options and make this latte your own. Enjoy every creamy, sweet sip!
Salted Caramel Brûlée Latte Irresistible Flavor Fix
Craving a sweet, comforting drink? Meet the Salted Caramel Brûlée Latte, your new favorite treat! This tasty blend of rich coffee, creamy milk, and decadent
- 200g (7 oz) digestive biscuits, finely crushed - 100g (3.5 oz) unsalted butter, melted - 300g (10.5 oz) cream cheese, at room temperature - 200g (7 oz) powdered sugar - 1 teaspoon pure vanilla extract - 200ml (7 fl oz) heavy cream, whipped to soft peaks - 150g (5.3 oz) dark chocolate, melted and cooled slightly - 150g (5.3 oz) white chocolate, melted and cooled slightly - 150g (5.3 oz) strawberry puree (either homemade or store-bought) - Fresh strawberries - Chocolate shavings To make Neapolitan Millionaire Cake, you need a mix of simple ingredients. Digestive biscuits give a crunchy base. Melted butter makes the base rich and smooth. Cream cheese adds creaminess, while powdered sugar adds sweetness. Pure vanilla extract enhances the flavor. Whipped heavy cream gives the filling a light texture. You can use dark and white chocolate for the filling. These chocolates bring a luxurious taste that pairs well with strawberry puree. You can use store-bought or homemade strawberry puree. Both options work great! For a beautiful finish, fresh strawberries and chocolate shavings are optional. They add a nice touch and make the cake look fancy. You can find everything you need in your local grocery store. Check out the Full Recipe for more details on how to combine these ingredients into a delightful dessert. - Combine crushed biscuits and melted butter. - Press the mixture into the cake tin. - Refrigerate to firm up. To make the base, I start with digestive biscuits. I crush them until they are fine crumbs. Then, I melt unsalted butter and mix it with the crumbs. This mixture needs to be pressed into a springform tin. I make sure it’s even and firm. Once done, I put the tin in the fridge for about 30 minutes. This helps the base set well. - Beat cream cheese until smooth. - Gradually add powdered sugar and vanilla. - Fold in whipped cream for fluffiness. Next, I focus on the cheesecake filling. I take room temperature cream cheese and beat it until smooth. It’s important to add powdered sugar slowly along with pure vanilla extract. This mix should be creamy and lump-free. Finally, I carefully fold in whipped cream. This adds air and makes the filling light and fluffy. - Divide filling into three parts. - Incorporate dark chocolate, white chocolate, and strawberry puree into each portion. Now it’s time to layer the flavors. I divide the cheesecake filling into three bowls. I add melted dark chocolate to one bowl, mixing gently. In another, I add melted white chocolate. The last bowl gets strawberry puree. Each mix should be smooth and colorful. - Layer dark chocolate mixture first. - Add white chocolate filling, then strawberry mixture. - Smooth layers evenly. As I assemble the cake, I start with the dark chocolate layer. I pour it into the springform tin and spread it out evenly. Next, I add the white chocolate filling, smoothing it over the dark layer. Lastly, I pour in the strawberry mixture. I take care to make each layer even for a lovely look. - Cover and refrigerate for at least 4 hours. - Best results achieved by overnight chilling. After assembling, I cover the cake with plastic wrap. It goes back into the fridge to chill. I let it sit for at least 4 hours, but overnight is even better. This sets the cake perfectly. - Release from the springform tin. - Decorate with strawberries and chocolate shavings. - Slice and serve cold. When ready to serve, I carefully release the cake from the springform tin. I love to decorate the top with fresh strawberries and chocolate shavings. This makes it look extra special. I slice the cake and serve it cold, enjoying every delightful layer! To get the best texture, start with your cream cheese. Make sure it is at room temperature. This helps it blend well and stay smooth. Next, whip your heavy cream to soft peaks. This will add fluffiness to your cake. The lightness in the cream makes every slice a delight. Using high-quality chocolate is key. Rich chocolate makes a big difference in taste. For the strawberry puree, you have two choices: fresh or store-bought. Fresh puree gives a bright flavor. Store-bought can save time but may lack depth. Pick what fits your needs best. Pair your Neapolitan Millionaire Cake with coffee or dessert wines. They bring out the cake's sweet layers. This cake is perfect for special occasions. Birthdays, anniversaries, or just a treat, it shines at any event. Enjoy every bite and share the joy! {{image_4}} You can change the flavors in Neapolitan Millionaire Cake. Swap the strawberry puree with raspberry or mango for a new twist. Both fruits add bright flavors and colors. You can also use different types of chocolate. Try milk chocolate or white chocolate to change the richness of the filling. Each option brings its own unique taste. If you need a gluten-free cake, it's easy to adapt. Just substitute the digestive biscuits with gluten-free biscuits. You can find these in many stores. This simple swap keeps the cake tasty for everyone. Want to make this cake vegan? No problem! Replace cream cheese with a vegan alternative, like cashew cream or a store-bought vegan cream cheese. For the heavy cream, use coconut cream. This will give you that creamy texture without dairy. With these changes, you still enjoy a delightful layered treat. This cake has endless possibilities! You can mix and match flavors to suit your taste. I encourage you to try out these variations and enjoy the process! Check out the Full Recipe for detailed instructions. You can keep Neapolitan Millionaire Cake in the refrigerator for up to 5 days. Make sure to cover it well to keep it fresh. The layers stay tasty and soft during this time. This cake is also suitable for freezing for up to 2 months. To freeze, wrap it tightly in plastic wrap, then place it in an airtight container. When you are ready to enjoy it, thaw the cake in the refrigerator overnight for best results. This way, it retains its flavor and texture. Always use an airtight container to stop the cake from drying out. This keeps the cake moist and delicious. While it’s okay to eat after a few days, I find it’s best enjoyed fresh. For optimal flavor, serve it within the first few days of making it. Enjoy every delightful layer! You can make this cake one day ahead. Prepare your cake and chill it overnight. This allows all the flavors to blend well. Cold cakes often taste better. Just remember to cover it well to keep it fresh. Yes, you can use a regular cake pan. Just line the bottom with parchment paper. This will help you remove the cake easily. You may need to run a knife around the edge before lifting it out. If you lack heavy cream, use coconut cream. It adds a nice flavor and works well. You can also try milk with butter. Mix ¾ cup milk with ¼ cup melted butter to mimic heavy cream. The cake is set when it feels firm to the touch. It should not wobble when you gently shake it. If it feels soft, chill it longer. A minimum of 4 hours is best, but overnight is ideal. Absolutely! You can swap strawberry puree for raspberry or mango. Each fruit brings a unique taste. You can also use different chocolates. Milk chocolate or white chocolate can change the cake's flavor. Have fun experimenting! For the full recipe, check out the instructions above. This recipe for Neapolitan Millionaire Cake combines simple ingredients and detailed steps. You learned how to prepare the base, create layers of flavors, and serve it beautifully. Remember to chill the cake for the best taste. Use fresh fruits or high-quality chocolate to enhance your creation. With variations available, you can tailor it to fit your needs. Enjoy getting creative in the kitchen, and impress your friends with this delicious dessert!
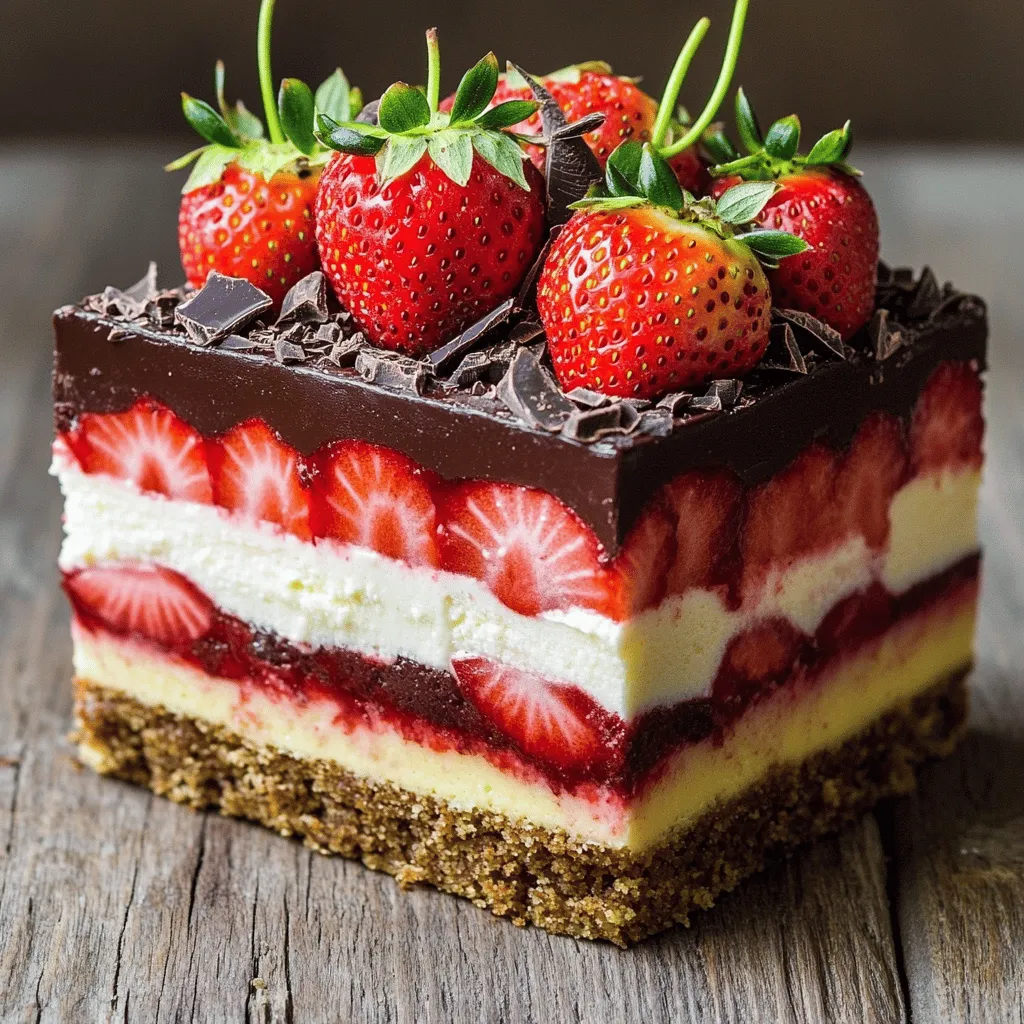
Neapolitan Millionaire Cake Delightful Layered Treat
Are you ready to indulge in a dessert that dazzles with every bite? The Neapolitan Millionaire Cake is a luscious, layered delight that combines rich
- 2 cups all-purpose flour - 1 teaspoon baking powder - 1 teaspoon baking soda - 1 teaspoon ground cinnamon - ½ teaspoon ground nutmeg - ½ teaspoon ground ginger - ½ teaspoon salt - 1 cup granulated sugar - ½ cup packed brown sugar - 1 cup vegetable oil - 1 cup canned pumpkin puree (not pumpkin pie filling) - 2 large eggs - 1 teaspoon vanilla extract - 8 oz cream cheese, softened to room temperature - ½ cup unsalted butter, softened to room temperature - 2 cups powdered sugar - 1 teaspoon vanilla extract Gather these ingredients for an easy and tasty treat. Each one plays a key role in making the best Amish Pumpkin Whoopie Pies. The mix of spices gives a warm flavor, while the cream cheese filling adds a rich touch. Using canned pumpkin puree ensures a smooth and sweet base for the cookies. You can find the full recipe to explore how to combine these ingredients into a delightful dessert. First, preheat your oven to 350°F (175°C). This step is key for even baking. While the oven warms up, get your baking sheets ready. Line them with parchment paper to prevent sticking. This will make clean-up easy later. Next, grab a medium bowl. In it, whisk together the dry ingredients. This includes flour, baking powder, baking soda, cinnamon, nutmeg, ginger, and salt. Mixing these well helps the flavors blend, so set this bowl aside. Now, take a large mixing bowl. Combine granulated sugar, brown sugar, and vegetable oil inside. Use a whisk or hand mixer to mix until it becomes smooth and creamy. Then, add in the pumpkin puree, eggs, and vanilla extract. Beat these ingredients together until you have a smooth mixture. After that, slowly add the dry mixture to the wet ingredients. Mix just until everything is combined. Be careful not to overmix; this keeps your whoopie pies light and fluffy. Now it's time to scoop the dough! Use a cookie scoop or a tablespoon to drop rounded dollops onto the prepared baking sheets. Make sure to space them about 2 inches apart. This gives them room to spread while baking. Place the baking sheets in the oven. Bake for 12-15 minutes. Check if they are done by pressing lightly on the tops. If they bounce back, they are ready! Let the cookies cool on the baking sheets for about 5 minutes. After that, move them to a wire rack to cool completely. This step is important for the best texture. To get soft and fluffy whoopie pies, mix your wet ingredients well. This helps create a nice, airy batter. Avoid overmixing the batter once you add the dry ingredients. Stir gently until just mixed. This keeps the cookies light and tender. Bake them until the edges are set but the tops are soft. They will firm up as they cool. One common mistake is using pumpkin pie filling instead of pure pumpkin puree. Pumpkin pie filling has added spices and sugar that can change the taste. Another mistake is not spacing the cookies enough on the baking sheet. They need room to spread while baking. Lastly, let the cookies cool completely before adding the filling. This will prevent the filling from melting. To make your whoopie pies look great, use a nice platter for serving. A sprinkle of cinnamon on top adds a festive touch. You can also wrap each pie in clear cellophane. Tie it with a colorful ribbon for a lovely gift. These small details make your whoopie pies stand out at any gathering. {{image_4}} You can easily change the flavor of your whoopie pies. Add chocolate chips for a sweet twist. A handful of chopped nuts can give a nice crunch. You can also mix in dried fruit like cranberries or raisins. For a spicier kick, try adding a pinch of cayenne pepper. These small changes keep the recipe fresh and fun. If you want to switch some ingredients, that’s easy too. You can use whole wheat flour instead of all-purpose flour. This will make the pies a bit denser but healthier. If you need a dairy-free option, use coconut cream instead of cream cheese. You can also swap granulated sugar with coconut sugar for a unique flavor. The classic cream cheese filling is great, but don’t stop there! Try a peanut butter filling for a nutty taste. You can also use whipped cream for a lighter touch. A chocolate ganache filling can create a rich dessert experience. Each filling brings a new layer of flavor to the whoopie pies. For the full recipe, check out the instructions above and get baking! To keep your whoopie pies fresh, store them in an airtight container. Place parchment paper between layers to prevent sticking. Keep them at room temperature for up to three days. If you live in a humid area, the fridge may be a better choice. Just remember to let them come back to room temperature before serving for the best taste. Freezing whoopie pies is a great way to save extras for later. Wrap each pie in plastic wrap, then place them in a freezer-safe bag. This helps prevent freezer burn. They can last up to three months in the freezer. When you're ready to enjoy them, just take them out and let them thaw on the counter. Whoopie pies stay fresh for about three days at room temperature. In the fridge, they can last up to a week. If frozen, they can last three months. Always check for any signs of spoilage before enjoying. If they smell off or look strange, it's best to toss them. Following these tips will keep your Amish pumpkin whoopie pies tasty and delightful for longer! Amish Pumpkin Whoopie Pies come from the Amish community in Pennsylvania. The Amish are known for their simple, homemade foods. These whoopie pies use pumpkin, which is a staple in fall cooking. They are a fun treat and often appear at gatherings and fairs. Many believe these pies started as a way to use leftover pumpkin. The soft cookies and creamy filling create a delightful contrast. Yes, you can use fresh pumpkin. Fresh pumpkin adds a rich flavor to your whoopie pies. To use fresh pumpkin, you need to cook it first. Cut the pumpkin, remove the seeds, and bake it until soft. Then, scoop out the flesh and puree it. You will need about one cup of fresh puree for this recipe. Just make sure to drain any excess water. Using fresh pumpkin can give your pies a homemade touch. If you need a substitute for cream cheese, use mascarpone cheese or Greek yogurt. Mascarpone adds a rich flavor, while Greek yogurt makes it lighter. For a dairy-free option, use coconut cream. Whip it until fluffy for a smooth filling. You can also mix powdered sugar with a dairy-free cream cheese alternative. Each option gives a unique taste while keeping the filling creamy. In this article, we covered how to make delicious Amish Pumpkin Whoopie Pies. We outlined the key ingredients, step-by-step instructions, and helpful tips for a perfect treat. We also discussed fun variations and storage tips to keep your pies fresh. Remember, making whoopie pies can be simple and fun. With these tips, you can enjoy a tasty dessert that impresses everyone. Now it’s your turn to bake and share these delightful treats!
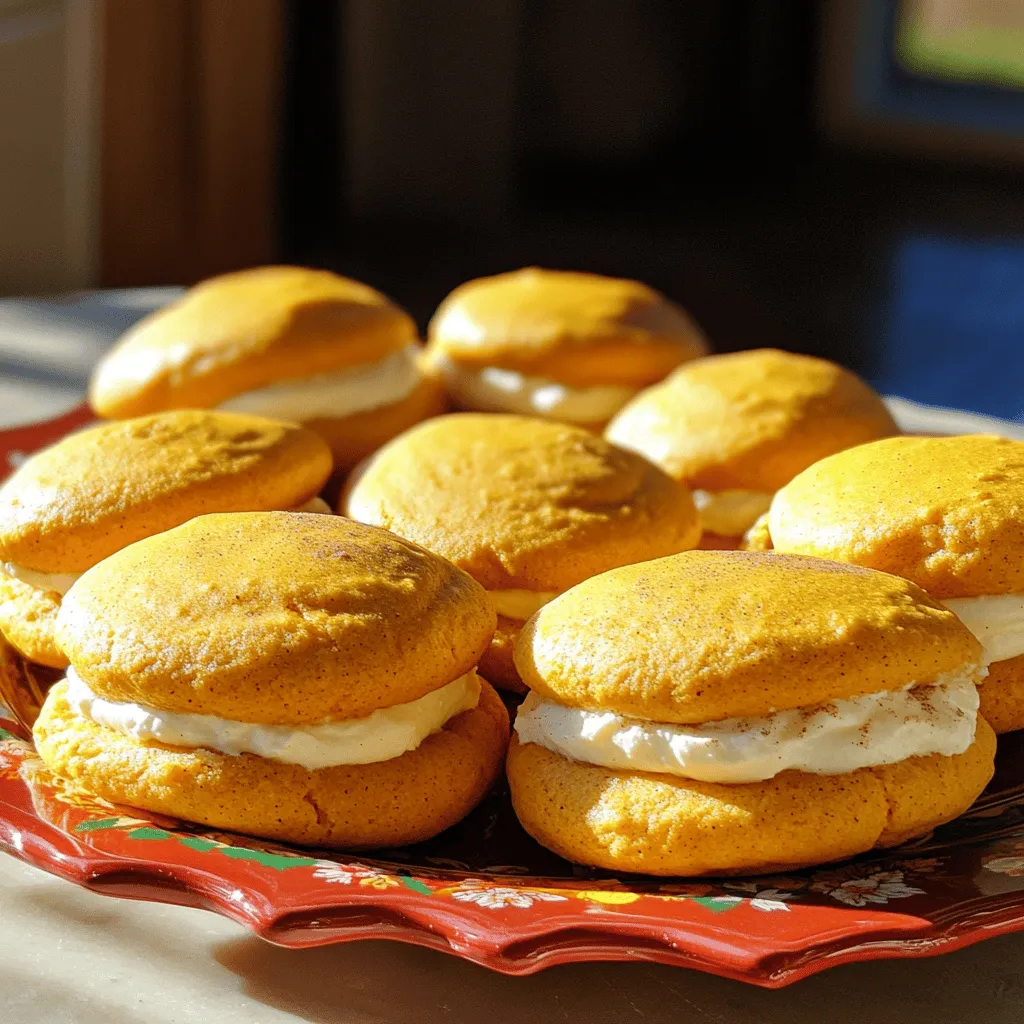
Amish Pumpkin Whoopie Pies Tasty and Easy Recipe
Are you ready to indulge in a delightful treat? Amish pumpkin whoopie pies are not only tasty but also easy to make. With soft pumpkin
To create delicious Sweet Potato Blondies with Maple Syrup Glaze, you need simple and wholesome ingredients. Here’s what you will need: - 1 cup mashed sweet potatoes (cooked and cooled) - 1/2 cup smooth almond butter - 1/2 cup brown sugar - 1/4 cup pure maple syrup - 2 large eggs - 1 teaspoon vanilla extract - 1 1/2 cups whole wheat flour - 1 teaspoon baking powder - 1/2 teaspoon baking soda - 1/4 teaspoon salt - 1/2 teaspoon ground cinnamon - 1/4 cup chopped pecans (optional) Each ingredient plays a key role in the flavor and texture of the blondies. Sweet potatoes add natural sweetness and moisture. Almond butter gives richness and creaminess. Brown sugar enhances that sweet taste. Maple syrup adds a lovely depth of flavor. Whole wheat flour provides a hearty base. Baking powder and soda help the blondies rise, while cinnamon adds warmth. If you want a little crunch, add the optional pecans. They give a nice texture and nutty flavor. You can find the full recipe for more guidance. - Preheat the oven to 350°F (175°C). - Grease an 8x8 inch baking dish or line it with parchment paper. - In a large mixing bowl, add the mashed sweet potatoes, almond butter, brown sugar, maple syrup, eggs, and vanilla extract. - Mix these wet ingredients together until smooth and creamy. - In a separate bowl, whisk together whole wheat flour, baking powder, baking soda, salt, and ground cinnamon. - This helps to evenly spread the leavening agents and spices. - Gradually add the dry mixture to the wet ingredients, stirring gently. - Be careful not to overmix. If using pecans, fold them in now for texture. - Pour the batter into the prepared baking dish, spreading it evenly. - Bake for 25-30 minutes. - Check if they are done by inserting a toothpick; it should come out clean or with a few moist crumbs. - Let the blondies cool in the pan for 15 minutes. - Transfer to a wire rack to cool completely before slicing. For the Maple Syrup Glaze, whisk together 1/4 cup of maple syrup with 1/2 cup of powdered sugar in a small bowl. Drizzle this glaze generously over the cooled blondies. For the full recipe, check out the earlier section. To get the perfect texture in your sweet potato blondies, use cooked and cooled sweet potatoes. This helps them blend smoothly with the other ingredients. You want a creamy mix without lumps. When you mix the wet and dry ingredients, do it gently. Overmixing can make the blondies tough. Stir just until combined for a soft, chewy treat. Making a smooth maple syrup glaze is simple. Mix pure maple syrup with powdered sugar in a bowl. Whisk until it is creamy and free of lumps. Timing is key when glazing. Wait until the blondies cool completely. This helps the glaze sit nicely without running off. For a lovely display, cut the blondies into neat squares. Place them on a decorative platter. A light dusting of cinnamon or a sprinkle of chopped pecans adds flair. These sweet treats pair well with warm drinks. Serve them alongside a cup of tea or coffee for a delightful snack. For the full recipe, check the recipe section above! {{image_4}} You can change the nut butter in this recipe. Almond butter gives a nutty taste. If you swap it for peanut butter, expect a richer flavor. Cashew butter adds creaminess without a strong taste. Choose what you like best! For gluten-free options, try almond flour or coconut flour. Both work well and keep the texture light. Adding spices can boost the taste. Nutmeg or ginger adds warmth, perfect for fall. You can also mix in dried fruits like cranberries or raisins for sweetness. Chocolate chips are a hit too! They melt and create gooey pockets of goodness in each bite. You can serve blondies warm or chilled. Warm blondies taste great with a scoop of vanilla ice cream. Cold blondies are chewy and refreshing. For toppings, consider drizzling caramel or adding fresh fruit. You can even sprinkle extra nuts for crunch. Don't forget to check the Full Recipe for more tips! To keep your sweet potato blondies fresh, store them in an airtight container. This method helps maintain their moisture and flavor. Line the container with parchment paper for extra protection. I recommend using a glass or plastic container that seals tightly. If you want to save some blondies for later, freezing is a great option. First, cut the blondies into squares. Wrap each square in plastic wrap or aluminum foil. Then, place them in a freezer-safe bag or container. This method keeps them safe from freezer burn. To enjoy them later, simply take a blondie out and let it thaw at room temperature. For best texture, you can warm them gently in the oven. When stored at room temperature, the blondies last about 3 to 5 days. They taste best when fresh, but you can still enjoy them after a few days. Look for signs that they have gone bad, like mold or an off smell. If they feel overly dry or hard, it’s time to toss them. For the full recipe, you can refer to the main article. - Can I substitute sweet potatoes with another ingredient? Yes, you can use pumpkin or butternut squash. Both give great texture. They also add a nice flavor to your blondies. - How do I know when the blondies are done baking? When a toothpick comes out clean, the blondies are ready. You can also check for a golden-brown top. - Can I make these blondies vegan? Yes! Use flax eggs or applesauce instead of eggs. This keeps the blondies moist and tasty. - What is the best way to cut blondies for serving? Use a sharp knife. Make sure to cut when they are cool. This helps you get nice, clean edges. - Why are my blondies too dense? Overmixing can cause density. Make sure to mix just until combined. Also, check if your baking powder is fresh. - How can I fix blondies that are too crumbly? Too little moisture may cause crumbliness. You can add a bit more almond butter next time. It helps bind the mixture. - Health benefits of sweet potatoes Sweet potatoes are rich in vitamins and fiber. They help with digestion and boost your immune system. - Caloric content per serving of Sweet Potato Blondies with Maple Syrup Glaze Each blondie has about 150 calories. This can vary based on added ingredients from the Full Recipe. Enjoy a treat without too many calories! These sweet potato blondies are a delicious treat, packed with great flavors and nutrients. We covered ingredients, step-by-step instructions, tips for baking, and variations to suit your taste. Remember, you can customize these blondies with different nuts or spices. Store them well to keep that fresh taste longer. With these tips, baking becomes easier and more fun. Try them warm or cold, and enjoy every bite!
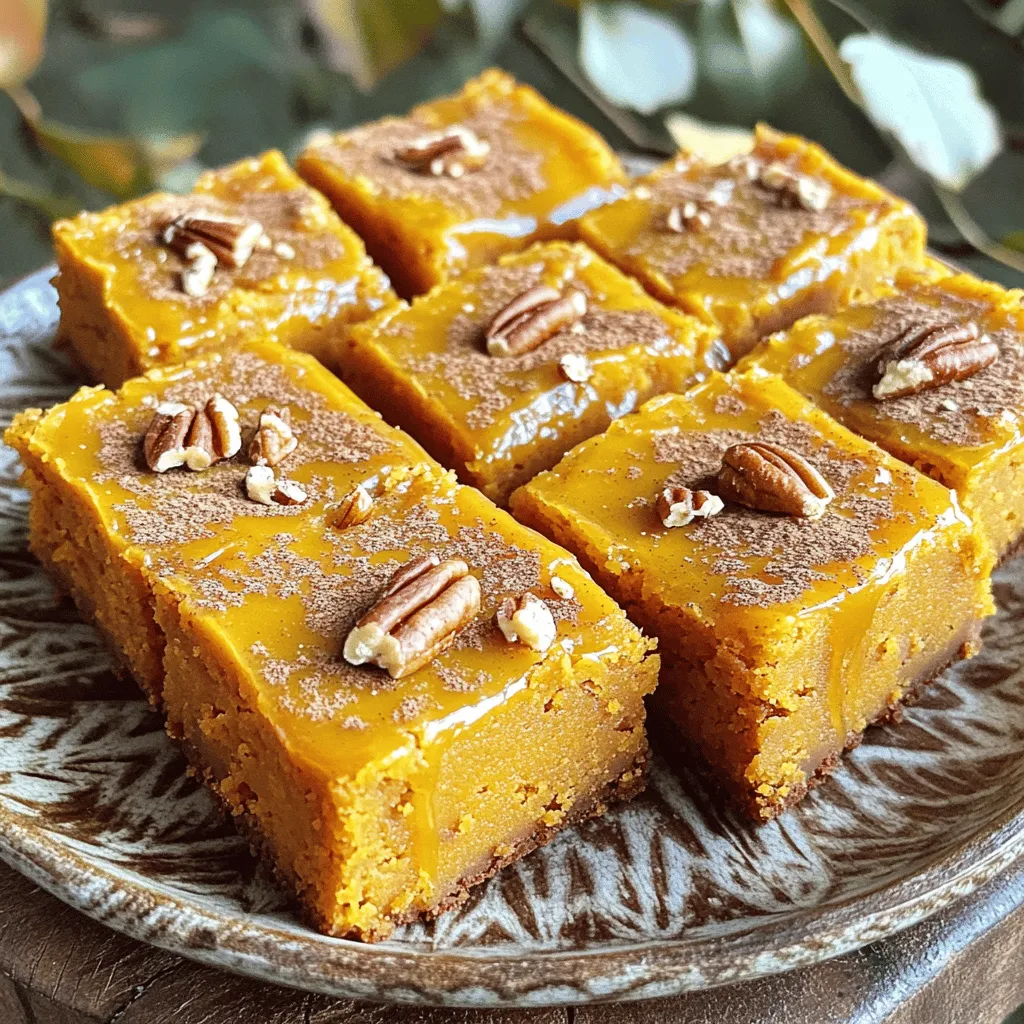
Sweet Potato Blondies with Maple Syrup Glaze Delight
Sweet Potato Blondies with Maple Syrup Glaze offer a tasty twist on a classic dessert. These sweet treats are not only easy to make, but
- 2 cups fresh strawberries, hulled and sliced - 2 ripe bananas, peeled and sliced - 1 cup vanilla pudding mix - 2 cups whole milk - 1 teaspoon pure vanilla extract - 1 cup heavy whipping cream - 2 tablespoons powdered sugar - 1 cup crushed graham crackers - Fresh mint leaves for garnish The ingredients you need for Strawberry Banana Pudding Dream are simple and fresh. First, the fresh produce includes strawberries and bananas, which give a sweet and fruity flavor. You want to use ripe fruits for the best taste. For the pudding base, you’ll need vanilla pudding mix, whole milk, and a splash of vanilla extract. This mix creates a creamy and smooth texture that pairs perfectly with the fruit. Next, for the whipped cream topping, have heavy whipping cream and powdered sugar on hand. Whipping the cream adds lightness. It also gives a sweet touch to the dessert. Finally, the crunchy element is the crushed graham crackers. They add a nice texture and a bit of crunch. You can use fresh mint leaves to garnish. They add color and a refreshing taste. These ingredients come together to make a light and dreamy dessert. You can feel good about serving this to your family and friends. {{ingredient_image_2}} - Combine 1 cup vanilla pudding mix, 2 cups whole milk, and 1 teaspoon vanilla extract in a bowl. - Whisk until the mixture is smooth. Let it rest for 5 minutes. This step helps the pudding thicken well. - In a separate bowl, pour 1 cup heavy cream and 2 tablespoons powdered sugar. - Whip the cream until stiff peaks form. This means it holds shape well. - Fold half of the whipped cream into the pudding mixture. Use a spatula to be gentle. - In a clear dish, start with a layer of 1 cup crushed graham crackers. - Spoon a layer of the pudding mixture on top. - Add a layer of sliced strawberries and bananas. Make sure to spread them evenly. - Repeat the layers until you use all the ingredients. Finish with a layer of whipped cream on top. - Cover the dish with plastic wrap. Refrigerate for at least 2 hours. This helps the flavors blend. - Before serving, garnish with fresh mint leaves and some fruit slices on top. This adds color and freshness to your dessert. To make smooth pudding, whisk the mixture well. Use a strong, steady motion. This helps break up any lumps. After mixing, let the pudding sit for about five minutes. Resting helps it thicken just right. You want it creamy but not too runny. Whipped cream is ready when stiff peaks form. You can check this by lifting the whisk. If peaks hold their shape, you’re good to go! When folding the whipped cream into the pudding, use a spatula. Gently lift and turn the mixture. This keeps the cream light and fluffy. For even layering, start with crushed graham crackers. Press them down lightly in your dish. Next, spoon in the pudding, followed by fruit. Make sure to distribute strawberries and bananas evenly. Using clear dishes shows off those lovely layers. It makes the dessert look tasty and fun! Pro Tips Use Fresh Ingredients: Always opt for the freshest strawberries and bananas to enhance the flavor of your pudding. Fresh fruit not only tastes better but also adds a vibrant color to your dish. Chill Before Serving: Allow the pudding to chill for at least 2 hours. This resting period is crucial for the flavors to meld and the texture to set, ensuring a delightful eating experience. Layering Technique: When layering, ensure that each fruit layer is evenly distributed to create a beautiful presentation. This will make each scoop visually appealing and enjoyable. Customize Your Toppings: Feel free to get creative with toppings! Consider adding crushed nuts or chocolate shavings for added texture and flavor contrast to your pudding. {{image_4}} You can easily change the flavor of your pudding. Try adding chocolate pudding mix for a fun twist. It pairs well with the fruits. You can also use different extracts, like almond or coconut. This adds depth to the taste. Just remember to keep the balance right. If you want to switch up the fruits, go for it! Use other berries like blueberries or raspberries. They add color and taste. You can also try tropical fruits like mango or kiwi. These fruits give a fresh vibe and a bit of zing. You can make this dessert healthier too. Use low-fat pudding and cream options if you prefer. This keeps the flavor while cutting calories. If you want a vegan version, swap the dairy with plant-based milk and cream. Almond or coconut milk works well here. Just ensure your pudding mix is dairy-free. Store your Strawberry Banana Pudding Dream in the fridge. It lasts about 3 days. Cover the dish tightly with plastic wrap. This helps keep it fresh and prevents odors from seeping in. Yes, you can freeze Strawberry Banana Pudding Dream! To freeze, place it in an airtight container. Make sure to leave some space at the top. This allows for expansion. When you're ready to enjoy it again, thaw it in the fridge overnight. Avoid refreezing, as it may change the texture. Yes, you can make this dessert ahead of time. I recommend preparing it up to one day before serving. This gives the dessert time to chill and the flavors to blend well. Just cover it tightly with plastic wrap to keep it fresh. You can use instant pudding mix if you like. The main difference is that instant pudding sets quickly. It might not be as creamy as cooked pudding, but it will still taste great. Just follow the package instructions for mixing with milk. If you want a different base, try using vanilla wafers or crushed cookies. You can even use oat biscuits or shortbread. Each option adds its own flavor to the layers, so pick what you like best! Yes, you can make a non-dairy version! Use almond milk or coconut milk for the pudding. For the whipped cream, try coconut cream whipped until fluffy. These swaps keep the dessert tasty and light without dairy. This dessert combines fresh fruit, creamy pudding, and whipped cream. You layer strawberries, bananas, and crushed graham crackers for a tasty treat. Remember, you can customize flavors and fruits to suit your taste. Follow the tips for perfect texture and presentation. Store it well for later enjoyment. Making this dessert brings joy and sweetness to any occasion. Enjoy the fun of creating and sharing this delicious dish!
Strawberry Banana Pudding Dream Simple and Light Delight
Are you searching for a light and tasty dessert that dazzles? Look no further! My Strawberry Banana Pudding Dream combines fresh fruit, smooth pudding, and
- 1 cup canned pumpkin puree - 1 cup brown sugar, packed - 1/2 cup granulated sugar - 1/2 cup unsalted butter, softened to room temperature - 1 large egg - 1 teaspoon pure vanilla extract - 2 cups all-purpose flour - 1 teaspoon baking soda - 1 teaspoon baking powder - 1 teaspoon ground cinnamon - 1/2 teaspoon ground nutmeg - 1/2 teaspoon salt - 1 cup walnuts, chopped (optional for added texture) - 1/2 cup cream cheese, softened (for frosting) - 1/4 cup powdered sugar (for frosting) - 1-2 tablespoons milk (for frosting, adjust for consistency) Using these ingredients, you create a delightful treat that combines the warmth of pumpkin with rich flavors. Canned pumpkin puree gives a smooth texture and deep flavor. Brown sugar adds moisture and a hint of caramel. Granulated sugar helps the cookies spread and brown nicely. Unsalted butter adds richness, while the egg binds everything together. The vanilla extract enhances the overall taste. All-purpose flour provides structure, while baking soda and baking powder help the cookies rise. Spices like cinnamon and nutmeg give that cozy fall flavor. If you want a little crunch, add walnuts. The cream cheese frosting adds a tangy sweetness that perfectly complements the cookies. For the full recipe, check the instructions above. Enjoy baking! Start by preheating your oven to 350°F (175°C). This temperature is perfect for baking soft cookies. While the oven heats, line two baking sheets with parchment paper. This helps with easy cleanup and keeps cookies from sticking. In a large bowl, mix 1 cup of pumpkin puree, 1 cup of packed brown sugar, 1/2 cup of granulated sugar, and 1/2 cup of softened unsalted butter. Use a hand mixer or stand mixer on medium speed. Beat until the mix is creamy and smooth. Next, add 1 large egg and 1 teaspoon of pure vanilla extract. Mix again until everything is well combined. This step is crucial for flavor! In a separate bowl, whisk together 2 cups of all-purpose flour, 1 teaspoon of baking soda, 1 teaspoon of baking powder, 1 teaspoon of ground cinnamon, 1/2 teaspoon of ground nutmeg, and 1/2 teaspoon of salt. Whisking helps spread the baking agents evenly. This ensures that your cookies will rise perfectly. Now, gently fold the dry mix into the wet pumpkin mix. Stir slowly with a spatula or mixer on low speed. Be careful not to over-mix; this can make the cookies tough. If you want a crunchy texture, you can add 1 cup of chopped walnuts at this stage. Scoop out portions of dough using a tablespoon. Drop them onto your prepared baking sheets, leaving about 2 inches of space between each. Bake for 12-15 minutes. The cookies are done when their edges turn lightly golden. You can use a toothpick to check; it should come out clean. While the cookies cool, prepare the cream cheese frosting. In a bowl, whisk together 1/2 cup of softened cream cheese, 1/4 cup of powdered sugar, and 1-2 tablespoons of milk. Adjust the milk amount to get a smooth, spreadable frosting. Once the cookies are cool, spread a thin layer of frosting on top. This adds a lovely touch to your pumpkin cookies. For the complete recipe, check the full recipe section. To get soft and chewy cookies, use room temperature butter. This helps the sugars mix well. Also, do not over-mix the dough once you add the flour. Mix just until combined. To avoid dry cookies, check your oven's temperature. Ovens can be off by a few degrees. If your cookies come out dry, you might bake them too long. Make sure to watch for the edges turning golden. Serve these cookies on a nice platter. You can sprinkle cinnamon on top for added flair. Whole walnuts also look great if you want extra garnish. Pair these treats with hot coffee or tea. The warmth of the drink complements the pumpkin flavors. Enjoying them together creates a cozy moment. Use a good quality baking sheet. A non-stick or parchment-lined sheet makes baking easier. It helps cookies bake evenly and come off smoothly. Check your oven's accuracy with an oven thermometer. This ensures your cookies bake at the right temperature. If your oven runs hot, adjust the time to prevent burning. For the full recipe, refer to the provided details. {{image_4}} You can easily twist the flavors of these cookies. Try adding chocolate chips for a sweet touch. They melt and create a rich, gooey surprise in every bite. If you want something different, caramel bits work great too. The warm caramel adds a delightful sweetness. Experimenting with spices can also change the game. Instead of just cinnamon and nutmeg, add ginger or allspice. These spices bring warmth and depth to the cookies. Just a little can make a big difference. If you want a healthier version, consider using whole wheat flour. It adds fiber and nutrients to your cookies. The taste is still great, and you get some added health benefits. You can also substitute sugars. Try using coconut sugar or honey for a natural sweetener. For butter, you can use applesauce. It keeps the cookies moist without the extra fat. For gluten-free options, use a gluten-free flour blend. Many blends work well without changing the texture. Just make sure to check the package for measurements. If you need a vegan alternative, there are easy swaps for the frosting. Use a dairy-free cream cheese or a simple frosting made with coconut cream. This way, everyone can enjoy these tasty treats. Check out the Full Recipe for more details and tips on making these cookies. To keep your pumpkin coffee cake cookies fresh, store them in an airtight container. This helps lock in moisture and flavor. I recommend using a plastic or glass container with a secure lid. You can place the cookies at room temperature. If you live in a warm area, consider the fridge to avoid melting frosting. To freeze these cookies, follow these steps: 1. Allow the cookies to cool completely. 2. Place them in a single layer on a baking sheet. 3. Freeze them for 1-2 hours until solid. 4. Transfer the cookies into a freezer bag or container. Remove as much air as possible. 5. Label with the date and store in the freezer. When you want to enjoy a cookie, take it out and thaw it at room temperature for about 30 minutes. This keeps the texture soft and delicious. These cookies stay fresh for about 5 days when stored properly. You will know they are bad if they become hard or dry. Also, check for any mold or off smells. If you notice these signs, it’s best to toss them out. Enjoy every bite of this delightful treat! For the full recipe, check out my detailed instructions. You can tell the cookies are done when their edges turn golden brown. The center may look soft, but that’s okay. The cookies will firm up as they cool. Always use the toothpick test for a final check. Insert a toothpick into the center of a cookie. If it comes out clean, your cookies are ready! Yes, you can make the dough ahead of time. Prepare the dough as directed, then chill it in the fridge. Wrap it well in plastic wrap or store it in an airtight container. This keeps the dough fresh for up to three days. When ready to bake, scoop the dough and place it on baking sheets. If you don’t have pumpkin puree, you can use applesauce or mashed bananas. Both will add moisture and sweetness. You may need to adjust spices to match the new flavor. For applesauce, keep the cinnamon. With bananas, try adding a bit more nutmeg for balance. This blog post detailed how to make delicious pumpkin cookies. We covered key ingredients, mixing steps, and baking techniques. I shared tips for perfect texture and fun variations, too. Remember, you can add your own twist by using different flavors. Store cookies properly to keep them fresh. With these steps, you'll bake amazing cookies that friends and family will love. Go ahead and enjoy the baking process!
Pumpkin Coffee Cake Cookies Delightfully Soft Treat
If you love fall flavors, you’re in for a treat! This Pumpkin Coffee Cake Cookies recipe delivers a delightfully soft bite, perfect for cozy afternoons.
To make the Apple Cider Donut Snack Cake, you will need the following ingredients: - 2 cups all-purpose flour - 1 cup apple cider - 1 cup granulated sugar - 1/2 cup unsalted butter, softened - 2 large eggs, lightly beaten - 1 teaspoon baking powder - 1 teaspoon baking soda - 1 teaspoon ground cinnamon - 1/2 teaspoon ground nutmeg - 1/2 teaspoon salt - 1 teaspoon pure vanilla extract - 1/4 cup brown sugar for topping - 1 tablespoon cinnamon sugar (sugar and cinnamon mix) These ingredients blend together to create a moist, flavorful cake that tastes just like your favorite apple cider donuts. Each item plays a key role. The apple cider gives it a sweet, fruity flavor. The butter adds richness, while the eggs help bind everything. The spices, like cinnamon and nutmeg, enhance the cake's warmth and depth. For the topping, I use brown sugar and cinnamon sugar. This mix creates a sweet caramelized crust that makes every bite delightful. You can find the detailed steps for making this cake in the Full Recipe section. 1. Preheat your oven to 350°F (175°C). Prepare a 9x13 inch baking dish. You can grease it with non-stick spray or line it with parchment paper. This helps with easy removal later. 2. In a large mixing bowl, place the softened butter and granulated sugar. Use a hand mixer or stand mixer to cream them together. Mix until light and fluffy, about 3-5 minutes. 3. Add the lightly beaten eggs and pure vanilla extract to the creamed mixture. Blend until smooth and well mixed. 1. In a separate bowl, whisk together the all-purpose flour, baking powder, baking soda, ground cinnamon, ground nutmeg, and salt. Make sure they are well combined. 2. Gradually add the dry ingredients into the wet mixture. Alternate adding the dry mix with the apple cider. Start and end with the flour mixture. Mix gently until just combined to keep the cake light. 3. Carefully pour the batter into the prepared baking dish. Use a spatula to spread it evenly across the dish. 1. In a small bowl, mix the brown sugar and cinnamon sugar thoroughly. Sprinkle this sweet mix evenly over the top of the batter for a great finish. 2. Bake in the preheated oven for 25-30 minutes. To check for doneness, insert a toothpick into the center of the cake. If it comes out clean or with a few moist crumbs, the cake is done. 3. Allow the cake to cool in the pan for about 10 minutes. Then, transfer it to a wire rack to cool completely before slicing. For the full recipe, check the ingredients and steps above. Enjoy your apple cider donut snack cake! To make a light cake, avoid overmixing the batter. Once the dry and wet ingredients mix, stop stirring as soon as you see no dry flour. This keeps your cake fluffy. Use proper measuring techniques for the best results. For flour, spoon it into a measuring cup and level it off. Avoid scooping directly from the bag, as this packs the flour down. You can add more spices to boost the flavor. Consider including a pinch of ground ginger or allspice for warmth. These spices can create a deeper taste. Using fresh apple cider makes a difference. It adds a rich apple flavor that bottled cider may lack. If possible, choose local cider for the best taste. Once your cake cools, dust it with powdered sugar. This adds a nice touch and makes it look pretty. Use a fine sieve to sprinkle the sugar evenly. For serving, pair each slice with warm apple cider. This combination brings out the flavors and warms your guests' hearts. It creates a cozy, inviting experience. {{image_4}} You can make this cake even better with fun add-ins. Nuts add a great crunch. Try using chopped walnuts or pecans. Chocolate chips are another option. They melt and create a rich flavor. Seasonal fruits also work well. Diced apples or pears enhance the cake’s taste. You can even add some dried cranberries for a tart touch. If you need a gluten-free version, swap the all-purpose flour for a gluten-free blend. Many blends work well in cakes. For a vegan cake, replace the eggs with flax eggs. Mix one tablespoon of ground flaxseed with three tablespoons of water. Let it sit until it thickens. Use a plant-based butter to keep the texture smooth. You can change the size of the cake easily. For smaller portions, bake in a muffin tin. Adjust the bake time to about 15-20 minutes. Check for doneness by inserting a toothpick. For a larger cake, use a 9x13 inch pan as the recipe states. If you use a round pan, watch the time closely. The batter may take longer to bake. For the full recipe, refer back to the earlier section. To keep your Apple Cider Donut Snack Cake fresh, store it properly. You can keep it at room temperature for up to three days. Make sure to place it in an airtight container. This helps maintain its moisture and flavor. If it’s warm in your kitchen, consider refrigerating it. However, refrigeration can dry it out. So, always choose airtight containers for the best results. If you want to save some for later, freezing is a great option. Cut the cake into squares before freezing. Wrap each piece in plastic wrap tightly. Then, place the wrapped pieces in a freezer bag. This keeps them fresh for up to three months. When you want to enjoy a piece, thaw it at room temperature. You can also reheat it in the microwave for about 15-20 seconds. This will bring back its warm, soft texture. Apple Cider Donut Snack Cake lasts about 3 to 5 days. Keep it in an airtight container. This keeps it moist and fresh. If you want it to last longer, you can freeze it. Wrap it well in plastic wrap before freezing. It can stay good in the freezer for up to three months. Yes, you can use different types of flour. Whole wheat flour works well for a denser cake. You can also try gluten-free blends. Just make sure they are suitable for baking. Each flour type may change the taste and texture slightly. If you need an egg substitute, try using applesauce. Use 1/4 cup of applesauce for each egg. You can also use mashed banana or a flaxseed meal mix. Mix 1 tablespoon of flaxseed with 3 tablespoons of water and let it sit for a few minutes. This will help bind the cake like eggs do. Yes, you can make the Apple Cider Donut Snack Cake ahead of time. Bake it, let it cool, then wrap it tightly. Store it at room temperature for a few days. You can also freeze it for longer storage. Just remember to let it cool completely before freezing. You can find pre-made Apple Cider Donut Snack Cake at some bakeries or specialty stores. Local farmers' markets may offer fresh versions in the fall. Check online for local shops that might sell it. If you want to enjoy the best flavor, I recommend making it at home using the Full Recipe. You now have all the steps to make a tasty Apple Cider Donut Snack Cake. From choosing fresh ingredients to following simple steps, you can create a delightful treat. Remember, a few tweaks can add personal flair. Feel free to try different flavors or make it gluten-free. Proper storage keeps it fresh longer too. Enjoy this sweet snack with your family or friends. Baking can be simple and fun, and this recipe shows just how rewarding it can be.
Apple Cider Donut Snack Cake Delicious and Easy Recipe
Craving a tasty treat that captures the essence of fall? Look no further! This Apple Cider Donut Snack Cake is a sweet, moist delight you’ll
To make these tasty apple pie bars, you will need the following ingredients: - 2 cups all-purpose flour - 1/2 cup granulated sugar - 1/2 teaspoon salt - 1 teaspoon baking powder - 3/4 cup unsalted butter, melted - 1 large egg - 2 cups apples, peeled, cored, and diced (about 2-3 medium apples) - 2 teaspoons ground cinnamon - 1 tablespoon fresh lemon juice - 1/4 cup packed brown sugar - 1 tablespoon cornstarch Here are some helpful conversions if you need them: - 1 cup = 240 ml - 1 tablespoon = 15 ml - 1 teaspoon = 5 ml - 1/2 cup = 120 ml These conversions make it easy to adjust your recipe if you need different amounts. Want to make these bars extra special? Consider these add-ins and toppings: - Chopped nuts like walnuts or pecans for crunch - Raisins or dried cranberries for extra sweetness - A sprinkle of nutmeg for a warm spice flavor - A drizzle of caramel sauce on top when serving - A scoop of vanilla ice cream for a creamy touch Feel free to mix and match to find your favorite combination! First, you need to preheat your oven to 350°F (175°C). This step gets your oven ready for baking. Next, take a 9x9 inch baking pan and grease it well. You can also line it with parchment paper. This will help you remove the bars later. In a large mixing bowl, combine 2 cups of all-purpose flour, 1/2 cup of granulated sugar, 1/2 teaspoon of salt, and 1 teaspoon of baking powder. Mix these dry ingredients well. Then, add 3/4 cup of melted unsalted butter and 1 large egg. Stir the mixture until it forms a smooth dough. Make sure there are no dry spots left. For the filling, take 2 cups of diced apples. You need to peel, core, and chop about 2-3 medium apples. In a different bowl, mix the apples with 2 teaspoons of ground cinnamon, 1 tablespoon of fresh lemon juice, 1/4 cup of packed brown sugar, and 1 tablespoon of cornstarch. Stir until all the apples are coated evenly. Now, reserve about 1 cup of the dough for the topping. Press the remaining dough evenly into the bottom of your prepared baking dish. Next, spread the apple filling evenly over the dough. Finally, crumble the reserved dough on top of the apple mixture. This will create a nice topping. Place the baking dish in the preheated oven. Bake for 30-35 minutes. You want the top to be golden brown and the apples to bubble. Once baked, take it out and let it cool completely in the pan. After cooling, slice the bars into pieces and serve. For extra flavor, you can add a scoop of vanilla ice cream or a drizzle of caramel sauce on top. Enjoy your delightful apple pie bars! For the complete recipe, check the Full Recipe section. To get a great crust for your apple pie bars, start with cold butter. Cut it into small pieces before mixing it with flour. This helps create a flaky texture. Make sure to mix just until the dough holds together. Over-mixing can make the crust tough. Also, let the dough chill for about 30 minutes. This step helps the crust stay firm while baking. Avoid these common mistakes for the best results: - Not measuring ingredients correctly: Use measuring cups and spoons for accuracy. - Skipping the chilling step: Chilling the dough prevents it from shrinking. - Overcooking the apples: They should be tender but not mushy. Keep these tips in mind to ensure your bars turn out just right. Serve your apple pie bars warm for a cozy treat. They pair well with: - A scoop of vanilla ice cream for a creamy touch. - A drizzle of caramel sauce for extra sweetness. - A sprinkle of chopped nuts for a crunchy contrast. Feel free to mix and match these ideas to find your favorite way to enjoy your apple pie bars. For the full recipe, check out the details above. {{image_4}} You can easily adjust this recipe to fit your dietary needs. For a gluten-free option, use 2 cups of gluten-free flour blend instead of all-purpose flour. If you need a dairy-free version, replace butter with coconut oil or a dairy-free butter substitute. For a vegan twist, swap the egg with a flaxseed meal. Mix one tablespoon of flaxseed meal with three tablespoons of water. Let it sit for five minutes to thicken. These simple changes help everyone enjoy apple pie bars. Want to add some flair? Try mixing in other spices. Nutmeg works great with cinnamon. Just use a pinch for a warm flavor. You can also add chopped pecans or walnuts for a crunchy texture. Stir in half a cup of nuts with the apple filling. This adds a nice bite and richness. You can even drizzle some caramel sauce on top after baking for a sweet finish. The type of apple you choose makes a big difference. Granny Smith apples bring a nice tartness. Honeycrisp apples add sweetness and crunch. You can mix different varieties for a more complex flavor. Use two cups of diced apples, and feel free to blend! The key is to pick apples that hold their shape when baked. This way, your bars stay delicious and look great too. To keep your apple pie bars fresh, store them in an airtight container. Place them at room temperature if you plan to eat them within two days. For longer storage, put them in the fridge. This will help them last up to a week. Make sure they cool completely before you store them. This helps prevent sogginess. You can freeze apple pie bars for up to three months. First, cut them into squares. Then, wrap each piece in plastic wrap. After that, place them in a freezer-safe bag. When you want to enjoy them, take them out and thaw in the fridge overnight. You can reheat them in the oven at 350°F (175°C) for about 10-15 minutes. This warms them up nicely and keeps them tasty. Freshly made apple pie bars are best eaten within a few days. They usually taste great for about five days when stored properly. If you notice that they look dry or lose flavor, it's time to toss them. Enjoy the taste of your hard work while they are fresh! For the full recipe, check out the earlier sections. Yes, you can make these apple pie bars a day before. Just bake them, cool them, and store them in an airtight container. They stay fresh and tasty. When you’re ready to serve, you can warm them up in the oven. This makes them great for parties! To check if your bars are done, look for a golden-brown top. The filling will bubble around the edges. You can also insert a toothpick in the center. If it comes out clean, your bars are ready. This usually takes about 30 to 35 minutes in a 350°F oven. If you want to avoid butter, you can use coconut oil or vegetable oil. Use the same amount as the butter in the recipe. These oils will keep your bars moist and tasty. You can also use applesauce for a healthier option, but it may change the texture a bit. Yes, using pre-made pie crust saves time. Just roll it out and press it into your baking dish. This makes assembly quick and easy. However, homemade dough gives a fresh taste that many love. If you’re short on time, go for the store-bought crust! For the full recipe, check the link above. You learned how to make delicious apple pie bars today. We explored the ingredients, instructions, and helpful tips. I shared storage info and answered common questions, so you can enjoy them longer. Remember, your choice of apples and toppings can change the flavor. Don't hesitate to get creative! With practice, you'll master these bars in no time. Happy baking!
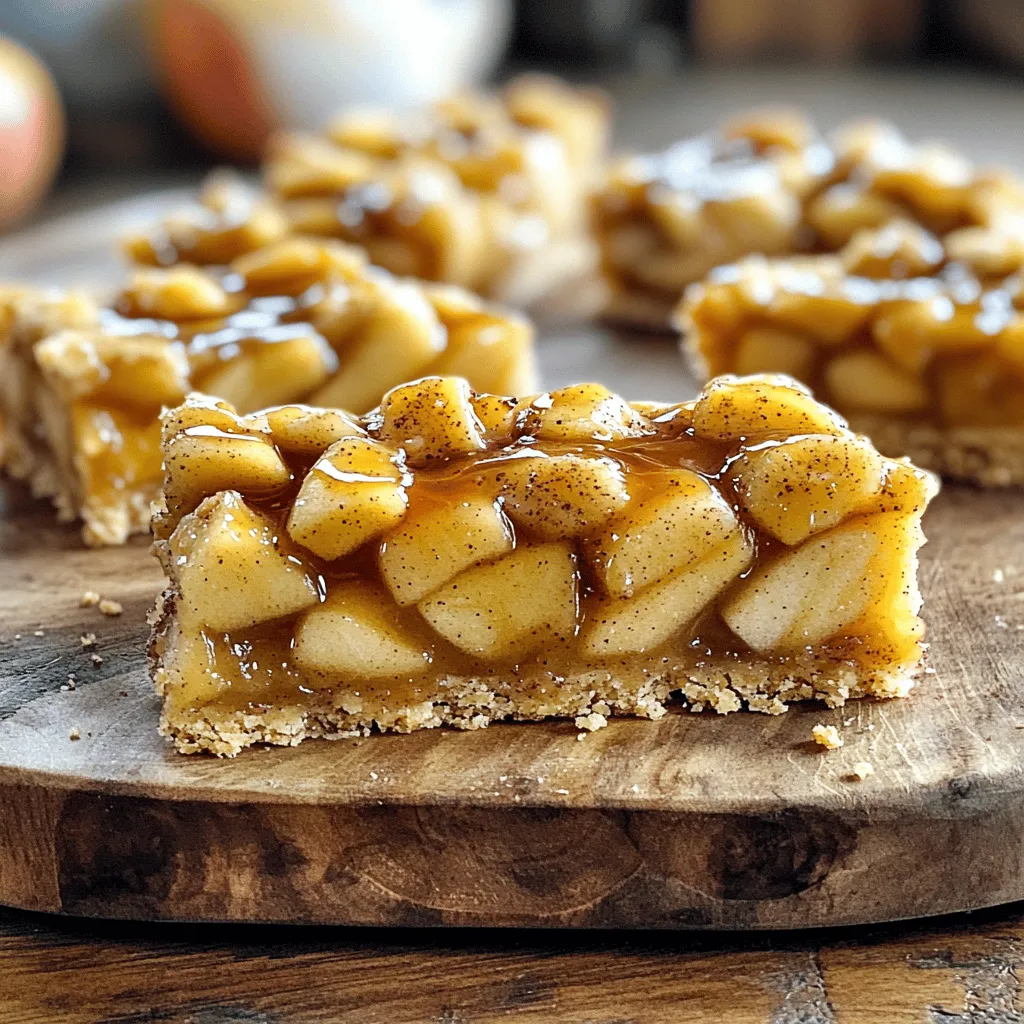
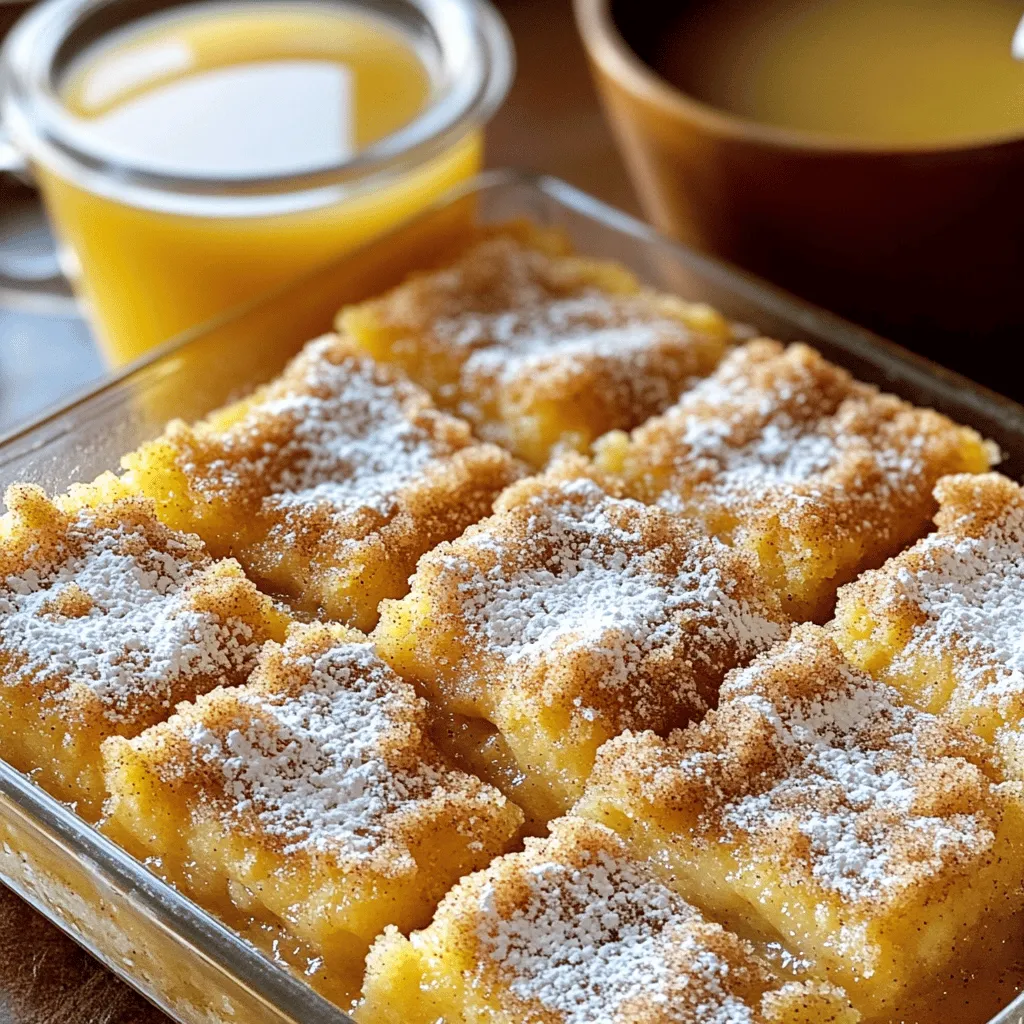
Quick & Delicious Apple Pie Bars Easy Bake Recipe
Are you craving a warm, tasty dessert but short on time? These Quick & Delicious Apple Pie Bars are your answer! In just a few
To make this tasty Apple Crumb Cake, you will need: - 2 cups all-purpose flour - 1 cup granulated sugar - 1 teaspoon baking powder - 1/2 teaspoon baking soda - 1/2 teaspoon salt - 1 teaspoon ground cinnamon - 1/2 cup unsalted butter, softened to room temperature - 2 large eggs - 1 cup sour cream - 2 cups apples, peeled and diced - 1/2 cup packed brown sugar - 1/2 cup rolled oats - 1/4 cup all-purpose flour (for the crumb topping) - 4 tablespoons cold butter, cut into small cubes For the cinnamon drizzle: - 1 cup powdered sugar - 2 tablespoons milk - 1/2 teaspoon ground cinnamon If you don't have all-purpose flour, you can use cake flour. It gives a lighter cake. For the sour cream, yogurt works well too. If you need a dairy-free option, try almond milk or coconut milk. You can swap granulated sugar with coconut sugar for a different flavor. If you want a sweeter cake, add more sugar, but remember to adjust other ingredients to keep the balance. Choosing apples is key to a great cake. Granny Smith apples are my top choice. They have a tartness that balances the sweetness of the cake. Look for firm apples that are free of bruises. Smell the apples; they should have a fresh scent. If you can't find Granny Smith, Honeycrisp or Fuji are good alternatives. They add sweetness and hold their shape well when baked. Start by preheating your oven to 350°F (175°C). This step is key for even baking. Lightly grease a 9x13-inch baking pan. Use butter or cooking spray to coat it well. This helps the cake come out cleanly after baking. Next, gather your mixing bowl and whisk. Add 2 cups of all-purpose flour, 1 cup of granulated sugar, 1 teaspoon of baking powder, 1/2 teaspoon of baking soda, 1/2 teaspoon of salt, and 1 teaspoon of ground cinnamon. Whisk them together until mixed. This ensures the dry ingredients are well combined. Now, add 1/2 cup of softened unsalted butter to the dry mix. Use an electric mixer or a wooden spoon to beat it in. You want a crumbly texture. This helps create a rich base for your cake. Then, add 2 large eggs and 1 cup of sour cream. Mix until everything is smooth and creamy. It’s important to get rid of any lumps. Finally, fold in 2 cups of diced apples. Granny Smith apples work best due to their tartness. In a separate bowl, combine 1/2 cup of packed brown sugar, 1/2 cup of rolled oats, and 1/4 cup of all-purpose flour. Add 4 tablespoons of cold butter cut into small cubes. Use a fork or your fingers to mix this until it looks like coarse crumbs. This topping adds a nice crunch to your cake. Once your batter is ready, pour it into the greased baking pan. Spread it out evenly using a spatula. Now sprinkle the crumb topping over the batter. Make sure it covers the entire surface. Place the baking pan in your preheated oven. Bake for 35-40 minutes. To check if it’s done, insert a toothpick in the center. If it comes out clean or with a few moist crumbs, your cake is ready. After baking, let it cool for 10-15 minutes in the pan. Then transfer it to a wire rack to cool completely. While it cools, you can prepare the cinnamon drizzle. This will add a sweet finish to your cake. For the drizzle, whisk together 1 cup of powdered sugar, 2 tablespoons of milk, and 1/2 teaspoon of ground cinnamon until smooth. Once your cake is cool, drizzle this icing on top. Enjoy your delicious creation! For the full recipe, check out the complete guide. To get that perfect crumb, use cold butter for the topping. Mixing it with flour and oats creates small clumps. This helps the topping bake into a crunchy layer. Avoid over-mixing the batter; it should be smooth but not overworked. Stir just until combined. This keeps the cake light and fluffy. Apple crumb cake shines as a breakfast treat or dessert. Serve it warm with a scoop of vanilla ice cream for a cozy dessert. Pair it with coffee or tea for a delightful afternoon snack. You can also add whipped cream on the side for extra richness. For a festive touch, sprinkle some chopped nuts on top when serving. The cinnamon drizzle makes this cake pop! Drizzle it generously over the cake right before serving. For added flair, sprinkle a dash of cinnamon on top. You can also scatter a few thin apple slices around the cake for freshness. This creates a beautiful presentation that’s sure to impress. {{image_4}} You can boost your Apple Crumb Cake's taste by adding nuts or dried fruits. Pecans or walnuts work great. They add a nice crunch and flavor. Chop them up and mix them into your batter or sprinkle them on top. Dried cranberries or raisins also add sweetness. Just remember to keep the total amount to about one cup. This keeps the cake moist while adding fun textures. If you need a gluten-free option, you can easily make this cake gluten-free. Replace the all-purpose flour with a gluten-free flour blend. Make sure it has a good binding agent, like xanthan gum, to help with the texture. You can find these blends in most grocery stores. This version still keeps the same yummy taste and moistness. While the cinnamon drizzle is delightful, you can try different toppings. A cream cheese frosting can give a rich, tangy taste. Just whip cream cheese, butter, and a bit of powdered sugar together. Another option is a simple glaze made from lemon juice and powdered sugar. This adds a fresh zing to your cake. Don't be afraid to get creative and mix flavors that you love. For the full recipe, check out the Apple Crumb Cake with Cinnamon Drizzle. To keep your Apple Crumb Cake fresh, let it cool completely. Then, cover it with plastic wrap or aluminum foil. This prevents it from drying out. Store it in a cool, dry place for up to three days. If you want to keep it longer, consider freezing. To freeze your cake, first slice it into portions. Wrap each piece in plastic wrap tightly. Then, place the wrapped slices in a freezer-safe bag or container. This helps keep the cake fresh for up to three months. When you’re ready to enjoy it, simply thaw it in the fridge overnight. To reheat, you can use the microwave or oven. For the microwave, warm a slice on high for about 15-20 seconds. If you prefer the oven, preheat it to 350°F (175°C). Place the slice in for about 10 minutes. This keeps the crumb nice and soft. Don’t forget to drizzle some fresh cinnamon icing on top before serving! For the full recipe, check out the details above. Apple crumb cake can last for about 3 to 4 days when stored properly. Keep it in an airtight container at room temperature. If you want it to last longer, store it in the fridge. It may last up to a week there. However, the cake might dry out a bit after a few days. For the best taste, enjoy it fresh within the first few days. Yes, you can make apple crumb cake ahead of time. Bake it and let it cool completely. Cover it tightly with plastic wrap or foil. This way, it can stay fresh for up to 4 days at room temperature. You can also freeze it for longer storage. Just make sure it is sealed well to prevent freezer burn. To enjoy, just thaw it in the fridge overnight before serving. Apple crumb cake pairs well with many tasty sides. Here are some great ideas: - A scoop of vanilla ice cream - Whipped cream for a light touch - Freshly brewed coffee or tea - Slices of sharp cheddar cheese for a sweet-savory combo These options will enhance your dessert experience. Enjoy the cake with whatever you like best! If you want to know more, check out the full recipe for more serving ideas. You now have all the details for making a delicious Apple Crumb Cake. We covered ingredients, step-by-step instructions, tips, variations, and storage information. With the right apples and a few tricks, your cake will shine. Always feel free to experiment with flavors and toppings. A well-stored cake can last days longer. Enjoy your baking and the sweet rewards that follow!
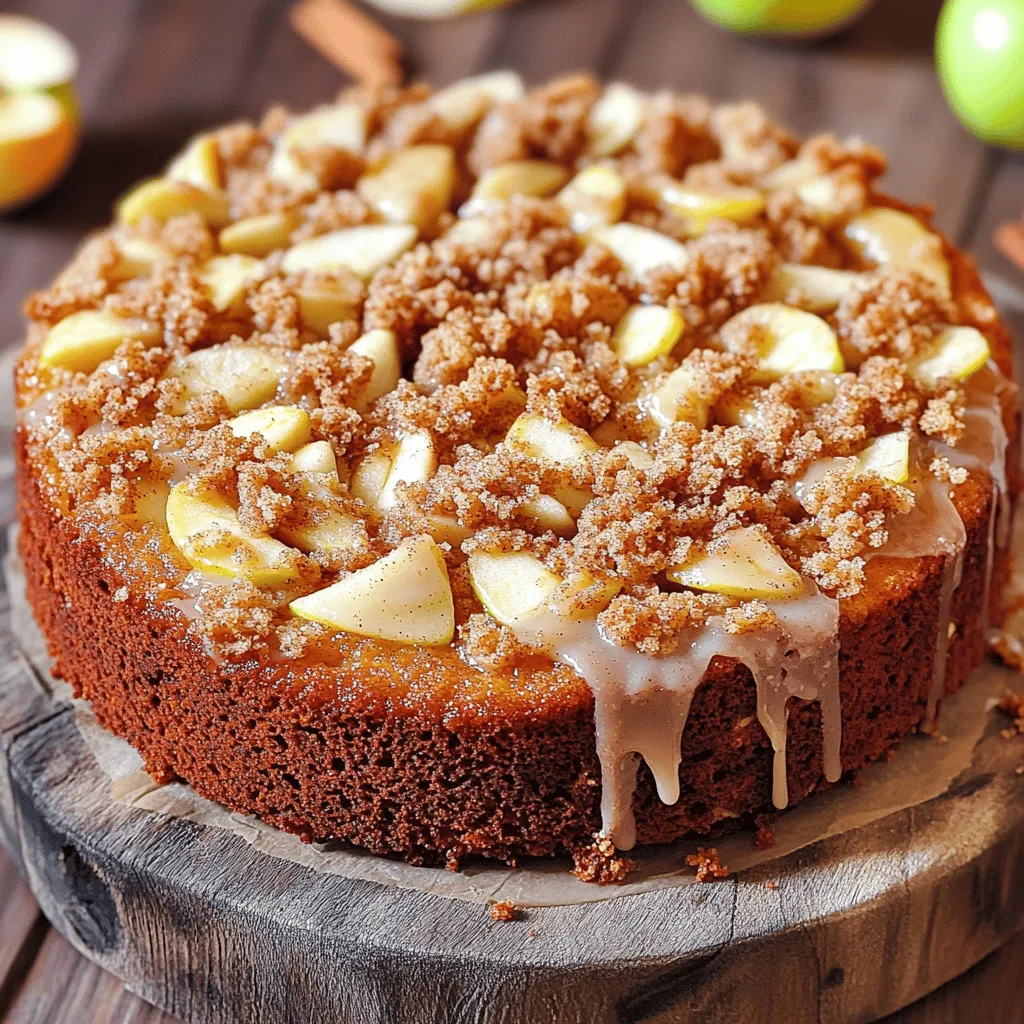
Irresistible Apple Crumb Cake with Cinnamon Drizzle
When it comes to cozy desserts, nothing beats a warm slice of Apple Crumb Cake with Cinnamon Drizzle. You’ll love this easy recipe that fills