Desserts
![- 10 cups of popped popcorn - 1 cup dark chocolate chips - 1/2 cup white chocolate chips - 1/2 cup candy corn - 1/2 cup mini marshmallows - 1/2 cup crushed Halloween-themed cookies - 1 tablespoon coconut oil - Sea salt to taste - Optional: colorful sprinkles - Microwave-safe bowls - Baking sheet - Parchment paper - Mixing bowls Gathering the right ingredients is key to making Halloween popcorn that delights all. You want to start with ten cups of freshly popped popcorn. You can use an air popper, stovetop, or microwave. Just make sure your popcorn is light and fluffy. Next, grab one cup of dark chocolate chips and half a cup of white chocolate chips. These will give you that rich chocolate flavor we all love. For extra sweetness, add half a cup of candy corn and half a cup of mini marshmallows. These little treats will make your popcorn fun and festive. Don't forget the crunch! Add half a cup of crushed Halloween-themed cookies like Oreos. They will add texture and a spooky touch. You’ll also need one tablespoon of coconut oil. This will help melt the chocolate smoothly. Finally, sprinkle some sea salt for balance. If you want a pop of color, throw in some colorful sprinkles as an optional touch. Now, let’s talk about the equipment. You will need microwave-safe bowls to melt the chocolate. A baking sheet lined with parchment paper will help your popcorn cool and set. Mixing bowls are essential for combining all your tasty treats. Having everything ready makes cooking easier and more fun! - Step 1: Pop the Popcorn Start by popping your popcorn. Use either an air popper, stovetop, or microwave. You need about 10 cups of popped popcorn. Once it pops, place it in a large bowl to cool. - Step 2: Melt the Chocolates In two separate bowls, put the dark chocolate chips and white chocolate chips. Add 1/2 tablespoon of coconut oil to each bowl. Microwave them for 30 seconds at a time. Stir after each time until the chocolate is smooth. - Step 3: Drizzle the Chocolate Take a spoon and drizzle the melted dark chocolate over your popcorn. Mix it gently with a spatula or your hands. Do the same with the white chocolate for a colorful look. - Step 4: Fold in Ingredients Now, it’s time to mix in the fun stuff! Fold in the candy corn, mini marshmallows, and crushed Halloween cookies. Mix until every piece is coated in chocolate. - Step 5: Sprinkle with Sea Salt To make the flavors pop, add a sprinkle of sea salt. This salty touch balances the sweet taste. Adjust it to fit your liking. - Step 6: Add Sprinkles If you want a festive look, fold in some colorful sprinkles. This is optional, but it adds a fun touch. - Step 7: Cool and Set Spread your popcorn mix on a baking sheet lined with parchment paper. Let it cool for about 15-20 minutes. You can put it in the fridge for faster results. - Step 8: Serve Once the chocolate hardens, break the popcorn into clusters. Serve them in fun bowls or bags for your Halloween party. Enjoy your spooky treat! This easy recipe will give you a fun Halloween snack. For the complete recipe, check out the full recipe section. - Use fresh popcorn kernels: Fresh kernels pop better. They give you light and fluffy popcorn. Old kernels may not pop well and can ruin the fun. - Ensure chocolate is smooth: Melt chocolate slowly. This keeps it creamy and easy to drizzle. Lumpy chocolate can spoil the look and taste of your popcorn. - Adjusting Sea Salt to Taste: Start with a little sea salt. You can always add more later. The right amount gives a nice balance to the sweet chocolate. - Perfecting Chocolate Drizzle Technique: Use a spoon to drizzle chocolate. Move it back and forth over the popcorn. This creates a beautiful pattern and covers the popcorn evenly. - Microwaving in intervals: Heat chocolate in 30-second bursts. This prevents the chocolate from burning. Stir it well after each interval. - Using proper bowls: Use microwave-safe bowls for melting. Glass or ceramic works best. Avoid using plastic as it may melt. These tips will help you make the best Halloween popcorn. For the full recipe, check the details above! {{image_4}} You can switch up your Halloween popcorn with different flavors. Here are some fun ideas: - Halloween Caramel Popcorn: Use caramel sauce instead of chocolate. Cook sugar and butter until it melts. Pour it over the popcorn and mix well. Let it cool for a crunchy treat. - Spicy Cheddar Halloween Popcorn: Toss popcorn with melted butter and sprinkle with cheddar cheese powder. Add a pinch of cayenne pepper for some heat. It's a savory twist for those who enjoy a kick. - Pumpkin Spice Popcorn: Mix pumpkin spice seasoning with melted white chocolate. Drizzle this over the popcorn. The warm spices make it perfect for fall. If you have dietary needs, there are easy swaps: - Gluten-free options: Use certified gluten-free popcorn and candies. Ensure all ingredients are gluten-free to keep it safe for everyone. - Vegan substitutions: Replace chocolate with dairy-free chocolate chips. You can also use maple syrup instead of caramel for a vegan twist. Make your popcorn pop at parties with these fun ideas: - Popcorn bags for parties: Use small paper bags. Fill them with popcorn and tie with a ribbon. They are easy for guests to grab and enjoy. - Halloween-themed bowls: Serve popcorn in spooky bowls. Look for bowls shaped like pumpkins or skulls. This adds a festive feel to your snack table. These variations and ideas can make your Halloween popcorn extra special! For the full recipe, check out the [Full Recipe]. To keep your Halloween popcorn fresh, use airtight containers. Glass jars or plastic containers work great. They prevent air from getting in and keep popcorn crunchy. Avoid using paper bags, as they allow moisture in. Always let the popcorn cool before sealing it up. This helps prevent sogginess. Halloween popcorn stays fresh for about one week. Store it in a cool, dry place for best results. If you notice soft spots or a stale smell, it’s time to toss it. You want to enjoy this treat while it’s still tasty and crispy. If your popcorn loses its crunch, don’t worry! You can revive it easily. Preheat your oven to 250°F. Spread the popcorn on a baking sheet in a single layer. Heat for about 5-10 minutes. Check it often to avoid burning. Once done, let it cool before enjoying. This method brings back that delightful texture. For more fun ideas, check out the Full Recipe! The best way to pop popcorn is by using an air popper, stovetop, or microwave. Each method works well. For stovetop, heat oil in a large pot, add kernels, and cover. Shake often until popping slows. For microwave, use a microwave-safe bowl with a lid. Follow package instructions for best results. Yes, you can use different types of chocolate. Feel free to swap dark chocolate for white chocolate or milk chocolate. Each type adds its own flavor. Experiment to find your favorite mix. Each chocolate brings a nice taste to the popcorn. To make this recipe nut-free, avoid any nuts in your mix. Use nut-free chocolate chips and check labels for any hidden nuts. Stick with the other fun ingredients. Candy corn, marshmallows, and cookies are great options. This recipe yields about eight servings. Each serving is a fun, tasty treat. Perfect for sharing at a Halloween party or with friends. Adjust the portion size if you want more or fewer servings. Yes, you can make Halloween Popcorn ahead of time. Store it in an airtight container. This keeps it fresh and tasty. You can make it a day or two before your event. Just remember to let it cool completely before storing. In this post, we explored how to make tasty Halloween popcorn. We discussed key ingredients like popcorn, chocolate, and candy. I shared step-by-step instructions to make it easy. Plus, I offered tips to enhance flavor and presentation. You can even try fun variations and find storage solutions. Now, get ready to enjoy your snack at Halloween parties and beyond! This sweet treat will surely delight fans of all ages.](https://meltedrecipes.com/wp-content/uploads/2025/07/10ec22b9-6bd2-4ee6-937a-d09158c1fd01.webp)
Halloween Popcorn Delight Simple and Fun Recipe
Looking for a tasty and fun treat this Halloween? You’re in the right spot! My Halloween Popcorn Delight recipe is simple, quick, and full of
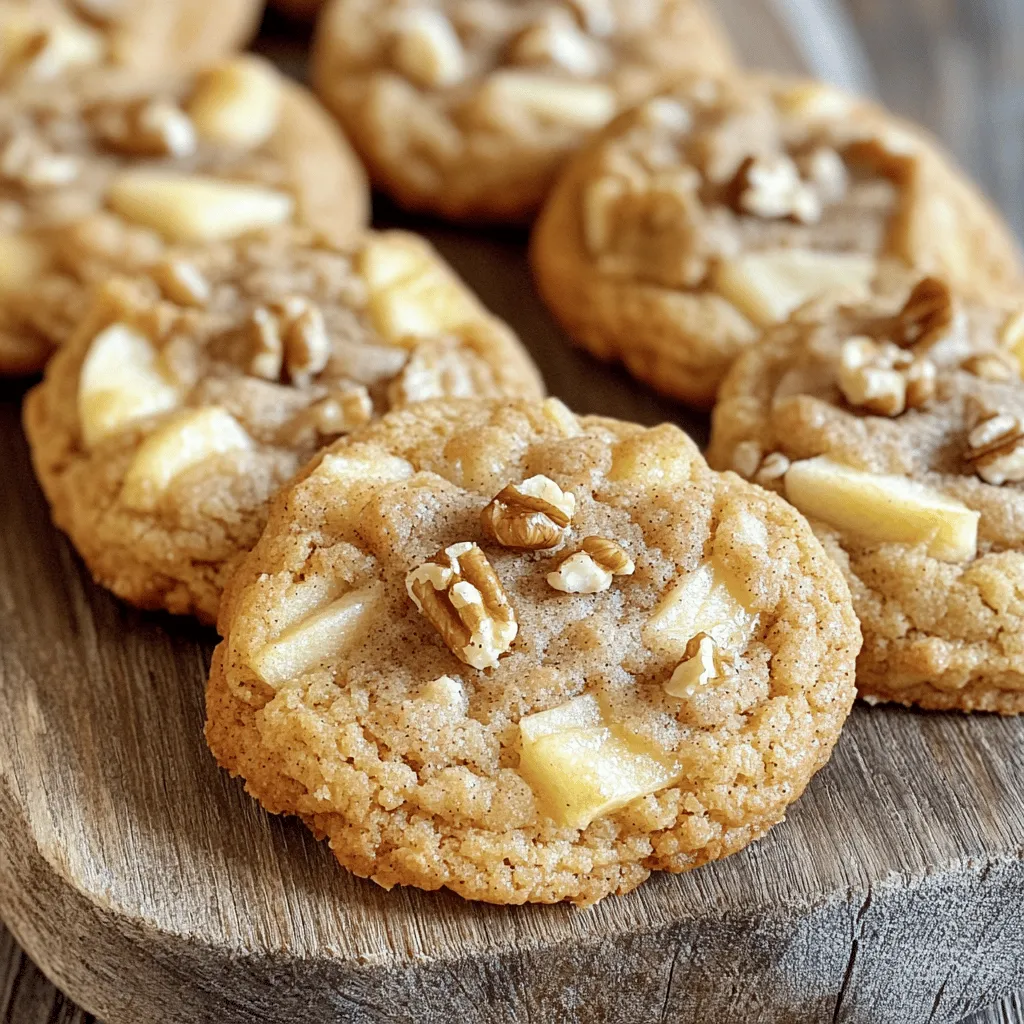
Apple Cinnamon Cookies Irresistible Flavor Delight
Are you ready to enjoy some warm, sweet goodness? Apple Cinnamon Cookies are a treat that you won’t be able to resist. With their soft
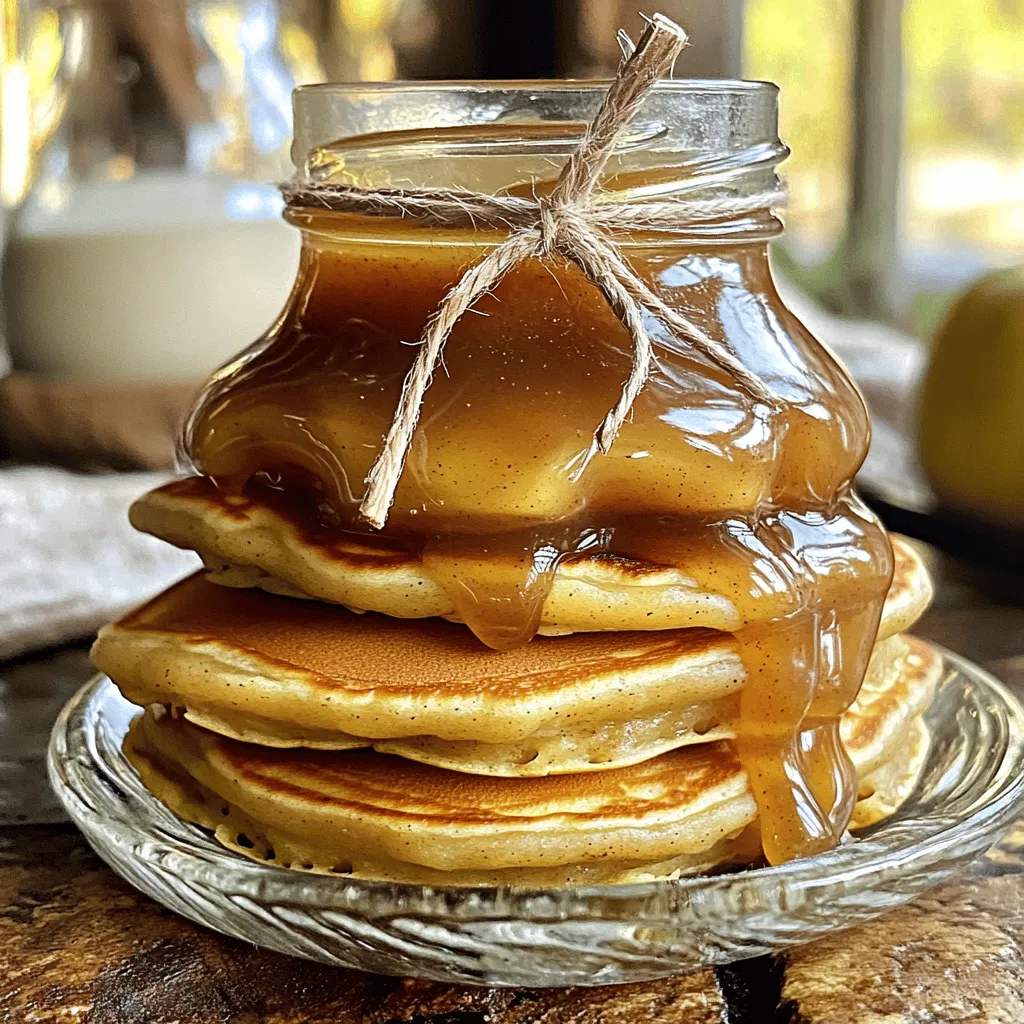
Apple Brown Sugar Syrup Simple and Sweet Recipe
Are you ready to add a touch of sweetness to your day? In this guide, I’ll show you how to make simple and delicious Apple
![- Canned pumpkin puree (1 cup) - Granulated sugar (1/2 cup) - Brown sugar (1/2 cup) - Eggs (2 large) - Vegetable oil (1/3 cup) - Pure vanilla extract (1 tsp) - All-purpose flour (1 1/2 cups) - Baking powder (1 tsp) - Baking soda (1/2 tsp) - Ground cinnamon (1 tsp) - Ground nutmeg (1/2 tsp) - Ground ginger (1/4 tsp) - Salt (1/4 tsp) - Cinnamon-sugar topping (1/4 cup granulated sugar mixed with 1 tsp ground cinnamon) Gathering these ingredients is the first step to making your oven-baked pumpkin donuts. Each one plays an important role. The canned pumpkin puree brings moisture and flavor. The sugars add sweetness and help with browning. Eggs help bind everything together. The vegetable oil keeps the donuts moist. Pure vanilla extract adds a nice depth of flavor. The all-purpose flour gives structure. Baking powder and baking soda help the donuts rise. The spices—cinnamon, nutmeg, and ginger—provide that warm fall taste. Finally, a touch of salt balances the sweetness. You can find most of these ingredients at your local grocery store. If you want to make the donuts even more special, consider using fresh spices. They can add more flavor than pre-ground ones. For the full recipe, check out the [Full Recipe]. - Preheat oven to 350°F (175°C). - Grease donut pan with cooking spray. - In a large bowl, combine pumpkin puree, granulated sugar, brown sugar, eggs, vegetable oil, and vanilla extract. Mix until smooth. - In a separate bowl, whisk together all-purpose flour, baking powder, baking soda, ground cinnamon, ground nutmeg, ground ginger, and salt. - Ensure even distribution of leavening agents and spices to avoid clumps. - Gently fold the dry ingredients into the wet mixture. - Stop mixing when the batter is just combined. - Use a piping bag or spoon to fill each donut cavity about three-quarters full. - Place the filled donut pan in the oven and bake for 12-15 minutes. - Check doneness by inserting a toothpick into the center. It should come out clean. - Let the donuts cool in the pan for 5 minutes. - Transfer them to a wire rack to cool completely. - Prepare the topping by mixing granulated sugar and ground cinnamon. - Roll each donut in the cinnamon-sugar mixture for a sweet finish. For more detailed steps, check the Full Recipe. - Avoid overmixing for a better texture: Mix until just combined. A few lumps are fine. Overmixing can make your donuts tough. You want them soft and fluffy. - Use a piping bag for neat filling: This keeps your filling even. It also helps avoid mess. If you don’t have a piping bag, a zip-top bag with a corner cut off works well. - Suggestions for high-altitude baking: If you bake at a high altitude, reduce the sugar by 1-2 tablespoons. Add a bit more liquid to keep the batter moist. This helps your donuts rise better. - Tips for adjusting for different ovens: Not all ovens heat the same. If your donuts brown too fast, lower the oven temperature by 25°F. Always check your donuts a few minutes early. - Presentation tips for serving: Place the warm donuts on a pretty plate. Sprinkle them with leftover cinnamon sugar. This adds a nice touch and makes them look great. - Pairing ideas for beverages: Enjoy these donuts with hot coffee or spiced tea. They also pair well with apple cider. The flavors complement each other perfectly. Try the Full Recipe for a delightful treat that’s easy to make! {{image_4}} You can make these donuts even more fun by adding extras. Adding chocolate chips or walnuts gives them a tasty twist. Just mix in about a half cup of either before baking. This change makes each bite exciting. You can also adjust spices for different flavors. Try adding a bit more cinnamon for warmth or a pinch of allspice for a unique taste. These small changes can create a new favorite. Need a gluten-free option? Swap all-purpose flour with almond or coconut flour. These flours work well and keep the donuts tasty. You can also use gluten-free baking mixes. If you want a lower sugar option, consider using a sugar substitute like stevia or monk fruit. Use these in equal amounts to the sugar in the recipe. These adjustments help you enjoy the donuts without worry. To keep your donuts fresh, store them in an airtight container. This keeps moisture in and prevents them from drying out. You can use a plastic container or a resealable bag. Place a piece of parchment paper between layers to avoid sticking. Keep them at room temperature for up to three days. If you want them to last longer, refrigerate them. However, be aware that chilling can change their texture. To freeze these tasty donuts, follow these steps: 1. Cool the donuts completely: Make sure they are at room temperature. 2. Wrap each donut: Use plastic wrap or aluminum foil to wrap each one tightly. This prevents freezer burn. 3. Place in a freezer bag: Put the wrapped donuts in a freezer-safe bag. Label the bag with the date. 4. Freeze: Store them in the freezer for up to three months. When you're ready to enjoy a donut, thaw it at room temperature. You can also warm it in the microwave for about 10-15 seconds. This helps bring back that fresh-baked taste and texture. To check if the donuts are done, use a toothpick. Insert it into the center of a donut. If it comes out clean, the donuts are ready. This method is quick and easy. You can also gently press the top of a donut. If it springs back, it’s fully baked. Yes, you can make these donuts ahead of time. After baking, let them cool completely. Then, store them in an airtight container. They stay fresh for up to three days. For longer storage, you can freeze them. Wrap each donut in plastic wrap, then place them in a freezer bag. They will keep well for up to three months. If you don’t have canned pumpkin puree, you can use homemade puree. Simply roast fresh pumpkin, then blend until smooth. You may also use sweet potato puree as a substitute. Both options will give you a similar taste and texture. No, it is not necessary to use a donut pan. If you don’t have one, you can use a muffin tin instead. Just fill the muffin cups with the batter. The baking time may change. Check for doneness as you would with donuts. You can also shape the batter by hand into rings. Just make sure they are evenly sized for even baking. You can easily create delicious donuts with simple ingredients and steps. We discussed everything from essential ingredients to baking tips and variations. You can even adjust for dietary needs or try different flavors. Remember, allowing the donuts to cool and topping them with cinnamon sugar makes a big difference. Enjoy sharing these tasty treats with family and friends! You now have the knowledge to make perfect pumpkin donuts at home. Get your ingredients ready and start baking!](https://meltedrecipes.com/wp-content/uploads/2025/07/a94014fa-e704-435e-82e5-1182a144eebb.webp)
Oven-Baked Pumpkin Donuts Delightfully Simple Recipe
If you love the taste of fall, you’ll adore these Oven-Baked Pumpkin Donuts! They’re easy to make, packed with flavor, and perfect for cozy mornings.
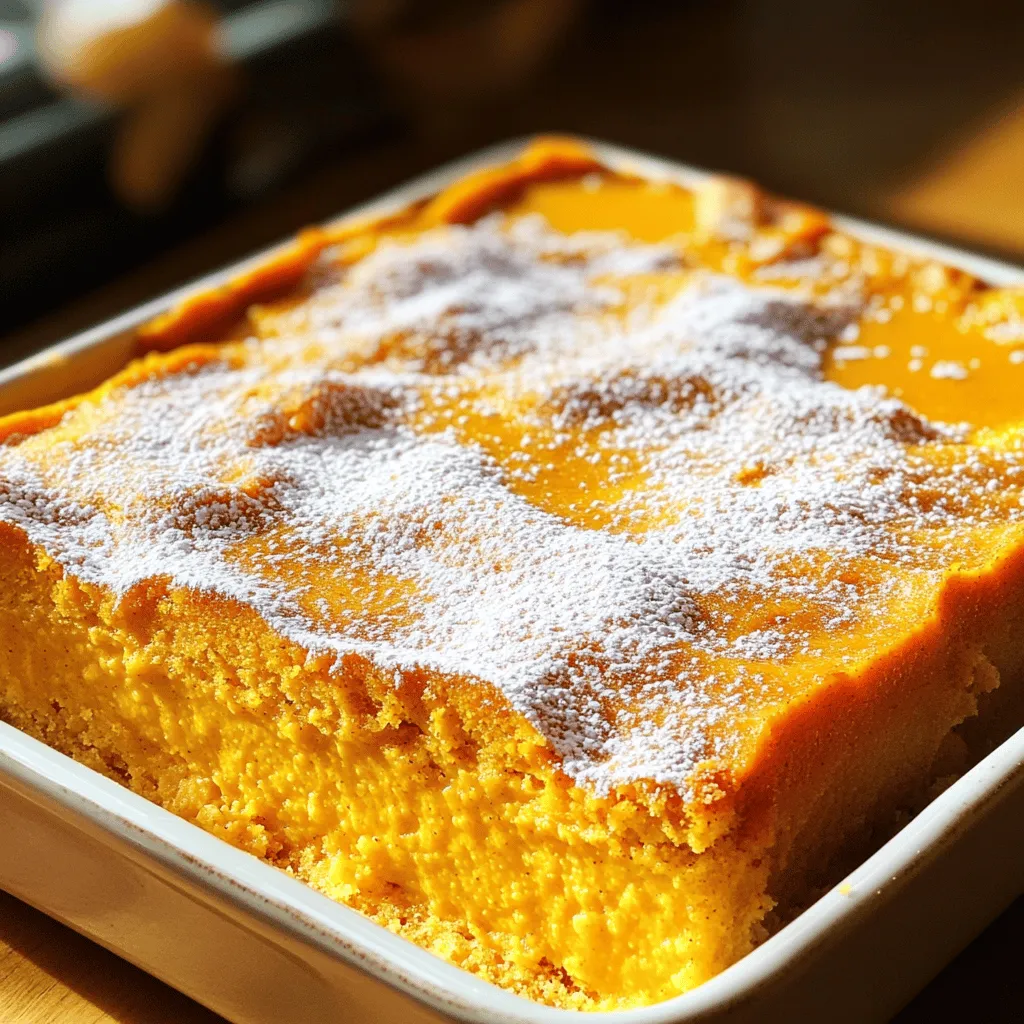
Pumpkin Magic Custard Cake Irresistible Dessert Delight
If you’re craving a dessert that brings the cozy flavors of fall, look no further! Pumpkin Magic Custard Cake is a delightful treat that transforms

Neapolitan Pound Cake Fluffy Delight for All Occasions
Have you ever craved a dessert that combines classic flavors in a fluffy delight? Meet the Neapolitan Pound Cake! This cake layers rich vanilla, luscious
![To make a tasty pumpkin pull-apart loaf, you need these key items: - 3 cups all-purpose flour, plus more for dusting - 1 packet (2 1/4 tsp) active dry yeast - 1/4 cup granulated sugar - 1 tsp salt - 1 tsp ground cinnamon - 1/2 tsp ground nutmeg - 1/2 tsp ground ginger - 1 cup pumpkin puree, fresh or canned - 1/2 cup milk, warmed to about 110°F (43°C) - 1/4 cup unsalted butter, melted and slightly cooled - 1 large egg, at room temperature These ingredients work together to create a fluffy, flavorful loaf. You can add some extras to enhance your loaf: - 1/4 cup packed brown sugar (for filling) - 1/4 cup chopped walnuts (optional, for filling) - 1/4 cup raisins or dried cranberries (optional, for filling) These optional ingredients give your loaf a sweet crunch and added flavor. If you need to make swaps, here are some ideas: - Flour: You can use whole wheat flour for a heartier loaf. - Milk: Almond milk or oat milk works well if you prefer non-dairy. - Pumpkin Puree: You can use sweet potato puree if you don't have pumpkin. - Sugar: Coconut sugar or honey can replace granulated sugar. These substitutions help you customize the recipe to your taste and needs. For the full recipe, check the [Full Recipe]. To start, gather your ingredients. In a large bowl, mix 2 cups of flour, sugar, salt, and spices. This blend gives your loaf a warm flavor. In another bowl, whisk together warm milk, pumpkin puree, melted butter, and egg. You want these to mix well. Sprinkle the yeast over the milk mixture and let it sit for five minutes. This step helps the yeast become active. Next, pour the milk mixture into the dry mix. Stir gently, then add the remaining flour, half a cup at a time. Once the dough starts to form, move it to a floured surface. Knead the dough for 5 to 7 minutes until it feels smooth. Place the dough back in a greased bowl, cover it, and let it rise in a warm spot for about one hour. After the dough has risen, punch it down gently. Move it to a floured surface and roll it into a rectangle about 1/4 inch thick. Brush the top with melted butter. Then sprinkle the brown sugar, walnuts, and raisins evenly over the dough. This adds sweetness and texture to your loaf. Using a sharp knife, cut the dough into 1-inch strips. Brush each strip with more melted butter. Stack the strips on top of each other, then cut the stack into squares or triangles. This will help create the pull-apart effect. Now, take your dough pieces and arrange them in a greased loaf pan. Stand them on their sides for a fun look. Cover the pan with a towel and let it rise for another 30 minutes. Preheat your oven to 350°F (175°C) as it rises. Once the dough has puffed up again, bake it for 30 to 35 minutes. It should turn a golden brown color. To check if it’s ready, insert a toothpick into the center. If it comes out clean, your loaf is done. Let it cool in the pan for 10 minutes before moving it to a wire rack. Enjoy your pumpkin pull-apart loaf! To make your pumpkin pull-apart loaf rise well, use warm milk. It should be about 110°F (43°C). This temperature helps the yeast activate. Always make sure your yeast is fresh. If it does not foam in five minutes, it may be dead. Create a warm spot in your kitchen for rising. You can turn on the oven for a few minutes and then turn it off. Cover the dough with a kitchen towel. This keeps it warm and helps it rise better. For a fluffy loaf, do not rush the kneading process. Knead the dough for 5-7 minutes. This helps develop gluten. A well-kneaded dough is smooth and elastic. When shaping the loaf, stack the cut strips carefully. This allows for even rising and better texture. Use a greased loaf pan to prevent sticking. Also, let the loaf rise again after shaping. This second rise is key for a light and airy texture. Serve your pumpkin pull-apart loaf warm for the best taste. It pairs wonderfully with cream cheese spread or whipped butter. For a fun twist, sprinkle some cinnamon on top. You can also add a drizzle of honey for extra sweetness. This loaf is perfect for breakfast or as a snack. Enjoy it with coffee or tea. Your friends and family will love it! For full details, check the Full Recipe. {{image_4}} You can play with flavors in your pumpkin pull-apart loaf. Try adding chocolate chips for a sweet twist. If you love nuts, swap walnuts for pecans. Use spices like cardamom or allspice for a warm kick. For a zesty touch, mix in orange zest. Each option gives your loaf a unique taste. Want to make this loaf gluten-free? Use a gluten-free flour blend instead of all-purpose flour. Make sure it has xanthan gum to help with texture. The rest of the ingredients stay the same. Your pumpkin pull-apart loaf will still be soft and tasty! Make your loaf fit the season. In fall, add maple syrup for a sweet touch. For winter, mix in cranberries for a tart flavor. In spring, try adding fresh herbs like rosemary or thyme. Each season brings new ideas for your loaf, keeping it fresh and exciting! For the full recipe, check out the details above. To keep your pumpkin pull-apart loaf fresh, place it in an airtight container. This will help retain moisture and flavor. If you cannot finish the loaf in a few days, consider freezing it. Properly stored, it lasts about 3 to 5 days at room temperature. To freeze your loaf, first, let it cool completely. Wrap it tightly in plastic wrap, then cover with aluminum foil. This keeps out air and prevents freezer burn. You can freeze the loaf for up to 3 months. When you're ready to enjoy it, just thaw it in the fridge overnight. Reheat your pumpkin loaf by slicing it and placing it in a toaster oven or regular oven. Preheat the oven to 350°F (175°C). Heat for about 10 minutes, or until warm. You can also microwave slices for about 20-30 seconds. Enjoy the warm, cozy flavors again! For best results, serve it with a spread, like cream cheese. Pumpkin pull-apart loaf lasts about 3 to 4 days when stored properly. Keep it in an airtight container at room temperature. If you want to keep it longer, consider freezing it. This way, it can last for up to 3 months. Just remember to wrap it tightly in plastic wrap and then foil. When you’re ready to eat, let it thaw in the fridge overnight. Yes, you can make this recipe ahead of time! You can prepare the dough and let it rise. After rising, shape it and place it in the loaf pan. Cover it and store it in the fridge overnight. The next day, take it out and let it rise before baking. This method adds great flavor and saves you time. You can serve pumpkin pull-apart loaf with many tasty options. Try it with spiced cream cheese spread or whipped cinnamon butter. Both add a nice touch. You can also pair it with warm apple cider or a cup of tea for a cozy treat. If you want something sweet, serve it with honey or maple syrup. Enjoy the flavors! In this post, we explored making a tasty pumpkin pull-apart loaf. First, we covered essential and optional ingredients, plus some substitutions. Next, I shared simple steps for preparing, rolling, and shaping the dough. We looked at tips for a perfect rise and baking a fluffy loaf. Variations like gluten-free options and seasonal flavors added fun. I also gave storage info for leftovers and answers to common questions. Baking this loaf brings joy and warmth to any gathering. Happy baking, and enjoy every bite!](https://meltedrecipes.com/wp-content/uploads/2025/07/7b8a2ec4-081a-4bc7-a26c-7657b315c81b.webp)
Pumpkin Pull-Apart Loaf Simple and Tasty Delight
If you’re craving a warm, soft treat, you’ll love this Pumpkin Pull-Apart Loaf! It’s easy to make and perfect for any season. With just a
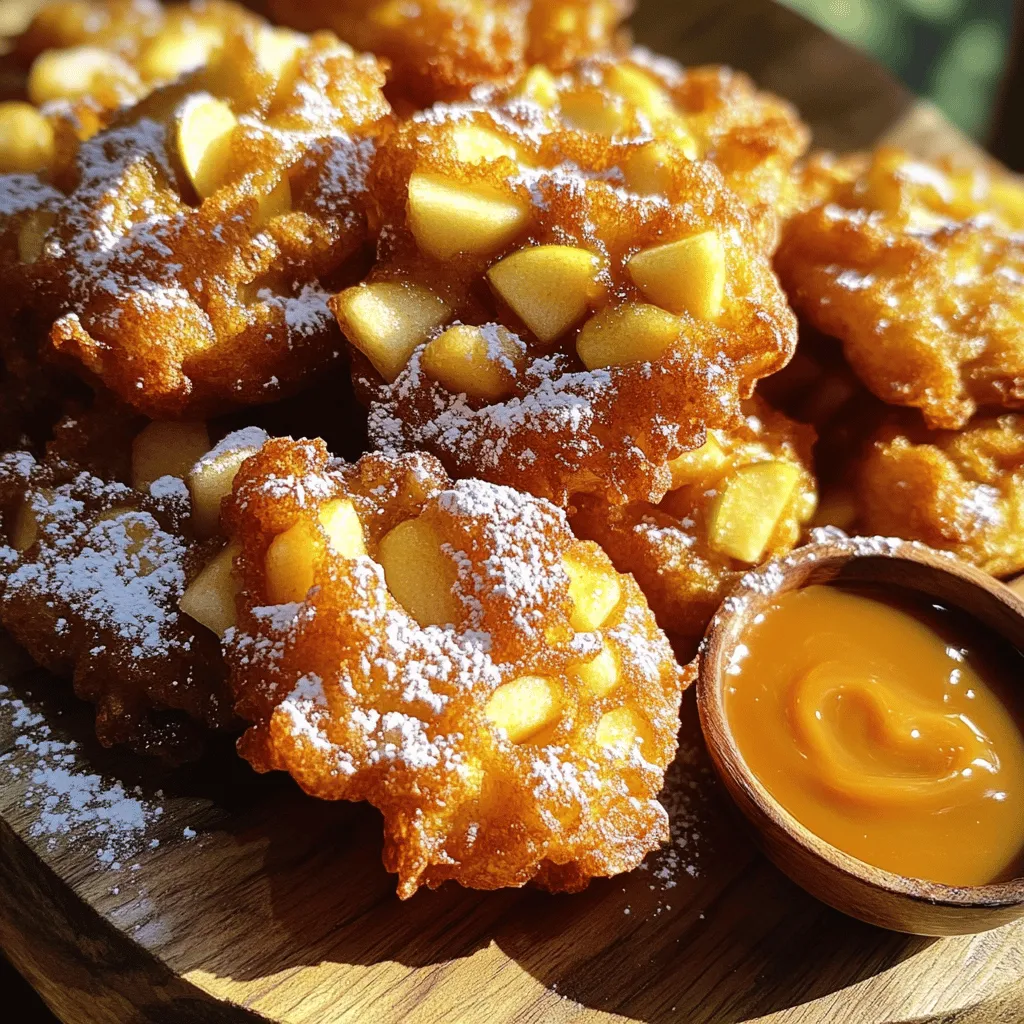
Easy Apple Fritters Delightfully Crispy and Sweet
Craving a sweet treat that’s also super easy to make? These Easy Apple Fritters are your answer! Imagine biting into a crispy, golden fritter bursting
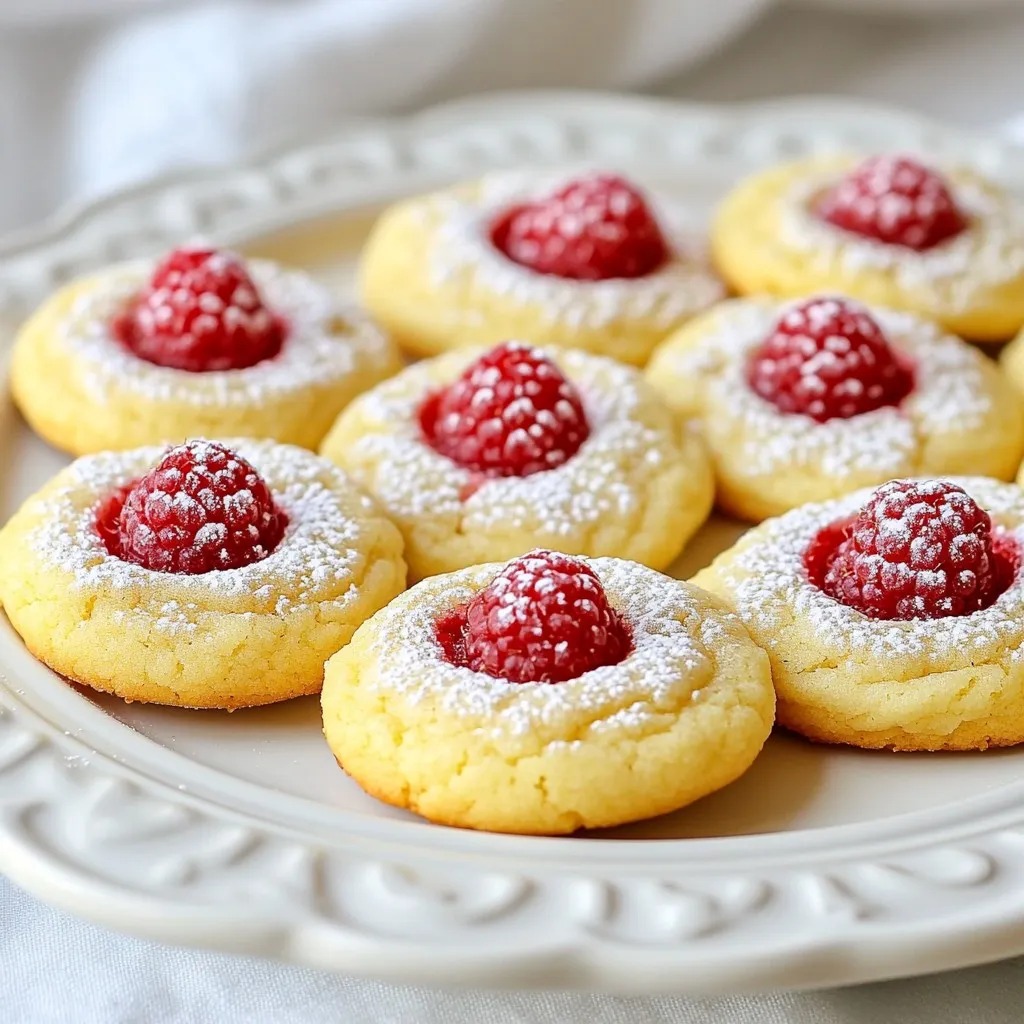
Lemon Raspberry Cookies Delightful and Easy Recipe
Looking for a sweet treat that bursts with flavor? You’ve found it! This easy Lemon Raspberry Cookies recipe will wow your taste buds. Fresh lemons
. Caramel Apple Nachos can be a treat, but they do have some sugars and calories. A serving contains about 300-400 calories, depending on toppings. Apples are healthy, packed with fiber and vitamins. To make them lighter, use less caramel or switch to a healthy topping. Balance is key! You can prep some ingredients ahead. Slice the apples and store them in lemon water to keep them fresh. You can also make the caramel sauce in advance. Just warm it before serving. Keep toppings like granola and nuts separate until you’re ready to serve. This keeps everything fresh and crunchy! Get creative with toppings! Here are some fun ideas: - Dried fruits like cranberries or raisins - Mini marshmallows for a sweet touch - Different nuts like almonds or pistachios - A drizzle of chocolate sauce for extra sweetness - Sprinkles for a colorful finish Adding these can make your nachos even more exciting! You now know how to make tasty caramel apple nachos. First, prepare the apples and add toppings. Use granola, chocolate chips, and nuts to enhance flavor. Remember to store any leftovers properly. You can customize your nachos for any season or diet. Don’t hesitate to get creative with toppings. Enjoy this simple yet delicious treat at any gathering or as a snack. These nachos are sure to impress!](https://meltedrecipes.com/wp-content/uploads/2025/07/2e20b66b-375d-4261-802c-4cfb3c980fe7.webp)
Carmel Apple Nachos Simple and Delicious Treat
Looking for a fun and tasty treat? Let’s dive into making Caramel Apple Nachos! This easy recipe combines juicy apple slices, creamy caramel, and your