Desserts
![- 1 ½ cups graham cracker crumbs - ½ cup unsalted butter, melted - 2 (8 oz) packages cream cheese, softened - 1 cup granulated sugar - 1 teaspoon vanilla extract - 2 large eggs - 1 cup sour cream - 2 cups diced apples (preferably Granny Smith or Honeycrisp) - 1 teaspoon ground cinnamon - ½ cup caramel sauce (store-bought or homemade) When making this caramel apple cheesecake, gather all your ingredients first. It helps to have everything ready. This makes the process smoother and more fun. Here are the specific weights and volumes for each ingredient: - Graham cracker crumbs: 1 ½ cups - Unsalted butter: ½ cup, melted - Cream cheese: 16 oz, softened (2 packages) - Granulated sugar: 1 cup - Vanilla extract: 1 teaspoon - Eggs: 2 large - Sour cream: 1 cup - Diced apples: 2 cups - Ground cinnamon: 1 teaspoon - Caramel sauce: ½ cup If you have allergies or special tastes, here are some substitutions to consider: - Graham cracker crumbs: Use gluten-free crumbs for a gluten-free option. - Cream cheese: Try a dairy-free cream cheese if needed. - Sour cream: Substitute with Greek yogurt for a lighter option. - Granulated sugar: You can use coconut sugar or a sugar substitute. These adjustments can help you enjoy this cheesecake without worries. Make sure to measure accurately for the best results. If you want more details, check the Full Recipe for a complete guide. 1. Preheat the oven: Start by setting your oven to 325°F (160°C). This will help bake the cheesecake evenly. 2. Prepare the graham cracker crust: In a bowl, mix 1 ½ cups of graham cracker crumbs with ½ cup of melted unsalted butter. Stir until the crumbs are well coated. Press this mixture firmly into the bottom of a 9-inch springform pan. Bake for 10 minutes and let it cool slightly. 3. Mixing cream cheese filling: In a large bowl, beat 2 packages of softened cream cheese with an electric mixer. Mix until it is smooth and creamy. 4. Incorporating apples and spices: Slowly add 1 cup of granulated sugar and 1 teaspoon of vanilla extract to the cream cheese. Mix well. Add 2 large eggs one by one, mixing well after each. Finally, blend in 1 cup of sour cream until smooth. 5. Pouring into crust: In another bowl, toss 2 cups of diced apples with 1 teaspoon of ground cinnamon. Carefully fold the spiced apple mixture into the cream cheese batter. Pour this mixture over the cooled graham cracker crust. 6. Baking time and tips: Bake the cheesecake for 50-60 minutes. The center should look set but still jiggle slightly. After baking, turn off the oven and leave the cheesecake inside for 1 hour. This helps to prevent cracks. 7. Cooling process to prevent cracking: After the hour, move the cheesecake to the fridge. Chill for at least 4 hours or overnight for the best texture. Now, you can drizzle caramel sauce on top before serving. This easy caramel apple cheesecake is ready to impress! For the full recipe and more details, check out the Full Recipe. To get a smooth cheesecake, start with softened cream cheese. Cold cheese can cause lumps. Beat the cream cheese alone first. This helps it get creamy. Then add sugar slowly. Mix until it’s fluffy. For chilling, let your cheesecake cool in the oven first. This helps it set without cracking. After an hour, move it to the fridge. Chill for at least four hours. Overnight is even better. When it’s time to serve, slice the cheesecake into even pieces. Place each slice on a nice plate. Drizzle caramel sauce over the top. Add a sprinkle of cinnamon for flavor. For a pop of color, add a mint leaf to the plate. This makes it look fancy! Pair your cheesecake with hot drinks like coffee or spiced cider. They balance the sweet flavors and add warmth. One big mistake is overmixing the batter. This can add air bubbles, which can crack your cheesecake. Mix just until combined. Another mistake is baking too long or too short. If underbaked, the center will be too jiggly. If overbaked, it will crack. Aim for a slight jiggle in the center when done. Check it at 50 minutes and adjust as needed. For the full recipe, check out the complete guide. Enjoy your baking journey! {{image_4}} You can change the flavor of your caramel apple cheesecake easily. Adding nuts like walnuts or pecans can give it a nice crunch. You can sprinkle them on top or mix them into the filling. They add texture and flavor that pairs well with the creamy cheesecake. You can also switch up the fruit. Instead of apples, try adding diced pears or peaches. Both fruits bring a sweet and juicy twist. Each option creates a unique flavor that makes your cheesecake special. If you need a gluten-free crust, just use gluten-free graham cracker crumbs. They work just like regular crumbs, so you won’t miss a thing. Mix them with melted butter, and you’re all set. For a vegan cheesecake, replace cream cheese with a vegan cream cheese. Use flax eggs or applesauce instead of eggs. You can also swap sour cream for coconut cream. This way, everyone can enjoy the cheesecake! During autumn, add warm spices to your cheesecake. Try mixing in nutmeg or ginger along with cinnamon. This gives your dessert a cozy, seasonal flavor that is perfect for fall. For the holidays, consider adding crushed candy canes or a splash of eggnog. Both give a festive flair and make the cheesecake feel special. You can even top it with seasonal fruits for a bright finish. For the full recipe, check out the details above. To keep your Easy Caramel Apple Cheesecake fresh, refrigerate it right away. - Refrigerating: Wrap the cheesecake tightly with plastic wrap. This helps keep it moist. You can also place it in an airtight container. Store it in the fridge for easy access. - Freezing: If you want to freeze it, slice the cheesecake first. Then, wrap each slice in plastic wrap. Place the wrapped slices in a freezer bag or container. This makes it easy to thaw just what you need. How long will your cheesecake last in the fridge? It stays good for up to five days. Make sure to check for signs of spoilage before eating. - Signs of spoilage: Look for changes in color or texture. If you see mold or it smells off, throw it away. Do you have leftover cheesecake? Here are some great ways to enjoy it again. - Best practices: Serve it cold or let it sit out for about 15 minutes to soften. For a warm option, you can microwave a slice for about 10-15 seconds. This will make the caramel sauce gooey again. Enjoy your delicious cheesecake with a warm cup of coffee or tea! For the complete recipe, refer to the [Full Recipe]. To make a no-bake version, simply skip the baking step. Use the same ingredients for the crust and filling, but chill the cheesecake in the fridge for at least 6 hours. This lets it set without heat. The texture will be creamy and smooth, just like the baked version. Yes, you can use store-bought apple pie filling. It saves time and still gives great flavor. Just mix it into the cheesecake batter as you would with fresh apples. This will add sweetness and spice without extra work. If your cheesecake cracks, don’t worry! This can happen. To fix it, let the cheesecake cool slowly in the oven. Then, cover the cracks with caramel sauce or whipped cream. It will taste just as good, and no one will notice! Chill the cheesecake for at least 4 hours before serving. For best results, chill it overnight. This allows the flavors to meld and the texture to firm up. The longer it chills, the better it tastes! Absolutely! You can use cookie crumbs like Oreos or a nut crust. Just crush the cookies or nuts and mix them with melted butter. The crust will add a unique flavor to your cheesecake. Experiment to find your favorite! For the full recipe, check the details above. You now have a complete guide to making a caramel apple cheesecake. We covered essential ingredients, step-by-step instructions, and useful tips to avoid mistakes. You learned how to customize your cheesecake with different flavors and dietary needs. Proper storage will keep your dessert fresh longer. Now, it's time to bake and enjoy your delicious creation! Trust the process, and don’t be afraid to experiment with your own twists. Happy baking!](https://meltedrecipes.com/wp-content/uploads/2025/08/b5a66139-8122-4b66-bceb-787948347b9c.webp)
Easy Caramel Apple Cheesecake Irresistible and Simple
Are you ready for a dessert that’s both easy and delicious? This Easy Caramel Apple Cheesecake combines creamy goodness with sweet, juicy apples and a
![To make this delightful cinnamon apple bread, gather these ingredients: - 2 cups all-purpose flour - 1 teaspoon baking powder - 1/2 teaspoon baking soda - 1/2 teaspoon salt - 1 teaspoon ground cinnamon - 1/4 teaspoon nutmeg - 1/2 cup unsalted butter, softened - 1 cup granulated sugar - 2 large eggs - 1 teaspoon vanilla extract - 1/2 cup sour cream - 2 cups apples, peeled, cored, and chopped - 1/2 cup chopped walnuts or pecans (optional) - 1/4 cup brown sugar (for topping) You can swap some ingredients if you want. Here are a few ideas: - Use whole wheat flour for a heartier bread. - Replace sour cream with plain yogurt for a tangy taste. - For a dairy-free option, try coconut oil instead of butter. - If you need gluten-free, use a gluten-free flour blend. - You can skip nuts if you prefer a nut-free bread. Choosing the right apples makes a big difference. Here are my tips: - Pick firm apples for the best texture. - Use sweet varieties like Fuji or Honeycrisp for great flavor. - Avoid mealy apples; they won't hold up well in baking. - Try a mix of tart and sweet apples for depth of flavor. - Fresh, in-season apples taste the best. Feel free to check the Full Recipe for more details on making this treat! Start by gathering your ingredients. Use fresh apples for the best taste. I like to use a mix of tart and sweet apples. Preheat your oven to 350°F (175°C). Prepare a 9x5 inch loaf pan by greasing it lightly with butter. Then, dust it with flour to stop sticking. In a medium bowl, mix the dry items. Combine 2 cups of flour, 1 teaspoon baking powder, 1/2 teaspoon baking soda, 1/2 teaspoon salt, 1 teaspoon ground cinnamon, and 1/4 teaspoon nutmeg. Whisk until they blend well. Set this dry mix aside. In a large bowl, cream together 1/2 cup softened butter and 1 cup sugar. Beat them until light and fluffy, about 3-5 minutes. Add 2 large eggs, mixing one at a time. Then stir in 1 teaspoon vanilla extract and 1/2 cup sour cream. Mix until smooth. Next, slowly add the dry ingredients. Stir gently until just combined. A few lumps are okay; do not overmix. Fold in 2 cups of chopped apples and nuts if you like. This step adds flavor and texture to your bread. Pour the batter into the prepared loaf pan. Smooth the top with a spatula. Finally, sprinkle 1/4 cup brown sugar on top. This will give you a sweet crust. Baking time matters. Bake the bread for 55-65 minutes. Every oven is different, so start checking early. Insert a toothpick into the center to check if it's done. If it comes out clean, the bread is ready. For the best texture, do not open the oven door too early. This can make your bread fall. When done, take it out and let it cool in the pan for 10 minutes. Then place it on a wire rack to cool completely. To check if your bread is done, use a toothpick. Insert it into the center of the loaf. If it comes out clean, your bread is ready. If it has batter on it, bake for a few more minutes. Look for a golden-brown color on the top. The sides should pull away slightly from the pan. These signs mean your Cinnamon Apple Bread is perfectly baked. For the complete recipe, refer to the Full Recipe section. To make your Cinnamon Apple Bread moist and tasty, focus on these tips: - Use fresh apples. Fresh apples ensure better flavor and moisture. I like using sweet varieties like Fuji or Honeycrisp. - Don’t overmix. Mix until just combined. Overmixing can make the bread tough. - Add sour cream. This ingredient adds moisture and richness. It also creates a tender crumb. - Use room temperature butter. Softer butter mixes easier and helps the bread rise well. Many home cooks make simple mistakes. Avoid these to improve your bread: - Skipping the flour dusting. Always dust the pan with flour. This step helps the bread release easily. - Not checking the oven temperature. Ovens can vary. Use an oven thermometer for accuracy. - Overbaking. Keep an eye on your bread. Check for doneness a few minutes early. - Ignoring the cooling time. Let it cool before slicing. This helps it set and taste better. Want to simplify the process? Here are my favorite tips: - Use a stand mixer. This saves time and effort. It mixes ingredients quickly and evenly. - Prep ingredients ahead. Chop apples and measure dry ingredients before you start. This makes mixing easier. - Make a double batch. Bake two loaves at once. One can be frozen for later use. - Try a bread maker. If you have one, it can do the mixing and baking for you, making it even more convenient. For the complete recipe, check the [Full Recipe]. Each of these tips can help you create a delightful and simple treat. Enjoy your baking adventure! {{image_4}} You can make this recipe healthier. Swap all-purpose flour for whole wheat flour. Whole wheat adds fiber and nutrients. If you need gluten-free bread, use a gluten-free flour blend. Make sure the blend has a good mix of flours. This will help the bread rise and taste great. You can change the flavor of your bread. Try adding spices like ginger or cloves for warmth. A dash of allspice can also add depth. If you want a hint of vanilla, use vanilla bean paste instead of extract. For a twist, add some citrus zest, like lemon or orange. This will brighten the flavors and make your bread unique. Want to make your bread even better? Consider adding toppings. Chopped nuts, like walnuts or pecans, add crunch and flavor. You can sprinkle them on top before baking. For a sweet touch, mix brown sugar with cinnamon and sprinkle it on top. This will create a lovely crust when baked. If you like, you can also use oats for a hearty topping. Feel free to explore these variations to make your cinnamon apple bread delightful and special. For the full recipe, check out the detailed steps for making this treat! To keep your Cinnamon Apple Bread fresh, store it in an airtight container. This helps keep moisture in and prevents drying out. You can also wrap the bread in plastic wrap or aluminum foil. Place it in a cool, dry place at room temperature. If you plan to eat it within a few days, this method works well. For longer storage, freezing is a great option. First, let the bread cool completely. Then, wrap it tightly in plastic wrap. To protect it further, add a layer of aluminum foil. This keeps out air and prevents freezer burn. You can freeze the bread for up to three months. When you’re ready to enjoy it, just thaw it in the fridge overnight. To reheat your Cinnamon Apple Bread, preheat your oven to 350°F (175°C). Wrap slices in aluminum foil and place them on a baking sheet. Heat for about 10 to 15 minutes. This warms the bread without drying it out. For a quick option, you can use a microwave. Just heat a slice for 15 to 20 seconds. Enjoy your warm, tasty treat just like when it was fresh! Yes, you can use different fruits! Pears, bananas, and berries work well too. Just make sure to chop them small. This way, they mix well into the batter. Each fruit gives a new flavor. Feel free to experiment and find your favorite! To check if your bread is done, use a toothpick. Insert it into the center of the loaf. If it comes out clean, your bread is ready. If it has wet batter on it, bake a bit longer. Keep an eye on the time too, as ovens can vary. Yes, you can make it vegan! Replace the eggs with flax eggs or applesauce. Use plant-based butter instead of regular butter. For sour cream, you can use coconut yogurt. These swaps keep the bread moist and tasty. To slice the bread, wait until it cools completely. Use a serrated knife for clean cuts. Slice it into thick or thin pieces, based on your taste. Serving warm slices adds to the flavor. Cinnamon Apple Bread lasts about three days at room temperature. Keep it in an airtight container to maintain freshness. If you want to keep it longer, freeze it. It can last for up to three months in the freezer. Just wrap it well! In this post, we covered the key parts of making delicious Cinnamon Apple Bread. You learned about the right ingredients, helpful substitutions, and how to select the best apples. I shared step-by-step instructions, baking tips, and ways to avoid common mistakes. We also explored fun variations and storage tips for your bread. Enjoy baking, sharing, and eating this comforting treat with friends and family!](https://meltedrecipes.com/wp-content/uploads/2025/08/325aa57d-bd74-42c4-9044-5dd2ecf2bbf6.webp)
Cinnamon Apple Bread Delightful and Simple Treat
Cinnamon Apple Bread is a warm, sweet treat that brings joy to any kitchen. You can whip up this delightful recipe with simple ingredients and
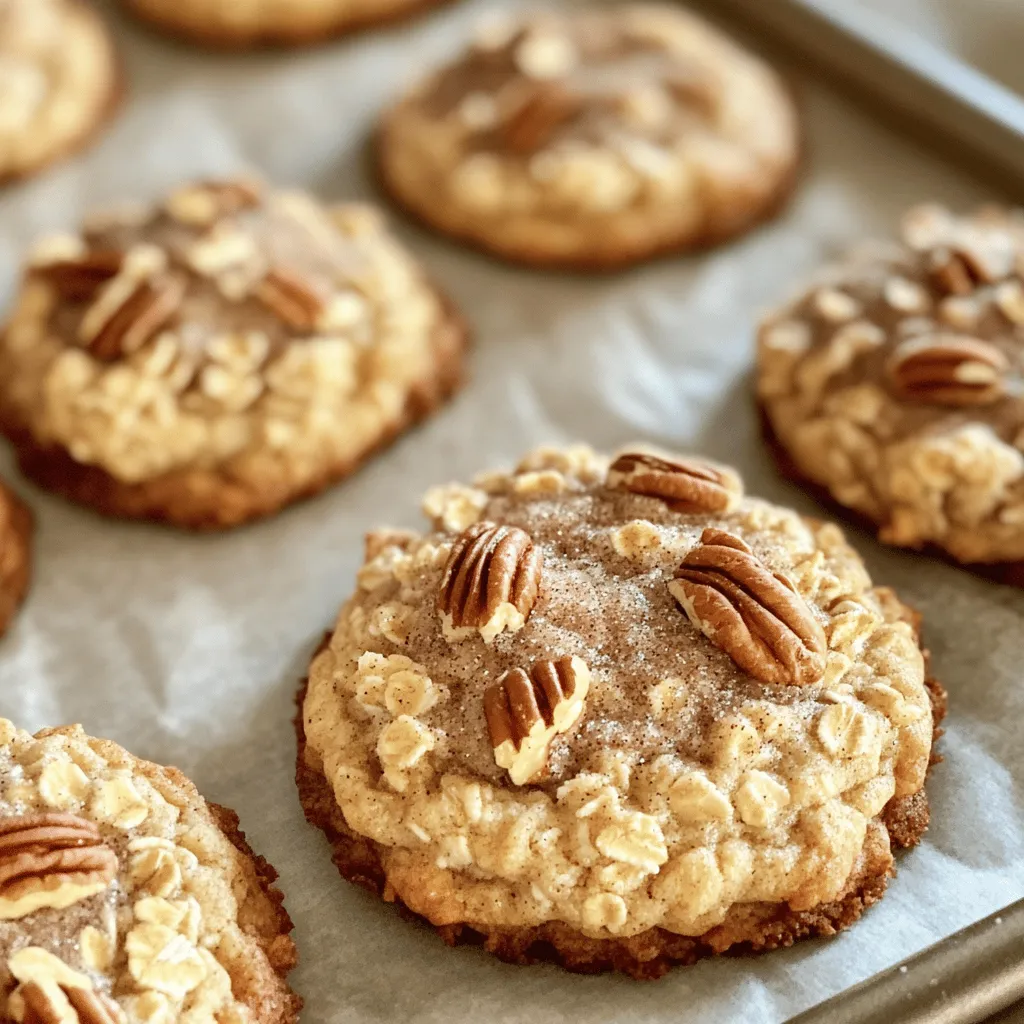
Coffee Cake Cookies Joyful and Flavorful Treat
If you love coffee and cookies, you’re in for a treat! Coffee cake cookies blend the cozy flavors of your favorite cake with the easy
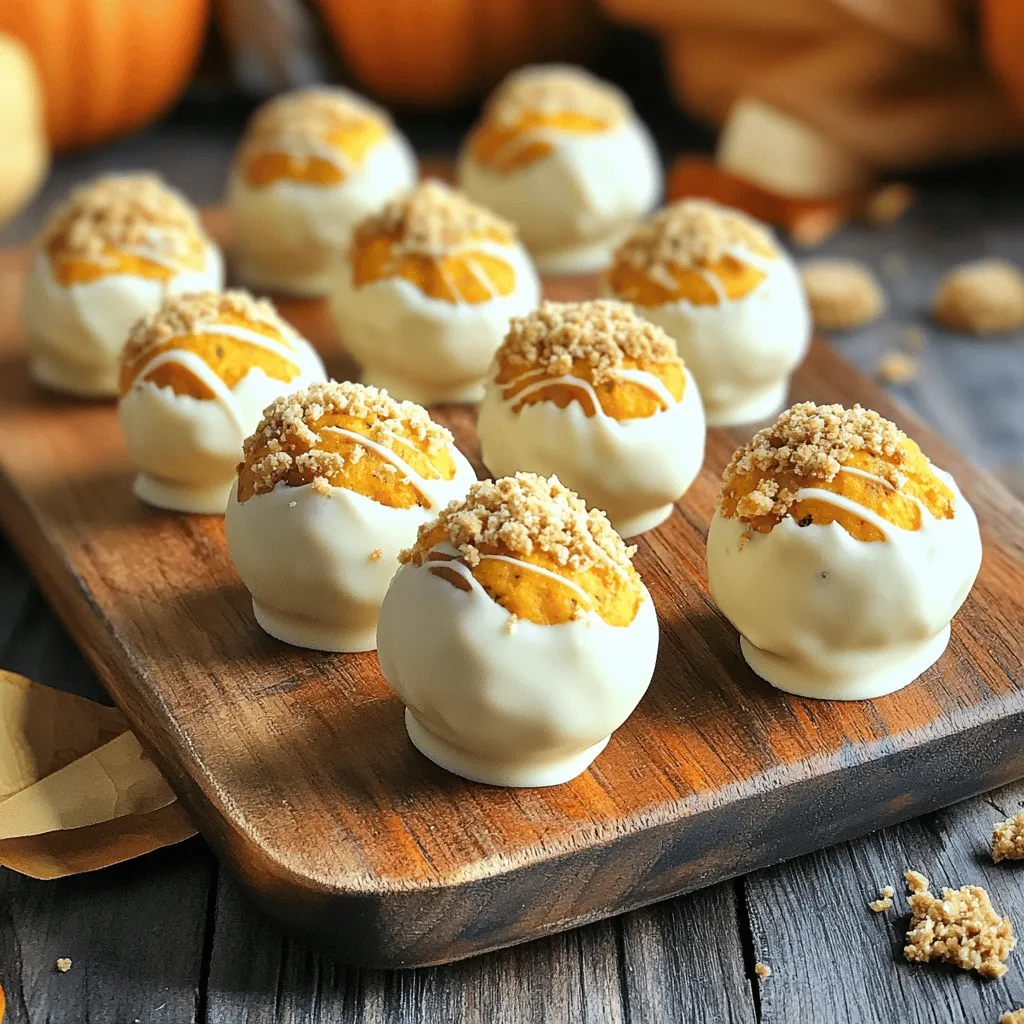
Pumpkin Oreo Balls Delightful and Easy Treat
Are you ready to enjoy a treat that captures the spirit of fall? Pumpkin Oreo Balls are a delightful and easy sweet that blend creamy
![To make the best Crumbl pumpkin pie cookies, gather these key ingredients: - 1 cup unsalted butter, softened to room temperature - 1 cup packed brown sugar - 1/2 cup granulated sugar - 1 large egg, at room temperature - 1 teaspoon pure vanilla extract - 1 cup pure pumpkin puree (ensure it's not pumpkin pie filling) - 2 1/2 cups all-purpose flour - 1 teaspoon baking soda - 1 teaspoon baking powder - 2 teaspoons ground cinnamon - 1 teaspoon ground nutmeg - 1/2 teaspoon ground ginger - 1/4 teaspoon fine salt - 1 cup white chocolate chips - 1/2 cup chopped pecans (optional, for added crunch) When picking ingredients, focus on freshness. Use pure pumpkin puree, not pie filling. Pure pumpkin gives a rich flavor. Look for butter that is creamy and smooth. For sugar, choose light brown sugar for a deeper taste. Quality spices elevate the dish. Always check expiration dates on your spices. Need to make adjustments? For gluten-free options, use a gluten-free flour blend. This works well in cookie recipes. For a vegan alternative, swap the egg for a flax egg or applesauce. Replace butter with coconut oil or a vegan butter substitute. These changes help everyone enjoy the cookies! For the full recipe, refer to the beginning of this section. To start, gather your ingredients. You need butter, sugars, an egg, and pumpkin puree. First, soften the butter to room temperature. In a large bowl, add the butter, brown sugar, and granulated sugar. Use an electric mixer to cream these together. Beat until the mix is light and fluffy, which takes about 2 to 3 minutes. Next, crack the egg into the bowl and add the vanilla extract. Mix until everything blends well. Now, fold in the pumpkin puree gently until smooth. In another bowl, whisk together the flour, baking soda, baking powder, cinnamon, nutmeg, ginger, and salt. Whisking is key here. It breaks up lumps and makes sure all the spices mix well. This step gives your cookies their great flavor. Once it's well combined, you'll slowly add this dry mix to the pumpkin mixture. Stir gently until just combined. Avoid overmixing to keep the cookies soft and tender. Now, it’s time to bake! Preheat your oven to 350°F (175°C). Prepare two baking sheets with parchment paper to prevent sticking. Scoop large balls of cookie dough and place them on the sheets. Leave about 2 inches between each ball. Bake for 12 to 15 minutes. The edges should be lightly golden, but the centers may look a bit soft. They will firm up as they cool. Once out of the oven, let them cool on the sheets for about 5 minutes. Then, transfer the cookies to wire racks to cool completely. Enjoy these delicious treats! For the full recipe, check out the details above. To get a soft and chewy cookie, avoid overmixing the dough. When you mix the wet and dry ingredients, stir gently. This keeps the cookies tender. Also, make sure your oven is set to the right temperature. I suggest preheating to 350°F (175°C). Baking at this temperature ensures even cooking. Take them out when the edges look golden, but the middle seems soft. They will firm up as they cool. To make these cookies even tastier, add more spices. Try using a pinch of allspice or cloves. These spices can give a warm, rich flavor. You can also mix in some chocolate chips or nuts. White chocolate chips add a nice sweetness. Chopped pecans give a great crunch if you want extra texture. Feel free to be creative and find your perfect combo! When serving your cookies, use a colorful platter. It makes them pop! For a fun touch, sprinkle some cinnamon on top. You can also add small decorative pumpkins or fall leaves around the cookies. This adds to the cozy autumn vibe. These little details make your cookie display inviting and fun for gatherings. {{image_4}} You can easily change the flavors in these pumpkin pie cookies. For a twist, try using dark chocolate chips instead of white chocolate. The rich cocoa flavor pairs well with pumpkin. You can also add dried cranberries or chopped apples for a fruity touch. These additions give the cookies a new taste and texture. Toppings can elevate your cookies. Cream cheese frosting is a great choice. It adds a smooth and sweet layer on top. You might also drizzle caramel sauce for a sweet finish. Another idea is to sprinkle chopped nuts or toasted coconut flakes on top. Each topping brings a new flavor and look to your cookies. Think outside the box when serving these cookies. You can make ice cream sandwiches. Just place a scoop of vanilla ice cream between two cookies. This is a fun and tasty treat! You could also create a milkshake using cookie crumbs. Blend some cookies with ice cream and milk for a delicious drink. These serving ideas make your cookies stand out at any gathering. For the complete recipe, check out [Full Recipe]. To keep your Crumbl pumpkin pie cookies fresh, use an airtight container. This helps lock in moisture and flavor. You can also freeze the dough before baking. Just scoop the dough into balls, place them on a baking sheet, and freeze. Once frozen, transfer the dough balls into a freezer bag. This way, you can bake fresh cookies anytime! When stored properly, these cookies will last about one week at room temperature. Check for signs of freshness. If they feel hard or dry, they might be past their prime. You can also refrigerate them, which can extend their life to about two weeks. But remember, they might lose some softness in the fridge. To enjoy your cookies warm again, preheat the oven to 350°F (175°C). Place the cookies on a baking sheet and heat for about five minutes. This will help restore their softness. Avoid using the microwave, as it can make them chewy and dry out. Enjoy your cookies as if they were just baked! These cookies stand out for their rich pumpkin pie flavor. The blend of spices—cinnamon, nutmeg, and ginger—gives them warmth. The white chocolate chips add sweetness and creaminess. Each bite is like a hug in cookie form. You won't find many cookies that combine these tastes as well as these do. Yes, you can prepare the dough in advance. If you want to save time, chill the dough for up to two days in the fridge. This also helps the flavors meld. You can even freeze the dough for up to three months. Just scoop the dough balls onto a baking sheet before freezing. Once frozen, store them in a bag. When you're ready to bake, just add a few extra minutes to the baking time. To achieve that soft, chewy texture, avoid overmixing the dough. Mix the wet and dry ingredients just until combined. Overmixing can lead to tough cookies. Keep a close eye on the baking time; the cookies should look slightly underbaked in the center. They will continue to firm up as they cool. This method will ensure you get that perfect crumbl texture. For more details, check out the Full Recipe. Now you have all you need to make delicious pumpkin pie cookies. Start with quality ingredients like real pumpkin puree and fresh spices. Follow the step-by-step instructions to prep your dough and bake perfectly. Use the tips to achieve the right texture and enhance flavors. Don't forget to explore unique variations and creative serving ideas. Store your cookies properly, so they stay fresh. With these insights, you can make treats that impress everyone. Enjoy baking and sharing these delightful cookies!](https://meltedrecipes.com/wp-content/uploads/2025/08/7ed5b253-5638-49a2-9ba2-94806acd1500.webp)
The Best Crumbl Pumpkin Pie Cookies Easy and Delicious
Get ready to fall in love with cookies! I’m sharing my favorite recipe for Crumbl Pumpkin Pie Cookies that are both easy to make and
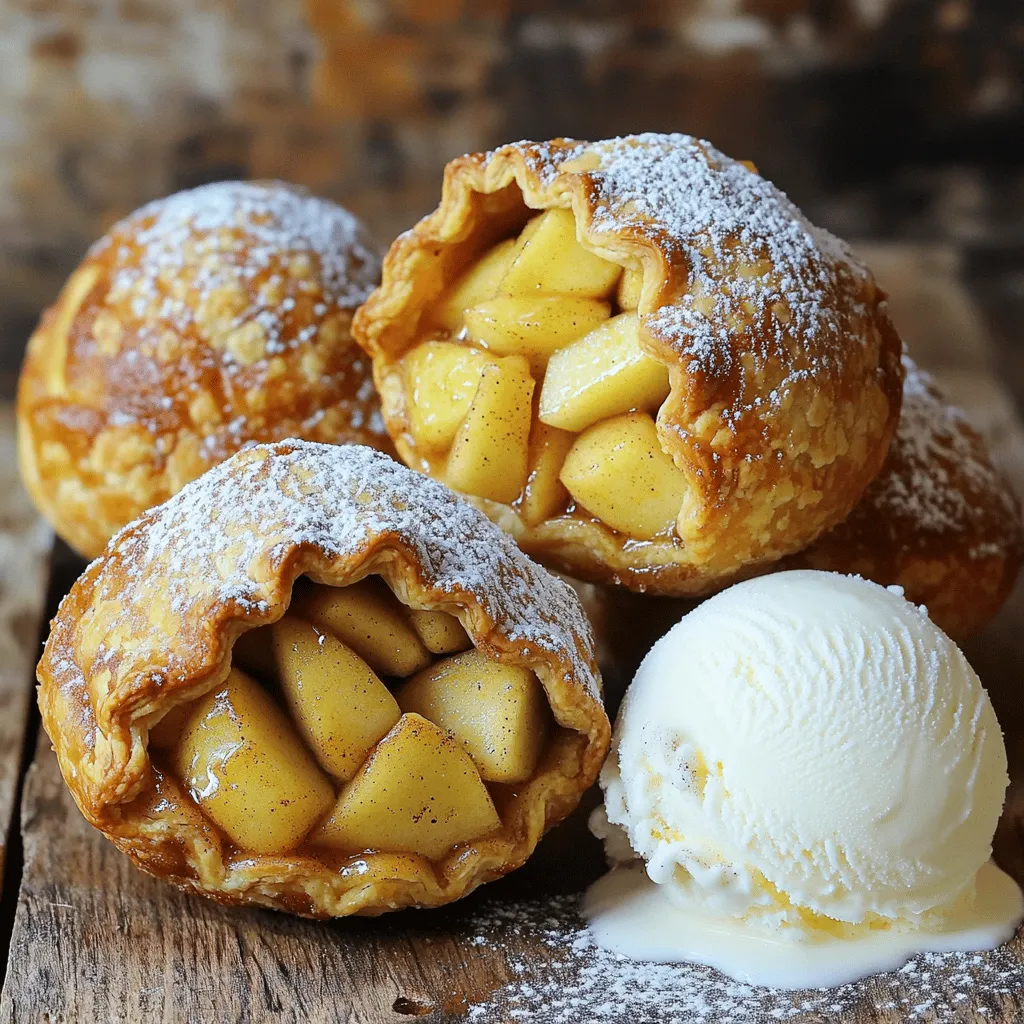
Air Fryer Apple Pie Bombs Sweet and Simple Treat
Get ready for a sweet treat that you can whip up in no time! Air Fryer Apple Pie Bombs are fun, easy, and full of
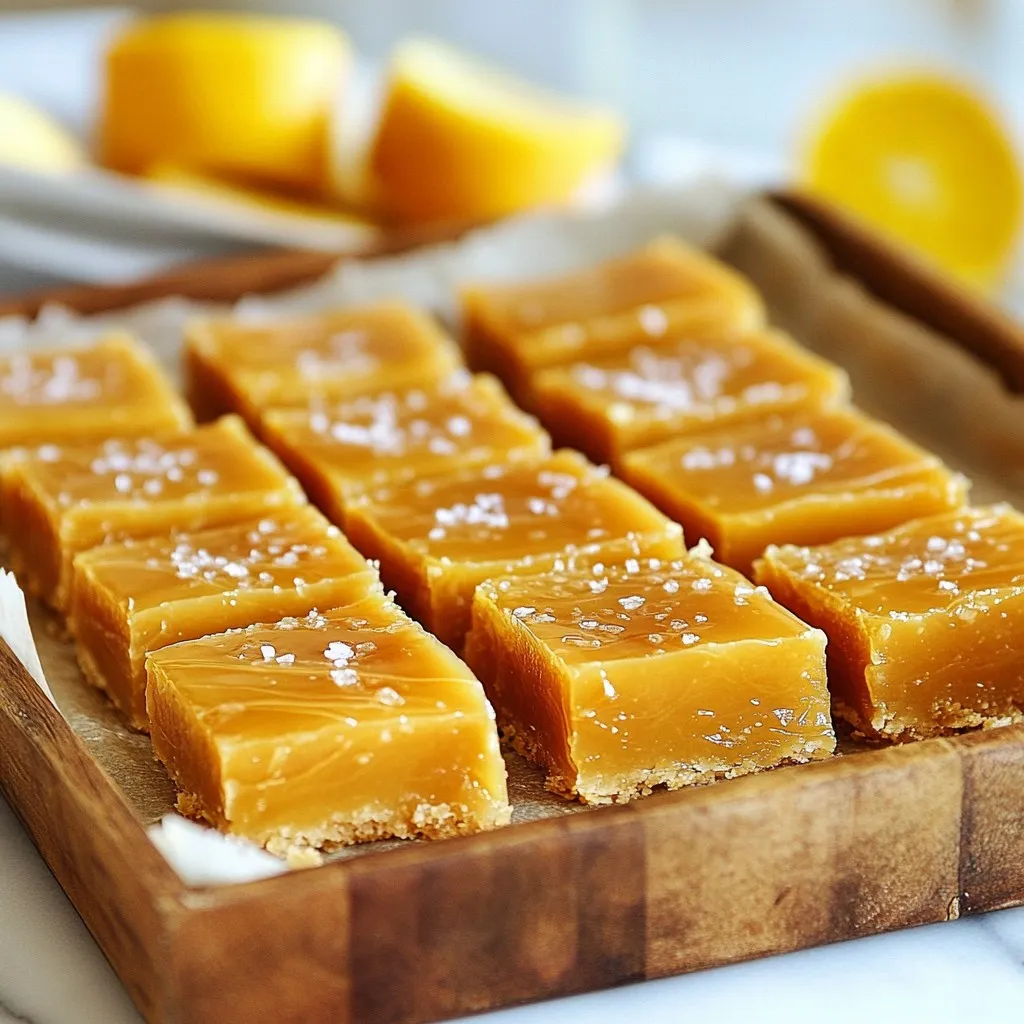
Soft Salted Caramel Bars Irresistible Dessert Recipe
If you crave a sweet treat packed with flavor, these Soft Salted Caramel Bars are for you. With a buttery base and gooey caramel, they
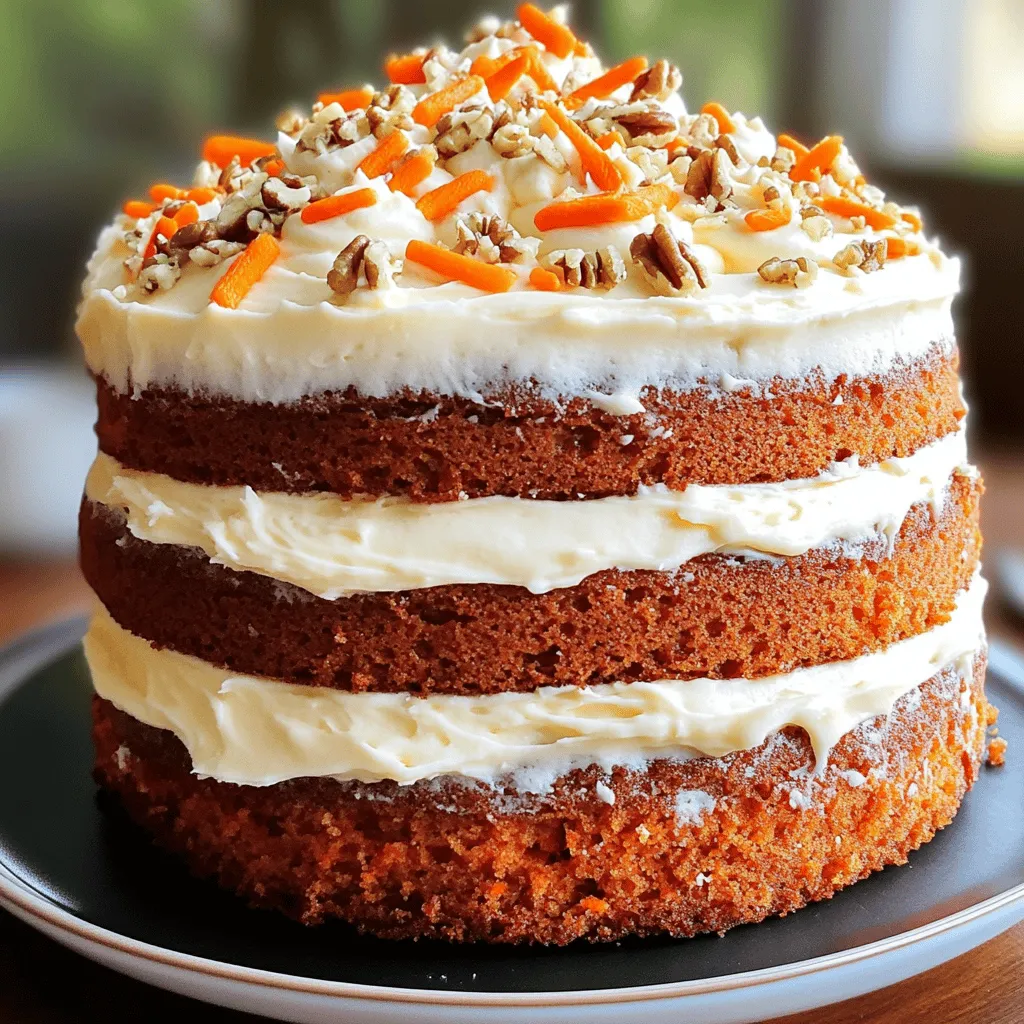
Gordon Ramsay’s Carrot Cake Fluffy and Flavorful Treat
Are you ready to bake a cake that is both fluffy and flavorful? Gordon Ramsay’s Carrot Cake brings together simple ingredients for a delicious dessert
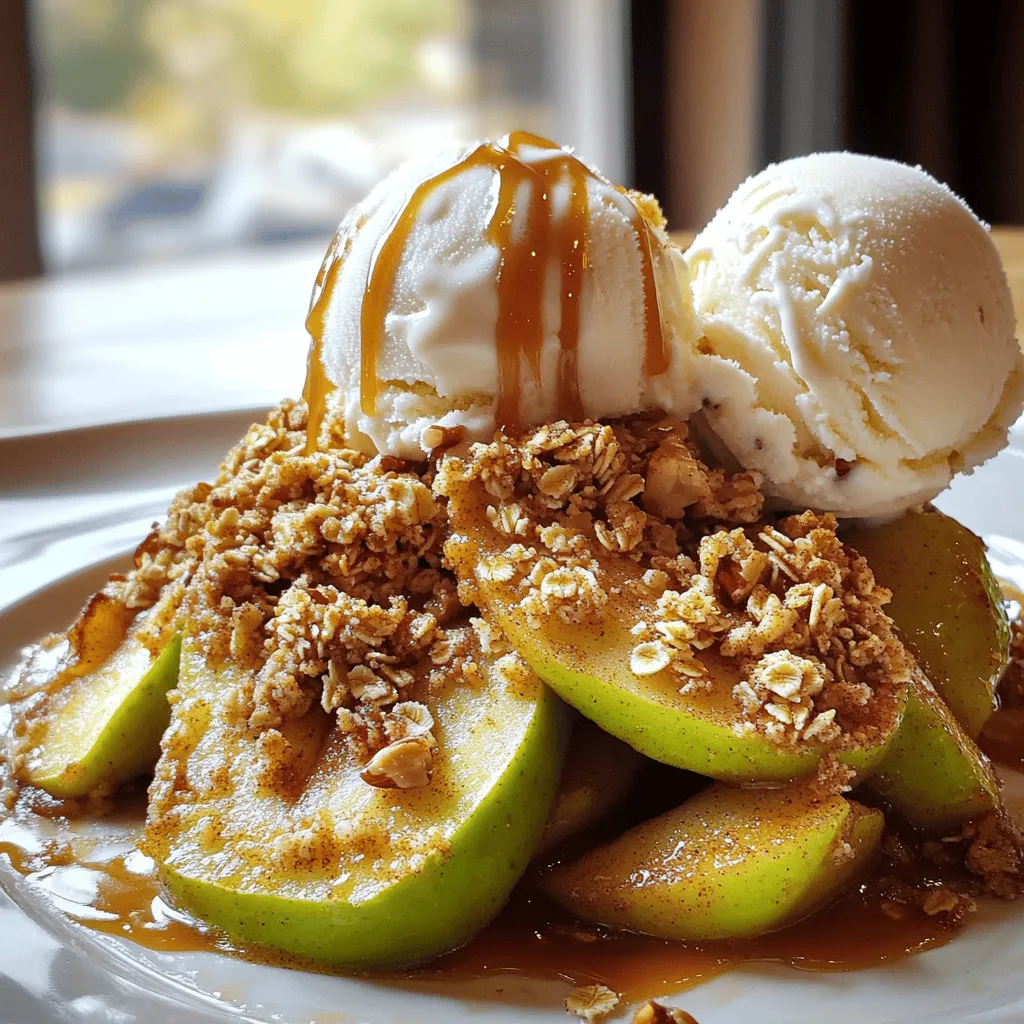
Old-Fashioned Baked Apple Slices with Vanilla Ice Cream
Craving a warm and comforting dessert? Let me share my recipe for Old-Fashioned Baked Apple Slices with Vanilla Ice Cream. This classic dish combines sweet
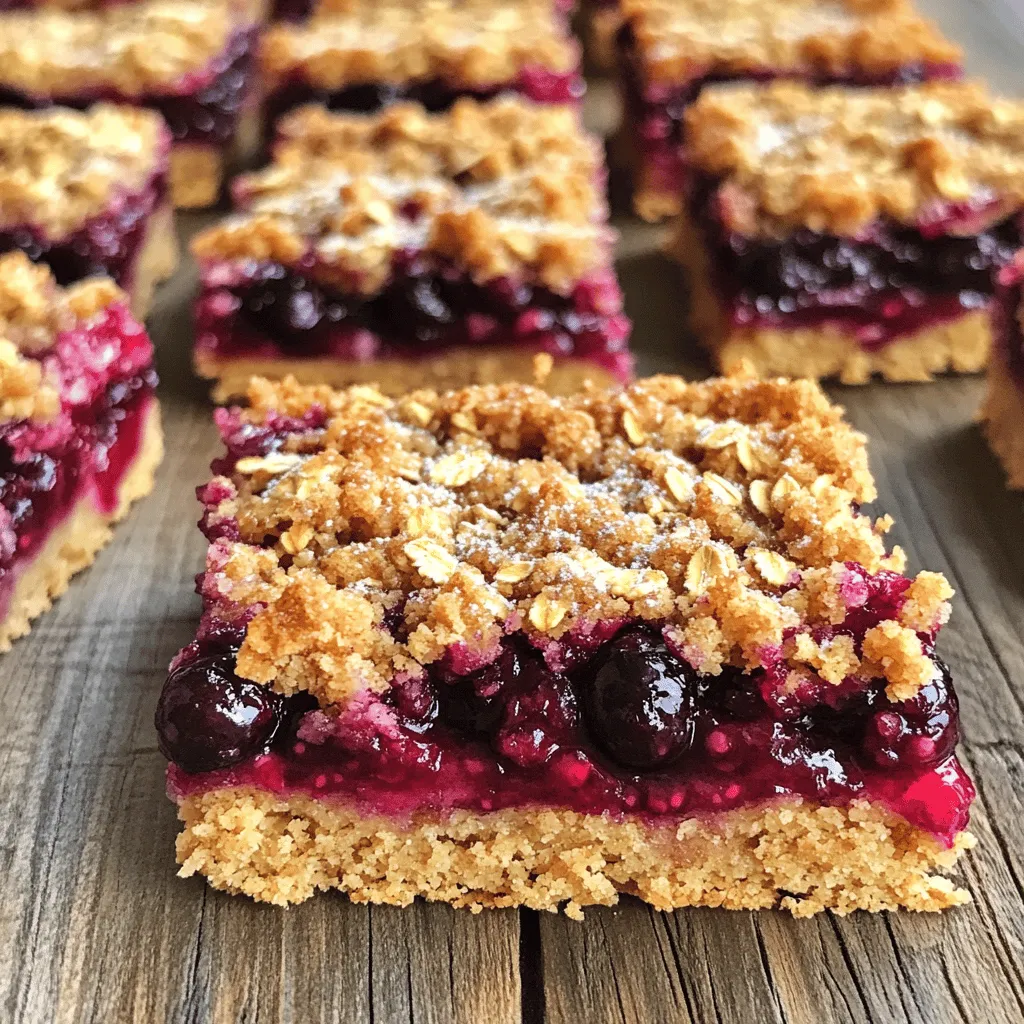
Huckleberry Crumb Bars Delightful and Easy Recipe
If you’re craving a sweet treat that’s both simple and delicious, you’ve come to the right place! These Huckleberry Crumb Bars are easy to make