Desserts
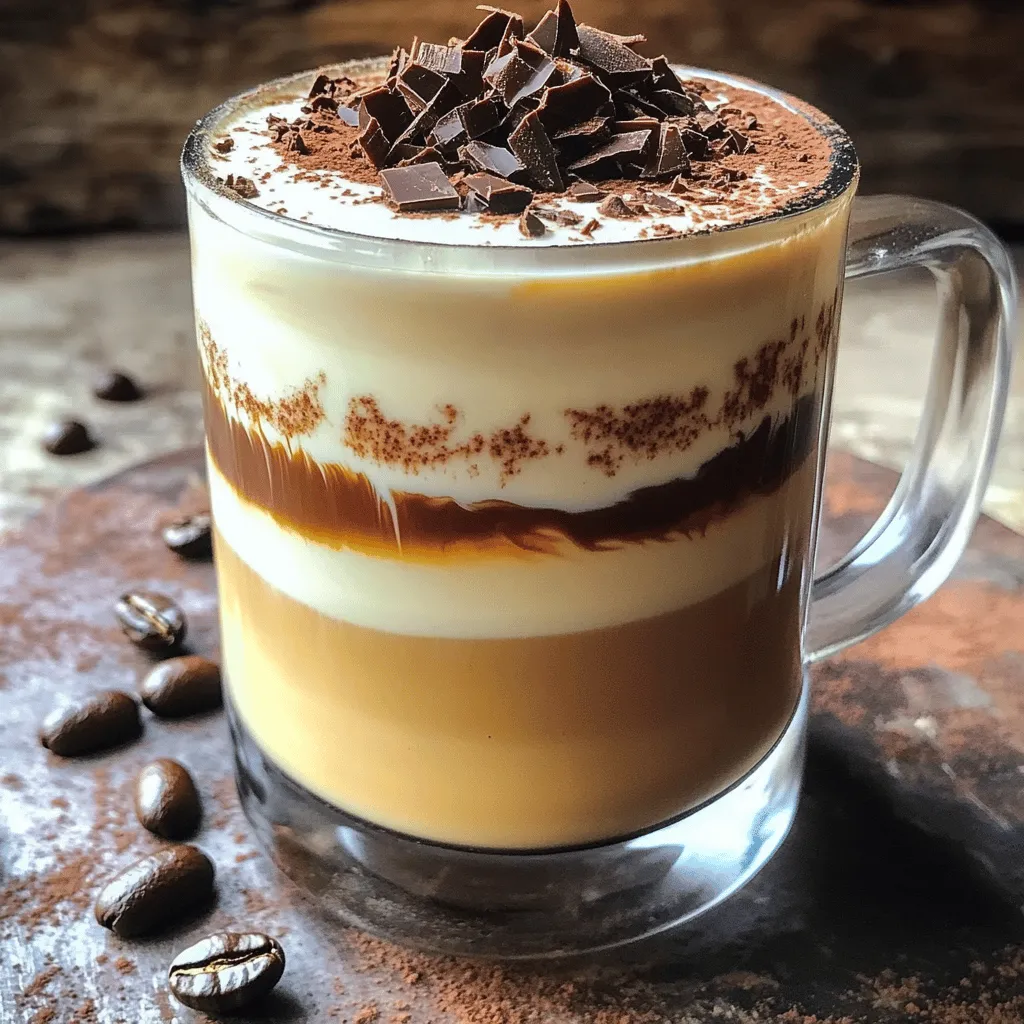
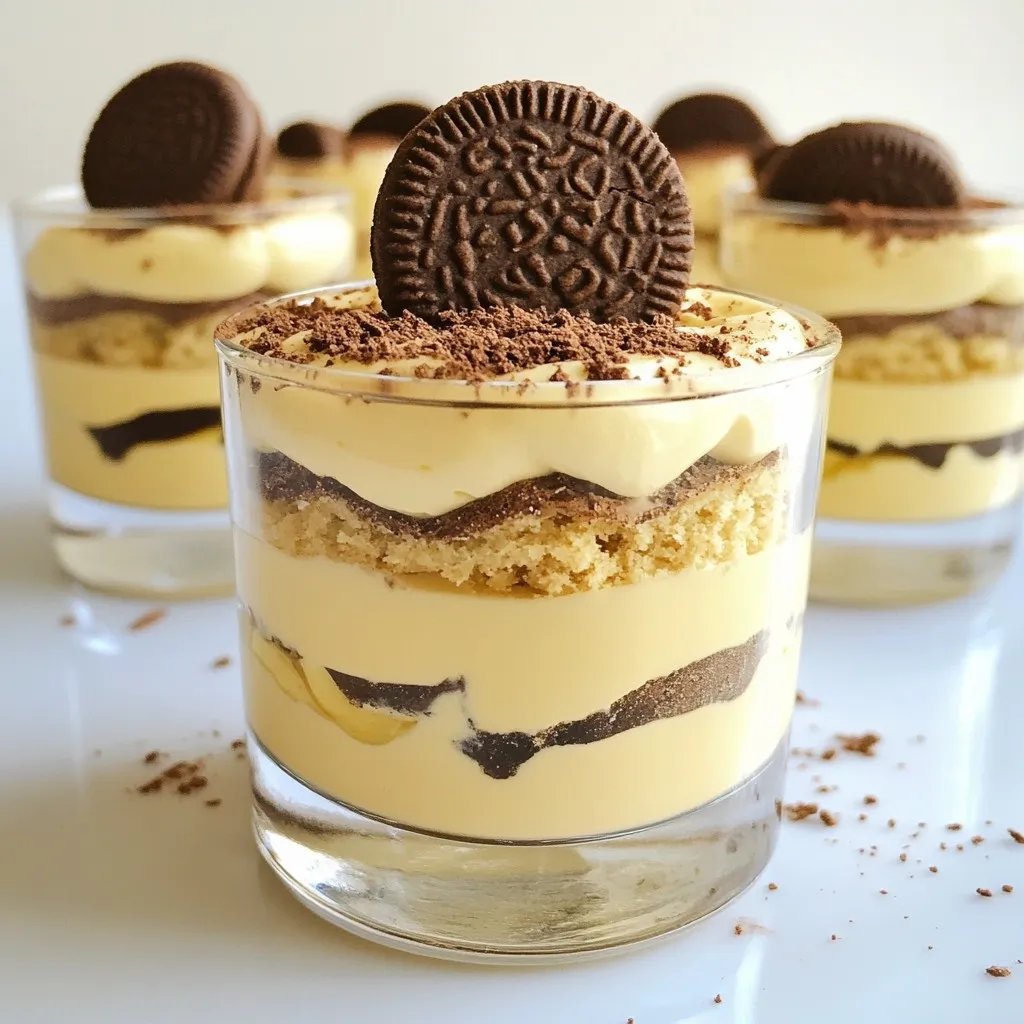
Tiramisu Latte Irresistible Creamy Coffee Delight
If you love coffee and desserts, you must try the Tiramisu Latte! This creamy delight blends the rich flavors of espresso and mascarpone, giving you
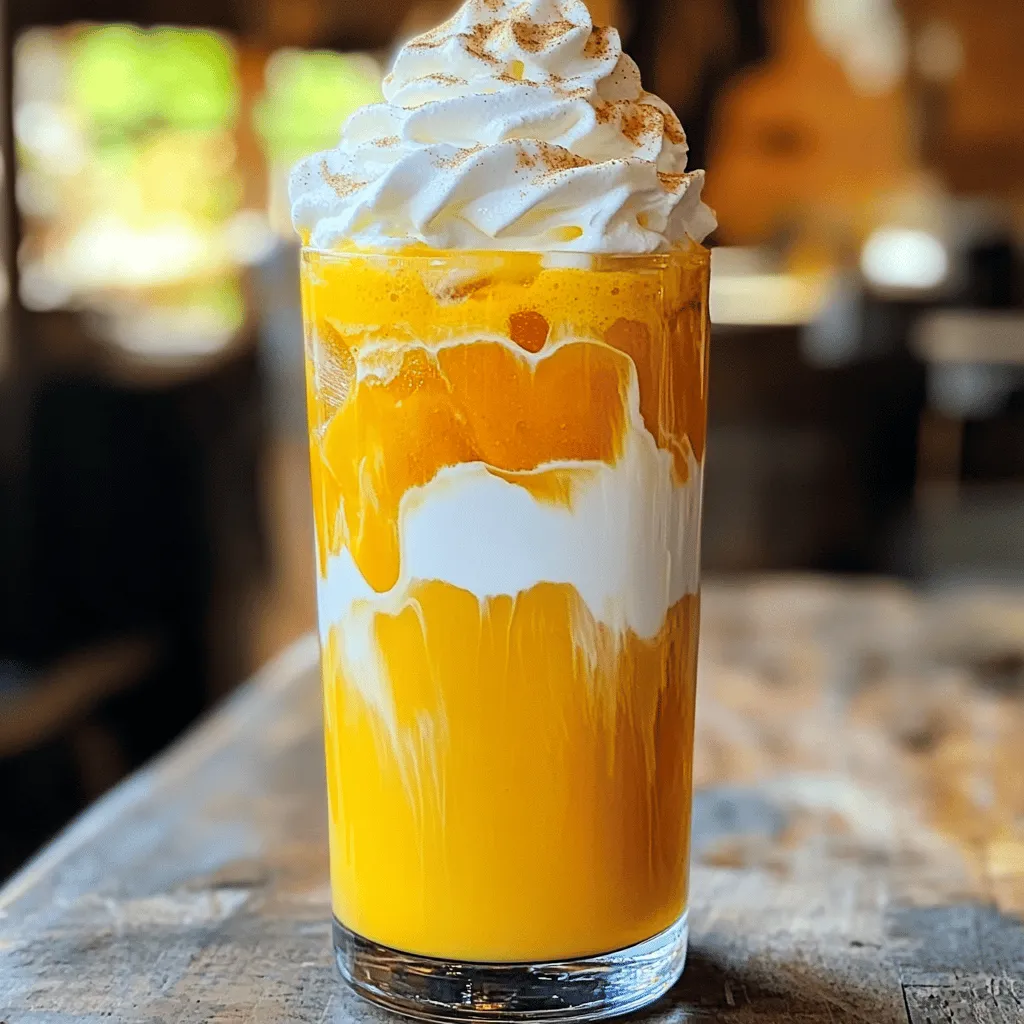
Iced Pumpkin Cream Chai Latte Easy Fall Beverage
Love fall flavors? You’ll adore making an Iced Pumpkin Cream Chai Latte at home! This easy recipe combines rich chai tea and creamy pumpkin for

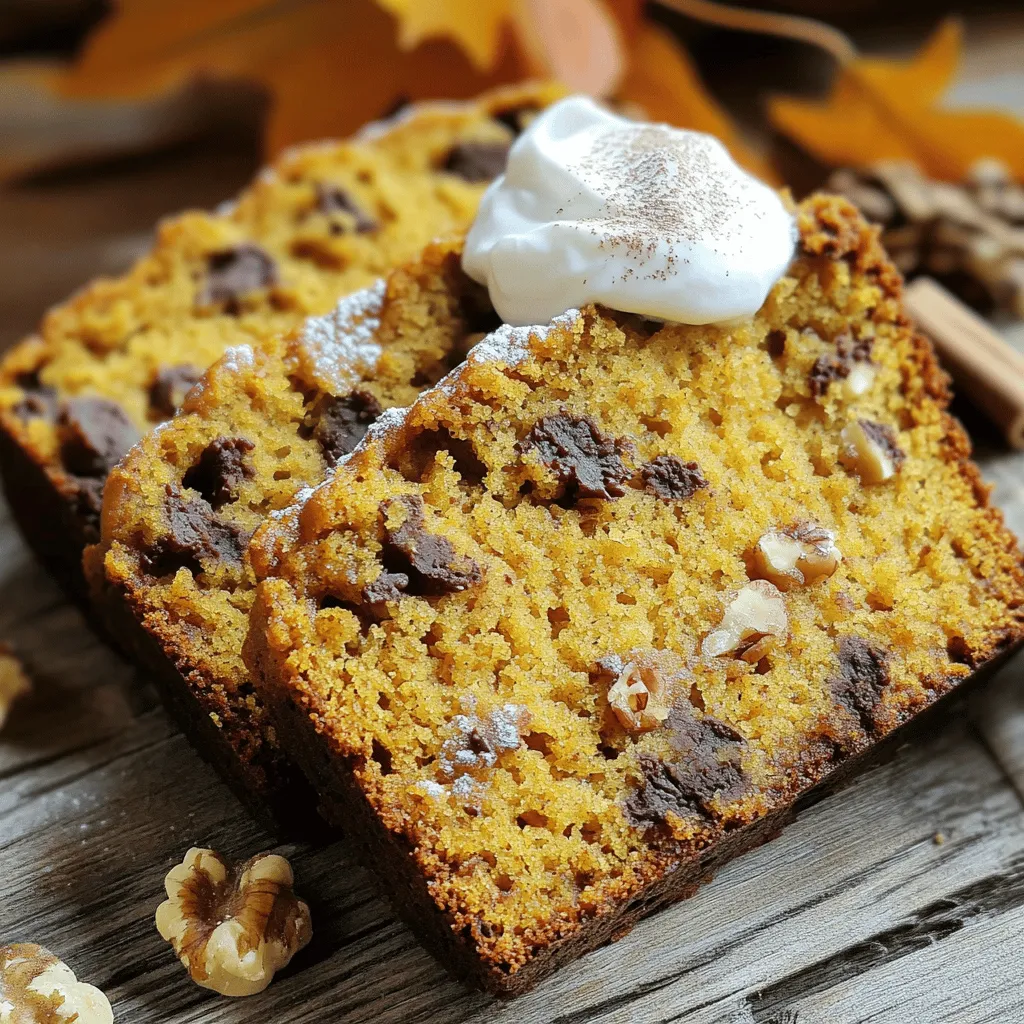
Copycat Starbucks Pumpkin Bread Flavorful Fall Delight
Fall is here, and that means it’s pumpkin season! If you love the cozy vibes of Starbucks’ pumpkin bread, you’re in for a treat. In
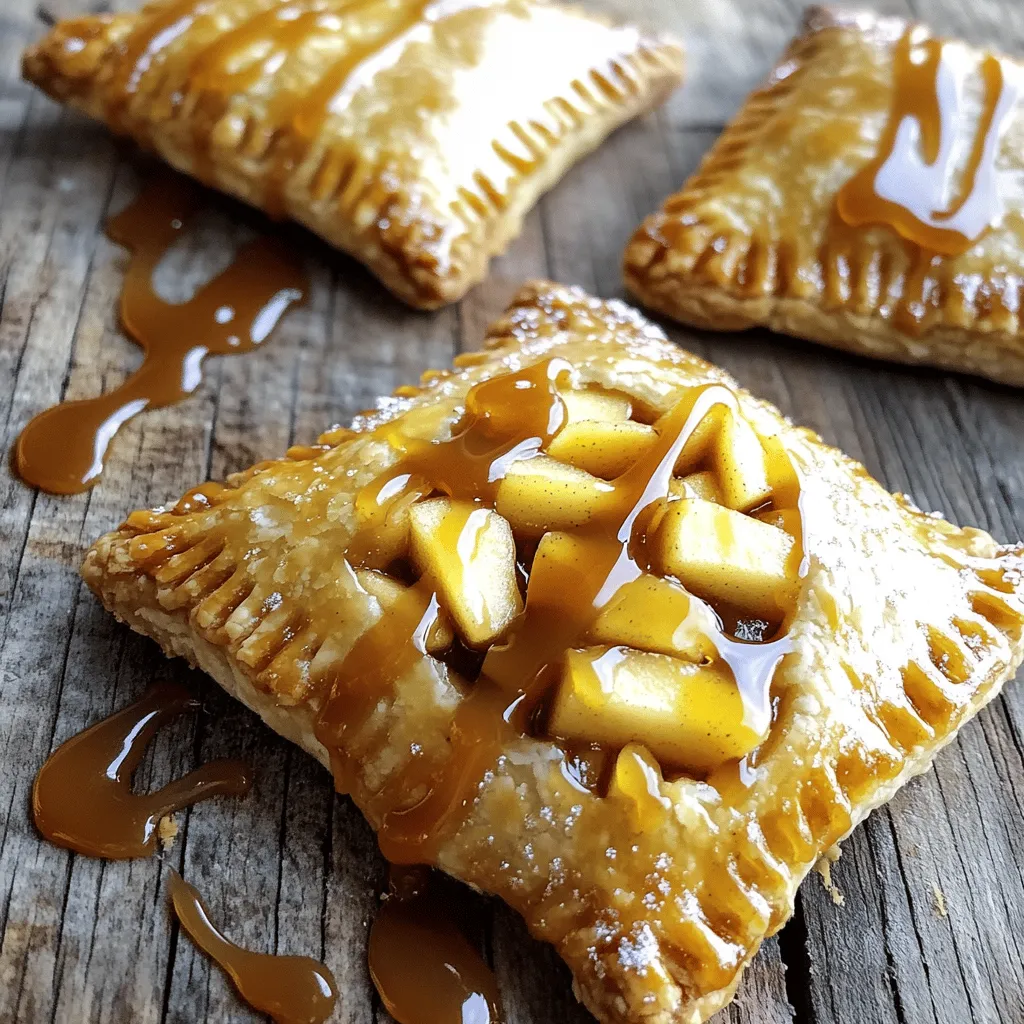
Caramel Apple Hand Pies Flavorful and Simple Treat
Craving a sweet, easy treat? Caramel apple hand pies are your answer! These mini pies blend warm apples, gooey caramel, and flaky crust for a
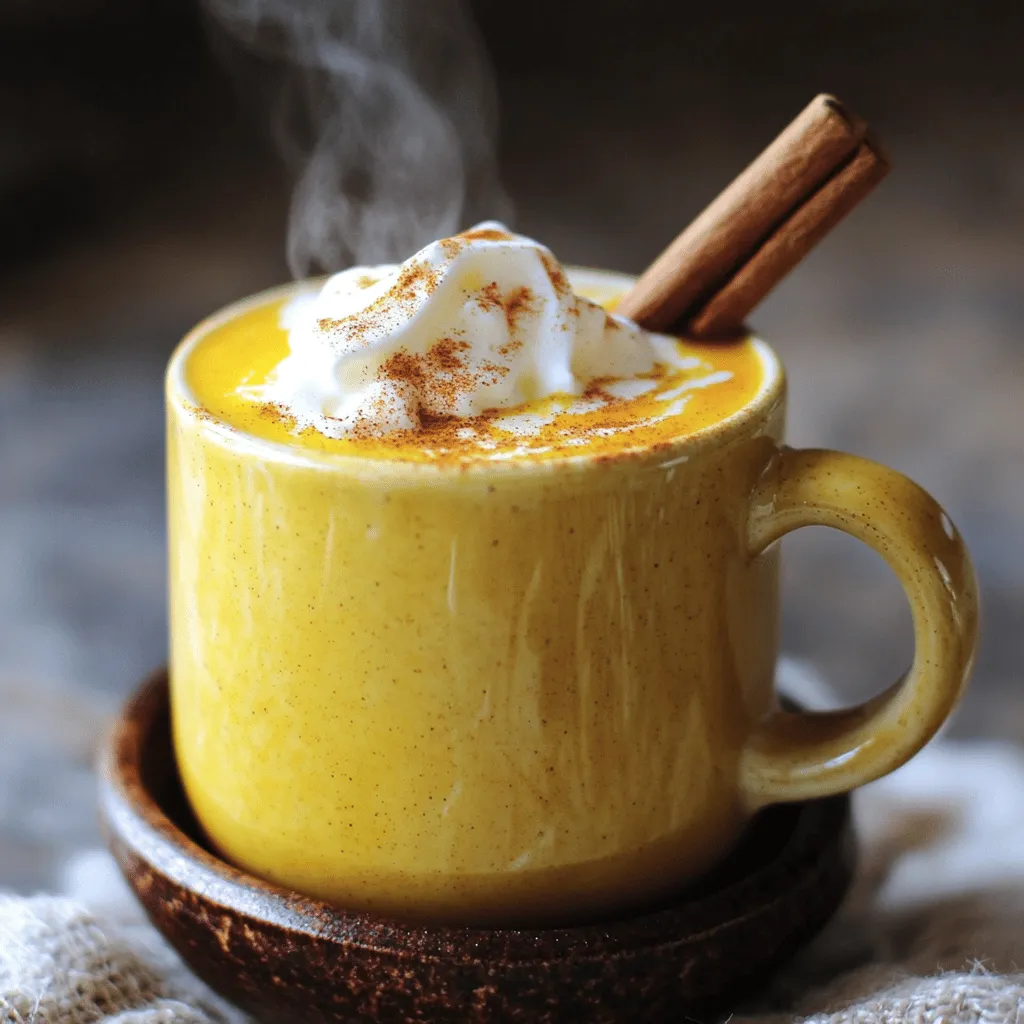
Pumpkin Spice Milk Creamy and Cozy Fall Drink
As the leaves start to change, it’s time to cozy up with a comforting drink. Pumpkin Spice Milk is creamy, warm, and the perfect treat
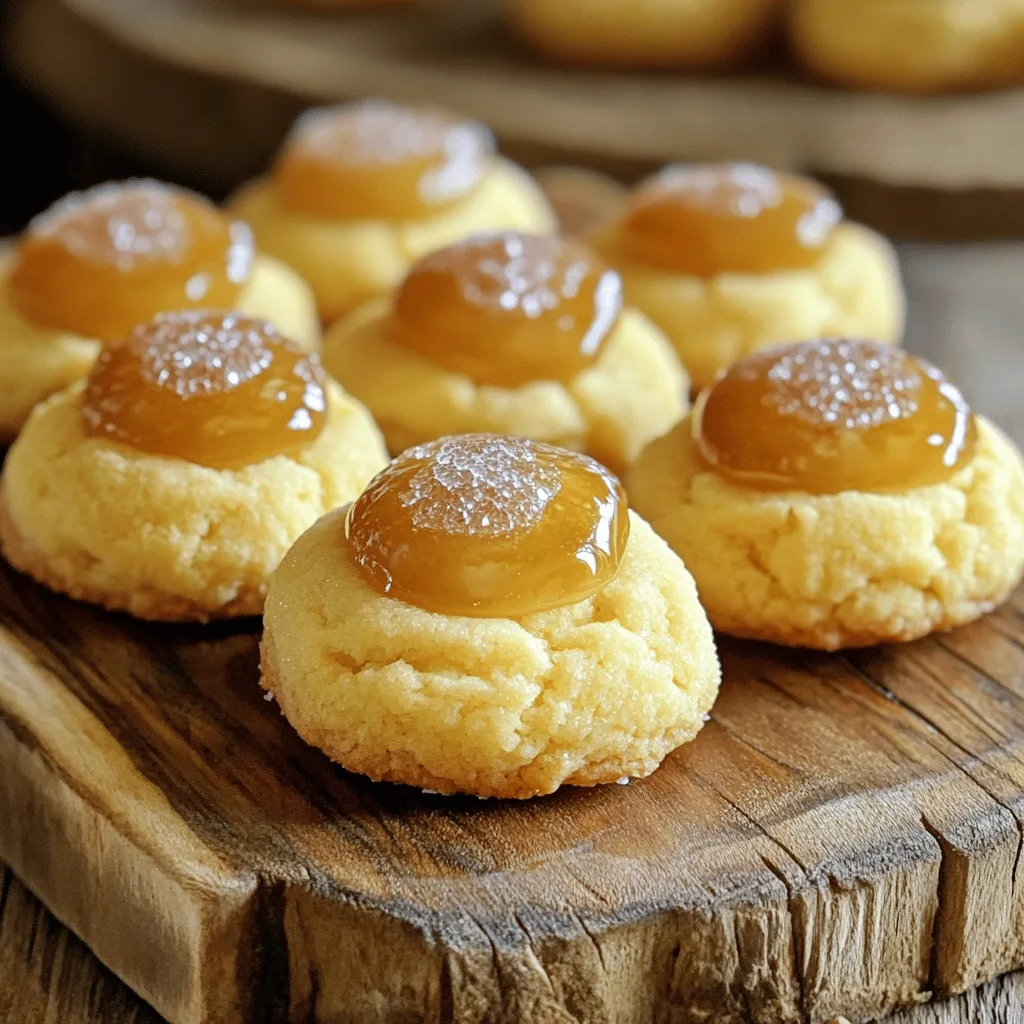
Crème Brûlée Cookies Irresistible Sweet Delight
Crème Brûlée Cookies are a sweet treat that combines the classic dessert’s creamy goodness with the joy of cookies. You’ll love how easy they are

Chai Latte Cupcakes Delightful Flavor in Every Bite
Welcome to the world of Chai Latte Cupcakes, where each bite is packed with cozy flavor! Imagine warm spices and sweet cream cheese frosting coming
Healthy Pumpkin Bread Simple and Delicious Recipe
If you’re craving a cozy treat that’s also healthy, look no further! My Healthy Pumpkin Bread is simple to make, delicious, and sure to please.
Ingredient Cookies & Cream Mousse Delicious Dessert
Are you ready to whip up a dessert that will wow your friends and family? This Cookies & Cream Mousse is creamy, dreamy, and oh-so-delicious!
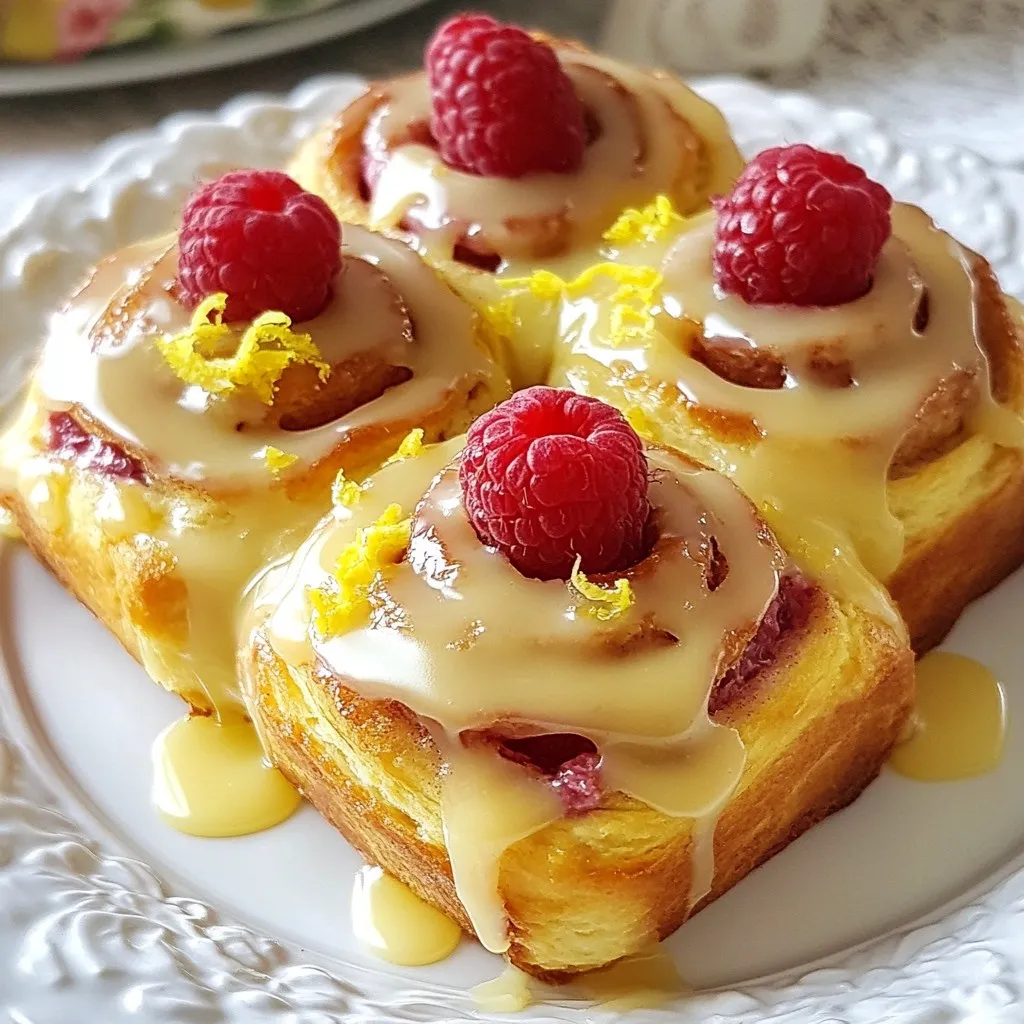
Raspberry Lemon Cinnamon Rolls Delicious and Fresh Treat
Get ready to treat yourself to a burst of flavor with my Raspberry Lemon Cinnamon Rolls! These soft, sweet rolls combine tart raspberry and zesty