Desserts
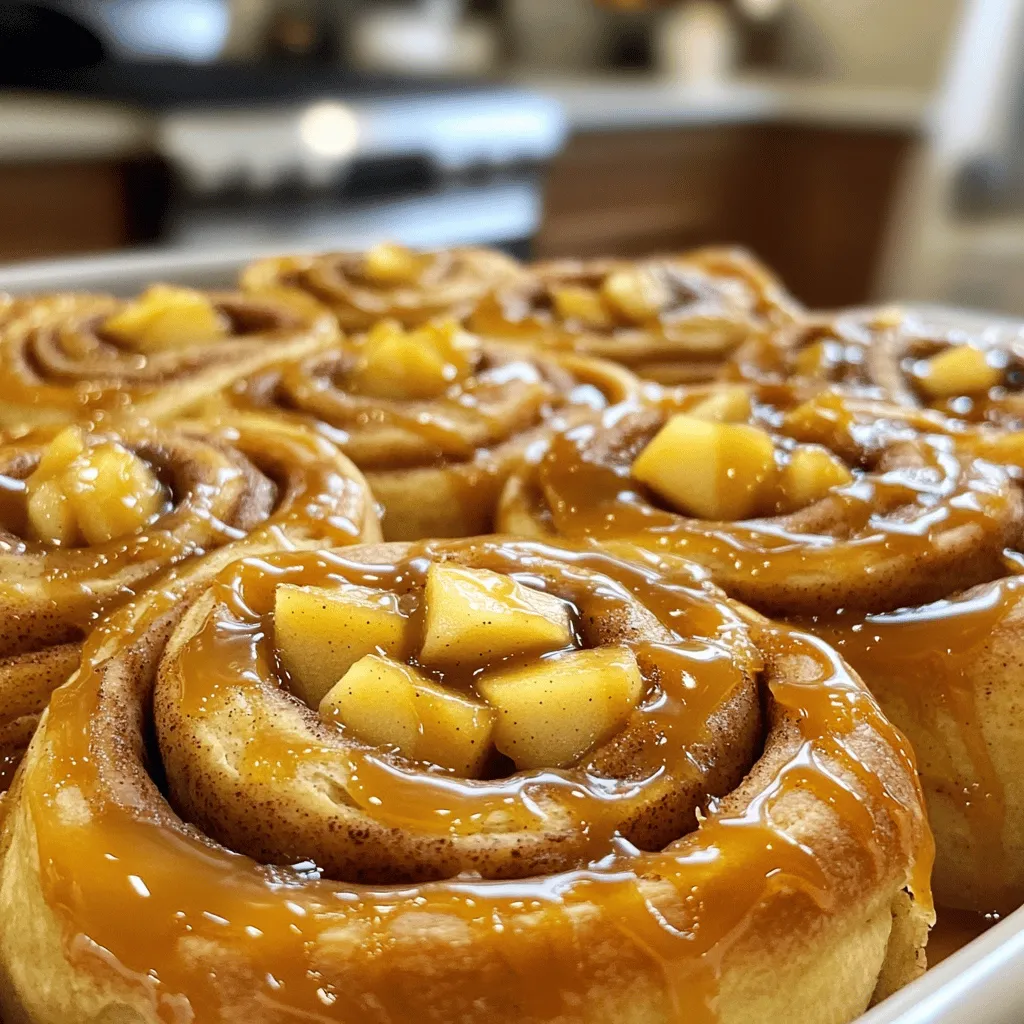
Caramel Apple Cinnamon Rolls Irresistible Sweet Treat
Get ready for a treat that’s hard to resist: Caramel Apple Cinnamon Rolls! Imagine warm, soft dough swirled with sweet apples and rich caramel. In
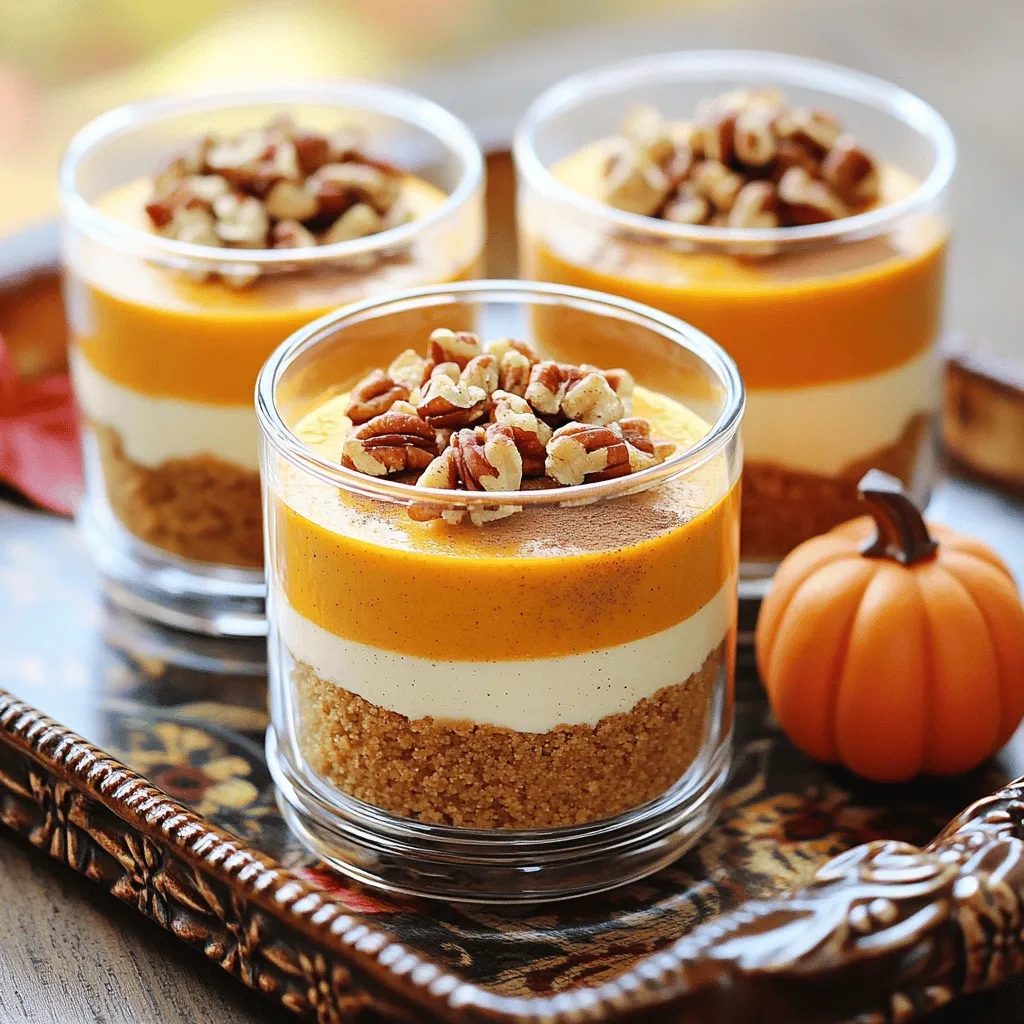
No-Bake Pumpkin Cheesecake Cups Easy and Delicious Delight
Get ready to enjoy a seasonal treat that’s easy to make and even easier to eat! My No-Bake Pumpkin Cheesecake Cups are a delicious delight
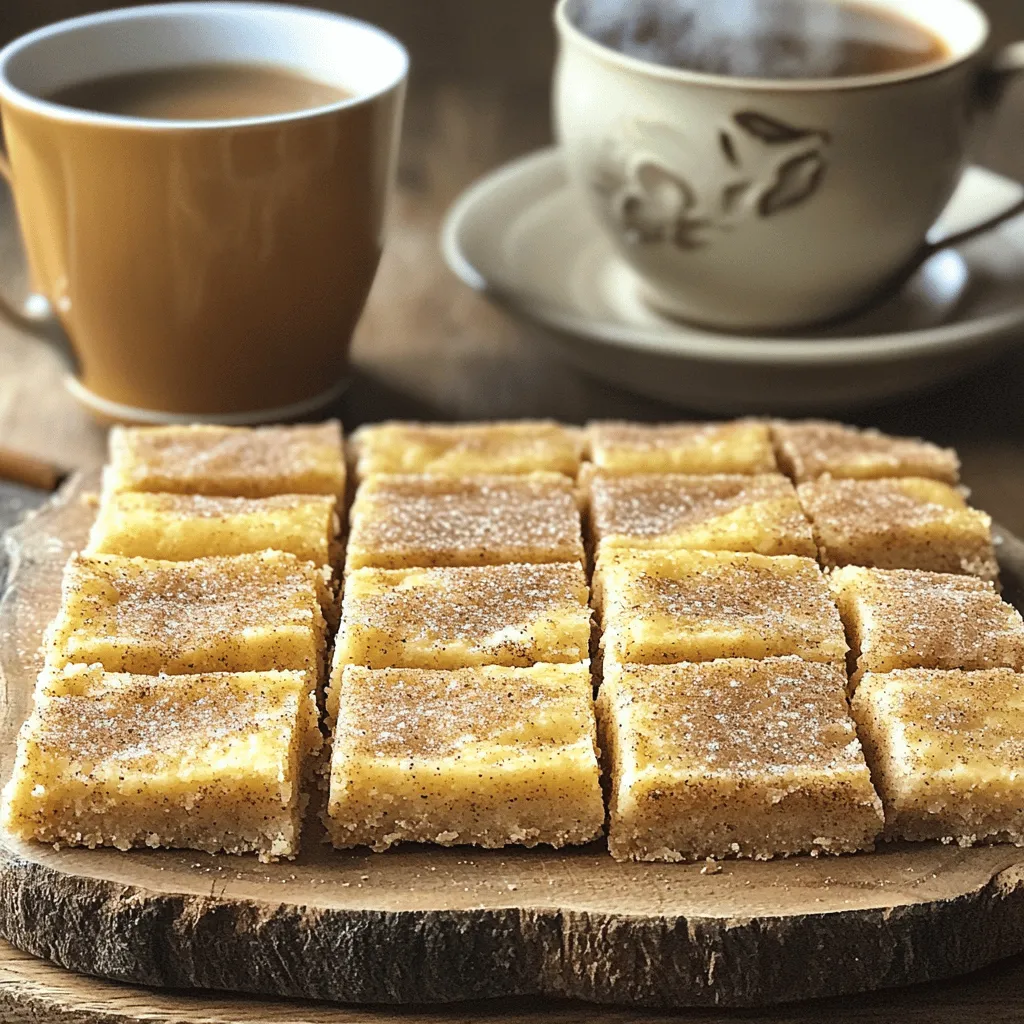
Spiced Chai Snickerdoodle Bars Irresistibly Flavorful
Are you ready to indulge in the warm, cozy flavors of Spiced Chai Snickerdoodle Bars? These bars combine the comforting spice of chai with the
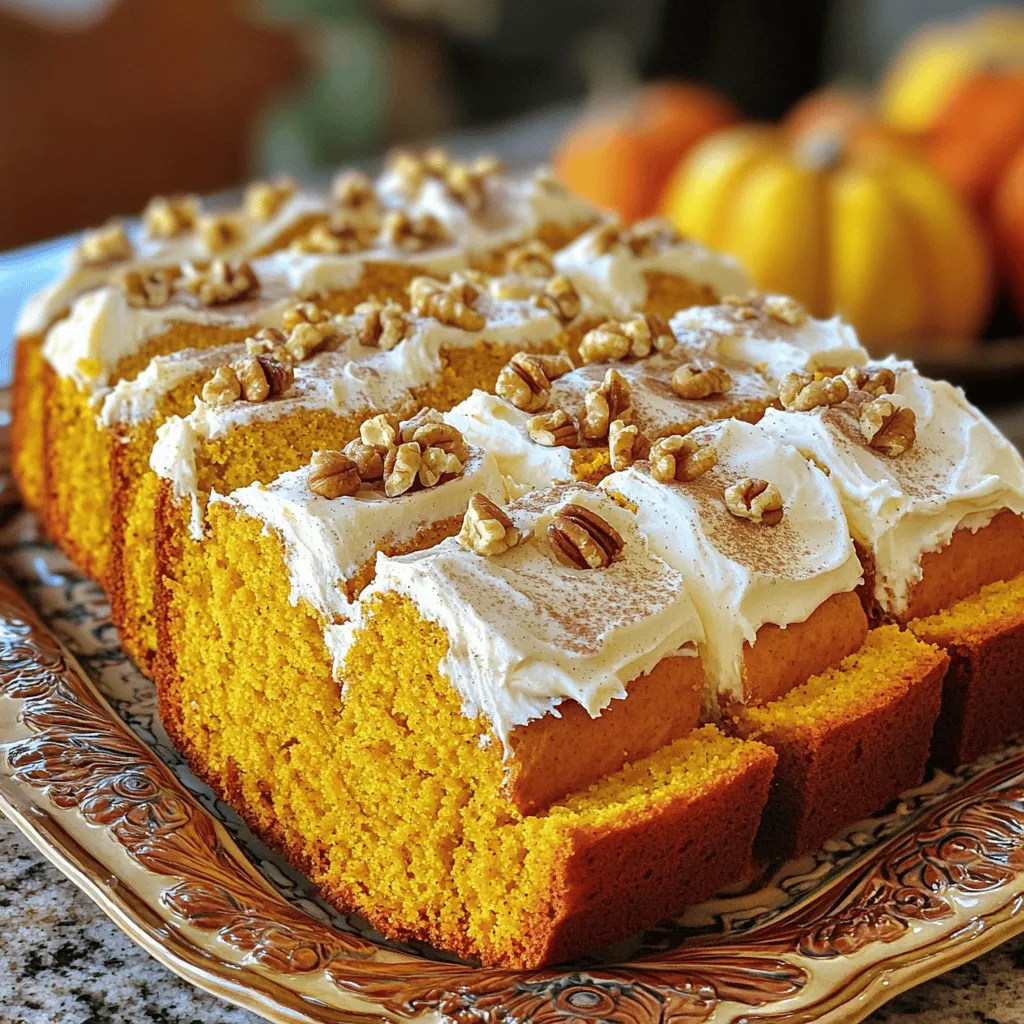
Delectable Pumpkin Bread with Cream Cheese Frosting
Get ready to indulge in the warm flavors of fall with my delectable pumpkin bread topped with cream cheese frosting. This recipe combines cozy spices
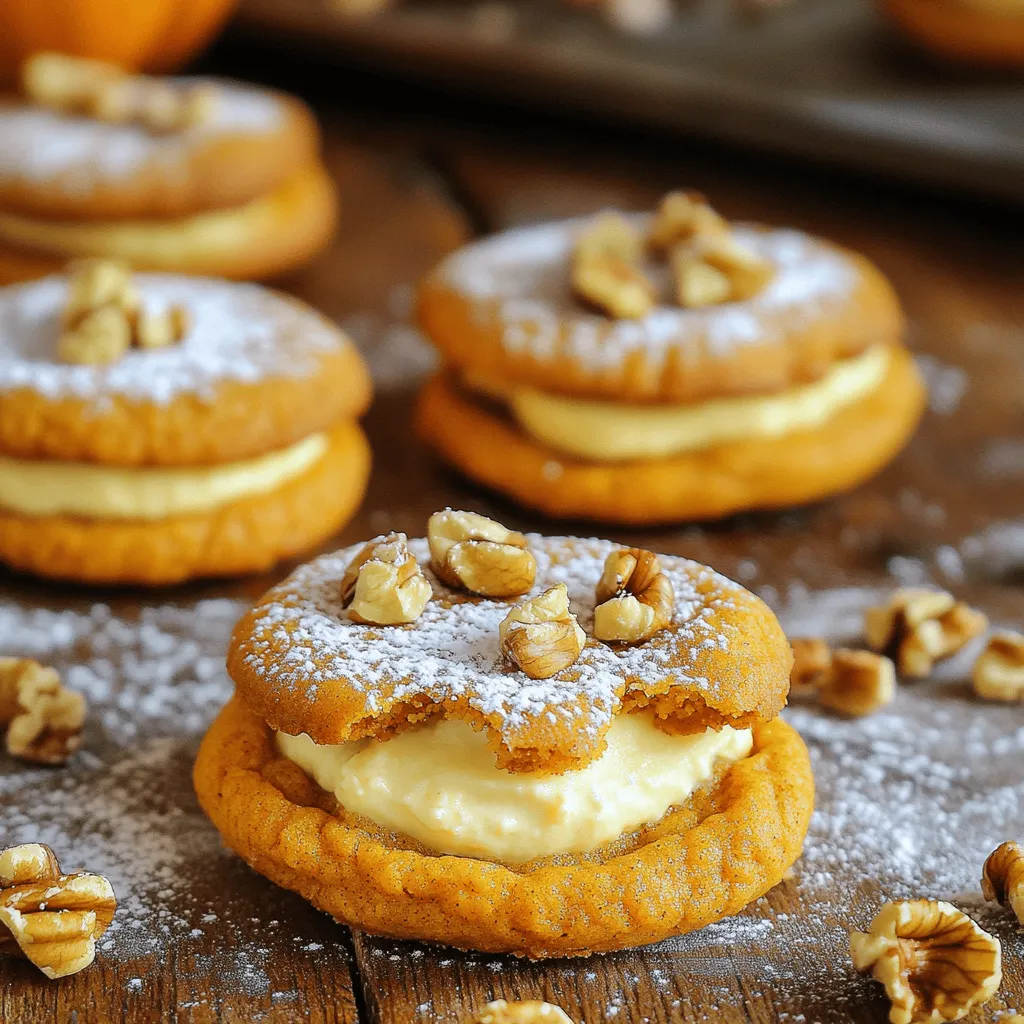
Pumpkin Cheesecake Cookies Perfect for Fall Treats
Fall is here, and what better way to celebrate than with pumpkin cheesecake cookies? These treats combine the rich flavors of pumpkin and cream cheese
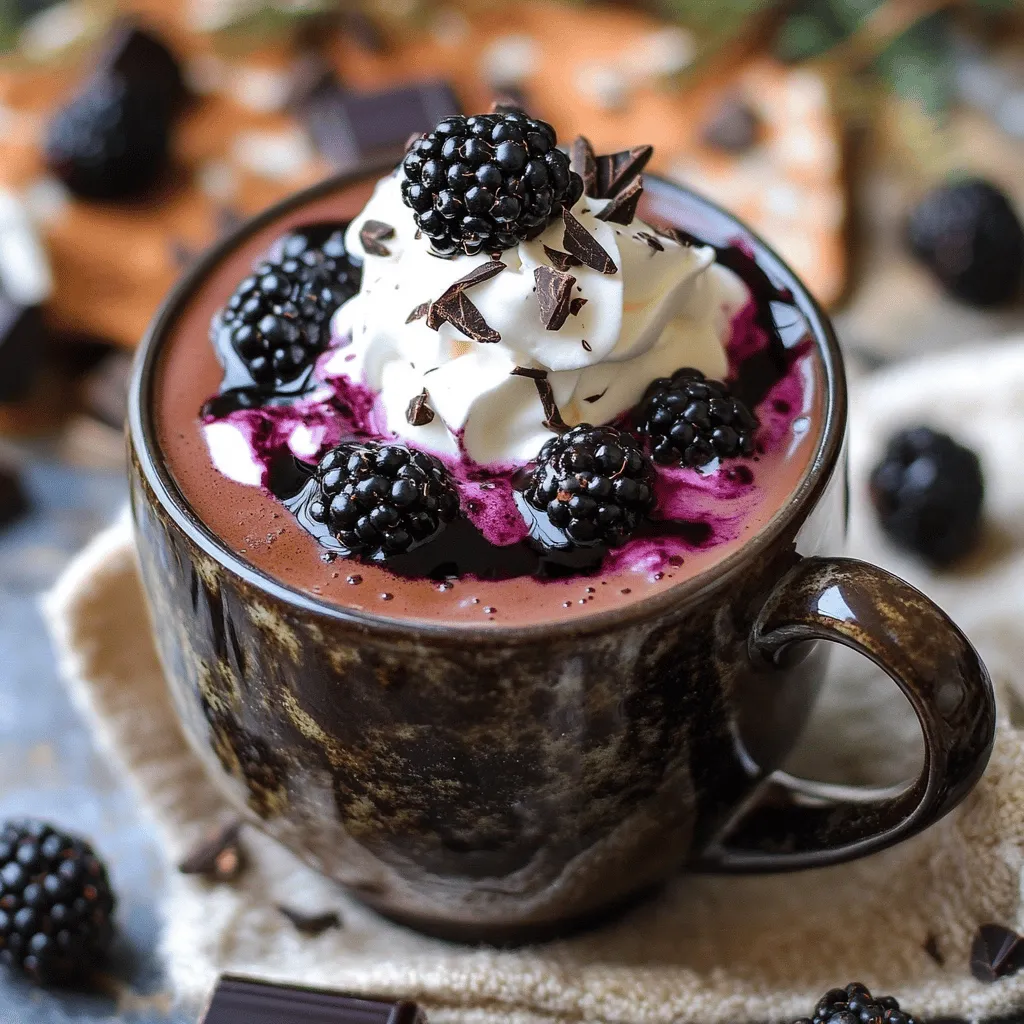
Blackberry Hot Chocolate Rich and Cozy Indulgence
Picture this: a warm mug of blackberry hot chocolate, rich and cozy, wrapping you in comfort. This delightful drink combines sweet blackberries with luscious chocolate,
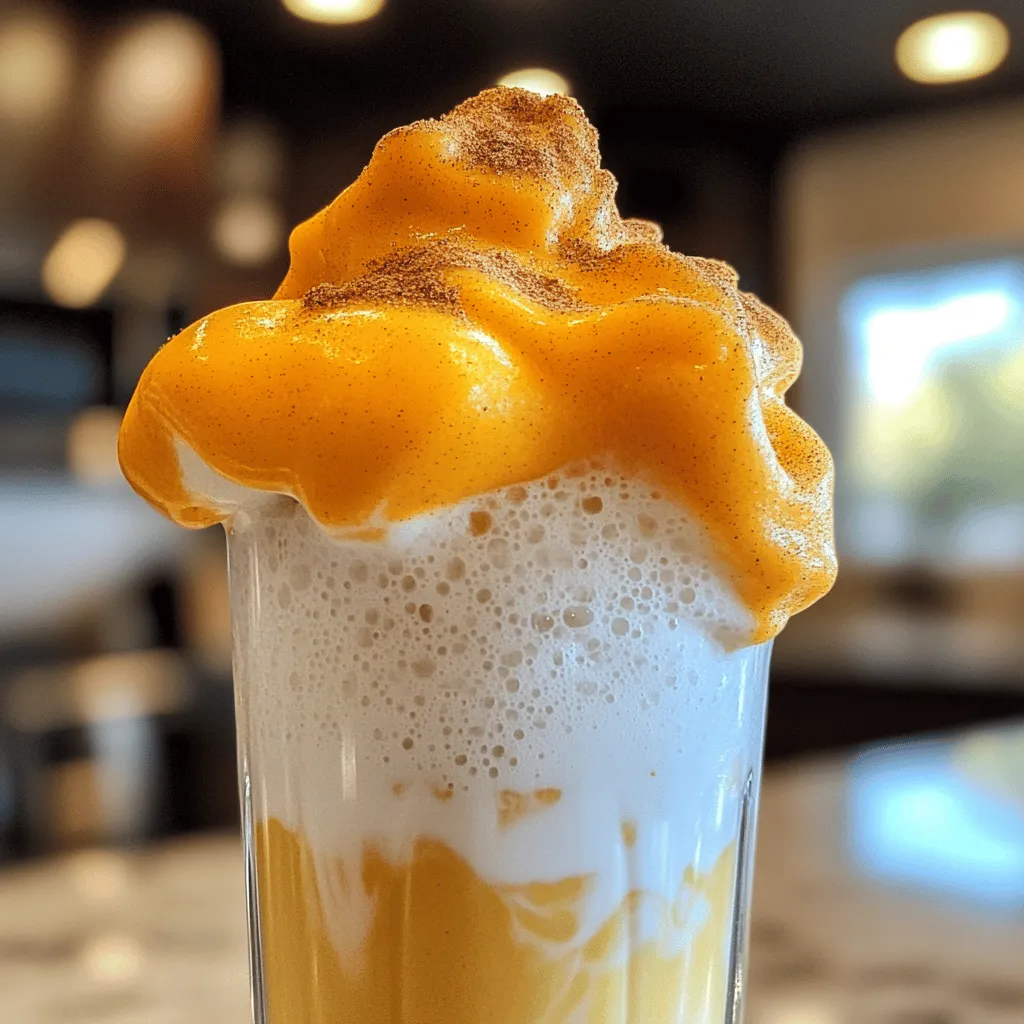
Pumpkin Cold Foam Tasty Recipe for Fall Drinks
Fall is here, and that means it’s time for cozy drinks! In this post, I’ll show you how to make a rich and tasty Pumpkin
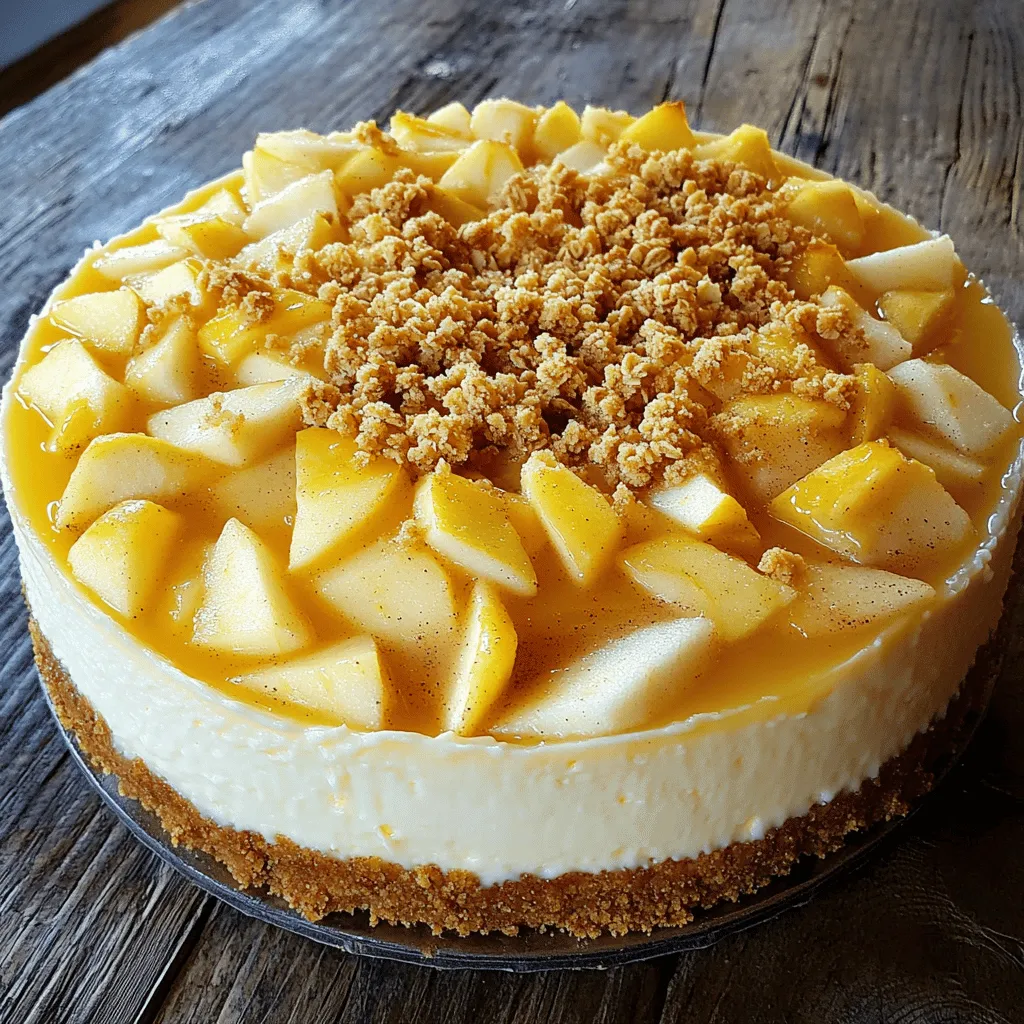
Creamy Apple Crumble Cheesecake Delightful Dessert Recipe
Craving a dessert that combines creamy cheesecake and warm spiced apples? You’re in the right place! Our Creamy Apple Crumble Cheesecake is the perfect treat
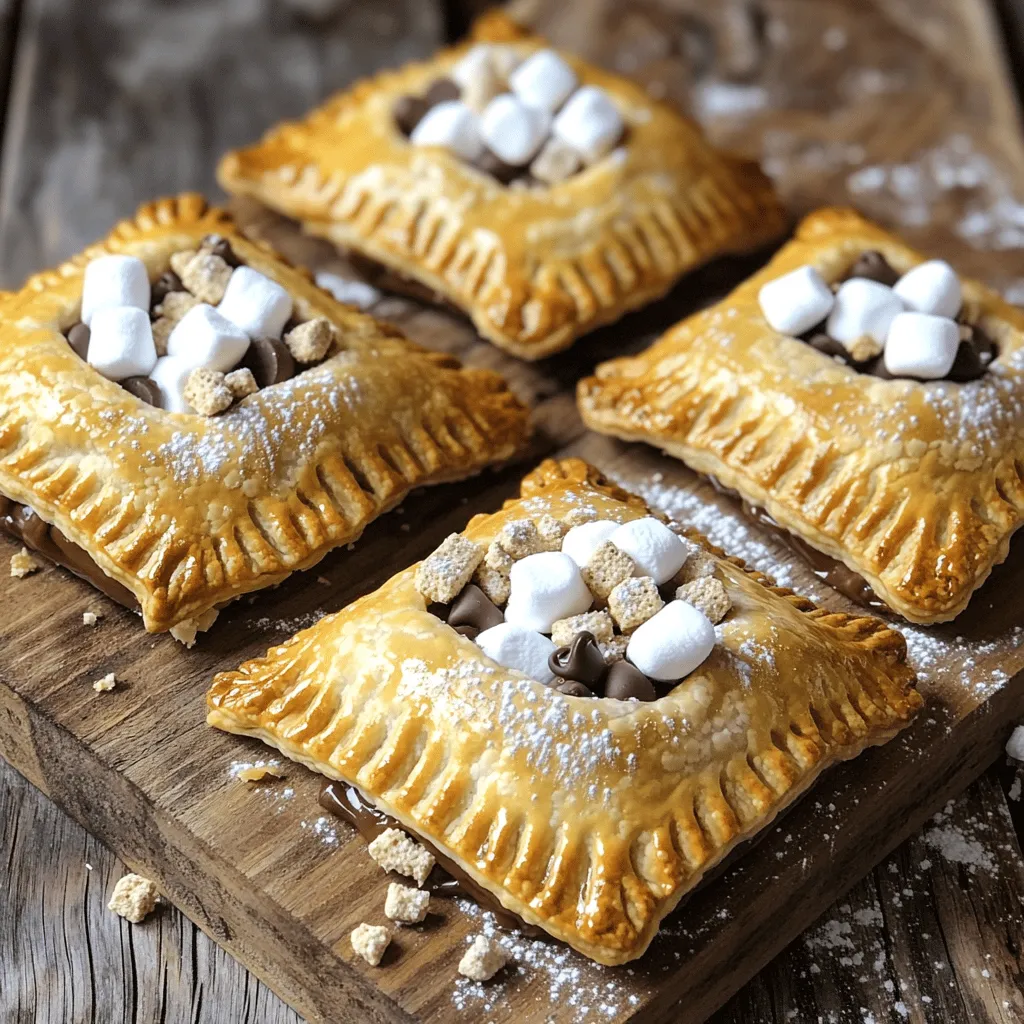
S’mores Hand Pies Simple and Delicious Dessert Treat
S’mores Hand Pies are a fun twist on a classic treat. Imagine gooey chocolate, fluffy marshmallows, and crunchy graham crackers all wrapped in flaky pastry.
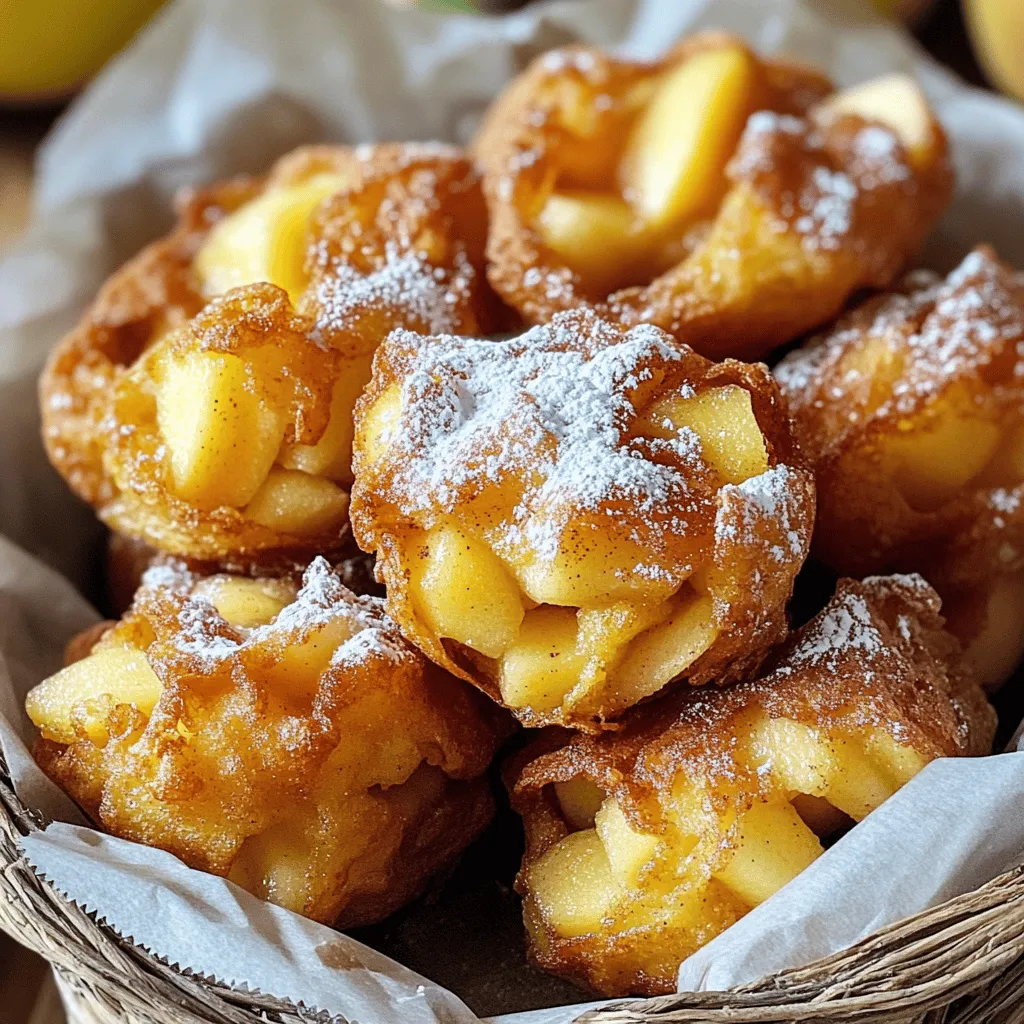
Apple Fritter Bites Savory and Simple Delight
Get ready to experience a sweet treat like no other with my Apple Fritter Bites! These bites pack all the delightful flavors of traditional apple