Desserts
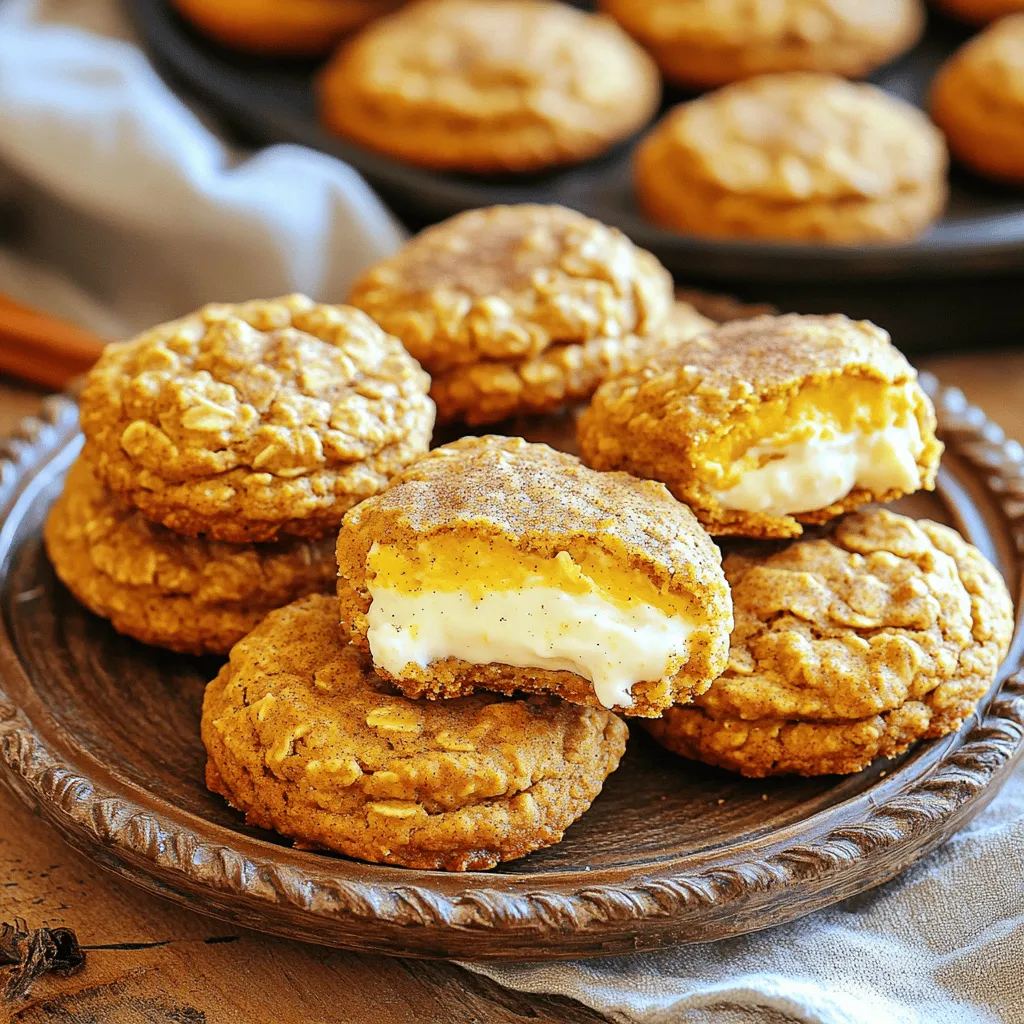
Pumpkin Oatmeal Cream Pies Irresistible Fall Treat
Fall is here, and that means it’s time for cozy treats! Pumpkin Oatmeal Cream Pies are the perfect way to enjoy the season. Soft, spiced
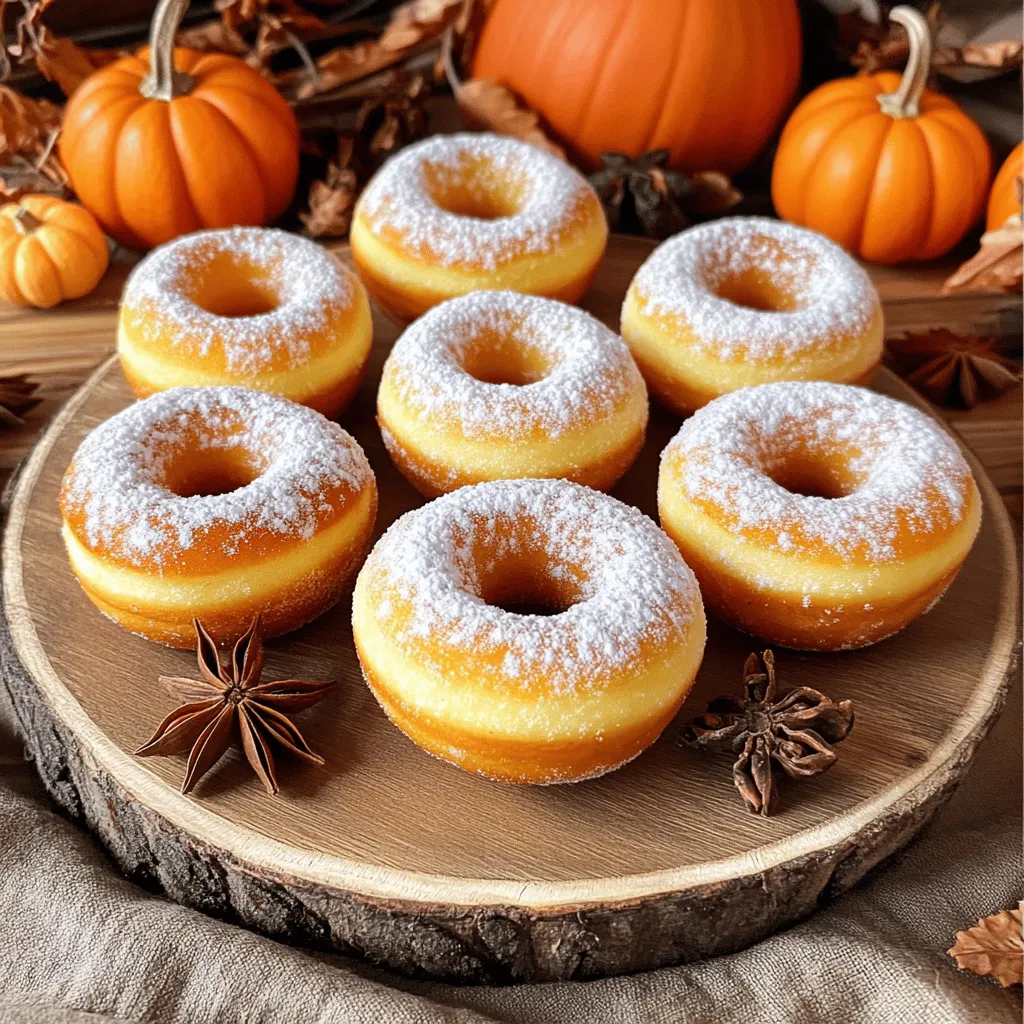
Air Fryer Pumpkin Spice Donuts Tasty and Easy Recipe
Get ready for fall with my easy air fryer pumpkin spice donuts! These donuts are fluffy, warm, and full of that perfect autumn flavor. With
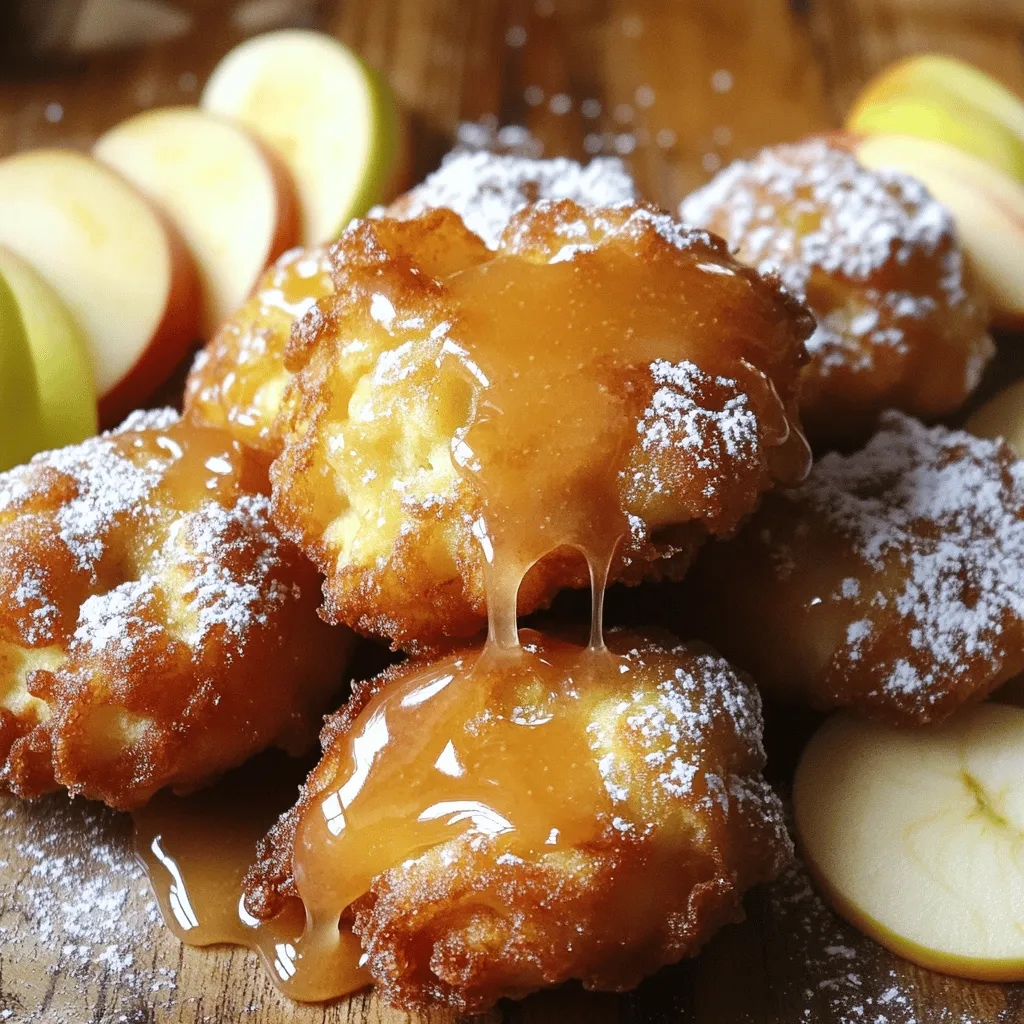
Maple Glazed Apple Fritters Simple and Tasty Treat
Are you ready to create a delicious treat that will wow your friends and family? These Maple Glazed Apple Fritters are a simple yet tasty

Easy Baked Apples Delightful Healthy Dessert Recipe
Are you craving a sweet yet healthy dessert? Look no further! My Easy Baked Apples recipe combines fresh flavors and simple ingredients for a delightful
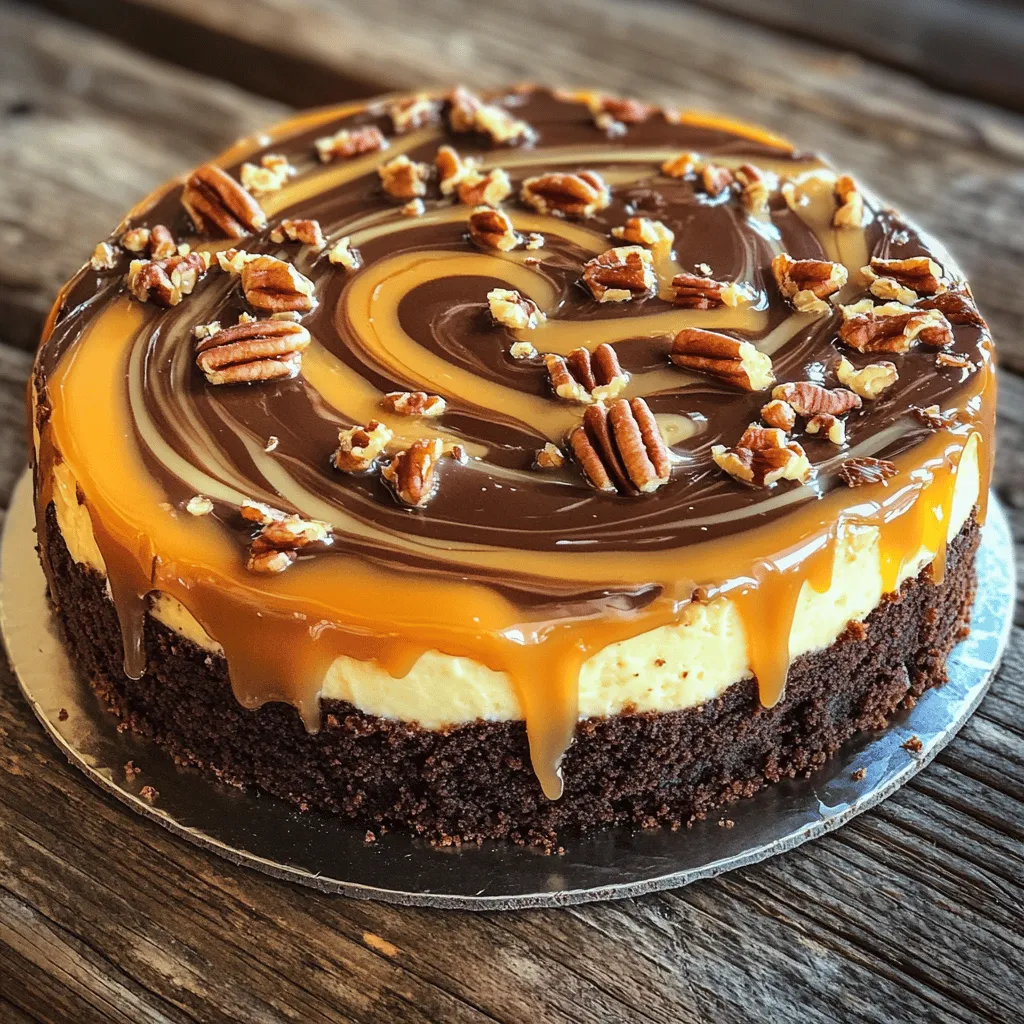
Caramel Brownie Cheesecake Irresistible Layered Delight
If you love rich, sweet treats, then you must try my Caramel Brownie Cheesecake. This dessert features layers of gooey brownie and creamy cheesecake, topped
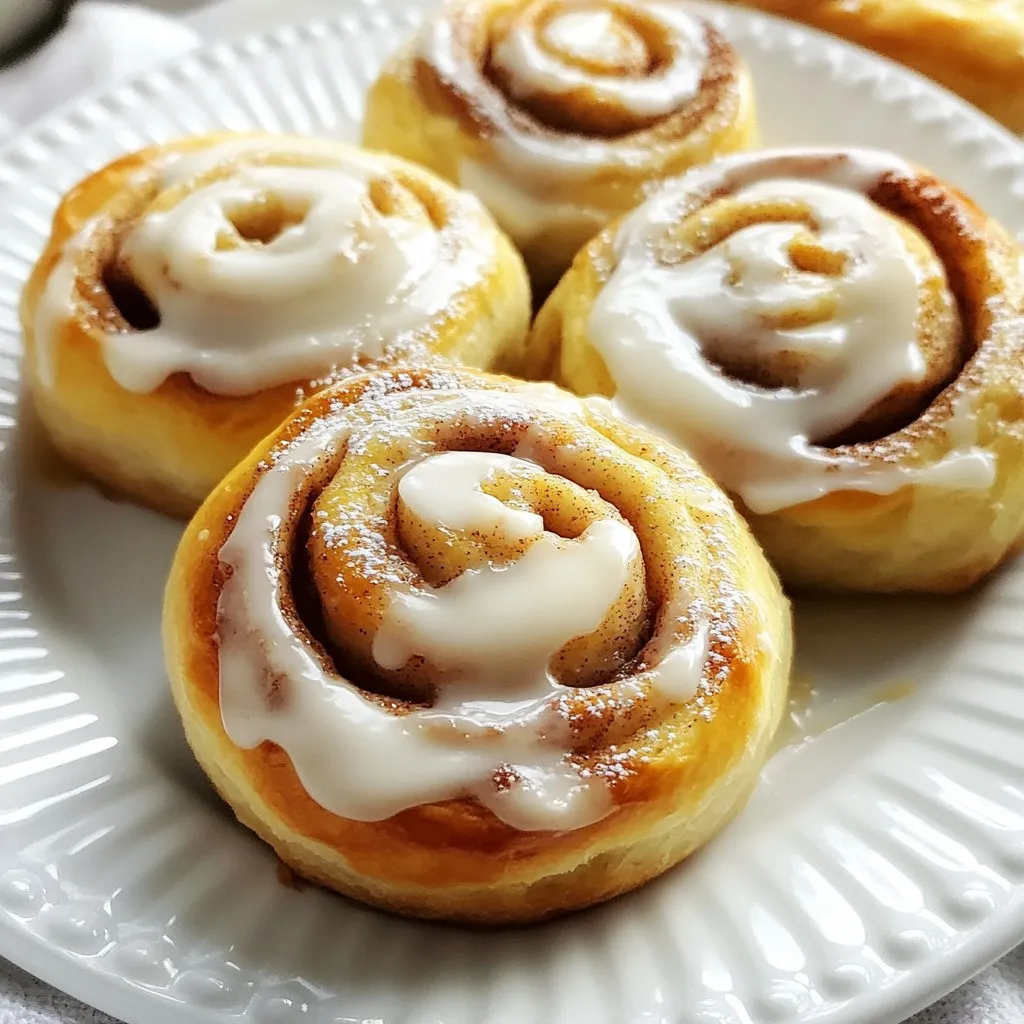
Fluffy Homemade Cinnamon Rolls That Delight You
Are you ready to transform your kitchen into a delightful bakery? In this post, I’ll share my secret to making fluffy homemade cinnamon rolls that
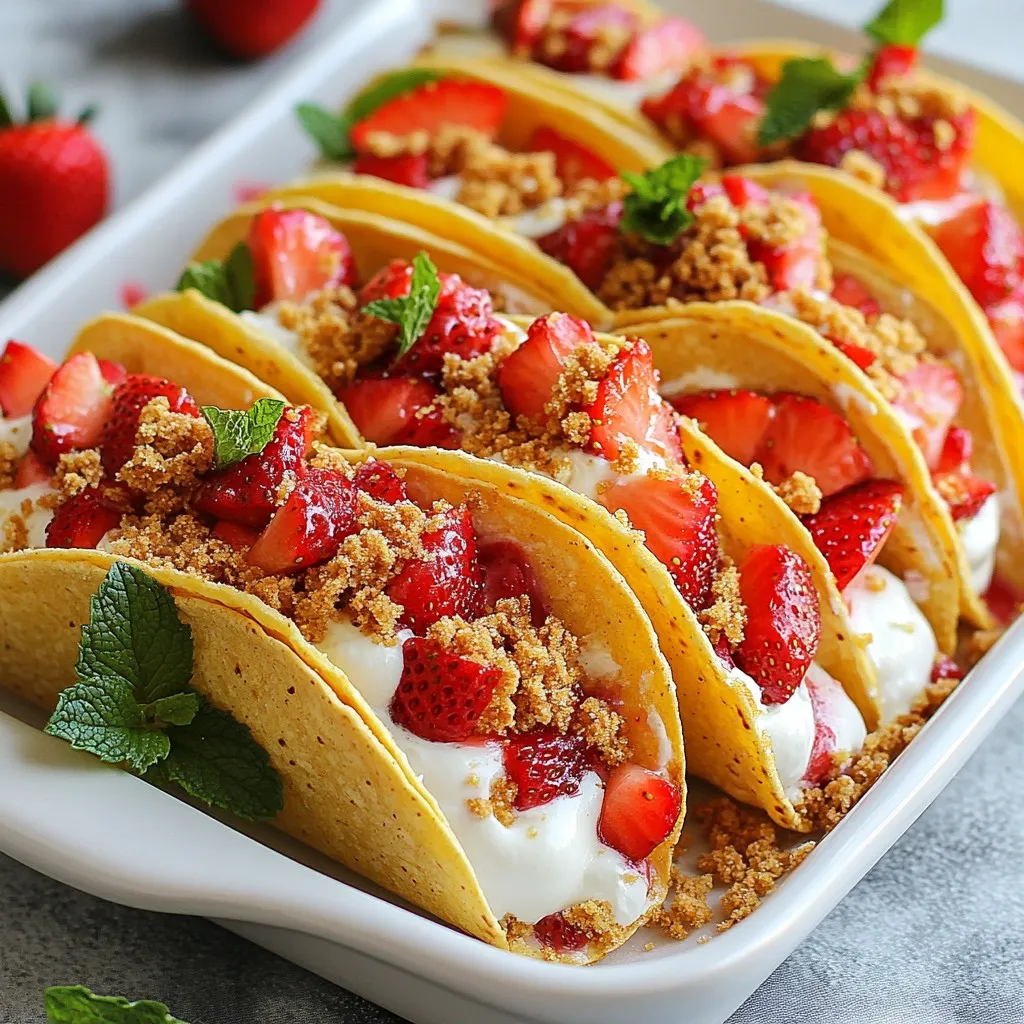
Strawberry Crunch Cheesecake Tacos Delightful Treat
Get ready for a fun twist on dessert with Strawberry Crunch Cheesecake Tacos! These delightful treats combine fresh strawberries and a creamy cheesecake filling in

Pumpkin Chai Latte Cupcakes Delightful Fall Treat
Fall is the perfect time for warm flavors and cozy treats. If you love pumpkin and chai, you’re in for a sweet surprise! In this
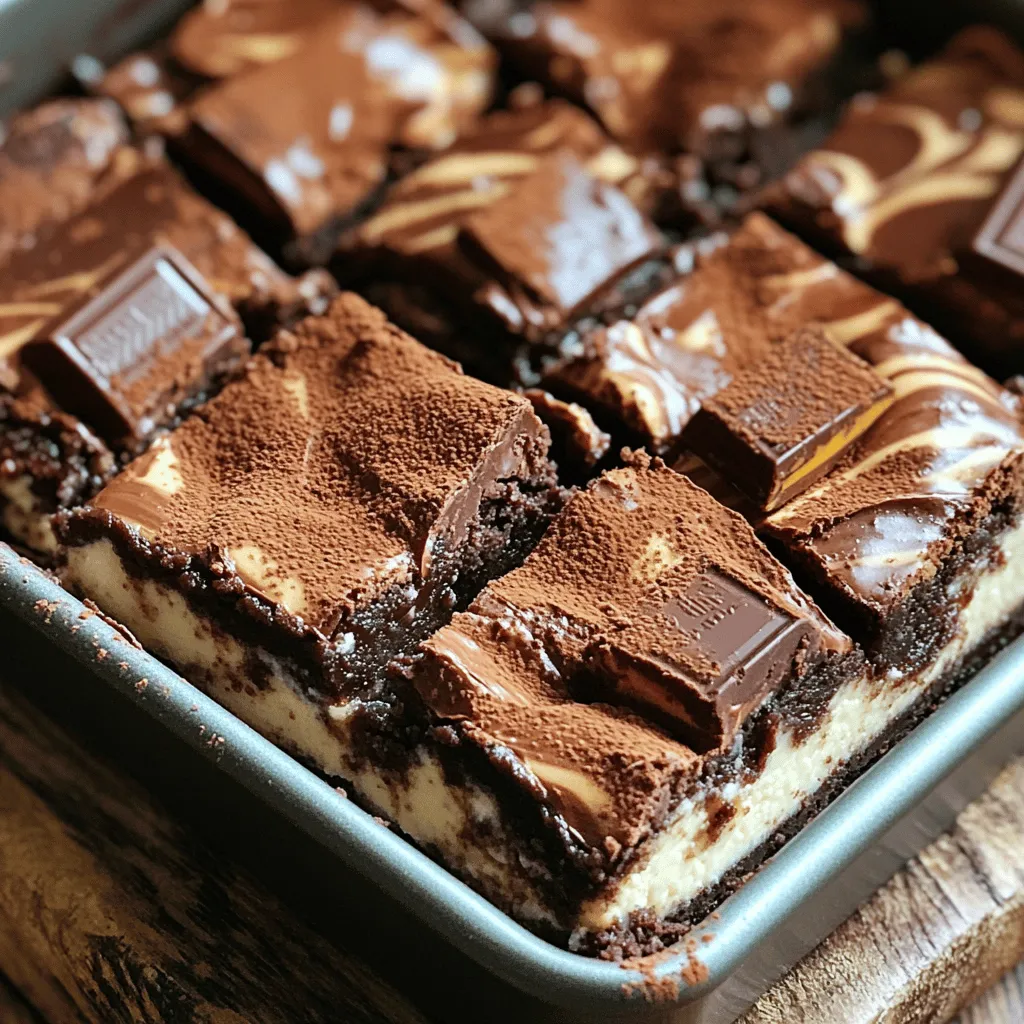
Milky Way Cheesecake Brownies Irresistible Dessert Treat
Craving something sweet? Let me introduce you to Milky Way Cheesecake Brownies! These rich, chewy brownies are layered with a creamy, dreamy cheesecake that features
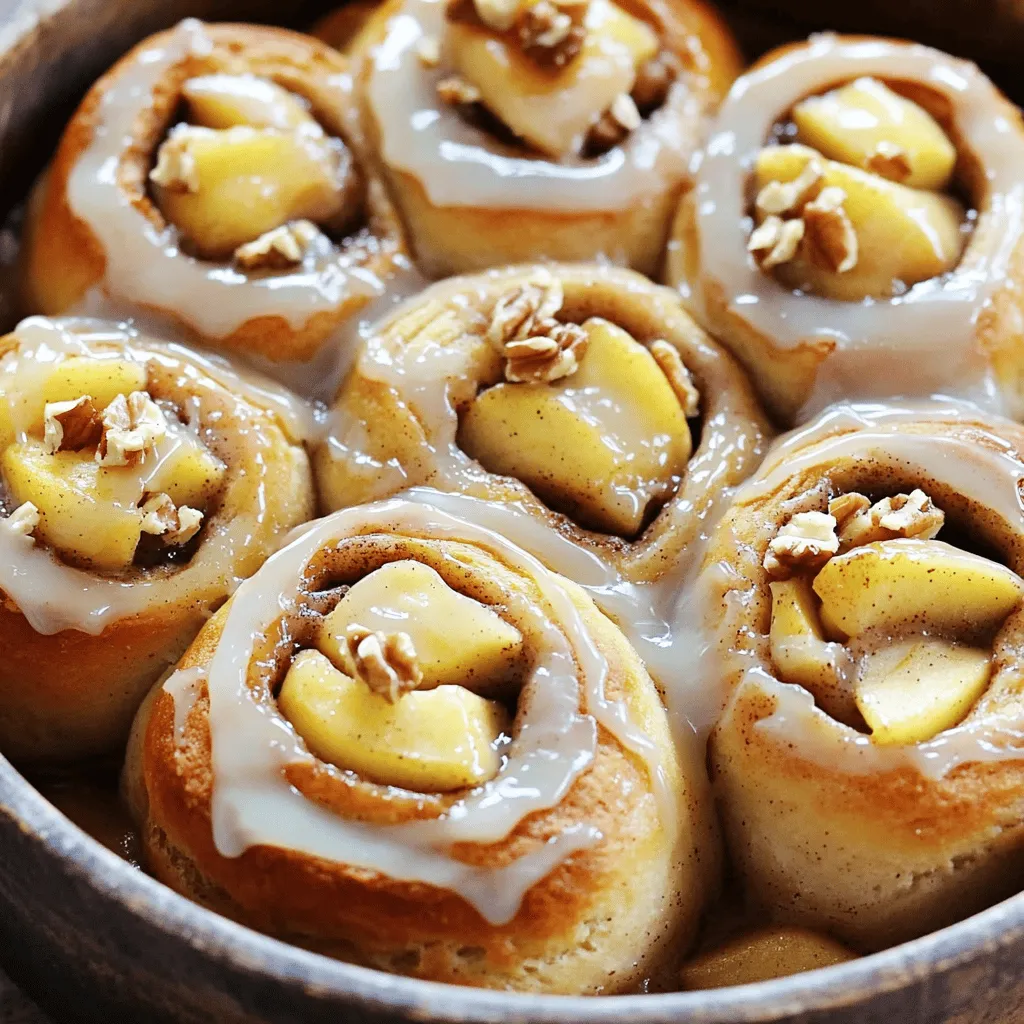
Overnight Apple Cinnamon Rolls Soft and Delicious Treat
Ready for a delicious treat that you can prepare the night before? These Overnight Apple Cinnamon Rolls blend sweet, warm apples with gooey, cinnamon goodness.