Desserts

- 4 cups all-purpose flour - 1 packet (2 1/4 teaspoons) instant yeast - 1/2 cup granulated sugar - 1 teaspoon salt - 1 cup whole milk, warmed - 1/4 cup unsalted butter, melted - 2 large eggs The dough forms the base of our rolls. Using all-purpose flour gives a nice texture. The instant yeast helps the rolls rise quickly. Warm milk and melted butter make the dough soft and rich. - 3 large apples, peeled and diced (Granny Smith or Honeycrisp work best) - 1/4 cup brown sugar - 1 teaspoon cinnamon - 1 tablespoon lemon juice - 1/2 teaspoon nutmeg - 1 tablespoon cornstarch The apple filling brings the pie flavor to our rolls. I love using Granny Smith apples for their tartness. The brown sugar and spices add sweetness and warmth, making it taste like fall. - 1/4 cup unsalted butter, softened - 1/2 cup powdered sugar - 1 teaspoon vanilla extract - 2 tablespoons milk This topping adds a sweet finish to the rolls. Softened butter blends well with powdered sugar. Vanilla extract gives it a lovely aroma, making the rolls even more inviting. To start, you need to prepare the dough. Begin by warming 1 cup of milk. Pour it into a large bowl. Add 1/4 cup of melted butter and 1/2 cup of sugar. Mix these well. Next, sprinkle 2 1/4 teaspoons of instant yeast on top. Let it sit for about 5 minutes until it looks foamy. In a separate bowl, mix 4 cups of all-purpose flour and 1 teaspoon of salt. Gradually add this flour mix to the yeast mixture. Now, add 2 large eggs. Stir until the dough is smooth. Once mixed, place the dough on a floured surface. Knead it for 5 to 7 minutes. It should feel smooth and elastic. Now, put the dough in a greased bowl. Cover it with a kitchen towel. Let it rise in a warm spot for about 1 hour. The dough will double in size. While the dough rises, you can make the apple filling. Take 3 large apples and peel them. Then, dice them into small pieces. In a medium bowl, combine the diced apples with 1/4 cup of brown sugar, 1 teaspoon of cinnamon, and 1/2 teaspoon of nutmeg. Add 1 tablespoon of lemon juice to keep the apples fresh. Lastly, mix in 1 tablespoon of cornstarch. This helps thicken the filling. Set this bowl aside for later. Once the dough has risen, punch it down. Roll it out on a floured surface into a rectangle, about 1/4 inch thick. Spread 1/4 cup of softened butter evenly over the dough. Now, take your apple filling and spread it evenly on top. Starting from one end, roll the dough tightly into a log. Cut the log into 12 equal pieces. Place these rolls in a greased 9x13 inch baking dish. Cover them and let them rise for another 30 minutes. Preheat your oven to 350°F (175°C). Once the rolls have risen, bake them for 25 to 30 minutes. Look for a golden-brown color. While they bake, prepare the glaze. In a bowl, mix 1/4 cup of softened butter, 1/2 cup of powdered sugar, 1 teaspoon of vanilla extract, and 2 tablespoons of milk. Stir until smooth. When the rolls come out of the oven, drizzle the glaze over them while they are still warm. Enjoy your delicious apple pie cinnamon rolls! When making apple pie cinnamon rolls, you can easily avoid some common mistakes. Here are a few: - Using cold ingredients: Always warm your milk and use room temperature eggs. Cold ingredients can slow yeast activity. - Skipping the first rise: Allow the dough to rise fully. This makes your rolls light and fluffy. - Overfilling the rolls: Don't add too much filling. Overfilling can cause the rolls to spill out and burn. Getting the dough to rise well is key to great cinnamon rolls. Here are my best tips: - Warm environment: Find a warm place for the dough. A turned-off oven or a sunny spot works well. - Cover the dough: Use a clean kitchen towel. This keeps the dough from drying out as it rises. - Time it right: Let the dough rise until it doubles in size. This usually takes about an hour. A good glaze makes your rolls shine! Here’s how to get it just right: - Mix well: Whisk the softened butter, powdered sugar, and milk until smooth. No lumps allowed! - Drizzle gently: Use a spoon to drizzle the glaze over warm rolls. This helps it melt into the rolls. - Adjust thickness: If the glaze is too thick, add a bit more milk. If it's too thin, add more sugar. These tips will help you create the best apple pie cinnamon rolls ever! Enjoy every bite of this sweet treat. {{image_4}} You can switch up the filling for different tastes. Try using pears instead of apples. Pears give a softer bite and a sweet flavor. You can also use berries. Blueberries or raspberries add a fresh twist. Mix nuts like walnuts or pecans for a crunchy texture. You can even add a bit of chocolate for a rich flavor. Choosing the right apple changes the taste of your rolls. Granny Smith apples are tart and hold their shape well. Honeycrisp apples are sweet and juicy, adding a lovely flavor. Fuji apples are also great. They are sweet and crisp. Try a mix of apples to get a balance of sweet and tart. Experiment to find your favorite combo. The topping can be just as fun to change. Instead of the classic glaze, try a caramel sauce for a rich treat. A cream cheese frosting adds a nice tangy flavor. You can also sprinkle chopped nuts on top for added crunch. For a more festive look, add a dusting of powdered sugar and cinnamon. There are many ways to make these rolls your own! Store leftover apple pie cinnamon rolls in an airtight container. Keep them at room temperature for up to two days. If you want to keep them longer, place them in the fridge. They can last up to a week in the fridge. Just make sure they are sealed well to prevent drying out. To freeze the rolls, let them cool completely first. Wrap each roll in plastic wrap. Then, place the wrapped rolls in a freezer-safe bag. They can last up to three months in the freezer. When you're ready to eat them, just thaw them in the fridge overnight. To reheat the rolls, you can use the oven or microwave. For the oven, preheat it to 350°F (175°C). Place the rolls on a baking sheet and cover them with foil. Heat for about 10-15 minutes until warm. If using the microwave, place one roll on a plate and heat for about 15-20 seconds. Enjoy them warm for the best taste! To make apple pie cinnamon rolls from scratch, follow these steps: 1. Prepare the dough: Mix warm milk, melted butter, and sugar in a large bowl. Sprinkle instant yeast on top and let it sit for about five minutes until it's foamy. 2. Mix dry ingredients: In another bowl, combine all-purpose flour and salt. Slowly add this mixture to the yeast mixture, followed by two eggs. Stir until the dough forms. 3. Knead the dough: Place the dough on a floured surface and knead for five to seven minutes. The dough should be smooth and elastic. Place it in a greased bowl, cover, and let it rise for one hour until it doubles in size. 4. Make the apple filling: In a bowl, mix diced apples, brown sugar, cinnamon, lemon juice, nutmeg, and cornstarch. 5. Roll out the dough: Once the dough has risen, punch it down and roll it out into a rectangle about a quarter-inch thick. 6. Assemble the rolls: Spread softened butter over the rolled dough. Evenly distribute the apple filling, then roll it tightly from one end. Cut the roll into twelve equal pieces. 7. Second rise: Place the rolls in a greased baking dish. Cover and let them rise for another thirty minutes. 8. Bake the rolls: Preheat the oven to 350°F. Bake the rolls for 25 to 30 minutes until they turn golden brown. 9. Prepare the topping: While they bake, mix softened butter, powdered sugar, vanilla extract, and milk until smooth. 10. Glaze the rolls: Once the rolls cool slightly, drizzle the topping over them. Yes, you can prep these rolls the night before. After you roll them and cut them, cover the baking dish and place it in the fridge. The next morning, take them out and let them rise for about 30 minutes at room temperature. Then, bake as directed. This method saves time and makes breakfast easy! The best way to serve apple pie cinnamon rolls is warm. Place them on a large platter and drizzle with glaze. For extra flair, sprinkle with cinnamon and add a few apple slices on the side. This makes a beautiful presentation and adds a lovely touch for guests or family gatherings! You now have all the details to make apple pie cinnamon rolls. We covered dough ingredients, apple filling, and topping options. I shared steps for preparation, baking, and tips to avoid mistakes. You also learned storage methods and tasty variations to try. Enjoy these rolls fresh or as leftovers. Your kitchen will smell amazing, and your taste buds will thank you! Remember, experiment and make these rolls your own for the best results. Happy baking!
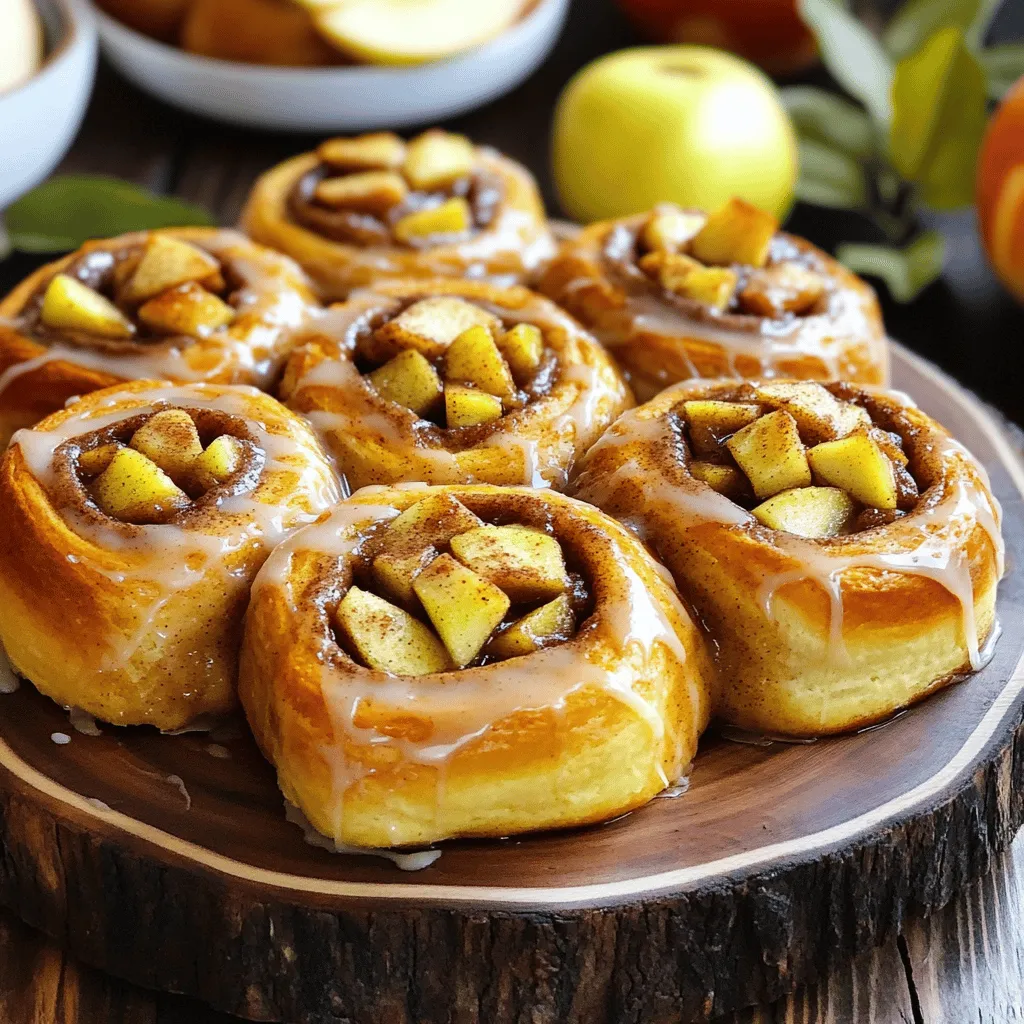
Apple Pie Cinnamon Rolls Irresistible Dessert Recipe
If you crave a dessert that brings warmth and joy, you’ll love these Apple Pie Cinnamon Rolls. Imagine soft, fluffy dough filled with sweet apples
- 1 cup all-purpose flour - 1 cup whole wheat flour - 1 teaspoon baking powder - 1 teaspoon baking soda - 1/2 teaspoon salt - 1 teaspoon ground cinnamon - 1/2 teaspoon ground nutmeg - 1/4 teaspoon ground ginger - 1/2 cup granulated sugar - 1/2 cup brown sugar, packed - 1/2 cup vegetable oil - 3/4 cup canned pumpkin puree - 2 large eggs - 1 teaspoon vanilla extract - 4 oz cream cheese, softened - 1/4 cup powdered sugar - 1 tablespoon lemon juice The main star of this recipe is canned pumpkin puree. It gives the bread its rich flavor and moist texture. You can also use fresh pumpkin, but canned is easier. Flours play a big role too. I use both all-purpose and whole wheat flour. The mix gives a nice texture and adds some health benefits. Spices like cinnamon, nutmeg, and ginger bring warmth and depth to the bread. They make each bite taste like fall. Cream cheese adds a lovely tang and richness. The cream cheese swirl makes the bread even more special. If you don’t have all-purpose flour, use just whole wheat flour. The bread will be denser but still tasty. For sugar, you can swap granulated sugar with coconut sugar. It gives a different flavor but works well. If you prefer oil, melted butter is a great alternative. It adds a rich taste to the bread. You can replace the eggs with flax eggs for a vegan option. Use 1 tablespoon of ground flaxseed mixed with 2.5 tablespoons of water for each egg. If you’re out of lemon juice, vinegar can do the trick. It helps balance the sweetness of the cream cheese. First, turn on your oven. Set it to 350°F (175°C). While it heats, grab a 9x5-inch loaf pan. Grease it or line it with parchment paper. This step helps the bread come out easily later. In a medium bowl, mix the all-purpose flour and whole wheat flour. Add baking powder, baking soda, salt, cinnamon, nutmeg, and ginger. Whisk these dry ingredients until they blend well. Set this bowl aside for now. Take a large bowl and add granulated sugar and brown sugar. Pour in vegetable oil. Whisk this mixture until it looks smooth. Next, add pumpkin puree, eggs, and vanilla extract. Beat these together until they form a nice, smooth mix. Now, take your dry mix and slowly add it to the wet mix. Use a spatula to fold them together gently. Stir just until combined. Be careful not to mix too much, as this helps keep the bread soft and fluffy. In a small bowl, mix softened cream cheese, powdered sugar, and lemon juice. Stir until the cream cheese is smooth. This mixture will create a rich swirl in your bread. Pour half of the pumpkin batter into the loaf pan. Spread it evenly. Then, scoop spoonfuls of the cream cheese mix on top. Use a knife to swirl it into the batter. Pour the rest of the pumpkin batter over the cream cheese layer. Create another swirl on top. Place the loaf pan in the oven and bake for 60-65 minutes. Check if it’s done by inserting a toothpick in the center. If it comes out clean, your bread is ready. Let it cool in the pan for about 10 minutes. After that, move it to a wire rack. Allow it to cool completely before slicing. Enjoy your warm, soft pumpkin cream cheese bread! To keep your pumpkin cream cheese bread soft, mix gently. After adding dry ingredients, use a spatula to fold. Stop mixing as soon as you see no dry flour. Overmixing makes bread dense. For the best swirl, use softened cream cheese. Blend it with powdered sugar and lemon juice until smooth. When layering, spread cream cheese in dollops. Use a knife to swirl gently but don't overdo it. This creates a lovely marbled look. A moist pumpkin bread needs perfect baking. Preheat your oven to 350°F. Bake for 60-65 minutes. Test doneness with a toothpick; it should come out clean. Let the bread cool in the pan for about 10 minutes to keep it moist. Serve pumpkin cream cheese bread warm or at room temperature. For a fun touch, add a sprinkle of cinnamon on top. Pair it with coffee or tea for a cozy feel. A dollop of whipped cream cheese makes it even better! {{image_4}} You can easily change the flavor of your pumpkin cream cheese bread. Adding nuts gives it a nice crunch. Try 1/2 cup of chopped walnuts or pecans. Mix them into the batter before pouring it into the pan. If you love chocolate, add 1/2 cup of chocolate chips. They will melt and add a sweet surprise in each bite. Both options make the bread even more delightful and rich. If you need a gluten-free version, it's simple. Use 2 cups of gluten-free flour instead of all-purpose and whole wheat flour. Make sure your baking powder is gluten-free, too. This way, everyone can enjoy this tasty treat without worry. The bread will still taste great and remain soft. You can enhance the flavor with more spices. Try adding 1/4 teaspoon of ground cloves for a warm taste. You can also add 1/2 teaspoon of pumpkin pie spice for extra flavor. If you want a hint of sweetness, add 1 teaspoon of almond extract. These small changes can make a big difference. They will take your pumpkin cream cheese bread to the next level. To keep your pumpkin cream cheese bread fresh, wrap it tightly in plastic wrap or aluminum foil. Place it in an airtight container if you have one. Store it at room temperature for up to three days. If you want to keep it longer, refrigeration is a good option, but it may change the texture a bit. You can freeze this bread for later enjoyment. First, let it cool completely. Then, wrap it tightly in plastic wrap. After that, place it in a freezer bag or container. This bread can freeze well for up to three months. When you’re ready to eat it, simply thaw it in the fridge overnight. To reheat your pumpkin cream cheese bread, slice it first. Place the slices in the microwave for about 15-20 seconds. If you prefer, you can toast it in a toaster oven for a few minutes. This will warm it up and enhance its flavors. Enjoy it warm for the best taste! Yes, you can use fresh pumpkin. First, cook the pumpkin until soft. Then, puree it until smooth. Measure out 3/4 cup of the puree for your recipe. This gives a fresh taste. Just note, it may have more moisture than canned pumpkin. To check if the bread is done, insert a toothpick in the center. If it comes out clean, your bread is ready. If it has batter on it, bake for a few more minutes. The bread should also spring back when lightly touched. This bread pairs well with many items. You can serve it with coffee or tea for a warm drink. A dollop of whipped cream cheese on the side adds a nice touch. You can also enjoy it with honey or maple syrup. The bread stays fresh for about 3 to 4 days at room temperature. Store it in an airtight container to keep it moist. If you want to keep it longer, you can freeze it. Wrapped well, it can last for up to 3 months in the freezer. Yes, you can make this bread in mini loaf pans. Divide the batter evenly among the pans. Bake for about 25-30 minutes. Check for doneness with a toothpick. Mini loaves are perfect for sharing or gifting! This blog post covered how to make delicious Pumpkin Cream Cheese Bread. We explored key ingredients, mixing steps, and baking tips. You can try different flavors or gluten-free options. Store it properly for long-lasting freshness. Final thoughts: This recipe is fun and easy. Enjoy each slice with family and friends!
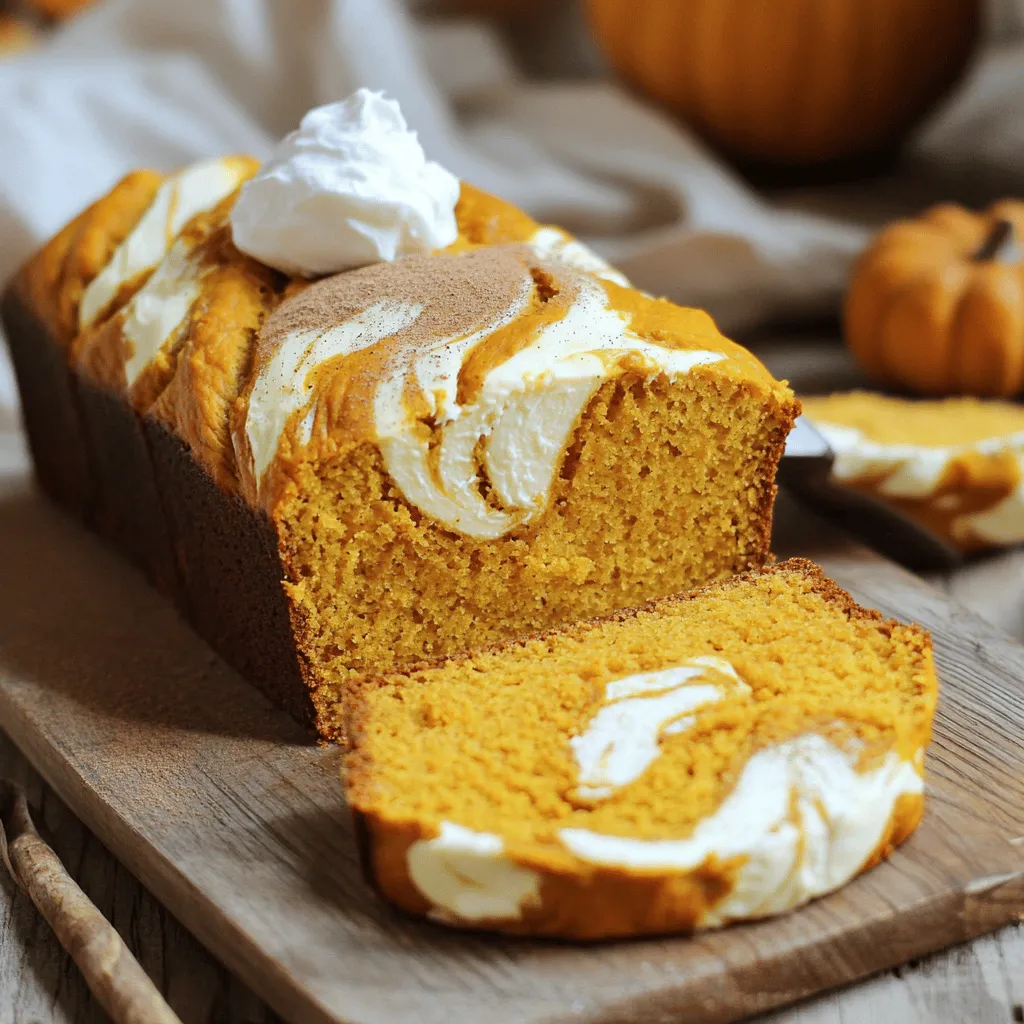
Pumpkin Cream Cheese Bread Soft and Flavorful Delight
If you love warm, spiced treats, you’re in for a real treat! This Pumpkin Cream Cheese Bread is a soft, flavorful delight that captures the
- 1 cup smooth cottage cheese - 1/4 cup creamy peanut butter - 1/4 cup pure maple syrup or honey The main ingredients create the base of our dip. Smooth cottage cheese gives a creamy texture. Creamy peanut butter adds richness and flavor. Pure maple syrup or honey provides natural sweetness. - 1/2 teaspoon almond extract for added flavor - 1/3 cup chopped walnuts or pecans for crunch - 1/2 cup mini chocolate chips You can enhance your dip with optional ingredients. Almond extract brings a lovely twist. Chopped walnuts or pecans add a nice crunch. Mini chocolate chips offer a sweet surprise in every bite. - Fresh fruit slices (apple, banana, strawberries) - Graham crackers For serving, I love using fresh fruit slices. Apples, bananas, and strawberries pair well with the dip. Graham crackers also work great for dipping. They provide a nice contrast to the creamy texture. First, grab a medium bowl. In the bowl, combine 1 cup of smooth cottage cheese, 1/4 cup of creamy peanut butter, 1/4 cup of pure maple syrup, 1 teaspoon of vanilla extract, and if you like, 1/2 teaspoon of almond extract. This mix creates a nice base. Now, use a hand mixer or a whisk. Blend until the mix is smooth. You want a creamy texture that feels like cookie dough. Next, add a pinch of salt. This little touch boosts the flavor. Then, fold in 1/2 cup of mini chocolate chips and 1/3 cup of chopped walnuts or pecans, if you want some crunch. Make sure they are evenly mixed in. This makes each dip flavorful and fun! Now, spoon the dip into a serving bowl. Use a spatula to smooth the top. This makes it look nice. Cover the bowl with plastic wrap. Chill it in the fridge for at least 30 minutes. Chilling helps the flavors blend well. When it’s time to serve, present the dip with fresh fruit slices like apples, bananas, or strawberries and some graham crackers. Enjoy your tasty treat! To get the best dip, start with smooth cottage cheese. It makes a big difference. Lumpy cheese can ruin the creamy feel. Use a hand mixer or whisk for blending. Mix until it looks like cookie dough. This smoothness is key to the dip’s texture. You can add fun flavors to your dip. Try a splash of almond extract for a twist. It adds a nice depth. You can also adjust the sweetness. If you want it sweeter, add more maple syrup or honey. Taste as you go to find your perfect balance. Make your dip look as tasty as it is! Use a nice bowl to serve it. Top with extra mini chocolate chips or walnuts for flair. Serve it with colorful fruit slices, like apples or strawberries. This adds a bright touch and makes it fun to eat. {{image_4}} You can make this dip lighter by choosing low-fat cottage cheese. It still tastes great and keeps the creamy texture. Instead of maple syrup, try using natural sweeteners like agave or stevia. These options can cut sugar without losing flavor. Want to mix it up? Different nut butters work well. Almond butter or cashew butter adds a unique twist. You can also spice it up! Adding a dash of cinnamon or nutmeg gives it warmth and a cozy feel. For those who avoid dairy, you can easily make it vegan. Use a dairy-free cottage cheese or silken tofu as a base. If you need gluten-free options, serve it with rice cakes or sliced fruits instead of graham crackers. These swaps ensure everyone can enjoy this tasty treat! To keep your cottage cheese cookie dough dip fresh, store it in an airtight container. This helps to lock in flavor and moisture. If you have leftovers, make sure to seal it tight. This dip stays good in the fridge for about 3 days. You usually don’t need to reheat this dip. It tastes best cold or at room temperature. If you want to warm it up, do it gently in the microwave. Heat it in short bursts, stirring in between. You can freeze this dip if you want to save some for later. Use a freezer-safe container and leave a little space for expansion. It can last in the freezer for up to 2 months. When you're ready to eat it, move it to the fridge overnight. After thawing, stir it well before serving. This will help bring back its creamy texture. Cottage Cheese Cookie Dough Dip is a creamy, sweet treat. The base is smooth cottage cheese, mixed with peanut butter and maple syrup. This dip tastes like cookie dough but is healthier. It has a rich flavor with hints of vanilla and chocolate. You can feel the mini chocolate chips and nuts for a nice crunch. Serve it with fresh fruit slices or graham crackers for a fun snack! Using regular cookie dough is not safe. Raw cookie dough may contain raw eggs and flour, which can cause illness. Plus, regular cookie dough lacks the creamy texture that cottage cheese offers. Stick with the cottage cheese to keep it safe and tasty. It’s much better for your health, and you still get that cookie dough vibe! To make this dip vegan, swap the cottage cheese for a plant-based alternative. Use a creamy cashew or almond yogurt. Replace the honey with maple syrup for a vegan sweetener. For the peanut butter, ensure it’s natural and free from added sugar. These swaps keep the flavor great while making it vegan-friendly! This blog post shared how to make a tasty cottage cheese cookie dough dip. We covered the main ingredients like smooth cottage cheese and creamy peanut butter. We also explored optional add-ins, from nuts to chocolate chips. The step-by-step guide helped you blend your base and add final touches. Remember, the right texture and flavors make all the difference. Enjoy personalizing your dip with healthy swaps or fun variations. Whether for a snack or party, this dip is sure to impress. Get creative and have fun with it!
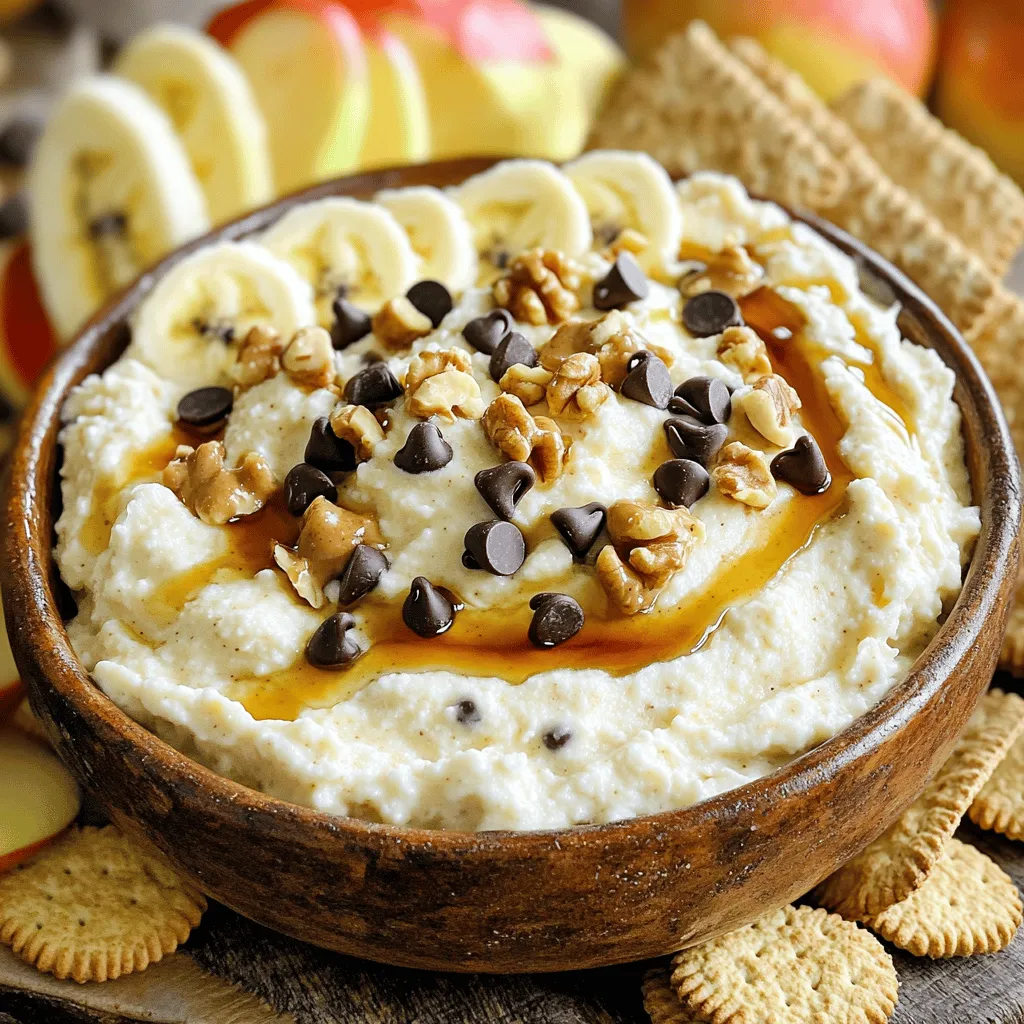
Cottage Cheese Cookie Dough Dip Easy and Tasty Treat
Craving a sweet treat that’s both easy and healthy? Look no further than Cottage Cheese Cookie Dough Dip! This tasty recipe blends smooth cottage cheese
To make these tasty cinnamon apple cider doughnuts, you will need: - 1 cup apple cider - 2 cups all-purpose flour - 1 teaspoon baking powder - 1/2 teaspoon baking soda - 1 teaspoon ground cinnamon - 1/2 teaspoon ground nutmeg - 1/2 teaspoon salt - 1/2 cup granulated sugar - 1/4 cup packed brown sugar - 2 large eggs - 1/2 cup unsweetened applesauce - 1/4 cup vegetable oil - 1 teaspoon vanilla extract - 1/4 cup granulated sugar (for coating) - 1 teaspoon ground cinnamon (for coating) You can swap some ingredients if needed. For the apple cider, you can use apple juice for a sweeter taste. If you want a gluten-free option, use gluten-free flour blends. Instead of eggs, you can use flaxseed meal mixed with water as a binder. Applesauce can be replaced with mashed bananas for a different flavor. Using fresh ingredients is key for great taste. Fresh apple cider adds a rich flavor that enhances the doughnuts. Fresh spices like cinnamon and nutmeg pack a punch. They make each bite fragrant and delightful. Fresh eggs and applesauce also improve texture. They help create a soft, fluffy doughnut that melts in your mouth. Always check the expiry dates on your ingredients. Freshness matters when you want to impress with your baking! Start by making the apple cider reduction. Pour 1 cup of apple cider into a medium saucepan. Heat it over medium heat until it gently boils. Let it simmer for 15 to 20 minutes. The goal is to reduce it to about 1/2 cup. This step brings out a rich apple flavor. Once it's reduced, take it off the heat and let it cool fully. While the cider cools, preheat your oven to 350°F (175°C). Grab a doughnut pan and grease it well with non-stick spray. In a large bowl, mix together your dry ingredients. Combine 2 cups of all-purpose flour, 1 teaspoon baking powder, 1/2 teaspoon baking soda, 1 teaspoon cinnamon, 1/2 teaspoon nutmeg, and 1/2 teaspoon salt. Whisk until they blend nicely. In another bowl, whisk together the sugars, eggs, applesauce, vegetable oil, vanilla extract, and the cooled apple cider. Mix until it's smooth. Next, pour the wet mix into the dry mix. Stir gently with a spatula. Remember, it’s okay if there are a few lumps. Now, spoon the batter into your greased doughnut pan. Fill each mold about two-thirds full. This allows space for the doughnuts to rise. Place the pan in the preheated oven and bake for 12 to 15 minutes. The doughnuts should turn golden brown. To check for doneness, insert a toothpick into the center; it should come out clean. After baking, let the doughnuts cool in the pan for about 5 minutes. Then, move them to a wire rack. While they're still warm, mix 1/4 cup sugar with 1 teaspoon cinnamon in a small bowl. Roll each doughnut in this mixture for a sweet finish. Enjoy these delicious treats warm! To keep your doughnuts light, avoid overmixing. When you combine wet and dry ingredients, stir gently. Use a spatula to fold the batter. It’s okay to have small lumps. Overmixing can make your doughnuts tough, not soft. Follow these simple tips for fluffy doughnuts: - Preheat your oven: Always preheat your oven to 350°F (175°C) before baking. This ensures even cooking. - Grease the pan well: Use non-stick spray to coat the doughnut pan. This helps them come out easily. - Fill the molds correctly: Fill each mold about two-thirds full. This allows room for rising without spilling over. - Check for doneness: Insert a toothpick into the center of a doughnut. If it comes out clean, they are ready. Serve your warm doughnuts for the best taste. Here are some fun ideas: - Pair with a hot drink like apple cider or coffee. - Try adding a drizzle of glaze for extra sweetness. - Serve with fresh fruit or whipped cream for a festive touch. - Arrange them on a platter for a beautiful display. Enjoy the cozy flavors! {{image_4}} You can mix in different flavors to make these doughnuts exciting. Try adding a dash of almond extract for a nutty taste. You might also want to fold in some finely chopped nuts or dried fruit for texture. Want to spice things up? Add a pinch of ginger or cardamom for warmth. Each option gives your doughnuts a unique twist! A simple glaze can take your doughnuts to the next level. Mix powdered sugar with a little apple cider and whisk until smooth. Drizzle this over the warm doughnuts for a sweet finish. Another idea is to use a caramel glaze. Just melt some caramel candies with a splash of cream for a rich topping. The sweet glaze pairs nicely with the cinnamon flavor! If you want a different way to finish your doughnuts, consider some alternative coatings. Instead of the classic cinnamon-sugar, try using powdered sugar or even cocoa powder. For a fun twist, roll the warm doughnuts in crushed cereal or coconut flakes. These coatings add crunch and flavor, making each bite even more delightful! To keep your cinnamon apple cider doughnuts fresh, place them in an airtight container. Make sure they cool completely before storing. This will help prevent any sogginess. Store them at room temperature for up to two days. If you want to keep them longer, consider freezing. When you're ready to enjoy your doughnuts again, reheating is easy. You can use the microwave for about 10 seconds for a quick warm-up. If you prefer a crispy texture, pop them in the oven at 350°F for around 5 minutes. This will revive their lovely golden crust. To freeze your doughnuts, first let them cool completely. Then, wrap each doughnut tightly in plastic wrap. Place the wrapped doughnuts in a freezer-safe bag or container. They can last up to three months in the freezer. When you want one, just thaw it at room temperature, then reheat as mentioned. Enjoy your homemade treats anytime! Homemade cinnamon apple cider doughnuts taste best fresh. They last about two days at room temperature. Store them in an airtight container to keep them soft. If you want them to last longer, put them in the fridge. They can last up to a week there. Just remember, the fridge can make them a bit dry. Yes, you can! To make gluten-free cinnamon apple cider doughnuts, replace all-purpose flour with a good gluten-free blend. Look for one that includes xanthan gum. This will help the doughnuts hold together well. The taste will still be great! Serve these doughnuts warm for the best flavor. They pair nicely with a cup of hot apple cider or coffee. You can also add a simple glaze or sprinkle more cinnamon on top. For a fun twist, serve them with ice cream or whipped cream for a treat! You’ve learned how to make delicious cinnamon apple cider doughnuts from start to finish. We discussed the key ingredients, ways to substitute, and the need for freshness. The step-by-step guide helped you mix, bake, and cool your doughnuts properly. Remember the tips to keep them light and fluffy, and explore fun variations. Lastly, knowing how to store and reheat can keep your doughnuts tasty. Now, you’re ready to enjoy your treats or share them with friends. Happy baking!
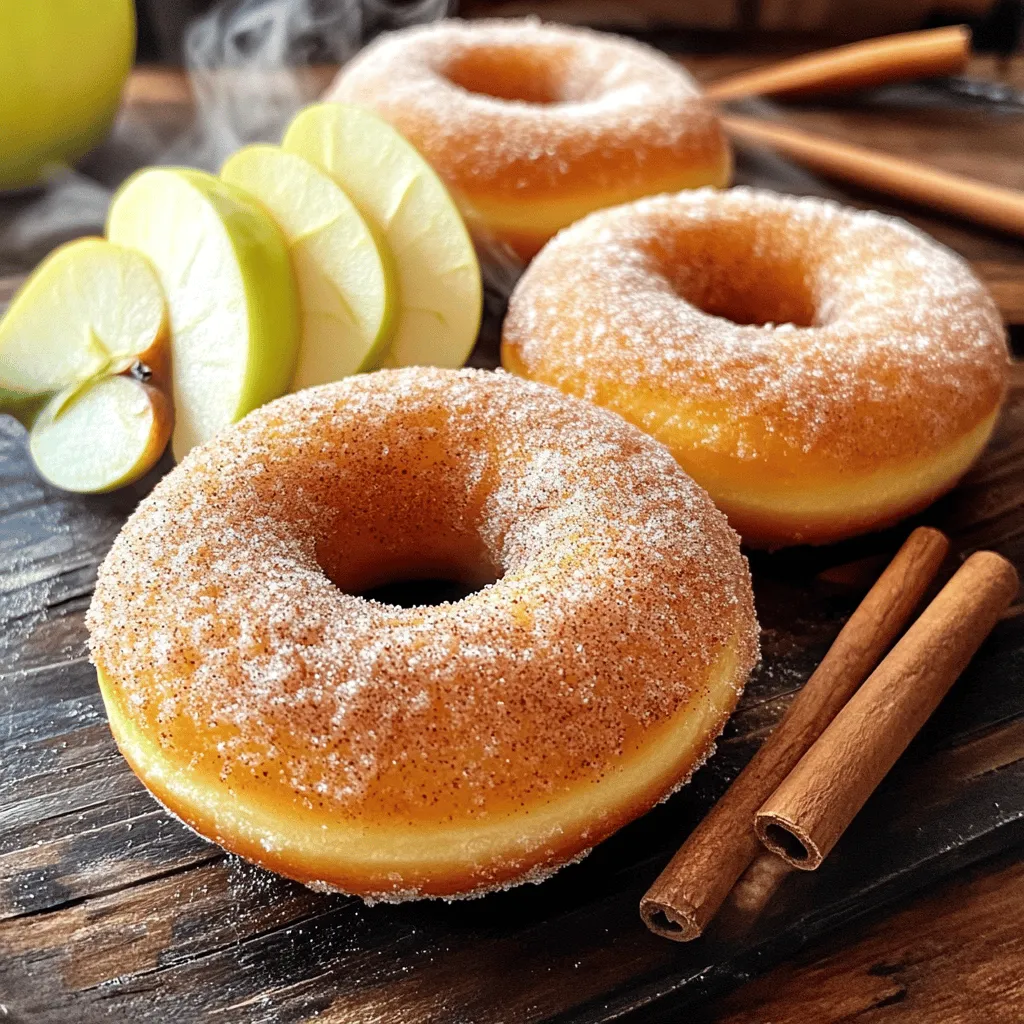
Cinnamon Apple Cider Doughnuts Irresistible Homemade Treat
There’s nothing quite like the taste of homemade cinnamon apple cider doughnuts. Imagine biting into a warm, fluffy treat, packed with the rich flavors of
To create these tasty trifles, you’ll need: - 1 cup pumpkin puree - 1 cup cream cheese, softened, at room temperature - 1/2 cup powdered sugar - 1 teaspoon pure vanilla extract - 1 teaspoon pumpkin pie spice - 1 cup heavy cream - 1 cup graham cracker crumbs - 1/2 cup caramel sauce (store-bought or homemade) These ingredients give the trifles their rich flavor and creamy texture. The pumpkin puree adds warmth, while the cream cheese provides a smooth base. Consider adding these to enhance your trifles: - 1/2 teaspoon ground cinnamon, for garnish - Whipped cream, for topping - Chopped pecans, for garnish These toppings add a nice crunch and visual appeal. A sprinkle of cinnamon brings out the pumpkin spice flavor. If you need to swap ingredients, here are some ideas: - Use Greek yogurt instead of cream cheese for a lighter option. - Try maple syrup in place of powdered sugar for a natural sweetener. - Substitute almond milk for heavy cream if you want a dairy-free version. These substitutions can help you customize the trifles to your taste or dietary needs. Don't be afraid to experiment! Start by grabbing a medium mixing bowl. Add 1 cup of softened cream cheese. Then, add 1/2 cup of powdered sugar. Next, pour in 1 teaspoon of pure vanilla extract and 1 teaspoon of pumpkin pie spice. Use an electric mixer on medium speed. Mix until smooth and creamy. Make sure there are no lumps left in the mix. This will be the base of your trifle. In a separate large bowl, pour in 1 cup of heavy cream. Use a whisk or an electric mixer to whip the cream. Whip until you see soft peaks forming. This should take about 2 to 3 minutes. When the cream is ready, gently fold it into the pumpkin cream cheese mixture. Be careful not to deflate the cream. We want to keep it light and fluffy for our trifles. Now, let’s build our trifles. Get your individual serving glasses or bowls ready. Start by adding about 2 tablespoons of graham cracker crumbs to the bottom of each glass. This is your tasty base. Next, spoon about 3 tablespoons of the creamy pumpkin mixture on top. Spread it smoothly. Drizzle a thin layer of caramel sauce over the pumpkin layer. Repeat this layering: more graham cracker crumbs, then more pumpkin mix, and another drizzle of caramel. Keep layering until each glass is filled. Finish with a lovely layer of the pumpkin mixture on top. Finally, add a dollop of whipped cream on each trifle. Sprinkle a dash of ground cinnamon and some chopped pecans for crunch. Cover the trifles with plastic wrap and place them in the fridge. Chill for at least 2 hours to let the flavors mix together. To get that smooth, creamy texture, mix the cream cheese first. Blend it with powdered sugar, vanilla, and pumpkin pie spice. Use an electric mixer for even results. Mix until there are no lumps. Next, whip the heavy cream until soft peaks form. This should take 2 to 3 minutes. Gently fold the whipped cream into the pumpkin mixture. Be careful not to deflate the cream. This folding keeps your trifle light and fluffy. Layering is key to a good trifle. Start with graham cracker crumbs at the bottom of each glass. This base adds texture and flavor. Next, spoon in the pumpkin cream mixture. Spread it evenly for a nice look. Drizzle caramel sauce over the pumpkin layer. Repeat this process. Add more graham cracker crumbs and pumpkin cream until each glass is full. Finish with a layer of pumpkin cream on top. This creates a beautiful finish. For a great presentation, use a decorative tray for your trifles. This makes them look inviting. Add a dollop of whipped cream on top of each trifle. Sprinkle with ground cinnamon and chopped pecans for extra flavor. For a fancy touch, drizzle extra caramel sauce over the whipped cream. This adds a delightful shine. Chill the trifles for at least 2 hours before serving. This helps the flavors blend together. Enjoy this delicious treat with friends or family. {{image_4}} You can give your trifles a twist by adding more spices. Try adding nutmeg or ginger for a warm touch. You can also use maple extract instead of vanilla for a richer flavor. Just a little change can make a big difference. If you like it spicy, add more pumpkin pie spice to the mix. This will enhance the pumpkin flavor and add depth. If you need a gluten-free option, swap out the graham crackers. Use gluten-free cookies or crushed nuts for the base. You can also check the caramel sauce. Make sure it’s gluten-free if you buy it. This way, everyone can enjoy the treat without worry. Want to serve these trifles in jars? It's a fun idea! Use small mason jars for a cute touch. Layer the ingredients just like you would in glasses. This makes it easy to grab and eat. Plus, it looks great at parties. You can even give them as gifts! To keep your Pumpkin Caramel Cheesecake Trifles fresh, store them in the fridge. Use an airtight container to avoid drying out. If you used clear glasses, cover them with plastic wrap. This keeps the trifles moist and tasty. Always place them on a flat shelf to prevent spills. When stored properly, your trifles will stay fresh for up to three days. After that, the texture may change. The whipped cream can lose its fluffiness, and the flavors may fade. It’s best to enjoy them within this time for the best taste. You can freeze these trifles for later enjoyment. However, the texture may change. To freeze, place them in airtight containers. Avoid the whipped cream and toppings before freezing. Thaw in the fridge before serving. Enjoy them within a month for the best flavor and quality. Yes, you can make these trifles a day in advance. This helps the flavors blend. Store them in the fridge, covered with plastic wrap. They will taste even better after chilling overnight. Serve the trifles in clear glasses or bowls. This allows everyone to see the beautiful layers. Top each trifle with whipped cream, a sprinkle of cinnamon, and some chopped pecans. This adds a nice crunch and flavor. For a special touch, drizzle more caramel sauce over the whipped cream. To lighten the trifles, you can use reduced-fat cream cheese. You can also swap heavy cream for whipped coconut cream. Use a sugar substitute in place of powdered sugar if you want to cut down on sugar. Adding fresh fruit like apple slices can also boost the health factor while adding flavor. In this article, we explored how to craft delicious Pumpkin Caramel Cheesecake Trifles. We covered the key ingredients, preparation steps, and essential tips for perfect layering. You learned about various flavor variations and how to customize the recipe for different dietary needs. Lastly, we discussed storage tips to keep your trifles fresh. Making these trifles is fun and easy. Now you can enjoy a tasty treat that impresses everyone! Enjoy your dessert adventure!
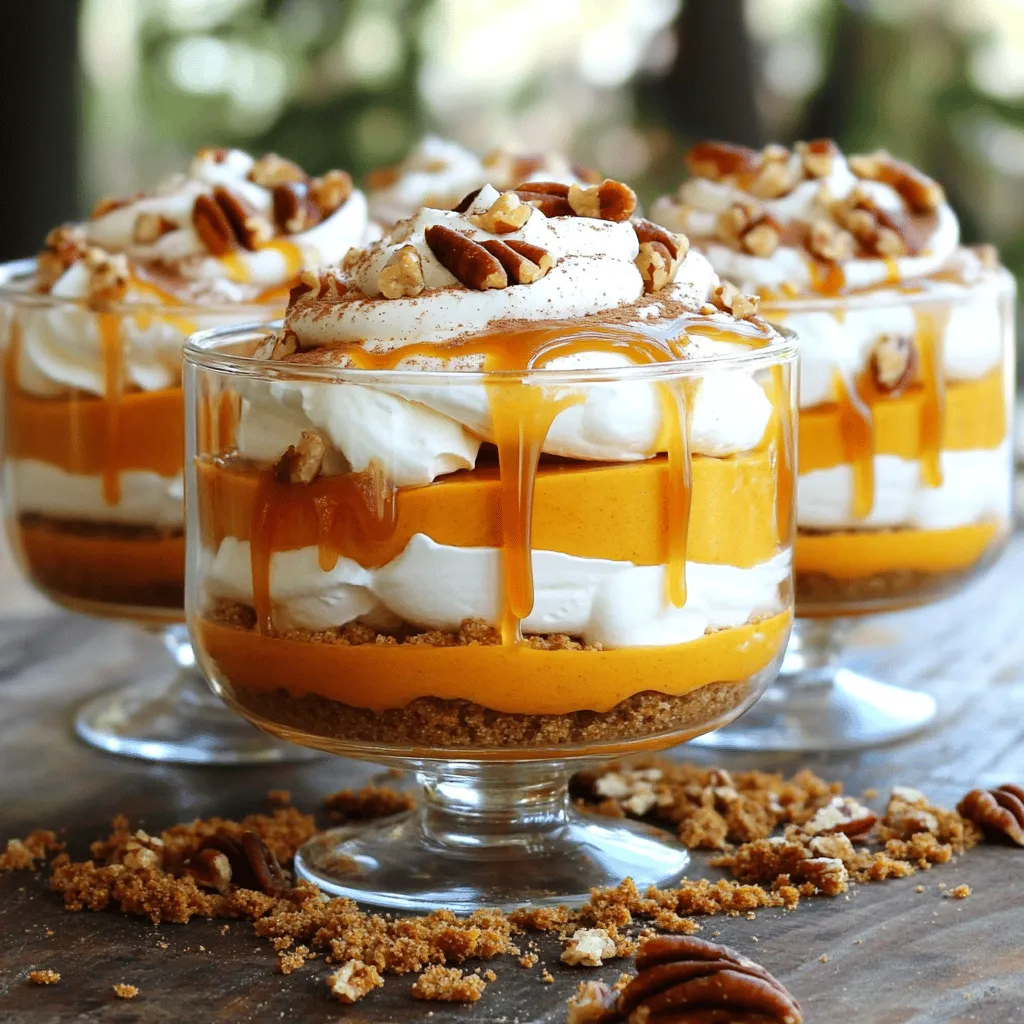
Pumpkin Caramel Cheesecake Trifles Delightful Treat
Ready to impress your friends and family with a stunning dessert? Pumpkin Caramel Cheesecake Trifles are a delicious treat that combines creamy cheesecake, spiced pumpkin,
To make chocolate almond butter energy balls, gather these simple ingredients: - 1 cup rolled oats - 1/2 cup almond butter - 1/4 cup honey or maple syrup - 1/4 cup unsweetened cocoa powder - 1/4 cup dark chocolate chips - 1/4 cup sliced almonds - 1 teaspoon vanilla extract - A pinch of sea salt These ingredients work together to create a tasty and nutritious snack. You can swap some ingredients if needed. Here are a few ideas: - Use peanut butter instead of almond butter for a different nutty taste. - Maple syrup can replace honey for a vegan option. - If you don't have dark chocolate chips, try semi-sweet or milk chocolate chips. - Any nut or seed can replace sliced almonds for a unique twist. These substitutes will keep the flavor and texture delicious. To ensure your energy balls taste great: - Use fresh oats and nuts for the best flavor. - Store ingredients in a cool, dark place to keep them fresh. - Make sure your almond butter is smooth; this helps with mixing. - Keep your energy balls in an airtight container in the fridge. These tips will help you enjoy your energy balls at their best! To start, gather your ingredients. You will need rolled oats, almond butter, honey or maple syrup, unsweetened cocoa powder, dark chocolate chips, sliced almonds, vanilla extract, and a pinch of sea salt. In a large mixing bowl, combine the rolled oats, almond butter, honey or maple syrup, cocoa powder, and vanilla extract. Use a spoon or spatula to mix well. You want a thick, sticky dough. Next, prepare to shape your mixture. Lightly grease your hands to prevent sticking. Scoop about 1 tablespoon of dough and roll it into a ball. Make sure the balls are even in size. Place them on a baking tray lined with parchment paper. Leave some space between each ball for easy handling. Continue until you shape all the dough. Now it's time to chill the energy balls. Put the baking tray in the fridge for at least 30 minutes. This helps them firm up and gives a chewy texture. You can enjoy them chilled or at room temperature. Either way, they make a tasty snack! To get the right texture for your energy balls, make sure you mix well. Combine rolled oats and almond butter until smooth. The mixture should be thick and sticky. If it feels too dry, add a bit more almond butter. If it’s too wet, add extra oats. This balance is key for a chewy bite. These energy balls are great as a snack or a quick breakfast. You can serve them chilled or at room temperature. For a fun twist, place them in a small bowl with fresh fruit. Arrange them on a platter for a party. A sprinkle of cocoa powder on top adds a nice touch, too! You can easily make these energy balls ahead of time. They store well in the fridge for up to a week. If you want to save them longer, freeze them. Just place them in a sealed bag and pull out as needed. This way, you always have a healthy snack on hand! {{image_4}} You can mix it up with fun flavors! Try adding coconut flakes for a tropical twist. Dried fruits like cranberries or apricots also add sweetness and chewiness. Just chop them small and fold them in. The options are endless, so get creative! These energy balls fit many diets. For a nut-free version, swap almond butter for sun butter. If you're vegan, use maple syrup instead of honey. You can also check if your dark chocolate chips are dairy-free. This way, everyone can enjoy the snack! Want more protein? Add a scoop of your favorite protein powder. You can also mix in seeds like chia or hemp for extra crunch. These not only boost the protein but also add fiber. Just remember, adjust the wet ingredients if you add more dry ones! To keep your chocolate almond butter energy balls fresh, store them in an airtight container. You can use a glass jar or a plastic container with a tight lid. This helps to keep moisture out and maintains flavor. Always place them in the fridge if you plan to eat them within a week. When stored correctly in the fridge, these energy balls will stay fresh for up to one week. If you notice any changes in smell or texture, it is best to discard them. Always check for freshness before enjoying your snack! For long-term storage, you can freeze these energy balls. Simply place them in a single layer on a baking tray and freeze for about an hour. Once firm, transfer them to a freezer-safe bag or container. They can last up to three months in the freezer. To enjoy, just thaw them in the fridge overnight. This keeps them tasty and ready for a quick snack! Chocolate almond butter energy balls last about one week in the fridge. Store them in an airtight container to keep them fresh. If you want them to last longer, you can freeze them. In the freezer, they stay good for up to three months. Just remember to let them thaw in the fridge before you enjoy them again. Yes, you can use different nut butters! If you want a change, try peanut butter or cashew butter. Each nut butter gives a unique taste. Just make sure the texture is similar to almond butter. This way, your energy balls will still hold together well. Yes, these energy balls are gluten-free. The main ingredient, rolled oats, is naturally gluten-free. Just check the label to ensure the oats are certified gluten-free. This way, you can enjoy your snack without worrying about gluten. If you want, you can add gluten-free extras like seeds or dried fruit. I covered all you need to know about making energy balls. We explored important ingredients, helpful tips, and variations to keep things exciting. You learned how to shape them, store them, and enjoy them in different ways. Remember, experimenting with flavors can lead to new favorites. These energy balls are not only easy to make, but they also fit any diet. Enjoy them fresh, or store them for later. With all these tips, you can create tasty energy balls tailored to your taste and needs. Happy cooking!
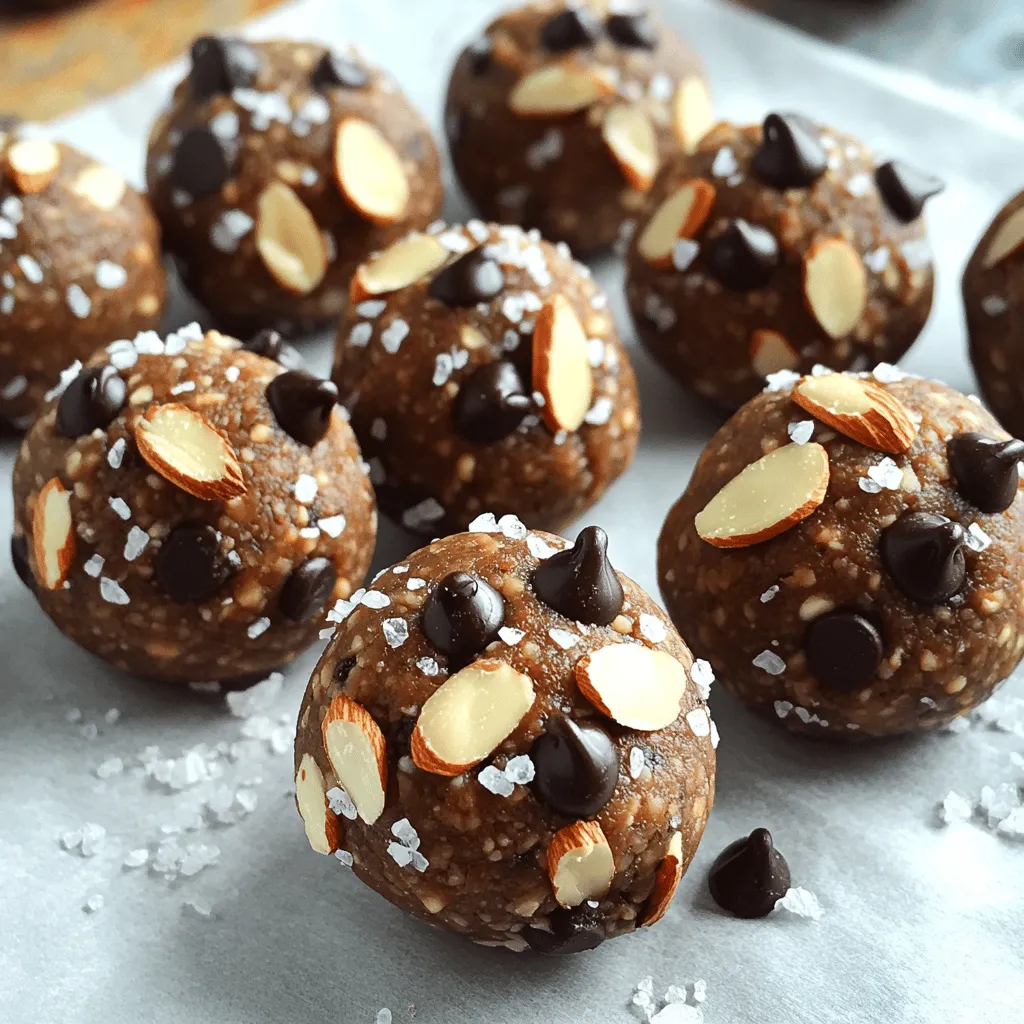
Chocolate Almond Butter Energy Balls Easy Recipe
Are you ready to make a tasty snack that’s both easy and healthy? In this post, I’ll show you how to whip up chocolate almond
- 4 cups all-purpose flour - 1 packet active dry yeast - ½ cup granulated sugar - 1 teaspoon salt - 1 cup whole milk - ⅓ cup unsalted butter (melted) - 2 large eggs - ⅓ cup packed brown sugar - 2 tablespoons ground cinnamon - ½ cup unsalted butter (softened) - 1 cup powdered sugar - 2 tablespoons milk - ½ teaspoon vanilla extract The ingredients for these soft cinnamon rolls are simple and easy to find. The main dough needs flour, yeast, sugar, salt, milk, butter, and eggs. The filling combines brown sugar, cinnamon, and more butter for rich flavor. The glaze is just powdered sugar, milk, and vanilla extract. You may ask, why use these specific ingredients? Each one plays a key role. The flour gives structure. The yeast makes the rolls rise and fluff up. Sugar adds sweetness and helps with browning. Milk and butter add moisture and flavor. Eggs add richness and help bind everything together. For the filling, brown sugar brings a deep sweetness. Cinnamon adds that warm, cozy flavor everyone loves. Softened butter helps the sugar stick to the dough and adds to the rolls' softness. Finally, the glaze is all about that sweet finish. It adds a beautiful shine and a creamy texture to the rolls. These ingredients come together to create a treat that’s soft, sweet, and utterly delightful. {{ingredient_image_2}} To start, find a large bowl. In this bowl, mix 1 cup of warm milk with ½ cup of sugar and 2 ¼ teaspoons of active dry yeast. Stir gently. Then, let it sit for about 5 to 10 minutes. You want it to get all frothy and bubbly. This means the yeast is alive and ready to help your rolls rise. Next, add ⅓ cup of melted butter, 2 large eggs, and 1 teaspoon of salt to your yeast mix. Whisk these together until smooth. After this, begin adding 4 cups of all-purpose flour. Do this one cup at a time. Mix well after each cup until the dough starts to come together. When it feels soft, move it to a floured surface. Knead it for about 5 to 7 minutes. You want it to feel smooth and elastic. Now, shape your kneaded dough into a ball. Place it in a greased bowl. Cover this bowl with a damp cloth. Let the dough rise in a warm place for about 1 hour. It should double in size. After it rises, gently punch it down to release the air. Roll the dough into a big rectangle, about 16 by 24 inches. Spread ½ cup of softened butter evenly over it. Then, mix ⅓ cup of packed brown sugar with 2 tablespoons of ground cinnamon. Sprinkle this over the butter. Start from the long edge and roll the dough tightly into a log. Slice it into 12 equal pieces. Place the rolls into a greased baking dish. Cover them with a cloth again and let them rise for another 30 minutes. They should look puffy. Preheat your oven to 350°F (175°C). Bake the rolls for 20 to 25 minutes. They should be golden brown and cooked through. While the rolls bake, make the vanilla glaze. In a small bowl, mix 1 cup of powdered sugar, 2 tablespoons of milk, and ½ teaspoon of vanilla extract. Whisk until smooth. If the glaze is too thick, add a bit more milk. You want it to drizzle easily. When the rolls are done baking, take them out and let them cool for a few minutes. Then, drizzle the glaze over the warm rolls. For a nice touch, serve them on a decorative platter. You can add a light dusting of powdered sugar on top for extra flair. Enjoy the delightful smell as you dig in! Kneading the dough is key. Use your palms to push the dough away, then fold it back. Repeat this for about 5-7 minutes. The dough should feel smooth and elastic. It’s ready when it springs back after you poke it. A well-risen dough is puffy and has doubled in size. Look for a soft texture that feels airy. If you poke it and it springs back, you're good to go. To get that golden brown, keep an eye on the rolls. Bake them at 350°F for 20-25 minutes. They should look golden and feel firm but soft. If you overbake them, they may dry out. You can check for doneness by tapping the bottom of a roll. If it sounds hollow, it's done. If not, give it a few more minutes. For the glaze, mix the powdered sugar, milk, and vanilla extract well. You want it smooth and creamy. If it’s too thick, add more milk a little at a time. To boost the flavor, consider adding a pinch of salt or a bit of lemon juice. This can brighten the taste and make it more exciting. Pro Tips Perfect Dough Temperature: Ensure your milk is warmed to around 110°F (43°C) to activate the yeast effectively, resulting in a light and fluffy roll. Knead with Care: Knead the dough until it is smooth and elastic, which usually takes about 5-7 minutes. This helps develop the gluten for a better rise. Avoid Overbaking: Keep an eye on your rolls while baking; they should turn golden brown but not overly dark to maintain a soft texture. Glaze While Warm: Drizzle the vanilla glaze over the rolls while they are still warm for optimal absorption and a delicious finish. {{image_4}} You can change the taste of your cinnamon rolls by adding some fun ingredients. Try mixing in nuts or raisins. Nuts like walnuts or pecans add a nice crunch. Raisins bring a sweet chewiness. You can even use a mix of both for an even more delightful treat. Consider using different spices, too. Instead of just cinnamon, try adding nutmeg or cardamom. Nutmeg gives a warm, earthy flavor. Cardamom adds a hint of sweetness and a floral note. Both spices will elevate your rolls to a new level. If you want a twist on the glaze, try cream cheese frosting. It’s rich and tangy, making it a fantastic pairing with the sweet rolls. To make it, mix cream cheese, powdered sugar, milk, and a bit of vanilla. Spread this on your cooled rolls for a luscious topping. Another option is a lemon glaze. This adds a zesty kick that cuts through the sweetness. To make it, mix powdered sugar with lemon juice and a bit of milk. Drizzle it over the warm rolls for a refreshing finish. You can also make these rolls a bit healthier. Use whole wheat flour instead of all-purpose flour. This adds fiber and nutrients. The rolls may be a bit denser, but they will still taste great. Consider reducing the sugar content, too. You might use less granulated sugar in the dough or the filling. You can also swap some of the brown sugar with a sugar substitute if you prefer. These small changes can help you enjoy your cinnamon rolls a bit more guilt-free. To keep leftover cinnamon rolls fresh, use airtight containers. Place the rolls in one layer. If you stack them, add parchment paper between layers. This stops them from sticking together. Store them at room temperature for up to two days. If you need them for longer, the fridge works too. Just make sure to seal them well. You can freeze cinnamon rolls before or after baking. To freeze before baking, shape the rolls and place them in a pan. Cover them tightly with plastic wrap. Then, freeze for up to three months. To bake, let them thaw overnight in the fridge. Then, let them rise before baking. If you already baked the rolls, let them cool completely first. Wrap them in plastic wrap and then in foil. Freeze for up to three months. To reheat, unwrap and place them in a warm oven for about 10 minutes. Cinnamon rolls stay fresh in the fridge for up to a week. Keep them in an airtight container. Always check for mold or an off smell. If you see either, it's time to toss them. A good roll should smell sweet and have a soft texture. If they feel hard or dry, they are no longer good. You can use instant yeast or fresh yeast. Instant yeast does not need to be activated. Just mix it into the dry ingredients. Fresh yeast is another option. Use about 0.6 ounces for each packet of active dry yeast. Yes, you can prepare these cinnamon rolls overnight. After you shape the rolls, place them in the baking dish. Cover them tightly with plastic wrap and refrigerate. In the morning, let them rise at room temperature for about 30 minutes before baking. To keep your rolls soft, store them in an airtight container. You can also place a slice of bread in the container. This slice helps keep the rolls moist. Avoid leaving them out in the open air, as they will dry out quickly. Yes, you can make the dough by hand. Mix the wet ingredients in a bowl. Gradually add the flour, mixing with a wooden spoon. Knead the dough for about 8-10 minutes on a floured surface until it is smooth. To reheat rolls, use your microwave. Place a roll on a microwave-safe plate and cover it with a damp paper towel. Heat for about 15-20 seconds. You can also reheat in the oven at 350°F. Wrap them in foil to avoid drying out. To make these rolls vegan, replace the eggs with flax eggs. Combine 1 tablespoon of ground flaxseed with 2.5 tablespoons of water for each egg. Use plant-based milk instead of whole milk. You can also replace butter with coconut oil or vegan butter. You now have all the elements to create amazing cinnamon rolls. We covered the key ingredients, step-by-step instructions, and expert tips. Remember to master your dough and glaze for the best results. You can try different flavors or healthier options to suit your taste. Storing leftovers and reheating them correctly ensures you enjoy these treats longer. With these insights, you're ready to bake cinnamon rolls that impress. Enjoy the process and the delicious rewards!
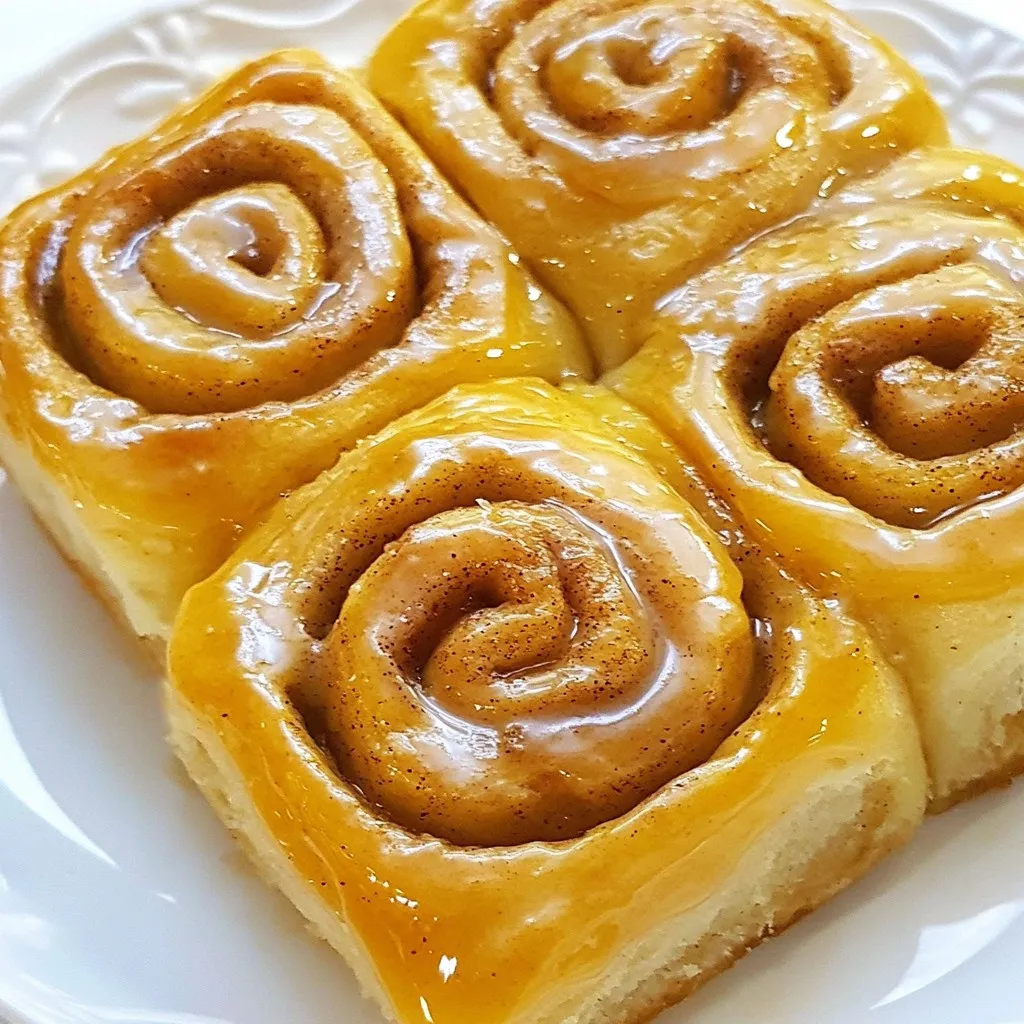
Soft Cinnamon Rolls with Vanilla Glaze Delightfully Simple
If you crave a sweet treat that’s easy to make, you’ll love my Soft Cinnamon Rolls with Vanilla Glaze. This recipe combines warm, pillowy rolls
- 1 cup graham cracker crumbs - 1/4 cup unsweetened cocoa powder - 1/3 cup granulated sugar - 1/2 cup unsalted butter, melted - 16 oz cream cheese, softened - 1 cup powdered sugar - 1 teaspoon vanilla extract - 1 cup heavy whipping cream - 1 cup mini marshmallows - 1/2 cup semi-sweet or milk chocolate chips - Additional mini marshmallows and chocolate shavings for garnish Using fresh ingredients makes a big difference. Make sure your cream cheese is soft enough for smooth mixing. This helps avoid lumps in your cheesecake. For the best flavor, use high-quality chocolate chips. They add richness to the dessert. Keep your heavy cream cold. It whips up better when cold, giving you those fluffy peaks. If you need a dairy-free option, try vegan cream cheese and coconut cream. For gluten-free, use gluten-free graham crackers. You can swap mini marshmallows for dairy-free ones if needed. If you’re allergic to nuts, check your chocolate chips. Some brands may contain traces of nuts. Always read labels to stay safe! Start by mixing the graham cracker crumbs, cocoa powder, granulated sugar, and melted butter. Use a medium mixing bowl for this. Stir until the mix looks like wet sand. This means it’s ready. Next, take small dessert cups. Divide the crust evenly, about one tablespoon for each cup. Press the mixture down firmly with a spoon or your fingers. Make sure the layer is compact and even. This crust will hold your cheesecake filling. In a large bowl, beat the softened cream cheese with an electric mixer. Mix until it is smooth and creamy. Next, add the powdered sugar and vanilla extract. Keep mixing until everything combines well. The mixture should be lump-free and creamy. Now, take another bowl and whip the heavy cream. Whip until you see stiff peaks. This means the cream is ready. Gently fold the whipped cream into the cream cheese mix using a spatula. Be careful to keep it light and fluffy. Lastly, stir in the mini marshmallows and chocolate chips. Mix until they are evenly spread throughout the filling. Spoon the cheesecake mixture over the crust in each cup. Fill them all the way to the top. Use a spatula or spoon to smooth the tops. Now, place the cheesecake cups in the refrigerator. Let them chill for at least 2-3 hours. This helps the cheesecake set firmly. Once set, remove them from the fridge. Decorate each cup with more mini marshmallows and chocolate shavings. For a fun twist, try toasting a few mini marshmallows with a kitchen torch before placing them on top. This adds a nice touch of s'mores flavor. To get the best texture for your No-Bake S’mores Cheesecake Cups, follow these steps: - Use softened cream cheese: This helps avoid lumps. Let it sit at room temp. - Whip the cream well: Beat the heavy cream until stiff peaks form. This makes the cheesecake light and fluffy. - Fold gently: When mixing the whipped cream into the cream cheese, fold carefully. This keeps the air in. Here are some common mistakes to watch for: - Skipping the chilling time: Let the cups chill for at least 2-3 hours. This helps them set properly. - Not pressing the crust firmly: Press the crust mixture down well. This prevents it from crumbling when you eat it. - Adding too many chocolate chips or marshmallows: Balance is key. Too many can make the cheesecake too heavy. Make your cheesecake cups look as good as they taste: - Use clear cups: This lets everyone see the layers. - Garnish with toasted marshmallows: A kitchen torch can add a warm touch. - Add chocolate shavings: Sprinkle these on top for an elegant finish. - Serve on a platter: Arrange the cups together for a beautiful display. {{image_4}} You can change the flavors to make this dessert your own. Try using different chocolate types, like white or dark chocolate, to add a unique twist. If you love peanut butter, mix in some creamy peanut butter into the cheesecake layer. For a fruity touch, add fresh berries or a fruit puree. You can also swap the mini marshmallows for flavored marshmallows, like strawberry or banana, for fun flavors. These cheesecake cups are great for all kinds of occasions. Serve them in clear cups to show off the layers. You can also use jars for a rustic feel. Want to impress guests? Create a dessert bar with toppings. Offer items like extra chocolate chips, crushed graham crackers, and toasted coconut. This way, guests can build their own s’mores cups. If you want to make a mini version, just reduce the portion size. Use small shot glasses or mini dessert cups. This way, guests can try multiple desserts without feeling too full. It’s perfect for parties or gatherings. You can also make a fun game by having a s’mores cheesecake tasting contest, where everyone votes for their favorite flavor. To store your no-bake s'mores cheesecake cups, cover them tightly with plastic wrap or place them in an airtight container. This will keep them fresh and tasty. You can store them in the fridge for up to five days. Just remember to keep them away from strong-smelling foods to avoid any unwanted flavors. If you want to freeze the cheesecake cups, make sure they are completely chilled first. Cover each cup with plastic wrap, then foil. This will protect them from freezer burn. You can freeze them for up to two months. When ready to eat, thaw them in the fridge overnight. This helps keep their creamy texture intact. The shelf life of these cheesecake cups depends on how you store them. In the fridge, they last for about five days. If frozen, they can last for two months. Always check for any changes in smell or texture before enjoying. Keeping track of these details ensures you savor every delicious bite! Yes, you can use other types of chocolate. Dark chocolate, white chocolate, or even flavored chocolate work well. Just swap the chocolate chips in the recipe with your choice. This gives you a chance to play with different flavors. You can make each cup unique! These cheesecake cups last about 3 to 5 days in the fridge. Keep them covered with plastic wrap or in an airtight container. This keeps them fresh and tasty. After a few days, the texture may change, so enjoy them sooner rather than later. You can make these cheesecake cups in advance! They are perfect for parties or gatherings. Just prepare them, chill them, and store them in the fridge. They taste even better after sitting for a while, as the flavors meld nicely. Yes, there are vegan alternatives! You can use vegan cream cheese and coconut cream instead of heavy cream. Replace the butter with coconut oil or vegan butter. For the graham cracker crust, check if your crackers are vegan. With these swaps, you can enjoy a delicious vegan version of this treat! You now have all the tools to make S’mores Cheesecake Cups. We covered ingredients, steps, and helpful tips. You learned about substitutions, storage, and fun variations. Use these ideas to create tasty treats. Remember to avoid common mistakes for the best results. Enjoy getting creative with flavors and presentations. Now, gather your ingredients and get started! You’ll impress everyone with your delicious cheesecake cups.
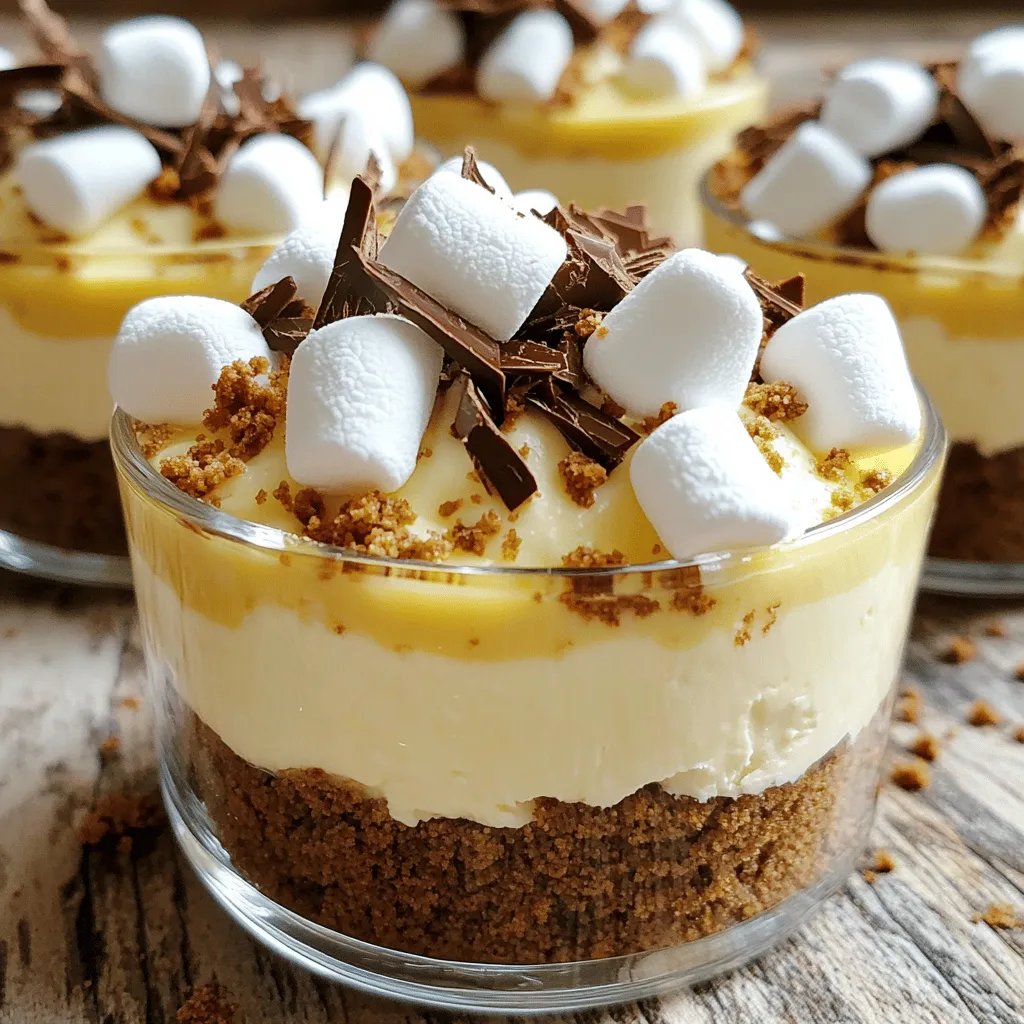
No-Bake S’mores Cheesecake Cups Tasty and Simple Treat
Craving a sweet and simple treat? Dive into my No-Bake S’mores Cheesecake Cups! This easy recipe combines creamy cheesecake, crunchy graham crackers, and rich chocolate
- 1 cup unsalted butter, melted - 2 cups granulated sugar - 4 large eggs - 1 teaspoon pure vanilla extract - 1 cup all-purpose flour - 1/2 cup unsweetened cocoa powder - 1/2 teaspoon baking powder - 1/4 teaspoon fine sea salt - 1 cup pumpkin puree - 8 oz cream cheese, softened to room temperature - 1/2 cup powdered sugar - 1 teaspoon ground cinnamon - 1/4 teaspoon ground nutmeg Gathering the right ingredients is key. Start with unsalted butter. It adds richness. Melting it helps blend flavors better and makes mixing easier. You need two cups of granulated sugar. This adds sweetness and helps the brownies rise. Next, use four large eggs. They make the brownies fluffy and moist. One teaspoon of pure vanilla extract gives a lovely aroma and taste. For the dry mix, you need one cup of all-purpose flour. This forms the base. Half a cup of unsweetened cocoa powder gives that chocolate flavor. Add half a teaspoon of baking powder. This helps the brownies rise. One-fourth teaspoon of fine sea salt enhances all the flavors. For the pumpkin cream cheese swirl, you need one cup of pumpkin puree. It adds moisture and a nice fall flavor. You will also need eight ounces of softened cream cheese. This makes the swirl creamy and rich. Add half a cup of powdered sugar to sweeten the cream cheese mixture. Lastly, one teaspoon of ground cinnamon and one-fourth teaspoon of ground nutmeg give warmth and spice, making these brownies truly special. These ingredients work together to create a rich, moist brownie with a delightful pumpkin swirl. - Preheat the oven to 350°F (175°C). - Grease a 9x13-inch baking dish. Start by preheating your oven. This helps the brownies cook evenly. Greasing the baking dish prevents sticking. You can use cooking spray or butter. Lining it with parchment paper is also a great option. Leave some paper hanging over the edges to lift the brownies out easily. - Combine melted butter and sugar. - Incorporate eggs and vanilla extract. In a large mixing bowl, combine the melted butter and granulated sugar. Whisk these together until smooth. Add in the eggs one by one. Make sure each egg blends in well before adding the next. Finally, stir in the vanilla extract. This adds a nice flavor to the brownies. - Sift together flour, cocoa powder, baking powder, and salt. - Gradually mix dry ingredients into wet ingredients. In another bowl, sift the flour, cocoa powder, baking powder, and salt. Sifting helps remove lumps and mixes the dry ingredients well. Gradually add this mix to your wet ingredients. Stir gently until combined. Be careful not to overmix, or your brownies may turn out tough. - Mix pumpkin puree, cream cheese, powdered sugar, cinnamon, and nutmeg. - Ensure mixture is smooth and creamy. In a separate bowl, mix the pumpkin puree and softened cream cheese. Add the powdered sugar, cinnamon, and nutmeg. Blend everything until it’s smooth and creamy. This mixture will create a sweet and spiced swirl in your brownies. - Layer brownie batter and pumpkin mixture. - Swirl together for a marbled effect. Pour half of the brownie batter into the greased dish. Smooth it out with a spatula. Next, dollop spoonfuls of the pumpkin mixture over the brownie batter. Then, carefully add the remaining brownie batter on top. Using a knife or toothpick, swirl the batters together gently. This creates a lovely marbled effect. - Bake for 30-35 minutes. - Check doneness with a toothpick. Place the dish in the oven and bake for 30-35 minutes. To check if they’re done, insert a toothpick into the center. If it comes out mostly clean, the brownies are ready. Let them cool in the pan for at least 15 minutes before slicing. To get that perfect brownie, do not overmix your batter. Overmixing makes brownies tough. Stir just until you combine the wet and dry ingredients. This keeps your brownies fudgy and moist. After baking, let the brownies cool for at least 15 minutes before slicing. This helps them set and makes cutting easier. Use a large mixing bowl for the wet ingredients. A separate bowl works best for the dry ones. For baking, a 9x13-inch dish is perfect. A spatula helps spread the batter evenly. When swirling the pumpkin and brownie batters, a knife or toothpick works well for a pretty design. Want to make your brownies even richer? Add chocolate chips to the batter. They melt and create delightful pockets of chocolate. You can also mix in nuts for a crunchy texture. Choose walnuts or pecans for the best flavor. These little tweaks can take your brownies from good to amazing! {{image_4}} You can switch things up with these fun ideas. Try using butterscotch instead of chocolate. This change gives your brownies a sweet twist. You can also play with spices. Adding ginger or cloves can bring warmth and depth to the flavor. Think about mixing in some chopped nuts for crunch. Each variation adds a new layer of delight. If you need a gluten-free option, almond flour or oat flour works well. Both flours give a nice texture without gluten. For a vegan version, replace eggs with flaxseed meal and use vegan butter. These swaps keep the taste rich and satisfying. You can enjoy your favorite treat while sticking to your diet. To keep your Pumpkin Cream Cheese Swirl Brownies fresh, store them in an airtight container at room temperature. This keeps them soft and tasty. For longer freshness, pop the container in the fridge. The cool air helps slow down spoilage. Just make sure to let them come to room temperature before enjoying them again. Freezing is a great way to save brownies for later. Cut them into squares and wrap each piece tightly in plastic wrap. Place the wrapped brownies in a freezer bag. This keeps them fresh for up to three months. When you’re ready to enjoy a brownie, take it out of the freezer. Let it thaw in the fridge overnight. If you're in a hurry, you can warm it in the microwave for about 10-15 seconds. This makes the brownie soft and gooey again. Enjoying these treats later is super easy! You should not use pumpkin pie filling for this recipe. Pumpkin pie filling has added sugar and spices. This can change the flavor and texture of our brownies. Stick to plain pumpkin puree for the best results. It gives a rich taste and smooth texture. You can find pumpkin puree in cans at the store. To check if the brownies are done, use a toothpick. Insert it into the center of the brownies. If it comes out mostly clean with a few moist crumbs, they're ready! If it has wet batter, bake them a few more minutes. Keep an eye on them to avoid overbaking. The edges should look set, while the center can be slightly soft. To cut brownies neatly, use a sharp knife. First, let them cool for at least 15 minutes. For best results, run the knife under hot water. Wipe it dry before slicing. This helps prevent sticking. Cut gently in straight lines. You can also use parchment paper overhangs to lift the brownies out. This way, you can cut them on a flat surface. These brownies blend rich chocolate with warm pumpkin spice. You have learned how to make them from scratch, step by step. We've covered tips to ensure perfect results and explored fun variations. Remember, you can adjust the recipe to suit your tastes and dietary needs. Enjoy them fresh or store them for later. Whether you share or savor them alone, these brownies will delight. Happy baking, and may your kitchen fill with delicious scents!
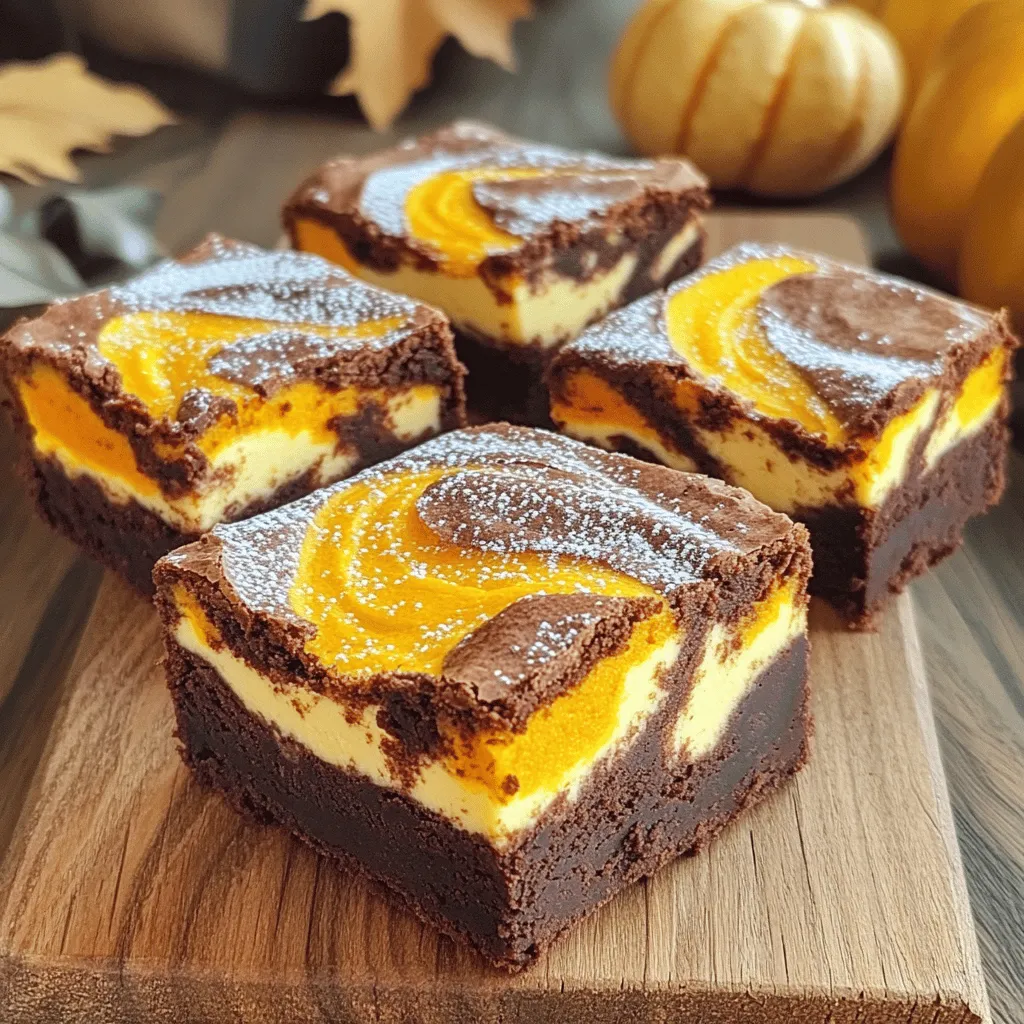
Pumpkin Cream Cheese Swirl Brownies Irresistible Treat
Fall is the perfect time to indulge in rich, decadent treats. These Pumpkin Cream Cheese Swirl Brownies are a must-try! They bring together the warm
- Flour, spices, and leavening agents - 2 ¼ cups all-purpose flour - 2 teaspoons ground ginger - 1 teaspoon ground cinnamon - ½ teaspoon ground cloves - ½ teaspoon baking soda - ¼ teaspoon baking powder - ½ teaspoon salt These ingredients create a strong base for the cookies. The flour gives structure, while the spices add great flavor. The baking soda and baking powder help the cookies rise. - Wet ingredients - ¾ cup unsalted butter, brought to room temperature - 1 cup packed brown sugar - 1 large egg - ¼ cup unsulfured molasses - 1 teaspoon pure vanilla extract These wet ingredients bring moisture and sweetness. The butter makes the cookies soft, while brown sugar adds richness. The molasses gives that classic ginger flavor, too. - Topping details (granulated sugar) - Granulated sugar, for rolling Rolling the dough in sugar gives the cookies a sweet crunch. It also adds a nice shine that makes them look even more tempting. When you gather these ingredients, you set the stage for soft, chewy cookies. Each component plays its part to make your cookies irresistible! First, set your oven to 350°F (175°C). This is the perfect heat for baking cookies. Next, line two baking sheets with parchment paper. This step keeps the cookies from sticking and makes cleanup easy. Now, grab a medium bowl. In it, whisk together 2 ¼ cups of all-purpose flour, 2 teaspoons of ground ginger, 1 teaspoon of ground cinnamon, ½ teaspoon of ground cloves, ½ teaspoon of baking soda, ¼ teaspoon of baking powder, and ½ teaspoon of salt. Make sure everything blends well. Set this mixture aside. In a large bowl, use an electric mixer to cream ¾ cup of unsalted butter with 1 cup of packed brown sugar. Mix them on medium speed for about 3 to 4 minutes. You want it light and fluffy. Then, add in 1 large egg, ¼ cup of unsulfured molasses, and 1 teaspoon of pure vanilla extract. Mix until everything combines and looks smooth. Now, slowly add the dry ingredients to your wet mixture. Stir gently with a spatula or wooden spoon. Be careful not to overmix; this can make your cookies tough. Take a cookie scoop or tablespoon to portion out the dough. Roll each piece into a smooth ball in your hands. Next, roll each dough ball in granulated sugar until fully coated. Place them on your prepared baking sheets, leaving about 2 inches between each cookie. Bake the cookies for 10 to 12 minutes. The edges should look firm, and the tops should have little cracks. The centers may appear slightly underbaked, but they will firm up as they cool. After baking, let the cookies cool on the sheets for about 5 minutes. Then, gently move them to a wire rack to cool completely. This helps improve their texture and flavor. To get your cookies soft and chewy, avoid overmixing the dough. When you mix too much, the cookies can become tough. Stir just until the dry and wet ingredients blend. This keeps the cookies tender. Cooling is key to getting the right texture. After baking, let the cookies cool on the baking sheet for about five minutes. This allows them to firm up and stay chewy. Then, transfer them to a wire rack to cool completely. This step is vital for the best taste and feel. You can add different spices to make your cookies unique. Try using nutmeg or cardamom for a twist. A splash of orange zest can brighten the flavors. You could also use maple extract instead of vanilla. Each change will give your cookies a new taste. Using the right tools makes baking easier. A sturdy mixing bowl is a must. I prefer glass or stainless steel bowls for mixing. They hold up well and are easy to clean. Use a rubber spatula to fold in the dry ingredients gently. A cookie scoop helps to form even dough balls. This ensures the cookies bake evenly. Don't forget parchment paper! It keeps the cookies from sticking and makes clean-up simple. {{image_4}} If you want gluten-free cookies, use a 1-to-1 gluten-free flour blend. This works well with the same measurements. You can also try almond flour, but reduce the amount slightly. For a vegan twist, replace the butter with coconut oil or vegan butter. Use a flax egg instead of the large egg. To make a flax egg, mix one tablespoon of ground flaxseeds with three tablespoons of water. Let it sit for a few minutes until it thickens. You can add chocolate chips or nuts to the dough for extra flavor. Dark chocolate chips pair well with the spices. Chopped pecans or walnuts add a nice crunch. Try adding seasonal spices like nutmeg or cardamom for a unique taste. These spices add warmth and depth to your cookies. You can also include dried fruit, like cranberries or currants, for a chewy texture. To keep your soft ginger molasses cookies fresh, store them at room temperature. Place them in an airtight container. This helps keep cookies soft and chewy. You can also refrigerate them, but this may change their texture. If you choose to refrigerate, allow them to warm up before eating. They taste best at room temperature. The best containers for freshness are glass jars or plastic bins. Make sure they seal tightly. You can also use wax paper between layers to prevent sticking. Freezing cookies is a great way to save some for later. You can freeze cookie dough or baked cookies. To freeze dough, scoop it into balls. Arrange them on a baking sheet and freeze for about an hour. Once frozen, transfer the dough balls to a freezer bag. This method prevents sticking. For baked cookies, let them cool completely. Then, place them in a single layer in a freezer-safe container. You can stack them with parchment paper between layers. Baked cookies can last up to three months in the freezer. When you're ready to eat, let them thaw at room temperature. You can also warm them in the oven for a few minutes. Enjoy the soft and chewy goodness! How can I make my cookies softer? To make your cookies softer, use more brown sugar instead of granulated sugar. Brown sugar adds moisture. You can also slightly underbake them. Remove them from the oven when the edges are firm, but the center looks soft. Can I substitute molasses with honey? You can use honey instead of molasses. The cookies will be sweeter and have a different flavor. Honey may also make the dough a bit runnier, so adjust the flour if needed. How long do the cookies stay fresh? These cookies stay fresh for about a week at room temperature. Store them in an airtight container. If you want to keep them longer, freeze them for up to three months. What can I do if my dough is too sticky? If your dough is too sticky, add a little more flour. Start with a tablespoon at a time. Mix until the dough is manageable but still soft. Is it necessary to chill the dough before baking? Chilling the dough is not necessary. However, if you prefer firmer cookies, chill for 30 minutes. This can help them hold their shape better while baking. In this post, we covered how to make soft ginger molasses cookies. We discussed key ingredients, step-by-step instructions, and tips for the best texture. I shared variations for different diets and ways to store your cookies for freshness. Baking can be fun and rewarding. With these tips, you can enjoy delicious cookies every time. Remember, practice makes perfect, so don’t hesitate to try new flavors and methods. Happy baking!
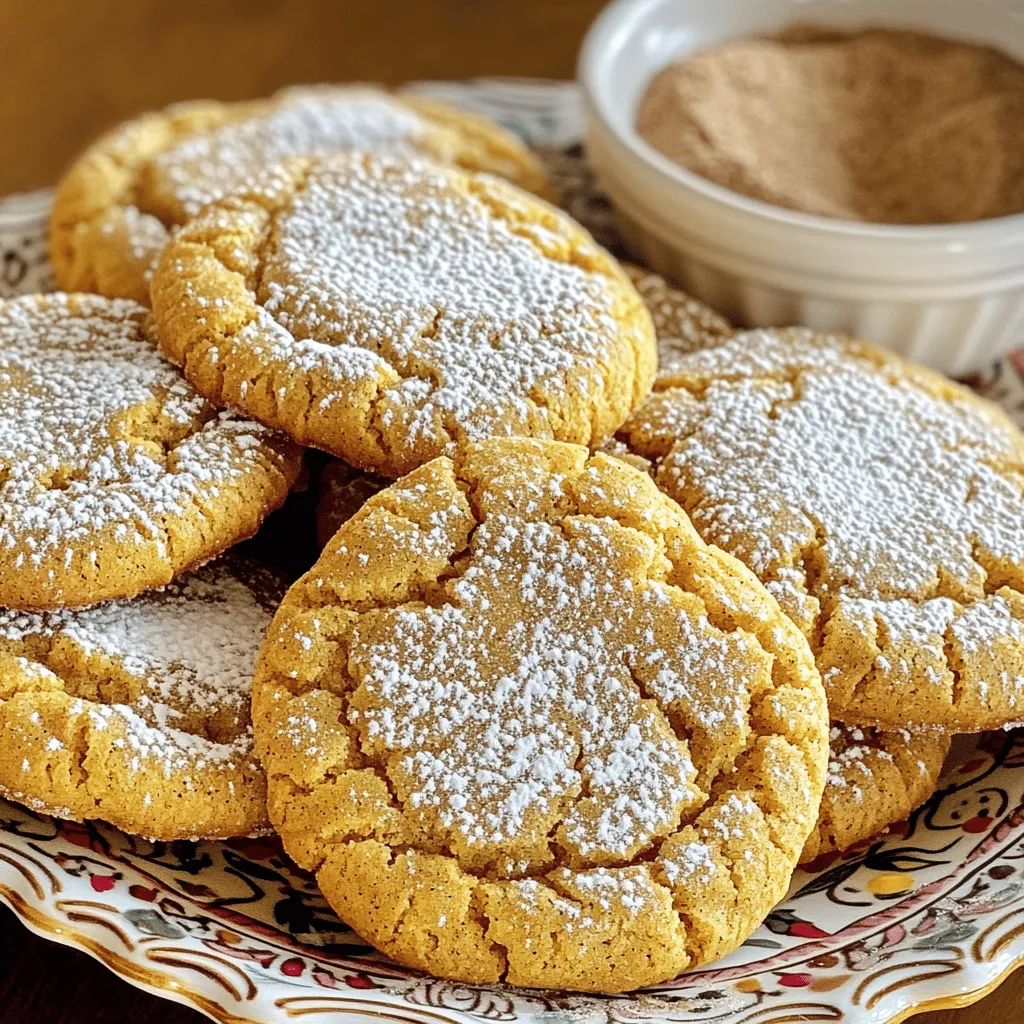
Soft Ginger Molasses Cookies Irresistible and Chewy
Are you ready to bake the best ginger molasses cookies? These cookies are soft, chewy, and filled with warm spices. With simple ingredients and easy