Breakfast

- 2 ripe bananas, thoroughly mashed - 1/2 cup natural peanut butter, creamy or crunchy - 1/4 cup honey (or maple syrup for a vegan-friendly choice) - 2 large eggs (or 2 tablespoons flaxseed meal mixed with 6 tablespoons water for a vegan option) - 1 teaspoon pure vanilla extract - 1 cup whole wheat flour - 1/2 teaspoon baking soda - 1/2 teaspoon baking powder - 1/4 teaspoon fine sea salt - 1/2 cup rolled oats - 1/2 teaspoon ground cinnamon (optional) - 1/4 cup dark chocolate chips or chopped nuts (optional) These ingredients come together to create a tasty, healthy muffin. The ripe bananas add natural sweetness and moisture. Peanut butter gives a rich flavor and protein. Honey or maple syrup keeps it sweet without added sugars. The eggs help bind everything together, or you can use flaxseed for a vegan option. Whole wheat flour makes the muffins wholesome. Baking soda and baking powder help them rise, while salt enhances the taste. Oats add texture and fiber. Ground cinnamon gives warmth, and the optional chocolate chips or nuts add extra flavor and fun. Feel free to mix and match these ingredients. You can find the full recipe to guide your cooking process. First, preheat your oven to 350°F (175°C). This step helps muffins bake evenly. Next, prepare your muffin tin. You can use paper liners or lightly grease the cups with cooking spray or oil. This will help the muffins come out easily after baking. In a large mixing bowl, mash two ripe bananas. Use a fork or spatula for this. Then, add 1/2 cup of natural peanut butter. Mix until smooth and creamy. Next, add in 1/4 cup of honey (or maple syrup for vegan). Crack in two large eggs, or use flaxseed meal for vegan. Finally, add 1 teaspoon of pure vanilla extract. Stir well until everything blends together. In a separate bowl, whisk together the dry ingredients. You will need 1 cup of whole wheat flour, 1/2 teaspoon of baking soda, 1/2 teaspoon of baking powder, and 1/4 teaspoon of fine sea salt. If you like, add 1/2 teaspoon of ground cinnamon. Mix these dry ingredients until they are evenly combined. Slowly add this mixture to your wet banana mix. Use a spatula to gently fold them together. It’s okay if there are a few lumps; do not over-mix. Using a spoon or an ice cream scoop, fill each muffin cup about three-quarters full. Leave some space at the top so they can rise. If you want, gently fold in 1/4 cup of dark chocolate chips or nuts into the batter before filling the cups. This adds extra flavor and crunch. Place the muffin tin in your preheated oven. Bake for 18 to 22 minutes. Check if they are done by inserting a toothpick into the center of a muffin. If it comes out clean or with a few moist crumbs, they are ready. After baking, let the muffins cool in the tin for about 5 minutes. Then, carefully transfer them to a wire rack. Let them cool completely before serving. This cooling step helps keep muffins moist and tasty. Enjoy these delightful treats! For the complete recipe, check the [Full Recipe]. To keep your muffins moist, use ripe bananas. Overripe bananas add natural sweetness and moisture. Mash them well to ensure they blend smoothly. Adding peanut butter also helps maintain moisture. It binds the ingredients and adds a creamy texture. Avoid overbaking your muffins. Keep an eye on the oven, so they stay soft inside. Mix your wet ingredients first. Blend the mashed bananas and peanut butter well. Then add honey, eggs, and vanilla. Make sure everything is smooth. For dry ingredients, whisk them in a separate bowl. Gently fold the dry mix into the wet mix. Avoid over-mixing; a few lumps are fine. Over-mixing can make the muffins tough. Try adding dark chocolate chips for a sweet touch. They melt beautifully and create a rich flavor. You can also mix in chopped nuts for crunch. Walnuts or pecans work great. If you're feeling adventurous, add dried fruits like cranberries or raisins for extra sweetness. These add-ins make your muffins even more delicious and fun! For more ideas, check the Full Recipe. {{image_4}} To make these muffins gluten-free, swap the whole wheat flour for a gluten-free blend. Look for a mix that has xanthan gum to help with texture. You can also use almond flour or oat flour. These options add a nice flavor and keep the muffins soft. Just remember, gluten-free flours may absorb more liquid. You might need to adjust the liquid in the recipe slightly. If you want to cut down on sugar, use ripe bananas. They add natural sweetness. You can also replace honey with unsweetened applesauce. This will keep the muffins moist while lowering sugar. Another option is to use stevia or monk fruit sweetener. These sweeteners have fewer carbs and calories. Adjust to taste, as they can be sweeter than sugar. You can change the flavor of these muffins in many ways. Add spices like nutmeg or ginger for warmth. You can also mix in dried fruits like raisins or cranberries for a chewy bite. For a richer taste, try adding cocoa powder for chocolate peanut butter muffins. A dash of espresso powder can boost the chocolate flavor too! Don't forget to sprinkle some chopped nuts or seeds on top for crunch. Each choice makes these muffins your own! For the full recipe, refer to the main article. Storing your peanut butter banana muffins properly keeps them fresh and tasty. Place the muffins in an airtight container. This helps keep moisture in, so they stay soft. You can also use a zip-top bag. Make sure to press out the air before sealing. Store them at room temperature for 2 to 3 days. If you want them to last longer, consider freezing. Freezing muffins is a great way to save them for later. First, let the muffins cool completely. Wrap each muffin in plastic wrap or foil. Then, place them in a zip-top freezer bag. This helps prevent freezer burn. You can freeze the muffins for up to 3 months. When you are ready to enjoy one, just take it out and let it thaw at room temperature. Reheating your muffins is simple. You can use the microwave or the oven. For the microwave, place a muffin on a plate and heat it for 15-20 seconds. If you prefer the oven, preheat it to 350°F. Place the muffins on a baking sheet and warm them for about 5-10 minutes. This will help revive their fresh taste and soft texture. Enjoy your delicious treat! You can make these muffins vegan by using flaxseed meal instead of eggs. Mix 2 tablespoons of flaxseed meal with 6 tablespoons of water. Let it sit for a few minutes to thicken. You can also switch honey for maple syrup to keep it vegan. Yes, you can use almond butter instead of peanut butter. This will change the flavor but still provide creaminess. Almond butter gives a nice nutty taste and works well in this recipe. To make the muffins less sweet, reduce the amount of honey or maple syrup. You might cut it down to 2 tablespoons. You can also skip the optional chocolate chips. This keeps the muffins tasty without too much sweetness. These muffins last for about 3 to 5 days at room temperature. Store them in an airtight container. If you want them to last longer, you can freeze them for up to 3 months. Yes! You can add fruits like blueberries or chopped apples. Nuts like walnuts or pecans also add great crunch. Just make sure to fold them in gently so they mix well. You can find the full recipe for these delightful muffins [here](Full Recipe). Enjoy the process of baking and the tasty results! These muffins are simple to make and full of flavor. We covered the key ingredients, nutritional info, and even options for customization. Step-by-step instructions help you bake perfect muffins every time. Remember, using fresh ingredients keeps them moist. Don't forget to explore variations, storage tips, and answers to common questions. By following these tips, you’ll create delicious treats that everyone will enjoy. Happy baking!
Healthy Peanut Butter Banana Muffins Delightful Treat
Get ready for a delicious twist on a classic! These Healthy Peanut Butter Banana Muffins are perfect for breakfast or a snack. Made with ripe
To make pancake mini muffins, you need some simple ingredients. Here’s what you will need: - 1 cup all-purpose flour - 1 tablespoon baking powder - 1/2 teaspoon salt - 1 tablespoon granulated sugar - 1 cup milk (dairy or non-dairy) - 1 large egg - 2 tablespoons melted unsalted butter (or a dairy-free substitute) - 1 teaspoon pure vanilla extract - 1/2 cup fresh blueberries or chocolate chips - Optional toppings or add-ins These ingredients come together to create a tasty treat. The flour gives the muffins structure. Baking powder makes them rise. Salt enhances the flavors, while sugar adds sweetness. You can use any milk you like, which makes this recipe flexible. A large egg helps bind everything together. The melted butter adds richness, and vanilla brings out all the flavors. You can also personalize your mini muffins. Add fresh blueberries for a burst of flavor or chocolate chips for a sweeter taste. You can even mix in nuts or spices like cinnamon for extra fun. For the full recipe, check out the instructions I provided. Enjoy your cooking! - Preheat the oven to 350°F (175°C). - Prepare the mini muffin tin. Grease it or use liners. - Combine dry ingredients in a bowl. Mix flour, baking powder, salt, and sugar. - Mix wet ingredients in another bowl. Whisk milk, egg, melted butter, and vanilla. - Blend wet and dry ingredients together. Pour the wet mix into the dry mix. Stir gently until just combined. - Fold in blueberries or chocolate chips. This adds sweetness and flavor. - Fill muffin tin and bake. Scoop batter into each cup, about two-thirds full. - Check doneness with a toothpick. Insert it into a muffin; it should come out clean. These steps give you tasty pancake mini muffins in no time. For the full recipe, check the recipe section above. - Ensure proper oven temperature: Always preheat your oven to 350°F (175°C) for even baking. An oven thermometer can help you check the exact temperature. - Avoid overmixing the batter: When mixing wet and dry ingredients, stir gently. A few lumps are okay. Overmixing makes muffins tough. - Tips for even baking: Place your muffin tin in the center of the oven. This helps hot air circulate evenly around your mini muffins. - Serving recommendations: Serve your pancake mini muffins warm for the best taste. Pair them with maple syrup for dipping. - Creative ways to garnish: Dust your muffins with powdered sugar for a sweet finish. Add fresh blueberries on top for color and freshness. - Storing leftovers effectively: Keep any leftovers in an airtight container. This keeps them fresh for up to three days. For longer storage, consider freezing them. By following these tips, you can ensure your pancake mini muffins are not only delicious but also visually appealing! Check the Full Recipe for more details on making these tasty treats. {{image_4}} You can easily switch up the flavors of your pancake mini muffins. Here are three fun ideas: - Chocolate Chip Pancake Mini Muffins: Add 1/2 cup of chocolate chips to the batter. They melt and create a sweet surprise in each bite. - Banana Nut Pancake Mini Muffins: Mash one ripe banana and mix it into the wet ingredients. Add 1/4 cup of chopped walnuts for a nice crunch. - Cinnamon Swirl Pancake Mini Muffins: Mix 1 tablespoon of cinnamon with 2 tablespoons of sugar. Swirl this mixture into the batter before baking for a delightful cinnamon flavor. Toppings can elevate your pancake mini muffins. Here are some tasty options: - Fresh fruit and yogurt: Top warm muffins with sliced strawberries or blueberries and a dollop of yogurt. This adds freshness and creaminess. - Whipped cream or maple syrup: Drizzle warm muffins with maple syrup or add a swirl of whipped cream. This enhances sweetness and makes them feel special. - Nut butter spreads: Spread almond or peanut butter on the muffins for a protein boost. It adds richness and flavor to each bite. Feel free to mix and match these ideas to find your favorite combinations! For the full recipe, check out the detailed instructions above. To keep your pancake mini muffins fresh, store them in an airtight container. This will help keep them moist. Place the container in a cool, dry spot in your kitchen. The best temperature for storage is room temperature. They will stay good for about 2 to 3 days. If you want to save some for later, you can freeze them. First, let the mini muffins cool completely. Then, place them in a freezer-safe bag or container. Be sure to remove as much air as possible to prevent freezer burn. They can last up to 3 months in the freezer. When you're ready to enjoy them again, simply reheat the muffins. You can do this in the microwave or oven. For the microwave, heat for about 15 to 20 seconds. In the oven, preheat to 350°F (175°C) and warm for 5 to 10 minutes. This will bring back their soft texture and delicious taste. For the full recipe, check back to see how easy these muffins are to make! Can I use whole wheat flour instead of all-purpose flour? Yes, you can use whole wheat flour. It gives a nutty taste and adds fiber. Just remember, it may change the texture a bit. You might need to add a little more liquid to keep the muffins soft. How can I make these muffins vegan? To make these muffins vegan, use non-dairy milk and replace the egg. You can use 1/4 cup of unsweetened applesauce or 1 tablespoon of ground flaxseed mixed with 2.5 tablespoons of water as an egg substitute. What can I substitute for eggs? You can use applesauce, mashed banana, or flaxseed meal. Each option gives moisture and helps bind the muffins. Just remember that these substitutes may change the flavor slightly. How long do pancake mini muffins last? Pancake mini muffins stay fresh for about 3 days at room temperature. If you store them in an airtight container, they stay soft and tasty. For longer storage, freeze them. Can I prepare the batter in advance? Yes, you can prepare the batter ahead of time. Just keep it in the fridge for up to 24 hours. When ready to bake, stir it gently before filling the muffin cups. How do I know when my muffins are done baking? Muffins are done when they turn a light golden brown. You can also use a toothpick. Insert it into the center; if it comes out clean, your muffins are ready. What are the signs of overmixing the batter? Overmixing creates a tough texture. You'll see a smooth, shiny batter with few lumps. If you see a lot of bubbles or the batter is very stretchy, you've mixed too much. Remember, a few lumps are okay! You now have all you need to make delicious pancake mini muffins. We covered the ingredients, step-by-step instructions, and tips for baking and storing. Don’t forget to try different flavors and toppings. These muffins are great for breakfast or snacks. Enjoy baking and sharing with friends and family. Simple recipes can bring joy to your kitchen life!
Pancake Mini Muffins Tasty and Quick Breakfast Treat
Are you ready to add some fun to your breakfast routine? Pancake mini muffins are the perfect quick treat! They are fluffy, easy to make,
To make homemade copycat McGriddles, you will need the following key ingredients: - 1 cup all-purpose flour - 1 tablespoon baking powder - 1 tablespoon granulated sugar - 1/2 teaspoon salt - 1/2 cup milk - 1 large egg - 2 tablespoons melted butter - 1 teaspoon vanilla extract - 1 cup pure maple syrup - 4 breakfast sausage patties - 4 slices American cheese These ingredients create the perfect blend of flavors and textures. The pancakes are soft and sweet, while the sausage adds a savory bite. You can customize your McGriddles with different ingredients. Here are some ideas: - Add chocolate chips to the batter for a sweet twist. - Use whole wheat flour for a healthier option. - Swap American cheese for cheddar or pepper jack. - Try adding a slice of bacon for extra flavor. These options let you personalize the dish to your taste. If you don't have certain ingredients at home, here are some good substitutions: - Use almond milk or soy milk instead of regular milk. - Substitute yogurt for the egg, if needed. - Coconut oil can replace melted butter for a dairy-free option. - Use maple-flavored syrup if pure maple syrup isn't available. These substitutions can help you make McGriddles even if you run low on supplies. {{ingredient_image_2}} Start by taking a large bowl. Add 1 cup of all-purpose flour, 1 tablespoon of baking powder, 1 tablespoon of granulated sugar, and 1/2 teaspoon of salt. Whisk them well. This step ensures your dry mix is even. In another bowl, combine 1/2 cup of milk, 1 large egg, 2 tablespoons of melted butter, and 1 teaspoon of vanilla extract. Whisk until smooth. Now, slowly pour the wet mix into the dry mix. Stir gently, just until combined. Don't overmix. A few lumps are okay. Preheat your non-stick skillet over medium heat. Lightly grease it with butter or cooking spray. For each pancake, pour about 1/4 cup of batter onto the skillet. Cook for 2-3 minutes. Look for bubbles on the surface. This means it's time to flip! Cook for another 2-3 minutes until golden brown. Remove pancakes and set them aside. Repeat this until you use all the batter. In the same skillet, add the breakfast sausage patties. Cook them for about 3-4 minutes. Turn them halfway through. You want them browned and cooked through. This step adds a savory flavor to your McGriddles. To build your McGriddles, start with one pancake on a plate. Place a sausage patty on top. Then, add a slice of American cheese. Drizzle a good amount of maple syrup over it. Finally, add another pancake on top. Repeat for the rest of the ingredients. Serve warm and enjoy! To make the best pancakes, don't overmix your batter. A few lumps are okay. This keeps the pancakes light and fluffy. Use a non-stick skillet to avoid sticking. Make sure your skillet is hot enough before adding the batter. You want bubbles to form on the surface. This usually takes about 2-3 minutes. Flip them gently to keep the fluffiness intact. For juicy sausage patties, cook them on medium heat. This ensures they brown nicely without burning. Turn them halfway through cooking to get an even color. It takes about 3-4 minutes for each side to cook through. Keep an eye on them; you want them golden brown. Let them rest for a minute before adding to your McGriddle. If you have leftovers, store them in an airtight container. This keeps them fresh for up to three days. You can also freeze them for longer storage. Just make sure to wrap each one tightly. To reheat, place them in the microwave or toaster oven. This helps bring back the warm, fluffy texture. Enjoy your delicious breakfast anytime! Pro Tips Use Fresh Ingredients: Ensure your baking powder is fresh for the best rise in your pancakes. Old baking powder can lead to flat pancakes. Control Heat: Keep the skillet at medium heat. Too high heat can burn the pancakes before they cook through. Perfect Pancake Size: Use a measuring cup to pour the batter onto the skillet for uniform pancakes that cook evenly. Layer Wisely: When assembling, drizzle the maple syrup between layers for maximum flavor in every bite. {{image_4}} You can switch up the protein in your McGriddles. Instead of sausage, try crispy bacon or a plant-based patty. Chicken or turkey sausage works great too. For cheese, feel free to use cheddar, pepper jack, or even gouda. Each option adds its own flavor and twist. Get creative with your toppings! You can add a fried egg for extra protein and richness. Slices of avocado also bring creaminess. For a sweet touch, drizzle with honey or sprinkle cinnamon sugar. If you love fruit, consider adding sliced strawberries or banana. These toppings enhance the flavor profile and make breakfast more fun. If you need gluten-free McGriddles, swap the all-purpose flour for a gluten-free blend. Make sure the blend works for baking. For a dairy-free version, use almond milk or oat milk instead of regular milk. You can also replace the butter with coconut oil. These options keep your breakfast tasty while meeting dietary needs. To keep your cooked McGriddles fresh, let them cool first. Place them in an airtight container. Store them in the fridge for up to three days. When you are ready to enjoy your McGriddles again, take them out of the fridge. You can reheat them in a skillet over low heat. This method helps maintain their texture. Heat each side for about two minutes until warm. You can also use a microwave, but it might make them a bit soft. If you choose the microwave, heat them for 30 seconds at a time until hot. If you want to store McGriddles for longer, freezing is a great option. First, let them cool completely. Wrap each McGriddle tightly in plastic wrap or foil. Then, place them in a freezer-safe bag. They can last up to three months in the freezer. When you're ready to eat, thaw them in the fridge overnight before reheating. This keeps them tasting fresh and delicious! You can make McGriddles healthier by using whole grain flour instead of all-purpose flour. Whole grain flour adds fiber, which is good for digestion. You can also reduce the sugar in the batter. Replace the sausage patty with turkey or veggie sausage for lower fat. If you want to cut calories, use fewer pancakes in each sandwich. Yes, you can use different types of syrup. Try agave syrup, honey, or even fruit syrup. These options can add unique flavors to your McGriddles. Just make sure the syrup is thick enough to stay on the pancakes. This way, you can enjoy your McGriddles with your favorite sweet taste. To make mini-sized McGriddles, use less batter for each pancake. Pour about 2 tablespoons of batter onto the skillet. This will create smaller pancakes. Also, use mini sausage patties or cut regular patties in half. This makes it easier to handle and perfect for kids or snacks. You can serve many items with McGriddles. Fresh fruit like berries or sliced bananas adds color and freshness. You can also serve yogurt for a creamy texture. A side of hash browns or home fries pairs well too. These sides help create a balanced breakfast and make it more filling. This blog post covered how to make delicious McGriddles from scratch. We detailed key ingredients, helpful tips, and ways to customize your dish. I shared step-by-step cooking instructions, variation ideas, and storage tips. With these insights, you can craft your perfect McGriddles. Try different ingredients and toppings for unique flavors. Enjoy your homemade breakfast treat!
Homemade Copycat McGriddles Easy and Flavorful Recipe
Craving the sweet, savory delight of McGriddles but want to make them at home? I’ve got you covered! In this easy and flavorful recipe, you’ll
Here are the simple ingredients you will need for Peanut Butter Cup Overnight Oats: - 1 cup rolled oats - 2 cups almond milk (or any milk of your choice) - 2 tablespoons natural peanut butter - 1 tablespoon unsweetened cocoa powder - 2 tablespoons honey or maple syrup (adjust sweetness to your preference) - 1 teaspoon pure vanilla extract - A pinch of salt - 1/4 cup mini chocolate chips (plus extra for topping) - Chopped peanuts (for garnish) These ingredients are easy to find and work well together. Rolled oats give you a hearty base. Almond milk adds creaminess. Natural peanut butter brings rich flavor. Cocoa powder gives that chocolate kick. Sweeteners let you control the sweetness. Vanilla extract enhances all the flavors. A pinch of salt balances the dish. Chocolate chips add fun. Chopped peanuts finish it with a crunch. You can mix and match these ingredients. Feel free to swap almond milk for any milk you like. You can also adjust the sweeteners based on your taste. {{ingredient_image_2}} First, grab a medium bowl. Pour in 1 cup of rolled oats and 2 cups of almond milk. Add a pinch of salt. Mix it well until all the oats are coated. This step gives a good base for your oats. Next, take a small bowl. Whisk together 2 tablespoons of natural peanut butter, 1 tablespoon of unsweetened cocoa powder, and 2 tablespoons of honey or maple syrup. Don’t forget to add 1 teaspoon of pure vanilla extract. Make sure the mixture is smooth and uniform. This creates the rich flavor. Now, pour the peanut butter mixture into the oats. Stir gently until everything is blended. You want a smooth texture with no lumps. This is where the magic begins! Spoon the mixture evenly into jars. Make sure to seal them tightly. This keeps the oats fresh. Place the jars in the fridge to chill overnight or at least for 4 hours. Give the oats time to soak up all that creamy goodness. When you’re ready to enjoy, stir the oats well. You can add a splash of milk for a creamier texture. Top your oats with extra mini chocolate chips and chopped peanuts. This adds a fun crunch and makes it look great! To keep your overnight oats fresh, use airtight containers. Glass jars work best. They help preserve flavor and moisture. Store your jars in the fridge. Peanut Butter Cup Overnight Oats can last up to five days. Just make sure you seal them tight. You can adjust the texture of your oats easily. If you want creamier oats, add a splash of milk before serving. Stir it in well for a smooth mix. If you prefer thicker oats, reduce the milk slightly. Play around to find what you enjoy most! If you want to swap honey or maple syrup, try agave syrup or stevia. Both work well and change the taste a bit. Adjust sweetness to your liking. Start with less and add more if needed. You can always make it sweeter! Pro Tips Use Rolled Oats: For the best texture, stick to rolled oats rather than instant oats, which can become too mushy. Customize Sweetness: Adjust the honey or maple syrup according to your taste; you can even omit it for a less sweet option. Mix Thoroughly: Ensure the peanut butter mixture is well-blended to avoid clumps in your overnight oats. Top Creatively: Experiment with different toppings like sliced bananas, berries, or a drizzle of honey for extra flavor and nutrition. {{image_4}} You can change up the flavor of your Peanut Butter Cup Overnight Oats easily. Adding fruits makes it fun! Try sliced bananas or a handful of berries. They bring sweetness and freshness to each bite. You can also add nuts or seeds for a nice crunch. Chopped almonds or flax seeds work well. This gives your oats a healthy boost and extra texture. If you need gluten-free options, use certified gluten-free oats. They will still taste great and give you the same texture. For vegan adaptations, switch honey for maple syrup. Use any plant-based milk like almond or oat milk. With these swaps, everyone can enjoy this tasty meal. Want more chocolate? You can use chocolate protein powder in your base. It adds flavor and boosts protein. Frozen cacao nibs are another great topping. They add a nice crunch and rich chocolate taste. You can choose any chocolate option that makes your taste buds happy! For the best storage, use airtight containers. Glass jars work great. They keep the oats fresh and let you see the layers. You can also use plastic containers. Just make sure they are sealed tight. Store your overnight oats in the fridge. They last well for up to five days. If you want to keep them longer, you can freeze them. Just remember, the texture may change when you thaw them. If you like your oats warm, you can reheat them. Place the oats in a bowl and microwave for about 30 seconds. Stir and check the temperature. If they need more time, heat in 10-second bursts. To keep the texture nice, add a splash of milk before warming. This keeps them creamy and smooth. For easy meal prep, make four servings at a time. This way, you have breakfast ready for the week. Divide the mixture into jars or containers. Using portion control helps reduce waste. You can enjoy them daily without making a mess. Yes, you can easily make this recipe vegan. Here are some simple swaps: - Use plant-based milk like soy, oat, or coconut milk. - Replace honey with maple syrup or agave syrup for sweetness. - Ensure your peanut butter is free from added sugar or dairy. These changes keep the flavor rich while making it suitable for a vegan diet. You can store Peanut Butter Cup Overnight Oats in the fridge for up to five days. This makes them great for meal prep. Just keep them in a sealed container to keep them fresh. You can use instant oats, but the texture will differ. Instant oats become softer and mushier when mixed with liquid. Rolled oats give a chewier bite and hold their shape better. For the best experience, stick with rolled oats. If almond milk isn’t your thing, you have plenty of choices: - Soy milk offers a creamy texture and good protein. - Oat milk is mild and complements the flavors well. - Coconut milk adds a rich, tropical twist. Choose any milk that fits your taste and dietary needs. To boost the protein in your overnight oats, consider these options: - Add a scoop of protein powder to the mix. - Stir in Greek yogurt for creaminess and extra protein. - Top with nuts or seeds like chia or hemp for added crunch and nutrition. These additions make your meal more filling and nutritious. You now know how to make Peanut Butter Cup Overnight Oats. We explored simple ingredients, mixing steps, and fun variations. Remember, you can customize flavors and adjust sweetness as you like. Store them properly for the best taste and texture. Try adding fruits or nuts for extra goodness. With these tips, your breakfast can be both tasty and quick. Enjoy creating your own perfect version!
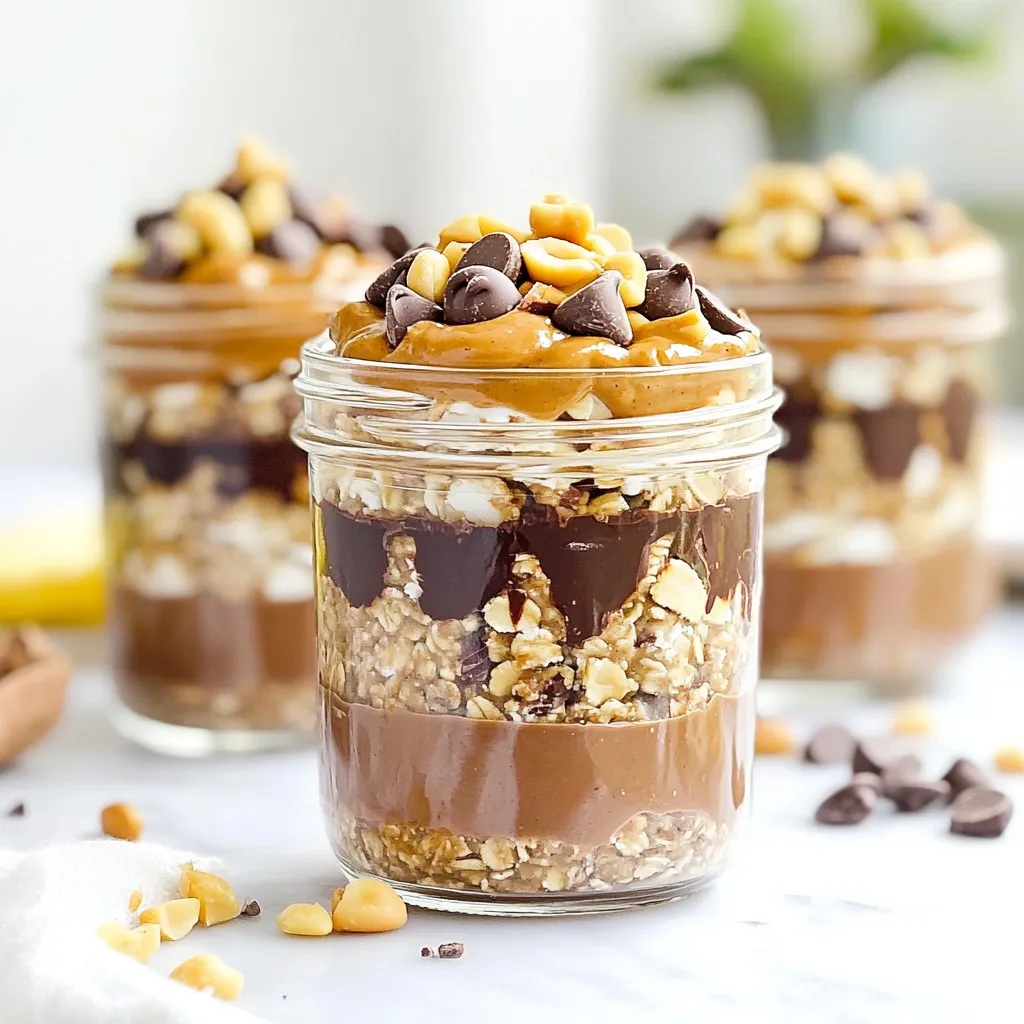
Peanut Butter Cup Overnight Oats Flavorful and Easy Meal
If you love the rich taste of peanut butter cups, you’re in for a treat! My Peanut Butter Cup Overnight Oats are an easy, tasty
- 2 medium zucchinis, grated - 1 cup all-purpose flour (gluten-free option available) - 1/2 cup grated Parmesan cheese - 1/4 cup finely chopped green onions - 1/4 cup milk (or non-dairy alternative) - 2 large eggs - 1 teaspoon baking powder - 1/2 teaspoon garlic powder - 1/2 teaspoon onion powder - Salt and pepper to taste - Olive oil or cooking spray for greasing I love using fresh zucchini in this recipe. Zucchini adds moisture and a light flavor. Grating the zucchini helps it mix well with the batter. You will want to squeeze out extra water to avoid soggy waffles. This step makes sure your waffles stay crisp and light. The combination of all-purpose flour and Parmesan cheese creates a nice base. The flour gives structure while the cheese adds a savory touch. You can swap all-purpose flour for gluten-free flour if needed. This way, anyone can enjoy these tasty waffles. Adding green onions not only boosts flavor but also adds color. The eggs bind everything together and add richness. You can use regular milk or a non-dairy option like almond milk. This flexibility makes the recipe easy to adapt. For seasoning, garlic and onion powder give depth. Salt and pepper enhance all the flavors. Remember to adjust these to your taste. A light drizzle of olive oil or cooking spray keeps the waffles from sticking. Check out the Full Recipe for more details and tips! First, you need to preheat your waffle iron. This step is key for making perfect waffles. Next, prepare the zucchini. Grate two medium zucchinis and place them in a large bowl. Add a generous pinch of salt. Let them sit for about ten minutes. This will help pull out extra water from the zucchini. After ten minutes, take a clean kitchen towel and squeeze the zucchini hard to remove as much water as you can. Set the drained zucchini aside. In a separate bowl, combine your dry ingredients. Mix 1 cup of all-purpose flour, 1/2 cup of grated Parmesan cheese, 1 teaspoon of baking powder, 1/2 teaspoon of garlic powder, and 1/2 teaspoon of onion powder. Add a pinch of salt and pepper too. In a small bowl, crack two large eggs and whisk them. Then stir in 1/4 cup of milk until it is well mixed. Now, add the squeezed zucchini and 1/4 cup of finely chopped green onions to the egg and milk mix. Stir it all together so that everything is well combined. Gently fold the wet mixture into the dry ingredients using a spatula. Mix until just combined. It is okay if there are a few lumps. Lightly grease your waffle iron with olive oil or cooking spray. Pour the right amount of batter onto the preheated waffle iron; this depends on your iron's size. Close the lid and cook the waffles for about 5 to 7 minutes, or until they turn golden brown. Once they are done, carefully remove the waffles with a fork. Keep them warm in a low-temperature oven while you cook the rest of the batter. Serve the warm waffles right away, topped with Greek yogurt or fresh herbs for extra flavor. You can find the full recipe above for all the steps! To make the best savory zucchini waffles, draining the zucchini is key. Zucchini has a lot of water. If you skip this step, your waffles may end up soggy. After grating the zucchini, sprinkle it with salt and let it sit for about 10 minutes. Then, squeeze it tightly in a clean towel. This will remove excess liquid. Next, be careful when mixing the batter. Overmixing can make the waffles tough. Mix just until everything is combined. A few lumps are okay. This will help keep your waffles light and fluffy. Using the right setting on your waffle iron is crucial. Preheat it according to the manufacturer's instructions. You want it to be hot enough to create a crispy outside. Generally, medium to high heat works best. To check if the waffles are done, look for a golden-brown color. You can also gently lift the lid to see if they release easily. If they stick, give them more time. For toppings, try adding a dollop of Greek yogurt or sour cream. They add a creamy touch and balance the flavors well. Fresh herbs like parsley or chives can brighten up your dish. If you are cooking in batches, keep your waffles warm. Place them in a low-temperature oven (around 200°F or 90°C). This will keep them warm and ready to serve from the Full Recipe. Enjoy your meal! {{image_4}} You can easily change the taste of your savory zucchini waffles. One fun way is to add different cheeses. Feta cheese gives a creamy and tangy flavor. Cheddar cheese adds a nice sharpness. Both options make the waffles even more delicious. Herbs also play a big role in boosting flavor. You can mix in fresh basil for a hint of sweetness. Dill adds a fresh and bright taste. Try adding a tablespoon of either herb to your batter. Your waffles will burst with flavor. If you have dietary needs, you can still enjoy these waffles. For a gluten-free option, use almond flour instead of regular flour. This switch keeps the dish light and tasty. Dairy-free options are easy too. Swap the milk for almond or oat milk. To make it vegan, replace the eggs with flaxseed meal. Mix one tablespoon of flaxseed meal with three tablespoons of water. Let it sit for a few minutes until it thickens. This mixture works great in the batter. Savory zucchini waffles pair well with many dishes. Try serving them with a fresh side salad. A simple green salad with lemon vinaigrette works well. You can also enjoy these waffles with dips. A tangy yogurt sauce adds creaminess. You can mix Greek yogurt with lemon juice and garlic. It's refreshing and complements the waffles nicely. For a different twist, try serving them with a spicy salsa or a rich avocado dip. For the full recipe, check out Savory Zucchini Waffles. To store leftover savory zucchini waffles, let them cool first. Place them in an airtight container or wrap them tightly in plastic wrap. Keep them in the fridge for up to three days. This way, you can enjoy them later without losing flavor. If you want to keep your waffles longer, freezing is a great option. Place the cooled waffles in a single layer on a baking sheet. Freeze them for about an hour until they are firm. After that, stack them in a freezer-safe bag or container. You can keep them in the freezer for up to three months. To reheat frozen waffles, pop them in a toaster or a warm oven at 350°F (175°C) for about 10 minutes. This will help them regain their crispy texture. Savory zucchini waffles last about three days in the fridge. In the freezer, they can last for up to three months. Always check for any signs of spoilage before eating. Enjoy these delicious waffles fresh or saved for later! If you want the full recipe, check out the complete instructions. Yes, you can use other vegetables! Carrots, spinach, or sweet potatoes work well. Grate them finely, just like zucchini. You can mix and match too. For a colorful dish, blend different veggies. This keeps your meal fun and tasty. Always remember to drain any excess moisture as you do with zucchini. Savory zucchini waffles are great with various sides. You can top them with Greek yogurt or sour cream. Fresh herbs like parsley or chives add a nice touch. Pair them with a simple salad for crunch. You might also enjoy them with avocado slices or poached eggs. These toppings enhance flavor and make your meal more filling. To add heat, mix in red pepper flakes or cayenne pepper. You can also use spicy cheese, like pepper jack. Another option is to serve with hot sauce or a spicy salsa. These choices will give your waffles a delightful kick. Adjust the heat level to suit your taste and enjoy the burst of flavor! This post shared a simple recipe for savory zucchini waffles. You learned about vital ingredients, step-by-step instructions, and helpful tips. These waffles are easy to make, flavorful, and adaptable to your taste. Don't forget to explore various toppings and side dishes to elevate your meal. Now it’s time to enjoy your delicious creation! Experiment with flavors and share them with others. You’ll be surprised at the joy these waffles bring to your table.
Savory Zucchini Waffles Healthy and Flavorful Dish
If you’re looking for a tasty dish that’s both healthy and easy to make, savory zucchini waffles are the answer! With just a few simple
- 1 cup rolled oats (ground into flour) - 1 scoop vanilla protein powder - 1 teaspoon baking powder - 1/4 teaspoon salt - 1 cup buttermilk (or plant-based milk) - 1 large egg - 1 tablespoon honey or maple syrup - 1 teaspoon vanilla extract - 1 cup fresh strawberries, diced - Greek yogurt or whipped cream Making these pancakes is simple and fun. The main ingredients start with rolled oats. You can easily grind these into flour using a blender. This oat flour gives the pancakes a hearty texture. Next, we add a scoop of vanilla protein powder. This boosts the protein and makes these pancakes a great meal. A teaspoon of baking powder helps the pancakes rise. A little salt brings out all the flavors. Now, for the wet ingredients. You can use buttermilk or any plant-based milk you love. One large egg adds richness to the batter. Sweeten the mix with a tablespoon of honey or maple syrup. One teaspoon of vanilla extract gives the pancakes a lovely aroma. For toppings, fresh strawberries are a must! They add sweetness and color. You can also top your pancakes with Greek yogurt or whipped cream for a creamy finish. This blend of ingredients makes for a tasty and hearty breakfast. Enjoy every bite of these strawberries and cream protein pancakes! {{ingredient_image_2}} Start with rolled oats. Use a blender or food processor. Grind them until they turn into fine flour. This oat flour makes the pancakes special and healthy. In a large bowl, mix the oat flour, protein powder, baking powder, and salt. Use a whisk to blend these dry ingredients well. This step ensures your pancakes rise nicely during cooking. In another bowl, whisk together the buttermilk, egg, honey, and vanilla extract. Make sure the mixture is smooth and well-combined. This adds moisture and flavor to your pancakes. Pour the wet mixture into the dry ingredients. Stir gently until just combined. Some lumps are fine. Then, fold in the diced strawberries. This adds fresh flavor and sweetness to your pancakes. Heat a non-stick skillet over medium heat. Lightly grease it with cooking spray or a little butter. For each pancake, pour about 1/4 cup of batter onto the skillet. Cook for 2-3 minutes. Look for bubbles on the surface. The edges should look set. Carefully flip the pancakes and cook for 1-2 more minutes. Both sides should be golden brown. Adjust the heat if needed to avoid burning. Repeat this process until you finish all the batter. Stack the pancakes high on a plate. Top each stack with Greek yogurt or whipped cream for a creamy touch. You can also add extra sliced strawberries on top. This makes your pancakes look and taste even better! To make pancakes light and fluffy, avoid overmixing the batter. When you mix too much, pancakes can turn tough. Stir until just combined. You will have some lumps, and that's okay. Also, adjust cooking time and heat settings. Start with medium heat. If pancakes brown too quickly, lower the heat. Each stove is different, so watch closely. You can customize the sweetness of your pancakes. I like to use honey or maple syrup. Add more or less based on your taste. Remember, the strawberries add natural sweetness too. Taste the batter before cooking to find your perfect level. For a great presentation, stack pancakes neatly. Drizzle honey or maple syrup over the top. This adds a shiny look and extra flavor. Garnish with fresh strawberry slices around the plate. It makes your meal colorful and inviting. A beautiful plate makes the pancakes even more enjoyable! Pro Tips Use Fresh Strawberries: For the best flavor and texture, opt for fresh, ripe strawberries. They not only enhance the taste but also add vibrant color to your pancakes. Don’t Overmix the Batter: When combining the wet and dry ingredients, mix just until combined. A few lumps are okay; overmixing can lead to tough pancakes. Keep Them Warm: If you're making a large batch, keep the cooked pancakes warm in a low oven (about 200°F) while you finish cooking the rest. Customize Your Toppings: While Greek yogurt or whipped cream is delicious, feel free to experiment with toppings like nuts, seeds, or a sprinkle of cinnamon for added flavor. {{image_4}} You can switch strawberries for other fruits. Blueberries or bananas work great! They add a sweet twist. Try using ripe bananas for a natural sweetness. Blueberries give a juicy pop in every bite. Feel free to mix fruits too! If you want a dairy-free choice, use almond or coconut milk. They blend well with the other flavors. This keeps your pancakes light and tasty. Plus, it's a great option for those with lactose intolerance. Want more protein? Add nut butter to the batter! Almond or peanut butter gives a rich flavor and extra protein. Just a tablespoon will do the trick. It makes the pancakes even more filling and delicious. To keep your pancakes fresh, refrigerate them in an airtight container. They will stay good for up to 3 days. This helps maintain their nice texture and flavor. Want to store your pancakes for longer? You can freeze them! First, let the pancakes cool completely. Then, stack them with parchment paper between each one. Place the stack in a freezer-safe bag or container. They will keep well for up to 2 months. When you want to enjoy them, just take out as many as you need. To keep your pancakes fluffy when reheating, avoid using the microwave. Instead, try these methods: - Oven: Preheat the oven to 350°F (175°C). Place the pancakes on a baking sheet. Cover them with foil to keep them moist. Heat for about 10 minutes. - Skillet: Heat a non-stick skillet over low heat. Add a little butter or oil, then place the pancakes in the skillet. Flip them after about 1-2 minutes. This method keeps them soft and warm. - Toaster: You can also use a toaster for reheating. Just pop them in until warm. This method works well if you like a bit of crispiness on the outside. You can easily make these pancakes vegan. Replace the egg with a flax egg. To make a flax egg, mix 1 tablespoon of ground flaxseed with 2.5 tablespoons of water. Let it sit for 5 minutes to thicken. For the buttermilk, use plant-based milk. Almond or oat milk works well. You can also add a splash of vinegar for a buttermilk flavor. This keeps your pancakes tasty and fluffy! To make your pancakes fluffier, use fresh baking powder. Ensure it is not expired. Also, do not overmix the batter. Mixing too much can make pancakes dense. Let the batter rest for a few minutes. This helps the baking powder create air bubbles. Finally, cook them on medium heat. This ensures the pancakes rise nicely and cook evenly. These pancakes pair well with many tasty sides. Fresh fruit like bananas or blueberries adds flavor. Serve them with a side of Greek yogurt for extra creaminess. Maple syrup drizzled on top is a must. For drinks, a glass of orange juice or a smoothie works great. You can also enjoy them with a cup of coffee or tea. These pancakes offer a healthy twist with oats and protein. You learned how to grind oats, mix ingredients, and cook perfectly fluffy pancakes. Remember, you can customize with different fruits or sweeteners. Enjoy them topped with Greek yogurt or cream. Store leftovers in the fridge or freeze for later. Experiment with variations to find your favorite. A few simple steps yield delicious results that satisfy your cravings. Now, it’s time to make your own and share this tasty treat!
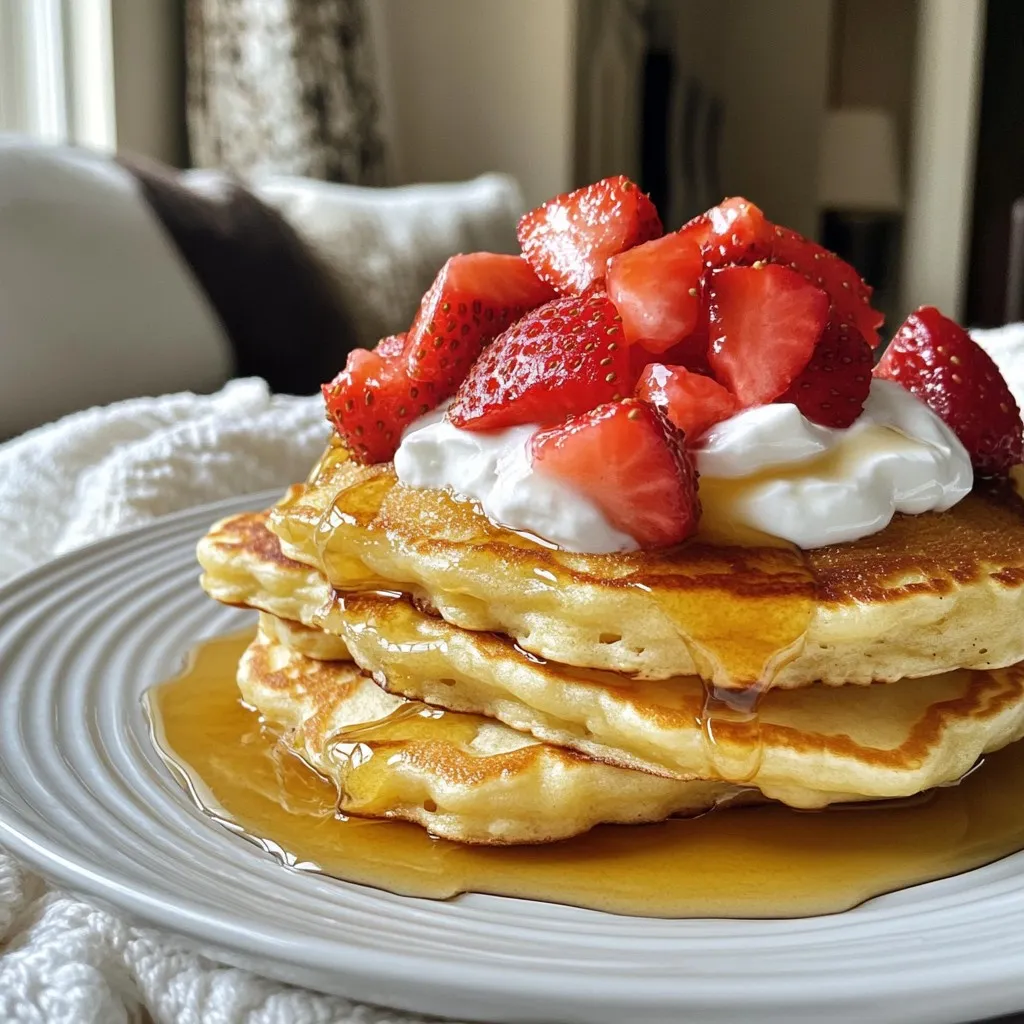
Strawberries and Cream Protein Pancakes Tasty Delight
Are you ready to elevate your breakfast game? My Strawberries and Cream Protein Pancakes are a tasty delight that packs a healthy punch. With simple
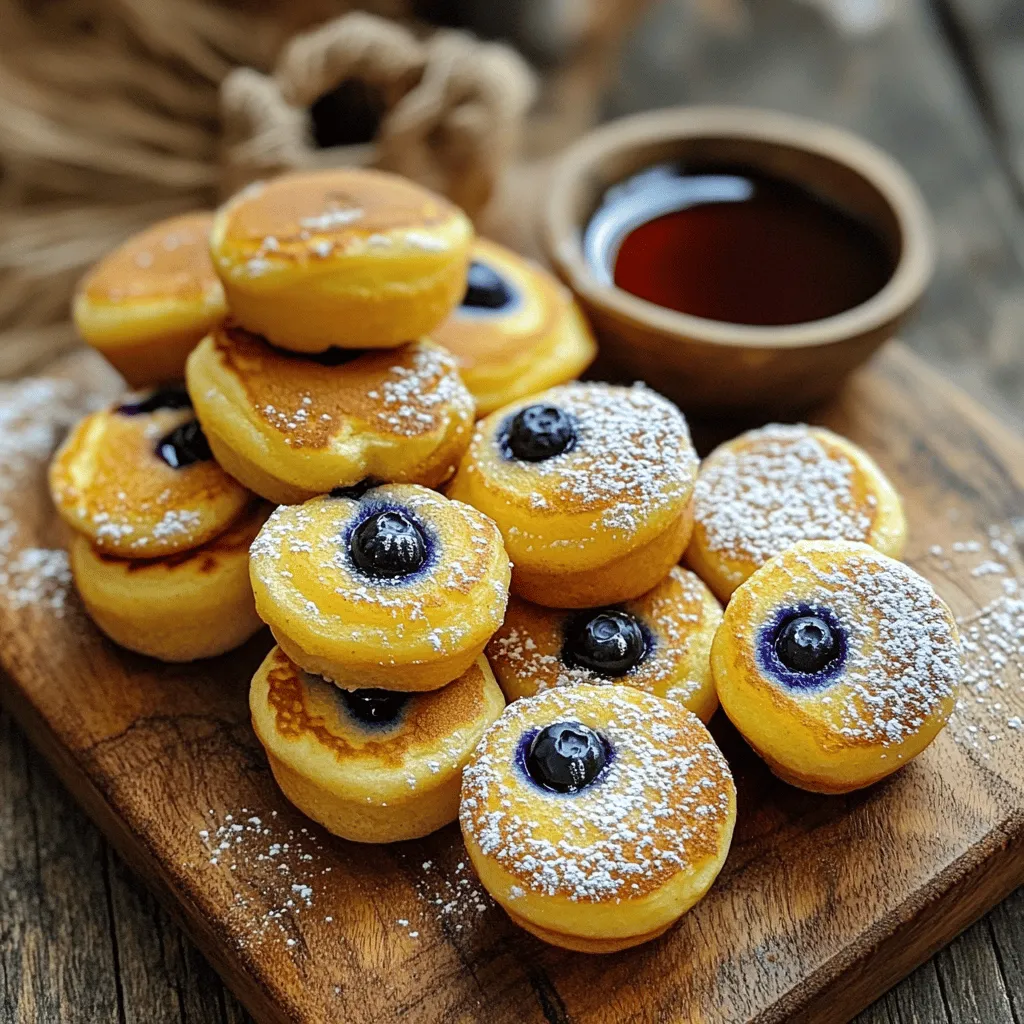
- Zucchini: Zucchini is low in calories and high in vitamins. It adds moisture to your muffins. Make sure to wash it well. Grate it finely before adding it to the mix. This helps it blend evenly. - Blueberries: Fresh blueberries taste great, but frozen ones work too. Frozen blueberries can save time and have a long shelf life. Just toss them in a little flour to avoid clumping in the batter. - Whole Wheat Flour and Oats: Whole wheat flour is packed with fiber and nutrients. It gives the muffins a hearty texture. Rolled oats add extra fiber and a nice bite. Look for whole grain options for the best health benefits. - Honey vs. Maple Syrup: Both honey and maple syrup are good options. Honey has more sweetness, while maple syrup gives a unique flavor. Choose what you like best. - Role of Eggs and Applesauce: Eggs help bind the ingredients together. They also add moisture. Applesauce is a great substitute if you want to cut down on fat. It keeps the muffins moist without extra calories. To start, preheat your oven to 350°F (175°C). This temperature is key for baking your muffins evenly. Prepare your muffin tin by lining it with paper liners or lightly greasing each cup. This way, your muffins will come out easily after baking. Next, it’s time to mix the wet ingredients. In a medium bowl, combine the finely grated zucchini, honey or maple syrup, eggs, applesauce, and vanilla extract. Stir this mixture well until everything blends together. Combining these ingredients thoroughly ensures your muffins are moist and flavorful. Now, let’s focus on the dry ingredients. In a larger bowl, whisk together the whole wheat flour, rolled oats, baking powder, baking soda, ground cinnamon, and salt. Whisking helps spread the dry ingredients evenly. This step is important for the muffins’ texture and taste. After that, we will combine the wet and dry mixtures. Gradually fold the dry mix into the wet ingredients. Use a spatula and stir gently until just combined. Be careful not to over-mix; this keeps your muffins light and fluffy. Now, let’s bake! Place the muffin tin in your preheated oven. Bake for 18-20 minutes. Proper oven temperature matters because it helps your muffins rise and cook evenly. To test for doneness, use a toothpick. Insert it into the center of one muffin. If it comes out clean, your muffins are ready. If not, bake for a few more minutes. Once baked, let the muffins cool in the tin for five minutes. Then, transfer them to a wire rack to cool completely. Enjoy your Healthy Blueberry Zucchini Muffins as a nutritious snack! Don't forget to check the [Full Recipe]. To keep muffins moist and fluffy, use ripe zucchini. Grate it finely and squeeze out excess water. This step adds moisture without making the batter too wet. Also, don’t over-mix your batter. Stir until ingredients are just combined. Over-mixing can lead to tough muffins. Common mistakes to avoid when baking include not measuring ingredients accurately. Use a kitchen scale for best results. Another mistake is skipping the oven preheating. Always preheat to the right temperature. This ensures even baking and proper rising. For dietary preferences, you can substitute whole wheat flour with almond or oat flour for gluten-free muffins. Use flax eggs instead of regular eggs for a vegan option. Just mix 1 tablespoon of ground flaxseed with 3 tablespoons of water. Let it sit for a few minutes until it thickens. To enhance flavor, add spices like nutmeg or cardamom. You can also toss in chopped nuts or seeds for more texture. Walnuts or pecans work well with blueberries. Try mixing in some lemon zest for a bright twist. These small changes can make your muffins even more delightful. For the full recipe, you can refer to the section above. {{image_4}} You can change up the flavor of your healthy blueberry zucchini muffins. Try using other berries like raspberries or strawberries. These fruits add a different taste and color to your muffins. You can also mix in diced apples or peaches for a fruity twist. Seasonal fruits work great too! If you want a savory muffin, consider adding cheese or herbs. Cheese like feta or cheddar can make your muffins rich and tasty. Fresh herbs like basil or thyme add a nice touch. These flavors create a unique muffin that is fun to eat. You can play with muffin size and shape for fun results. Mini muffins are perfect for snacks or lunchboxes. They bake quicker, usually in just 10-12 minutes. Standard muffins take a bit longer, around 18-20 minutes. Consider using different molds too. Heart-shaped or star-shaped molds can make your muffins more exciting. You can even use a loaf pan for a big slice. The shapes can bring joy to any meal or snack time. To keep your Healthy Blueberry Zucchini Muffins fresh, cool them properly. Let them sit in the muffin tin for about five minutes after baking. Then, move them to a wire rack to cool completely. This helps them stay moist. Once cooled, store your muffins in an airtight container. You can keep them in the fridge for up to a week. They will stay soft and tasty, perfect for snacking any time. If you want to save muffins for later, freezing is a great option. To freeze, wrap each muffin tightly in plastic wrap. Then, place them in a zip-top freezer bag. Remove as much air as possible to prevent freezer burn. Label the bag with the date. Muffins can last up to three months in the freezer. When you want to enjoy one, simply take it out. Thaw it in the fridge overnight or use the microwave for a quick thaw. Reheat in the oven at 350°F for about five minutes. This helps restore that fresh-baked taste. Yes, you can use frozen blueberries. Frozen berries do save time. They are also easy to store. However, they may make your muffins a bit wetter. Fresh blueberries will give you a firmer texture. If using frozen, do not thaw them before mixing. This keeps them from breaking apart. You can lower the sugar by using less honey or maple syrup. Try using mashed bananas or applesauce as a natural sweetener. These options add moisture and flavor. You can also use stevia or monk fruit sweetener. Just remember to adjust the amounts to match the sweetness level. To help your muffins rise, use fresh baking powder and soda. These ingredients must be active to work well. Make sure your oven is preheated to 350°F (175°C). Fill the muffin cups only two-thirds full. This gives space for the muffins to rise nicely. To make these muffins vegan, replace the eggs with flax eggs. Mix one tablespoon of flaxseed meal with three tablespoons of water. Let it sit for five minutes. You can also use plant-based yogurt instead of applesauce. This keeps the muffins moist and tasty. Zucchini is low in calories but high in vitamins. It helps with hydration and digestion. Blueberries are packed with antioxidants. They support brain health and may lower blood pressure. Together, they offer a tasty way to boost your nutrition. Yes, you can make these muffins ahead of time. Bake them and let them cool completely. Store them in an airtight container for up to a week. You can also freeze them for longer storage. Just wrap them well to avoid freezer burn. When ready to eat, thaw and enjoy! For the Full Recipe, check out the complete instructions above. We explored how to make healthy blueberry zucchini muffins using fresh ingredients. Zucchini and blueberries offer great nutrition while whole wheat flour and oats add health benefits. I shared steps for preparation, mixing, and baking. You learned tips to make your muffins fluffy and moist, plus ways to customize them. The right storage will keep your muffins fresh, and I answered common questions about substitutions and storage. Now, you have the tools to create delicious muffins that fit your needs. Enjoy baking!
Healthy Blueberry Zucchini Muffins for Nutritious Snacking
Snack time just got healthier! These Healthy Blueberry Zucchini Muffins pack nutrients and flavor in every bite. Zucchini adds moisture and vitamins, while blueberries bring
To make Feta Zucchini Muffins, you need a few key items: - 1 ½ cups grated zucchini (about 1 medium zucchini) - 1 cup all-purpose flour - ½ cup whole wheat flour - ½ cup crumbled feta cheese - 2 large eggs - ¾ cup plain yogurt (or buttermilk) - ¼ cup extra-virgin olive oil - 1 teaspoon baking powder - 1 teaspoon baking soda - ½ teaspoon salt - ¼ teaspoon freshly ground black pepper - ¼ teaspoon garlic powder - ¼ teaspoon dried oregano These ingredients work together to create a moist and flavorful muffin. To elevate the taste, consider these optional ingredients: - Chopped fresh herbs, like dill or parsley - A sprinkle of red pepper flakes for heat These add-ons can give your muffins a fresh twist. You can swap out some ingredients if needed: - Use Greek yogurt instead of plain yogurt for a thicker texture. - Substitute feta with goat cheese for a creamier taste. - Replace all-purpose flour with almond flour for a gluten-free option. These substitutions help you customize the muffins to your taste. For the full recipe, refer to the section above. Start by grating one medium zucchini. You will need about 1 ½ cups of it. Sprinkle a pinch of salt on the grated zucchini. Let it sit for about 10 minutes. This step helps draw out the moisture, which is key for the muffins. After resting, take the zucchini and wrap it in a clean towel. Squeeze it gently to get rid of excess water. This makes your muffins moist but not soggy. In a bowl, whisk together two large eggs, ¾ cup of plain yogurt, and ¼ cup of extra-virgin olive oil. Make sure the mix is smooth and creamy. This creamy base gives your muffins a rich flavor. After mixing, add in the drained zucchini and ½ cup of crumbled feta cheese. Fold these in gently. You don’t want to overmix at this stage; a few lumps are okay! In another bowl, combine 1 cup of all-purpose flour, ½ cup of whole wheat flour, 1 teaspoon of baking powder, 1 teaspoon of baking soda, ½ teaspoon of salt, and some spices. Use ¼ teaspoon of black pepper, garlic powder, and dried oregano. Whisk these dry ingredients well. Gradually add the dry mix to the wet ingredients. Stir gently until just combined. Again, lumps are fine; don’t overdo it! Preheat your oven to 350°F (175°C). Prepare a 12-cup muffin tin with liners or grease it lightly. Fill each muffin cup about ¾ full with batter. This allows room for the muffins to rise. Bake them for 20-25 minutes. You’ll know they are done when they are golden brown and a toothpick comes out clean. Let them cool in the tin for 5 minutes before moving them to a wire rack. This cooling step keeps them from falling apart. Enjoy your Feta Zucchini Muffins warm or at room temperature! To get the best texture in your muffins, follow these tips: - Squeeze out excess moisture from the grated zucchini. This step is key for light muffins. - Use a mix of all-purpose and whole wheat flour. This adds flavor and keeps them soft. - Avoid overmixing the batter. A few lumps are okay; it helps keep them tender. Want to enhance the taste? Try these ideas: - Add fresh herbs like dill or parsley. They bring a bright, fresh flavor. - Mix in chopped sun-dried tomatoes or olives for a Mediterranean twist. - Swap out feta for goat cheese for a creamier texture. Here are some errors to watch out for: - Don’t skip salting the zucchini. This helps draw out moisture and improves texture. - Avoid overbaking. Check your muffins a few minutes early to keep them moist. - Use fresh ingredients. Old baking powder or flour can lead to flat muffins. For the full recipe and detailed steps, check out the section titled Full Recipe. {{image_4}} You can change up the cheese in your muffins. Try goat cheese for a tangy kick. Or use sharp cheddar for a rich flavor. Each cheese brings a new taste to your dish. You might also mix cheeses for a complex flavor. Just keep the same amount of cheese as the recipe says. This keeps the texture right. Swap out all-purpose flour for whole grain flour. It adds more fiber and nutrients. If you need gluten-free muffins, choose a gluten-free flour blend. Almond flour or oat flour can work too. Just be aware that this might change the texture. You may need to adjust the liquid in the recipe slightly. Boost the nutrition by adding more veggies. Carrots or spinach blend well with zucchini. You can also try adding herbs like basil or thyme. These herbs make the muffins more fragrant and tasty. Fresh herbs can brighten the flavor. Just chop them finely and mix them in gently. For a full recipe, check the details above. To keep your Feta Zucchini Muffins fresh, store them in an airtight container. Place them at room temperature if you plan to eat them within two days. For longer freshness, put them in the fridge. Just make sure they cool completely before sealing them up. This helps prevent sogginess and keeps the texture nice. When you want to enjoy your muffins again, reheating is key. Preheat your oven to 350°F (175°C). Place the muffins on a baking sheet and warm them for about 5-10 minutes. This method keeps them soft and brings back their tasty flavor. You can also use a microwave for quick reheating. Just heat for 15-20 seconds. Be careful not to overdo it, or they might dry out. Freezing is a great option if you want to save your muffins for later. After they cool, wrap each muffin in plastic wrap. Then, put them in a freezer-safe bag or container. They can stay fresh for up to three months in the freezer. When you want one, take it out and let it thaw at room temperature. You can also reheat straight from the freezer. Just increase the oven time to 15-20 minutes. Enjoy your muffins any time! Yes, you can make Feta Zucchini Muffins ahead of time. Prepare them and store them in an airtight container. They stay fresh for up to three days at room temperature. For longer storage, freeze them. Just wrap each muffin tightly in plastic wrap before placing them in a freezer bag. When ready to eat, thaw them overnight in the fridge and warm them up in the oven. These muffins pair well with many foods. You can serve them with a dollop of Greek yogurt or a side salad. They also work great as a side dish for soup or stew. For breakfast, enjoy them with fresh fruit or a smoothie. Experiment with flavors to find your favorite combo! To check if your muffins are fully baked, insert a toothpick into the center of one muffin. If it comes out clean or with a few crumbs, they are done. The muffins should also be golden brown on top. If the toothpick comes out wet, bake them for a few more minutes. Yes, you can replace eggs in this recipe. Use a flaxseed egg or a chia seed egg. To make one flaxseed egg, mix one tablespoon of ground flaxseed with three tablespoons of water. Let it sit for about five minutes until it thickens. This acts as a great binder in muffins. For the complete list of ingredients and detailed instructions, check out the Full Recipe. Enjoy making these tasty muffins! You learned how to make tasty Feta Zucchini Muffins with this guide. We covered essential ingredients, step-by-step baking, and tips for perfect texture. You also discovered fun variations and storage ideas to keep muffins fresh. Remember, adding your twist and avoiding common mistakes can make a big difference. Enjoy baking these muffins, and share them with friends. They will love them, and you'll feel proud of your work. Happy baking!
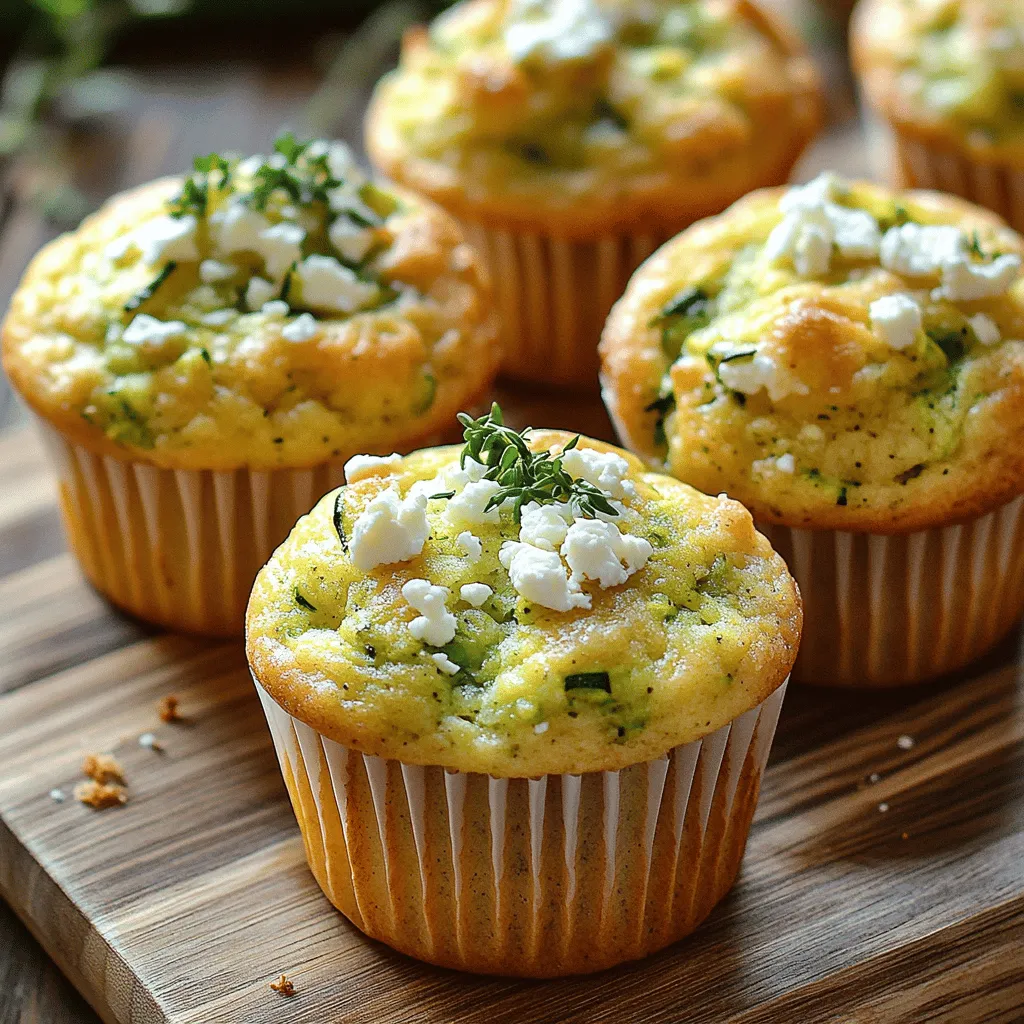
Feta Zucchini Muffins Flavorful and Simple Recipe
Are you ready to bake something tasty and easy? Feta Zucchini Muffins are the perfect snack! Packed with flavor and simple to make, these muffins
To make Sausage Egg Breakfast Rolls, you will need the following ingredients: - 1 lb breakfast sausage, casings removed - 4 large eggs - 1/4 cup milk - 1/2 cup shredded cheddar cheese - 1/4 cup diced bell peppers (mix of red and green for color) - 1/4 cup finely diced onions - 1 teaspoon garlic powder - Salt and pepper to taste - 1 package refrigerated crescent roll dough - Fresh parsley, chopped (for garnish, optional) Each ingredient brings its own flavor to the rolls. The breakfast sausage gives a hearty taste. Eggs add protein and a soft texture. Milk makes the eggs fluffy. Cheddar cheese adds richness. Bell peppers and onions offer freshness and crunch. Garlic powder enhances the aroma. Salt and pepper balance the flavors. The crescent roll dough wraps everything up in a golden shell. If you want, sprinkle fresh parsley on top for a pop of color. {{ingredient_image_2}} To bake the rolls perfectly, preheat your oven to 375°F (190°C). Preheating is key. It helps the rolls cook evenly. This step ensures that you get that golden brown color and flaky texture. In a skillet over medium heat, add your breakfast sausage. Crumble it into small pieces. Cook for about 5-7 minutes until it is browned. Stir it often. Once it is fully cooked, carefully drain any excess grease. This keeps the rolls from becoming soggy. Grab a medium bowl and whisk together four large eggs. Add 1/4 cup of milk, garlic powder, salt, and pepper. Whisk until the mixture is smooth and slightly frothy. This helps the eggs blend well. Pour the egg mixture into the skillet with the cooked sausage. Add diced bell peppers and onions. Cook over medium heat, stirring gently. Scramble the eggs for about 3-4 minutes until they are soft and just set. Remove from heat and fold in 1/2 cup of shredded cheddar cheese until it melts. Unroll the crescent roll dough on a clean surface. Separate the dough into individual triangles. This makes it easy to fill and roll. At the wide end of each triangle, place a generous tablespoon of the sausage and egg mixture. Starting from the wide end, roll each triangle up toward the pointed tip. Tuck the pointed tip underneath to securely encase the filling. Place the filled rolls on a greased baking sheet. Bake in your preheated oven for 12-15 minutes. Look for a golden brown color and a flaky texture. Let them cool for a couple of minutes before serving. If you like, garnish with freshly chopped parsley for a nice touch. To make the filling shine, balance flavors with seasoning. Start with salt and pepper. Garlic powder adds depth. The sausage brings savory notes, while the eggs add creaminess. For texture, consider adding diced bell peppers and onions. They bring crunch and freshness. You can also mix in some cooked spinach or mushrooms for added flavor. For the best flaky rolls, use cold crescent dough. Keep it chilled until ready to bake. When you unroll it, handle it gently to avoid tearing. Preheat your oven to 375°F (190°C) for even cooking. Bake until the rolls are golden brown, around 12 to 15 minutes. This gives you that perfect crispy texture. Serve your breakfast rolls with fresh fruit like berries or sliced oranges. These add a refreshing touch. You might also enjoy them with a side of yogurt. For drinks, coffee or fresh juice pairs nicely. Try a chilled glass of milk for a classic option. Pro Tips Use Fresh Ingredients: Fresh bell peppers and onions enhance the flavor of your rolls. Opt for vibrant, in-season vegetables for the best taste. Don’t Overcook the Eggs: For perfectly creamy eggs, remove them from the heat while they are still slightly undercooked. They will continue to cook in the residual heat. Experiment with Cheeses: While cheddar is delicious, feel free to try other cheeses like pepper jack for a spicy kick or mozzarella for a milder flavor. Make Ahead: Prepare the sausage and egg mixture the night before and store it in the fridge. Just fill and bake the rolls in the morning for a quick breakfast. {{image_4}} You can easily switch up the meat in these rolls. Try using bacon or ham instead of sausage. Each choice brings a new taste. If you want a lighter option, go for turkey sausage. For those who want a dairy-free version, you can change the milk and cheese. Use almond milk or oat milk. Nutritional yeast can replace cheese for a cheesy flavor without dairy. Adding more veggies is a great way to boost nutrition. Spinach or kale can add a fresh touch. Try mushrooms for an earthy flavor. Carrots add sweetness and crunch. Seasonal veggies can also change the taste. In spring, use asparagus. In fall, add roasted butternut squash for a warm flavor. Enhancing flavors can take your rolls to the next level. Add spices like paprika or cayenne for heat. Fresh herbs like chives or cilantro can brighten the dish. Cheese options also vary the taste. Use pepper jack for a spicy kick. Goat cheese adds creaminess and tang. Experiment with your favorites to find the best mix! To keep your sausage egg breakfast rolls fresh, store them in the fridge. Wrap each roll in plastic wrap or place them in an airtight container. This method stops them from drying out. You can keep them in the fridge for up to three days. After that, they may lose their flavor and texture. When you want to warm up your rolls, avoid losing their crispy texture. The oven is a great choice for reheating. Set it to 350°F (175°C) and bake for about 10 minutes. This keeps them nice and flaky. If you're in a hurry, you can use the microwave. Heat them for about 30 seconds. But remember, the microwave may make them a bit soft. To freeze your cooked rolls, let them cool completely first. Then, wrap each roll tightly in plastic wrap. Place them in a freezer bag or container. This way, they can stay fresh for up to two months. When you’re ready to eat them, take them out to thaw overnight in the fridge. To reheat, bake them in the oven at 350°F (175°C) for about 15 minutes. You’ll get that fresh-out-of-the-oven taste! If you don't have crescent roll dough, you can use other options. Here are some alternatives: - Puff pastry: This gives a flaky texture. - Biscuit dough: It adds a nice, soft bite. - Pizza dough: You get a chewier roll. - Homemade dough: Mix flour, butter, and water for a fresh taste. Yes, you can prepare these rolls ahead of time. Here’s how: - Cook the sausage and egg mixture, then cool it. - Roll the dough and fill it with the mixture. - Place the rolls on a baking sheet, cover, and refrigerate. - When ready, bake them straight from the fridge. Just add a few extra minutes to the bake time. You can tell if the sausage is done by checking a few things: - Color: It should be browned, not pink. - Texture: It will crumble and feel firm. - Temperature: Use a meat thermometer. The inside should read 160°F (71°C). Dipping sauces can add great flavor. Here are some tasty options: - Ketchup: A classic choice for its sweetness. - Hot sauce: For those who like extra heat. - Honey mustard: Sweet and tangy for a fun twist. - Ranch dressing: Creamy and cool, it complements the rolls well. This recipe combines tasty ingredients to create a vibrant breakfast roll. You learned about cooking sausage, making the egg mix, and using crescent dough. Remember to customize your rolls with different veggies and meats to suit your taste. Store leftovers properly so you can enjoy them later. Breakfast rolls bring fun to your morning routine, making any day feel special. Experiment with flavors and find what you love most. Happy cooking!
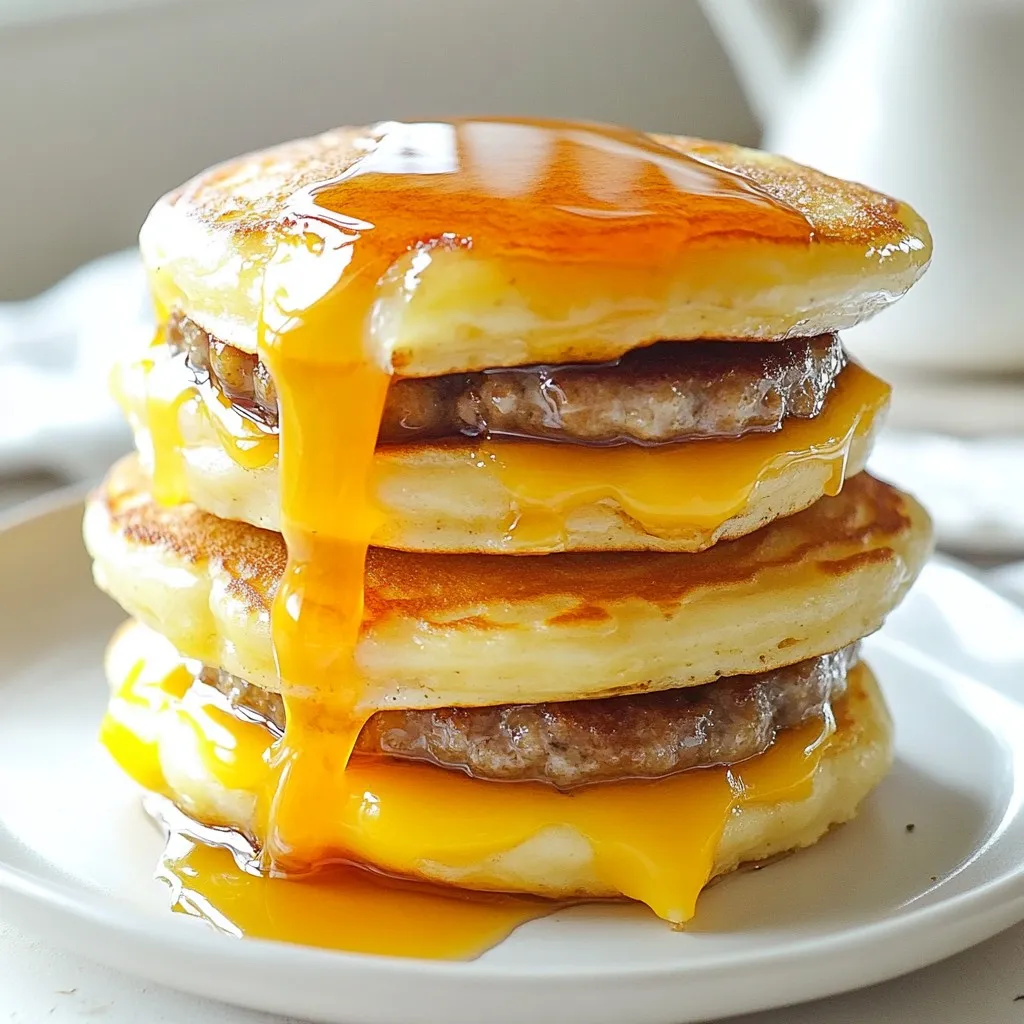
Sausage Egg Breakfast Rolls Tasty Morning Treat
Start your morning right with these delicious Sausage Egg Breakfast Rolls! Packed with savory sausage, fluffy eggs, and melted cheese, they are the ultimate breakfast
To make these easy zucchini carrot pancakes, you need the following: - 1 medium zucchini, finely grated - 1 medium carrot, finely grated - 1 cup all-purpose flour - 1 teaspoon baking powder - 1/2 teaspoon baking soda - 1/2 teaspoon salt - 1 large egg - 3/4 cup milk (or choice of plant-based milk) - 1 tablespoon honey or maple syrup - 1/2 teaspoon garlic powder (optional) - 2 tablespoons olive oil (for frying) - Fresh herbs (such as parsley or chives, for garnish) Each ingredient plays a key role. The zucchini and carrot add moisture and flavor. I suggest using medium-sized veggies for balance. If you want a healthier twist, try whole wheat flour instead of all-purpose. For a gluten-free option, use almond or gluten-free flour. You can also adjust the milk type based on your diet. Garnishes make your dish pop! Fresh herbs like parsley or chives add a nice touch. You might drizzle extra honey or maple syrup on top for sweetness. A dollop of yogurt works well too, giving creaminess. If you want crunch, sprinkle sesame seeds on top. These small changes can elevate your pancakes from simple to stunning. For the full recipe, check out the details below. Start by taking a medium zucchini and a medium carrot. Grate them finely using a box grater. This can also be done with a food processor for speed. After grating, place the veggies in a clean dish towel. Twist the towel tightly and squeeze out as much moisture as you can. This step is key to keeping the pancakes from being soggy. The drier the veggies, the better your pancakes will turn out. In a large mixing bowl, combine the grated zucchini and carrot with 1 cup of all-purpose flour, 1 teaspoon of baking powder, 1/2 teaspoon of baking soda, and 1/2 teaspoon of salt. If you want a hint of flavor, add 1/2 teaspoon of garlic powder. In another bowl, whisk together 1 large egg, 3/4 cup of milk (or your choice of plant-based milk), and 1 tablespoon of honey or maple syrup. Mix until it is smooth. Then, pour the wet mixture into the dry ingredients. Fold it gently until just combined. Don’t worry if there are a few lumps; this is normal. Heat a non-stick skillet over medium heat. Add enough olive oil to lightly coat the bottom of the pan. For each pancake, pour about 1/4 cup of batter onto the skillet. Cook for 3-4 minutes, waiting for bubbles to form on the surface. When the underside is golden brown, carefully flip the pancakes. Cook for another 2-3 minutes until both sides are golden and cooked through. Once done, transfer the pancakes to a plate. Keep them warm while you cook the rest of the batter. Serve warm, topped with fresh herbs, and drizzle with more honey or maple syrup if desired. For the full recipe, check out the detailed instructions above. To avoid soggy pancakes, moisture control is key. After grating the zucchini and carrot, squeeze them in a clean dish towel. This step removes excess water. If you skip this, your pancakes may turn out wet and flat. Trust me, you want crispy edges and fluffy centers. Cooking at the right heat makes a big difference. Use medium heat for your skillet. If it’s too hot, the outside burns, while the inside stays raw. If it’s too low, the pancakes may take too long and turn dry. You want a nice golden color on both sides. These pancakes are great on their own but even better with toppings. Try serving them with yogurt or a dollop of sour cream. Fresh herbs like parsley or chives add a nice touch. For sweetness, drizzle honey or maple syrup over the top. You can even add sliced avocado for a creamy contrast. Check out the Full Recipe for more ideas and details! {{image_4}} You can easily make these pancakes gluten-free. Just swap the all-purpose flour with gluten-free flour blend. Look for a mix that has xanthan gum; it helps hold the pancakes together. This makes a light and tasty pancake that everyone can enjoy. Herbs and spices can add a burst of flavor. Try adding fresh herbs like basil or thyme for a garden touch. You can also use spices like cumin or paprika for a warm kick. A pinch of black pepper can bring out the taste of the zucchini and carrot. If you want to cut back on sugar, there are good options. You can replace honey or maple syrup with mashed bananas or unsweetened applesauce. These options add natural sweetness and moisture. They keep the pancakes soft and delicious without added sugar. For a full recipe, check out the Savory Zucchini and Carrot Pancakes 🥕🥞. After cooking, let the pancakes cool completely. Place them in an airtight container. You can stack them with parchment paper in between. This prevents sticking. Store the container in the fridge. Leftover pancakes can last up to three days. To reheat, you can use a skillet or microwave. For a skillet, heat on low for about two minutes on each side. This keeps them crispy. If using a microwave, place a damp paper towel over the pancakes. Heat for 30 seconds to one minute. This method keeps them moist. To freeze, first cool the pancakes. Then, place them in a single layer on a baking sheet. Freeze until firm, around one hour. Once frozen, transfer them to a freezer bag. Try to remove as much air as possible. The pancakes can last up to three months in the freezer. When ready to eat, simply reheat from frozen. You can use the skillet or microwave methods mentioned earlier. Enjoy your pancakes whenever you want! Check out the Full Recipe for details. Yes, you can use whole wheat flour in this recipe. Whole wheat adds a nutty flavor. It also boosts fiber content. If you use whole wheat flour, the pancakes may be denser. Start with a 1:1 ratio, but you may need to add a bit more liquid. If you need an egg substitute, there are several options. You can use 1/4 cup of unsweetened applesauce. Another choice is 1/4 cup of mashed banana. Both will help bind the ingredients well. You can also use a flax egg. To make this, mix 1 tablespoon of ground flaxseed with 2.5 tablespoons of water. Let it sit for a few minutes to thicken. To make these pancakes vegan, use plant-based milk and an egg substitute. Almond, soy, or oat milk all work well. For the egg, use one of the substitutes I mentioned above. This way, you can enjoy these tasty pancakes without eggs or dairy. You now know how to make delicious pancakes with fresh ingredients and simple steps. We've covered the best ingredients, cooking methods, and tips to make your pancakes perfect every time. Remember, you can try variations like gluten-free options or adding spices for extra flavor. Enjoy your pancakes warm or store leftovers for later. With these insights, you can impress anyone at breakfast. Keep experimenting, and you’ll find your own favorite twist on this classic dish!
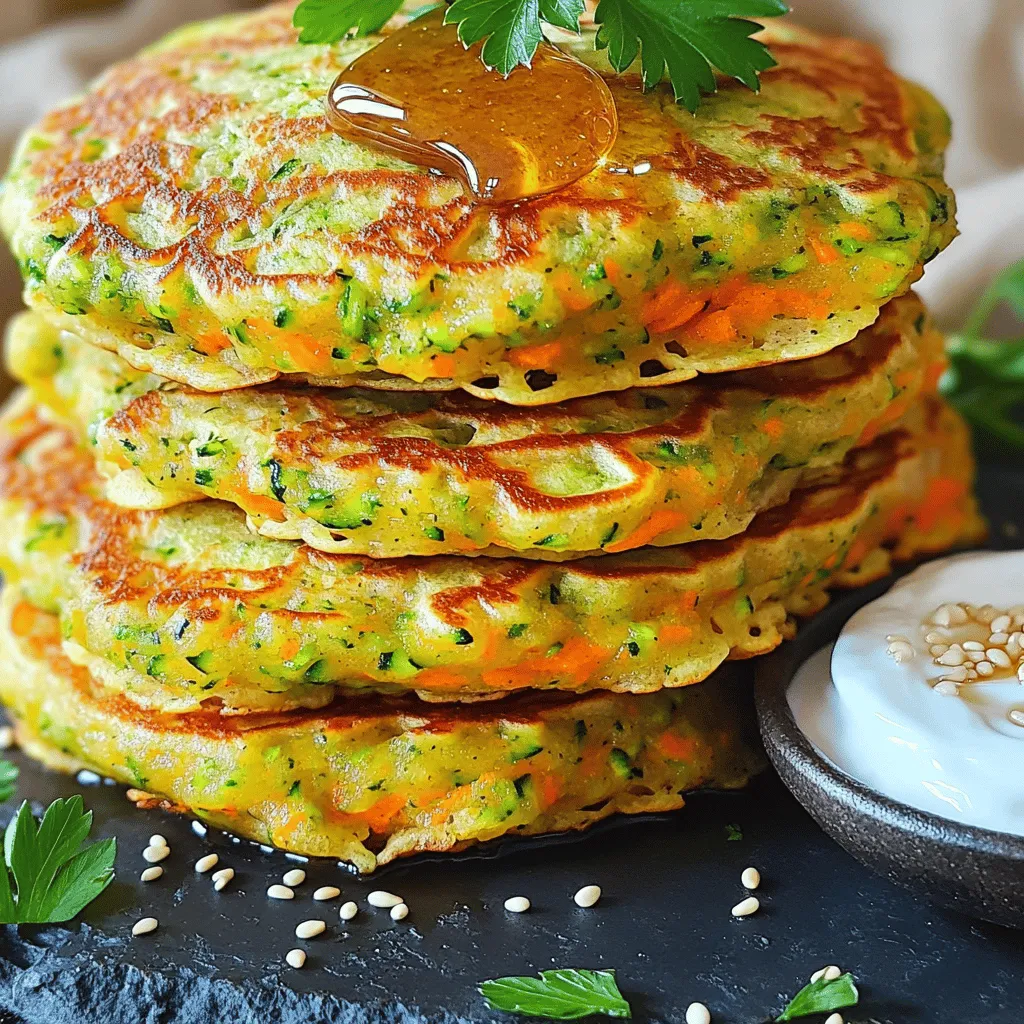
Easy Zucchini Carrot Pancakes Quick and Flavorful Dish
Looking for a fun way to spice up breakfast? These Easy Zucchini Carrot Pancakes are your answer! Bursting with flavor, they blend veggies into a