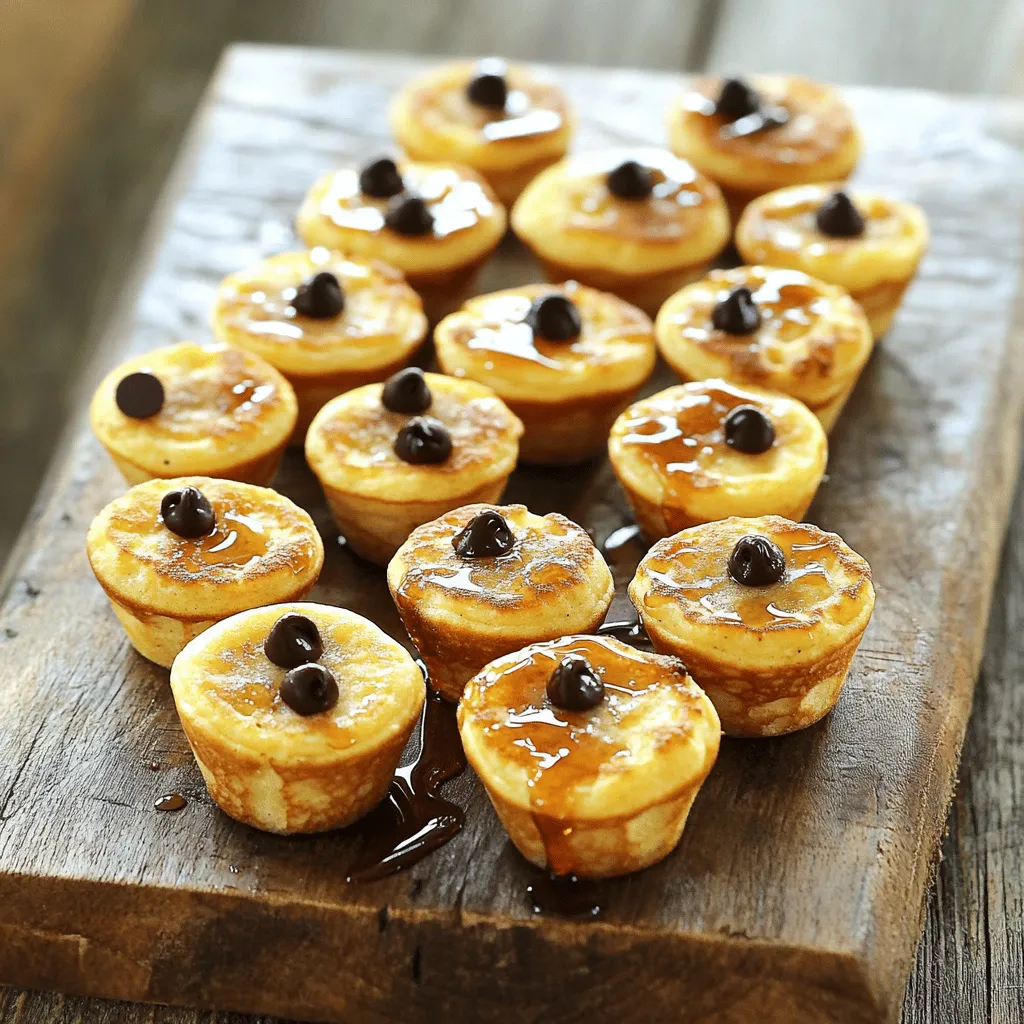
Breakfast

To make these tasty McGriddle Bites, gather these simple items: - 1 cup pancake mix - 1/2 cup milk - 1 large egg - 1/4 cup pure maple syrup - 1/2 teaspoon pure vanilla extract - 1/2 cup cooked sausage, crumbled - 1/4 cup shredded sharp cheddar cheese - Cooking spray for greasing - Optional: Freshly sliced strawberries or banana for serving You can swap some ingredients if you need to. Here are a few ideas: - Use almond milk instead of regular milk for a dairy-free option. - Try a plant-based egg substitute to replace the egg for vegan bites. - If you don’t have sausage, crumbled bacon or diced ham works great too. - For a different flavor, substitute cheddar cheese with pepper jack or mozzarella. Choosing fresh ingredients makes a big difference. Here’s how to pick the best items: - Pancake Mix: Check the expiration date. It should be fresh for the best rise. - Milk: Smell it before buying. It should have no sour odor. - Eggs: Look for clean, uncracked shells. They should feel heavy for their size. - Syrup: Go for pure maple syrup. It has more flavor than the fake stuff. - Cheese: Choose cheese that feels firm and smells fresh. Avoid any that feel sticky or smell off. These tips will help you create McGriddle Bites that taste amazing! For the full recipe, see above. Making McGriddle Bites is easy and fun. You mix simple ingredients, cook them in small bites, and serve with syrup. This recipe takes about 20 minutes. You can make enough for four people. 1. Mix the batter: In a medium bowl, combine pancake mix, milk, egg, maple syrup, and vanilla extract. Whisk it well until smooth. 2. Add fillings: Gently fold in crumbled sausage and shredded cheddar cheese. This makes each bite tasty and filling. 3. Heat the skillet: Preheat a non-stick skillet or griddle on medium heat. Lightly spray the surface with cooking spray to avoid sticking. 4. Scoop the batter: Use a tablespoon to drop small amounts of batter onto the skillet. Leave space between each one. 5. Cook the bites: Let them cook for 2-3 minutes. Look for small bubbles forming on top. This shows they are ready to flip. 6. Flip and finish: Carefully turn each pancake over. Cook for 2 more minutes until they are golden brown on both sides. 7. Keep warm: Once cooked, place the McGriddle Bites on a plate covered with a clean kitchen towel. This keeps them warm while you finish the rest. 8. Serve: Drizzle with extra maple syrup. For a fruity twist, top with fresh strawberries or banana slices. - Medium mixing bowl - Whisk - Non-stick skillet or griddle - Cooking spray - Tablespoon for scooping - Clean kitchen towel for covering For the full recipe, check out the detailed steps above. Happy cooking! To make your McGriddle Bites fluffy, use fresh ingredients. Mix the pancake mix with milk and egg until smooth. Do not over-mix; a few lumps are fine. Fold in the sausage and cheese gently. This keeps the batter light. Use a hot skillet, but not too hot. A medium heat works best for even cooking. A few mistakes can ruin your McGriddle Bites. First, avoid using cold ingredients. Always use room temperature milk and eggs. This helps the batter blend well. Second, don’t crowd the skillet. Leave space between each bite to cook evenly. Lastly, resist the urge to flip too soon. Wait for bubbles to form before flipping. Serve McGriddle Bites warm with extra maple syrup. They pair well with fresh fruit. Sliced strawberries or bananas add a nice touch. You can also serve them with yogurt for a creamy contrast. For a savory option, try a side of crispy bacon or scrambled eggs. These ideas make breakfast fun and tasty. For the full recipe, check out the [Full Recipe]. {{image_4}} You can add a sweet twist to your McGriddle Bites. Consider using fresh fruit. Strawberries or bananas work great. They add natural sweetness and flavor. To do this, simply fold in chopped fruit into the batter. You can also top your bites with more fruit after cooking. A drizzle of honey or extra maple syrup is a nice touch. If you prefer a savory bite, you have many options. Try adding cooked bacon or ham for extra flavor. You can also include diced bell peppers or green onions. These ingredients boost taste and add color. For a cheesy kick, mix in your favorite cheese. Think about pepper jack for a bit of heat. These savory twists make each bite unique and fun. For a vegan version, swap the egg with flaxseed meal. Mix one tablespoon of flaxseed with three tablespoons of water. Let it sit until it thickens. Use almond milk or soy milk instead of regular milk. For gluten-free bites, select a gluten-free pancake mix. These small changes keep the taste delicious while meeting dietary needs. Check out the Full Recipe for all the tasty details! To keep your McGriddle Bites fresh, store them in an airtight container. Let them cool first. You can keep them in the fridge for up to three days. If you want to enjoy them later, wrap them tightly in plastic wrap. This keeps out air and moisture. When you're ready to eat your McGriddle Bites, you can reheat them easily. Use a microwave for quick heat. Place them on a microwave-safe plate. Heat for about 30 seconds. Check if they are warm enough. If not, heat in 15-second bursts. You can also use a skillet to reheat. Just warm it over low heat for a few minutes, flipping them once. Freezing McGriddle Bites is a great way to make meals ahead of time. Let them cool completely, then place them in a single layer on a baking sheet. Freeze for about an hour. Once frozen, transfer them to a freezer bag. They can last up to two months in the freezer. To enjoy, just thaw them in the fridge overnight before reheating. This method keeps them tasty and ready for breakfast. McGriddle Bites are small pancakes with sweet and savory flavors. They mix maple syrup, sausage, and cheese in a bite-sized form. You can enjoy them for breakfast or as a snack. They are easy to make at home using the Full Recipe. McGriddle Bites are thicker and more filling than regular pancakes. They have a unique blend of sweet and savory in every bite. Regular pancakes are usually just sweet, while McGriddle Bites add fun flavors. The addition of sausage and cheese makes them stand out. Absolutely! You can add your favorite ingredients. Try using different meats like bacon or ham. You can also switch the cheese for a milder or stronger flavor. Fresh fruits like blueberries or bananas can add sweetness, too. Make them your own! Many fast food places offer McGriddle Bites as part of their breakfast menu. They are often found at chains known for breakfast items. Check local menus or apps to see if they sell them near you. Promotions can vary by location and time. Many restaurants offer deals through apps or loyalty programs. It’s best to check their websites or social media for current offers. You might find special pricing or combo deals on McGriddle Bites. McGriddle Bites are fun and easy to make at home. We explored key ingredients, cooking steps, and ways to store them. You learned about substitutions and how to achieve the best texture. Variations let you customize flavors. Remember, fresh ingredients make a big difference. With these tips, you can create a delicious treat anytime. Enjoy your cooking, and impress others with your tasty McGriddle Bites!
McGriddle Bites Flavorful and Easy Breakfast Treat
Looking for a tasty and fun breakfast? McGriddle Bites are your perfect solution! These little bites pack big flavor and are simple to make. In
To make a tasty Apple Crisp Cold Brew Latte, you need a few key items: - 1 cup cold brew coffee - ½ cup almond milk (or any milk of choice) - 1 medium apple, peeled and diced into small cubes - 1 tablespoon brown sugar - ½ teaspoon ground cinnamon - ¼ teaspoon ground nutmeg - 1 tablespoon pure maple syrup - 1 teaspoon vanilla extract - ¼ cup granola (for a crunchy topping) - Whipped cream (optional, for an indulgent garnish) - Extra ground cinnamon (for a finishing touch) These ingredients work together to create a cozy drink that brings fall flavors to life. The cold brew coffee provides a smooth base, while the spices and apples add warmth and sweetness. If you prefer different milk, you have great choices! You can use: - Oat milk - Coconut milk - Soy milk - Whole milk Each option changes the flavor and texture a bit. Experiment with what you like best. Oat milk gives a creamy feel, while coconut milk adds a nice hint of sweetness. Sometimes, you may not have all the fresh ingredients. Here are some quick swaps: - Use canned apple pie filling instead of fresh apples. It’s sweet and easy. - Swap brown sugar for honey or agave syrup for less refined sweetness. - If you don’t have maple syrup, try using simple syrup made from sugar and water. These substitutions keep the spirit of the recipe while making it easier to prepare. Enjoy the Apple Crisp Cold Brew Latte with these flexible options! For the full recipe, check the section above. Start by peeling and dicing your apple into small cubes. This helps them cook evenly. In a small saucepan, mix the diced apple with brown sugar, ground cinnamon, and ground nutmeg. Heat this over medium heat. Stir it for about 5-7 minutes. You want the apples to soften and smell great. Once they do, take the pan off the heat. Let it cool a bit before using. Grab a glass or mixing jar. Pour in 1 cup of cold brew coffee. Add in ½ cup of almond milk, or any milk you like. Next, mix in the maple syrup and vanilla extract. Use a spoon or whisk to stir it all together. You want it to be creamy and well combined. Now, let’s put it all together! Take a tall glass and start by spooning the warm apple mixture into the bottom. This will give your drink a nice base. Carefully pour the cold brew latte mixture over the apples. Watch how the layers form! If you want to make it even better, add a dollop of whipped cream on top. Sprinkle some granola over the cream for a nice crunch. Finish with a light dusting of extra ground cinnamon. This adds lovely aroma and flavor. Take a moment to admire your drink before you enjoy it. The warm apple spice and chilled coffee create a perfect fall treat. For the full recipe, check out the section above. To get the best flavor from your Apple Crisp Cold Brew Latte, start with fresh ingredients. Use ripe apples for a sweet, juicy taste. I recommend Honeycrisp or Fuji apples, as they add great sweetness and crunch. The spices in the apple mixture, like cinnamon and nutmeg, create warmth. These spices balance the cold brew coffee's smoothness. Mixing in maple syrup enhances the sweetness. It ties together all the flavors. Always taste your mixture and adjust the sweetness to your liking. Choosing the right coffee blend is key. A medium roast works best for this drink. It offers a balanced flavor that won’t overpower the apple mixture. Look for blends with chocolate or nutty notes. These flavors pair well with the spices. Cold brew coffee should be smooth and not too bitter. If you prefer a stronger coffee taste, go for a dark roast. Just remember to brew it strong to keep the flavor bold. If you have leftover apple mixture, store it in an airtight container. You can keep it in the fridge for up to three days. This mixture makes a great topping for pancakes or yogurt too! Just reheat it gently on the stovetop before using. This way, you can create a quick apple dessert or breakfast treat. Enjoy the warm apple flavor anytime! For the full recipe, check out the Apple Crisp Cold Brew Latte. {{image_4}} You can easily make this drink vegan. Just swap dairy milk for almond milk or oat milk. Both options keep it creamy and tasty. Use maple syrup to sweeten. It adds a rich flavor without using honey. For the whipped cream, choose a coconut-based one. It will top your latte perfectly. Want to boost the flavor? Try adding a pinch of ginger or cloves. These spices give a warm touch. You can also switch the apple for pears. They add a nice twist to the drink. If you love caramel, drizzle some on top for extra sweetness. It makes the latte feel more like a treat. For a dessert-style latte, add a scoop of vanilla ice cream. Place it on top of the warm apple mixture. Pour the cold brew latte over the ice cream. It will melt slightly and mix in. This adds a rich and creamy texture. You can top it with more granola and cinnamon. This will create a fun and delicious dessert experience. To keep the apple mixture fresh, place it in an airtight container. Store it in the fridge. It can last for about 3 to 4 days. If you notice any browning, add a bit of lemon juice. This will help keep it vibrant. When you are ready to use it, just reheat it in a pan. Stir it gently to warm it up without cooking it further. Cold brew coffee has a nice shelf life. You can store it in the fridge for up to two weeks. Keep it in a sealed container to keep it fresh. If you notice any strange smells or tastes, it’s best to toss it. To save time, make a big batch. This way, you have cold brew ready for your Apple Crisp Cold Brew Latte. To enjoy your Apple Crisp Cold Brew Latte on busy mornings, prep ahead. Make the apple mixture and cold brew coffee a day in advance. Store them in separate containers. When you're ready, layer them together for a quick treat. You can also prepare the latte base and store it in the fridge. This makes morning assembly fast and easy. For the freshest taste, keep the granola and whipped cream separate until serving. This will keep your drink crunchy and delightful. For the complete recipe, check out the Full Recipe section! Yes, you can use fresh apples. However, cooked apples bring more flavor. Cooking softens the apples and mixes their juices with spices. If you choose fresh apples, try to slice them thinly. This method helps the flavors blend. The result is still delicious, but it won't have the same warm taste. Many cafes now serve this tasty drink. Look for local coffee shops that focus on seasonal flavors. Chains like Starbucks often offer seasonal lattes too. Check their fall menus for the Apple Crisp Cold Brew Latte. You can also ask your favorite cafe if they can make it. Most baristas love to try new ideas. To make a low-calorie version, swap some ingredients. Use unsweetened almond milk or oat milk. This change cuts calories without losing flavor. You can also skip the whipped cream. If you use less brown sugar, the drink will still taste great. Lastly, consider using a sugar substitute like stevia. This method keeps the sweetness while lowering the calories. For the full recipe, check the earlier section. You can now create an amazing Apple Crisp Cold Brew Latte at home. We discussed the key ingredients, milk options, and simple substitutions. I provided step-by-step instructions to help you layer your drink perfectly. Tips for flavor and storage ensure your latte stays fresh. I also shared fun variations, like vegan options and a dessert twist. Enjoy crafting this drink to share or savor on your own. With a bit of creativity, you can make it truly yours. Happy brewing!
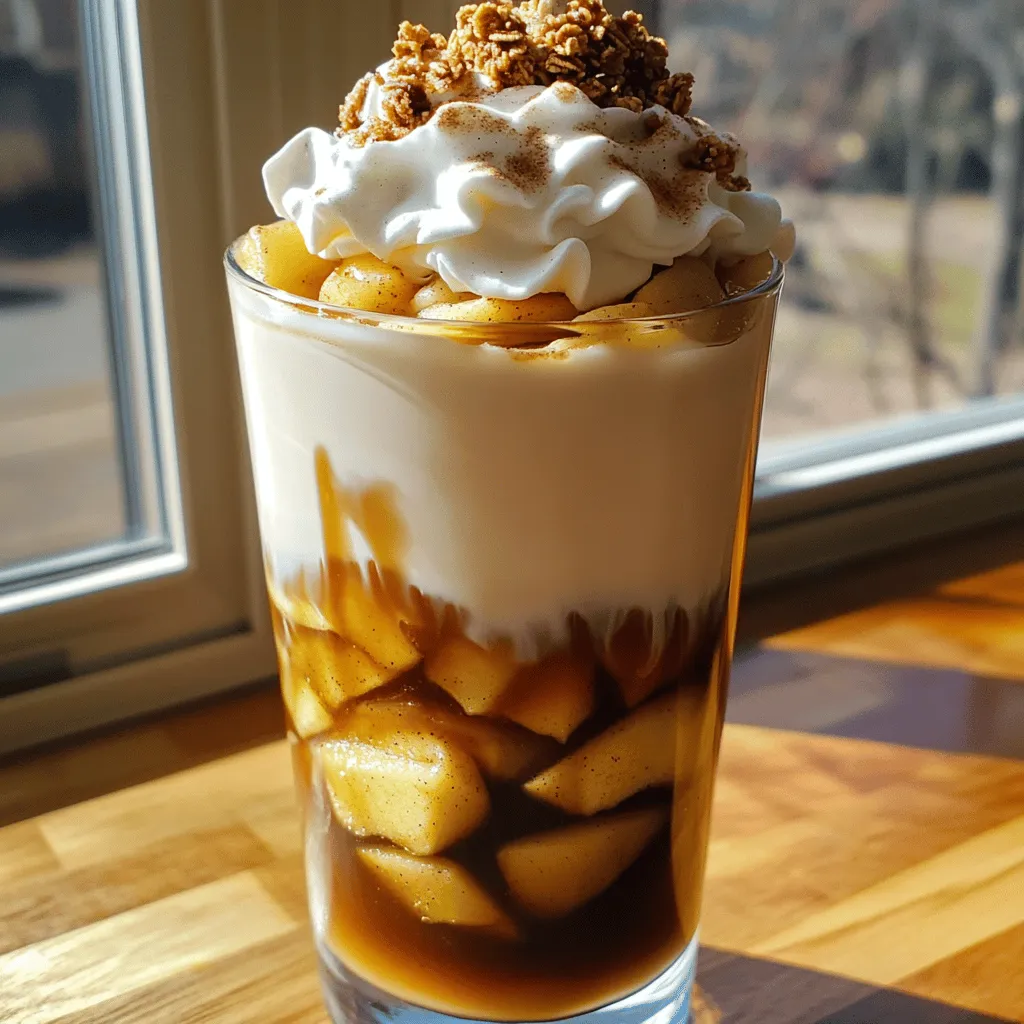
Apple Crisp Cold Brew Latte Flavorful Fall Delight
Dive into the cozy flavors of fall with my Apple Crisp Cold Brew Latte! This delightful drink combines the rich taste of cold brew coffee
To make a light and tasty Fresh Lemon-Blueberry Dutch Baby, you will need: - 3 large eggs - 1/2 cup all-purpose flour - 1/2 cup whole milk - 1 tablespoon pure vanilla extract - 1/4 cup granulated sugar - Zest of 1 large lemon - 1 tablespoon freshly squeezed lemon juice - 1/4 teaspoon fine salt - 2 tablespoons unsalted butter - 1 cup fresh blueberries, plus more for garnish - Powdered sugar, for a delightful dusting Measuring your ingredients correctly is key to a great Dutch Baby. Here are some tips: - Use Dry Measuring Cups: For flour and sugar, use dry measuring cups. Fill them and level off with a knife. - Liquid Measuring Cups: Use clear liquid measuring cups for milk and lemon juice. Check the measurement at eye level. - Eggs at Room Temperature: If your eggs are cold, let them sit out for about 30 minutes. This helps them mix better. - Zest with Care: When zesting the lemon, avoid the bitter white pith. Just get the bright yellow part. You can customize your Dutch Baby with these substitutions: - Milk: Swap whole milk for almond milk or oat milk for a dairy-free option. - Flour: Use whole wheat flour for a nuttier flavor. You can also try a gluten-free flour blend. - Sweetener: Replace granulated sugar with coconut sugar or honey for a different sweetness. - Fruit: If you can’t find blueberries, try raspberries or sliced strawberries as tasty alternatives. Feel free to explore these options in the Full Recipe to make your Dutch Baby unique! First, you need to gather all your ingredients. This makes the cooking process easier. In a big bowl, whisk together the eggs until they are frothy. Then, slowly add in the flour, milk, vanilla, sugar, lemon zest, lemon juice, and salt. Keep whisking until your batter is smooth and lump-free. Let it sit for a bit to let the flavors meld together. Grab a 10-inch cast iron skillet or another oven-safe pan. Heat it over medium heat and add the unsalted butter. Let the butter melt and swirl it around to coat the pan. Once the butter is bubbling, carefully pour in your batter. Sprinkle fresh blueberries on top. Now, move the skillet to your preheated oven set at 425°F (220°C). Bake for 20 to 25 minutes. Look for a beautiful golden brown edge and a big rise. When the Dutch baby is done, take it out and let it cool for a few minutes. It will deflate a bit, and that's okay! For a lovely finish, dust powdered sugar on top using a fine sieve. Slice it into wedges and serve warm. I recommend adding more blueberries and a light drizzle of lemon juice for an extra zing. You can find the full recipe to make this dish at home. Enjoy your tasty creation! To get a great rise, start with a hot pan. Heat your skillet on medium before adding butter. The butter should sizzle when you pour in the batter. This sizzling creates steam, which helps the Dutch baby rise. Also, make sure your oven is at 425°F (220°C) before baking. The heat is key. Let the batter rest for a few minutes before baking to let the flavors develop. One common mistake is not using enough eggs. Eggs provide structure and help with the rise. Another mistake is not preheating the pan. If the pan is not hot enough, the batter won’t puff up. Also, avoid opening the oven door while it bakes. This cools the oven and can cause your Dutch baby to collapse. Lastly, don’t skip the powdered sugar! It adds a nice touch to the final dish. You can enhance flavors by adding spices to the batter. A pinch of cinnamon or nutmeg works well. If you want a little more zest, add more lemon juice or zest. You can also mix in other fruits like sliced peaches or cherries. For a twist, try adding a splash of almond extract. This adds a lovely nutty flavor that pairs well with the blueberries. {{image_4}} You can switch blueberries for many fruits. I love using raspberries or strawberries. These fruits add a nice pop of color and flavor. You can also try peaches or apples for a sweet twist. Fresh or frozen fruits work well. Just keep the same amount, and you're good to go! To change the taste, you can add other flavors. Try almond extract instead of vanilla for a nutty touch. Adding a hint of cinnamon gives a warm feel. You can also mix in lemon zest or orange zest for more citrus flavor. Each change can brighten your Dutch baby in a new way. If you need a gluten-free option, swap all-purpose flour for gluten-free flour. Look for blends that work well in baking. You can also use almond flour for a nutty flavor. Just remember to check your baking time, as it may differ slightly. This way, everyone can enjoy this tasty dish! After enjoying your Fresh Lemon-Blueberry Dutch Baby, you might have some left. To store it, let it cool first. Place the slices in an airtight container. Keep it in the fridge for up to three days. This way, it stays fresh and tasty. If you notice any moisture, you can add a paper towel to absorb it. To reheat, preheat your oven to 350°F (175°C). Place the slices on a baking sheet. Heat them in the oven for about 10 minutes. This method helps restore its fluffiness. You can also use a microwave, but the oven gives better results. If you use a microwave, heat for 30 seconds at a time. Stop when it’s warm enough. If you want to keep it longer, freezing works well. Wrap each slice in plastic wrap tightly. Then, place them in a freezer-safe bag. Make sure to remove as much air as possible. You can freeze them for up to two months. When ready to enjoy, take it out and let it thaw in the fridge overnight. Reheat as mentioned before for the best taste. For a delicious treat, check out the Full Recipe for detailed steps! A Dutch baby is a large, fluffy pancake baked in the oven. It puffs up high and has a light texture. You make it with eggs, milk, and flour. The batter cooks in a hot skillet, creating crispy edges and a soft center. The best part? You can top it with fruit, like blueberries, or sprinkle it with sugar. Yes, you can prepare the batter ahead of time. Mix it and store it in the fridge for a few hours. When you are ready, heat your skillet and bake it. However, it’s best to serve Dutch babies fresh. They taste the best right out of the oven. You can serve your Dutch baby warm, dusted with powdered sugar. Add fresh blueberries on top for a pop of color. A drizzle of lemon juice brightens the flavor. You can also pair it with whipped cream or a scoop of yogurt. For a twist, try maple syrup or honey for sweetness. For the full recipe, check out the Lemon-Infused Blueberry Dutch Baby Delight! You now have all the tools to make a fresh lemon-blueberry Dutch baby. We discussed key ingredients and how to measure them. I shared steps for making and cooking it, along with tips for perfecting your rise. Remember, there are many ways to adapt this recipe, whether it’s using different fruits or going gluten-free. Lastly, I covered how to store and reheat leftovers. Enjoy your baking adventure and delight in your tasty creations!
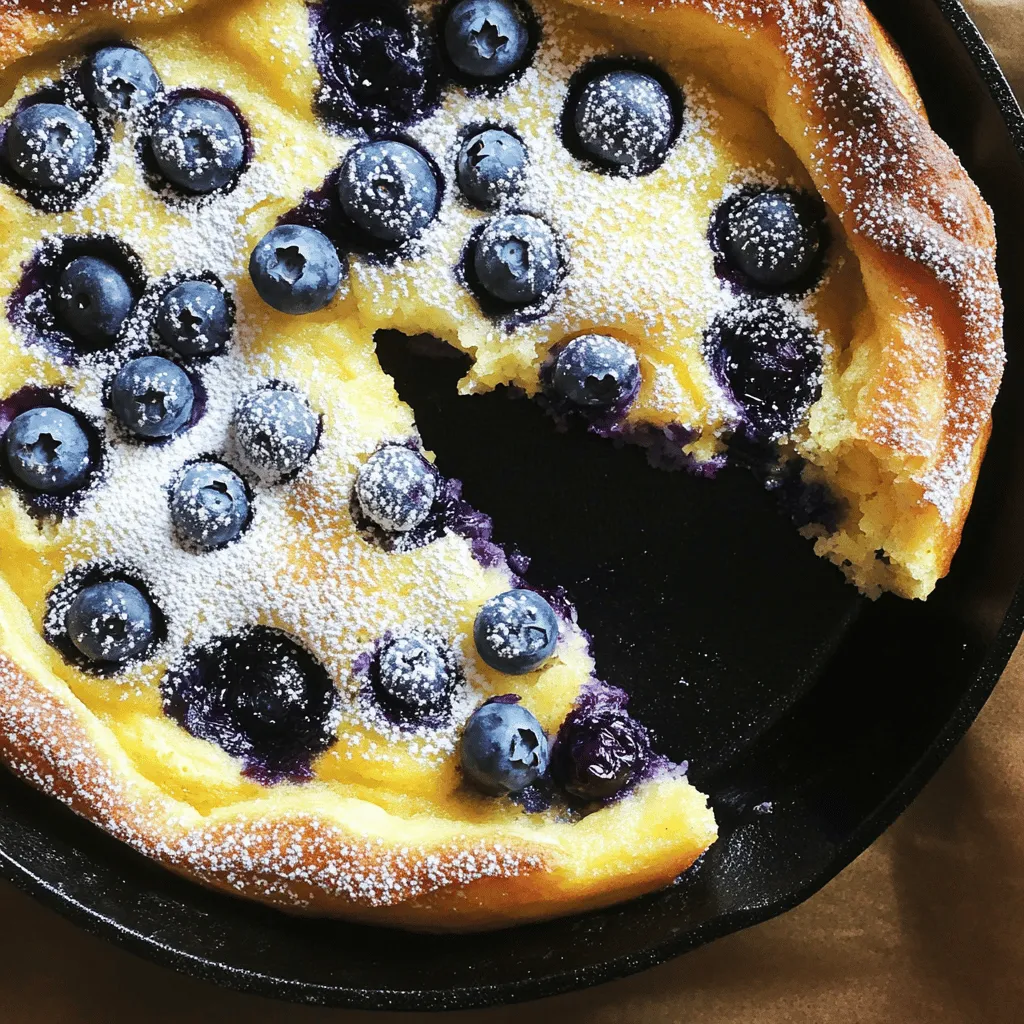
Fresh Lemon-Blueberry Dutch Baby Tasty and Light Dish
Looking for a light and tasty dish that brightens your breakfast? The Fresh Lemon-Blueberry Dutch Baby is your answer! This fluffy, oven-baked pancake is easy
To make the perfect Apple Crisp Macchiato, gather these key items: - 1 shot of espresso (or 1/2 cup strong brewed coffee) - 1 cup milk (your choice of dairy or non-dairy options) - 1 medium apple, cored and diced - 1 tablespoon packed brown sugar - 1 teaspoon ground cinnamon - 1/2 teaspoon vanilla extract - 1 tablespoon granola (for topping) - Whipped cream (optional, for an indulgent touch) These ingredients create a rich and warm flavor profile that captures the essence of fall. You can add extra touches to make your drink unique. Consider these options: - A pinch of nutmeg for spice - Caramel sauce for sweetness - Different types of apples for varied flavors - Extra granola or nuts for crunch These customizations let you tailor your Apple Crisp Macchiato to your taste. Having the right tools makes cooking easier and more fun. Here are some must-haves: - Small saucepan for caramelizing apples - Espresso machine or coffee maker - Frother or separate saucepan for heating milk - Serving glass or mug for presentation - Spoon for layering and serving Using these tools ensures a smooth cooking process and a beautiful final drink. To create your Apple Crisp Macchiato, start by cooking the apples. In a small pot, mix the diced apple, brown sugar, and cinnamon. Turn the heat to medium. Stir the mixture often for about 5 to 7 minutes. You want the apples to soften and get sweet. Once they look nice and caramelized, take the pot off the heat. Stir in the vanilla extract for extra flavor. While the apples cook, brew your espresso or strong coffee. If you do not have espresso, strong brewed coffee works too. Use a coffee maker or French press. Once brewed, set it aside to stay warm. This will be the base of your drink. Next, heat the milk in a separate pot or use a milk frother. Heat it until it steams but does not boil. If you are using a frother, froth the milk until it is nice and creamy. This creamy milk will sit on top of the coffee and create a beautiful drink. Now you are ready to build your Apple Crisp Macchiato. Follow the full recipe for more detailed steps to complete your drink. Enjoy! To make the best caramelized apples, choose a firm apple, like Granny Smith or Honeycrisp. These apples hold their shape well when cooked. Start by dicing your apple into small, even pieces. This helps them cook evenly. Use a medium heat on your saucepan. This heat level allows the sugar to melt and caramelize without burning. Stir the apples often, so they cook evenly. Once they soften and turn golden, they are ready. Adding vanilla extract at the end enhances the flavor. For a creamy froth, whole milk works great. It has enough fat to create a rich texture. If you prefer non-dairy options, try oat or almond milk. Both froth well and have unique flavors. Use fresh milk for the best results, as old milk may not froth properly. Heat your milk gently until it steams, but do not let it boil. This keeps the milk creamy and sweet. When you serve your Apple Crisp Macchiato, consider using a clear glass. This lets you show off the lovely layers of coffee, milk, and apples. Top it with whipped cream for a rich treat, but it’s not necessary. A sprinkle of granola adds a nice crunch. You can also add a dash of extra cinnamon on top for an aromatic touch. Enjoy your drink warm for the best experience. Check out the Full Recipe for all the details. {{image_4}} You can add many flavors to your Apple Crisp Macchiato. Try adding a splash of caramel syrup for extra sweetness. You can also mix in a hint of nutmeg for a warm, cozy note. If you love spice, a dash of pumpkin pie spice can elevate the fall vibe. Each added flavor brings a new twist to this delightful drink. To make a non-dairy version, swap out the regular milk for almond, oat, or soy milk. These options froth well and taste amazing. For a richer flavor, use coconut milk. It adds a nice creaminess to the drink. Ensure your caramel and whipped cream also fit your dietary needs for a fully non-dairy treat. In warm weather, you can enjoy an Apple Crisp Macchiato as a cold brew. Start by brewing your coffee cold, using a coarser grind. Let it steep in the fridge overnight. The next day, mix your cold brew with the caramelized apple mixture and non-dairy milk over ice. This refreshing twist makes your favorite fall drink perfect for summer. For the full recipe, check out the Apple Crisp Macchiato Delight. Store any leftover apple mixture in an airtight container. Keep it in the fridge. It will last for about three days. If you want to enjoy it later, reheat it gently on the stove. This keeps the apples soft and tasty. If you have extra espresso or coffee, let it cool first. Pour it into a sealed container. Store it in the fridge for up to two days. When you’re ready to use it, just heat it up. Avoid microwaving for best flavor. To reheat espresso or coffee, use a small pot on low heat. Stir it gently to warm it evenly. If using the microwave, heat it in short bursts. This way, you won’t overcook it. Enjoy your drink just like fresh-brewed! An Apple Crisp Macchiato is a warm drink that combines espresso and spiced apple flavors. It features steamed milk, caramelized apples, and a sprinkle of granola. This drink brings the cozy taste of fall right to your cup. It’s sweet, creamy, and comforting. You can enjoy it at home with the Full Recipe or at your favorite coffee shop. Yes, you can! If you don’t have espresso, use strong brewed coffee instead. It will still taste great. Just brew about 1/2 cup of strong coffee. The flavor will change a bit, but it will be just as cozy and delightful. This makes the drink more accessible for everyone. You can find Apple Crisp Macchiato at many popular coffee chains during the fall season. Look for it at places like Starbucks or local cafes. These spots often make their own versions with unique twists. If you prefer to enjoy it at home, you can easily whip it up using the Full Recipe. To make an Apple Crisp Macchiato, we covered essential ingredients, step-by-step prep, and helpful tips. You can customize your drink with different flavors and milk options, even create a non-dairy version. Proper storage keeps your leftover mixture fresh for later. Enjoy making this cozy drink at home or try a cold brew version during summer. Remember, the right ingredients and tools make all the difference. Now, get creative and enjoy every sip of your delicious creation!
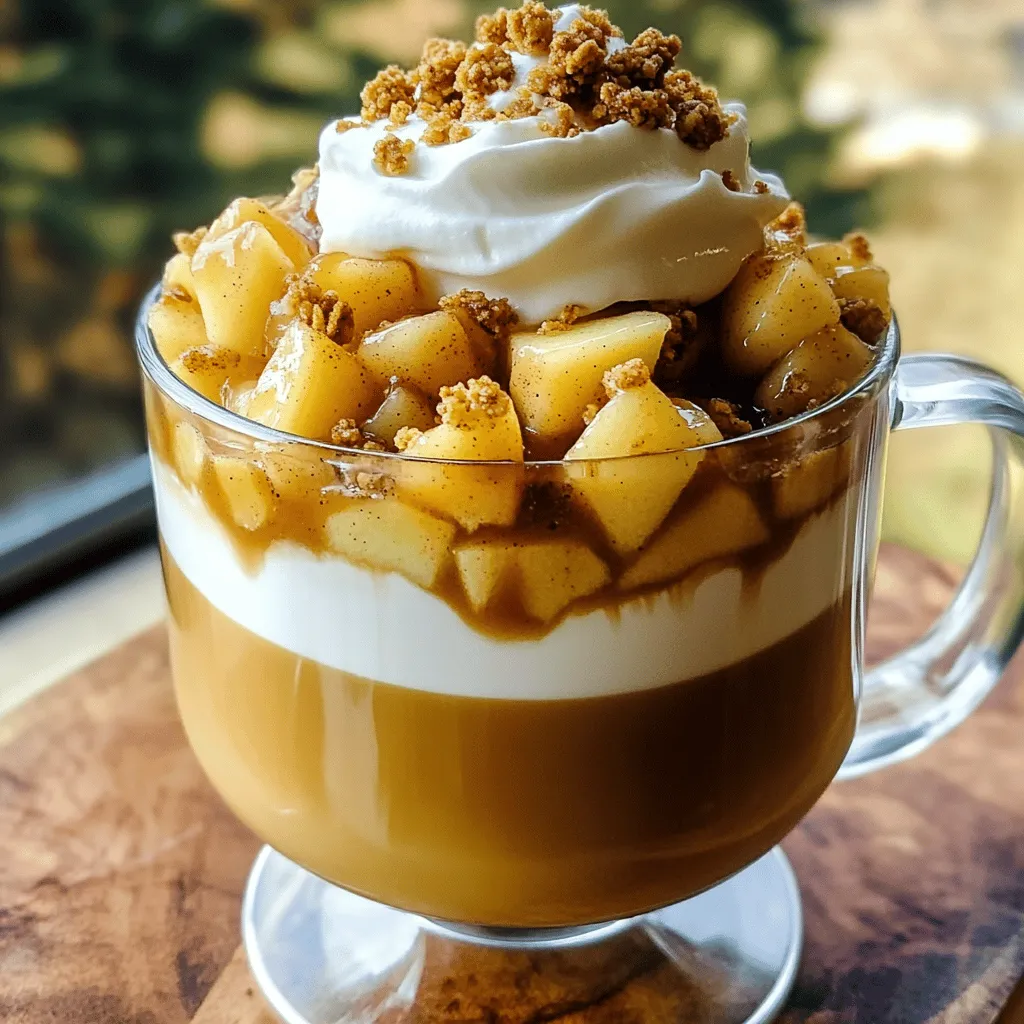
Apple Crisp Macchiato Flavorful Fall Delight Recipe
Fall is here, and that means it’s time for warm, cozy drinks! If you love flavorful seasonal treats, you must try my Apple Crisp Macchiato.
- 2 ripe bananas - 1 cup rolled oats - 1/2 cup milk (or preferred dairy-free alternative) - 2 large eggs - 1 teaspoon baking powder - 1 teaspoon ground cinnamon - 1 teaspoon vanilla extract - A pinch of salt - Coconut oil or non-stick cooking spray for the skillet When I make flourless banana oat pancakes, I enjoy the simple and healthy ingredients. The ripe bananas add natural sweetness, making sugar unnecessary. Rolled oats provide fiber and help keep you full. The milk gives the batter a creamy texture. You can use any milk, like almond, soy, or oat milk, for a dairy-free choice. The eggs bind everything together and add protein, while baking powder makes the pancakes fluffy. Ground cinnamon adds a warm spice flavor, and vanilla extract gives a sweet aroma. A pinch of salt balances all the flavors. Lastly, I use coconut oil or non-stick spray to keep the pancakes from sticking to the skillet. Each pancake has about 80 calories. They contain roughly 14 grams of carbs, 3 grams of protein, and 2 grams of fat. This makes them a nutritious choice for breakfast or a snack. If you want dairy-free pancakes, use almond or coconut milk instead of regular milk. For a vegan option, replace the eggs with a mix of flaxseed and water. Mix one tablespoon of flaxseed with three tablespoons of water and let it sit for a few minutes. This will act as a great egg substitute. {{ingredient_image_2}} - Combine 2 ripe bananas, 1 cup rolled oats, 1/2 cup milk, and 2 large eggs in a blender. - Add 1 teaspoon baking powder, 1 teaspoon ground cinnamon, 1 teaspoon vanilla extract, and a pinch of salt. - Blend on medium speed until smooth. The batter should be thick and creamy. - Let the batter rest for about 5 minutes. This helps thicken it up. - Preheat your non-stick skillet over medium heat. Lightly grease it with coconut oil or non-stick spray. - Pour about 1/4 cup of the batter onto the hot skillet for each pancake. - Cook until small bubbles form on the surface, about 2-3 minutes. - Carefully flip the pancake with a spatula and cook for another 2-3 minutes. Look for a lovely golden brown color. - Place the cooked pancakes on a plate to keep them warm. - To keep pancakes warm, cover them with a clean kitchen towel. - Stack the pancakes high on a serving plate for visual appeal. - Drizzle with maple syrup or honey, and add fresh berries on top. - For a beautiful finish, add a light dusting of powdered sugar and banana slices. Resting the batter is key. Letting it sit for 5 minutes helps the oats soak up the milk. This thickens the batter, making it fluffier. Cook over medium heat. This gives you even browning and prevents burning. You want a golden color, not dark brown. Avoid over-blending the batter. Blend just enough to mix the ingredients. Too much blending makes the pancakes tough. Also, don’t skip greasing the skillet. This keeps your pancakes from sticking. Use coconut oil or non-stick spray for best results. For toppings, think fresh fruits or syrup. Bananas, berries, and a drizzle of honey work well. Add a dusting of powdered sugar for a nice touch. For a great look, stack the pancakes high. It makes for an Instagram-worthy dish that tastes as good as it looks! Pro Tips Use Ripe Bananas: The riper the bananas, the sweeter and more flavorful your pancakes will be. Look for bananas that are heavily speckled with brown spots for the best results. Rest the Batter: Allowing the batter to rest for a few minutes before cooking helps the oats absorb moisture, resulting in thicker and fluffier pancakes. Adjust Heat as Needed: If pancakes are browning too quickly, reduce the heat. Cooking on medium to medium-low ensures they cook through without burning. Experiment with Add-ins: Feel free to add chocolate chips, nuts, or dried fruits to the batter for an extra flavor boost. Just fold them in gently before cooking. {{image_4}} You can make these pancakes even more fun! Try adding nuts or chocolate chips. Walnuts or pecans add crunch. Chocolate chips bring a sweet touch. Mix them into the batter before cooking. This makes each bite exciting. You can also use flavored extracts. Almond extract gives a nutty taste. You can add a splash of coconut extract for a tropical vibe. Just a little goes a long way. These pancakes can fit many diets. If you need gluten-free options, use certified gluten-free oats. They work just as well and keep the texture right. For a vegan twist, swap the eggs for flaxseed meal. Mix 1 tablespoon of flaxseed with 2.5 tablespoons of water. Let it sit for a few minutes until it thickens. Use this mix in place of eggs. You can also choose almond milk or oat milk instead of regular milk. Want to try something different? You can make savory pancakes. Add spinach, cheese, or herbs to the batter. This gives a unique taste that’s perfect for brunch. You can also create mini pancake bites. Just pour less batter on the skillet. These bite-sized treats are perfect for kids. They’re easy to eat and fun to share! To store leftover pancakes, let them cool down first. Place them in an airtight container. You can also use a zip-top bag. This keeps them fresh and prevents them from drying out. I recommend stacking parchment paper between each pancake. It stops them from sticking together. For freezing pancakes, first, let them cool completely. Then, stack them with parchment paper in between. Wrap the stack tightly in plastic wrap and put it in a freezer bag. This method keeps them from getting freezer burn. To reheat, you can use a microwave or toaster. For the microwave, heat for about 30 seconds. If using a toaster, toast on low until warm. These pancakes last about 3 to 4 days in the fridge. In the freezer, they can last up to 2 months. Just make sure to label your container with the date. This way, you know when they were made. Enjoy your pancakes anytime with these easy storage tips! Yes, you can! If you want to skip the eggs, try using applesauce or mashed banana. About 1/4 cup of these can replace one egg. They will keep your pancakes moist and add flavor. Look for small bubbles forming on the surface of the pancakes. This usually takes 2-3 minutes. Once you see bubbles, it’s time to flip them. Cook until they are golden brown on both sides. You can use instant oats, but the texture will change. Instant oats are finer and can make pancakes softer. Rolled oats give a heartier texture, while instant oats blend quickly into the batter. You can create delicious banana pancakes with just a few simple ingredients. We covered mixing, cooking, and avoiding common mistakes. Remember to rest the batter for fluffy pancakes and keep the heat medium. There are so many fun variations to try, from nuts to savory options. Store leftovers properly, and they will be ready for you later. Making pancakes can be easy and enjoyable. With these tips, you can impress anyone at breakfast. Now, grab your ingredients and start cooking!
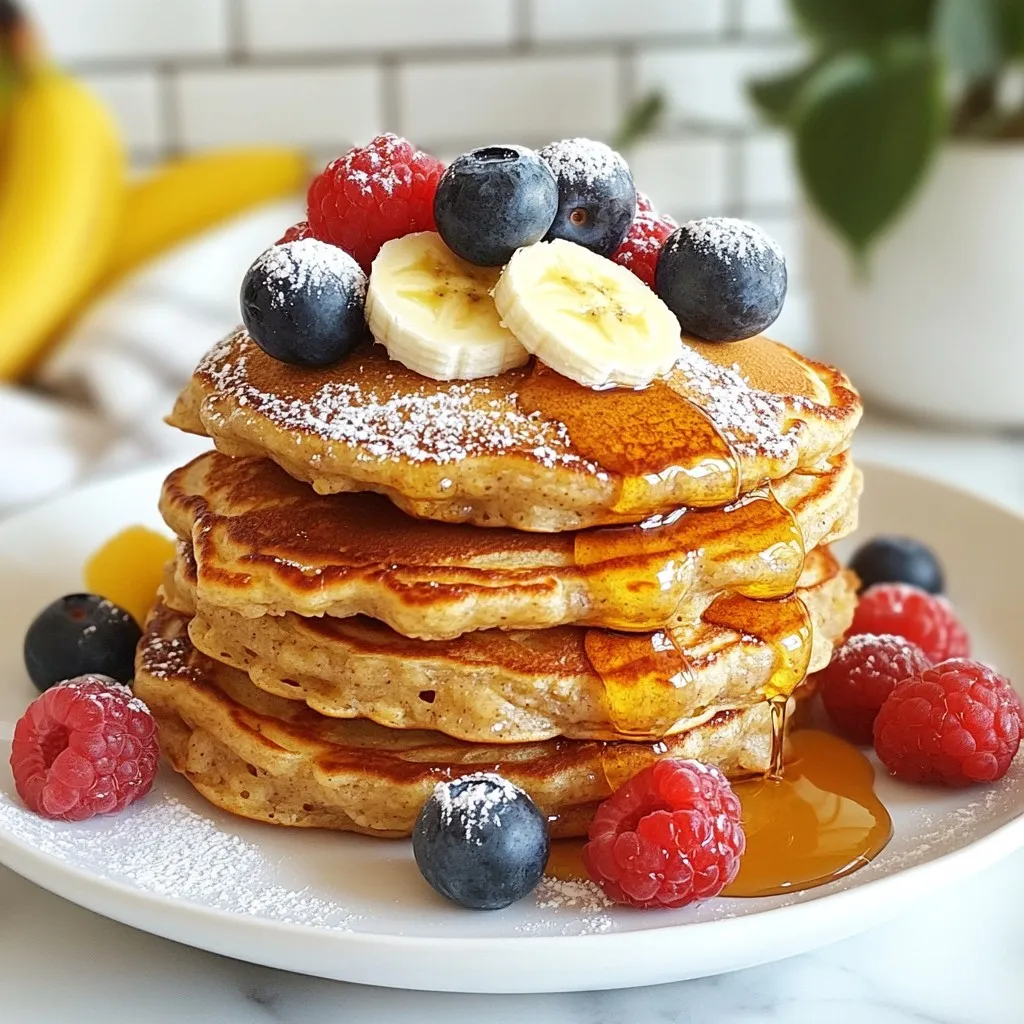
Flourless Banana Oat Pancakes Nutritious and Easy Recipe
Looking for a quick and healthy breakfast? Try my Flourless Banana Oat Pancakes! They’re easy to make and packed with nutrition, using just bananas, oats,
- 1 cup rolled oats - 1 scoop vanilla protein powder - 1/4 cup almond flour - 1 teaspoon baking powder - 1 teaspoon ground cinnamon - 1/4 teaspoon sea salt - 1/2 cup unsweetened applesauce - 2 large eggs - 1/4 cup honey or pure maple syrup - 1 teaspoon pure vanilla extract - 1/4 cup almond milk (or your preferred milk) - 1/4 cup chopped walnuts or pecans - 2 tablespoons brown sugar (for topping) - 1 teaspoon ground cinnamon (for topping) Each muffin has about 150 calories. It offers 5 grams of protein and 3 grams of fiber. The healthy fats come from almond flour and nuts. This snack is not only tasty but also fills you up. You can feel good about enjoying these muffins. {{ingredient_image_2}} Preheat your oven to 350°F (175°C). This step is key for even baking. Prepare a muffin tin by lining each cup with paper liners. If you don't have liners, lightly grease each cup with cooking spray or oil. This ensures easy muffin release after baking. In a large mixing bowl, combine the rolled oats, vanilla protein powder, almond flour, baking powder, ground cinnamon, and sea salt. Use a whisk to mix these dry ingredients well. This helps distribute the baking powder and cinnamon evenly, which is vital for great flavor. In another bowl, whisk together the unsweetened applesauce, eggs, honey or maple syrup, pure vanilla extract, and almond milk. Mix until the mixture is smooth. This blend adds moisture and sweetness to the muffins, making them soft and tasty. Now, carefully mix the wet ingredients into the dry ingredients. Stir until just combined. Be careful not to overmix; this keeps your muffins fluffy. If you want some added crunch, gently fold in the chopped walnuts or pecans at this stage. They bring a nice texture to the muffins. In a small bowl, mix the brown sugar and ground cinnamon for the topping. Spoon the muffin batter into the prepared muffin tin. Fill each cup about two-thirds full. Then, sprinkle a pinch of the cinnamon sugar mix on top of each muffin. This creates a sweet crust when baked. Place your muffin tin in the preheated oven and bake for 18-20 minutes. Check doneness by inserting a toothpick into the center of a muffin. If it comes out clean, your muffins are ready. Once baked, let them cool in the tin for around 5 minutes. Then, transfer them to a wire rack to cool completely before serving. Enjoy your delicious cinnamon roll protein muffins! To get the best muffin texture, avoid overmixing. Mix the wet and dry ingredients until just combined. This keeps the muffins light and fluffy. Use room temperature eggs and almond milk for better mixing. Also, a gentle fold of any add-ins, like nuts, helps maintain that fluffy feel. Feel free to get creative! You can add fruits like blueberries or chopped apples. For a chocolate twist, throw in chocolate chips. You can also swap in different nuts or seeds. If you like spices, try adding nutmeg or ginger. The options are endless, so have fun! Accurate measuring is key to great muffins. Use a kitchen scale for dry ingredients. It gives you the most precise measurement. For cups, spoon the ingredient into the cup and level it off with a knife. Avoid packing the ingredients down. This helps keep the muffins light and airy. Pro Tips Mix Carefully: Take care not to overmix the batter to maintain a light and fluffy texture in your muffins. Try Different Nuts: Experiment with different nuts like pecans or almonds for varied flavors and textures. Serving Suggestions: Serve warm with a drizzle of honey or a dollop of Greek yogurt for extra creaminess. Storage Tips: Store any leftovers in an airtight container to keep them fresh for up to 3 days. {{image_4}} To make these muffins gluten-free, swap the rolled oats for certified gluten-free oats. Use a gluten-free flour blend instead of almond flour. This keeps the texture light and fluffy without the gluten. For a vegan version, omit the eggs. You can use flax eggs instead. Mix 1 tablespoon of ground flaxseed with 2.5 tablespoons of water for each egg. Replace honey or maple syrup with agave nectar. This keeps your muffins sweet and plant-based. You can get creative with flavors. Add chocolate chips for a sweet twist. Toss in dried fruits like cranberries or blueberries for a fruity kick. If you love apple pie, add diced apples and a touch of nutmeg. Each variation gives a new taste and keeps your snacks exciting! To keep your muffins fresh, place them in an airtight container. This way, they stay moist and tasty. You can store them at room temperature for up to three days. If you want to keep them longer, the fridge is a good option too. Just remember to let them cool completely before storing. Freezing these muffins is easy. Wrap each muffin tightly in plastic wrap. Then, place them in a freezer bag or container. Make sure to label the bag with the date. They can last up to three months in the freezer. When you are ready to eat them, just take out the muffins you want. To reheat, you can use the microwave or oven. If you use the microwave, heat each muffin for about 15-20 seconds. If you prefer the oven, preheat it to 350°F (175°C). Place the muffins on a baking sheet for about 5-10 minutes. This makes them warm and soft again. Enjoy your tasty snack! Yes, you can use different protein powders. You may try whey, casein, or plant-based options. Each type may change the taste slightly. I like vanilla protein powder for its sweet flavor. If you switch to chocolate, your muffins will taste like dessert! If you want to replace eggs, try using flaxseed meal. Mix 1 tablespoon of flaxseed with 2.5 tablespoons of water. Let it sit for a few minutes to thicken. You can also use unsweetened applesauce. Use 1/4 cup of it for each egg. To cut sugar, reduce the honey or maple syrup. You can use just 2 tablespoons instead of 1/4 cup. Another option is to use a sugar substitute like stevia. This way, you keep the sweetness without the extra sugar. Oats are great for muffins! They add fiber, which helps with digestion. Oats also provide energy and keep you full longer. They are low in calories and high in vitamins. Plus, they give muffins a nice texture and nutty taste. This article covered key ingredients for muffins, from main components to tasty toppings. I shared step-by-step instructions, tips for great texture, and fun variations like gluten-free and vegan options. You learned how to store muffins to keep them fresh and answered common questions. In making muffins, you now have all the tools to create your ideal treat. Explore your options, experiment, and discover your favorite flavors! Happy baking!
Cinnamon Roll Protein Muffins Healthy and Tasty Snack
Craving a snack that’s both healthy and satisfying? Meet my Cinnamon Roll Protein Muffins! These muffins are packed with protein and delightfully tasty. They’re perfect
For the perfect Maple Brown Sugar Overnight Oats, gather these simple ingredients: - 1 cup rolled oats - 1 ½ cups almond milk (or any milk of your preference) - 2 tablespoons pure maple syrup - 1 tablespoon packed brown sugar - 1 teaspoon pure vanilla extract - ½ teaspoon ground cinnamon - A pinch of salt - ½ cup chopped pecans (or walnuts for a different flavor) - Fresh fruit for topping (such as sliced bananas, seasonal berries, or diced apples) Using these ingredients, you can create a wholesome breakfast that is both tasty and filling. Each item plays a key role. The oats provide fiber, while the nuts add healthy fats. Maple syrup and brown sugar give sweetness, making this dish delightful. If you want to make it creamy, almond milk works great. You can also try whole milk or oat milk if you prefer. Don't forget the fresh fruit! It not only adds color but also boosts nutrition. For the full recipe, follow along with the steps in the next section. Enjoy your healthy start today! - Mix the Ingredients Start by gathering all your ingredients. In a large bowl, combine 1 cup of rolled oats, 1 ½ cups of almond milk, 2 tablespoons of pure maple syrup, and 1 tablespoon of packed brown sugar. Add 1 teaspoon of pure vanilla extract, ½ teaspoon of ground cinnamon, and a pinch of salt. Use a whisk or spoon to blend everything well. This mix is the base for your overnight oats. - Divide into Containers After mixing, take your oat mixture and divide it into two jars or airtight containers. Make sure to leave a little space at the top. This space is for toppings you'll add later. It’s important to use containers that seal well to keep your oats fresh overnight. - Refrigerate Overnight Secure the lids on the jars and place them in the fridge. Let them chill overnight or for at least 4 hours. This soaking time allows the oats to absorb the almond milk and flavors. You’ll wake up to creamy oats ready to enjoy! - Stir Before Serving In the morning, take the jars out of the fridge. Give the oats a good stir to mix any settled ingredients. If the oats seem too thick, add a splash of milk to reach your desired creaminess. This step ensures every bite is smooth and tasty. - Add Toppings Now comes the fun part! Top each jar with a handful of chopped pecans or walnuts for a crunchy contrast. You can also add fresh fruit like sliced bananas, seasonal berries, or diced apples for extra flavor. These toppings not only boost taste but also make your oats look pretty! For the full recipe, check out the details above. Enjoy your healthy start! - Adjusting Liquid Levels: If your oats seem too thick, add more milk. Start with a little and mix well. This helps you find the right texture you love. For creamier oats, use more milk or yogurt. If you prefer them thicker, cut back on the liquid. - Stirring Techniques: Stir well before serving. This mixes the ingredients and keeps the oats smooth. If you notice clumps, give it a good mix. You can also use a fork to break them up. This ensures even flavor in every bite. - Additional Sweetener Options: While maple syrup and brown sugar are great, you can try honey or agave. Each adds a unique taste. If you want less sugar, use ripe bananas for natural sweetness. They mash well and blend into the oats. - Spice Variations: Cinnamon is a classic, but you can add more spices. Try nutmeg or ginger for a warm kick. A dash of cocoa powder gives a chocolatey twist. Another option is to mix in some pumpkin spice for a seasonal touch. Each spice changes the flavor profile for a fun twist. {{image_4}} If you want a nut-free dish, use seeds instead of nuts. Seeds like sunflower or pumpkin can add great crunch. They also bring healthy fats and protein. Just sprinkle a handful on top of your oats. This keeps it tasty and safe for those with nut allergies. You can give your oats a fun twist. Try adding chocolate or cocoa powder for a rich taste. Just mix in one tablespoon when you combine your ingredients. It adds a sweet touch that feels like dessert. Another way to enhance flavor is by adding nut butters. A scoop of peanut butter or almond butter adds creaminess. It also gives extra protein. Simply stir it into the oats before refrigerating. These small changes make your Maple Brown Sugar Overnight Oats even more exciting. You can create your own version every time! For the full recipe, check out the Maple Brown Sugar Overnight Oats section. To keep your maple brown sugar overnight oats fresh, use airtight containers. These containers lock in moisture and prevent your oats from drying out. Make sure to fill each jar, but leave some space at the top for toppings. This practice helps keep the oats from getting soggy. Store the jars in the fridge for up to five days. Check for any change in smell or texture before eating. If the oats smell off or look strange, it’s best to toss them. Enjoy your oats while they’re still fresh for the best taste. You can freeze overnight oats for longer storage. To freeze, pour the oats into a freezer-safe container. Leave some room for expansion as they freeze. Seal the container tightly to avoid freezer burn. When you want to eat them, move the container to the fridge overnight to thaw. If you need it quicker, place the container in cold water for about an hour. Stir well before serving and add your favorite toppings for a delicious meal. You can store overnight oats in the fridge for up to five days. They stay fresh in airtight containers. I recommend eating them within this time for the best taste. If you notice any off smells or textures, it’s best to discard them. Yes, you can use many types of milk. Almond milk works well, but you can also try oat milk, soy milk, or cow's milk. Each choice brings its own flavor and texture. Experiment to find what you like best! Overnight oats are very healthy. They are rich in fiber, which helps with digestion. They also provide protein and healthy fats, especially if you add nuts. The oats keep you full longer, which can help with weight management. Absolutely! You can make a big batch of maple brown sugar overnight oats for the week. Just divide the mixture into jars before refrigerating. Keep the jars sealed and grab one each morning for a quick breakfast. Fruits add great flavor and texture. I love using sliced bananas, seasonal berries, or diced apples. You can also try peaches or mangoes. Fresh fruit not only tastes good but also boosts the nutrition of your meal. You learned how to make tasty maple brown sugar overnight oats. We covered the key ingredients, easy steps, and storage tips. Remember, you can switch ingredients based on your taste. Try new fruits, nuts, or spices for fun flavors. Overnight oats are perfect for busy mornings and meal prep. Enjoy a healthy, quick breakfast that you can make your own! You now have a great start for many delicious mornings ahead.
Maple Brown Sugar Overnight Oats Healthy Start Today
Start your day with a delicious twist! Maple Brown Sugar Overnight Oats are quick, tasty, and packed with nutrients. Imagine waking up to creamy oats
- 4 slices of thick bread (brioche or challah recommended) - 1 cup pumpkin puree (canned or homemade) - 2 large eggs - 1/2 cup milk (dairy or plant-based) - 1 teaspoon pure vanilla extract - 1 teaspoon pumpkin pie spice - 1 tablespoon brown sugar - Butter or oil for frying - Maple syrup and whipped cream for serving When making Pumpkin French Toast, use good quality ingredients. I love thick bread like brioche or challah. They soak up the pumpkin mix well and create a soft texture. Next, pumpkin puree is key. You can use canned puree or make your own. If you make it, roast the pumpkin until soft, then blend it until smooth. This gives your dish a fresh taste. Eggs bind everything together. They add richness and help the bread crisp up nicely. Milk adds creaminess. You can use dairy or plant-based milk, depending on your taste. Vanilla extract and pumpkin pie spice add warmth and flavor. You can make your spice blend with cinnamon, nutmeg, and ginger if you like. For those who want a sweeter touch, brown sugar is an option. It enhances the flavor of the pumpkin. Finally, you'll need butter or oil for frying. This helps the toast get that golden brown crust. Don’t forget maple syrup and whipped cream for serving! They elevate the dish and add a delicious finish. For the full recipe, check the link above. Enjoy your cooking! Start by gathering your ingredients. In a medium bowl, combine the pumpkin puree, eggs, milk, vanilla extract, pumpkin pie spice, and a pinch of salt. If you want it sweeter, add brown sugar. Use a whisk to mix everything well until it becomes smooth. This mixture will give your French toast a rich, pumpkin flavor. Next, preheat a non-stick skillet over medium heat. Add a small amount of butter or oil to the skillet and let it melt. This will help your toast cook evenly and prevent sticking. Take each slice of your thick bread and dip it into the pumpkin mixture. Make sure both sides get coated, but do not soak them too long. Let any extra mixture drip back into the bowl. Carefully place the coated bread slices onto the hot skillet. Cook each slice for about 3-4 minutes on each side, until they turn golden brown and crispy. Once you cook a slice, remove it from the skillet and keep it warm on a plate. Repeat this for the rest of the slices. When you're done cooking, it’s time to serve. Stack the pumpkin spice French toast on plates and drizzle with maple syrup. Add whipped cream if you like. For a pretty touch, you can sprinkle some extra pumpkin pie spice on top. Enjoy your delicious creation! Check the full recipe for more tips. For the best pumpkin French toast, use thick bread like brioche or challah. These breads soak up the pumpkin mix well. Their soft texture gives a nice bite. If you pick thinner bread, it may burn faster or become too soggy. Aim for slices about one inch thick. This thickness helps the bread cook evenly and hold onto the flavor. Set your skillet to medium heat for even cooking. If it’s too hot, the outside cooks fast, but the inside stays wet. To avoid sogginess, dip each slice quickly in the pumpkin mixture. You want it coated, but not soaked. Let any extra mixture drip off before placing it in the pan. This step keeps it from becoming mushy. Add fun toppings to make your dish pop. Maple syrup is a classic choice that adds sweetness. You can also use whipped cream for a rich finish. For extra flair, sprinkle some pumpkin pie spice on top. Pair your French toast with seasonal sides, like crispy bacon or fresh fruit. These sides balance the sweetness and add color to your plate. For the full recipe, check out the details provided earlier. {{image_4}} You can easily change up the flavor of your Pumpkin French Toast. Adding chocolate chips or nuts makes it even better. Chocolate chips give a sweet twist. Nuts add a nice crunch. You can mix them into the batter or sprinkle them on top before serving. Try using different spices too. Instead of pumpkin pie spice, you can use cinnamon, nutmeg, or ginger. Each spice brings its own taste. Mix and match to find your favorite combination. If you need gluten-free options, choose gluten-free bread. Many brands offer tasty choices. This way, everyone can enjoy this dish. You can also use dairy-free milk to make it vegan. Almond milk or oat milk works well. Just substitute the regular milk in the recipe. You can serve Pumpkin French Toast in savory ways too. Add cheese or fresh herbs for a fun twist. This makes it a tasty brunch option. If you are hosting a gathering, turning it into a casserole is a great idea. Layer the bread in a baking dish and pour the pumpkin mixture over it. Bake until golden brown. This way, you can serve many guests at once. For the full recipe, check the recipe section above. To store your Pumpkin French Toast, place it in an airtight container. Make sure it cools down first. This helps keep it fresh. In the fridge, it lasts about three days. If you want to eat it later, freezing is a good option. To reheat without losing texture, use an oven or toaster oven. Preheat to 350°F (175°C) and place the French toast on a baking sheet. Heat it for about 10 minutes. This keeps it warm and crisp. You can also use a skillet over medium heat. Just add a little butter to keep it from sticking. To freeze leftovers, wrap each slice tightly in plastic wrap. Then, place them in a freezer bag. This helps prevent freezer burn. They can stay in the freezer for up to two months. When ready to eat, thaw in the fridge overnight. You can also use the microwave for quick thawing. Just be careful not to overheat. Yes, you can prep Pumpkin French Toast ahead of time. Start by mixing the pumpkin mixture as directed in the Full Recipe. Store it in the fridge for up to 24 hours. This helps the flavors meld well. You can also coat the bread slices in the mixture and cover them with plastic wrap. Just cook them when you're ready to eat. This makes busy mornings easier. Serving Pumpkin French Toast is fun and creative. You can stack the slices high on a plate. Drizzle warm maple syrup over them for a sweet touch. Add whipped cream for a rich flavor. For a festive look, sprinkle extra pumpkin pie spice on top. You can also serve it with fresh fruit like sliced bananas or berries. These toppings add color and taste. Using fresh pumpkin is great, but it changes the taste and texture. Fresh pumpkin has a lighter flavor than canned puree. It also needs more prep time. You must cook and mash the pumpkin before using it. If you choose fresh, make sure it is well-cooked and smooth. This way, it blends nicely into the mixture. To sum up, making Pumpkin French Toast is both fun and simple. You learned about the key ingredients, like thick bread and pumpkin puree. I shared easy steps to prepare and cook this dish perfectly. You saw tips for choosing the right bread and ideas for serving your toast. Don’t forget the fun variations to fit different diets and tastes. With this guide, you'll impress anyone you serve. Enjoy every bite of your homemade Pumpkin French Toast!
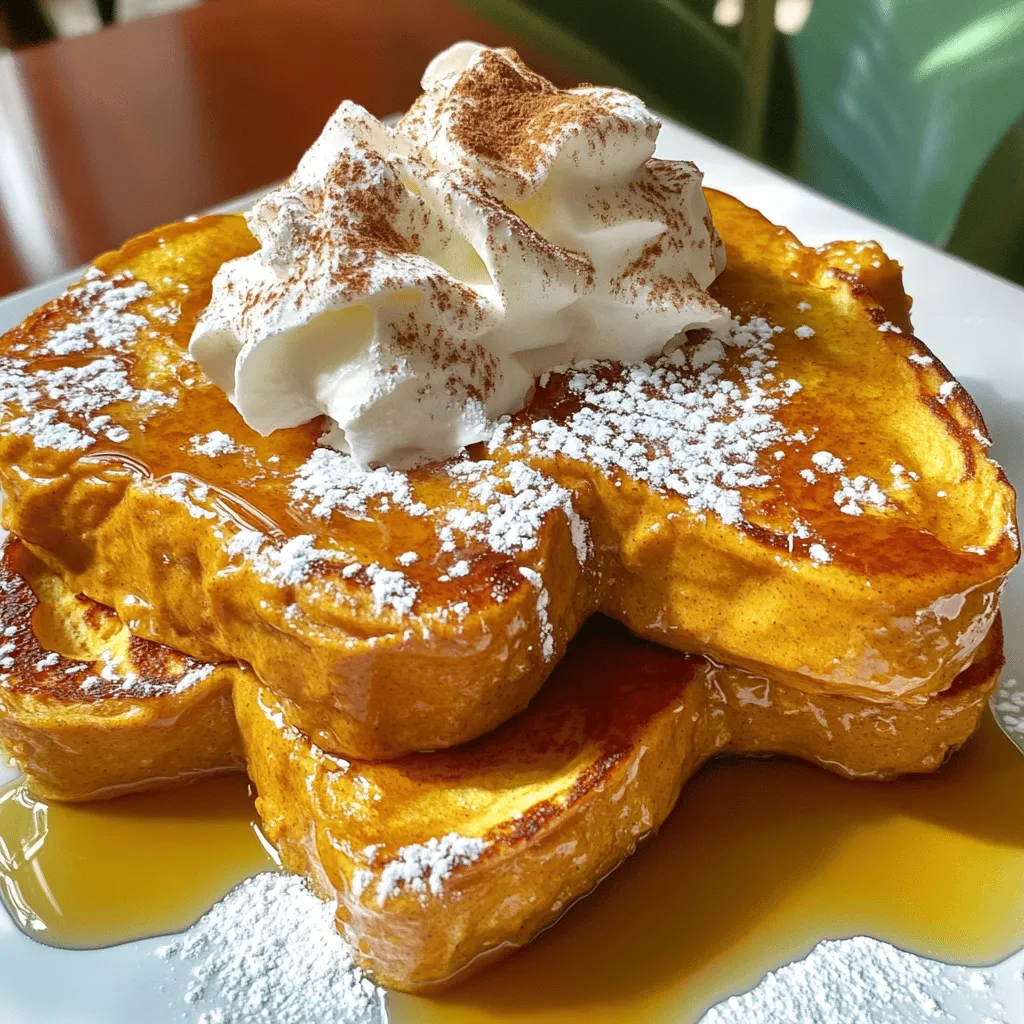
Pumpkin French Toast Simple and Delicious Recipe
Get ready to enjoy autumn on your plate! This Pumpkin French Toast recipe is simple and delicious, perfect for cozy mornings. With thick slices of
- 1 cup all-purpose flour - 1 tablespoon baking powder - 1/2 teaspoon salt - 1 tablespoon granulated sugar - 1 cup milk (dairy or non-dairy) - 1 large egg - 2 tablespoons unsalted butter, melted (plus extra for greasing) - 1 teaspoon pure vanilla extract - 1/2 cup chocolate chips or blueberries - Maple syrup, for drizzling For these pancake mini muffins, start with the basics. You need flour, baking powder, and salt. These three ingredients form the base of your muffin. The flour gives structure. Baking powder helps them rise. Salt enhances flavor. Next, add some sweetness with granulated sugar. It adds a nice touch without being too sweet. Then, you require milk. You can choose dairy or non-dairy. Both work well in this recipe. Milk keeps the muffins moist. You will also need one large egg. The egg binds everything together. It adds richness too. Melt the unsalted butter. Two tablespoons give a lovely flavor. Remember to save some butter for greasing your muffin tin. Don’t forget the vanilla extract. A teaspoon brings warmth and depth to the muffins. Finally, choose your mix-ins. You can use chocolate chips for a sweet treat. Or blueberries for a fruity burst. Make sure to have maple syrup ready for drizzling. It adds a delightful finish. These ingredients come together to create fluffy and tasty pancake mini muffins. You can find the full recipe above to see how to combine them perfectly. - Preheat your oven to 350°F (175°C). Prepare a mini muffin tin with liners or grease it with melted butter. - In a large mixing bowl, combine 1 cup of all-purpose flour, 1 tablespoon of baking powder, 1/2 teaspoon of salt, and 1 tablespoon of granulated sugar. Whisk these dry ingredients until they are fluffy and well mixed. - In a separate bowl, whisk together 1 cup of milk, 1 large egg, 2 tablespoons of melted unsalted butter, and 1 teaspoon of pure vanilla extract until smooth. - Carefully pour the wet mixture into the bowl with the dry ingredients. Stir gently with a spatula until just combined. Be careful not to overmix; it’s okay if there are a few lumps. - Gently fold in 1/2 cup of chocolate chips or blueberries to the batter. This adds a nice burst of flavor. - Using a small cookie scoop or spoon, fill each muffin cup about two-thirds full with the batter. This allows them to rise nicely. - Place the muffin tin in your preheated oven. Bake for about 10-12 minutes, until the tops are golden and a toothpick inserted in the center comes out clean. - Once baked, let the mini muffins cool in the tin for about 5 minutes. After that, transfer them to a wire rack to cool completely. - To serve, enjoy these mini muffins warm. Drizzle with maple syrup for a sweet touch. These muffin bites are perfect for breakfast or a snack! For the complete details and ingredients, check out the Full Recipe. To make your pancake mini muffins fluffy, avoid overmixing. When you combine wet and dry ingredients, mix just until you see no dry flour. A few lumps are fine. This keeps the muffins light and airy. Using room temperature ingredients also helps. Take your milk and egg out of the fridge ahead of time. This allows for better mixing and a smoother batter. Present your mini muffins on a pretty platter. Garnish with extra chocolate chips or fresh berries to catch the eye. You can drizzle maple syrup on top or serve it on the side for dipping. This adds extra sweetness and fun! For added flavor, try different toppings. Consider whipped cream, nut butter, or yogurt. These toppings can make each bite special. You will need a mini muffin tin to bake these treats. A silicone or non-stick tin works best. This helps the muffins pop out easily after baking. A small cookie scoop is also handy. It allows for even portioning of the batter. This ensures all muffins bake evenly and look great. Using the right tools makes the process smoother and more enjoyable. For the full recipe, check out the complete guide. {{image_4}} You can make these pancake mini muffins even better with mix-ins. Try adding fresh fruits like bananas, strawberries, or apples. Nuts like walnuts or pecans also work well. They add a nice crunch and flavor. You can also explore different extracts. Almond or hazelnut extract gives a unique taste. Just add a teaspoon when mixing your wet ingredients. If you need gluten-free options, use almond flour or oat flour. Both work great in this recipe. You can also make these muffins vegan. Just replace the egg with a flax egg. To do this, mix one tablespoon of ground flaxseed with three tablespoons of water. Let it sit for about five minutes until it thickens. Use a non-dairy milk like almond or oat milk in place of regular milk. These mini muffins can be more than a snack. You can turn them into a breakfast sandwich. Just slice one in half and fill it with cream cheese or nut butter. You can also serve them with flavored syrups or fruit compote. A drizzle of maple syrup brings out the best flavor. For a fun twist, try serving them with a side of yogurt for dipping. Each option creates a new way to enjoy these tasty treats. To keep your pancake mini muffins fresh for a few days, store them in an airtight container. Place a piece of parchment paper between layers. This helps them stay soft and moist. Keep them at room temperature for up to three days. If you want them to last longer, consider refrigerating them. For long-term storage, freeze your mini muffins. Place them in a freezer-safe bag or container. They can stay fresh for up to two months. When you want to enjoy them, take out as many as you need. Let them thaw in the fridge overnight. For a quick fix, you can reheat them in the microwave for about 20-30 seconds. This gives them a warm, fresh taste. To check if your muffins are stale, look for a dry texture or off smell. If they feel hard, they might not be good anymore. You can try reviving stale muffins by wrapping them in a damp paper towel. Microwave them for about 10 seconds. This can bring back some moisture and softness. Enjoy your pancake mini muffins with confidence, knowing how to store and revive them! Can I use whole wheat flour for this recipe? Yes, you can use whole wheat flour. It makes the muffins a bit denser. The taste will change, but they will still be tasty. You may need to add a little more milk to keep them moist. How do I make these muffins dairy-free? To make these muffins dairy-free, swap regular milk for oat or almond milk. Use coconut oil instead of butter. These changes keep the muffins soft and delicious without dairy. Can I reduce sugar in this recipe without affecting taste? Yes, you can cut the sugar by a third. Use ripe bananas or applesauce to add natural sweetness. This keeps the muffins tasty while reducing added sugar. What is the best way to check if muffins are done? The best way is to use a toothpick. Insert it in the center of a muffin. If it comes out clean, the muffins are ready. If it has batter on it, bake for a few more minutes. How can I adjust baking time if using a regular muffin tin? If using a regular muffin tin, bake for about 15-18 minutes. The larger muffins need more time than mini ones. Always check with a toothpick to be sure. Caloric content of each mini muffin Each mini muffin has about 100 calories. This depends on the mix-ins you choose. Muffins with chocolate chips will have more calories than those with fruit. Nutritional benefits of using specific ingredients Using whole wheat flour adds fiber, which is good for digestion. Milk provides protein and calcium, helping your bones. Adding fruit boosts vitamins and gives a fresh flavor to the muffins. In this post, we explored making delicious mini muffins from scratch. We covered all the ingredients, step-by-step instructions, and helpful tips to ensure success. We also shared creative variations and storage tips to keep your muffins fresh. Whether you choose chocolate chips or fruit, these muffins are versatile and fun. You can enjoy them anytime, from breakfast to a snack. Happy baking!
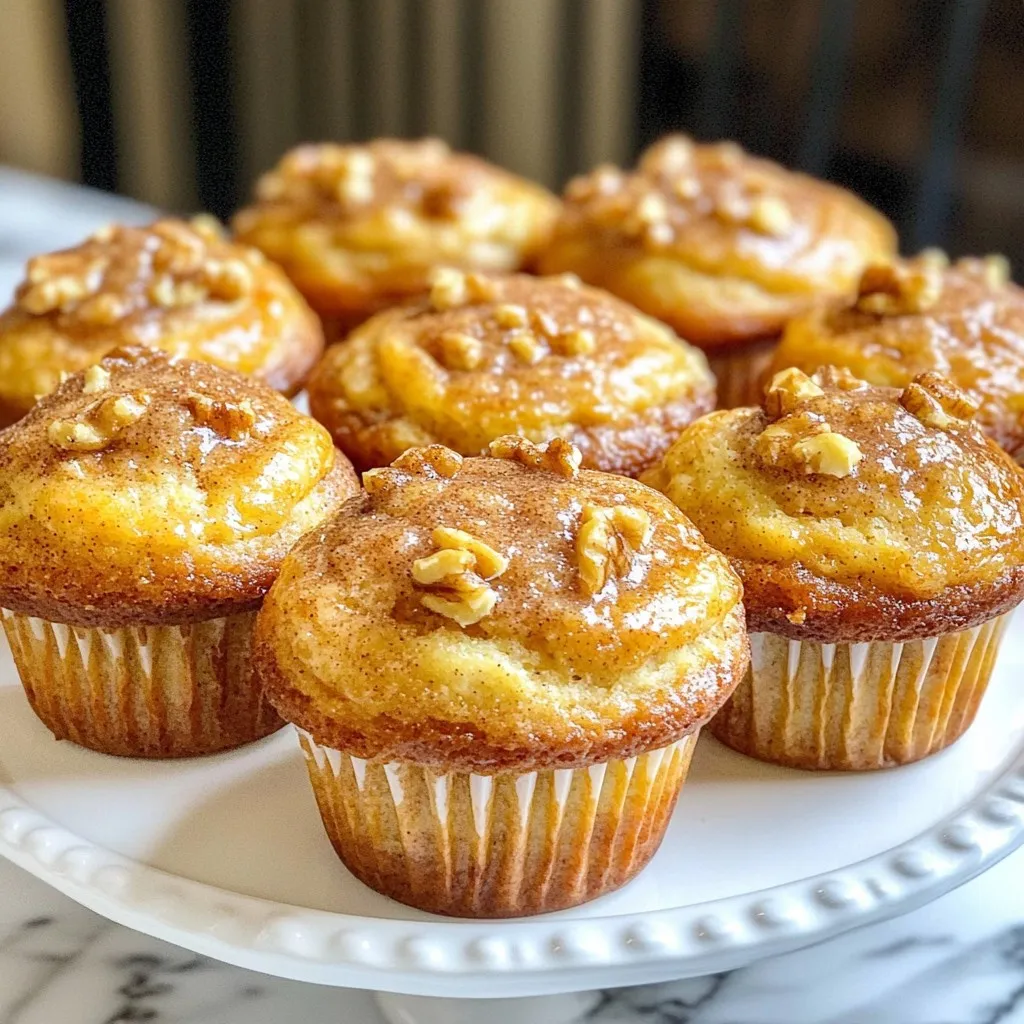
Pancake Mini Muffins Fluffy and Easy Breakfast Treat
Looking for a simple and tasty breakfast treat? Let me introduce you to pancake mini muffins! These fluffy bites are quick to make and perfect
- 1 cup freshly brewed espresso or strong coffee - 1 cup unsweetened almond milk (or your preferred milk alternative) - 2 tablespoons pure pumpkin puree - 1 tablespoon maple syrup - 1 teaspoon pumpkin spice blend - 1/2 teaspoon pure vanilla extract - Whipped coconut cream (optional topping) - Low-calorie sweeteners instead of maple syrup - Non-dairy milk options (oat, soy, coconut) - Healthy whipped topping alternatives - Ground cinnamon and nutmeg for garnish - Additional flavorings (such as vanilla or chocolate) Using these ingredients, you can create a tasty and healthy pumpkin spice latte. Feel free to swap in your favorite milk or sweetener. I love using almond milk for its light flavor. If you're looking for something sweeter, consider low-calorie sweeteners. They can add flavor without the extra calories. For a fun twist, add a sprinkle of cinnamon or nutmeg on top. It gives your latte a cozy feel. If you're feeling adventurous, try adding a bit of chocolate. It makes the drink even more delightful. You can find the Full Recipe for step-by-step instructions on how to make this delicious drink. Enjoy your cozy cup of fall goodness! To start, grab a small saucepan. You will combine several ingredients here. Add 1 cup of unsweetened almond milk, 2 tablespoons of pure pumpkin puree, 1 tablespoon of maple syrup, 1 teaspoon of pumpkin spice blend, and 1/2 teaspoon of pure vanilla extract. Stir this mix gently. Heat it on medium. Be careful not to let it boil. You want the mixture warm, not hot. Once your milk mixture is warm, take it off the heat. Now comes the fun part! Use a milk frother or a whisk to froth the pumpkin milk. If you don’t have a frother, whisk it hard until it gets light and airy. This step gives your latte a nice texture. Now, take your favorite mug. Pour in 1 cup of brewed espresso or strong coffee. This is the base of your latte. Next, pour the spiced pumpkin milk mixture over the coffee. Watch how they blend together! Finally, add a generous dollop of whipped coconut cream on top. For a festive touch, sprinkle a bit of ground cinnamon and nutmeg over the cream. Enjoy your homemade pumpkin spice latte! To make your latte just right, you can adjust the sweetness. If you like it sweeter, add more maple syrup. If you prefer a less sweet drink, use less. The choice is yours! When heating your milk mixture, be careful not to boil it. Boiling can ruin the texture. You want it warm and smooth, not bubbling. Stir continuously for the best blend. You can boost the flavor by playing with different spice blends. Try a bit of ginger or allspice for a fun twist. You might even enjoy mixing in a touch of cocoa powder. It adds a nice chocolatey depth to your latte. For a cozy treat, pair your latte with pumpkin bread or pastries. The warm spices work great together! Don’t forget to sprinkle some cinnamon on top. It adds a lovely finish and makes your drink even more inviting. Find the Full Recipe to make your own delicious pumpkin spice latte today! {{image_4}} If you want a creamy drink without dairy, try these milk choices: - Almond milk - Coconut milk - Oat milk - Soy milk These options work well for vegan and lactose-free diets. Each brings a unique taste and texture. Almond milk is light and nutty. Coconut milk offers a rich, tropical flavor. Oat milk adds creaminess. Soy milk is thick and hearty. You can make this latte sugar-free. Here are some tips: - Use stevia or erythritol instead of maple syrup. - Reduce the amount of pumpkin puree. This helps cut down the sugar too. Stevia is a sweet herb, and erythritol is a sugar alcohol. Both are great for those watching their sugar intake. Want a refreshing drink? Make an iced version. Here’s how: 1. Brew your espresso or coffee and let it cool. 2. Mix the milk, pumpkin, and spices as before. 3. Pour the coffee over ice in a glass. 4. Add the spiced milk mixture on top. For a chill twist, use cold brew coffee. It pairs well with the pumpkin flavors. Enjoy this cool treat on warm days! You can find the Full Recipe for all the detailed steps. To store leftover pumpkin milk, pour it into a clean jar or container. Seal it tightly and keep it in the fridge. It will stay fresh for about three days. When you want to enjoy it again, give it a good shake before use. For cooled lattes, let them sit at room temperature for a bit, then refrigerate. Just like the pumpkin milk, they will last for about three days. When you’re ready to drink, reheat gently in the microwave or on the stove. Yes, you can freeze the pumpkin puree and milk mixture! It’s a great way to save extra. Use ice cube trays to freeze small portions. Once frozen, pop them out and store in a freezer bag. To reheat your frozen portions, take out what you need and let them thaw in the fridge overnight. Then, warm it up in a pan or microwave. Stir well before using to mix the flavors together again. Pumpkin puree lasts about one week in the fridge once opened. Always check for off smells or mold. For almond milk, it usually lasts about 7-10 days after opening. Always look at the “use by” date on the carton. Maple syrup can last for a long time if stored properly. Keep it in the fridge after opening. If you see any crystals, just warm it up slightly and stir. It will be good to use again! To reduce sweetness in your pumpkin spice latte, try these tips: - Use less maple syrup. Start with 1 teaspoon instead of 1 tablespoon. - Replace maple syrup with a low-calorie sweetener, like stevia or monk fruit. - Adjust the amount of pumpkin puree. It adds some natural sweetness too. These changes can help you enjoy a less sweet drink while keeping the pumpkin flavor. Yes, you can use regular milk in this recipe. However, using non-dairy milk offers some health benefits. Non-dairy options, like almond milk, are often lower in calories and fat. They also contain no lactose, making them better for some people. Regular milk will change the flavor slightly, making it creamier. Yes, this recipe is already vegan-friendly! All the ingredients, like almond milk and pumpkin puree, are plant-based. If you want to add whipped cream, choose a vegan coconut cream or leave it out. So, you can enjoy this latte while sticking to a vegan diet. Pumpkin spice lattes offer several health benefits: - Pumpkin is high in vitamins A and C, which support eye health and boost immunity. - The spices, like cinnamon and nutmeg, have anti-inflammatory properties. - They can help regulate blood sugar levels and improve digestion. This drink can be a tasty way to enjoy these benefits. You can find the Full Recipe for the Healthy Pumpkin Spice Latte in the earlier section of this article. It includes all the steps and tips for making this delightful drink. Enjoy crafting your perfect latte! In this post, we explored how to create a delicious pumpkin spice latte. We covered the main ingredients, step-by-step instructions, tips, variations, and storage info. You can easily customize your latte to suit your taste or diet. Remember to try new spices and enjoy this cozy drink with your favorite treats. Whether warm or iced, this recipe offers comfort and flavor, making it a perfect choice for any season. Enjoy your homemade latte!
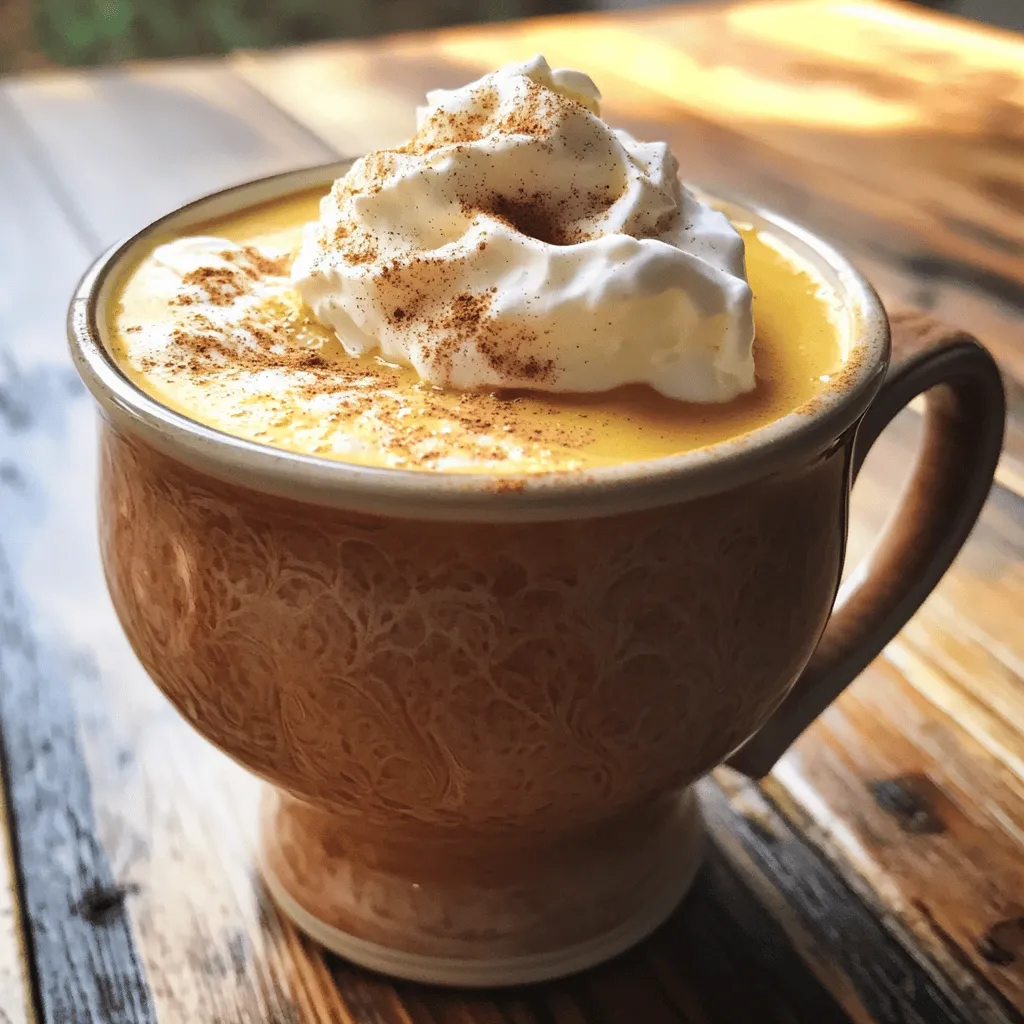
Healthy Pumpkin Spice Latte Simple and Tasty Recipe
Craving a warm, cozy drink without the guilt? This Healthy Pumpkin Spice Latte is your solution! With simple ingredients like pumpkin puree and almond milk,