Breakfast

- 2 cups brewed coffee, cooled - 1/4 cup brown sugar - 1 teaspoon vanilla extract - 1/2 cup milk or a milk alternative (such as almond, oat, etc.) - Ice cubes - Whipped cream (optional, for topping) - A pinch of sea salt (optional, for garnish) To make a great Brown Sugar Vanilla Iced Coffee, use accurate measurements for best results. This ensures your drink tastes just right. Here are some tips: - For brewed coffee, use strong coffee for more flavor. - Brown sugar can be packed tightly for a sweeter taste. - If you like it creamier, add more milk. - Remember, 1/2 cup of milk can be swapped for 1/2 cup of any milk alternative. Using these tips, you can adjust the taste to suit your preferences. Enjoy your iced coffee! 1. In a small saucepan, combine 1/4 cup of brown sugar with 1/4 cup of cooled brewed coffee. 2. Place the pan over medium heat. Stir the mixture well. 3. Heat until the sugar dissolves completely. This takes about 2-3 minutes. 4. Once dissolved, remove the pan from heat and let the syrup cool. 1. In a large glass or pitcher, mix the remaining cooled brewed coffee. 2. Add 1 teaspoon of vanilla extract and the cooled brown sugar syrup. 3. Stir well to ensure everything is mixed evenly. 1. Fill a glass with ice cubes, about halfway full. 2. Carefully pour the coffee mixture over the ice. Leave some space at the top. 3. Add 1/2 cup of milk or your milk alternative. 4. Gently stir to mix all the flavors together. 5. If you like, top with whipped cream and a pinch of sea salt. 6. Before sipping, stir again to mix in the whipped cream and salt. Enjoy the rich flavors! To make your Brown Sugar Vanilla Iced Coffee even better, think about adding spices. A sprinkle of cinnamon or nutmeg can add warmth. You might also try a dash of cocoa powder for a chocolate twist. For sweetness, brown sugar gives a nice depth. If you want it sweeter, add more syrup. Mix well until you reach your perfect level of sweetness. Remember, you can always add more, but you can't take it out! Enjoy your Iced Coffee on hot afternoons or lazy weekends. It’s great for breakfast or a midday pick-me-up. Pair it with a slice of coffee cake or a buttery croissant. The flavors go well together and make for a delightful treat. For brewing, I recommend using a drip coffee maker or a French press. Both methods create rich coffee that works well for this recipe. If you like cold brew, that’s a tasty option too! When mixing, a whisk or spoon does the job well. For a fun twist, use a milk frother to blend your milk and coffee. This can make your drink feel extra special. {{image_4}} You can make this iced coffee with different milk options. Almond milk, oat milk, and coconut milk are great choices. Each brings a unique taste. Almond milk adds a nutty flavor. Oat milk gives a creamy touch. Coconut milk brings a tropical vibe. If you use these non-dairy milks, you might want to adjust the amount. Some are sweeter than regular milk. Start with a little, then add more if needed. You can swap brown sugar for other sweeteners. White sugar works well, but it lacks the rich flavor. Maple syrup is another option. It adds a nice, warm taste. If you prefer sugar-free, try stevia or monk fruit. These sweeteners are good for low-calorie drinks. Just remember, they can be sweeter than brown sugar. So, use less at first and taste as you go. You can change this iced coffee with seasonal flavors. In fall, add pumpkin spice for warmth. A dash of cinnamon can also work wonders. For winter, try peppermint extract for a festive twist. In spring, you can add a splash of vanilla or almond extract. Summer is perfect for fruity flavors like strawberry or peach. Try adding fresh fruit to blend in with your coffee. The options are endless, so have fun exploring! To store leftover iced coffee, pour it into an airtight container. This helps keep it fresh. Place the container in the fridge. Try to use it within 2-3 days for the best taste. If you want to reheat it, warm it gently on the stove or in a microwave. But remember, iced coffee is best cold. You can also repurpose it by blending it into a coffee smoothie or using it in desserts. Brewed coffee can last in the fridge for about one week. The brown sugar and vanilla extract can last much longer. Brown sugar stays good for months if kept dry. Vanilla extract can last for years. Watch for signs of spoilage. If your iced coffee smells off or has a strange taste, it’s best to toss it. If you notice any mold or strange colors, throw it away right away. Fresh ingredients make the best iced coffee! Yes, you can make this iced coffee ahead of time. Simply prepare the brown sugar syrup and the coffee mixture. Store both in the fridge. When ready to enjoy, just pour them over ice and add milk. This makes it quick and easy for busy mornings. You can customize your iced coffee in many ways. Try adding flavors like caramel or hazelnut syrup. You can also change the milk to almond, oat, or soy. For a fun twist, add a sprinkle of cinnamon or nutmeg on top. If you don’t have brown sugar, you can use white sugar instead. Just mix it with a bit of molasses if you have it. This gives you a similar flavor. You can also use honey or maple syrup for a unique taste. Yes, this recipe is great for beginners. It has simple steps and only a few ingredients. Anyone can follow along and create a tasty drink. You don’t need fancy tools or skills to make it. For the best brewed coffee, use fresh coffee beans. Grind them just before brewing for the best flavor. Brew your coffee using a method you enjoy, like a drip coffee maker or a French press. Make sure to let it cool before using it in the recipe. Enjoying Brown Sugar Vanilla Iced Coffee is easy. We explored key ingredients and step-by-step instructions. You learned helpful measuring tips for perfect flavor and consistency. With various options, you can customize your drink to match your taste. Remember to store leftovers properly for later enjoyment. This sweet coffee treat suits any time of day. Try different flavors or pair it with snacks. Get creative and have fun making your own iced coffee!
Brown Sugar Vanilla Iced Coffee Bold and Simple Recipe
Are you ready to enjoy a delicious Brown Sugar Vanilla Iced Coffee? This bold and simple recipe will transform your daily caffeine fix! With just
To make flourless pumpkin muffins, you need the following ingredients: - 1 cup canned pumpkin puree - 2 large eggs - 1/2 cup almond butter (creamy or crunchy) - 1/4 cup pure maple syrup - 1 teaspoon vanilla extract - 1 teaspoon baking soda - 1 teaspoon pumpkin pie spice - 1/2 teaspoon salt These ingredients form the base of the muffins. The pumpkin puree gives them moisture and flavor. Almond butter adds richness and protein. Eggs help bind the mix together, making them fluffy. For extra taste, consider adding: - 1/3 cup chopped walnuts or pecans (optional, for added crunch) - 1/4 cup chocolate chips (optional, for a delightful sweetness) Chopped nuts bring a nice texture. Chocolate chips add sweetness and make the muffins more fun! If you have allergies or dietary needs, here are some swaps: - Use sunflower seed butter instead of almond butter for nut-free options. - Substitute honey or agave syrup for maple syrup, if preferred. - Replace eggs with flax eggs for a vegan option. Just mix 1 tablespoon of flaxseed meal with 2.5 tablespoons of water per egg. These substitutions help you enjoy the muffins while catering to your needs! First, set your oven to 350°F (175°C). This step is key for even baking. Next, prepare your muffin tin. You can line it with paper liners or grease each cup with cooking spray or oil. This will help the muffins pop out easily after baking. In a large bowl, combine one cup of canned pumpkin puree, two large eggs, half a cup of almond butter, a quarter cup of pure maple syrup, and one teaspoon of vanilla extract. Use a whisk or an electric mixer to blend these ingredients until the mixture is smooth. This step adds moisture and flavor to your muffins. In another bowl, whisk together one teaspoon of baking soda, one teaspoon of pumpkin pie spice, and half a teaspoon of salt. Mixing dry ingredients separately helps ensure that the baking soda and spices are evenly distributed. Gradually add the dry mixture to the wet ingredients. Stir gently until just combined. It’s okay if a few lumps remain; overmixing can make the muffins tough. Using a scoop or a spoon, fill each muffin cup with batter until it's about two-thirds full. This gives the muffins room to rise while baking. It’s important to not overfill them. Place your muffin tin in the preheated oven. Bake for 18 to 20 minutes. Check for doneness by inserting a toothpick into the center of a muffin. If it comes out clean, your muffins are ready. Let them sit in the tin for five minutes to cool. Then transfer them to a wire rack to cool completely. Enjoy the wonderful aroma while they bake! To make your muffins moist, use fresh pumpkin puree. I like to use canned pumpkin for its smooth texture and rich flavor. Mix well until the batter is smooth; this helps keep the muffins light. Do not overmix the batter; a few lumps are okay. This keeps moisture in and makes them soft. Add nuts or chocolate chips for extra texture and taste. One common mistake is overbaking. Keep an eye on your muffins. Check them at 18 minutes with a toothpick. If it comes out clean, they are ready. Another mistake is not measuring ingredients correctly. Use measuring cups for dry and wet ingredients. This ensures the right balance. Lastly, do not skip greasing the muffin tin or using liners. This prevents sticking and makes cleanup easy. After baking, let the muffins cool in the tin for 5 minutes. This helps them firm up. Then, move them to a wire rack to cool completely. This stops them from getting soggy. Store cooled muffins in an airtight container. They last up to 3 days at room temperature. If you want to keep them longer, freeze them for up to 3 months. Just wrap them well to prevent freezer burn. {{image_4}} You can easily make these muffins gluten-free. The main ingredient, almond butter, is already gluten-free. Always check labels to ensure no hidden gluten exists. Use certified gluten-free oats or flour substitutes if you want a different texture. Coconut flour or almond flour can work well in this recipe. Just remember, these flours absorb more moisture. Adjust your liquid ingredients to keep the muffins moist. To make these muffins vegan, replace the eggs with flax eggs. To create a flax egg, mix one tablespoon of ground flaxseed with three tablespoons of water. Let it sit for five minutes until it thickens. You can also substitute maple syrup with agave nectar or date syrup. These swaps keep your muffins delicious and plant-based. Adding flavors can lift your muffins to another level. Mix in chocolate chips for sweetness. Use dark or semi-sweet chips for a richer taste. If you like crunch, add chopped walnuts or pecans. These nuts add texture and healthy fats. For a spicier kick, increase the pumpkin pie spice or add cinnamon. You can also try nutmeg or ginger for warmth. Experiment with these options to find your favorite flavor blend! To store leftover muffins, let them cool completely. Place them in an airtight container. You can keep them at room temperature for up to three days. If you live in a humid area, use the fridge. Just remember, the fridge may dry them out a bit. You can freeze these muffins for up to three months. Wrap each muffin tightly in plastic wrap. Then, place them in a freezer bag or container. When you're ready to eat one, take it out and let it thaw at room temperature. You can also warm it in the microwave for about 15 seconds. These muffins will last for about three days at room temperature. In the fridge, they can stay fresh for about a week. Freezing extends their life to three months. Make sure to check for any signs of spoilage before eating. Yes, you can use other nut butters. Options include peanut butter or cashew butter. Each nut butter has a unique taste. So, choose one you like. Remember, the texture may change slightly. You can use honey or agave syrup instead of maple syrup. Both sweeteners work well in this recipe. They add sweetness and moisture. If you want a sugar-free option, try a sugar substitute. The muffins are done when a toothpick comes out clean from the center. You can also check if the tops are firm and slightly golden. If they look wet or soft, bake them a bit longer. Yes, you can replace eggs with a flax egg or applesauce. To make a flax egg, mix one tablespoon of ground flaxseed with three tablespoons of water. Let it sit for a few minutes to thicken. Applesauce works too, using a quarter cup instead of one egg. Flourless pumpkin muffins are easy and fun to make. I shared key ingredients, both required and optional, to help enhance your muffins. With clear steps, you can bake these treats without any fuss. Remember the tips to avoid common mistakes and ensure moist muffins. Lastly, explore variations and storage methods for the best results. Baking should be enjoyable, so have fun experimenting with flavors and ingredients!
Flourless Pumpkin Muffins Tasty and Healthy Treat
Are you ready for a tasty and healthy treat? Flourless pumpkin muffins are perfect for everyone, even those with dietary needs. These muffins are packed
To make these tasty pumpkin spice cottage cheese muffins, gather the following: - 1 cup cottage cheese - 1 cup canned pumpkin puree - 2 large eggs - 1/2 cup granulated sugar (or maple syrup) - 1/4 cup melted coconut oil or unsalted butter - 1 teaspoon pure vanilla extract - 1 1/2 cups all-purpose flour - 1 tablespoon pumpkin pie spice - 1 teaspoon baking powder - 1/2 teaspoon baking soda - 1/4 teaspoon salt You can make these muffins even more special by adding some mix-ins: - 1/2 cup chopped nuts (walnuts or pecans) - 1/2 cup chocolate chips These add-ins give a nice crunch and sweet flavor. If you want to change things up, try these options: - Replace cottage cheese with Greek yogurt for a creamier texture. - Use honey or agave syrup instead of sugar for a natural sweetener. - Swap all-purpose flour for whole wheat flour for a healthier muffin. These substitutions can help you customize the recipe to fit your needs! First, set your oven to 350°F (175°C). This helps the muffins bake evenly. Next, grab a muffin tin. Line it with paper liners or grease it well. This will stop the muffins from sticking. In a large bowl, mix together the cottage cheese, canned pumpkin puree, and eggs. Add the sugar or maple syrup, melted coconut oil, and vanilla extract. Whisk these until you see a smooth mixture. Make sure there are no lumps left behind. In another bowl, combine the all-purpose flour, pumpkin pie spice, baking powder, baking soda, and salt. Whisk these dry ingredients well to blend them. This step ensures a uniform flavor in each muffin. Now, slowly add the dry mixture to the wet ingredients. Use a spatula or wooden spoon to mix them together. Stir gently until you see no dry flour. The batter should be slightly lumpy. Avoid overmixing, as this can make the muffins tough. If you like, fold in chopped nuts or chocolate chips at this stage. This adds extra flavor and texture to your muffins. Make sure they spread evenly in the batter for the best results. Spoon the batter into your prepared muffin tin. Fill each cup about two-thirds full. This allows room for the muffins to rise. Bake in the preheated oven for 18-20 minutes. Check if they are done by inserting a toothpick into a muffin. It should come out clean. Once baked, let them cool in the tin for about 5 minutes. Then, move them to a wire rack to cool completely. This helps keep their texture just right. To keep muffins soft, mix gently. After adding dry ingredients, stir just until combined. If you see some lumps, that’s okay! Lumps mean tender muffins. Overmixing makes them tough. So, be kind to your batter. - Always preheat your oven to 350°F (175°C). - Use a muffin tin lined with paper or greased well. - Fill each muffin cup about two-thirds full. This allows room for rising. - Bake for 18-20 minutes. Check with a toothpick for doneness. - Let muffins cool in the tin for five minutes. This helps them set. Make your muffins shine! Serve them warm. A dollop of whipped cream adds charm. A sprinkle of cinnamon sugar gives a sweet touch. Pair them with tea or coffee for a cozy vibe. Enjoy these muffins fresh and delightful! {{image_4}} If you want to make these muffins nut-free, simply leave out the nuts. This keeps the muffins safe for those with nut allergies. You can also add some seeds, like sunflower or pumpkin seeds, for extra crunch. These seeds add flavor without the risk of nuts. To make vegan pumpkin spice cottage cheese muffins, swap the eggs for flax eggs. Mix 1 tablespoon of flaxseed meal with 2.5 tablespoons of water for each egg. Use a plant-based cottage cheese alternative for a creamy texture. You can also replace the sugar with maple syrup for a natural sweetener. You can boost the flavor of these muffins in many ways. Try adding chocolate chips or dried fruit, like cranberries or raisins. You can also mix in more spices, such as cinnamon or nutmeg, to deepen the taste. These small changes keep the muffins exciting and full of warmth. Experiment with these variations to make the recipe your own! To keep your muffins fresh, place them in an airtight container. This helps prevent them from drying out. You can store them at room temperature for up to three days. If you want to keep them longer, refrigeration is an option. Just remember, this may change their texture a bit. Freezing is a great way to save muffins for later. First, let the muffins cool completely. Then, wrap each muffin tightly in plastic wrap. After that, place them in a freezer-safe bag or container. They can last for about three months in the freezer. When you're ready to eat one, simply thaw it at room temperature. Reheating is easy! You can use an oven or microwave. For the oven, preheat it to 350°F (175°C). Place the muffin on a baking sheet and heat for about 10 minutes. For the microwave, heat on medium power for 15 to 30 seconds. This warms them up nicely and brings back that fresh-baked taste. Enjoy your muffins warm! Yes, you can use fresh pumpkin. First, cook the pumpkin until soft. Then, mash it well. This gives a fresh taste to your muffins. Keep in mind that fresh pumpkin may be a bit wetter. You might need to adjust the flour a little. You can use Greek yogurt or ricotta cheese. Both options add creaminess. They also keep the muffins moist. If you want a dairy-free choice, try silken tofu. Blend it until smooth to replace cottage cheese. These muffins can last for up to five days. Store them in an airtight container at room temperature. If you want them to last longer, you can freeze them. They freeze well for about three months. Absolutely! You can add spices like nutmeg or ginger. They bring extra warmth and flavor. Just be careful not to add too much. A little goes a long way, enhancing the pumpkin spice blend. You now know the key ingredients and steps for baking delicious muffins. We explored optional add-ins, substitutions, and tips to make your muffins shine. Remember to avoid overmixing to keep them fluffy, and try different variations to suit your taste. Store leftovers properly, and enjoy them later with our reheating tips. With this guide, you can bake fresh muffins with ease. I hope you find joy in making and sharing your creations!
Pumpkin Spice Cottage Cheese Muffins Fresh Delight
If you love the cozy flavors of fall, you’ll adore my Pumpkin Spice Cottage Cheese Muffins! These muffins blend the warm taste of pumpkin spice
- 1 cup brewed strong coffee or espresso - 1 cup milk (choose from whole, almond, or oat) - 2 tablespoons packed brown sugar - 1 teaspoon ground cinnamon - 1/2 teaspoon pure vanilla extract - Whipped cream (for topping) - Additional ground cinnamon or cinnamon sticks (for garnish) To make a tasty homemade cinnamon dolce latte, you need simple ingredients. Start with one cup of strong brewed coffee or espresso. This gives your drink a bold flavor. Choose your milk, like whole, almond, or oat. Each type brings a unique taste and feel to your latte. Next, you’ll need brown sugar and ground cinnamon. The brown sugar adds sweetness, while the cinnamon gives a warm spice. Don't forget the pure vanilla extract, which enhances the flavor. For the toppings, whipped cream makes your drink extra special. A sprinkle of more cinnamon on top or a cinnamon stick for garnish adds a lovely touch. Using quality ingredients makes a big difference. You can adjust the sweetness or spice to fit your taste. This way, your cinnamon dolce latte will be just right for you! To start, you need to heat the milk. Use a small saucepan and set it on medium heat. Stir the milk gently as it warms. You want it to steam, but do not let it boil. This will take about 2-3 minutes. Heating the milk this way helps keep it creamy. Next, you will froth the milk. You can use a milk frother or a whisk. Froth the milk for 1-2 minutes until it is nice and foamy. This step adds a light and airy texture to your latte. Now, let's brew your coffee or espresso. I recommend using a strong coffee for the best flavor. You can use a drip coffee maker, a French press, or an espresso machine. Aim for about 1 cup of brewed coffee or espresso. The stronger the coffee, the richer your latte will taste. In a separate bowl, you will create the cinnamon and brown sugar mixture. Combine 2 tablespoons of packed brown sugar with 1 teaspoon of ground cinnamon and 1/2 teaspoon of pure vanilla extract. Mix these until you form a smooth paste. This mixture brings sweet and spicy flavors to your latte. After the coffee is ready, you can mix it with the cinnamon mixture. In a large coffee mug, pour the brewed coffee or espresso into the bowl. Stir it well until the sugar dissolves completely. This creates a sweet base for your latte. Now, it’s time to combine the coffee and milk. Slowly pour the frothed milk over the coffee. Start with the liquid milk, holding back the foam. Finish by spooning the frothy milk on top. This layering adds a beautiful look to your drink. Finally, add a generous swirl of whipped cream on top. Sprinkle some extra ground cinnamon or add a cinnamon stick for a lovely garnish. Your Homemade Cinnamon Dolce Latte is now ready to enjoy! To get your cinnamon dolce latte just right, you can tweak the sweetness and cinnamon level. If you like it sweeter, add more brown sugar. Start with a little and taste as you go. For a stronger cinnamon flavor, use more ground cinnamon. Just remember, balance is key. Choosing the right milk is also important for frothing. Whole milk creates a rich, creamy foam. Almond milk gives a nutty taste, while oat milk is smooth and slightly sweet. Experiment with different types to find your favorite! Serving your latte can be fun and creative. Use a clear glass mug to show off the layers of coffee and foam. You can also try adding a sprinkle of cocoa powder for extra flair. For garnishes, whipped cream is a must. Then, add a sprinkle of ground cinnamon or place a cinnamon stick on the side. This not only looks great but adds a nice touch of flavor too. Enjoy your beautiful latte! {{image_4}} You can change up your Homemade Cinnamon Dolce Latte easily. Try adding flavored syrups like chocolate or vanilla. A little chocolate syrup gives a rich twist. Vanilla syrup adds a sweet and smooth touch. Both options are delicious! Consider spicing it up too. Adding nutmeg or cardamom can give your latte a warm boost. Nutmeg adds a sweet and earthy flavor. Cardamom brings a hint of spice that pairs well with cinnamon. Try these spices in small amounts first. You can always add more to taste! If you want a dairy-free option, many choices exist. Almond milk is light and has a slight nutty flavor. Oat milk is creamy and works great for frothing. Coconut milk gives a tropical twist. Each option changes the latte's taste and texture. Choose what fits your taste and health needs best. For a refreshing iced Cinnamon Dolce Latte, brew your coffee and let it cool. Pour the cooled coffee over ice in a tall glass. Use cold milk or a milk alternative and pour it over the coffee. Stir well to mix. Finish with whipped cream and a sprinkle of cinnamon. This makes a perfect treat for hot days! To keep your coffee and milk fresh, follow these steps: - Coffee: Store any leftover brewed coffee in an airtight container. This keeps it from getting stale. Place it in the fridge for up to 3 days. - Milk: If you have leftover milk, pour it back into its original container. Seal it tightly and store it in the fridge. Use it within 5-7 days for the best taste. - Cinnamon Sugar Mixture: If you made extra cinnamon and brown sugar mix, store it in a small jar. Seal it tightly and keep it in a cool, dry place for up to two weeks. When reheating your latte or its components, do it gently to avoid losing texture. - Coffee: Heat coffee in a small pot over low heat. Stir it often to prevent burning. You can also use a microwave, but heat it in short bursts, stirring in between. - Milk: For milk, heat it slowly in a pot. Stir it constantly to keep it from boiling. If it's frothed, you can use a milk frother again to restore its foaminess. Knowing how long your homemade latte lasts helps you enjoy it at its best. - Brewed Coffee: Lasts about 3 days in the fridge. - Frothed Milk: Best used right away, but can be stored for up to 2 days if kept in the fridge. Just remember to reheat it carefully. - Cinnamon Mixture: Stays good for about 2 weeks when stored properly. By following these tips, you can enjoy your homemade cinnamon dolce latte and keep it fresh for days! A latte is a mix of espresso and steamed milk. It is creamy and smooth. A cinnamon dolce latte adds brown sugar and cinnamon. This gives it a sweet and spicy flavor. The cinnamon dolce latte feels cozy and warm. You can top it with whipped cream and more cinnamon for a treat. Yes, you can make this drink dairy-free. Use almond, oat, or soy milk instead of regular milk. These options froth well and have great taste. They will keep the creamy texture. Just choose your favorite dairy substitute and follow the same steps in the recipe. To make more servings, just double or triple the ingredients. Use two cups of brewed coffee or espresso for two servings. Adjust the milk, sugar, and cinnamon as well. For larger groups, you can prepare it in a big pot. Just keep the same ratios. This way, everyone can enjoy a delicious drink together! This blog post showed you how to make a delicious Cinnamon Dolce Latte at home. You learned about the key ingredients, from strong coffee to perfect milk frothing. I shared tips for customizing sweetness and flavor, plus ideas for serving and storing. Experiment with your favorite variations to make it your own. Enjoy every sip of your homemade coffee treat. A little practice makes perfect, so keep trying until you find your perfect blend!
Homemade Cinnamon Dolce Latte Creamy Coffee Treat
Craving a cozy coffee treat? I’ll show you how to make a Homemade Cinnamon Dolce Latte that’s creamy and delicious! With just a few simple
- 1 cup pumpkin puree - 1 cup rolled oats - ½ cup vanilla protein powder - ¼ cup honey or maple syrup - 1/3 cup almond milk (or any milk of your choice) - 2 large eggs - 1 teaspoon baking powder - 1 teaspoon baking soda - 1 teaspoon ground cinnamon - ½ teaspoon ground nutmeg - ½ teaspoon vanilla extract - ¼ teaspoon salt - Optional: ½ cup chopped walnuts or pecans Each muffin is packed with nutrients. Here’s what you get: - Calories: About 120 - Protein: 6 grams - Carbohydrates: 18 grams - Fiber: 3 grams - Sugar: 5 grams - Fat: 3 grams These muffins offer a great balance of protein and healthy carbs. They’re perfect for breakfast or a snack. You can swap ingredients based on your taste or needs. Here are a few ideas: - Use almond flour instead of rolled oats for a gluten-free option. - Swap honey with agave syrup for a vegan choice. - Replace eggs with flaxseed meal (1 tablespoon flaxseed + 2.5 tablespoons water) for a vegan muffin. - Try coconut milk instead of almond milk for a richer flavor. - Add chocolate chips or dried fruit for a sweet twist. These simple swaps keep the muffins delicious while meeting your dietary needs. Start by preheating your oven to 350°F (175°C). This step ensures even baking. Next, prepare your muffin tin. You can use paper liners in each cup, or lightly grease them with cooking spray. This helps the muffins come out easily after baking. In a large mixing bowl, combine the following ingredients: - 1 cup pumpkin puree - 1 cup rolled oats - ½ cup vanilla protein powder - ¼ cup honey or maple syrup - 1/3 cup almond milk (or any milk of your choice) - 2 large eggs - ½ teaspoon vanilla extract Use a whisk or spatula to mix these items well. You want a smooth mixture with no lumps. This blend is where the magic begins. In another bowl, whisk together the dry ingredients: - 1 teaspoon baking powder - 1 teaspoon baking soda - 1 teaspoon ground cinnamon - ½ teaspoon ground nutmeg - ¼ teaspoon salt Make sure these components are evenly mixed. This step is crucial for a good rise and flavor in your muffins. Now, gently fold the dry mixture into the wet ingredients. Mix just until combined. Be careful not to overmix, as this can make the muffins tough. If you want added crunch, fold in ½ cup chopped walnuts or pecans at this point. Spoon the batter into the muffin tin, filling each cup about two-thirds full. This allows room for the muffins to rise. Place the tin in the preheated oven and bake for 18-20 minutes. Check doneness with a toothpick in the center of a muffin. If it comes out clean, they are ready. Once baked, take the muffins out and let them cool in the pan for about 5 minutes. Then, transfer them to a wire rack to cool completely before serving. Enjoy your delicious and healthy pumpkin protein muffins! To bake great muffins, follow these tips: - Use fresh ingredients: They make a big difference in taste. - Measure carefully: Use dry and liquid measuring cups for accuracy. - Preheat the oven: Always preheat to ensure even cooking. - Don’t overmix: Stir until just combined to keep muffins fluffy. - Fill the cups right: Fill each muffin cup two-thirds full for proper rise. Avoid these common mistakes for best results: - Too much flour: This can make muffins dry. Use a spoon to scoop and level. - Not enough baking powder: This can lead to flat muffins. Check the date on your baking powder. - Ignoring oven temperature: An oven that’s too hot or too cold affects baking time. - Skipping the cooling step: Letting muffins cool helps set their structure. You can easily enhance flavor and texture: - Add spices: Extra cinnamon or ginger gives muffins a warm flavor. - Incorporate nuts: Walnuts or pecans add crunch and richness. - Use yogurt: A dollop of yogurt can make muffins moist and tangy. - Try mix-ins: Chocolate chips or dried fruit can add sweetness and fun. With these tips, your pumpkin protein muffins will be tasty and satisfying! {{image_4}} You can make these muffins even more fun! Try adding cranberries or chocolate chips. Dried cranberries give a tart touch. Chocolate chips add sweetness. Both mix well with pumpkin. You can fold in about ½ cup of either before baking. This change gives your muffins a new flavor twist. Want a gluten-free version? It’s simple! Just swap out rolled oats for gluten-free oats. Be sure to check the label. Use almond flour instead of regular flour. This keeps it light and tasty. Your muffins will still be moist and delicious. If you want to cut sugar, choose unsweetened applesauce. Replace honey or maple syrup with it. You can also use a sugar substitute like stevia. This keeps your muffins sweet without added sugar. Keep in mind that flavor might change slightly. To keep your muffins fresh, store them in an airtight container. Place them at room temperature for up to three days. If you want them to last longer, refrigerate them. In the fridge, they stay good for about a week. Make sure to separate layers with parchment paper to avoid sticking. You can freeze these muffins for longer storage. Let them cool completely first. Then, wrap each muffin in plastic wrap or foil. Place the wrapped muffins in a freezer-safe bag or container. They will last for up to three months in the freezer. When you're ready to eat, just thaw them in the fridge overnight. To reheat, use your oven or microwave. For the oven, preheat to 350°F. Place the muffins on a baking sheet for about 10 minutes. For the microwave, heat each muffin for 15-20 seconds. Check to make sure they are warm throughout. Enjoy your tasty treat just like fresh! To boost fiber, add chia seeds or flaxseeds. Both seeds blend well in the mix. You can also replace some rolled oats with whole wheat flour. This adds more fiber without changing the taste. Yes, canned pumpkin works well. It is often thicker and creamier than fresh. Just make sure to choose pure pumpkin and not pumpkin pie filling. This keeps your muffins healthy and tasty. If you want to skip protein powder, try using ground oats. You can also use nut flour like almond flour for extra protein. Both options will change the taste a bit, but they keep your muffins nutritious. These muffins can stay fresh for about four days at room temperature. Store them in an airtight container. If you want to keep them longer, you can freeze them for up to three months. Yes, you can make mini muffins! Just reduce the baking time. Bake them for 10-15 minutes. Keep an eye on them to avoid overbaking. Mini muffins are fun and perfect for snacks. You can use flax eggs as a substitute. Mix one tablespoon of ground flaxseed with three tablespoons of water. Let it sit for a few minutes until it thickens. This works well to bind your muffins without eggs. You now have all the tools to make delicious pumpkin protein muffins. We covered key ingredients, baking steps, and helpful tips. You learned how to tweak the recipe for your preferences and how to store your muffins for freshness. Baking can be fun and easy with the right approach. Try these ideas to create your perfect muffin. Enjoy your baking journey and share these tips with others!
Pumpkin Protein Muffins Healthy and Simple Recipe
Looking for a delicious snack that’s also healthy? You’ll love my Pumpkin Protein Muffins! These simple muffins are packed with nutrients and flavor. I’ll show
To make real masala chai, you need a few key items. Here’s what you’ll need: - 2 cups water - 1 cup milk (you can use whole, almond, or any non-dairy type) - 2 tablespoons loose black tea (try Assam or Darjeeling) - 1-2 tablespoons sugar (adjust to your taste) - 1 cinnamon stick - 4-5 green cardamom pods, lightly crushed - 4-5 black peppercorns - 1 piece of fresh ginger (about 1 inch), thinly sliced - 2-3 whole cloves These ingredients come together to create a rich and warming drink. You can add some extra flavors to your masala chai. Here are some options: - A pinch of nutmeg for warmth - A few bay leaves for depth - Aniseed for a unique twist - Vanilla extract for sweetness Feel free to experiment with these options. They can elevate your chai to new levels. Choosing the right tea is key for great masala chai. Here’s how to pick the best: - Look for loose leaf tea instead of tea bags for better flavor. - Select strong black tea varieties like Assam or Darjeeling. - Check the freshness; older tea can lose its bold taste. A good quality tea will make your masala chai truly shine. For the complete recipe, refer to the Full Recipe section. First, take a medium saucepan and add 2 cups of water. Place it on medium heat. Wait for the water to boil. As soon as it bubbles, add the sliced ginger, crushed cardamom pods, black peppercorns, whole cloves, and the cinnamon stick. Turn the heat down a bit. Let the mix simmer for about 5 minutes. This makes the spices release their flavors. Now, stir in 2 tablespoons of loose black tea. Let it steep for 2-3 minutes. You can adjust this time based on how strong you want your chai. Keep in mind, a longer steep means a stronger flavor. The tea and spices blend together nicely during this step. Next, slowly add your choice of milk. You can use whole milk, almond milk, or any non-dairy milk. Increase the heat slightly and bring it back to a gentle boil. Once it's bubbling, add 1-2 tablespoons of sugar. Stir until it dissolves completely. Let it simmer for another 2-3 minutes. This helps to blend all the flavors. Finally, remove it from heat and strain the chai into cups using a fine mesh strainer. Serve it hot! You can enjoy your masala chai with biscuits or savory snacks for a great treat. For the full recipe, check out Spiced Delight: Authentic Masala Chai. To make great masala chai, you need the right balance of spices. Start with the basics: ginger, cardamom, and cinnamon. These spices give chai its warm and inviting flavor. You can adjust the amounts based on your taste. If you like it spicy, add more ginger and black pepper. For a sweeter taste, use extra cardamom. Play with the spices until you find your perfect mix. The way you brew your chai can change its taste. Start by boiling the water with the spices first. This step releases their flavors. After that, add the tea leaves. Let them steep for 2-3 minutes. If you want a stronger chai, steep the tea longer. Remember, the longer it brews, the more flavor you will get. Finally, always add the milk after the tea has steeped. This helps keep the chai creamy and rich. Many people make simple mistakes when making masala chai. One common mistake is not boiling the spices long enough. This can lead to a weak flavor. Another mistake is adding the milk too early. Always wait until after the tea has steeped. Also, be careful with the sugar. Start with a little and taste as you go. You can always add more, but you can't take it out. Following these tips will help you create a perfect cup of masala chai every time. For a detailed recipe, check the Full Recipe. {{image_4}} You can change the spices in masala chai to fit your taste. Instead of ginger, try using fennel seeds for a sweet touch. Replace cardamom with star anise for a bold flavor. You can even add turmeric for a warm color and health boost. Each spice brings a new twist to your drink. Masala chai usually uses whole milk for creaminess. However, you can swap it for almond, oat, or soy milk. Each option brings its own flavor. Almond milk gives a nutty taste, while oat milk adds a creamy feel. Experiment to find the best match for your palate. Seasonal chai recipes make each season special. In winter, add a pinch of nutmeg or a splash of vanilla for warmth. In summer, try iced masala chai. Just brew your chai, cool it, and serve over ice. You can garnish with mint leaves for a refreshing twist. Enjoy the flavors of the season with every sip! To keep your leftover masala chai fresh, pour it into a clean container. Make sure it has a tight lid. Place it in the fridge. Use it within two days for the best flavor. This way, you can enjoy your chai later without losing its taste. For the freshest masala chai, always brew it right before serving. Use fresh spices and loose black tea for maximum flavor. If you want to make a larger batch, use the Full Recipe. Always measure your ingredients accurately. This helps create the perfect balance of flavors. When reheating masala chai, do it slowly on the stove. Avoid the microwave, as it can change the taste. Heat it until it's warm, but don’t let it boil again. This keeps the spices and flavors intact. Stir well before serving to blend everything nicely. Authentic masala chai is a spiced tea from India. It blends black tea with milk and spices. The spices usually include cardamom, cinnamon, ginger, and cloves. Each family has its own special recipe. You can adjust the spice levels to fit your taste. Masala chai is warm, rich, and comforting, perfect for any time of day. Yes, you can make masala chai without milk. Use water instead to keep it dairy-free. The taste will differ, but it can still be flavorful. You can also try plant-based milk like almond or oat. These options add a unique twist. Adjust the spices to keep the drink delicious. You can find authentic masala chai ingredients at local Indian grocery stores. Most stores stock spices like cardamom, cloves, and cinnamon. You can also buy loose black tea, such as Assam or Darjeeling, there. For convenience, shop online for specialty items. Websites often offer fresh spices. Check for quality and freshness to ensure the best flavor in your chai. For the complete recipe, see the [Full Recipe]. Masala chai is a delightful drink, rich in flavor and tradition. We explored essential and optional ingredients, ensuring a perfect blend. I shared step-by-step instructions for brewing and tips to enhance your chai experience. You can add your personal touch through variations and learn how to store it properly. Remember, good masala chai comes from using quality ingredients and avoiding common mistakes. Enjoy experimenting with your own recipes and savor each sip of this comforting beverage.
Authentic Masala Chai Rich and Flavorful Recipe Guide
If you’re craving a warm cup of comfort, you’ve come to the right place! In my guide, Authentic Masala Chai: Rich and Flavorful Recipe, I’ll
To make the Iced Pumpkin Spice Latte, you need these items: - 1 cup brewed coffee, cooled to room temperature - 1/2 cup milk (your choice of dairy or non-dairy) - 1/4 cup pure pumpkin puree - 2 tablespoons pure maple syrup (adjust to taste) - 1/2 teaspoon pumpkin pie spice (plus additional for garnish) - 1/4 teaspoon pure vanilla extract - Ice cubes, as needed - Whipped cream (optional, for a finishing touch) When it comes to milk, you can pick your favorite. Options include whole milk, almond milk, oat milk, or soy milk. Each will give a unique twist to your drink. For the best flavor, I recommend using high-quality brands. For vanilla extract, look for pure options like Nielsen-Massey or McCormick. For pumpkin puree, Libby’s is a solid choice. It offers a rich flavor that elevates your latte. With these ingredients, you’re ready to create a creamy and flavorful drink that warms your soul. If you want details on the full recipe, check that out for complete guidance. First, grab a medium mixing bowl. Add 1/4 cup pure pumpkin puree. Then, mix in 2 tablespoons pure maple syrup and 1/2 teaspoon pumpkin pie spice. Also, add 1/4 teaspoon pure vanilla extract. Whisk everything together well. You want a smooth mix without any lumps. This flavor base gives your latte that cozy fall taste. Next, brew 1 cup of coffee and let it cool to room temperature. If you want to speed up this process, pour it into a shallow dish. This helps it cool faster. In a separate pitcher, combine the cooled coffee with 1/2 cup of your favorite milk. I like using almond milk for a nutty flavor. Stir gently until the two liquids blend well. Now, it’s time to layer your drink. Fill two glasses with ice cubes. Carefully pour the coffee and milk mixture over the ice. Then, slowly add the pumpkin mix on top. This creates a beautiful layered look. If you like, top each drink with whipped cream. A sprinkle of pumpkin pie spice adds a nice touch. Enjoy your creamy and flavorful iced pumpkin spice latte! Using fresh pumpkin can make a big difference in taste. Fresh pumpkin adds a rich, earthy flavor. However, canned pumpkin puree is convenient and works well too. Just pick a brand with no added sugar. When it comes to milk, you have many choices. Whole milk gives a creamy taste. Almond milk offers a nutty flavor, while oat milk is smooth and sweet. Try different ones to find your favorite mix. You can easily adjust the sweetness in your Iced Pumpkin Spice Latte. Start with the amount of maple syrup in the recipe. If you want it sweeter, add more. Consider using natural sweeteners like honey or agave syrup. These can add unique flavors while keeping it healthier. You can save time by prepping parts of the drink in advance. Make the pumpkin mixture and store it in the fridge. It stays fresh for a few days. Brew coffee and chill it for quick use later. This way, you can enjoy your Iced Pumpkin Spice Latte whenever you like! {{image_4}} If you're looking for a dairy-free Iced Pumpkin Spice Latte, try using almond, oat, or soy milk. Almond milk gives a nutty flavor. Oat milk is creamy and smooth, perfect for lattes. Soy milk adds a nice protein boost. These options make your drink light and delicious. To jazz up your Iced Pumpkin Spice Latte, consider adding chocolate or caramel flavors. A drizzle of chocolate syrup creates a rich taste. Caramel adds sweetness and depth. You can also enhance the seasonal feel with nutmeg or extra cinnamon. These spices make your drink cozy and festive. To make a cold brew version, start with cold brew coffee instead of regular coffee. Use the same ratio of coffee and milk as in the original recipe. Mix your pumpkin mixture with the cold brew. Pour over ice as usual. This method gives a smooth, less acidic flavor. For the full recipe, check out the detailed instructions above. Enjoy customizing your Iced Pumpkin Spice Latte! To store the pumpkin spice mixture, place it in an airtight container. Keep it in the fridge. This mixture lasts about five days. For brewed coffee, let it cool fully. Then, store it in a sealed container in the refrigerator. It can stay fresh for up to a week. If you have leftover latte, you can use it in desserts. Pour it over ice cream for a tasty treat. You can also mix it into pancakes for a fun breakfast twist. Or, try adding it to a cake batter for a cozy flavor. When you prepare the pumpkin spice mix, it can last for five days in the fridge. Brewed coffee remains fresh for about one week. If you make the latte in advance, enjoy it within three days for the best taste. Use fresh ingredients for the best results. Yes, you can use instant coffee. It saves time and is easy to prepare. However, instant coffee may not taste as rich as brewed coffee. If you want a stronger flavor, stick with brewed coffee. Instant coffee can be less smooth and might have a different texture. Pumpkin spice and pumpkin pie spice often confuse many. Pumpkin spice is the flavor of the season. It includes cinnamon, nutmeg, and ginger. Pumpkin pie spice has these spices plus allspice. Use pumpkin pie spice for a richer flavor in your drink. To lighten your Iced Pumpkin Spice Latte, consider these tips: - Use skim milk or a non-dairy milk like almond or oat. - Reduce the amount of maple syrup. You can use less or try a sugar-free version. - Skip the whipped cream on top, or use a lighter option. Many coffee shops serve great Iced Pumpkin Spice Lattes. Starbucks is a popular choice. Local cafes often make unique versions too. Check online reviews to find the best in your area. Ask friends for their favorites! For a detailed guide on making the Iced Pumpkin Spice Latte, check out the [Full Recipe](#). You now have a clear guide to make a delicious Iced Pumpkin Spice Latte. We covered the essential ingredients, easy steps, and creative tips. Remember, you can customize flavors and milk choices to fit your taste. Preparing this drink ahead of time can save you effort on busy days. Try out various options and enjoy your unique version. Make it fun and share it with friends. With practice, you’ll master this cozy drink. Enjoy your homemade delight any time, especially in autumn!
Iced Pumpkin Spice Latte Creamy and Flavorful Drink
Craving a cool, creamy treat that celebrates fall? The Iced Pumpkin Spice Latte is your answer! This drink combines rich pumpkin flavors with warm spices,
- Freshly Brewed Coffee: Start with two cups of your favorite coffee. Freshness matters for a rich flavor. - Grated Ginger: Use one tablespoon of fresh ginger. This adds a spicy kick to your drink. - Sweeteners and Spices: I like to use two tablespoons of brown sugar, half a teaspoon of cinnamon, and a quarter teaspoon of nutmeg. These enhance the overall taste. - Milk or Plant-based Alternatives: You can use one cup of regular milk or any plant-based milk you prefer. This adds creaminess. - Whipped Cream and Garnishes: A dollop of whipped cream on top makes it special. You can also add a small piece of candied ginger for flair. - Fine-mesh sieve: This helps filter out the ginger and spices for a smooth coffee. - Saucepan: Use this to heat your coffee and mix in the flavors. - Milk frother or whisk: These tools froth the milk, making it light and airy. To learn how to combine these ingredients into a delicious cup, check out the Full Recipe. To make ginger coffee, start by gathering your ingredients. You need freshly brewed coffee, grated ginger, brown sugar, ground cinnamon, and ground nutmeg. 1. Combining Ingredients in a Saucepan Pour 2 cups of fresh coffee into a small saucepan. Next, add 1 tablespoon of finely grated ginger, 2 tablespoons of brown sugar, 1/2 teaspoon of ground cinnamon, and 1/4 teaspoon of ground nutmeg. This mix creates a warm and spicy flavor. 2. Heating and Blending Flavors Heat your mixture over medium-low heat. Stir it gently and keep an eye on it. You want it hot, but not boiling. This step helps the flavors blend well together, making your coffee rich and fragrant. Next, it’s time to filter and froth. 1. Pouring Through a Sieve Once heated, pour your coffee through a fine-mesh sieve into a large mug. This step removes the grated ginger and spices, leaving you with a smooth blend. It’s important for a clean taste. 2. Frothing the Milk for Creaminess In another saucepan, warm up 1 cup of milk or your favorite plant-based alternative over low heat. Be careful not to boil it. Use a whisk or milk frother to froth the milk until it’s creamy and light. This makes your drink feel special. Now for the fun part! 1. Mixing Coffee and Milk Gradually pour the frothed milk into your mug of spiced coffee. Use a spoon to stir gently. This mixes the flavors and creates a lovely texture. 2. Adding Whipped Cream and Garnish If you want a treat, add a dollop of whipped cream on top. For an elegant touch, finish with a small piece of candied ginger. It adds sweetness and looks great in your cup. You can find the full recipe in the recipe section. Enjoy your ginger coffee! To make your ginger coffee just right, start by adjusting sweetness and spice levels. You can change the amount of brown sugar based on your taste. If you like it sweet, go for two tablespoons. For less sweetness, one tablespoon works well. As for spice, add more ginger if you enjoy a stronger kick. A good rule is one tablespoon of grated ginger per cup of coffee. Next, focus on ideal ginger-to-coffee ratios. I recommend using two cups of coffee for a robust flavor. This amount pairs well with one tablespoon of fresh ginger. If you want to make a larger batch, keep this ratio in mind. It helps the flavors blend nicely. When it comes to brewing, the French press or drip coffee maker works well. The French press gives a richer taste since it steeps longer. On the other hand, a drip coffee maker is quick and easy. Just use fresh ground coffee for the best flavor. You can also try other methods to enhance flavor. For example, steeping ginger in hot water first creates a strong ginger tea. Then, mix this with brewed coffee. This method boosts the ginger flavor. Serving plays a big role in the experience. Use clear glass mugs to show off your drink. The layers of coffee and milk look beautiful! You can also add a dollop of whipped cream on top. It adds creaminess and makes it look fancy. To enhance aroma, consider adding a sprinkle of cinnamon on top. This tiny touch elevates the scent. When you take a sip, the warm spices will greet you. Enjoying every aspect of your ginger coffee makes it a true treat. For those who want to dive deeper, check out the Full Recipe for more tips on perfecting your ginger coffee. {{image_4}} What are the benefits of ginger? Ginger packs a powerful punch. It has antioxidants that fight free radicals. These antioxidants help keep your body healthy. Ginger also has anti-inflammatory properties. It can ease pain and swelling in your body. How does ginger help digestion and immunity? Ginger acts like a friend to your stomach. It can soothe nausea and improve digestion. It helps your body absorb food better. Plus, ginger can boost your immune system. It helps you fight off colds and viruses. Can ginger have side effects? Like all good things, too much ginger can be bad. It may upset your stomach if you consume it excessively. You might feel heartburn or nausea. Listen to your body and enjoy in moderation. When should you avoid ginger coffee? If you are pregnant or have certain health issues, be cautious. Consult your doctor if you are unsure. Always put your health first. What do nutritionists say about ginger? Many nutritionists praise ginger for its health benefits. They recommend it for those looking to spice up their coffee. They also note its role in making coffee healthier. Are there misconceptions about ginger? Some people think ginger only adds heat. In reality, it enhances flavors and offers health perks too. Ginger coffee can be a delicious way to enjoy these benefits. For a delightful experience, try my Ginger Spice Coffee recipe [Full Recipe]. This drink combines the warmth of ginger with the rich taste of coffee, creating a perfect morning boost. You can enhance ginger coffee by adding spices like cardamom or clove. These spices add warmth and depth. Cardamom brings a sweet, floral note. Clove adds a rich, warm flavor. Try a pinch of each to see what you like best. Using different coffee beans or strengths also changes the flavor. A light roast coffee gives a bright taste, while a dark roast offers bold flavors. If you prefer a stronger drink, use more coffee grounds. This will boost the flavor and the caffeine kick. You can make iced ginger coffee for hot days. Just brew the coffee and let it cool. Then add ice and your ginger mix. This drink is refreshing and perfect for summer. Using coffee concentrate is another quick method. Brew a strong batch, then mix it with ginger and milk. This saves time and still delivers that great ginger flavor. If you want a quick fix, several store-bought ginger coffee brands are available. Look for brands that use real ginger for the best taste. I recommend trying brands like Ginger Brew or Spiced Coffee Co. They have great reviews and make it easy to enjoy ginger coffee at home. What is Ginger Coffee? Ginger coffee is a warm drink made by mixing coffee with fresh ginger. It has a spicy, sweet flavor that wakes up your senses. You can make it easily at home. Just follow the Full Recipe for a delightful drink. How can I make it stronger? To make your ginger coffee stronger, use more coffee or add extra ginger. You can also brew your coffee longer for a bolder taste. Experiment with these options until you find your perfect strength. Can I drink ginger coffee every day? Yes, you can drink ginger coffee daily if you enjoy it. Ginger has health benefits, like boosting your immune system. Just be mindful of your ginger intake. Too much can lead to stomach upset. Does ginger coffee help with digestion? Absolutely! Ginger helps soothe the stomach and can ease nausea. Drinking ginger coffee may support digestion and comfort your tummy after meals. It’s a great choice for those who struggle with digestive issues. How long can you store ginger coffee? You can store ginger coffee in the fridge for about 3 days. Just remember to keep it in an airtight container. Reheat it gently on the stove or in the microwave before enjoying. Can I use powdered ginger instead of fresh? Yes, you can use powdered ginger if fresh is not available. Use about 1/4 teaspoon of powdered ginger for each tablespoon of fresh ginger. The flavor will be different, but it can still be tasty. Ginger coffee combines the warmth of coffee with ginger's zing. You learned how to prepare it, from key ingredients to final touches. The health benefits add to its appeal, while variations offer new flavors. Remember to balance sweetness and ginger strength to suit your taste. Whether you brew it hot or cold, ginger coffee is a delightful treat. Enjoy exploring this unique beverage, and make it your own!
Ginger Coffee Boost Healthy Energy and Flavor
Are you ready to supercharge your mornings with a delicious twist? Ginger coffee combines the rich flavors of your favorite brew with the zing of
To make the perfect egg and cheese breakfast sandwich, you need these key ingredients: - 2 large eggs - 2 slices of sharp cheddar cheese - 1 English muffin, split in half - 1 slice of creamy avocado - 1 tablespoon mayonnaise - Salt and freshly cracked black pepper, to taste - 1 teaspoon extra virgin olive oil - A handful of fresh arugula or baby spinach, for garnish These ingredients work together to create a tasty and filling meal. The eggs give protein, while the cheese adds creaminess. The English muffin is crispy, and the avocado adds a smooth texture. Fresh greens make it colorful and bright. You can get creative with your sandwich! Here are some fun add-ins to consider: - Sliced tomatoes for freshness - Crispy bacon or sausage for extra protein - Sliced jalapeños for a spicy kick - Fresh herbs like basil or cilantro for a fragrant touch - Hot sauce for a zesty finish These options let you customize your sandwich. You can mix and match to find your favorite flavors. This breakfast sandwich is not only delicious but also offers good nutrition. Here’s a simple breakdown: - Calories: About 450 (depends on add-ins) - Protein: Around 20g - Fat: About 30g - Carbohydrates: Approximately 30g This meal gives you energy to start your day. The protein keeps you full, while healthy fats help your brain function. You can enjoy this sandwich guilt-free, knowing it fuels your body well. For the full recipe, check out the Cheesy Sunny-Side-Up Delight. Start by splitting the English muffin in half. Toast each half until golden brown. This step adds a nice crunch to your sandwich. You can use a toaster or a broiler for even toasting. The crunchy texture makes each bite more enjoyable. Next, heat a non-stick skillet over medium heat. Pour in the olive oil and let it warm up. Crack two large eggs gently into the pan, keeping the yolks whole. Season them with salt and black pepper. Cook the eggs for about 2-3 minutes. When the whites turn white and firm, add a slice of cheddar cheese on each egg. Cover the skillet with a lid. This helps the cheese melt nicely while the yolks cook. You can choose sunny-side-up or over-easy eggs based on your taste. Now, it's time to build your sandwich. Take the toasted English muffin halves. Spread mayonnaise on the toasted sides. On the bottom half, place a slice of creamy avocado. Then, add the cheesy egg right on top. Finish with a handful of fresh arugula or baby spinach for a burst of color. Put the top half of the muffin on the sandwich. Press down gently to hold everything together. Your tasty egg and cheese breakfast sandwich is ready to enjoy! For the full recipe, check out Cheesy Sunny-Side-Up Delight. To cook eggs well, start with fresh eggs. Fresh eggs taste better and look nicer. Use a non-stick skillet for easy cooking. Heat the skillet over medium heat to avoid burning. Crack the eggs gently to keep the yolks whole. Add a pinch of salt and pepper for flavor. Cook them until the whites are firm but the yolks stay runny, about 2-3 minutes. This gives you that perfect sunny-side-up look. To melt cheese just right, use slices that are not too thick. Sharp cheddar works great here. As the egg whites cook, place the cheese on top of the eggs. Cover the skillet with a lid. The steam will help the cheese melt evenly. Keep an eye on it. You want it gooey, not burnt. This step adds creaminess to your sandwich. Presentation is key for any meal. Slice the English muffin in half and toast it until golden. Spread some mayonnaise on each half for added flavor. Layer a slice of avocado on the bottom half. Then, add the cheesy egg for a beautiful look. Top the sandwich with fresh arugula or spinach. This adds color and a nice crunch. Serve your sandwich on a plate with fruit or hash browns. It makes the meal feel special. {{image_4}} You can switch up the cheese in your egg and cheese breakfast sandwich. Try using mozzarella for a mild flavor. Pepper jack adds a spicy kick. For a creamy touch, go with gouda or brie. Each cheese brings its own unique taste. Experiment until you find your favorite. Adding veggies boosts flavor and nutrition. Spinach, tomatoes, or bell peppers work well. Sauté them in the same pan as the eggs for extra flavor. You can also include proteins like bacon, sausage, or turkey. Layer them in for a heartier meal. This way, your sandwich becomes even more satisfying. If you want a portable option, try a breakfast wrap. Use a tortilla instead of an English muffin. Follow the same steps for cooking the eggs and cheese. Add your favorite fillings, then roll it up like a burrito. This makes for a quick meal on the go. You can still enjoy all the flavors in a new style. For a full recipe, check out the Cheesy Sunny-Side-Up Delight. To keep your egg and cheese breakfast sandwich fresh, store it well. First, let it cool down. Then, wrap it tightly in plastic wrap or foil. You can also use an airtight container. This will keep it from drying out or getting soggy. Store it in the fridge for up to 2 days. If you think you won't eat it soon, consider freezing it. When you’re ready to eat your sandwich, reheating it properly is key. Place it in the microwave on a microwave-safe plate. Heat it for about 30 seconds to 1 minute. Check if it’s warm enough. If you want a crispy texture, pop it in the toaster oven or a skillet for a few minutes. This way, the bread stays crunchy and the cheese melts nicely. If you want to make this sandwich ahead of time, freeze the components separately. Cook the eggs and cheese, then let them cool. Wrap them in plastic and place them in a freezer bag. You can also freeze the English muffin halves. This method lets you make a fresh sandwich later. Just remember to thaw everything in the fridge overnight before reheating. Enjoy your Cheesy Sunny-Side-Up Delight anytime! The best bread for a breakfast sandwich is an English muffin. It has a nice texture and holds the filling well. You can also use bagels, croissants, or whole grain bread. Each type adds its own flavor and crunch. Choose what you like best! Yes, you can make this sandwich ahead of time! Just cook the eggs and assemble the sandwich. Wrap it up and store it in the fridge. When you are ready to eat, heat it in the microwave or toaster oven. This will keep it warm and tasty. Many cafes and diners serve egg and cheese breakfast sandwiches. Popular chains like Starbucks and Dunkin' offer them too. Local bakeries often have unique versions. Try different places to find your favorite! You can easily modify this recipe! For a vegan option, use tofu or a chickpea scramble instead of eggs. Substitute dairy cheese with plant-based cheese. If you're gluten-free, try a gluten-free English muffin. These swaps will fit into your dietary needs while keeping the meal tasty. For a complete guide on making the sandwich, check the Full Recipe. This article covered how to make a delicious egg and cheese breakfast sandwich. We explored key ingredients, cooking methods, and tasty add-ins. I shared tips for perfecting your sandwich, from eggs to cheese, and offered variations to keep it exciting. Don't forget about storage and reheating methods to enjoy leftovers. These sandwiches are easy to make and fun to customize. Try them for a tasty start to your day!
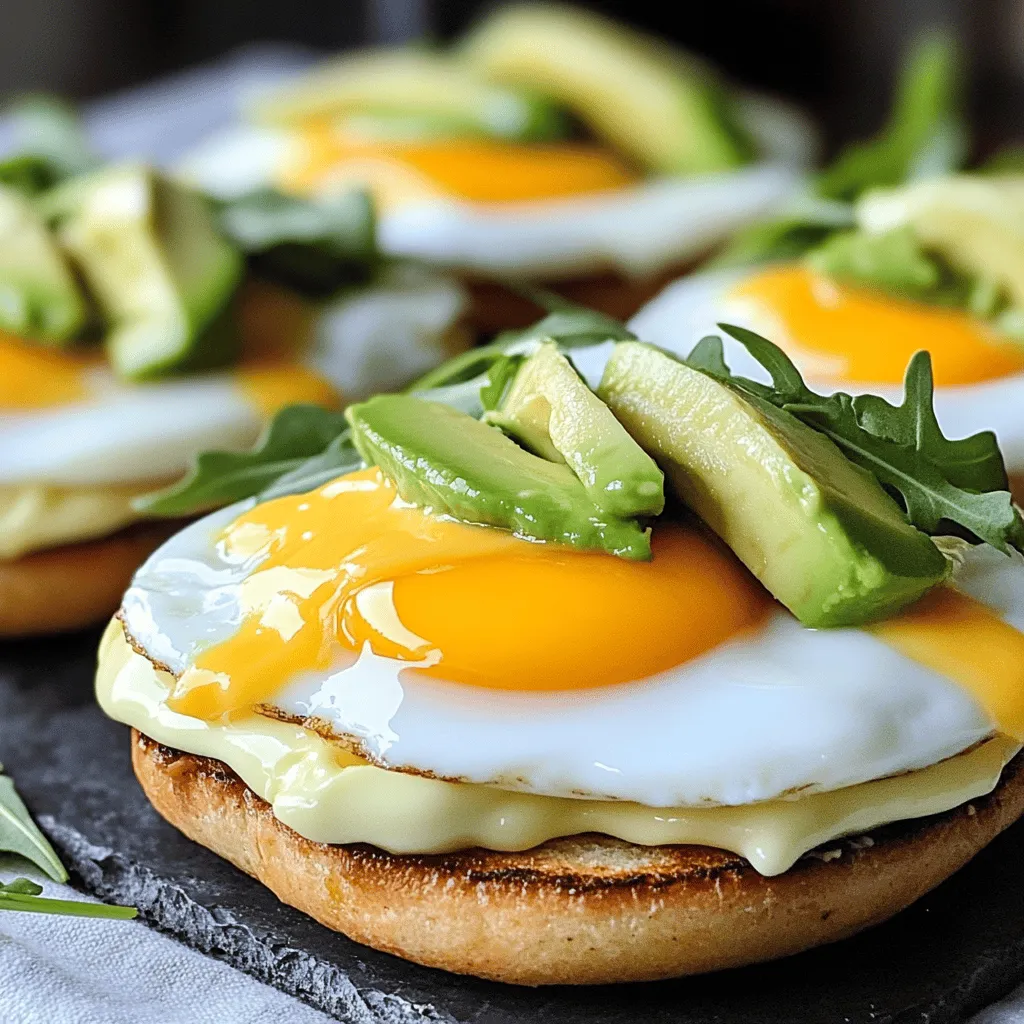
Egg and Cheese Breakfast Sandwich Easy and Tasty Meal
Start your day right with an Egg and Cheese Breakfast Sandwich! This easy and tasty meal is perfect for busy mornings or a lazy brunch.
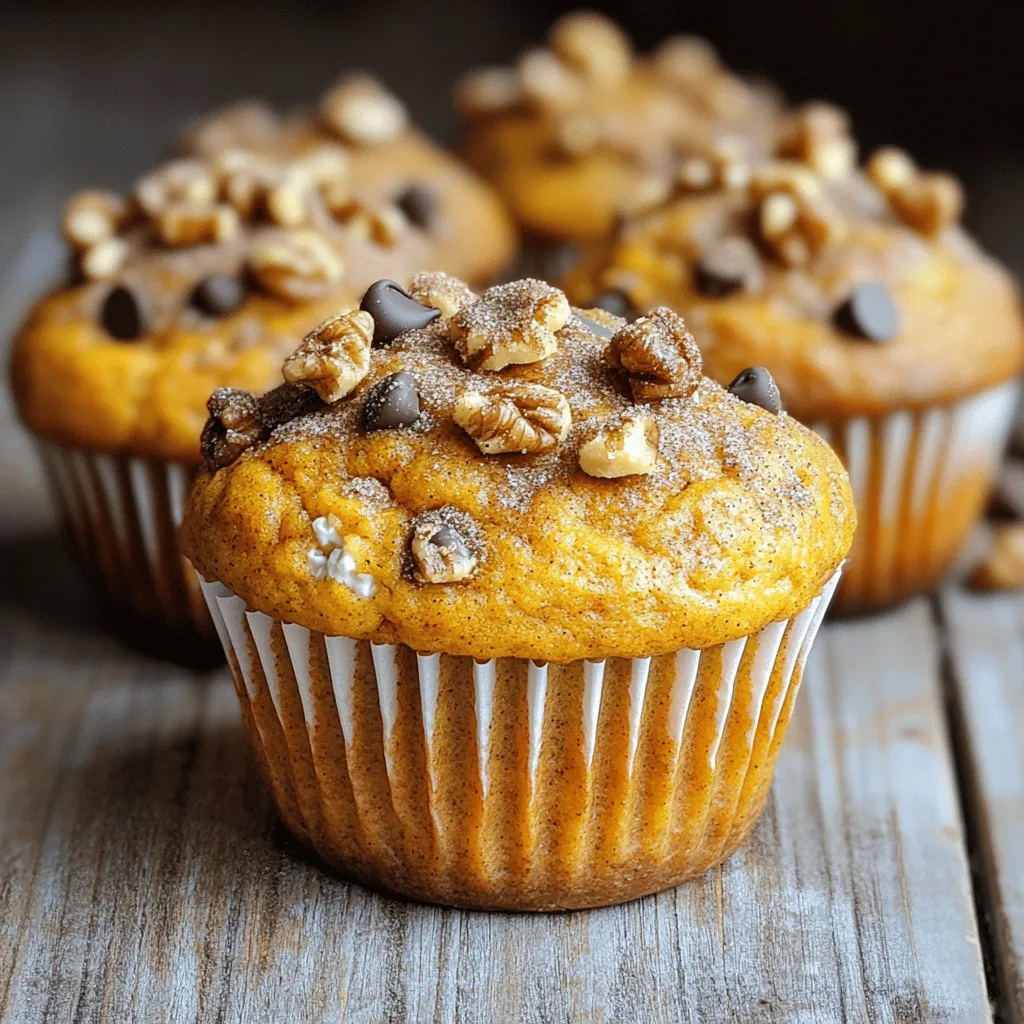
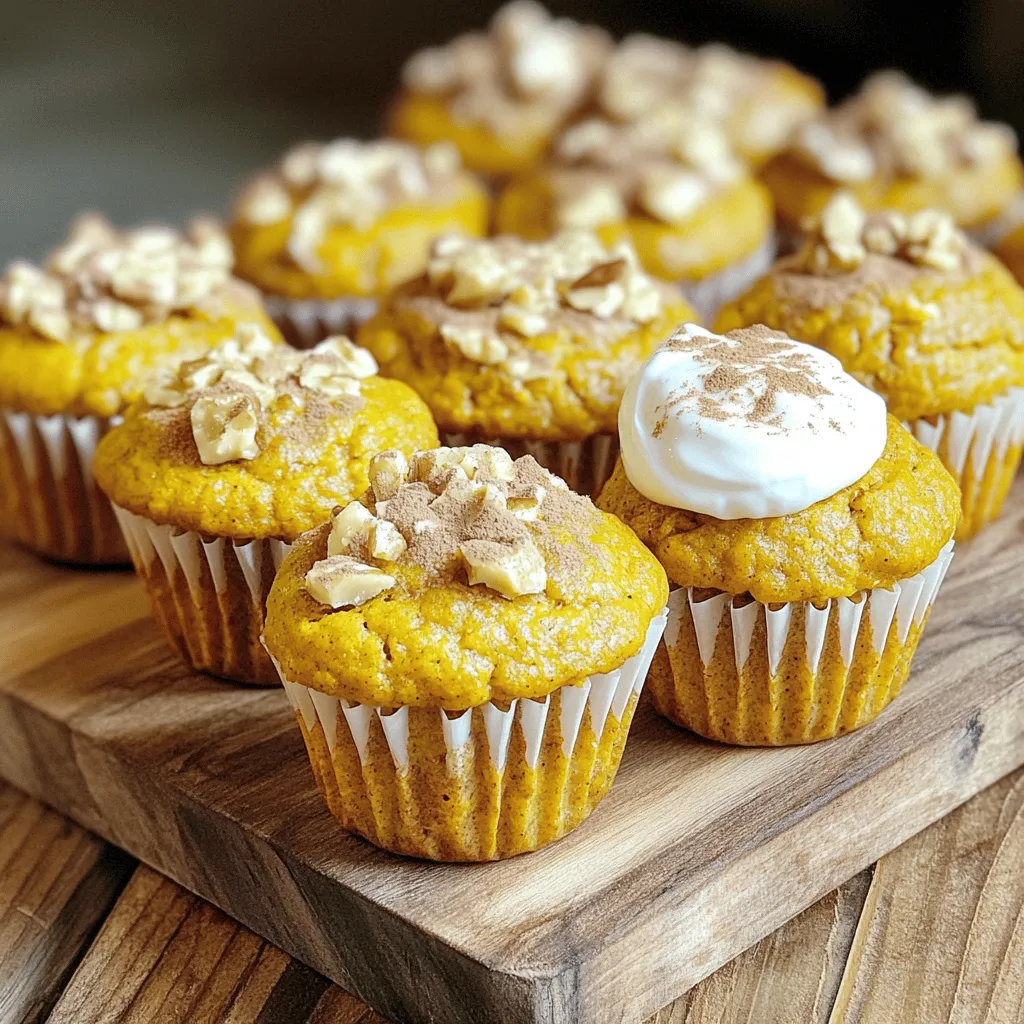
- 1 cup canned pumpkin puree - 3/4 cup Greek yogurt - 1/2 cup brown sugar - 1/4 cup pure maple syrup - 2 large eggs, at room temperature - 1 teaspoon pure vanilla extract - 1 1/2 cups all-purpose flour - 1 teaspoon baking soda - 1 teaspoon baking powder - 1 teaspoon pumpkin pie spice - 1/2 teaspoon salt - 1/2 cup chopped walnuts (or pecans) - Optional: pumpkin seeds for topping Using Greek yogurt in these muffins adds protein and moisture. This makes them soft and rich. Canned pumpkin is full of fiber and vitamins. It gives the muffins a nice flavor and a lovely orange color. Brown sugar adds a deeper taste than regular sugar. Pure maple syrup brings a natural sweetness and a hint of earthiness. Finally, nuts add healthy fats and a nice crunch. If you want a dairy-free option, use coconut yogurt instead of Greek yogurt. For a lower sugar version, you can replace brown sugar with a sugar substitute. If you avoid nuts, skip them or replace them with seeds. You can also use whole wheat flour for a healthier option. Each swap keeps the muffins tasty while fitting your needs. For more details, check the Full Recipe. To make Greek yogurt pumpkin muffins, start by gathering all your ingredients. You need canned pumpkin puree, Greek yogurt, brown sugar, maple syrup, eggs, vanilla extract, flour, leavening agents, spices, and nuts. Preheat your oven to 350°F (175°C) and prepare your muffin tin. You can use paper liners or non-stick spray for easy removal. 1. Mix Wet Ingredients: In a large bowl, combine the canned pumpkin puree, Greek yogurt, brown sugar, maple syrup, eggs, and vanilla extract. Whisk until smooth. 2. Combine Dry Ingredients: In another bowl, sift together the flour, baking soda, baking powder, pumpkin pie spice, and salt. This helps distribute the leavening agents evenly. 3. Combine Mixtures: Gently fold the dry mix into the wet mixture. Stir until no dry flour shows, but don’t overmix. This keeps your muffins light. 4. Add Nuts: Fold in chopped walnuts or pecans for added crunch. This step gives your muffins texture. 5. Portion the Batter: Scoop the batter into your muffin tin, filling each cup about two-thirds full. If you like, sprinkle pumpkin seeds on top for a nice finish. 6. Bake: Place the muffin tin in the preheated oven. Bake for 18-20 minutes. Check them with a toothpick; it should come out clean when done. 7. Cool: After baking, let the muffins cool in the tin for 5 minutes. Then, transfer them to a wire rack to cool completely. This step is key for the best texture. - Don’t Overmix: Mix until just combined to keep the muffins fluffy. Overmixing leads to tough muffins. - Check Oven Temperature: Oven temperatures can vary. Use an oven thermometer for accuracy. - Cool Completely: Letting muffins cool on a rack helps prevent sogginess. Serve warm for the best taste. Follow these steps carefully, and your Greek yogurt pumpkin muffins will be a hit! You can find the [Full Recipe] for more details and tips. Baking can be tricky. Here are some common mistakes to avoid: - Overmixing the batter: This can lead to tough muffins. Mix just until wet and dry ingredients combine. - Incorrect oven temperature: Always preheat your oven. An oven that’s too hot or too cold changes baking results. - Not measuring ingredients: Use measuring cups and spoons for accuracy. Too much flour can make muffins dry. Greek yogurt adds moisture and richness. Here’s how to use it best: - Use full-fat yogurt: This gives the muffins a creamy texture. - Don't skip the eggs: They add moisture and help the muffins rise. - Check baking time: Remove muffins when a toothpick comes out clean. If they bake too long, they become dry. Adding flavors makes your muffins special. Here are some tips: - Use fresh spices: Fresh pumpkin pie spice brings warmth. You can also try cinnamon for a different twist. - Add nuts: Walnuts or pecans add crunch. They also enhance the flavor. - Incorporate fruits: Dried cranberries or chocolate chips can add a sweet surprise. For the complete recipe, check the Full Recipe section. Enjoy experimenting with flavors! {{image_4}} To make your Greek yogurt pumpkin muffins gluten-free, swap the all-purpose flour for a gluten-free blend. Look for a mix that includes xanthan gum; this helps mimic the texture of regular flour. You can also use almond flour for a nutty flavor. Just remember, gluten-free flours may absorb more moisture. So, you might need to add a little extra Greek yogurt or pumpkin puree to keep your muffins moist. If you want to make these muffins vegan, replace the eggs with flax eggs. To make one flax egg, mix one tablespoon of flaxseed meal with two and a half tablespoons of water. Let it sit for a few minutes until it thickens. Also, swap Greek yogurt with a dairy-free yogurt made from almond or coconut. Use maple syrup as a sweetener since it is naturally vegan. Feel free to customize your muffins with fun flavors. Chocolate chips add a sweet twist. About half a cup works well. You can also mix in dried fruit like cranberries or raisins for a fruity burst. Nuts like pecans or walnuts bring in a nice crunch. For a seasonal touch, add a pinch of nutmeg or a splash of orange zest. This variety keeps every bite exciting! Check out the Full Recipe for more ideas. To keep your Greek Yogurt Pumpkin Muffins fresh, store them in an airtight container. This helps prevent drying out. If you plan to eat them within a few days, keep them at room temperature. For longer storage, place them in the fridge. They stay tasty for up to one week. Reheating is simple! If you want a warm muffin, place it in the microwave. Heat it for about 10-15 seconds. Make sure to check it often to avoid overheating. If you prefer a crisp exterior, use an oven. Preheat it to 350°F (175°C) and warm the muffins for about 5-10 minutes. Freezing muffins is a great way to save them for later. Wrap each muffin in plastic wrap, then place them in a freezer bag. They can last up to three months in the freezer. When you’re ready to eat one, take it out and let it thaw at room temperature. You can also pop it in the microwave for a quick warm-up. Enjoy your muffins whenever you want! For the full recipe, check out the [Full Recipe]. Greek Yogurt Pumpkin Muffins stay fresh for about 3 to 5 days at room temperature. Store them in an airtight container to keep moisture in. They also freeze well, lasting up to 3 months. Just make sure to wrap them tightly in plastic wrap and then in foil before freezing. When you're ready to enjoy them, thaw them overnight in the fridge. Yes, you can use other types of yogurt. Plain yogurt or low-fat yogurt can work well, too. However, Greek yogurt gives these muffins a nice texture and moisture. If you use regular yogurt, they may be less thick and may need slight adjustments in baking time. Try to avoid flavored yogurts, as they can alter the muffin's taste. These muffins use Greek yogurt instead of butter or oil. This swap cuts down on fat and adds protein. Greek yogurt also brings moisture, which keeps the muffins soft. The recipe uses brown sugar and pure maple syrup, providing a more natural sweetness. Plus, the addition of pumpkin gives extra fiber and vitamins, making these muffins a wholesome treat. In this post, we explored Greek Yogurt Pumpkin Muffins. We listed ingredients, shared benefits, and offered smart swaps for diets. I covered clear steps to make your muffins perfect. I shared tips to keep them moist and avoid common mistakes. You'll find tasty variations and smart storage methods too. Making these muffins is easy and fun. Enjoy the flavors and share them with friends for a delightful treat!
Greek Yogurt Pumpkin Muffins Wholesome and Tasty Treat
Looking for a delicious and healthy treat? Greek Yogurt Pumpkin Muffins are your answer! These muffins are moist, tasty, and packed with nutrition. Using Greek