Breakfast

- 4 cups water - 2 tablespoons finely ground coffee - 1 tablespoon hazelnut extract - 1 cinnamon stick - 1 teaspoon pure vanilla extract - 1 tablespoon brown sugar (or honey) - 1/2 teaspoon ground nutmeg - 1 strip of orange peel (optional) - Garnishes: whipped cream and crushed hazelnuts (optional) The first step in making a wonderful Cinnamon Hazelnut Coffee Simmer Pot is gathering all your ingredients. This brew is simple yet flavorful. You will need 4 cups of water to start. The water should be fresh and cold. Next, you will use 2 tablespoons of finely ground coffee. This coffee adds richness to your drink. Adding 1 tablespoon of hazelnut extract gives your brew a nutty twist. The cinnamon stick adds warmth and aroma. You will also need 1 teaspoon of pure vanilla extract, which enhances the sweet notes. For sweetness, use 1 tablespoon of brown sugar or honey. Adjust this based on your taste. You can also add 1/2 teaspoon of ground nutmeg for a hint of spice. If you want a zesty flavor, consider using a strip of orange peel. It adds a fresh note. Finally, for garnishes, you may want whipped cream and crushed hazelnuts. These are optional, but they make your drink look and taste great. With these ingredients ready, you will create a delightful brew that warms your heart and home. Enjoy the process! - Start by pouring 4 cups of water into a medium-sized pot. Place it over medium heat. - Heat the water until it reaches a gentle simmer. Look for small bubbles at the surface. - Once simmering, add 2 tablespoons of finely ground coffee to the pot. - Next, pour in 1 tablespoon of hazelnut extract and add 1 cinnamon stick. - Add 1 teaspoon of pure vanilla extract and 1 tablespoon of brown sugar. - Finally, stir in 1/2 teaspoon of ground nutmeg. Use a wooden spoon to mix well. - Allow the mixture to simmer for 10-15 minutes. Keep an eye on it to avoid boiling. - This gentle simmer helps the flavors blend beautifully. - If desired, add a strip of orange peel halfway through the simmering time. This adds a nice citrusy zest. - Once simmering is done, turn off the heat. Let the mixture steep, covered, for 5 minutes. - This extra time deepens the flavors even more. - To serve, strain the mixture through a fine mesh sieve into mugs. - Make sure to catch all coffee grounds and spices. - Serve the warm coffee right away. If you like, top it with whipped cream and crushed hazelnuts for a tasty finish. To make the best cinnamon hazelnut coffee, gentle simmering is key. A gentle simmer means small bubbles rise slowly. This method keeps flavors rich and bright. If it boils too hard, you can lose some taste. Adjust sweetness to fit your taste. Start with one tablespoon of brown sugar or honey. Taste as you go. You can always add more if you want it sweeter. You can add more spices to boost flavor. Try adding a pinch of clove or cardamom for warmth. These spices add depth to your brew. Experiment with extracts too. If you like, swap in almond or maple extracts. Each will give a new twist to the drink. For gatherings, make your coffee look great. Use clear mugs to show off the rich color. Add a swirl of whipped cream on top. A sprinkle of crushed hazelnuts adds a nice crunch. Pair this coffee with snacks or desserts. It goes well with cookies or a slice of cake. The flavors work together, making your treat time even better. {{image_4}} You can switch up the nut extracts in this simmer pot. Try almond or pecan extracts for a fun twist. Each one brings its own unique flavor. You can also add seasonal spices like cloves or ginger. These spices can warm you up during cold months. They can also give your drink a festive flair. If you want to skip the caffeine, make a caffeine-free simmer pot. Use herbal tea or roasted grain coffee instead. These options still taste great and keep the cozy feel. You can even mix in chamomile or peppermint for a calming effect. These herbal alternatives offer a lovely aroma, too. Garnishes can take your drink to a new level. If you want a creamy touch, use non-dairy whipped cream. It adds richness without dairy. You can also try toppings like cocoa powder or chocolate shavings for extra taste. Crushed nuts or seeds add a fun crunch and enhance the texture. Let your simmer pot cool down first. Then pour the mixture into a clean jar. Seal it tightly and put it in the fridge. It will stay fresh for about three days. The flavors will remain strong if stored properly. To reheat, pour the mixture into a pot. Warm it over low heat. Stir gently and do not let it boil. This method will keep the flavors intact. You can also use a microwave. Heat in short bursts, stirring in between. You can easily make this simmer pot ahead of time. Just follow the recipe and store it in the fridge. For long-term storage, freeze it in an airtight container. It will last up to a month. When ready to enjoy, thaw it in the fridge overnight before reheating. The simmer pot lasts for about 3 to 5 days when refrigerated. Make sure to store it in a sealed container. This keeps the flavors fresh and helps prevent spoilage. Yes, you can use pre-ground coffee. This option saves time and is convenient. However, finely ground coffee gives a richer flavor. It allows for better extraction of taste and aroma during simmering. You can add a few extra ingredients to boost the aroma. Try including: - Whole cloves - Star anise - Fresh ginger slices These will enrich your simmer pot's scent. For additional spice combinations, consider mixing in: - Cardamom pods - Allspice berries - Vanilla bean These ingredients add warmth and depth, making your brew even more inviting. This blog post explored how to create a delightful simmer pot. You learned about the essential ingredients, step-by-step instructions, and tips for perfecting your brew. We discussed variations, storage tips, and answered common questions. In my view, experimenting with flavors leads to unique aromas in your home. So, get creative and enjoy the process! Your next gathering will be even better with these warm, inviting scents.
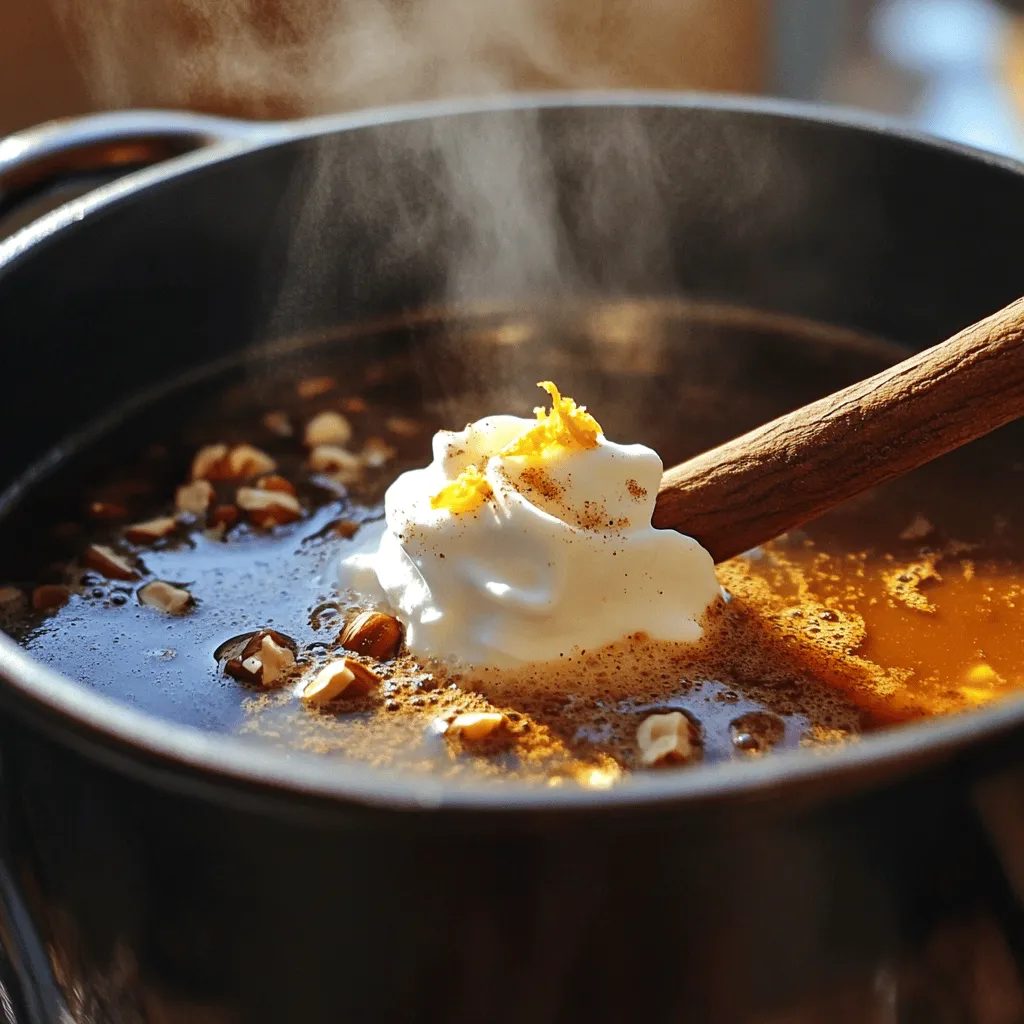
Cinnamon Hazelnut Coffee Simmer Pot Delightful Brew
If you love the warm, cozy aromas of coffee and spices, you’ll adore my Cinnamon Hazelnut Coffee Simmer Pot. This easy recipe blends rich flavors,
- 1 ½ cups whole wheat flour - 1 teaspoon baking powder - ½ teaspoon baking soda - ½ teaspoon salt - 1 teaspoon ground cinnamon - 2 large eggs - ¾ cup plain Greek yogurt - ½ cup honey or maple syrup - 1 teaspoon vanilla extract - 1 apple, peeled and diced (preferably Granny Smith or Honeycrisp) - ½ cup chopped walnuts (optional) I love using whole wheat flour in these muffins. It gives them a nice, hearty texture. The baking powder and baking soda help them rise perfectly. A pinch of salt balances the sweetness, while ground cinnamon adds warmth and flavor. For the wet mix, I use Greek yogurt. It keeps the muffins moist and gives them a lovely tang. I prefer honey or maple syrup for sweetness, but you can pick your favorite. The vanilla extract adds a lovely aroma. Diced apples bring freshness and sweetness. I like using Granny Smith or Honeycrisp apples for their crispness. If you want a nutty crunch, add chopped walnuts. They make the muffins even more delightful! First, preheat your oven to 350°F (175°C). This step is key, as it ensures even baking. Next, prepare your muffin tin. You can line it with paper liners or lightly grease each cup with butter or cooking spray. This will help the muffins come out easily. In a large bowl, combine the whole wheat flour, baking powder, baking soda, salt, and ground cinnamon. Whisk these dry ingredients until they blend well and there are no lumps. This process is important for the muffins' texture. In another bowl, crack two large eggs and beat them lightly. Then, add the plain Greek yogurt, honey or maple syrup, and vanilla extract. Stir these ingredients together until you have a smooth mixture. This is where your muffins get their moist and tasty base. Now, slowly fold the dry ingredient mix into the wet mix. Use a spatula for this. Gently combine them until just mixed. Be careful not to overmix. Overmixing can make the muffins dense instead of light and fluffy. Next, fold in the diced apple. If you like, you can also add the chopped walnuts. Make sure the pieces are evenly spread throughout the batter. This will give every muffin a delightful crunch and burst of flavor. Using a spoon or measuring cup, portion the batter into your muffin tin. Fill each liner about ¾ full. This allows the muffins to rise nicely while baking. Place the muffin tin in the oven and bake for 18-20 minutes. They should turn golden brown on top. Check with a toothpick; it should come out clean when the muffins are ready. Once done, let them cool on a wire rack for a few minutes before enjoying! To get the best texture in your muffins, avoid overmixing the batter. When you mix too much, muffins can turn out dense. Instead, gently fold the wet and dry ingredients together until just combined. This keeps them light and fluffy. Also, use room temperature ingredients. This helps them mix smoothly and evenly, leading to a better rise. You can enhance the flavor of your muffins by trying different apple varieties. Granny Smith apples add a tart taste. Honeycrisp apples are sweet and juicy. Each type gives a unique taste to your muffins. You can also add spices like nutmeg or ginger. These spices add warmth and depth to the flavor, making your muffins even more delicious. For a lovely finish, dust the muffins with powdered sugar before serving. This adds a nice touch and makes them look inviting. You can also serve the muffins with a dollop of Greek yogurt. This gives extra richness and pairs well with the apple and cinnamon flavors. Enjoy your beautiful and tasty muffins! {{image_4}} If you want a nut-free muffin, just skip the walnuts. This keeps the muffins tasty and safe for those with nut allergies. The apples and spices still pack a lot of flavor. You can enjoy these muffins without worry. To make these muffins gluten-free, swap the whole wheat flour with a gluten-free blend. Many brands offer great options that work well in baking. Just check the label to ensure it suits your needs. This way, everyone can enjoy these delicious treats. For a fun twist, add chocolate chips or dried fruits to the batter. Chocolate chips bring sweetness and richness. Dried fruits, like raisins or cranberries, add a chewy texture. Either option enhances the muffins and makes them even more enjoyable. You can keep your muffins fresh for a few days. Store them in an airtight container at room temperature. They stay tasty for 2-3 days. Make sure to seal them well to avoid drying out. If you want to save some for later, freezing works great. You can freeze baked muffins for up to 2 months. Use a freezer-safe bag to keep them safe from freezer burn. When you’re ready to enjoy them, just pull out what you need! To get the best texture, reheat your muffins before serving. You can use the microwave or the oven. For the microwave, heat them for about 15-20 seconds. In the oven, warm them at 350°F (175°C) for about 5-10 minutes. This will bring back that fresh-baked taste! Yes, you can substitute Greek yogurt with regular yogurt, but the texture may vary. Greek yogurt makes the muffins moist and fluffy. If you choose regular yogurt, your muffins might not rise as well or be as rich. Increase the amount of honey or maple syrup in the recipe to enhance sweetness. You can start by adding an extra tablespoon. Taste the batter and adjust as needed. This gives you control over the sweetness level. Use a dairy-free yogurt alternative to achieve a similar texture. Options like almond yogurt or coconut yogurt work great. Just be sure to check for added sugars in these alternatives. Ensure not to overmix the batter and check your measuring techniques for accuracy. Overmixing can lead to tough muffins. Use a gentle folding motion when combining the wet and dry ingredients. Rotate the muffin tin halfway through baking for even heat distribution. This helps all muffins bake uniformly. You can also place the tin in the center of the oven for best results. These apple muffins are simple and fun to make. We start with whole wheat flour and healthy ingredients. You learned how to mix, bake, and add personal touches. Remember to avoid overmixing for fluffy muffins. Feel free to play with flavors or make variations to suit your taste. Store them right for fresh enjoyment later. Now get baking and enjoy your delicious, homemade apple muffins!
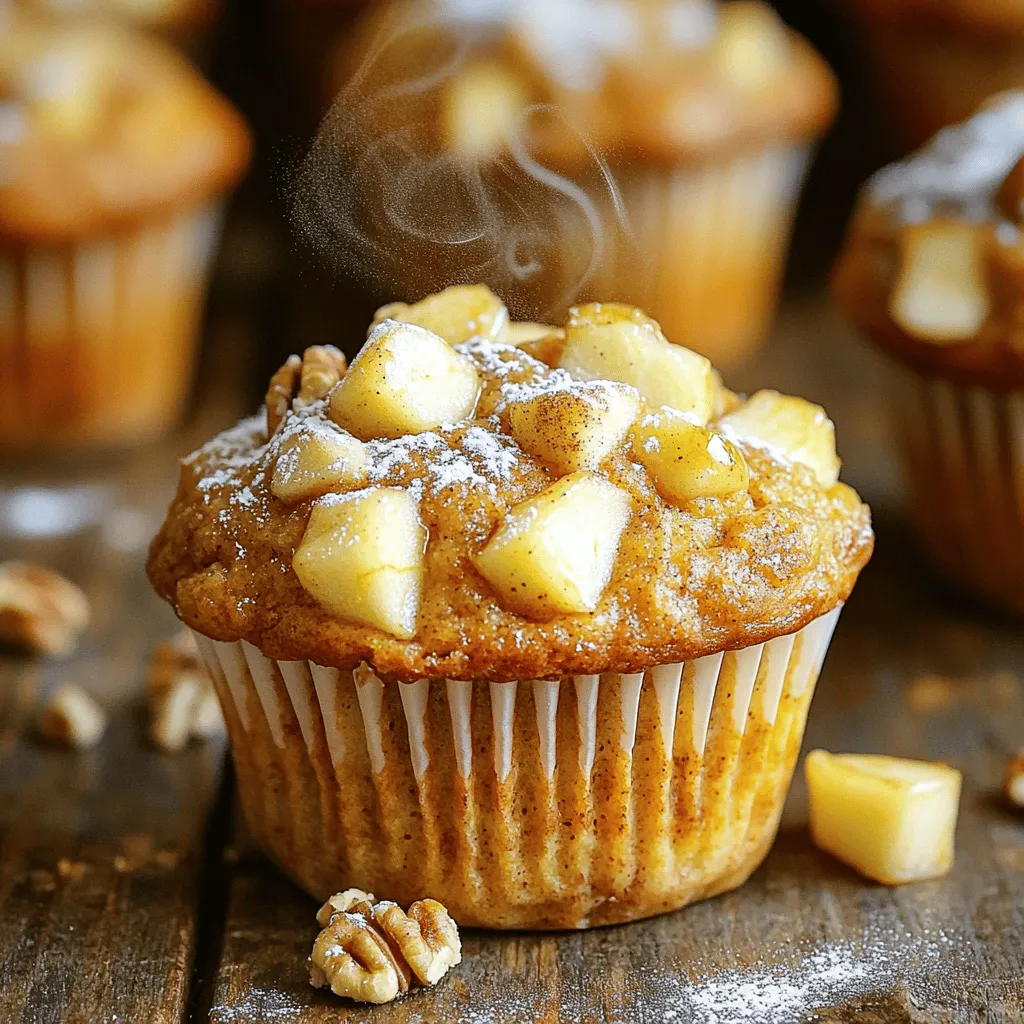
Apple Cinnamon Greek Yogurt Muffins Delightful Treat
If you’re craving a sweet yet healthy snack, these Apple Cinnamon Greek Yogurt Muffins are a must-try! Packed with wholesome ingredients like whole wheat flour
- 4 large russet potatoes, peeled and coarsely grated - 1 small onion, finely minced - 3 tablespoons all-purpose flour - 1 large egg, lightly beaten - Salt and freshly ground black pepper, to taste - 1/4 teaspoon paprika (optional) - 4 tablespoons vegetable oil Gathering the right ingredients is key to great crispy hash browns. Russet potatoes work best because they are starchy and create a nice crispy texture. You can finely mince the onion for extra flavor. Adding flour helps to bind the mixture together, while the egg adds richness. Don't forget to season with salt and pepper to taste. A touch of paprika can add warmth, but it's optional. Finally, vegetable oil is essential for frying and achieving that golden crust. {{ingredient_image_2}} To start, take your grated potatoes and put them in a clean kitchen towel. Twist the towel tightly and squeeze out as much moisture as you can. This step is key for crispy hash browns. If you skip this, your hash browns may turn out soggy. Trust me, squeezing is essential! Now, grab a large mixing bowl. Combine your well-drained potatoes with the minced onion, flour, beaten egg, salt, black pepper, and paprika if you like a hint of warmth. Mix it all together well. You want every piece of potato to be coated. This helps bind everything and adds flavor. Next, heat a large non-stick skillet over medium-high heat. Pour in enough vegetable oil to cover the bottom, about 1/4 inch deep. Wait for the oil to shimmer but not smoke. Once it’s ready, take a handful of the potato mix and shape it into a round patty, about 1/2 inch thick. Place it in the hot skillet. Repeat with the rest, but don’t overcrowd the pan! Cook each patty for about 4-5 minutes until the bottom is golden and crisp. Flip with a spatula and cook for another 4-5 minutes. After cooking, transfer your hash browns to a plate lined with paper towels. This helps drain extra oil. Keep cooking the rest the same way. Enjoy your crispy hash browns hot! To make crispy diner-style hash browns, moisture is your enemy. Wet potatoes will steam instead of fry. First, grate your russet potatoes. Then, use a clean kitchen towel to squeeze out the water. The drier the potatoes, the crispier your hash browns will be. Next, the cooking temperature matters too. Set your skillet to medium-high heat. The oil should shimmer but not smoke. The right heat helps form a golden crust while keeping the inside tender. When cooking hash browns, space is key. Don’t overcrowd the skillet. If you add too many patties at once, they will steam instead of fry. This will lead to soft, mushy hash browns. Cook them in batches. Give each patty room to breathe and brown evenly. Flipping hash browns can be tricky. You want to turn them without breaking them apart. Use a wide spatula for support. Gently slide it under the patty. Lift it carefully, and flip it over with a swift motion. Confidence is key here! If you’re unsure, try flipping one patty first to practice. This way, you’ll master the technique for all your hash browns. Pro Tips Drain Well: Make sure to squeeze out as much moisture from the grated potatoes as possible. This step is crucial for achieving that perfect crispy texture. Even Thickness: Shape the patties to be uniform in thickness. This ensures they cook evenly and achieve that golden-brown crispness on all sides. Don’t Overcrowd: When cooking, avoid placing too many patties in the skillet at once. Overcrowding can lower the oil temperature and lead to soggy hash browns. Keep Warm: If you're making a large batch, keep the cooked hash browns warm in a low oven while you finish cooking the rest. This helps maintain their crispiness. {{image_4}} You can make your hash browns even better by adding cheese or herbs. Cheddar cheese melts well and gives a nice flavor. Just mix in a cup of shredded cheese with the potato mixture. Fresh herbs like parsley or chives can also add a burst of flavor. Chop them finely and stir them in for a fresh taste. Switching up the main ingredients can lead to fun new flavors. Sweet potatoes can be a tasty replacement for russets. They bring a natural sweetness and vibrant color. You can also try using red or green onions instead of yellow. Each type of onion has a unique taste that can change the dish. Toppings make hash browns even more delicious. You can add dollops of sour cream for creaminess. Fresh chives sprinkled on top give a nice touch and flavor. If you like spice, a splash of hot sauce can add an exciting kick. You can also serve them with eggs or bacon for a hearty breakfast. To store cooked hash browns, let them cool completely. Place them in an airtight container. You can keep them in the fridge for up to 3 days. If you want to keep them longer, freezing is a great option. Just make sure they are well-packed to avoid freezer burn. For reheating, I recommend using an oven or a skillet. Preheat your oven to 400°F (200°C). Spread the hash browns on a baking sheet in a single layer. Bake for about 10-15 minutes. This method helps them stay crispy. If using a skillet, heat a little oil over medium heat. Add the hash browns and cook until they are hot and crisp. Avoid using the microwave, as it can make them soggy. Yes, you can freeze hash browns! To do this, let them cool completely first. Then, place them on a baking sheet in a single layer. Freeze for about 1-2 hours until firm. Once frozen, transfer them to a freezer bag or container. They can last up to 3 months in the freezer. When you're ready to eat, just reheat them straight from the freezer. To make your hash browns crispy, moisture control is key. After grating the potatoes, place them in a clean kitchen towel. Squeeze tightly to remove as much water as you can. This step is crucial. If the potatoes are wet, they will steam instead of crisping. When frying, use a hot skillet with enough oil. Aim for about 1/4 inch of oil. Make sure the oil shimmers before adding the patties. Do not overcrowd the skillet. This allows each hash brown to brown evenly and get that nice crunch. Yes, you can use other potatoes, but russets are best. They have high starch content, which helps in achieving a crispy texture. Yukon Golds are another good choice. They are creamy and add a nice flavor, but they may not be as crispy. Red potatoes are waxy and won't crisp up as well. Stick with russets for that diner-style crunch. Many toppings work well with hash browns. Here are some popular options: - Sour cream - Fresh chives - Shredded cheese - Ketchup - Hot sauce - Diced tomatoes - Fried eggs These toppings can add flavor and make your hash browns even more delicious. Think about pairing them with breakfast items like eggs or bacon for a tasty meal. You learned how to make perfect hash browns with simple ingredients. We covered peeling, grating, and cooking techniques to achieve crispiness. You can swap in different potatoes and add tasty flavors. Don’t forget how to store leftovers and reheat them for the best crunch. Making hash browns is fun and easy. Enjoy serving them with your favorite toppings. Now, go ahead and impress your friends and family with this delicious dish!
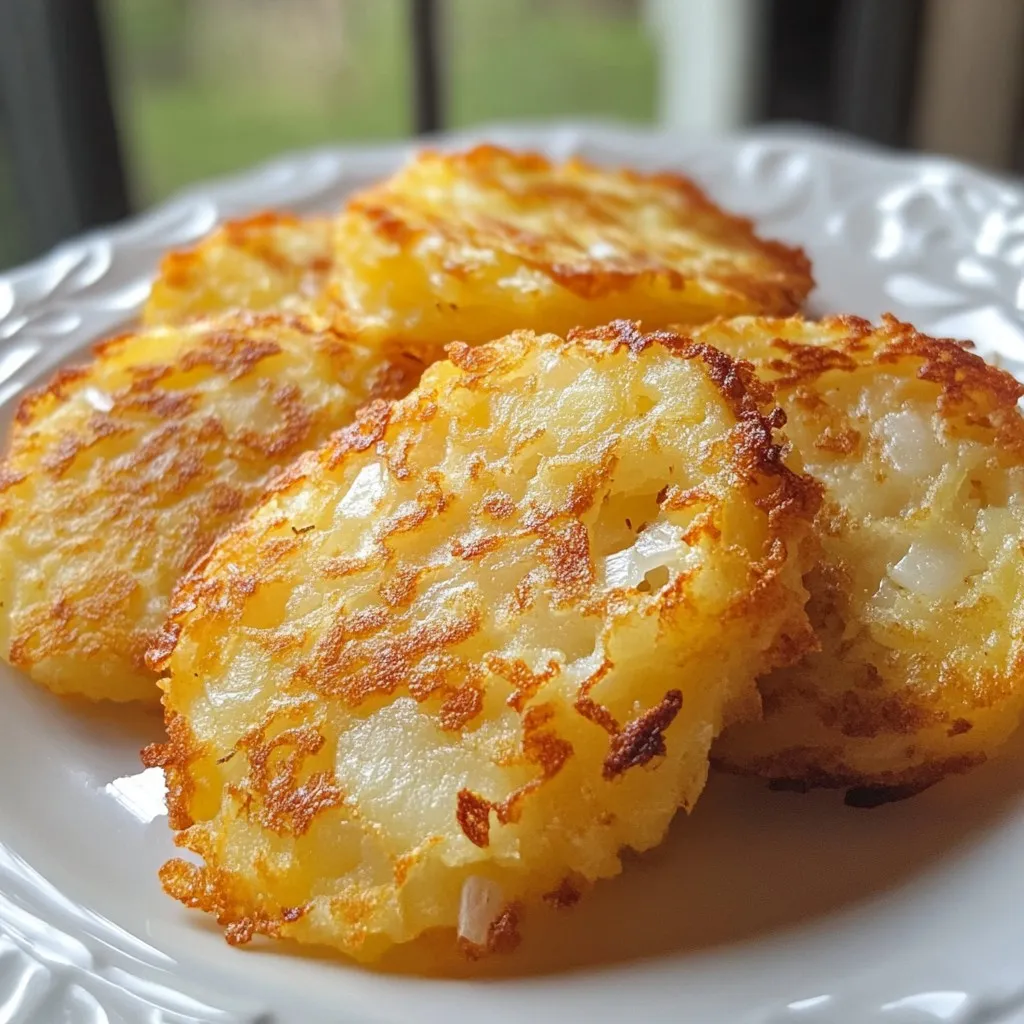
Crispy Diner-Style Hash Browns Simple and Tasty Recipe
Are you ready to whip up some crispy diner-style hash browns right at home? In this simple and tasty recipe, I’ll guide you through making
- 1 cup cold brew coffee - 1/2 cup milk (or a dairy-free alternative such as almond or oat milk) - 2 tablespoons canned pumpkin puree - 1 tablespoon pure maple syrup - 1/2 teaspoon pumpkin pie spice - 1/4 teaspoon pure vanilla extract - Whipped cream for topping - Optional: Cinnamon stick or additional pumpkin pie spice for garnish Cold brew coffee is the heart of this drink. It is smooth and rich. You can buy it or make your own. Just steep coarse coffee grounds in cold water for 12 to 24 hours. Next, choose your milk. Regular milk works well, but almond or oat milk adds a nice twist. They give a creamy feel without dairy. Pumpkin puree is key for that fall flavor. It gives the drink its warmth and color. Use canned pumpkin for ease, but you can also roast fresh pumpkin if you prefer. Maple syrup sweetens the mix. It adds a natural, cozy sweetness that pairs well with pumpkin. You can also try honey or agave syrup. Pumpkin pie spice brings all the warm notes of fall. This mix usually has cinnamon, nutmeg, and ginger. It adds depth to the drink. Vanilla extract enhances the flavors. Just a little bit makes everything taste better. Whipped cream on top adds a creamy finish. It’s a must-have for that cafe-style look. For extra flair, you can add an optional cinnamon stick. It looks great and adds a nice aroma as you sip. These ingredients blend perfectly, creating a drink that is both refreshing and comforting. In a small bowl, combine the following: - 2 tablespoons canned pumpkin puree - 1 tablespoon pure maple syrup - 1/2 teaspoon pumpkin pie spice - 1/4 teaspoon pure vanilla extract Use a whisk or fork to mix these ingredients. Keep mixing until the mixture is smooth and well blended. This step creates the rich base for your drink. For the best flavor, brew your cold brew coffee ahead of time. Use high-quality coffee beans for a bold taste. Let it chill fully in the fridge. Cold brew should be served cold for the best experience. Take your cold brew coffee and pour in - 1 cup cold brew coffee - 1/2 cup milk (or a dairy-free alternative) Stir gently to combine. Next, add your pumpkin mixture to the cold brew. Mix well to get a creamy blend. Fill a tall glass with ice cubes, then pour the mixture over the ice. Top it generously with whipped cream. For a fun touch, sprinkle a bit of pumpkin pie spice or cinnamon on top. You can even add a cinnamon stick for extra flavor and style. Enjoy your drink while relaxing and savoring the fall season! - Choosing high-quality coffee beans: Start with fresh, whole coffee beans. Look for a medium roast for a smooth taste. Grind them coarsely. This helps in making the best cold brew. - Tips for slow brewing: Mix coffee grounds with cold water in a jar. Use a 1:4 ratio of coffee to water. Let it steep for 12 to 24 hours. The longer you brew, the richer the flavor. Strain the coffee through a fine mesh or cheesecloth to remove the grounds. - Adjusting sweetness and spice levels: Taste as you mix. Add more maple syrup if you like it sweeter. If you want a spicier flavor, add more pumpkin pie spice. Start with small amounts and adjust until it’s perfect for you. - Substitutions for dietary preferences: If you are lactose intolerant, use almond or oat milk instead of cow's milk. You can also use agave syrup for a vegan sweetener. This keeps the drink tasty for everyone. - Creative serving suggestions: Serve in a clear glass to show off the layers. Use tall glasses for a dramatic look. You can also add ice cubes shaped like pumpkins for fun. - Garnishing ideas for visual appeal: Top your drink with whipped cream. Sprinkle a bit of pumpkin pie spice or cinnamon on top. For extra flair, add a cinnamon stick. It not only looks great but adds more flavor too. {{image_4}} If you want a dairy-free drink, use almond or oat milk instead of regular milk. Both options blend well with the cold brew. They add a nice creaminess without dairy. You can also try coconut milk for a richer taste. For vegan substitutions, skip the whipped cream or use a coconut whipped cream. This keeps it plant-based and just as delicious. To take your drink up a notch, add a drizzle of chocolate or caramel on top. This gives a sweet touch that pairs nicely with the pumpkin. You can also try different spices like nutmeg or ginger for extra warmth. Each spice adds a unique twist, so feel free to mix and match. In fall, enjoy the classic pumpkin flavor. In winter, think about adding peppermint or chocolate for a cozy feel. For spring, consider lighter flavors like vanilla or almond. You can switch up the spices too, using fresh herbs or citrus zest to brighten the drink. Each season brings new flavors to explore, making your cold brew a year-round treat! To keep your pumpkin puree fresh, seal it well in an airtight container. Store it in the fridge. It lasts about a week. If you want to keep it longer, freeze it in small portions. Use ice cube trays for easy access later. Milk can also spoil quickly. If you have leftover milk, store it in a tightly closed container in the fridge. It usually stays good for about a week, depending on the type. Check the expiration date for better safety. Cold brew coffee can stay fresh for a week in the fridge. Store it in a sealed container to keep flavors intact. The longer it sits, the stronger the taste gets. Yes, you can make the pumpkin cream cold brew ahead of time. This drink tastes great when chilled. Just mix the pumpkin base and cold brew, then refrigerate. For best results, prepare the pumpkin mixture in batches. You can store it in the fridge for up to five days. When you’re ready to enjoy, just add it to freshly brewed cold brew and milk. This way, you save time and still get that great taste. Pumpkin Cream Cold Brew is a delightful drink that combines cold brew coffee and pumpkin flavors. This drink gained popularity in recent years, especially during fall. You can find it at many coffee shops, but making it at home is easy and fun. Yes, you can customize this recipe! Here are some options: - Sweetness: Adjust the maple syrup to make it sweeter or less sweet. - Milk alternatives: Use almond, oat, or coconut milk for a dairy-free version. - Spices: Add more pumpkin pie spice for a bolder flavor. Pumpkin Cream Cold Brew has some health benefits. It contains pumpkin puree, which is rich in vitamins. However, watch the sugar and calories. - Calories: A basic serving has around 250 calories. - Sugar: The maple syrup adds sweetness, so consider less if you want fewer sugars. Enjoy this drink in moderation for a tasty treat! You learned how to make a tasty Pumpkin Cream Cold Brew. We covered all the key ingredients, from cold brew coffee to whipped cream. I shared steps to mix the pumpkin base and prepare the drink just right. Don’t forget the tips for both brewing and presentation to impress others. You can even try different flavors and variations for every season. Now you’re ready to enjoy or share this drink. Get creative and have fun making it your own!
Pumpkin Cream Cold Brew Irresistible Fall Delight
As the leaves turn and the air gets crisp, it’s time to treat yourself to the cozy joy of pumpkin cream cold brew. This delightful
To make Pumpkin Pie Overnight Oats, you need the following: - 1 cup rolled oats - 1 cup almond milk (or milk of your choice) - 1/2 cup canned pumpkin puree - 1 tablespoon pure maple syrup - 1 teaspoon ground cinnamon - 1/2 teaspoon ground nutmeg - 1/4 teaspoon ground ginger - 1/4 teaspoon pure vanilla extract - 1/2 cup Greek yogurt (or a dairy-free alternative) - Optional toppings: chopped pecans, whipped cream, or sunflower seeds If you need alternatives, here are some ideas: - Rolled oats: Use quick oats for a softer texture. - Almond milk: Any milk works, like soy, oat, or cow’s milk. - Canned pumpkin puree: Use fresh pumpkin if you prefer. - Maple syrup: Honey or agave syrup can replace maple syrup. - Greek yogurt: Silken tofu or coconut yogurt is great for a dairy-free option. Each ingredient brings health benefits: - Rolled oats: They are rich in fiber, which helps digestion. - Almond milk: This milk has fewer calories and is often fortified with vitamins. - Pumpkin puree: It is full of vitamins, especially vitamin A, for good vision. - Maple syrup: This natural sweetener contains antioxidants. - Cinnamon: It can help maintain healthy blood sugar levels. - Nutmeg and ginger: Both spices have anti-inflammatory properties. - Greek yogurt: It provides protein and probiotics for gut health. These ingredients not only create a cozy dish but also support your health. Enjoy making your Pumpkin Pie Overnight Oats! {{ingredient_image_2}} To make Pumpkin Pie Overnight Oats, start by gathering all your ingredients. You will need rolled oats, almond milk, pumpkin puree, Greek yogurt, and some spices. This simple mix creates a cozy dish. The prep time is just ten minutes! In a medium bowl, combine these ingredients: - 1 cup rolled oats - 1 cup almond milk - 1/2 cup canned pumpkin puree - 1/2 cup Greek yogurt Use a whisk or a spoon to mix them well. Make sure the mixture is smooth. Next, add more flavor: - 1 tablespoon pure maple syrup - 1 teaspoon ground cinnamon - 1/2 teaspoon ground nutmeg - 1/4 teaspoon ground ginger - 1/4 teaspoon pure vanilla extract Stir this mixture until all the spices blend in well. This will give your oats a warm, pumpkin pie flavor. Once mixed, divide the oats into two jars. Make sure to leave some space at the top. Secure the lids and place them in the fridge overnight. This helps the oats soak up the liquid and become soft. The next morning, take the jars out. Stir the oats to mix everything again. If you want them creamier, add a splash more almond milk. Serve your oats topped with: - Chopped pecans - Whipped cream - Sunflower seeds Present your oats in clear jars. A sprinkle of cinnamon on top adds a nice touch! Enjoy your healthy and cozy breakfast! For the best texture, use rolled oats. They soak up liquid well. Quick oats can turn mushy. When mixing, ensure you blend the oats and liquid fully. This helps create a creamy base. After refrigerating, stir the oats before eating. If they seem too thick, add a splash of almond milk. This will make them creamier and more enjoyable. Making these pumpkin pie overnight oats is simple and quick. You can prep them in just ten minutes. I love making a double batch. This way, I have breakfast ready for two days! Just store them in jars with lids in the refrigerator. They will stay fresh for about three days. To keep them tasting great, avoid adding toppings until you are ready to eat. Layering ingredients can enhance both flavor and look. Start with oats at the bottom. This helps them soak up moisture first. Next, add the pumpkin puree and yogurt. Then sprinkle in the spices for extra flavor. Finally, drizzle the maple syrup on top. This layering method keeps flavors distinct until you mix them. You can also add your toppings like chopped pecans or whipped cream right before serving. This keeps them crunchy and fresh. Pro Tips Use Fresh Spices: Freshly ground spices can significantly enhance the flavor of your overnight oats, giving them a more robust and aromatic profile. Customize the Sweetness: Adjust the amount of maple syrup according to your sweetness preference. You can also substitute with honey or agave syrup for a different flavor. Experiment with Toppings: Feel free to mix and match toppings based on your mood. Try adding fresh fruits, seeds, or even granola for added texture and flavor. Make Ahead: Prepare a larger batch to enjoy throughout the week. These oats can last up to five days in the refrigerator, making them a convenient breakfast option. {{image_4}} You can easily make this recipe dairy-free or vegan. Swap the Greek yogurt for a dairy-free yogurt. Almond milk works great, but feel free to use any plant-based milk you like. Coconut milk adds a rich flavor, while oat milk provides creaminess. If you want sweetness, use maple syrup or agave nectar. This way, you keep all the cozy flavors without any dairy. Want to switch it up? Try adding different spices or flavors. A pinch of clove adds warmth. You can also mix in cocoa powder for a chocolate twist. If you love apples, add some diced apples for a fruity bite. For a nutty flavor, mix in almond or peanut butter. Experiment with these flavors to find your favorite combination! Toppings make your overnight oats even more fun. Chopped pecans add crunch and flavor. A dollop of whipped cream makes it feel special. If you want a healthy boost, sprinkle pumpkin seeds on top. You can also add fresh fruit like bananas or berries for sweetness. Try different toppings each time to keep it exciting! Store your pumpkin pie overnight oats in airtight jars or containers. This keeps them fresh and tasty. Make sure the lids are tight to prevent air from getting in. If you plan to enjoy them later, do not add toppings until serving. These oats last up to five days in the fridge. The flavors get better each day. Just stir them before eating. If they seem too thick, add a splash of almond milk to loosen them up. You can freeze overnight oats for up to three months. Use freezer-safe jars or containers. Leave some space at the top for the oats to expand. When you want to eat them, thaw in the fridge overnight. Reheat or enjoy them cold, adding toppings as desired. Yes, you can! While rolled oats are best for this recipe, you can use quick oats or steel-cut oats. Quick oats will soften faster, while steel-cut oats will be chewier. If you use steel-cut oats, soak them longer to get the right texture. Overnight oats can last in the fridge for up to five days. They stay fresh when stored in airtight containers. Just remember to check for any changes in smell or texture before eating them after a few days. Absolutely! You can adjust the sweetness by adding more or less maple syrup. You can also use honey, agave, or a sugar substitute if you prefer. Taste the mixture before chilling to find your perfect level of sweetness. In this post, we explored ingredients, step-by-step instructions, and helpful tips for overnight oats. You learned about ingredient substitutions and health benefits. We also shared how to mix, refrigerate, and serve your oats for the best results. You can customize flavors and toppings to fit your taste. Remember how to store your oats for freshness, and check answers to common questions. Enjoy creating your perfect bowl of overnight oats for a healthy breakfast!
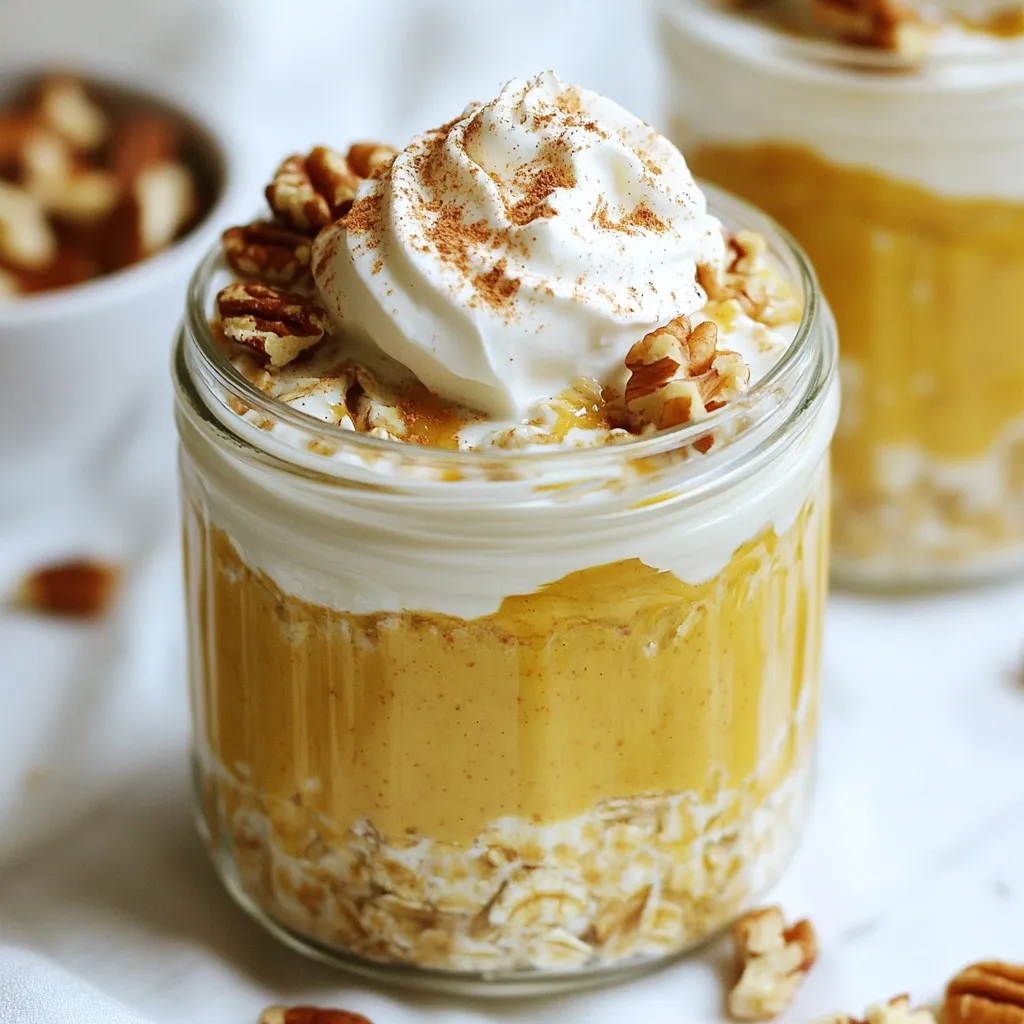
Pumpkin Pie Overnight Oats Cozy and Healthy Breakfast
Start your day with a warm cup of comfort: Pumpkin Pie Overnight Oats! This cozy and healthy breakfast packs all the tasty flavors of fall
To make a tasty fried egg quesadilla, you'll need a few key items: - 4 large eggs - 1 tablespoon olive oil - 4 flour tortillas (8-inch size recommended) - Salt and freshly cracked black pepper, to taste These ingredients form the base of your quesadilla. They create a rich, satisfying meal that you can enjoy at any time. Cheese makes your quesadilla melt and gooey. Here are some great choices: - 1/2 cup shredded mozzarella cheese - 1/2 cup shredded cheddar cheese Mix these cheeses for a delightful blend. They add flavor and texture, making each bite irresistible. Adding fresh veggies enhances both taste and nutrition. I recommend: - 1/4 cup bell peppers, diced (a mix of red, yellow, and green) - 1/4 cup fresh spinach, chopped These veggies bring color and crunch to your quesadilla. They also balance the richness of the eggs and cheese, making your dish more vibrant and healthy. {{ingredient_image_2}} To start, crack the 4 large eggs into a bowl. Add a pinch of salt and some freshly cracked black pepper. Beat the eggs well until they are mixed and frothy. This frothiness helps make the eggs fluffy when cooked. Next, heat 1 tablespoon of olive oil in a non-stick skillet over medium heat. When the oil is hot, add 1/4 cup of diced bell peppers. I like to use a mix of red, yellow, and green for color. Sauté the peppers for about 2-3 minutes until they soften and smell great. Now, pour the beaten eggs into the skillet, covering the peppers. Stir gently with a spatula, cooking until the eggs are just set but still creamy, about 3-4 minutes. Remove the skillet from heat. Fold in 1/4 cup of chopped spinach and half of the shredded mozzarella and cheddar cheese. Take 2 flour tortillas and lay them flat. Spread the egg mixture evenly on each tortilla. Top with the rest of the cheese, then place the other 2 tortillas on top to make two quesadillas. Return the skillet to heat and place one quesadilla inside. Cook for 2-3 minutes on each side until the tortillas turn golden brown and crisp. The cheese inside should be melty. Repeat this with the second quesadilla. Once done, let the quesadillas rest for a minute before slicing them into quarters. Serve with salsa and garnish with fresh cilantro leaves. Enjoy your tasty fried egg quesadilla! To get fluffy eggs, beat them well. Crack four large eggs into a bowl. Add a pinch of salt and black pepper. Whisk until the eggs are mixed and frothy. This air helps the eggs rise. Cook them gently in the skillet. Stir them slowly while they cook. This keeps them soft and creamy. Use a non-stick skillet for best results. Heat one tablespoon of olive oil before adding the eggs. Make sure the oil is hot but not smoking. This helps the eggs slide out easily. If you notice sticking, gently loosen the eggs with a spatula. For making quesadillas, a non-stick skillet works best. A spatula helps flip them without spilling. A sharp knife is great for cutting into wedges. Also, keep a mixing bowl handy for the egg mixture. Using these tools makes cooking easier and more fun. Pro Tips Use Fresh Ingredients: Fresh vegetables and herbs enhance the flavor of your quesadilla, making it more vibrant and delicious. Don’t Overcook the Eggs: Keep the eggs slightly creamy for a better texture. They will continue to cook when you fold them into the quesadilla. Experiment with Cheeses: Try different cheese combinations for a unique flavor. Pepper jack or feta can add a nice twist! Serve with Variety: Offer a selection of salsas or guacamole to elevate your quesadilla experience and cater to different tastes. {{image_4}} To spice up your fried egg quesadilla, think about adding jalapeños or hot sauce. You can mix diced jalapeños into the egg mixture. This will add a nice kick. Another idea is to serve your quesadilla with a spicy salsa. You could also use chipotle peppers for a smoky flavor. Just a little heat can make your meal exciting! If you're looking for vegetarian options, skip the cheese and eggs. Use a mix of mushrooms, zucchini, and onions instead. Sauté them in olive oil until soft. For vegan quesadillas, try using tofu or chickpea scramble. This will give you a nice protein boost. You can also add nutritional yeast for a cheesy flavor without dairy. For cheese lovers, there are many fun options. You can use pepper jack for some heat. A smoked gouda can add a rich flavor. If you want a healthier choice, try feta or goat cheese. For vegan cheese, look for brands made from nuts or soy. They melt well and taste great! To keep your leftover quesadillas fresh, let them cool down first. Wrap each quesadilla in plastic wrap or aluminum foil. This helps to keep them from drying out. You can also store them in an airtight container. Make sure to layer them with parchment paper if you stack them. This prevents sticking. Store in the fridge for up to three days. When reheating, I recommend using a skillet. Heat it over medium heat. Add a little oil or butter for flavor. Place the quesadilla in the skillet. Cook for about 2-3 minutes on each side. This keeps the tortillas crisp and warms the cheese nicely. You can also use a microwave for a quick option. Place the quesadilla on a microwave-safe plate. Heat in 30-second intervals until warm. To freeze, let the quesadillas cool completely. Wrap each one in plastic wrap. Then, place them in a freezer-safe bag or container. Make sure to remove as much air as possible. They can last in the freezer for about two months. To cook from frozen, heat in a skillet as mentioned above. You may need to cook them a bit longer. Enjoy your delicious, quick meals anytime! Yes, you can make fried egg quesadillas ahead of time. Prepare the egg mixture and cook the quesadillas as directed. After cooking, let them cool completely. Wrap each quesadilla in plastic wrap or foil. Store them in the fridge for up to two days. When you're ready to eat, just reheat them in a skillet or microwave. There are many tasty side dishes for quesadillas. Here are a few ideas: - Fresh guacamole - Sliced jalapeños - Black bean salad - Corn salsa - Crispy tortilla chips with salsa These sides add flavor and texture to the meal. Absolutely! You can use many types of tortillas for your quesadilla. Here are some options: - Whole wheat tortillas - Corn tortillas - Gluten-free tortillas - Spinach or tomato tortillas Each variation will bring a unique taste to your dish. You can customize your quesadilla in many fun ways. Here are some ideas: - Add extra veggies like onions or mushrooms. - Try different cheeses like pepper jack or feta. - Mix in cooked meats like chicken or bacon. - Spice it up with hot sauce or salsa. Experiment with flavors that you love! In this post, we explored the essential ingredients and steps for perfect fried egg quesadillas. We discussed how to make fluffy eggs, cook fresh veggies, and assemble delicious fillings. I also shared tips for preventing sticking and recommended tools for cooking. Plus, we covered tasty variations and how to store leftovers effectively. Now it's time to get cooking! Enjoy crafting your quesadillas just the way you like. Your kitchen can become a tasty adventure.
Fried Egg Quesadilla Quick and Tasty Recipe
Looking for a quick and tasty meal? Try my Fried Egg Quesadilla recipe! It’s simple, fun, and packed with flavor. You’ll learn how to whip
To make these tasty muffins, gather the following ingredients: - 1 cup pure pumpkin puree - 1/2 cup packed brown sugar - 1/4 cup granulated sugar - 1/4 cup vegetable oil - 2 large eggs, at room temperature - 1 teaspoon vanilla extract - 1 1/2 cups all-purpose flour - 1 teaspoon baking powder - 1/2 teaspoon baking soda - 1 teaspoon ground cinnamon - 1/2 teaspoon ground nutmeg - 1/4 teaspoon ground ginger - 1/4 teaspoon salt - 1 cup semi-sweet chocolate chips If you need to swap ingredients, here are some ideas: - Use applesauce for vegetable oil to cut fat. - Replace brown sugar with coconut sugar for a different taste. - Substitute eggs with flax eggs for a vegan option. - You can use whole wheat flour instead of all-purpose flour for added fiber. - For a nutty flavor, add chopped nuts instead of chocolate chips. Prepare these tools before you start: - Mixing bowls (large and medium) - Whisk - Spatula or wooden spoon - Muffin tin - Paper liners or non-stick spray - Scoop or ladle - Toothpick for testing doneness - Wire rack for cooling Start by preheating your oven to 350°F (175°C). This step is key for even baking. Next, line a muffin tin with paper liners. If you don’t have liners, grease the tin lightly with non-stick spray. This keeps the muffins from sticking. In a large bowl, combine the pumpkin puree, packed brown sugar, granulated sugar, vegetable oil, and eggs. Make sure your eggs are at room temperature for the best results. Add in the vanilla extract and whisk until smooth. In another bowl, mix the all-purpose flour, baking powder, baking soda, ground cinnamon, ground nutmeg, ground ginger, and salt. This helps to ensure even distribution of the dry ingredients. Gradually add the dry mix to the wet mix. Use a spatula or wooden spoon to stir gently. Mix until just combined. Be careful not to overmix; otherwise, your muffins may become dense. Lastly, fold in the semi-sweet chocolate chips until they are evenly distributed. Now, it’s time to fill the muffin tin. Use a scoop or ladle to pour the batter into each cup. Fill them about 3/4 full to allow room for rising. Place the muffin tin in the oven and bake for 18-20 minutes. To check if they are done, insert a toothpick into the center of a muffin. It should come out clean or with a few moist crumbs. Once baked, take the muffins out of the oven. Let them cool in the tin for about 5 minutes. Then, carefully move them to a wire rack to cool completely. Enjoy the aroma as they cool! To get the best muffin texture, use room temperature eggs. This helps the batter mix well. Mix until just combined to avoid dense muffins. Overmixing leads to tough muffins. Fill each muffin cup about three-quarters full. This allows room for the muffins to rise nicely. One common mistake is using cold ingredients. Cold eggs or milk can make your muffins dense. Another mistake is overfilling the muffin cups. This can cause them to overflow and stick. Lastly, avoid underbaking. Always test with a toothpick. If it comes out clean, your muffins are done. To enhance flavor, try adding spices like cloves or allspice. These spices can add depth. You can also use dark chocolate chips for a richer taste. For a fun twist, consider adding nuts or dried fruit. These additions can make your muffins unique and delicious! {{image_4}} To make a nut-free version of these muffins, just skip any nuts. The recipe is already nut-free since it doesn’t call for any. You can enjoy the soft and moist texture without worry. The chocolate chips add enough flavor and sweetness. You can switch up the chocolate chips to suit your taste. Try using butterscotch chips or white chocolate chips for a fun twist. Dried fruits, like cranberries or raisins, also work well. This will give your muffins a unique flavor while keeping them delicious. If you need a gluten-free option, use a gluten-free flour blend. Look for a blend that includes xanthan gum for the best texture. You can also use almond flour or coconut flour, but adjust the liquid to avoid dryness. These alternatives will help you enjoy the muffins without gluten. To keep your pumpkin chocolate chip muffins fresh, store them in an airtight container. This helps lock in moisture and keeps them soft. Place the container on your kitchen counter for up to three days. If you want to keep them longer, consider freezing. Freezing muffins is easy! First, let the muffins cool completely after baking. Wrap each muffin tightly in plastic wrap. Then, place them in a freezer bag or container. Label the bag with the date. You can freeze them for up to three months. When you’re ready to enjoy, just take out the desired amount. To reheat your muffins, you can use a microwave or oven. For the microwave, place a muffin on a plate and heat for about 15-20 seconds. If you prefer the oven, preheat it to 350°F (175°C). Place the muffins on a baking sheet and warm for 5-10 minutes. This will make them taste fresh again! Yes, you can use fresh pumpkin. First, cook the pumpkin until soft. Then, mash it well. Strain it to remove excess water. This gives you a nice texture. Fresh pumpkin adds a unique flavor. However, using canned puree saves time and effort. Both options work well in these muffins. To make these muffins healthier, consider a few simple swaps. - Use whole wheat flour instead of all-purpose flour. - Replace half the sugar with applesauce or mashed banana. - Use unsweetened cocoa powder for added flavor without extra sugar. - Add nuts or seeds for healthy fats and protein. These changes keep the taste while lowering calories and adding nutrients. Pumpkin chocolate chip muffins pair well with many drinks. - A hot cup of coffee or tea works great. - Serve with a dollop of yogurt for a creamy touch. - A scoop of ice cream makes for a fun dessert twist. These options elevate your muffin experience and make it even more delightful. We covered key ingredients, tools, and steps for amazing muffins. I shared helpful tips to avoid mistakes and improve texture. You learned about fun variations and how to store your treats. Muffins can be made healthy or altered to fit diets. Keep experimenting with mix-ins for new flavors. With this guide, you are ready to bake delicious muffins. Enjoy the process, and share them with others!
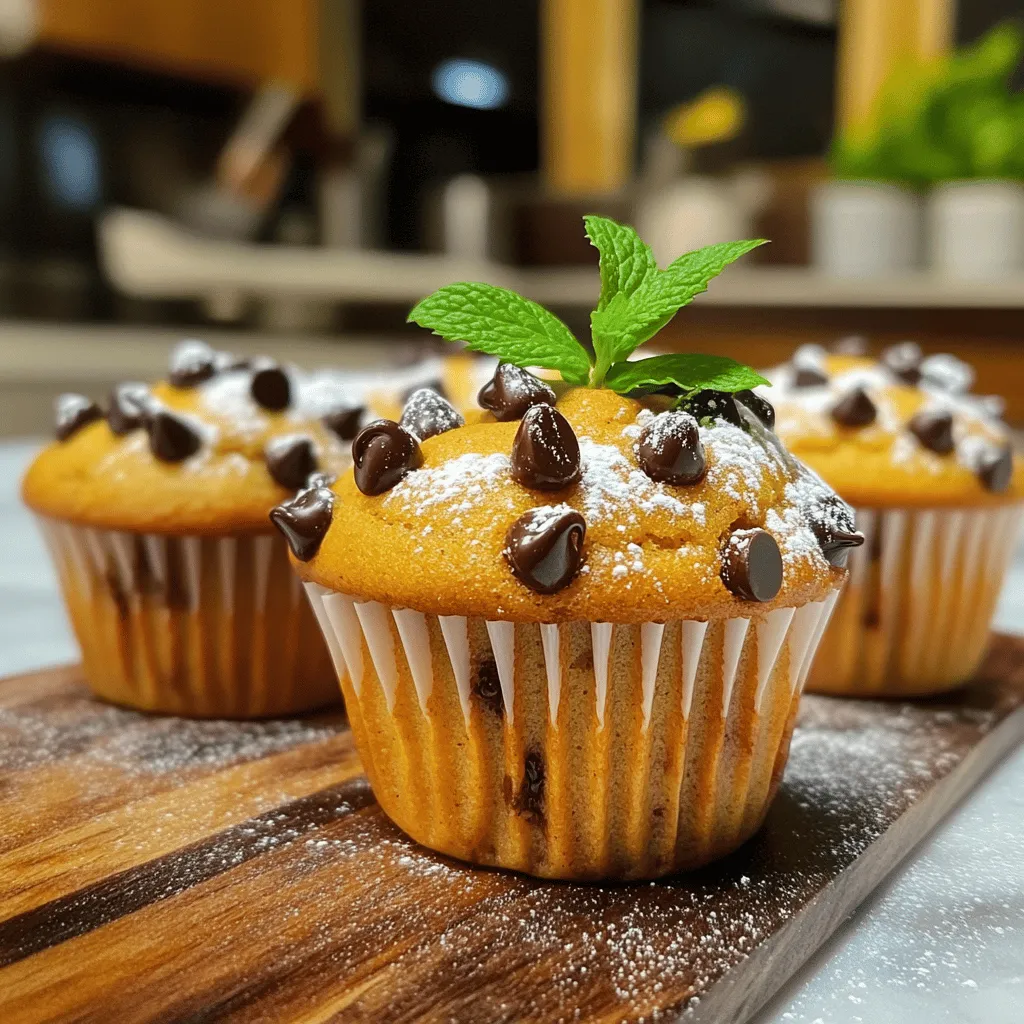
Pumpkin Chocolate Chip Muffins Delightful and Simple
Are you ready to make the best Pumpkin Chocolate Chip Muffins? These treats are easy, tasty, and perfect for any season. In this article, I
- 1 cup brewed espresso or strong coffee - 1 cup milk (dairy or non-dairy option) - 1/4 cup pumpkin puree - 2 tablespoons white chocolate chips - 1 tablespoon maple syrup (adjust sweetness) - 1 teaspoon pure vanilla extract - 1/2 teaspoon pumpkin spice (blend of cinnamon, nutmeg, ginger) - Whipped cream (for topping) - Ground cinnamon and nutmeg (for garnish) These ingredients come together to create a cozy drink. The rich espresso gives it a strong base. You can choose any milk you like, from whole to almond. The pumpkin puree adds creaminess and flavor. White chocolate chips melt into a sweet delight. Maple syrup adds a touch of natural sweetness. Vanilla extract brings depth to the drink. Pumpkin spice makes it warm and inviting. Finally, whipped cream and spices on top make it look and taste festive. Feel free to mix and match. You can use oat milk for a nut-free choice. Or, skip the white chocolate if you want a more pumpkin-focused taste. Try different spices to find your perfect mix! To brew a great espresso or strong coffee, start with fresh coffee beans. I recommend a medium roast for a balanced flavor. Grind the beans finely. Use about two tablespoons of coffee for every ounce of water. Brew the coffee using an espresso machine or a French press. When done, set it aside and let it cool a bit. In a small saucepan, combine 1/4 cup of pumpkin puree with 2 tablespoons of white chocolate chips. Add 1 tablespoon of maple syrup and 1 teaspoon of pure vanilla extract. Mix in 1/2 teaspoon of pumpkin spice. Place the saucepan over low heat. Stir often until the white chocolate melts. Avoid boiling the mixture to keep it smooth. After the pumpkin mixture is ready, gradually whisk in 1 cup of milk. You can use dairy or non-dairy milk based on your taste. Heat gently, stirring until it's warm but not boiling. To froth the milk, use a hand frother or whisk. Whisk until you see light and airy foam. This makes your drink creamy and delightful. In a large mug, pour in 1 cup of your brewed coffee or espresso. Next, blend in the warm pumpkin-milk mix. Stir gently for a smooth mix. Top your drink with a generous dollop of whipped cream. Finally, sprinkle ground cinnamon and nutmeg on top for a festive look. Serve hot and enjoy your homemade Pumpkin White Mocha! You can change the maple syrup based on your taste. Start with one tablespoon. If you want it sweeter, add more. If you prefer less sweet, use less syrup. You can also try other sweeteners. Honey, agave syrup, or stevia are great options. Each sweetener gives a unique flavor. Choose what you enjoy most. Frothing milk at home is fun and easy. Use a hand frother for best results. If you don't have one, a whisk works too. Just whisk the milk quickly until it's frothy. To make foam even better, heat your milk gently. Avoid boiling it. Boiling can ruin the foam. You want warm milk, not hot. Garnish your pumpkin white mocha to make it special. Use whipped cream on top for creaminess. You can also sprinkle ground cinnamon or nutmeg for extra flavor. Get creative with toppings! Try crushed graham crackers or chocolate shavings. Seasonal spice blends can add a nice touch too. Think about using chai spices or even a dash of clove. {{image_4}} If you want a dairy-free Pumpkin White Mocha, you have options. You can use plant-based milk like: - Almond milk - Oat milk - Soy milk These milks work well and keep the drink creamy. For the white chocolate, you can use vegan substitutes. Look for dairy-free white chocolate chips. They melt nicely and taste great. To make your drink even more inviting, add spices. Cardamom brings a warm touch to the flavor. You can also try flavored syrups. Adding caramel syrup gives a sweet twist. Just a splash can change the whole drink! Want a cool drink? You can adapt this recipe for an iced version. Start by brewing your coffee or espresso. Let it cool down. Next, blend your pumpkin mixture as usual. Once it’s ready, fill a glass with ice. Pour the cooled coffee over the ice. Then, add your pumpkin-milk blend. Stir it well, and don’t forget the whipped cream on top! Enjoy your refreshing iced Pumpkin White Mocha! To store any extra Pumpkin White Mocha, place it in a sealed container. Refrigerate it within two hours of making. You can keep it in the fridge for up to three days. If you notice the drink separates, just give it a good stir before enjoying it again. When reheating, use a gentle method. You can warm it in a small pot over low heat. Stir it often to keep it smooth. Avoid boiling, as that can ruin the taste. If you want to keep the frothiness, try using a hand frother after reheating. This will help recreate that creamy texture. Enjoy your cozy drink again with these simple steps! Pumpkin White Mocha is a warm, cozy drink. It blends rich espresso with smooth pumpkin puree. The white chocolate adds sweetness and creaminess. Topped with whipped cream, it’s a fall favorite. This drink combines the flavors of pumpkin spice and coffee. It’s perfect for chilly days. Yes, you can make this recipe gluten-free. Most of the ingredients are naturally gluten-free. However, check the labels on your white chocolate chips. Some brands may contain gluten. Use a certified gluten-free brand to be safe. Maple syrup and pumpkin puree are gluten-free as well. You can make this drink sugar-free! Use sugar-free white chocolate chips. You can also replace maple syrup with a sugar substitute, like stevia or monk fruit. These options will keep the flavor without the sugar. Adjust the amount to your taste for the best results. Many cafes offer Pumpkin White Mocha, especially in fall. Chains like Starbucks and Dunkin’ serve this drink. Local coffee shops may also have their own version. Ask your favorite café if they can make it. You might find unique twists on the classic recipe. If you don’t have pumpkin puree, use butternut squash puree instead. Sweet potato puree is another great option. Both will provide a similar texture and flavor. You can also use apple sauce for a different taste. Just remember to adjust the spices to match your choice. This blog post covered how to make a delicious Pumpkin White Mocha. You learned about essential ingredients, step-by-step instructions, and tips for perfecting your drink. We also explored fun variations, storage info, and answered common questions. In the end, enjoy crafting this seasonal favorite. Experiment with flavors and make it your own. Whether warm or iced, it’s a treat you'll love. Happy brewing!
Pumpkin White Mocha Delightful Fall Coffee Recipe
As fall arrives, cozy moments call for a delicious coffee treat. The Pumpkin White Mocha combines rich espresso with pumpkin puree and sweet white chocolate
To make a delicious dairy-free pumpkin spice latte, you need a few key items. Here’s what you’ll need: - 1 cup of your favorite dairy-free milk - 2 tablespoons of pumpkin puree - 2 tablespoons of maple syrup - 1 teaspoon of pumpkin spice blend - 1/2 teaspoon of pure vanilla extract - 1 shot of espresso or 1/2 cup of strong coffee These ingredients work together to give you that warm, cozy fall flavor. The pumpkin puree adds richness, while the maple syrup sweetens it just right. Choosing the right milk makes a big difference. Here are some great options: - Almond milk: It has a light flavor and is a popular choice. - Oat milk: Creamy and slightly sweet, it pairs well with pumpkin. - Coconut milk: Rich and creamy, it adds a tropical twist. Feel free to pick your favorite! Each milk brings its own unique taste and texture to the latte. Once your latte is ready, you can make it even more special. Consider these fun toppings: - Whipped coconut cream: It adds a luscious layer on top. - Ground cinnamon: A sprinkle gives a warm, spicy finish. - Cinnamon stick: Use it as a stirrer for extra flair. These toppings not only enhance the flavor but also make your drink look beautiful. Enjoy customizing your latte! First, grab a medium saucepan. Pour in 1 cup of your favorite dairy-free milk. Almond, oat, or coconut milk work well. Add 2 tablespoons of pumpkin puree. Ensure it’s pure pumpkin, not pie filling. Next, add 2 tablespoons of maple syrup. You can change the amount for your taste. Then, sprinkle in 1 teaspoon of pumpkin spice blend and 1/2 teaspoon of pure vanilla extract. Heat this mixture over medium heat. Whisk it continuously until it's warm and a bit frothy. Avoid boiling, as you want it smooth and creamy. While the milk mixture heats, it’s time to brew your coffee. You can use a shot of fresh espresso or 1/2 cup of strong coffee. Choose what you like best! Pour the brewed coffee or espresso into a large, cozy mug. This will be the base of your latte. Once your dairy-free milk mixture is warm, pour it over your brewed coffee. Use a spoon to stir gently. This helps blend the flavors together. Taste your latte. If you want it sweeter, add more maple syrup. Mix well after adding. For a special touch, top it with whipped coconut cream, if you like. Then, sprinkle ground cinnamon on top for a lovely finish. It makes your latte look and taste amazing! Enjoy your cozy, dairy-free pumpkin spice latte. To make your latte creamy, choose the right dairy-free milk. Almond, oat, or coconut milk works great. Each milk has its own taste and texture. Oat milk is thick and frothy, while almond milk is light. Heat your milk slowly in a pan. Whisk it gently to add air. This helps create a frothy layer. Just don’t let it boil! Start with two tablespoons of maple syrup. This gives a good base flavor. After mixing, taste your latte. If you want it sweeter, add more syrup. You can also use other sweeteners, like agave or honey. Adjust until it feels just right for you. Remember, the pumpkin puree adds some natural sweetness too. To make your latte look pretty, use a clear glass. This shows off the lovely layers. Top it with whipped coconut cream for extra flair. Sprinkle ground cinnamon on top for color and aroma. You can even add a cinnamon stick for a cozy touch. These little details help create a drink that looks as good as it tastes. {{image_4}} You can change the flavor of your latte easily. Try adding a pinch of nutmeg for warmth. A splash of almond extract gives a nice twist. You can swap pumpkin spice for chai spice for a different vibe. If you like chocolate, a bit of cocoa powder can make it richer. Adjust the pumpkin puree amount if you want a stronger pumpkin taste. Autumn is all about flavors. In fall, add a touch of maple syrup for extra sweetness. For winter, try peppermint extract for a cool taste. In spring, blend in some fresh vanilla beans for freshness. In summer, serve it iced with cold brew coffee. Each season can bring new fun to your latte! Sweeteners change how your drink tastes. Maple syrup is great, but honey or agave also works. If you want less sugar, try stevia or monk fruit. For milk, stick to your favorites: almond, coconut, or oat. Each has its own flavor and creaminess. Experiment to find your perfect mix! Store unused dairy-free milk in an airtight container in the fridge. It stays fresh for about a week. Keep any leftover pumpkin puree in a sealed container as well. Use it within a week for the best flavor. If you have extra maple syrup, store it in a cool, dark place. It lasts for months. When reheating your latte, do it gently. Pour it into a saucepan over low heat. Stir often to keep it smooth. Avoid boiling, as this can change the texture. You can also use a microwave. Heat for short bursts, checking every 15 seconds. Stir after each burst for even warmth. You can freeze pumpkin puree for later use. Pour it into ice cube trays. Once frozen, store the cubes in a freezer bag. This way, you can easily use small amounts in future recipes. It keeps well for up to three months. Just thaw what you need in the fridge before using. Yes, you can use regular milk, but it won't be dairy-free. I recommend almond, oat, or coconut milk for a creamy texture and great flavor. These options also add nice nutty or sweet notes to your latte. If you prefer dairy, whole milk works well too, but it changes the recipe's focus on being dairy-free. If you don't have pumpkin puree, you can use butternut squash puree or sweet potato puree. Both offer a similar texture and taste. Make sure to choose pure versions. Avoid pie fillings, as they contain added sugar and spices that can alter the taste. This recipe is already vegan-friendly if you use plant-based milk and maple syrup. Maple syrup is a great sweetener that fits a vegan diet. Just ensure your coffee or espresso is made without any animal products. You can also skip the whipped coconut cream if you want to keep it simple. You now know how to make a dairy-free pumpkin spice latte. We explored ingredients like milk choices and toppings. I guided you through easy steps to prepare your latte. We covered tips for texture and sweetness too. Feel free to experiment with flavors and storage methods. Enjoy your cozy drink any time of year! Making it your own makes it special. Happy sipping!
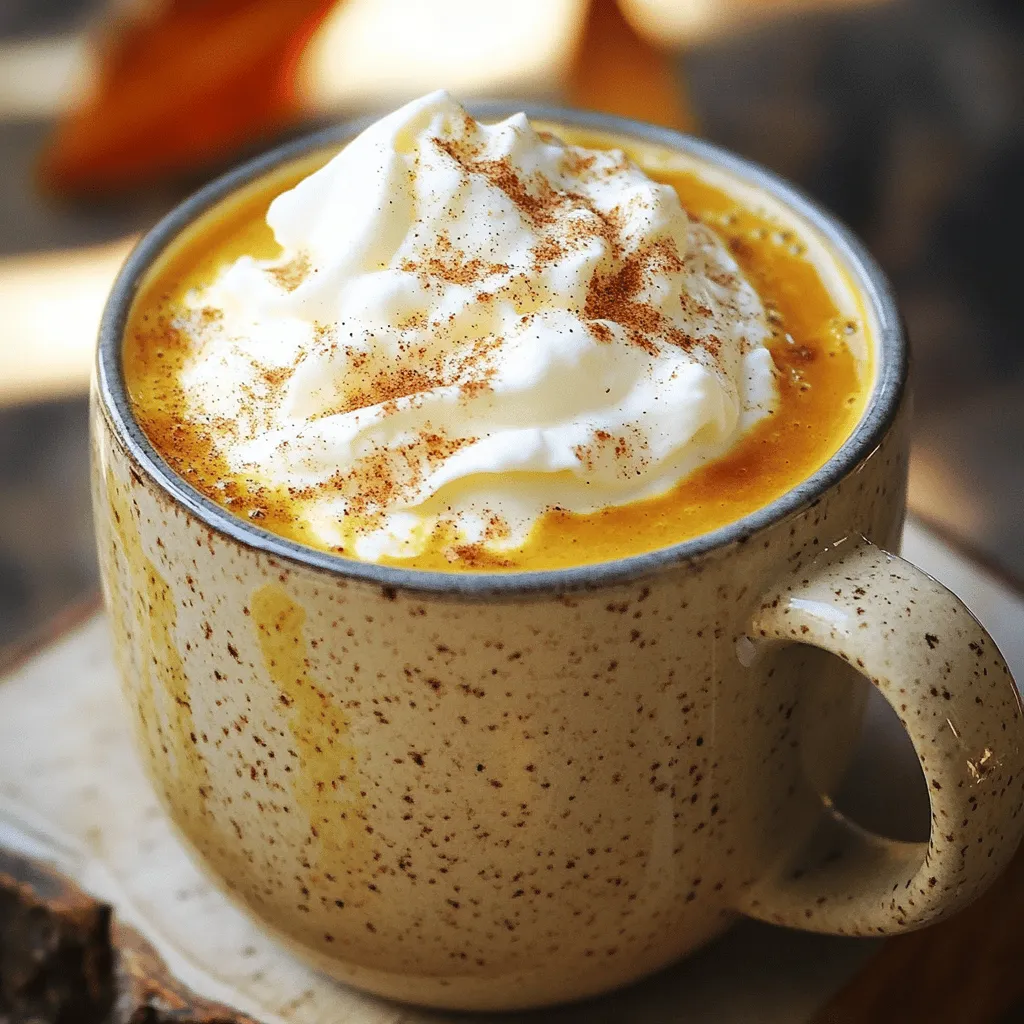
Dairy Free Pumpkin Spice Latte Flavorful Fall Recipe
Are you craving a cozy fall drink without the dairy? Look no further! I’ll show you how to make a Dairy Free Pumpkin Spice Latte
- 2 cans (12.4 oz each) of refrigerated cinnamon rolls - 5 large eggs - 1 cup whole milk - 1/2 cup heavy cream - 1 teaspoon vanilla extract - 1 teaspoon ground cinnamon - 1/4 teaspoon ground nutmeg - 1/4 cup pure maple syrup - 1/2 cup chopped pecans or walnuts (optional for added texture) - Powdered sugar for a finishing dust - Additional maple syrup for serving Gathering the right ingredients is key to making this dish a hit. First, you need two cans of refrigerated cinnamon rolls. This is the base of your casserole. Then, you’ll need five large eggs. They create a rich and creamy custard. Whole milk and heavy cream come next, adding depth and flavor. For flavor, don’t forget the vanilla extract, ground cinnamon, and nutmeg. These spices give warmth and sweetness. Maple syrup adds a lovely, rich touch too. If you like a nice crunch, consider adding chopped pecans or walnuts. They’ll give your casserole extra texture. Lastly, have powdered sugar on hand for that finishing touch. You can serve it with more maple syrup for drizzling on top. With these ingredients, you’ll create a delicious Cinnamon Roll French Toast Casserole. Each bite will be soft and flavorful. This dish is perfect for breakfast or brunch. 1. Preheat your oven to 375°F (190°C). This step is key for even cooking. 2. Grease a 9x13 inch baking dish with butter or cooking spray. This keeps the casserole from sticking. 1. Open both cans of cinnamon rolls. Take care to separate each roll. 2. Cut each roll into quarters. Spread the pieces evenly in the greased dish. 1. In a large bowl, whisk together 5 eggs, 1 cup of whole milk, and 1/2 cup of heavy cream. 2. Add 1 teaspoon of vanilla extract, 1 teaspoon of ground cinnamon, and 1/4 teaspoon of ground nutmeg. 3. Mix in 1/4 cup of pure maple syrup. Make sure the custard is well blended. 1. Pour the custard mixture over the quartered cinnamon roll pieces. Ensure all pieces get coated. 2. If you like, sprinkle 1/2 cup of chopped pecans or walnuts on top for extra crunch. 1. Cover the dish tightly with aluminum foil. Bake for 30 minutes. 2. After 30 minutes, remove the foil. Continue baking for 15-20 minutes. Look for a golden brown top. 1. After baking, let the casserole cool for 5 minutes. This helps set the dish. 2. Drizzle the warm icing from the cinnamon rolls over the top. Dust with powdered sugar for a sweet finish. To make your casserole perfect, start with even soaking. After you cut the cinnamon rolls, spread them out evenly in the dish. When you pour the egg mixture, make sure every piece is covered. Press down any rolls that float. This helps all the pieces soak up the custard. Next, watch your baking times. Bake covered for 30 minutes, then remove the foil. Continue baking for 15 to 20 minutes. Look for a golden brown top and a firm center. The casserole should not jiggle. This means it is ready to serve. To make your casserole look great, consider garnishing it. Add extra chopped nuts on top for a crunch. Fresh fruit, like banana slices or berries, adds color. It makes your dish pop on the table. When serving, keep it warm and offer extra maple syrup. This lets everyone drizzle their own. For a final touch, dust powdered sugar over the top. It gives a nice, sweet finish. Enjoy serving this treat at any gathering! {{image_4}} You can easily switch up flavors in your Cinnamon Roll French Toast Casserole. Adding fruits like berries or bananas gives a fresh twist. Simply slice the fruit and layer it with the cinnamon roll pieces. The fruit will add sweetness and moisture. You can also try different nuts. Pecans and walnuts bring a nice crunch. But you can replace them with almonds for a different taste. Just chop the nuts and sprinkle them on top before baking. If you want a lighter version, there are easy swaps. Use non-dairy milk instead of whole milk and heavy cream. Almond milk or oat milk works well. This way, you keep rich flavor without the extra calories. Also, look for whole grain or low-sugar cinnamon rolls. They are often softer and give a healthier option. You can find these in stores or make them at home. Seasonal flavors can change the game. In fall, try adding pumpkin spice to the custard mixture. Just a teaspoon can give you that cozy, warm taste. For the holidays, think about gingerbread flavor. You can add ground ginger and cloves to the egg mixture. This will create a festive treat that everyone will love. To keep your cinnamon roll French toast casserole fresh, follow these steps: - Refrigeration tips: Let the casserole cool down first. Cover it tightly with plastic wrap or aluminum foil. Store it in the fridge for up to 3 days. - Freezing instructions: If you want to save it for later, cut the casserole into pieces. Wrap each piece in plastic wrap. Then, place them in a freezer-safe bag. This way, it can last for up to 2 months. When it's time to enjoy your leftovers, you can reheat them in a few ways: - Best methods for reheating: The oven is a great choice. Preheat it to 350°F (175°C). Place the casserole in a baking dish and cover it with foil. Heat for about 15-20 minutes, or until warm. You can also use the microwave. Heat a single piece on high for about 30-45 seconds. Enjoy your tasty treat! Yes, you can prepare this dish the night before. Just follow the steps up to pouring the egg mixture over the rolls. Cover it tightly and store it in the fridge. Bake it in the morning for a fresh breakfast. Absolutely! Just thaw them first. You can let them sit at room temperature for a few hours. Once they are soft, cut them into quarters and follow the recipe as usual. You can use half-and-half or whole milk instead. If you want a lighter option, try using almond milk or oat milk. Just keep in mind that it may change the texture a bit. Look for a golden top and check if the center is set. You can insert a knife into the middle. If it comes out clean, it's ready. The baking time may vary, so keep an eye on it. Yes, you can double the ingredients. Just use a larger baking dish. Keep the baking time similar, but check for doneness a bit earlier, as it may take longer to bake evenly. This blog post covered how to make a delicious cinnamon roll casserole. We discussed the key ingredients, from refrigerated rolls to optional toppings. I walked you through each step, from prepping the dish to baking it to a golden brown. I shared useful tips for a perfect casserole and variations to try for different tastes. Lastly, we reviewed storage and reheating methods for leftovers. Now, you have all the tools to bake a fantastic treat that can suit any occasion! Enjoy making this easy and tasty dish!
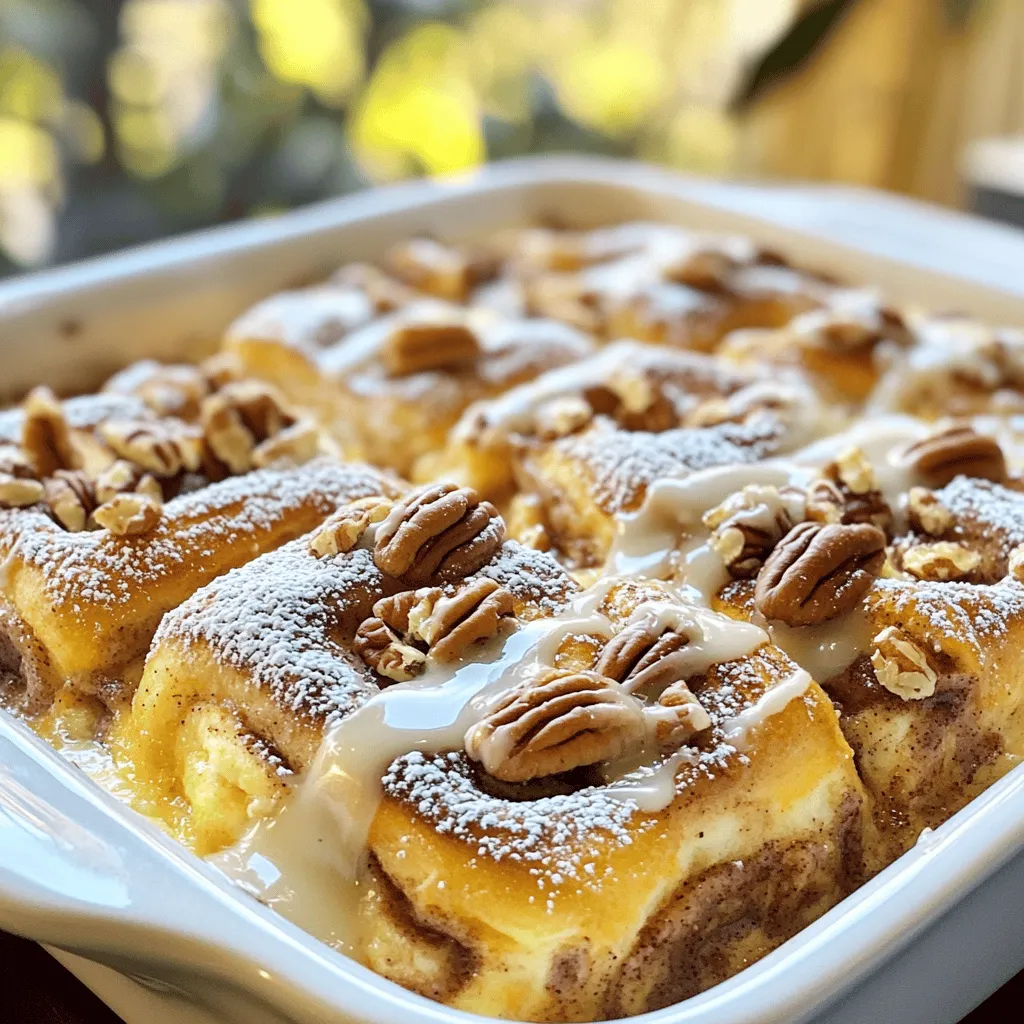
Cinnamon Roll French Toast Casserole Easy Delight
Looking for an easy breakfast that tastes like a sweet hug? Try my Cinnamon Roll French Toast Casserole! You’ll love how simple it is to