Breakfast

To make warm maple pecan baked oatmeal, gather these items: - 2 cups rolled oats - 1/2 cup pecans, roughly chopped - 1/2 cup pure maple syrup - 2 cups almond milk (or your preferred milk) - 1/4 cup unsweetened applesauce - 1 teaspoon vanilla extract - 1 teaspoon ground cinnamon - 1/2 teaspoon ground nutmeg - 1/4 teaspoon salt - 1 large banana, sliced (optional for topping) - Extra maple syrup for drizzling (optional) You can swap ingredients for different flavors or needs: - Use walnuts instead of pecans for a unique taste. - Coconut milk works well in place of almond milk. - If you don't have applesauce, mashed banana can be a great stand-in. - For a sweeter dish, consider adding a bit more maple syrup. - You can leave out the banana and use berries instead for a fresh twist. Each serving (based on 6 servings) offers balanced nutrition: - Calories: About 250 - Protein: 6g - Total Fat: 9g - Saturated Fat: 1g - Carbohydrates: 42g - Fiber: 5g - Sugar: 10g - Sodium: 120mg This dish provides healthy energy, fiber, and flavor, making it a great choice for breakfast or a snack. Enjoy the warmth and comfort of this easy recipe, tailored for your taste! 1. First, preheat your oven to 350°F (175°C). This step is key for even baking. 2. Next, grease a 9x9 inch baking dish. Use cooking spray or a light oil. This helps prevent sticking. 3. In a large bowl, mix 2 cups of rolled oats with 1/2 cup of chopped pecans. 4. Add 1 teaspoon of ground cinnamon, 1/2 teaspoon of ground nutmeg, and 1/4 teaspoon of salt. Stir well to combine these dry ingredients. 5. In a separate bowl, whisk together 2 cups of almond milk, 1/2 cup of pure maple syrup, 1/4 cup of unsweetened applesauce, and 1 teaspoon of vanilla extract. Mix until smooth. 6. Gradually pour the wet mixture into the dry ingredients. Stir gently until everything is well combined. 7. Once mixed, pour the oatmeal mixture into the prepared baking dish. Spread it out evenly. 8. If you like, add sliced banana on top for added flavor. This step is optional but tasty! 9. Bake in the oven for 30-35 minutes. The oatmeal should be firm and golden on top. 10. After baking, take it out and let it cool for a few minutes. This helps it set. - Use rolled oats for the best texture. They absorb liquid well. - Make sure to mix the wet and dry ingredients thoroughly. This ensures even cooking. - Let the oatmeal cool slightly before slicing. This makes serving easier. - Drizzle extra maple syrup on top just before serving. This adds extra sweetness and flavor. You can make this baked oatmeal your own. Here are some fun ideas: - Fruits: Add berries, apples, or raisins for extra sweetness. - Nuts: Swap pecans for walnuts or almonds. They give a nice crunch. - Spices: Experiment with ginger or allspice for a new flavor. - Sweeteners: If you like it sweeter, use honey or agave syrup. You can even mix in some chocolate chips for a treat! Storing your baked oatmeal is easy. Here are some tips: - Cool completely: Let it cool down before storing to avoid sogginess. - Use airtight containers: This keeps it fresh longer. - Refrigeration: Store it in the fridge for up to 5 days. - Freezing: You can freeze individual portions for up to 3 months. Just wrap them well! For the best experience, serve your baked oatmeal warm. Here’s how: - Toppings: Add sliced bananas, yogurt, or more maple syrup on top. - Presentation: Serve in bowls, and sprinkle with chopped pecans. - Pair it up: Enjoy it with a side of fresh fruit or a cup of tea. These small touches can make your dish even better! {{image_4}} You can mix in some fun flavors to your baked oatmeal. Here are a few ideas: - Dried fruit: Add raisins or cranberries for sweetness. - Chocolate chips: Toss in dark or milk chocolate for a sweet treat. - Seeds: Chia or flax seeds can boost nutrition. - Spices: Try adding a pinch of ginger or cardamom for warmth. Each of these add-ins can change the taste and give your dish a personal touch. If you need a gluten-free version, it’s simple. Just use gluten-free oats. They work just like regular oats but are safe for those with gluten issues. Check the package to ensure they are certified gluten-free. This recipe is easy to make vegan! Here are some swaps: - Use almond milk or any plant-based milk. - Replace eggs with flaxseed meal mixed with water. Use 1 tablespoon of flaxseed meal with 2.5 tablespoons of water for each egg. - Ensure your maple syrup is pure and vegan. These changes keep your dish delicious and plant-based. You won’t miss the eggs or dairy! To keep your warm maple pecan baked oatmeal fresh, let it cool first. Once cooled, cover it tightly with plastic wrap or aluminum foil. You can also place it in an airtight container. Store it in the fridge for up to five days. This keeps the flavors intact while preventing it from drying out. When you’re ready to enjoy your baked oatmeal again, there are a few easy ways to reheat it. You can use a microwave for quick warming. Place a serving in a bowl and heat it for about 30 seconds. Stir and check if it's warm enough. If not, heat it in 15-second bursts. You can also reheat it in the oven. Preheat the oven to 350°F (175°C). Cover the dish with foil and heat for about 10-15 minutes. This method keeps it nice and soft. If you want to save some for later, freezing is a great option. Cut the baked oatmeal into squares after it cools. Wrap each piece in plastic wrap, then place them in a freezer-safe bag. Label the bag with the date. You can freeze it for up to three months. To eat, simply thaw in the fridge overnight and reheat as mentioned above. This way, you’ll always have a delicious breakfast ready to go! Yes, you can use any milk you like. Cow's milk works well. Soy milk or oat milk is also great. They will give a nice flavor and texture. Just keep the same amount as in the recipe. This way, you keep the same creaminess. To make this oatmeal nut-free, skip the pecans. You can replace them with seeds. Sunflower seeds or pumpkin seeds are good choices. They add crunch and nutrition without the nuts. You can also use more oats for bulk. Toppings can make this dish even better! Here are some tasty options: - Sliced banana - Chopped nuts (if not nut-free) - Fresh berries like strawberries or blueberries - A dollop of yogurt - A drizzle of extra maple syrup Feel free to mix and match your favorites! We covered a lot about baked oatmeal. We looked at key ingredients and useful substitutes. You now know how to prepare and bake it perfectly. I shared tips for storage and creative variations. Balancing nutrition with taste makes this a great dish. Enjoy exploring all the ways to customize your recipe. With these tips, your baked oatmeal will shine at any meal. Happy baking!
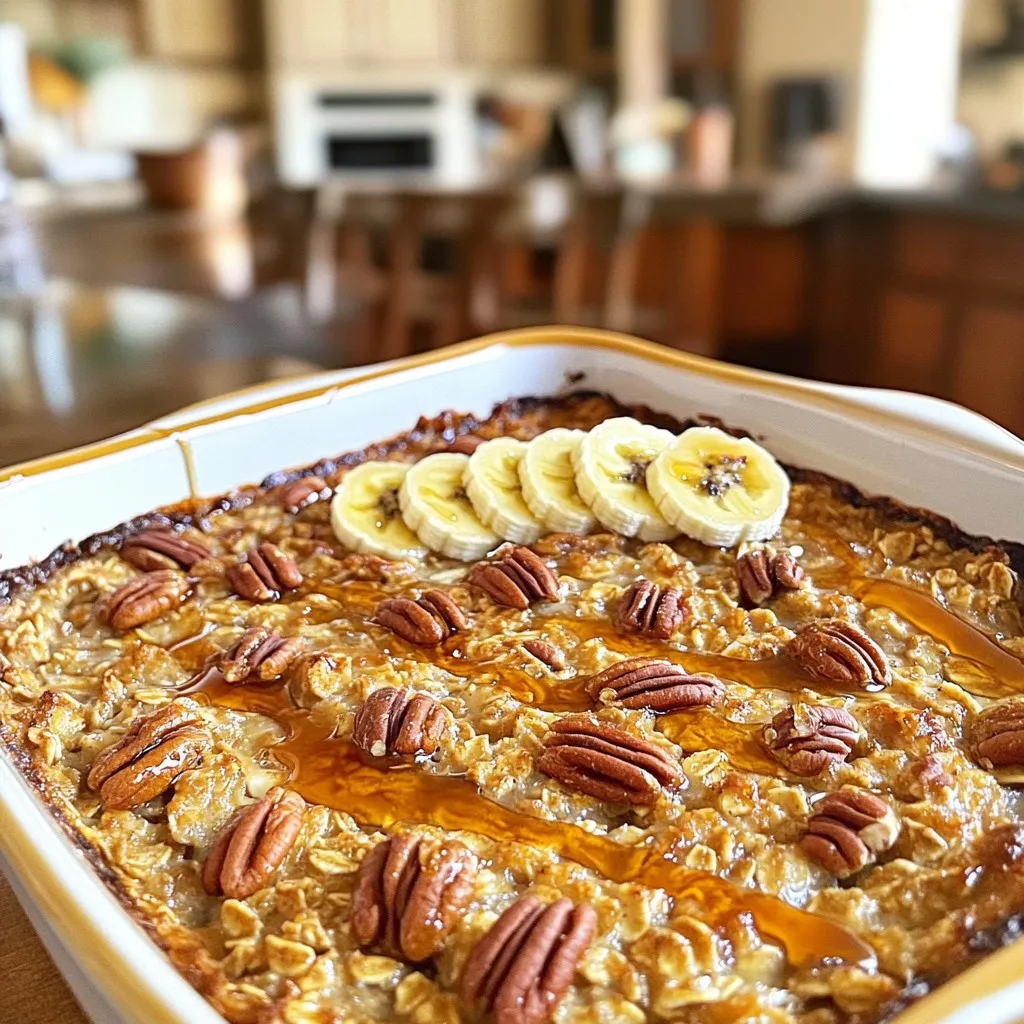
Warm Maple Pecan Baked Oatmeal Comforting and Easy Dish
Looking for a warm and tasty breakfast that’s easy to make? You’ve found it! My Warm Maple Pecan Baked Oatmeal is the perfect comfort dish
- 4 slices of brioche or challah bread - 2 large eggs - 1/2 cup milk (or almond milk for a dairy-free alternative) - 1 teaspoon pure vanilla extract - 1 teaspoon ground cinnamon - 1 tablespoon granulated sugar - A pinch of salt To make Air Fryer French Toast Bites, you need some simple ingredients. I love using brioche or challah bread. They give the bites a rich taste. Using day-old bread works best. It soaks up the egg mixture without getting too soggy. Next, you need eggs. They help bind everything together. Milk adds creaminess. You can use regular milk or almond milk if you prefer dairy-free. Don't forget the vanilla extract! It brings a lovely aroma. Ground cinnamon adds warmth and spice. A little sugar sweetens the mix, and salt balances the flavors. - Cooking spray or melted butter - Maple syrup, powdered sugar, or fresh berries for serving For cooking, you’ll need cooking spray or melted butter. This keeps the bites from sticking to the air fryer. When serving, you can get creative! Maple syrup is classic. Powdered sugar adds a sweet touch. Fresh berries make a colorful, tasty addition. Enjoy these bites warm for the best experience! {{ingredient_image_2}} Cutting the Bread into Cubes Start by taking your brioche or challah bread. Cut each slice into cubes that are about 1 inch wide. This size helps them cook evenly. Ensuring the Right Size for Cooking Make sure the cubes are not too big or too small. If they are too big, they will not cook well. If they are too small, they may burn. The right size makes a big difference. Combining Eggs and Other Ingredients In a large bowl, crack two eggs and pour in ½ cup of milk. Add 1 teaspoon of vanilla extract, 1 teaspoon of ground cinnamon, 1 tablespoon of sugar, and a pinch of salt. Whisking Techniques Use a whisk to mix all the ingredients together. Make sure to blend until it is smooth. This helps the sugar to dissolve fully. Preheating the Air Fryer While the bread soaks, preheat your air fryer to 350°F (175°C). This takes about 5 minutes. Preheating is key for that crispy texture. Coating and Arranging the Bread Gently fold the bread cubes into your egg mixture. Make sure each cube gets a good coat. Let them sit for about 5 minutes. This helps them soak up all the tasty flavors. Timing and Temperature for Cooking Once ready, lightly grease the air fryer basket. Place the coated bread cubes in a single layer. Cook them for 8-10 minutes. Shake the basket halfway through to get even browning. Keep a close watch towards the end. You want them golden brown and crispy! - Adjusting Cooking Time for Crispiness: To get the perfect crunch, keep an eye on the timer. Cooking for 8 to 10 minutes works well. If you want them extra crispy, add a minute at a time. Just check often to avoid burning. - Importance of Preheating: Preheating your air fryer is key. Set it to 350°F (175°C) for about 5 minutes. This step helps the bites cook evenly and become crispier. - Overcrowding the Air Fryer: Give the bread cubes space. If you pile them on top of each other, they won’t cook evenly. Cook in batches if needed. This keeps the air flowing around each piece. - Inadequate Soaking Time: Let the bread soak in the egg mix for at least 5 minutes. This invites the flavors in and makes each bite moist. Skipping this step can lead to dry bites. Pro Tips Use Day-Old Bread: Using day-old brioche or challah bread enhances the texture, allowing for better absorption of the egg mixture without becoming too soggy. Experiment with Flavors: Feel free to add different spices like nutmeg or cardamom to the batter for a unique twist on the traditional flavor profile. Adjust Cooking Time: Depending on your air fryer model, you may need to adjust the cooking time. Keep an eye on the bites to achieve your desired crispiness. Perfect Dipping Sauce: Pair these bites with a variety of dipping sauces, such as chocolate sauce or yogurt, for a fun and delicious breakfast or snack option. {{image_4}} You can easily change the taste of your Air Fryer French Toast Bites. One simple way is to add spices. Adding a pinch of nutmeg can give your bites a warm flavor. You can also try other spices like allspice or cardamom for a unique twist. Another fun variation is to use different types of bread. While brioche or challah work great, try sourdough or whole wheat. Each bread type gives a new texture and flavor. Day-old bread soaks better and helps keep the bites crisp. When it comes to toppings, the options are endless! Maple syrup is a classic choice, but you can mix it up. Try flavored syrups like caramel or hazelnut for a new taste. For a fruity touch, add fresh berries or banana slices. You can also sprinkle nuts like walnuts or pecans for crunch. Dusting your bites with powdered sugar adds a sweet finish that everyone loves. To store leftovers, let the bites cool down. Place them in an airtight container. Keep them in the fridge for up to three days. If you want to reheat them, use your air fryer. Set it to 350°F (175°C) and heat for about 3-5 minutes. This keeps them crispy. To freeze Air Fryer French toast bites, place them in a single layer on a baking sheet. Freeze for about one hour until solid. Then, transfer them to a freezer-safe bag. They can stay frozen for up to three months. To thaw, take them out the night before and put them in the fridge. When you’re ready to eat, reheat them in the air fryer at 350°F (175°C) for 5-7 minutes. Enjoy the crispy goodness! You can store these bites in the fridge for up to three days. Place them in an airtight container. For best taste, reheat them in the air fryer for a few minutes. Yes, you can use other breads! White bread, whole wheat, or even sourdough works well. Just make sure the bread is a bit stale for the best texture. If you need an egg substitute, try mashed bananas or unsweetened applesauce. Use about 1/4 cup for each egg. This keeps the bites moist and tasty. To make your bites extra crispy, preheat the air fryer well. You can also spray a bit more oil on them before cooking. Shaking the basket halfway through helps too. Yes, you can prepare the bread and batter ahead of time. Just store them in the fridge for up to 24 hours. Cook them in the air fryer when you’re ready to eat! You learned how to make delicious Air Fryer French Toast Bites. We covered all the key ingredients and cooking steps. I shared tips to ensure perfect texture and how to avoid common mistakes. You can experiment with flavors and toppings for a unique twist. Don't forget the best ways for storage and reheating. This easy recipe fits any meal. Follow these steps, and you'll impress everyone with your French toast bites. Happy cooking!
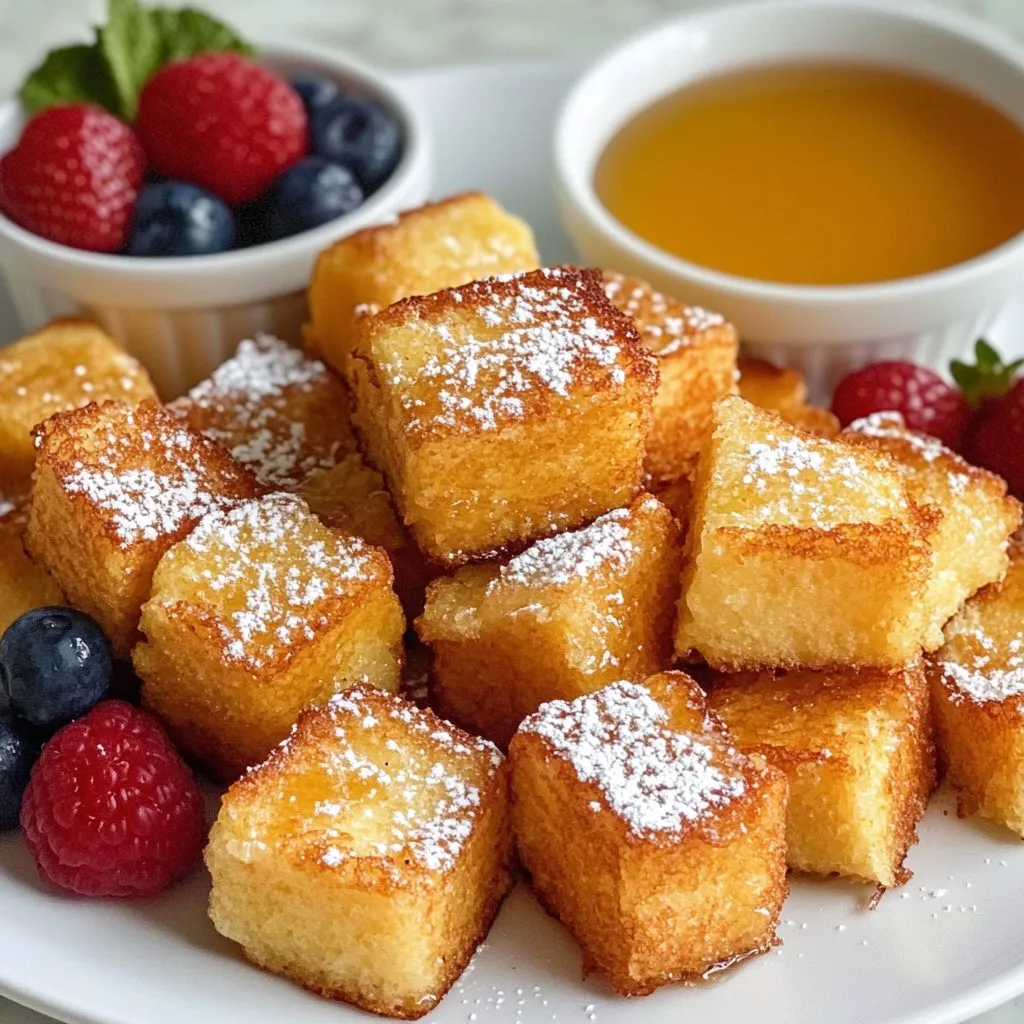
Air Fryer French Toast Bites Tasty Breakfast Treat
Looking for a fun breakfast twist? Air Fryer French Toast Bites are your answer! These crispy, bite-sized treats are easy to make and perfect for
- 2 cups rolled oats - 1 ½ cups apple cider - 1 teaspoon baking powder - 1 teaspoon ground cinnamon - ½ teaspoon ground nutmeg - ¼ teaspoon salt - 2 tablespoons pure maple syrup - 1 large egg, lightly beaten - 1 cup diced apples (preferably Granny Smith or Honeycrisp for a tart flavor) - ½ cup chopped walnuts (optional for added crunch) - 2 tablespoons melted coconut oil (or unsalted butter for richness) - ¼ cup brown sugar (for a caramelized topping) This recipe brings together simple and wholesome ingredients. Rolled oats serve as the base, offering fiber and texture. Apple cider adds a sweet and tangy flavor that makes each bite special. Baking powder helps the mix rise and become fluffy. Spices like cinnamon and nutmeg bring warmth and depth to the dish. A pinch of salt balances the sweetness. Sweeteners like pure maple syrup and brown sugar give it that cozy, dessert-like taste we all love. Don’t forget the eggs! They bind everything together and add richness. Coconut oil or unsalted butter enhances the flavor and texture. If you want some extra goodness, fold in diced apples and walnuts for a delightful crunch. These ingredients come together to create a baked oatmeal that tastes just like your favorite apple cider donuts. - Preheat your oven to 350°F (175°C). Grease a 9x9-inch baking dish with cooking spray or butter. This helps with easy removal later. - In a large mixing bowl, mix together the rolled oats, baking powder, ground cinnamon, ground nutmeg, and salt. Stir until all dry ingredients are well combined. - In another bowl, whisk the apple cider, pure maple syrup, lightly beaten egg, and melted coconut oil. Make sure the mixture is smooth. - Gradually pour the wet mixture into the dry mix. Stir gently until everything is just combined. Do not overmix; this keeps the oats fluffy. - Carefully fold in the diced apples and chopped walnuts, if you choose to add them. This adds a nice crunch and flavor. - Transfer the mixture into the greased baking dish. Spread it out evenly, so it cooks well. - Sprinkle the brown sugar on top. This creates a sweet, caramelized layer when baked. - Bake for 25-30 minutes. The top should turn golden brown. Check with a toothpick; it should come out clean when done. To get the best texture, avoid overmixing. When you mix the wet and dry ingredients, do it gently. This keeps the oatmeal fluffy. For apples, I recommend using Granny Smith or Honeycrisp. They add a nice tartness that balances the sweetness. Serve the baked oatmeal warm for the best taste. You can drizzle extra apple cider over each square. Dusting with powdered sugar also adds a nice touch. For garnishing, try adding diced apples or a dollop of yogurt. This not only makes it pretty but adds creaminess. To boost flavor, consider adding spices like nutmeg or ginger. You can also mix in chocolate chips for a sweet twist. Pair this dish with yogurt or whipped cream. These add richness and make every bite more enjoyable. {{image_4}} You can easily change the oats in this recipe. Try steel-cut oats for a chewier texture. If you want a gluten-free option, use certified gluten-free oats. For sweeteners, swap maple syrup with honey or agave if you prefer. Each choice will give a unique flavor twist. If you like nuts, walnuts work great. But you can use pecans or almonds too. They will add a nice crunch. Feel free to skip the nuts altogether if you want. Fruits can change everything. Instead of apples, try pears for a softer taste. Berries mix in well, adding a burst of color and flavor. You can even add dried fruits like cranberries or raisins for extra sweetness. If you're vegan, skip the egg and use a flax egg instead. Mix one tablespoon of ground flaxseed with three tablespoons of water. Let it sit for a few minutes to thicken. This will help bind your oatmeal just like an egg. Want to switch things up? Turn this baked oatmeal into muffins or bars. Just pour the mixture into a muffin tin or a larger pan and cut it into bars after baking. This makes for easy snacks on the go. Another fun idea is to make a parfait. Layer baked oatmeal with yogurt and fresh fruit. This gives you a tasty and pretty dish. Each bite will be a mix of flavors and textures, making breakfast even more exciting! After you bake your Apple Cider Donut Baked Oatmeal, let it cool. Cut it into squares and store them in an airtight container. This helps keep it fresh. You can refrigerate it for up to five days. If you want to keep it longer, freezing is a great option. Wrap each square tightly in plastic wrap. Place the wrapped squares in a freezer-safe bag. This way, they can last up to three months. You can reheat your oatmeal in two ways: the oven or the microwave. For the oven, preheat it to 350°F (175°C). Place the squares in a baking dish and cover them with foil. Heat for about 10-15 minutes, until warm. This method helps maintain the texture. If you use a microwave, place a square on a microwave-safe plate. Heat it for about 30 seconds to 1 minute. Add a splash of apple cider to keep it moist. Enjoy your warm breakfast treat! Can I use quick oats instead of rolled oats? Yes, you can use quick oats. They will change the texture. Quick oats make the oatmeal softer and chewier. If you prefer a heartier bite, stick with rolled oats. How do I know when the oatmeal is done baking? The oatmeal is done when the top turns golden brown. Insert a toothpick in the center; it should come out clean. If it has wet batter on it, bake for a few more minutes. Can I make this recipe ahead of time? Yes, this recipe is great for meal prep! You can mix and bake it the night before. Store in the fridge and reheat in the morning for a quick breakfast. General nutritional content This baked oatmeal is rich in fiber and healthy carbs. Each serving has about 180 calories. It has a good mix of macronutrients from oats, apples, and nuts. Health benefits of key ingredients - Oats: They support heart health and help manage blood sugar. - Apples: They provide vitamins and antioxidants. - Walnuts: They are high in healthy fats and omega-3s. What to do if the mixture is too dry/wet? If the mixture is too dry, add a little more apple cider. If it’s too wet, add a few more oats. Adjust until you reach your desired consistency. Adjusting sweetness level to taste You can reduce the maple syrup or brown sugar if you want less sweet. To make it sweeter, add more maple syrup. Try to taste the mixture before baking to get it just right. This blog post covered all the critical steps to make a delicious baked oatmeal. We discussed key ingredients like oats, spices, and sweeteners. The step-by-step instructions guide you through mixing and baking. I offered tips to achieve the best texture and enhance flavors, along with various serving styles and storage tips. Remember, cooking is about experimenting. Don't be afraid to modify flavors and try new ingredients. I hope this inspires your next baking adventure!
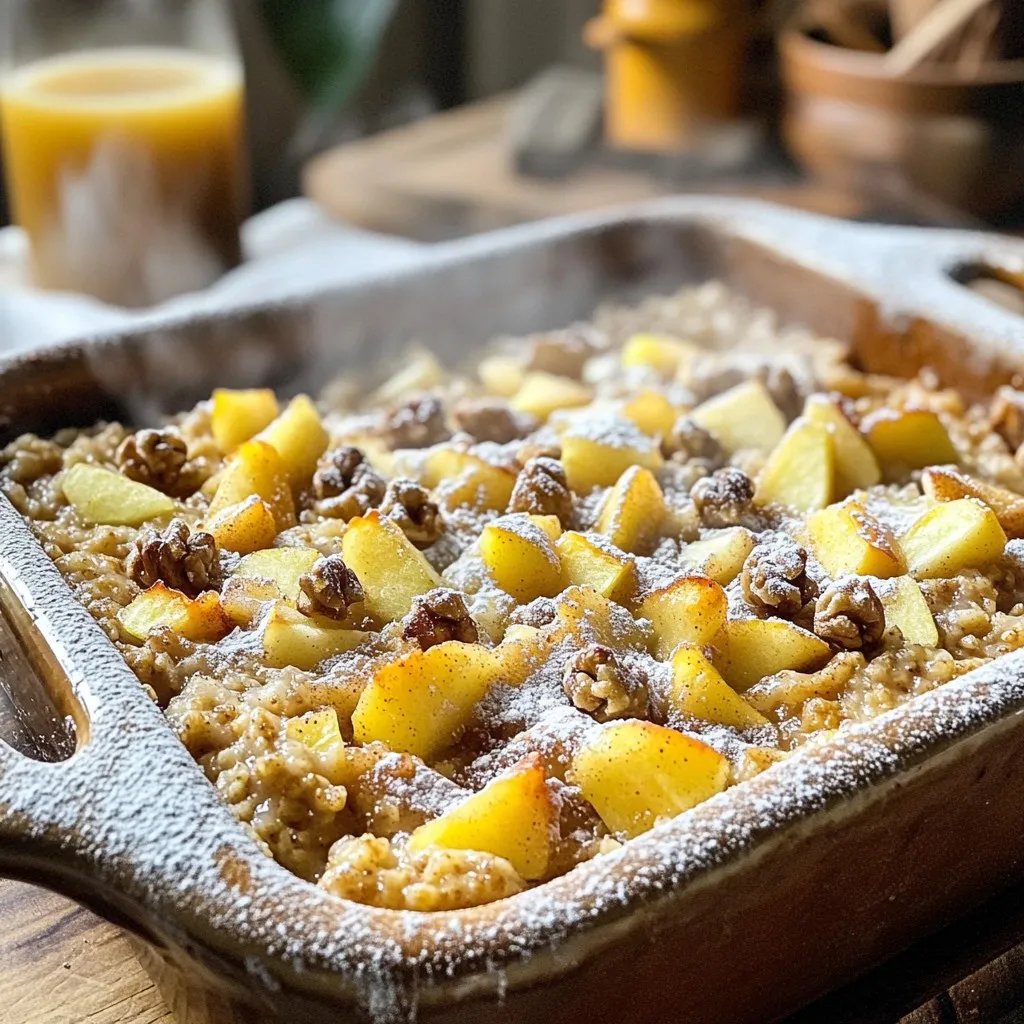
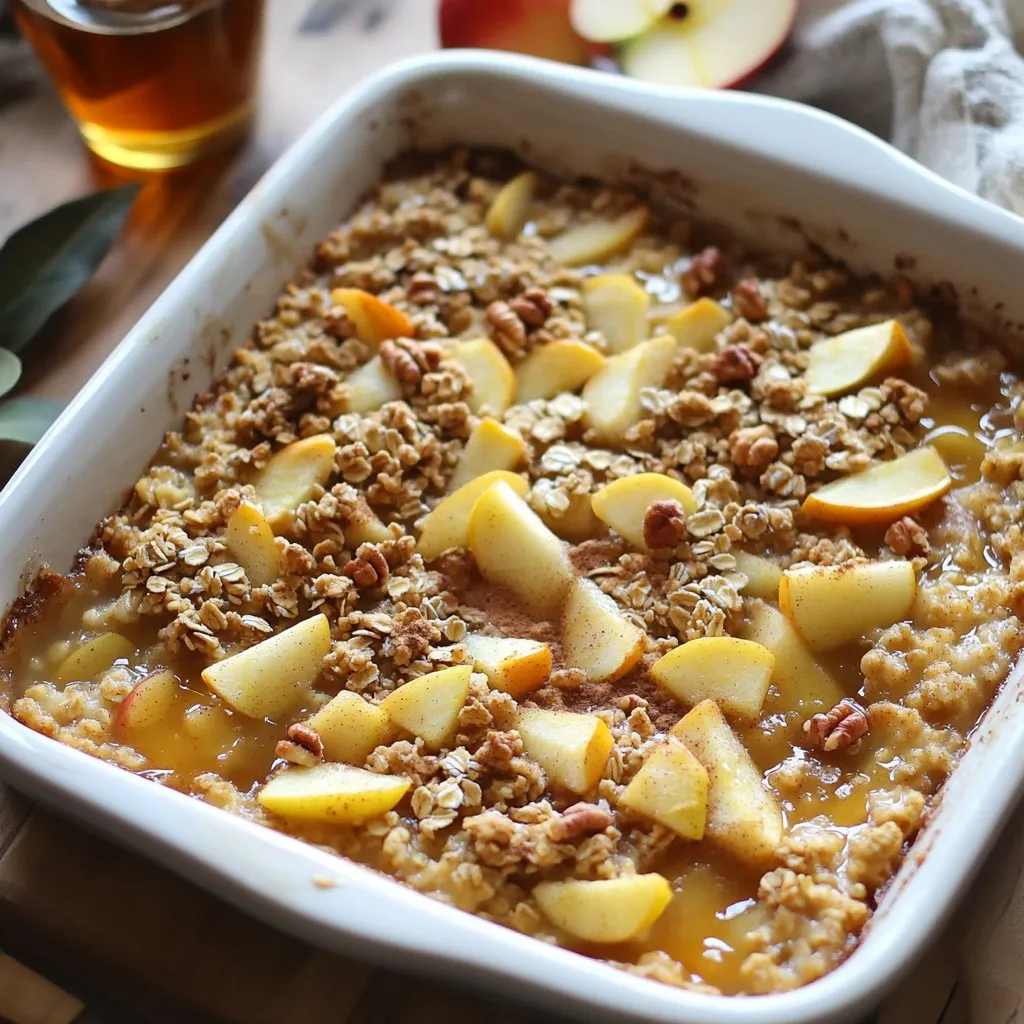
Apple Cider Donut Baked Oatmeal Tasty Breakfast Treat
Who doesn’t love the warm, sweet taste of fall? This Apple Cider Donut Baked Oatmeal brings that cozy flavor right to your breakfast table. With
To make tasty Maple Brown Sugar Overnight Oats, gather these simple ingredients: - 1 cup rolled oats - 2 cups milk (dairy or plant-based) - 1/4 cup pure maple syrup - 1/4 cup packed brown sugar - 1/2 teaspoon vanilla extract - 1/2 teaspoon ground cinnamon - A pinch of salt - 1/2 cup Greek yogurt (optional) - 1/2 cup chopped nuts (try pecans, walnuts, or your favorite nut) - Fresh fruit for topping (like sliced bananas, mixed berries, or diced apples) These ingredients work together to create a creamy, sweet, and satisfying breakfast. The rolled oats form the base, while the maple syrup and brown sugar add the perfect sweetness. The milk makes everything smooth, and Greek yogurt gives it a rich texture if you choose to add it. Top with fresh fruit and nuts for extra flavor and crunch. Start by taking a large mixing bowl. Add 1 cup of rolled oats and a pinch of salt. Stir gently to mix the oats and salt. This step helps to enhance the flavor of the oats. In a separate bowl, pour in 2 cups of milk. You can use dairy or your favorite plant-based milk. Next, add 1/4 cup of pure maple syrup, 1/4 cup of packed brown sugar, 1/2 teaspoon of vanilla extract, and 1/2 teaspoon of ground cinnamon. Whisk all these ingredients together until the brown sugar dissolves. Now, pour the wet mix over the oats. Use a spoon or spatula to stir the mixture thoroughly. Make sure all the oats are coated well. If you want creaminess, fold in 1/2 cup of Greek yogurt. This step is optional but adds great texture. Divide the mixture into mason jars or airtight containers. Seal them tightly. Place the jars in the refrigerator. Let them chill overnight or for at least 4 hours. This allows the oats to soak up the flavors and become soft. When you're ready to eat, take the oats out of the fridge. Stir them well. If they seem too thick, add a splash of milk to adjust the texture. Top with fresh fruit like sliced bananas or mixed berries. You can also sprinkle some chopped nuts on top for crunch. Enjoy your tasty breakfast! To get the right thickness for your overnight oats, use rolled oats. They soak up liquid well. If you like your oats thicker, add less milk. For creamier oats, mix in Greek yogurt. This adds a rich texture. You can also adjust the soaking time. Let them sit longer for a thicker result. Not everyone likes the same sweetness. Start with 1/4 cup of maple syrup and brown sugar. Taste it after mixing. If you want it sweeter, add more syrup or sugar. You can always drizzle extra syrup on top before serving. This lets you control the flavor. Serve your oats in mason jars for a fun look. Layer your fresh fruit on top for color. Consider adding nuts for crunch. A sprig of mint can make it fancy. This small touch can elevate the meal. Enjoy how beautiful it looks as much as how it tastes! {{image_4}} If you have a nut allergy, no worries! You can easily skip the nuts in this recipe. Instead, try adding seeds like chia or sunflower seeds for a crunchy texture. These seeds pack a nutritious punch and won't compromise the flavor. You can also use extra fruit for that added bite and sweetness. Want to change things up? You can add cocoa powder for a chocolatey twist. Just mix in a tablespoon or two for a rich flavor. If you need an extra boost, add protein powder. It blends well and keeps you full. Nut butters like almond or sunflower butter can add creaminess and a lovely taste. Just a spoonful will do the trick! You can make your oats exciting by using seasonal fruits. In summer, add fresh berries like strawberries or blueberries. In fall, diced apples and a sprinkle of nutmeg add warmth. During winter, try raisins or dried figs. Each season brings its flavors, so feel free to get creative! To keep your overnight oats fresh, use airtight containers. Mason jars work well and are fun to serve in. Make sure to seal them tightly after filling. This prevents air from getting in and keeps them tasty. You can store your oats in the fridge for up to five days. This allows you to prep several servings at once. Just remember, the longer they sit, the softer they become. So, plan to eat them within that time for the best texture. If you want warm oats, simply heat them in the microwave. Start with 30 seconds and stir. If they’re too thick, add a splash of milk to loosen them. Enjoy them warm or cold, depending on your mood! Yes, you can use instant oats. They cook faster and soak up liquid quickly. However, they may turn out a bit mushy. Rolled oats keep a nice texture and chewiness. If you prefer a creamier option, instant oats work fine. Just reduce the soaking time. This recipe is not gluten-free as it uses rolled oats, which can contain gluten. To make it gluten-free, look for certified gluten-free oats. These oats are processed in a way that avoids gluten cross-contamination. Always check labels to be sure. Yes, you can easily make this recipe vegan. To replace dairy milk, use almond, soy, or oat milk. For the Greek yogurt, use coconut yogurt or any plant-based yogurt. This keeps the creaminess while making it vegan-friendly. You can boost the nutrition by adding toppings. Consider chia seeds, flaxseeds, or protein powder. Fresh fruit adds vitamins, and nuts add healthy fats. You can also add a spoonful of nut butter for extra protein and flavor. This article provided a clear guide on making overnight oats. You learned about the ingredients, mixing methods, and chilling times. We discussed tips for texture, sweetness, and serving style. You can also explore fun variations based on your taste and needs. Remember, personalized storage and reheating tips keep your oats fresh and tasty. Overall, overnight oats offer a flexible and healthy meal option to enjoy each day. Embrace your creativity and make this recipe your own!
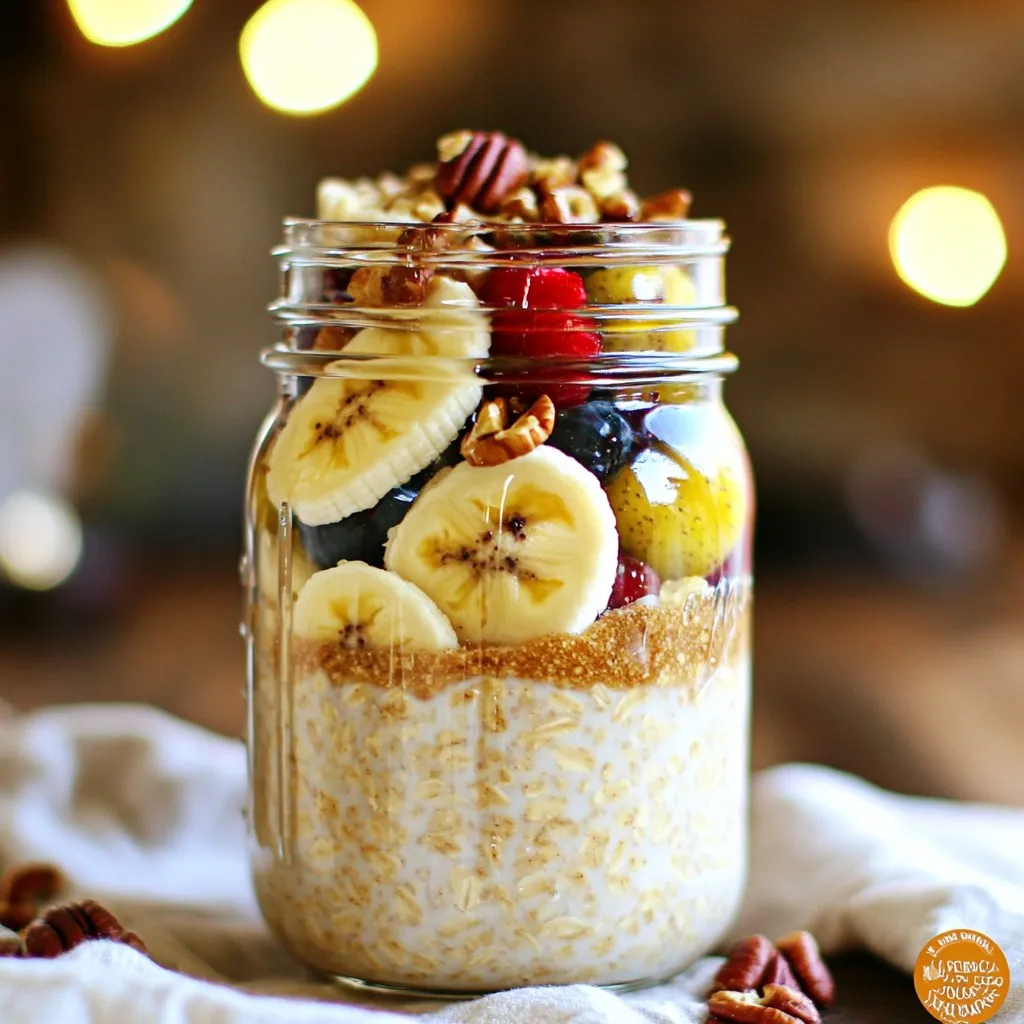
Maple Brown Sugar Overnight Oats Quick and Tasty Meal
Looking for a quick and tasty breakfast? Maple Brown Sugar Overnight Oats are the answer! This easy recipe combines wholesome oats, sweet maple syrup, and
- 1 (14 oz) loaf of challah or brioche bread, cut into 1-inch cubes - 1 cup canned pumpkin puree - 8 oz cream cheese, softened at room temperature - 4 large eggs - 2 cups whole milk - 1/2 cup packed brown sugar - 1 teaspoon pure vanilla extract - 1 teaspoon ground cinnamon - 1/2 teaspoon ground nutmeg - 1/4 teaspoon ground ginger - 1/4 teaspoon sea salt - 1/2 cup chopped pecans (optional, for added crunch) - Maple syrup, for drizzling upon serving The main ingredients give this dish its rich and creamy texture. The bread soaks up all the flavors. Canned pumpkin puree adds a sweet, earthy taste. Cream cheese makes it smooth and creamy. For flavor, we use eggs and whole milk. They create a custard that binds the bake. Brown sugar adds sweetness while spices like cinnamon and nutmeg bring warmth. Ginger gives a little kick. Sea salt balances the sweet notes. If you want extra crunch, pecans are a great choice. They add texture and a nutty flavor. Drizzling maple syrup on top adds sweetness when serving. - Preparing the Baking Dish: Start by preheating your oven to 350°F (175°C). Grease a 9x13 inch baking dish with non-stick spray or butter. This step helps the bake not stick. - Cubing the Bread: Take your challah or brioche bread and cut it into 1-inch cubes. The cubes should be even for better soaking. Spread them evenly in the greased dish. - Mixing Cream Cheese and Pumpkin: In a large bowl, beat the softened cream cheese until smooth. Add the canned pumpkin puree and mix until blended well. - Adding Sugars and Spices: Next, add brown sugar, eggs, vanilla extract, cinnamon, nutmeg, ginger, and salt. Blend until you have a creamy mixture. - Layering the Bread and Cream Mixture: Pour the creamy pumpkin mixture over the bread cubes. Make sure each piece is coated well. Toss gently with a spatula or your hands. If using pecans, sprinkle them on top for crunch. - Preparing the Egg and Milk Mix: In a separate bowl, whisk the remaining eggs with milk and a sprinkle of cinnamon. This mix adds richness to the bake. Pour it evenly over the bread and cream cheese mix. - Soaking Period: Room Temp vs. Overnight: Let the mixture rest for at least 20 minutes at room temperature. For a deeper flavor, cover and refrigerate it overnight. This helps the bread soak up all the flavors. - Baking Instructions: Cover the baking dish with foil and place it in the preheated oven. Bake for 30 minutes, then remove the foil. Bake for another 15-20 minutes until golden brown and set. - Cooling and Slicing the Bake: Once baked, let it cool for a few minutes. Then slice into squares for serving. - Toppings and Garnishes: Serve warm, drizzled with maple syrup. For an extra touch, dust with cinnamon or add a dollop of whipped cream. Enjoy! - Recommended Soaking Times: Soaking the bread for at least 20 minutes is key. This time lets the bread soak up the creamy pumpkin mix. If you want even more flavor, cover it and let it sit in the fridge overnight. This extra soak allows the spices to deepen and the bread to become very soft. - Oven Temperature Tips: Preheat your oven to 350°F (175°C). This temperature is perfect for baking. It cooks the inside well while giving the top a nice golden crust. If you see the top browning too fast, cover it with foil to prevent burning. - Ideal Pairings with Pumpkin Cream Cheese French Toast Bake: Serve this dish warm with maple syrup drizzled on top. A sprinkle of powdered sugar adds a sweet touch. Fresh fruit like sliced bananas or berries on the side brightens the plate. For a nutty crunch, add a handful of chopped pecans. - Presentation Ideas: Slice the bake into squares and serve on individual plates. A dollop of whipped cream on top makes it look fancy. Garnish with a sprinkle of cinnamon for color and a touch of flavor. This makes every bite special and inviting. {{image_4}} You can change this dish in fun ways. Adding chocolate chips makes it sweet and rich. You could also add fresh fruit like apples or bananas. They will add a fresh taste and a nice texture. Different types of bread can change the feel of the bake too. While challah or brioche works great, you can try sourdough or whole wheat. Each type brings a unique taste. Just make sure it is sturdy enough to soak up the mix. If you need gluten-free options, use gluten-free bread. There are many tasty kinds available. Just check the label to ensure it works for your diet. For a dairy-free version, swap the whole milk for almond or oat milk. Use a dairy-free cream cheese too. These changes keep the creamy texture while making it suitable for those who avoid dairy. To keep your Pumpkin Cream Cheese French Toast Bake fresh, store it properly. - Refrigeration Guidelines: Place leftovers in an airtight container. They stay good for up to 3 days in the fridge. Make sure to cool it first before sealing. - Freezing Tips: If you want to save some for later, wrap portions tightly in plastic wrap. Then, place them in a freezer bag. You can freeze it for up to 2 months. Just remember to label the bag with the date. When you are ready to enjoy your leftovers, reheating is key. - Oven vs. Microwave: The oven gives the best results. Preheat it to 350°F (175°C). Place the bake in a baking dish and cover it with foil. Heat for about 15-20 minutes until warm. If you use the microwave, cut a piece and heat it for 30-60 seconds. Check to make sure it heats evenly. Can I make this recipe ahead of time? Yes, you can prepare this bake the night before. Just soak the bread and mixture in the fridge. The next day, you bake it fresh. Is it necessary to use challah or brioche bread? While challah and brioche give the best texture, you can use other bread. French bread or even Texas toast works well too. What can I do with leftover pumpkin puree? Leftover pumpkin puree is great in smoothies, pancakes, or muffins. You can also freeze it for later use. Can I use different types of cheese? You can try mascarpone or ricotta for a twist. These cheeses will add a different flavor to your bake. How can I make this vegan-friendly? To make it vegan, use plant-based cream cheese and milk. Substitute eggs with flax eggs or silken tofu blended smooth. You’ve learned how to make a delicious Pumpkin Cream Cheese French Toast Bake. We covered the best ingredients, steps for preparation, and tips for serving. Remember, soaking time and the choice of bread can change everything. Try variations to fit your taste. Storing and reheating your leftovers will keep the flavor alive. I hope you feel excited to create this tasty dish! Enjoy the cozy flavors this recipe brings to your kitchen.
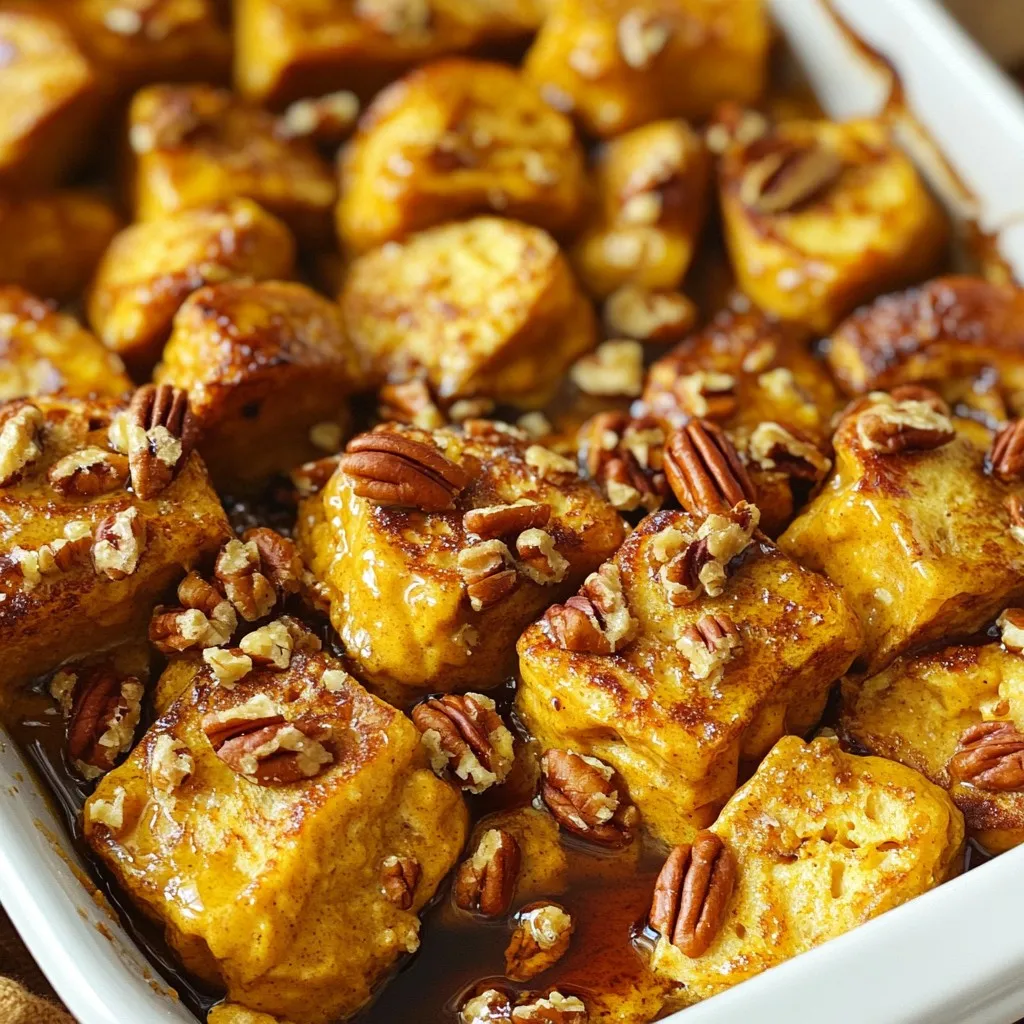
Pumpkin Cream Cheese French Toast Bake Delightful Recipe
Are you ready to indulge in a tasty fall treat? This Pumpkin Cream Cheese French Toast Bake is a must-try recipe. You’ll savor rich pumpkin
- 1 cup rolled oats - 1 ½ cups almond milk - 1 medium apple, diced - 2 tablespoons caramel sauce - 1 tablespoon chia seeds The main ingredients create a hearty base. Rolled oats give you a good texture. Almond milk adds creaminess. Diced apples bring sweetness and crunch. Caramel sauce makes it a treat. Chia seeds add a nice pop and some health benefits. - 1 teaspoon ground cinnamon - 1 tablespoon maple syrup - Chopped nuts for topping Add-ins boost flavor and texture. Ground cinnamon gives warmth and spice. Maple syrup sweetens it just the right amount. Nuts add crunch and healthy fats. You can mix and match these to fit your taste. - Extra apple slices - Drizzling caramel sauce For serving, add more apple slices for freshness. A drizzle of caramel on top makes it extra special. These simple touches make your oats even more appealing. Enjoy every bite! 1. In a mixing bowl, mix these base ingredients well: - 1 cup rolled oats - 1 ½ cups almond milk - 1 medium apple, diced - 1 tablespoon chia seeds (optional) - 1 teaspoon ground cinnamon - 1 tablespoon maple syrup - A pinch of salt This mix creates a tasty and creamy base for your oats. 2. Next, drizzle 2 tablespoons of caramel sauce over the oat mixture. Use a spatula to gently fold in the caramel. Make sure to save some caramel for later. 3. Now, divide the mixture into two mason jars. This helps with serving later. Seal the jars tightly to keep the oats fresh. 4. Place the jars in the refrigerator overnight. You can also refrigerate them for at least 4-6 hours. This soaking time makes the oats soft and flavorful. 5. In the morning, take the jars out of the fridge. Give the oats a good stir. If you like it creamier, add a splash of almond milk to your taste. 6. Before serving, top the oats with these extras: - Chopped nuts, like walnuts or pecans - Extra apple slices - A drizzle of the reserved caramel sauce These toppings add crunch and sweetness, making your meal even better. - Choosing the right apple variety: I love using Honeycrisp apples. They are sweet and crunchy. You can also try Fuji or Gala apples for a similar taste. The right apple makes a big difference in flavor. - Adjusting sweetness with maple syrup: Maple syrup adds a nice touch. Start with one tablespoon, then taste. If you want more sweetness, add a little more. - The role of chia seeds: Chia seeds help thicken the oats. They absorb liquid and create a creamy texture. If you want a heartier meal, include one tablespoon. - Recommendations for milk types: Almond milk works great, but you can use any milk. Try oat milk or coconut milk for a fun twist. Each type adds its own flavor. - How long to prepare in advance: You can make these oats the night before. Prep them in just ten minutes. This lets flavors blend overnight. - Ideal refrigeration time: Refrigerate the jars for at least 4-6 hours. Overnight is best. This gives the oats time to soak up the milk and become soft. {{image_4}} You can change the flavor of your caramel apple overnight oats easily. Here are some fun ideas: - Adding different fruits: Try using berries, bananas, or pears. Each fruit adds a unique taste. - Incorporating nut butters: Peanut butter or almond butter can add creaminess and a rich flavor. Want to make it fit your diet? Here are some choices: - Using dairy-free options: Almond milk works great, but you can use oat milk or coconut milk too. - Low-sugar substitutes: Use sugar-free caramel or a natural sweetener like stevia instead of maple syrup. Seasonal changes can inspire new flavors in your oats: - Fall-inspired additions: Add pumpkin puree or spice up with nutmeg. These flavors celebrate autumn. - Summer fruit variations: Swap in peaches or mango for a refreshing taste in warmer months. Experiment with these ideas to make your overnight oats even more delightful! Store your caramel apple overnight oats in an airtight container. This keeps them fresh longer. I recommend using mason jars for a fun touch. Your oats will stay good in the fridge for up to three days. After that, they may lose their taste and texture. You can freeze your overnight oats for later use. To freeze, place the mixture in a safe container. Leave some space at the top, as oats expand when frozen. Thaw them overnight in the fridge before eating. You can warm them up in the microwave or enjoy them cold. Mason jars are great for more than just overnight oats. You can repurpose them for salads or snacks. This helps reduce waste and is good for the planet. Opt for glass containers when possible. They are durable and eco-friendly. Overnight oats are a simple way to prepare oatmeal. You combine rolled oats with liquid. The oats soak up the liquid overnight. This softens them and makes them ready to eat. You can add fruits, nuts, or sweeteners. The best part? You can customize them to fit your taste! Yes, you can use instant oats. However, they cook faster and may turn mushy. Rolled oats offer a chewy texture. They hold up better when soaked overnight. If you prefer a softer bite, go for instant oats. Just know they may not provide the same experience. To make this recipe vegan, simply swap almond milk with any plant-based milk. You can choose oat milk, soy milk, or coconut milk. For the caramel sauce, look for a vegan version or make your own. Use maple syrup instead of honey for sweetness. Absolutely! Overnight oats are perfect for meal prep. Prepare several jars at once for quick breakfasts. Store them in airtight containers. They last in the fridge for up to five days. Just give them a good stir before eating. Enjoy them cold or warm them up if you prefer. In this post, I covered key ingredients and steps for making delicious overnight oats. I shared tips for flavor, texture, and storage, ensuring a great result every time. You can customize your oats with different fruits, sweeteners, or toppings. Keep your oats fresh in the fridge or even freeze them for later. Experiment with variations that suit your taste. With these ideas, you’ll enjoy tasty, healthy breakfasts that fit your lifestyle. Now, it's time to get creative in your kitchen and make your perfect bowl of overnight oats!
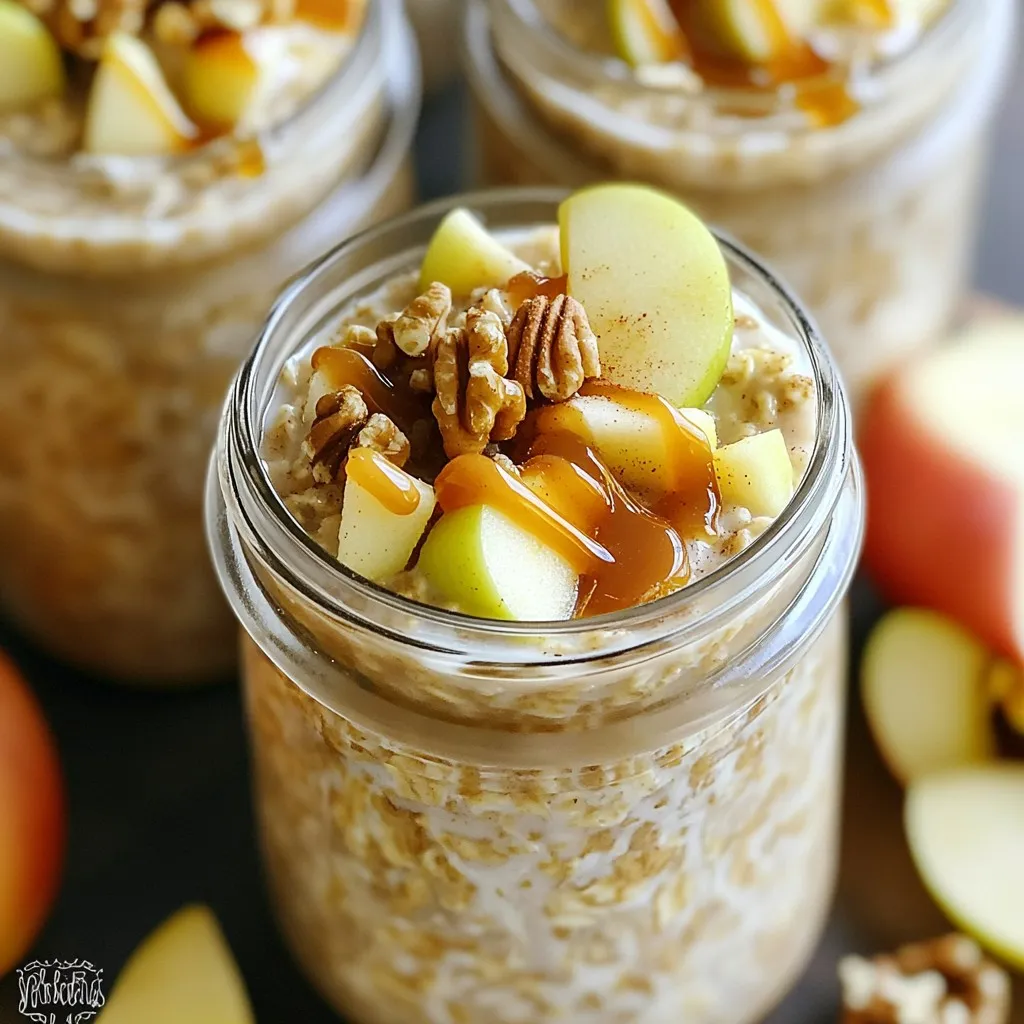
Caramel Apple Overnight Oats Simple and Tasty Meal
Are you ready to start your day with a tasty treat? Caramel Apple Overnight Oats are a simple way to enjoy breakfast. With just five
- 1 cup rolled oats - 1 cup milk (dairy or plant-based) - 1 ripe banana, thoroughly mashed - 1 cup whole wheat flour - 1 tablespoon baking powder - 1 teaspoon ground cinnamon - ½ teaspoon pure vanilla extract - 1 apple, peeled and finely grated - A pinch of salt - Coconut oil or butter for cooking - 2 tablespoons maple syrup (optional for added sweetness) Each serving of these pancakes offers a great mix of nutrients. They provide fiber from oats and whole wheat flour. The apple adds vitamins, while the banana offers potassium. You can expect around 150 calories per pancake, depending on your cooking fat and any toppings you choose. Enjoy a tasty breakfast that fuels your day! {{ingredient_image_2}} Start by combining 1 cup of rolled oats and 1 cup of milk in a bowl. Let this mix sit for about 10 minutes. This softens the oats and helps them absorb the milk. After the oats have softened, add in 1 ripe mashed banana, 1 grated apple, 1 teaspoon of vanilla extract, and 2 tablespoons of maple syrup if you want it sweeter. Stir until everything is mixed well. In another bowl, whisk together 1 cup of whole wheat flour, 1 tablespoon of baking powder, 1 teaspoon of ground cinnamon, and a pinch of salt. Make sure these ingredients are well blended. Slowly add the dry ingredients into the bowl with the wet mixture. Stir gently until just combined. It’s okay if the batter has a few lumps; don’t overmix. Put a non-stick skillet over medium heat. Add a small amount of coconut oil or butter. Let it melt and coat the skillet’s surface. Pour about ¼ cup of batter for each pancake onto the skillet. Cook until bubbles form on top, about 3-4 minutes. The edges should look set. Use a spatula to flip each pancake carefully. Cook for about 2-3 more minutes until they turn golden brown. Continue making pancakes with the remaining batter. Add more coconut oil or butter as needed between batches to keep them from sticking. Serve your pancakes warm. Top them with more grated apple, maple syrup, or a sprinkle of cinnamon for extra flavor. Enjoy every bite! To get fluffy and thick pancakes, let the oats soak in milk for 10 minutes. This helps soften them. When mixing, combine wet and dry ingredients gently. Do not overmix; some lumps are okay. This keeps your pancakes light and airy. Set your skillet to medium heat. If it’s too hot, pancakes can burn easily. Use a small amount of coconut oil or butter to coat the pan. You know the skillet is ready when a drop of water sizzles on contact. Get creative with toppings! Try extra grated apple for a fresh crunch. A drizzle of maple syrup adds sweetness. You can also sprinkle cinnamon on top for extra flavor. Fresh berries and yogurt make great additions too. Enjoy these pancakes warm for the best taste! Pro Tips Use Fresh Ingredients: Ensure your apples are fresh and crisp for the best flavor and texture in your pancakes. Adjust Sweetness: Depending on your taste and the ripeness of the banana, you may want to adjust the amount of maple syrup added. Keep the Heat Moderate: Cooking pancakes on medium heat ensures they cook evenly without burning on the outside. Experiment with Toppings: Try adding nuts, yogurt, or berries on top for added flavor and nutritional value! {{image_4}} You can make your apple oatmeal pancakes even better. Try adding nuts or raisins. Chopped walnuts or pecans add crunch. They also boost protein and healthy fats. Raisins bring natural sweetness and chewiness to each bite. Mix in about ½ cup of your choice when adding the apple. This change can make your pancakes more fun. If you need gluten-free pancakes, swap the whole wheat flour. Use a gluten-free flour blend instead. Many brands have good options that work well. Make sure your oats are certified gluten-free. This way, you can enjoy these pancakes without worry. They still taste great and are safe for those with gluten sensitivities. To make this recipe vegan, replace the milk and egg. Use plant-based milk like almond, soy, or oat milk. Instead of a banana, you can use a flax egg. Mix 1 tablespoon of ground flaxseed with 2.5 tablespoons of water. Let it sit for a few minutes until it thickens. This way, you can still enjoy fluffy pancakes without animal products. To keep your leftover pancakes fresh, stack them in a container. Place parchment paper between each pancake. This keeps them from sticking together. Seal the container tightly. You can store them in the fridge for up to three days. Reheat your pancakes quickly in a microwave or on a skillet. For the microwave, place them on a plate and cover with a damp paper towel. Heat for about 20-30 seconds. On a skillet, warm them over low heat for about 1-2 minutes on each side. This will help them stay soft and tasty. Freezing pancakes is simple! Once they cool, stack them with parchment paper in between. Place the stack in a freezer-safe bag or container. Squeeze out the air before sealing. They can last in the freezer for up to two months. When you're ready to eat, just reheat them. Enjoy your pancakes anytime! Yes, you can use quick oats. They will work fine in this recipe. The texture may change a bit, but the pancakes will still be tasty. Quick oats absorb liquid faster than rolled oats. This might make your batter a little thicker. To make these pancakes healthier, try these tips: - Use whole grain flour instead of white flour. - Add more grated apples or bananas for natural sweetness. - Decrease the maple syrup or skip it entirely. - Use a sugar substitute like stevia if you want sweet pancakes. If you don't have maple syrup, here are some good options: - Honey works well and adds a nice flavor. - Agave nectar is a good vegan choice. - You can use fruit puree for a natural sweetener. - A sprinkle of powdered sugar can also be nice. Yes, these pancakes are great for meal prep. You can make a big batch and store them. Just cool them down and place them in an airtight container. They last in the fridge for about three days. You can also freeze them for longer storage. Absolutely! Almond milk or other plant-based milks work perfectly in this recipe. They add a nice flavor and keep the pancakes moist. Just be sure to choose unsweetened versions if you want to control the sweetness. These delicious pancakes use simple ingredients for a great breakfast. I shared easy steps to prepare, cook, and enjoy them. Tips included perfecting your pancake's texture and exploring various toppings. You can also adapt the recipe for dietary needs. Now you can make pancakes that suit your taste and needs. Try these ideas, enjoy the process, and share your tasty results!
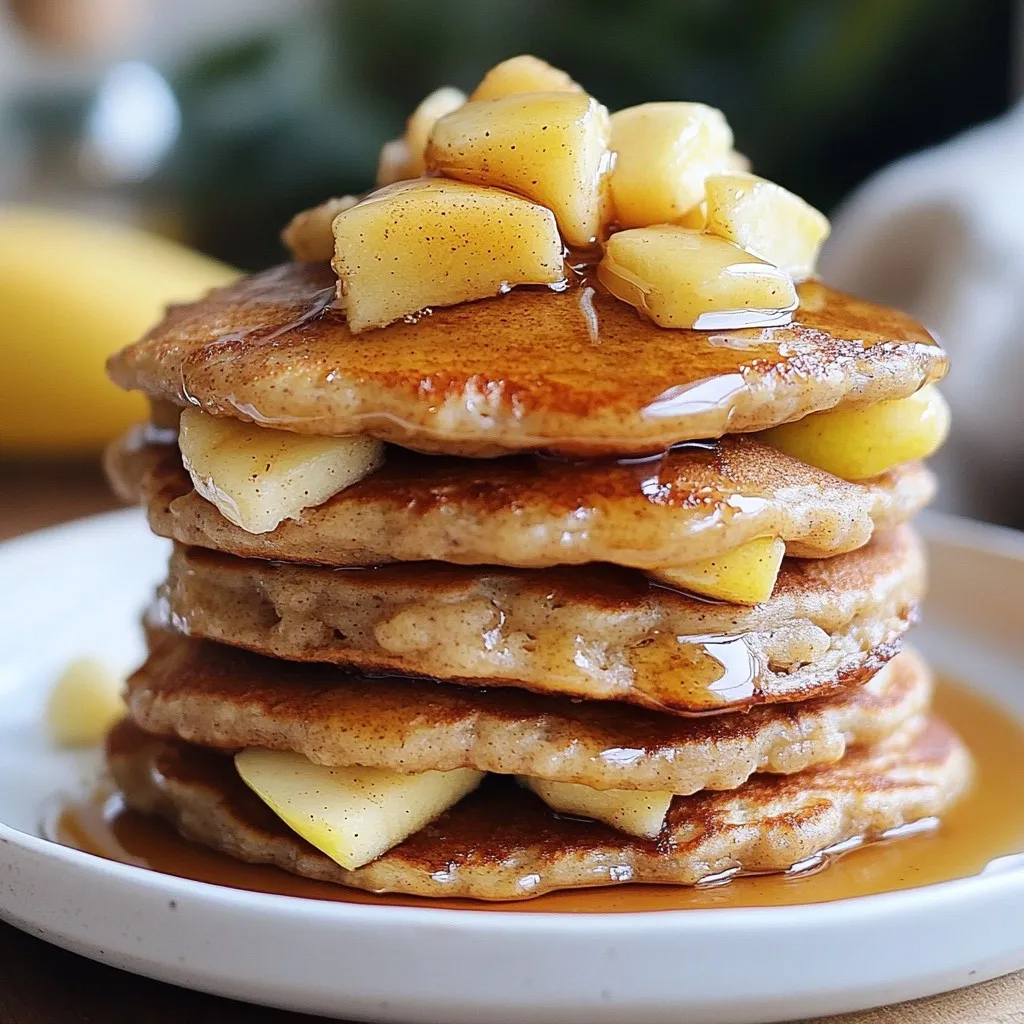
Apple Oatmeal Pancakes Nutritious and Simple Recipe
Are you craving a healthy breakfast that’s both tasty and easy to make? Look no further! My Apple Oatmeal Pancakes combine wholesome ingredients for a
- 1 ½ cups all-purpose flour - 1 teaspoon baking powder - ½ teaspoon baking soda - 1 teaspoon ground cinnamon - ½ teaspoon ground nutmeg - ½ teaspoon ground ginger - ¼ teaspoon ground cloves - ½ teaspoon salt - 1 cup canned pumpkin puree - ¾ cup granulated sugar - ½ cup brown sugar, packed firmly - ½ cup vegetable oil - 2 large eggs - 1 teaspoon vanilla extract - ½ cup all-purpose flour - ⅓ cup brown sugar, packed firmly - ½ teaspoon ground cinnamon - ¼ cup unsalted butter, melted - ¼ cup chopped walnuts or pecans (optional) Gather these ingredients before you start. It makes cooking easier and more fun. Make sure you use canned pumpkin puree, not pie filling. Each dry ingredient plays a role. The flour gives structure, while baking powder and baking soda help muffins rise. The spices add warmth and flavor, giving the muffins that classic pumpkin spice taste. For the wet mix, the pumpkin puree keeps the muffins moist. Granulated and brown sugar provide sweetness. Eggs bind everything together, while vanilla adds a lovely aroma. The vegetable oil keeps your muffins soft and tender. The streusel topping is what makes these muffins extra special. It adds a sweet crunch. You can add nuts to the topping for some texture. If you choose to use them, chop the walnuts or pecans finely. This will mix in well and not overpower the other flavors. This combination of ingredients ensures you get delicious muffins that are cozy and satisfying! 1. Preheat your oven to 350°F (175°C). This helps muffins bake evenly. 2. Prepare the muffin tin by lining it with paper liners or greasing it lightly. This keeps muffins from sticking. 1. In a large bowl, combine 1 ½ cups of all-purpose flour, 1 teaspoon baking powder, and ½ teaspoon baking soda. 2. Add 1 teaspoon ground cinnamon, ½ teaspoon ground nutmeg, ½ teaspoon ground ginger, ¼ teaspoon ground cloves, and ½ teaspoon salt. Whisk these until fully mixed. 3. In a separate bowl, mix ¾ cup granulated sugar, ½ cup brown sugar, and ½ cup vegetable oil until smooth. 4. Add 2 large eggs and 1 cup of canned pumpkin puree to the sugar mix. Blend well. Stir in 1 teaspoon vanilla extract for extra flavor. 5. Fold the dry mix into the wet mix gently. Be careful not to overmix; this keeps the muffins light. 1. In a small bowl, combine ½ cup of all-purpose flour, ⅓ cup of brown sugar, and ½ teaspoon of ground cinnamon. 2. Pour in ¼ cup melted unsalted butter and add ¼ cup chopped walnuts or pecans if you want crunch. Mix until you get a crumbly texture. 1. Fill each muffin cup about two-thirds full with batter. This gives them room to rise. 2. Sprinkle the streusel topping generously over the batter. This adds a nice crunch. 3. Bake in the oven for 20-25 minutes. To test for doneness, insert a toothpick into the center. It should come out clean. 4. Once baked, let the muffins cool in the tin for about 5 minutes. Then, transfer them to a wire rack to cool completely. - Avoiding overmixing: When you mix the batter, do it gently. Use a spatula to fold in the dry ingredients. Stop as soon as you see no flour. This keeps the muffins light and fluffy. Overmixing makes them tough. - Achieving the perfect rise: Fill each muffin cup about two-thirds full. This gives them room to rise. Make sure your oven is preheated to 350°F. A hot oven helps the muffins rise well. - Adding optional nuts or spices: For extra crunch, add chopped walnuts or pecans to the streusel. You can also mix in a pinch of nutmeg or ginger to the batter for added flavor. - Serving suggestions: Serve these muffins warm. A drizzle of icing or a dollop of whipped cream makes them even better. A light dusting of powdered sugar adds a nice touch too. - What to do if muffins are too dense: Dense muffins can mean you overmixed the batter. Next time, be gentle when mixing. Also, check your baking powder and baking soda for freshness. They need to be active for the muffins to rise. - Ensuring even baking: Rotate the muffin tin halfway through baking. This helps them bake evenly. Also, avoid opening the oven door too soon. It can cause the muffins to sink. {{image_4}} You can make these muffins fit many diets. For gluten-free options, use almond flour or a gluten-free blend. These swaps keep the texture light. If you want to cut sugar, try using honey or maple syrup. Both add sweetness and flavor without refined sugar. Want to mix it up? Adding chocolate chips gives a rich twist. Use dark or milk chocolate for sweetness. You can also add dried fruits like cranberries or raisins. They add chewy bites and extra flavor to each muffin. Using fresh pumpkin instead of canned can elevate these muffins. Roast and puree fresh pumpkin for the best taste. You can also change the spice mix. Try adding cardamom for a unique twist. This keeps the muffins fresh and exciting for every season. To keep your pumpkin spice streusel muffins fresh, store them in an airtight container. This will prevent them from drying out. At room temperature, they stay good for about 2-3 days. If you want to enjoy them longer, freezing is the best way. To freeze muffins, wrap each one tightly in plastic wrap. Place them in a freezer-safe bag or container. They can last up to 3 months in the freezer. When you’re ready to eat, take a muffin out and let it thaw. You can also reheat it in the microwave for about 15-20 seconds. After storage, serve muffins warm for the best taste. They go well with coffee or tea. You can also add a drizzle of icing or a dollop of whipped cream on top. For a nice touch, sprinkle some powdered sugar for a sweet finish. Yes, you can use fresh pumpkin. First, cook the pumpkin until soft. Then, mash it well. This will give you a fresh flavor. Make sure to measure the same amount as canned pumpkin. Check the muffins at 20 minutes. Insert a toothpick in the center. If it comes out clean, they are done. If it has wet batter, bake a little longer. Yes, you can prepare the batter a day in advance. Store it in the fridge. When ready to bake, let it sit at room temperature. This helps them rise well. If the streusel is too crumbly, add a bit more melted butter. Mix it in slowly. This will help the topping stick together better. You can swap all-purpose flour for gluten-free flour. Use a sugar substitute for lower sugar options. If you need a dairy-free version, replace butter with coconut oil or a dairy-free spread. In this article, we explored the ingredients and steps to make tasty muffins. We detailed dry and wet ingredients and explained how to get a perfect streusel topping. I shared baking tips and flavor variations to suit every taste. Remember, with some simple adjustments, your muffins can shine. Take the time to bake, experiment, and enjoy the delicious results. Happy baking!
Pumpkin Spice Streusel Muffins Savory and Cozy Treat
Autumn is here, and with it comes the cozy, warm flavors of pumpkin spice! If you’re craving a sweet treat that captures the essence of
- 1 cup all-purpose flour - 1 tablespoon baking powder - 1/2 teaspoon baking soda - 1/4 teaspoon salt - 1 cup creamy Greek yogurt - 2 large eggs - 1/4 cup milk (dairy or plant-based) - 2 tablespoons honey or maple syrup - 1 teaspoon vanilla extract - Butter or cooking oil (for greasing) Fluffy Greek yogurt pancakes need simple ingredients. Each one plays a key role in the taste and texture. All-purpose flour gives the pancakes structure. It helps them hold together. Baking powder and baking soda work together. They create air bubbles that make the pancakes fluffy. Salt enhances the flavor, making each bite more delicious. Greek yogurt is the star. It adds creaminess and moisture. This ingredient also boosts protein. It helps keep you full longer. Large eggs bind everything together. They add richness, too. Milk, whether dairy or plant-based, makes the batter smooth. It adjusts the consistency. The honey or maple syrup adds sweetness. This gives your pancakes a lovely taste. Finally, vanilla extract elevates the flavor. It adds warmth and depth. Don't forget the butter or cooking oil! You will need this for greasing the skillet. This step ensures the pancakes cook nicely without sticking. Now that you have all your ingredients, you are ready to make these tasty treats! {{ingredient_image_2}} In a big bowl, combine the following dry ingredients: - 1 cup all-purpose flour - 1 tablespoon baking powder - 1/2 teaspoon baking soda - 1/4 teaspoon salt Use a whisk to mix them well. This helps to add air for fluffiness. In a separate bowl, add the creamy Greek yogurt. Then, whisk in: - 2 large eggs - 1/4 cup milk (you can use plant-based milk if you want) - 2 tablespoons honey or maple syrup - 1 teaspoon vanilla extract Mix until it is smooth and creamy. Make sure there are no lumps. Gently pour the wet mixture into the bowl of dry ingredients. Use a spatula to fold them together. Be careful not to overmix! You want some lumps to keep the pancakes fluffy. Heat a skillet over medium heat. Once hot, add a little butter or cooking oil to coat the pan. Ladle about 1/4 cup of batter for each pancake onto the skillet. Cook for 2-3 minutes until small bubbles appear on the surface. Use a spatula to flip the pancakes. Cook for another 1-2 minutes until golden brown. Once cooked, place the pancakes on a plate with a kitchen towel to keep warm. Repeat with the rest of the batter, greasing the skillet as needed. Enjoy your fluffy pancakes warm! To make fluffy pancakes, keep some lumps in the batter. Lumps help create air pockets. These air pockets make the pancakes rise when cooking. If you overmix, you lose that fluffiness. Mix just enough until the dry and wet ingredients blend. Remember, a few lumps are okay! The right skillet temperature is key for perfect pancakes. Heat your skillet over medium heat. Test if it’s ready by splashing a few drops of water on it. If the water dances and evaporates, your skillet is hot enough. If it sizzles too much or burns, lower the heat. Cooking at the right temperature ensures golden-brown pancakes. Serve your pancakes with fun toppings. Fresh fruits like berries or bananas add color and flavor. A dollop of extra Greek yogurt gives a creamy touch. Drizzling honey or maple syrup adds sweetness. You can also sprinkle nuts for a crunchy bite. Get creative and mix your favorite toppings! Pro Tips Use Room Temperature Ingredients: Ensure your eggs and yogurt are at room temperature before mixing. This helps create a smoother batter and results in fluffier pancakes. Don't Overmix: When combining wet and dry ingredients, mix until just combined. A few lumps in the batter are okay and contribute to the pancakes' fluffiness. Preheat the Skillet: Make sure your skillet is properly preheated before adding the batter. This helps achieve that perfect golden-brown crust. Experiment with Add-ins: Feel free to add your favorite ingredients like blueberries, chocolate chips, or nuts to the batter for extra flavor and texture. {{image_4}} For a dairy-free twist, use plant-based yogurt. Almond, coconut, or soy yogurt works great. They add creaminess without dairy. Replace regular milk with almond or oat milk. This keeps your pancakes light and fluffy while being dairy-free. You can add fun flavors to your pancakes. Try adding vanilla or cinnamon to the batter. For fruity flavors, mash in bananas or blueberries. This makes your pancakes even more tasty and colorful. You can also mix in chocolate chips for a sweet treat. If you need gluten-free pancakes, swap all-purpose flour with a gluten-free blend. Rice flour, almond flour, or oat flour are good choices. Just make sure the flour is finely ground. This keeps the pancakes from being gritty. Adjust the liquid slightly to get the right batter consistency. To keep your pancakes fresh, store any leftovers in an airtight container. You can place parchment paper between each pancake to avoid sticking. Refrigerate them if you plan to eat them within a few days. For longer storage, freeze the pancakes. Just stack them with parchment paper and place them in a freezer-safe bag. This helps keep them tasty for later. For the best texture, reheat pancakes in the microwave or on the stovetop. If using a microwave, heat them for about 20-30 seconds. Check if they are warm enough. On the stovetop, place the pancakes in a hot skillet for about one minute on each side. This method keeps them fluffy and delicious. In the fridge, your pancakes will last for about 3-4 days. If you freeze them, they can stay good for up to 2 months. Just make sure to label your containers with the date. This way, you can enjoy your fluffy Greek yogurt pancakes anytime you crave a tasty treat! Yes, you can use low-fat Greek yogurt. It will change the texture a bit. The pancakes may be less rich and creamy. They may not rise as much, resulting in a denser pancake. However, they can still taste great! Just make sure to mix well to keep the batter smooth. You can make pancakes without eggs! Try using 1/4 cup of applesauce instead of each egg. Another option is to use 1/4 cup of mashed banana. You can also mix 1 tablespoon of ground flaxseed with 2.5 tablespoons of water. Let it sit for a few minutes to thicken. These substitutes will help bind the ingredients and keep your pancakes fluffy. If you want to skip honey, try maple syrup as a sweetener. You can also use agave syrup or brown sugar. For a sugar-free option, consider using stevia or erythritol. These alternatives will keep your pancakes sweet without changing the flavor too much. You learned how to make tasty pancakes using simple ingredients. We discussed mixing wet and dry parts, cooking tips, and ways to store. Add fun flavors or try dairy-free options for variety. These pancakes can fit anyone's needs. Enjoy making them your way! Follow these steps, and you’ll have a great breakfast. Happy cooking!
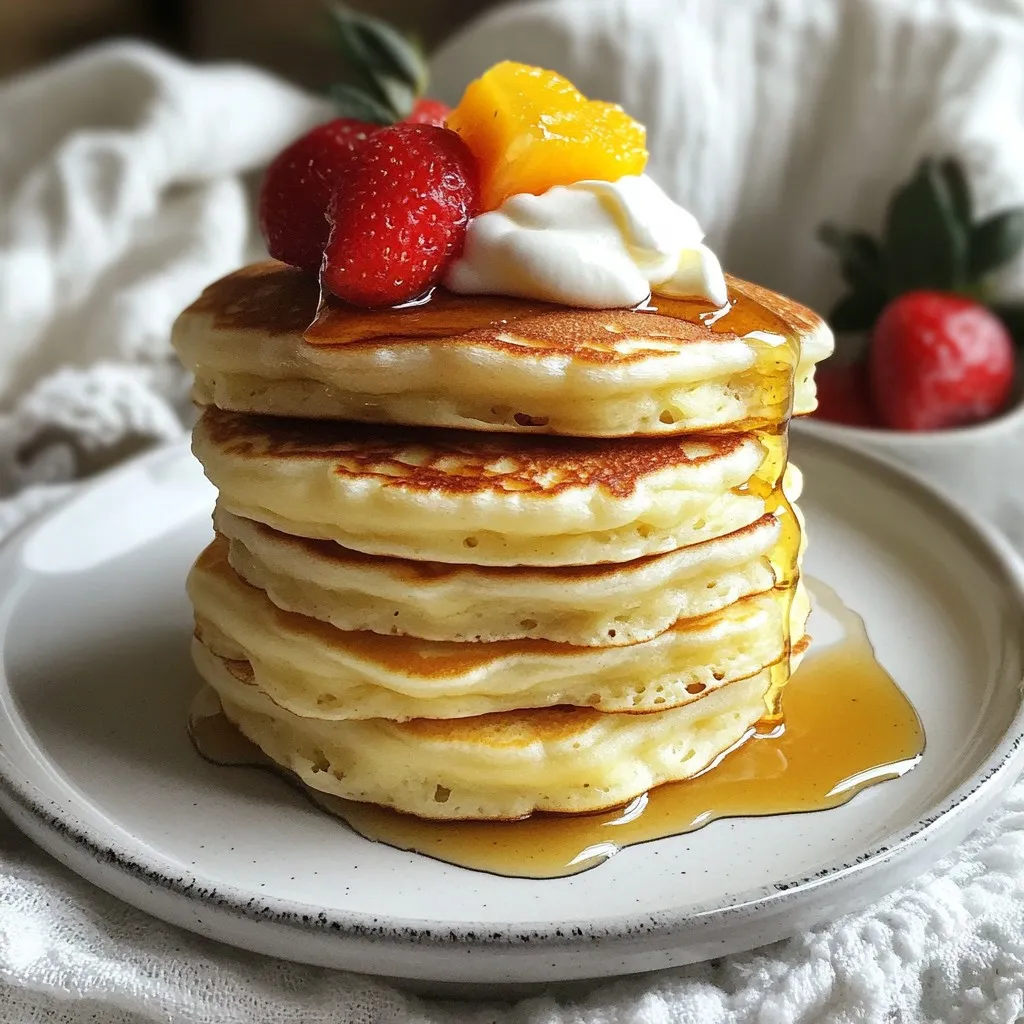
Fluffy Greek Yogurt Pancakes Simple and Tasty Treat
Get ready to flip your breakfast game with my Fluffy Greek Yogurt Pancakes! These delicious pancakes are simple and filled with creamy goodness. You’ll love
- 2 cups rolled oats - 2 ripe apples, peeled, cored, and diced - 1/2 cup brown sugar, packed - 1/2 cup unsweetened applesauce - 2 cups milk (dairy or non-dairy) - 1/4 cup pure maple syrup The main ingredients create a warm and comforting dish. The oats give it a nice texture. Apples add sweetness and flavor. Brown sugar enhances the taste with a rich note. Applesauce keeps it moist while adding more apple flavor. Milk ties everything together and helps it bake. Maple syrup brings a lovely sweetness that pairs well with apples. - 1 teaspoon vanilla extract - 1 tablespoon baking powder - 1 teaspoon ground cinnamon - 1/2 teaspoon ground nutmeg - 1/4 teaspoon salt Spices make this dish special. Vanilla adds a sweet aroma that makes it inviting. Baking powder helps the bake rise and become fluffy. Cinnamon and nutmeg provide warmth and a classic fall taste. Salt balances the sweet flavors and enhances everything. - 1/2 cup chopped walnuts or pecans - 1/2 cup raisins or dried cranberries - Additional rolled oats or chopped nuts for topping You can personalize this dish with add-ins. Nuts give a crunchy texture and healthy fats. Dried fruits like raisins or cranberries add extra sweetness. Topping with more oats or nuts creates a delightful crunch. Feel free to mix and match to fit your taste! 1. Start by preheating your oven to 350°F (175°C). 2. Lightly grease a 9x9-inch baking dish with cooking spray or butter. This helps prevent sticking. 1. In a large bowl, combine the rolled oats, baking powder, ground cinnamon, ground nutmeg, and salt. 2. Mix them well. This ensures the baking powder and spices spread evenly. 1. In a medium bowl, whisk together the milk, unsweetened applesauce, pure maple syrup, and vanilla extract. 2. Make sure all the ingredients blend well. This creates a smooth mixture. 1. Gradually pour the wet mixture into the dry oat mixture. 2. Stir gently until just combined. A few lumps are fine; don't over-mix! 3. Fold in the diced apples, chopped walnuts or pecans, and raisins if you choose to use them. Ensure they mix evenly into the batter. 1. Pour the mixture into your prepared baking dish. Spread it out evenly with a spatula. 2. For a crunchy topping, sprinkle some extra rolled oats and chopped nuts over the top. 3. Place the dish in the oven and bake for 30-35 minutes. 4. Check doneness by inserting a toothpick; it should come out clean. The top should be golden brown. 5. After baking, let it cool for about 5-10 minutes before slicing into squares. You can serve the Apple Crisp Oatmeal Bake warm. A drizzle of maple syrup adds sweetness. If you prefer, top it with yogurt for creaminess. For a nice touch, add fresh apple slices or a sprinkle of cinnamon on top. To ensure even baking, spread the mixture evenly in the dish. This helps the texture stay consistent. Keep an eye on the baking time. The bake is done when the top is golden and the center is firm. A toothpick should come out clean. You can mix it up by using different fruits like pears or berries. For a nutty flavor, try almonds or hazelnuts. If you want it sweeter, add more brown sugar or maple syrup. You can also play with spices, like adding more cinnamon or a hint of ginger. {{image_4}} You can make this recipe gluten-free by using gluten-free oats. These oats are made from pure oats that are processed in a way to avoid cross-contamination with gluten. They taste great and keep the dish hearty. Just check the label to ensure they are certified gluten-free. This small swap makes the dish safe for those with gluten allergies. To make this oatmeal bake vegan, use dairy-free milk. Almond, oat, or soy milk work well. You can also replace the egg with flaxseed meal or chia seeds mixed with water. These substitutes bind the ingredients nicely. Choosing these options keeps the recipe plant-based and delicious. You can get creative with flavor in this bake! Add a bit of nutmeg for warmth. A spoonful of vanilla extract can enhance the taste, too. Consider mixing in some dried fruit like cranberries or apricots for extra sweetness. A pinch of cardamom or ginger can add a lovely twist. These small changes can make your oatmeal bake unique and fun! To store leftovers, let the oatmeal bake cool to room temperature. Then, cover it tightly with plastic wrap or aluminum foil. You can also use an airtight container. This way, it will stay fresh in the fridge for up to four days. If you want to freeze the oatmeal bake, cut it into squares first. Place the pieces in a single layer on a baking sheet. Freeze for 1-2 hours until firm. Afterward, transfer the squares to a freezer-safe bag. Remove as much air as possible. The bake can last for up to three months in the freezer. To reheat, simply thaw overnight in the fridge. Then, warm it in the oven at 350°F (175°C) for about 15 minutes. When stored properly, the Apple Crisp Oatmeal Bake stays fresh for about four days in the refrigerator. If you freeze it, you can enjoy it for up to three months. Always check for any off smells or changes in texture before eating. Yes, you can use various fruits. Try pears, peaches, or berries. Each fruit adds a unique flavor. Just make sure they are ripe and diced well. Absolutely! You can reduce the brown sugar or use a sugar substitute. Applesauce adds natural sweetness, so you can rely on it more. Adding cinnamon also enhances sweetness without extra sugar. Yes, you can prep this dish in advance. Mix the dry and wet ingredients the night before. Just cover and store them in the fridge. In the morning, combine and bake. A few mistakes can affect your bake. - Overmixing: Stir gently to keep the texture light. - Not greasing the dish: This can lead to sticking. - Skipping the cooling time: Letting it cool helps it set better. Reheat slices in the microwave for about 30 seconds. For an oven, warm it at 350°F (175°C) for 10 minutes. This keeps it moist and delicious. You can create a delicious Apple Crisp Oatmeal Bake with simple ingredients and steps. We covered what to include, from oats to apples, and how to mix and bake them. I shared tips for serving, perfecting your bake, and customizing flavors. You can also explore options for gluten-free and vegan diets. Remember, store leftovers well for later enjoyment. This recipe is tasty and flexible, perfect for any time. Enjoy every bite of your warm, sweet creation!
Apple Crisp Oatmeal Bake Tasty and Easy Recipe
Craving a warm, hearty breakfast that’s easy to make? This Apple Crisp Oatmeal Bake is your perfect solution! With simple ingredients and quick steps, you’ll