Breakfast

To make vanilla protein pancakes, you need simple and healthy ingredients: - 1 cup rolled oats - 1 cup almond milk (or any milk of your choice) - 1 scoop vanilla protein powder - 1 teaspoon baking powder - 1 teaspoon vanilla extract - 1 ripe banana, well-mashed - 1 teaspoon coconut oil (for cooking) These ingredients work together to create a fluffy and tasty breakfast. The oats give the pancakes their base, while the protein powder adds nutritional value. The banana provides natural sweetness and moisture. You can make your pancakes even better by adding toppings. Here are some ideas: - Fresh berries - Maple syrup - Nut butter - Creamy yogurt These toppings add color, flavor, and extra nutrition. You can mix and match to find your favorite combo! If you don't have some ingredients, don't worry! Here are some easy swaps: - Oats: You can use oat flour if you have it on hand. - Almond Milk: Any milk, like soy or cow’s milk, will work. - Protein Powder: Try a different flavor or leave it out for a lower protein option. - Banana: Applesauce or pumpkin puree can replace the banana for moisture. These substitutions keep the pancakes tasty while fitting your needs. Enjoy experimenting! {{ingredient_image_2}} Start by measuring 1 cup of rolled oats. Place them in a blender. Blend until they become a fine flour-like texture. This oat flour helps the pancakes become fluffy and light. Make sure there are no lumps. This step is key for the right pancake texture. Next, add the following ingredients to the blender: - 1 cup almond milk (or any milk of your choice) - 1 scoop vanilla protein powder - 1 teaspoon baking powder - 1 teaspoon vanilla extract - 1 ripe banana, well-mashed Blend until the mixture is smooth. You want it creamy and well combined. Let the batter rest for about 5 minutes. This allows it to thicken, making your pancakes even better. Heat a non-stick skillet over medium heat. Add 1 teaspoon of coconut oil to the pan. Let it melt and coat the bottom. For each pancake, pour about 1/4 cup of the batter into the skillet. Cook for 2-3 minutes. Look for small bubbles forming on the surface. This shows it’s time to flip. Carefully turn the pancake with a spatula. Cook for another 2-3 minutes until golden brown. Repeat this process with the remaining batter. If needed, add more coconut oil to the skillet to prevent sticking. Serve the pancakes warm and enjoy your tasty breakfast! To make your pancakes fluffy, use ripe bananas. They add natural sweetness and moisture. Blend the rolled oats into a fine flour. This creates a better texture. Let the batter rest for about five minutes. This helps the pancakes rise better while cooking. When cooking, keep the heat at medium. Too low heat can make them dense. Too high can burn them. Watch for bubbles on the surface. This means it’s time to flip! One common mistake is over-mixing the batter. This can make pancakes tough. Blend just until smooth and combined. Don’t skip resting the batter. This step is key for fluffy pancakes. Another mistake is using too much oil. Just a small amount is enough to coat the pan. Lastly, don’t rush the cooking. Give each pancake enough time to cook before flipping. Serve your pancakes warm for the best taste. Stack them high and drizzle with maple syrup. Add fresh berries for a burst of flavor. Try nut butter or creamy yogurt for richness. You can also sprinkle nuts on top for crunch. Get creative with toppings to suit your taste. Enjoy them with a cup of coffee or tea for a perfect breakfast! Pro Tips Use Fresh Ingredients: Always use ripe bananas for the best flavor and sweetness in your pancakes. Adjust Consistency: If the batter is too thick, add a splash more milk to achieve your desired consistency. Keep it Warm: To keep pancakes warm while cooking, place them on a plate in a warm oven (around 200°F or 93°C). Experiment with Flavors: Feel free to add spices like cinnamon or nutmeg for an extra flavor boost! {{image_4}} You can easily make these pancakes gluten-free. Just use gluten-free oats instead of regular rolled oats. Look for oats labeled as gluten-free. They are processed in a way to avoid cross-contamination. This small change keeps your pancakes soft and fluffy without gluten. Want to mix it up? You can create fun flavors! For chocolate pancakes, add two tablespoons of cocoa powder to the batter. This change gives you rich, chocolatey goodness. If you like berries, toss in fresh or frozen berries right into the batter. Blueberries and strawberries work great! These add a sweet burst of flavor in every bite. Make your pancakes even more nutritious. You can add Greek yogurt to the batter for extra protein. Just use 1/4 cup of yogurt for creaminess. If you like crunch, mix in nuts like walnuts or almonds. Chopped nuts add a nice texture and healthy fats. These options boost the protein in your meal, keeping you full longer. To keep your leftover pancakes fresh, let them cool first. Once cool, stack them in a container. Place parchment paper between each pancake. This step prevents them from sticking together. Cover the container tightly with a lid. Store it in the fridge for up to three days. You can enjoy your pancakes again without losing their taste or texture. Freezing pancakes is a great way to save time. After cooling, place the pancakes in a single layer on a baking sheet. Freeze them for about two hours. This method helps them freeze without sticking. Once frozen, transfer the pancakes to a freezer-safe bag. Remove as much air as possible to avoid freezer burn. Label the bag with the date. You can keep them frozen for up to three months. Reheating pancakes is simple. For best results, use a skillet. Heat the skillet over medium-low heat. Add a tiny bit of oil or butter. Place the pancake in the skillet and reheat for about one minute on each side. If you’re in a hurry, you can use a microwave. Place a pancake on a microwave-safe plate. Heat it for 20-30 seconds. Check if it’s warm enough, and enjoy! These pancakes are high in protein mainly due to the vanilla protein powder. One scoop adds a good amount of protein to each serving. The rolled oats also contribute some protein, making them a filling breakfast. When you combine these ingredients, you get a tasty meal that helps keep you full and energized. Yes, you can use any milk you like. Almond milk works well, but you can try oat milk, soy milk, or dairy milk too. Each type of milk will change the flavor a bit, but all will make great pancakes. Just choose what you enjoy or have on hand. To make these pancakes vegan, swap out the regular protein powder for a plant-based version. Use almond milk or any plant milk you prefer. You can also skip the egg by using a ripe banana, which acts as a binder. This way, you keep the flavor and texture without using animal products. You learned how to make delicious vanilla protein pancakes. We covered essential ingredients, tasty toppings, and useful substitutions. The step-by-step guide gave clear instructions for perfect pancakes every time. With tips to prevent common mistakes and serving ideas, you'll impress anyone. Don't forget the fun variations for gluten-free options and extra nutrients. Lastly, we discussed how to store and reheat your pancakes. Enjoy making these pancakes for yourself and others!
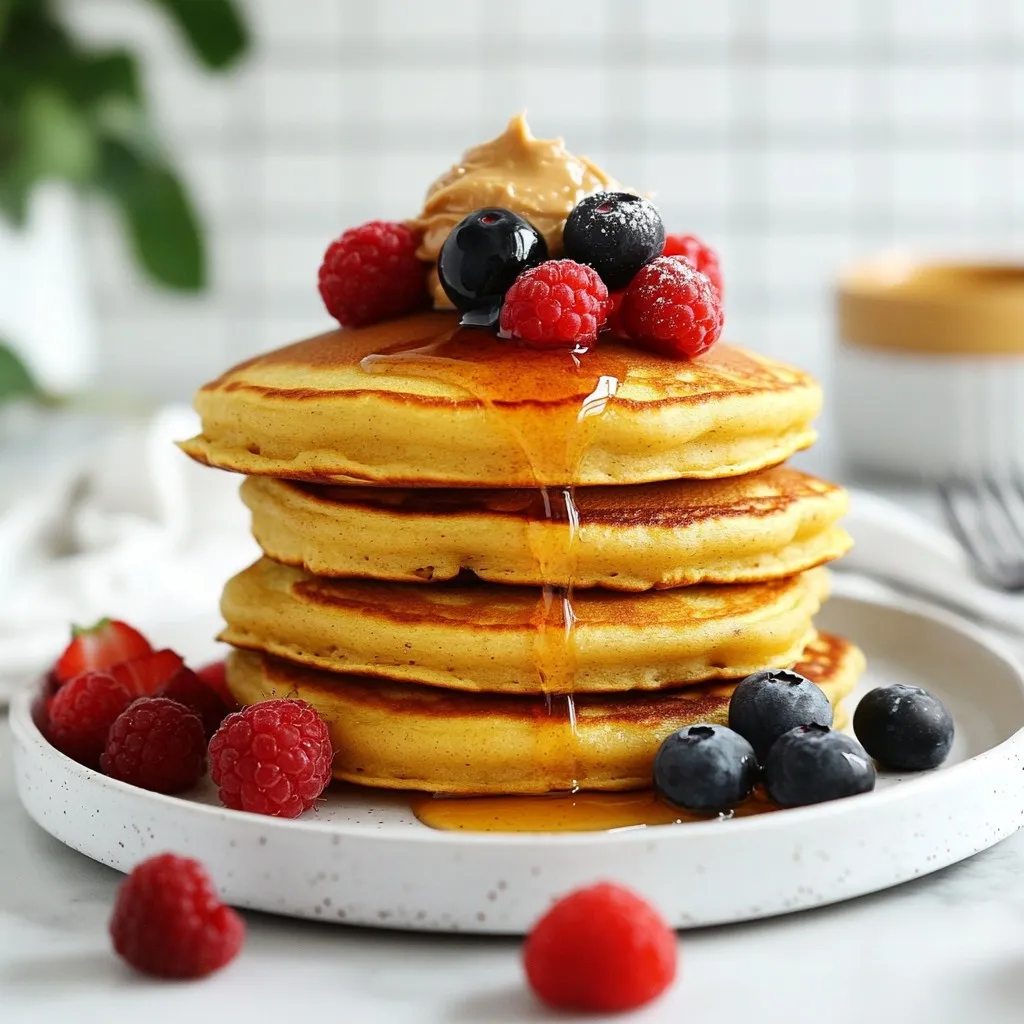
Vanilla Protein Pancakes Simple and Tasty Breakfast
Are you ready to elevate your breakfast game? These Vanilla Protein Pancakes are simple and tasty, giving you a nutritious start to your day. Packed
To make Jiggly Japanese Soufflé Pancakes, gather these ingredients: - 1 cup all-purpose flour - 2 tablespoons cornstarch - 2 teaspoons baking powder - 1/4 teaspoon salt - 1/3 cup milk - 3 large eggs, separated - 2 tablespoons granulated sugar, divided - 1 teaspoon vanilla extract - 1 tablespoon vegetable oil - Butter (for greasing) - Maple syrup (for serving) - Fresh assorted fruit (like berries and banana) You can swap some ingredients if needed: - Use almond milk or oat milk instead of regular milk for a dairy-free option. - If you don’t have cornstarch, use an equal amount of flour. - For a lower sugar option, use a sugar substitute. - You can replace vegetable oil with melted coconut oil for added flavor. Make sure you have the right tools: - Mixing bowls (at least two) - Whisk or electric mixer - Spatula - Non-stick skillet - Ring mold or round cookie cutter - Lid for the skillet - Measuring cups and spoons {{ingredient_image_2}} Start with a bowl. Add 1 cup of all-purpose flour. Next, mix in 2 tablespoons of cornstarch, 2 teaspoons of baking powder, and 1/4 teaspoon of salt. Whisk these dry ingredients until they blend well. This mix is the base for our light pancakes. Set it aside for now. In another bowl, combine 1/3 cup of milk with 3 large egg yolks. Add 1 tablespoon of granulated sugar and 1 teaspoon of vanilla extract. Whisk this mixture until smooth. The yolks add richness, while the milk keeps everything moist. Next, gently add the dry mix into the wet mixture. Stir it carefully. It’s okay if some lumps remain. This will help our pancakes stay fluffy and airy. Now, take a clean bowl. Use an electric mixer to whip the 3 egg whites. Beat them until soft peaks form. Gradually add the remaining 1 tablespoon of sugar. Keep mixing until you see stiff peaks. This step is key for that soufflé effect. Preheat a non-stick skillet on low heat. Lightly grease it with butter. Use a ring mold or cookie cutter to help shape your pancakes. Pour about 1/4 cup of batter into the mold. Cover the skillet with a lid. This traps steam and keeps the pancakes fluffy. Cook for about 4-6 minutes. When the bottom is golden, remove the mold. Flip the pancake and cover again. Cook for another 4-6 minutes until both sides are golden. Once cooked, stack them high on a plate. Drizzle with maple syrup and add fresh fruits for a beautiful touch. Enjoy your fluffy, jiggly pancakes! To get that famous jiggly texture, follow these key steps: - Whip egg whites: Make sure to beat the egg whites until they form stiff peaks. This step is key for fluffiness. - Gently fold: When mixing the whipped egg whites with the batter, use a spatula to fold gently. This keeps the air bubbles intact. - Low and slow: Cook the pancakes on low heat. This allows them to rise slowly and stay fluffy. Here are some pitfalls to steer clear of: - Overmixing the batter: Mixing too much can deflate your batter. Leave some lumps! - High heat: Cooking on high heat can burn the outside while leaving the inside raw. Patience is key. - Skipping the lid: Covering the skillet helps trap steam. This steam is crucial for that soufflé puff. Make your pancakes look as good as they taste: - Stack them high: Create a tall stack for a dramatic effect. - Garnish smartly: Add fresh fruit like berries or banana around the stack. This adds color and texture. - Finish with syrup: Drizzle maple syrup on top for a sweet touch. A dusting of powdered sugar adds elegance too! Pro Tips Whip the Egg Whites Properly: Ensure your mixing bowl and beaters are completely clean and dry before whipping the egg whites to achieve the best volume and texture for your pancakes. Low and Slow Cooking: Cooking the pancakes on low heat allows them to rise beautifully without burning. Patience is key for that perfect soufflé texture. Use a Ring Mold: Utilizing a ring mold helps in achieving the classic tall shape of soufflé pancakes. If you don’t have one, a metal cookie cutter can work as a substitute. Experiment with Toppings: Feel free to get creative with toppings! Besides maple syrup, try adding whipped cream, chocolate sauce, or a variety of fresh fruits for added flavor and presentation. {{image_4}} You can change the taste of your pancakes easily. Try adding matcha powder for a green tea flavor. Simply mix in a tablespoon with the dry ingredients. Want something sweeter? Add cocoa powder for chocolatey pancakes. Use about two tablespoons for a rich taste. You can also add spices like cinnamon for warmth. Each flavor brings its own fun twist. Toppings can make your pancakes even better. Fresh fruit is always a hit. Use berries, bananas, or peaches for color and taste. A fruit compote is another great choice. Just simmer fruits with sugar until soft. Whipped cream adds a light touch, too. Drizzle maple syrup for sweetness. You can even sprinkle nuts for crunch. Mix and match until you find your favorite combo! Want to make these pancakes gluten-free? Swap the all-purpose flour for a gluten-free blend. Make sure it has a good binding agent. For a vegan version, use plant milk and a flax egg instead of eggs. Just mix one tablespoon of ground flaxseed with three tablespoons of water and let it sit. These swaps keep the pancakes light and fluffy while meeting your dietary needs. To keep your leftover Jiggly Japanese Soufflé Pancakes fresh, store them correctly. First, let the pancakes cool completely. Then, stack them with parchment paper between each pancake. This step prevents sticking. Place the stack in an airtight container. Store it in the fridge for up to three days. If you want to enjoy them later, freezing is a great option. When you want to eat your pancakes again, try reheating them gently. You can use a microwave or a skillet. For the microwave, heat them for about 15-20 seconds. Check if they are warm enough. If not, heat for a bit longer. For the skillet, use low heat. Add a small amount of butter and heat each pancake for about 1-2 minutes. This keeps them soft and fluffy. Freezing your pancakes allows you to enjoy them anytime. After cooling, stack the pancakes with parchment paper in between. Wrap the stack tightly in plastic wrap. Then, place the wrapped stack in a freezer-safe bag. Label the bag with the date. You can freeze them for up to a month. When you’re ready to eat, just thaw them in the fridge overnight and reheat as mentioned above. Enjoy your delicious pancakes anytime! Japanese Soufflé Pancakes are lighter and fluffier. They use whipped egg whites. This method creates a soft, airy texture. Regular pancakes are denser and flatter. The key to their fluffiness lies in the meticulous folding of egg whites into the batter. This gives them that signature jiggle. You can prepare the batter ahead of time. Store it in the fridge for up to 2 hours. However, for the best fluffiness, make these pancakes fresh. The whipped egg whites start to lose volume over time. If you want to save time, measure out your dry and wet ingredients ahead. Check the color of the pancakes. They should be golden brown on both sides. You can also gently press the top. It should spring back lightly. If it holds an imprint, it needs more time. Cooking on low heat is key for even cooking. Stack the pancakes high on a plate for a stunning look. Drizzle with maple syrup for sweetness. Add fresh fruit like berries or banana for color and flavor. You can also dust with powdered sugar for a nice touch. A dollop of whipped cream makes it extra special. Enjoy every fluffy bite! In this article, we covered the key ingredients, substitutions, and required equipment for making Japanese Soufflé Pancakes. You learned the step-by-step process, tips for the perfect texture, and ideas for delicious variations. Remember to store any leftovers properly and use reheating tips for the best taste. These pancakes are unique and fun to make. With practice, you’ll impress anyone with your jiggly creations. Enjoy the process and have fun serving these fluffy delights!
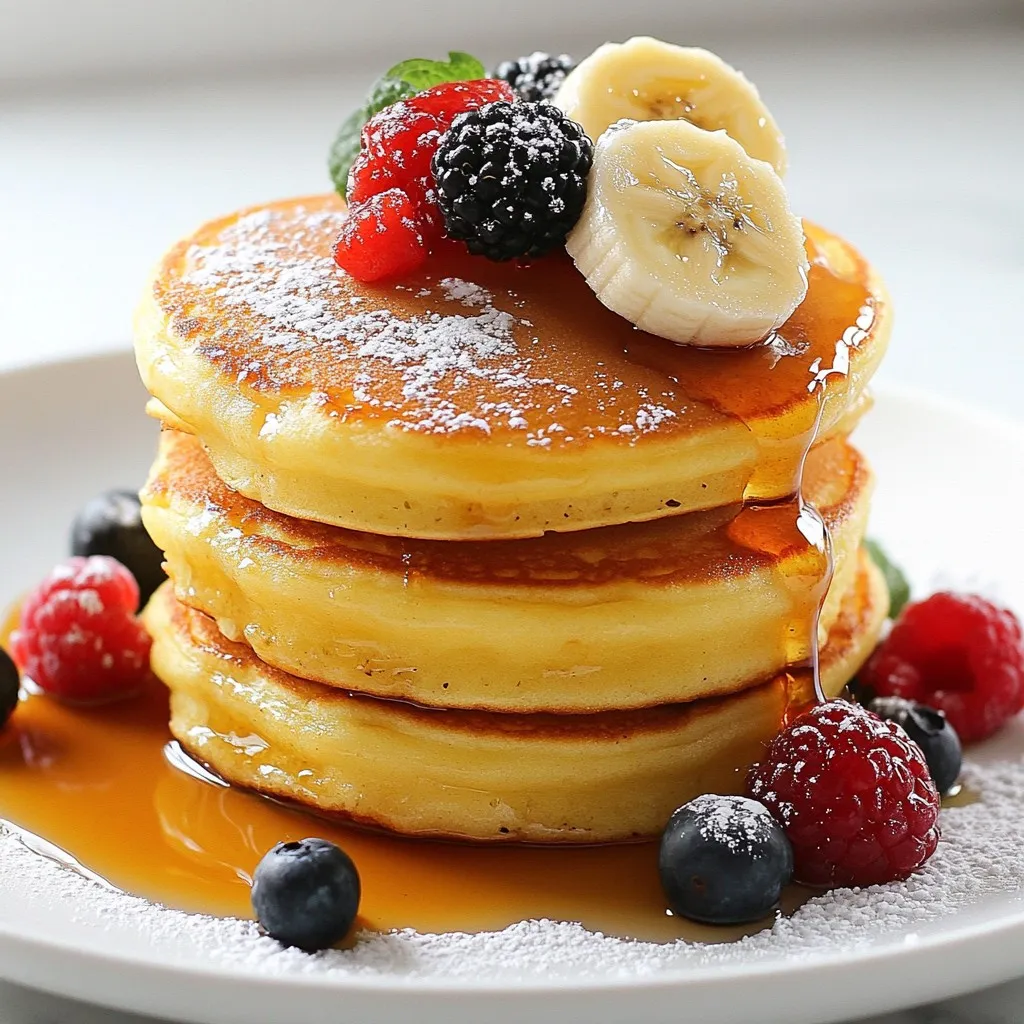
Jiggly Japanese Soufflé Pancakes Fluffy and Delicious
Are you ready to enjoy a breakfast treat that’s as fun to make as it is to eat? Jiggly Japanese soufflé pancakes are fluffy clouds
- 1 ½ cups rolled oats - 1 scoop vanilla protein powder - 1 teaspoon baking powder - 1 teaspoon baking soda - 1 teaspoon ground cinnamon - ¼ teaspoon salt - 1 cup unsweetened applesauce - 2 large eggs - ¼ cup maple syrup (or honey) - 1 teaspoon vanilla extract - ¼ cup chopped walnuts (optional) - 2 tablespoons brown sugar (for topping) - 1 tablespoon cinnamon (for topping) These ingredients come together to create a healthy treat. Each item plays a role in taste and nutrition. Rolled oats provide fiber and make the muffins hearty. Vanilla protein powder adds protein, making these muffins a great post-workout snack. Baking powder and baking soda help the muffins rise and stay fluffy. Ground cinnamon gives that warm, sweet flavor we love in cinnamon rolls. The unsweetened applesauce keeps the muffins moist and reduces sugar. Eggs bind the mixture and add protein. I often use maple syrup or honey for sweetness. Both options blend well with the other flavors. Chopped walnuts add a nice crunch but are optional. The topping of brown sugar and cinnamon gives a sweet finish, making them feel like a treat. Each muffin is packed with around 8 grams of protein. They contain about 150 calories, making them a guilt-free snack. The muffins also have healthy fats and carbs, thanks to the oats and walnuts. Enjoy these muffins knowing they fuel your body right! {{ingredient_image_2}} 1. Preheat your oven to 350°F (175°C). Prepare a muffin tin by lining it with paper liners. You can also spray it with non-stick cooking spray. This helps the muffins come out easily. 2. In a large bowl, mix the dry ingredients. Combine 1 ½ cups of rolled oats, 1 scoop of vanilla protein powder, 1 teaspoon of baking powder, 1 teaspoon of baking soda, 1 teaspoon of ground cinnamon, and ¼ teaspoon of salt. Use a whisk or spatula to blend these well. 3. In another bowl, whisk the wet ingredients. Mix 1 cup of unsweetened applesauce, 2 large eggs, ¼ cup of maple syrup or honey, and 1 teaspoon of vanilla extract. Make sure it’s smooth and well combined. 4. Now, pour the wet ingredients into the dry ones. Stir gently until just mixed. Don't overmix! If you want, fold in ¼ cup of chopped walnuts for extra crunch. 5. Fill the muffin cups. Divide the batter evenly, filling each cup about three-quarters full. This allows space for the muffins to rise while baking. 6. Prepare the topping. In a small bowl, mix 2 tablespoons of brown sugar with 1 tablespoon of cinnamon. Sprinkle this mix on top of each muffin. 7. Bake the muffins for 18-20 minutes. Check for doneness by inserting a toothpick into the center. It should come out clean, and the tops should be golden brown. 8. Let the muffins cool in the tin for about 5 minutes. Then, move them to a wire rack. This helps keep their texture nice and fluffy. To get the best muffins, avoid overmixing your batter. When you mix too much, the muffins can become dense. Stir just until the wet and dry ingredients blend. This keeps your muffins light and fluffy. Next, watch your baking times closely. Bake your muffins for 18-20 minutes. Check doneness with a toothpick. If it comes out clean, your muffins are ready. If not, give them a few extra minutes. Every oven is different, so keep an eye on them. Serve your muffins warm. This enhances their flavor and makes them more inviting. You can place them on a rustic wooden board or a nice tiered stand. For a sweet touch, drizzle extra maple syrup on top. A sprinkle of cinnamon makes them look and taste amazing. Pair these muffins with fresh fruit or yogurt. Both options add flavor and nutrition. You can also enjoy them with a hot drink like coffee or tea. This makes for a delightful snack or breakfast. Pro Tips Use Fresh Ingredients: Ensure your baking powder and baking soda are fresh for optimal rising. Check expiration dates to achieve the best texture in your muffins. Customize Your Nuts: If you’re not a fan of walnuts, try substituting with pecans or almonds for a different flavor and crunch. Store Properly: Keep any leftover muffins in an airtight container at room temperature for up to 3 days, or freeze for longer storage. Experiment with Spices: Feel free to add other spices like nutmeg or ginger to the batter for a unique twist on the classic cinnamon flavor. {{image_4}} You can easily change the protein powder in this recipe. If you prefer plant-based options, try pea protein or brown rice protein. Each type has its own unique flavor and texture. Play around to find what you like best. Sweeteners can also vary. Instead of maple syrup, you can use honey or agave. Honey adds a nice floral note. Agave is milder and won't change the taste much. Both keep the muffins moist and sweet. Adding nuts or dried fruits can make these muffins even better. Try chopped pecans or almonds for crunch. Dried cranberries or raisins add a chewy texture and burst of sweetness. Mixing in these ingredients creates a fun surprise in each bite. To boost the cinnamon flavor, add more spices like nutmeg or ginger. A pinch of nutmeg gives warmth, while ginger adds a zing. You can also use vanilla beans for a richer taste. These small changes create exciting flavor profiles you’ll love. To keep your cinnamon roll protein muffins fresh, follow these tips: - Cool Completely: Let the muffins cool down on a wire rack. This stops steam from making them soggy. - Use an Airtight Container: Place the cooled muffins in a container with a tight seal. This keeps them soft and moist. - Room Temperature: Store them at room temperature for up to three days. - Refrigerating: If you want to keep them longer, put them in the fridge. They can last up to a week there. - Freezing: For even longer storage, freeze the muffins. Wrap each muffin in plastic wrap and place them in a freezer bag. They can last up to three months. To warm up your muffins without losing moisture, try these methods: - Microwave: Place a muffin on a plate. Cover it with a damp paper towel. Heat for 10-15 seconds. Check if it’s warm. - Oven: Preheat your oven to 350°F (175°C). Wrap muffins in foil and heat for about 10 minutes. This keeps them soft and tasty. - Toaster Oven: Set it to 350°F (175°C). Warm the muffin for about 5 minutes. This method gives a nice texture. Can I make these muffins vegan? Yes, you can make these muffins vegan. Replace the eggs with flax eggs. Mix one tablespoon of ground flaxseed with two tablespoons of water for each egg. Let it sit until it thickens. Use maple syrup or agave instead of honey. How can I adjust the recipe for a smaller batch? To make fewer muffins, halve the recipe. Use ¾ cup of oats, half a scoop of protein powder, and one egg. This gives you six muffins instead of twelve. What should I do if my muffins are too dry? If your muffins turn out dry, check your baking time. Bake them for less time next time. You can also add a bit more applesauce or maple syrup for moisture. Can I use quick oats instead of rolled oats? You can use quick oats, but they may change the texture. Rolled oats give a heartier bite. If you use quick oats, reduce the baking time slightly. Is there a substitute for applesauce? Yes, you can use mashed bananas or yogurt. Both add moisture and sweetness to your muffins. This blog post covered how to make delicious and healthy muffins. We explored key ingredients, step-by-step instructions, and tips for baking them just right. You learned about serving and storing options too. In my view, these muffins are a great and easy treat. They fit well into a balanced diet and offer many fun variations. Enjoy experimenting with different flavors and toppings to make your muffins unique. Happy baking!
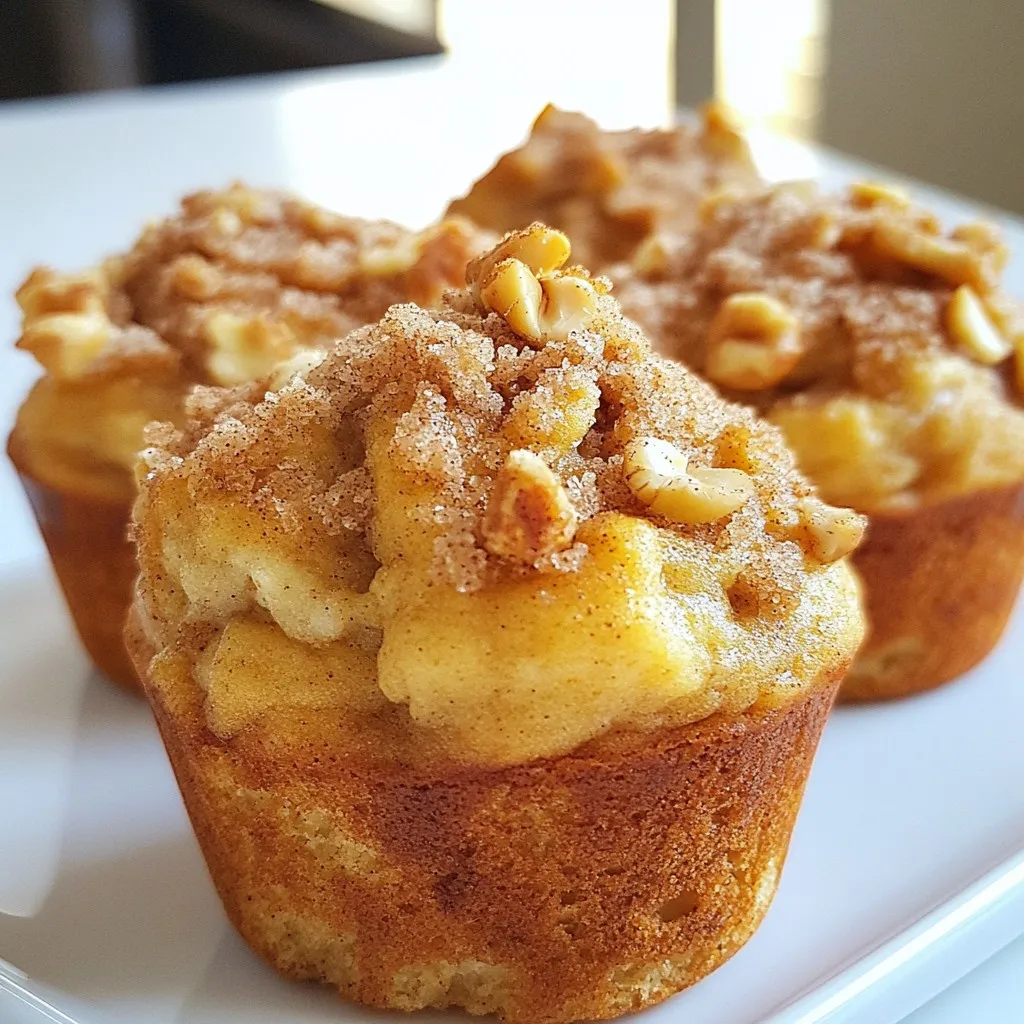
Cinnamon Roll Protein Muffins Healthy and Tasty Treat
Looking for a healthy treat that satisfies your sweet tooth? Try my Cinnamon Roll Protein Muffins! Packed with protein and whole ingredients, they’re perfect for
To make Crème Brûlée French Toast, gather these ingredients: - 6 thick slices of brioche or challah bread - 4 large eggs - 1 cup whole milk - 1/2 cup heavy cream - 1 teaspoon pure vanilla extract - 1/4 teaspoon almond extract - 1/4 cup granulated sugar (plus extra for caramelizing) - 1/2 teaspoon ground cinnamon - 1/4 teaspoon freshly grated nutmeg - Pinch of salt - Fresh berries (like strawberries, blueberries, or raspberries, for garnish) - Whipped cream (optional, for serving) You can change things up if needed. Here are some ideas: - Use any soft bread like sourdough or even gluten-free bread. - Swap heavy cream with coconut cream for a dairy-free twist. - If you lack almond extract, use more vanilla extract instead. - For a sweeter taste, consider adding maple syrup to the egg mix. Quality ingredients make a big difference in flavor. Always choose fresh eggs and rich cream. The bread should be soft and slightly sweet. Fresh berries add color and taste. If you use good ingredients, your French toast will be a delightful treat. Trust me, it’s worth it! {{ingredient_image_2}} First, gather your ingredients. You will need eggs, whole milk, heavy cream, vanilla extract, almond extract, sugar, cinnamon, nutmeg, and salt. In a large bowl, whisk the eggs until smooth. Then, add milk and cream. Mix in vanilla and almond extracts, sugar, cinnamon, nutmeg, and a pinch of salt. Whisk until everything blends well. This custard mixture gives the French toast its rich flavor. Next, take your brioche or challah bread. Arrange the slices in a large baking dish in one layer. Pour the custard mixture evenly over the bread. Make sure each slice is soaked. Cover the dish with plastic wrap. Refrigerate for at least 30 minutes or overnight for the best taste. Soaking the bread allows it to soak up all that tasty custard. Preheat your oven to 350°F (175°C). After your bread has soaked, take the dish out of the fridge. Remove the cover and place the dish in the oven. Bake for 25-30 minutes. You want the French toast to turn golden brown and puffed. This step makes it warm and fluffy. Once baked, carefully remove the dish from the oven. Let it cool for about 5-10 minutes. This helps it set. Now, for the crème brûlée topping, sprinkle a thin layer of sugar over the warm French toast. Use a kitchen torch to caramelize the sugar until it forms a crispy crust. If you don’t have a torch, place the dish under the broiler for 1-2 minutes. Watch closely to avoid burning. Slice the French toast into generous pieces. Serve it warm for the best taste. Add fresh berries on top for a pop of color. You can also add whipped cream if you like. For an elegant touch, use decorative plates. Drizzle with maple syrup or dust with powdered sugar for extra sweetness. Enjoy this delightful morning treat! To get the best texture, use thick slices of brioche or challah bread. These breads soak up the custard well. Let the bread sit in the egg mixture for at least 30 minutes. For even better results, soak overnight. This helps the bread become soft and creamy inside while staying crispy on top. When you bake it, aim for a golden brown color. This shows it's perfectly cooked. One mistake is using thin bread. Thin slices do not soak enough and can turn dry. Another issue is not soaking long enough. If the bread isn't soaked well, it won’t absorb the custard. Also, be careful with the sugar when caramelizing. Too much sugar can burn quickly, ruining the crunchy top. Lastly, avoid opening the oven too soon. It can lower the temperature and affect baking. To make this dish, you need a few key tools. A large mixing bowl is a must for the custard. A whisk helps blend the ingredients smoothly. Use a baking dish that fits your bread slices well. An oven-safe dish works best. A kitchen torch is great for caramelizing the sugar. If you don’t have one, a broiler can also do the job. Lastly, have a sharp knife ready for slicing the French toast into portions. Pro Tips Choose Fresh Bread: Using fresh brioche or challah will yield the best texture. Stale bread absorbs the custard better, but freshly baked bread provides a delightful contrast. Soaking Time Matters: Allowing the bread to soak overnight in the custard mixture enhances the flavors and helps achieve a creamy, custardy center. Perfect Caramelization: When caramelizing the sugar, ensure it's an even layer and keep the torch moving to avoid burning. If broiling, watch closely to achieve the perfect golden crust. Garnish Creatively: Fresh berries not only add flavor but also a vibrant color to your dish. Consider adding a sprinkle of mint or a drizzle of chocolate for an extra touch of elegance. {{image_4}} You can make this dish even better with simple add-ins. Try adding chocolate chips for a sweet surprise. Nuts like pecans or walnuts add crunch and flavor. You could also mix in some orange zest for a bright taste. Fresh berries on top give color and freshness. Drizzle with maple syrup for added sweetness. If you need gluten-free French toast, use gluten-free bread. Look for one that is soft and thick. For a dairy-free version, swap the milk and cream for almond milk or coconut milk. Use a dairy-free butter for cooking. This way, everyone can enjoy this tasty treat without worry. You can change the flavors with the seasons. In autumn, add pumpkin spice and top with caramel sauce. During winter, try peppermint extract mixed in. For spring, use fresh fruits like peaches or cherries. In summer, berries shine as the main topping. These changes keep the dish exciting and fun for every season. To keep leftover crème brûlée French toast fresh, store it in an airtight container. Allow it to cool to room temperature first. Place a piece of parchment paper between the layers to prevent sticking. This way, it stays fluffy and tasty. Store it in the fridge for up to three days. To reheat your French toast, you have a few options. The oven works best for keeping it crispy. Preheat the oven to 350°F (175°C). Place the toast on a baking sheet and warm it for about 10-15 minutes. Make sure to cover it loosely with foil to avoid drying it out. If you're in a rush, use the microwave. Heat it in 30-second bursts, checking often to avoid overheating. If you want to save some for later, freezing works well too. Wrap individual slices tightly in plastic wrap. Then place them in a freezer bag or container. Remove as much air as possible to prevent freezer burn. You can freeze it for up to two months. When ready to enjoy, thaw in the fridge overnight and reheat as mentioned above. The best bread for this dish is thick and soft. I recommend using brioche or challah bread. These breads soak up the custard well. Their rich flavor adds to the overall taste. If you want a twist, you can try sourdough for a tangy kick. You can prepare this recipe ahead. It’s best to soak the bread overnight. Just mix the custard and pour it over the bread. Cover the dish and refrigerate. This allows the bread to soak up the flavors. You can bake it fresh in the morning for a warm treat! To avoid soggy French toast, use thick slices of bread. Brioche and challah are perfect. Ensure you soak the bread just long enough. Too much soaking makes it soggy. Bake it until golden brown and puffed. This gives you a nice texture on the outside. If you don’t have a kitchen torch, don’t worry! You can use your oven's broiler. Sprinkle sugar on top and place it under the broiler for 1-2 minutes. Keep an eye on it to prevent burning. This method still gives you a nice caramelized top! This blog post covered all the key steps to make delicious French toast. We explored the right ingredients, how to prepare them, and baking tips for the best texture. I shared helpful tricks and variations to suit everyone’s tastes. Plus, I outlined easy storage methods to keep leftovers fresh. In the end, making French toast is fun and rewarding. Follow these steps, and you’ll have a tasty dish ready for any meal! Enjoy your cooking journey and savor every bite!
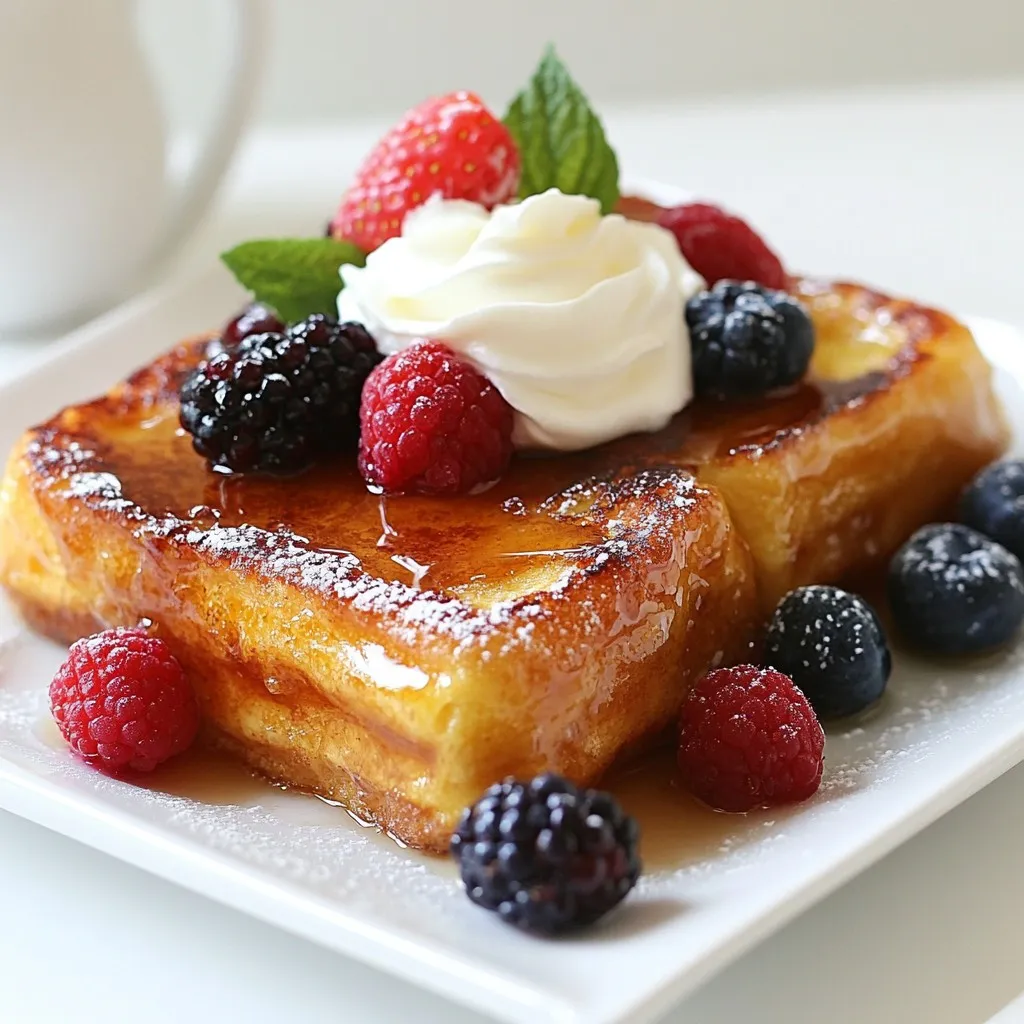
Creme Brulee French Toast Delightful Morning Treat
Start your day with the irresistible taste of Creme Brulee French Toast. This delightful morning treat combines rich flavors and a crispy caramel top, making
- 1 cup rolled oats - 2 tablespoons creamy peanut butter - 1 ripe banana, mashed (reserve a few slices for garnish) - 1 cup almond milk (or your favorite milk) - 1 tablespoon chia seeds - 1 tablespoon honey or maple syrup (optional, for sweetness) - 1/2 teaspoon vanilla extract - A pinch of salt - Sliced banana and chopped peanuts for garnish You can swap rolled oats for quick oats if you like. Use any nut butter instead of peanut butter. Almond milk can be replaced with cow's milk or oat milk. If you want it sweeter, add more honey or syrup. You can leave out the vanilla if you don’t have any. - Rolled Oats: High in fiber, they help keep you full. They also support heart health. - Peanut Butter: Offers protein and healthy fats, giving you energy. It’s also rich in vitamins and minerals. - Bananas: Packed with potassium, they help with muscle function. They also add natural sweetness. - Chia Seeds: High in omega-3s, they support brain health. They also add fiber for digestion. - Almond Milk: Low in calories, it is a good dairy-free option. It also has vitamins E and D. This recipe combines these great ingredients for a healthy start to your day! {{ingredient_image_2}} First, take a medium bowl. Add 1 cup of rolled oats, 1 tablespoon of chia seeds, and a pinch of salt. Mix these dry ingredients well. This step helps the chia seeds spread evenly throughout the oats. You want every bite to have that nice texture. Now, grab another bowl. Here, you will mix the wet ingredients. Combine 1 cup of almond milk, 2 tablespoons of creamy peanut butter, and 1 ripe banana that you have mashed. If you like it sweeter, add 1 tablespoon of honey or maple syrup. Lastly, add 1/2 teaspoon of vanilla extract. Whisk this mixture until it is smooth. This will give your oats a rich, creamy taste. Once your wet and dry ingredients are ready, pour the wet mixture into the bowl with the oats and chia seeds. Stir everything together until well mixed. Then, divide the mixture between two jars or containers. Seal them tightly and put them in the fridge. Let them sit overnight, or at least for 4 hours. This soaking time makes the oats soft and easy to eat. When you’re ready to serve, stir the oats again. If you want them creamier, add a splash of almond milk. Top with banana slices and chopped peanuts for crunch. Enjoy your tasty Peanut Butter Banana Overnight Oats! To get the best texture, use rolled oats. They soak up the liquid well. Mix oats with chia seeds and a pinch of salt first. This step ensures even flavor and texture. When you add the wet mix, stir well. For creamier oats, add more almond milk after soaking. You can also let the mixture sit longer to soften the oats. Overnight is best, but four hours works too. This gives you a nice, thick, and creamy bowl of goodness. Sweetness is key. You can use honey or maple syrup to fit your taste. Start with one tablespoon and adjust as needed. If you want less sugar, skip it. The banana adds natural sweetness too. For a fun twist, try adding a splash of vanilla extract. This brings extra flavor without extra sugar. Taste your mixture before you seal it. This way, you can make it just right for you. Presentation makes meals special. Serve your oats in clear glass jars. This shows off the beautiful layers of oats and toppings. Top with banana slices and chopped peanuts for flair. For an extra touch, drizzle some peanut butter on top. Adding extra chopped peanuts gives a nice crunch. You can also add a sprinkle of cinnamon for warmth. A pretty presentation makes breakfast even more enjoyable! Pro Tips Use ripe bananas: The riper the banana, the sweeter and creamier your overnight oats will be. Look for bananas with brown spots for the best flavor! Experiment with milk: Feel free to substitute almond milk with any milk of your choice, such as oat milk, soy milk, or even coconut milk for a tropical twist. Add variety: Mix in other toppings like berries, granola, or seeds to enhance texture and flavor. You can also try different nut butters for a unique twist. Make it ahead: These oats can be made in advance and stored in the refrigerator for up to 5 days, making them a perfect grab-and-go breakfast option! {{image_4}} You can mix up your peanut butter banana overnight oats with fun flavor add-ins. Try adding cocoa powder for a chocolate twist. If you like spices, a dash of cinnamon or nutmeg can work wonders. You can also use almond butter instead of peanut butter for a different taste. For a fruity boost, add berries or diced apples. These swaps help keep your oats exciting and new. You don’t have to stick to almond milk. Any milk works great here. Use cow's milk, oat milk, or coconut milk based on your taste. Each type of milk brings its own flavor. For a creamier texture, whole milk or oat milk are good choices. If you want a lighter version, go for skim milk. Experimenting with milk can change the whole feel of the dish. Toppings can turn your oats into a masterpiece. Sliced bananas add freshness, but don’t stop there! Try adding chopped nuts like almonds or walnuts for crunch. A sprinkle of granola can give a nice texture too. For extra sweetness, drizzle honey or maple syrup on top. You can even add seeds like hemp or pumpkin for more nutrients. These toppings not only make your oats look good but also taste amazing. To keep your Peanut Butter Banana Overnight Oats fresh, use airtight containers. Glass jars work well. Make sure the lids seal tightly. This keeps air out and moisture in. Store them in the fridge. If you want to enjoy them later, you can also freeze them. In the fridge, your oats can last up to 5 days. The oats soak up the liquid and get softer over time. However, the bananas may brown. To avoid this, add banana slices just before serving. This keeps them fresh and bright. Freezing is an option for longer storage. To freeze, place the oats in airtight containers. Leave some space at the top, as they will expand. You can freeze them for up to 3 months. When ready to eat, thaw them in the fridge overnight. Stir well and add fresh toppings before enjoying. Yes, you can make these oats in advance. Prepare them the night before. They only need about four hours to soak. I like to let mine sit overnight for the best flavor. The oats absorb the milk and become soft. You can store them in jars with lids in the fridge. This makes breakfast quick and easy! If you want a substitute for peanut butter, try almond butter or sunflower seed butter. Both give a nice taste. You can also use cashew butter for a different flavor. If you need a nut-free option, sunflower seed butter works well. Don’t worry; you can still enjoy the creaminess and texture. Absolutely! These oats are perfect for meal prep. You can make multiple jars at once. This way, you have breakfast ready for several days. Just store them in the fridge. They stay fresh for up to five days. Enjoy a tasty and healthy meal anytime! This guide covered all you need for making delicious overnight oats. We discussed the right ingredients, including key substitutes and their health benefits. You learned how to prepare your oats step by step, achieving the perfect texture along the way. We also shared fun variations, storage tips, and answered common questions. Now, you have everything to create your own tasty overnight oats. Enjoy experimenting with flavors and make it your own!
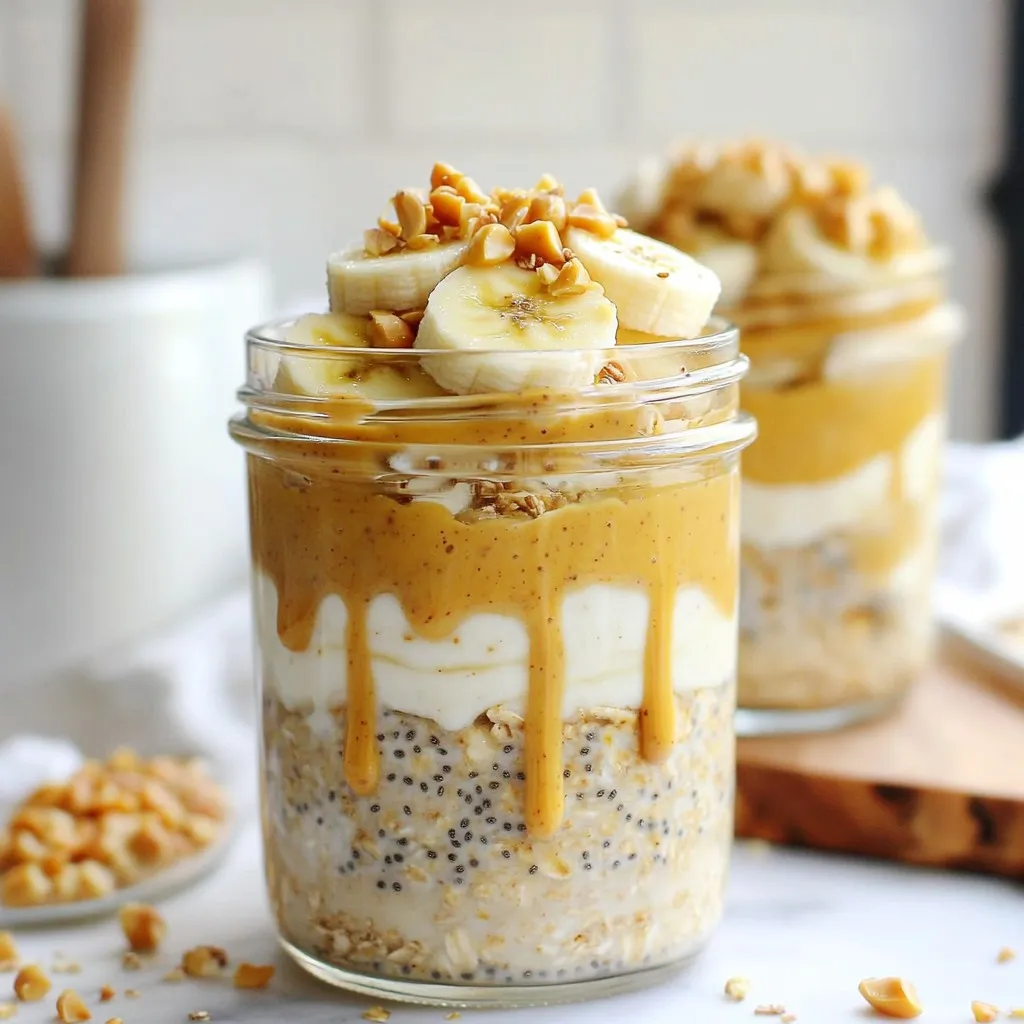
Peanut Butter Banana Overnight Oats Quick and Easy Recipe
Looking for a quick, tasty breakfast? Try my Peanut Butter Banana Overnight Oats recipe. It’s simple, healthy, and packed with flavor. Just combine a few
To make a tasty breakfast croissant sandwich, gather these simple ingredients: - 2 large buttery croissants - 4 large eggs - 1/4 cup whole milk - Salt and freshly ground pepper - 1/2 cup shredded cheese - 1 ripe avocado, sliced - 4 slices of turkey or chicken sausage (optional) - 1 tablespoon unsalted butter - Fresh arugula or baby spinach - Hot sauce (optional) Each ingredient plays a vital role in bringing flavor and texture to your sandwich. The croissants provide a flaky base, while the eggs add richness. Cheese melts into a creamy delight, and avocado gives a fresh touch. You can add sausage for extra protein, or keep it light with just eggs and greens. Don't skip the hot sauce if you like a bit of heat. Each bite is a burst of flavor! {{ingredient_image_2}} Start by preheating your oven to 350°F (175°C). Grab a baking sheet and line it with parchment paper. Place the croissants on the sheet and let them warm up for about 5-7 minutes. This will make them lightly toasted and a bit crispy. Next, take a medium bowl and crack four large eggs into it. Add 1/4 cup of whole milk. Sprinkle in a pinch of salt and some freshly ground pepper. Whisk everything together until it looks nice and frothy. Heat a non-stick skillet over medium heat. Add 1 tablespoon of unsalted butter to the pan. Wait until it melts and starts bubbling. Pour your egg mixture into the skillet. Gently stir the eggs with a spatula as they cook. After about 3-4 minutes, they should be just set but still soft. Remove from heat and mix in 1/2 cup of shredded cheese until it melts. If you're using sausage, add the slices to the same skillet. Cook them on medium heat for about 3-4 minutes. Turn them now and then until they are browned and heated through. Carefully cut each croissant in half. On the bottom half, pile on the cheesy scrambled eggs. Next, add the sliced avocado. If you cooked sausage, add that too. Top everything with a handful of fresh arugula or baby spinach. This adds a nice crunch and bright color. If you like it spicy, drizzle some hot sauce on top. Place the top half of the croissant over your sandwich and press down gently. Serve it warm and enjoy your tasty breakfast delight! To make the best scrambled eggs, use fresh eggs. Start by whisking eggs with whole milk. This mixture adds creaminess. Season it well with salt and pepper. Cook the eggs on low heat. Stir gently, so they stay soft. Remove them from heat when they look just set. The residual heat will finish cooking them perfectly. Use large, buttery croissants for the best flavor. Look for croissants that are flaky and golden. Fresh croissants from a bakery are ideal. If you use frozen ones, let them thaw first. A good croissant adds texture and taste to your sandwich. - Using different cheeses: Try cheddar, mozzarella, or even pepper jack. Each cheese brings a new taste. You can mix different cheeses, too. - Adding spices or herbs: Fresh herbs like chives or dill can brighten your dish. A sprinkle of paprika or a dash of hot sauce can add depth. Experiment with your favorites to find what you love best. These tips can help you create a breakfast croissant sandwich that is simple, tasty, and fun to eat. Pro Tips Use Fresh Ingredients: Always opt for fresh eggs and ripe avocados to enhance the overall flavor of your breakfast croissants. Perfectly Cooked Eggs: Stir the eggs gently while cooking to ensure they remain soft and creamy; avoid overcooking for the best texture. Customize Your Cheese: Experiment with different cheese blends such as feta or pepper jack for a unique twist on the classic cheesy flavor. Add More Veggies: Consider adding sautéed bell peppers, mushrooms, or tomatoes for an extra boost of nutrition and flavor. {{image_4}} To make a vegetarian breakfast croissant sandwich, skip the sausage. Instead, load your sandwich with more veggies. Try adding sautéed mushrooms, bell peppers, or even some fresh tomatoes. These will add great flavor and color. For a vegan version, replace the eggs with tofu. Use firm tofu, and scramble it like eggs. Add a splash of plant milk and season it with turmeric for color. Instead of cheese, use a vegan cheese or skip it entirely. Top with avocado and greens for a yummy meal. - Adding herbs like chives or dill: Fresh herbs can elevate your sandwich. Chives add a mild onion flavor, while dill offers a fresh, tangy note. Just sprinkle them in the egg mixture or on top. - Using different greens: Swap arugula or spinach for kale or watercress. Each green brings its own taste and texture. Experiment to find your favorite green for this tasty sandwich. To keep your breakfast croissant sandwiches fresh, store them in an airtight container. This will help avoid sogginess. Place them in the fridge if you plan to eat them within a few days. They should stay good for up to 3 days. If you have just the egg mixture left, store it in a separate container. It can last about 2 days in the fridge. When you're ready to enjoy your leftover sandwich, heat it gently. You can use a toaster oven for best results. Set it to 350°F (175°C) for about 10 minutes. This will warm the sandwich and keep it crispy. If you choose to use a microwave, do so for about 30 seconds to 1 minute. Just keep in mind that the croissant may get a bit soft. If you want to save your sandwiches for a longer time, freezing is a great option. Wrap each sandwich tightly in plastic wrap, then place them in a freezer bag. They can last up to 2 months in the freezer. When you want to eat one, let it thaw in the fridge overnight. Then follow the reheating tips to warm it up. Enjoy your delicious breakfast even on busy mornings! It takes about 20 minutes to make a breakfast croissant sandwich. You can split this time into 10 minutes for prep and 10 minutes for cooking. This quick time makes it perfect for busy mornings when you need a tasty meal fast. Yes, you can make the egg mixture ahead of time. Just mix the eggs and milk in a bowl. Store it in the fridge for up to 24 hours. When you’re ready, you can cook the eggs right away. This saves time on busy mornings. Great sides for a breakfast croissant sandwich include: - Fresh fruit like berries or melon - Crispy hash browns or home fries - A light salad with arugula or spinach - Yogurt with granola These sides complement your sandwich and add color to your plate. Yes, you can use other types of bread for your sandwich. Some good options are: - Brioche - Bagels - English muffins - Whole grain bread Each option gives a unique taste and texture. Choose what you like best! This blog post shared how to make a tasty breakfast croissant sandwich. We covered ingredients like eggs, cheese, and avocado. I showed you how to cook the eggs and, if you choose, sausage. We also discussed tips, variations, and storage. In closing, this sandwich is easy to customize and perfect for busy mornings. Enjoy experimenting with flavors and making it your own. Try it out and delight in the deliciousness!
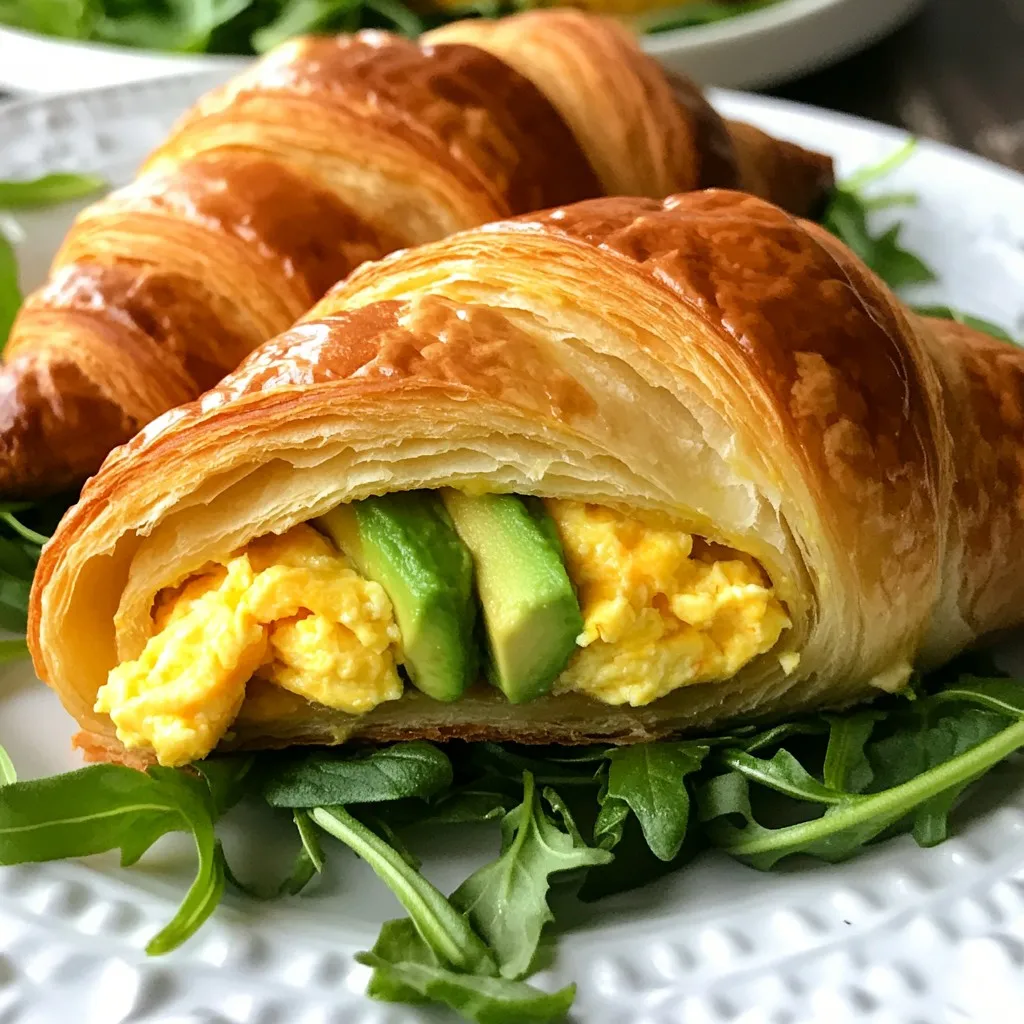
Breakfast Croissant Sandwich Simple and Delicious Meal
Start your day right with a breakfast croissant sandwich—simple, delicious, and filled with flavor! In this post, I’ll share all the tips, ingredients, and easy
This Tater Tot Sausage Breakfast Casserole is a game changer for any morning. It combines crispy tater tots with savory sausage for pure joy. You can make it for brunch, breakfast, or any time you want comfort food. What do you need to make this casserole? - 32 oz. frozen tater tots - 1 lb. breakfast sausage, crumbled - 6 large eggs - 1 cup milk - 1 cup shredded cheddar cheese - 1/2 cup diced bell peppers - 1/2 cup diced onions - 1/2 teaspoon garlic powder - 1/2 teaspoon smoked paprika - Salt and black pepper to taste - Fresh parsley, chopped, for garnish How do you prepare the casserole? Start by preheating your oven to 375°F (190°C). This step ensures your casserole cooks evenly. Next, cook the crumbled breakfast sausage in a skillet over medium heat. This takes about 5-7 minutes. Keep stirring to break it into smaller pieces. Once it's brown, drain any excess grease. In a large bowl, whisk together the eggs and milk. Add garlic powder, smoked paprika, salt, and black pepper. Mix until smooth. Now, take a greased 9x13-inch baking dish and spread half of the frozen tater tots across the bottom. This base layer gives a great texture. Evenly distribute the cooked sausage over the tater tots. Next, sprinkle the diced bell peppers and onions across the sausage. Pour the egg mixture over everything. Make sure it seeps into all the layers. This helps in cooking them evenly. With the remaining tater tots, create a second layer on top. Press them down gently to help them stick to the egg mixture. Finally, sprinkle the shredded cheddar cheese over everything. Bake the casserole for 35-40 minutes. It's done when the cheese is melted and bubbly, and the casserole feels firm. Let it cool for a few minutes, then cut it into squares. Garnish with fresh parsley for a pop of color. Serve it warm straight from the dish. You can even add hot sauce for extra flavor. This dish makes mornings feel special and is sure to please everyone! {{ingredient_image_2}} This blog explored key tips on improving your daily productivity. We discussed setting clear goals, limiting distractions, and prioritizing tasks. Remember, small changes can lead to big results. It’s not just about working harder; it’s about working smarter. By applying these tips, you can boost your focus and reach your goals faster. Stay consistent, and you’ll see progress. Your time is valuable, so make it count!
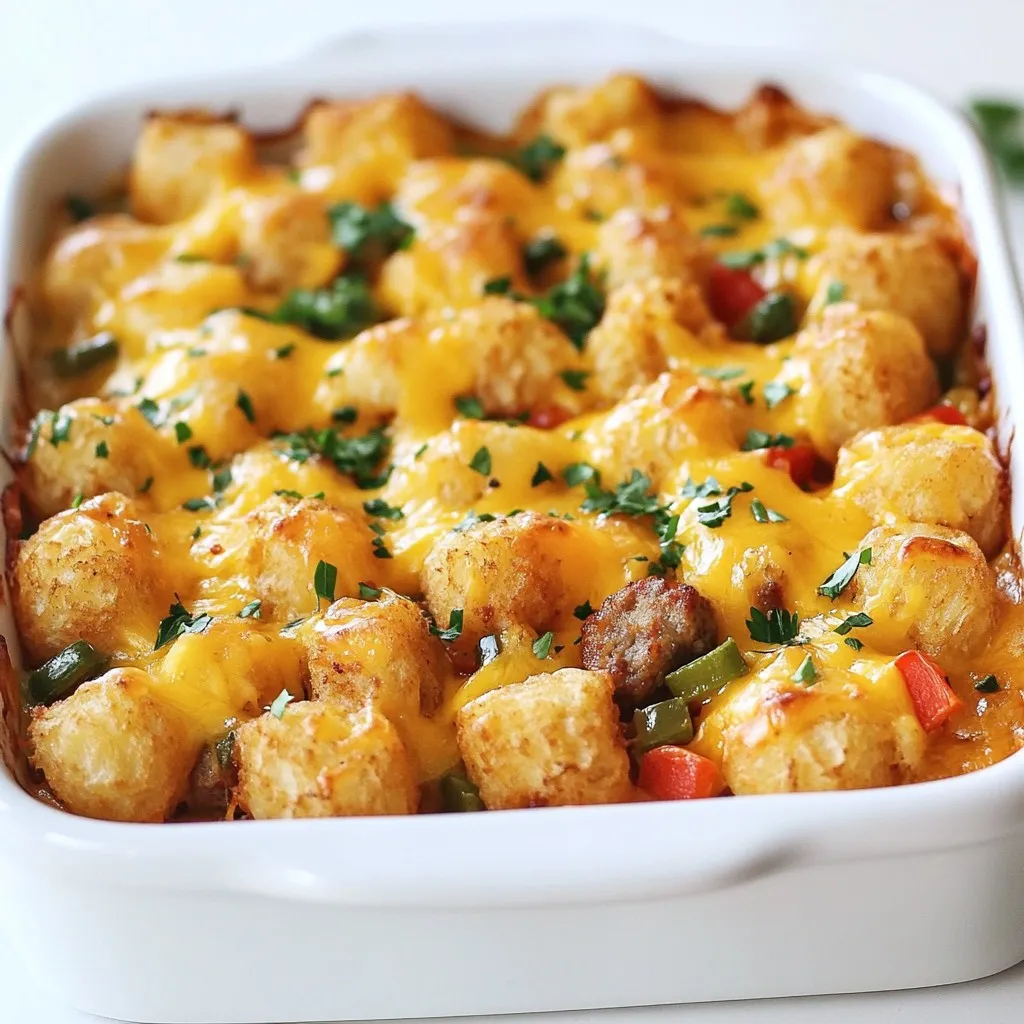
Tater Tot Sausage Breakfast Casserole Delight
Looking for a breakfast that’s easy and tasty? You’ve found it! My Tater Tot Sausage Breakfast Casserole is a crowd-pleaser. It mixes crispy tater tots,
To make this tasty wrap, you need a few key items: - 1 large tortilla (flour or whole wheat) - 2 large eggs - 1/4 cup milk - 1/2 cup shredded cheese (cheddar or your choice) - 1/4 cup diced bell peppers (mixed colors for visual appeal) - 1/4 cup chopped fresh spinach - 1/4 avocado, sliced thin - Salt and fresh cracked black pepper to taste - 1 tablespoon olive oil or butter - Hot sauce (optional) for a flavorful kick You can change up the wrap with these fun extras: - Cooked bacon or sausage for added protein - Diced onions for extra flavor - Fresh herbs like cilantro or parsley - Sliced jalapeños for a spicy kick - Different types of cheese like pepper jack or feta - Other veggies like mushrooms or zucchini This wrap is not just tasty, but also packed with good stuff: - Calories: About 450 per serving - Protein: Roughly 25 grams - Fat: About 30 grams (depends on cheese and oil) - Carbohydrates: Around 30 grams - Fiber: About 5 grams (with the tortilla and veggies) - Vitamins: Rich in vitamins from the spinach and peppers This wrap offers a great balance of protein, healthy fats, and carbs. It’s a perfect start to your day! {{ingredient_image_2}} Start by grabbing a medium bowl. Crack two large eggs into it. Add 1/4 cup of milk, a pinch of salt, and some black pepper. Using a whisk, mix well. You want it to be frothy and blended nicely. This will be the base for your wrap. Next, heat a non-stick skillet over medium heat. Add one tablespoon of olive oil or butter. Let it melt and coat the skillet. Once hot, toss in 1/4 cup of diced bell peppers. Sauté for 2-3 minutes. Stir them until they are tender and bright. This adds color and flavor to your wrap. Now, lower the heat a bit and pour in your egg mixture over the peppers. Use a spatula to gently stir the eggs. Cook for about 3-4 minutes. You want the eggs to be set, not runny. When they are ready, fold in 1/4 cup of chopped spinach and half of the 1/2 cup of shredded cheese. Stir until the cheese melts and mixes well. Take your large tortilla and lay it flat on a plate. Spoon the egg mix into the center. Layer it with thin slices of 1/4 avocado and the remaining cheese on top. Now, fold the sides of the tortilla over the filling. Starting from the bottom, roll the tortilla up tightly. This helps hold all the tasty stuff inside. If you like, put the wrap back in the skillet. Toast it over medium heat for 1-2 minutes on each side. You want the outside to be golden and crispy. Once done, take it out and slice it in half diagonally. If you like some heat, drizzle hot sauce on top before serving. Enjoy your tasty breakfast wrap! To scramble eggs well, start with fresh eggs. Crack them into a bowl and whisk until mixed. Add milk for creaminess. Mix in salt and pepper to taste. Heat a non-stick skillet over medium heat. Use olive oil or butter to coat the pan. This helps prevent sticking. Pour in the egg mix and stir gently. Cook until the eggs are soft and fluffy. Don't overcook. Remove from heat just before they look done. They will keep cooking off the heat. Pick a large tortilla, either flour or whole wheat. Flour tortillas are soft and pliable. Whole wheat adds a nutty flavor and more fiber. Make sure it’s fresh. Check the expiration date. A fresh tortilla wraps better and tastes great. You can warm tortillas in the microwave for a few seconds. This makes them easier to fold and roll. Store leftover ingredients properly to keep them fresh. Place unused eggs in their carton in the fridge. Keep chopped veggies in a sealed container. They stay crisp longer this way. Shredded cheese can also go in a container. If you have leftover wraps, wrap them tightly in foil or plastic wrap. Store in the fridge for up to 2 days. Pro Tips Fresh Ingredients: Use fresh, high-quality ingredients for the best flavor and texture in your wrap. Customize Your Fillings: Feel free to add other vegetables or proteins like diced tomatoes, mushrooms, or cooked sausage to suit your taste. Perfectly Toasted: Toasting the wrap in the skillet gives it a crispy exterior and helps to meld the flavors together. Make It Ahead: Prepare the filling in advance and store it in the fridge for a quick breakfast option during busy mornings. {{image_4}} For a tasty vegetarian twist, skip the eggs. Use a mix of sautéed veggies instead. Try mushrooms, zucchini, or onions. Add your favorite cheese for a creamy touch. Spinach gives a fresh taste. You can also add beans for protein. This wrap is colorful and full of flavor. If you love heat, add jalapeños or hot sauce. You can mix diced spicy sausage or chorizo into the egg mixture. A sprinkle of cayenne pepper gives a nice kick without overwhelming the dish. Top with pepper jack cheese for an extra layer of zest. Enjoy the spicy goodness in every bite! For a low-carb wrap, swap out the tortilla for lettuce leaves. Use large romaine or iceberg leaves to hold all the filling. You can also use a low-carb tortilla. This keeps the meal light and fresh. Load it up with eggs, cheese, and veggies. You still get great taste without the carbs! To store your leftover wraps, let them cool first. Wrap each one in plastic wrap or foil. This keeps them fresh. Place them in an airtight container. Store in the fridge for up to three days. If you want to keep them longer, freezing is a great option. To reheat, take the wrap from the fridge. Unwrap it and place it in a skillet on medium heat. Heat for about 2-3 minutes on each side. You can also use a microwave. Place it on a plate and cover it with a damp paper towel. Heat for 30-45 seconds. To freeze, wrap each cool tortilla tightly in plastic wrap. Then, place them in a freezer-safe bag. Make sure to remove as much air as possible. They can stay in the freezer for up to a month. When you're ready, thaw in the fridge overnight before reheating. This way, you always have a tasty breakfast ready! Yes, you can prepare the filling ahead of time. Cook the eggs and veggies, then store them in the fridge. When ready to eat, just wrap and toast it. This saves time on busy mornings. You can add many tasty ingredients! Try cooked bacon, sausage, or ham for protein. You can also use mushrooms, onions, or tomatoes for more flavor. Mixing in different cheeses can also change the taste. Yes, you can make this wrap in the microwave. Cook the eggs and veggies in a microwave-safe bowl. Mix them well, then put the filling in the tortilla. Roll it up and heat it for about 30 seconds. To make a healthier wrap, use whole wheat tortillas. You can also add more veggies and skip the cheese. Try using egg whites or a plant-based egg substitute. This will lower calories and add nutrients. Look out for trends like the "wrap hack" where you cut a slit in the tortilla. This lets you layer different fillings and fold them easily. You can also find creative ways to use breakfast wraps in bowls or as burritos! This blog post covered how to make an easy TikTok breakfast tortilla wrap. We discussed main and optional ingredients, plus their nutrition. I shared step-by-step instructions, helpful tips, and tasty variations. You also learned about storing your wraps and reheating them. Final thoughts: This wrap is versatile and fun. It's perfect for breakfast or lunch. Get creative with your ingredients and enjoy every bite!
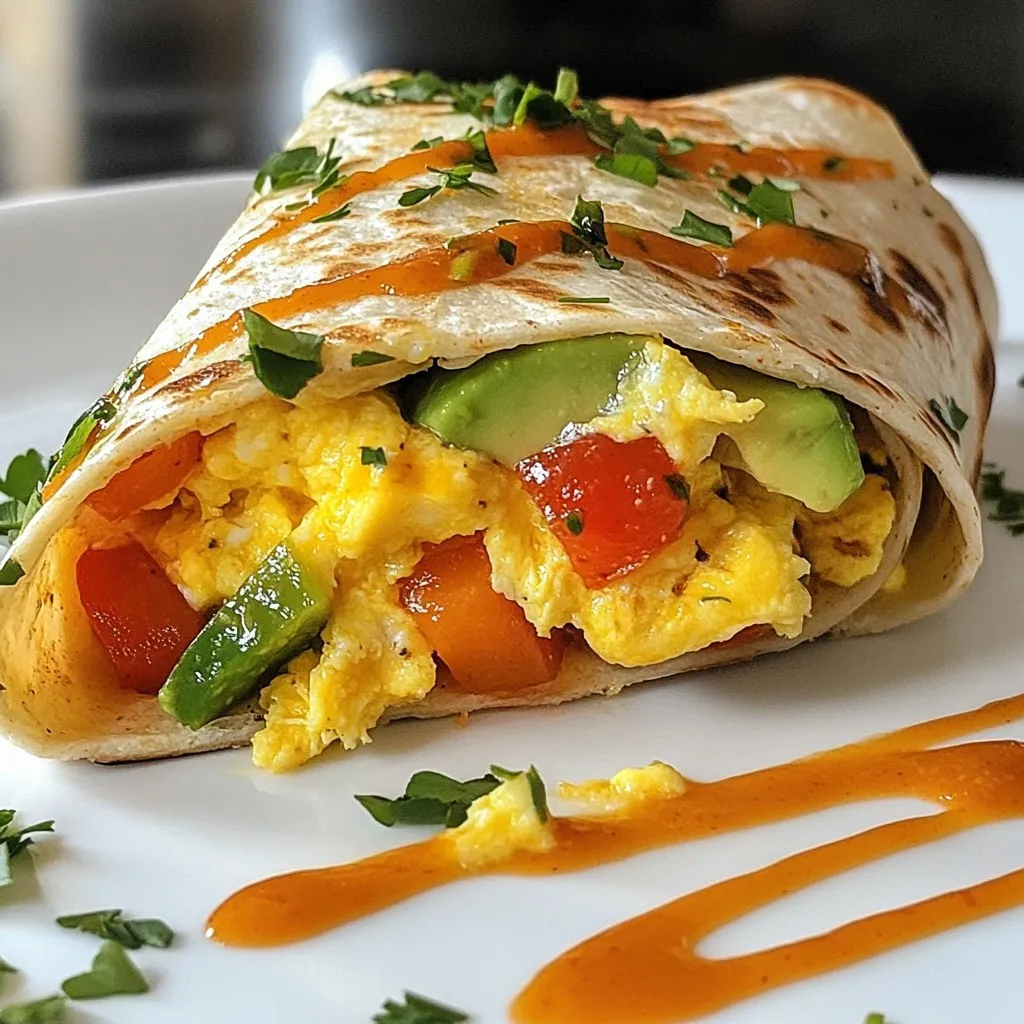
TikTok Breakfast Tortilla Wrap Easy and Quick Recipe
Looking for a quick and tasty breakfast idea? The TikTok Breakfast Tortilla Wrap is your answer! This simple recipe lets you customize your wrap with
To make tasty sausage pancake muffins, you need the following ingredients: - 1 cup all-purpose flour - 2 tablespoons granulated sugar - 2 teaspoons baking powder - 1/2 teaspoon baking soda - 1/4 teaspoon salt - 1 cup buttermilk (room temperature) - 1 large egg (room temperature) - 2 tablespoons unsalted butter, melted - 1 cup cooked breakfast sausage, crumbled - 1/2 cup sharp cheddar cheese, shredded - 1/4 cup green onions, finely chopped - Cooking spray or muffin liners These ingredients blend together to create a deliciously savory muffin. The buttermilk gives a rich flavor and soft texture. The breakfast sausage adds a hearty bite, while the cheddar and green onions bring in sharpness and freshness. Remember to use room temperature ingredients. This helps everything mix well for a perfect batter. Get ready to enjoy a fun twist on breakfast! {{ingredient_image_2}} 1. Preheat your oven to 350°F (175°C). Prepare a muffin tin by greasing it with cooking spray or using muffin liners. This will help the muffins not stick. 2. In a large mixing bowl, combine 1 cup of all-purpose flour, 2 tablespoons of granulated sugar, 2 teaspoons of baking powder, 1/2 teaspoon of baking soda, and 1/4 teaspoon of salt. Whisk these dry ingredients together until they blend well. 3. In another bowl, mix together 1 cup of buttermilk, 1 large room-temperature egg, and 2 tablespoons of melted unsalted butter. Whisk until smooth and creamy. 4. Gradually pour the wet mixture into the dry ingredients. Stir gently with a spatula or wooden spoon. Mix just until combined; it's okay if the batter is a bit lumpy. 5. Carefully fold in 1 cup of crumbled breakfast sausage, 1/2 cup of shredded sharp cheddar cheese, and 1/4 cup of finely chopped green onions. This mix will add great flavor and texture. 6. Using a spoon or ice cream scoop, fill each muffin cup about two-thirds full with the batter. This allows the muffins to rise nicely. 7. Bake in your preheated oven for 18-20 minutes. The muffins will turn golden brown. To check if they are ready, insert a toothpick in the center. If it comes out clean, they are done. 8. Once baked, let the muffins cool in the tin for around 5 minutes. Then, move them to a wire rack to cool completely. Enjoy these tasty sausage pancake muffins warm, or serve them with syrup or sour cream for extra flavor! - Achieving the right batter consistency: Mix the dry and wet ingredients until just combined. A few lumps in the batter are okay. This keeps the muffins light and fluffy. - Keeping muffins moist: Use buttermilk instead of regular milk. It adds moisture and richness. Also, don't overmix your batter. Overmixing can lead to dense muffins. - Ensuring even baking: Fill each muffin cup about two-thirds full. This helps them rise evenly. Rotate your muffin tin halfway through baking to ensure all muffins bake at the same rate. - Serving warm with syrup or sour cream: These muffins taste great on their own, but you can elevate them. Drizzle some warm maple syrup on top for a sweet touch. For a savory twist, try a dollop of sour cream. - Creative plating ideas: Stack two or three muffins on a plate. Add some fresh fruit on the side. This makes for a colorful and inviting breakfast spread. You can also sprinkle some chopped green onions on top for a pop of color. Pro Tips Use Room Temperature Ingredients: Ensure your buttermilk and egg are at room temperature before mixing; this helps the batter combine more seamlessly and results in a lighter muffin. Don't Overmix: Mix the batter just until combined to prevent tough muffins. A few lumps are okay as they will bake out. Customize Your Add-Ins: Feel free to experiment with other mix-ins like diced bell peppers, jalapeños, or different types of cheese for a unique flavor twist. Check for Doneness: Insert a toothpick in the center of a muffin to check for doneness. It should come out clean or with a few moist crumbs, but not wet batter. {{image_4}} You can make sausage pancake muffins even more exciting. Here are some ideas: - Adding Vegetables: Toss in diced bell peppers or fresh spinach. They add color and nutrients. - Exploring Cheese Options: Try using pepper jack or mozzarella instead of cheddar. This change adds a new taste. - Using Different Types of Sausage: Swap pork sausage for turkey or chicken sausage. Each type brings its own flavor twist. I know some folks have special diets. Here are smart swaps: - Gluten-Free Alternatives: Use gluten-free flour in place of all-purpose flour. This lets everyone enjoy these muffins. - Low-Fat Substitutions: Choose low-fat buttermilk and reduced-fat cheese. You still get great taste with fewer calories. To keep your sausage pancake muffins fresh, store them in an airtight container. This helps to trap moisture and keep them soft. You can keep them at room temperature for about two days. If you want to save them longer, freezing is a great option. To freeze, let the muffins cool completely. Then, wrap each muffin tightly in plastic wrap. Place the wrapped muffins in a freezer bag or a container. This way, they can last up to three months. When you're ready to enjoy them, just thaw at room temperature. Reheating muffins is easy and keeps them tasty. To heat, place the muffin in a microwave for about 15-20 seconds. This will warm them without making them tough. If you want a crispy outside, warm them in the oven. Set your oven to 350°F (175°C). Heat for about 5-10 minutes. This will revive their soft texture and bring back the great flavor. Can I use pre-cooked sausage? Yes, you can use pre-cooked sausage. Just crumble it into the batter. This saves time and still gives great flavor. How do I know when the muffins are done? Check the muffins around 18 minutes. They should be golden brown. Insert a toothpick in the center; it should come out clean if they are ready. Can I make the batter ahead of time? You can prepare the batter ahead. Just store it in the fridge for up to 24 hours. Stir it gently before using to mix any settled ingredients. What are some dipping sauces for these muffins? These muffins taste great with maple syrup or sour cream. You can also try hot sauce or a sweet chili sauce for extra kick! You learned how to make delicious sausage pancake muffins. We covered the key ingredients, step-by-step instructions, and tips for the perfect bake. You can explore fun flavor twists and smart storage techniques too. Remember, tailoring this recipe to your taste makes it truly yours. Enjoy sharing these muffins warm with family and friends! Cooking should always be fun and rewarding. Dive in and enjoy every bite!
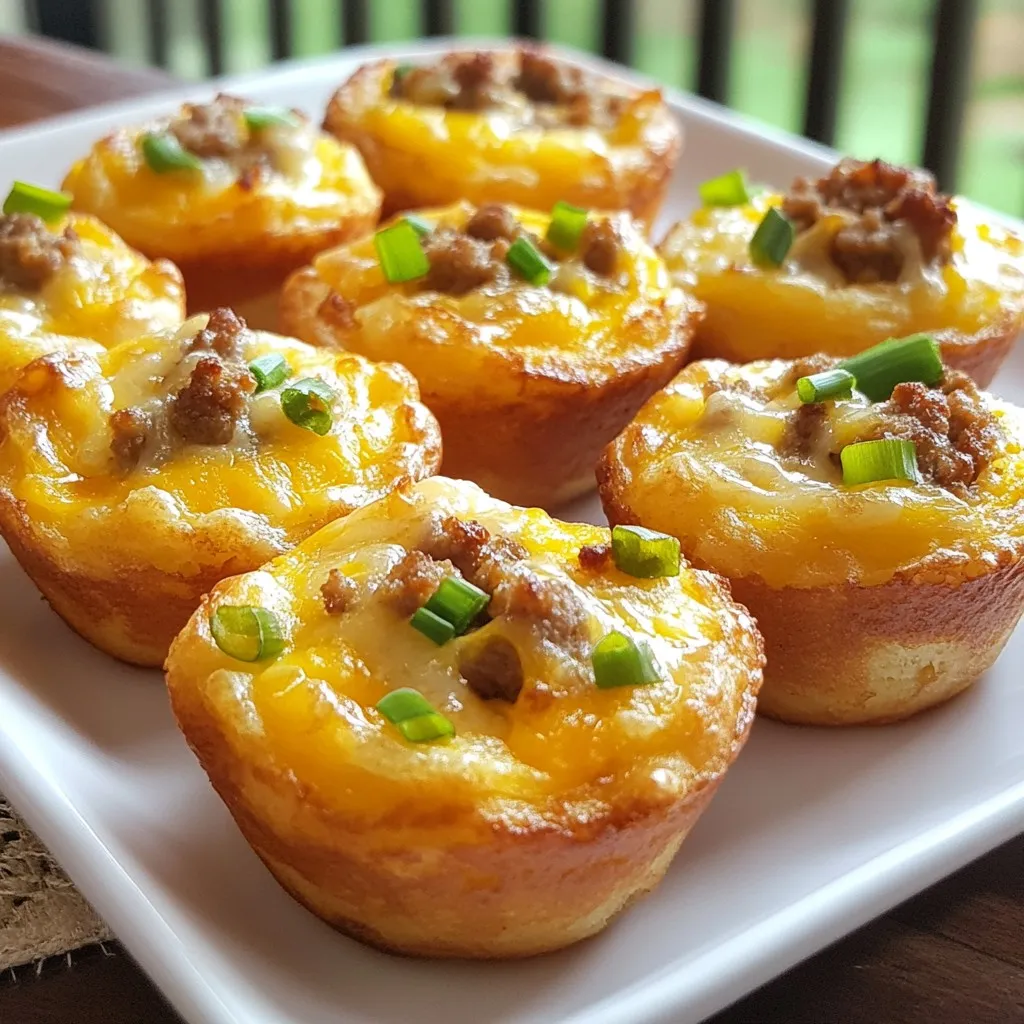
Sausage Pancake Muffins Tasty Breakfast Treats
Looking for a quick and tasty breakfast? Sausage pancake muffins are the perfect solution! These snacks blend savory sausage and fluffy pancakes into a handheld
To make these tasty cinnamon roll protein muffins, gather the following items: - 1 cup rolled oats - 1/2 cup vanilla protein powder - 1/2 cup unsweetened applesauce - 1/4 cup almond milk (or your preferred milk) - 1/4 cup pure maple syrup - 1 teaspoon ground cinnamon - 1 teaspoon baking powder - 1/2 teaspoon baking soda - 1/4 teaspoon salt - 1/2 cup chopped walnuts or pecans (optional) - 1/4 cup raisins or dried cranberries (optional) - Additional cinnamon and sugar mix for topping These muffins pack a punch of nutrition. The rolled oats provide fiber, which helps with digestion. Fiber also keeps you feeling full longer. The protein powder boosts your protein intake, supporting muscle health. Applesauce adds moisture and natural sweetness, while maple syrup gives quick energy. Ground cinnamon can help lower blood sugar levels. Nuts add healthy fats, and dried fruit brings in vitamins and minerals. You can easily swap ingredients to meet your needs. If you have a nut allergy, use oat milk instead of almond milk. For those avoiding gluten, choose gluten-free oats. If you dislike applesauce, mashed bananas work well. You can also skip the protein powder or use a plant-based option. Feel free to switch up the nuts and dried fruits based on what you like or have on hand. {{ingredient_image_2}} To make these delicious Cinnamon Roll Protein Muffins, start by gathering your ingredients. You will need rolled oats, protein powder, applesauce, almond milk, maple syrup, cinnamon, baking powder, baking soda, salt, nuts, and dried fruit. 1. Preheat the Oven: Heat your oven to 350°F (175°C). 2. Prepare the Muffin Tin: Line a muffin tin with paper liners or grease it lightly. 3. Mix Dry Ingredients: In a large bowl, whisk together: - 1 cup rolled oats - 1/2 cup vanilla protein powder - 1 teaspoon ground cinnamon - 1 teaspoon baking powder - 1/2 teaspoon baking soda - 1/4 teaspoon salt 4. Combine Wet Ingredients: In another bowl, mix well: - 1/2 cup unsweetened applesauce - 1/4 cup almond milk - 1/4 cup pure maple syrup 5. Combine Wet and Dry Mixes: Pour the wet mix into the dry mix. Stir gently until combined. Don’t overmix! 6. Add Nuts and Fruit: If you want, fold in 1/2 cup chopped nuts and 1/4 cup raisins or cranberries. 7. Fill the Muffin Cups: Use a spoon or scoop to fill each cup about two-thirds full. 8. Prepare the Topping: Mix 1 tablespoon sugar with 1 teaspoon cinnamon. Sprinkle this blend on top of each muffin. 9. Bake: Place the muffin tin in the oven. Bake for 18-20 minutes. Check if done by inserting a toothpick in the center. If it comes out clean, they are ready! 10. Cool: Let the muffins cool in the pan for about 5 minutes. Then, move them to a wire rack to cool completely. - Don't Overmix: Stir just until the wet and dry ingredients combine to keep them fluffy. - Use Room Temperature Ingredients: This helps the muffins rise better. - Check for Doneness: Use a toothpick to ensure they are fully baked. If it comes out wet, bake for a few more minutes. - Let Them Cool: Cooling on a wire rack helps maintain their texture and flavor. Enjoy these muffins warm, maybe with a drizzle of maple syrup or a touch of nut butter! When making Cinnamon Roll Protein Muffins, watch out for a few common errors. First, don't overmix the batter. This can make the muffins tough. Mix just until you see no dry flour. Second, check your oven temperature. An oven that is too hot may burn the tops. Always use an oven thermometer for accuracy. Lastly, be sure to fill the muffin cups only two-thirds full. This gives them space to rise and prevents overflow. To make your muffins even tastier, consider adding a few extras. Chopped walnuts or pecans add a nice crunch. You can also mix in raisins or dried cranberries for sweetness. If you want a spicier flavor, add a pinch of nutmeg. For a richer taste, swap half the almond milk for coconut milk. Lastly, top the muffins with a sprinkle of cinnamon and sugar mix before baking for a sweet crust. Keep your muffins fresh by storing them in an airtight container. This helps keep moisture in. They last about three days at room temperature. If you want to save them longer, freeze the muffins. Place them in a freezer bag and remove as much air as possible. They freeze well for up to three months. When you want to eat one, just heat it in the microwave for about 30 seconds. Enjoy your tasty treat! Pro Tips Use Fresh Ingredients: Ensure your baking powder and baking soda are fresh for the best rise and fluffiness in your muffins. Customize Your Add-Ins: Feel free to swap out nuts and dried fruits with your favorites, such as chocolate chips or coconut flakes, for a personalized touch. Check for Doneness: Always perform the toothpick test a minute or two before the suggested baking time to avoid overbaking. Storage Tips: Store leftover muffins in an airtight container at room temperature for up to 3 days, or freeze for longer preservation. {{image_4}} You can change the flavors of your muffins easily. Try adding different fruits like blueberries or bananas. These fruits will add both taste and moisture. You can also mix in spices like nutmeg or ginger for extra warmth. If you like a sweeter muffin, add a bit more maple syrup. To make these muffins gluten-free, swap the rolled oats for gluten-free oats. This small change keeps the taste while making it safe for those with gluten issues. For a vegan version, use plant-based protein powder and a nut milk option. You can also replace the eggs with flaxseed meal mixed with water. This makes a great egg substitute. If you want smaller muffins, use a mini muffin tin. This will help you control portion sizes and create bite-sized treats. You can also freeze some muffins for later. This way, you have healthy snacks ready whenever you want. Just remember to take them out to thaw before eating! To keep your cinnamon roll protein muffins fresh, store them in an airtight container. This will help them stay moist and tasty. Place a paper towel inside the container. The towel absorbs any extra moisture. Keep them at room temperature for up to 3 days. If you want to keep them longer, consider freezing. To freeze these muffins, let them cool completely first. Wrap each muffin in plastic wrap or foil. Place the wrapped muffins in a freezer bag. Be sure to remove as much air as possible before sealing. They can last in the freezer for up to 3 months. When you are ready to enjoy one, just take it out and thaw it at room temperature. To reheat your muffins, use a microwave or oven. If using a microwave, heat each muffin for about 15-20 seconds. For the oven, preheat it to 350°F (175°C), and warm the muffins for about 5-10 minutes. This will help restore their fluffy texture and delicious taste. Enjoy them warm for the best flavor! Yes, you can make these muffins without protein powder. If you skip the protein powder, replace it with more rolled oats. This keeps the texture right. You may want to add a bit of extra liquid, like almond milk, to balance it. The muffins will still taste great, but they will have less protein. To make these muffins less sweet, you can reduce the maple syrup. Try cutting it down to 2 tablespoons instead of 1/4 cup. You can also skip the cinnamon and sugar topping. If you want, use unsweetened applesauce for a less sweet base. Experiment to find your perfect balance. If you don’t have applesauce, you can use mashed bananas. They add moisture and a nice flavor. Yogurt is another good option. You can use plain Greek yogurt or any other type you like. Both will keep your muffins moist and tasty. You learned about key ingredients and their benefits for your muffins. We explored substitutions for allergies and preferences. The step-by-step guide showed how to bake perfect muffins every time. We also discussed common mistakes and tips to enhance flavor. In the end, you can enjoy many muffin variations, from gluten-free to fruit-filled. Store them properly for freshness, and remember the reheating tips. Use the FAQs to solve any last-minute concerns. Now, you have all the tools to create delicious muffins that suit your taste and needs.
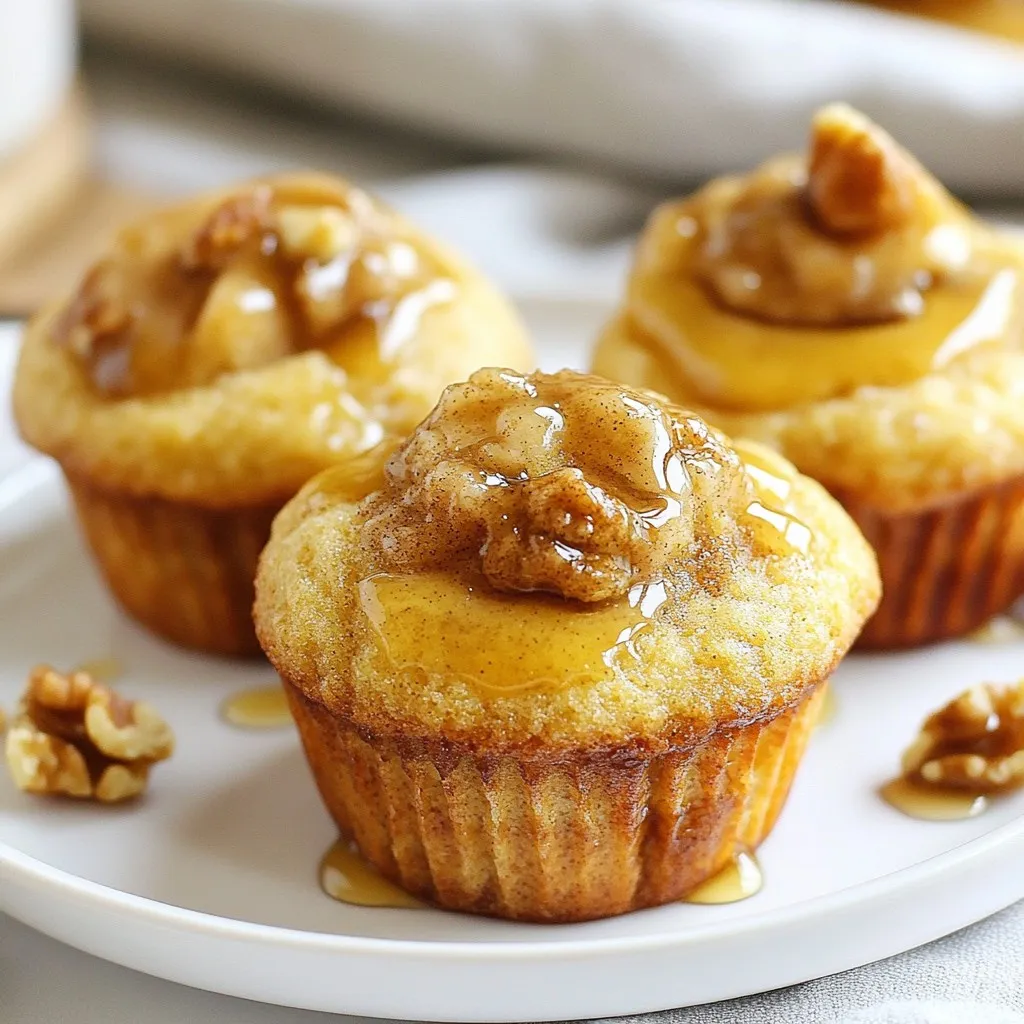
Cinnamon Roll Protein Muffins Easy and Healthy Recipe
Craving a sweet treat that’s easy to make and healthy? I’ve got the perfect solution for you: Cinnamon Roll Protein Muffins! These tasty muffins offer