Breakfast

- 1 cup all-purpose flour - 2 tablespoons granulated sugar - 2 teaspoons baking powder - 1/2 teaspoon baking soda - 1/4 teaspoon fine sea salt - 1 cup buttermilk (or milk mixed with 1 tablespoon vinegar) - 1 large egg, preferably at room temperature - 2 tablespoons unsalted butter, melted (plus extra for greasing the skillet) - 1 teaspoon pure vanilla extract - Fresh berries, like strawberries, blueberries, or raspberries - Maple syrup Gather these items before you start. The dry ingredients make the base for your fluffy pancakes. The wet ingredients add moisture and flavor. Fresh berries and maple syrup make great toppings. I love mixing and matching flavors to create breakfast fun. {{ingredient_image_2}} Start by sifting the flour and dry ingredients. In a big bowl, mix together: - 1 cup all-purpose flour - 2 tablespoons granulated sugar - 2 teaspoons baking powder - 1/2 teaspoon baking soda - 1/4 teaspoon fine sea salt Sifting helps break up any lumps. This step is key for fluffy pancakes. It makes sure the ingredients mix evenly and rise well. In another bowl, whisk together your wet ingredients. Use: - 1 cup buttermilk (or milk mixed with 1 tablespoon vinegar) - 1 large egg - 2 tablespoons unsalted butter, melted - 1 teaspoon pure vanilla extract Whisk until smooth. This mix adds flavor and moisture to your pancakes. Make a well in the center of the dry mix. Pour the wet mixture into this well. Use a spatula to gently fold the batter. It’s okay if some lumps stay. Overmixing makes pancakes tough, so handle the batter lightly. Let the batter rest for about 10 minutes. This helps the baking powder work better. Resting gives your pancakes that cloud-like fluffiness. First, preheat your skillet over medium heat. Add a small pat of unsalted butter to coat the skillet. Pour about 1/4 cup of batter for each pancake. Cook until bubbles form on the surface and the edges look set. This takes about 2-3 minutes. When ready, carefully flip the pancakes with a spatula. Cook for another 1-2 minutes until golden brown on both sides. Keep cooked pancakes warm while you finish the rest. To make fluffy pancakes, let the batter rest. This step is key. Resting gives the baking powder time to work. I like to wait about 10 minutes. This helps the pancakes rise higher. Avoid overmixing the batter. Mix just until combined. Small lumps are fine. Overmixing can make the pancakes tough. You want them light and airy! Keeping the right temperature on your skillet is important. Heat it to medium. Too hot will burn the pancakes. Too low will make them soggy. Add a small pat of butter to the skillet. Swirl it around to coat the surface. This helps the pancakes cook evenly. Stacking pancakes can be fun! First, place one pancake on a plate. Then, add another on top. You can use three or four for a tall stack. Top the pancakes with fresh berries. I love strawberries, blueberries, or raspberries. A drizzle of maple syrup adds sweetness. For extra flair, sprinkle powdered sugar on top. You can also add a dollop of whipped cream! Pro Tips Use Room Temperature Ingredients: Allow your egg and buttermilk to come to room temperature before mixing. This helps create a smoother batter and contributes to fluffier pancakes. Don’t Overmix the Batter: When combining wet and dry ingredients, mix just until combined. Overmixing can lead to tough pancakes instead of the desired fluffy texture. Let the Batter Rest: Allowing the batter to rest for about 10 minutes allows the gluten to relax and helps the pancakes rise better during cooking. Perfect Cooking Temperature: Cook your pancakes on medium heat to ensure they cook evenly without burning. Adjust the heat as necessary to maintain a steady cooking temperature. {{image_4}} You can make fluffy pancakes even more fun by adding flavor. Here are two great options: - Chocolate chips: Stir in 1/2 cup of chocolate chips into the batter. This adds sweetness and a rich taste. - Nuts: Toss in a handful of chopped nuts, like walnuts or pecans. They add crunch and a nutty flavor. You can easily modify this recipe to fit your diet. Here are some options: - Gluten-free substitutes: Use 1 cup of gluten-free flour blend instead of all-purpose flour. This keeps the pancakes light and fluffy. - Dairy-free options: Substitute buttermilk with almond milk or oat milk mixed with a bit of vinegar. This works well for a dairy-free pancake. Try these fun serving ideas to change up your pancake experience: - Savory pancake options: Add herbs like chives or spinach into the batter. Serve with a dollop of sour cream for a savory twist. - Breakfast parfait ideas: Layer pancakes with yogurt and fresh fruit in a glass. This makes a pretty and tasty breakfast parfait! - Refrigeration guidelines: To keep your fluffy pancakes fresh, place them in an airtight container. Store them in the fridge for up to three days. Make sure they are completely cool before sealing to avoid sogginess. - Freezing instructions: For longer storage, you can freeze pancakes. Stack them with parchment paper between each one. Place the stack in a freezer-safe bag. They will stay good for up to three months. - Best methods for reheating pancakes: To reheat, use the microwave for quick results. Heat them on a plate for about 30 seconds. For a crispier texture, use a skillet. Warm them on low heat for about one minute on each side. Enjoy your pancakes warm and fluffy again! Baking powder is key for fluffy pancakes. It creates bubbles that puff up the batter. Resting the batter for about 10 minutes helps too. This wait time lets the baking powder work well. The result? Soft, cloud-like pancakes that rise beautifully. Yes, all-purpose flour works great for fluffy pancakes. It gives a nice texture. Other flours can change the taste and fluffiness. For example, whole wheat flour is denser. Stick with all-purpose for best results. You can add many fun flavors! Fresh fruits like berries or bananas bring sweetness. Spices like cinnamon or nutmeg add warmth. A splash of vanilla or almond extract gives a nice twist. Get creative and make your pancakes unique! This blog post covered key ingredients, step-by-step instructions, tips, variations, storage info, and FAQs for making perfect pancakes. You learned about dry and wet ingredients, how to mix them, and tips for fluffiness. Remember, resting the batter helps achieve that perfect texture. Whether you like sweet or savory, enjoy experimenting with unique flavors. Proper storage keeps leftovers tasty for later. With these insights, you can create delicious pancakes every time. Happy cooking!
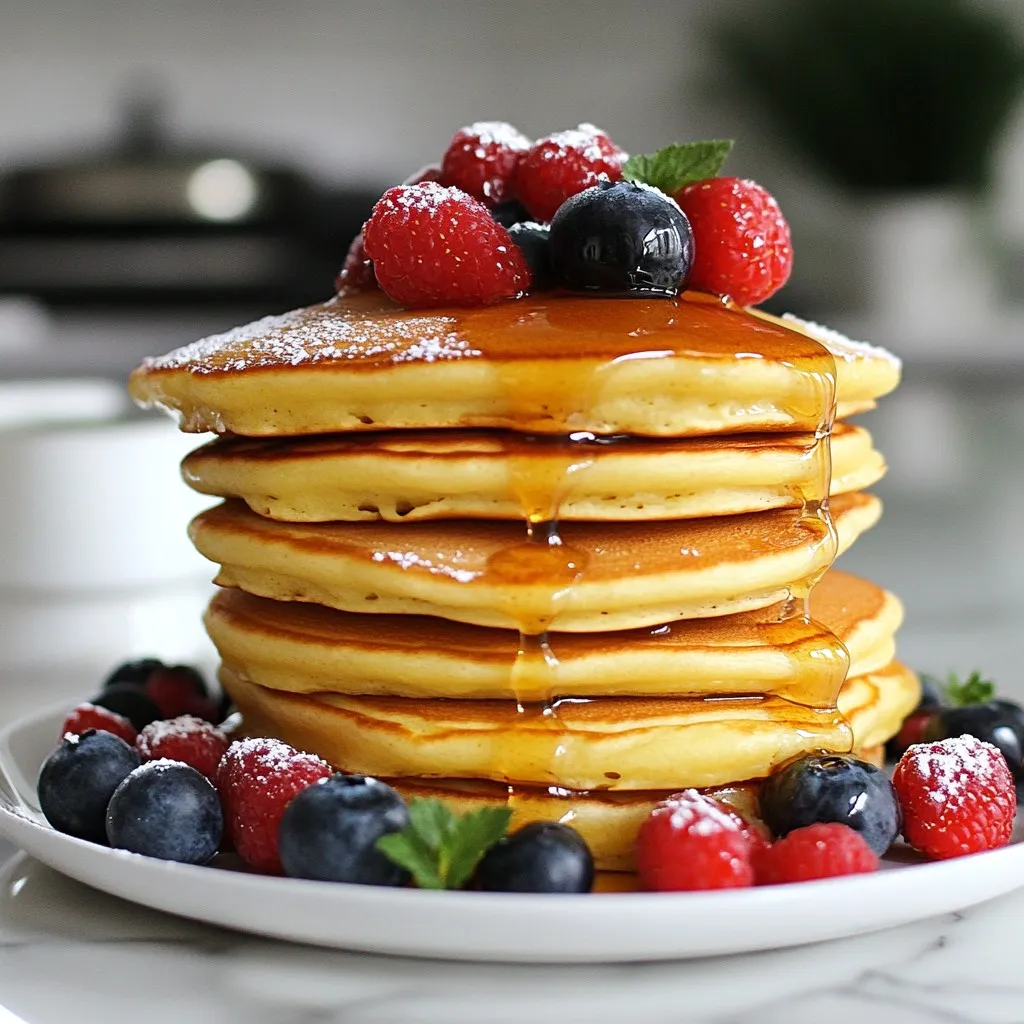
Fluffy Pancakes Delightful Recipe for Breakfast Fun
Are you ready to elevate your breakfast game? In this post, I’ll share my delightful recipe for fluffy pancakes that are light and airy, perfect
To make these tasty breakfast egg muffins, gather these items: - 6 large eggs - 1/2 cup milk - 1 cup fresh spinach, chopped - 1/2 cup bell pepper, diced (choose any vibrant color) - 1/2 cup cherry tomatoes, halved - 1/2 cup shredded cheese (cheddar or feta for a zesty kick) - 1/4 cup green onions, finely chopped - Salt and pepper to taste - 1 teaspoon garlic powder - 1/2 teaspoon dried oregano - Olive oil spray (for greasing the muffin tin) You can add fun flavors to your muffins! Here are some ideas: - Cooked bacon or sausage for a meaty bite - Mushrooms for an earthy flavor - Zucchini for added veggies - Different cheeses like mozzarella or goat cheese - Fresh herbs like basil or parsley for extra freshness Each muffin packs a nutritious punch. Here are some key facts: - Calories: 120 - Protein: 8g - Fat: 8g - Carbohydrates: 3g - Fiber: 1g - Sugar: 1g These muffins are a great way to start your day! {{ingredient_image_2}} First, preheat your oven to 350°F (175°C). This helps the muffins bake evenly. In a large bowl, crack 6 large eggs. Add 1/2 cup of milk, 1 teaspoon of garlic powder, and 1/2 teaspoon of dried oregano. Sprinkle in salt and pepper to taste. Whisk everything together until it's well mixed and frothy. Next, add 1 cup of chopped spinach, 1/2 cup of diced bell pepper, and 1/2 cup of halved cherry tomatoes. Also, stir in 1/2 cup of shredded cheese and 1/4 cup of finely chopped green onions. Mix gently to spread the veggies and cheese evenly. Take a muffin tin and spray it with olive oil. This keeps the muffins from sticking. Carefully pour the egg mixture into the muffin cavities. Fill each one about 3/4 full. This gives the muffins space to rise without spilling over. Now, place your filled muffin tin in the preheated oven. Bake for 18-20 minutes. The muffins are done when they puff up and a toothpick comes out clean when you poke them. Once baked, take them out and let them cool in the tin for about 5 minutes. To remove them, run a knife around the edges. Then, transfer the muffins to a wire rack to cool completely. Enjoy them warm or store them in the fridge for later! To make your breakfast egg muffins fluffy, use fresh eggs. Fresh eggs help create a light texture. Whisk the eggs and milk until they are frothy. This adds air, which helps the muffins rise. Mix your veggies and cheese gently. Overmixing can make the muffins dense. Fill each muffin cup about 3/4 full. This gives them space to puff up beautifully. To avoid sticking, spray your muffin tin well with olive oil. Ensure you coat every cavity. If you do not have oil spray, use a paper towel to rub oil inside the tin. After baking, let the muffins cool for five minutes. Run a knife around the edges to help release them. This step will save you from messy muffins. These muffins are great for meal prep. You can make a batch and store them in the fridge. Keep them in an airtight container for up to one week. For serving, warm them in the microwave for a quick meal. Pair them with fresh fruit or yogurt for a balanced breakfast. You can also enjoy them cold as a snack. Add chopped green onions on top for a nice touch! Pro Tips Use Fresh Ingredients: Opt for the freshest vegetables and herbs to enhance the flavor and nutritional value of your egg muffins. Customize Fillings: Feel free to experiment with different vegetables, meats, or cheeses based on your taste preferences or what's in your fridge. Batch Cooking: Make a large batch at once for meal prep. These muffins freeze well and can be easily reheated for a quick breakfast. Check for Doneness: Use a toothpick to ensure the muffins are fully cooked. They should be puffed up and the toothpick should come out clean. {{image_4}} If you want a low-carb option, go keto with your egg muffins. Skip the milk and use cream cheese for a creamier texture. Add in crispy bacon bits. Choose green veggies like spinach and zucchini to keep carbs low. You can also swap regular cheese for cream cheese or mozzarella for a rich flavor. These muffins will be filling and tasty while sticking to keto rules. For a veggie twist, focus on colorful ingredients. You can use mushrooms, asparagus, and zucchini. Replace the cheese with a vegan option or skip it altogether. Make sure to add herbs like basil or parsley for extra flavor. This way, you get a healthy and bright breakfast that everyone can enjoy. Want more protein? Add cooked bacon or sausage to your muffins. Just chop the meat into small pieces before mixing it in. This addition gives a nice salty taste and keeps you full longer. You can also use turkey bacon for a leaner choice. Make sure to adjust the salt since bacon can be salty. Enjoy a hearty breakfast with these tasty protein-packed muffins! To keep your breakfast egg muffins fresh, place them in an airtight container. This helps lock in moisture and flavor. Store them in the fridge if you plan to eat them within a week. If you want to keep them longer, consider freezing. Reheating your egg muffins is super easy. You can use the microwave for a quick fix. Place one muffin on a microwave-safe plate and heat for about 30 seconds. Check if it’s warm. If it needs more time, heat in 10-second intervals. You can also use the oven. Preheat it to 350°F (175°C) and warm the muffins for about 10 minutes. This method keeps them fluffy. If you want to freeze your muffins, let them cool completely first. Wrap each muffin in plastic wrap and place them in a freezer-safe bag. This way, they won’t get freezer burn. They can last up to three months in the freezer. When you're ready to eat, thaw them in the fridge overnight, then reheat as mentioned before. Enjoy your tasty, easy breakfast anytime! Yes, you can use egg whites. This will make your muffins lighter. You can mix three egg whites for each whole egg. This swap cuts down on fat. Just remember, muffins may taste less rich. Breakfast egg muffins can last up to one week in the fridge. Store them in an airtight container. This keeps them fresh and tasty. Always check for any signs of spoilage before eating. Absolutely! Make these muffins the night before. Just bake, cool, and store them in the fridge. They make a great grab-and-go breakfast. You can also reheat them quickly in the microwave. You learned the key steps to make tasty breakfast egg muffins. We covered essential and optional ingredients, as well as nutrition facts. I shared detailed instructions and best practices for fluffy muffins. You also discovered fun variations and smart storage tips. These muffins are simple and customizable, making them perfect for any meal. With these ideas in hand, you can enjoy delicious breakfasts all week long. Happy cooking!
Breakfast Egg Muffins Tasty and Simple Recipe
Are you ready to start your mornings with a delicious and easy breakfast? Breakfast egg muffins are the perfect go-to when you need something quick.
- 2 plain or everything bagels, halved - 4 tablespoons cream cheese (choose plain or your favorite flavored variety) - 1 cup assorted fresh fruits (consider strawberries, blueberries, kiwi, bananas, or any mix you adore) - 2 tablespoons honey or maple syrup (for sweetness) - 1 tablespoon chia seeds (optional for a nutritional boost) - Fresh mint leaves for garnish (optional, but adds a delightful touch) Making Bagel Fruit Breakfast Pizzas is quick and fun. Start with fresh bagels, which give your pizzas a sturdy base. You can use plain or everything bagels based on your taste. Toast them until golden brown to add a nice crunch. Next, cream cheese makes a rich topping. You can choose plain cream cheese or try flavored ones like strawberry or chive. This choice adds a personal touch to your pizzas. For the fruits, pick a mix that you love. Strawberries bring sweetness, while kiwi adds tartness. Bananas are soft and creamy, and blueberries pop with flavor. The more colors, the better! Drizzle honey or maple syrup on top for sweetness. Chia seeds add a nice crunch and boost nutrition. Fresh mint leaves make a lovely garnish. They add color and a fresh taste. These simple ingredients come together to create a delightful breakfast. {{ingredient_image_2}} Start by slicing each bagel in half. Use a sharp knife for easy cutting. Toast the bagels in a toaster or oven until they turn golden brown. This gives them a nice crunch. The toasted bagel serves as a perfect base for your fruit pizzas. Once the bagels are toasted, grab 1 tablespoon of cream cheese. Spread it evenly over each bagel half. Make sure to cover the entire surface well. A good layer of cream cheese adds a creamy base that pairs well with the fruit. Rinse your assorted fresh fruits under cold water. Chop them into bite-sized pieces. You can use strawberries, blueberries, kiwi, or bananas. Feel free to mix and match your favorite fruits. Aim for a colorful array when you layer the fruits on your bagels. Arrange them artfully on top of the cream cheese. This makes each pizza look inviting and tasty. To add sweetness, drizzle honey or maple syrup over the fruits. This adds a delightful touch to your pizzas. If you want, sprinkle chia seeds on top. These tiny seeds give a nice crunch and boost nutrition. For a fresh pop, garnish each bagel half with a few mint leaves. The mint adds color and a refreshing taste. Your bagel fruit breakfast pizzas are now ready to enjoy! For bagel fruit breakfast pizzas, you can use plain or everything bagels. Plain bagels provide a soft base. Everything bagels offer a fun flavor punch. Choose what you like best! Freshness matters too; always pick bagels from the bakery or store that just baked them. Cream cheese is key for a creamy texture. You can use plain cream cheese for a classic taste. Flavored options like strawberry or chive add fun twists. Try mixing two types for an exciting combination. Look for cream cheese with natural ingredients for the best taste. Fruits make these pizzas colorful and tasty. Strawberries and blueberries are popular choices. Kiwi brings a tropical flair, while bananas add sweetness. Mix your favorites for a colorful display! You can also use fruits in season for better taste and freshness. Pro Tips Choose the Right Bagel: Opt for fresh bagels for the best texture and flavor. Everything bagels add a savory contrast to the sweet toppings. Mix and Match Fruits: Experiment with different fruit combinations to find your favorite mix. Seasonal fruits can enhance the flavor and nutritional value. Customization is Key: Feel free to swap out the cream cheese for yogurt or nut butter for a different twist on this breakfast pizza. Add a Crunch: Consider topping your bagel creations with nuts or granola for an added texture that complements the soft fruit and creamy base. {{image_4}} You can make bagel fruit breakfast pizzas savory by adding veggies or protein. Try slicing cucumbers or bell peppers thinly. These add crunch and freshness. You can also include proteins like smoked salmon or turkey. Just layer them on top of the cream cheese. This change gives your breakfast pizza a tasty twist. If you want a different base, use yogurt or nut butter instead of cream cheese. Greek yogurt adds a tangy flavor and is rich in protein. Almond or peanut butter gives a nutty taste. Spread it on the toasted bagels just like you would with cream cheese. This makes your breakfast even more fun! Change your toppings based on the season. In summer, use fresh peaches or cherries. In fall, try apples and pears with a sprinkle of cinnamon. For winter, citrus fruits like oranges or grapefruits shine bright. This keeps your bagel fruit breakfast pizzas exciting and full of seasonal flavors. Adjusting your ingredients helps you enjoy different tastes all year long! To keep your bagel fruit breakfast pizzas fresh, store them properly. If you have leftovers, place them in an airtight container. This helps to maintain their flavor and texture. Make sure to refrigerate them if you plan to eat them later. They will stay fresh for up to two days. However, the fruits may become a bit soggy over time. When you reheat bagels, you want to keep them crisp. Preheat your oven to 350°F (175°C). Place the bagel halves on a baking sheet. Heat them for about 5 to 7 minutes. This will warm the cream cheese and revive the crunch of the bagel. Avoid using a microwave, as this can make the bagels chewy. Enjoy your tasty treat as if it were just made! Yes, you can prepare some parts ahead. Toast the bagels and store them in a bag. Keep the cream cheese and fruits separate in the fridge. When you're ready to eat, just spread the cream cheese and top with fruits. This way, your bagels stay fresh and tasty. You can get creative with fruits! Here are some ideas: - Raspberries - Blackberries - Peaches - Pineapple - Grapes Mix and match your favorites. Each fruit adds a unique taste and color. Yes, they can be healthy! Here’s why: - Bagels provide carbs for energy. - Cream cheese has protein and calcium. - Fresh fruits are full of vitamins and fiber. Adding honey or maple syrup gives a little sweetness without too much sugar. Chia seeds boost fiber and omega-3s. Enjoy guilt-free! In this article, I shared how to make delicious bagel fruit breakfast pizzas. We covered key ingredients like bagels, cream cheese, and fresh fruits. It's easy to get creative with toppings, using honey and chia seeds for added flair. Remember to select the best bagels and explore different spreads. Whether you go savory or stick to sweet, these pizzas are fun and easy to make. Enjoy your tasty creations and don’t hesitate to experiment with flavors!
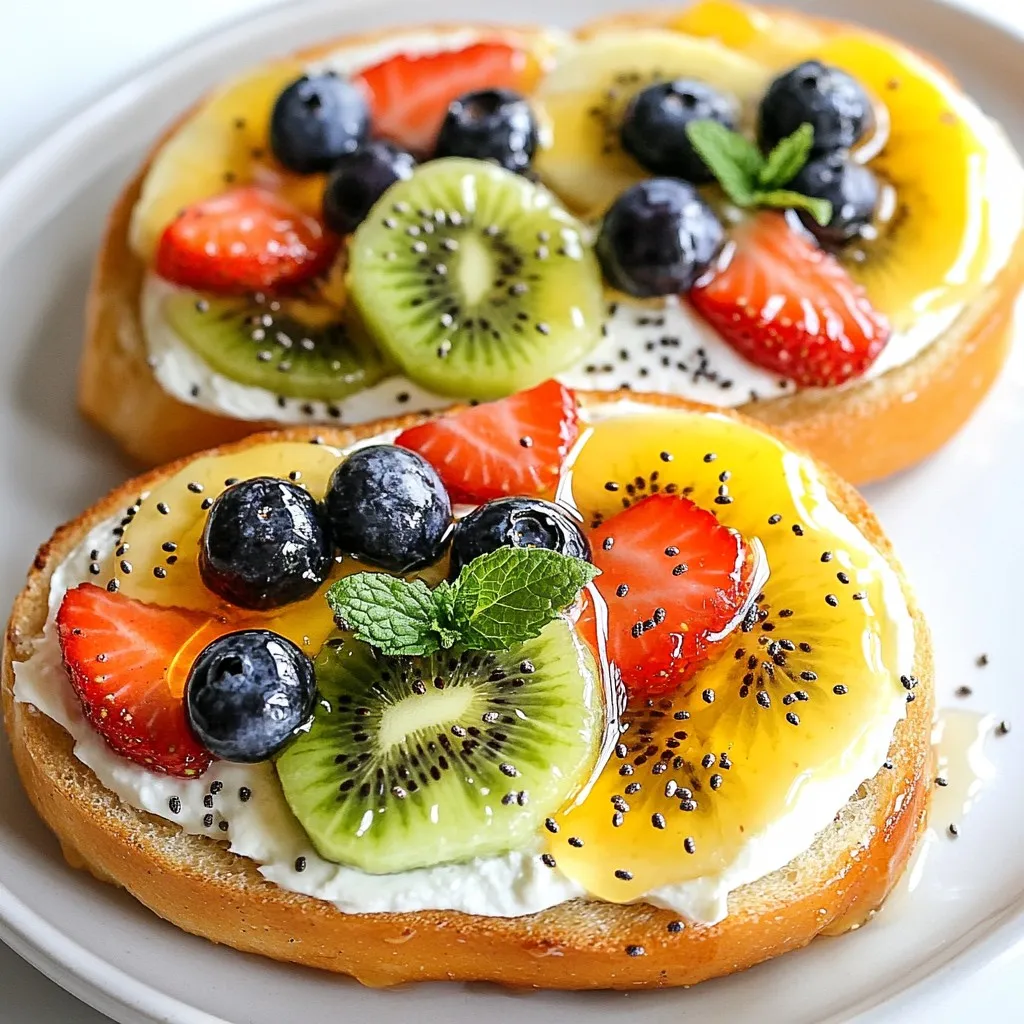
Bagel Fruit Breakfast Pizzas Fun and Tasty Treats
Start your morning with a fun twist on breakfast! Bagel Fruit Breakfast Pizzas are easy to make and packed with flavor. You can combine crispy
- 1 loaf of crusty bread, cut into 1-inch cubes - 8 large eggs - 2 cups whole milk - 1 cup sharp cheddar cheese, freshly shredded - 1 cup cooked breakfast sausage, crumbled - 1 bell pepper, diced - 1 small onion, finely chopped To make this dish, start with crusty bread. The cubes soak up the egg mixture well. Next, use large eggs for a fluffy texture. Whole milk adds creaminess and richness. Sharp cheddar cheese delivers a bold flavor that melts beautifully. Crumbled breakfast sausage gives the casserole a hearty feel. You can use turkey sausage for a lighter dish. Dice a bell pepper for color and sweetness. Finally, a small onion adds depth to each bite. - 1 teaspoon garlic powder - 1 teaspoon paprika - Salt and black pepper, to taste Seasonings are key to enhancing flavors. Garlic powder adds a savory note. Paprika gives a subtle smokiness and color. Salt and black pepper bring all the flavors together. Don’t skip on these; they elevate the dish. - 2 green onions, sliced Garnish with sliced green onions for a fresh touch. They add color and a mild onion flavor. This step makes the dish look pretty and inviting. For serving, pair each slice with fresh fruit. This adds a bright and refreshing contrast to the rich casserole. {{ingredient_image_2}} 1. Preheat your oven to 350°F (175°C). 2. Take a 9x13-inch baking dish. Grease it with cooking spray or butter. 3. In a large bowl, crack 8 eggs. 4. Pour in 2 cups of whole milk. 5. Whisk them together. Make sure to mix until smooth. 6. Add 1 teaspoon of garlic powder, 1 teaspoon of paprika, salt, and black pepper to taste. 7. Whisk again to combine everything well. 1. Spread 1 loaf of cubed bread evenly in the baking dish. 2. Carefully pour the egg mixture over the bread cubes. 3. Ensure that the mixture soaks the bread evenly. 4. Now, layer 1 cup of crumbled sausage over the bread. 5. Add 1 diced bell pepper and 1 small chopped onion on top. 6. Finish by sprinkling 1 cup of shredded sharp cheddar cheese over everything. 1. Cover the dish with aluminum foil. This helps keep it moist. 2. Bake in the preheated oven for 30 minutes. 3. After 30 minutes, remove the foil. 4. Return the dish to the oven. Bake for another 15-20 minutes. 5. Look for bubbly and golden cheese. 6. To check if it’s done, insert a knife in the center. It should come out clean. 7. Once baked, let it rest for 5 minutes. This helps it set. 8. Garnish with sliced green onions before serving. Cut into squares and serve warm. To make your Crack Breakfast Casserole perfect, ensure even egg distribution. After whisking the eggs and milk, pour the mixture slowly over the bread. This helps the bread soak up the flavors well. You can also use a spatula to gently press the bread down. This way, every piece gets coated. If you want to try alternative cooking methods, consider a slow cooker. Just layer your ingredients as usual, and cook on low for 6 to 8 hours. This method is great for busy mornings. Pair your casserole with fresh fruit. Berries or sliced oranges add a bright note. The sweet and tangy flavors contrast well with the savory casserole. For presentation, serve each slice on individual plates. Sprinkle extra cheddar cheese on top for extra flavor. Adding a few green onion slices as garnish makes it look inviting and fresh. Common issues can happen when making casseroles. One problem is soggy bread. To avoid this, use crusty bread. Let it sit out for a few hours to dry out. If your casserole comes out too dry, you can add a splash of milk before serving. This will help moisten it up. Another option is to cover it with foil during baking. This keeps moisture in while cooking. Pro Tips Use Stale Bread: For the best texture, use bread that is a day or two old. Stale bread absorbs the egg mixture better without becoming too soggy. Mix and Match Ingredients: Feel free to customize the casserole with your favorite ingredients like spinach, mushrooms, or different types of cheese. Make It Ahead: Assemble the casserole the night before and store it in the refrigerator. Just bake it in the morning for a hassle-free breakfast! Let It Rest: Allow the casserole to sit for a few minutes after baking. This helps it firm up, making it easier to cut and serve. {{image_4}} You can make your casserole lighter by using turkey sausage instead of regular sausage. This change cuts down on fat and calories. Another option is to use low-fat milk. This will keep it creamy without the added fat. For a meatless version, try using plant-based sausage. It tastes great and keeps the dish hearty. Adding different veggies can really boost the flavor. Spinach or mushrooms are great choices. They add a nice texture and depth. You can also mix in different cheese. Try using pepper jack for spice or mozzarella for a milder taste. These small changes can make your casserole unique. You can change your casserole with the seasons. In fall, add pumpkin and warm spices like cinnamon or nutmeg. This gives a cozy vibe. In summer, include fresh zucchini and juicy tomatoes. This keeps it light and fresh. Adapting your dish to the season keeps it fun and exciting. To keep your Crack Breakfast Casserole fresh, store leftovers in the fridge. Use airtight containers to prevent air from making it dry. Cut the casserole into squares before storing. This makes it easy to grab a piece later. It will last about 3 to 4 days in the fridge. You can reheat the casserole using two methods: the microwave or the oven. For the microwave, place a square on a microwave-safe plate. Heat it in short bursts of 30 seconds. Check to see if it's warm enough. If you use the oven, preheat it to 350°F. Place the casserole in a baking dish and cover it with foil. Bake for about 15-20 minutes. This helps keep the texture soft and tasty. If you want to freeze the casserole, let it cool completely first. Cut it into squares and wrap each piece tightly in plastic wrap. Place them in a freezer-safe bag or container, removing as much air as possible. When you're ready to eat, take out a square and thaw it in the fridge overnight. Reheat it using the oven or microwave as mentioned above. This way, you can enjoy a warm breakfast whenever you like. Crack Breakfast Casserole lasts about 3-4 days in the fridge. Store it in an airtight container. For the best taste, eat it within this time frame. The flavors stay fresh, and it remains tasty! Yes, you can make this casserole ahead of time! Prepare it the night before and store it in the fridge. Just cover it with foil after assembling. In the morning, bake it straight from the fridge. It saves time and makes breakfast easy! You can make this casserole gluten-free! Simply use gluten-free bread instead of regular bread. Check the labels to ensure all other ingredients are gluten-free. This way, everyone can enjoy the dish without worry. Crack Breakfast Casserole pairs well with fresh fruit, like berries or sliced bananas. You can also serve it with a light salad or yogurt on the side. These sides add color and nutrition to your breakfast spread! In this blog post, I covered the ingredients, preparation, and baking steps for the Crack Breakfast Casserole. I shared tips for perfecting the dish, various ingredient options, and storage advice. This casserole is simple but delicious, making it a great choice for any meal. With a few easy steps, you can create a meal that friends and family will love. Enjoy experimenting with flavors and pairings to make it your own!
Crack Breakfast Casserole Savory and Satisfying Dish
Are you ready to elevate your breakfast game? The Crack Breakfast Casserole is a savory, satisfying dish that everyone will love. With layers of crusty
- 2 cups all-purpose flour - 1 tablespoon baking powder - 1/2 teaspoon salt - 2 tablespoons granulated sugar - 2 large eggs - 1 1/2 cups milk - 1 teaspoon vanilla extract - 1/4 cup unsalted butter, melted - 1 tablespoon ground cinnamon - 1/4 cup brown sugar - 1/2 cup cream cheese, softened - 1/4 cup powdered sugar - 1-2 tablespoons milk (for glaze) You can easily swap some ingredients. For a gluten-free option, use almond or oat flour. If you need a dairy-free version, try almond milk and coconut cream cheese. For lower sugar, use stevia or monk fruit sweetener instead of brown sugar. Accurate measurements are key for baking success. Always use the right tools. Use dry measuring cups for flour and sugar. Liquid measuring cups are best for milk and other liquids. Level off dry ingredients with a knife for precision. This will help your pancakes rise perfectly! {{ingredient_image_2}} To start, grab a large mixing bowl. In this bowl, combine 2 cups of all-purpose flour, 1 tablespoon of baking powder, 1/2 teaspoon of salt, and 2 tablespoons of granulated sugar. Whisk these dry ingredients together until they are well mixed. In another bowl, crack 2 large eggs and beat them well. Next, pour in 1 1/2 cups of milk and 1 teaspoon of vanilla extract. Whisk this mixture until it is fully blended. Slowly add 1/4 cup of melted unsalted butter into the wet mix. Stir until smooth. Now, gently pour this wet mixture into the dry ingredients. Use a spatula or wooden spoon to mix until just combined. It’s okay if there are some lumps; avoid overmixing. Let the batter rest for about 5 minutes. This helps it thicken a little. In a small bowl, mix together 1/4 cup of brown sugar and 1 tablespoon of ground cinnamon. Stir until the cinnamon and sugar are evenly mixed. This sweet and spicy filling will create that delightful swirl in your pancakes. Set this mixture aside for later use. Now, preheat a large non-stick skillet or griddle over medium heat. You want it hot but not too hot. Pour about 1/2 cup of pancake batter onto the skillet for each pancake. To make the pancakes larger, gently spread the batter into a bigger circle using a spoon or spatula. Before the batter sets, sprinkle some of the cinnamon-sugar mixture in a spiral pattern over the top of the pancake. Take a toothpick or skewer and lightly swirl the cinnamon mix into the batter. Cook for about 3-4 minutes, watching for bubbles to form on the surface. The edges should look set before you flip. Carefully use a spatula to flip the pancake. Cook for another 3-4 minutes until it turns golden brown. Repeat this process for the rest of the batter. Adjust the heat as needed to get perfect pancakes. To get the best texture, watch the batter closely. The batter should feel thick but not dry. If you mix too much, the pancakes can turn tough. Stir just until the dry and wet parts blend. It’s okay if the batter has lumps. Let it rest for 5 minutes before cooking. This helps it thicken. Creating the perfect swirl takes some practice. After pouring the batter, sprinkle the cinnamon-sugar mix in a spiral. Use a toothpick or skewer to swirl gently. Do not mix too deep; you want to see the swirl. This will make your pancakes look fancy and taste great. When serving, stack the pancakes high on a pretty plate. Drizzle the cream cheese glaze over the top. Let it drip down the sides for a nice look. You can add a little cinnamon-sugar on top for extra flair. Fresh fruits like strawberries or blueberries add color and flavor. A dollop of whipped cream can make your dish even more special. Pro Tips Use Fresh Ingredients: Ensure your baking powder is fresh for the fluffiest pancakes. Expired baking powder can result in dense and flat pancakes. Control the Heat: Keep the skillet at medium heat to prevent the pancakes from browning too quickly while ensuring they cook through. Adjust as necessary after testing the first pancake. Swirl Technique: For a perfect cinnamon swirl, don't overmix the batter once the cinnamon-sugar is added. This keeps the design visible and enhances the flavor in every bite. Customize Your Glaze: Feel free to add a splash of vanilla extract or a pinch of nutmeg to the cream cheese glaze for an extra flavor dimension that complements the cinnamon rolls. {{image_4}} You can add fun flavors to your giant cinnamon roll pancakes. Try mixing in nutmeg for a warm spice kick. You can also toss in chocolate chips for a sweet twist. Add a handful of chopped nuts for crunch. Each of these options brings a unique taste to your breakfast. Toppings can take your pancakes to the next level. Fresh fruits like strawberries, blueberries, or sliced bananas bring brightness and flavor. You can also sprinkle nuts on top for added texture. Another great option is a dollop of whipped cream. These simple additions will make your pancakes even more enjoyable. If you want a vegan version, swap eggs with flaxseed meal mixed with water. Use almond or oat milk instead of regular milk. For a low-carb option, you can use almond flour and a sugar substitute like erythritol. These swaps keep the flavor while meeting your dietary needs. To store leftover giant cinnamon roll pancakes, first let them cool completely. Place them in an airtight container. You can keep them in the fridge for up to three days. For longer storage, freeze them. Stack the pancakes with parchment paper between them in a freezer-safe bag. This prevents them from sticking together. They can last in the freezer for up to two months. When it’s time to enjoy your pancakes again, reheating them properly is key. You can use a microwave or a skillet. If using a microwave, place a few pancakes on a plate. Heat them for about 20 to 30 seconds. If they are cold in the center, heat in five-second bursts until warm. For the skillet, heat it on low. Place the pancakes in the skillet for a few minutes on each side. This method keeps them fluffy and tasty. To serve your pancakes fresh and full of flavor, warm them slightly before serving. You can also drizzle extra cream cheese glaze on top. Add a sprinkle of cinnamon-sugar for that perfect finishing touch. If you want, serve with fresh fruit on the side. This adds color and extra taste. Your guests will love the beautiful presentation and delicious flavors. You can tell when your pancakes are done by looking for a few signs. First, bubbles will form on the surface, and the edges will appear dry. Use a spatula to gently lift a corner to check the color. The pancake should be golden brown. If you're unsure, you can use a toothpick. Insert it into the center. If it comes out clean, your pancake is cooked through. Yes, you can make the batter ahead of time. Store it in an airtight container in the fridge for up to 24 hours. This makes morning cooking easier. Just give the batter a gentle stir before using, as it may thicken. If it seems too thick, add a splash of milk to loosen it up. These pancakes taste great with various sides. Here are some ideas: - Fresh fruit like strawberries, bananas, or blueberries - Whipped cream for extra sweetness - Maple syrup for a classic touch - Bacon or sausage for a savory contrast - Hot coffee or a glass of orange juice to drink In this blog post, I shared a complete guide for making Giant Cinnamon Roll Pancakes. You learned about essential ingredients, measuring tips, and how to prepare the batter. I also covered cooking methods and ways to avoid common mistakes. Remember to explore variations that fit your taste, and don’t forget the storage tips to keep leftovers fresh. Enjoy experimenting with flavors and toppings. With practice, you will master this delicious recipe and impress your family or guests. Happy cooking!
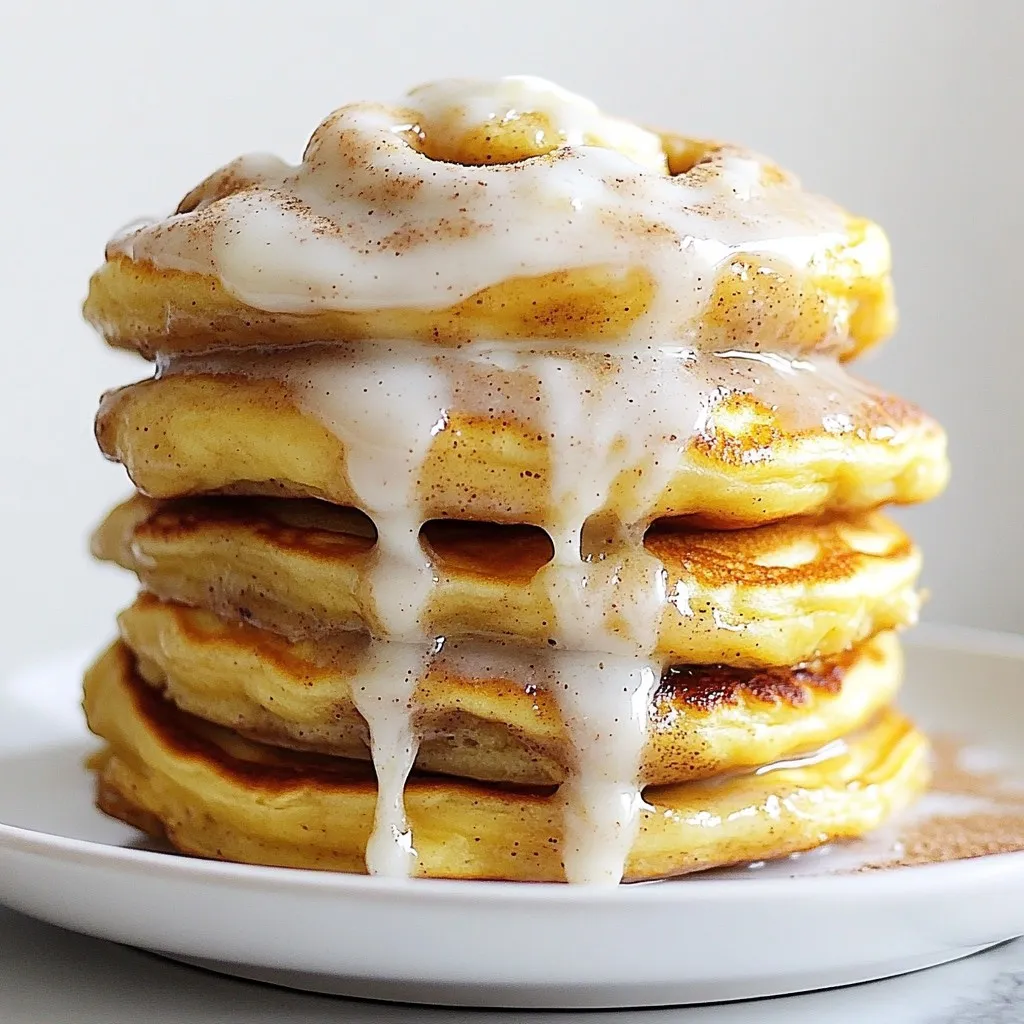
Giant Cinnamon Roll Pancakes Irresistible Morning Treat
Looking for a delightful breakfast that will wow your family? Let me introduce you to Giant Cinnamon Roll Pancakes! These fluffy, sweet treats combine the
- 8 breakfast sausages (your choice: pork or turkey) - 1 package (8 oz) crescent roll dough - 4 large eggs - 1/4 cup milk - 1/2 cup shredded cheddar cheese - 1 tablespoon chopped fresh chives or green onions - Salt and freshly ground black pepper, to taste These ingredients are key to making tasty breakfast pigs in a blanket. The breakfast sausages bring a savory flavor that pairs well with the buttery crescent roll dough. The eggs and milk add richness, while the cheddar cheese gives a nice melt and flavor. Chives or green onions add a fresh touch. Remember to season well with salt and pepper for the best taste. - Cooking spray or olive oil - Additional seasoning ideas Using cooking spray or olive oil helps to prevent sticking. You can also get creative with seasonings. Try adding garlic powder, paprika, or even a dash of hot sauce to your egg mixture for extra flavor. These options can elevate your breakfast pigs in a blanket and make them uniquely yours. {{ingredient_image_2}} First, preheat your oven to 375°F (190°C). This step is key for a crisp finish. Next, prepare a baking sheet by lining it with parchment paper. This helps prevent sticking and makes cleanup easy. In a medium bowl, whisk together 4 large eggs and 1/4 cup milk. Make sure to mix well until smooth. Add salt and black pepper to taste. Then, gently fold in 1/2 cup shredded cheddar cheese and 1 tablespoon of chopped chives or green onions. This mixture adds great flavor to your dish. Heat a skillet over medium heat. Add 8 breakfast sausages and cook them until they are browned, about 8-10 minutes. Be sure to turn them for even cooking. Once they are done, place them on a plate to cool a bit before wrapping. On a clean surface, unroll the crescent roll dough. Carefully separate it into triangles. Take one sausage and place it at the wide end of each triangle. Roll the dough around the sausage, starting from the wide end. Make sure to cover the sausage completely in the dough. Place the rolled sausages on your prepared baking sheet, leaving space between each one. Use a spoon to drizzle the egg and cheese mixture over the top of each roll. This adds flavor and helps the dough brown. Bake in the oven for 12-15 minutes, until the dough is golden brown. Once baked, let them cool for a few minutes before serving. To make great breakfast pigs in a blanket, wrap the dough tightly around the sausage. This keeps the filling inside and prevents spills. If the dough tears, patch it up with extra dough. For evenly baked dough, space each roll out on the baking sheet. This helps hot air flow around them as they bake. Add flavor with spices and herbs like garlic powder, onion powder, or smoked paprika. These will bring out the taste of the sausage. Use fresh chives or green onions for a bright touch. Make sure the oven's heat is even. Rotate the baking sheet halfway through to ensure all sides bake well. Serve these tasty treats on a large platter. A sprinkle of chopped chives adds color and freshness. Offer dips like hot sauce or maple syrup for fun flavor combos. This makes the meal more exciting and interactive for everyone. Pro Tips Use Fresh Ingredients: For the best flavor, use fresh chives or green onions and high-quality breakfast sausages. Experiment with Cheese: Feel free to substitute cheddar with your favorite cheese, such as pepper jack for a spicy kick. Don’t Skip the Egg Mixture: The egg and cheese mixture adds moisture and flavor, so be generous when drizzling it over each pig in a blanket. Perfectly Golden Brown: Keep an eye on the baking time to ensure the dough is perfectly golden brown without burning. {{image_4}} You can mix up the filling for your breakfast pigs in a blanket. Here are some ideas: - Alternative sausage options: Try chicken or veggie sausages if you want a lighter option. You can also use spicy sausage for a kick. - Cheese varieties: Besides cheddar, you can use mozzarella, pepper jack, or even feta. Each cheese gives a different taste and texture. Dipping sauces add fun and flavor to your breakfast treat. Here are some popular choices: - Popular sauce choices: Ketchup and mustard are classic. Hot sauce gives it a spicy twist, while honey adds sweetness. - Homemade sauce recipes: You can make your own ranch or barbecue sauce. Just mix yogurt or mayo with spices for a quick dip. Pair your breakfast pigs in a blanket with sides and drinks. This makes the meal more complete: - Sides: Fresh fruit, like berries or slices of banana, balances the savory taste. You can also serve crispy hash browns for added crunch. - Beverages: A glass of fresh orange juice or a hot cup of coffee goes well with this dish. Both add brightness and warmth to your meal. Once your breakfast pigs in a blanket cool, it’s time to store them. First, let them sit for about 10 minutes. This cooling step helps keep the dough firm. Next, use an airtight container. A glass or plastic container works well. Place parchment paper between layers if you stack them. This prevents sticking. To reheat, use the oven for the best taste. Preheat it to 350°F (175°C). Place the pigs in a blanket on a baking sheet. Heat for about 10 minutes. This warms them nicely without making them soggy. For crispiness, avoid the microwave. If you must use it, heat in short bursts. Check every 30 seconds to avoid sogginess. Enjoy them warm for the best flavor and texture! Breakfast pigs in a blanket keep well in the fridge for about 3 to 4 days. Store them in an airtight container to keep them fresh. You can reheat them in the oven or microwave when you want to eat. Keeping the dough crisp is key. Yes, you can freeze these tasty treats! Wrap each one in plastic wrap and place them in a freezer bag. They can last up to 2 months in the freezer. When you're ready to eat, thaw them in the fridge overnight. Then, bake them for a crispy finish. I love serving breakfast pigs in a blanket with maple syrup or hot sauce. The sweet syrup pairs so well with the savory sausage. Hot sauce adds a nice kick if you like spice. You can also try ranch dressing for a creamy option. Absolutely! You can use puff pastry or biscuit dough if you prefer. Just make sure to adjust the baking time as needed. Each type of dough gives a unique texture and flavor, so feel free to experiment. Yes! You can use vegetarian sausage or even cheese sticks for a cheesy version. Just follow the same steps with your chosen filling. This way, everyone can enjoy breakfast pigs in a blanket, whether they eat meat or not. This blog post covered the fun and easy recipe for Breakfast Pigs in a Blanket. You learned about the key ingredients, like breakfast sausages, crescent roll dough, and cheese. We discussed how to prepare, bake, and even vary this dish based on your taste. Remember, you can mix up the fillings or try different dips to keep things fresh. Cooking should be fun, so get creative while enjoying these tasty bites. Happy cooking!
Tasty Breakfast Pigs in a Blanket Recipe Today
Are you ready to spice up your breakfast routine? My Tasty Breakfast Pigs in a Blanket recipe combines savory breakfast sausages with soft, flaky crescent
- 1 cup cottage cheese - 4 large eggs - 1 ripe banana, thoroughly mashed - 1 teaspoon pure vanilla extract - 1 teaspoon baking powder - A pinch of salt These ingredients form the base of your flourless cottage cheese pancakes. Each one plays a key role. The cottage cheese gives a fluffy texture and adds protein. Eggs bind everything together and make it rise. A ripe banana adds natural sweetness and moisture. Vanilla extract gives a lovely flavor. Baking powder helps the pancakes rise, making them light. A pinch of salt balances the sweet flavors. - Fresh fruits - Maple syrup - Powdered sugar Toppings can elevate your pancakes. Fresh fruits like berries or sliced bananas add color and nutrition. Maple syrup brings a sweet touch. A dusting of powdered sugar can make the dish feel special. Feel free to mix and match your favorite toppings. - Choosing the right cottage cheese: Look for cottage cheese that is creamy and has small curds. This will blend well and give a smooth texture to the pancakes. Full-fat options work best for richness. - Selecting ripe bananas for sweetness: Choose bananas that are yellow with a few brown spots. These will be sweet and easy to mash. Avoid green bananas, as they will not give the same flavor. By picking the right ingredients, you ensure your pancakes turn out delicious every time. Enjoy the process and the tasty results! {{ingredient_image_2}} 1. Start with a large bowl. Add 1 cup of cottage cheese and 4 large eggs. 2. Use a whisk to mix them well. Keep whisking until it’s smooth and a bit frothy. This makes the pancakes light and fluffy. 3. Next, add 1 ripe banana that you have mashed. Also, pour in 1 teaspoon of pure vanilla extract, 1 teaspoon of baking powder, and a pinch of salt. 4. Mix everything together until you have a thick and creamy batter. Make sure there are no lumps in it. 1. Preheat your skillet over medium heat. Wait until it’s hot. This helps cook the pancakes evenly. 2. Spray the skillet lightly with cooking spray or add a small amount of oil. This keeps the pancakes from sticking. 3. Pour about 1/4 cup of batter onto the skillet for each pancake. 4. Cook for about 2 to 3 minutes. Look for bubbles on the surface. This shows it’s time to flip. 5. Carefully flip the pancake using a spatula. Cook for another 2 to 3 minutes until it’s golden brown. 6. Move the pancakes to a warm place. Keep cooking the rest of the batter, greasing the pan as needed. 1. Stack the pancakes on a nice plate. You can add fresh berries or sliced bananas on top for a pop of color. 2. Drizzle with maple syrup or sprinkle powdered sugar on top for extra sweetness. 3. Enjoy your delicious pancakes warm! They are great for breakfast or a snack. To make smooth batter, blend the cottage cheese and eggs well. Use a whisk until the mix is frothy. This step helps create light pancakes. For fluffiness, cook them on medium heat. If the skillet is too hot, they can burn. Flip the pancakes when bubbles form. This means they are ready to turn. To make these pancakes low-carb, swap the banana for unsweetened applesauce or pumpkin. You can also use a sugar substitute for sweetness. For a gluten-free option, ensure your baking powder is gluten-free. This way, you can enjoy these pancakes without worries. One big mistake is overmixing the batter. Mix just until combined to keep the pancakes fluffy. Another mistake is cooking at incorrect temperatures. If the heat is too low, they will not brown. If it’s too high, they will burn. Find that sweet spot for perfect pancakes! Pro Tips Whisk Thoroughly: Make sure to whisk the cottage cheese and eggs until the mixture is smooth and frothy. This will help create a light and fluffy texture in your pancakes. Use Ripe Bananas: The riper the banana, the sweeter your pancakes will be. Look for bananas with brown spots for optimal sweetness and flavor. Control the Heat: Cooking at medium heat is key. Too high, and your pancakes may burn on the outside while remaining uncooked on the inside. Make sure to adjust the heat as necessary. Experiment with Toppings: Don’t be afraid to get creative with your toppings. Try adding nut butter, yogurt, or a sprinkle of cinnamon for added flavor and nutrition. {{image_4}} You can easily change the flavor of these pancakes. Adding cocoa powder gives you rich chocolate pancakes. Just mix in 2 tablespoons of cocoa powder with the other dry ingredients. This simple addition transforms your breakfast into a sweet treat. You can also boost the taste with spices. Try adding a teaspoon of cinnamon. It will warm your pancakes and add a lovely aroma. You can even mix in nutmeg for an extra kick. These spices can make your pancakes feel cozy and special. If you want to make these pancakes dairy-free, use silken tofu instead of cottage cheese. Blend it until smooth for the best texture. Almond or soy milk can also work well in place of eggs. Just make sure to use a good egg substitute like flaxseed or chia seeds to bind the mixture. You can also change the bananas for other fruits. Mashed sweet potato or applesauce can add unique flavors. Each fruit brings its own sweetness and texture. You can even mix different fruits for a fun twist. Don’t be shy about trying savory pancakes. Add chopped spinach and feta cheese to the batter. This will create a delicious, unique breakfast. You can also try adding herbs like chives or parsley for more flavor. Another fun idea is a breakfast burrito style. After cooking the pancakes, spread them with cream cheese. Then, add scrambled eggs and avocado. Roll them up like a burrito. This makes for a hearty meal that’s still easy to enjoy! To store leftover pancakes, let them cool first. Place them in an airtight container. You can keep them in the fridge for up to three days. If you want to save them longer, freeze the pancakes. Stack them with parchment paper in between. This prevents them from sticking together. When you are ready to eat, reheating is easy. The best method is to use a skillet. Heat it over medium-low heat and add the pancakes. Cook for about one minute on each side. This keeps them fluffy. You can also use a microwave. Heat them for 15 to 30 seconds. Just be careful not to overheat; this can make them tough. In the fridge, the pancakes last about three days. In the freezer, they can last up to two months. Always check for signs of spoilage. If they smell sour or have mold, it's best to throw them away. Keeping track of dates helps avoid wasting food. Yes, you can use low-fat cottage cheese. However, it may change the texture and flavor of the pancakes. Low-fat options often yield a less creamy texture. This could lead to slightly denser pancakes. For a fluffier bite, whole-fat cottage cheese is best. It adds richness and moisture, enhancing the overall taste. These pancakes are excellent for meal prep. You can make a larger batch and store them. Let the pancakes cool completely. Then, place them in an airtight container. Store them in the fridge for up to five days. For longer storage, freeze them in a single layer. Once frozen, stack them with parchment paper in between. They will keep well for up to three months. When you're ready to eat, just reheat in the microwave or toaster. Yes, you can make these pancakes without eggs. Some good substitutes include mashed bananas or flaxseed meal. For flaxseed, mix one tablespoon with three tablespoons of water. Let it sit for five minutes until it gels. This mix helps bind the ingredients like eggs. You can also try applesauce. Use a quarter cup of unsweetened applesauce as a substitute for each egg. Adjusting the recipe this way can still yield tasty pancakes. You’ve learned how to make delicious pancakes with simple and healthy ingredients. We covered key ingredients, tips for preparation, and various ways to customize the recipe. Don't be afraid to try different flavors or serve them in creative ways. Remember, practicing the cooking techniques will help you achieve the perfect texture. Enjoy making pancakes that suit your taste and dietary needs. Embrace your kitchen skills and have fun while cooking!
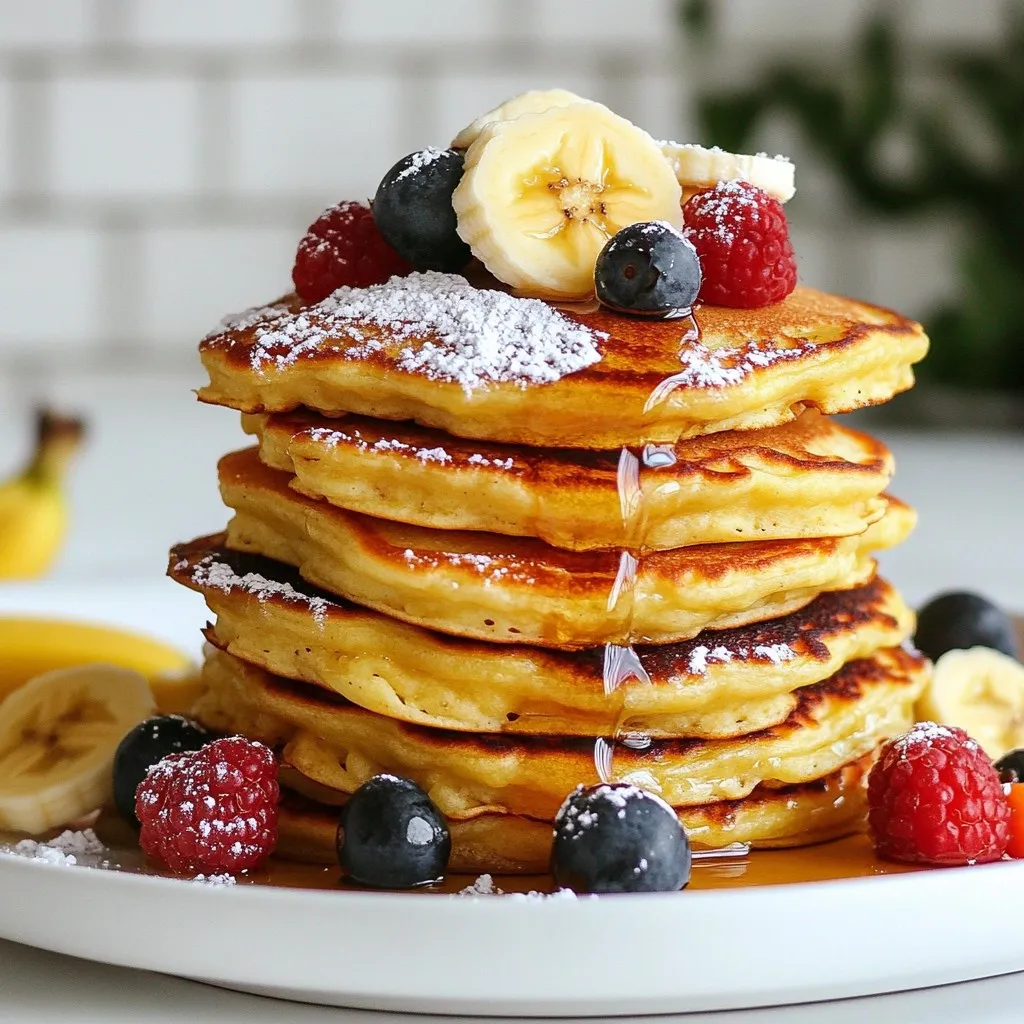
Flourless Cottage Cheese Pancakes Simple and Delicious
Looking for a simple, delicious breakfast that packs a protein punch? Try my Flourless Cottage Cheese Pancakes! They’re easy to whip up with just a
To make this tasty dish, gather these main items: - 1 cup rolled oats - 1 cup almond milk (or your preferred milk) - 1/2 cup canned pumpkin puree - 2 tablespoons pure maple syrup - 1 teaspoon pumpkin spice blend (this includes cinnamon, nutmeg, and ginger) - 1/2 teaspoon pure vanilla extract - A pinch of salt These ingredients work together to create a rich and creamy base. The oats soak up all the flavors overnight, making them soft and delicious. You can also add these items to make your oats unique: - 1 tablespoon chia seeds (for more creaminess and nutrition) Chia seeds are a great option. They help thicken the oats and add healthy omega-3s. If you like a thicker texture, try adding them! Top your oats with these tasty options for extra crunch and flavor: - Chopped pecans - Chopped walnuts - Toasted coconut flakes These toppings bring texture and a fun twist to your meal. You can mix and match to find your perfect combination! {{ingredient_image_2}} To start, grab a medium mixing bowl. Add 1 cup of rolled oats and 1 cup of almond milk. Then, mix in 1/2 cup of canned pumpkin puree. Next, pour in 2 tablespoons of pure maple syrup. This gives your oats a nice sweetness. Now, add 1 teaspoon of pumpkin spice blend. This is a mix of cinnamon, nutmeg, and ginger. You can also add 1/2 teaspoon of pure vanilla extract for extra flavor. If you want more creaminess, toss in 1 tablespoon of chia seeds. Finally, add a pinch of salt to enhance the taste. Use a whisk or spoon to stir everything well. Make sure the oats soak up the milk and pumpkin mixture. Once your mixture is ready, it’s time to divide it. Pour the oat mixture into two or three airtight jars. This makes it easy to store and serve later. Close the lids on your jars and place them in the fridge. Let the oats chill for at least 6 to 8 hours, or overnight if you can. This soaking time helps the oats soften and take on all those delicious flavors. When morning comes, take the jars out of the fridge. Give the oats a good stir. If they feel too thick, add a splash of almond milk. This will help you reach your desired creaminess. Now comes the fun part—adding toppings! You can sprinkle chopped pecans, walnuts, or toasted coconut flakes on top. These add a nice crunch and extra flavor. For a fancy touch, serve the oats in clear jars. This shows off the vibrant orange color of the pumpkin mixture. A light dusting of pumpkin spice on top makes them look even better. Enjoy your easy and flavorful breakfast! To make your oats creamy, use rolled oats instead of quick oats. Rolled oats soak better and provide a nice texture. Combine them with almond milk and pumpkin puree to keep it rich. If you want extra creaminess, add chia seeds. They absorb liquid and thicken the mix. - Mix well: Stir until all oats are well coated with liquid. - Refrigerate overnight: Let the oats soak for at least 6-8 hours. You can make your pumpkin spice oats your own. Use more or less pumpkin spice blend based on your taste. If you love cinnamon, add extra. Want a hint of sweetness? Pour in more maple syrup. You could also swap in different extracts like almond or hazelnut for a unique twist. - Try different spices: Add nutmeg or allspice for a new flavor layer. - Experiment with sweeteners: Use honey or agave syrup instead of maple syrup. Boost the nutrition of your overnight oats with fun add-ins. Flax seeds are great for omega-3s. Greek yogurt can add protein and creaminess. You can also mix in some nuts or seeds for healthy fats. - Add fruit: Toss in some berries or banana slices before serving. - Include greens: A spoonful of spinach or kale blends well and adds vitamins. Follow these tips to make your pumpkin spice overnight oats even better. Enjoy the creamy, tasty goodness! Pro Tips Use Steel-Cut Oats for Chewiness: If you prefer a heartier texture, substitute rolled oats with steel-cut oats. Just remember to soak them longer for optimal softness! Experiment with Milk Alternatives: While almond milk is delicious, feel free to try coconut milk, oat milk, or even soy milk to add unique flavors to your overnight oats. Sweetness Level Adjustment: Depending on your taste, you can adjust the amount of maple syrup. For a less sweet option, start with 1 tablespoon and add more to taste after the oats have soaked. Make it a Meal Prep: Double or triple the recipe to have a convenient breakfast ready for several days. Just store the extra jars in the refrigerator and enjoy throughout the week! {{image_4}} For a dairy-free and vegan version, I use almond milk. You can swap it for any plant-based milk, like oat or coconut milk. Canned pumpkin puree is naturally vegan. Pure maple syrup adds sweetness without any animal products. This makes the dish both rich and creamy, perfect for a healthy breakfast. To make this recipe gluten-free, choose certified gluten-free rolled oats. Most oats are processed in places that handle gluten. So, it's best to check the label. The rest of the ingredients are naturally gluten-free, so you can enjoy this dish without worry. You can mix up the flavors too! For a twist, try adding cocoa powder for chocolate pumpkin oats. Or, mix in a dollop of nut butter for extra creaminess. You might also enjoy adding fresh fruit like sliced bananas or diced apples. Each variation brings a new taste and excitement to your morning routine. To store your pumpkin spice overnight oats, use airtight containers. Glass jars work best. Make sure you seal them tightly. This keeps the oats fresh and tasty. Refrigerate the jars right after you make them. These oats stay good in the fridge for up to five days. The flavors get better as they sit. However, keep an eye on them. If you see any change in color or smell, it's best to toss them. You can eat the oats cold or warm them up. If you prefer warm oats, heat them in the microwave. Add a splash of almond milk if they seem dry. Stir well to mix the flavors. Enjoy your tasty treat at any time of the day! Overnight oats stay fresh for about 3 to 5 days in the fridge. After that, they may lose their taste and texture. To enjoy them at their best, eat them within this time. Yes, you can use any milk you like. Almond milk, soy milk, oat milk, or coconut milk all work well. Each option gives a unique taste. Choose what you enjoy most or what you have at home. Absolutely! You can skip the chia seeds if you want. They add creaminess and nutrition, but they are not necessary. Your oats will still taste great without them. Pumpkin spice overnight oats are easy, tasty, and fun to make. We covered the main and optional ingredients, plus types of toppings. You learned how to prepare the oats, store them, and personalize your flavor. Making healthy versions is simple with a few swaps too. These oats fit any taste and need. Enjoy them for breakfast or a snack. I hope you try these ideas and create your perfect bowl of pumpkin spice overnight oats!
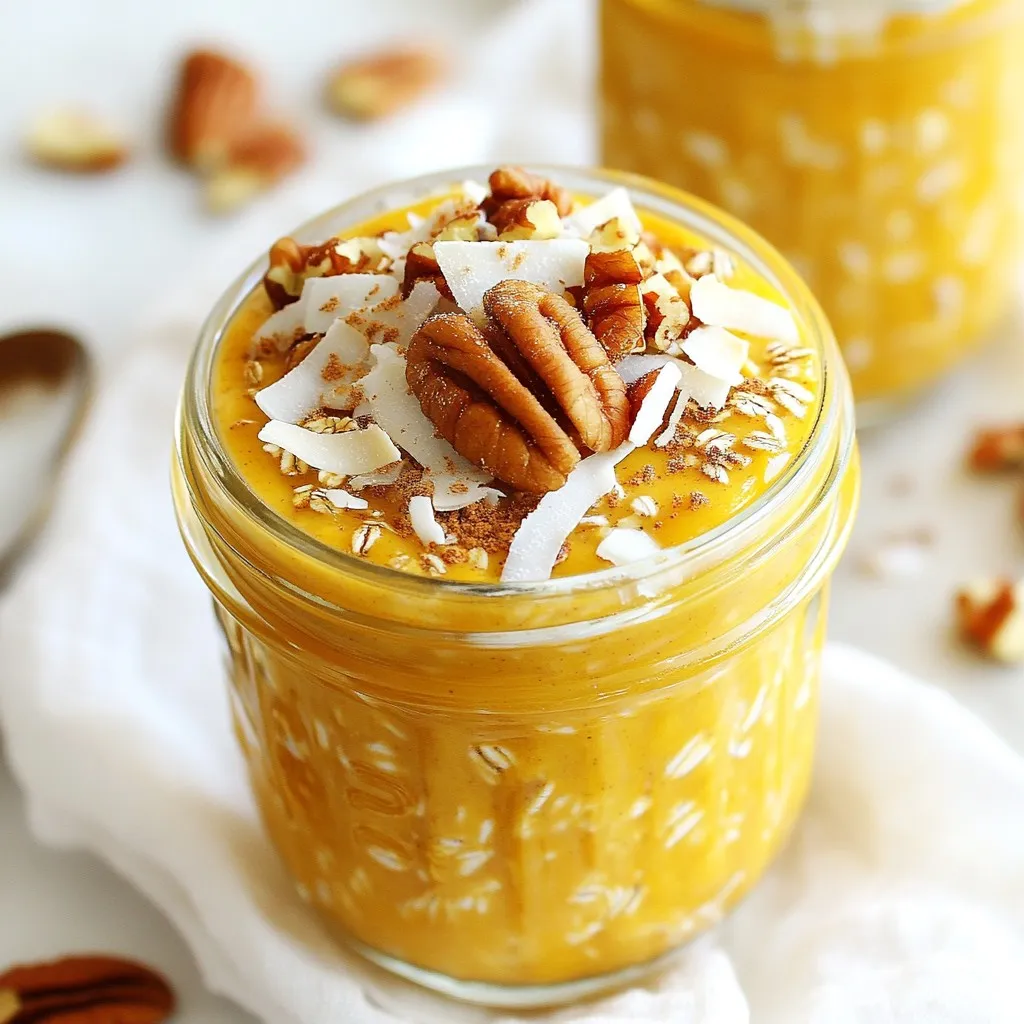
Pumpkin Spice Overnight Oats Easy and Flavorful Recipe
Ready to embrace the cozy flavors of fall? My Pumpkin Spice Overnight Oats are easy to make and bursting with flavor. This recipe combines rich
To make Crème Brûlée French Toast, gather these key ingredients: - 1 loaf of challah bread, sliced into thick slices - 4 large eggs - 1 cup heavy cream - 1 cup whole milk - 1/2 cup granulated sugar - 1 tablespoon pure vanilla extract - 1 teaspoon ground cinnamon - A pinch of salt - 1/4 cup brown sugar (for a glorious topping) These ingredients create a rich custard that soaks into the bread. The heavy cream and milk combine for a creamy texture. The eggs help bind everything together, making it a perfect base for this dish. You can elevate your Crème Brûlée French Toast with these optional garnishes: - Fresh berries (like strawberries, blueberries, or raspberries) - Fresh mint leaves These additions bring color and freshness to your meal. Berries add a sweet, tart flavor, while mint offers a refreshing touch. They make your dish look beautiful, too. While challah bread is the star here, you can also try other breads: - Brioche - French bread - Texas toast These breads are soft and absorbent. They soak up the custard well, ensuring a rich flavor and perfect texture. Use what you have on hand for a tasty twist. {{ingredient_image_2}} Start by gathering your ingredients. In a large bowl, crack four eggs. Add one cup of heavy cream and one cup of whole milk. Then, pour in half a cup of granulated sugar. Add one tablespoon of pure vanilla extract, one teaspoon of ground cinnamon, and a pinch of salt. Whisk the mixture until it is smooth and combined. This custard is the heart of your Crème Brûlée French Toast. Slice your loaf of challah bread into thick slices. Take each slice and dip it into the custard mix. Let it soak for about 30 seconds on each side. This step is key. It allows the bread to soak up all the flavors. Once soaked, arrange the slices in a greased baking dish. You can overlap them if needed to fit them all in. Pour any leftover custard over the bread. Cover the dish with foil and let it rest for 15 minutes. This step helps the bread absorb even more custard. Preheat your oven to 375°F (190°C). Once the dish has rested, remove the foil. Sprinkle a quarter cup of brown sugar evenly over the top. Bake in the oven for 25 minutes. After baking, switch to the broiler for the last 2-3 minutes. Watch closely as the sugar caramelizes. You want a golden, crunchy top. Once done, take it out of the oven and let it cool for a few minutes. Cut into squares and serve warm for a delightful treat. The custard soak is key to this dish. Use fresh eggs and cream for the best flavor. Whisk the eggs and cream together until smooth. Soak each slice of challah bread for about 30 seconds on each side. This helps the bread absorb the custard well. If the bread is too dry, it won't soak up enough. If it’s too wet, it will fall apart. To get that crunchy top, sprinkle brown sugar evenly over the soaked bread. This sugar will melt and caramelize in the oven. After baking, switch to broil for the last 2-3 minutes. Keep a close eye on it. You want it golden, not burnt. The caramelized layer adds a nice contrast to the creamy custard. For a beautiful presentation, cut the French toast into squares. Arrange them on a decorative platter. Pile fresh berries next to the slices for color. Add a sprig of mint on top for a fresh look. Serve warm with coffee or tea. This makes for a lovely brunch that impresses everyone. Enjoy each bite! Pro Tips Soak Time Matters: Allow the challah bread to soak in the custard mixture for at least 30 seconds on each side. This ensures that each slice is infused with flavor and maintains a creamy texture after baking. Use Fresh Ingredients: Whenever possible, opt for fresh eggs, high-quality cream, and real vanilla extract. These ingredients will elevate the flavor profile of your French toast, making it truly decadent. Watch the Broiler: When using the broiler to caramelize the sugar, stay vigilant! It can go from perfectly caramelized to burnt in seconds, so keep a close eye on it. Garnish for Glamour: Fresh berries and mint not only add vibrant color to your dish but also provide a refreshing contrast to the richness of the French toast. Don't skip this step for an elegant presentation! {{image_4}} You can boost the flavor of your Crème Brûlée French Toast easily. Try adding zest from oranges or lemons to the egg mixture. This will give it a bright, fresh taste. You can also mix in spices like nutmeg for warmth. A few drops of almond extract can add a nice twist too. Each of these options enhances the dish in a unique way. If you have dietary needs, there are simple swaps. Use gluten-free bread if you want to avoid gluten. To make it dairy-free, replace heavy cream and milk with almond or coconut milk. You can also use flax eggs instead of regular eggs for a vegan option. These swaps ensure everyone can enjoy this delicious recipe. Want to get creative? Try making stuffed Crème Brûlée French Toast. Spread cream cheese or a fruit jam between two slices of bread before soaking. You can also layer the bread slices with berries for added flavor and texture. These twists make your French toast even more fun and exciting to eat. After you enjoy your Crème Brûlée French Toast, you may have some left. To store it well, let it cool completely. Then, place the slices in an airtight container. You can keep it in the fridge for up to three days. If you want to save it longer, consider freezing it. When you're ready to eat the leftovers, reheating is key. For best results, use the oven. Preheat your oven to 350°F (175°C). Place the slices on a baking sheet. Heat them for about 10-15 minutes. This makes the edges crispy again. You can also use a microwave, but it may make the toast a bit soggy. Freezing is a great option if you want to meal prep. Wrap each slice in plastic wrap. Then, place them in a freezer bag. Make sure to remove as much air as possible. You can freeze them for up to two months. When you want to enjoy them, thaw overnight in the fridge before reheating. Yes, you can prepare Crème Brûlée French Toast ahead of time. First, follow the recipe until you arrange the soaked bread in the baking dish. After that, cover it tightly with plastic wrap. Place it in the fridge overnight. In the morning, remove it from the fridge and let it sit for about 15 minutes at room temperature. Then, sprinkle the brown sugar on top and bake as directed. If you don’t have heavy cream, you can use half-and-half or whole milk. For a lighter version, use a mixture of milk and Greek yogurt. This mix keeps the custard creamy while reducing fat. However, heavy cream gives the best flavor and texture. To keep the bread from getting soggy, do not soak it for too long. Dip each slice in the custard mix for only about 30 seconds on each side. Arrange the bread neatly in the baking dish, allowing space between slices. Also, letting it rest for 15 minutes after soaking helps too. This way, the bread absorbs the custard without becoming too wet. This blog post covered how to make Crème Brûlée French Toast from start to finish. We explored essential ingredients, detailed step-by-step instructions, and helpful baking tips. I shared fun variations and how to store leftovers for later. Enjoy making this tasty dish! Remember, experimenting with flavors or toppings can make it even better. With practice, you’ll impress everyone at the table.
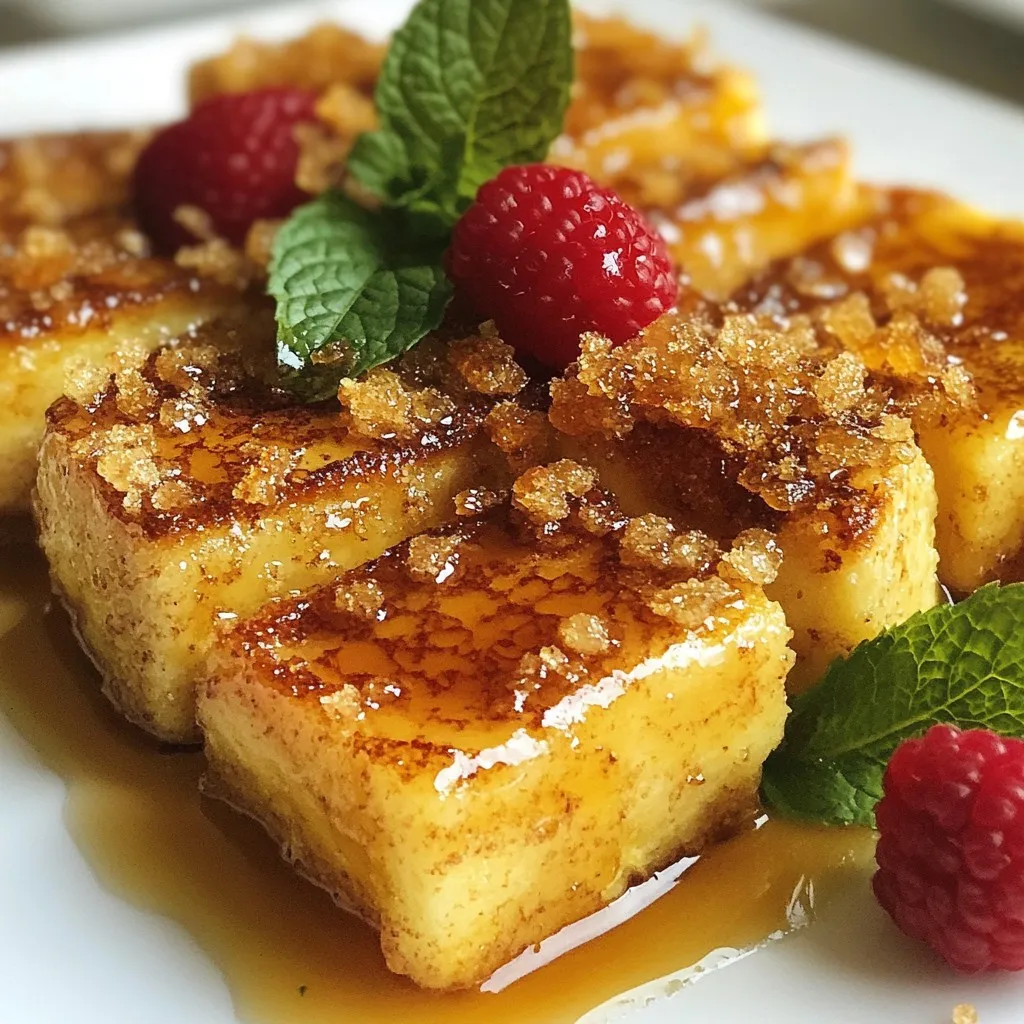
Crème Brûlée French Toast Decadent and Delicious Dish
Ready to elevate your breakfast game? Crème Brûlée French Toast combines rich custard with crispy caramel, creating a dish that’s both decadent and delicious. In
- 4 slices of whole-grain bread - 2 large eggs - 1/2 cup shredded cheddar cheese - 1/4 cup cream cheese, softened - 1 tablespoon olive oil - 1 clove garlic, minced - 1/4 teaspoon paprika - Fresh chives, chopped (for garnish) - A pinch of salt - A pinch of pepper In this recipe, I use whole-grain bread for a hearty base. It adds fiber and flavor. The large eggs are the star, providing protein and richness. I always choose sharp cheddar cheese. It melts beautifully and adds a bold taste. Cream cheese makes the mixture creamy and smooth. You want that lovely texture in each bite. The olive oil adds a nice touch. It helps sauté the garlic, which gives a warm, savory flavor. Minced garlic adds a lot of taste, so don’t skip this step. Paprika adds a hint of smokiness. You will love the flavor it brings! Fresh chives are a must for garnish. They add color and freshness. As for seasoning, a pinch of salt and pepper brings out all the flavors. Adjust to your taste. Use these ingredients to create a simple yet delicious breakfast. You will enjoy every bite! {{ingredient_image_2}} Start by preheating your oven to 375°F (190°C). This step is key. A hot oven helps the toast cook evenly. You want that cheese to melt perfectly and the eggs to set just right. Next, take a small skillet and add 1 tablespoon of olive oil. Heat it on medium. Once the oil shimmers, add 1 clove of minced garlic. Sauté for 1-2 minutes. Watch closely so the garlic does not burn. The smell will be amazing! In a mixing bowl, combine 1/4 cup of softened cream cheese with 1/2 cup of shredded cheddar cheese. Add 1/4 teaspoon of paprika, a pinch of salt, and a dash of pepper. Mix well until creamy. This mixture is rich and flavorful. Take your 4 slices of whole-grain bread. Spread the cream cheese mixture evenly on one side of each slice. Make sure to cover it completely. Now, use the back of a spoon to gently press down in the center of each slice. This will create small nests for the eggs. In a separate bowl, crack 2 large eggs. Whisk them until the yolks and whites mix well. Carefully pour the beaten eggs into each nest you made in the toast. Sprinkle the remaining cheddar cheese on top. Place the baking sheet in your preheated oven. Bake for 12-15 minutes. Check to see if the eggs are set and the cheese is golden brown. Enjoy the delicious aroma while it cooks! To avoid overcooked eggs, watch the baking time closely. Bake for just 12-15 minutes. Check your eggs at the 12-minute mark. The whites should be set, but the yolks can stay runny for a creamy bite. For a cheesy melt, use fresh shredded cheese. It melts better than pre-shredded types. Sprinkle the cheese on top just before baking. This ensures a gooey, golden finish. Try different cheeses like mozzarella, gouda, or feta. Each adds its own unique taste. For a stronger flavor, mix in some blue cheese. It pairs well with eggs. Using fresh herbs enhances the dish. Chives add a mild onion taste. You can also use parsley or basil. Just sprinkle them on top after baking for a fresh touch. Garnish your cheesy egg toast with extra chives. This adds color and flavor. You can also add a slice of avocado on the side for creaminess. Serve the toast on a wooden cutting board or a colorful plate. Pair it with mixed greens for a refreshing contrast. This makes your meal look as good as it tastes! Pro Tips Choose Quality Bread: Opt for fresh, high-quality whole-grain bread for the best texture and flavor. Variations on Cheese: Experiment with different types of cheese such as mozzarella or feta for unique flavors. Egg Cooking Preference: Adjust baking time to achieve your preferred egg doneness—longer for well-cooked, shorter for runny yolks. Garnishing Ideas: Enhance the final dish with additional toppings like avocado slices or a drizzle of hot sauce for extra flair. {{image_4}} You can make cheesy egg toast even better by adding veggies. Spinach, tomatoes, and peppers work great. Here is how to do it: - Add spinach: Use a handful of fresh spinach. Sauté it in the garlic oil for a minute. - Tomatoes: Chop cherry tomatoes in half and add them to the top before baking. - Peppers: Dice bell peppers and mix them into the cream cheese blend. When adding veggies, remember to cook them first. This helps keep the toast from getting soggy. Sauté the veggies lightly before spreading the cream cheese. This way, they stay crisp and tasty. Want to make your cheesy egg toast heartier? Add some protein! Bacon or ham can really boost the flavor. Here’s how: - Bacon: Cook the bacon until crispy. Crumble it and mix it in with the cream cheese. - Ham: Dice ham into small pieces and add it to the egg mixture. Cooking the meat first is key. This adds flavor and ensures it cooks well in the oven. If you need a gluten-free option, don't worry! You can still enjoy cheesy egg toast. - Bread types: Look for gluten-free bread. Brands like Udi's or Schar work well. - Preparing: Just follow the same steps as usual. Spread the cream cheese on gluten-free bread and bake as directed. This way, everyone can enjoy a delicious breakfast! To keep your cheesy egg toast fresh, follow these tips: - Best practices for refrigeration: Allow the toast to cool completely. Place it in the fridge within two hours. - Containers to use: Use an airtight container to store the toast. This keeps it from drying out. When you're ready to eat leftovers, here’s what you can do: - Oven vs. microwave reheating: The oven gives a better texture. Preheat it to 350°F (175°C). Place the toast on a baking sheet. Heat for about 10 minutes. - Maintaining texture and flavor: If using a microwave, heat on low power. This helps keep the eggs and cheese from getting rubbery. You can freeze cheesy egg toast. Here’s how: - Can cheesy egg toast be frozen?: Yes, it freezes well for up to two months. - Steps for freezing and defrosting: Wrap each piece tightly in plastic wrap, then place in a freezer bag. To defrost, put it in the fridge overnight. Reheat in the oven for the best taste. Making cheesy egg toast is quick. It takes about 10 minutes to prep. Cooking in the oven takes another 12 to 15 minutes. In total, you will spend around 25 minutes from start to finish. This makes it a perfect choice for a busy morning. Yes, you can prep the cheesy egg toast ahead of time. Spread the cream cheese mix on the bread and store it in the fridge. You can also whisk the eggs and keep them in a bowl. Just add the eggs and bake when you're ready to eat. This way, you still enjoy a warm meal without much fuss. Cheesy egg toast pairs well with many sides. You can serve it with mixed greens for a fresh crunch. A side of fruit adds natural sweetness. If you want something heartier, crispy bacon or sausage will do great. Feel free to get creative with your sides to match your taste! In this post, I showed you how to make cheesy egg toast from scratch. We covered key ingredients like whole-grain bread, eggs, and cheese, along with step-by-step instructions. I shared tips to perfect texture, enhance flavors, and even offered variations for added twists. You can store leftovers and learn how to reheat them for great taste. Enjoy making this dish and feel free to get creative with your ingredients. Cheesy egg toast is not just a meal; it's a way to impress.
Cheesy Egg Toast Deliciously Simple Breakfast Recipe
Are you ready to transform your breakfast routine? My Cheesy Egg Toast recipe is a delicious and simple way to start your day. With just