Breakfast

- 2 cups rolled oats: This is the main ingredient. It gives the pancakes a hearty texture. - 1 large ripe banana: It adds natural sweetness and moisture. - 1 large apple, peeled and finely grated: This brings a fresh flavor and moisture. - 2 large eggs: They bind the ingredients together and provide protein. - 1 teaspoon baking powder: This helps the pancakes rise and become fluffy. - 1 teaspoon ground cinnamon: It adds warmth and spice to the pancakes. - 1/2 teaspoon vanilla extract: This enhances the overall flavor. - 1/4 cup milk (either dairy or non-dairy): It helps create a smooth batter. - Pinch of salt: This balances the sweetness. - Coconut oil or butter, for cooking: This prevents sticking and adds flavor. - Maple syrup, for serving (optional): This is a tasty way to sweeten your pancakes. - Rolled oats: Use gluten-free oats for a gluten-free option. - Banana: Applesauce can replace banana for a different flavor. - Eggs: Use flax eggs or chia seeds mixed with water to make it vegan. - Milk: Almond milk or oat milk works well for dairy-free diets. - Grated apple or banana slices: These fresh toppings add texture and flavor. - Sprinkle of cinnamon: This boosts the warm spice flavor. - Maple syrup: A drizzle adds sweetness and a lovely finish. Each ingredient plays a vital role in making these pancakes delicious and nutritious. You can swap ingredients based on your needs, making this recipe flexible and fun! {{ingredient_image_2}} To start, place the rolled oats into a blender. Blend them until they look like fine flour. This step is key for the best pancakes. If the oats are not blended well, your pancakes may turn out gritty. Make sure you blend them thoroughly. Once done, transfer the oat flour to a large mixing bowl. Now, add these ingredients to the blender: the ripe banana, grated apple, eggs, baking powder, ground cinnamon, vanilla extract, milk, and a pinch of salt. Blend this mix until it is smooth and creamy. This helps all the flavors come together nicely. Pour the blended mix into the bowl with the oat flour. Stir everything until it's well mixed. Let the batter rest for about five minutes. This resting time thickens the batter and improves the texture. While the batter rests, preheat a non-stick skillet over medium heat. Add a small amount of coconut oil or butter to coat the skillet. This step prevents sticking and helps the pancakes cook evenly. Using a ladle, pour about 1/4 cup of the batter onto the skillet for each pancake. Cook them for about 2-3 minutes. Watch for bubbles to form on the surface. When the edges look firm, it's time to flip them. Use a spatula to carefully turn the pancakes over. Cook them for another 2-3 minutes until they are golden brown. Repeat this until all the batter is used, adding more oil or butter as needed. Enjoy your pancakes warm with maple syrup if you like a sweet touch! The texture of your pancakes matters. To get it just right, resting the batter is key. After mixing, let it sit for about five minutes. This helps the oats absorb the liquid and thicken. A thicker batter leads to fluffier pancakes. If you prefer thinner pancakes, add a bit more milk to the batter. Adjusting the thickness can fit your taste. You can make your pancakes even better with toppings. Fresh fruits like bananas or berries work great. They add color and extra flavor. Maple syrup is a classic choice for sweetness. Drizzle it on top for a delightful finish. You can also add a sprinkle of cinnamon or nuts for texture. For a fun twist, stack pancakes high and add a dollop of yogurt. Be careful not to overmix the batter. Mixing too much can make your pancakes tough. Blend until just combined for the best results. Watch the cooking temperature, too. If your skillet is too hot, the outside cooks fast while the inside stays raw. A medium heat works best. Flip the pancakes when you see bubbles forming. This helps them cook evenly and turn golden brown. Pro Tips Use Overripe Bananas: The riper the banana, the sweeter your pancakes will be. This not only enhances flavor but also reduces the need for added sugars. Rest the Batter: Allowing the batter to rest for about 5 minutes helps the oats absorb moisture, resulting in fluffier pancakes. Keep the Heat Medium: Cooking pancakes at medium heat ensures they cook evenly without burning. Adjust the heat as needed while cooking. Customize Your Add-ins: Feel free to add nuts, seeds, or dried fruits to the batter for added texture and flavor. Just fold them in gently before cooking. {{image_4}} You can easily change the taste of your pancakes. Adding spices makes them more exciting. Try adding: - 1/2 teaspoon nutmeg for warmth. - 1 teaspoon vanilla extract for sweetness. - A pinch of ginger for a spicy kick. You can also mix in other fruits or nuts. Here are some ideas: - Blueberries for a burst of juiciness. - Chopped walnuts for crunch. - Sliced bananas for extra sweetness. These tweaks create unique flavors for each batch. If you need gluten-free pancakes, use certified gluten-free oats. They work just as well and keep the taste great. For dairy-free options, choose non-dairy milk. Almond milk or oat milk are good choices. You can also use coconut milk for a tropical twist. To make the recipe vegan-friendly, replace the eggs with one of these options: - 1/4 cup unsweetened applesauce. - 1/4 cup mashed banana. - 1 tablespoon ground flaxseed mixed with 2.5 tablespoons water. These replacements keep the pancakes fluffy and tasty. You can change how you serve these pancakes, too. One fun idea is to make pancake muffins. Simply pour the batter into a greased muffin tin and bake at 350°F for about 15-20 minutes. They’re perfect for on-the-go breakfast! Another idea is to make mini pancakes for kids. Use a smaller ladle to pour the batter. They cook quicker and are fun for little hands. Plus, kids love them! These variations make your pancakes fun and customizable for everyone. If you have extra pancakes, store them in the fridge. Use an airtight container to keep them fresh. They will last for about three days. If you want to keep them longer, freeze them. Place parchment paper between each pancake. This way, they won’t stick together. You can freeze them for up to three months. To reheat the pancakes, use a microwave or skillet. For the microwave, heat them for 30 seconds. If you use a skillet, warm them over low heat for a few minutes. This keeps them soft and tasty. If you have leftover batter, you can store it too. Place it in a covered bowl in the fridge. It’s best to use it within one day. If you leave it too long, it may lose its rise. Before using, give the batter a good stir. If it seems too thick, add a little more milk. This helps it regain the right consistency. Leftover pancakes are versatile. You can make a pancake sandwich by adding peanut butter or yogurt between two pancakes. This makes a fun snack or breakfast. Another idea is to chop the pancakes and add them to a fruit salad. They add a nice texture and flavor. You can also crumble them over ice cream for a sweet treat. Enjoy getting creative with these delicious pancakes! Yes, you can use quick oats. Quick oats will change the texture slightly. They may create a softer pancake. If you use them, watch the cooking time. Quick oats may cook faster, so flip them as soon as bubbles appear. To make these pancakes gluten-free, ensure your oats are labeled gluten-free. Oats can often be mixed with gluten. To avoid this, use a clean bowl and clean utensils. Check your baking powder too, as some brands may contain gluten. You can substitute eggs with a few options. Try using 1/4 cup of unsweetened applesauce. Another choice is 1/4 cup of mashed banana. You can also use flaxseed meal mixed with water. For this, mix 1 tablespoon of flaxseed with 2.5 tablespoons of water and let it sit until it thickens. This blog post covered all you need to make perfect pancakes. We discussed ingredients, how to prepare oat flour, and tips for a smooth batter. You learned how to cook pancakes just right and avoid common mistakes. We also explored flavor and dietary variations, along with storing tips. In the end, pancake-making can be fun and creative. Enjoy your culinary journey and share your tasty creations!
Flourless Oatmeal Apple Pancakes Simple and Tasty Recipe
Looking for a delicious breakfast that’s quick and easy? Try my Flourless Oatmeal Apple Pancakes! This tasty recipe swaps traditional flour for oats, making it
- 1 cup all-purpose flour - 1/2 cup unsweetened cocoa powder - 1/4 cup granulated sugar - 2 tablespoons brown sugar - 2 teaspoons baking powder - 1/2 teaspoon baking soda - 1/4 teaspoon salt - 1 cup buttermilk (or milk with vinegar) - 1 large egg - 2 tablespoons melted butter (plus extra for greasing) - 1/2 cup semi-sweet chocolate chips - 1/2 cup white chocolate chips - Optional toppings: whipped cream, chocolate syrup These ingredients create the base for your delicious ultimate double chocolate pancakes. The all-purpose flour gives structure, while cocoa powder adds rich chocolate flavor. Granulated and brown sugars sweeten the batter, giving it a lovely depth. Baking powder and baking soda help the pancakes rise. The salt balances the sweetness and enhances the chocolate taste. Buttermilk makes the pancakes tender and fluffy. If you don’t have buttermilk, you can mix regular milk with vinegar for a quick substitute. The egg binds the batter, while melted butter adds richness. Semi-sweet and white chocolate chips provide that double chocolate flavor that makes these pancakes a treat. Feel free to add whipped cream and chocolate syrup as toppings for extra indulgence. Enjoy the process of gathering these ingredients; it’s the first step to a delightful breakfast! {{ingredient_image_2}} First, get a large mixing bowl. Sift together these dry ingredients: - 1 cup all-purpose flour - 1/2 cup unsweetened cocoa powder - 1/4 cup granulated sugar - 2 tablespoons brown sugar - 2 teaspoons baking powder - 1/2 teaspoon baking soda - 1/4 teaspoon salt Make sure to stir well. This helps combine everything and removes any lumps. A smooth mix is key for perfect pancakes. In another bowl, whisk together: - 1 cup buttermilk (or milk mixed with vinegar) - 1 large egg - 2 tablespoons melted butter Whisk until the mixture is smooth. This step is crucial. A well-mixed wet blend leads to a better batter. Now, slowly pour the wet mixture into the dry ingredients. Use a spatula or wooden spoon to mix gently. Stir just until combined. It’s okay if there are small lumps. Overmixing will make your pancakes tough, not fluffy. Then, fold in: - 1/2 cup semi-sweet chocolate chips - 1/2 cup white chocolate chips This adds a delightful chocolate experience to each bite. Next, preheat a non-stick skillet or griddle over medium heat. Add a little butter to grease the pan. This stops the pancakes from sticking. For each pancake, pour about 1/4 cup of batter onto the skillet. Cook for 2-3 minutes. Look for bubbles on the surface and set edges. Carefully flip the pancake using a spatula. Cook for another 2-3 minutes until golden brown. If you have more batter, repeat the cooking steps. Keep adding butter to the skillet to prevent sticking. To keep pancakes warm, place them on a baking sheet in a low oven (around 200°F/93°C). This way, all your pancakes stay nice and warm until ready to serve. To get fluffy pancakes, you must not overmix the batter. Mix just until you see no dry flour. It’s okay if there are lumps. Overmixing can make pancakes tough and flat. Cook the pancakes for 2-3 minutes until bubbles form and the edges look set. Then, flip them carefully and cook for another 2-3 minutes. They should be golden brown when done. For the best chocolate flavor, try using different chocolate chips. You can mix semi-sweet with dark chocolate chips for a richer taste. You can also add more cocoa powder if you want a deeper chocolate flavor. Just keep a balance so it doesn’t become too dry. A little extra sweetness from the chocolate can also enhance the flavor. Presentation is key! Stack your pancakes high on a large plate. Drizzle chocolate syrup over the top and let it drip down the sides. Add a dollop of whipped cream on top for extra creaminess. You can also sprinkle more chocolate chips for a fun touch. Pair these pancakes with fresh fruit or ice cream for a tasty twist! Pro Tips Use Room Temperature Ingredients: For the best results, ensure your buttermilk and egg are at room temperature. This helps the batter combine more smoothly and results in fluffier pancakes. Don’t Overmix: When combining wet and dry ingredients, mix until just combined. A few lumps are okay! Overmixing can lead to dense pancakes. Check Your Heat: If your pancakes are browning too quickly, reduce the heat. Medium-low heat is often ideal for even cooking without burning. Experiment with Toppings: Get creative! Besides whipped cream and chocolate syrup, try adding fresh berries, crushed nuts, or even a drizzle of peanut butter for a unique twist. {{image_4}} If you want to make these pancakes gluten-free, try using almond flour or oat flour. Both work well and still taste great. You can find these flours at most grocery stores. For a dairy-free option, swap buttermilk with a mix of regular milk and one tablespoon of vinegar. This creates a similar tangy flavor. You can also use coconut oil or a plant-based butter instead of regular butter. To enhance the flavor, add a teaspoon of cinnamon or a splash of vanilla extract. These spices will bring out the chocolate taste even more. If you want to add fruit, bananas or raspberries are perfect choices. Slice the bananas and fold them into the batter. For raspberries, gently mix them in to avoid smashing them. Both options add a fresh twist to the pancakes. These pancakes can work for both breakfast and dessert. You can serve them with a drizzle of syrup for breakfast. For dessert, try adding a scoop of ice cream on top. Unique toppings can elevate your pancakes. Consider using fruit compote or caramel sauce instead of regular syrup. You can also add whipped cream and extra chocolate chips for a fun touch. To keep your leftover pancakes fresh, place them in an airtight container. You can stack them with parchment paper in between to stop sticking. If you want to freeze them, wrap each pancake in plastic wrap. This keeps them safe from freezer burn. To reheat pancakes, use a microwave. Heat on medium for about 20-30 seconds. You can also use a skillet. Just heat it on low and add a little butter. Cook each side for about a minute. This keeps them soft and tasty. In the fridge, pancakes last about 3-4 days. Make sure to check for any signs of spoilage. If you freeze them, they can last up to 2 months. Just remember to label the bag with the date. This helps keep track of their freshness. Yes, you can use regular milk. To make a buttermilk substitute, mix 1 cup of milk with 1 tablespoon of vinegar. Let it sit for five minutes. This mix will give your pancakes a nice tang, just like buttermilk. To reduce sweetness, cut the sugar by a few tablespoons. You can try using just 2 tablespoons of granulated sugar instead of 1/4 cup. If you want more chocolate taste, consider adding extra cocoa powder instead of sugar. Use parchment paper between your pancakes when stacking. This will keep them from sticking together. You can also place them on a warm plate with a little butter spread on it. This method ensures your pancakes maintain their shape. Yes, you can make the batter ahead. Store it in the fridge for up to 24 hours. Just remember to give it a gentle stir before using. The batter may thicken a bit, but it will still work great for your pancakes. This post covered everything you need to make delicious chocolate pancakes. We went over the list of ingredients, step-by-step instructions, and helpful tips. You can even modify the recipe for different diets or flavors. Remember, not overmixing is key for fluffiness. Store leftovers properly for later enjoyment. With these tips, enjoy serving these pancakes for breakfast or dessert. Now, go ahead and create your perfect stack!
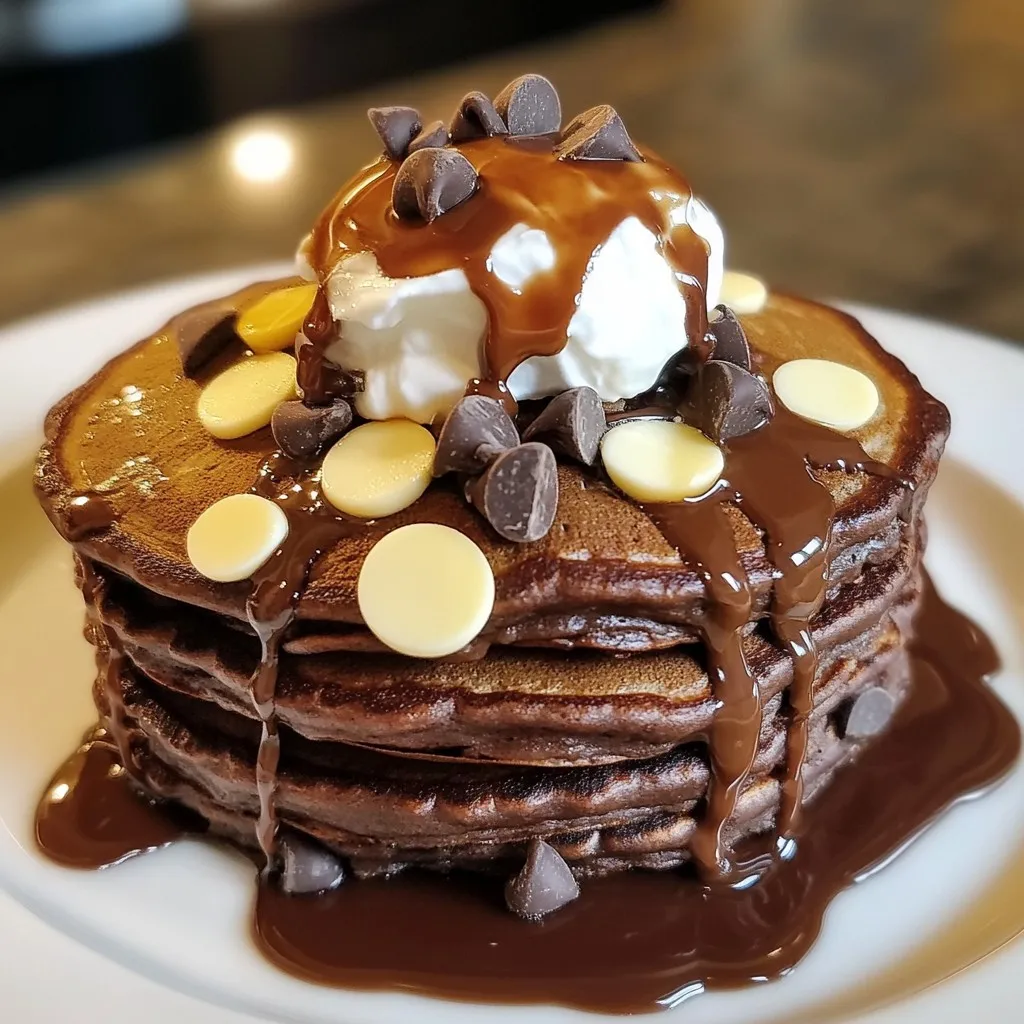
Delicious Ultimate Double Chocolate Pancakes Recipe
Get ready to transform your mornings with my ultimate double chocolate pancakes recipe! These rich, fluffy stacks are packed with cocoa and chocolate chips, making
To make Easy Skillet Shakshuka, you need a few simple and fresh items. These ingredients come together to create a dish full of flavor. Here’s what you will need: - 2 tablespoons extra virgin olive oil - 1 medium onion, diced - 1 vibrant red bell pepper, diced - 3 cloves of garlic, minced - 1 teaspoon ground cumin - 1 teaspoon smoked paprika - 1 can (14 oz) of crushed tomatoes - 4 large eggs, preferably farm-fresh - Salt and freshly cracked black pepper to taste - Fresh cilantro or parsley, chopped (for garnish) - Crumbled feta cheese (optional, for added richness) - Warm pita bread or rustic crusty bread (for serving) These ingredients are easy to find. They work well together to make a warm, comforting meal. The eggs add protein, while the tomatoes provide a rich base. Fresh herbs and spices lift the whole dish. Enjoy the vibrant colors and flavors that come from this list! {{ingredient_image_2}} 1. Start by heating the extra virgin olive oil in a large skillet over medium heat. This oil is key for flavor and helps your dish shine. 2. When the oil shimmers, it’s ready. Add the diced onion and red bell pepper. Sauté these for about 5 minutes. Stir them often until the onion softens and turns clear. 1. Next, add the minced garlic, ground cumin, and smoked paprika to the skillet. Cook for one more minute. Stir well, and let the spices wake up with their tasty smell. 2. Now, pour in the crushed tomatoes. Add a pinch of salt and freshly cracked black pepper. Let everything simmer gently for about 10 minutes. This step lets the flavors blend and become rich and delicious. 1. After the sauce simmers, use the back of a spoon to make small wells in the tomato mix. Carefully crack an egg into each well. Keep those yolks intact for the best result! 2. Cover the skillet with a lid. Let the eggs cook for 5 to 7 minutes. You’ll know they’re done when the whites firm up, but the yolks still jiggle. Adjust the time based on how you like your yolks. 3. When the eggs look good, take the skillet off the heat. Sprinkle some fresh cilantro or parsley on top. If you like, add crumbled feta cheese for more flavor. Choosing the right skillet is key. I like to use a large, oven-safe skillet. This helps with even cooking and makes serving easy. A cast iron skillet works well too, as it holds heat nicely. Adjusting spice levels can make a difference in the taste. If you want more heat, add some red pepper flakes or chili powder. Start with a little, then taste as you go. You can always add more, but it’s hard to take spice out once it’s in! For the best bread pairings, warm pita bread is my top choice. It’s soft and perfect for scooping up the shakshuka. Rustic crusty bread is also great for dipping. You can even toast it for extra crunch. Presentation tips are simple but effective. Use a shallow bowl to show off the colorful eggs and sauce. Sprinkle fresh herbs on top for bright color. If you add feta cheese, it makes the dish look fancy and delicious! Pro Tips Fresh Ingredients: Using farm-fresh eggs and ripe vegetables will significantly enhance the flavor of your shakshuka. Spice it Up: Feel free to adjust the spices to your taste; adding a pinch of cayenne pepper can give your dish an extra kick. Customize Your Toppings: Experiment with different toppings like avocado or olives for a unique twist on this classic dish. Perfect Egg Cooking: For perfectly runny yolks, monitor the cooking time closely and remove the skillet from heat just as the whites set. {{image_4}} You can change ingredients in shakshuka to suit your taste. Start with vegetables. If you don’t have red bell pepper, use zucchini, spinach, or even kale. Each veggie brings unique flavor and texture. Adding proteins or beans is a great option too. Try chickpeas or black beans for extra protein. You can also add ground meat like lamb or beef for a heartier meal. This keeps the dish filling and tasty. To make shakshuka exciting, play with spices. You can add cayenne pepper for heat or coriander for a fresh taste. Smoked paprika adds a nice depth, but feel free to explore other spices you love. Cheese can also enhance flavors. Feta cheese is popular, but goat cheese or mozzarella works well, too. Each cheese gives a different taste and creaminess. Don't be afraid to experiment and find what you enjoy most! To store leftovers, let the shakshuka cool first. Place it in an airtight container. This keeps it fresh for up to three days. When you’re ready to eat, reheat it on the stove over low heat. Stir gently so it warms evenly. You can also use a microwave, but check every 30 seconds to avoid overcooking the eggs. You can freeze shakshuka, but it’s best to do this before cooking. To freeze uncooked shakshuka, prepare your base of onions, peppers, and spices. Pour it into a freezer-safe container. Leave space for expansion. When you’re ready to cook, thaw it overnight in the fridge. For cooked shakshuka, allow it to cool completely before freezing. Store it in an airtight container for up to three months. To reheat, thaw it in the fridge overnight. Heat it gently on the stove, adding a splash of water if it seems dry. For best results, cook the eggs fresh after thawing. This keeps them runny and delicious. What can I serve with Shakshuka? You can serve Shakshuka with warm pita bread or rustic crusty bread. These breads are great for dipping into the rich sauce. You might also enjoy it with a fresh salad on the side. A light cucumber or tomato salad works well, adding a nice crunch. Can I make Shakshuka ahead of time? Yes, you can make Shakshuka ahead of time. Prepare the sauce and store it in the fridge. When you are ready to eat, just heat it up and add the eggs. Cook the eggs fresh for the best texture. Can I use fresh tomatoes instead of canned? Absolutely! You can use fresh tomatoes instead of canned. Just peel and chop about 4-5 medium-sized tomatoes. Cook them down until they are soft and juicy, which may take a bit longer than canned tomatoes. Are there vegetarian options for shakshuka? Shakshuka is naturally vegetarian. You can also add more veggies, like spinach or zucchini, for extra flavor and nutrition. If you want a vegan version, skip the eggs and enjoy the sauce with chickpeas for added protein. You learned about making shakshuka with fresh veggies, spices, and eggs. We covered each step, from cooking the base to adding flavors. Remember, you can adjust spice levels and try different ingredients for fun twists. Perfect your dish with the right skillet and serve with your favorite bread. Store leftovers safely and enjoy them later. Shakshuka is easy to make and customize. Dive in and savor your delicious creation!
Easy Skillet Shakshuka Flavorful and Simple Recipe
If you’re craving a dish that bursts with flavor and is easy to make, you’re in the right spot! My Easy Skillet Shakshuka recipe is
- 6 slices of white bread (crusts removed) - 3 large eggs - 1/2 cup milk - 1 teaspoon vanilla extract - 1 teaspoon ground cinnamon + extra for coating - 1/4 cup granulated sugar - 4 tablespoons unsalted butter - Maple syrup (for drizzling) - Powdered sugar (for dusting, optional) I love using white bread for this recipe. It rolls easily and soaks up the egg mix well. Make sure to remove the crusts; this helps keep the roll-ups soft. Using fresh eggs is key for a fluffy texture. For the milk, any type works, but whole milk gives a rich flavor. The vanilla extract adds a nice warmth to each bite. Ground cinnamon is a must! It makes the roll-ups smell amazing and taste sweet. You’ll need granulated sugar to mix with the cinnamon for coating. This adds a sweet crunch. Unsalted butter cooks the roll-ups perfectly. It gives a golden, crispy outside while keeping the inside soft. Maple syrup is great for drizzling on top. It adds a touch of sweetness. If you like, sprinkle some powdered sugar for a nice finish. You can find the full recipe for these delightful roll-ups above. Enjoy making them! - Prepare the Bread: Start by removing the crusts from each slice of bread. Use a rolling pin to flatten them to about 1/4 inch thick. This step helps the bread roll easily without tearing. - Make the Egg Mixture: In a medium bowl, whisk together 3 large eggs, 1/2 cup of milk, 1 teaspoon of vanilla extract, and 1 teaspoon of ground cinnamon. Mix until everything is smooth and well combined. - Roll It Up: Take a piece of the flattened bread. Place 1-2 teaspoons of your preferred filling at one end. You can use nut butter, cream cheese, or fruit jam. Roll the bread tightly, making sure the filling stays inside, like a burrito. - Coat the Roll Ups: In a shallow dish, mix 1/4 cup of granulated sugar with another teaspoon of ground cinnamon. Dip each rolled bread slice into the egg mixture. Let any excess drip off, then roll it in the cinnamon-sugar mix. Make sure each roll is well coated. - Cook the Roll Ups: Heat 2 tablespoons of unsalted butter in a large skillet over medium heat. Once melted and sizzling, add the roll-ups seam side down. Cook for 2-3 minutes on each side until they turn golden brown and crispy. If needed, repeat with more butter and remaining roll-ups in batches. - Serve the Final Dish: After cooking, transfer the roll-ups to a serving plate. If you want, lightly dust them with powdered sugar. Serve warm with maple syrup on the side for dipping. Enjoy this delightful treat! You can find the full recipe to guide you through these steps. - Ensure bread is evenly flattened: Use a rolling pin to flatten each slice. This helps create a nice, even texture. - Use room temperature eggs for better mixing: Cold eggs can clump in the mixture. Room temp eggs blend smoothly, ensuring a creamy mix. - Don't overfill the roll-ups to avoid spillage: Use just 1-2 teaspoons of filling. This keeps everything inside during cooking. - Ideal accompaniments: Fresh fruits like strawberries or blueberries add color and flavor. A dollop of whipped cream makes each bite richer. - Suggestions for presentation: Arrange roll-ups on a colorful plate. Dust with powdered sugar for a touch of elegance. Drizzle with maple syrup for extra sweetness. For the full recipe, check out the details above. Enjoy your tasty creation! {{image_4}} You can make Cinnamon French Toast Roll Ups even more fun with different flavors. Start with sweet fillings. Cream cheese adds a rich taste. Fruit jams bring a burst of sweetness. You can even mix cream cheese with fruit for a yummy combo. For savory options, try cream cheese mixed with herbs. This gives a fresh twist. Nut butters also work great. Peanut or almond butter adds a nutty flavor. Experiment with these fillings to find your favorite! If you need gluten-free options, use gluten-free bread. This works well and keeps the dish tasty. You can also make the roll-ups vegan. For this, replace eggs with mashed banana or flaxseed meal mixed with water. Use plant-based milk instead of regular milk. These swaps let everyone enjoy this treat! For the full recipe, check out the detailed instructions above. After enjoying your cinnamon French toast roll-ups, store any leftovers properly. First, let them cool to room temperature. This step helps prevent moisture from building up. Next, place the roll-ups in an airtight container. I recommend using a glass or plastic container with a tight lid. This keeps them fresh for up to three days in the fridge. If you want to keep them longer, consider freezing them. Wrap each roll-up in plastic wrap before placing them in a freezer-safe bag or container. They can last up to three months in the freezer. When you're ready to enjoy your roll-ups again, reheating them well is key. For the best texture, I suggest using an oven or skillet. Preheat your oven to 350°F (175°C). Place the roll-ups on a baking sheet and heat for about 10-15 minutes. This method restores their crispiness. If you use a skillet, heat it over medium-low heat. Add a small amount of butter or oil to keep them from sticking. Cook each roll-up for about 2-3 minutes on each side. This method prevents sogginess and keeps them warm without drying out. Enjoy your roll-ups just like the first time! Can I make this recipe ahead of time? Yes, you can prepare the roll-ups ahead of time. After cooking, let them cool. Store them in an airtight container in the fridge. When ready to serve, just warm them up in a skillet or microwave. How can I customize the filling? You can customize the filling to your taste! Try cream cheese with fruit jam, nut butter with banana slices, or even chocolate spread. The sky is the limit! Experiment with different flavors and textures to find your favorite. What can I do with leftover bread crusts? Don’t throw away those crusts! You can save them for croutons or breadcrumbs. Just cut them into small pieces, season, and bake until crispy. They add great flavor and texture to soups and salads! Is it possible to freeze Cinnamon French Toast Roll Ups? Yes, you can freeze them! After cooking, let them cool completely. Wrap each roll-up in plastic wrap and place them in a freezer bag. They can last for up to two months. When ready to enjoy, just reheat them in the oven or microwave. For the full recipe, check out the details above! Cinnamon French toast roll ups are fun and easy to make. You learned about the main ingredients and steps to prepare them. Tips like using room temperature eggs help make them perfect. You can even customize your fillings for more taste. Store any leftovers properly to enjoy them later. Now, you have all you need to whip up this tasty treat. Enjoy your cooking and the smiles they bring!
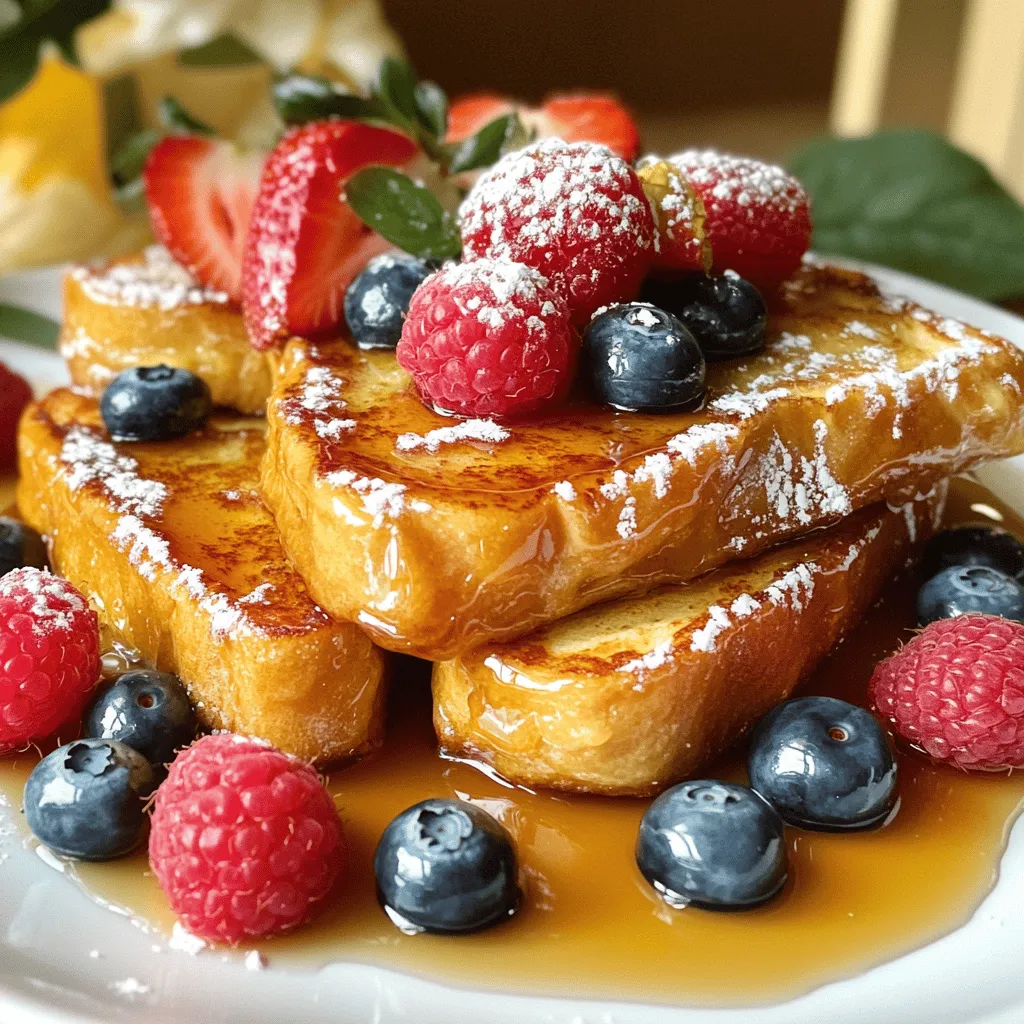
Cinnamon French Toast Roll Ups Delightful and Easy Recipe
Wake up your mornings with Cinnamon French Toast Roll Ups! This delightful and easy recipe combines soft bread with a sweet, cinnamon filling, perfect for
- 6 slices of bread (white or whole grain) - 4 tablespoons butter, softened - 1 tablespoon ground cinnamon - 1/4 cup granulated sugar - 1/4 cup cream cheese, softened to room temperature - 1/4 cup powdered sugar - 2 large eggs - 1/4 cup milk (dairy or non-dairy) - 1 teaspoon vanilla extract Gathering the right ingredients makes all the difference. For this recipe, I like using white or whole grain bread. Both options give a soft texture that rolls well. You need six slices, so grab a loaf from the store. Next, the filling needs cream cheese. It adds a rich taste that pairs perfectly with cinnamon. You’ll want it softened to room temperature for easy mixing. The sweet part comes from powdered sugar, which blends smoothly with the cream cheese. This filling will surprise you with its creamy goodness. Next, let’s talk about the egg mixture. Two large eggs, some milk, and vanilla extract create a flavorful custard. This mixture coats the roll-ups and makes them rich and tasty. The cinnamon sugar mix is simple yet essential. Combine granulated sugar with ground cinnamon. This gives the roll-ups a sweet and spicy coating. You now have all the ingredients to create a delightful treat. For the full recipe, check out the specific steps that follow. Enjoy the process of making these Cinnamon Roll French Toast Roll-Ups! To make the cream cheese filling, grab a small bowl. Add 1 tablespoon of softened butter, 1/4 cup of cream cheese, and 1/4 cup of powdered sugar. Use a fork or hand mixer to blend everything together. Mix until it’s smooth and creamy. This filling will add a delicious touch to your roll-ups. Now, let’s prepare the bread. Use a rolling pin to flatten each slice of bread. Roll gently until they are slightly thin. This makes it easier to roll them up later. Next, take a slice of flattened bread. Spread a thin, even layer of the cream cheese filling on top. Be careful to leave a little space around the edges. This will help the filling stay inside when you roll it up. It’s time to roll the bread. Start at one end and roll the slice tightly into a log shape. Keep rolling until you reach the other end. Repeat this with each slice of bread. Next, make the cinnamon sugar coating. In a small bowl, mix 1/4 cup of granulated sugar with 1 tablespoon of ground cinnamon. Stir well to combine. Now, heat a skillet over medium heat. Add 3 tablespoons of butter and let it melt. In a shallow dish, whisk together 2 large eggs, 1/4 cup of milk, and 1 teaspoon of vanilla extract. Dip each rolled bread piece into this egg mixture. Make sure to coat it but don’t soak it. Place each coated roll in the skillet. Cook for about 2-3 minutes on each side. You want them golden brown and crispy. Once they are cooked, remove them from the skillet. Immediately roll them in the cinnamon sugar mixture until covered. Enjoy these tasty treats with syrup! For the full recipe, check out the earlier section. When you spread the cream cheese filling, leave a small border. This helps keep the filling inside while rolling. If you spread it all the way to the edge, the filling might ooze out. A tiny gap makes all the difference. Be careful not to over-soak the bread in the egg mixture. If you dip it too long, the bread gets soggy. Just a quick dip is enough. The goal is to coat it lightly with the mixture. This way, your roll-ups stay crispy on the outside. Presentation counts! Add fresh fruit or a light dusting of powdered sugar on top. A sprinkle of berries brings color and freshness. You can also drizzle honey or syrup for extra sweetness. These little touches make your dish look amazing and taste even better. For the full recipe, check out the details above! {{image_4}} You can make your Cinnamon Roll French Toast Roll-Ups even better! Try adding chocolate chips or fruit preserves inside the roll. Chocolate gives a tasty twist, and fruit preserves add a fun burst of flavor. You can also use flavored cream cheese, like strawberry or pumpkin spice, to change the taste profile. These small changes make a big impact. If you need gluten-free options, look for gluten-free bread. This way, everyone can enjoy the treat. For those who avoid dairy, use dairy-free cream cheese or even nut-based alternatives. This keeps your roll-ups creamy and delicious without using dairy. You can choose different types of syrups, too. Berry syrup adds a fruity touch, while caramel syrup brings a rich sweetness. For extra crunch, sprinkle some nuts on top or add colorful sprinkles. These toppings can turn your roll-ups into a truly special dish. For the full recipe, check out the [Full Recipe]. To store your Cinnamon Roll French Toast Roll-Ups, let them cool completely. Place them in an airtight container. They will stay fresh in the fridge for about three days. If you want to save space, stack them with parchment paper between each layer. Reheating is simple and quick. Preheat your skillet over medium heat. Place the roll-ups in the skillet for about two minutes on each side. This method keeps them crispy. You can also use a microwave. Heat them for about 20-30 seconds. However, this may make them a bit soft. Yes, you can freeze Cinnamon Roll French Toast Roll-Ups! To freeze, cool them completely and wrap each roll in plastic wrap. Then, place them in a freezer bag. They can stay frozen for about two months. To thaw, take them out the night before and place them in the fridge. If you're in a hurry, microwave them for 1-2 minutes until warm. This way, you can enjoy this tasty treat anytime. To make these tasty roll-ups, follow these steps: 1. Prepare the Cream Cheese Filling: Mix 1 tablespoon of softened butter with 1/4 cup of softened cream cheese and 1/4 cup of powdered sugar in a bowl until smooth. 2. Flatten the Bread: Use a rolling pin to gently flatten each slice of bread. 3. Spread the Cream Cheese Filling: Apply a thin layer of the cream cheese mixture on each flattened slice, leaving a small border. 4. Roll the Bread: Starting from one end, tightly roll each slice into a log. 5. Make the Cinnamon Sugar Coating: Mix 1/4 cup of granulated sugar with 1 tablespoon of ground cinnamon in a small bowl. 6. Prepare the Egg Mixture: Whisk together 2 large eggs, 1/4 cup of milk, and 1 teaspoon of vanilla extract in a shallow dish. 7. Cook the Roll-Ups: Heat a skillet over medium heat and melt 3 tablespoons of butter. Dip each roll in the egg mixture, then cook for 2-3 minutes on each side until golden brown. 8. Coat in Cinnamon Sugar: Roll the cooked roll-ups in the cinnamon sugar mixture while warm. 9. Serve and Enjoy: Place the roll-ups on a plate and drizzle with syrup. Yes, you can prepare these roll-ups ahead. Here’s how: - Prep Early: Make and roll the bread slices, then store them in the fridge. - Cook Later: When ready to eat, cook them fresh. This keeps them crispy and warm. These roll-ups pair well with many sides: - Fresh Fruit: Berries or sliced bananas add a nice touch. - Yogurt: A dollop of yogurt offers a creamy contrast. - Syrups: Maple syrup or fruit syrup enhances their sweetness. - Powdered Sugar: A light dusting adds a nice final touch. For the full recipe, check out my detailed instructions! You've learned how to make tasty Cinnamon Roll French Toast Roll-Ups, using simple ingredients. We covered everything from the cream cheese filling to the final cooking steps. Remember to seal your roll-ups and not soak them too long for the best results. Don't forget to try different flavors and toppings to make it your own. Whether you store them, reheat, or even freeze them, these roll-ups are sure to please. Enjoy your delicious creation, and have fun experimenting with variations!
Cinnamon Roll French Toast Roll-Ups Easy and Tasty Treat
If you love sweet breakfast treats, you’re in for a treat! Cinnamon Roll French Toast Roll-Ups combine the best of two worlds: gooey cinnamon rolls
- 1 lb breakfast sausage - 6 large eggs - 1 cup shredded cheddar cheese - 1 cup diced bell peppers - 1/2 cup finely diced onions - 1 can (4 oz) diced green chiles - 1 tsp garlic powder - 1 tsp ground cumin - Salt and black pepper to taste - Fresh cilantro - Avocado slices For this recipe, start with the main ingredients. I use breakfast sausage for a savory base. Six large eggs create a fluffy filling. Shredded cheddar cheese adds a creamy touch. I love using a mix of colorful bell peppers for flavor and fun. Finally, some finely diced onions give depth to the dish. Next, we add seasoning and garnish. Diced green chiles bring a mild heat that enhances the dish. Garlic powder and ground cumin offer warmth and depth. Don't forget to season with salt and black pepper to taste. Fresh cilantro adds brightness, while ripe avocado slices provide creaminess. These add-ons make each bite special and fresh. This ingredient list helps you build a tasty and satisfying meal. You can easily find these items at your local store. They combine to create a hearty breakfast taco that everyone will love! {{ingredient_image_2}} - Cooking breakfast sausage: Start by crumbling 1 pound of breakfast sausage into a medium skillet. Cook over medium heat for 6-8 minutes until it is browned and fully cooked. Drain any grease before moving the sausage to the slow cooker. - Whisking eggs with vegetables and seasonings: In a large mixing bowl, crack 6 large eggs. Whisk them until they are well beaten. Next, add 1 cup of diced bell peppers, 1/2 cup of finely diced onions, and 1 can of drained diced green chiles. Season with 1 teaspoon each of garlic powder and ground cumin. Add salt and freshly cracked black pepper to your taste. Stir well to combine everything. - Layering ingredients in the slow cooker: Carefully pour the egg mixture over the cooked sausage in the slow cooker. Spread it evenly so every bite gets flavor. - Cooking times for low and high settings: Cover the slow cooker with its lid. Set it to cook on low for 4 hours or high for 2 hours. The eggs are done when they have set and cooked through. Stir occasionally to ensure even cooking. - Adding shredded cheese: Once the taco filling is fully cooked, sprinkle 1 cup of shredded cheddar cheese on top. Cover the slow cooker again and let it sit on warm for about 10 minutes. This lets the cheese melt nicely. - Warming tortillas: While the cheese melts, warm 8 small flour tortillas. You can do this in a dry skillet over medium heat for about 30 seconds on each side. Alternatively, microwave them for 20 seconds until they are soft. - Assembling and garnishing the tacos: To assemble, take a warm tortilla and spoon a generous amount of the breakfast mixture in the center. Add fresh cilantro and a couple of avocado slices for creaminess and extra flavor. - Best sausage to use: I recommend using a mild breakfast sausage. It gives a great flavor and won’t overpower the dish. If you like spice, try a hot sausage for a kick. - How to avoid overcooking the eggs: Keep an eye on your slow cooker. Cook on low for 4 hours or high for 2 hours. Stir occasionally to ensure even cooking. - Presentation ideas for serving: Serve the tacos on a bright platter. Add extra cilantro and avocado slices on the side. This allows guests to customize their tacos. A drizzle of hot sauce adds a nice touch and some heat. - Pairing drinks with breakfast tacos: A fresh juice or a light coffee pairs well. If you want something fun, try a mimosa or a spicy Bloody Mary. - Substitutions for vegetables: You can swap bell peppers for zucchini or spinach. Both add color and flavor. Feel free to mix in your favorite veggies based on what you have. - Adding different types of cheese: While cheddar cheese is classic, you can try pepper jack for spice or a creamy Monterey Jack for a milder taste. Each cheese brings its own unique flavor to the tacos. Pro Tips Use Fresh Ingredients: Opt for fresh, locally sourced vegetables and high-quality sausage for the best flavor in your breakfast tacos. Customize Your Spice Level: Adjust the heat by adding more or fewer diced green chiles or incorporating jalapeños for an extra kick. Perfectly Warm Tortillas: Warm tortillas in a skillet instead of the microwave to achieve a better texture and flavor. Make Ahead: Prepare the filling a day in advance and store it in the refrigerator. Reheat in the slow cooker before serving for a quick breakfast option. {{image_4}} You can switch up the meat in your tacos. Try using turkey or chicken sausage instead of regular sausage. These options are leaner and still pack great flavor. If you want a vegetarian choice, black beans work well too. They add protein and a nice texture. Simply replace the sausage with a can of rinsed black beans. You’ll still enjoy a hearty taco! Want to add a little zing? Try adding spices like paprika or chili powder. These spices boost the flavor and give your dish a warm kick. You can also experiment with different types of peppers. Jalapeños or poblano peppers add heat. If you prefer milder options, go for bell peppers. The choice is yours! If you need gluten-free options, look for gluten-free tortillas. Many brands offer tasty choices that work great in tacos. For those avoiding dairy, consider using dairy-free cheese. There are many brands that melt nicely and taste great. These swaps let everyone enjoy breakfast tacos, no matter their diet! To keep your breakfast tacos fresh, store them in an airtight container. Make sure to cool them down before you put them in the fridge. Breakfast tacos can last up to three days in the fridge. Always check for any off smell or change in texture before eating. If you want to freeze the taco filling, let it cool first. Then, place it in a freezer-safe bag. Try to remove as much air as possible to avoid freezer burn. The filling can last up to three months in the freezer. When you're ready to eat, thaw it overnight in the fridge. Reheat it on the stove or in the microwave until it's hot. To make quick breakfasts, prepare the filling on a weekend. Portion it into small containers for easy grab-and-go meals. You can also wrap the filling in tortillas and freeze them. This way, you have a tasty meal ready in minutes. Just warm them up and enjoy! You can swap the breakfast sausage for turkey sausage or plant-based options. Use egg whites instead of whole eggs for fewer calories and fat. Add more veggies like spinach or zucchini for extra fiber and nutrients. You can also choose whole wheat tortillas for added health benefits. Yes, you can make the filling a day ahead. Cook the sausage and mix it with the other ingredients. Store it in the fridge overnight. When ready to cook, simply put the filling in the slow cooker. This saves time in the morning and makes breakfast quick and easy. - Extra toppings: - Salsa - Sour cream - Hot sauce - Chopped green onions - Side dishes that complement breakfast tacos: - Fresh fruit salad - Mexican-style street corn - Refried beans - A light green salad These additions boost flavor and make your meal more filling. Enjoy your tasty breakfast tacos with these fun sides! You now have all the info to make delicious slow cooker breakfast tacos. We covered key ingredients, step-by-step cooking, and handy tips. Remember, you can customize these tacos to fit your taste. Try different meats or veggies, and enjoy variations to keep meals exciting. Lastly, storing leftovers will help you save time for busy mornings. With these tacos, you’ll have a quick, tasty breakfast ready whenever you want. Dive in, and happy cooking!
Savory Slow Cooker Breakfast Tacos Easy Morning Treat
Are you ready to kickstart your mornings with something delicious? These Savory Slow Cooker Breakfast Tacos are a breeze to make. With just a few
To make Air Fryer Egg and Cheese Toast, gather these simple ingredients: - 4 slices of whole grain bread - 4 large eggs - 1 cup shredded cheddar cheese - 1 tablespoon butter, softened - Salt and black pepper, to taste - 1 teaspoon smoked paprika (optional) - Fresh chives or parsley for garnish (optional) These ingredients make a delicious meal that is easy to prepare. I love using whole grain bread because it adds a nice texture and flavor. The eggs bring protein, while the cheese adds creaminess. Don’t forget about the spices! They give your toast an extra kick. If you want to make it even more special, add fresh herbs on top. They not only look nice but also add a fresh taste. You can find the full recipe [here](#). Enjoy your cooking! Preheat your air fryer to 350°F (175°C). This step is key for even cooking. It warms up the air, making your toast crispy. Spread softened butter on one side of each slice. Make sure to cover it well. This creates a nice golden crust and adds flavor. Place the bread in the air fryer, buttered side up. Crack one egg onto each slice. Be gentle to keep the yolk whole. Season the eggs with salt, black pepper, and smoked paprika if you like a smoky taste. Cook in the air fryer for 8-10 minutes. Check at 8 minutes for doneness. If you like runny yolks, take them out then. For firmer yolks, cook a bit longer. When done, use tongs or a spatula to lift them out. If you want, sprinkle chopped chives or parsley on top for a fresh touch. Enjoy your cheesy egg toast hot! To get the best yolk, timing is key. For runny yolks, check your toast after 8 minutes. If you want firmer yolks, let it cook for 10 minutes. Keep an eye on it, as every air fryer is different. You’ll want to pull it out right when it looks perfect. If you have a larger air fryer, you can cook more toast at once. Just make sure to space the bread slices well. If they touch, they may not cook evenly. You can also cook in batches. This way, you can ensure every piece toasts perfectly. Make your egg toast look great! After cooking, sprinkle fresh chives or parsley on top. This adds color and freshness. You can even try a dash of smoked paprika for a pop of flavor. A well-presented dish always makes a meal feel special. {{image_4}} You can change up the cheese to keep things fun. Try using mozzarella for a stretchy texture. Feta adds a nice saltiness. You could even use pepper jack for a spicy kick. Each cheese brings a new flavor and texture. Mix and match to find your favorite! Feel free to add more toppings to your egg toast. Sliced avocado makes it creamy and rich. Fresh tomatoes add a burst of flavor and color. You could also add cooked bacon or ham for some protein. Don’t be shy to get creative with your toppings! Seasoning can really change the taste of your toast. Garlic powder gives a nice depth. Fresh herbs like basil or thyme add brightness. If you like heat, drizzle some hot sauce on top. These simple tweaks can make each bite exciting and new. To keep your egg toast fresh, store any leftovers in an airtight container. Place the toast in the fridge within two hours of cooking. Make sure to separate layers with parchment paper to avoid sticking. This way, you can enjoy your tasty meal later without losing quality. Reheat your egg and cheese toast in the air fryer for the best taste. Set it to 350°F (175°C) and heat for about 3-5 minutes. This helps keep the bread crispy and the cheese melty. You can also use a microwave, but it may make the toast a bit soggy. If using the microwave, heat for 30 seconds at a time until warm. Yes, you can freeze Air Fryer Egg and Cheese Toast! To freeze, let the toast cool completely. Wrap each piece tightly in plastic wrap or foil, then place them in a freezer-safe bag. They can last up to three months in the freezer. When ready to eat, thaw in the fridge overnight and reheat as mentioned above. Yes, you can use many types of bread for this recipe. While I love whole grain bread, white, sourdough, or rye work great too. Each type adds its own flavor and texture. You can even try gluten-free bread if needed. Just keep in mind that the cooking time might change slightly based on the bread's thickness. Absolutely! If you don't have an air fryer, you can use a regular oven. Preheat your oven to 375°F (190°C). Butter the bread and place it on a baking sheet. Crack the eggs onto the bread and sprinkle cheese on top. Bake for about 10-12 minutes or until the eggs are cooked to your liking. You can also use a stovetop skillet. Just cover it to help the eggs cook evenly. There are several ways to lighten up this dish. You can use whole wheat or low-calorie bread. Instead of butter, try using a light cooking spray. For cheese, consider using reduced-fat cheddar or even a dairy-free cheese. You can add spinach or tomatoes for more nutrients. These swaps help keep the flavor while making it a bit healthier. Enjoy your meal guilt-free! This blog post shared how to make Air Fryer Egg and Cheese Toast. You learned the key ingredients, like whole grain bread, eggs, and cheddar cheese. I detailed easy steps for cooking and offered tips for perfect results. You can try variations, storing tips, and answers to common questions. Feel confident to create your own delicious toast, sharing it with friends or enjoying it solo. Experiment with ingredients to find your favorite combo. Enjoy your cooking adventure!
Air Fryer Egg and Cheese Toast Quick and Tasty Meal
Looking for a quick meal that’s both tasty and simple? You’ve found it! My Air Fryer Egg and Cheese Toast is packed with flavor and
This recipe is easy and fun. You will make an Overnight Crème Brûlée French Toast that tastes like dessert. The bread absorbs a rich custard overnight, making it soft and creamy. You can serve this dish for breakfast or brunch. Here are the must-have ingredients for your Overnight Crème Brûlée French Toast: - 8 slices of thick brioche or challah bread - 4 large eggs - 1 cup whole milk - 1 cup heavy cream - 1/2 cup granulated sugar - 2 teaspoons pure vanilla extract - 1 teaspoon almond extract - 1/2 teaspoon ground cinnamon - Pinch of salt - 1/4 cup brown sugar (for topping) These ingredients create a custard that soaks into the bread. The brioche or challah adds a rich flavor. The sugar caramelizes on top, giving a sweet crunch. You can make your dish even better with these tasty toppings: - Fresh berries (like strawberries or blueberries) - Whipped cream Adding these garnishes makes the dish look pretty. It also adds fresh flavors to balance the sweetness. Enjoy your beautiful meal! Start by cutting your brioche or challah into thick slices, about 1 inch each. Use a sharp knife for clean cuts. Next, butter a 9x13 inch baking dish. Lay the slices in the dish, slightly overlapping them. This makes a pretty presentation. In a large bowl, whisk together the eggs and both the whole milk and heavy cream. Add the granulated sugar, vanilla extract, almond extract, ground cinnamon, and a pinch of salt. Mix until everything blends well and the mixture is smooth. This custard gives the French toast its creamy texture. Carefully pour the custard over the bread slices. Make sure every slice gets soaked. You can gently press down with a spatula to help the custard soak in. Cover the dish tightly with plastic wrap. Place it in the refrigerator overnight or for at least 4 hours. This soaking time helps the flavors meld together for a tasty breakfast treat. For the Full Recipe, check the earlier section. To start, preheat your oven to 350°F (175°C). This step is key. An oven that is not hot enough can lead to uneven baking. A proper preheat helps the custard set and the bread to rise. Place your dish in the oven after preheating. Bake for 30-35 minutes. Your goal is to let the custard set firmly. Keep an eye on the top. It should turn golden and slightly caramelized. This color shows that your French toast is almost ready. To get that crispy top, switch your oven to broil. Broil the French toast for 1-2 minutes. You must watch closely during this step. The sugar can burn quickly. Look for a bubbly, golden crust that resembles crème brûlée. This finish adds a delicious crunch to your dish. Using these baking techniques, you ensure that your Overnight Crème Brûlée French Toast comes out perfect every time. {{image_4}} For this recipe, you want thick bread. Brioche and challah work best. These breads are soft and soak up the custard well. Look for bread that is fresh and slightly sweet. You can also use stale bread for a firmer texture. Just cut it into thick slices. To make sure every slice gets soaked, pour the custard evenly. After pouring, press the bread down gently. This helps the custard soak in better. You should see the custard seeping into the bread. If you skip this step, some slices may be dry. Keep an eye on your French toast while it bakes. The goal is a golden top and set custard. If you bake too long, it can dry out. Use a timer and check around 30 minutes. If the top looks golden but needs more crisp, broil it for a minute or two. This gives a nice finish without overdoing it. You can easily mix up the flavors in this dish. Try adding orange zest or lemon zest to the custard. This will give a fresh, bright taste. You can also swap vanilla for maple extract for a sweet twist. Want a nutty flavor? Add a tablespoon of hazelnut spread to the mix. For a decadent touch, sprinkle chocolate chips on the bread before adding the custard. Each of these ideas will create a unique flavor that your family will love. If you want to change things up, there are many easy substitutions. Instead of brioche or challah, try sourdough or whole wheat bread. For a dairy-free option, use almond milk or coconut milk instead of whole milk and heavy cream. You can also use flax eggs as a substitute for regular eggs. Just mix one tablespoon of ground flaxseed with three tablespoons of water for each egg. This will help keep the custard creamy. When serving, you can add fun toppings. Fresh berries, sliced bananas, or a drizzle of maple syrup are great choices. A dusting of powdered sugar adds elegance and sweetness. You can also pair your French toast with crispy bacon or sausage for a hearty meal. Serve it with a side of whipped cream for extra indulgence. Each option will make your brunch even more special. Explore the full recipe for detailed instructions and tips! Yes, you can. Instead of eggs, use silken tofu or a mix of almond milk and cornstarch. This will help create a creamy texture. Just blend these ingredients until smooth. Then, proceed with the rest of the recipe as usual. The taste may be slightly different but will still be delightful. You can store leftover French toast for up to three days. Place it in an airtight container in the fridge. To reheat, pop it in the oven or toaster. This will help keep it crispy. Enjoy it warm for the best flavor. Yes, you can freeze this dish. Let it cool completely, then wrap individual slices in plastic wrap. Place them in a freezer bag. It will last for up to two months. When ready to eat, thaw in the fridge overnight and reheat in the oven. This keeps it tasty and fresh. For the full recipe, check out the complete guide. You learned how to make Overnight Crème Brûlée French Toast. We discussed the key ingredients and optional garnishes. I shared step-by-step instructions for preparing the bread, making the custard, and soaking the bread. You also learned baking techniques to get the perfect finish. Remember to choose the best bread and avoid over-baking. Feel free to explore variations to keep it exciting. Enjoy creating this delicious dish. It will impress anyone you serve it to!
Overnight Crème Brûlée French Toast Delight Recipe
Welcome to your new favorite breakfast treat: Overnight Crème Brûlée French Toast! This dish combines the creamy goodness of crème brûlée with the comfort of
- 1 tube of crescent roll dough - 1 pound breakfast sausage (spicy or mild) - 1 cup shredded cheddar cheese - 1/2 teaspoon garlic powder - 1/2 teaspoon onion powder - 1/4 teaspoon black pepper - 1 egg (for egg wash) - Fresh chives, finely chopped (optional, for garnish) I love how simple these ingredients are. You can find them at any store. The crescent roll dough gives a nice flaky texture. The breakfast sausage adds a hearty flavor. You can choose spicy or mild sausage based on your taste. The seasonings are key to making the sausage pop. Garlic and onion powder bring warmth. Black pepper adds a nice kick. Together, these spices make each bite flavorful. The egg wash is a secret to golden rolls. It gives a shiny finish that looks great. I like to add fresh chives on top. They add color and a fresh taste. For the full recipe, check out the steps in the article. This dish is quick and fun to make. You will enjoy the amazing flavors and textures! - Preheat oven to 375°F (190°C). - Cook breakfast sausage in a skillet over medium heat. First, make sure your oven is hot enough. This helps the rolls bake evenly. Next, place the sausage in the skillet. Cook it until it turns brown. As it cooks, break it into small pieces. This helps each bite be full of flavor. Once done, drain the extra grease. This keeps the rolls from getting soggy. After that, mix in garlic powder, onion powder, and black pepper. Stir well to blend the spices. Then, turn off the heat and set aside. - Unroll crescent roll dough and separate into triangles. - Add sausage mixture and cheese to the dough. Now, take the crescent roll dough. Unroll it on a clean surface. You will see triangles. Keep them intact and ready. At the wide end of each triangle, place about one tablespoon of the sausage mix. Next, add a sprinkle of shredded cheddar cheese. This cheese will melt and add great taste. - Roll and seal the dough. - Brush with egg wash and bake for 12-15 minutes. Start rolling the dough from the wide end. Roll towards the pointed end. Pinch the sides to seal in the filling. This keeps everything inside as they bake. Place the rolls on a baking sheet lined with parchment paper. In a small bowl, crack the egg and beat it lightly. Use a brush to coat the tops of the rolls with the egg wash. This will give them a nice shine. Finally, place the baking sheet in the oven. Bake for about 12 to 15 minutes. Watch them closely so they don’t burn. When they are golden brown, they are ready to eat. To make the best sausage filling, drain excess grease after cooking. This step keeps your rolls from getting soggy. You want that flaky, crispy texture. Also, don’t be shy with cheese! Use your favorite cheese varieties to add creamy goodness. Cheddar is great, but pepper jack or mozzarella can give a nice twist. To get an even bake, use parchment paper on your baking sheet. This helps prevent sticking and makes cleanup easy. Keep an eye on the color of the rolls as they bake. You want them golden brown, so check around the 12-minute mark. It’s better to pull them out a bit early than let them burn. When it’s time to serve, garnish with freshly chopped chives. This adds a pop of color and flavor. For a fun twist, pair your rolls with dipping sauces. Mustard and hot sauce work really well. They add a nice kick and make each bite even more enjoyable. {{image_4}} Cheese is a fun way to change your Breakfast Sausage Crescent Rolls. You can switch the cheddar with pepper jack for a spicy twist. If you love creaminess, add cream cheese to the filling. It melts beautifully and makes each bite rich and tasty. You can also add fun ingredients to mix things up. If you like heat, include jalapeños for a spicy kick. They add great flavor and warmth. For a healthier choice, mix in sautéed vegetables like peppers or onions. This adds color and nutrition to your rolls. When it comes to dough, you have options. Use puff pastry for a flaky and buttery texture. It will make your rolls feel extra special. If you want a lighter option, try low-carb tortillas. They are great for a healthier breakfast while still being delicious. For the full recipe, check out the complete instructions. Enjoy exploring these variations! Store any leftovers in an airtight container. This keeps them fresh and tasty. The rolls are best consumed within 3-4 days. Make sure to check for any signs of spoilage before eating. You can freeze unbaked rolls for later use. This is a great way to have a quick meal ready. Wrap each roll individually to prevent them from sticking together. Use plastic wrap or freezer bags to keep them fresh. To reheat, the oven is your best choice for a crispy texture. Simply place the rolls on a baking sheet and warm them up. This method usually takes about 10 minutes. If you’re in a rush, you can use the microwave. However, this may cause the rolls to lose some crispiness. Enjoy them hot for the best flavor. Yes, you can use turkey or vegetarian sausage. These options offer a lighter choice. They also bring different flavors to the dish. Feel free to choose what suits your taste best. You can prepare the filling and roll them the night before. Just store them in the fridge. In the morning, pop them in the oven. This saves you time while still giving you fresh rolls. These rolls pair well with scrambled eggs, fruit, or a side of hashbrowns. You can also add some fresh juice or coffee to complete your breakfast. This way, you create a balanced meal. Handle the dough minimally and make sure your oven is at the right temperature. This helps the rolls puff up nicely. Avoid pressing down too hard when rolling them. This keeps them light and flaky. These breakfast sausage crescent rolls are a tasty and easy option. We covered the simple steps: preparing the sausage, assembling the rolls, and baking them nicely. I also shared tips for perfecting the filling and ideas for variations. Don't forget to store any leftovers properly. These rolls are great to enjoy fresh or as a quick snack later. Try them out, and you’ll see how delicious they can be!
Breakfast Sausage Crescent Rolls Tasty and Simple Treat
Craving a quick and tasty breakfast? You’ve hit the jackpot with these Breakfast Sausage Crescent Rolls. They combine flaky dough, savory sausage, and melted cheese
- 1 loaf of brioche bread, cut into thick slices - 4 large eggs - 1 cup whole milk - 1 cup heavy cream - 1/2 cup granulated sugar - 1 tablespoon vanilla extract - 1 teaspoon ground cinnamon - Pinch of salt - 1/4 cup brown sugar (for the brûlée topping) Brioche bread is the star here. Its rich texture makes the toast soft and sweet. Eggs, milk, and cream create a creamy custard. Sugar and spices give it a delightful flavor. The vanilla adds warmth, while cinnamon gives a hint of spice. - Fresh berries (strawberries, blueberries, or raspberries) for garnish - Whipped cream (optional, for serving) Fresh berries add a burst of color and flavor. You can use strawberries, blueberries, or raspberries. Whipped cream is a fun touch and adds creaminess. Both options make the dish look and taste amazing. For the full recipe, check out the Overnight Crème Brûlée French Toast 🥞. First, grab a large mixing bowl. Whisk together the 4 large eggs until they look frothy. Next, add in 1 cup of whole milk and 1 cup of heavy cream. Then, mix in 1/2 cup of granulated sugar, 1 tablespoon of vanilla extract, 1 teaspoon of ground cinnamon, and a pinch of salt. Keep whisking until the mixture is smooth. This step is key for a rich custard blend. Now, take a greased 9x13 inch baking dish. Arrange thick slices of brioche bread in a single layer. Let them overlap a little for even soaking. Once you have the bread set, pour the creamy egg mixture over the slices. Make sure each piece gets fully coated. Gently press down on the bread with your hands or a spatula, helping it soak up the custard. Cover the baking dish tightly with plastic wrap. Place it in the fridge overnight or for at least 4 hours. This soaking time helps the bread absorb all the yummy flavors. When you're ready to bake, preheat your oven to 350°F (175°C). Remove the dish from the fridge and let it sit for about 15 minutes. This helps it bake evenly. Bake your French toast for 30 to 35 minutes. It's done when the custard is set and the top is golden brown. While it bakes, mix 1/4 cup of brown sugar with a pinch of cinnamon in a small bowl. After baking, sprinkle this mixture over the top. Use a kitchen torch to brûlée the sugar until it bubbles and gets crispy. If you don't have a torch, broil it for 1-2 minutes, but watch closely to avoid burning. Let the brûlée topping cool a bit, and then you’re ready to serve this delicious treat! To make the best Overnight Crème Brûlée French Toast, soaking the bread well is key. I recommend soaking your brioche for at least four hours, but overnight is best for full flavor. This time allows the custard to seep in deeply. When you place the bread in the dish, use your hands or a spatula to press gently down. This helps the bread absorb the creamy mixture evenly. The goal is to ensure every slice gets coated and soaked. Getting that perfect brûlée crust can be fun. I prefer using a kitchen torch for this step. It gives you more control over the sugar. Just sprinkle a thin layer of brown sugar on top and torch it until it bubbles. If you don't have a torch, a broiler works too. Place the dish under the broiler for 1-2 minutes. Keep a close eye on it to prevent burning. You want a golden brown crust that crackles when you tap it. For great texture, let the brûlée topping cool slightly before serving. This contrast of creamy and crunchy makes each bite a delight. For the full recipe, be sure to check out the details above. {{image_4}} You can easily customize your Overnight Crème Brûlée French Toast with different flavors. Here’s how: - Adding extracts or spices: Try adding almond or maple extract to the egg mixture. A dash of nutmeg can also add warmth. You can mix in a bit of orange or lemon zest for a bright note. - Incorporating fruits or nuts: Fresh fruits like bananas or apples can enhance the taste. You can layer sliced fruit between the bread slices or fold them into the custard. Adding nuts, such as pecans or walnuts, gives a delightful crunch and richness. Pairing your French toast with the right toppings makes it even better. Here are some tasty ideas: - Pairing with sauces or syrups: Drizzle warm maple syrup or a berry compote over the top for added sweetness. A dollop of chocolate sauce can make it a decadent treat. - Brunch cocktail recommendations: Serve your French toast with a light mimosa or a spicy Bloody Mary. Both drinks complement the dish perfectly and add a festive touch to your brunch. Try these variations to create your own twist on this delightful recipe! To keep your Overnight Crème Brûlée French Toast fresh, store it in the fridge. Place the leftovers in an airtight container. It will stay good for up to three days. When you want to enjoy it again, just reheat it. I recommend using an oven for the best results. Preheat the oven to 350°F (175°C). Place the slices on a baking sheet. Cover them with foil to keep them moist. Bake for about 10-15 minutes until heated through. If you want to save some for later, you can freeze it. First, let the French toast cool completely. Then, wrap each slice in plastic wrap. Place the wrapped slices in a freezer-safe bag. This way, they will not get freezer burn. You can freeze them for up to two months. When you’re ready to eat, remove a slice from the bag. Let it thaw in the fridge overnight. After that, reheat it in the oven as mentioned above for the best taste. Enjoy your delicious creation anytime! Yes, you can prepare this dish the night before. This makes it easy for busy mornings. To do this, follow the steps of mixing the custard and soaking the brioche. Then, cover the dish tightly with plastic wrap and place it in the fridge. Let it sit overnight to soak up all the flavors. This way, the bread becomes soft and creamy. You can simply bake it in the morning. If you don't have brioche, there are great alternatives. You can use challah, which has a similar texture. French bread or even Texas toast can work too. Just pick bread that can soak up the custard well. Stale bread is even better since it absorbs the custard without falling apart. To make a smaller batch, you can scale down the ingredients. For example, use half a loaf of bread. Adjust the eggs to two, and reduce the milk and cream by half too. Keep the other ingredients the same, but be mindful of the baking time. A smaller dish may bake faster, so check it a few minutes early. You can still enjoy the same delicious flavors! Overnight Crème Brûlée French Toast combines simple ingredients to create a flavorful dish. Start with brioche bread and a rich custard mix of eggs, milk, cream, and sugar. Add optional garnishes like fresh berries or whipped cream to elevate your meal. You can experiment with flavors and tips for a perfect crispy topping. For easy storage, refrigerate leftovers and learn to freeze portions. This dish is great for brunch or any cozy gathering. Enjoy your cooking adventure and impress everyone with a delicious twist on a classic favorite!
Overnight Crème Brûlée French Toast Delightful Recipe
Craving a breakfast that feels fancy but is easy to make? Look no further! My Overnight Crème Brûlée French Toast is the perfect blend of