Appetizers

- 1 can (15 oz) chickpeas, drained and rinsed - 1 small onion, roughly chopped - 2 cloves garlic, minced - 1/4 cup fresh parsley, finely chopped - 1/4 cup fresh cilantro, finely chopped - 2 tablespoons sesame seeds - 1 teaspoon ground cumin - 1 teaspoon ground coriander - 1/2 teaspoon baking powder - 1/4 teaspoon cayenne pepper (optional, for a kick) - 3 tablespoons olive oil, divided - Salt and black pepper, to taste These ingredients create a base full of flavor. The chickpeas give protein and fiber, while herbs add freshness. - Lemon juice for brightness - Chili flakes for more heat - Tahini for creaminess - Roasted red pepper for a smoky touch These extras can elevate your falafel. Lemon adds zing, while tahini gives a rich taste that pairs well. Chickpeas are rich in protein and fiber. They help keep you full for longer. Fresh herbs boost vitamins and antioxidants. Garlic has anti-inflammatory properties, and olive oil offers healthy fats. Together, these ingredients create a tasty and nutritious dish. You can serve these golden brown bites with a side of veggies for a complete meal. For the full recipe, check out the Golden Brown Baked Falafel Made Easy section. - Preheating the Oven Start by preheating your oven to 400°F (200°C). This high heat helps the falafel get crispy. - Preparing the Ingredients Gather your ingredients. You need: - 1 can (15 oz) chickpeas, drained and rinsed - 1 small onion, roughly chopped - 2 cloves garlic, minced - 1/4 cup fresh parsley, finely chopped - 1/4 cup fresh cilantro, finely chopped - 2 tablespoons sesame seeds - 1 teaspoon ground cumin - 1 teaspoon ground coriander - 1/2 teaspoon baking powder - 1/4 teaspoon cayenne pepper (optional) - 3 tablespoons olive oil, divided - Salt and black pepper, to taste - Blending the Mixture In a food processor, add the chickpeas, onion, garlic, parsley, cilantro, sesame seeds, cumin, coriander, baking powder, cayenne, salt, and pepper. Blend until coarsely mixed. Scrape the sides often. Keep some texture in the mixture for airy falafel. - Rolling Techniques With clean, slightly damp hands, take small amounts of the mixture. Roll them into balls or flatten them into patties, each about 1 inch wide. This makes them easy to cook and eat. - Placing on Baking Sheet Line a baking sheet with parchment paper. Place the shaped falafel on the sheet, leaving space between each one. This helps them bake evenly. - Drizzling with Olive Oil Drizzle the remaining tablespoon of olive oil over the falafel. This helps them turn a nice golden brown as they bake. - Flipping for Even Cooking Bake the falafel for 20-25 minutes. Halfway through, gently flip each one. This ensures both sides get crispy and brown. For the full recipe, check the details above. Enjoy your golden brown baked falafel! To get the right texture, avoid over-blending your mixture. Pulse it until the chickpeas are coarsely mixed. The mixture should feel slightly grainy but not mushy. This keeps the falafel light and airy. If you want a crunch, add some toasted sesame seeds. They give a nice bite. Bake your falafel at 400°F (200°C) for 20-25 minutes. This heat makes them golden and crispy. Halfway through, flip the falafel for even cooking. Keep an eye on them so they don’t burn. Each oven is different, so check for that perfect golden color. Fresh herbs are key! Use parsley and cilantro for a bright taste. You can also add spices like cumin and coriander for depth. A pinch of cayenne pepper adds heat if you like spice. For extra flavor, let the mixture sit for 10 minutes before shaping it. This helps the spices blend well. Check the full recipe for more tips on enhancing flavors. {{image_4}} To add heat to your falafel, include more cayenne pepper. You can also mix in chopped jalapeños or red pepper flakes. Adjust the spice level based on your taste. Enjoy the extra kick in every bite! Get creative with herbs! Try adding fresh dill, mint, or basil. Each herb brings a unique flavor to the falafel. Mix them into the base for a fresh twist. You can even combine different herbs for a more complex taste. Baked falafel fits many meals. Serve them in pita bread with lettuce, tomatoes, and tahini sauce for a tasty wrap. You can also make a falafel salad with mixed greens and a yogurt dressing. For a fun snack, pair falafel with hummus and fresh veggies. Check out the Full Recipe for more ideas! You can store leftover falafel in an airtight container. Place them in the fridge for up to four days. Make sure they cool completely before sealing to prevent sogginess. If you want to keep them longer, freezing is a great option. To freeze falafel, arrange them in a single layer on a baking sheet. Freeze them for about an hour until they are firm. Then, transfer the falafel to a freezer-safe bag or container. Label it with the date. They can last for up to three months in the freezer. This method keeps them fresh and tasty. Reheating falafel is simple. You can bake or pan-fry them for the best results. For baking, preheat your oven to 375°F (190°C). Place the falafel on a baking sheet and heat for about 10-15 minutes. If pan-frying, add a bit of oil to a skillet and heat over medium. Cook each side for about 3-4 minutes until they are warm and crispy again. Enjoy your falafel just like when they were fresh! For the full recipe, check out the Golden Brown Baked Falafel Made Easy. Yes, you can make baked falafel without a food processor. Use a fork or potato masher to mash the chickpeas. Chop the onion, garlic, and herbs finely. Mix all the ingredients in a bowl, ensuring you have a good texture. This method may take more time, but it works well. To make your falafel gluten-free, skip any bread crumbs. Instead, use ground oats or rice flour. These options help bind the falafel without gluten. Always check labels on ingredients, especially spices, to avoid hidden gluten. Baked falafel pairs great with many dishes. Serve it with a fresh salad, tahini sauce, or yogurt. You can also add it to a pita with veggies. For a heartier meal, enjoy it with rice or quinoa. Each option adds flavor and nutrition. In this post, I covered how to make baked falafel. We started with key ingredients and optional add-ins. Then, I walked you through the preparation steps and tips for the perfect texture. I also shared fun variations to try. Finally, I explained how to store leftover falafel and answered common questions. By following these steps, you can make tasty and healthy falafel. Enjoy your cooking adventure and treat yourself to this delicious dish!
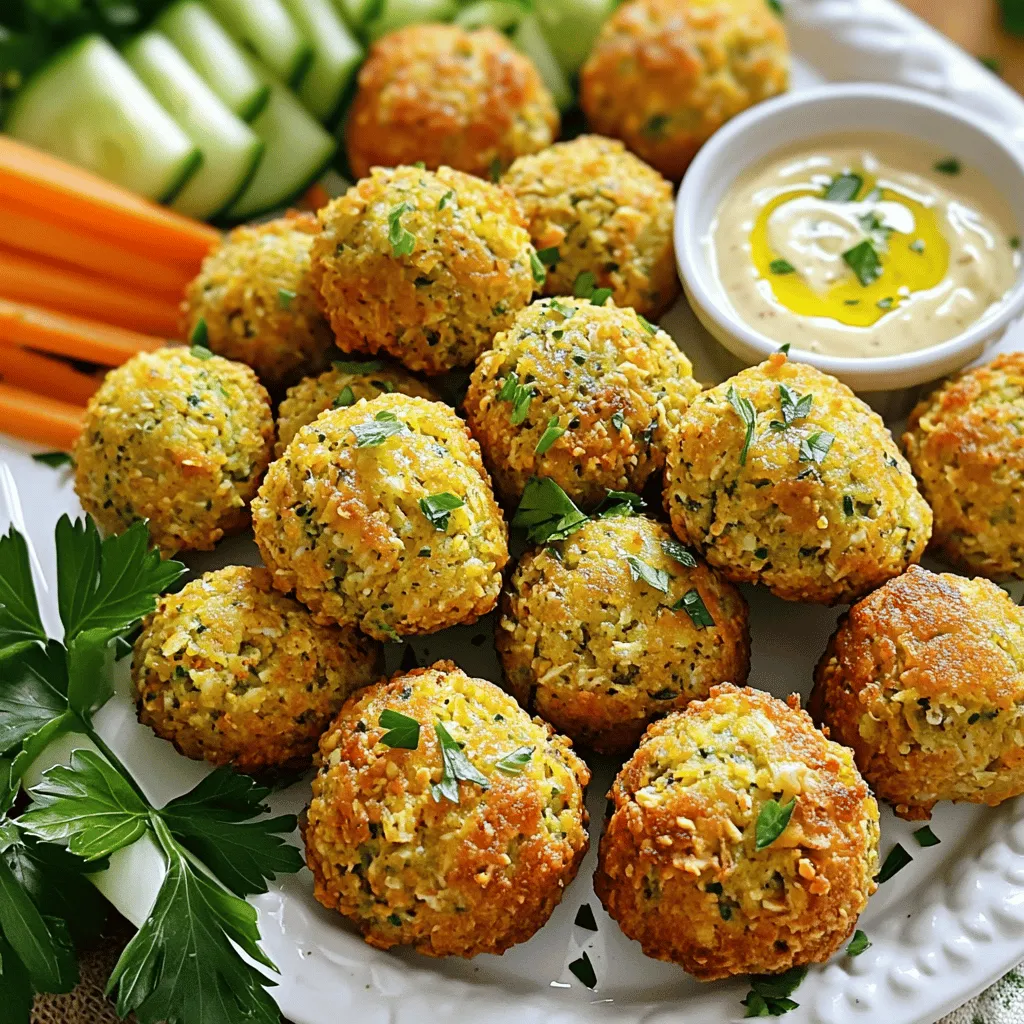
Golden Brown Baked Falafel Made Easy and Quick
If you want a tasty, healthy meal, try my Golden Brown Baked Falafel. It’s easy to make and packed with flavor. In just a few
- 1 lb boneless, skinless chicken breast, cut into 1-inch cubes - 4 cloves garlic, minced - 1/2 cup freshly grated Parmesan cheese - 1/4 cup plain Greek yogurt - 2 tablespoons fresh lemon juice - 1 tablespoon extra virgin olive oil - 1 teaspoon dried oregano - 1 teaspoon smoked paprika - Salt and freshly cracked black pepper to taste When making Garlic Parmesan Chicken Skewers, the choice of ingredients is key. The chicken breast provides a lean protein base. I love using boneless, skinless chicken because it cooks evenly and absorbs flavors well. Garlic is the star of this dish. It adds a bold and fragrant flavor. Freshly minced garlic gives the best taste. Parmesan cheese adds a rich, salty kick. Freshly grated cheese melts into the chicken, creating a flavorful crust. The marinade is just as important. Greek yogurt keeps the chicken moist. It also adds tanginess that balances the rich flavors. Lemon juice brightens up the dish. The olive oil adds healthy fat and helps the marinade stick. For seasonings, oregano brings a nice herbal touch. Smoked paprika gives a warm depth. Salt and pepper are essential to enhance all the flavors. You can find the full recipe to guide you through making these tasty skewers. Each ingredient works together to create a dish that is simple yet full of flavor. To start, we need to make the marinade. Grab a medium bowl and mix the following ingredients: - 4 cloves garlic, minced - 1/2 cup freshly grated Parmesan cheese - 1/4 cup plain Greek yogurt - 2 tablespoons fresh lemon juice - 1 tablespoon extra virgin olive oil - 1 teaspoon dried oregano - 1 teaspoon smoked paprika - Salt and freshly cracked black pepper to taste Use a whisk or spoon to blend everything. Focus on getting a smooth mix. This smooth consistency helps the flavors blend well. Now, let’s coat the chicken. Take 1 lb of boneless, skinless chicken breast, cut into 1-inch cubes. Add the chicken to the marinade. Make sure each piece is well-coated. Cover the bowl with plastic wrap or a lid. For best flavor, let the chicken marinate for at least 30 minutes. If you have time, aim for up to 2 hours. This step makes the chicken tender and flavorful. While the chicken marinates, you can prepare the grill. Preheat it over medium-high heat. This ensures the skewers cook evenly. Once the chicken is ready, thread the cubes onto skewers. Leave a small gap between each piece for better cooking. Place the skewers on the hot grill. Cook for about 10-12 minutes. Turn them often to get a nice golden-brown color. The chicken should reach an internal temperature of 165°F for safe eating. After cooking, let the skewers rest for 5 minutes. This step locks in the juices for a tasty bite. For the full recipe, check out the details provided earlier. Enjoy your meal! For the best taste, use fresh ingredients. You can swap Greek yogurt with sour cream for a richer flavor. If you want a dairy-free option, try coconut yogurt. Marinating the chicken is key. I recommend letting it sit for at least 30 minutes. If you have time, two hours gives even more flavor. When using a grill, preheat it well. A hot grill gives nice marks and crisp edges. If you use a grill pan, keep the heat medium-high. This will help cook the chicken evenly. To check for doneness, use a meat thermometer. The chicken should reach 165°F. This ensures it is safe to eat. To serve, place skewers on a wooden board. This adds a rustic feel. Sprinkle extra Parmesan cheese on top for a nice touch. Fresh parsley brings color and flavor. Add lemon wedges on the side for a zesty kick. You can also serve with a green salad or grilled veggies for a complete meal. {{image_4}} You can make garlic Parmesan chicken skewers even more exciting. Add spices like cayenne pepper for heat. Try fresh herbs like parsley or thyme for a fresh twist. You can also swap the Parmesan cheese. Use mozzarella for a gooey texture or feta for a tangy kick. Each choice brings new taste. Want to change up the protein? Try shrimp or beef for a different flavor. Both cook well on skewers and soak up the marinade nicely. For a vegetarian option, use firm tofu or hearty mushrooms. Both options soak up the garlic and Parmesan flavors well. You can cook these skewers in different ways. For oven-baked skewers, preheat your oven to 400°F. Place the skewers on a baking sheet lined with parchment paper. Bake for about 15-20 minutes, turning halfway through. If you prefer an air fryer, set it to 375°F. Cook for about 8-10 minutes, shaking the basket halfway. Both methods give a tasty outcome. Check out the Full Recipe for more details on these variations! To keep your Garlic Parmesan Chicken Skewers fresh, store them in an airtight container. Place a paper towel inside to absorb any moisture. This helps prevent sogginess. Best practices for refrigeration: - Cool the skewers to room temperature before storing. - Refrigerate them within two hours of cooking. - Consume leftovers within three days for the best taste. Freezing guidelines: - You can freeze the skewers for longer storage. - Wrap each skewer in plastic wrap, then place them in a freezer bag. - They can last up to three months in the freezer. - Thaw in the fridge overnight before reheating. When it's time to enjoy your leftovers, reheating them properly keeps them juicy. Tips for keeping the skewers juicy: - Use a microwave-safe plate and cover with a damp paper towel. - Heat in intervals of 30 seconds to prevent drying out. Recommended reheating methods: - For the best texture, reheat on a grill or grill pan. - Preheat your grill to medium heat and warm the skewers for about 5 minutes, turning them often. Knowing how long your skewers last helps you eat safely. Duration of freshness in the fridge: - Garlic Parmesan Chicken Skewers can stay fresh in the fridge for up to three days. Signs of spoilage: - Look for off smells, discoloration, or a slimy texture. - If you notice any of these, it’s best to discard them. You can enjoy these skewers with many tasty sides. Here are some great options: - Fresh Salad: A crisp green salad pairs well. Use mixed greens, cherry tomatoes, and a light vinaigrette. - Roasted Vegetables: Try roasted zucchini and bell peppers for a colorful plate. They add nice flavor. - Rice or Quinoa: These grains soak up the sauce well. They bring great texture to the meal. - Garlic Bread: Crunchy garlic bread adds a fun twist. The garlic flavor matches the skewers perfectly. Feel free to mix and match these sides. They all enhance the garlic parmesan chicken skewers. Yes, you can prepare these skewers in advance. Here’s how: - Marinate the Chicken: You can marinate the chicken up to two hours ahead. Store it in the fridge until you’re ready to grill. - Skewering: You can also thread the chicken onto skewers a day before. Just keep them covered in the fridge. - Storage: Use an airtight container to keep leftovers. They will stay fresh for about three days in the fridge. Making these skewers ahead saves time on busy days. You can grill them when you’re ready to eat. Making garlic parmesan chicken skewers gluten-free is easy. Here are some tips: - Check Ingredients: Ensure your Greek yogurt is gluten-free. Most brands are safe, but it's good to check. - Use Gluten-Free Marinade: The other ingredients are typically gluten-free. Just make sure to use gluten-free Worcestershire sauce if you include it in your marinade. - Choose Skewers Wisely: Use bamboo or metal skewers. Avoid any that may have gluten-based coatings. These small changes keep the dish tasty and safe for gluten-free diets. Enjoy the skewers without worry! This blog post covered the steps to make delicious Garlic Parmesan Chicken Skewers. We explored the essential ingredients and how to prepare the marinade. You learned the best tips for cooking and presenting your skewers. In summary, these skewers are easy to make and fun to customize. Enjoy experimenting with flavors and cooking methods. Don’t forget to store any leftovers properly to keep them fresh. Your next meal is bound to impress!
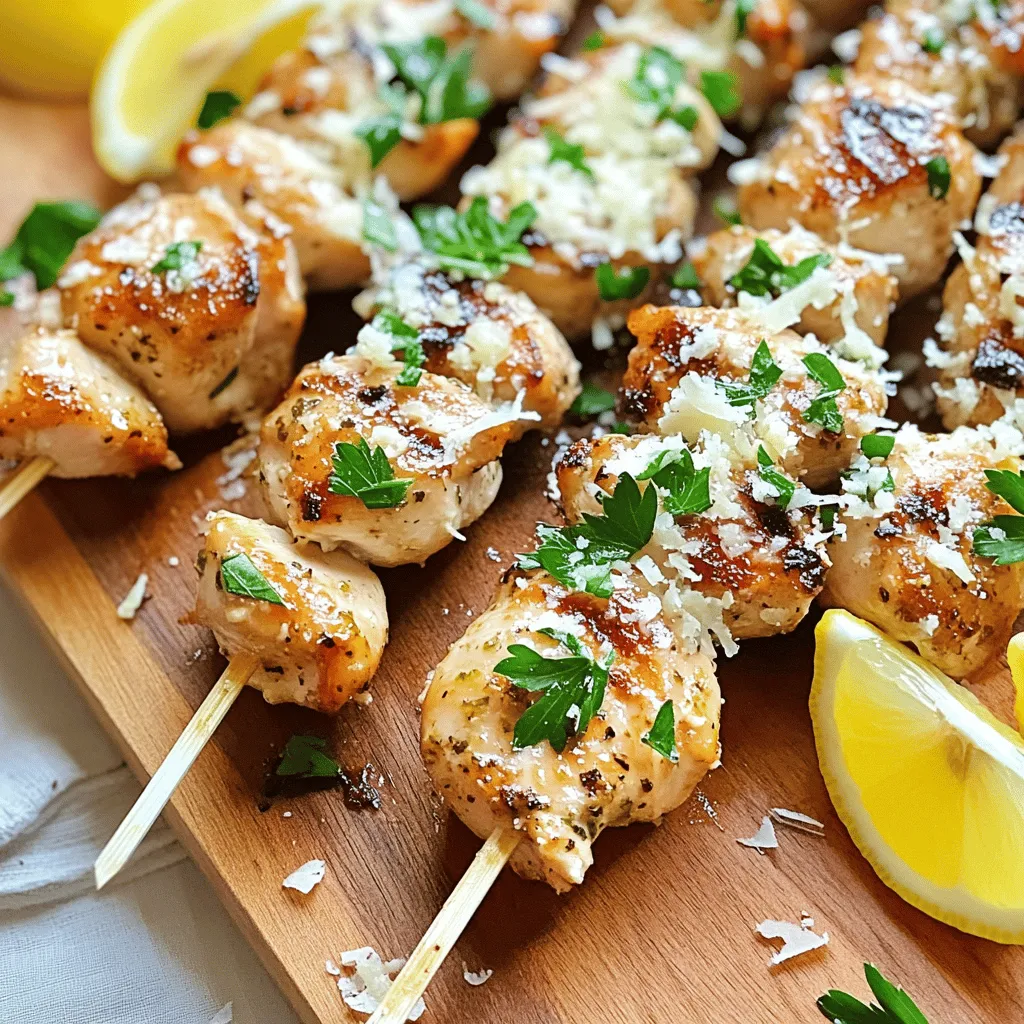
Garlic Parmesan Chicken Skewers Tasty and Simple Meal
Looking for a tasty and simple meal? Garlic Parmesan Chicken Skewers are a perfect choice! You’ll love how easy they are to make and how
- 1 pound fresh green beans, trimmed - 4 cloves garlic, peeled and smashed - 1 cup distilled white vinegar - 1 cup water - 2 tablespoons sugar - 1 tablespoon salt - 1 tablespoon dill seeds - 1/2 teaspoon red pepper flakes (optional) - 1/2 teaspoon black peppercorns - 4 sterilized pint jars with lids Gathering the right ingredients is key to making Grandma's crispy garlic dilly beans. Fresh green beans are the star of the show. Their crispness adds a delightful crunch. Choose bright green beans without blemishes for the best quality. The garlic brings a strong, savory flavor. Smash the cloves to release their oils and aromas. Next, you need to make the brine. The vinegar is essential for tanginess. I prefer distilled white vinegar for its clean taste. The water balances the acidity. Sugar and salt create a perfect harmony, enhancing the flavor. Dill seeds give that classic dilly taste. If you like a little heat, add red pepper flakes. The black peppercorns add a nice depth, too. Finally, you need sterilized jars. These keep your beans safe and fresh. Four pint jars will hold this recipe well. Follow the full recipe for a clear guide to making these delightful beans. Happy cooking! Start by rinsing 1 pound of fresh green beans under cold water. This removes dirt and grit. Next, trim both ends of the beans. You can use a sharp knife or kitchen scissors for this task. Set the trimmed beans aside for later use. In a medium saucepan, combine 1 cup of distilled white vinegar and 1 cup of water. Add 2 tablespoons of sugar and 1 tablespoon of salt to the mix. Heat this mixture over medium heat. Stir it gently until the sugar and salt dissolve. Once the mixture reaches a rolling boil, remove it from the heat. Allow it to cool for 5 to 10 minutes. Take 4 sterilized pint jars. In each jar, place 1 smashed garlic clove and 1 tablespoon of dill seeds. If you like spicy, add 1/2 teaspoon of red pepper flakes. Next, place 1/2 teaspoon of black peppercorns in each jar. Now, stand the green beans upright and pack them tightly into the jars. Leave about 1 inch of headspace at the top for the brine. Carefully pour the cooled brine over the packed green beans in each jar. Make sure all the beans are fully submerged. Distribute the garlic and spices evenly as you pour. This ensures that every bean is full of flavor. Take a clean cloth and wipe the rims of the jars. This helps create a good seal. Secure the lids onto the jars, screwing them on firmly but not too tight. Let the jars cool on the counter until they reach room temperature. Once cooled, transfer them to the refrigerator. For the best flavor, let the beans pickle for at least 24 hours. If you can wait a week, the flavor will be even better. You can find the full recipe details in the preceding sections. Enjoy crafting these crunchy, flavorful dilly beans! To keep your Dilly Beans crispy, always start with fresh green beans. Look for bright green beans that snap easily. Older beans can be tough and mushy. Trim both ends to help them soak up the brine. Choosing the right vinegar is key too. I use distilled white vinegar for a clean taste. It helps the beans stay crunchy and adds a nice tang. You can try apple cider vinegar for a fruity twist, but it may change the flavor. Feel free to experiment with spices in your Dilly Beans. You can add crushed red pepper for extra heat. Try mustard seeds or coriander for a unique taste. Remember, a little goes a long way! Adjusting sugar and salt levels is also important. If you like it sweeter, add more sugar. For a saltier kick, increase the salt slightly. Taste your brine before pouring to find the right balance. There are many creative ways to enjoy Dilly Beans. Serve them cold as a crunchy snack or side dish. They also make a great garnish for salads and sandwiches. Pair Dilly Beans with other dishes too. They complement grilled meats and fish perfectly. You can even chop them up and mix them into pasta salads for added texture. For full details, check the Full Recipe. {{image_4}} To give your dilly beans some heat, try adding more red pepper flakes. This simple change will give each bite a spicy kick. You can also include sliced jalapeños. Just add them to the jars before you pour in the brine. This adds a fresh, zesty flavor that pairs well with garlic. You can also play with different herbs and spices in your recipe. Incorporating herbs like thyme or oregano adds a new twist. Just sprinkle a teaspoon in each jar. You can also experiment with mustard seeds. Try yellow or brown seeds for varied flavors. This small change can make a big difference. If you want to enjoy these dilly beans fast, go for a quick pickle version. Shorten the pickling time to just a few hours. This way, you can enjoy them the same day! Another option is to use hot water bath methods. This will help develop flavors quickly, giving you tasty beans in no time. Dilly beans taste best when stored in the fridge. They can last about 2 to 3 weeks when sealed properly. Check for signs of spoilage. If you see mold, an off smell, or soft beans, throw them away. Freshness is key for that crisp bite! You can freeze dilly beans, but they may lose some crunch. To freeze them, blanch the beans first. Boil them for 2 minutes, then plunge them into ice water. Drain and pack them in airtight bags. This method helps keep their bright color and flavor. Water bath canning is a great way to preserve dilly beans for long-term storage. Fill jars with beans, spices, and brine, then process in boiling water for 10 minutes. This seals the jars and keeps out air. Store the jars in a cool, dark place. Check seals before using. Dilly beans are pickled green beans. They mix fresh green beans with garlic and dill. This dish comes from the American South, where pickling is popular. The crunch of the green beans pairs well with the tangy brine. You can enjoy them as a snack or a side. They add a zesty touch to meals and are easy to make at home. For the best flavor, let the dilly beans pickle for at least 24 hours. This time helps the flavors meld. If you want a stronger taste, wait a week. The longer they sit, the more intense the taste. Keep them in the fridge while they pickle. This ensures they stay fresh and crisp. Yes, you can adjust the recipe easily. If you want more jars, simply double the ingredients. For fewer jars, cut the amounts in half. Just make sure to keep the same ratios. This way, the flavor stays balanced. You can always experiment with the spices too. This makes your dilly beans even more unique. Dilly beans are great for canning. Use sterilized jars to store them safely. Make sure to follow proper canning steps to avoid spoilage. The vinegar helps preserve the beans for a long time. If done right, they can last for months. Always check for signs of spoilage before eating them. Dilly beans are low in calories. A serving has about 30 calories. They are high in fiber, which helps digestion. Plus, they offer vitamins like A and C. The garlic adds health benefits too. It may help boost your immune system. Enjoying these beans can be a tasty way to add healthy options to your diet. Making Dilly Beans is easy and fun. You learned about the key ingredients and steps. Fresh green beans and the right spices create a tasty dish. Follow the tips to ensure your beans stay crisp and flavorful. Feel free to try variations for added spice or different herbs. Store them correctly for long-lasting enjoyment. Dilly Beans can be a great addition to your meals. I hope you feel inspired to make your own batch today!
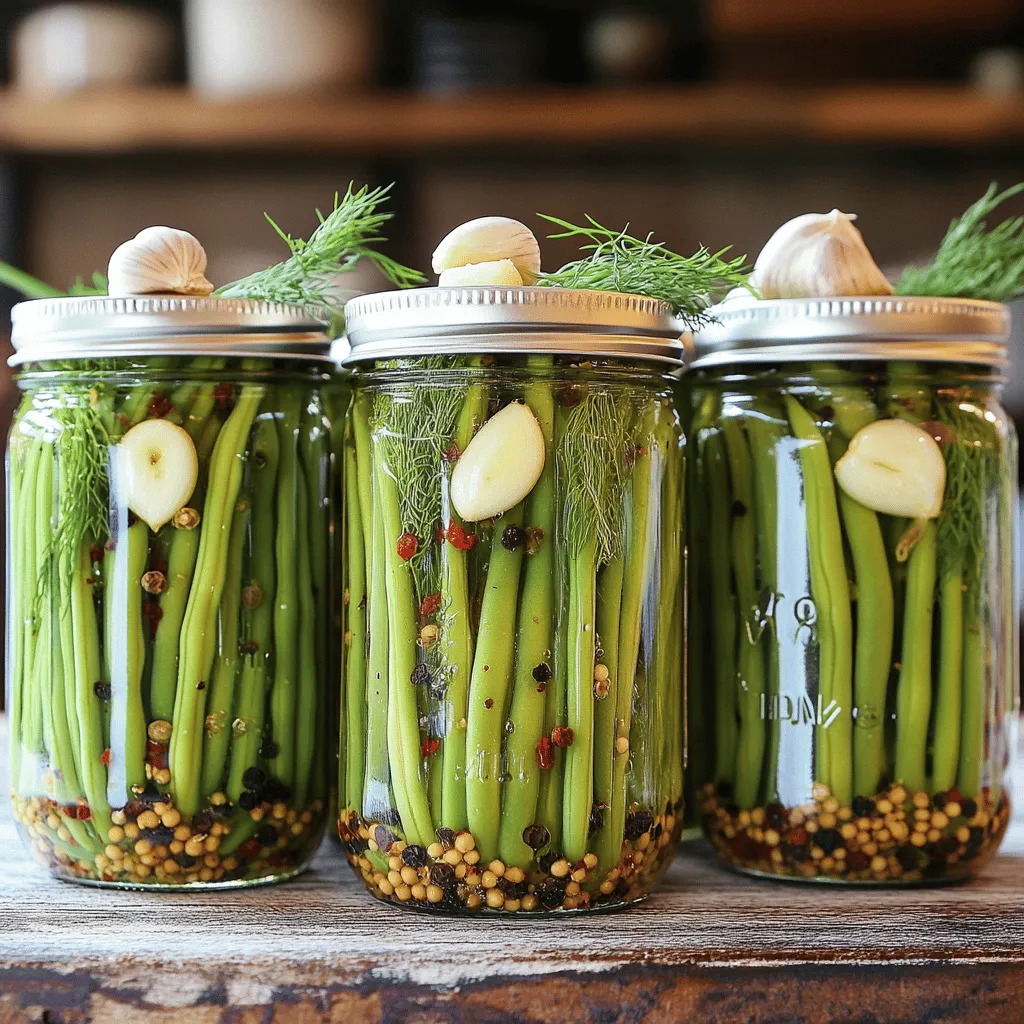
Grandma’s Crispy Garlic Dilly Beans Delightful Recipe
Are you ready to add some zing to your snack game? Today, I’m sharing my grandma’s recipe for crispy garlic dilly beans—tangy, crunchy, and bursting
- 6 large eggs - 1/4 cup mayonnaise - 1 tablespoon Dijon mustard - 1 teaspoon apple cider vinegar - Salt and pepper to taste - 1 can black beans, rinsed and drained - 1 can corn, drained - 1 red bell pepper, diced - 1 jalapeño, seeded and minced - 1/2 red onion, finely chopped - 1/4 cup fresh cilantro, chopped - 2 tablespoons olive oil - 2 tablespoons lime juice - Salt and pepper to taste I love how deviled eggs are a classic that everyone knows. But when you add cowboy caviar, you create something special. The fresh and bold flavors of cowboy caviar make these eggs exciting. First, let’s talk about the main ingredients for the deviled eggs. You need six large eggs. I always choose the freshest eggs I can find. They make a big difference in flavor. You will also need mayonnaise, Dijon mustard, apple cider vinegar, and salt and pepper. These ingredients create that creamy filling we all love. Now, for the cowboy caviar. This dish is a mix of black beans, corn, and fresh veggies. You’ll need one can each of black beans and corn. Rinsing the beans is key. It removes extra salt and liquid. Next, grab a red bell pepper and a jalapeño. The red bell pepper adds sweetness, while the jalapeño gives a kick. You also need half a red onion, fresh cilantro, olive oil, lime juice, and some salt and pepper. All these ingredients combine to make a vibrant topping for the deviled eggs. For the full recipe, check out the Cowboy Caviar Deviled Eggs section. Trust me, your guests will love this twist on a classic dish! - Step 1: Place eggs in water and bring to a boil. - Step 2: Cover, remove from heat, and let sit for 10-12 minutes. Boiling eggs is simple. Start by placing the eggs in a pot. Cover them with cold water. The water should be about an inch above the eggs. I use medium heat to bring the water to a boil. Once it boils, cover the pot with a lid. Then, remove it from heat. Let the eggs sit for 10-12 minutes. This step gives you perfect hard-boiled eggs every time. - Step 1: Combine all cowboy caviar ingredients in a mixing bowl. - Step 2: Prepare dressing and mix with bean mixture. Cowboy caviar is a fun mix of flavors. In a large mixing bowl, combine these ingredients: black beans, corn, diced red bell pepper, minced jalapeño, finely chopped red onion, and fresh cilantro. Make sure you rinse and drain the beans and corn first. In a small bowl, whisk together olive oil, lime juice, salt, and pepper to make the dressing. Pour this dressing over the bean mixture and toss it all together. The flavors will blend well if you let it sit for a bit. - Step 1: Cool and peel eggs in an ice bath. - Step 2: Mix yolk filling and combine with cowboy caviar. - Step 3: Stuff egg whites and garnish with remaining caviar. After the eggs sit, it's time to cool them. Transfer the eggs into an ice bath. This helps them cool quickly and makes peeling easier. Let them sit in the ice water for about 5 minutes. Under running water, peel the cooled eggs carefully. Slice each egg in half and scoop the yolks into a bowl. Add mayonnaise, Dijon mustard, apple cider vinegar, and a pinch of salt and pepper. Mix this filling until it is smooth. Gently fold in half a cup of cowboy caviar to the yolk mixture. Now, it’s time to stuff the egg whites. Use a spoon or piping bag to fill each egg half. Make sure to be generous; you want each bite full of flavor. Finally, garnish with a small dollop of the remaining cowboy caviar on top. These deviled eggs are now ready to impress at your next party! For the full recipe, check out the details above. To get perfect hard-boiled eggs, start with fresh eggs. Place the eggs gently in a pot. Cover them with cold water, about an inch above the eggs. Bring the water to a rapid boil over medium heat. Once boiling, cover the pot and remove it from the heat. Let the eggs sit for 10-12 minutes. This method gives you firm yolks without a green ring. Peeling eggs can be tricky. For easy peeling, cool the eggs right after cooking. An ice bath works best. Fill a bowl with ice and water. Transfer the eggs to this bath for about five minutes. The cold water helps separate the shell from the egg. Peel the eggs under running water for even better results. Presenting deviled eggs can be fun and creative. Use a nice serving platter to show them off. You can arrange them in a circle or a line. Adding fresh cilantro on top gives a nice color contrast. For a twist, serve extra cowboy caviar on the side. This allows guests to dip or add more flavor. Think about pairing these eggs with other appetizers. They work well with chips, veggies, or even meat skewers. This creates a nice balance and adds variety to your spread. Want some heat? Adjust the spice levels by adding jalapeño to your cowboy caviar. You can also mix in diced bell peppers or corn for a sweet touch. If you like it mild, skip the jalapeño or use less. You can add other vegetables to the cowboy caviar too. Try diced cucumbers or chopped tomatoes for extra crunch. Mixing different veggies keeps things fresh and fun. Remember, this dish is all about your taste! For the full recipe, check out the Cowboy Caviar Deviled Eggs section above. {{image_4}} You can make these deviled eggs even more exciting. Just add hot sauce or sriracha to the filling. Start with a few drops and taste. You can always add more if you want more heat. This spice adds a great kick and pairs well with the fresh flavors of cowboy caviar. It’s a fun way to surprise your guests. If you want a lighter option, try Greek yogurt instead of mayonnaise. Greek yogurt gives a creamy texture and adds protein. It also makes the dish tangy and delicious. Just swap the mayo for the same amount of yogurt in the filling. Your deviled eggs will still be tasty and satisfying. You can easily make cowboy caviar vegetarian-friendly. For the black beans, you can use chickpeas or kidney beans instead. Swap the jalapeño for diced bell peppers if you prefer a milder taste. You can also add chopped avocado for creaminess. These changes keep the dish fresh and vibrant while catering to different diets. For the full recipe, check out the details above to make these tasty party treats! To keep leftover deviled eggs fresh, store them in a covered container. Place a damp paper towel at the bottom. This helps keep them moist. You can also cover the eggs with plastic wrap. Make sure the wrap touches the eggs to reduce air exposure. This method keeps them from drying out. They can stay fresh for up to three days in the fridge. I do not recommend freezing deviled eggs. Freezing changes the texture of the eggs. The filling can become watery and grainy. If you want to make it ahead, prepare the filling and store it. You can freeze the cowboy caviar, but not the eggs. Just thaw and mix it on the day you serve. Deviled eggs are best eaten within two days. If stored properly in the fridge, they can last up to three days. After that, the taste and texture may decline. Always check for signs of spoilage before eating. If in doubt, throw them out. Enjoy your tasty party treat with confidence! Cowboy caviar is a zesty bean salad. It combines black beans, corn, and fresh veggies. You’ll find diced red bell pepper, jalapeño, and red onion in it. Fresh cilantro adds a nice touch. Lime juice and olive oil bring it all together. This dish is colorful and packed with flavor. It pairs perfectly with deviled eggs, adding a fun twist. Yes, you can prepare many parts ahead. Make the cowboy caviar a day before. Store it in the fridge to let the flavors mix. You can also boil the eggs in advance. Just keep them in the fridge after cooling. Fill the eggs right before serving for the best taste. Start with cold eggs in a pot of water. Bring the water to a boil over medium heat. After boiling, cover and turn off the heat. Let the eggs sit for 10-12 minutes. This method helps avoid overcooking. If your eggs crack, try using a pin to poke a small hole before boiling. This lets steam escape and keeps the shells intact. Deviled eggs and cowboy caviar make a tasty pair for any gathering. You learned how to boil eggs and create a fresh, vibrant dish. Don’t forget to try variations and customize to suit your taste. Store leftovers properly to keep them fresh. With a few simple tips, you can impress friends and family. Enjoy your cooking and share these recipes!
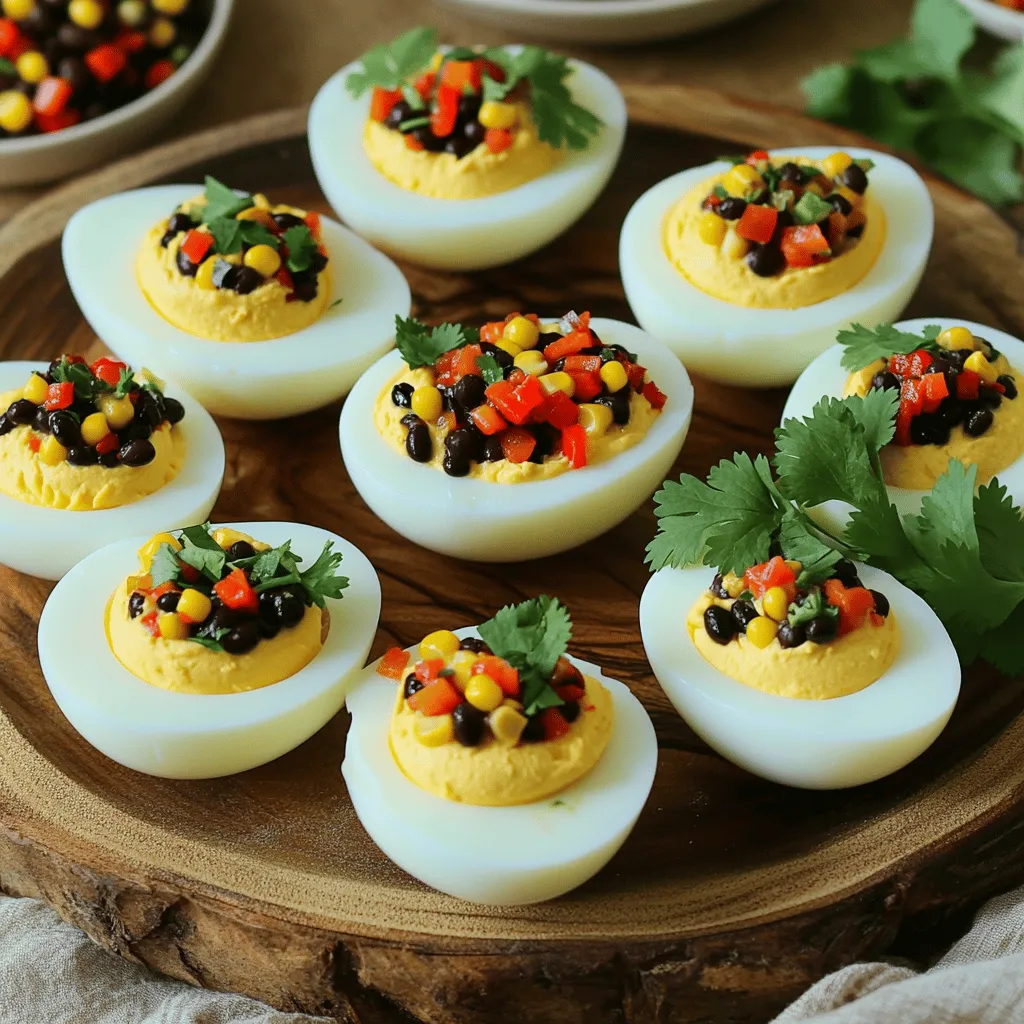
Deviled Eggs with Cowboy Caviar Tasty Party Treat
Looking for a fun twist on a classic dish? Deviled Eggs with Cowboy Caviar is the answer! This tasty party treat combines creamy, flavorful deviled
- 2 medium yellow squash, sliced into 1/4-inch rounds - 1 cup freshly grated Parmesan cheese - 1/2 cup whole wheat breadcrumbs - 2 tablespoons extra-virgin olive oil - 1 teaspoon garlic powder - 1 teaspoon dried Italian herbs - Salt and freshly cracked black pepper, to taste - Fresh parsley for garnish If you want to switch things up, here are some easy swaps: - Alternative cheeses: You can use Pecorino Romano or cheddar for a different taste. - Gluten-free breadcrumbs options: Try almond flour or crushed rice crackers for a gluten-free option. - Fresh herbs vs. dried herbs: Fresh herbs add vibrant flavor. Use one tablespoon of fresh herbs for every teaspoon of dried herbs. These substitutions help you tailor the recipe to your taste. Enjoy experimenting with flavors! First, preheat your oven to 400°F (200°C). This step is key for crispiness. Next, line your baking sheet with parchment paper. This helps the rounds cook evenly and not stick. In a medium bowl, mix the dry ingredients. Combine the grated Parmesan cheese, whole wheat breadcrumbs, garlic powder, and dried Italian herbs. Add a pinch of salt and pepper. Stir well to blend all the flavors. Now, drizzle the olive oil over the sliced yellow squash rounds. Toss them gently to coat every slice. This oil helps the coating stick and adds flavor. Take each squash round and dip it into the cheese mixture. Press the mixture onto both sides of each slice. This step ensures a good coating for that crispy finish. Arrange the coated squash rounds on the baking sheet. Place them in a single layer, leaving space between each round. This allows hot air to circulate for even cooking. Bake in the preheated oven for 20 to 25 minutes. Watch closely for a golden brown color. You want a nice crispy texture on the outside. Once they are done, remove the rounds from the oven. Let them cool on the sheet for a few minutes. This cooling helps keep them crispy. For a lovely touch, transfer the baked rounds onto a serving platter. Sprinkle with finely chopped fresh parsley. This adds color and flavor to your dish. Enjoy your crispy delight! For the best results, choose a heavy-duty baking sheet. This helps your squash rounds cook evenly. Look for sheets that are non-stick or have a silicone coating. This allows easy release of the rounds. Parchment paper is key for achieving that crispy texture. It prevents sticking and helps with even browning. Plus, it makes cleanup a breeze. Always line your baking sheet with parchment before you start. To spice things up, consider adding extra seasonings. Try red pepper flakes for heat or smoked paprika for a deep flavor. You can also swap out the dried Italian herbs for fresh ones, like basil or thyme, to elevate the taste. Pair your baked squash rounds with sauces or dips. A tangy yogurt dip or a zesty marinara will complement the flavors nicely. This adds variety and makes your dish more exciting. Serve your baked rounds on a bright plate or wooden board. This adds a rustic touch and makes the dish pop. For a final flourish, sprinkle extra Parmesan on top, along with fresh parsley. Garnish with lemon zest for a fun twist. This adds a burst of color and fresh fragrance. Your guests will be impressed by both taste and look. {{image_4}} You can make baked Parmesan yellow squash rounds even more exciting. Adding different spices or herbs can change the taste. Try paprika for a smoky flavor. You can also use thyme for a fresh twist. Mixing in crushed red pepper flakes adds a nice kick. You can also incorporate other vegetables. Zucchini works well and has a similar texture. Eggplant rounds can add richness. Slice them thinly and follow the same steps. Mixing colors from various veggies makes the dish more vibrant and fun. If you want a vegan option, use nutritional yeast instead of Parmesan. It gives a cheesy flavor without dairy. Just sprinkle it on the squash rounds before baking. For low-carb alternatives, you can skip the breadcrumbs. Coat the squash in almond flour instead. This keeps the dish crispy while cutting down on carbs. You’ll still get a satisfying crunch. You can cook these squash rounds in an air fryer, which makes them extra crispy. Preheat the air fryer to 375°F (190°C). Cook for 10-12 minutes, shaking the basket halfway through. Grilling is another fun way to prepare them. Preheat your grill and place the rounds on a grill basket. Grill for about 5-7 minutes per side. This gives the rounds a nice smoky flavor with grill marks. For the full recipe, check out the instructions above. Enjoy trying these variations! To keep your baked Parmesan yellow squash rounds fresh, place them in an airtight container. This prevents moisture from making them soggy. Store in the fridge for up to 3 days. They taste best when eaten fresh, but leftovers can still be tasty. If you want to freeze them, here’s how. First, let the rounds cool completely. Next, place them on a baking sheet in a single layer and freeze for 1-2 hours. Once frozen, transfer them to a freezer bag. They can last for up to 2 months in the freezer. Keep in mind that the texture may change slightly after freezing. They may not be as crispy when reheated. To reheat your squash rounds and keep them crispy, use the oven. Preheat it to 375°F (190°C). Place the rounds on a baking sheet and heat for 10-12 minutes. You can also use an air fryer at 350°F (175°C) for about 5-7 minutes. This method gives you a nice crisp texture. Enjoy your delicious leftovers! You can tell when they are done by their color and texture. Look for a golden brown color. The edges should be crispy, while the center should be tender. This usually takes about 20-25 minutes in the oven. To check, you can gently poke a round with a fork. If it feels soft but firm, it's perfect! Yes, you can prep the squash rounds ahead of time. Slice and coat them in the breadcrumb mixture. Place them on the baking sheet, cover, and store in the fridge for up to a day. When you're ready to bake, just pop them in the oven. This saves time on busy days! These rounds pair well with many dishes. Try serving them alongside grilled chicken or fish for a complete meal. They also work great as a side dish with pasta or a fresh salad. You can even enjoy them as a tasty snack or appetizer! To make this recipe gluten-free, simply swap the whole wheat breadcrumbs for gluten-free breadcrumbs. You can find these in most stores. Ensure your Parmesan cheese is gluten-free as well. With these changes, you can enjoy the same crispy delight without gluten! Check out the Complete Recipe for Baked Parmesan Yellow Squash Rounds [here](#). Baked Parmesan Yellow Squash Rounds are easy and fun to make. We covered the main ingredients, step-by-step instructions, and helpful tips. You can adapt the recipe with various flavors and diets. Also, we discussed storing and reheating for later enjoyment. With these insights, you'll create a tasty dish that fits your needs. Don't hesitate to try new flavors or methods. Enjoy every bite and share this recipe with friends!
Baked Parmesan Yellow Squash Rounds Crispy Delight
Are you ready to elevate your vegetable game? Baked Parmesan Yellow Squash Rounds offer a crispy delight that’s both tasty and healthy. With just a
- Zucchini: 1 cup, finely grated - Potato: 1 cup, finely grated (approximately 1 medium potato) - Parmesan cheese: 1 cup, grated - All-purpose flour: 1 cup - Eggs: 2 large - Milk: 1/2 cup - Extra virgin olive oil: 1/4 cup - Baking powder: 1 teaspoon - Baking soda: 1/2 teaspoon - Garlic powder: 1 teaspoon - Salt and freshly cracked black pepper, to taste - Chopped fresh herbs (e.g., parsley or chives) for garnish These ingredients create a great mix of flavors. The zucchini and potato give the muffins a soft texture. Parmesan cheese adds a savory touch. The eggs and flour bind everything together. Olive oil keeps them moist. Baking powder and baking soda help them rise well. Seasoning and herbs make every bite tasty. When making these muffins, use fresh ingredients for the best taste. Grate the zucchini and potato finely to help with moisture control. This step is key for a firm muffin. You can find the full recipe to enjoy these delightful muffins. Preheat your oven to 375°F (190°C). Grab a muffin tin and line it with paper liners or grease it lightly with olive oil. This step helps the muffins come out easily. In a large bowl, combine the finely grated zucchini and potato. Use your hands or a clean towel to squeeze out any extra moisture. This helps the muffins stay firm. Next, add in the flour, grated Parmesan cheese, baking powder, baking soda, garlic powder, salt, and pepper. Mix these dry ingredients until they just blend with the vegetables. In another bowl, whisk together the eggs, milk, and olive oil until smooth. This mixture adds moisture and richness to the muffins. Carefully pour the wet mixture into the bowl with the dry ingredients. Stir gently until just combined. Do not overmix; it's okay if there are a few lumps. Overmixing can make the muffins tough. Spoon the batter into your prepared muffin tin, filling each cup about three-quarters full. This allows the muffins to rise nicely. Bake in the preheated oven for 20 to 25 minutes. They are done when they turn golden brown and a toothpick comes out clean from the center. Once baked, take the muffin tin out of the oven. Let the muffins cool in the tin for about 5 minutes. After that, gently transfer them to a wire rack to cool completely. Before serving, sprinkle some chopped fresh herbs on top for a burst of color and flavor. Enjoy these muffins warm or at room temperature! For the full recipe, check out the details above. To get the best texture in your muffins, you need to squeeze out excess moisture. Zucchini and potatoes hold a lot of water. If you skip this step, your muffins may turn out too soggy. After grating the zucchini and potato, take a clean kitchen towel. Wrap them up and squeeze firmly. Remove as much liquid as you can. This makes for a firmer muffin that holds its shape better. Don't be afraid to experiment with flavors! You can try using different cheeses like cheddar or feta. Adding herbs like thyme or rosemary can also change the taste. Each ingredient you swap can create a new muffin experience. Think of what flavors you love and mix them in. This way, you can make these muffins your own. When it's time to serve, add a sprinkle of extra Parmesan cheese on top. Fresh herbs like parsley or chives add a nice touch too. Pair these muffins with a warm bowl of soup or a crisp salad. They make a great side dish or a light meal. Enjoy them warm for the best flavor. Check out the Full Recipe for details on how to prepare this tasty dish! {{image_4}} You can easily make these muffins gluten-free. Just swap the all-purpose flour with a gluten-free flour blend. Look for blends that include a mix of rice flour, tapioca flour, and xanthan gum for the best results. This change keeps the muffins soft and tasty without the gluten. To make these muffins vegan, use flax eggs instead of regular eggs. Mix one tablespoon of ground flaxseed with three tablespoons of water. Let it sit for five minutes to thicken. For milk, choose any non-dairy milk you like, such as almond or oat milk. These swaps keep the muffins moist and delicious while making them plant-based. If you crave some heat, add a spicy twist to your muffins. Toss in chopped jalapeños or a pinch of red pepper flakes. This adds a lovely kick that pairs well with the cheesy flavor. Adjust the amount to suit your taste. You can always start small and add more if you want extra spice. Keep your Parmesan Zucchini Potato Muffins in an airtight container. They stay fresh at room temperature for up to 3 days. This way, you can enjoy them for breakfast or a quick snack. To freeze muffins, place them in a single layer on a baking sheet. Once frozen, transfer them to a freezer bag. This keeps them good for up to 3 months. When you want a muffin, just take one out and let it thaw. You can reheat your muffins in the microwave. Just heat them for about 15-20 seconds. Alternatively, use a toaster oven for a crispier texture. Simply toast until warm and enjoy! For the full recipe, check back to the beginning. - Follow the detailed step-by-step instructions provided above. - Yes, you can substitute vegetables like carrots or spinach for variation. This adds new flavors and colors. You could try sweet potatoes for a sweet twist. Mixing veggies keeps it fun! - These muffins pair well with salad, soup, or as a brunch item. A light green salad adds freshness. A warm soup makes it cozy. They are great for any meal! - They can last up to 3 days at room temperature or 3 months in the freezer. Store them in an airtight container. Thaw frozen muffins overnight for best results. - You can use any hard cheese or nutritional yeast for a dairy-free option. Cheddar or Pecorino can work well. Nutritional yeast gives a nice cheesy flavor without dairy. In this post, I covered how to make delicious Parmesan Zucchini Potato Muffins. We looked at key ingredients, step-by-step instructions, and tips for perfect texture and flavor. You can even try gluten-free or vegan options. These muffins are simple to make and packed with flavor. Store leftovers for later or serve them fresh. Enjoy this tasty treat, whether with soup, salad, or on their own. I hope you find joy in making and sharing these muffins!
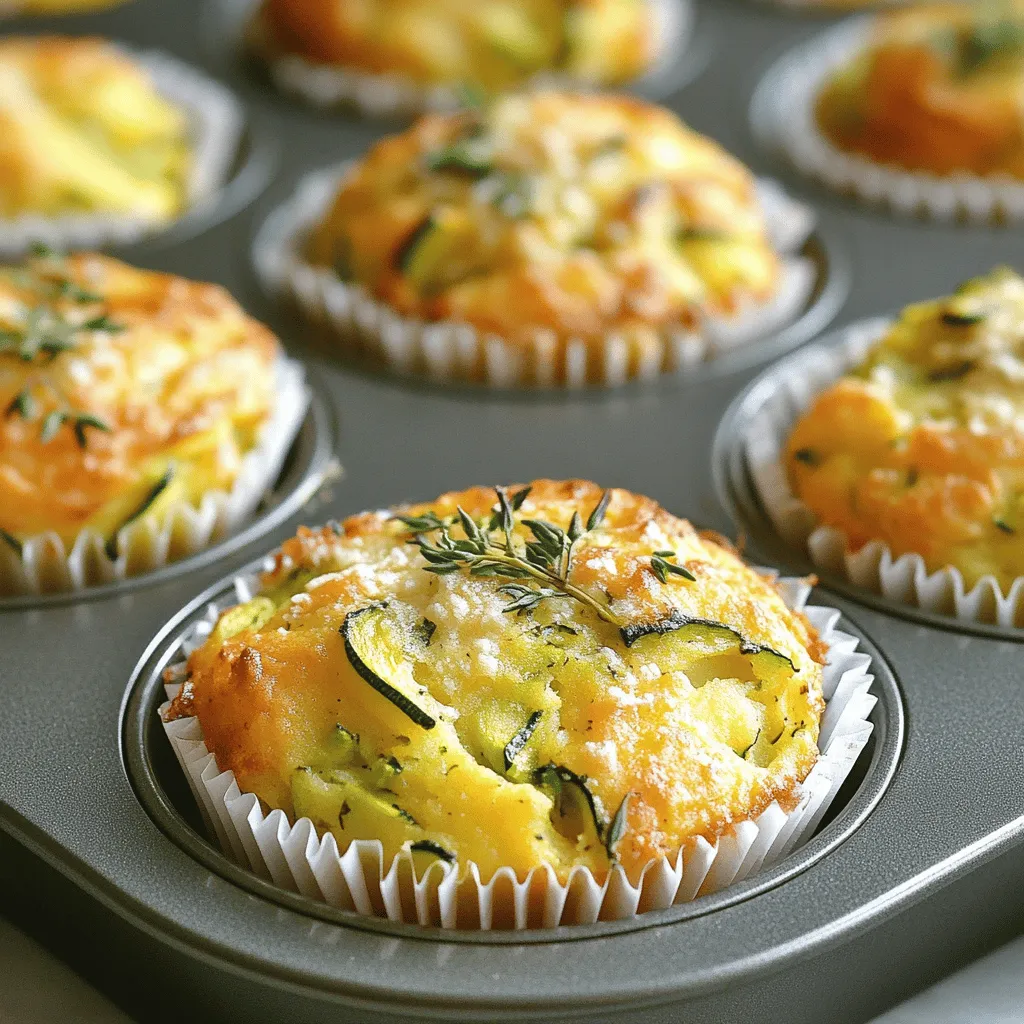
Parmesan Zucchini Potato Muffins Savory and Simple Dish
Looking for a tasty and simple dish to impress your family? These Parmesan Zucchini Potato Muffins are the answer! Packed with flavor and easy to
- 1 medium zucchini, grated and excess moisture squeezed out - 1 cup shredded sharp cheddar cheese - 2 cups all-purpose flour - 1 tablespoon baking powder - 1 teaspoon garlic powder - 1 teaspoon salt - 1/2 teaspoon black pepper - 1/4 cup unsalted butter, cold and cubed - 3/4 cup milk - 2 tablespoons fresh chives, chopped (optional) Each ingredient plays a key role in making these biscuits soft and flavorful: - Zucchini adds moisture and a subtle taste. It makes the biscuits tender. - Sharp cheddar cheese brings a rich, savory flavor that balances the zucchini. - All-purpose flour gives structure to the biscuits while keeping them light. - Baking powder helps the biscuits rise, making them fluffy. - Garlic powder adds depth and a bit of zing. - Salt enhances all flavors and balances the taste. - Black pepper provides a slight kick without being overwhelming. - Unsalted butter keeps the biscuits rich and flaky. - Milk hydrates the dry ingredients, creating a soft dough. - Chives offer a fresh, herbal note, brightening the flavor (optional). You can make these biscuits more inclusive with a few swaps: - Gluten-free flour can replace all-purpose flour for a gluten-free option. - Dairy-free cheese or nut-based cheese works well instead of cheddar if you're avoiding dairy. - Vegan butter can replace unsalted butter for a dairy-free version. - Plant-based milk can substitute regular milk to avoid dairy. Finding the right ingredients is essential for tasty zucchini cheddar biscuits. You can enjoy them while meeting dietary needs! First, gather all your ingredients. You will need: - 1 medium zucchini, grated and excess moisture squeezed out - 1 cup shredded sharp cheddar cheese - 2 cups all-purpose flour - 1 tablespoon baking powder - 1 teaspoon garlic powder - 1 teaspoon salt - 1/2 teaspoon black pepper - 1/4 cup unsalted butter, cold and cubed - 3/4 cup milk - 2 tablespoons fresh chives, chopped (optional) Start by preheating your oven to 400°F (200°C). Line your baking sheet with parchment paper. This helps prevent sticking. Grate the zucchini and squeeze out extra moisture. This step is key for a light biscuit. In a large bowl, mix the zucchini, cheddar cheese, flour, baking powder, garlic powder, salt, and black pepper. Stir well until everything is combined. Next, add the cold butter. You can use a pastry cutter or your fingers to mix it in. Aim for a crumbly texture with small chunks of butter visible. Now, slowly pour in the milk. Gently fold the mixture together. Stop mixing as soon as it comes together. Overmixing can make your biscuits tough. If you're using chives, add them now and fold gently. Transfer the dough to a floured surface. Pat it down into a rectangle about 1 inch thick. Use a round cutter or a glass to cut out biscuits. Place them 1 inch apart on your baking sheet. Bake in your preheated oven for 15-20 minutes. Watch for a golden brown top. After baking, remove the biscuits from the oven. Let them cool slightly on the baking sheet. This time helps them set and makes them easier to serve. Enjoy them warm for the best taste! To make soft and tender biscuits, keep your butter cold. Cold butter creates steam during baking. This steam makes the biscuits light and fluffy. Another tip is to mix gently. Overmixing can lead to tough biscuits. Combine your ingredients just until they come together. Lastly, don't skip chilling the dough. A little chill time helps the biscuits rise better. Zucchini adds moisture and flavor. First, grate the zucchini finely. Then, squeeze out excess water. This step is key. Too much moisture makes the biscuits soggy. You can also sauté the zucchini lightly. This step adds a nice depth of flavor. Just let it cool before adding to the dough. One common mistake is using warm butter. Warm butter won't create the right texture. Another mistake is not measuring ingredients correctly. Too much flour will make biscuits dry. Lastly, do not open the oven door too soon. This can cause the biscuits to deflate. Follow these tips for perfect biscuits every time. {{image_4}} You can use different cheeses for your biscuits. Try mozzarella for a milder taste. Feta adds a salty kick and a crumbly texture. If you want a stronger flavor, go for blue cheese. Each cheese changes the taste and texture. Feel free to mix them for a unique blend. Zucchini isn’t the only veggie you can use. Carrots add sweetness, while spinach gives a nice color and flavor. You can also try corn for some crunch. Fresh herbs like basil or parsley can brighten up your biscuits. Just chop them finely and mix them in with the dry ingredients. You can make these biscuits sweet too. Add some sugar and cinnamon for a tasty treat. Chopped apples or blueberries can bring a fruity twist. Sweet biscuits pair well with tea or coffee. On the other hand, savory biscuits are perfect for meals. Think about serving them with soups or salads. Each variation brings its own charm and taste to the table. To keep your zucchini cheddar biscuits fresh, store them in an airtight container. This helps prevent them from drying out. Place a piece of parchment paper between layers to avoid sticking. They stay fresh for up to three days at room temperature. If you want them to last longer, refrigeration is a good option. In the fridge, they can last about a week. When you’re ready to enjoy leftovers, reheating is key. Preheat your oven to 350°F (175°C). Place the biscuits on a baking sheet. Heat for about 10 minutes. This warms them up and makes them soft again. You can also use a microwave for quick reheating. Just heat for about 15-20 seconds. Be careful not to overheat, or they may become tough. Freezing is a great way to save your biscuits for later. First, let the biscuits cool completely. Then, place them in a single layer on a baking sheet. Freeze them for about two hours. After they are firm, transfer them to a freezer bag. Seal it tightly, removing as much air as possible. They will stay good for up to three months. To enjoy them later, thaw overnight in the fridge and then reheat. This way, you can enjoy fresh tasting biscuits anytime! You can tell the biscuits are done when they turn golden brown on top. This usually takes about 15 to 20 minutes in the oven. To be sure, you can also poke one with a toothpick. If it comes out clean, your biscuits are ready! Yes, you can make these biscuits ahead of time. You can prepare the dough and place it in the fridge for up to 24 hours. When you're ready, just cut and bake them. This saves time and gives you fresh biscuits whenever you want. These biscuits go great with soups, salads, and stews. They also make a nice side for grilled meats or a light brunch. You can even enjoy them with a bit of butter or jam for a tasty snack. For the full recipe, check the Soft and Tender Zucchini Cheddar Biscuits section above. It has all the steps and details you need to make these delicious biscuits! In this blog post, I covered key ingredients for zucchini cheddar biscuits. Each ingredient plays an important role in flavor and texture. I also provided tips on substitutions for allergens and detailed steps for prepping, mixing, and baking. Helpful tricks ensure tender biscuits and ways to mix in zucchini effectively. Finally, I shared storage tips to keep your biscuits fresh. These biscuits are a great addition to your table, offering many tasty options. Enjoy making them!
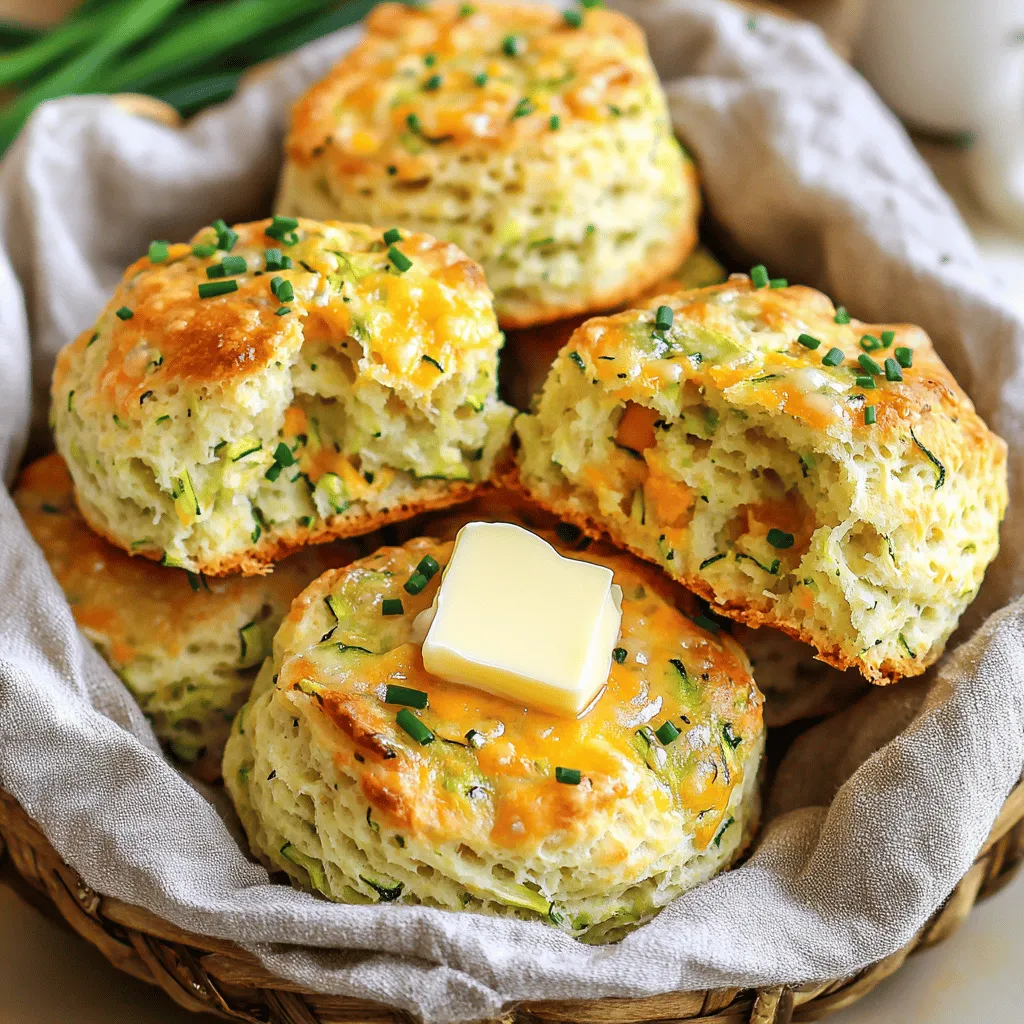
Soft and Tender Zucchini Cheddar Biscuits Recipe
Welcome to my kitchen, where we’ll make Soft and Tender Zucchini Cheddar Biscuits! These biscuits are easy to whip up and bursting with flavor. You’ll
To make tasty zucchini fritters, gather these ingredients: - 2 medium zucchinis, grated - 1 teaspoon salt - 1/2 cup all-purpose flour - 1/4 cup grated Parmesan cheese - 1/4 cup chopped fresh parsley - 1 large egg, beaten - 1/2 teaspoon garlic powder - 1/2 teaspoon onion powder - 1/4 teaspoon black pepper - Olive oil for frying When picking zucchinis, look for firm ones. They should feel heavy for their size. The skin should be smooth and shiny. Avoid zucchinis with soft spots or wrinkles. Smaller zucchinis often taste better. If you can, buy organic for the best flavor. You can swap ingredients if needed. For a gluten-free option, use almond flour instead of all-purpose flour. If you're out of Parmesan cheese, use feta or goat cheese for a different taste. Fresh herbs like basil or dill can replace parsley. If you need a vegan option, replace the egg with flaxseed meal mixed with water. Start by grating the zucchinis. You can use a box grater or a food processor. After grating, put the zucchini in a colander. Sprinkle 1 teaspoon of salt over them. Let them sit for 10-15 minutes. This helps remove extra moisture. Moisture can make your fritters soggy. So, this step is key! Next, take a clean kitchen towel or paper towels. Press the grated zucchini to squeeze out any leftover moisture. You want them as dry as possible for crispy fritters. In a large mixing bowl, combine the drained zucchini with the following ingredients: - 1/2 cup all-purpose flour - 1/4 cup grated Parmesan cheese - 1/4 cup chopped fresh parsley - 1 large egg, beaten - 1/2 teaspoon garlic powder - 1/2 teaspoon onion powder - 1/4 teaspoon black pepper Stir the mixture well. It should form a thick batter. Make sure everything is blended evenly. This ensures each fritter is packed with flavor. Heat a skillet over medium heat. Add olive oil to coat the bottom of the pan. You need enough oil to fry the fritters well. When the oil is hot, use a tablespoon to scoop about 2 tablespoons of the mixture for each fritter. Drop them into the skillet. Gently flatten each fritter with the back of the spoon. This helps them cook evenly. Fry the fritters for 3-4 minutes on each side. Look for a golden-brown color. Adjust the heat if the fritters brown too quickly. Once done, transfer them to a plate lined with paper towels. This helps soak up any extra oil. Repeat the cooking process with the remaining mixture. Don’t forget to add more olive oil as needed. For the full recipe, check the section above. Enjoy your crispy zucchini fritters! To make your fritters crispy, moisture control is key. After grating the zucchini, sprinkle it with salt. This step pulls out extra water. Let the zucchini sit for 10-15 minutes. Then, squeeze it dry using a towel. The drier your zucchini, the crispier your fritters will be. One mistake many make is not removing enough moisture. If the mixture is too wet, fritters will be soggy. Also, avoid overcrowding the pan. Fry in small batches to get even cooking. If you add too many fritters at once, they can steam instead of fry. Lastly, don’t skip the oil. A good amount of oil helps achieve that golden-brown finish. Heat your skillet before adding oil. This helps prevent sticking. Once the oil is hot, drop in the mixture and gently flatten each fritter. This step ensures even cooking. Flip them carefully to keep them intact. Cook them only until golden brown, about 3-4 minutes on each side. Keep an eye on them to avoid burning. For best results, use a non-stick or cast-iron skillet. Enjoy your crispy zucchini fritters! You can find the full recipe above for a detailed guide. {{image_4}} You can make your zucchini fritters even tastier by adding cheese. Try using feta for a tangy kick. Mozzarella brings a nice stretchiness to the fritters. You can also mix cheeses, like Parmesan and cheddar, for a rich flavor. Just remember to adjust the salt, as some cheeses are saltier than others. Herbs and spices can add depth to your fritters. Consider fresh basil or dill for a vibrant taste. If you like heat, add a pinch of cayenne pepper or red pepper flakes. For a savory note, sprinkle in some smoked paprika. Each herb or spice you choose can change the flavor profile of your fritters. To make gluten-free fritters, swap out the all-purpose flour for a gluten-free blend. Almond flour or chickpea flour works well too. These flours add unique flavors and textures. Just ensure the rest of your ingredients, like the baking powder, are gluten-free. This way, everyone can enjoy your delicious zucchini fritters without worry! For more details, check out the Full Recipe. To store leftover fritters, let them cool down first. Place them in an airtight container. You can keep them in the fridge for up to three days. Make sure to layer parchment paper between fritters to avoid sticking. When you are ready to eat the fritters again, reheating is key. Use a skillet on medium heat to bring back their crunch. Add a little olive oil to the pan. Heat each fritter for about two minutes on each side. This method helps them stay crispy and tasty. If you want to freeze your fritters, let them cool completely. Arrange them in a single layer on a baking sheet. Freeze them for about two hours until firm. Once firm, transfer the fritters to a freezer bag. They will stay good for up to three months. When ready to enjoy, thaw in the fridge and reheat as mentioned above. For the full recipe, check out the section above. You can make zucchini fritters without eggs by using mashed potatoes or flaxseed meal. Mix one tablespoon of flaxseed meal with two and a half tablespoons of water. Let it sit for five minutes to thicken. This will act like an egg. You can also use about 1/4 cup of mashed potatoes for binding. The fritters will still hold together, and you'll get great flavor. Yes, you can bake zucchini fritters! Preheat your oven to 400°F (200°C). Place the fritters on a baking sheet lined with parchment paper. Brush or spray them lightly with olive oil for a crisp finish. Bake for about 20-25 minutes. Flip them halfway through for even cooking. Baking makes them a bit healthier, but they may not be as crispy as fried fritters. Zucchini fritters pair well with several dips. Consider serving them with tangy Greek yogurt or refreshing tzatziki sauce. You can also add a squeeze of lemon for brightness. For a heartier meal, serve them alongside a salad or in a wrap. The flavors of the fritters shine through any dip, making them versatile and tasty. For the full recipe, check out the Zesty Zucchini Fritters section. Zucchini fritters are easy to make and fun to enjoy. We covered choosing fresh zucchini, cooking techniques, and tips for crispy results. You can switch up flavors with different cheeses and herbs. Storing and reheating fritters is simple, too. Now you have the tools to create your perfect dish. Get cooking and share your tasty zucchini fritters with others!
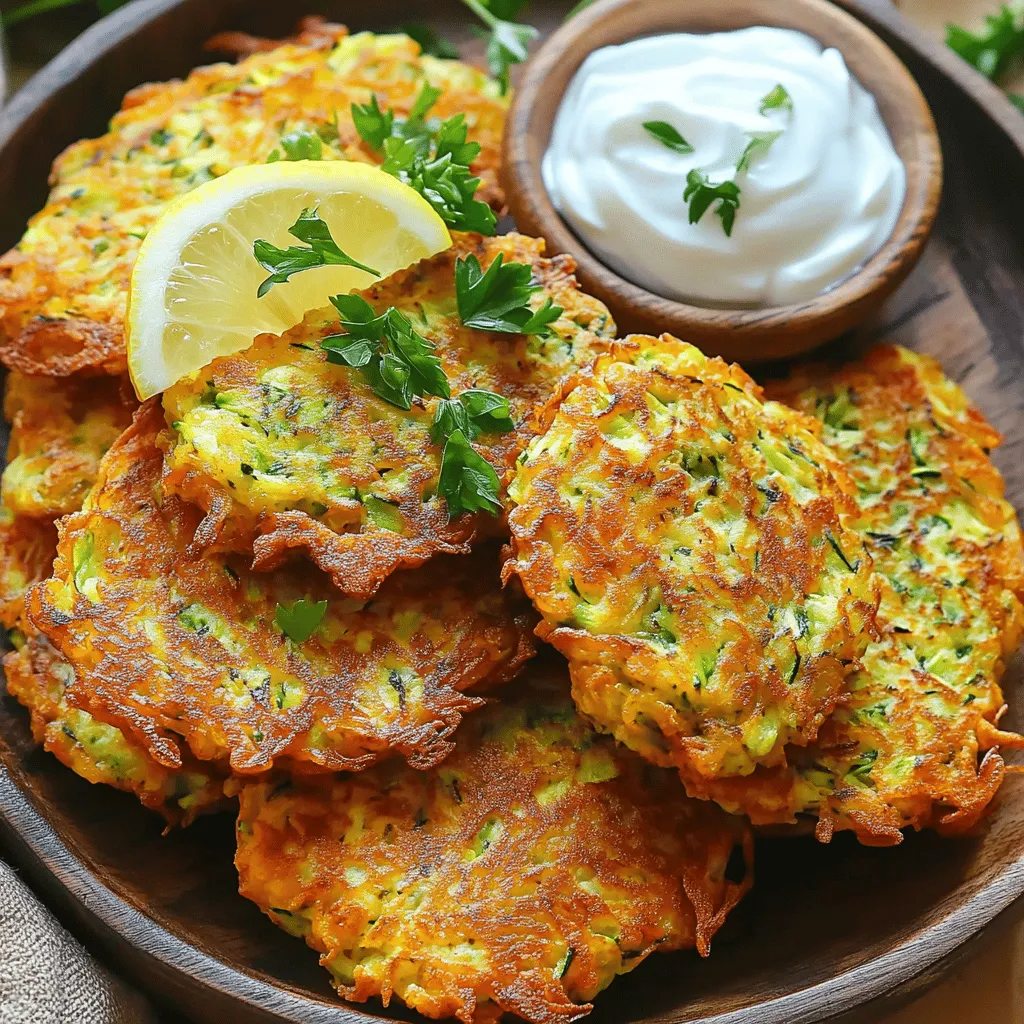
Easy Zucchini Fritters Quick and Crispy Recipe
If you love simple, tasty snacks, you’ll enjoy this Easy Zucchini Fritters recipe! These golden bites are quick to prepare and packed with flavor. Whether
- 2 medium zucchinis, cut into 1/4-inch rounds - 1 cup freshly grated Parmesan cheese - 1 cup panko breadcrumbs - 1 teaspoon garlic powder - 1 teaspoon onion powder - 1 teaspoon dried oregano - 1/2 teaspoon red pepper flakes (optional for heat) - Salt and black pepper to taste - 2 large eggs, whisked until blended - Olive oil spray for crisping To make these baked Parmesan zucchini chips, you need fresh, high-quality ingredients. Start with two medium zucchinis. Cutting them into 1/4-inch rounds ensures they bake evenly, giving you that delightful crunch. Next, Parmesan cheese plays a big role in flavor. Grate it fresh for the best taste. Panko breadcrumbs add a light and crispy texture that regular breadcrumbs can't match. For seasoning, mix in garlic powder, onion powder, and dried oregano. These spices enhance the flavor without overpowering the zucchini. If you like heat, add red pepper flakes, but it’s optional. Don't forget to season with salt and black pepper to taste. This step is key to bringing out the flavors. You’ll need two large eggs to create a binding layer for the coating. Whisk them until blended. Finally, a light spritz of olive oil will help achieve that crispy finish as the chips bake. Once you gather these ingredients, you’re ready to create a snack that’s crispy and flavorful. For the complete process, check the Full Recipe. 1. Preheat the oven and prepare the baking sheet Set your oven to 425°F (220°C). Line a baking sheet with parchment paper. This helps the chips bake evenly and prevents them from sticking. 2. Mix the panko and seasoning blend In a shallow bowl, combine 1 cup of panko breadcrumbs, 1 cup of grated Parmesan cheese, 1 teaspoon of garlic powder, 1 teaspoon of onion powder, and 1 teaspoon of dried oregano. If you like heat, add 1/2 teaspoon of red pepper flakes. Season with salt and black pepper to taste. Mix it all well. 3. Whisk the eggs and prepare zucchini slices In another bowl, whisk 2 large eggs until smooth. Take 2 medium zucchinis and cut them into 1/4-inch rounds. 4. Coat zucchini and arrange on the baking sheet Dip each zucchini slice into the egg mixture. Let any extra egg drip off. Then, coat it in the panko and cheese mix. Press gently to make sure it sticks. Place the coated slices in a single layer on the prepared baking sheet. For a crunchier finish, lightly spritz the tops with olive oil spray. 1. Bake the zucchini chips Put the baking sheet in the oven. Bake for 20-25 minutes or until the chips turn golden brown. They should look crispy and inviting. 2. Cooling time for crispiness Once baked, take the sheet out of the oven. Let the chips cool for a few minutes. This cooling time helps them firm up, making them even crunchier. - Presentation tips for serving Serve your zucchini chips on a nice platter. A bowl of marinara sauce or a creamy dip on the side makes for a great presentation. It adds color and flavor. - Ideal dips to pair with the chips You can pair these chips with marinara sauce, ranch dressing, or even a tangy yogurt dip. Each dip brings out different flavors in the chips. Enjoy experimenting! For the full recipe, check out the detailed instructions to create this tasty snack. To get crispy zucchini chips, you need an even coating. This means covering each slice well with the panko and Parmesan mix. When you coat them, press down a bit to help the mixture stick. Oven settings also matter. Preheat your oven to 425°F (220°C) to ensure the chips cook evenly. A hot oven helps the chips become golden and crispy. Choosing high-quality Parmesan cheese is key. Freshly grated cheese will melt better and add more flavor. Avoid pre-grated cheese, as it often contains fillers that lessen taste. If you want a change, you can swap panko breadcrumbs for crushed cornflakes or almond flour. Both give a nice crunch and can change the flavor too. To prevent sogginess, do not overcrowd the baking sheet. Space out the chips so hot air can circulate around them. This helps them stay crispy. Another tip is to avoid skipping the egg wash. It helps the coating stick and gives the chips a crunch. Always check for even baking, and rotate the tray halfway through cooking. This ensures all sides get enough heat. For the full recipe, check the main article. {{image_4}} You can change the taste of your zucchini chips by adding herbs and spices. Try mixing in basil, thyme, or even a pinch of smoked paprika. These additions will give your chips a new twist. For cheese lovers, consider using aged cheddar or a dairy-free cheese. These options can add a different flavor profile to your crunchy snack. If you need gluten-free options, use almond flour or gluten-free breadcrumbs instead of panko. This swap keeps your chips tasty and safe for those with gluten sensitivities. For a vegan version, replace Parmesan with nutritional yeast and use flax eggs instead of regular eggs. This way, you can still enjoy crispy zucchini chips without any animal products. You can get creative with how you serve your baked zucchini chips. Try adding them to a salad as a crunchy topping. They add great texture and flavor. You can also use these chips as a garnish for soups. They provide a delightful crunch that enhances the overall dish. For the full recipe, check out the detailed steps and instructions on how to make these delicious Baked Parmesan Zucchini Chips. To keep your zucchini chips fresh, place them in an airtight container. This helps prevent moisture from making them soggy. Store the chips in the fridge. They stay good for about 2 to 3 days this way. When you want to enjoy your leftover chips, reheating is key. Set your oven to 350°F (175°C). Place the chips on a baking sheet and heat for about 5 to 10 minutes. This method keeps them crispy. Avoid using the microwave, as it can make them soft and chewy. You can also freeze zucchini chips for later. First, allow them to cool completely. Then, arrange the chips in a single layer on a baking sheet. Freeze them for a few hours until solid. Once frozen, transfer the chips to a freezer bag. They can last for up to 2 months in the freezer. To enjoy frozen chips, thaw them in the fridge overnight. Reheat them in the oven as mentioned above. This way, you can savor crispy baked Parmesan zucchini chips anytime! For the full recipe, check the earlier section. Baked Parmesan zucchini chips can last up to five days in the fridge. Store them in an airtight container. This keeps them fresh and helps prevent sogginess. If you want to enjoy them longer, consider freezing them. Yes, you can use other veggies! Try eggplant, sweet potatoes, or carrots. Each adds a unique flavor and crunch. Just slice them to about 1/4-inch thick. Adjust your baking time as needed for different vegetables. Serve these chips with tasty dips! Marinara sauce is a classic choice. You can also pair them with ranch dressing or a creamy garlic dip. For a fun twist, add some fresh herbs on top before serving. To change the spice level, add more or less red pepper flakes. For a milder flavor, leave them out. If you like heat, try adding cayenne pepper or a dash of hot sauce. Taste as you go to find your perfect balance. You learned how to make tasty baked Parmesan zucchini chips. We covered the main ingredients, preparation steps, and baking tips. You now know how to store and reheat them without losing crispiness. These chips can fit many diets and flavor preferences. Experiment with herbs and dips to make them your own. Enjoy this healthy snack that is easy to make and fun to share. Dive into the world of flavorful snacking with these simple yet delicious chips!
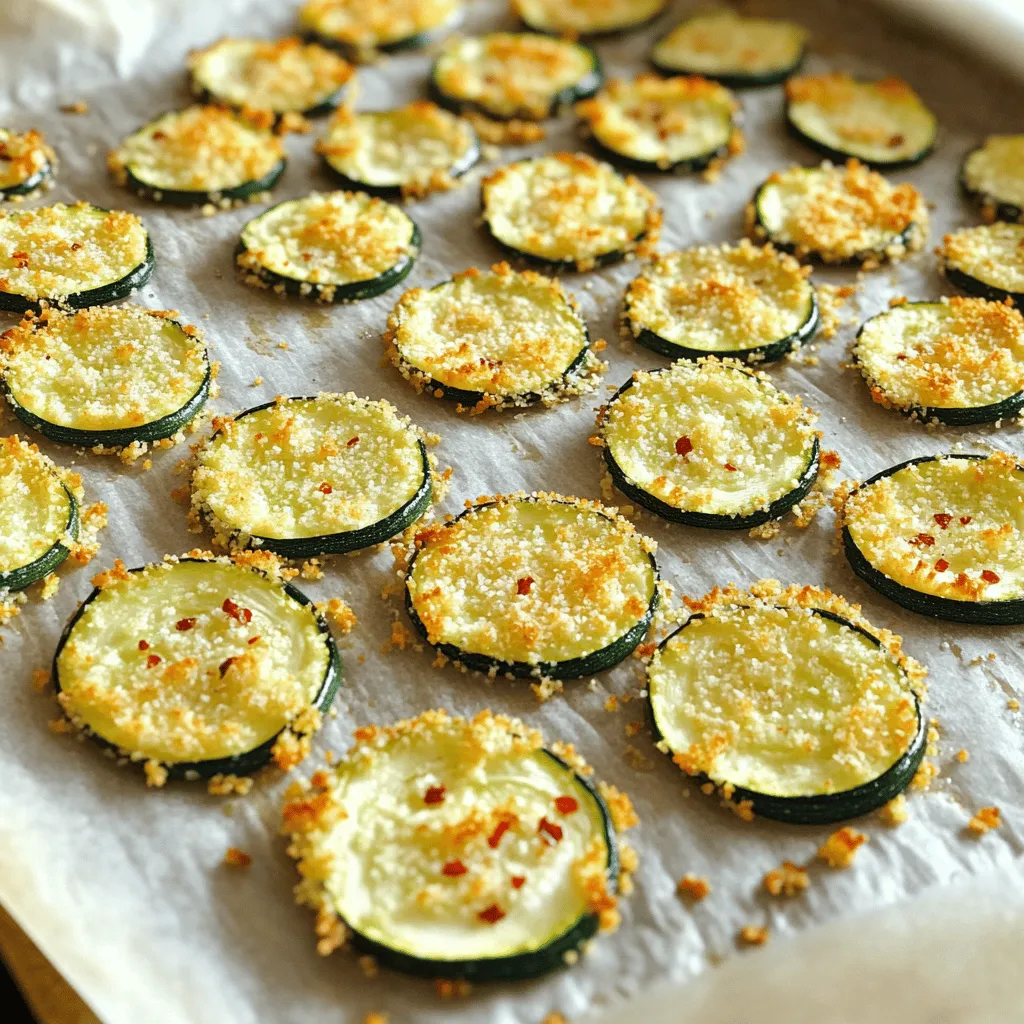
Baked Parmesan Zucchini Chips Crispy and Flavorful Snack
Looking for a snack that’s both tasty and healthy? Baked Parmesan Zucchini Chips are your answer! These chips are crunchy, cheesy, and easy to make.
To make Mom's Perfect Sweet Gherkin Pickles, gather these simple items: - 2 pounds small cucumbers (gherkins) - 1 cup white vinegar - 1 cup water - 1 ½ cups granulated sugar - 2 teaspoons salt - 1 teaspoon mustard seeds - 1 teaspoon celery seeds - ½ teaspoon ground turmeric - 1 teaspoon black peppercorns - 2 cloves garlic, thinly sliced - 1 small onion, thinly sliced - Fresh dill sprigs (for garnishing) When choosing gherkins, look for small, firm cucumbers. They should be bright green with no blemishes. Fresh gherkins should feel crisp when you hold them. Avoid any that are soft or wrinkled, as they may not pickle well. If you can, buy from local farmers' markets. This way, you get the freshest gherkins possible. If you can’t find some ingredients, don't worry! Here are some easy swaps: - Gherkins: You can use small pickling cucumbers or Kirby cucumbers if gherkins are not available. - White vinegar: Apple cider vinegar or rice vinegar can work as a substitute. They will give a slightly different flavor but still taste great. - Granulated sugar: Try using brown sugar or honey for a deeper sweetness. Just remember, it may change the taste a bit. - Fresh dill: If you don't have fresh dill, use dried dill. Adjust the amount to about one-third of fresh dill. These changes can make the recipe work with what you have on hand while still keeping it delicious. For the full recipe, check out the earlier section! First, wash the gherkin cucumbers under cool running water. You want them clean and fresh. Next, trim off the blossom end of each cucumber. This step is key to keep them crisp. If you skip it, the pickles might turn soft. In a large pot, mix the white vinegar, water, sugar, and salt. Place the pot over medium heat. Stir until the sugar and salt dissolve completely. When they have dissolved, add the mustard seeds, celery seeds, ground turmeric, and black peppercorns. Let the mixture simmer gently for about five minutes. This lets the spices release their flavors. The aroma will fill your kitchen! Now it's time to pack the jars. Make sure they are sterilized first. Place the cucumbers tightly in the jars. Alternate layers with sliced garlic, onion, and fresh dill. These add great flavor to your pickles. Next, carefully ladle the hot brine over the cucumbers. Ensure they are fully submerged. Leave about half an inch of space at the top of each jar. This allows for expansion. Finally, seal the jars tightly with their lids. Let them cool at room temperature for about an hour. After that, transfer them to the fridge. For the best taste, let the pickles chill in the fridge for at least 48 hours. This resting time helps all the flavors meld together. Enjoy the process! For the full recipe, check out the detailed steps above. To keep your sweet gherkin pickles crunchy, choose fresh, firm gherkins. Look for small cucumbers with smooth skin. Always trim the blossom end, as this part can make pickles soft. Soaking the cucumbers in ice water for a few hours helps too. Don't skip this! It enhances their crunchiness. Sterilizing jars is key for safe pickling. Start by washing jars in hot, soapy water. Rinse well. Then, place jars in a pot of boiling water for 10 minutes. This kills any germs. Use tongs to remove them and let them air dry. You can also run them through a dishwasher on the hottest setting. This ensures your pickles stay fresh and safe. If you want your pickles sweeter, simply add more sugar. Start with an extra 1/4 cup. Taste the brine to find your perfect balance. If you prefer less sweetness, cut the sugar by the same amount. Remember, the flavor will change as the pickles sit. Adjust according to your taste, and enjoy the process of finding what you love! For the full recipe, check out the complete guide on making Mom's Perfect Sweet Gherkin Pickles. {{image_4}} To make spicy sweet gherkin pickles, add some heat. Mix in 1 to 2 teaspoons of red pepper flakes or sliced jalapeños to your brine. This simple change gives your pickles a nice kick. You can adjust the spice level based on your taste. Try it out and see how you like it! You can also play with herbs and spices. Fresh thyme, coriander seeds, or even a pinch of cinnamon can enhance the flavor. Add a few sprigs of fresh mint for a unique twist. Experiment with your favorite herbs to create a personalized touch. If you want to change the sweetness, consider using honey or maple syrup. These can give a different flavor profile. You can also try using stevia or agave nectar for a healthier option. Just remember to adjust the amount since these sweeteners can be sweeter than sugar. For the full recipe, check out Mom's Perfect Sweet Gherkin Pickles! After making Mom's perfect sweet gherkin pickles, store them in the fridge. Keep the jars sealed tightly. This helps them stay fresh and crunchy. Always use a clean utensil to scoop out pickles. Avoid letting any food touch the brine. This keeps the pickles safe from bacteria. Your pickles will last about 2 months in the fridge. After this time, they may lose their crispness. If you notice any off smells or changes in color, it's best to toss them. For the best taste, enjoy them within the first month. Always check jars for leaks or bulging lids before use. Freezing pickles is not recommended. The texture of the cucumbers will become mushy when thawed. The crunch is part of what makes sweet gherkin pickles so tasty! Instead, focus on making small batches that you can eat fresh. This way, you can enjoy the full flavor and crunch every time. For the full recipe, refer back to the instructions above. Yes, you can use larger cucumbers, but they won't be gherkins. They may need more time to pickle. Choose cucumbers that are firm and fresh. If you pick larger ones, cut them into smaller pieces. This will help them absorb the brine better and stay crunchy. The pickles need at least 48 hours in the fridge before you eat them. This time allows the flavors to blend well. After 48 hours, they will taste sweet and tangy. If you can wait longer, they will taste even better! Sweet gherkin pickles add a great crunch to many dishes. They pair well with sandwiches and burgers. You can also serve them on a cheese board for a fun snack. Try them in salads for extra zest. They can even be a tasty side with grilled meats! Enjoy them however you like! In this blog post, I covered important points about making sweet gherkin pickles. We looked at ingredients, key preparation steps, and ways to ensure your pickles stay crunchy. I also shared tips on variations and storage options. Remember, the right ingredients and methods make all the difference in taste and texture. With this knowledge, you can create delicious pickles at home. Enjoy your pickling journey!
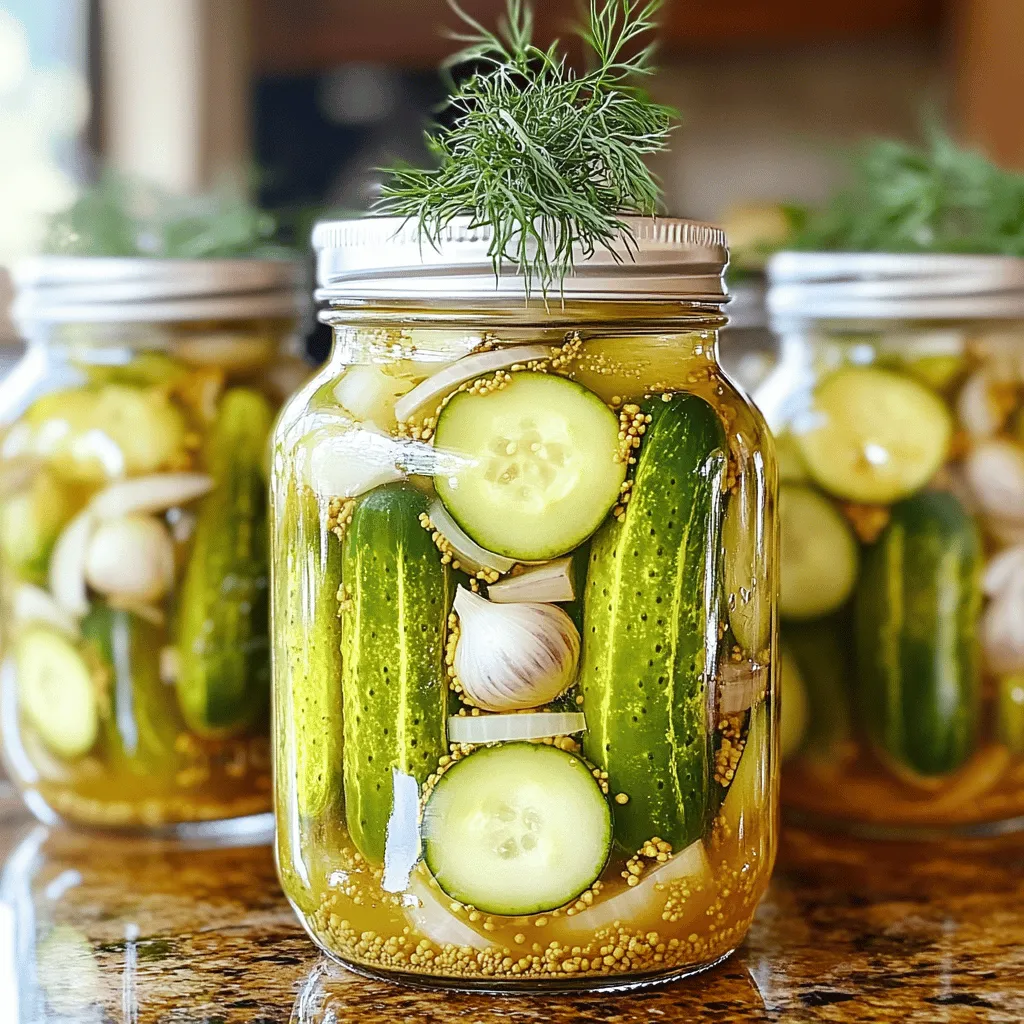
Mom’s Perfect Sweet Gherkin Pickles Simple Recipe
If you want to make the perfect sweet gherkin pickles, you’re in the right place. I’ll share my mom’s simple recipe that guarantees crunchy, tasty