Appetizers
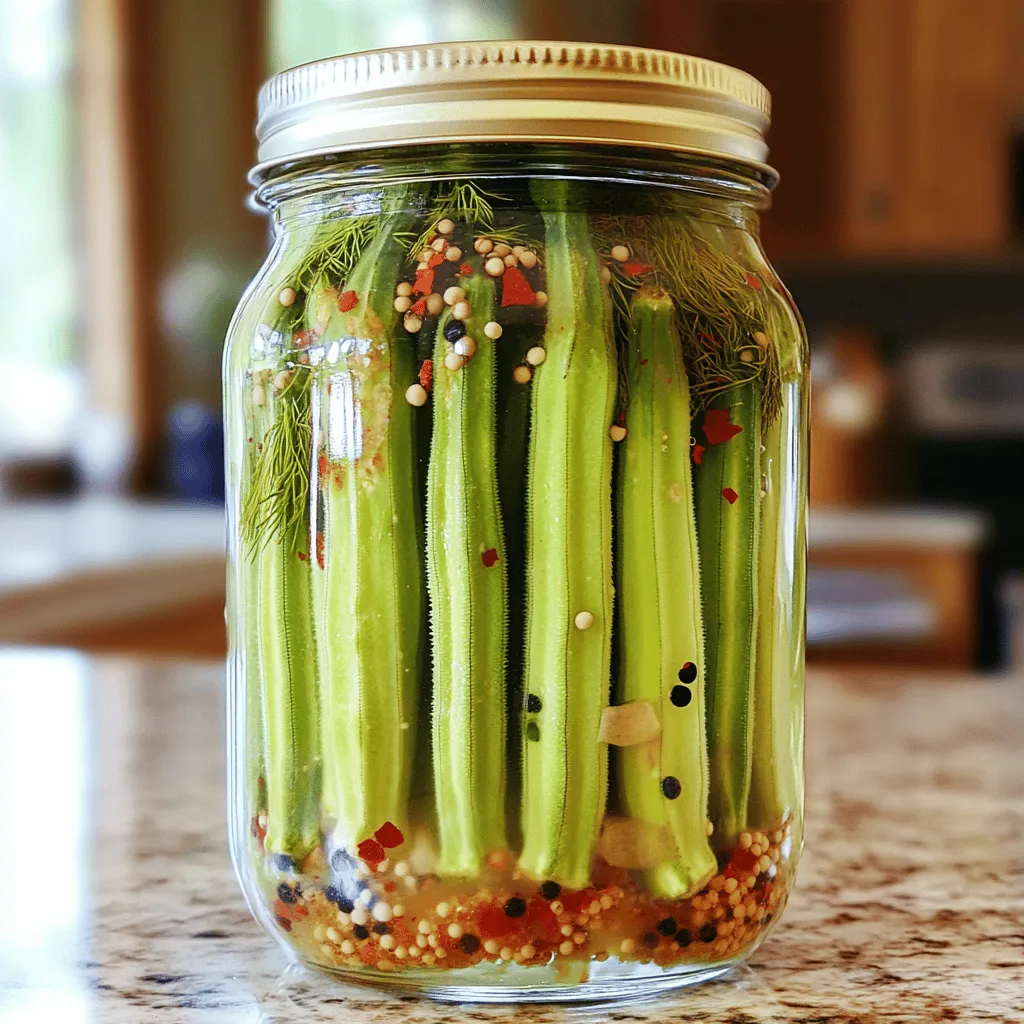
Quick Refrigerator Pickled Okra Flavorful and Simple
If you love a tangy crunch, you’ll adore this Quick Refrigerator Pickled Okra recipe. I’ll guide you through making a zesty brine and packing fresh
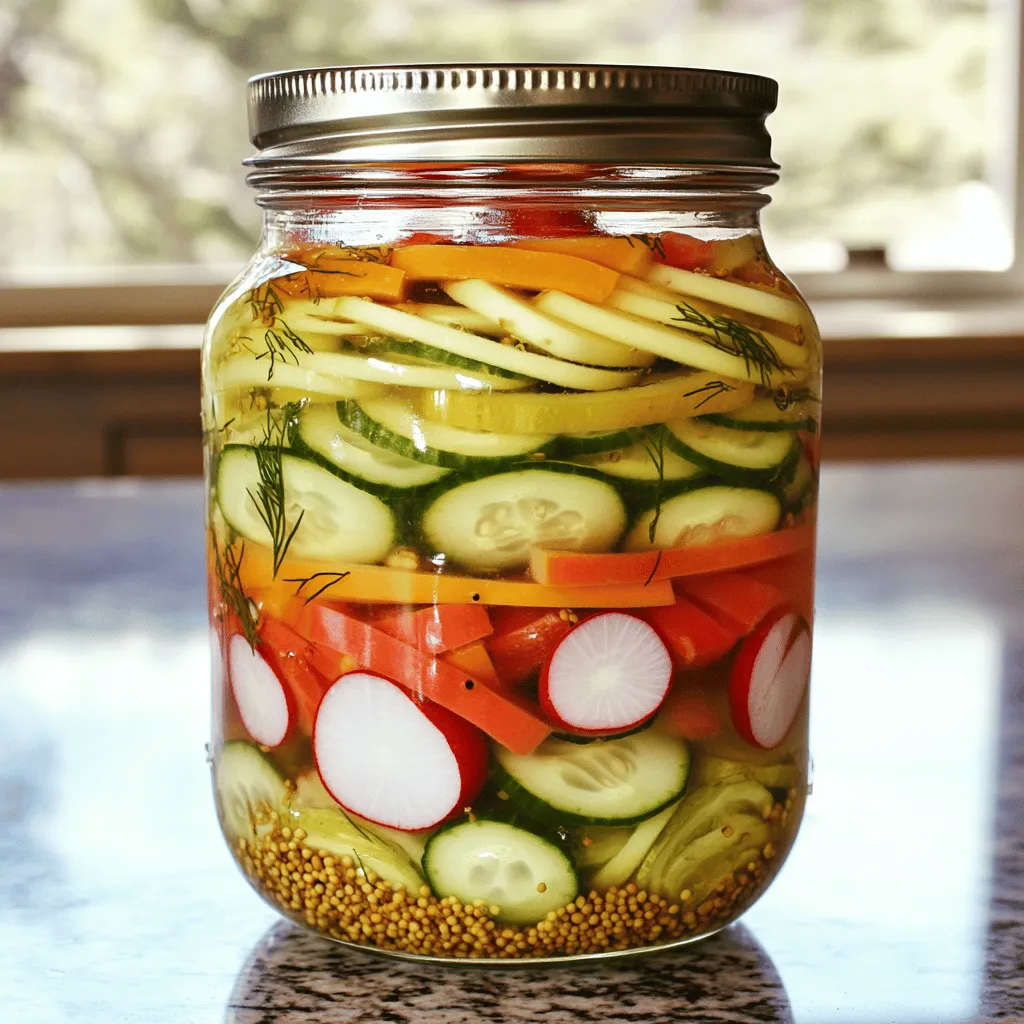
Easy Refrigerator Pickled Vegetables Crunchy and Fresh
Are you looking for a quick, tasty way to preserve your veggies? Easy refrigerator pickled vegetables are the answer! In just a few steps, you
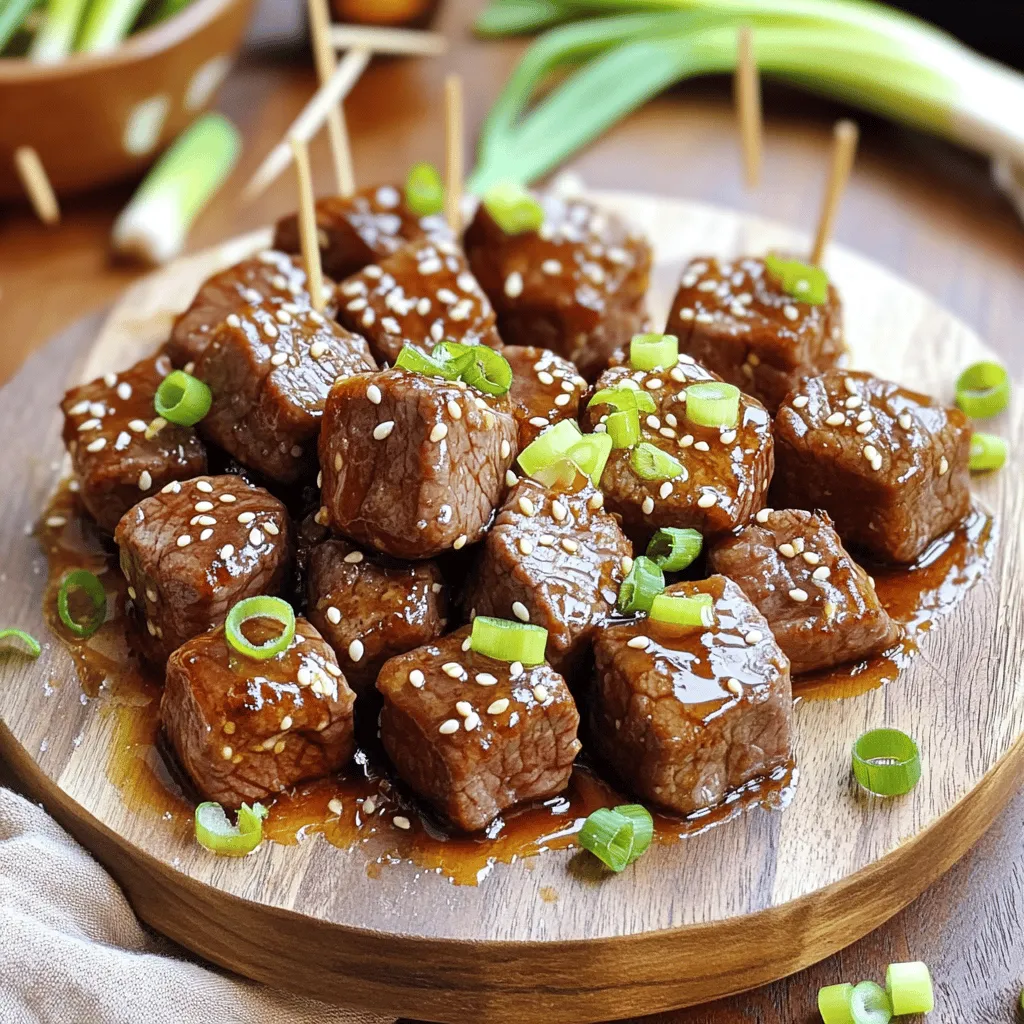
Honey Garlic Steak Bites Savory and Simple Recipe
Get ready to impress your taste buds with my simple and delicious Honey Garlic Steak Bites recipe! This dish combines sweet honey and savory garlic

Garlic Parmesan Cheeseburger Bombs Easy Recipe
Are you ready to take your burger game to a whole new level? These Garlic Parmesan Cheeseburger Bombs offer all the taste you love in
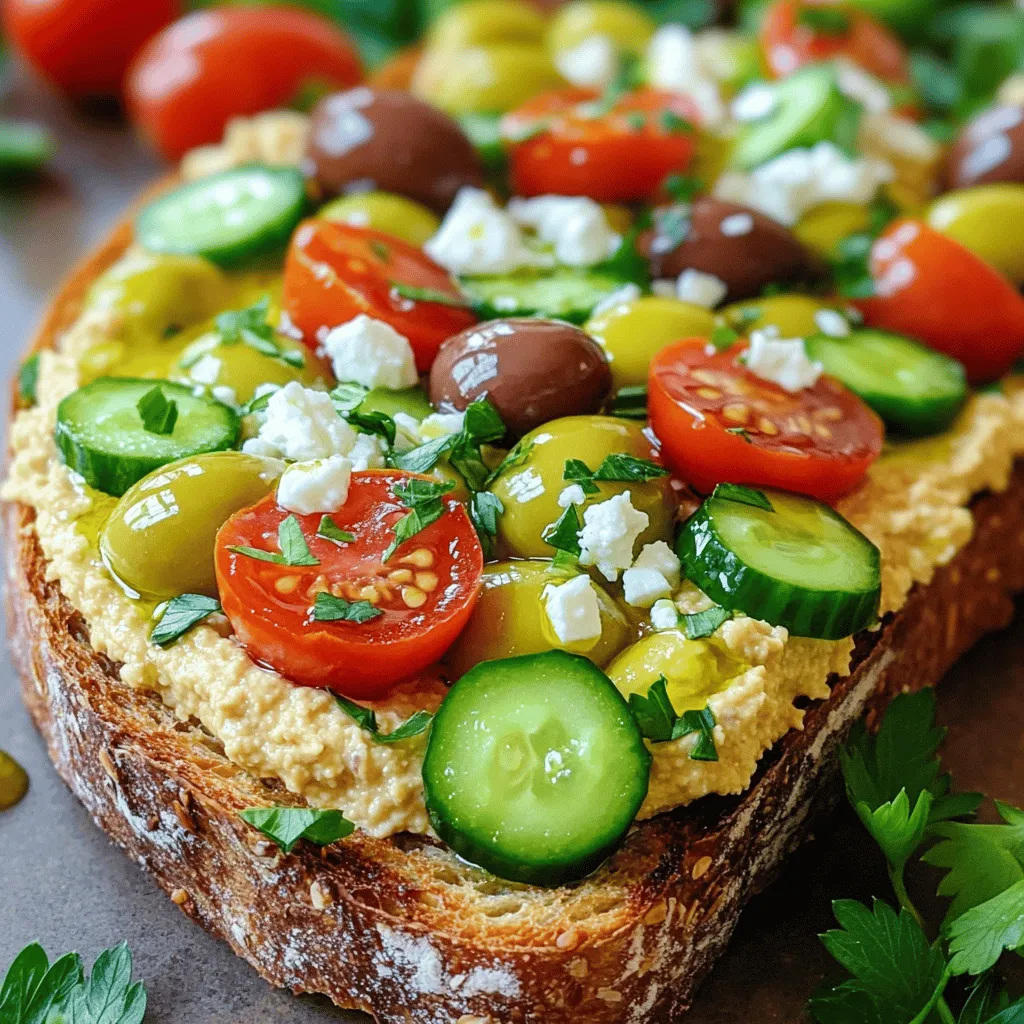
Mediterranean Hummus Toast Tasty and Simple Delight
If you crave a fresh and tasty snack, Mediterranean Hummus Toast is your answer! This dish combines creamy, flavorful hummus with crisp veggies on warm
![- 1 pound fresh salmon fillet, skinless and cut into bite-sized pieces - 1 cup cornstarch - 1 teaspoon garlic powder - 1 teaspoon paprika - 1/2 teaspoon salt - 1/2 teaspoon black pepper - 1 cup mayonnaise - 2 tablespoons sweet chili sauce - 1 tablespoon sriracha (adjust based on your spice preference) - 1 tablespoon fresh lime juice The heart of this recipe is the fresh salmon. I love using skinless salmon fillets. They cook evenly and offer a mild flavor. The cornstarch gives the bites a crunchy coating. Garlic powder and paprika add depth to the flavor. Salt and black pepper bring balance to the dish. You need the bang bang sauce for that creamy, spicy kick. It mixes mayonnaise, sweet chili sauce, sriracha, and lime juice. This sauce is what makes the bites truly special. It adds a zesty and sweet taste that pairs perfectly with the salmon. - Chopped green onions - Sesame seeds For garnishes, I like to sprinkle chopped green onions on top. They add color and some crunch. Sesame seeds are another great touch. They give a nice nutty flavor and look beautiful on the plate. - Baking sheet - Mixing bowls - Whisk You will need a baking sheet to cook the salmon. Lining it with parchment paper helps prevent sticking. Mixing bowls are essential for combining the cornstarch and making the bang bang sauce. Lastly, a whisk is great for mixing the sauce smoothly. You can find the full recipe for Bang Bang Salmon Bites [Full Recipe]. First, you need to preheat your oven to 400°F (200°C). This step is key for crispy salmon bites. While the oven heats, line a baking sheet with parchment paper. This helps prevent sticking. Next, grab a mixing bowl. In it, combine the cornstarch, garlic powder, paprika, salt, and black pepper. Stir these together well. You want them evenly mixed to coat the salmon. Now it's time to dip the salmon. Take each piece of salmon and place it in the cornstarch mixture. Make sure it gets a good coat, then shake off any extra. This helps keep each bite light and crispy. After coating, arrange the salmon bites on the baking sheet. Space them out evenly for even cooking and crisping. Place the baking sheet in the preheated oven. Bake the salmon bites for about 12-15 minutes. Keep an eye on them until they turn golden and crispy. While the salmon is baking, prepare the bang bang sauce. In a separate bowl, whisk together the mayonnaise, sweet chili sauce, sriracha, and fresh lime juice. Adjust the sriracha for your spice level. After baking, let the salmon cool for a minute. Toss the warm bites in the bang bang sauce. Now, they are ready to serve! Enjoy your tasty snack. To make crispy salmon bites, you need cornstarch. This ingredient creates a light, crunchy coat. Dip each salmon piece well in the cornstarch mix. Shake off any extra coating. Bake for 12-15 minutes at 400°F (200°C). Keep an eye on them to avoid overcooking. Salmon should be golden and cooked through. If you want a milder sauce, reduce the sriracha. Start with half a tablespoon and taste. You can always add more if you like heat. For a different flavor, try using a sweet chili sauce without sriracha. This keeps the dish flavorful and enjoyable for everyone. For a great look, serve your Bang Bang Salmon Bites on a nice platter. A wooden board adds a rustic feel. A white plate makes the colors pop. Place a small bowl of extra bang bang sauce on the side. This not only looks good but also invites guests to dip their bites. {{image_4}} You can easily swap proteins in this recipe. If you want a change, try chicken or tofu. Both options work well with the same coating and sauce. For a gluten-free version, substitute cornstarch with a gluten-free flour blend. This keeps your bites crispy while being safe for gluten-sensitive friends. You can make these bites more exciting with different spices. Try adding cayenne for heat or smoked paprika for a smoky taste. Another great idea is to mix fresh herbs into your bang bang sauce. Chopped cilantro or basil can add a fresh kick that brightens the dish. There are several methods to cook your salmon bites. If you want them extra crispy, use an air fryer. It will give you a crunchy outside without too much oil. Baking is also great for a simple, healthy option. If you're in a hurry, pan-frying is quick and yields a nice golden brown crust. Each method gives you a tasty treat, so choose what fits your mood! To keep your Bang Bang Salmon Bites fresh, store them in an airtight container. Place parchment paper between layers to avoid sogginess. Refrigerate them within two hours of cooking. This helps maintain their crispy texture. If you want to freeze them, wrap each piece in plastic wrap. Then, place them in a freezer bag. They will stay fresh for up to three months. To reheat and keep that crispy texture, the oven is your best bet. Preheat your oven to 375°F (190°C). Place the salmon bites on a baking sheet and heat for about 8-10 minutes. This method helps retain the crunch. If you use a microwave, know that they may get soggy. Microwave on a plate for about 30 seconds. Check if they're warm enough and repeat if necessary. In the fridge, your Bang Bang Salmon Bites will last for about three days. After that, they may lose their flavor and texture. Always check for any unusual smell or color before eating leftovers. If they look or smell off, it’s best to discard them. Enjoy your tasty bites while they are fresh! For the full recipe, see the earlier sections. Bang Bang Salmon Bites are crispy, flavorful snacks made from salmon. I cut fresh salmon fillet into bite-sized pieces and coat them in a mix of cornstarch and spices. Baking them at a high heat gives the bites a crunchy texture. I toss them in a creamy bang bang sauce that combines mayonnaise, sweet chili sauce, sriracha, and lime juice. This dish brings a sweet, spicy kick and is perfect for sharing or as a tasty appetizer. Yes, you can prep Bang Bang Salmon Bites ahead of time. You can coat the salmon pieces in the cornstarch mix and store them in the fridge. Just keep them covered to maintain freshness. I recommend baking them right before serving for the best texture. You can also prepare the bang bang sauce ahead of time and keep it in the fridge. This way, you have a quick and easy snack ready to go for any occasion. I like to serve Bang Bang Salmon Bites on a rustic wooden board or a simple white platter. This presentation makes the dish look inviting. You can add a small bowl of extra bang bang sauce on the side for dipping. To enhance flavor, some fresh vegetables like cucumber or carrot sticks make great accompaniments. These bites also pair well with a light salad or some steamed rice for a complete meal. For the full recipe, check out the Bang Bang Salmon Bites section. To sum up, you learned about making Bang Bang Salmon Bites from fresh salmon to crispy perfection. The key steps included preparing the salmon, coating it, and baking while mixing a delicious bang bang sauce. Feel free to explore ingredient swaps and cooking methods for new flavors. Remember, presentation matters, too! Enjoy these bites fresh or store leftovers safely. Creating this dish is fun, and I hope you find joy in every bite. Happy cooking!](https://meltedrecipes.com/wp-content/uploads/2025/06/0cded4de-3d97-4341-9b1e-96059a9a105e.webp)
Bang Bang Salmon Bites Crispy and Flavorful Snack
Craving a snack that’s both crispy and full of flavor? Look no further than Bang Bang Salmon Bites! These tasty bites pack a big punch
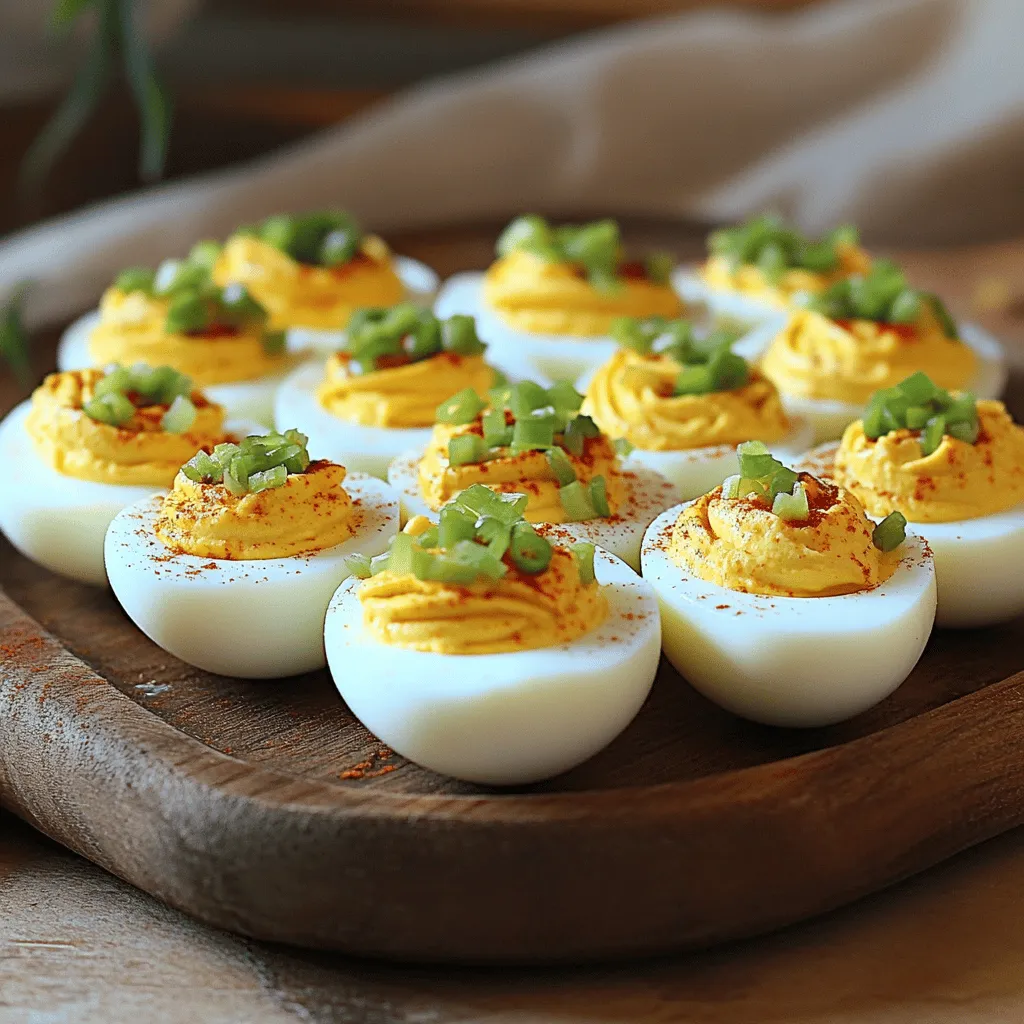
Spicy Chili Garlic Deviled Eggs Tasty Party Snack
Looking for a fun and spicy twist on a timeless snack? Try these Spicy Chili Garlic Deviled Eggs! They pack bold flavors and are perfect
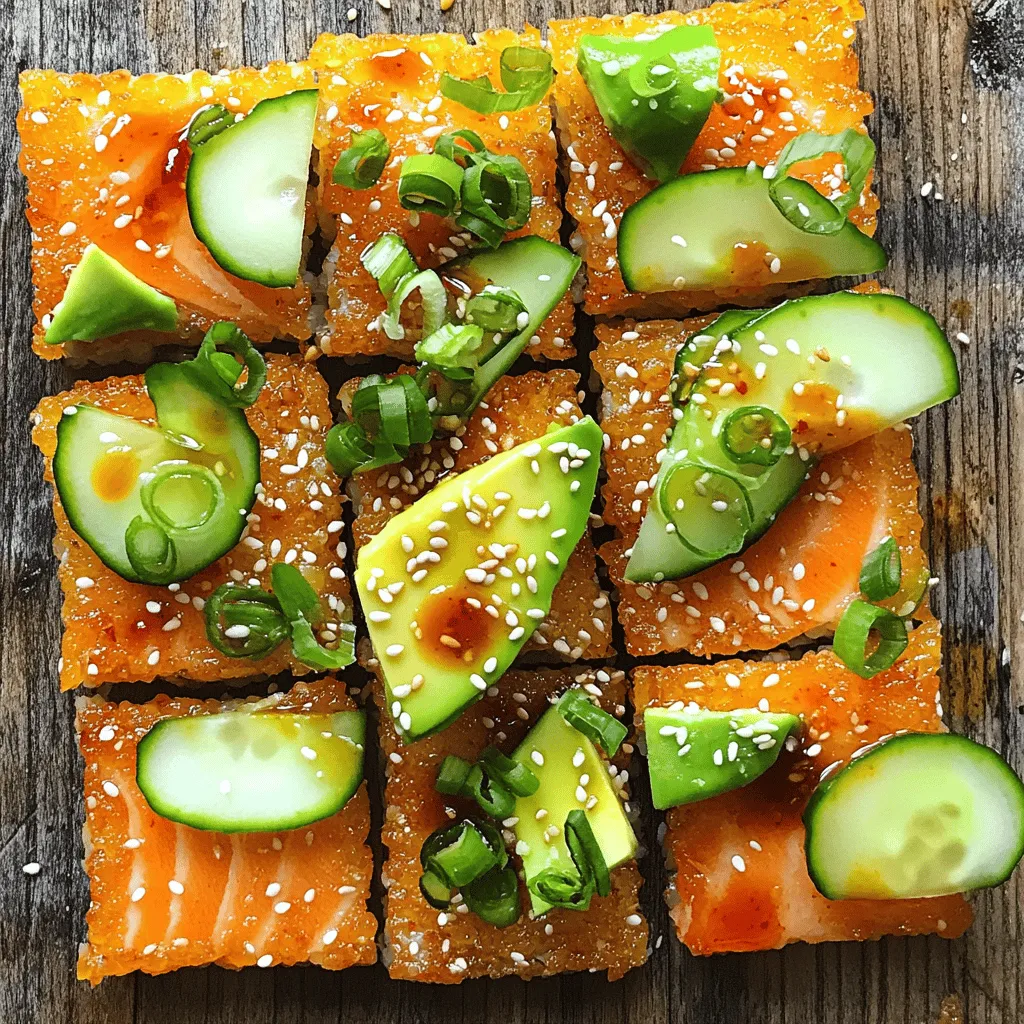
Salmon Crispy Rice Tasty and Simple Delight Recipe
Imagine a dish that’s both tasty and easy to make—a true crowd-pleaser! With my Salmon Crispy Rice recipe, you’ll whip up a delightful meal that
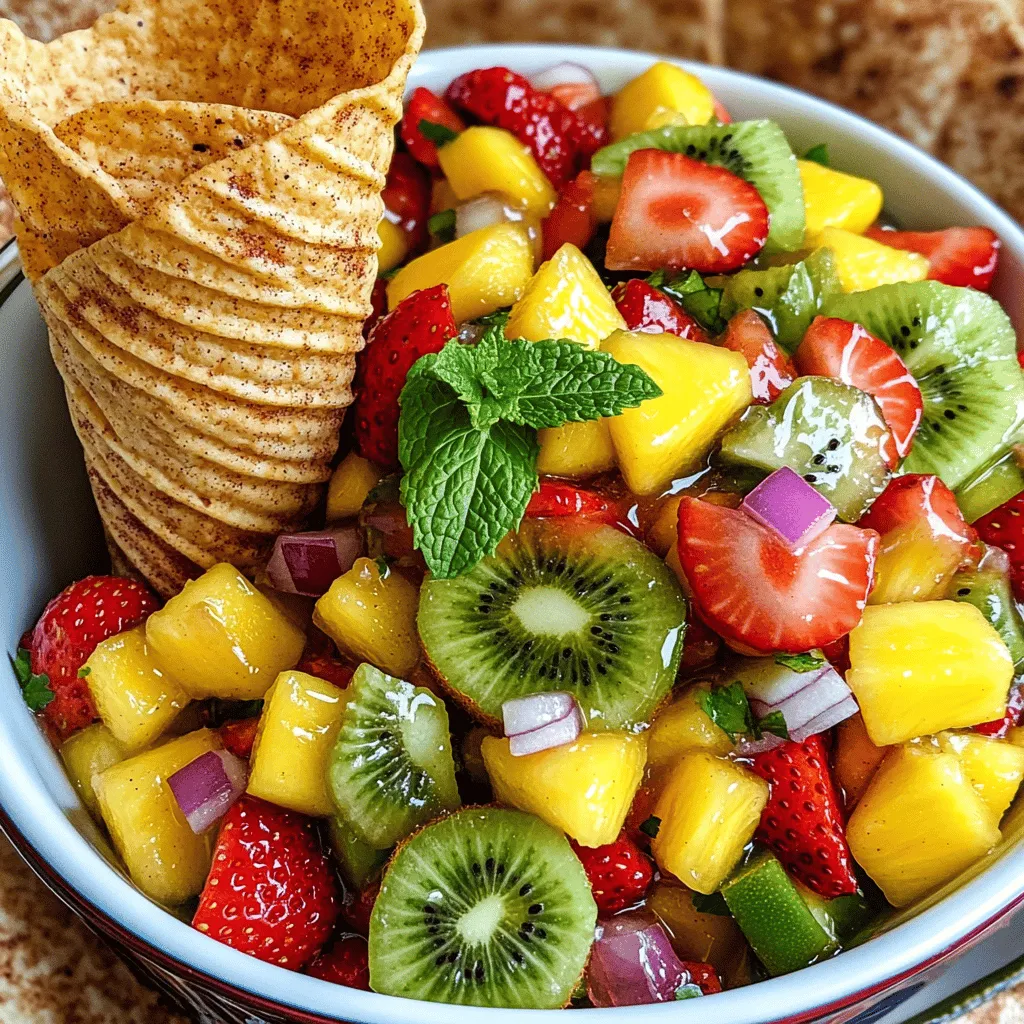
Fruit Salsa with Cinnamon Sugar Tortilla Chips Delight
Looking for a fun and tasty snack that impresses? Try my Fruit Salsa with Cinnamon Sugar Tortilla Chips Delight! This bright and refreshing dish blends

Irresistible Mashed Potato Cheese Puffs Dish Delight
Craving a tasty snack that’s simple to make? These Irresistible Mashed Potato Cheese Puffs are your answer! With leftover mashed potatoes and gooey cheese, they’re