Zucchini Chocolate Chip Cookies Delightful and Easy Recipe

Welcome to your new favorite treat—Zucchini Chocolate Chip Cookies! This easy recipe combines fresh zucchini with rich chocolate chips, making a perfect snack or dessert. You get a delicious treat …

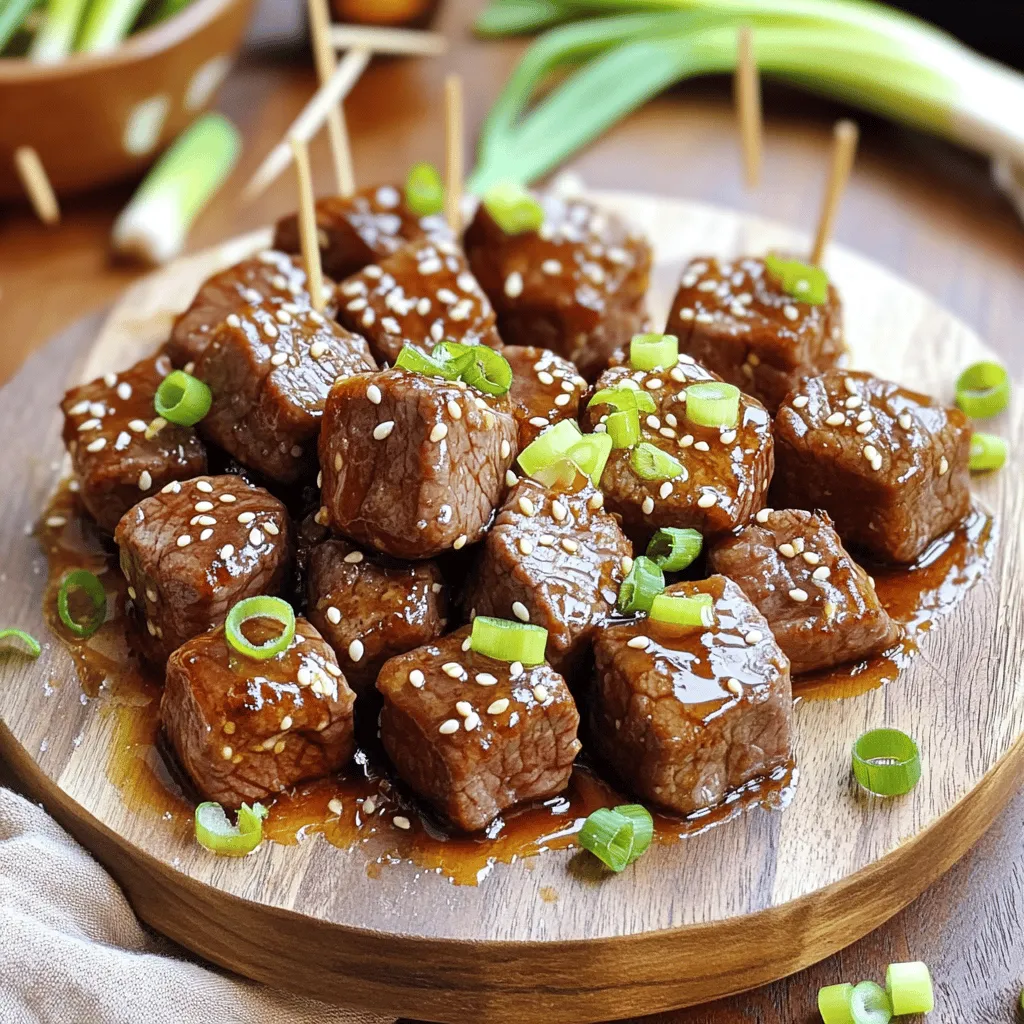
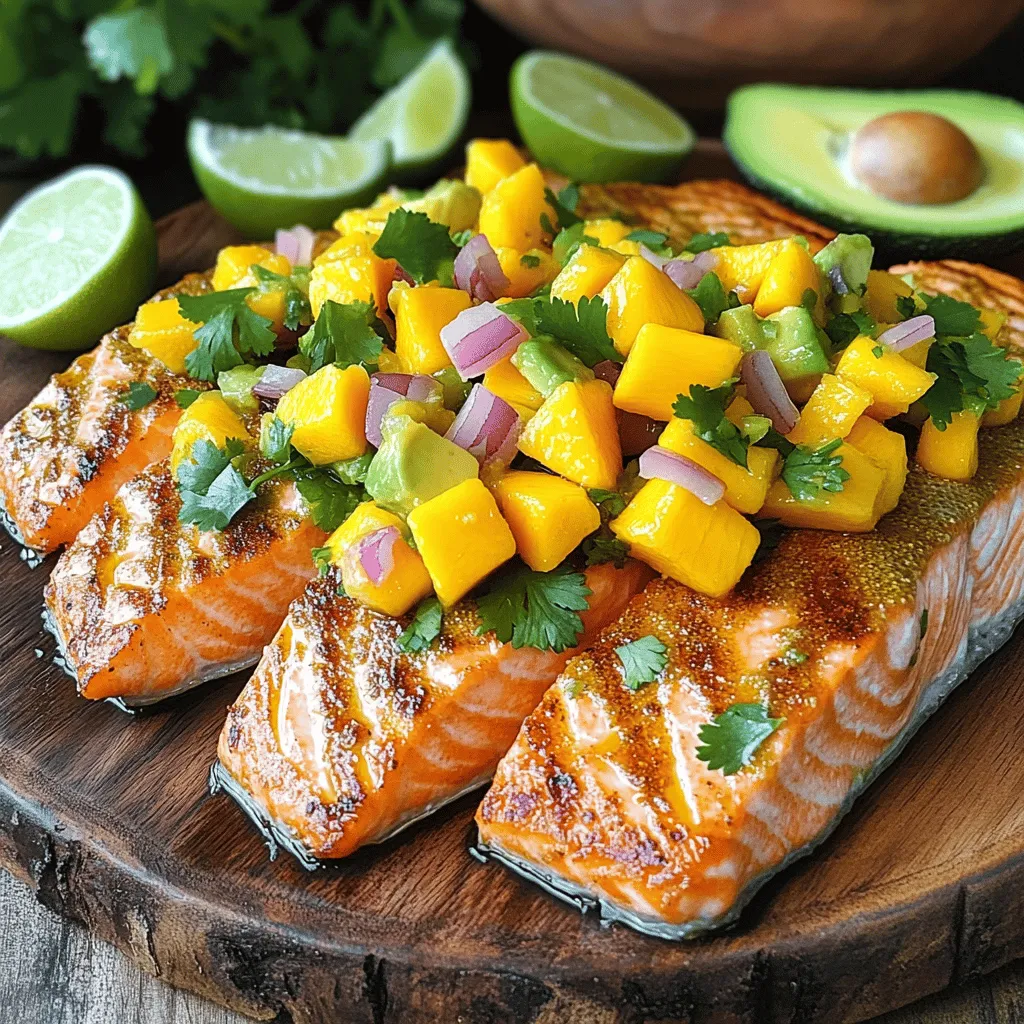
![- Fish options: - 4 white fish fillets (like tilapia or snapper) - Jerk seasoning and its components: - 2 tablespoons jerk seasoning - 2 tablespoons extra virgin olive oil - Juice of 1 lime - Sea salt, to taste - Additional toppings and accompaniments: - 1/2 cup red cabbage, finely shredded - 1 ripe avocado, sliced - 1/4 cup fresh cilantro, roughly chopped - 8 small corn tortillas - 1 cup mango salsa, for topping Jerk fish tacos stand out due to their bold flavors and fresh ingredients. You can choose fish like tilapia or snapper. These fish are mild and soak up the jerk seasoning well. Jerk seasoning adds a spicy and smoky flavor. It usually includes ingredients like allspice, thyme, and scotch bonnet peppers. This mix creates a perfect blend of heat and taste. Toppings elevate your taco experience. Shredded red cabbage adds crunch, while avocado brings creaminess. Fresh cilantro adds a burst of flavor, and mango salsa gives a sweet contrast to the spice. With these simple ingredients, you can create a vibrant dish that bursts with flavor. For a complete guide, check the Full Recipe. Marinating is key for flavor. It helps the fish soak in the spices. You need at least 30 minutes to let the fish absorb the jerk seasoning. For the best taste, I like to marinate for up to two hours. To marinate, grab a medium bowl. Add your fish fillets, olive oil, jerk seasoning, lime juice, and a pinch of sea salt. Mix it well to coat each fillet. Cover the bowl and place it in the fridge. This step gives the fish a bold and tasty kick. Before grilling, preheat your grill to medium-high heat. A hot grill helps to get nice grill marks and a great flavor. Once it’s hot, place the marinated fish on the grill. Cook each fillet for about 3-4 minutes on each side. You can check if the fish is done by poking it with a fork. It should flake easily and look opaque. After grilling, take the fish off the grill. Let it rest for a few minutes to keep it juicy. Now, it’s time to put it all together. First, warm your corn tortillas on the grill for about 30 seconds on each side. This makes them soft and tasty. Take a warm tortilla and place a piece of grilled fish on top. Then, add some shredded red cabbage for crunch. Next, place a few slices of ripe avocado on top. Finally, sprinkle fresh cilantro for a burst of flavor. For a sweet touch, spoon some mango salsa over each taco. This adds a nice contrast to the spicy fish. Serve your tacos right away with lime wedges on the side. A squeeze of lime juice makes it even tastier. Enjoy your flavorful jerk fish tacos! To grill fish just right, focus on temperature and timing. Preheat your grill to medium-high heat. This helps the fish cook evenly. You want the grill hot enough to sear the fish without sticking. Grill each fish fillet for about 3-4 minutes on each side. The fish should turn opaque and flake easily when done. Watch closely to avoid overcooking it. Overcooked fish can become dry and tough. Common grilling mistakes include not preheating the grill or flipping the fish too soon. Let the fish sit on the grill until it releases easily. This helps keep it whole and juicy. Pair jerk fish tacos with tasty sides to enhance the meal. Fresh mango salsa goes great on top. You can also serve coleslaw or rice and beans. These sides add flavor and texture. For drinks, try a cold beer or a fruity cocktail. A refreshing mojito or a piña colada works well too. The sweet and tart flavors balance the spiciness of the jerk fish. Looking for more? Check out the Full Recipe for an easy guide to make these tacos! {{image_4}} You can use many fish types for jerk fish tacos. Each type brings a unique taste. Here are some options: - Tilapia: This mild fish cooks quickly. It absorbs flavors well. Grill it for 3-4 minutes on each side. - Snapper: This fish has a firm texture and a slightly sweet taste. It’s great for grilling. Cook it the same way as tilapia. - Mahi Mahi: This fish is meaty and holds up well on the grill. Grill it for 4-5 minutes on each side. - Cod: Known for its flaky texture, cod is a good option too. It cooks fast, so check it often. Each of these fish options pairs well with jerk seasoning. Explore these choices to find your favorite! A good jerk seasoning makes all the difference. Here’s a simple homemade jerk seasoning recipe: - 1 tablespoon allspice - 1 tablespoon thyme - 1 tablespoon brown sugar - 1 teaspoon cinnamon - 1 teaspoon nutmeg - 1 teaspoon black pepper - 1 teaspoon sea salt - 1 tablespoon cayenne pepper (adjust to taste) - 2 cloves garlic, minced - 1 small onion, chopped - 2-3 green onions, chopped - Juice of 1 lime Mix all ingredients in a bowl. This mix gives your fish a perfect kick! Besides jerk seasoning, try other sauces for more flavor. A mango salsa adds sweetness and freshness. You can also use a creamy avocado sauce or a spicy aioli. Experiment with these to find what you love. For the full recipe, check out [Full Recipe]. Store leftover jerk fish in an airtight container. This keeps the fish fresh and prevents odors. You can place the fish in the fridge for up to three days. For tacos, it’s best to separate the components. Store the fish, toppings, and tortillas in separate containers. This way, the tortillas won’t get soggy. The toppings can stay fresh longer when stored correctly. To reheat fish without drying it out, use low heat. You can place the fish in a pan on the stove. Add a splash of water or broth to keep it moist. Cover the pan with a lid. Heat for about five minutes or until warm. For tortillas, warm them in a dry skillet for 30 seconds on each side. This method brings back their soft texture and flavor. You can also wrap them in a damp paper towel and microwave for 15-20 seconds. Enjoy your leftovers as if they were fresh! Jerk seasoning has a mix of bold flavors. The main ingredients usually include: - Allspice - Scotch bonnet peppers - Thyme - Garlic - Ginger - Onion - Nutmeg - Cinnamon - Brown sugar Each ingredient adds depth and warmth. The allspice brings a sweet, peppery flavor. Scotch bonnet peppers add heat. Fresh herbs like thyme give it an earthy taste. This blend makes jerk seasoning unique and tasty. Yes, you can use jerk seasoning on many proteins. It works well with: - Chicken - Pork - Shrimp - Tofu - Vegetables Marinate these proteins just like the fish. The seasoning enhances their flavors. You can grill, bake, or sauté them. Each method gives a different taste. Experiment to find your favorite! To adjust the spice level, you can modify the jerk seasoning. Here are some tips: - Less spice: Use less jerk seasoning or remove the Scotch bonnet. - More spice: Add more peppers or cayenne pepper. - Balance heat: Pair with creamy toppings like avocado or sour cream. These changes help you find the right heat for your taste buds. Traditional side dishes for jerk fish include: - Rice and peas - Fried plantains - Coleslaw - Grilled vegetables - Festival (sweet fried dough) These dishes add texture and flavor. They also balance the spice of the jerk fish. Enjoy a mix of tastes for a full meal! In this blog post, we explored how to make delicious jerk fish tacos. We covered key ingredients, from fish options to jerk seasoning and toppings. You learned the marinating and grilling techniques for perfectly cooked fish. We also discussed assembling the tacos and suggested side dishes. Finally, we shared tips for storing leftovers and reheating effectively. I hope you feel ready to enjoy this tasty dish. Experiment with different fish and spices for your perfect jerk fish taco!](https://meltedrecipes.com/wp-content/uploads/2025/06/a2aa73af-5f81-4b04-b67d-cb8d71747be5.webp)
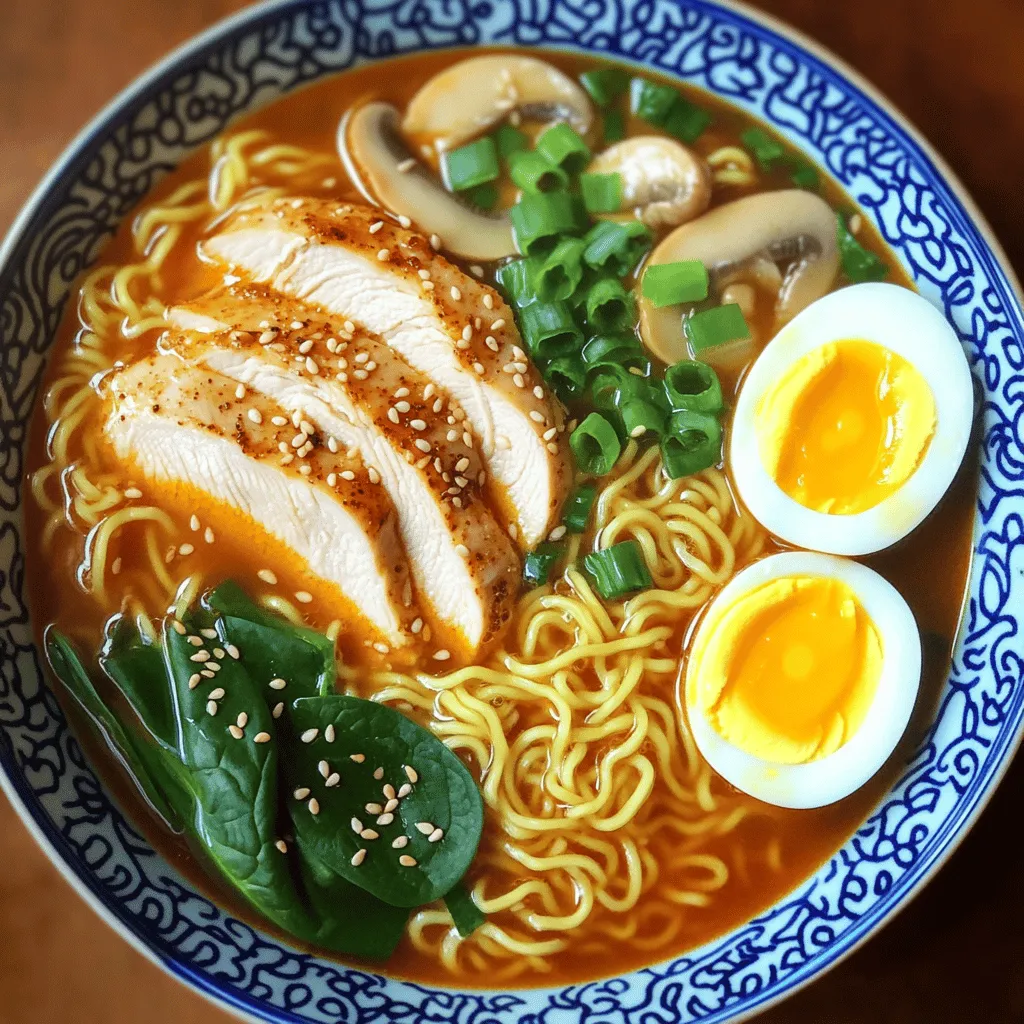
![To make No Bake S’mores Cookie Dough Bites, gather these tasty ingredients: - 1 cup almond flour - 1/2 cup peanut butter (or your preferred nut butter) - 1/4 cup pure maple syrup - 1 teaspoon pure vanilla extract - 1/2 cup mini chocolate chips - 1/2 cup mini marshmallows - 1/4 cup crushed graham crackers (plus extra for coating) These ingredients blend to create a fun treat that everyone will love. If you have allergies, here are some easy swaps: - Use sunflower seed butter instead of peanut butter. - Swap almond flour with oat flour for gluten-free needs. - Try agave syrup if you want a different sweetener. - For a dairy-free option, check that your chocolate chips are dairy-free. These substitutions keep the flavor while catering to your needs. Using high-quality ingredients makes a huge difference. Here are my top tips: - Choose pure maple syrup for a better taste than regular syrup. - Look for natural nut butters without added sugars or oils. - Use fresh mini marshmallows for the best texture. - Select high-quality chocolate chips to enhance flavor. These tips will help you create delicious bites that impress everyone. Don't forget to check the [Full Recipe] for more details! 1. Start by gathering all your ingredients. You need almond flour, peanut butter, maple syrup, vanilla extract, chocolate chips, marshmallows, and graham crackers. Make sure everything is ready to go. 2. In a large mixing bowl, combine 1 cup of almond flour and 1/2 cup of peanut butter. Use a spatula to mix until it looks crumbly. 3. Slowly add in 1/4 cup of pure maple syrup and 1 teaspoon of vanilla extract. Stir well until the dough sticks together. 4. Next, fold in 1/2 cup of mini chocolate chips, 1/2 cup of mini marshmallows, and 1/4 cup of crushed graham crackers. Make sure they are evenly mixed in. 5. Now, take small amounts of the mixture and roll them into balls about 1 inch wide. 6. For extra crunch, roll each ball in more crushed graham crackers. This adds a nice touch. 7. Place your cookie dough bites on a parchment-lined baking sheet. Space them out so they don’t stick together. 8. Refrigerate the bites for about 30 minutes. This helps them firm up and makes them easier to eat. - Step 1: Picture of ingredients neatly arranged on a countertop. - Step 2: Image of the crumbly mixture in a mixing bowl. - Step 3: Visual of the dough forming after adding syrup and vanilla. - Step 4: Photo showing the added chocolate chips, marshmallows, and graham crackers. - Step 5: Image of hands rolling the dough into small balls. - Step 6: Photo of dough balls rolled in graham crackers. - Step 7: Visual of the baking sheet with spaced-out bites. - Step 8: Image of the finished bites in the refrigerator. - Ensure your peanut butter is well-stirred. This helps mix it easily. - If the dough feels too dry, add a bit more maple syrup. - For better rolling, wet your hands slightly to prevent sticking. - Make sure to let the bites chill in the fridge. This sets their shape. - Use a kitchen scale for precise measurements, especially the almond flour. These steps will help you create perfectly delicious No Bake S’mores Cookie Dough Bites. For the full recipe, check the earlier section. Enjoy your treats! To get the best texture, start with almond flour. It gives a nice, soft base. Mix the almond flour with peanut butter well. You want it crumbly but sticky. Gradually add maple syrup and vanilla. This helps bind the mix. Fold in mini chocolate chips and marshmallows gently. Avoid overmixing to keep them light and chewy. One common mistake is using too much liquid. If you add too much maple syrup, the dough gets too soft. Another pitfall is not chilling the bites long enough. If they are too warm, they may fall apart. Also, be careful not to skip the graham cracker coating. It adds a nice crunch and taste. Serve these bites on a fun plate. Add extra marshmallows and chocolate chips on top for looks. You can pair them with hot cocoa or milk for a cozy treat. For a fun twist, try them with a scoop of ice cream. These cookie dough bites are best enjoyed cold. Refrigerate them before serving for a refreshing taste. For the full recipe, check out the No Bake S’mores Cookie Dough Bites. {{image_4}} You can have fun with flavors in these bites. Try using almond butter instead of peanut butter for a nutty twist. Swap mini chocolate chips for white chocolate chips for a sweeter taste. Want a fruity touch? Add dried cranberries or cherries for a tart kick. You can even mix in coconut flakes for a tropical vibe! The choice is yours. This recipe is already gluten-free! The almond flour keeps it safe for those who avoid gluten. If you want more crunch, use gluten-free graham crackers. This way, you can enjoy each bite without worry. Just make sure to check labels to ensure all ingredients are gluten-free. To make these bites vegan, use maple syrup as a sweetener. It’s plant-based and delicious. Choose a nut butter that’s free of added sugars and oils. You can also swap mini marshmallows for vegan marshmallows. These small changes will keep the treats tasty and kind to animals. Enjoy making these tasty bites in a way that fits your diet! For the full recipe, check the main section of the article. To keep your No Bake S’mores Cookie Dough Bites fresh, store them in an airtight container. This prevents them from drying out. You can place parchment paper between layers to avoid sticking. Refrigerating them is the best way to maintain their texture and flavor. If you want to save some for later, freezing is a great option. First, place the cookie dough bites on a baking sheet and freeze them for about an hour. Once frozen, transfer them to a freezer-safe bag. This helps keep them from clumping together. You can store them in the freezer for up to three months. When kept in the fridge, these bites last about one week. If you freeze them, they can stay good for up to three months. Just make sure to label your container with the date. This way, you can enjoy them at their best! For the full recipe, check out the complete section above. Yes, you can use different nut butter. Almond butter or cashew butter work well too. Just pick a nut butter you love. Each type will change the taste a bit. If you want a nut-free option, try sun butter. It gives a nice flavor while avoiding nuts. To lower the sugar, use less maple syrup. You can also swap it for a sugar-free syrup. Another option is to add mashed banana for sweetness. It adds a nice flavor and keeps the bites soft. Using dark chocolate chips can help too, as they are less sweet. Yes, these bites are great for kids! They are fun to make and eat. They have no raw eggs or harmful ingredients. You can also adjust the sweetness to fit their taste. Just keep an eye on the mini marshmallows, as they can be a choking hazard for little ones. For more details, check the Full Recipe. In this article, we covered the main steps to create delicious bites. We discussed key ingredients, helpful substitutions, and tips for quality. You learned essential preparation steps and saw visual aids to guide you. We shared tips for perfect texture and common mistakes to avoid. You also discovered fun flavor variations and storage options. Now you can make these bites with confidence. Enjoy the process and share your tasty creations!](https://meltedrecipes.com/wp-content/uploads/2025/06/ebbcac34-206c-4f1a-8dbf-3250d389c738.webp)
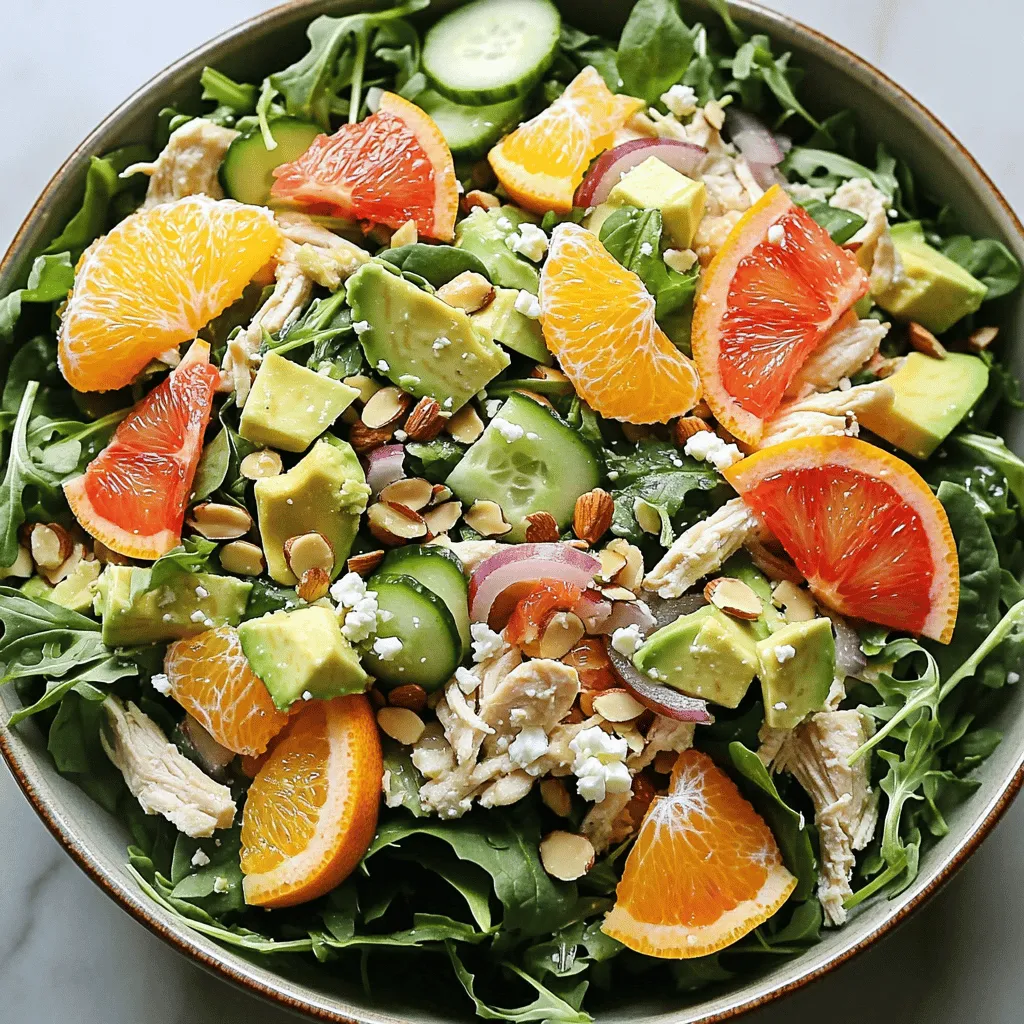
![Fresh ingredients make this shrimp and avocado bowl a real delight. Here’s what you will need: - 1 pound shrimp, peeled and deveined - 2 ripe avocados, expertly diced - 1 cup cooked quinoa, preferably chilled - 1 red bell pepper, diced into small pieces - 1 cup cherry tomatoes, expertly halved - 2 tablespoons extra virgin olive oil - 1 tablespoon freshly squeezed lime juice - 1 teaspoon garlic powder - Salt and freshly ground black pepper, to taste - Fresh cilantro, roughly chopped, for garnish - Lime wedges, for serving Each ingredient plays a key role in flavor and texture. The shrimp adds protein, while the avocados bring creaminess. Quinoa provides a hearty base. The bell pepper and tomatoes add crunch and color. Olive oil and lime juice enhance the overall taste. Garlic powder gives a subtle kick. And cilantro? It adds freshness. This recipe is not just tasty; it is also packed with nutrition. You can enjoy this dish guilt-free, knowing you are eating wholesome foods. For more details, check out the Full Recipe. Preparing the Shrimp - Start by combining 1 pound of peeled and deveined shrimp with 2 tablespoons of olive oil, 1 teaspoon of garlic powder, salt, and pepper. Mix well to coat the shrimp evenly. - Next, heat a non-stick skillet over medium-high heat. Add the seasoned shrimp and cook for 2-3 minutes on each side until they turn pink and opaque. Remove from heat and set aside. Assembling the Bowl - In a large serving bowl, create a base with 1 cup of cooked quinoa. Spread it evenly across the bottom. - Layer the bowl with 2 ripe avocados, diced, 1 cup of halved cherry tomatoes, and 1 red bell pepper, diced into small pieces. Arrange these ingredients in a colorful display. - Finally, add the cooked shrimp on top of the layered vegetables, making the dish look vibrant and inviting. Final Touches - Drizzle 1 tablespoon of freshly squeezed lime juice over the bowl. This adds a zesty kick. - Garnish with fresh cilantro, roughly chopped, to enhance the aroma and flavor. - Serve with lime wedges on the side. This allows everyone to add more lime juice for an extra burst of flavor. For a detailed overview of the ingredients, check out the Full Recipe. How to choose fresh shrimp When selecting shrimp, look for a few key signs. Fresh shrimp should smell like the ocean, not fishy. Their shells should be shiny and firm. Avoid shrimp with black spots or a dull appearance. If you can, buy shrimp that is wild-caught for better flavor and sustainability. Selecting ripe avocados A ripe avocado feels slightly soft when you gently squeeze it. Look for dark green to black skin. If the avocado is too hard, it is not ripe yet. If it feels very soft, it may be overripe. Always check the stem; if it pops off easily and is green underneath, the avocado is ready to eat. Best methods for cooking shrimp The best way to cook shrimp is quickly. You can grill, sauté, or boil them. Make sure your pan is hot before adding shrimp. This helps them cook evenly and get a nice sear. Avoiding overcooked shrimp To avoid overcooked shrimp, pay close attention to their color. Cook shrimp until they turn pink and opaque. This usually takes about 2-3 minutes per side. If they curl tightly, they are likely overcooked. Remove them from heat as soon as they change color. Creative plating ideas For a stunning presentation, use a large bowl. Start with quinoa as your base. Then, layer diced avocado, cherry tomatoes, and red bell pepper neatly on top. Place the shrimp last to show off their vibrant color. A sprinkle of cilantro adds a nice touch. Pairing with sides for a complete meal Serve your shrimp and avocado bowl with a side salad or fresh fruit. A crisp green salad pairs well and adds crunch. If you want something warm, serve with roasted vegetables. This creates a balanced and colorful meal. For the full recipe, check out the Shrimp and Avocado Bowls section. {{image_4}} You can easily change the flavor of your shrimp and avocado bowls. Start by adding spices or herbs. A pinch of cumin or paprika gives a warm touch. Fresh herbs like dill or parsley add bright notes. You can also mix in garlic or onion for extra depth. Adding other vegetables can enhance taste and texture. Try corn for sweetness or cucumber for crunch. Grated carrots add color and a hint of earthiness. Each new ingredient makes the bowl unique. If shrimp isn’t your favorite, you have options! Chicken works well in this recipe. Simply grill or sauté it with the same spices. Tofu is a great vegan choice. Use firm tofu and cook it until golden. You can also use canned or pre-cooked shrimp. It saves time and still tastes great! If you need a gluten-free version, this bowl is naturally safe! All the ingredients are gluten-free. For a vegan option, swap the shrimp for chickpeas or tempeh. These plant-based proteins are filling and tasty. You can mix and match to fit your diet. Enjoy the freedom to make this dish your own! For the [Full Recipe], check back to see how these variations come together. To keep your shrimp and avocado bowls fresh, store them in airtight containers. This method prevents air from entering, which helps maintain flavor and texture. Make sure to separate the shrimp from the avocado if possible. Shrimp can last in the fridge for up to three days. However, avocados brown quickly. Use them within one day for the best taste. When reheating shrimp, do it gently. Use a skillet over low heat to warm them. This keeps the shrimp juicy and avoids drying them out. Never microwave shrimp; it can ruin the texture. To keep avocados fresh, avoid reheating them. Add fresh avocado on top after reheating the other ingredients. You can freeze shrimp for later use. Cooked shrimp freeze well and can last up to three months. However, avocados do not freeze well. To freeze, place shrimp in a single layer on a baking tray, then transfer them to a freezer bag. For best results, use shrimp and avocado bowls fresh. This ensures you enjoy the best flavors. For more details, check out the Full Recipe. It takes about 4 to 6 minutes to cook shrimp. You want them pink and firm. Cook them for 2 to 3 minutes on each side. This gives you juicy shrimp that are not overcooked. Yes, you can prep the bowls ahead. Cook the shrimp and quinoa, then chill them. Keep the shrimp and avocado separate until serving. This keeps the avocado fresh and green. If you don’t have quinoa, try brown rice or couscous. Both add a nice texture. You can also use farro or barley for a different flavor. Absolutely! Shrimp and avocado bowls work great for meal prep. They store well in the fridge for up to three days. Just remember to keep the avocado separate to avoid browning. Shrimp is high in protein and low in calories. It has omega-3 fatty acids, which are good for your heart. Avocado is packed with healthy fats, fiber, and vitamins. Together, they make a balanced meal. Check out the Full Recipe for more details! In summary, making shrimp and avocado bowls is simple. You need fresh shrimp, ripe avocados, and quinoa. Cook the shrimp lightly and layer the fresh ingredients in a bowl. Add lime for zing and cilantro for flavor. Remember to choose quality ingredients and try variations to suit your taste. With these tips, you can enjoy a tasty meal that works for any occasion. Embrace your kitchen skills and enjoy this healthy dish.](https://meltedrecipes.com/wp-content/uploads/2025/06/d37f8f7e-7867-4f17-b7bc-5b306f95faf2.webp)