Skip to content
Melted Recipes
  • Home
  • Appetizers
  • Desserts
  • Salads
  • Breakfast
  • Dinner
  • Privacy Policy
  • Contact
  • About

Chef Miles

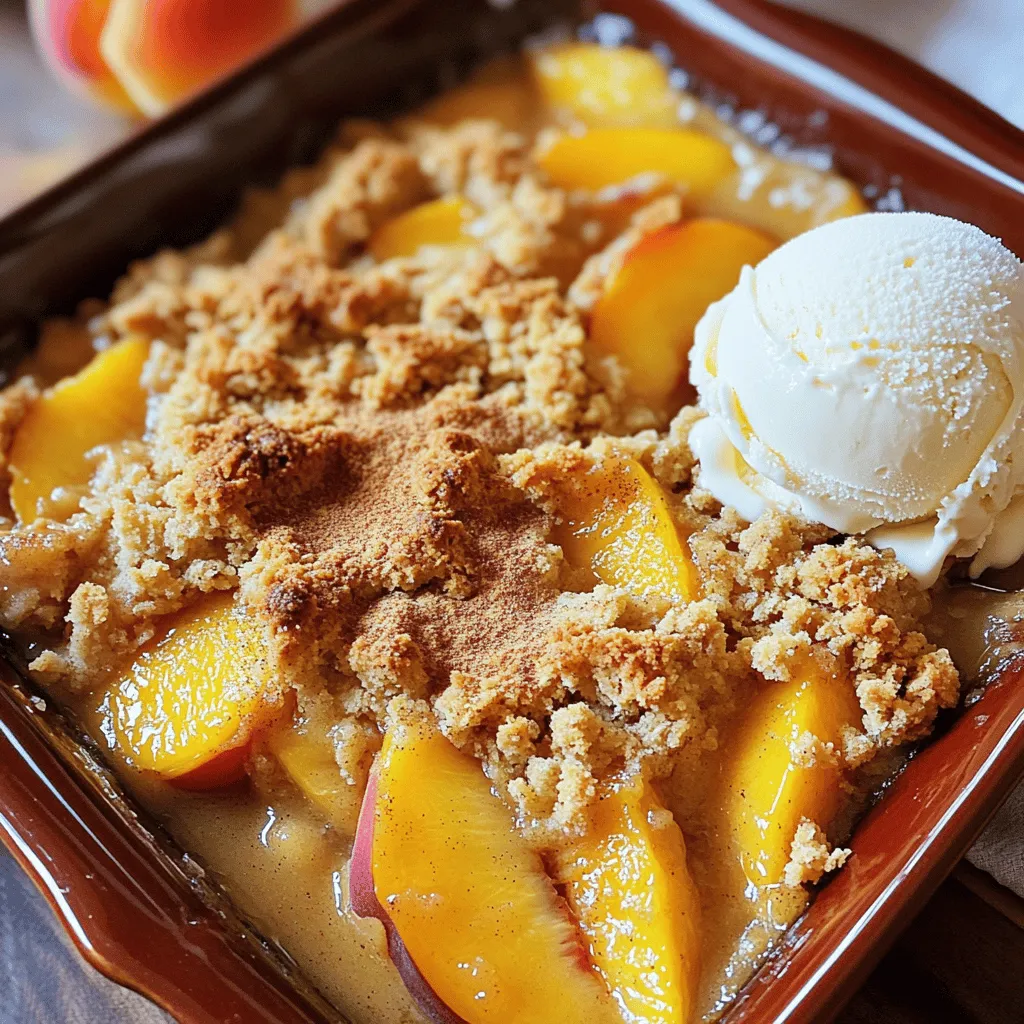
Super Easy Peach Cobbler Delightful and Simple Treat

June 22, 2025 by Chef Miles
- 4 cups fresh peaches, peeled and sliced - 1 cup granulated sugar (¾ cup + ¼ cup) - 1 tablespoon freshly squeezed lemon juice - 1 teaspoon vanilla extract - 1 teaspoon ground cinnamon - 1½ cups all-purpose flour - 1 tablespoon baking powder - ½ teaspoon salt - ½ cup unsalted butter, melted - 1 cup whole milk To make a super easy peach cobbler, you need fresh ingredients. Fresh peaches give the best flavor and texture. You can use ripe, juicy peaches. The sugar sweetens the fruit and balances the flavors. Lemon juice adds a nice zing. Vanilla and cinnamon bring warmth to the dish. The dry mix is just as important. The flour gives the cobbler its body. Baking powder helps it rise and become fluffy. Be sure to measure your ingredients well. Salt enhances the sweetness and balances the taste. Melted butter adds richness, while whole milk keeps the batter moist. This simple mix is the backbone of your cobbler. - Ground nutmeg for extra flavor - Almond extract instead of vanilla - Fresh berries to mix with peaches You can change up the flavors with optional ingredients. A pinch of nutmeg adds warmth and spice. Almond extract gives a nice twist instead of vanilla. If you want, toss in fresh berries with the peaches. This makes your cobbler even more fruity and fun. This peach cobbler recipe is flexible. You can easily customize it to fit your taste. For the full recipe, check the section above. - Preheat oven to 350°F (175°C). - Prepare the peach mixture by mixing peaches, ¾ cup sugar, lemon juice, vanilla, and cinnamon. Let it sit for 10 minutes. This step helps the peaches soak up the sweetness. - In a separate bowl, mix flour, baking powder, salt, and ¼ cup sugar. Whisk until combined. - Combine melted butter and whole milk into the dry mix. Stir gently until just combined. It’s okay if there are some lumps; they will bake out. - Grease a 9x13-inch baking dish well. Pour the batter into the dish, spreading it evenly. - Layer the marinated peaches over the batter. Make sure the batter stays below the peaches for a great texture. - Place the dish in the preheated oven. Bake for 40-45 minutes. - Check doneness with a toothpick. If it comes out clean, your cobbler is ready. For the full recipe, you can refer to the earlier section. Enjoy making this simple and delightful peach cobbler! How to select ripe peaches Choose peaches that feel slightly soft. Look for a rich gold color. A sweet smell is a good sign too. Avoid peaches with bruises or dark spots. Best practices for measuring ingredients Use dry measuring cups for flour and sugar. Spoon flour into the cup, then level it off with a knife. For liquids, use a clear measuring cup to see the line. This helps you get the right amounts. Use canned or frozen peaches Canned or frozen peaches save time. They are still tasty and juicy. Just drain canned peaches well before use. If using frozen, thaw them first and pat dry. Make ahead of time and reheat You can prepare this cobbler a day early. Store it in the fridge after it cools. Reheat in the oven to keep the crust nice. Serve with vanilla ice cream A scoop of vanilla ice cream on warm cobbler is perfect. The cold ice cream melts into the warm fruit. This creates a delicious mix of flavors. Garnish with fresh mint or whipped cream A sprig of mint adds a pop of color. Whipped cream brings extra creaminess. Both make your peach cobbler look fancy and inviting. For the complete recipe, check out the [Full Recipe]. {{image_4}} You can switch peaches for other fruits easily. Berries like blueberries or strawberries work great. Apples also add a nice crunch. Just chop them up like you do with peaches. If you want fun, mix different fruits together. A mixed fruit cobbler can surprise your taste buds. It’s a fun twist on the classic recipe. If you need a gluten-free cobbler, don't worry! Use gluten-free all-purpose flour instead of regular flour. This will keep the texture nice. You can also swap out sugar for alternative sweeteners. Honey or maple syrup can add a unique flavor, too. Just make sure to adjust the amount for sweetness. Want a vegan version? It's simple! Replace the butter with coconut oil. This gives a lovely flavor and keeps it moist. For milk, use non-dairy milk like almond or oat. You can also add an egg replacer to bind the ingredients. This way, everyone can enjoy this delicious treat. Check out the Full Recipe for more details to get started! To keep your leftover cobbler tasty, let it cool completely first. Store it in an airtight container. This helps keep it fresh and moist. You can also cover it tightly with plastic wrap or foil. It stays good for up to three days in the fridge. Want to save some for later? You can freeze peach cobbler! First, let it cool down. Cut it into pieces and place them in a freezer-safe container. You can also wrap each piece tightly in plastic wrap. This helps prevent freezer burn. When you’re ready to eat, thaw the cobbler overnight in the fridge. The best way to reheat your cobbler is in the oven. Preheat your oven to 350°F (175°C). Place the cobbler in an oven-safe dish and cover it with foil. Warm it for about 15-20 minutes. If you’re in a hurry, you can also use a microwave. Just heat a piece for 30 seconds, checking often. Enjoy your warm, delicious treat! Peach cobbler can last for a few days in the fridge. It stays fresh for about 3 to 5 days. Make sure to cover it well with plastic wrap or foil. For longer storage, you can freeze it. In the freezer, peach cobbler can last for up to 3 months. Thaw it in the fridge before reheating. Yes, you can use frozen peaches for your cobbler. Just make sure to thaw them first. Drain any excess liquid before mixing with sugar and spices. This helps keep your cobbler from getting too watery. Follow the same steps as the Full Recipe, and you'll have a tasty treat! Cobbler and crisp are both fruit desserts, but they differ in texture. A cobbler has a soft, biscuit-like topping. It usually covers the fruit filling. A crisp, on the other hand, has a crumbly topping made from oats, butter, and sugar. This gives it a crunchy texture. Both are delicious, but the choice depends on your mood! This blog covers how to make a simple, delicious peach cobbler. I shared the key ingredients and step-by-step instructions for a perfect bake. Tips help you pick ripe peaches and save time. You can also explore variations like gluten-free and vegan options. Lastly, I provided storage methods to keep your cobbler fresh longer. Enjoy baking and sharing this tasty treat with others. You’ll impress friends and family with ease!

Craving a sweet treat that’s simple to make? This Super Easy Peach Cobbler is just what you need! With fresh peaches and a few pantry staples, you can whip up …

Read more

Categories Desserts

Forgotten Chicken Flavorful Comfort Food Recipe

June 22, 2025 by Chef Miles
- 4 bone-in chicken thighs, skin-on - 2 cups vegetable broth - 1 medium onion, thinly sliced - 4 cloves garlic, finely minced - 2 cups cherry tomatoes, halved - 2 tablespoons balsamic vinegar - 1 teaspoon dried thyme - 1 teaspoon smoked paprika - Salt and freshly cracked black pepper, to taste - Fresh basil or parsley, coarsely chopped for garnish - 2 cups quinoa or rice (for serving) - Presentation tips for an appealing dish Forgotten Chicken is a warm, tasty dish. It uses simple ingredients that combine to create a rich flavor. The chicken thighs are juicy and tender. They soak up the broth and tomatoes' goodness. You need quality chicken thighs. The skin adds flavor and texture. Don't skip the balsamic vinegar. It gives a nice tang to the dish. The cherry tomatoes burst with juice while cooking. I love to add fresh herbs at the end. They make the dish pop with color and flavor. You can use basil or parsley. Both add freshness to every bite. For a hearty meal, serve Forgotten Chicken over fluffy quinoa or rice. This soak up the extra sauce well. To present, use shallow bowls. It looks nice and inviting. A sprinkle of herbs on top makes it perfect. For the full recipe, check the notes above. Enjoy your cooking! 1. Preheat your oven to 350°F (175°C). 2. Grab a large, heavy pot or Dutch oven. 3. Add a drizzle of olive oil and heat it over medium heat. 4. Season the chicken thighs with salt and pepper on both sides. 5. Once the oil is hot, place the chicken skin-side down in the pot. 6. Sear the chicken for 4-5 minutes until the skin is golden brown. 7. Flip the thighs and cook for 4 more minutes. 8. Remove the chicken from the pot and set it aside on a plate. 1. In the same pot, toss in the sliced onion. 2. Sauté the onion for 2-3 minutes until it softens. 3. Add minced garlic and stir for 1 minute to release its aroma. 4. Next, add halved cherry tomatoes, balsamic vinegar, vegetable broth, dried thyme, and smoked paprika. 5. Mix everything well, ensuring the tomatoes are coated in the sauce. 1. Carefully place the seared chicken thighs back into the pot. 2. Nestle them skin-side up in the tomato mixture. 3. Cover the pot with a lid and transfer it to the preheated oven. 4. Bake for 1 hour, or until the chicken is tender and fully cooked. 5. While the chicken bakes, prepare quinoa or rice based on the package directions. 6. When time is up, take the pot from the oven and let the chicken rest for a few minutes. 7. Serve the Forgotten Chicken over a bed of quinoa or rice, drizzling some tomato sauce on top. 8. Garnish with freshly chopped basil or parsley for a burst of flavor! To get that crispy chicken skin, follow these steps: - Start with dry chicken: Pat the chicken thighs dry with paper towels. - Use hot oil: Make sure the oil is hot before adding the chicken. - Do not overcrowd the pot: Cook in batches if needed. Common mistakes include not waiting long enough to flip the chicken. Let it sear without moving it. This helps form a nice crust. If the skin sticks, it is not ready to turn. To boost the flavor of your Forgotten Chicken, consider these: - Add fresh herbs: Try rosemary or oregano for a different twist. - Spice it up: A pinch of red pepper flakes adds heat. Balancing acidity is key. If the dish tastes too tangy, add a touch of honey or sugar. This will round out the flavors and create a nice depth. Pair your Forgotten Chicken with these sides for a complete meal: - Quinoa or rice: Both options soak up the sauce well. - Steamed veggies: Green beans or broccoli add color and nutrition. For garnishing, chop fresh basil or parsley. Sprinkle it on top right before serving. This adds a pop of color and freshness to your dish. To highlight the chicken, serve in shallow bowls. Drizzle extra sauce around the edges for a rustic look. Enjoy your meal! {{image_4}} You can switch up the protein in Forgotten Chicken. Here are a couple of ideas: - Using different cuts of chicken: Try using chicken breasts or drumsticks. Each cut offers a different taste and texture. Breasts cook faster, while drumsticks provide a richer flavor. - Substituting chicken for other proteins: If you prefer, use turkey thighs for a slightly milder flavor. For a plant-based option, try tofu. Firm tofu soaks up the sauce well and makes a great base. You can easily adjust this recipe to fit your dietary needs: - Making the dish gluten-free or dairy-free: Swap the vegetable broth for a gluten-free version. Use coconut milk instead of dairy, if you like creaminess. - Vegetarian alternatives for a plant-based dish: Replace the chicken with hearty vegetables. Use eggplant, mushrooms, or cauliflower. These veggies add depth and flavor while keeping the dish plant-based. Don't hesitate to experiment with flavors in this dish: - Experimenting with different types of vinegar or broth: Try apple cider vinegar for a sweeter taste. Or use chicken broth for a more savory flavor. - Adding seasonal vegetables for variety: Incorporate seasonal veggies like zucchini, bell peppers, or spinach. They add color, texture, and nutrition to your meal. These easy variations let you customize Forgotten Chicken to your taste, making it a fun dish to enjoy! To keep your Forgotten Chicken fresh, follow these tips: - Cool first: Let the chicken cool down before storing. - Use airtight containers: Store in glass or plastic containers with tight lids. - Label and date: Write the date on the container for easy tracking. Refrigerate your leftovers within two hours. They will stay good for about 3-4 days. To reheat without drying out the chicken, use these methods: - Oven method: Preheat your oven to 350°F (175°C). Place chicken in an oven-safe dish with a splash of broth. Cover with foil to keep it moist. - Microwave method: Use a microwave-safe plate. Add a bit of water or broth, then cover with a damp paper towel. Heat in short bursts, checking often. To keep the flavor when reheating, add a little fresh basil or parsley before serving. Follow these steps to freeze Forgotten Chicken properly: - Cool completely: Make sure the chicken is fully cool before freezing. - Use freezer bags: Place the chicken in heavy-duty freezer bags. Remove as much air as possible before sealing. - Label and date: Write the date and contents on the bag. For the best taste and texture, thaw chicken overnight in the fridge. Reheat it gently using the methods above. Forgotten Chicken is a cozy dish made with chicken, tomatoes, and herbs. It began as a simple way to cook chicken slowly in a pot. The dish became popular for its rich flavors and ease of cooking. The chicken becomes tender and absorbs all the yummy flavors from the sauce. You can keep your Forgotten Chicken leftovers in the fridge for up to four days. Make sure to store it in an airtight container. This helps keep the chicken fresh and tasty. Yes, you can make Forgotten Chicken in a slow cooker. Start by searing the chicken on the stove first. Then, place everything into the slow cooker. Cook it on low for 6 to 8 hours. This way, the chicken will be very tender. I suggest serving Forgotten Chicken with quinoa or rice. Both soak up the sauce well. You can also add a side of steamed vegetables or a fresh salad. These sides balance the meal and add color to your plate. In summary, Forgotten Chicken is a simple yet delicious dish made with chicken thighs and fresh ingredients. The recipe uses easy steps to ensure your meal turns out great. You can explore various flavors, try different proteins, and adjust for dietary needs. Remember to store and reheat properly for the best taste. With these tips, you can enjoy this delightful dish again and again. Happy cooking!

If you’re looking for a dinner that’s both easy and tasty, Forgotten Chicken is the dish for you. This flavorful comfort food combines juicy chicken thighs, fresh veggies, and rich …

Read more

Categories Dinner

Sunshine Salad Vibrant and Fresh Flavors Await

June 22, 2025 by Chef Miles
- 2 cups mixed salad greens (arugula, spinach, romaine) - 1 cup cherry tomatoes, halved - 1 cup diced cucumber - 1 yellow bell pepper, thinly sliced - 1 ripe avocado, diced - 1/3 cup candied pecans - 1/4 cup crumbled feta cheese - 1/4 cup fresh basil leaves, roughly chopped - 3 tablespoons extra virgin olive oil - 2 tablespoons fresh lemon juice - 1 tablespoon honey - Salt and pepper to taste Using fresh ingredients makes your salad lively and tasty. Mixed greens provide a crisp base. Cherry tomatoes add sweetness and color. Cucumbers bring crunch and freshness. Yellow bell pepper offers a sweet, crunchy bite, while avocado gives a creamy texture. Candied pecans add a sweet crunch, and feta cheese gives a tangy flavor. Fresh basil adds a fragrant touch, making every bite delightful. - Mixed greens: High in vitamins A and C. Great for skin health. - Cherry tomatoes: Packed with antioxidants. They support heart health. - Cucumber: Hydrating and low in calories. Good for digestion. - Yellow bell pepper: Rich in vitamin C. Boosts your immune system. - Avocado: Contains healthy fats. Supports heart health and brain function. - Candied pecans: Provide healthy fats and protein. Good for energy. - Feta cheese: A source of calcium. Supports bone health. - Basil: Contains anti-inflammatory properties. Good for digestion. - Olive oil: Rich in monounsaturated fats. Supports heart health. - Lemon juice: High in vitamin C. Good for skin health. - Honey: Natural sweetener with antioxidants. May soothe your throat. Using these fresh ingredients not only makes your salad tasty but also boosts your health! To start, gather all your ingredients. You need: - 2 cups mixed salad greens - 1 cup cherry tomatoes, halved - 1 cup diced cucumber - 1 yellow bell pepper, sliced - 1 ripe avocado, diced - 1/3 cup candied pecans - 1/4 cup crumbled feta cheese - 1/4 cup fresh basil leaves - 3 tablespoons extra virgin olive oil - 2 tablespoons fresh lemon juice - 1 tablespoon honey - Salt and pepper to taste Wash your greens and chop your veggies. Cut the cherry tomatoes and cucumber into small pieces. Slice the yellow bell pepper into thin rings. Dice the avocado right before you add it to keep it fresh. In a large bowl, place the mixed salad greens as your base. Next, layer the halved cherry tomatoes, diced cucumber, and sliced yellow bell pepper on top. This makes the salad look bright and fun! Now, gently fold in the diced avocado. Sprinkle the candied pecans and crumbled feta cheese over the salad. This adds a nice mix of textures and flavors. In a small bowl, whisk together the olive oil, lemon juice, honey, salt, and pepper. Mix until it’s smooth and well combined. This dressing is bright and full of flavor! Drizzle the dressing over the salad. Toss everything together gently so all the ingredients blend well. Finally, add the chopped basil on top for a fresh touch. You can find the full recipe in the previous section. Enjoy your vibrant and refreshing Sunshine Salad! To dice an avocado, first cut it in half. Remove the pit with a knife. Carefully scoop the flesh out with a spoon. Place the avocado half flat on the cutting board. Slice it lengthwise into strips, then crosswise to make small cubes. This method gives you nice, even pieces for your salad. If you have leftover Sunshine Salad, store it in an airtight container. Keep it in the fridge for up to two days. However, be aware that the avocado might brown. To slow this down, you can squeeze a bit of lemon juice over the avocado before storing. This keeps your salad fresh and tasty for later. Serve your Sunshine Salad in a large bowl or on individual plates. Add extra feta cheese and fresh basil on top for a lovely look. Pair the salad with grilled chicken or shrimp for a full meal. This way, you can enjoy the vibrant flavors and colors while also filling your belly! {{image_4}} You can easily boost the protein in your Sunshine Salad. Grilled chicken adds a savory touch. Just slice it thin and layer it on top. If you want a plant-based option, chickpeas work great too. Just rinse and drain them before adding. Both choices make the salad filling and satisfying. Fruits can add a sweet twist to the salad. In summer, try adding fresh berries like strawberries or blueberries. They bring a nice pop of color and flavor. In the fall, diced apples are perfect. They add a crisp texture and a touch of sweetness. Experiment with different fruits for fun new flavors! The dressing can change your salad game. A classic balsamic vinaigrette is always a hit. Just mix balsamic vinegar with olive oil, salt, and pepper. You can also try a honey mustard dressing for a sweet zing. Or, make a creamy avocado dressing for a smooth touch. Each dressing gives the salad a unique taste that you’ll love! For the full recipe, check out the Sunshine Salad Delight. To keep your Sunshine Salad fresh, store each ingredient separately. This method helps maintain their crunch and flavor. Place greens in a dry container with a paper towel. This absorbs moisture and keeps them crisp. Store chopped veggies in airtight containers. This will prevent them from wilting. For avocado, sprinkle lime juice on the cut side. This slows browning. If stored correctly, your salad lasts about three days. The greens will stay fresh for up to two days. Other ingredients like cucumber and bell pepper hold up well for those days too. Once you dress the salad, eat it within a day. The dressing makes the greens soggy over time. You can freeze some ingredients, but not the whole salad. Freezing cucumbers and tomatoes will change their texture. Avoid freezing the avocado, as it turns mushy. Instead, freeze the pecans and cheese separately. They maintain their flavor and texture better that way. Always label your containers with the date. Yes, you can swap cheese types. Try goat cheese for a tangy flavor. You can also use mozzarella for a milder taste. Just remember, each cheese adds a unique touch. Experiment to find what you love best! Sunshine Salad shines with many dishes. Pair it with grilled chicken for protein. You can also serve it alongside fish for a light meal. For a vegetarian option, add chickpeas or quinoa. These pairings balance the salad's fresh flavors. To make Sunshine Salad vegan, skip the feta cheese. Use a nut-based cheese or avocado for creaminess. Replace honey with maple syrup for sweetness. This keeps the salad tasty while making it plant-based. Enjoy the vibrant flavors without dairy! This blog post covered the fresh ingredients for the Sunshine Salad Delight. You learned how to prepare, assemble, and dress the salad. I shared tips on dicing avocado and storing leftovers for later use. We also explored fun variations to keep it interesting. In short, this salad is bright, healthy, and easy to make. Enjoy every bite and feel great about your choice!

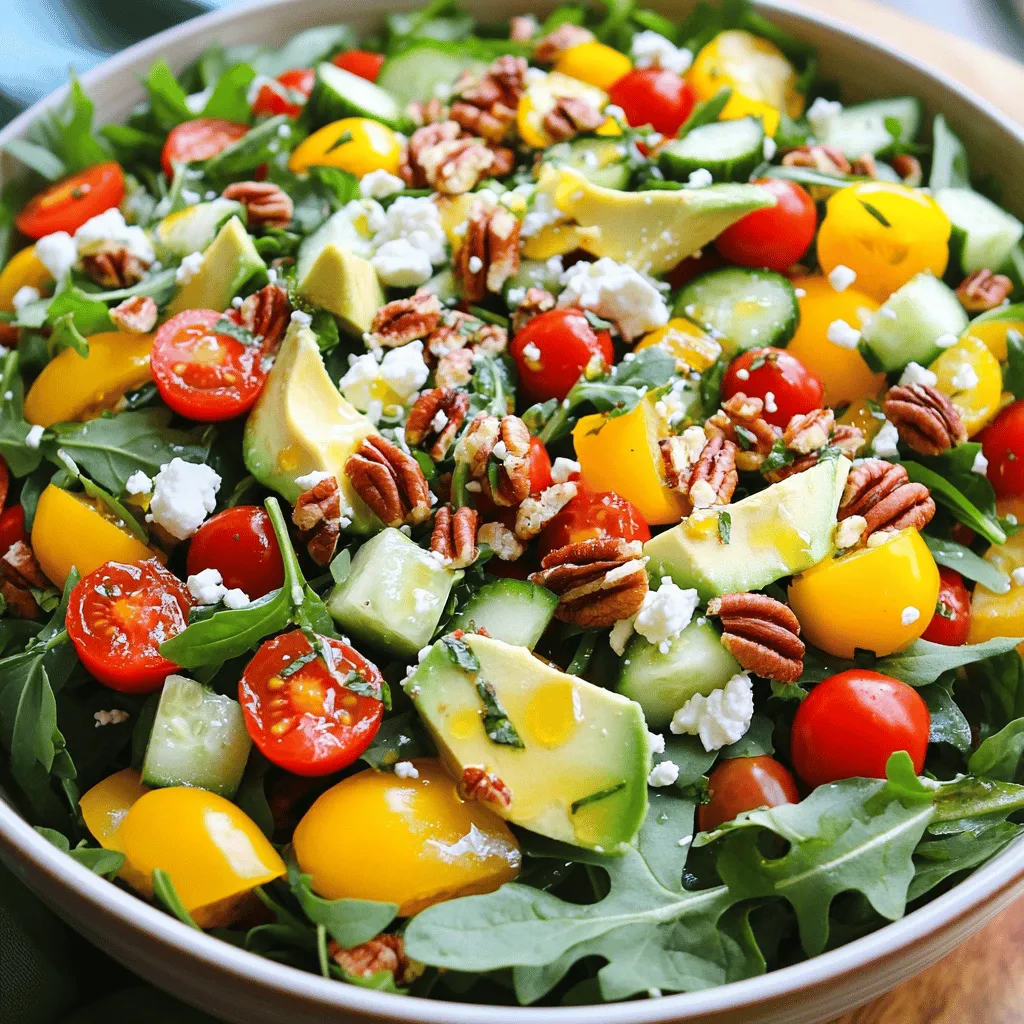
Get ready for a burst of color and flavor with my Sunshine Salad! This dish is packed with fresh ingredients that bring joy to your plate. I’ll share a simple …

Read more

Categories Salads

Melt In Your Mouth Chicken Flavorful and Simple Dish

June 21, 2025 by Chef Miles
To make Melt In Your Mouth Chicken, you will need the following key ingredients: - 4 boneless, skinless chicken breasts - 1 cup buttermilk - 1 teaspoon garlic powder - 1 teaspoon onion powder - 1 teaspoon smoked paprika - Salt and black pepper, to taste - 1 cup all-purpose flour - 1/2 teaspoon baking powder - 1 cup breadcrumbs (preferably panko for extra crunch) - 1/4 cup finely grated Parmesan cheese - 1/2 cup unsalted butter, melted - Fresh parsley leaves, for garnishing For those who want to kick it up a notch, consider adding: - 1/2 teaspoon cayenne pepper (for heat) - Fresh herbs like thyme or rosemary for extra aroma - A splash of hot sauce in the marinade for a tangy twist When choosing chicken, look for these tips: - Color: Fresh chicken should be pink and moist, not gray. - Texture: The meat should feel firm to the touch, not slimy. - Smell: Ensure it has no foul odor. A fresh smell is key. - Source: Buy from local farms or trusted grocery stores. Organic and free-range options often taste better. Select your chicken wisely to ensure a meal that truly melts in your mouth. For the full recipe, check the details above. Start by making the marinade. In a bowl, mix buttermilk, garlic powder, onion powder, smoked paprika, salt, and black pepper. This mix adds flavor and keeps the chicken juicy. Submerge the chicken breasts fully in this marinade. Cover the bowl with plastic wrap and place it in the fridge. I recommend marinating for at least 2 hours, but overnight works best. Next, set up your breading station. You will need three bowls. In the first bowl, mix flour, baking powder, a pinch of salt, and cayenne pepper if you like heat. In the second bowl, combine breadcrumbs with finely grated Parmesan cheese. The third bowl should have melted butter. This setup makes coating easy and quick. After marinating, take the chicken out. Let any excess marinade drip off. First, coat each chicken breast in the flour mix. Then dip it into the melted butter for richness. Finally, press it into the breadcrumb mix for a crunchy crust. Preheat your oven to 375°F (190°C). Arrange the coated chicken on a parchment-lined baking sheet. Bake for 25 to 30 minutes until golden brown and the internal temperature reaches 165°F (75°C). Let the chicken rest for 5 minutes before serving. Garnish with fresh parsley for a touch of color. For the complete recipe, check out the [Full Recipe]. To get that melt-in-your-mouth feel, you need to focus on marinating. The buttermilk is key. It tenderizes the chicken and adds flavor. I suggest marinating for at least two hours, but overnight is even better. After marinating, let the chicken rest before cooking. This helps keep it juicy. I love baking this chicken in the oven. Preheat it to 375°F (190°C). Place the chicken on a baking sheet lined with parchment paper for easy cleanup. Bake for 25 to 30 minutes. If you prefer a quicker method, try an air fryer. Set it to 375°F (190°C) and cook for about 20 minutes. Both methods give you a crispy outside and juicy inside. Here are a few mistakes to watch for: - Skipping the Marinade: Don’t skip marinating. It makes a big difference in taste and texture. - Not Preheating: Always preheat your oven or air fryer. This ensures even cooking. - Overcrowding the Pan: If you put too much chicken on one sheet, it can steam instead of bake. Give each piece space. - Not Checking Temperature: Use a meat thermometer. The chicken should reach 165°F (75°C) to ensure it’s safe to eat. With these tips, your melt-in-your-mouth chicken will shine! For the full recipe, check the section above. {{image_4}} You can easily switch up the flavors in this recipe. Try fresh herbs like thyme or rosemary for a bright taste. For a spicy kick, add chili powder or cayenne pepper. You can also use different marinades. A lemon and herb marinade adds a zesty twist. Mixing in honey or mustard brings a sweet and tangy vibe. Experiment with your favorite spices to create a unique flavor. If you need a gluten-free option, replace all-purpose flour with almond flour or gluten-free flour. You can also use crushed gluten-free crackers instead of breadcrumbs. For more flavor, season your breadcrumbs with herbs or cheese. This makes a crispy, tasty coating. You can use panko breadcrumbs for extra crunch, but make sure they are gluten-free if needed. Melt In Your Mouth Chicken pairs well with many sides. Consider serving it with creamy mashed potatoes or fluffy rice. A fresh garden salad adds a nice crunch. For sauces, a light lemon butter sauce or a tangy barbecue sauce works great. You can also add a drizzle of balsamic glaze for a sweet finish. These sides and sauces make your meal more exciting and balanced. To keep your Melt In Your Mouth Chicken fresh, store it in an airtight container. Make sure it cools down first. Place it in the fridge within two hours of cooking. This helps prevent bacteria growth. The chicken stays good for up to four days in the refrigerator. If you notice any off smells or strange colors, throw it away. When you want to enjoy leftovers, reheating is key. I recommend using the oven for best taste. Preheat your oven to 350°F (175°C). Place the chicken on a baking sheet. Cover it with foil to keep it moist. Heat for about 15-20 minutes. Check that the chicken is warm all the way through. You can also use a microwave, but it might lose some crunch. If you want to save chicken for later, freezing is a great option. Wrap each piece tightly in plastic wrap. Then, place them in a freezer bag. Remove as much air as possible to prevent freezer burn. You can freeze it for up to three months. When ready to eat, thaw it overnight in the fridge before reheating. Enjoy your meal later with the same great taste! The best way to marinate chicken is to use buttermilk. It helps break down the meat and makes it tender. Mix buttermilk with garlic powder, onion powder, smoked paprika, salt, and black pepper. Let the chicken sit in this mix for at least two hours, or overnight for best results. It’s like giving your chicken a spa day! You can store Melt In Your Mouth Chicken in the fridge for up to four days. Just place it in an airtight container. This keeps it fresh and prevents any strong odors from mixing with other foods. When you're ready to eat, reheat it gently to enjoy that melt-in-your-mouth goodness again. Yes, you can use chicken thighs instead of breasts! Thighs have more fat, which makes them juicier and more flavorful. They also stay tender even if cooked a bit longer. Just follow the same marinating and cooking steps from the recipe. Your chicken will still melt in your mouth! For the full recipe, check the detailed instructions and enjoy your cooking adventure! In this post, I shared key ingredients and easy steps to make delicious Melt-in-Your-Mouth Chicken. I offered tips to get the right texture and suggested fun variations. Remember, choosing good chicken matters. Store extras properly to enjoy later. Test out different flavors and styles to keep things exciting. Cooking should be fun, so don’t be afraid to experiment. Enjoy your meals and happy cooking!

Welcome to a delicious journey with my Melt In Your Mouth Chicken. This flavorful dish is not only easy to make but also a hit at the dinner table. I’ll …

Read more

Categories Dinner

Oven Fried Chicken Crispy and Flavorful Delight

June 21, 2025 by Chef Miles
- Chicken thighs (bone-in, skin-on) - Greek yogurt - Dijon mustard - Honey The main ingredients create a tasty base for your oven fried chicken. I love using bone-in, skin-on chicken thighs. They stay juicy and flavorful. The Greek yogurt adds creaminess to the marinade. Dijon mustard gives a nice tang. Honey adds a touch of sweetness that balances the flavors. - Garlic powder - Onion powder - Smoked paprika - Dried thyme - Panko breadcrumbs - All-purpose flour These seasonings bring out the best in chicken. Garlic powder and onion powder add depth. Smoked paprika gives a subtle smokiness. Dried thyme adds a hint of earthiness. The panko breadcrumbs create a crispy crust. Mixing them with all-purpose flour ensures the coating sticks well. - Cooking spray - Olive oil Misting your chicken with cooking spray or olive oil helps it brown. This step is key to achieving a crispy texture. You can also use olive oil to drizzle on top for extra flavor. I recommend these additions to elevate your dish to the next level. For the complete recipe, check out the Full Recipe section to get started on this delicious oven fried chicken! Whisk together the marinade ingredients in a large mixing bowl. Use Greek yogurt, Dijon mustard, honey, garlic powder, onion powder, smoked paprika, thyme, salt, and black pepper. Mix until it's smooth. This marinade gives the chicken great flavor. Coat the chicken thighs well with the marinade. Make sure every piece gets covered. Cover the bowl with plastic wrap and place it in the refrigerator. Marinate for at least one hour. For the best taste, leave it overnight. Prepare the breading by mixing panko breadcrumbs and flour in a shallow dish. Once the chicken has marinated, take it out of the fridge. Let the excess marinade drip off. Dredge each thigh in the panko-flour mixture. Press gently to help the crumbs stick. Place the breaded chicken on a lined baking sheet. Give each piece space to cook evenly. Preheat your oven to 425°F (220°C). Bake the chicken for about 30-35 minutes. Check that it turns a golden brown and reaches an internal temperature of 165°F (74°C). This ensures the chicken is safe to eat and juicy. To get that perfect crunch, use panko breadcrumbs. They are lighter and crispier than regular breadcrumbs. Mix them with a bit of flour to help the coating stick. Before baking, mist the chicken with oil. This helps create a golden, crunchy layer on the outside. Marinating chicken is key for flavor. You can marinate for one hour or overnight. If you choose overnight, the chicken absorbs more flavor. It also makes the meat juicier. So, if you have time, go for the longer marination. You will taste the difference! When serving your oven fried chicken, think about color and balance. Place the chicken on a colorful platter. Garnish with fresh herbs like parsley or thyme. These add brightness and a pop of flavor. Serve with sides like coleslaw or creamy potato salad. These pair well and create a complete meal. For a fun touch, try serving the chicken with dipping sauces! {{image_4}} You can change the flavor of your oven fried chicken with different marinades. Here are a few great options: - BBQ Marinade: Mix BBQ sauce, garlic, and brown sugar for a sweet twist. - Spicy Marinade: Add hot sauce, cayenne, and chili powder for heat. - Herb-Infused Marinade: Use fresh herbs like rosemary, thyme, and basil for a fresh taste. Each marinade can make your chicken unique and tasty. Try them all to find your favorite! If you want to switch things up, consider other cooking methods. You can use an air fryer or grill instead of the oven. - Air Frying: This method gives you a crispier texture with less oil. Set your air fryer to 400°F (200°C) and cook for about 25 minutes. - Grilling: For a smoky flavor, grill the chicken on medium heat for about 15-20 minutes. Just make sure to turn it often for even cooking. These methods still keep the chicken flavorful and juicy. How you serve your oven fried chicken can also change the meal. Here are some fun ideas: - Sliders: Cut the chicken into smaller pieces and serve on mini buns. Add some slaw and sauce for extra flavor. - With Sauces: Serve with different dipping sauces like ranch, honey mustard, or BBQ. This adds fun options to each bite. - In Salads: Slice the chicken and serve it on top of a fresh salad. Add veggies, nuts, and cheese for a complete meal. These serving styles make your chicken more exciting and versatile. Enjoy experimenting with different flavors and styles! After enjoying your oven fried chicken, you may have some leftovers. To keep them fresh, let the chicken cool first. Place it in an airtight container. This helps lock in flavor and moisture. If you leave it out too long, it can spoil. Store it in the fridge for up to 3 days. When it's time to enjoy your leftovers, reheating correctly is key. Use an oven or an air fryer for the best results. Preheat your oven to 350°F (175°C). Place the chicken on a baking sheet. Heat for about 15-20 minutes. This keeps the chicken crispy and warm. If you use a microwave, the chicken may lose its crunch. If you have more than you can eat, freezing is a good option. Wrap each piece tightly in plastic wrap. Then place them in a freezer bag. This helps prevent freezer burn. You can freeze the chicken for up to 2 months. When you’re ready to eat, thaw it in the fridge overnight before reheating. To make this dish gluten-free, swap regular flour and breadcrumbs. Use almond flour or chickpea flour instead of all-purpose flour. For the breadcrumb coating, go for gluten-free panko or crushed rice cereal. Both options give a nice crunch. Yes, you can use skinless chicken. However, it may not be as crispy. Skin adds flavor and moisture. If you choose skinless, try adding a bit more oil to the marinade for extra moisture. This helps keep the chicken juicy. You have many tasty options. Try serving it with coleslaw, mashed potatoes, or corn on the cob. A fresh garden salad or baked beans also pairs well. These sides balance the rich flavor of the chicken. Using a meat thermometer is key. Insert it into the thickest part of the chicken. You want it to read 165°F (74°C). This ensures your chicken is safe to eat and perfectly cooked. Marinating is not strictly necessary, but it greatly enhances flavor and texture. The yogurt tenderizes the meat. This process makes the chicken juicy and flavorful. For best results, marinate overnight. Yes, you can prepare the chicken ahead of time. Marinate it up to 24 hours in advance. If you have less time, even an hour will help. This allows the flavors to soak in before cooking. For the best texture, bread the chicken right before baking. Oven fried chicken is simple and tasty. You learned key ingredients, like chicken thighs and a yogurt marinade. I shared step-by-step methods, tips for crispy texture, and tasty serving ideas. You can also try flavor variations and different cooking styles. Remember to store leftovers properly to keep them fresh. Exploring these tips makes cooking fun and easy. Enjoy your delicious oven fried chicken with sides you love.

Looking for a tasty way to enjoy crispy chicken without the deep frying? My Oven Fried Chicken recipe gives you that delicious crunch and flavor, all baked to perfection. Using …

Read more

Categories Dinner

Alice Springs Chicken Flavorful and Satisfying Meal

June 21, 2025 by Chef Miles
Alice Springs Chicken is a hearty dish. It blends chicken, cheese, and ham. This meal is both filling and tasty. You can find the full recipe above. Here’s what you need to make this dish: - 4 boneless, skinless chicken breasts - 1 cup shredded Monterey Jack cheese - 1 cup chopped cooked ham - 1/2 cup honey mustard dressing - 1 teaspoon paprika - 1 teaspoon garlic powder - 1 teaspoon freshly cracked black pepper - 1 tablespoon olive oil - Fresh parsley, finely chopped (for garnish) Each ingredient plays a key role. The chicken serves as the base. The cheese gives it a creamy texture. Ham adds a savory taste, while honey mustard brings sweetness. You can switch things up! Try adding sautéed mushrooms or spinach for extra flavor. If you want a bit of spice, add jalapeños. For a lighter version, use grilled chicken or turkey. You can also swap Monterey Jack cheese for Swiss or cheddar. These changes can give your dish a fresh twist. First, gather all your ingredients. You need: - 4 boneless, skinless chicken breasts - 1 cup shredded Monterey Jack cheese - 1 cup chopped cooked ham - 1/2 cup honey mustard dressing - 1 teaspoon paprika - 1 teaspoon garlic powder - 1 teaspoon freshly cracked black pepper - 1 tablespoon olive oil - Fresh parsley, finely chopped (for garnish) Next, preheat your oven to 375°F (190°C). This ensures a hot and ready oven for baking. In a small bowl, mix paprika, garlic powder, and black pepper. Use this spice mix to season both sides of each chicken breast. Make sure to cover them well, so they are flavorful. Heat olive oil in a large, oven-safe skillet over medium-high heat. Once the oil shimmers, add the seasoned chicken breasts. Sear each side for about 4-5 minutes. You want a nice golden-brown crust. While the chicken cooks, mix chopped ham with half of the honey mustard dressing. This will add flavor to the dish. After searing, pour the ham mixture over the chicken in the skillet. Drizzle the remaining honey mustard dressing on top. Now, sprinkle the shredded Monterey Jack cheese over everything. This creates a cheesy layer that melts beautifully. Carefully transfer the skillet to your preheated oven. Bake for 25-30 minutes. Check that the chicken is no longer pink in the center. The cheese should be bubbly and golden. Once done, let the skillet rest for a few minutes. This keeps the juices inside the chicken. Finally, garnish with fresh parsley for a bright touch. Enjoy the flavors of this dish, and don't forget to check the full recipe for more tips! To cook perfect chicken, start with high-quality breasts. Look for boneless and skinless cuts. This type cooks evenly and stays juicy. Always season the chicken well. Use spices like paprika, garlic powder, and pepper. Sear the chicken in hot olive oil. This step gives it a nice crust. Cook each side for about 4-5 minutes. The golden color means it’s ready for baking. Make sure the chicken reaches 165°F (74°C) for safety. To enhance flavors, use honey mustard dressing. It adds a sweet and tangy kick. Mixing it with ham creates a rich taste. You can also add fresh herbs. Parsley brightens the dish. For a spicy touch, add a pinch of cayenne pepper. Experiment with different cheese types. Monterey Jack melts well and adds creaminess. Try other options like cheddar or provolone for variety. Serve Alice Springs Chicken straight from the skillet. This gives a rustic and homely feel. Pair it with seasonal vegetables. Roasted asparagus or green beans work well. For a starch, consider mashed potatoes or rice. These sides soak up the flavors nicely. You can also serve it with a fresh salad for crunch. A light vinaigrette adds a refreshing touch. Don’t forget to sprinkle fresh parsley on top. It looks great and adds flavor. Check out the Full Recipe for more details. {{image_4}} You can swap ingredients to fit your taste. If you don't have Monterey Jack cheese, try cheddar or gouda. For a smoky flavor, use smoked ham instead of regular ham. If you want a kick, add jalapeños or use spicy mustard. You can also replace chicken breasts with thighs for a juicier bite. If you need gluten-free options, ensure your ham and mustard are gluten-free. You can use gluten-free breadcrumbs on top for a crunch. For a low-carb version, skip the honey mustard dressing and add a creamy cheese sauce instead. This keeps all the flavor without the carbs. Alice Springs Chicken has roots in Australian cuisine, but you can add your own twist. For a Mexican flair, add salsa and use pepper jack cheese. If you love Italian, try adding pesto and mozzarella. You can even go Asian by using teriyaki sauce and topping with sesame seeds. Each twist brings a new taste, making this dish fun and versatile. After you make Alice Springs chicken, store leftovers in an airtight container. Keep it in the fridge for up to four days. If you want to keep it longer, freezing is a great option. Let the chicken cool before placing it in a freezer bag. Remove as much air as possible to prevent freezer burn. To reheat, take the chicken from the fridge. Place it on a microwave-safe plate. Heat on medium power for about two minutes. Check if it’s warm throughout. If not, continue heating in 30-second intervals. You can also reheat it in the oven. Preheat to 350°F (175°C). Place the chicken in an oven-safe dish and cover it with foil. Heat for about 15-20 minutes until warm. If you freeze Alice Springs chicken, it can last for up to three months. To thaw, move it to the fridge a day before you plan to eat it. For quick thawing, you can use the microwave. Make sure to heat it right after thawing to maintain freshness. Enjoy this flavorful dish later with ease! You can prepare Alice Springs Chicken ahead of time. Start by cooking the chicken and adding the ham and cheese. After baking, let the dish cool completely. Then, cover it tightly and store it in the fridge. You can do this up to two days before serving. When ready to eat, reheat it in the oven at 350°F (175°C) until heated through. Alice Springs Chicken pairs well with many sides. Here are some great choices: - Roasted vegetables for a healthy touch - Mashed potatoes for a cozy feel - Rice pilaf for a light option - A fresh green salad for crunch - Garlic bread for something extra These sides balance the rich flavors of the chicken, making your meal even better. Yes, you can use other cheeses if you want. Cheddar cheese works well for a sharper taste. Swiss cheese adds a nice nutty flavor. You can even mix cheeses for a unique blend. Just make sure the cheese melts well for that creamy finish. Don’t forget to check the Full Recipe for all the details! This post covered the key points of making Alice Springs Chicken. You learned about the ingredients, cooking steps, and tips for a great dish. Plus, I shared variations, storage info, and answered common questions. Remember, cooking should be fun and flexible. Feel free to adjust ingredients and serve it your way. With the right techniques, you can impress anyone with your Alice Springs Chicken. Enjoy your cooking adventure!

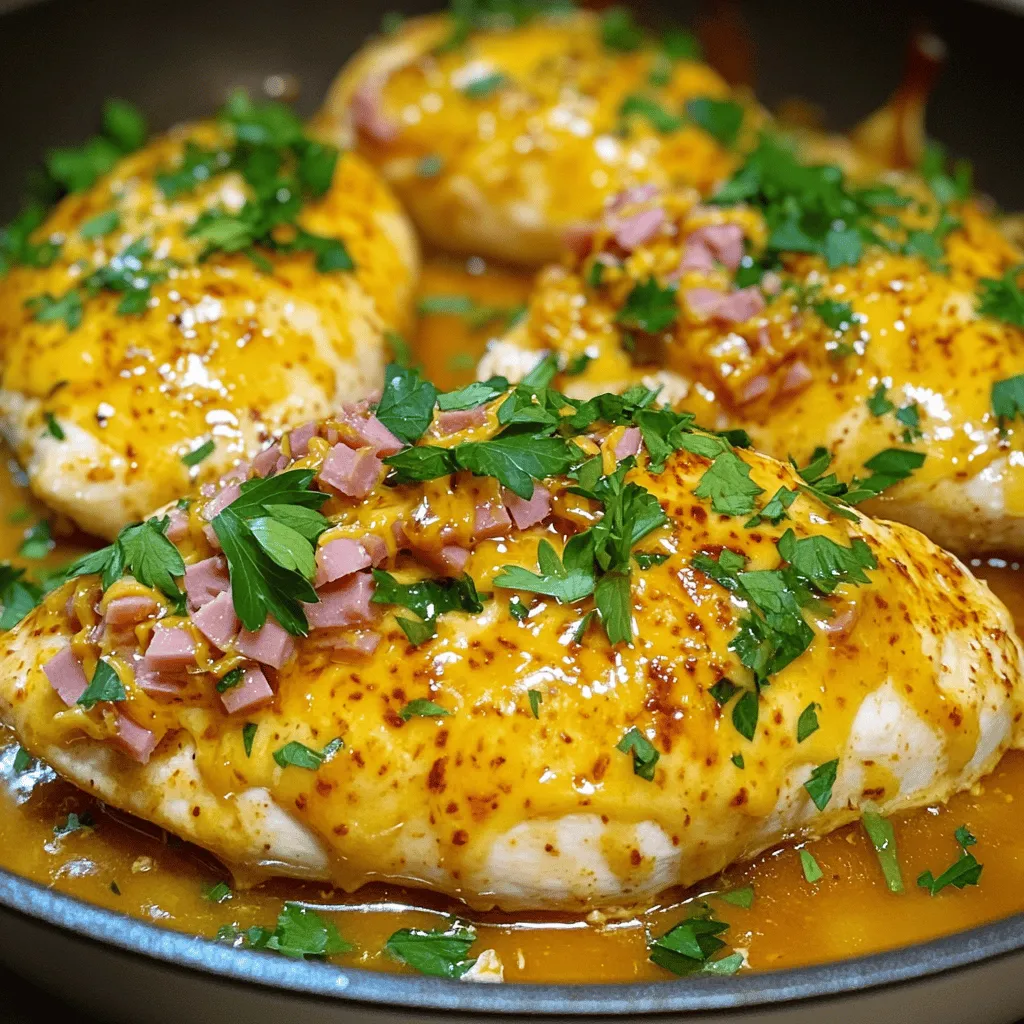
Are you ready to enjoy a flavorful and satisfying meal? Alice Springs Chicken is a dish that packs a punch with its rich taste and hearty ingredients. In this post, …

Read more

Categories Dinner

The Best Zucchini Bread Comfort Food Recipe

June 21, 2025 by Chef Miles
To make the best zucchini bread, gather these key ingredients: - 2 cups finely grated zucchini (about 2 medium zucchinis) - 1 cup all-purpose flour - 1 cup whole wheat flour - 1 teaspoon baking powder - 1 teaspoon baking soda - 1 teaspoon ground cinnamon - 1/2 teaspoon ground nutmeg - 1/2 teaspoon salt - 3/4 cup granulated sugar - 1/2 cup packed brown sugar - 2 large eggs, at room temperature - 1/2 cup vegetable oil or melted coconut oil - 1 teaspoon pure vanilla extract - 1/2 cup chopped walnuts or pecans (optional) - 1/2 cup chocolate chips (optional) These ingredients create a soft and flavorful bread. The zucchini adds moisture without making it soggy. You might need to swap some items. Here are good substitutions: - Flours: Use all-purpose flour only for a lighter bread. - Sugars: Replace granulated sugar with coconut sugar for a richer taste. - Oils: Applesauce can replace oil for a lower-fat option. - Eggs: Use flax eggs (1 tablespoon ground flaxseed + 2.5 tablespoons water) for a vegan version. These swaps keep the bread tasty and still enjoyable. To enhance your bread, consider these add-ins: - Nuts: Chopped walnuts or pecans add great crunch. - Chocolate Chips: They bring sweetness and richness. - Spices: Add a pinch of cloves or ginger for a unique twist. - Fruits: Dried cranberries or raisins can add a fun texture. Mix in one or more of these for a new flavor experience. Each option gives a tasty surprise in every slice. Don't forget to check the Full Recipe for more details! Start by gathering all your ingredients. You will need: - 2 cups finely grated zucchini (about 2 medium zucchinis) - 1 cup all-purpose flour - 1 cup whole wheat flour - 1 teaspoon baking powder - 1 teaspoon baking soda - 1 teaspoon ground cinnamon - 1/2 teaspoon ground nutmeg - 1/2 teaspoon salt - 3/4 cup granulated sugar - 1/2 cup packed brown sugar - 2 large eggs, at room temperature - 1/2 cup vegetable oil or melted coconut oil - 1 teaspoon pure vanilla extract - 1/2 cup chopped walnuts or pecans (optional) - 1/2 cup chocolate chips (optional) Preheat your oven to 350°F (175°C). Grease a 9x5-inch loaf pan with butter or cooking spray. Dust it with flour to keep the bread from sticking. Grate the zucchinis using a box grater. After grating, place the zucchini in a clean kitchen towel. Squeeze out as much moisture as you can. This step is very important for the bread’s texture. In a medium bowl, whisk the all-purpose flour, whole wheat flour, baking powder, baking soda, cinnamon, nutmeg, and salt. Set this aside. In a large bowl, whisk together the granulated sugar, brown sugar, and eggs. Mix until smooth. This should take about a minute. Now, add the vegetable oil and vanilla extract. Stir until everything is well mixed. Gradually add the dry flour mix to the wet mix. Alternate this with adding the grated zucchini. Gently fold everything together until just combined. Avoid overmixing, as this can make the bread tough. If you like, fold in the walnuts or chocolate chips for extra flavor. Pour the batter into the prepared loaf pan. Use a spatula to smooth the top. Place the loaf pan in the oven and bake for 50 to 60 minutes. Check for doneness by inserting a toothpick in the center. It should come out clean or with a few moist crumbs. Once baked, take the pan out and cool it for about 10 minutes. Then, carefully transfer the bread to a wire rack. Let it cool completely before slicing. Enjoy the delightful smell of the baking bread in your kitchen. This zucchini bread is truly comfort food at its best. For exact measurements and more details, refer to the Full Recipe. To get the best texture in your zucchini bread, remember this key step: remove excess moisture. After grating the zucchinis, place them in a clean towel and squeeze. This helps prevent a soggy loaf. Use a mix of all-purpose and whole wheat flour for a balanced density. Also, don’t overmix your batter. Gently fold until just combined to keep the bread light and tender. Many people make the mistake of skipping the moisture removal step. This can lead to a wet and dense bread. Another common error is overmixing the batter, which can make the bread tough. Ensure your baking powder and baking soda are fresh. Using old leavening agents can result in flat bread. Lastly, check your oven temperature to ensure even baking. To boost the flavor in your zucchini bread, consider adding spices like nutmeg or allspice. These add warmth and depth. You can also mix in chocolate chips for a sweet twist or nuts for crunch. For a hint of citrus, add some orange or lemon zest. Each of these options brings a unique touch, making your zucchini bread even more delightful. For the full recipe, check out the Ultimate Zucchini Bread Delight. {{image_4}} You can make a gluten-free zucchini bread. Swap the all-purpose flour for gluten-free flour. Look for a blend that works well in baking. This change keeps the bread soft and moist. You can also add a bit of xanthan gum, about 1/2 teaspoon, to help bind the ingredients. This will give a great texture without the gluten. To make this zucchini bread vegan, replace the eggs with flax eggs. Mix one tablespoon of ground flaxseed with three tablespoons of water. Let it sit for five minutes until it thickens. Also, use plant-based oil like coconut or olive oil. Swap out regular sugar for coconut sugar or another vegan sweetener. These easy changes let everyone enjoy this treat! Want to brighten your zucchini bread? Add flavor infusions! Try zesting a lemon or orange into the batter. This gives a fresh taste. You can also mix in spices like ginger or cardamom for warmth. Cinnamon is a classic, but adding nutmeg or allspice can change the game too. Don't forget about extracts! Almond or coconut extracts give a unique twist, too. For more fun ideas and tips, check the Full Recipe! To keep your zucchini bread fresh, first let it cool completely. This step is key. Next, wrap the bread tightly in plastic wrap or aluminum foil. You can also place it in an airtight container. This helps to keep it moist and tasty. Store it at room temperature for up to three days. If you want to keep it longer, consider freezing it. Freezing zucchini bread is easy and smart. First, slice the bread to make it easy to thaw. Then, wrap each slice in plastic wrap. After that, place the wrapped slices in a freezer bag or container. Be sure to label the bag with the date. This way, you’ll know how long it has been in the freezer. Zucchini bread can last up to three months in the freezer without losing flavor. To reheat your zucchini bread, you have a few options. The oven is best for getting a nice crust. Preheat your oven to 350°F (175°C). Place the bread on a baking sheet and warm it for about 10-15 minutes. If you’re in a hurry, you can use the microwave. Heat each slice for about 15-20 seconds. Just be careful not to overdo it, or the bread can get tough. Enjoy your warm zucchini bread with butter or your favorite spread! Yes, you can use yellow squash instead of zucchini. Both types of squash have a similar texture and flavor. Just make sure to grate it finely, like you would with zucchini. The yellow squash may add a slightly different color to your bread, but it will still taste delicious. Check if your zucchini bread is done by inserting a toothpick into the center. If it comes out clean or with just a few moist crumbs, it’s ready. The top should be golden brown, and the bread should spring back when gently touched. If it looks wet or gooey, bake it a little longer. You can replace sugar with applesauce or mashed bananas for a healthier option. Use the same amount as the sugar called for in the recipe. You can also try honey or maple syrup, but reduce the liquid in the recipe slightly. This keeps the bread moist without making it too sweet. To maintain the best texture, be mindful of the moisture content in your substitute. For more details on creating the perfect zucchini bread, check out the Full Recipe. You now know the key ingredients for the best zucchini bread, along with easy substitutes. I shared step-by-step instructions to simplify your baking. You learned tips to improve texture and avoid common mistakes. Variations offer gluten-free and vegan options, plus fun flavor twists. I also provided storage tips to keep your bread fresh. Enjoy your baking journey and remember to experiment with flavors! You can make zucchini bread your own and share it with others.

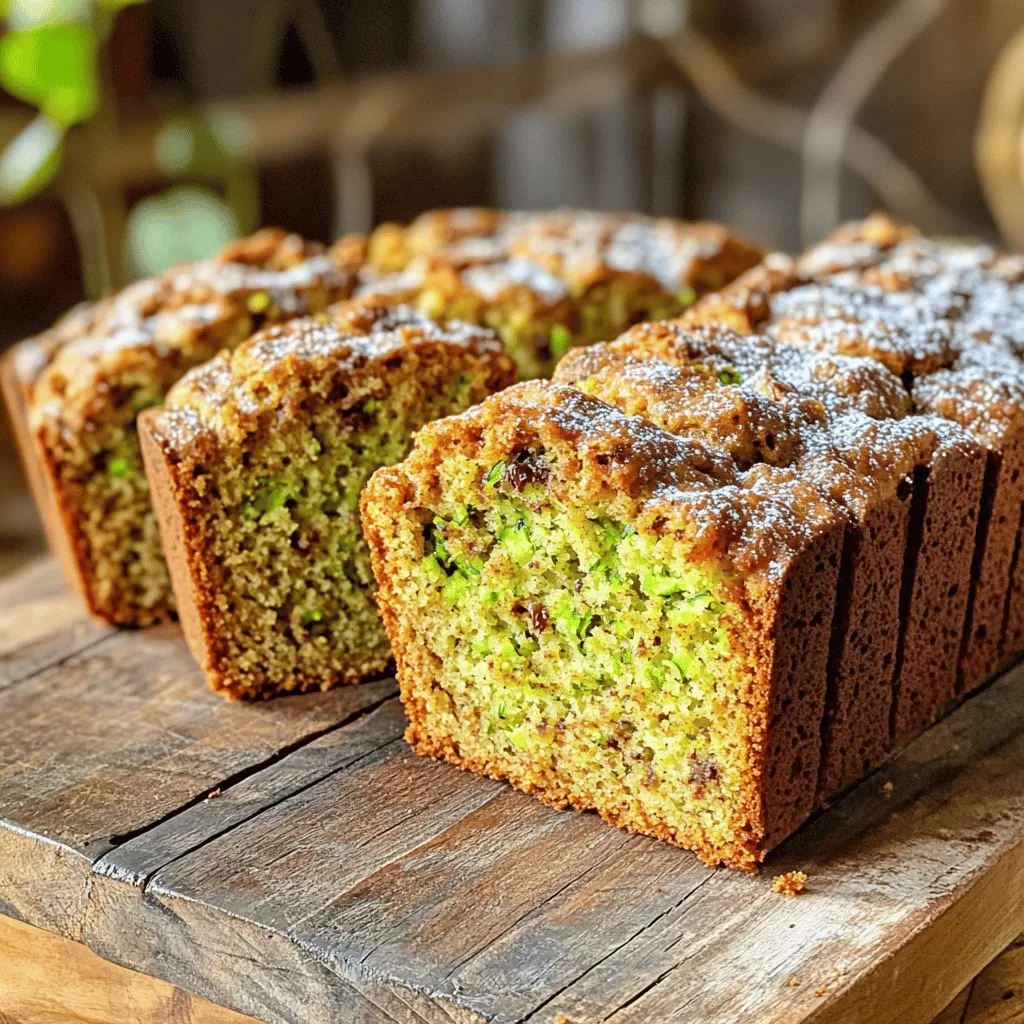
If you’re craving a warm slice of comfort, you’ve found the best zucchini bread recipe! This dish is moist, flavorful, and easy to make. I’ll guide you through each step, …

Read more

Categories Desserts

Easy Chicken & Rice Bowls Quick and Tasty Meal

June 21, 2025 by Chef Miles
- 2 cups cooked brown rice - 1 lb chicken breast, diced - 1 tablespoon olive oil - 1 small onion, finely chopped - 1 bell pepper (any color), diced - 1 cup corn (canned or frozen) - 1 ripe avocado, sliced - Fresh cilantro, chopped for garnish - 1 teaspoon ground cumin - 1 teaspoon smoked paprika - Salt and pepper to taste In this recipe for Easy Chicken & Rice Bowls, we focus on simple ingredients. The base includes brown rice and diced chicken. Brown rice is healthy and fills you up. Chicken adds protein and flavor. You can add optional ingredients like bell peppers and corn. They bring color and extra taste. Fresh avocado slices make the dish creamy. Cilantro adds a nice touch on top. For spices, we use ground cumin and smoked paprika. These give depth to your meal. Salt and pepper will enhance all the flavors. If you want to see the full list of ingredients, check the Full Recipe. Enjoy mixing and matching these ingredients for your perfect chicken and rice bowl! First, heat one tablespoon of olive oil in a large skillet over medium heat. Once it is hot, add one small, finely chopped onion. Sauté the onion for about 3 to 4 minutes. It should turn soft and fragrant. Next, add two cloves of minced garlic. Cook this for one minute, stirring often. This keeps the garlic from burning. Now, it’s time to add one pound of diced chicken breast. Make sure to season it well with one teaspoon of ground cumin, one teaspoon of smoked paprika, salt, and pepper. Stir the mixture well and cook for 5 to 7 minutes. The chicken should be cooked through and no longer pink. Towards the end, add one diced bell pepper and one cup of corn. Cook for another 3 to 4 minutes. This makes the flavors pop. While your chicken mixture is cooking, fluff two cups of cooked brown rice in a bowl. Use a fork to make it light and airy. When it's nice and fluffy, divide the rice evenly among your serving bowls. This helps with even portions for everyone. Now comes the fun part—plating! Generously layer the warm chicken mixture over the rice in each bowl. Make it look nice! Then, add slices of ripe avocado on top for a creamy touch. Finally, sprinkle fresh chopped cilantro over everything for that added flavor and color. Serve with lime wedges on the side. This lets everyone add a fresh burst of flavor to their bowls. Enjoy your savory chicken and rice bowls with family or friends! For the full recipe, check here. - Always check that chicken reaches 165°F. This ensures it is safe to eat. - Use a non-stick skillet. It makes cooking and cleaning much easier. - You can prepare the chicken and vegetable mix ahead of time. This saves time on busy nights. - Store the cooked rice separately. This helps keep it fresh and easy to reheat. - Serve in colorful bowls. This makes your meal look more appealing. - Add lime wedges for a fresh touch. They brighten the dish and add flavor. For the full recipe, check out the details above and enjoy! {{image_4}} You can easily change the flavor of your chicken and rice bowls. Add different spices to switch things up. For example, a teaspoon of curry powder gives a warm and rich taste. If you want a different protein, use shrimp or tofu. Shrimp cooks fast and adds a nice touch, while tofu brings a great plant-based option. Vegetables make your bowls colorful and healthy. Try adding zucchini, broccoli, or spinach. These veggies cook quickly and taste great. Using seasonal vegetables boosts freshness and flavor. For example, spring brings peas and asparagus, while fall offers squash and kale. If you need gluten-free meals, check your spice blends. Some may contain gluten. You can also make a vegetarian version. Replace the chicken with chickpeas or black beans. These options are packed with protein and fiber. This way, everyone can enjoy your easy chicken and rice bowls! To keep your chicken and rice bowls fresh, store them in airtight containers. This helps lock in flavor and moisture. If you can, keep the rice and chicken mixture separate. This way, the rice stays fluffy and the chicken does not get soggy. You can freeze the chicken and rice bowls for up to 3 months. Make sure to use freezer-safe containers. When you are ready to eat, thaw the bowls overnight in the fridge. This ensures that they reheat evenly and taste fresh. Reheat your chicken and rice bowls in the microwave or on the stovetop. If using the stovetop, add a splash of water to keep it moist. Stir well and heat until warm. Make sure everything is heated through before serving. Enjoy your meal! Yes, white rice can be used but may require adjusting cooking times. White rice cooks faster than brown rice, so check it often to avoid overcooking. You can use a 1:2 ratio of rice to water and shorten the cooking time to around 15-18 minutes. You can use tofu, shrimp, or even canned beans for a protein alternative. Tofu works well if you want a vegetarian option. Just make sure to marinate or season it well to boost flavor. Shrimp cooks quickly, so add it towards the end of cooking. The full prep and cooking time is approximately 25 minutes. This makes it perfect for a quick weeknight meal. You can chop the vegetables while the rice cooks to save time. Absolutely! This recipe is great for meal prep and can be stored in individual containers. Just pack the rice and chicken mix separately to keep everything fresh. Enjoy it throughout the week for easy lunches or dinners. This blog post covers a simple and tasty chicken bowl recipe. You learned about key ingredients like brown rice, chicken, and optional veggies. I shared step-by-step instructions and valuable tips for cooking and storage. Remember, you can customize this dish with different proteins and spices. It’s easy to prepare and perfect for meal prep. Enjoy making your own healthy meal packed with flavor!

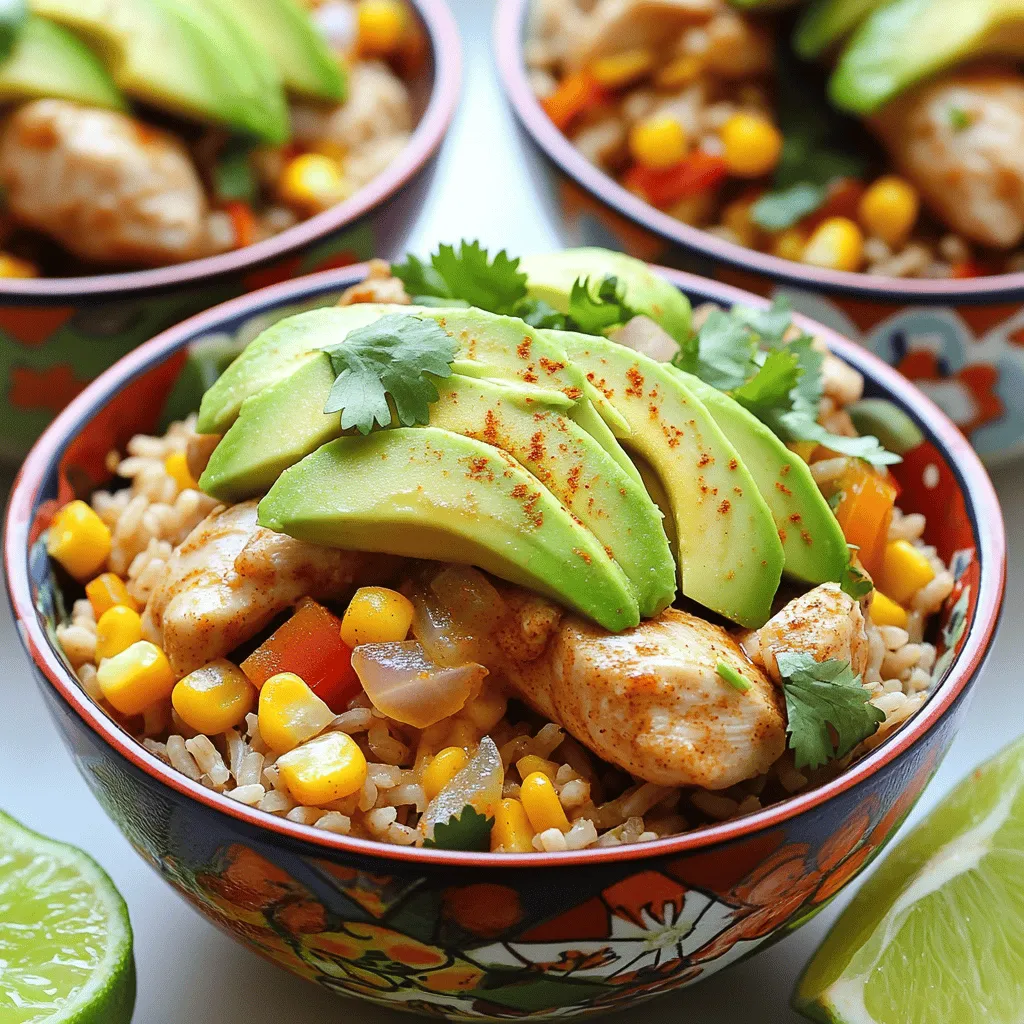
Looking for a quick and satisfying meal? My Easy Chicken & Rice Bowls might be just what you need! With just a few main ingredients like chicken, rice, and veggies, …

Read more

Categories Dinner

Simple Peach Crisp Delicious and Easy Dessert Recipe

June 21, 2025 by Chef Miles
For this simple peach crisp, you need a few key items: - 6 ripe peaches, peeled and sliced - 1 tablespoon fresh lemon juice - ¾ cup packed brown sugar, divided - 1 teaspoon ground cinnamon - ½ teaspoon ground nutmeg - 1 cup rolled oats - ½ cup all-purpose flour - ½ cup unsalted butter, melted - ¼ teaspoon salt These ingredients work together to create a sweet and warm dessert. The peaches bring a juicy base, while the oats and butter form a crispy topping. You can add other items based on your taste: - Chopped nuts, like walnuts or pecans - A dash of vanilla extract - A sprinkle of sea salt for contrast These optional ingredients can give your crisp a unique twist. Try mixing in some berries for an added flavor boost! To make this peach crisp, you will need: - A large mixing bowl - A 9x13 inch baking dish - A spatula or wooden spoon - A separate bowl for mixing the topping - An oven for baking Having the right tools makes the cooking process easier. Be sure to preheat your oven to 350°F (175°C) before you start, as this helps everything bake evenly. For the full recipe, check out the complete guide. 1. Start by preheating your oven to 350°F (175°C). This helps the crisp bake evenly. 2. In a big mixing bowl, add the sliced peaches. Pour in the fresh lemon juice. 3. Add ½ cup of brown sugar, ground cinnamon, and ground nutmeg. 4. Use a spatula to mix until the peaches are coated well. The juices will blend nicely. 5. Grease a 9x13 inch baking dish. Carefully pour the peach mix into the dish. 6. Spread the fruit evenly. This helps with even cooking. 1. In another bowl, mix rolled oats, the remaining ¼ cup of brown sugar, and flour. 2. Pour in the melted butter and sprinkle in salt. Stir until it looks crumbly. 3. Sprinkle this oat mix over the peaches in the baking dish. Cover the fruit well. 4. Place your dish in the oven. Bake for 30-35 minutes. 5. Look for a golden brown topping and bubbly edges. This means it’s almost ready. - Check the topping for a nice golden color. - Look for bubbling around the edges of the dish. - If you see both, it’s done! - Let it cool for 5-10 minutes before serving. This helps the flavors mix well. - If you want to be fancy, serve with vanilla ice cream. It makes it even better. For the full recipe, check out the details above. When picking peaches, look for ones that feel soft but not mushy. The skin should be bright and have a slight give when pressed gently. A sweet smell means they are ripe and ready to use. I recommend using fresh peaches for the best taste in your crisp. Adding spices can lift your peach crisp to new heights. Ground cinnamon and nutmeg are classic choices. They bring warmth and depth to the sweetness of the peaches. You can also try a pinch of ginger or cardamom for a unique twist. Just remember, a little goes a long way. You can easily tweak this recipe for different diets. For a gluten-free version, swap regular flour for almond flour or a gluten-free blend. If you're vegan, try using coconut oil instead of butter. You can also replace brown sugar with maple syrup or coconut sugar for a healthier option. Each change can give your crisp a new flavor profile. {{image_4}} You can make this peach crisp even better by adding berries. Blueberries, raspberries, or strawberries mix well with peaches. They add color and extra flavor. Just toss in about one cup of mixed berries with the peaches. You can also try other fruits like plums or apricots. The key is to keep the fruit mix to about six cups total. If you want a gluten-free version, it's easy! Swap the all-purpose flour with gluten-free flour. You can also use certified gluten-free oats. This way, you still get that delicious crisp without gluten. Make sure to check labels to avoid cross-contamination. To make this dessert vegan, replace the butter with coconut oil or vegan butter. You can also use maple syrup instead of brown sugar. This change adds a unique taste while keeping the crisp sweet. Make sure that your oats are also vegan, as some brands may add non-vegan ingredients. Enjoy this tasty dessert while staying true to your diet. For the full recipe, check the details above. To store your Simple Peach Crisp, let it cool first. Cover the dish with plastic wrap or aluminum foil. You can also transfer it to an airtight container. This helps keep it fresh. Store it in the fridge for up to three days. If you want to keep it longer, freezing is a good option. When you are ready to enjoy the leftovers, preheat your oven to 350°F (175°C). Place the crisp in an oven-safe dish. Cover it with foil to prevent burning. Heat for about 15-20 minutes. Check to see if it's warm all the way through. You can also microwave individual servings for about 30 seconds to 1 minute, depending on your microwave. Freezing Simple Peach Crisp is simple. If you want to freeze it, make sure it is cool first. Wrap it tightly in plastic wrap, then in aluminum foil. This helps prevent freezer burn. You can freeze it for up to three months. When you want to eat it, thaw it in the fridge overnight. Then, reheat it as mentioned above. Enjoy your delicious treat whenever you like! You can find the Full Recipe linked in the article for more details. Yes, you can use canned peaches! Just make sure to drain them well. Canned peaches are soft and sweet, which makes them a good option. They will work fine in your crisp. However, fresh peaches bring a unique flavor and texture. If you have fresh peaches, use them for the best taste. You will know the crisp is done when the topping is golden brown. The peaches should be bubbling around the edges. This usually takes about 30-35 minutes in the oven. If you want to be sure, you can insert a fork into the topping. It should feel firm and not mushy. Let it cool for a bit before serving. Simple Peach Crisp is delicious on its own, but you can add a few things. A scoop of vanilla ice cream on top is a classic choice. Whipped cream also works well. For a twist, try adding fresh berries or a drizzle of caramel sauce. These add extra flavor and make your dessert special. This blog post covered the essentials for making a Simple Peach Crisp. We explored key ingredients, preparation steps, and baking tips. You learned how to select the best peaches and how to customize the recipe for your needs. We also discussed storage options to keep your crisp fresh. In short, making peach crisp is fun and simple. With these tips, you can enjoy a tasty dessert anytime. So gather your ingredients and start baking!

Looking for an easy dessert that impresses? You’ll love this Simple Peach Crisp! With juicy peaches and a crisp topping, it’s a treat that anyone can make. I’ll walk you …

Read more

Categories Desserts

One-Pan Bold Honey BBQ Chicken Rice Delight

June 20, 2025 by Chef Miles
- 4 boneless, skinless chicken thighs - 1 cup jasmine rice, well-rinsed to remove excess starch - 2 cups chicken broth (homemade or low-sodium for better control) - 1/2 cup honey (preferably raw for a richer flavor) - 1/3 cup BBQ sauce (choose your favorite variety for personal flair) - 1 tablespoon soy sauce (or tamari for a gluten-free option) - 1 teaspoon garlic powder - 1 teaspoon onion powder - 1 teaspoon smoked paprika (adds a nice depth) - 1/2 teaspoon black pepper - 1 cup mixed bell peppers, diced (try a colorful mix of red, yellow, and green) - 1/2 cup green onions, finely chopped for garnish - Salt, to taste When picking chicken, choose thighs for moistness. They stay juicy during cooking. For rice, use jasmine. Its fragrant aroma enhances the meal. Always rinse jasmine rice to remove excess starch. This helps it cook fluffy. Raw honey gives the best flavor. It adds depth to the dish. For BBQ sauce, pick one you love. This choice makes the flavors pop. If you want a gluten-free meal, use tamari instead of soy sauce. You can swap chicken for firm tofu for a plant-based dish. Replace jasmine rice with brown rice if you prefer whole grains. Using vegetable broth instead of chicken broth adds flavor for a vegetarian version. You can also mix in more veggies, like carrots or broccoli, for extra nutrients! 1. First, you need to heat a large skillet over medium-high heat. Add a splash of oil, like olive oil. 2. Next, season your chicken thighs with salt, black pepper, garlic powder, onion powder, and smoked paprika. This adds great flavor. 3. Once the oil is hot, add the chicken to the skillet. Sear each side for 5-7 minutes until golden brown. 4. Remove the chicken and set it aside on a plate. This resting time is key. 5. In the same skillet, toss in the diced bell peppers. Sauté them for about 3-4 minutes. You want them to soften and brighten up. 6. Now, lower the heat to medium. Stir in the rinsed jasmine rice with the peppers. This helps the rice soak up the flavors. 7. In a bowl, whisk together honey, BBQ sauce, soy sauce, and chicken broth until smooth. Pour this mix over the rice and peppers. 8. Bring the mixture to a gentle boil. Once boiling, return the chicken to the skillet, nesting it partially in the rice. 9. Cover the skillet with a lid and reduce the heat to low. Let it simmer for 20-25 minutes. This cooks the chicken and flavors the rice. 10. After cooking, remove the skillet from heat. Let it sit, covered, for a few minutes. This resting time blends the flavors nicely. 11. Finally, fluff the rice with a fork and add salt if needed. Top with chopped green onions before serving. Searing chicken is vital. It gives your chicken a lovely crust and keeps it juicy. Use medium-high heat to achieve this. The oil should shimmer but not smoke. This way, your chicken cooks evenly and stays tender. When you sauté the bell peppers, stirring often is important. This helps them cook evenly and keeps their bright colors. You want them soft but not mushy. Adding rice to the pan with the peppers helps it absorb flavors. Rinsing the rice first removes excess starch. This keeps the rice fluffy instead of sticky. To achieve a perfect sear, don’t overcrowd the pan. If you add too much chicken, it won’t brown well. The chicken should have space to cook. Let the chicken sear without moving it for a few minutes. This forms a nice crust. Once you see brown edges, flip it over to sear the other side. Letting the chicken rest after cooking is crucial. This keeps the juices inside when you cut into it. Enjoy your meal! Make sure to check the Full Recipe for all the details. To boost the taste of your One-Pan Bold Honey BBQ Chicken Rice, follow these tips: - Season Well: Use salt and pepper generously on the chicken. - Use Fresh Ingredients: Fresh bell peppers and green onions add great flavor. - Experiment with Sauces: Try different BBQ sauces to find your favorite. - Add Herbs: Fresh herbs like parsley or cilantro can elevate the dish. - Let it Rest: Allow the dish to sit before serving. This helps flavors blend. Choosing the right pan makes cooking easier. Here are my top picks: - Cast Iron Skillet: This retains heat well and creates a nice crust on the chicken. - Non-Stick Pan: A good non-stick surface helps with easy cleanup. - Deep Sauté Pan: This provides enough room for rice and chicken to cook evenly. - Lid: Ensure your pan has a tight-fitting lid to trap steam and flavors. Avoid these errors for the best results: - Not Rinsing Rice: Always rinse jasmine rice to remove excess starch. - Overcrowding the Pan: Cook chicken in batches if your pan is too small. - Skipping the Resting Time: Letting the dish rest helps develop flavor. - Underestimating Liquid: Ensure you have enough broth for the rice to absorb. - Ignoring Temperature: Keep an eye on the heat to prevent burning. For the full recipe, check out the details above! {{image_4}} You can easily make this dish vegetarian or vegan. Replace the chicken with firm tofu or tempeh. Cut the tofu into cubes and press it to remove extra water. Marinate it in the honey BBQ sauce mix before cooking. Use vegetable broth instead of chicken broth. This keeps the flavors rich while making it plant-based. To boost nutrition, add more veggies. Try adding carrots, zucchini, or corn. Chop them small to cook evenly. You can mix them in with the bell peppers. This not only adds color but also more flavor. Fresh herbs like parsley or cilantro can also brighten the dish. If you love heat, add some spice to your dish. You can stir in crushed red pepper flakes or diced jalapeños. Mix these in with the rice and veggies before adding the broth. This will give your meal a nice kick. For a smoky flavor, consider adding chipotle sauce to the BBQ mix. To store leftovers, first let the dish cool down. Place the chicken and rice in an airtight container. This helps keep it fresh. Refrigerate the container for up to three days. Be sure to keep the dish well-sealed to avoid drying out. When you’re ready to enjoy the leftovers, reheat them on the stove. Add a splash of chicken broth to keep it moist. Heat on low, stirring gently until warm. You can also use the microwave if you prefer. Just cover the dish to trap steam, which keeps it from drying. If you want to save the dish for later, freezing is a great option. Let the chicken and rice cool completely. Place them in a freezer-safe bag or container. It will stay good in the freezer for up to three months. When you're ready to eat, thaw it in the fridge overnight. Then reheat following the guidelines above. This way, you can enjoy your One-Pan Bold Honey BBQ Chicken Rice anytime! I recommend using jasmine rice for this dish. Jasmine rice has a light, floral scent. It cooks well and pairs nicely with the honey BBQ flavor. Make sure to rinse it well to remove excess starch. This helps keep the rice fluffy and prevents it from becoming sticky. Yes, you can use bone-in chicken. Bone-in chicken adds more flavor as it cooks. Just keep in mind that it may take longer to cook. Ensure the internal temperature reaches 165°F. This way, you will enjoy tender and juicy chicken in your meal. To make this dish gluten-free, simply use tamari instead of soy sauce. Tamari is a great gluten-free option that tastes similar. Also, check your BBQ sauce for gluten. Many brands offer gluten-free BBQ sauce. This way, you can enjoy the same great taste without gluten. This dish is hearty enough on its own, but you can add sides. A fresh salad with greens and a simple vinaigrette works well. You could also serve steamed broccoli or roasted vegetables for color and nutrition. These sides enhance the meal and add more flavor. Leftovers will stay fresh in the fridge for about 3 to 4 days. Store them in an airtight container to keep them tasty. When you're ready to eat, just reheat in the microwave or on the stove. It’s a quick and easy way to enjoy your delicious meal again. This post shared all you need for One-Pan Bold Honey BBQ Chicken Rice. We covered quality ingredients, simple steps, and smart cooking tips. I also offered storage advice and answered common questions. Remember, cooking should be fun and easy. Use these tips to make tasty meals without stress. Enjoy your cooking journey!

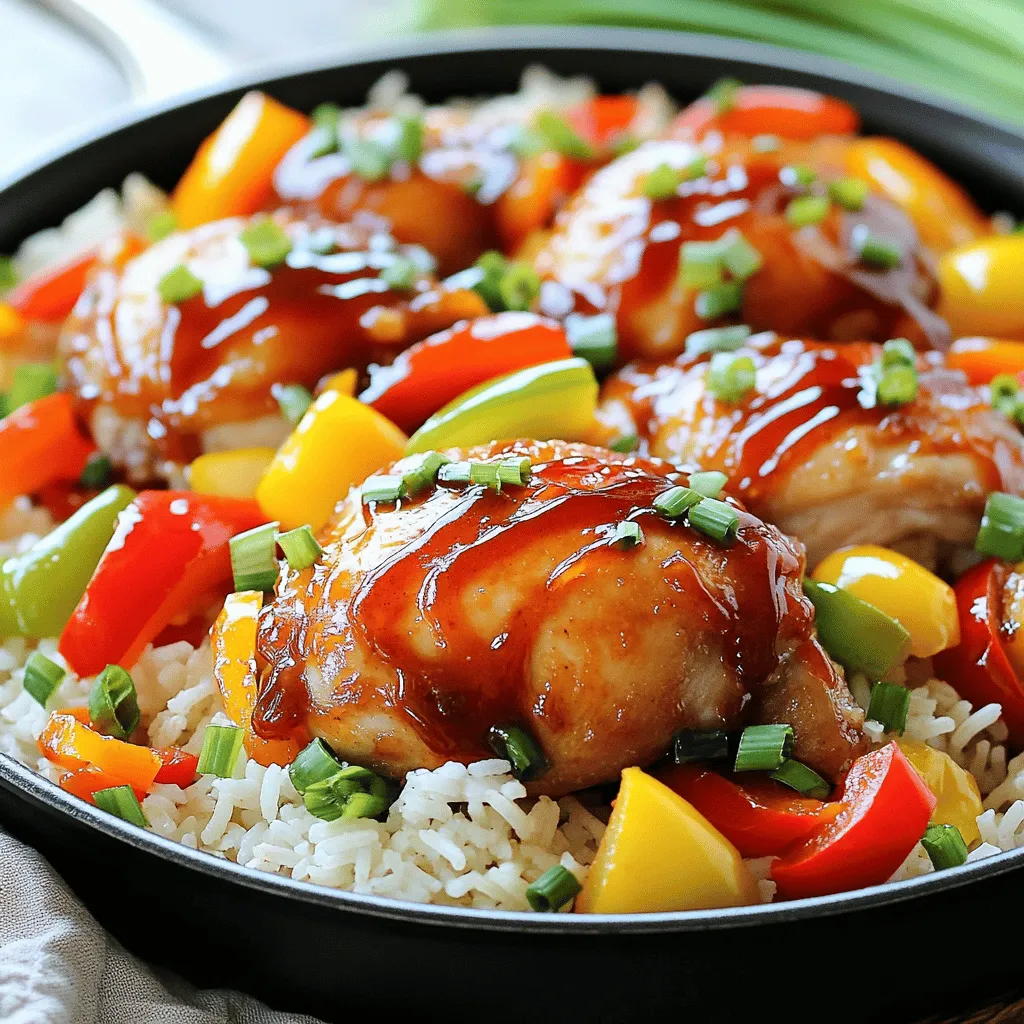
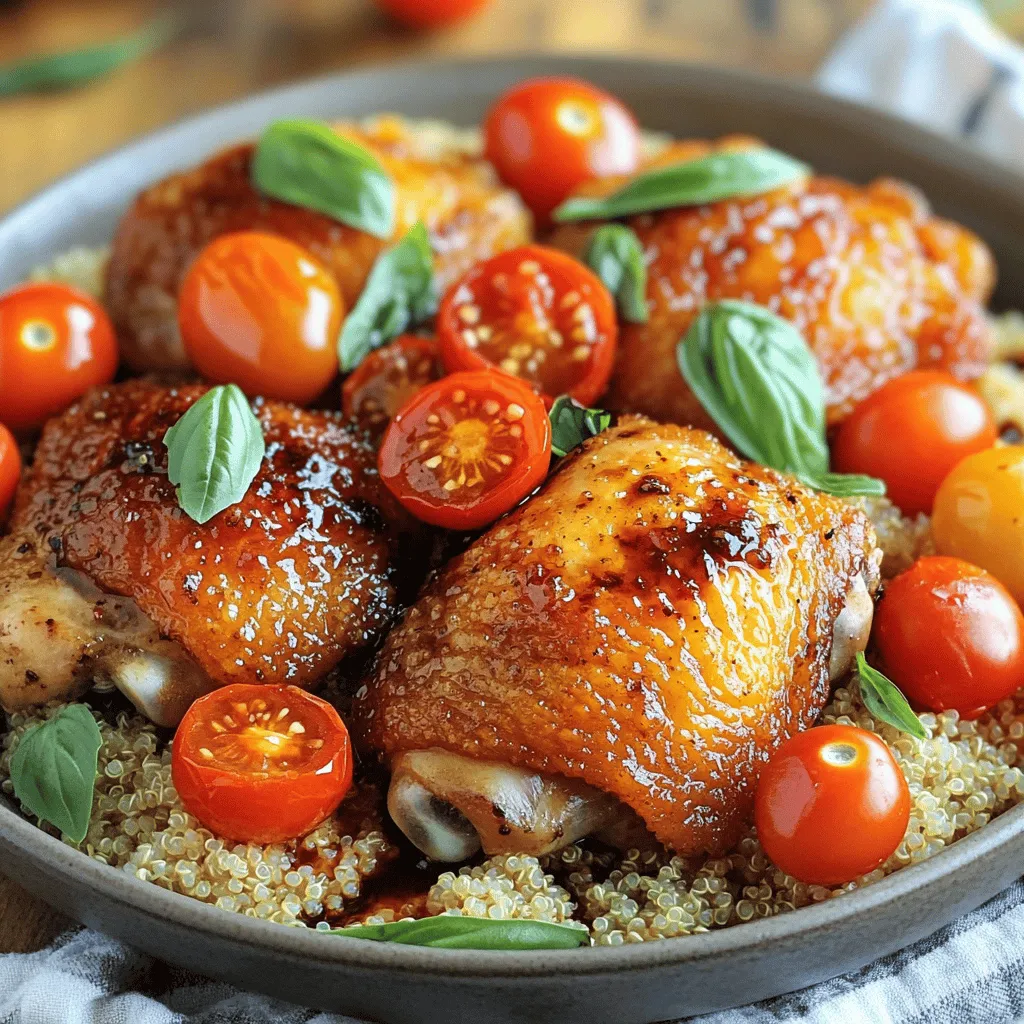
Are you ready to transform your dinner game? My One-Pan Bold Honey BBQ Chicken Rice is here to save your weeknight meal prep. This vibrant dish brings juicy chicken and …

Read more

Categories Dinner
Older posts
Newer posts
← Previous Page1 … Page85 Page86 Page87 … Page112 Next →

MELTED RECIPES

where delicious ideas melt into life, from stovetop to backyard. Always warm, simple, and irresistibly satisfying. 🍳🔥🧀

PAGES

Home About Contact Privacy Policy Terms & Conditions Cookie Policy GDPR Policy Copyright Policy Disclaimer

CATEGORIES

Appetizers Desserts Salads Breakfast Dinner

Contact

  • Pinterest
  • Mail
Copyright © 2025 Melted Recipes. All rights reserved.