Skip to content
Melted Recipes
  • Home
  • Appetizers
  • Desserts
  • Salads
  • Breakfast
  • Dinner
  • Privacy Policy
  • Contact
  • About

Chef Miles

Cucumber Sandwiches Fresh and Flavorful Delight

June 23, 2025 by Chef Miles
To make delicious cucumber sandwiches, you need the right ingredients. Here is a simple list: - 1 large cucumber, thinly sliced - 8 slices of whole grain bread - 4 ounces cream cheese, softened - 1 tablespoon fresh dill, finely chopped - 1 tablespoon fresh lemon juice - 1 teaspoon garlic powder - Salt and freshly ground pepper, to taste - 1 cup arugula or mixed salad greens These ingredients create a light and tasty treat. The cucumber adds crunch, while the cream cheese brings creaminess. Whole grain bread gives a nice texture. The dill, lemon juice, and garlic powder add flavor. You can make your cucumber sandwiches even better with some add-ins. Here are a few ideas: - Thin slices of radish for crunch - A sprinkle of paprika for a hint of spice - Sliced avocado for creaminess These options let you try new flavors. Feel free to mix and match to find your favorite! Cucumber sandwiches are not only tasty but also healthy. Each serving has about: - Calories: 150 - Protein: 5 grams - Fat: 6 grams - Carbohydrates: 22 grams - Fiber: 3 grams These sandwiches are low in calories and high in nutrients. They make a great snack or light meal. Enjoy them with a side salad or some fruit for a complete meal. For the full recipe, check the details above. Start by gathering your ingredients. You need cream cheese, dill, lemon juice, garlic powder, salt, and pepper. In a medium bowl, mix the softened cream cheese with the dill and lemon juice. Add garlic powder, salt, and pepper. Stir until smooth. This creamy spread gives the sandwiches a rich flavor. Now, lay out the bread on a clean surface. Take a slice and spread a generous layer of the cream cheese mixture on it. Make sure to reach the edges. Next, layer thin cucumber slices over the cream cheese. Cover the entire slice with cucumber for a nice crunch. On top of the cucumbers, add a handful of arugula or mixed greens. This adds freshness and color. Finally, place another slice of bread on top, cream cheese side down. To make the sandwiches look nice, trim the crusts off with a sharp knife. Cut each sandwich into quarters for easy eating. If you want to impress, add thin radish slices on top of the cucumbers. These little touches make your cucumber sandwiches pop! For the full recipe, check the details above. Slice cucumbers thinly for the best taste. A sharp knife helps create even slices. Aim for about 1/8 inch thick. This size gives a nice crunch and flavor in each bite. You can also use a mandoline for perfect slices. Remember to wash the cucumber before slicing. This step removes dirt and germs. Soggy sandwiches are a common problem. To keep your sandwiches dry, salt the cucumber slices first. Let them sit for about 10 minutes. This process draws out extra moisture. After that, pat them dry with a paper towel. Another tip is to spread cream cheese on both slices of bread. This extra layer acts as a barrier. Cucumber sandwiches are light and refreshing. They pair well with a variety of drinks. Try serving them with iced tea or lemonade for a classic touch. You can also add some fruit on the side. Fresh strawberries or grapes complement the flavors nicely. For a full meal, serve them with a light soup or salad. For more details on how to make these sandwiches, check the Full Recipe. {{image_4}} You can easily make cucumber sandwiches vegan. Instead of cream cheese, use hummus. Hummus adds a nice, creamy texture and rich flavor. Choose your favorite flavor, like roasted red pepper or garlic. Spread it evenly on the bread. Then, add thin cucumber slices and a sprinkle of salt. For extra crunch, toss in some fresh sprouts. This simple swap makes your sandwiches plant-based and tasty. For a gluten-free version, use gluten-free bread. Many brands offer great-tasting options now. Follow the same steps as the original recipe. Spread the cream cheese mixture on the gluten-free slices. You can also use a gluten-free wrap if you prefer. Fill it with cucumbers and greens, just like before. Enjoy your fresh and crunchy sandwiches without any gluten. You can get creative with your spreads. Try avocado spread for a creamy, healthy twist. Mash ripe avocado with some lime juice and salt. This spread pairs well with cucumber. You can also use pesto for a burst of flavor. Layer it under the cucumbers for a herbaceous kick. Other options include yogurt-based spreads or even a spicy mustard. Feel free to mix and match your favorite flavors to make each sandwich unique. For the full recipe, check out the Crispy Cucumber Delight Sandwiches. To keep your cucumber sandwiches fresh, store any leftovers in the fridge. Place them in an airtight container. This helps prevent them from drying out. Make sure to eat them within two days. The longer they sit, the soggier they get. Freezing cucumber sandwiches isn’t the best idea. Cucumbers hold water, which turns mushy when thawed. Instead, you can freeze the cream cheese mixture. Just store it in a freezer-safe bag. When you’re ready, spread it on fresh bread with cucumbers. Use a flat, shallow container for storing sandwiches. This keeps them from getting squished. Line the container with wax paper or parchment. This helps absorb excess moisture. You can also cover the sandwiches with a damp paper towel before sealing the container for extra freshness. Yes, you can make cucumber sandwiches ahead of time. Just remember, they taste best fresh. If you prepare them a few hours in advance, keep them covered in the fridge. Wrap them tightly in plastic wrap to prevent drying out. If you store them too long, the bread may get soggy. For best flavor, enjoy them within 24 hours. The best bread for cucumber sandwiches is soft and fresh. Whole grain bread adds a nice texture and flavor. White bread also works well for a classic taste. You can try rye or sourdough for a twist. Just avoid bread that is too crusty. It can make biting into the sandwich difficult. Adding protein to cucumber sandwiches is easy. You can spread a layer of hummus or add slices of turkey or chicken. Cream cheese is a great base and can be mixed with smoked salmon. Another option is to include hard-boiled eggs, sliced thinly. These choices add flavor and keep you full longer. For a fun and tasty cucumber sandwich, check out the Full Recipe! Cucumber sandwiches are a delightful treat to make and enjoy. We explored key ingredients, efficient preparation steps, and helpful tips for perfect sandwiches. You learned about variations, storage info, and answers to common questions. Now, you can create tasty cucumber sandwiches that impress everyone. With these tips, you can enhance flavor, keep them fresh, and serve something special. Get creative and enjoy the process!

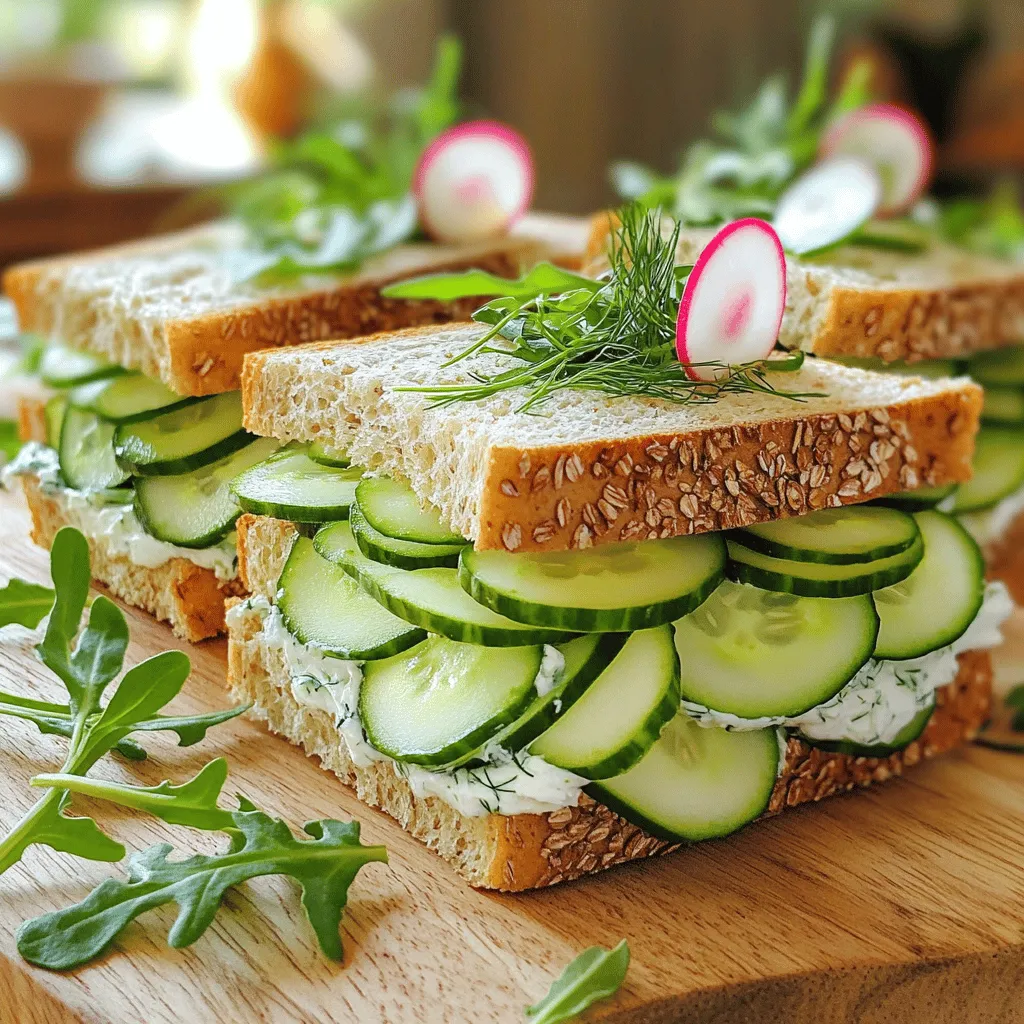
If you’re looking to impress your guests or treat yourself, cucumber sandwiches are the way to go. Light, crisp, and packed with flavor, they make a perfect snack or meal. …

Read more

Categories Appetizers

Cheesy Chicken Bake Tasty Comfort Food Delight

June 23, 2025 by Chef Miles
To make this cheesy chicken bake, you need a few key ingredients. Each one adds its own flavor and texture. Here’s what you’ll need: - 2 cups cooked chicken, shredded - 1 cup cooked quinoa - 1 cup broccoli florets, steamed - 1 cup sharp cheddar cheese, shredded - ½ cup cream cheese, softened to room temperature - ½ cup plain Greek yogurt - 2 cloves garlic, finely minced - 1 teaspoon smoked paprika - ½ teaspoon salt, or to taste - ½ teaspoon freshly ground black pepper - 1 tablespoon olive oil - ¼ cup green onions, finely chopped (for garnish) These ingredients work together to create a creamy and cheesy dish. The cooked chicken adds protein. Quinoa gives a nice texture and is full of nutrients. The broccoli adds color and crunch. The cream cheese and Greek yogurt create a rich sauce. The garlic and spices bring in flavor. Don’t skip the green onions for garnish; they add a fresh touch. If you want to see how to put these ingredients together, check the Full Recipe. - Step 1: Preheat the oven to 375°F (190°C). This sets the right temperature for baking. - Step 2: In a large bowl, combine 2 cups of shredded cooked chicken, 1 cup of cooked quinoa, 1 cup of steamed broccoli florets, and ½ cup of sharp cheddar cheese. Mix them well to blend the flavors. - Step 3: In a different bowl, blend ½ cup of softened cream cheese and ½ cup of plain Greek yogurt until smooth. Add 2 cloves of minced garlic, 1 teaspoon of smoked paprika, ½ teaspoon of salt, and ½ teaspoon of black pepper. Mix until everything is well combined. - Step 4: Pour the creamy mixture over the chicken and veggie blend. Stir gently to coat all ingredients evenly. - Step 5: Lightly grease a baking dish with 1 tablespoon of olive oil. This helps prevent sticking. Carefully transfer the chicken mixture into the dish, spreading it evenly. - Step 6: Bake in the preheated oven for 25-30 minutes. The cheese should turn a lovely golden brown. Once baked, let it cool for a few minutes. Enjoy this cheesy chicken bake as a cozy meal! For the full recipe and more tips, check out the Full Recipe. - Ensure even cooking by mixing ingredients well. This step helps each bite taste great. - Allow to cool for 5 minutes before serving. This helps the dish set and makes serving easier. - Garnish with green onions before serving. This adds color and a fresh taste. - Serve with a side salad for a balanced meal. The crunch pairs nicely with the creamy bake. - Double the cheese for an extra cheesy experience. More cheese means more flavor! - Incorporate different types of cheese for flavor variations. Try mozzarella or pepper jack for a twist. For the complete recipe, check out the [Full Recipe]. {{image_4}} You can change the protein in this dish. Use rotisserie chicken or turkey for quick prep. These options save time and still taste great. If you want a vegetarian meal, try tofu or chickpeas. Both add protein and a nice texture. Swap out broccoli for spinach or kale. This change gives you more nutrients. You can also add bell peppers or zucchini. These veggies add color and a sweet flavor. Mixing different vegetables keeps the dish fresh and exciting. For gluten-free needs, check all labels for certified gluten-free ingredients. This step ensures everyone can enjoy it. If you follow a dairy-free diet, replace cream cheese and yogurt with dairy-free versions. This way, you still get that creamy texture without dairy. Feel free to explore these variations to suit your taste and dietary needs, making your cheesy chicken bake truly your own. For more details and a full list of ingredients, check out the Full Recipe. After enjoying your cheesy chicken bake, you might have some leftovers. Store them in an airtight container. This keeps the flavors fresh. You can refrigerate them for up to 3-4 days. If you want to save them longer, freeze portions. They can last in the freezer for 2-3 months. Just make sure to wrap them tightly. When you’re ready to eat the leftovers, reheating is key. The oven gives the best texture. Preheat your oven to 350°F (175°C). Place the dish inside for about 15-20 minutes. If you need a quick fix, the microwave works too. Just remember to add a splash of broth or water. This helps keep the dish moist while it reheats. Enjoy your cheesy chicken bake again! What can I serve with Cheesy Chicken Bake? You can serve Cheesy Chicken Bake with a side salad. Mixed greens add crunch and freshness. Garlic bread also pairs well, adding a nice touch of flavor. You can even enjoy it with steamed veggies for a healthy balance. How do I make Cheesy Chicken Bake spicier? To spice things up, add diced jalapeños or red pepper flakes. You can also use pepper jack cheese instead of cheddar for a kick. Mixing in some hot sauce will enhance the heat as well. Adjust to your taste! Can I use uncooked chicken in this recipe? Using uncooked chicken is not recommended. It won’t cook evenly in the baking time. Always use cooked chicken for safety and texture. Shredded rotisserie chicken is a great time-saver! What are the calories per serving? Each serving has about 400 calories. This varies based on the exact ingredients used. If you want a lower-calorie version, consider using less cheese or swapping out the cream cheese for Greek yogurt. Is this recipe suitable for meal prep? Yes, Cheesy Chicken Bake is perfect for meal prep! You can prepare it ahead of time and store it in the fridge. It reheats well, making it a great option for busy weeknights. How do I prevent the dish from drying out? To keep it moist, don’t overbake the dish. Check the cheese around 25 minutes. Adding a bit more yogurt or cream cheese can also help keep the dish creamy and flavorful. Can I make this in advance? Absolutely! You can prepare the dish ahead of time. Store it in the fridge before baking. Just bake it when you’re ready to eat. This makes it a super easy and comforting meal! For the complete cooking instructions, check the Full Recipe. This Cheesy Chicken Bake is simple and delicious. You learned about the key ingredients, easy steps, and tips for the best results. Try different proteins and veggies to match your taste. Store leftovers well to enjoy later. I hope you feel inspired to make this dish your own. Share it with friends and family for a tasty meal! Enjoy every bite and have fun cooking!

Looking for a warm and cheesy dish that brings comfort to your table? This Cheesy Chicken Bake is the perfect solution! Packed with tender chicken, nutritious quinoa, and vibrant veggies, …

Read more

Categories Dinner

Creamy Pasta Salad Wholesome and Refreshing Dish

June 23, 2025 by Chef Miles
- 2 cups rotini pasta - 1 cup cherry tomatoes, halved - 1 cup cucumber, diced - 1/2 cup red bell pepper, chopped - 1/4 cup red onion, finely chopped - 1 cup cooked and cooled chickpeas - 1/2 cup Greek yogurt - 1/4 cup mayonnaise - 2 tablespoons fresh lemon juice - 1 tablespoon Dijon mustard - 1 teaspoon garlic powder - Salt and freshly ground black pepper to taste - Fresh parsley, finely chopped, for garnish I choose these ingredients to create a vibrant and tasty pasta salad. The rotini pasta holds the creamy dressing well. Cherry tomatoes add a sweet burst, while cucumber gives a nice crunch. Red bell pepper and red onion bring color and flavor. Chickpeas add protein and fiber. The dressing, made with Greek yogurt and mayo, provides creaminess and tang. Lemon juice and Dijon mustard enhance the flavor, while garlic powder adds depth. Fresh parsley gives a bright finish. You can add more to your pasta salad for even better taste. Here are some great options: - Suggested vegetables: You can try adding diced carrots, sweet corn, or peas for extra color and crunch. - Protein options: Grilled chicken, shrimp, or tofu are great choices if you want more protein. - Cheese and other mix-ins: Feta cheese, mozzarella balls, or olives can add a nice twist. These add-ins let you make the salad your own and play with different flavors. To cook the rotini, bring a large pot of salted water to a boil. Add the pasta and stir it right away. This helps prevent sticking. Cook according to the package instructions until it is al dente. Al dente means the pasta is firm when bitten. After cooking, drain the pasta in a colander. Rinse it under cold water. This stops the cooking and keeps the pasta perfect. In a big mixing bowl, combine the cooled rotini with the cherry tomatoes, cucumber, bell pepper, red onion, and chickpeas. Use a gentle touch when mixing. Toss the ingredients lightly to avoid breaking the pasta. You want an even mix of flavors in every bite. For the dressing, grab a medium-sized bowl. Add Greek yogurt, mayonnaise, lemon juice, Dijon mustard, garlic powder, and a pinch of salt and pepper. Use a whisk to blend everything until it is smooth. If you want a different taste, adjust the seasoning. Add more lemon juice for tang or extra salt for flavor. Once the dressing is ready, pour it over the salad mixture. Use a spatula to fold the dressing gently into the salad. This ensures all the pasta and vegetables are coated well. You can find the full recipe for this delicious creamy pasta salad at the beginning of the article. Chilling your creamy pasta salad is key. It allows the flavors to mix well. I suggest refrigerating for at least 30 minutes. This wait helps the salad taste even better. To prevent your pasta from sticking, rinse it right after cooking. Use cold water to cool it down. This stops the cooking process and keeps each piece separate. You can add a bit of oil too, which helps keep the pasta loose. If you want a lighter dish, try low-fat yogurt instead of Greek yogurt. You can also swap the mayonnaise for more yogurt. For a vegan version, use plant-based yogurt or tofu. These options keep the creaminess without dairy. To customize the dressing, add herbs or spices. If you prefer it tangy, add more lemon juice. For a milder taste, reduce the garlic powder. This way, you can create a dressing that fits your taste perfectly. For the complete recipe, check out the [Full Recipe]. {{image_4}} If you want to switch up the pasta, many options exist. You can choose penne, fusilli, or even farfalle. Each type brings its own charm. Penne has a smooth surface, perfect for holding dressings. Fusilli twists can catch bits of veggies and dressing, adding great flavor. Farfalle, with its bow tie shape, can make your salad look fun and inviting. Each pasta type changes the texture and feel of your salad. Changing the dressing can make your pasta salad unique. You can use ranch, vinaigrette, or even pesto. Each dressing brings its own taste. For a zesty twist, try adding lime juice instead of lemon. You can also blend in herbs like basil or dill for a fresh kick. Consider seasonal ingredients too. In summer, add fresh corn or peas for sweetness. In fall, roasted squash or sweet potatoes add warmth. These small changes can make your creamy pasta salad a delightful surprise every time. For a complete experience, refer to the Full Recipe for ideas that will inspire your next creation. To keep your creamy pasta salad fresh, refrigerate it right away. Store it in an airtight container. This helps to keep the flavors intact. If you don’t have an airtight container, use a bowl covered tightly with plastic wrap. Make sure to push out any excess air before sealing. You can expect your creamy pasta salad to stay fresh for about 3 to 5 days in the fridge. After that, the quality starts to drop. Look for signs of spoilage. If the salad smells sour or has a slimy texture, it’s time to toss it. Also, if you see any mold, discard it immediately. Keeping an eye on freshness ensures you enjoy this delight at its best. Yes, you can make this pasta salad ahead of time. Prepare the salad and store it in the fridge. Just remember to keep it in an airtight container. This helps keep it fresh. Making it a day before can deepen the flavors. However, if you make it too early, the veggies may get soft. So, try to enjoy it within two days for the best taste. If you don’t have Greek yogurt, you can use sour cream. Cream cheese is another option too. These swaps change the flavor slightly. Sour cream gives a tangy taste, while cream cheese adds a rich creaminess. Both options still keep the salad creamy and delicious. Yes, you can easily make this salad gluten-free. Use gluten-free rotini pasta. Many brands offer tasty options made from rice or corn. For a gluten-free dressing, check the labels on yogurt and mayonnaise. Some brands have gluten-free versions. This way, everyone can enjoy this creamy dish! This pasta salad is both simple and flavorful, with the right mix of ingredients. We explored essential components, optional add-ins, and step-by-step instructions to achieve the perfect dish. Remember to chill your salad for the best taste and consider variations to keep it exciting. Proper storage ensures it stays fresh, so enjoy this dish now and later. By following these tips, you can make a creamy pasta salad that fits your taste and dietary needs. Happy cooking!

Are you ready to whip up a dish that is both creamy and refreshing? In this blog post, I’ll guide you through how to create a delicious creamy pasta salad …

Read more

Categories Salads

Honey Garlic Chicken Breasts Easy and Tasty Recipe

June 23, 2025 by Chef Miles
For this tasty dish, you will need: - 4 boneless, skinless chicken breasts - 1/2 cup honey - 1/4 cup low-sodium soy sauce - 4 cloves garlic, finely minced - 1 tablespoon fresh ginger, grated - 1 tablespoon apple cider vinegar - 2 tablespoons extra virgin olive oil - Salt and freshly ground pepper to taste These ingredients bring out the sweet and savory flavors. The honey gives a sticky glaze, while the garlic adds a nice kick. To make your dish pop, consider these garnishes: - Sesame seeds - Chopped green onions These add texture and color, making your meal more appealing. You can swap ingredients if needed: - Use maple syrup instead of honey for a different sweet taste. - If you don't have soy sauce, coconut aminos work well. - For a spicy kick, add red pepper flakes or sriracha to the marinade. These swaps let you customize the recipe to your taste. Enjoy your cooking adventure with this full recipe! Start by making the marinade. In a large bowl, mix together the honey, soy sauce, minced garlic, grated ginger, and apple cider vinegar. Stir until everything blends well. This mix gives the chicken its sweet and savory flavor. Set aside a bit of this marinade, about 1/4 cup, to use later for glazing. This step ensures the chicken gets a tasty coating. Once your marinade is ready, it's time to marinate the chicken. Take your chicken breasts and place them in the bowl with the marinade. Make sure they are fully covered. Cover the bowl with plastic wrap and put it in the fridge. Let the chicken sit for at least 30 minutes. If you have time, marinating for up to 2 hours will give you even better flavor. Now, let’s cook the chicken. Heat up a large skillet over medium-high heat and add the olive oil. Wait until it shimmers. Carefully take the chicken out of the marinade, discarding any leftover marinade that touched raw meat. Gently place the chicken in the hot skillet. Cook each side for about 5-7 minutes. You want a nice golden brown color, and the chicken should reach 165°F (75°C) inside. After cooking, pour the reserved marinade into the skillet. Let it simmer for 2-3 minutes. This will thicken the sauce and make it sticky. The chicken will soak up all that yummy flavor. Once done, garnish with sesame seeds and chopped green onions. Your honey garlic chicken is ready to serve hot! To make juicy chicken breasts, start with even thickness. Use a meat mallet to pound them if needed. This helps them cook evenly. Always preheat your skillet for a good sear. Searing locks in the juices and boosts flavor. Remember to let the chicken rest for a few minutes after cooking. This step keeps the chicken moist and tender. To thicken your marinade, you can use cornstarch or flour. Mix one tablespoon of cornstarch with two tablespoons of water. Stir it into your sauce while it simmers. This gives you a glossy glaze that clings to the chicken. You can also let the sauce simmer longer to reduce it naturally. This will concentrate the flavors and create a thicker texture. For a beautiful plate, serve your chicken over a mound of fluffy rice. Drizzle the thickened glaze generously on top. Add a sprinkle of sesame seeds and chopped green onions for color. A few sprigs of fresh herbs can also brighten the dish. Use a white plate to make the colors pop. This will impress your guests and make the meal more enjoyable. {{image_4}} You can add a rainbow of veggies to your honey garlic chicken. Try using bell peppers, broccoli, or snap peas. Start by sautéing the veggies in the pan before adding the chicken. This way, the veggies soak up the tasty sauce. Once they are tender, add the chicken and glaze it all together. This makes a complete meal full of colors and flavors. For a kick, you can make a spicy version. Simply add red chili flakes or sriracha to the marinade. Start with half a teaspoon and adjust to your taste. The heat pairs well with the sweet honey. Cook it the same way as the original recipe. The glaze will be sweet and spicy, which is perfect for those who like a bit of heat. You don't have to stick to chicken. This recipe works great with shrimp or tofu. For shrimp, adjust the cooking time. Cook them until they turn pink, usually 2-3 minutes per side. If using tofu, press it first to remove excess water. Then, cut it into cubes and follow the same steps. Both options will still provide that delicious honey garlic flavor. Check out the Full Recipe for more details! To store your honey garlic chicken, let it cool first. Place the chicken in an airtight container. You can keep it in the fridge for up to three days. If you want to save it longer, freezing is a great option. When you're ready to eat leftovers, reheat gently. Use a microwave or skillet. If using a microwave, cover your chicken to keep it moist. Heat for about one to two minutes, checking every 30 seconds. In a skillet, add a splash of water and heat on low. This keeps the chicken juicy. Freezing is simple. Wrap the chicken tightly in plastic wrap, then foil. This protects it from freezer burn. It can stay frozen for up to three months. When you're ready to eat it, thaw it in the fridge overnight for the best results. Enjoy your sticky honey garlic chicken whenever you want! For the complete cooking process, check the Full Recipe. You should marinate honey garlic chicken for at least 30 minutes. This helps the chicken soak up the flavors. For even better taste, you can marinate it for up to 2 hours. Just don’t go over two hours, as the chicken may get too salty. Yes, you can use bone-in chicken breasts. Just remember that bone-in pieces may take longer to cook. Ensure the internal temperature reaches 165°F or 75°C. Adjust cooking time to allow the meat to cook evenly. Honey garlic chicken pairs well with many side dishes. Here are some tasty options: - Steamed white rice - Sautéed green beans - Roasted broccoli - Garlic mashed potatoes - Simple garden salad These sides complement the sweet and savory flavors of the chicken. You can mix and match based on your taste. For the full recipe, check out the [Full Recipe]. You learned how to make honey garlic chicken breasts with key ingredients and steps. We covered tips for cooking, thickening sauce, and serving with style. You also explored variations and storage ideas to make this dish your own. Honey garlic chicken is simple, tasty, and adaptable. I hope you feel excited to try it out, impressing your family and friends with your skills. Cook it your way, and enjoy every bite!

Are you ready to impress your family with a simple, yet delicious meal? Honey Garlic Chicken Breasts are quick to make and bursting with flavor. With just a few ingredients, …

Read more

Categories Dinner

Easy Tomato Galette Simple and Delicious Recipe

June 23, 2025 by Chef Miles
To make an easy tomato galette, you need fresh and simple ingredients. Here’s what you’ll need: - 1 sheet of store-bought puff pastry or homemade pie crust - 4-5 ripe tomatoes, assorted colors and varieties - 1 cup shredded fresh mozzarella cheese - 1/2 cup creamy ricotta cheese - 2 tablespoons fresh basil, finely chopped - 1 tablespoon extra virgin olive oil - 1 teaspoon garlic powder - Sea salt and freshly cracked black pepper to taste - 1 large egg (for egg wash) These ingredients bring together a burst of flavor. The tomatoes shine with their taste and color. Cheese adds creaminess, and basil gives a fresh touch. This mix makes the galette both simple and delicious. You can find the full recipe above to guide you through the steps. Enjoy gathering these ingredients! 1. Preheat your oven to 400°F (200°C). This step is key for even baking. 2. Roll out the pastry into a 12-inch circle. Place it on a baking sheet lined with parchment. 3. In a bowl, mix the ricotta, half of the mozzarella, basil, garlic powder, salt, and pepper. Spread this cheese mixture evenly over the pastry, leaving a 2-inch border. 1. Layer the sliced tomatoes on top of the cheese. Overlap them to create a nice look. 2. Drizzle olive oil over the tomatoes. Sprinkle the rest of the mozzarella on top for extra flavor. 1. Fold the edges of the pastry over the tomatoes. Create pleats for a rustic look. It doesn't have to be perfect. 2. Beat the egg in a small bowl and brush it on the folded edges. This gives a nice golden color when baked. 3. Place the galette in the oven. Bake for 30-35 minutes until the crust is golden and the tomatoes are soft. You can find the full recipe above to guide you through these steps. Enjoy making your easy tomato galette! - Choosing the right tomatoes: Use ripe tomatoes for the best flavor. Look for heirloom or vine-ripened types. Their colors and tastes add depth to your galette. - Keeping the pastry cold before baking: Cold pastry makes a flakier crust. Chill it in the fridge for 15 minutes before baking. This step helps the crust hold its shape. - Egg wash for a golden finish: Brush the edges of your galette with beaten egg. This gives the crust a nice golden color. It also makes it look more appealing. - Adding spices to the cheese mixture: You can add spices like oregano or red pepper flakes. This boosts the flavor of the cheese and makes every bite exciting. - Using different cheese combinations: Try mixing cheeses like goat cheese or parmesan. Each cheese adds its unique taste and creaminess to the dish. - Incorporating fresh herbs: Fresh herbs like thyme or rosemary can enhance flavor. Sprinkle them on top before baking for a fragrant twist. {{image_4}} You can easily change the taste of your galette with some fun additions. Here are two great ideas: - Spinach and feta for a Mediterranean twist: Add fresh spinach and crumbled feta cheese to your cheese layer. This mix gives a bright and tangy flavor that pairs well with tomatoes. It also boosts the nutrition of your dish! - Caramelized onions for added sweetness: Sauté some onions in olive oil until they are soft and golden. Spread them over the cheese mixture before adding tomatoes. The sweet taste of the onions adds depth and makes every bite special. Using seasonal ingredients makes your galette even better. Here are two tasty options: - Incorporating summer vegetables like zucchini: Slice fresh zucchini thinly and layer it with the tomatoes. This adds a lovely crunch and makes the dish colorful. You can also grill the zucchini for a smoky flavor. - Using seasonal pesto instead of cheese: Swap out the cheese for your favorite pesto in summer. Spread the pesto on the pastry before adding tomatoes. This creates a fresh and vibrant taste that shines with seasonal produce. These variations let you get creative with your Easy Tomato Galette. Feel free to mix and match! For the full recipe, check out the details above. To keep your tomato galette fresh, store leftovers in the fridge. Place the galette in an airtight container. If you want to enjoy it later, wrap it tightly with plastic wrap before putting it in the container. This keeps the crust from getting soggy. Your galette should stay good for about three days. For longer storage, you can freeze the galette. First, let it cool completely. Then, wrap it in plastic wrap and aluminum foil. This will prevent freezer burn. It can last up to two months in the freezer. When you're ready to eat, just thaw it overnight in the fridge. To reheat your galette in the oven, preheat it to 350°F (175°C). Place the galette on a baking sheet. Heat it for about 15-20 minutes. This method keeps the crust nice and crisp. If you need a quick option, use the microwave. Place a slice on a microwave-safe plate. Cover it with a damp paper towel. Heat it for about 30 seconds. Check to see if it's warm enough. If not, heat in 10-second bursts until it's ready. This method is fast but may make the crust a bit soft. Enjoy your tomato galette again with these easy tips! The best tomatoes for a galette are ripe and juicy. I love using heirloom tomatoes. They add great color and taste. Look for a mix of red, yellow, and orange for an eye-catching dish. Yes, you can use homemade dough. It’s a fun way to add your personal touch. Just make sure it’s rolled thin for the best texture. The galette lasts about three days in the fridge. Store it in an airtight container to keep it fresh. Reheat it in the oven for a crispy crust. Yes, you can prep the galette a few hours ahead. Just assemble it and store it in the fridge. Bake it just before serving for the best taste. Tomato galette pairs well with a simple salad. A green salad with vinaigrette adds freshness. You can also serve it with a light soup for a complete meal. For a fun twist, serve it with a side of pesto for dipping. This article showed you how to make a delicious tomato galette. You learned about key ingredients like ripe tomatoes and two types of cheese. I shared steps, tips, and variations to help you create your own unique dish. Remember, choosing fresh ingredients makes a big difference. Try new flavors and don’t be afraid to experiment. Enjoy your cooking and impress your friends with this simple yet tasty galette!

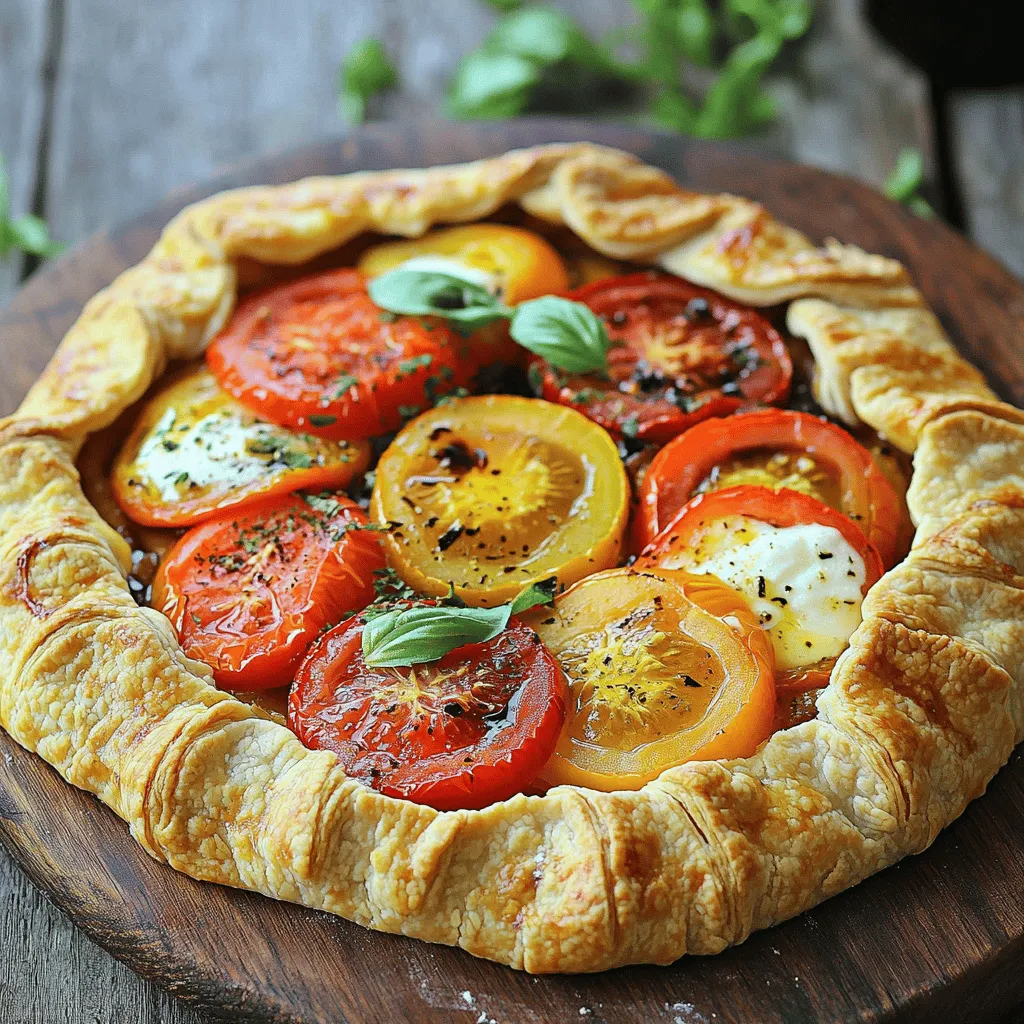
If you love fresh tomatoes and easy recipes, this Easy Tomato Galette is for you! With a crisp crust, creamy cheeses, and vibrant tomatoes, it’s a perfect dish for any …

Read more

Categories Dinner

Crispy Baked Chicken Tenders Flavorful and Easy Dish

June 22, 2025 by Chef Miles
For this recipe, you need fresh chicken breast. Use about 1 lb, cut into strips. The marinade is key for juicy chicken. Soak the strips in 1 cup of buttermilk. This helps tenderize the meat and adds flavor. You can marinate for 30 minutes or leave it overnight for more taste. The dry coating gives the tenders their crispy crunch. You need: - 1 cup all-purpose flour - 1 cup Panko breadcrumbs - 1 teaspoon garlic powder - 1 teaspoon onion powder - 1 teaspoon smoked paprika - 1/2 teaspoon cayenne pepper (optional) - Salt and pepper to taste Mix these ingredients well in a bowl. The flour helps the breadcrumbs stick. Panko breadcrumbs add extra crunch. The spices bring out great flavor, so don’t skip them! To make your chicken tenders even tastier, think about adding some extra ingredients. You can use: - Grated Parmesan cheese for a cheesy crust - Fresh herbs like parsley or thyme for a hint of freshness - Lemon zest for a bright, zesty touch These additions can elevate your dish and impress your guests. Follow the Full Recipe for guidance on how to bring it all together! Start by preheating your oven to 400°F (200°C). This step is key for crispiness. Use parchment paper on your baking sheet to prevent sticking. It makes cleanup easy and keeps the tenders intact. In a medium bowl, add the chicken strips. Pour in the buttermilk, covering each piece. This helps keep the chicken juicy. Cover the bowl with plastic wrap and place it in the fridge. Let it sit for at least 30 minutes, or longer for better taste. In a separate bowl, mix the all-purpose flour, garlic powder, onion powder, smoked paprika, cayenne pepper, and a good pinch of salt and pepper. This blend gives the chicken a flavorful crust. Whisk it well to combine all the spices evenly. Take the chicken out of the buttermilk. Let the excess drip off. First, coat each strip in the flour mixture. Make sure each piece is well-covered. Next, dip it into the Panko breadcrumbs. Press lightly to help them stick. This step is crucial for that crispy finish. Arrange the coated chicken on the baking sheet. Place them in a single layer, leaving space between each piece. Lightly spray or drizzle the tops with cooking spray or olive oil. Bake for 15-20 minutes. Flip them halfway through to ensure even cooking. They should be golden brown and reach an internal temperature of 165°F (75°C). Once baked, let the chicken tenders cool for a few minutes on the baking sheet. This helps them stay crispy. Serve them hot with your favorite dipping sauce. Enjoy every crunchy bite! For the full recipe, check out the details shared earlier. To get the best crunch, start with the chicken. Use fresh chicken breast cut into strips. Marinating in buttermilk helps. The acids in buttermilk tenderize the meat. This also adds flavor. After marinating, coat the chicken in flour first. This helps the breadcrumbs stick better. Use Panko breadcrumbs for extra crunch. They are lighter and crispier than regular breadcrumbs. A light spray of oil before baking helps too. It promotes browning and crispiness as the chicken cooks. One common mistake is overcrowding the baking sheet. Leave space between each chicken tender. This allows hot air to circulate. If you don't, they will steam instead of crisp. Another mistake is skipping the marination step. It may seem fast, but marinating adds so much flavor. Avoid using too much flour or breadcrumbs. This can make the coating thick and soggy. Finally, don't forget to flip them halfway through cooking. This ensures they brown evenly on both sides. For this recipe, a few tools can help. Use a sharp knife to cut the chicken easily. A whisk is great for mixing the dry ingredients. Bowls for marinating and breading are essential. Parchment paper keeps the chicken from sticking. A baking sheet is needed for cooking. I also recommend a meat thermometer. This ensures your chicken reaches 165°F (75°C). Having these tools ready makes the process smooth. For the full recipe, check out the complete guide. {{image_4}} You can easily make gluten-free chicken tenders. Instead of all-purpose flour, use almond flour or gluten-free flour. For breadcrumbs, try gluten-free Panko or crushed rice cereal. These swaps keep the crispy texture while meeting gluten-free needs. To make your chicken tenders spicy, add cayenne pepper to the dry mixture. You can also mix in hot sauce with the buttermilk. For extra heat, use a spicy seasoning blend. This variation brings a kick that many will enjoy. You can add different flavors to your chicken tenders. Try mixing dried herbs, like thyme or oregano, into the coating. Adding grated Parmesan cheese to the Panko gives a savory twist. Lemon zest in the buttermilk also brightens the dish. These simple changes make your tenders unique and tasty. For the full recipe, see above. To keep your crispy baked chicken tenders fresh, store them in an airtight container. Make sure they cool down before sealing. This way, they won’t get soggy. You can keep them in the fridge for up to three days. If you want to save some for later, freezing is a great option. Place the chicken tenders in a single layer on a baking sheet. Freeze them for about an hour until firm. Then, transfer them to a freezer bag. This prevents them from sticking together. You can freeze them for up to three months. To reheat, use the oven for best results. Preheat your oven to 400°F (200°C). Place the chicken tenders on a baking sheet. Bake for about 10-15 minutes, or until heated through. This helps keep them crispy. Avoid using the microwave, as it makes them soggy. Enjoy your delicious tenders again! Yes, you can use chicken thighs. They are juicy and flavorful. Thighs have more fat, adding richness. Just adjust the cooking time slightly. Bake them until they reach 165°F (75°C). To boost flavor, try using these tips: - Marinate longer: Let the chicken soak in buttermilk for at least 2 hours. - Spices: Add herbs like thyme or rosemary to the dry mix. - Seasoning: Mix in more garlic or onion powder for a punch. - Citrus: Squeeze lemon juice over the cooked tenders for brightness. My favorite dipping sauce is honey mustard. It’s sweet and tangy, perfect with the crispy tenders. You can also try: - BBQ sauce for smokiness. - Ranch dressing for a creamy option. - Sriracha mayo for a spicy kick. Check the internal temperature. It should reach 165°F (75°C). Use a meat thermometer for the best accuracy. Look for a golden brown color too. If you cut into the chicken, the juices should run clear. Enjoy your crispy chicken tenders! For the Full Recipe, refer to the main section. Crispy baked chicken tenders are simple to make and full of flavor. We covered all you need: chicken prep, dry coating mixes, and cooking tips. Remember, you can adjust the recipe for extra zest or dietary needs. Always use the right tools and avoid common mistakes for the best results. Enjoy your crispy tenders with your favorite dipping sauce. Whether you make spicy or gluten-free versions, these tenders are a hit. Try these methods, and you’ll impress everyone at the table. Happy cooking!

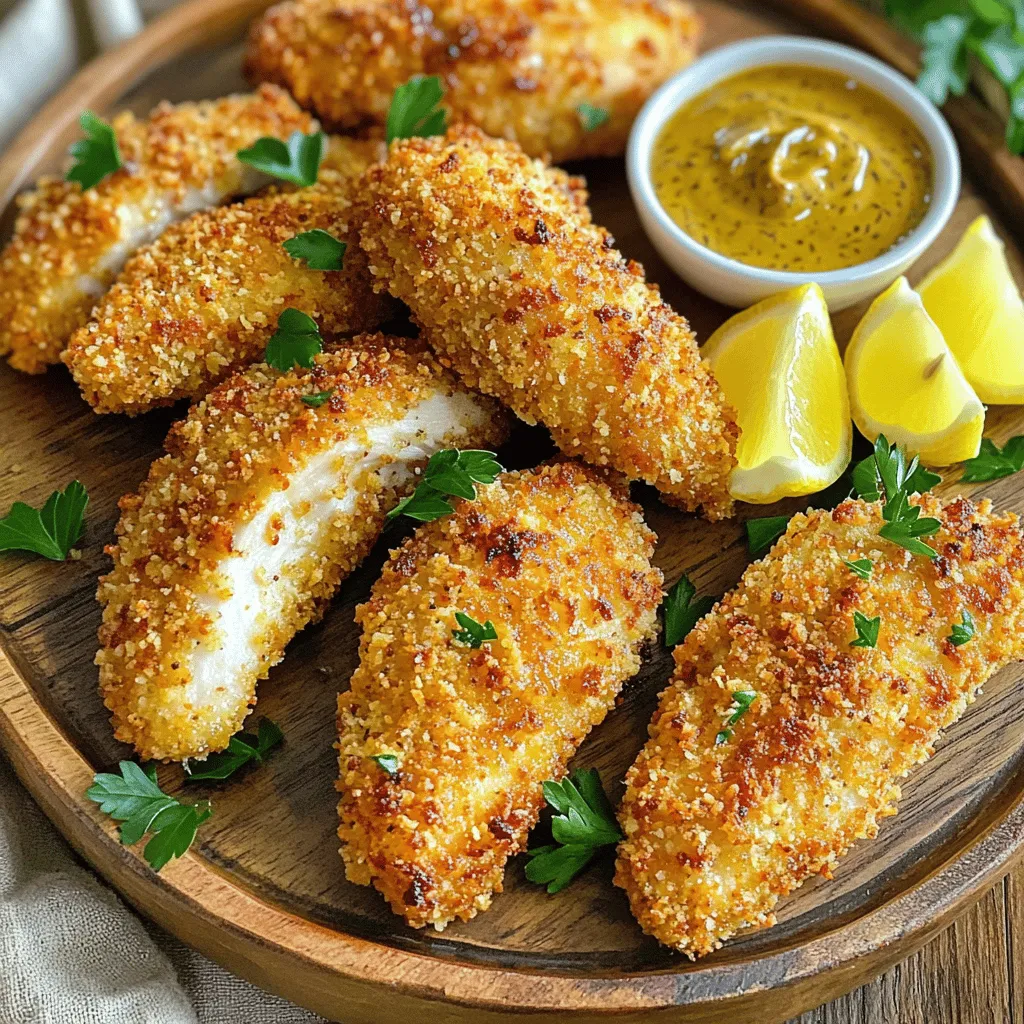
If you’re craving crispy baked chicken tenders that are easy to make, you’re in the right place! I’ll guide you through each step, from marinating the chicken to achieving that …

Read more

Categories Appetizers

Baked Frittata with Roasted Peppers Savory Delight

June 22, 2025 by Chef Miles
- 6 large eggs - 1 cup milk - 1 cup roasted red peppers, chopped - 1/2 cup onion, finely chopped - 1 cup fresh spinach, chopped - 1 cup feta cheese, crumbled - 1/2 teaspoon garlic powder - 1/2 teaspoon paprika - Salt and black pepper to taste - 2 tablespoons olive oil - Fresh parsley, chopped, for garnish When I make a baked frittata, I love the blend of flavors. First, I gather my main ingredients. I use six large eggs, one cup of milk, and one cup of roasted red peppers. The roasted peppers bring a sweet, smoky taste that makes the frittata shine. I also chop half a cup of onion, which adds a nice crunch and flavor. Next, I add a few more goodies to the mix. I chop one cup of fresh spinach. It adds a pop of color and a healthy boost. I also crumble one cup of feta cheese, which gives a creamy texture and salty kick. For seasoning, I use half a teaspoon each of garlic powder and paprika. They enhance the dish without overpowering it. Don’t forget to add salt and black pepper to taste. To finish off, I pour in two tablespoons of olive oil. This helps the frittata cook evenly and adds richness. Lastly, I keep fresh parsley on hand for garnish. It adds a vibrant touch and fresh flavor. These simple ingredients come together to create a savory delight. For the full recipe, check out the instructions that follow. Error: Error code: 429 - {'error': {'message': 'Rate limit reached for gpt-4o-mini in organization org-zFeAnX8gJvsCtEtJubNX3NN3 on tokens per min (TPM): Limit 200000, Used 198989, Requested 2327. Please try again in 394ms. Visit https://platform.openai.com/account/rate-limits to learn more.', 'type': 'tokens', 'param': None, 'code': 'rate_limit_exceeded'}} To check if your frittata is done, insert a knife in the center. If it comes out clean, it is ready. If not, bake it a few more minutes. Each oven works differently, so you may need to adjust the time. Keep an eye on it after 25 minutes. Add spices like oregano or thyme for extra taste. Fresh herbs can also boost the flavor. When selecting roasted peppers, look for ones that are bright and firm. They should smell sweet and have a nice char. You can use store-bought or roast them yourself for a fresh touch. For a great presentation, slice the frittata into wedges and serve it on a colorful plate. Drizzle with olive oil or sprinkle with red pepper flakes for flair. A side of mixed greens adds freshness and color. Pair the frittata with a light salad or some crusty bread for a complete meal. Enjoy this savory delight! Check out the Full Recipe for more details on making this dish. {{image_4}} You can change the cheese in your frittata. Try mozzarella or cheddar for a new taste. Goat cheese adds a creamy twist. Feel free to swap out the roasted peppers. Zucchini, mushrooms, or even broccoli work great. You can also add proteins like cooked sausage or diced ham for extra flavor. To make the frittata gluten-free, check your seasonings. Most are safe, but always read labels. For a dairy-free option, use almond or soy milk. You can replace regular cheese with a dairy-free version too. If you want low-carb choices, skip the milk and use more eggs. Adding more veggies helps keep it filling without extra carbs. Combining flavors makes cooking exciting! You can add zucchini or mushrooms for a fresh taste. These vegetables bring great texture. For some heat, sprinkle crushed red pepper on top. It adds a nice kick to each bite. Fresh herbs like basil or chives also enhance flavor. You can mix and match to find your favorite combination. You can find the full recipe to explore even more ideas! To store your baked frittata, let it cool first. Once cool, place it in an airtight container. This helps keep it fresh for up to four days. When you want to eat it again, simply slice a piece and reheat it. Use a microwave for quick warming or an oven for a crisp finish. If using the oven, heat it at 350°F (175°C) until warm. You can freeze leftovers for later meals. Cut the frittata into portions and wrap each piece in plastic wrap. Then, place the wrapped pieces in a freezer bag. This way, they stay fresh for up to three months. When ready to eat, take out a portion and let it thaw in the fridge overnight. For best texture, reheat in the oven instead of the microwave. This keeps the frittata from getting too soggy. Enjoy your baked frittata anytime! For the full recipe, check out the details above. A baked frittata stays fresh for about 3 to 5 days in the fridge. Store it in an airtight container. Look for signs of spoilage like a sour smell or mold. If you see any, toss it out. Yes, you can make the frittata ahead of time. Cook it, let it cool, and store it in the fridge. When you're ready to eat, heat it in the oven or microwave until warm. This saves time on busy mornings. Here are some great side dishes and drinks to pair with your frittata: - Mixed greens salad - Fresh fruit salad - Toasted whole-grain bread - A light vinaigrette dressing - Coffee or herbal tea Yes, you can use fresh peppers, but roasted peppers add more flavor. Roasting brings out their sweetness and gives them a smoky taste. If you choose fresh, sauté them first to soften and enhance their taste. This frittata recipe is simple and full of flavor. You can mix fresh veggies, eggs, and cheese for a tasty dish. Remember to adjust cooking times and spices to fit your taste. Try different ingredients for fun variations. Store any leftovers well to enjoy later. With these tips, you can make a great frittata any time. Enjoy the cooking process and share this dish with family or friends!

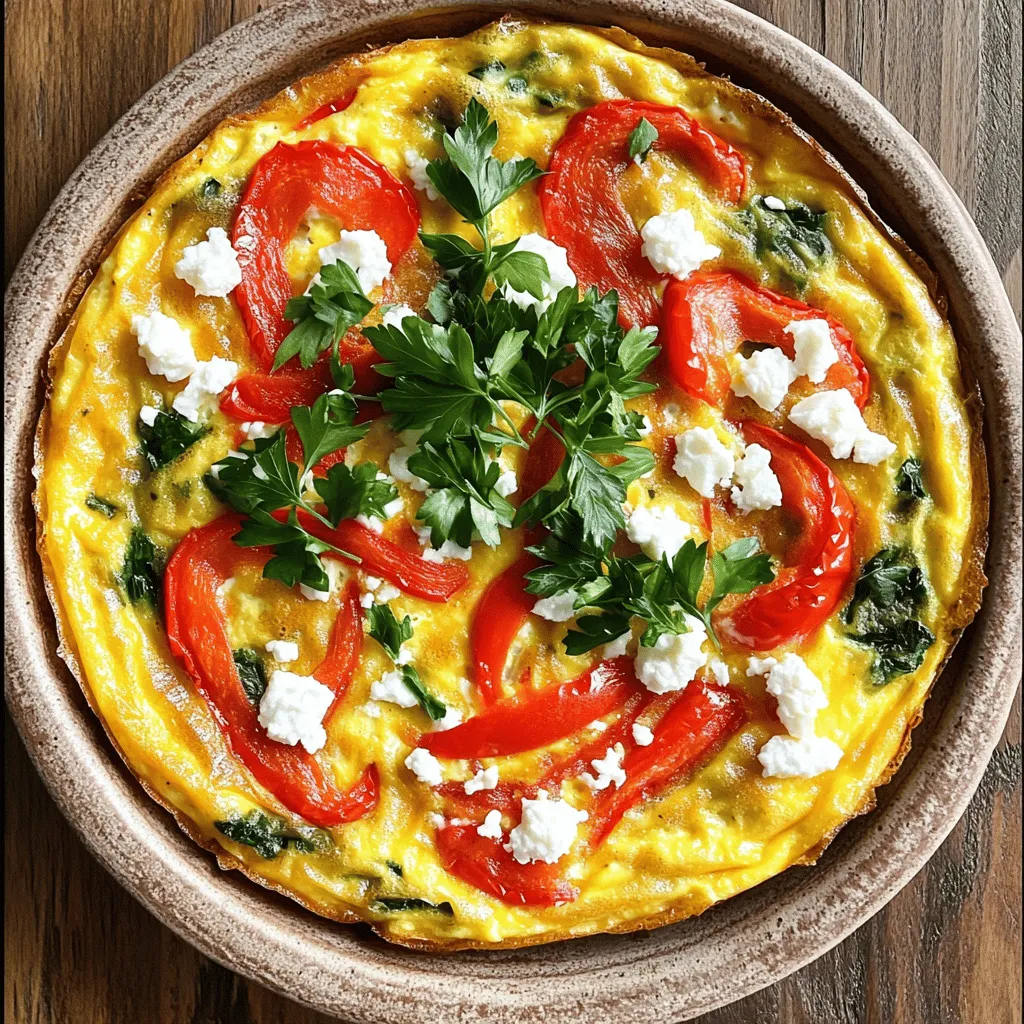
Are you ready to elevate your breakfast game? This Baked Frittata with Roasted Peppers is a savory delight that’s easy to make and packed with flavor. With simple ingredients like …

Read more

Categories Breakfast

Homemade Chicken Nuggets Crispy and Flavorful Treat

June 22, 2025 by Chef Miles
To make crispy and flavorful homemade chicken nuggets, gather these items: - 2 boneless, skinless chicken breasts - Seasoning options: - 1 teaspoon garlic powder - 1 teaspoon onion powder - 1 teaspoon paprika - 1 teaspoon dried thyme - 1 teaspoon dried oregano - Breading components: - 1 cup all-purpose flour - 2 large eggs, beaten - 1 cup panko breadcrumbs - Oil for frying - Salt and pepper These ingredients create the perfect blend of flavor and crunch. I love using panko breadcrumbs for an extra crispy finish. This recipe really shines with the right spices. The chicken breasts are the star, and they soak up the seasoning well. You can mix and match the spices to suit your taste. For the frying oil, choose vegetable or canola oil. Both work great for cooking. The right oil helps achieve that golden brown color. Make sure you have enough oil to cover the nuggets as they fry. This will keep them crispy and prevent sticking. If you want to read the full recipe, check out the [Full Recipe]. Error: Error code: 429 - {'error': {'message': 'Rate limit reached for gpt-4o-mini in organization org-zFeAnX8gJvsCtEtJubNX3NN3 on tokens per min (TPM): Limit 200000, Used 198944, Requested 2165. Please try again in 332ms. Visit https://platform.openai.com/account/rate-limits to learn more.', 'type': 'tokens', 'param': None, 'code': 'rate_limit_exceeded'}} To get that perfect crunch, heat the oil to about 350°F (175°C). This temperature ensures the nuggets fry quickly, sealing in moisture. I love using panko breadcrumbs. They give the nuggets a light, airy crunch that regular breadcrumbs can’t match. Make sure to press the panko onto the chicken for better adhesion. Marinating the chicken is key to keeping it juicy. I suggest letting it sit for at least 20 minutes. This allows the flavors to soak in. When you fry, cook the nuggets for about 4-5 minutes on each side. Check for a golden brown color and ensure they’re cooked through. For dipping sauces, consider honey mustard, barbecue, or ranch. These add great flavor and fun to the meal. When plating, arrange the nuggets on a nice platter. A sprinkle of fresh herbs or paprika can make it look vibrant and inviting. Serve small bowls of sauces for a delightful dining experience. {{image_4}} You can make chicken nuggets healthier by baking them instead of frying. To bake, preheat your oven to 400°F (200°C). Place the breaded nuggets on a baking sheet lined with parchment paper. Bake for about 15-20 minutes, flipping halfway through. This method gives you crispy nuggets without the added oil. Another great option is using an air fryer. Preheat the air fryer to 375°F (190°C). Place the breaded nuggets in a single layer in the basket. Cook for about 10-12 minutes or until they turn golden brown. This method uses less oil and still gives you a tasty crunch. You can easily customize your chicken nuggets by adding spices or herbs. Try mixing in some cumin or chili powder for a spicy kick. Fresh herbs like parsley or cilantro can also add a nice touch. Want to get cheesy? You can incorporate shredded cheese into the chicken mixture. Cheddar or mozzarella works well. This addition makes the chicken nuggets even more delicious and gives them a unique twist. You can also add finely chopped vegetables like spinach or bell peppers for extra flavor and nutrition. To keep your homemade chicken nuggets fresh, let them cool completely first. Place them in an airtight container. This helps prevent moisture. You can refrigerate them for up to three days. If you want to store them longer, freezing is the best choice. For freezing, use a freezer-safe container or a resealable bag. Lay the nuggets flat in the bag to save space. Separate layers with parchment paper to avoid sticking. They can stay in the freezer for up to three months. When it comes to reheating, the oven is best for crispness. Preheat your oven to 400°F (200°C). Place the nuggets on a baking sheet in a single layer. Bake for about 10 to 12 minutes. This method keeps them crunchy and delicious. If you're in a hurry, the microwave works too. However, it may not keep the nuggets as crispy. Heat them for about 1 to 2 minutes. Check them frequently to avoid overheating. They are best when served warm. For full details on making these tasty bites, check out the Full Recipe. Yes, you can use chicken thighs. They add a richer flavor and stay moist. Chicken thighs have more fat, which makes them juicy. If you prefer a softer bite, thighs are great. Just cut them into bite-sized pieces like breasts. Using thighs can change the taste and texture, making them a fun option. You can store homemade chicken nuggets in the fridge for three to four days. Make sure to keep them in an airtight container. For longer storage, freeze them. They last up to three months in the freezer. Just remember to cool them completely before freezing. Many sauces go well with chicken nuggets. Here are some tasty options: - Honey mustard: Sweet and tangy. - Barbecue sauce: Smoky and bold. - Ranch dressing: Creamy and herby. - Ketchup: A classic favorite. - Sweet and sour sauce: A fun twist. Try mixing and matching to find your favorite! In this post, we explored how to make tasty chicken nuggets from scratch. You learned about the right ingredients, step-by-step instructions, and smart tips for crispiness. Our variations showed how to bake and add flavors, while storage info helped plan for leftovers. Making chicken nuggets at home is fun and rewarding. With these simple steps, you can enjoy a delicious snack any time!

Are you ready to transform your kitchen into a crispy nugget haven? Homemade chicken nuggets are a game-changer! With juicy chicken, flavorful spices, and a perfect crunch, you’ll never crave …

Read more

Categories Appetizers

15-Minute Garlic Parmesan Chicken Simple and Tasty Meal

June 22, 2025 by Chef Miles
- 2 boneless, skinless chicken breasts - 3 tablespoons olive oil - 4 cloves garlic, minced - 1/2 cup grated Parmesan cheese - 1 teaspoon Italian seasoning - Salt and pepper to taste - Fresh parsley, finely chopped (for garnish) - Lemon wedges (for serving) To make 15-Minute Garlic Parmesan Chicken, you need just a few simple ingredients. Start with two boneless, skinless chicken breasts. They cook quickly and stay tender. Next, grab three tablespoons of olive oil. This oil helps the chicken brown nicely in the pan. You’ll also need four cloves of minced garlic. Garlic adds a strong, tasty flavor that pairs well with chicken. Don’t forget the half cup of grated Parmesan cheese. This cheesy goodness creates a rich, savory topping. Italian seasoning adds a nice mix of herbs. A teaspoon will do. Season with salt and pepper to taste. Fresh parsley gives the dish a pop of color and freshness. Lastly, lemon wedges are great for serving. They add a zesty kick that brightens the meal. These ingredients come together to make a meal that is quick and delicious. For the full recipe, check out the detailed instructions. - First, dry the chicken breasts with a paper towel. This helps them sear better. - Next, season both sides of the chicken with salt, pepper, and Italian seasoning. Make sure to coat evenly for great flavor. - Heat a large skillet over medium-high heat. Add 2 tablespoons of olive oil. - Once the oil shimmers, carefully place the seasoned chicken in the skillet. Cook for about 5-6 minutes on each side. You want them golden-brown and cooked through. The chicken should reach an internal temperature of 165°F. After cooking, set the chicken aside on a plate. - In the same skillet, lower the heat to medium and add the last tablespoon of olive oil. - Add the minced garlic, sautéing for 1-2 minutes. Stir often so the garlic does not burn. You want it fragrant but not brown. - Finally, return the seared chicken to the skillet. Sprinkle grated Parmesan cheese on top. Let it melt for about 2 minutes. For the full recipe, refer to the earlier section. The steps are simple and quick, making this meal a delight to prepare and enjoy! To keep your chicken juicy, you want to cook it just right. The key cooking temperature for chicken is 165°F. Use a meat thermometer to check this. It helps avoid dry chicken. Once cooked, let the chicken rest for a few minutes. This lets the juices settle back in. Sautéing garlic can be tricky. You want it to be fragrant but not burnt. Cook it over medium heat for 1-2 minutes, stirring often. If you want to try something new, use Pecorino Romano or nutritional yeast instead of Parmesan cheese. Both add great flavor. Plating can make your meal look fancy. Place the chicken on a nice plate. Drizzle the garlic sauce over it. For a restaurant-style touch, add a sprinkle of chopped parsley on top. Lemon wedges on the side add color and flavor. This makes your dish pop and looks inviting. For more tips, check the Full Recipe. {{image_4}} You can boost your meal by adding fresh veggies. I love using spinach, bell peppers, or broccoli. They add color and nutrition. To include them in your dish, here’s what to do: 1. Prep the Veggies: Wash and chop your chosen vegetables into bite-sized pieces. 2. Cook Together: After searing the chicken, add the veggies to the skillet with the garlic. 3. Stir-Fry: Cook them for about 3-5 minutes until they are tender but still crisp. 4. Finish Up: Then, return the chicken to the pan and sprinkle with Parmesan as usual. You can easily switch up the flavor with different herbs. Try thyme, rosemary, or even basil for a fresh taste. Each herb gives a unique twist to the dish. If you want some heat, you can add red pepper flakes or a dash of cayenne. 1. Herbs: Use 1 teaspoon of your favorite herb, fresh or dried. 2. Spices: Add spice at the same time you add garlic, so they infuse together. If you want a low-carb or gluten-free meal, there are easy swaps. Instead of traditional carbs, try serving the chicken with zucchini noodles or cauliflower rice. - Substitutes: Use almond flour instead of regular flour if a coating is desired. - Sauces: Look for gluten-free sauces or make a simple lemon butter sauce for extra flavor. These tweaks keep your meal tasty and healthy without losing any charm. For the full recipe, check back for more delicious ideas! To keep your 15-Minute Garlic Parmesan Chicken fresh, use these methods: - Refrigeration method: Place leftovers in an airtight container. They stay fresh for about 3 days in the fridge. Make sure to let the chicken cool first. This helps prevent extra moisture build-up. - Freezing instructions: If you want to save it longer, freeze the chicken. Wrap each piece tightly in plastic wrap, then put it in a freezer bag. It can last up to 3 months in the freezer. Just remember to label the bags with the date. Reheating your chicken correctly keeps it tasty. Here’s how: - Efficient reheating methods for best taste: The best way to reheat is in a skillet. Heat it on medium-low and add a splash of water or broth. Cover it with a lid. This keeps the chicken moist while warming it through. - Avoiding dried-out chicken experiences: Avoid microwaving, as it can dry out the chicken. If you must use a microwave, cover it with a damp paper towel. This helps keep moisture in while reheating. Cooking this dish takes about 15 minutes total. Here's the breakdown: - Prep Time: 5 minutes to season the chicken and get the pan ready. - Cooking Time: 10 minutes to cook the chicken and make the sauce. You’ll have a tasty meal ready in no time! Yes, you can use frozen chicken breasts! Just keep these tips in mind: - Thawing: Thaw them in the fridge overnight for best results. - Cooking Time: If you cook from frozen, add 5-7 minutes to cooking time. Make sure the internal temperature reaches 165°F for safety. This chicken pairs well with several sides. Here are my favorites: - Steamed broccoli for a healthy option. - Garlic bread to soak up the tasty sauce. - Mashed potatoes for a comforting feel. - Caesar salad for a fresh crunch. These sides will complement the flavors perfectly! This blog post covered how to make Garlic Parmesan Chicken. We explored the ingredients needed and the step-by-step process. I shared tips for juicy chicken and ways to enhance flavor. We also discussed storage options and delicious variations. Remember, preparing this dish can be quick and easy. With the right techniques, you can enjoy a flavorful meal in no time. So, grab your pan, and let’s get cooking!

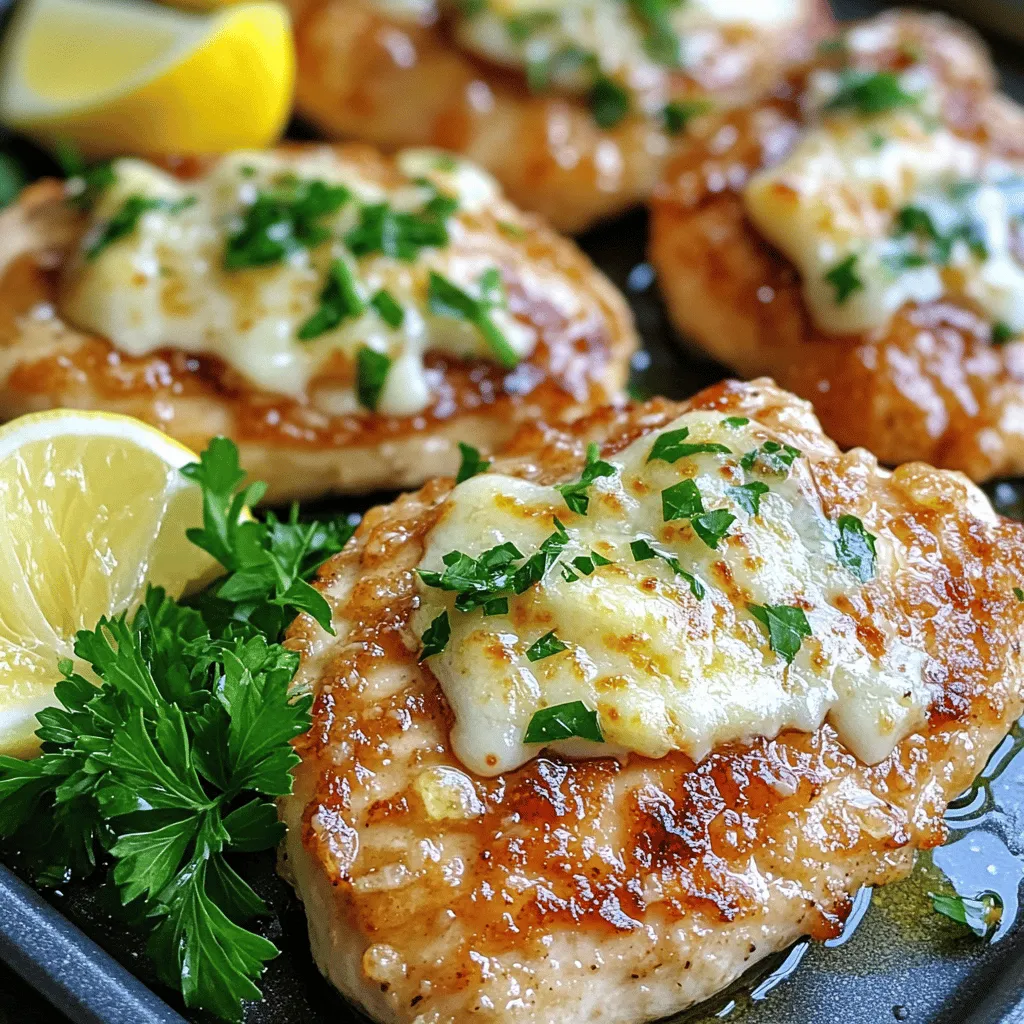
Looking for a quick and delicious meal? Try my 15-Minute Garlic Parmesan Chicken! This simple dish features juicy chicken, rich garlic, and savory Parmesan cheese. Perfect for busy nights, it’s …

Read more

Categories Dinner

Juicy Oven Baked Chicken Breast Simple and Flavorful Recipe

June 22, 2025 by Chef Miles
- 4 boneless, skinless chicken breasts - 3 tablespoons extra virgin olive oil - 2 teaspoons garlic powder - 1 teaspoon onion powder - 1 teaspoon smoked paprika - 1 teaspoon dried oregano - 1 teaspoon dried thyme - 1 teaspoon sea salt - ½ teaspoon freshly ground black pepper - Juice of ½ lemon - Fresh parsley for garnish Why use high-quality olive oil? High-quality olive oil adds rich flavor. It helps the spices stick to the chicken. This makes each bite tasty and full of flavor. Fresh herbs vs. dried herbs: Fresh herbs give a bright taste. Use dried herbs when fresh ones are not available. They still add great flavor but may be less intense. Choosing the right chicken breast: Look for chicken breasts that are plump and pink. Avoid any with a gray or dried look. This ensures you get juicy and tender meat for your dish. For the full recipe, check out the detailed steps later! - Preheat the oven to 425°F (220°C). - In a bowl, mix olive oil, garlic powder, onion powder, smoked paprika, oregano, thyme, sea salt, black pepper, and lemon juice. - Place the chicken breasts in the bowl. - Make sure each piece gets a good coat of the marinade. - Cover the bowl and let it sit in the fridge for at least 30 minutes. - For the best flavor, marinate for up to 4 hours. - Line a baking sheet with parchment paper or spray it lightly. - Arrange the marinated chicken on the sheet, leaving space between each piece. - Bake for 25-30 minutes. - Check the chicken's internal temperature; it should be 165°F (75°C). - The juices should run clear when you pierce it. - Let the chicken rest for 5 minutes before slicing. - Garnish with fresh parsley for a nice touch. For the full recipe, check out the details provided above. To keep your chicken juicy, always let it rest after baking. This step helps the juices settle back into the meat. If you skip this, the juices run out when you slice it. A meat thermometer is also key. It shows when your chicken hits 165°F (75°C). This ensures it is cooked well, but still moist. Try adding spices like cumin or cayenne pepper for more kick. You can also use fresh herbs like rosemary or basil. Marinating is a fun way to add flavor. For the best taste, marinate your chicken for at least 30 minutes but longer is better. You could even let it sit overnight in the fridge. Serve your chicken on a bright plate for a great look. Add fresh lemon wedges on the side for color and taste. A sprinkle of chopped parsley not only looks nice but also adds freshness. Arranging the chicken on a wooden cutting board gives it a rustic charm. For more flair, you can add a few slices of avocado or colorful cherry tomatoes. For the full recipe, check out the details provided above! {{image_4}} You can change the taste of your juicy oven baked chicken breast easily. For a Mediterranean twist, try these spices: - 1 teaspoon dried basil - 1 teaspoon dried rosemary - 1 teaspoon lemon zest Mix these in with the olive oil and lemon juice. This gives the chicken a bright, fresh flavor. If you want something sweet and spicy, add: - 1 tablespoon honey - 1 teaspoon chili powder This mix adds a nice kick and a touch of sweetness. You’ll enjoy the different tastes without much effort. While baking gives great results, grilling adds a smoky flavor. Simply marinate the chicken as usual, then grill it on medium heat. This method takes about 6-8 minutes per side. You can also slow cook or pressure cook the chicken. For slow cooking, set the chicken in a slow cooker with the marinade and cook on low for 6 hours. A pressure cooker cooks it fast, around 10 minutes on high pressure. Both methods keep the chicken juicy and tender. If you need gluten-free options, use tamari instead of soy sauce in the marinade. For low-carb diets, skip the honey or sugar. You can also try vegan options. Use pressed tofu or tempeh instead of chicken. Marinate them just like the chicken. Bake or grill until golden brown. You won't miss the meat! For more ideas, check the Full Recipe. To keep your juicy oven baked chicken fresh, follow these steps: - Allow the chicken to cool for about 15 minutes. - Place the chicken in an airtight container. - Store in the fridge for up to 4 days. For best results, keep the chicken in whole pieces. This helps it stay moist. Want to save some for later? You can freeze it too! - Wrap each chicken breast in plastic wrap. - Then place the wrapped chicken in a freezer bag. - Make sure to remove as much air as you can. When ready to eat, thaw the chicken in the fridge overnight. To reheat, place it in the oven at 350°F (175°C) for about 20 minutes. This keeps the flavor and moisture intact, making it just as tasty as before! You can find the full recipe to enjoy this dish fresh. To check if the chicken is cooked, use a meat thermometer. The chicken should reach an internal temperature of 165°F (75°C). This temperature ensures it is safe to eat. Checking the juices can also help. If they run clear when you cut the chicken, it is done. Cooking it to the right temperature keeps it juicy and safe. Yes, you can use bone-in chicken breasts. They often have more flavor due to the bone. When using bone-in chicken, you need to adjust your cooking time. Bone-in pieces take longer to cook than boneless ones. Bake them for about 35 to 40 minutes. Always check the internal temperature to ensure they are fully cooked. Many sides go well with juicy oven-baked chicken. Here are some great ideas: - Steamed broccoli - Roasted carrots - Mashed potatoes - Quinoa or rice - A fresh salad These sides add color and flavor to your meal. They also help round out a delicious dinner. Oven-baking chicken gives it a different texture. The heat is even, which helps the chicken cook uniformly. Baking also allows for more flavor to build up, especially from the marinade. Stovetop cooking can lead to dry spots if not careful. Plus, oven-baking lets you set it and forget it, making it easier to prepare other dishes at the same time. This blog post covered key ingredients and steps for perfect oven-baked chicken. You learned about the right marinade, cooking tips, and variations to keep meals exciting. Remember, high-quality ingredients and proper technique are vital for juicy chicken. Don’t forget to rest the meat after baking for the best texture. With these tips, you can create flavorful and appealing dishes every time. Enjoy your cooking journey and don’t hesitate to experiment!

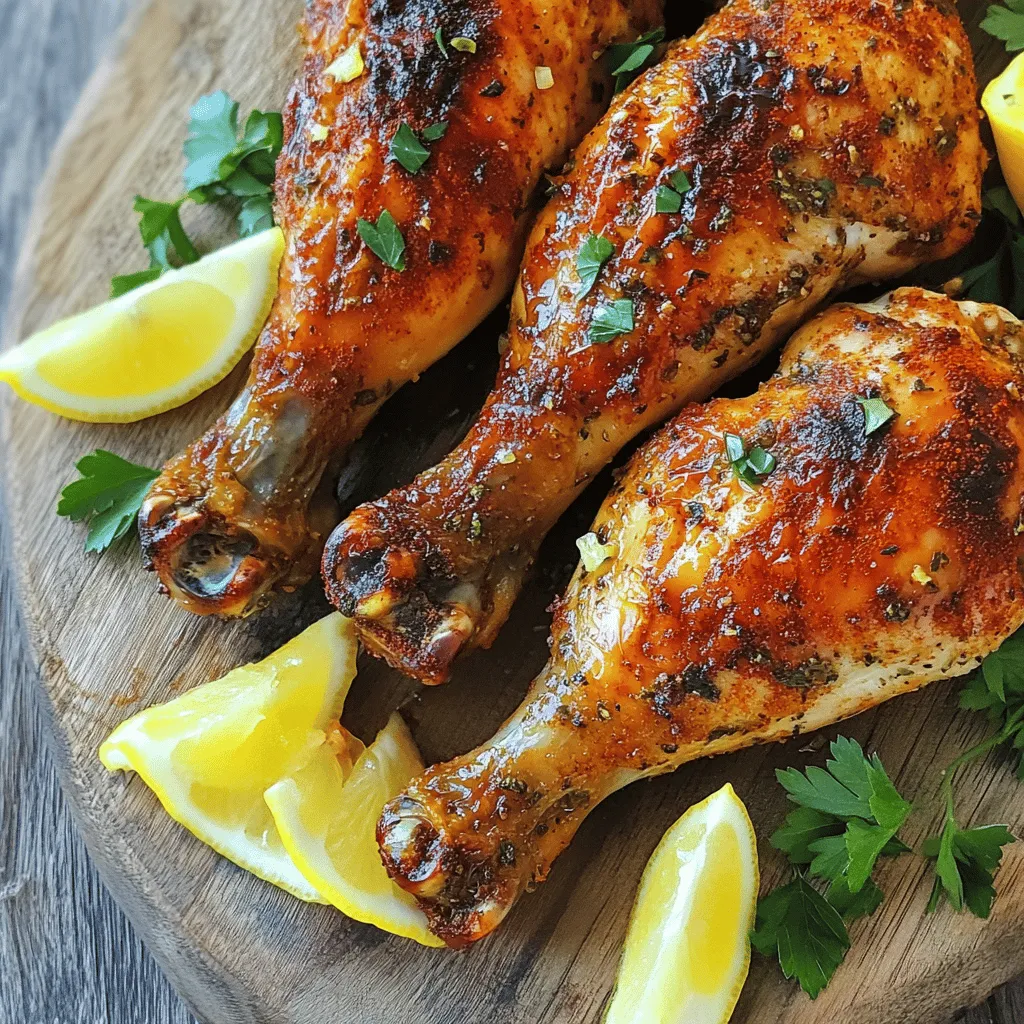
Are you ready to transform your chicken dinners? My Juicy Oven Baked Chicken Breast recipe is simple and packed with flavor. In just a few easy steps, you can whip …

Read more

Categories Dinner
Older posts
Newer posts
← Previous Page1 … Page84 Page85 Page86 … Page112 Next →

MELTED RECIPES

where delicious ideas melt into life, from stovetop to backyard. Always warm, simple, and irresistibly satisfying. 🍳🔥🧀

PAGES

Home About Contact Privacy Policy Terms & Conditions Cookie Policy GDPR Policy Copyright Policy Disclaimer

CATEGORIES

Appetizers Desserts Salads Breakfast Dinner

Contact

  • Pinterest
  • Mail
Copyright © 2025 Melted Recipes. All rights reserved.