Skip to content
Melted Recipes
  • Home
  • Appetizers
  • Desserts
  • Salads
  • Breakfast
  • Dinner
  • Privacy Policy
  • Contact
  • About

Chef Miles

The Best Fried Chicken Crispy and Flavorful Recipe

June 24, 2025 by Chef Miles
- Chicken options: 4 pieces of chicken (thighs, drumsticks, or breasts with skin) - Buttermilk: 1 cup for marinating - Hot sauce: 1 teaspoon (optional for heat) - All-purpose flour: 1 ½ cups for coating - Smoked paprika: 1 teaspoon for extra depth - Garlic powder: 1 teaspoon for flavor - Onion powder: 1 teaspoon for sweetness - Cayenne pepper: ½ teaspoon (adjust for heat preference) - Kosher salt: 1 teaspoon for seasoning - Freshly cracked black pepper: ½ teaspoon for spice - Vegetable oil: enough for frying (about 2 inches in the pan) These ingredients make your fried chicken crispy and packed with flavor. The buttermilk helps tenderize the chicken, while the spices in the flour create a crunchy, tasty coating. - Large deep skillet or Dutch oven: This will hold the oil for frying. - Thermometer for oil temperature: This ensures your oil is hot enough. - Mixing bowls and whisk: Use these to mix your buttermilk and spices. With these ingredients and tools, you are ready to make the best fried chicken. The crispy texture and rich flavors will impress anyone who tries it. For the full recipe, check out the details in the earlier section! Marinating chicken is key to great flavor. It helps the meat soak up spices and moisture. For this recipe, we use buttermilk. It makes the chicken tender and juicy. Mix 1 cup of buttermilk with 1 teaspoon of hot sauce if you want some heat. Place the chicken in this mixture. Cover it and put it in the fridge for at least 2 hours, or overnight if you can. The longer it sits, the better it gets! Next, we prepare the coating. In a shallow bowl, mix 1 ½ cups of flour with your spices. Use 1 teaspoon of smoked paprika, garlic powder, and onion powder. Add ½ teaspoon of cayenne pepper for heat, along with 1 teaspoon of kosher salt and ½ teaspoon of black pepper. Stir this well to spread the flavors evenly. To make the coating stick, remove the chicken from the buttermilk. Let any extra liquid drip off. Then, dredge the chicken in the flour mix, pressing gently to make sure it sticks. Now it's time to cook! Heat vegetable oil in a large, deep skillet. Use about 2 inches of oil and heat it to 350°F (175°C). A thermometer helps here for the perfect temperature. Carefully place the coated chicken in the hot oil. Do not overcrowd the pan; fry in batches if needed. Cook for about 12-15 minutes, turning halfway through. The chicken should turn a nice golden brown. Make sure its internal temperature reaches 165°F (75°C). Once cooked, place the fried chicken on a wire rack or a plate with paper towels. This helps drain excess oil and keeps it crispy. To get that perfect crispy skin, start with a few simple tricks. First, ensure you marinate the chicken well. A good soak in buttermilk helps tenderize the meat and adds flavor. The longer you marinate, the better it gets. Aim for at least two hours, but overnight is best. Next, when you coat the chicken, press the flour mix onto the meat. This helps it stick better. For frying, heat your oil to 350°F (175°C). Use a thermometer for accuracy. This temperature creates a nice golden crust while keeping the inside juicy. To spice up your flour mix, add smoked paprika, garlic powder, onion powder, and cayenne pepper. These spices give your chicken a flavorful kick. You can adjust the cayenne based on how spicy you like it. For dipping sauces, consider serving honey mustard or ranch. These pair well with fried chicken. You can also try a spicy aioli for an extra kick. These sauces add a fun twist and enhance the overall flavor. For the full recipe, check out the Crispy Dreams Fried Chicken. {{image_4}} Fried chicken varies greatly across regions. Southern fried chicken is known for its crispy crust and juicy meat. It often uses a simple blend of flour and spices. This method gives it a classic taste. On the other hand, Nashville hot chicken brings the heat. It features a spicy oil paste that coats the fried chicken. This adds a fiery kick to every bite. You can serve it with pickle slices to cool down the spice. Asian-inspired fried chicken offers delightful twists. Korean fried chicken is double-fried for extra crispiness. It often has a sweet and spicy glaze made from gochujang. Japanese karaage uses a soy marinade and potato starch for a light, crunchy coating. Each style has unique flavors and textures. Exploring these options can make your fried chicken experience even more exciting. If you're looking for healthier ways to enjoy fried chicken, consider oven-fried versions. These recipes use less oil and still achieve a crispy outside. You can coat chicken pieces with seasoned breadcrumbs or a mix of flour and spices. Bake them until golden and crunchy. Baked chicken can also mimic fried chicken flavors. You can use similar spices and marinades. Marinating in buttermilk keeps the meat juicy. Oven-baking allows you to control the fat content while still enjoying tasty chicken. These options let you savor the deliciousness without the extra grease. To keep your fried chicken crispy, store it correctly. First, let the chicken cool. If you put hot chicken in a container, it gets soggy. Place the chicken on a wire rack. This allows air to circulate around it. Use an airtight container for storage. A heavy-duty plastic bag works well too. Line the container with paper towels. This absorbs any moisture and helps keep the chicken crispy. Store it in the fridge if you plan to eat it within a few days. Reheating fried chicken can be tricky. You want it hot without losing its crunch. The air fryer is a great choice. Preheat it to 375°F (190°C). Place the chicken in a single layer. Heat for about 5-7 minutes. This method brings back the crispiness. You can also use the oven. Preheat it to 400°F (200°C). Place the chicken on a baking sheet. Heat for 10-15 minutes. This method works well but may take longer. For the best results, always check the internal temperature. It should reach 165°F (75°C) to ensure it’s safe to eat. The secret to juicy fried chicken lies in marination and cooking temperature. Marinating the chicken in buttermilk adds moisture and flavor. It also helps tenderize the meat. I recommend marinating for at least two hours, but overnight is best. This gives the buttermilk time to work its magic. Cooking temperature is just as crucial. Make sure your oil reaches 350°F (175°C) before adding the chicken. This high heat creates a crispy crust while keeping the inside juicy. If your oil is too cool, the chicken will absorb more oil and become greasy. Use a thermometer for accuracy. Yes, you can freeze fried chicken! To freeze it properly, let the chicken cool completely. Once cool, wrap each piece in plastic wrap. Then place them in a freezer bag. Removing as much air as possible helps prevent freezer burn. When you are ready to enjoy it, thaw the chicken in the fridge. This keeps it safe and helps maintain texture. Reheat in the oven at 375°F (190°C) to get the skin crispy again. You can keep leftover fried chicken in the fridge for up to four days. Store it in an airtight container to maintain freshness. If you want it to last longer, freezing is a great option. Just remember to follow the freezing tips I shared. For the best taste and safety, eat your fried chicken within these time frames. This way, you can enjoy that crispy, flavorful goodness! To make the best fried chicken, start with quality ingredients like fresh chicken and buttermilk. Use the right tools for frying to ensure safety and efficiency. Follow the steps for marinating, coating, and cooking to achieve crispy, juicy results. Experiment with seasoning and regional styles for variety. Finally, store your chicken properly and reheat it the right way to keep it delicious. Perfect fried chicken can be yours with practice and these tips. Enjoy every bite and make it your own!

Are you ready to make the best fried chicken ever? Crispy, juicy, and packed with flavor, this recipe will take your cooking to the next level. You’ll learn about essential …

Read more

Categories Dinner

Quick Refrigerator Pickled Peppers Flavorful and Easy

June 24, 2025 by Chef Miles
- 4 medium bell peppers (any color), sliced into rings - 1 cup apple cider vinegar - 1 cup water - 3 tablespoons granulated sugar - 1 tablespoon salt - 1 teaspoon garlic powder - 1 teaspoon black peppercorns - 1 teaspoon crushed red pepper flakes (optional for added heat) - 2 cloves garlic, smashed - Fresh herbs (such as dill or thyme) for garnish The main star of this dish is the bell pepper. You can choose red, yellow, or green peppers. Each color has its own taste. Red peppers are sweeter, while green ones are more bitter. The apple cider vinegar gives the pickles a nice tang. It balances the sweetness from the sugar. Granulated sugar is important to make the pickling liquid tasty. It helps to cut through the acidity of the vinegar. Salt adds flavor and helps preserve the peppers. Garlic powder and black peppercorns give a warm taste that makes these pickled peppers pop. Smashed garlic cloves add a strong garlic flavor. I love the crunch of the peppers mixed with the garlic. If you like some heat, crushed red pepper flakes are a great choice. They bring a little kick without being too spicy. You can add various herbs and spices to change the flavor. Try adding fresh dill or thyme for a herby touch. If you want more spice, consider adding some sliced jalapeños. Another option is to include a bay leaf for a deeper flavor. Mixing in sliced onions can also add a nice crunch. You can even use different vinegars, like rice or white vinegar, for a unique taste. The choice is yours! Feel free to experiment and make these pickled peppers your own. For the full recipe, check the previous section. To start, wash your bell peppers well under cold water. You want them clean and fresh. Next, slice each pepper into thin, even rings. Be sure to remove the seeds and stems for the best taste. Set the sliced peppers aside on a clean cutting board. This simple step makes a big difference in how they turn out. Now, let’s make the pickling liquid. Take a medium-sized saucepan and mix together the apple cider vinegar, water, granulated sugar, salt, garlic powder, black peppercorns, and crushed red pepper flakes. Heat this mixture over medium heat. Stir it often until the sugar and salt dissolve. This usually takes a few minutes. Once everything is dissolved, remove the saucepan from the heat and let it cool slightly. This liquid is key to making your peppers flavorful. You’re almost done! Grab a clean mason jar or an airtight container. Add the sliced peppers to the jar along with the smashed garlic cloves. Carefully pour your warm pickling liquid over the peppers. Make sure every slice is covered in the liquid. Seal the jar tightly with a lid. Let it cool to room temperature, then put it in the refrigerator. For the best taste, let the peppers marinate for at least 1 hour, but overnight is even better. Enjoy these zesty pickled peppers as a snack, on sandwiches, or in salads. For the complete recipe, check out the Full Recipe. Store your pickled peppers in a clean glass jar. A mason jar works well. Make sure the jar has a tight lid. This keeps air out and helps flavors mix. Place the jar in the fridge immediately after sealing. The cold helps the peppers stay crisp and fresh. You can add more to the pickling liquid for extra flavor. Try using whole spices like mustard seeds or coriander seeds. Fresh herbs like basil or oregano can also boost taste. If you like heat, add more crushed red pepper flakes. A few slices of onion or carrot can add sweetness and crunch. One common mistake is not using enough salt. Salt helps with flavor and preservation. Another mistake is not letting the peppers sit long enough. For best flavor, give them at least one hour to pickle. Avoid using metal containers for storage, as they can react with the vinegar. Always use clean utensils to prevent spoilage. Explore these tips to make your Quick Refrigerator Pickled Peppers even better. For the full recipe, check out the instructions above. {{image_4}} You can pick many types of peppers for this recipe. Bell peppers add sweetness and crunch. If you want a kick, use jalapeños or serranos. For a milder taste, try banana peppers. Each pepper brings its own flavor and texture. Mix and match them for fun results! Apple cider vinegar works great, but it’s not your only choice. White vinegar gives a sharper taste. Rice vinegar is milder and sweeter. You can even use malt vinegar for a unique twist. Each vinegar changes the flavor profile, so feel free to experiment! Spices can transform your pickled peppers. Try adding mustard seeds for a tangy flavor. Coriander seeds bring a warm, citrusy touch. You can also add bay leaves or dill for extra depth. Don’t be afraid to get creative with spices. Each choice can make your pickled peppers truly special. To store your pickled peppers, use a clean mason jar or an airtight container. After making the peppers, pour the warm pickling liquid over the sliced peppers. Make sure all slices are under the liquid. Seal the jar tightly with a lid. This keeps the peppers fresh and flavorful. Quick refrigerator pickled peppers can last up to 2-3 weeks in the fridge. For the best taste, eat them within the first week. Store them in the coldest part of the fridge. This helps maintain their crunch and flavor. If you want to keep them longer, consider canning them. Check your pickled peppers for any signs of spoilage. If you see mold or an off smell, it's time to toss them. If the liquid looks cloudy or the peppers have changed color, do not eat them. Always trust your senses. When in doubt, throw it out! Yes, you can use other types of vinegar. White vinegar works well. It gives a sharp taste. You can also try rice vinegar for a milder flavor. Each vinegar adds a unique twist to your pickled peppers. Experiment with different options to find your favorite. Pickled peppers last about two weeks in the fridge. Make sure to keep them in a sealed jar. After two weeks, the flavor will still be good, but the texture may change. Always check for any signs of spoilage before eating. You can serve pickled peppers in many ways. They make a great snack on their own. You can also add them to sandwiches or tacos. Use them to spice up salads or grain bowls. For more ideas, check the Full Recipe for serving suggestions. In this article, we covered the key steps to making pickled peppers. We started with listing essential ingredients and shared their detailed descriptions. I detailed how to prepare the peppers and make the pickling liquid. I also shared tips for storage and common mistakes to avoid. Variations let you experiment with different ingredients and storage info to keep your peppers fresh. Making pickled peppers is fun and tasty. Enjoy the crunch and zesty flavor in your meals.

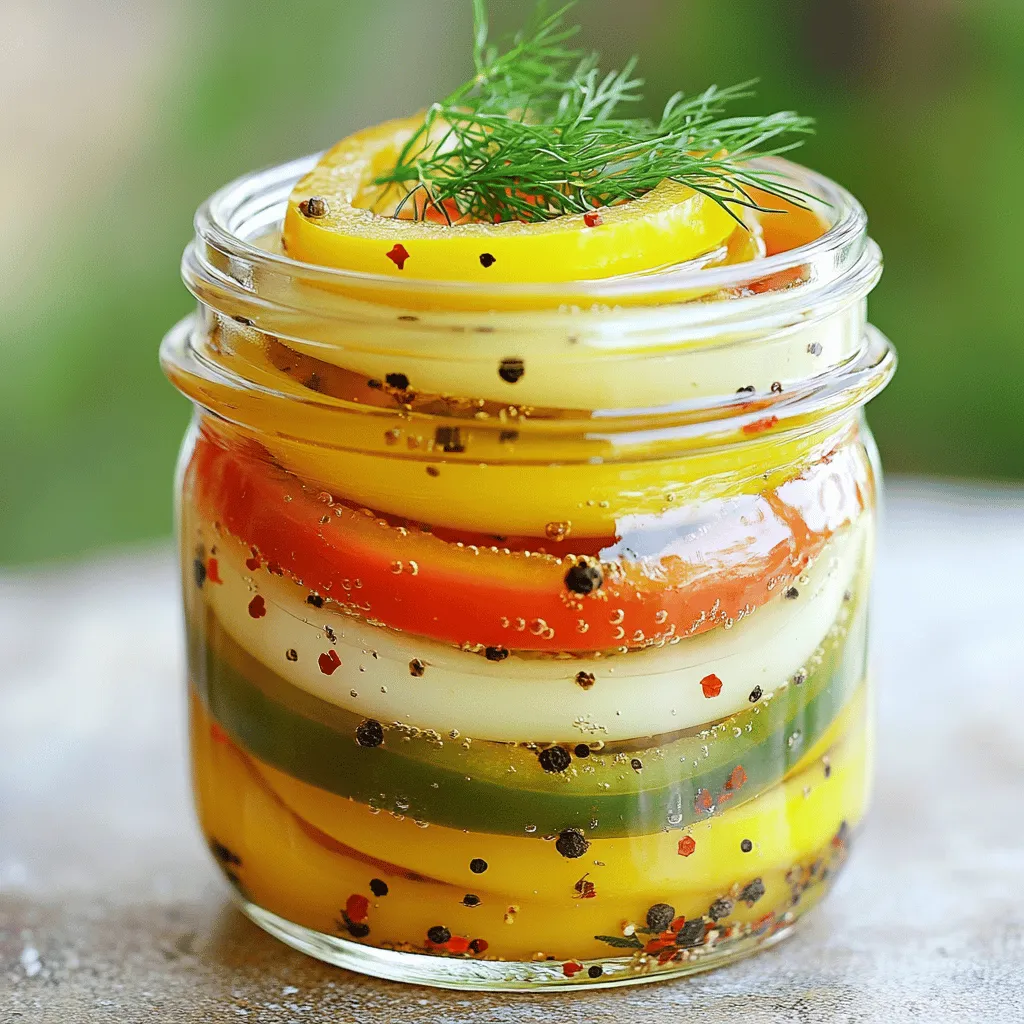
Are you ready to add a burst of flavor to your meals? Quick refrigerator pickled peppers are the answer! They are easy to make and perfect for brightening up sandwiches, …

Read more

Categories Appetizers

Insanely Easy Italian Sausage Frittata with Peppers Recipe

June 24, 2025 by Chef Miles
To make an Insanely Easy Italian Sausage Frittata with Peppers, you need a few key ingredients. Here’s what you'll gather: - 6 large eggs - 1 cup Italian sausage, casings removed - 1 bell pepper (red, yellow, or green), diced - 1 small onion, finely diced - ½ cup fresh spinach, chopped - ½ cup shredded mozzarella cheese - ¼ cup grated Parmesan cheese - 2 tablespoons olive oil - Salt and black pepper to taste - Fresh basil leaves, for garnishing Each ingredient plays a role in making this dish delicious. The eggs form the base, while the Italian sausage adds rich flavor. Peppers and onions bring color and sweetness. Spinach adds freshness, and the cheeses give a creamy texture. Olive oil helps with cooking and adds richness to the dish. Fresh basil at the end adds a nice touch. For the full recipe, check out the complete list and instructions. 1. Preheat your oven to 375°F (190°C). This helps the frittata cook evenly. 2. Grab a large oven-safe skillet and pour in 2 tablespoons of olive oil. Heat it over medium heat. 3. Add 1 cup of Italian sausage to the skillet. Break it into small pieces with a wooden spoon. 4. Cook until the sausage is browned and cooked through, about 5-7 minutes. 5. Once the sausage is ready, add 1 small diced onion and 1 diced bell pepper. 6. Sauté the veggies for 3-4 minutes until soft and fragrant. 7. Stir in ½ cup of chopped fresh spinach and cook for another 1-2 minutes until it wilts. 1. In a mixing bowl, whisk together 6 large eggs until they are well blended. 2. Add ½ cup of shredded mozzarella cheese and ¼ cup of grated Parmesan cheese. 3. Season the mixture with salt and pepper to taste. Stir until all ingredients are combined. 1. Pour the egg and cheese mixture over the sausage and veggies in the skillet. 2. Let the frittata cook on the stovetop for 2-3 minutes without stirring. 3. Use a spatula to gently lift the edges so uncooked egg can flow underneath. 4. When the edges start to set, transfer the skillet to your preheated oven. 5. Bake the frittata for 15-20 minutes until set in the center and golden on top. 6. Remove the skillet and let it cool for a few minutes. Slice into wedges. 7. Garnish with fresh basil leaves for a lovely touch. For the full recipe, check out the detailed instructions above. Enjoy your delicious Italian sausage frittata! - Use fresh ingredients for better flavor. Fresh veggies and herbs make a big difference. - Ensure even cooking on the stovetop. Let the edges set before moving to the oven. This keeps the frittata fluffy and not rubbery. - Stove-top only method can save time. You can cook it fully on the stove and skip the oven. Just cover the skillet with a lid to help it cook through. - Oven variations give different textures. Baking makes the top golden and fluffy. If you want a crispy top, broil it for a minute after baking. These tips will help you master the art of making an Italian sausage frittata. For more details, check the Full Recipe. Enjoy your cooking! {{image_4}} You can easily change the meat in this frittata. Try turkey sausage or chicken sausage instead of Italian sausage. For a vegetarian option, use mushrooms or zucchini. These options still give great flavor. You can also switch up the cheese. Instead of mozzarella, try feta or goat cheese. These cheeses add a tangy taste. If you want a sharp flavor, use aged cheddar. Each choice will change the taste and texture of the dish. To make your frittata unique, think about adding herbs or spices. Fresh basil or oregano work well with the Italian theme. For a spicy kick, add red pepper flakes or a touch of cayenne. Incorporating seasonal vegetables can also enhance flavor. Try asparagus in spring or squash in summer. These fresh veggies not only add taste but also color to your dish. This frittata is adaptable and fun to experiment with. For more details, check the Full Recipe. To keep your frittata fresh, let it cool down first. Once it’s cool, cover it tightly using plastic wrap or place it in an airtight container. Store it in the fridge for up to three days. If you want it to last longer, you can freeze it. To freeze, cut the frittata into slices. Wrap each slice tightly in plastic wrap, then place them in a freezer-safe bag. This helps keep out air and prevents freezer burn. The frittata can stay good in the freezer for up to three months. When you want to eat your frittata again, there are quick ways to reheat it. The microwave is easy and fast. Simply place a slice on a microwave-safe plate. Heat it for about 30 seconds, then check if it's warm. If not, heat for another 15 seconds. For the oven, preheat it to 350°F (175°C). Place the frittata slice on a baking sheet. Heat it for about 10-15 minutes until warmed through. This method helps keep the frittata’s texture. Try to avoid overheating, as it can make the frittata dry. Enjoy your delicious Italian sausage frittata again! For the full recipe, check out the earlier section. How to know when the frittata is done? You can tell the frittata is done when the center is firm and not jiggly. The edges should be lightly golden. A knife inserted into the center should come out clean. If the top is slightly puffed and set, it’s ready to serve! Can I make the frittata ahead of time? Yes, you can make this frittata ahead of time. It stores well in the fridge for up to three days. Just cover it tightly with plastic wrap or foil. You can reheat it in the oven or microwave when you're ready to eat. Breakdown of calories and macros This frittata serves 4-6 people. Each serving has about 250 calories. It includes roughly 20 grams of protein and 15 grams of fat. The carbs are around 5 grams, making it a great low-carb option. Health benefits of the ingredients used The eggs are rich in protein and good fats. Italian sausage adds flavor and protein. Bell peppers are high in vitamins A and C. Spinach provides iron and calcium. Together, these ingredients make a nutritious meal. What to serve with this frittata? You can serve this frittata with a simple side salad. A fresh tomato salad drizzled with olive oil works well. You might also enjoy it with crusty bread. Ideal breakfast or brunch pairings This frittata is perfect for breakfast or brunch. Pair it with fresh fruit or yogurt for a balanced meal. A glass of orange juice or coffee complements it nicely too. This blog post outlined how to make a tasty frittata. You learned about the best ingredients, steps for prep, and cooking tips. I shared ways to mix it up with flavors and substitutions. Storing and reheating your frittata is easy when you follow my best practices. Now, you can enjoy a delicious meal any day. With fresh ingredients and a little care, your frittata will shine at breakfast or brunch. Happy cooking!

Are you ready to whip up something delicious? This Insanely Easy Italian Sausage Frittata with Peppers is just what you need. You’ll love how simple it is to make, using …

Read more

Categories Breakfast

Homemade Sweet & Spicy Korean Fried Chicken Delight

June 24, 2025 by Chef Miles
- 1.5 lbs chicken wings or drumsticks - 1 cup all-purpose flour - 1 cup cornstarch - 1 teaspoon baking powder - 1 teaspoon garlic powder - 1 teaspoon onion powder - 1 teaspoon salt - 1/2 teaspoon freshly ground black pepper - Vegetable oil (for frying) For the chicken, I love using wings or drumsticks. They cook evenly and stay juicy. The flour and cornstarch mixture gives the chicken that perfect crunch. The baking powder helps it puff up nicely. Garlic and onion powder add rich flavors. Don't skip the salt and pepper; they season the chicken well. - 1/2 cup gochujang (Korean chili paste) - 1/4 cup honey - 1/4 cup soy sauce - 2 tablespoons rice vinegar - 1 tablespoon sesame oil - 2 cloves garlic, finely minced - 1 tablespoon fresh ginger, finely minced The sauce is the star here! Gochujang brings heat and depth. Honey adds sweetness, while soy sauce gives umami. Rice vinegar adds a tangy note. Sesame oil rounds it all out, making the sauce rich. Fresh garlic and ginger boost the flavor even more. - Sesame seeds - 2 green onions, thinly sliced Garnishes make your dish pop! Sesame seeds add crunch and a nutty flavor. Green onions bring freshness and color. They both enhance the look and taste of your dish. Remember, you can find the full recipe for detailed steps and tips. To start, you need to make the flour coating. Grab a large mixing bowl. Add the following dry ingredients: - 1 cup all-purpose flour - 1 cup cornstarch - 1 teaspoon baking powder - 1 teaspoon garlic powder - 1 teaspoon onion powder - 1 teaspoon salt - 1/2 teaspoon freshly ground black pepper Whisk these ingredients together well. This mixture gives the chicken a crispy texture you will love. Now, let’s coat the chicken. First, pat the chicken wings or drumsticks dry with paper towels. This step helps the coating stick better. Next, take each piece and dredge it through the flour mixture. Make sure it’s fully coated. Shake off any extra flour mix to avoid clumps. Heat up some vegetable oil in a deep frying pan. Aim for about 2 inches deep. Bring the oil to around 350°F (175°C). Carefully add the coated chicken pieces in small batches. Fry them for about 8-10 minutes. Turn them occasionally for even cooking. They should turn golden brown. Make sure the chicken reaches an internal temperature of 165°F (75°C). Once done, move the chicken to a wire rack or paper towels to drain excess oil. Now, it’s time to make the sweet and spicy sauce. In a medium saucepan, mix the following ingredients over medium heat: - 1/2 cup gochujang (Korean chili paste) - 1/4 cup honey - 1/4 cup soy sauce - 2 tablespoons rice vinegar - 1 tablespoon sesame oil - 2 cloves garlic, finely minced - 1 tablespoon fresh ginger, finely minced Stir the mixture well. Let it come to a simmer. Cook for about 5 minutes. This will thicken the sauce. Once thickened, remove the pan from heat. To finish, pour the sauce over the fried chicken in a large bowl. Toss until each piece is well coated. For an added touch, sprinkle sesame seeds and sliced green onions on top. This is the key to your homemade sweet and spicy Korean fried chicken delight. To achieve crispy chicken texture, start with dry chicken. Pat your chicken wings or drumsticks with paper towels. This step helps the coating stick better. Next, use a mix of flour and cornstarch for the best crunch. The cornstarch adds a lightness that flour alone cannot provide. Heat your oil to about 350°F (175°C). This temperature ensures the chicken fries evenly and gets that golden brown color. Fry in small batches to avoid overcrowding. This keeps the temperature steady and allows for even cooking. Adjusting thickness and sweetness is key to a great sauce. For a thicker sauce, let it simmer longer. If it’s too thick, add a splash of water or more vinegar. Sweetness can be increased by adding more honey. Taste as you go! Balance is crucial; you want sweet, spicy, and savory all at once. The sauce should coat the chicken well but not be too runny. A good rule is to make it thick enough to cling to the chicken without dripping off. For a fantastic presentation, arrange the fried chicken on a large platter. Drizzle extra sauce over the top for a glossy look. Sprinkle sesame seeds generously to add texture. Green onions make a fresh garnish and add color. Serve with pickled radishes on the side. They give a nice contrast to the richness of the chicken. You can also add steamed rice or a fresh salad for a complete meal. Try these options to make your chicken dish even more delightful! {{image_4}} You can switch up the chicken for different proteins. Chicken thighs work well if you want dark meat. They stay juicy and tender during cooking. If you're vegan or vegetarian, use tofu or tempeh instead. Press the tofu to remove excess moisture. Then, cut it into bite-sized pieces. You can also use cauliflower for a tasty veggie option. Just coat the florets like you would with chicken. You can change the sauce to match your taste. If you like it sweeter, add more honey. If you want more heat, include extra gochujang. You can also add some sriracha for a different kick. For a tangy twist, add lime juice or more rice vinegar. This lets you create a flavor that is perfect for you. If you or your guests need gluten-free meals, you can easily adjust the recipe. Use gluten-free flour instead of all-purpose flour. Cornstarch is already gluten-free, so you’re set there. Check the soy sauce label and pick a gluten-free version. This way, everyone can enjoy this dish without worry. Feel free to get creative and make this dish your own! For the complete recipe, visit the Full Recipe section. To keep your sweet and spicy Korean fried chicken fresh, use good storage methods. First, let the chicken cool to room temperature. Then, place it in an airtight container. Make sure to separate layers with parchment paper to avoid sticking. Store it in the fridge. It will last up to three days. To reheat, the goal is to keep the chicken crispy. Preheat your oven to 375°F (190°C). Place the chicken on a baking sheet lined with foil. Bake for about 10-15 minutes. This method revives the crunch. You can also use a toaster oven for smaller batches. Avoid using the microwave; it makes the chicken soggy. If you want to freeze your chicken, prepare it first. Allow it to cool completely. Wrap each piece in plastic wrap, then place them in a freezer bag. Squeeze out as much air as you can. Label the bag with the date. You can freeze it for up to three months. To thaw, move it to the fridge overnight before reheating. Making this dish takes about 50 minutes. You need around 20 minutes to prep. Frying the chicken takes about 10 minutes. The sauce takes another 5 minutes. Overall, it’s a quick and tasty meal for any day. Yes, you can use an air fryer. It’s a healthier option. Preheat your air fryer to 375°F (190°C). Lightly coat the chicken with oil before placing it in the basket. Cook for about 25-30 minutes. Check the chicken is crispy and reaches 165°F (75°C) inside. To change the spice level, use less gochujang in the sauce. You can also add honey for sweetness. If you like more heat, add extra gochujang or some chili flakes. Adjust to your taste as you mix the sauce. You learned how to make sweet and spicy Korean fried chicken. I covered main ingredients, cooking steps, and tips. You can customize this dish by changing proteins or sauces. Remember to store leftovers correctly and reheat to keep them crispy. This recipe is fun and easy to adapt for everyone. Enjoy your cooking adventure and share the joy of this tasty dish!

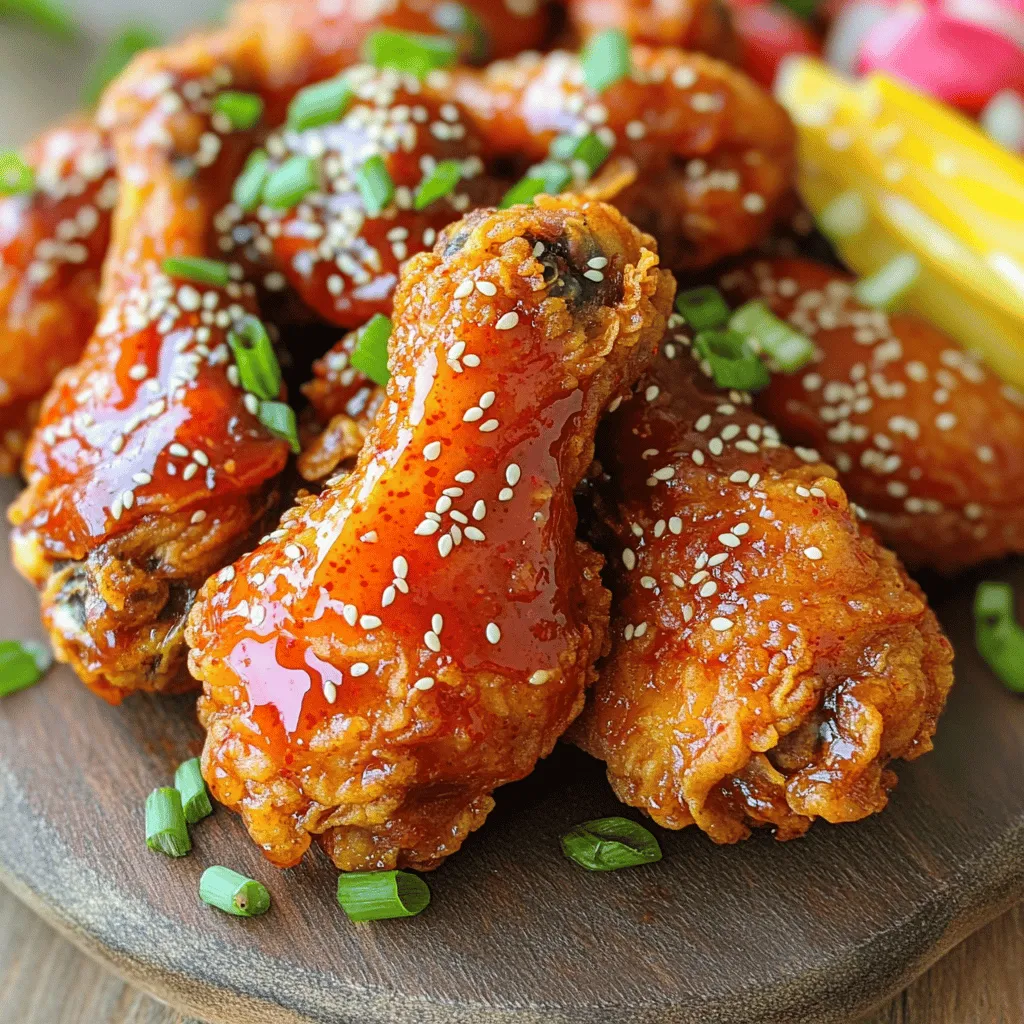
Are you craving a flavor explosion? Homemade Sweet & Spicy Korean Fried Chicken is your answer! I’ll show you how to make crispy chicken coated in a luscious sauce that …

Read more

Categories Dinner

How To Cook Frozen Chicken Breasts In The Instant Pot

June 24, 2025 by Chef Miles
For this recipe, you need 2 to 4 frozen chicken breasts. They should weigh about 1.5 to 2 pounds. Frozen chicken breasts are great for quick meals. The seasoning gives the chicken great flavor. Here’s what you need: - 2 teaspoons garlic powder - 1 teaspoon onion powder - 1 teaspoon paprika - 1 teaspoon Italian seasoning - Salt and freshly cracked pepper to taste Mix these spices together in a bowl. This blend makes your chicken taste amazing. You can use broth to keep the chicken juicy. Here are your choices: - 1 cup chicken broth (for rich flavor) - 1 cup vegetable broth (for a lighter taste) The broth adds moisture and helps the chicken cook evenly. You can find both options at any grocery store. For the full recipe, check out Instant Pot Magic: Juicy Frozen Chicken Breasts. Start by plugging in your Instant Pot. Select the 'Sauté' function and add one tablespoon of olive oil. Let it heat for about one minute until it looks shiny. This step helps to add flavor and color to your chicken. While the pot warms up, grab a small bowl. Mix together these spices: - 2 teaspoons garlic powder - 1 teaspoon onion powder - 1 teaspoon paprika - 1 teaspoon Italian seasoning - Salt and freshly cracked pepper to taste Take your frozen chicken breasts and rub the spice mix all over them. Make sure to cover each piece well. The seasoning will help the chicken taste great. When the olive oil is hot, carefully place the seasoned frozen chicken breasts in the pot. Pour one cup of chicken broth around the edges of the pot. This broth adds moisture and keeps the chicken tender without touching it directly. Next, close the lid and set the steam valve to 'Sealing'. Press the 'Manual' or 'Pressure Cook' button. Set the timer for 10 minutes if your chicken is thin, or 12 minutes for thicker pieces. After cooking, let the pressure release naturally for about 5 minutes. Then, switch the steam valve to 'Venting' to let out any remaining pressure. Open the lid carefully. Use a meat thermometer to check that the chicken's internal temperature reaches at least 165°F (75°C). If it’s done, you can serve it whole or shred it with two forks. For extra flavor, you can make a sauce with the leftover broth. Follow these steps, and you'll have juicy, tasty chicken in no time. For the full recipe, check the earlier section. To ensure your chicken is cooked just right, use a meat thermometer. The internal temperature should reach 165°F (75°C). If your chicken breasts are thick, you might need to increase the cooking time slightly. After cooking, let the chicken rest for a few minutes. This helps keep it juicy and tender. You can boost the flavor of your chicken with simple changes. Try adding lemon juice or zest to the broth for brightness. Fresh herbs like thyme or rosemary can also add depth. If you like it spicy, include some cayenne pepper or crushed red pepper flakes in your seasoning mix. These small tweaks can turn a good dish into a great one. How you serve your chicken matters. Slice the breasts into even pieces to show off the juicy interior. Arrange them on a nice platter and sprinkle fresh parsley or cilantro on top. This adds color and makes the dish look inviting. Pair your chicken with colorful sides like roasted veggies or a fresh salad. A well-presented plate not only looks good, but it also enhances the dining experience. For more detailed instructions and tips, check out the Full Recipe. {{image_4}} You can change up the flavor by using different spices. Try using taco seasoning for a zesty twist. Or, go for a sweet and smoky flavor with barbecue seasoning. For an Asian flair, use soy sauce, ginger, and sesame oil. You can also use fresh herbs like rosemary or thyme for a bright taste. Sauces can take your chicken to the next level. A simple lemon butter sauce is fresh and rich. Mix melted butter with lemon juice and a bit of garlic for a bright flavor. For a creamy option, whisk together sour cream, ranch seasoning, and a splash of milk. You can also try a spicy buffalo sauce for a kick. Serving your chicken well makes it look appealing. Slice the chicken and place it on a bed of rice or quinoa for a filling meal. You can also shred it for tacos or sandwiches. Pair it with crunchy vegetables for a salad. Drizzle with your favorite sauce to add flavor and color. For a heartier option, serve it alongside roasted potatoes or pasta. For more ideas, check out the Full Recipe for inspiration! After you cook your chicken, let it cool. Place leftover chicken in a shallow container. Cover it tightly with a lid or plastic wrap. This helps keep it fresh. Store the chicken in the fridge. It will last for up to four days. If you want to save it longer, you can freeze it. To reheat leftover chicken, use the microwave or the oven. If using the microwave, place the chicken on a plate. Cover it with a damp paper towel. Heat it in short bursts, checking often. In the oven, set it to 350°F (175°C). Place the chicken in a baking dish. Add a splash of broth to keep it moist. Heat for about 15 to 20 minutes. If you freeze cooked chicken, it will stay fresh for up to three months. Cut the chicken into pieces for easy storage. Wrap each piece in plastic wrap, then place it in a freezer bag. Remove as much air as possible. Label the bags with the date. When ready to eat, thaw the chicken overnight in the fridge. You can also use it straight from the freezer in soups or stews. Yes, you can cook fresh chicken breasts in the Instant Pot. The cooking time will be shorter. For fresh chicken, set the timer for about 6 to 8 minutes. Always check the internal temperature. It should reach 165°F (75°C) for safe eating. If your chicken isn't done, don't worry. Simply seal the pot again and cook for a few more minutes. Check the temperature again afterward. This is why a meat thermometer is a great tool. It helps you ensure perfect doneness every time. To make this recipe low-carb, choose a low-carb broth. You can also skip any added sugars in seasoning. Use more herbs and spices for flavor. Serve with non-starchy veggies like broccoli or cauliflower to keep it low-carb and delicious. For full details, check the Full Recipe. This guide showed you how to cook chicken breasts in an Instant Pot. We covered ingredients, step-by-step instructions, and tips for perfect results. You learned how to enhance flavors and present your dish well. Variations and storage tips help you adapt and keep leftovers fresh. With answers to common questions, you're now ready to create a delicious meal. Enjoy cooking and experimenting with your chicken dishes!

Do you have frozen chicken breasts but no time to thaw? The Instant Pot is your answer! In this guide, I’ll show you how to cook frozen chicken breasts fast …

Read more

Categories Dinner

Eggplant Tomato Pie Flavorful and Simple Recipe

June 23, 2025 by Chef Miles
- 1 large eggplant, sliced into 1/4 inch rounds - 2 large ripe tomatoes, sliced - 1 medium onion, thinly sliced - 2 cloves garlic, minced Eggplant is the star of this dish. Its rich and creamy texture pairs well with tomatoes. You want ripe tomatoes for the best flavor. The onion adds sweetness, while garlic gives it a savory kick. - 1 cup creamy ricotta cheese - 1 cup shredded mozzarella cheese - 1/2 cup finely grated Parmesan cheese Cheese makes this pie extra tasty. I love using ricotta for its creaminess. Mozzarella melts beautifully, adding a gooey layer. Parmesan gives a nice salty touch, enhancing the overall taste. - 1 teaspoon dried oregano - 1 teaspoon fresh basil, chopped (or 1/2 teaspoon dried basil) - 1 tablespoon extra virgin olive oil - 1 pre-made pie crust (store-bought or homemade) Seasonings bring life to the pie. Dried oregano adds an Italian flair, while fresh basil offers brightness. Olive oil helps everything blend together. You can use a store-bought pie crust for ease or make your own for that homemade touch. Check out the Full Recipe for more details! 1. Preheat your oven to 375°F (190°C). This helps cook the pie evenly. 2. Slice the eggplant into 1/4 inch rounds. Place them on a baking sheet. 3. Drizzle olive oil over the eggplant slices. Use enough to coat them well. 4. Season the slices with sea salt and black pepper. 5. Roast the eggplant in the oven for about 20 minutes. Flip the slices halfway through for even browning. Once done, take them out and let them cool. 1. Heat a skillet over medium heat. Add a splash of olive oil. 2. Sauté the thinly sliced onion until soft and translucent, about 3-4 minutes. 3. Stir in the minced garlic. Cook for another minute until fragrant. Remove the skillet from the heat. 1. In a mixing bowl, combine ricotta cheese, half of the mozzarella, Parmesan, oregano, basil, and a pinch of salt and pepper. Mix until smooth. 2. Roll out your pie crust and fit it into a pie dish. Make sure it covers the bottom and sides evenly. 3. Spread the ricotta mixture evenly on the crust. 4. Layer the roasted eggplant slices over the ricotta. Follow with the sliced tomatoes. 5. Sprinkle the sautéed onions and garlic on top for added flavor. 1. Scatter the remaining mozzarella cheese over the top of the pie. 2. Place the pie in the preheated oven. Bake for 25-30 minutes. 3. Check for a golden-brown top and melted cheese. Once done, let it rest for about 10 minutes. This makes slicing easier and lets flavors meld together. For more details, refer to the Full Recipe. - Roasting eggplant: To avoid sogginess, slice the eggplant into 1/4 inch rounds. Lay them flat on a baking sheet. Lightly drizzle with olive oil. Sprinkle sea salt and black pepper. Roast for 20 minutes, flipping halfway. This method helps keep them firm and tasty. - Ensuring even melting of cheese: Use freshly shredded mozzarella cheese. Spread it evenly on top of the pie. This way, it melts evenly and creates a golden crust. - Slicing and garnishing suggestions: When serving, slice the pie into wedges. Each slice should show off the layers. Garnish with fresh basil leaves for color and taste. A drizzle of balsamic reduction adds elegance and flavor. - Serving with accompaniments: Pair your pie with a light salad. A simple arugula or mixed greens salad works well. You can also serve it with crusty bread for a hearty meal. - Overcooking vegetables: Keep an eye on your veggies. Overcooking can make them mushy. Aim for tenderness without losing structure. - Using too much liquid: Be careful with sauces. Excess liquid can make your pie soggy. Stick to the recipe for the right balance. These tips will help you create a delightful Eggplant Tomato Pie that impresses everyone at the table. For the complete guide, check the Full Recipe. {{image_4}} You can make this dish fit your diet. If you're vegan, try using dairy-free cheese. Brands like Daiya or Follow Your Heart work well. These cheeses melt nicely and taste great. If you need a gluten-free option, look for gluten-free pie crusts. Many stores offer ready-made crusts, or you can make one from almond flour or rice flour. This keeps the pie delicious and safe for all diets. To boost the flavor, add spices or herbs. You could sprinkle in some red pepper flakes for heat. Fresh herbs like thyme or rosemary also add depth. You can include protein too. Ground turkey or beef adds heartiness. For a plant-based option, use chickpeas or lentils. These options make the pie more filling and tasty. You can change this pie based on the season. In summer, add zucchini or bell peppers for freshness. In fall, try sweet potatoes or butternut squash for a cozy twist. These seasonal changes keep the dish exciting and new. To keep your Eggplant Tomato Pie fresh, store it in the fridge. Here’s how: - Wait until the pie cools down. - Cover it tightly with plastic wrap or aluminum foil. - Place it in an airtight container for best results. For freezing, follow these steps: - Slice the pie into portions. - Wrap each slice in plastic wrap. - Place the wrapped slices in a freezer-safe bag or container. This way, you can enjoy it later without losing flavor. When it’s time to reheat, the oven is the best choice. Here’s why: - Preheat your oven to 350°F (175°C). - Place the pie on a baking sheet. - Cover it with foil to avoid drying out. Bake for about 15-20 minutes, or until it's hot. If you need a quicker option, use the microwave: - Place a slice on a microwave-safe plate. - Heat for about 1-2 minutes. However, this method can make the crust soft. The oven keeps the texture and flavor intact. Enjoy your delicious pie! Bake the Eggplant Tomato Pie for 25 to 30 minutes. You want the cheese to melt and bubble. It should turn a lovely golden brown color. Check it at 25 minutes to avoid overbaking. Yes, you can prepare this dish ahead of time. Assemble the pie and cover it tightly. Store it in the fridge for up to 24 hours before baking. This can save you time on busy days. This pie pairs well with a fresh salad. Try a simple green salad with a light vinaigrette. You can also serve it with crusty bread or a side of roasted vegetables. These sides enhance the meal and add more flavors. Yes, you can omit the cheese if you prefer. Use a vegan cheese substitute or skip it entirely. The pie will still taste great with the roasted eggplant and tomatoes. Just ensure you add a bit more seasoning for flavor. Eggplant tomato pie combines tasty ingredients for a delightful dish. You learned about the key ingredients, like eggplant, tomatoes, and cheese. I shared step-by-step instructions to make perfect pie layers. You received tips to avoid common mistakes and enhance flavors. Don't forget the storage and reheating tips for leftovers. With these insights, you can create a delicious eggplant tomato pie that impresses everyone at the table. Enjoy the cooking process and savor every bite!

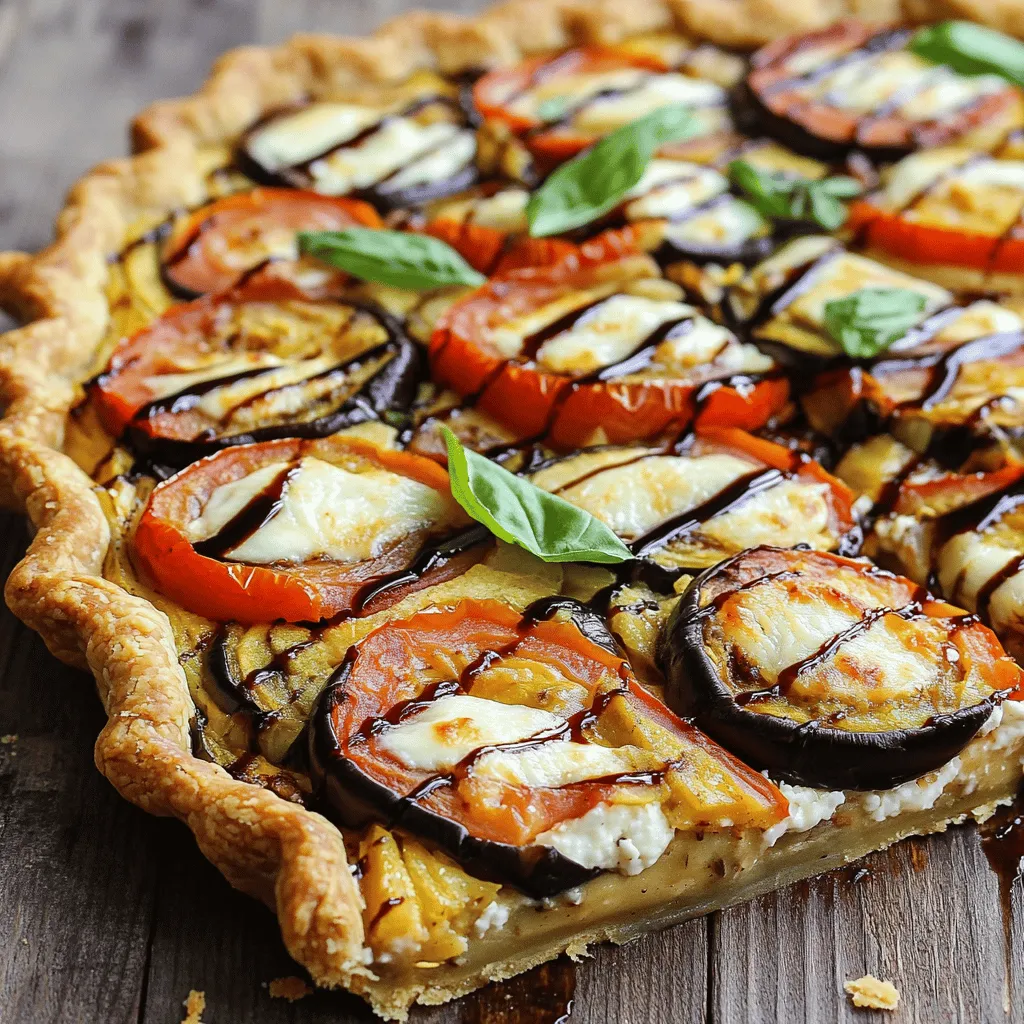
Welcome to the world of flavorful cooking! Today, I’ll share my simple and tasty Eggplant Tomato Pie recipe. This dish combines fresh eggplant, juicy tomatoes, and rich cheese, creating a …

Read more

Categories Dinner

Savory Tomato Basil Chicken Easy Recipe for Dinner

June 23, 2025 by Chef Miles
For a tasty Tomato Basil Chicken, you need these main items: - 4 boneless, skinless chicken breasts - 2 cups cherry tomatoes, halved - 1 cup fresh basil leaves, finely chopped - 3 cloves garlic, finely minced - 1 teaspoon dried oregano - 1 teaspoon balsamic vinegar - 1/4 cup extra virgin olive oil - Salt and freshly ground pepper to taste These ingredients work together to create a fresh and vibrant dish. You can enhance your dish with these optional items: - Fresh mozzarella cheese, sliced (for topping) - A squeeze of lemon juice - Red pepper flakes for heat Adding these can give your meal a personal touch. Freshness matters! Here’s how to choose the best: - Chicken: Look for bright pink, moist breasts. Avoid any that look gray or slimy. - Tomatoes: Choose firm, shiny cherry tomatoes. They should smell sweet and fruity. - Basil: Pick bright green basil leaves. They should feel fresh, not wilted. Using fresh ingredients makes your dish taste better. For the full recipe, check out my delicious Tomato Basil Chicken Delight. To start, let's make the tomato basil mixture. Grab a large mixing bowl. In it, add: - 2 cups cherry tomatoes, halved - 3 cloves garlic, finely minced - 1/4 cup extra virgin olive oil - 1 teaspoon dried oregano - 1 teaspoon balsamic vinegar - 1 cup fresh basil leaves, finely chopped - Salt and freshly ground pepper to taste Mix these ingredients gently. You want the tomatoes to be well-coated. The garlic adds a nice kick, while the basil gives freshness. This mixture is key for flavor. Next, we need to sear the chicken. Heat one tablespoon of olive oil in a large oven-safe skillet over medium-high heat. While the skillet heats, season both sides of the chicken breasts with salt and pepper. Once the skillet is hot, add the chicken. Sear each side for about five minutes. Look for a golden-brown crust. This step locks in the juices and flavor. After searing, pour the tomato basil mixture over the chicken. If you want, add slices of fresh mozzarella on top. Now, it's time to bake. Carefully put the skillet in the preheated oven at 375°F (190°C). Bake for 20 to 25 minutes. Check that the chicken reaches an internal temperature of 165°F (75°C). The tomatoes should bubble and soften. Once done, take the skillet out and let it rest for five minutes. This helps the chicken stay juicy. Now, you can serve it up and enjoy the delicious flavors of your hard work! For the full recipe, refer to the complete list of steps. To get the best chicken texture, start with fresh, high-quality chicken breasts. Before cooking, let the chicken rest at room temperature for about 15 minutes. This helps it cook evenly. When you sear the chicken, don’t overcrowd the skillet. Give each piece space to brown. This creates a nice crust. Sear each side for about five minutes. Then, bake it just until it reaches 165°F. This keeps the meat juicy and tender. To boost the flavor, use fresh herbs like thyme or parsley along with basil. You can also add a pinch of red pepper flakes for heat. If you like a bit of sweetness, try adding a tablespoon of honey to the tomato mixture. Using fresh lemon juice adds brightness to the dish. If you're a cheese lover, sprinkle some grated Parmesan cheese over the chicken just before serving. This adds a savory touch. Presentation makes a big impact. After cooking, plate each chicken breast neatly. Spoon the tomato and basil mix generously on top. For a pop of color, add fresh basil leaves as a garnish. Serve with a side of green beans or a light salad for a well-rounded meal. You can also drizzle a bit of olive oil over the dish for shine. This simple step makes your meal look gourmet. For the full recipe, check out the details above. {{image_4}} For a smoky flavor, try grilling your chicken. Use the same ingredients from the full recipe, but change the cooking method. Start by marinating the chicken breasts in olive oil, garlic, and balsamic vinegar for at least 30 minutes. This step helps the chicken soak up all the great flavors. Preheat your grill to medium-high heat. Grill each side for about 6-8 minutes. You want the chicken to reach 165°F. Once done, top with the fresh tomato and basil mixture. If you like a one-pan meal, the skillet method shines. You can add chopped bell peppers or zucchini to the tomato mixture. Just toss them in while you sear the chicken. This adds a nice crunch and extra nutrients. You can also use different types of cheese, like feta, for a tangy twist. Searing gives the chicken a lovely brown crust, then bake as usual. You can switch up ingredients based on what you have. If you don’t have cherry tomatoes, use regular tomatoes and chop them. Dried basil can replace fresh basil in a pinch, but use less since dried herbs are stronger. If you need a dairy-free option, skip the cheese or use a nut-based cheese. You can also swap the chicken for turkey or fish, adjusting your cooking time as needed. After enjoying your Tomato Basil Chicken, store leftovers properly. First, let the dish cool completely. Then, place it in an airtight container. This keeps the chicken fresh and tasty. Store it in the fridge for up to three days. If you want to keep it longer, consider freezing it. When it's time to eat your leftovers, heat them gently. The best method is to use the oven. Preheat the oven to 350°F (175°C). Place the chicken in an oven-safe dish. Cover it with foil to keep it moist. Heat for about 20 minutes. If you prefer the microwave, use it on medium power. Heat for 2-3 minutes, checking often. This keeps the chicken juicy. If you want to freeze your Tomato Basil Chicken, it’s easy! Cut the chicken into portions. Place them in freezer-safe bags. Remove as much air as possible. Label the bags with dates. You can freeze it for up to three months. When ready to eat, thaw it in the fridge overnight. Then, follow the reheating instructions for the best taste. Enjoy your meal later on! For the full recipe, check the detailed instructions above. You can serve Tomato Basil Chicken with many sides. Here are some great options: - Steamed seasonal vegetables for a healthy touch. - A light salad to complement the dish. - Garlic bread for a nice crunch. - Rice or pasta to soak up the sauce. These sides add balance to your meal and make it more filling. Yes, you can use dried basil. However, fresh basil gives a brighter taste. If using dried, remember: - Use one teaspoon of dried basil for every tablespoon of fresh. - Add it earlier in cooking to allow the flavor to bloom. Dried herbs are handy, but fresh basil enhances the dish. The best way to check chicken is by using a meat thermometer. Insert it into the thickest part of the chicken. Look for: - An internal temperature of 165°F (75°C). - Clear juices running from the chicken when you cut it. If you don't have a thermometer, cut into the chicken. The meat should be white, not pink. Cooking the chicken fully keeps it safe and tasty. This blog post covered everything you need for Tomato Basil Chicken. We explored key ingredients, from essential to optional ones, and tips for selecting fresh produce. You learned easy steps for prep, cooking, and baking to gain the best flavor. Plus, we shared useful tips for texture and presentation. Variations and storage ideas helped expand options for your meals. Keep these tips in mind to make your cooking easier and more delicious every time. Enjoy your tasty dishes!

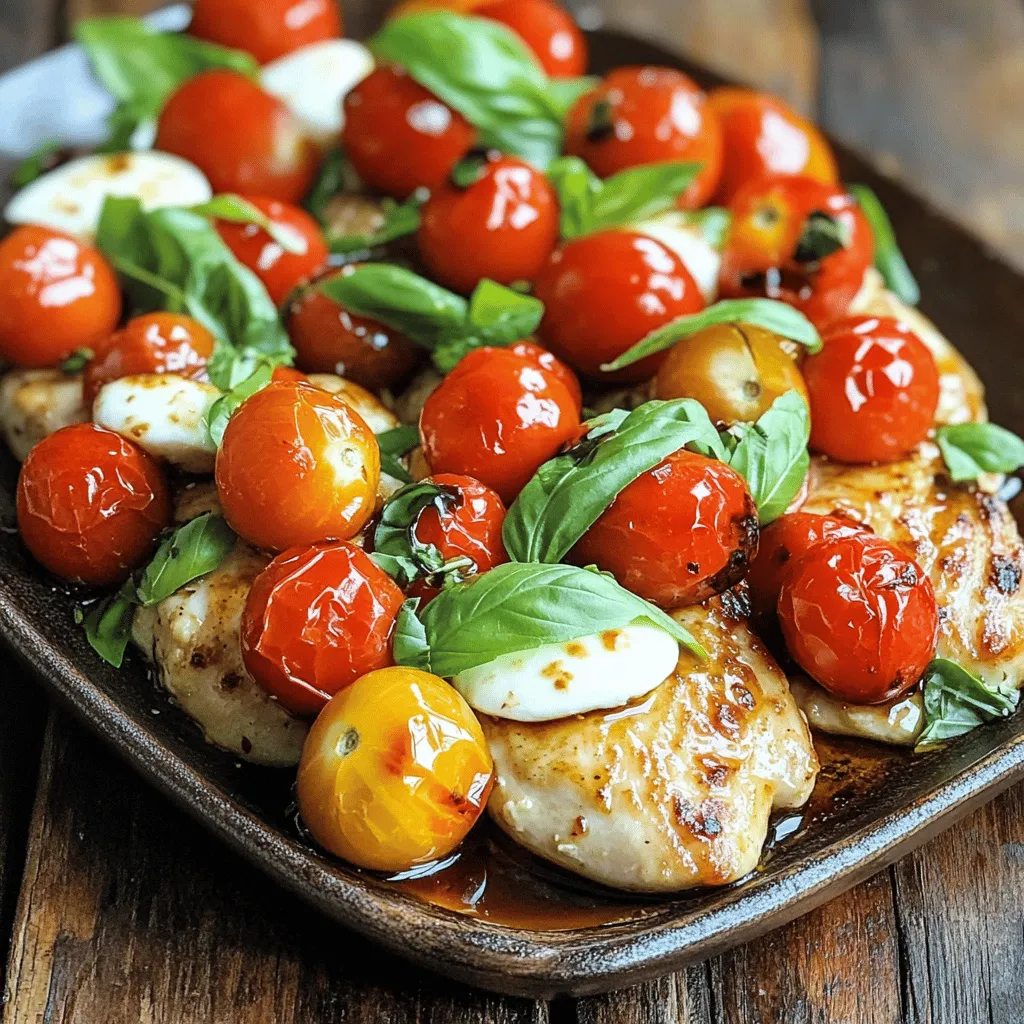
Looking for a quick and tasty dinner idea? This Tomato Basil Chicken recipe is your answer! It’s simple, fresh, and bursting with flavor. You’ll love how easy it is to …

Read more

Categories Dinner

Healthy Peach Crumble Flavorful and Nutritious Dessert

June 23, 2025 by Chef Miles
To make a healthy peach crumble, you need fresh and wholesome ingredients. Here’s what you will need: - 4 ripe peaches, sliced into wedges - 1 tablespoon honey or pure maple syrup - 1 teaspoon ground cinnamon - 1 tablespoon freshly squeezed lemon juice - 1 cup rolled oats - 1/2 cup whole wheat flour - 1/4 cup almond meal or finely ground almonds - 1/4 cup coconut oil, melted and slightly cooled - 2 tablespoons brown sugar or coconut sugar - A pinch of fine salt Using ripe peaches is key. They add natural sweetness and flavor to the dish. You can use honey or maple syrup as your sweetener. Both options provide a unique taste and help balance the tartness of the peaches. The ground cinnamon and lemon juice enhance the flavors. Cinnamon gives warmth, while lemon juice brightens the dish. For the crumble topping, rolled oats, whole wheat flour, and almond meal create a nutritious base. Coconut oil keeps it moist, while brown sugar adds just the right amount of sweetness. The pinch of salt brings all the flavors together. This combination of ingredients makes the crumble not just tasty, but also nutritious. You can find the full recipe to see how to bring these ingredients together. 1. Preheating the Oven Start by preheating your oven to 350°F (175°C). This step is key for even baking. 2. Preparing the Peach Mixture In a medium bowl, mix the sliced peaches with honey (or maple syrup), ground cinnamon, and lemon juice. Gently toss it all together. Make sure every peach slice is coated well. Then, transfer this mixture to a greased 8x8-inch baking dish, spreading it evenly. 3. Making the Crumble Topping In another bowl, mix rolled oats, whole wheat flour, almond meal, melted coconut oil, brown sugar, and a pinch of salt. Use a fork to stir until the mixture is crumbly and well combined. This topping adds a nice crunch to the dessert. 1. Assembling the Dish Carefully spread the crumble topping over the peach layer in the baking dish. Make sure to cover all the peaches. This helps seal in the flavor and keeps the fruit moist. 2. Baking Time and Temperature Place the dish in your preheated oven. Bake for 25-30 minutes. Look for a golden brown topping and bubbly peaches beneath. 3. Cooling and Serving Suggestions Once baked, take the crumble out and let it cool for a few minutes. This settling time allows the flavors to mix. Serve warm, with a scoop of creamy vanilla yogurt or whipped coconut cream. Add a sprig of fresh mint on top for a pretty finish. Enjoy every bite of this delicious treat! For the complete recipe, check out the Full Recipe section. Achieving the Right Crunch To get the perfect crunch, mix your dry ingredients well. Use rolled oats, whole wheat flour, and almond meal. The combination gives a great texture. Melted coconut oil binds everything together. When you bake, the top will crisp up nicely. If it seems too dry, add a tiny bit more oil. This keeps the crumble from being too crumbly. Adjusting Sweetness to Taste Sweetness can change based on your peaches. Taste your peach mix before adding more sweetener. If you want it sweeter, drizzle in honey or maple syrup. Remember, the topping also adds some sweetness. So, taste often and find what you like best! Vegan Options If you want a vegan crumble, swap honey for maple syrup. This keeps the flavor rich and sweet. Use coconut oil as your fat. It’s plant-based and gives a nice coconut flavor. You can also use a flax egg instead of regular eggs if a recipe calls for them. Gluten-Free Alternatives For a gluten-free option, replace whole wheat flour with almond flour or gluten-free flour mix. Make sure your oats are labeled gluten-free. This ensures they have no cross-contamination. The crumble will still be tasty and satisfying! Feel free to experiment with these tips and substitutions. Enjoy creating your Healthy Peach Crumble! Want the full recipe? Check out the [Full Recipe]. {{image_4}} Adding Nuts or Seeds You can boost the crunch by adding nuts or seeds to the crumble topping. Walnuts, almonds, or pumpkin seeds work great. Chop them up and mix them in with the oats and flour. This adds healthy fats and protein. It also gives you a nice texture. You can even sprinkle some on top before baking for extra crunch. Incorporating Other Fruits If you want to mix flavors, feel free to add other fruits. Berries, apples, or plums can pair well with peaches. Just remember to adjust the sweetener based on the fruits you choose. For example, apples may need a bit more honey or maple syrup. Experimenting with fruits keeps it fun and fresh. Low-Fat Modifications You can lower the fat content by replacing coconut oil with unsweetened applesauce. This keeps the crumble moist while cutting calories. You could also use less oil or a light cooking spray. This makes it lighter without losing flavor. Sugar-Free Options For a sugar-free version, you can use mashed bananas or pureed dates in place of honey or maple syrup. These natural sweeteners add flavor and keep it healthy. You can also use sugar substitutes like stevia or monk fruit. This way, you can enjoy your dessert without the extra sugar. For complete details, check the Full Recipe. Refrigeration Tips To keep your healthy peach crumble fresh, store it in the fridge. Use an airtight container for best results. This will help maintain its flavor and texture. It can last about 3 to 5 days in the refrigerator. When you want to serve it, just take it out and let it sit at room temp for a bit. Freezing Instructions If you want to save some for later, freezing is a great option. Wrap the crumble tightly in plastic wrap, then place it in a freezer bag. Make sure to squeeze out any air before sealing. It can stay good for 2 to 3 months in the freezer. When you're ready to eat, just thaw it overnight in the fridge. Methods for Keeping the Crumble Crispy To reheat your peach crumble and keep it crispy, use the oven. Preheat it to 350°F (175°C). Place the crumble in a baking dish and cover it lightly with foil. Bake for about 15 to 20 minutes. This method warms it up without making the topping soggy. You can also microwave it, but the oven is best for crispiness. Enjoy your delicious dessert warm! Can I use frozen peaches? Yes, you can use frozen peaches for this recipe. Just thaw and drain them before mixing. This keeps the crumble from getting too watery. How long does the healthy peach crumble last? The crumble lasts about 3 to 5 days in the fridge. Store it in an airtight container to keep it fresh. Can I make this crumble ahead of time? Absolutely! You can prepare the peach mixture and crumble topping in advance. Just bake it before serving for a warm dessert. Serving Size and Calorie Count This healthy peach crumble serves six. Each serving has about 180 calories. This is a guilt-free treat that still satisfies your sweet tooth. Health Benefits of Key Ingredients - Peaches: Rich in vitamins A and C, peaches boost your immune system. - Oats: They provide fiber, which is great for digestion. - Almond meal: It adds protein and healthy fats, keeping you full longer. - Coconut oil: This oil can help improve heart health when used in moderation. For the complete details on how to make this delicious dish, check out the Full Recipe. You learned how to make a healthy peach crumble with simple steps and tasty ingredients. From ripe peaches to a crunchy topping, this dessert is simple to prepare. Remember to adjust sweetness and try variations for fun twists. Don’t forget the best storage tips to keep your crumble fresh. Now, you can enjoy this treat any day! Happy baking!

Looking for a delicious dessert that’s both flavorful and nutritious? You’ve found it! This Healthy Peach Crumble is a tasty twist on a classic treat. With ripe peaches and wholesome …

Read more

Categories Desserts

7UP Grilled Chicken Juicy and Flavorful Delight

June 23, 2025 by Chef Miles
- 4 boneless, skinless chicken breasts - 1 cup 7UP soda - 1/4 cup extra virgin olive oil - 1 tablespoon Worcestershire sauce - 2 cloves garlic, finely minced To start, you need some good chicken. I prefer boneless, skinless chicken breasts because they cook evenly. Next, grab a cup of 7UP. This soda adds sweetness and helps tenderize the chicken. You also need a quarter cup of extra virgin olive oil for richness. A tablespoon of Worcestershire sauce adds depth. Lastly, use two cloves of finely minced garlic for flavor. - 1 teaspoon smoked paprika - 1 teaspoon onion powder - 1/2 teaspoon freshly ground black pepper - 1/2 teaspoon sea salt - 1 tablespoon freshly chopped herbs for garnish These seasonings make your chicken pop. Smoked paprika gives a nice smoky taste. Onion powder adds a hint of sweetness. Black pepper and sea salt bring out all the flavors. Don’t forget the herbs! They add freshness to your dish. - Fresh lemon wedges for serving Lemon wedges are optional, but they are a great addition. A squeeze of lemon brightens up the flavors. It gives your grilled chicken a fresh, zesty finish. For the full recipe, check out the details above. Enjoy cooking your 7UP Grilled Chicken! To start, gather your marinade ingredients. In a medium bowl, mix together: - 1 cup 7UP soda - 1/4 cup extra virgin olive oil - 1 tablespoon Worcestershire sauce - 2 cloves garlic, finely minced - 1 teaspoon smoked paprika - 1 teaspoon onion powder - 1/2 teaspoon freshly ground black pepper - 1/2 teaspoon sea salt Whisk these ingredients well until you have a smooth marinade. Next, place the chicken breasts into a large resealable bag or a shallow glass dish. Pour the marinade over the chicken, ensuring that each piece is well coated. Seal the bag or cover the dish tightly. Refrigerate for at least 1 hour, but up to 4 hours is even better for flavor. While the chicken marinates, it’s time to prepare your grill. Preheat your grill to a medium-high temperature, around 375°F to 400°F (190°C to 200°C). Make sure the grates are clean and well-oiled to prevent sticking. This step is key for achieving those perfect grill marks. Once your grill is ready, take the chicken out of the marinade and discard the leftover marinade. Place the chicken breasts gently on the grill. Grill each side for about 6-7 minutes. The chicken is done when its internal temperature reaches 165°F (75°C). This ensures the chicken is fully cooked and juicy. After grilling, transfer the chicken to a clean plate. Let it rest for about 5 minutes before serving. This resting time helps the juices stay in the meat, making it tender and delicious. For the best flavor, marinate the chicken for at least one hour. If you can, aim for four hours. The longer it sits, the more flavor it absorbs. Using 7UP in the marinade adds sweetness and helps tenderize the chicken. The acidity breaks down the meat, making it juicy and soft. To flip the chicken without sticking, let it cook on one side until it easily releases. Avoid moving it too soon. Resting the chicken after grilling is key. Let it sit for five minutes so the juices redistribute. This keeps the meat tender and flavorful. For garnish, use fresh herbs like parsley or cilantro. They add color and freshness. Serve the chicken with grilled veggies or a crisp salad. Lemon wedges bring a zesty finish. You can find the Full Recipe to guide you through the process effortlessly. {{image_4}} You can switch up the flavor of 7UP grilled chicken with fun marinades. One idea is a citrus marinade. Use lime or orange juice to add a bright taste. Just mix the juice with 7UP and your favorite herbs. This gives the chicken a fresh twist. If you crave heat, try a spicy version. Add hot sauce to the 7UP marinade. Just a few dashes can make a big difference. It creates a zesty kick that many will love. Experimenting with different marinades keeps your meals exciting. You can also cook 7UP chicken in different ways. If you don’t have a grill, try oven baking. Preheat your oven to 375°F (190°C). Place the marinated chicken in a baking dish. Bake for about 25-30 minutes or until the chicken is cooked through. For super tender chicken, use a slow cooker. Just add the marinated chicken to the slow cooker. Cook on low for 6-8 hours or high for 3-4 hours. This method makes the chicken juicy and flavorful. The fun doesn’t stop with cooking methods. You can serve 7UP chicken in many ways. One tasty option is to make tacos. Shred the grilled chicken and pile it into soft tortillas. Add toppings like avocado and salsa for a delicious meal. Another idea is to use the chicken as a salad topping. Slice the grilled chicken and place it over mixed greens. Add your favorite veggies and dressing. This makes for a fresh and healthy dish that is easy to prepare. For the full recipe and more details, check out the Full Recipe section. To keep your 7UP grilled chicken fresh, store it in an airtight container. Let it cool completely before sealing. This helps lock in moisture and flavor. You can safely refrigerate the chicken for up to 4 days. Always check for any off smell or change in texture before eating. If you want to keep your chicken longer, freezing is a great choice. Wrap the grilled chicken tightly in plastic wrap or foil. Then, place it in a freezer-safe bag. This helps prevent freezer burn. You can freeze the chicken for up to 3 months. When you're ready to eat, transfer it to the fridge overnight to thaw slowly. This keeps it juicy and tasty. When reheating your 7UP grilled chicken, do it gently. The best way is to use an oven set to 350°F (175°C). Place the chicken in a baking dish, cover it with foil, and heat for about 15-20 minutes. This keeps it from drying out. You can also use a microwave, but add a splash of water to keep it moist. Heat in short bursts, checking often. Enjoy your juicy and flavorful delight! Yes, you can use diet 7UP. It will change the taste a bit. The regular soda adds sweetness and a slight zing. Diet soda has less sugar and fewer calories. Your chicken may taste less sweet but still be flavorful. If you want a lighter option, diet 7UP works fine. Check the internal temperature of the chicken. It should reach 165°F (75°C). This means it is safe to eat. Use a meat thermometer for the best results. Insert it into the thickest part of the chicken. If it hits 165°F, your chicken is done. This step is key to avoid undercooked chicken. You can use soy sauce if you need a substitute. It offers a similar salty flavor. Another option is to mix soy sauce with a bit of vinegar. You can also try balsamic vinegar for a different taste. Each option will give your chicken a unique flavor twist. This blog post covered how to make a flavorful grilled chicken using 7UP and simple ingredients. You learned about the right marinating, grilling, and serving techniques, plus useful tips on variations and storage. The key to great chicken lies in the marinade, cooking method, and resting time. Apply these steps and enjoy your tasty meals. With a little creativity, you can make this dish your own. Perfect results are just a grill away!

Are you ready for a meal that bursts with flavor? My 7UP Grilled Chicken is juicy, tender, and easy to make! This recipe uses 7UP as a unique marinade that …

Read more

Categories Dinner

Best Peach Pie Ever Deliciously Simple Recipe

June 23, 2025 by Chef Miles
When picking peaches, choose ripe ones. Look for firm, fragrant peaches with a slight give. They should have a warm color, mostly yellow or golden. Avoid peaches with bruises or dark spots. For this pie, you need 6 cups fresh peaches, peeled and sliced. I love using local peaches when they are in season. They taste so much better! You need some key ingredients to make this pie delicious. Here is a list of what you need: - 1 cup granulated sugar - 1/4 cup all-purpose flour - 1 teaspoon ground cinnamon - 1/4 teaspoon ground nutmeg - 1 tablespoon freshly squeezed lemon juice - 1 tablespoon unsalted butter, diced - 1 tablespoon pure vanilla extract - 1 package refrigerated pie crusts (or your homemade crust, if preferred) - 1 egg, beaten (for egg wash) These ingredients create a sweet and flavorful filling. The spices add warmth, while the lemon juice brightens the flavor. You can add some extra ingredients to make your pie unique. Here are a few ideas: - A splash of bourbon for depth - A handful of blueberries for color - A pinch of ginger for a nice zing These add-ins can elevate your peach pie. Feel free to get creative with your choices! For the full recipe, check the Best Peach Pie Ever section. First, gather six cups of fresh peaches. Peel and slice them thin. In a large bowl, mix the peach slices with one cup of sugar, a quarter cup of flour, one teaspoon of cinnamon, and a pinch of nutmeg. Add one tablespoon of lemon juice and one tablespoon of vanilla extract. Stir gently until the peaches are coated. Let this sit at room temperature for about 30 minutes. This helps the peaches release juices and enhances the flavor. Next, preheat your oven to 425°F (220°C). Take one pie crust from the package. Unroll it carefully and fit it into a 9-inch pie dish. Press it into the sides. Use scissors to trim any excess dough around the edge. Spoon the peach filling into your crust, spreading it evenly. Dot the filling with small pieces of diced butter. This adds richness and flavor to your pie. Now, take the second pie crust and unroll it over the filling. You can cut slits in the top for steam to escape or create a lattice design if you like. Trim and crimp the edges to seal the pie. Brush the top with a beaten egg for a golden finish. Place the pie on a baking sheet to catch any drips. Bake it in the preheated oven for 45 to 50 minutes. Look for a golden crust and bubbly filling. When it's done, let it cool for at least two hours. This sets the filling and makes it easier to slice. Enjoy your delicious peach pie with ice cream or whipped cream! When picking peaches, look for ripe, fragrant ones. A peach should feel slightly soft when you press it gently. The color is important, too. Choose peaches that have a golden hue, not green. You can use yellow or white peaches. Both taste great! If you can, buy local peaches. They often taste better and are fresher. A great pie crust makes a big difference. For a crisp crust, keep your ingredients cold. Use cold butter and ice water when mixing. If you make your own crust, let it chill in the fridge for 30 minutes. This helps it stay flaky. If you use store-bought, roll it out gently. Avoid stretching it too much. This keeps it from getting tough. Serve your pie warm or at room temperature. A scoop of vanilla ice cream or a dollop of whipped cream makes it even better. You can also sprinkle some cinnamon on top for extra flavor. For a fun twist, add a slice of cheddar cheese on the side. This pairing brings out the sweetness of the peaches. If you want to impress guests, serve slices on rustic wooden boards. Add fresh mint leaves for a pop of color. Enjoy your Best Peach Pie Ever with family and friends! For the complete recipe, check out the Full Recipe. {{image_4}} You can choose between a classic pie crust and a lattice top pie. The classic pie has a solid top crust, keeping the filling cozy inside. It's easier to make and looks lovely when baked. The lattice top, however, gives a more rustic feel and showcases the juicy peaches. To make a lattice top, cut the second crust into strips and weave them over the filling. It takes more effort, but the results are stunning. Peaches are the star of this pie, but you can mix in other fruits too. Try adding blueberries, raspberries, or even apples. These fruits add extra flavor and texture. If you mix fruits, adjust the sugar based on their sweetness. A good rule is to keep the total fruit amount around six cups. This way, you keep the pie balanced and yummy. Spices can elevate your peach pie. Ground cinnamon and nutmeg are great, as they blend well with peaches. You can also add ginger for a warm kick or cardamom for an exotic twist. A pinch of salt helps balance the sweetness. Experiment with the amounts to find your perfect blend. Just remember, spices can make a big difference, so add them slowly and taste as you go. To keep your leftover peach pie fresh, cover it well. Use plastic wrap or aluminum foil. Place it in the fridge, where it will stay good for about 3-4 days. If you want to keep it longer, consider freezing it. You can freeze your peach pie for up to 3 months. Let the pie cool completely first. Wrap it tightly in plastic wrap, then in aluminum foil. This will help prevent freezer burn. Label the pie with the date so you know when to use it. When you're ready to eat, you can bake it straight from the freezer. To reheat your pie, preheat your oven to 350°F (175°C). Place the pie on a baking sheet to catch any drips. Bake for 20-30 minutes, or until it's heated through. You can cover the crust with foil to avoid burning it. Enjoy your warm, delicious pie! For the complete recipe, check out the Full Recipe section. Peach pie can last for about 3 to 4 days. Store it in the fridge. For best taste, cover it with plastic wrap or foil. This keeps it fresh and prevents it from drying out. If you want to keep it longer, you can freeze it. Frozen peach pie stays good for up to 3 months. Yes, you can use frozen peaches! Just thaw them first. Drain any extra juice before mixing them with sugar and spices. This helps avoid a soggy pie. Frozen peaches work well, especially if fresh ones are out of season. You still get that delicious peach flavor. The best way to reheat a peach pie is in the oven. Preheat it to 350°F (175°C). Place the pie on a baking sheet and cover it with foil. Heat for about 15 to 20 minutes. This warms the pie evenly and keeps the crust crisp. You can remove the foil for the last few minutes if you want a golden top. Enjoy it warm with ice cream for a treat! This blog post covered how to make a delicious peach pie from scratch. We discussed how to choose fresh peaches and essential baking ingredients. Then, we walked through preparing the peach filling, crafting the pie crust, and baking it. I shared tips for choosing the best peaches and serving ideas. Remember, you can also create fun variations or store your pie for later. Enjoy making your peach pie, and have a great time sharing it with friends and family!

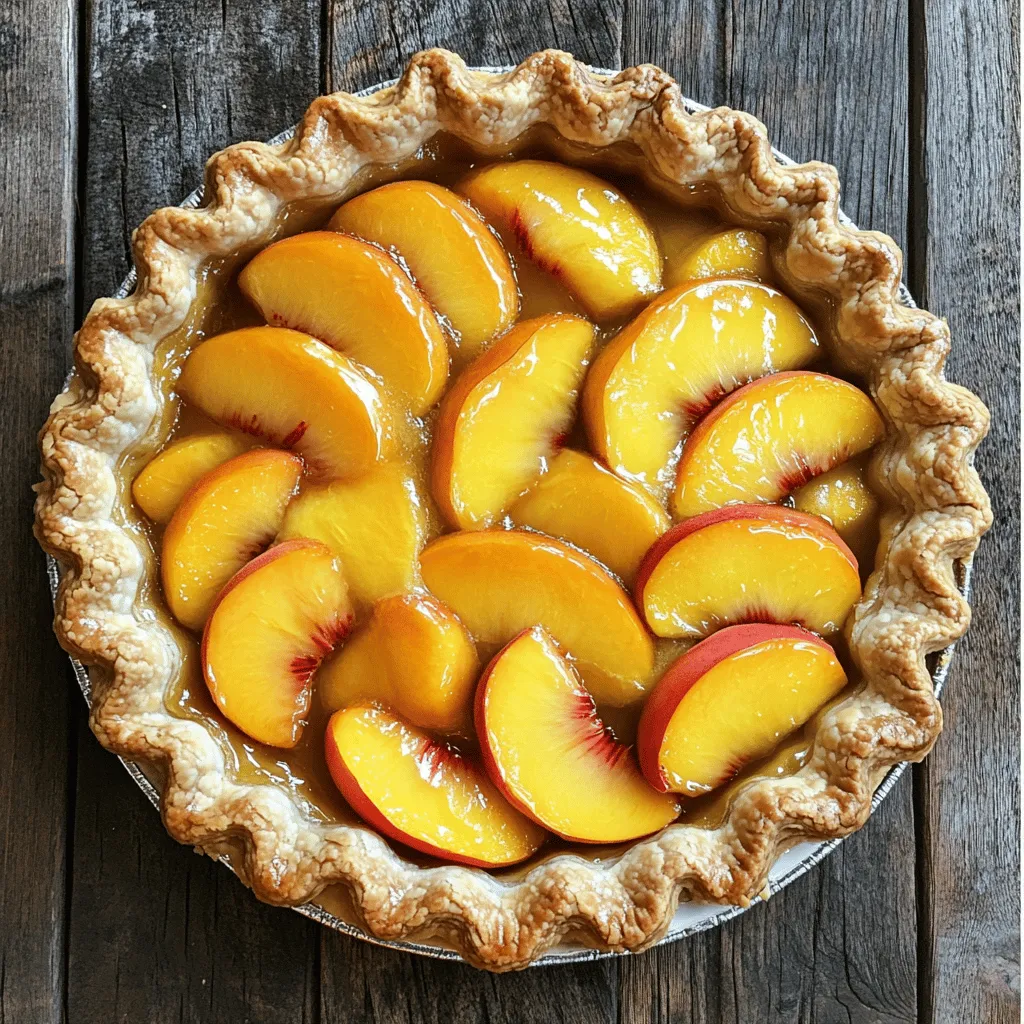
If you love the taste of sweet summer peaches, you’re in for a treat! In this article, I’ll show you how to make the best peach pie ever. This recipe …

Read more

Categories Desserts
Older posts
Newer posts
← Previous Page1 … Page83 Page84 Page85 … Page112 Next →

MELTED RECIPES

where delicious ideas melt into life, from stovetop to backyard. Always warm, simple, and irresistibly satisfying. 🍳🔥🧀

PAGES

Home About Contact Privacy Policy Terms & Conditions Cookie Policy GDPR Policy Copyright Policy Disclaimer

CATEGORIES

Appetizers Desserts Salads Breakfast Dinner

Contact

  • Pinterest
  • Mail
Copyright © 2025 Melted Recipes. All rights reserved.