Skip to content
Melted Recipes
  • Home
  • Appetizers
  • Desserts
  • Salads
  • Breakfast
  • Dinner
  • Privacy Policy
  • Contact
  • About

Chef Miles

Quick Pickled Vegetables Flavorful and Easy Recipe

June 27, 2025 by Chef Miles
To make quick pickled vegetables, you'll need the following: - 1 cup cucumbers, thinly sliced - 1 cup radishes, thinly sliced - 1 cup carrots, julienned - 1 cup bell peppers, thinly sliced (mix colors for fun) - 1 cup white vinegar - 1 cup water - 2 tablespoons granulated sugar - 1 tablespoon salt - 1 teaspoon mustard seeds - 1 teaspoon coriander seeds - 1 teaspoon crushed red pepper flakes (adjust to taste) - Fresh dill sprigs, for garnish Want to take your pickles to the next level? Try adding these: - Garlic cloves for a bold flavor - Ginger slices for a zing - Jalapeños for a spicy kick - Lemon or lime juice for a citrus twist These add-ins can give your pickles a unique taste and make them extra special. Using fresh ingredients is key for tasty pickles. Fresh veggies keep their crunch and color, making your dish pop. When you choose ripe cucumbers, crisp radishes, and vibrant peppers, you enhance both flavor and nutrition. Freshness also ensures that your quick pickled vegetables taste their best. Always pick the best quality produce for a delicious outcome. For the full recipe, check out the Zesty Rainbow Quick Pickles. First, gather your veggies. You need cucumbers, radishes, carrots, and bell peppers. I like to use a mix of colors. It makes the dish more fun! Slice the cucumbers and radishes thinly. Julienne the carrots, and slice the bell peppers. Place all the veggies in a large mixing bowl. Toss them gently to mix. Next, we make the brine. In a medium saucepan, add white vinegar, water, sugar, and salt. Also, include mustard seeds, coriander seeds, and crushed red pepper flakes. Heat this mixture over medium heat. Stir it until it simmers. Ensure the sugar and salt dissolve completely. This brine is what gives the veggies their flavor. Now it’s time to combine. Pour the hot brine over the mixed vegetables in the bowl. Make sure all the veggies are fully submerged in the liquid. This step is key for even pickling. The heat helps the flavors seep into the vegetables. Let the mixture cool at room temperature for 20 to 30 minutes. After cooling, transfer the pickled veggies and brine into a clean jar or container. Seal it tightly. Place the jar in the fridge. Let it chill for at least 2 hours for the best flavor. For more flavor, pickling overnight is ideal. You can find the full recipe for these zesty rainbow quick pickles to follow along easily. For great flavor, let your pickles sit in the fridge. Two hours is good, but overnight is best. The longer they sit, the more the flavors blend. I love the taste after a full day. To get that perfect crunch, pick fresh, firm vegetables. Slice them thinly for even pickling. Also, don't skip the salt in the brine. It helps keep the veggies crisp. One common mistake is using old vegetables. Always choose the freshest produce. Another mistake is not letting the brine cool before adding the veggies. This can lead to soggy pickles. Lastly, don't skip refrigerating them. This step is key for flavor and safety. For the full recipe, check out Zesty Rainbow Quick Pickles. {{image_4}} You can pickle many vegetables. Try using: - Cauliflower florets - Green beans - Asparagus - Zucchini - Red onions These vegetables add different tastes and colors. They also change the texture of your pickles. Use what you like best. You can mix and match to find your favorite combo. You can add more fun to your pickles with unique flavors. Some ideas include: - Ginger for a sweet kick - Garlic cloves for a bold taste - Lemon zest for a fresh twist - Bay leaves for a warm aroma These flavors can change the whole vibe of your pickles. Don’t be afraid to experiment! Each time you pick a new flavor, you create something fresh and exciting. Heat can make your pickles pop! To customize the spice, think about: - Adding more crushed red pepper flakes for heat - Using jalapeños for a fresh kick - Trying Thai bird chilies for a serious burn Start with a little heat. You can always add more later. This way, you can control how spicy your pickles become. Everyone can enjoy their own level of heat in your dishes! To keep your quick pickled vegetables fresh, store them in the fridge. Use a clean, airtight jar. Make sure the veggies are fully submerged in the brine. This helps maintain their crunch and flavor. Avoid using metal lids as they may react with vinegar. Glass or plastic lids work best. Quick pickled vegetables last about two weeks in the fridge. After that, their taste may fade. To enjoy them at their best, eat them within this time frame. If you want to keep them longer, consider canning for preservation. Look for changes in color or texture. If the vegetables become mushy or slimy, they may be bad. A foul smell is also a strong indicator of spoilage. If you see mold or any unusual growth, discard the pickles immediately. Always trust your senses when checking for spoilage. It takes about 10 minutes to prep and 2 hours to chill. You can eat them after chilling. For the best taste, let them sit overnight. Yes, you can use apple cider vinegar or rice vinegar. Each vinegar gives a unique flavor. Experiment to find your favorite! Yes, they are low in calories and high in nutrients. You get the benefits of fresh veggies and probiotics. They can add zest to your meals too. This recipe is not meant for canning. Quick pickles are for the fridge, not long storage. They taste best fresh and crisp. Serve them with sandwiches, tacos, or salads. They also make a great side for grilled meats. Use them to add a pop of color to cheese plates! Quick pickling is easy and fun. You learned about the key ingredients, flavors to add, and the need for freshness. I walked you through the steps to prepare the vegetables, make brine, and store the pickles. You now know tips for the best crunch and how to avoid common mistakes. Explore variations with different veggies and flavors to make this your own. Lastly, I shared storage tips and answered FAQs for your peace of mind. Enjoy your quick pickled creations and share them with family and friends!

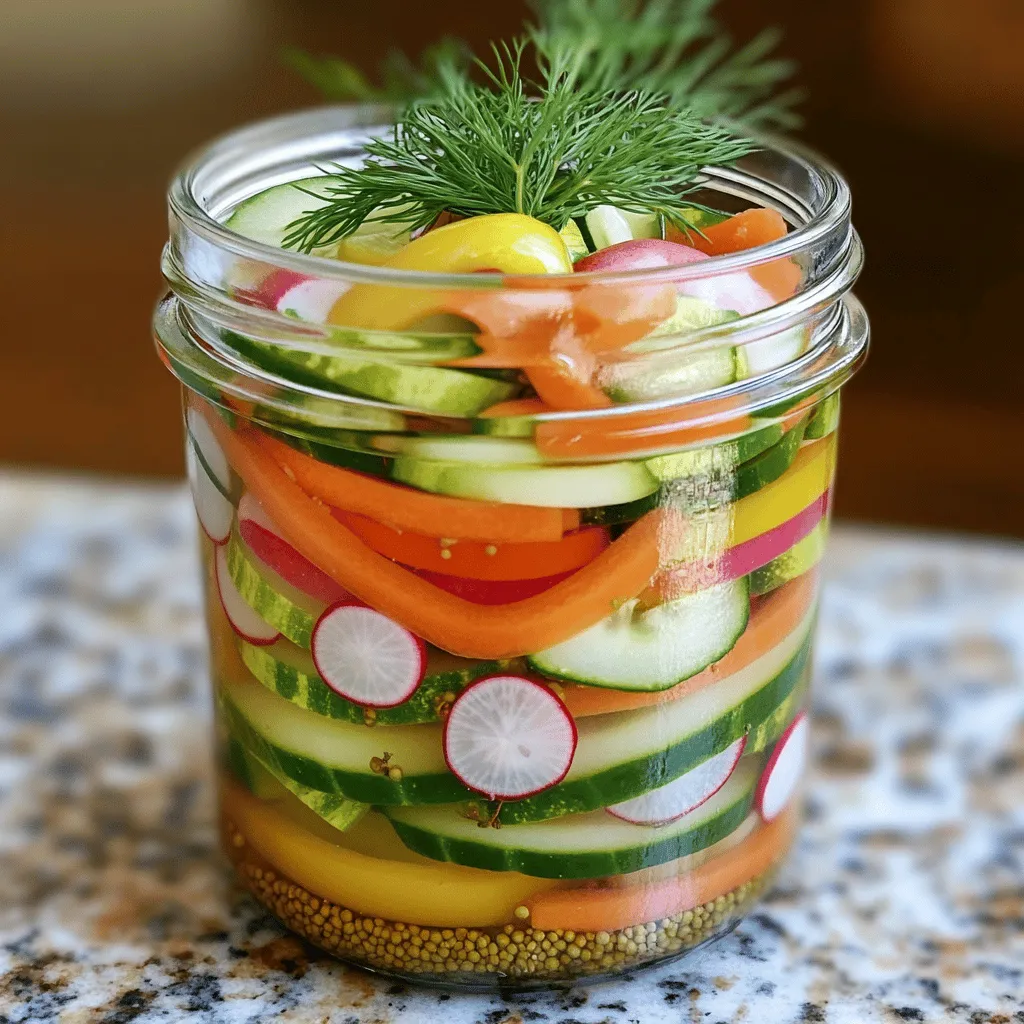
Are you ready to add a burst of flavor to your meals? Quick pickled vegetables are easy to make and incredibly tasty! In this guide, I’ll walk you through a …

Read more

Categories Salads

Spinach Stuffed Chicken Breasts Flavorful Dinner Idea

June 26, 2025 by Chef Miles
To make the best spinach stuffed chicken breasts, gather these fresh ingredients: - 4 boneless, skinless chicken breasts - 2 cups fresh spinach, finely chopped - 1 cup creamy ricotta cheese - 1/2 cup shredded mozzarella cheese - 1/4 cup freshly grated Parmesan cheese - 2 cloves garlic, minced - 1 teaspoon mixed dried Italian herbs (such as oregano, basil, and thyme) - Salt and freshly cracked pepper, to taste - 2 tablespoons extra virgin olive oil - 1 tablespoon freshly squeezed lemon juice - Toothpicks or kitchen twine, for securing the chicken Each ingredient plays a key role. The chicken breasts serve as a tasty base. Fresh spinach adds a vibrant color and healthy nutrients. Cheeses like ricotta, mozzarella, and Parmesan bring creaminess and flavor. Garlic and herbs enhance the taste profile, making each bite special. Olive oil and lemon juice add richness and brightness. Seasoning with salt and pepper ensures everything is balanced. This dish is both healthy and filling. If you want a detailed cooking guide, check out the Full Recipe. Enjoy the process and the delicious results! 1. Preheat the Oven: Start by preheating your oven to 375°F (190°C). This step is key for cooking the chicken evenly. 2. Mix the Stuffing Ingredients: In a medium bowl, mix together the chopped spinach, ricotta cheese, mozzarella, and Parmesan. Add minced garlic and Italian herbs. Don’t forget to season with salt and pepper. Mix until well combined. 3. Prepare the Chicken Breasts: Take each chicken breast and cut a pocket into the thick part. Be careful not to cut all the way through. Season both the inside and outside with salt and pepper for added flavor. 1. Sear the Chicken: Heat extra virgin olive oil in an oven-safe skillet over medium-high heat. Add the stuffed chicken breasts and sear for 3-4 minutes on each side. You want them to be golden brown. 2. Bake the Chicken: After searing, drizzle lemon juice over the chicken. Transfer the skillet to the oven. Bake for 20-25 minutes. Check that the internal temperature reaches 165°F (75°C) for safety. 1. Let the Chicken Rest: Once cooked, remove the skillet from the oven and let the chicken rest for about 5 minutes. This step helps the juices stay inside the chicken, making it juicy. 2. Presentation Tips: To impress, slice each chicken breast in half. This shows off the green spinach filling. Arrange the slices on a platter. Garnish with extra Parmesan and fresh spinach leaves for color. Follow these steps, and you’ll create a delicious Spinach Stuffed Chicken Breasts dinner. For the full recipe, check out the details above. To keep the filling inside the chicken, make a deep pocket. Use a sharp knife to cut carefully. Do not slice all the way through. After stuffing, secure the pocket with toothpicks or kitchen twine. This helps prevent any delicious filling from leaking out. For juicier chicken, do not overcook it. Use a meat thermometer to check the chicken's internal temperature. It should reach 165°F. Let the chicken rest for about five minutes after cooking. This allows the juices to settle for a tender bite. Using the right cookware makes a big difference. I suggest an oven-safe skillet for searing and baking. A heavy-bottomed pan helps distribute heat evenly. This ensures your chicken cooks well without burning. Also, keep a meat thermometer handy. It takes the guesswork out of cooking chicken. You will know when it is perfectly done. A sharp knife and a cutting board are essential for preparing the chicken and stuffing. For the full recipe, check out the detailed guide provided. {{image_4}} You can change up the cheese in this dish. Try feta for a tangy twist. Goat cheese also works well, adding a creamy texture. For a richer taste, use a blend of cheeses. You can mix ricotta with cream cheese for a smooth filling. Adding extra vegetables can boost nutrition and flavor. Chopped sun-dried tomatoes add a sweet and tangy bite. You can also include artichoke hearts for a fun texture. Fresh herbs like basil or parsley can brighten the dish. Spices can take your stuffed chicken to the next level. A pinch of red pepper flakes adds heat. Try smoked paprika for a hint of smokiness. You can also use lemon zest to bring fresh flavor. For sauces and toppings, consider a drizzle of balsamic glaze. It adds sweetness and a lovely shine. A light cream sauce can make the dish feel fancy. You can also serve it with a side of marinara for a fun twist. Explore these variations to make your spinach stuffed chicken breasts your own! For the complete recipe, check out the [Full Recipe]. Refrigeration You can keep leftovers in the fridge. Place the chicken in an airtight container. It stays fresh for up to three days. Make sure to cool it first before sealing. This prevents extra moisture, which can make it soggy. Freezing If you want to save it longer, freezing works well. Wrap each piece tightly in plastic wrap. Then, place them in a freezer-safe bag. You can freeze it for up to three months. Just remember to label it with the date. This way, you know when to use it. Microwave vs. Oven Microwaving is quick but may dry out the chicken. Use medium heat for one to two minutes, checking often. If you prefer juicier chicken, use the oven. Preheat it to 350°F (175°C). Place the chicken in a baking dish, cover it with foil, and heat for 15-20 minutes. This way, the flavors stay rich and vibrant. For more details, check the Full Recipe. How to Make Spinach Stuffed Chicken Breasts? To make spinach stuffed chicken breasts, start by mixing chopped spinach, ricotta, mozzarella, and Parmesan. Add minced garlic and Italian herbs to the mix, then season with salt and pepper. Next, cut a pocket in each chicken breast and fill them with the spinach mixture. Sear the stuffed breasts in olive oil until golden brown. Finally, bake until cooked through. For a detailed guide, check the Full Recipe. What Can I Serve with Spinach Stuffed Chicken Breasts? You can pair the chicken with a fresh salad or roasted vegetables. Mashed potatoes or rice also make great sides. For a light touch, consider a lemon vinaigrette on the salad. These accompaniments enhance the flavors of the chicken and create a balanced meal. Can I Prepare Spinach Stuffed Chicken Breasts Ahead of Time? Yes, you can prepare these stuffed chicken breasts a day ahead. Simply fill and secure the chicken, then store it in the fridge. When ready to cook, sear and bake as usual. This can save you time on busy nights while still giving you a delicious dinner. Healthy Aspects of the Dish Spinach stuffed chicken breasts are packed with nutrients. Spinach adds vitamins A, C, and K, along with iron and fiber. The chicken provides lean protein, which is vital for muscle health. Using low-fat cheese options can reduce calories while keeping flavor. Serving Sizes and Portions This recipe serves four, with each portion being one stuffed chicken breast. Each breast is filling, so you may not need much more than a side dish. If you have leftovers, they make for great lunches the next day! You learned how to make spinach stuffed chicken breasts with simple steps. We covered the ingredients, preparation, cooking processes, and tips for the best results. You can add your own twist with ingredient swaps and flavor enhancements. In conclusion, this dish is both tasty and healthy. It’s perfect for family meals or special occasions. Use the storage tips to keep leftovers fresh. Enjoy making this recipe, and share it with friends! Your cooking will impress everyone.

Looking for a tasty dinner idea? Spinach stuffed chicken breasts are a delicious option! This dish is not just flavorful; it’s also packed with nutrients. You’ll love how easy it …

Read more

Categories Dinner

Corn and Cherry Tomato Quiche Tasty Comfort Dish

June 26, 2025 by Chef Miles
- 1 pre-made pie crust (9-inch) - 1 cup fresh corn kernels (frozen can be substituted if necessary) - 1 cup cherry tomatoes, halved - 3 large eggs - 1 cup heavy cream - 1 cup shredded Gruyère cheese - 1 tablespoon fresh basil, finely chopped (or 1 teaspoon dried basil) - 1 teaspoon garlic powder - Salt and freshly ground black pepper to taste - 1 tablespoon olive oil for sautéing - Spinach or kale for added greens - Crumbled feta or goat cheese for extra flavor - Red pepper flakes for a spicy kick - 9-inch pie dish for the crust - Medium skillet for sautéing - Large mixing bowl for the egg mixture - Whisk for blending eggs and cream - Fork for poking holes in the crust - Measuring cups and spoons for accuracy When gathering your ingredients, focus on freshness. Fresh corn and ripe cherry tomatoes make a big difference in flavor. If you can, choose local produce to enhance your dish. The tools you use also matter. A good pie dish ensures even baking. Using a whisk helps blend ingredients smoothly. All these details come together to make your Corn and Cherry Tomato Quiche a tasty comfort dish. You can find the full recipe at the beginning of the article. Enjoy cooking! First, set your oven to 375°F (190°C). Preheating warms the oven for a perfect bake. This helps the quiche rise and cook evenly. Next, take a medium skillet and add one tablespoon of olive oil. Heat it over medium heat. Once hot, add one cup of fresh corn kernels. Sauté the corn for about 3-4 minutes. You want it tender and slightly golden. Season with salt, black pepper, and garlic powder. This adds flavor to your dish. After cooking, remove the skillet from heat and set it aside. Grab a large mixing bowl. Crack three large eggs into it and pour in one cup of heavy cream. Whisk them together until they blend well. Next, add one tablespoon of finely chopped fresh basil. You can use one teaspoon of dried basil if fresh is not available. Season with salt and pepper to taste. This mixture forms the base of your quiche. Now it's time to prepare the pie crust. Carefully place the pre-made pie crust into your pie dish. Use a fork to poke several holes in the bottom. This step prevents bubbling during baking. With the pie crust ready, layer the sautéed corn evenly over the bottom. Next, add one cup of halved cherry tomatoes, spreading them out for even flavor. Pour the egg and cream mixture over the corn and tomatoes. Fill just until covered. Finally, sprinkle one cup of shredded Gruyère cheese on top. This adds a rich, cheesy finish. Place the quiche in the preheated oven. Bake for 35-40 minutes, or until the center is set and the top turns golden brown. Once done, remove it from the oven and let it cool for about 10 minutes. This resting time helps the quiche set perfectly for slicing. For the full recipe, check out the [Full Recipe]. To get the best crust, start with a pre-made pie crust. Make sure to poke holes in the bottom. This keeps it from bubbling up while baking. You can also chill the crust for 30 minutes before filling. This helps it stay crisp and flaky. Gruyère cheese brings a rich flavor to the quiche. If you want to try something different, use cheddar or feta. Both add unique tastes. A mix of cheeses can also work well, giving your quiche depth. Remember to shred your cheese for even melting. You can change the flavor by adding spices or herbs. Fresh herbs like thyme or rosemary add a nice touch. For a kick, a pinch of red pepper flakes can spice things up. Don’t forget to taste as you go. This ensures the flavors blend just right. For the sweetest flavor, use ripe cherry tomatoes. They balance nicely with the corn's sweetness. For more tips and the full recipe, check out the complete guide. {{image_4}} You can make this quiche even more colorful and tasty by adding vegetables. Spinach, bell peppers, or zucchini work great. For spinach, use about one cup, chopped. With bell peppers, one medium-sized, diced will add some crunch and flavor. Zucchini can be shredded or sliced thin. Add these before you pour in the egg mixture for a delightful twist. Herbs can change the whole flavor of this quiche. Instead of basil, you can try thyme or parsley. Both add a fresh taste. A pinch of smoked paprika gives a warm kick. You might also like to add a dash of red pepper flakes for heat. Mix and match until you find your favorite combo. Seasonal vegetables can enhance your quiche. In spring, try asparagus or peas. In summer, add zucchini or fresh herbs. Fall is great for mushrooms or roasted squash. In winter, use hearty greens like kale or Swiss chard. These veggies keep your quiche fresh and exciting all year round. For the full recipe, check out the details above! To store leftover quiche, let it cool first. Wrap the slices tightly in plastic wrap. Place the wrapped quiche in an airtight container. You can keep it in the fridge for up to three days. Make sure to label it with the date. This helps you track how long it stays fresh. To reheat quiche, preheat your oven to 350°F (175°C). Place the slices on a baking sheet. Cover them loosely with aluminum foil to keep the moisture in. Heat for about 15-20 minutes or until warm. You can also use a microwave. Heat each slice for about 30-60 seconds. This method is faster but may make the crust less crispy. If you want to freeze quiche, slice it first. Wrap each slice in plastic wrap, then in foil. This prevents freezer burn. You can freeze it for up to three months. When ready to eat, thaw it in the fridge overnight. Reheat in the oven for the best texture. This way, you can enjoy your Corn and Cherry Tomato Quiche later! Yes, you can make this quiche ahead of time. Prepare it fully and bake it. Once baked, let it cool. After cooling, wrap it well in plastic wrap or foil. Store it in the fridge for up to three days. You can also freeze it for longer storage. To freeze, wrap it tightly and store for up to three months. To serve, just reheat it in the oven. This way, you save time on busy days. Quiche pairs well with many dishes. Here are some ideas to serve: - A simple green salad with vinaigrette - Roasted or steamed vegetables - Fresh fruit, like berries or melon - A light soup, such as tomato or vegetable - Toasted bread or croissants These sides add color and balance to your meal. They make it feel complete and satisfying. To check if your quiche is done, look for a few signs. First, the edges should be set and firm. The center should be slightly jiggly but not liquid. You can also insert a knife into the center. If it comes out clean, the quiche is ready. The top should be golden brown. If it looks perfect, let it cool for a bit before slicing. This resting time helps it hold its shape. This blog post covered how to make a tasty Corn and Cherry Tomato Quiche. We looked at key ingredients, step-by-step instructions, and useful tips. You learned ways to personalize your quiche and keep it fresh. In the end, making quiche is fun and flexible. With practice, you will impress everyone with your cooking skills! Enjoy experimenting with flavors and sharing your delicious quiche with others.

Are you ready to enjoy a warm slice of Corn and Cherry Tomato Quiche? This tasty comfort dish combines sweet corn and juicy cherry tomatoes for a perfect blend of …

Read more

Categories Dinner

Peach Pudding Delight Simple and Tasty Recipe

June 26, 2025 by Chef Miles
- 4 ripe peaches, peeled and diced - 1/2 cup granulated sugar, divided - 2 tablespoons cornstarch - 1/4 teaspoon salt - 2 cups almond milk (or any milk of your choice) - 1 teaspoon pure vanilla extract - 1/4 teaspoon ground cinnamon - 1 tablespoon fresh lemon juice - Whipped cream, for serving (optional) - Fresh mint leaves, for garnish (optional) Gathering these ingredients is simple. Fresh peaches give this dish its sweet flavor. I like to use ripe peaches that are soft to the touch. They should smell sweet, which shows they are ready to eat. Using granulated sugar, I balance the sweetness just right. Cornstarch helps thicken the pudding. It makes the texture creamy and smooth. Almond milk is my favorite base, but any milk works well. Vanilla extract adds a lovely aroma. Lemon juice brings a nice tanginess that complements the peaches. Ground cinnamon gives a warm flavor, making each bite special. Optional toppings like whipped cream and mint leaves add extra flair. You can make it look nice for a special occasion. This list of ingredients is perfect for making a delightful peach pudding. You can find the full recipe in the next sections for easy cooking! 1. Start by peeling and dicing the ripe peaches. Use a sharp knife for clean cuts. 2. Place the diced peaches in a medium saucepan. Add 1/4 cup of granulated sugar and lemon juice. 3. Stir gently and let the peaches rest for about 10 minutes. This helps them soften and release juices. 4. In a separate bowl, mix 2 tablespoons of cornstarch with the remaining 1/4 cup of sugar. 5. Add 1/4 teaspoon of salt and 2 cups of almond milk to the bowl. 6. Whisk the mixture until it is smooth and without lumps. 1. Place the saucepan with the peach mixture over medium heat. Cook for about 5 minutes. 2. Stir occasionally until the mixture bubbles gently. This ensures even cooking. 3. Gradually pour the cornstarch mixture into the saucepan. Stir constantly to combine. 4. Cook for an additional 5-7 minutes. The mixture should thicken to a creamy consistency. 5. Once thickened, remove the saucepan from heat and stir in the vanilla extract. 1. Allow the mixture to cool for a few minutes in the saucepan. 2. Transfer the pudding into individual bowls or ramekins. 3. Cover the bowls with plastic wrap to avoid any skin forming. 4. Chill the peach pudding in the refrigerator for at least 2 hours. This step is key for the right texture. 5. Serve each portion with whipped cream on top for extra delight. 6. Garnish with a fresh mint leaf and a slice of peach for a nice touch. For more detailed instructions, check out the [Full Recipe]. How to choose ripe peaches Look for peaches that have a sweet smell. They should feel slightly soft when you press them gently. If they are too firm, they may not be ripe. Avoid any that have bruises or dark spots. The best peaches have a golden color. You can find great peaches in late summer. Adjusting sweetness levels Taste your peaches before you mix them in. If they are sweet, you might need less sugar. If they are tart, add more sugar. You can start with half the sugar in the recipe. Then, taste and add more if needed. This way, you can make your pudding just right for your taste. Ensuring a creamy texture Make sure to whisk the cornstarch and milk well. This step prevents lumps from forming. If you see lumps, use a fine strainer to fix it. Stir the mixture constantly as it cooks. This helps to create a smooth, creamy pudding. Avoiding lumps in the pudding Mix the cornstarch and sugar before adding milk. This helps it dissolve better. If you notice lumps while cooking, use a whisk to blend them. Never stop stirring while heating. This keeps the pudding smooth and tasty. For the full recipe, check the Peachy Dream Pudding section. {{image_4}} You can make this pudding vegan by using almond milk. Almond milk has a nice, creamy texture. You can also try coconut milk for a tropical twist. Replace granulated sugar with maple syrup or agave nectar for sweetness. This keeps it plant-based and still tasty. To ensure your peach pudding is gluten-free, use cornstarch as a thickener. Make sure your almond milk is gluten-free, too. Most almond milk brands are safe, but always check the label. Avoid any products that may contain gluten. This way, everyone can enjoy this delicious dessert. Spices can really change the taste of your peach pudding. Try adding ground nutmeg or cardamom for a warm flavor. A splash of almond extract can give it a unique twist. If you like a bit of zing, add more lemon juice. These simple changes can make your pudding even more delightful. For the full recipe, check out the section above. Peach pudding lasts about 3 to 5 days in the fridge. Make sure to cover it well. Use plastic wrap or a tight lid. This keeps the pudding fresh and tasty. The cold helps maintain its creamy texture and flavor. To freeze peach pudding, place it in an airtight container. It can be stored for about 2 months. Leave some space at the top. The pudding will expand when frozen. When ready to eat, take it out and let it thaw in the fridge overnight. To reheat peach pudding, gently warm it on the stove. Use low heat and stir often. This way, it stays smooth. Avoid microwaving it, as this can make it lumpy. If it's thick, add a splash of milk to restore its creamy texture. Making peach pudding is quick and easy. It takes about 15 minutes to prep. Cooking adds another 10 to 12 minutes. Don't forget to chill it! You need at least 2 hours in the fridge. So, in total, you need around 2 hours and 30 minutes. Yes, you can use canned peaches. Canned peaches save time and are easy to find. They are often sweeter, so adjust the sugar. Fresh peaches have a better texture and flavor. If you use canned, drain them well. This helps keep the pudding from getting too watery. Peach pudding pairs well with many treats. Here are some ideas: - Vanilla ice cream for a creamy touch - Crumbled cookies for added crunch - Fresh berries for a tart contrast - A sprinkle of nuts for texture You can also serve it with whipped cream on top. This makes it look fancy! Peach pudding is simple to make and delicious. We covered ingredients, steps, and tips for a smooth texture. You learned how to pick ripe peaches and avoid common mistakes. With options for vegan and gluten-free versions, anyone can enjoy this treat. Remember to chill it well before serving. Store it in the fridge for a few days or freeze it for later. Take these ideas and make your peach pudding a hit!

If you love peaches, you’re in for a treat! My Peach Pudding Delight is simple and tasty, making it perfect for any occasion. With just a handful of ingredients, this …

Read more

Categories Desserts

Grilled Mexican Street Corn Flavorful and Easy Recipe

June 26, 2025 by Chef Miles
Here is what you will need to make Grilled Mexican Street Corn: - Fresh corn on the cob - Creamy mayonnaise - Cotija cheese - Chili powder - Smoky paprika - Garlic powder - Lime juice - Fresh cilantro - Salt and pepper - Lime wedges Each ingredient plays a key role in bringing this tasty dish to life. The corn gives a sweet crunch, while the creamy mayonnaise provides a rich base. Cotija cheese adds a salty, tangy flavor. Chili powder and smoky paprika bring warmth and depth. Garlic powder gives an added kick, and the lime juice brightens every bite. Fresh cilantro adds a burst of color and freshness. Don't forget the salt and pepper; they help balance the flavors. Lime wedges are perfect for a zesty finish. For the full recipe, see above. You'll find all the steps to create this delicious dish. Enjoy every bite! First, you need to preheat the grill to a medium-high temperature. This step is key for perfect grilling. A hot grill gives the corn a nice char. The heat helps to lock in the juices and flavors. To husk corn, grab an ear and pull back the green leaves. Remove all the silk strands. Make sure to get it all off for the best taste. When the corn is clean, it is ready for grilling. Now, let’s make the flavor mixture. In a small bowl, mix together the mayonnaise, chili powder, smoky paprika, garlic powder, lime juice, and a pinch of salt and pepper. Stir until smooth and well blended. This mixture will add a creamy, zesty touch to the corn. Place the husked corn directly on the grill. Grill the corn for about 10-15 minutes. Turn the corn every few minutes to get an even char. Look for a nice golden-brown color. This is when the corn is ready to come off the grill. Once the corn cools a bit, coat each ear with your mayo mixture. Use a pastry brush or the back of a spoon to spread it out. Make sure every bit of corn is covered. Then, sprinkle crumbled cotija cheese over each ear, allowing it to stick to the mayo. To serve, arrange the grilled corn on a platter. Garnish with fresh cilantro and a sprinkle of chili powder. Add lime wedges on the side for guests to squeeze over the corn. This will add a refreshing zing right before they take a bite. Enjoy your tasty grilled Mexican street corn! For the complete recipe, check out the Full Recipe. To avoid overcooking the corn, watch the time closely. Grill the ears for about 10 to 15 minutes. Turn them every few minutes for even cooking. You want a nice golden-brown color but not burnt. If you see the kernels drying out, take them off the heat. You can spice things up with some extra seasonings. Try adding cayenne pepper for heat. Smoked paprika gives a nice flavor too. You could also add some zest from lime for a fresh twist. Get creative! Mix and match to find your perfect blend. For an attractive display, use a wooden platter or a simple white dish. Lean the grilled corn against each other for a fun look. Scatter fresh cilantro around the corn for color. Place lime wedges on the side. This way, guests can squeeze fresh lime juice over the corn right before eating. Enjoy the vibrant colors and flavors! {{image_4}} You can make this dish vegetarian by swapping out a few items. Use vegan mayonnaise instead of regular mayo. For cheese, try using dairy-free options like cashew cheese or nutritional yeast. Both choices give a tasty twist while keeping it meat-free. This way, you can enjoy the same street corn feel without using animal products. Want to heat things up? Add hot sauce to the mayo mix for a spicy kick. You can also chop some fresh jalapeños and sprinkle them on top. This adds flavor and nice heat to the corn. Adjust the amount based on how spicy you like it. This variation makes your grilled corn stand out at any cookout. Cotija cheese is traditional, but there are many tasty options. You can use feta cheese if you want something a bit different. For a creamier texture, try goat cheese. Each cheese brings its own flavor, so feel free to experiment. This lets you find the perfect cheese that fits your taste buds and adds a new twist to the classic recipe. To store leftover grilled corn, let it cool first. Wrap each ear tightly in plastic wrap or foil. You can also place it in an airtight container. This helps keep the corn fresh. Store it in the fridge for up to three days. If you want to enjoy it later, check for any signs of spoilage before using. To reheat grilled corn, use a grill or stovetop. Heat your grill to medium heat. Place the corn on the grill for about 5 minutes. This will help revive the flavors. You can also use a microwave. Wrap the corn in a damp paper towel and heat for 1-2 minutes. This method keeps the corn moist and tasty. Freezing corn on the cob is simple. First, husk the corn and remove all silk. Blanch the corn by boiling it for 4-5 minutes. Then, cool it in ice water for the same time. Pat it dry and wrap each ear in plastic wrap. Place them in a freezer bag, and label the bag with the date. You can freeze the corn for up to six months. When you're ready to eat it, just thaw it overnight in the fridge or cook it from frozen. Enjoy that fresh flavor anytime! Grilled Mexican street corn, or elote, is a popular snack in Mexico. It features fresh corn on the cob, grilled to perfection. Vendors often serve it on the street, slathered with creamy toppings. The dish combines flavors of mayonnaise, cheese, lime, and spices. This dish reflects the rich food culture of Mexico and brings joy to many. Yes, you can prep some parts before serving. Husk the corn a few hours in advance. You can also mix the mayo sauce ahead of time. Just store it in the fridge until you are ready to grill. Cook the corn fresh to keep it warm and tasty. To make it mild, skip the chili powder or use a small amount. For medium heat, stick to the recipe. For a hot version, add cayenne pepper or diced jalapeños. Taste the mayo mix and adjust the spices to your liking. Grilled Mexican street corn pairs well with many dishes. Try it with tacos, grilled meats, or a fresh salad. It also goes nicely with beans or rice. You can serve it at parties or cookouts for a fun twist! Grilled Mexican Street Corn is a tasty treat you can easily make. We covered the best ingredients, from fresh corn to creamy toppings. I shared steps for grilling and tips for perfect flavors. You can add your twists, too, like spicy or vegetarian options. Store leftovers correctly for later enjoyment. Now, you have the tools to impress friends and family with this delicious dish. Enjoy your cooking and have fun experimenting with flavors!

If you’re craving a dish that bursts with flavor, Grilled Mexican Street Corn is a must-try! This easy recipe takes fresh corn on the cob and transforms it into a …

Read more

Categories Appetizers

Savory Shrimp Frittata Quick and Easy Recipe

June 26, 2025 by Chef Miles
- 8 large eggs - 1 cup cooked shrimp, roughly chopped - 1 cup fresh spinach, roughly chopped - 1 medium onion, finely chopped - 1/2 cup bell pepper, diced - 1/2 cup cherry tomatoes, halved - 1/4 cup freshly grated Parmesan cheese - 2 tablespoons extra virgin olive oil - Salt and freshly ground black pepper - Fresh parsley, chopped (for garnish) To make a great shrimp frittata, you need fresh and quality ingredients. The eggs serve as the base and provide protein. The cooked shrimp adds a nice seafood flavor, making the dish hearty. Fresh spinach not only adds color but also increases the nutritional value. Onions and bell peppers bring sweetness and crunch. Cherry tomatoes give a pop of flavor and a juicy bite. Parmesan cheese adds saltiness and richness, while olive oil keeps everything moist. - For alternative proteins, use crab or smoked salmon instead of shrimp. - You can swap spinach for other veggies like zucchini or mushrooms. - If you want to change the cheese, try feta or goat cheese. These substitutions keep the dish exciting. They allow you to play with different flavors and textures. You can use what you have on hand or what’s in season. This flexibility makes cooking more fun and less stressful. Feel free to explore and make it your own. For the Full Recipe, check out the details above. - Preheat the oven to 375°F (190°C). - Chop the bell pepper, onion, and shrimp. Start by preheating your oven. This step ensures the frittata cooks evenly. Then, chop your bell pepper and onion. Aim for small pieces so they cook fast. Roughly chop the shrimp too, making sure they are bite-sized. - Heat olive oil and cook onion and bell pepper. - Add spinach and cherry tomatoes. Next, grab a large skillet and heat the olive oil over medium heat. Once it shimmers, add the chopped onion and bell pepper. Cook them for about 4-5 minutes. You want the onion to be clear and soft. Then, toss in the spinach and halved cherry tomatoes. Stir them for 2 more minutes. The spinach should wilt, and the tomatoes will soften. - Whisk eggs and combine with shrimp and cheese. - Pour egg mixture into the skillet and stovetop cook. - Transfer to the oven and bake. Now, crack the eggs into a mixing bowl. Whisk them well, adding salt and pepper to taste. Fold in your chopped shrimp and cheese. Mix until everything is combined. Carefully pour this egg mixture into the skillet over the sautéed veggies. Let it cook on the stovetop for 3-4 minutes. You’ll see the edges starting to set. Finally, transfer the skillet to your preheated oven. Bake for 10-12 minutes. The frittata should puff up and feel firm in the center. For the full recipe, check out Shrimp & Spinach Frittata Delight. To get the best frittata texture, focus on the eggs. Whisk them well to add air. This makes the frittata light and fluffy. When cooking on the stovetop, keep the heat medium. Too high a heat can burn the edges before the center sets. For even cooking in the skillet, use a non-stick pan. This helps prevent sticking and allows for easy flipping. Pour the egg mixture slowly over the veggies. This helps distribute the ingredients evenly. Cook until the edges firm up, then bake. This two-step method gives a great texture. For plating, consider a rustic wooden board. This adds a nice touch. You can also use a bright platter to make the colors pop. Serve with a side of mixed greens. Drizzle them with olive oil and lemon juice for freshness. For drinks, pair your frittata with a light white wine or even iced tea. Both complement the flavors well. To boost flavor, add fresh herbs like basil or cilantro. These can make a big difference. You can also try spices like paprika or chili flakes for a kick. For cheese, explore different types. Feta adds a salty tang, while goat cheese offers creaminess. Mixing cheeses can create a unique taste profile. You can try adding a sprinkle of cheddar for a sharp bite. For the full recipe, check out the Shrimp & Spinach Frittata Delight 🥚. {{image_4}} You can swap shrimp for other meats. Crab and lobster add a nice touch. Smoked salmon gives a rich flavor too. For a vegetarian twist, mushrooms and tofu work well. Mushrooms bring an earthy taste, while tofu adds protein. These options keep your frittata fresh and exciting. Using seasonal ingredients can boost flavor. Fresh vegetables like tomatoes and zucchini shine in their peak months. You can also use leftover veggies for a fridge-cleaning frittata. Toss in whatever you have on hand. This not only reduces waste but also creates unique flavor combos. A shrimp frittata fits any meal. For breakfast, serve it with toast or fruit. Pair it with a light salad for lunch. At dinner, it makes a great main dish. You can even add a side of roasted veggies to round it out. Enjoy it warm or at room temperature for a tasty option. To keep your frittata fresh, follow these steps: - Refrigeration guidelines: Place any leftover frittata in an airtight container. Store it in the fridge for up to three days. Ensure it cools to room temperature before sealing. - Freezing tips: If you want to keep it longer, you can freeze it. Cut the frittata into slices. Wrap each slice in plastic wrap and place them in a freezer bag. It can last up to three months in the freezer. To enjoy your frittata later, here’s how to reheat it: - Techniques for reheating: Use an oven or skillet for the best results. Preheat the oven to 350°F (180°C). Place your frittata on a baking sheet for about 10-15 minutes. If using a skillet, add a splash of water, cover it, and heat on low for 5-7 minutes. - Best practices for leftover storage: Always ensure your frittata is in a sealed container. This keeps it from drying out and preserves its taste. Enjoy your meal just as delightful as the first time! A frittata is thicker than an omelet. It cooks slowly and often includes more ingredients. You mix everything in and cook it gently. An omelet is folded and usually has fewer fillings. Frittatas are great for feeding a crowd. You can slice and serve them easily. Yes, you can make a shrimp frittata ahead of time. Just cook it, let it cool, and store it in the fridge. It keeps well for up to three days. Reheat it in the oven or microwave when you're ready to serve. This makes it a perfect dish for busy mornings. Check the center of the frittata. It should feel firm to the touch. If you insert a knife, it should come out clean. The edges will be slightly puffed and golden. Keep an eye on it to avoid overcooking. Yes, you can use frozen shrimp. Just thaw them before chopping. Make sure to pat them dry to remove excess moisture. This helps keep the frittata from becoming soggy. Frozen shrimp can be just as tasty as fresh. A shrimp frittata pairs well with a fresh salad or sautéed veggies. You can also serve it with toast or crispy potatoes. For a light meal, add some fruit on the side. Drinks like juice or iced tea complement it nicely. For the complete recipe, check out the [Shrimp & Spinach Frittata Delight 🥚](#). This blog post shared a simple, tasty shrimp frittata recipe. You learned about the necessary ingredients, how to cook it step by step, and ways to add flavor. We also explored variations and how to store leftovers. Frittatas are great for any meal of the day. You can mix it up based on what you have. I hope you feel inspired to try this dish and enjoy it with your loved ones.

Ready to elevate your brunch game? This savory shrimp frittata is quick, easy, and delicious! Packed with fresh ingredients, it makes a perfect dish for breakfast, lunch, or dinner. Whether …

Read more

Categories Breakfast

Cornmeal Cheddar Tomato Cobbler Simple and Savory Dish

June 26, 2025 by Chef Miles
- 4 cups ripe tomatoes, chopped - 1 tablespoon olive oil - 1 cup cornmeal - 1 cup all-purpose flour - 1 cup shredded sharp cheddar cheese - 1 teaspoon granulated sugar - 1 teaspoon sea salt - 1/2 teaspoon freshly ground black pepper - 1 teaspoon dried oregano - 1/2 teaspoon garlic powder - 1/4 cup unsalted butter, melted - 1 cup buttermilk or whole milk - Fresh basil leaves, for garnish The main ingredients for this dish are simple yet delicious. You need ripe tomatoes, which bring a bright and juicy flavor. The olive oil adds richness and helps cook the tomatoes. Cornmeal gives the cobbler its hearty texture, while all-purpose flour balances it out. Sharp cheddar cheese melts beautifully and adds depth to every bite. For the seasonings, sugar helps to enhance the sweetness of the tomatoes. Sea salt and black pepper bring out the flavors. Dried oregano and garlic powder add an aromatic touch that makes the dish sing. The melted butter provides moisture, while buttermilk or whole milk gives the batter a creamy consistency. Finally, fresh basil leaves are perfect for garnish. They add a pop of color and a fresh taste. For the full recipe, check out the details and see how you can make this savory delight! First, heat one tablespoon of olive oil in a large skillet over medium heat. Once the oil is hot, add in four cups of chopped ripe tomatoes. Stir them around for about five to seven minutes. Add one teaspoon of sugar, one teaspoon of sea salt, half a teaspoon of black pepper, one teaspoon of dried oregano, and half a teaspoon of garlic powder. These seasonings really boost the flavor. Cook until the tomatoes soften and release their juices, then take the skillet off the heat. In a mixing bowl, combine one cup of cornmeal, one cup of all-purpose flour, one tablespoon of baking powder, and half a teaspoon of baking soda. Whisk these dry ingredients together until they are well mixed. Next, fold in one cup of shredded sharp cheddar cheese. This adds a nice cheesy flavor to the batter. In another bowl, whisk together one cup of buttermilk or whole milk and a quarter cup of melted unsalted butter. This mix will add moisture. Gradually pour the wet mixture into the dry ingredients and stir carefully. Be sure not to overmix. This helps keep the cobbler light and fluffy. Grease a baking dish that is about 9x13 inches. Pour the cooked tomato mixture into the bottom of the dish, spreading it out evenly. Now, using a spoon, dollop the cornbread batter over the tomatoes. Spread it gently to cover the tomatoes as much as possible. Preheat your oven to 400°F (200°C). Place the baking dish in the oven and bake for 25 to 30 minutes. To check for doneness, insert a toothpick into the center. If it comes out clean, your cobbler is ready. Once done, let it cool for about ten minutes before serving. This will help the layers firm up nicely. You can find the Full Recipe to explore more details. To achieve the perfect sauté, start with ripe tomatoes. Cut them into bite-sized pieces. Heat the olive oil in a large skillet over medium heat. Add the tomatoes once the oil shimmers. Sauté for about 5-7 minutes. Stir gently to avoid breaking the tomatoes too much. This will help them soften and release their juices. After sautéing, let the mixture cool. Cooling helps the flavors blend and prevents the batter from cooking prematurely. To ensure a fluffy cobbler, avoid overmixing the batter. Overmixing can make it dense. Mix just until the dry and wet ingredients combine. It’s okay if there are a few lumps. Also, use ingredients at room temperature. Cold ingredients can lead to a tougher texture. When you add melted butter and milk, the warmth helps the batter rise better. This cobbler pairs well with a fresh green salad. The bright greens balance the rich flavors. Serve the cobbler warm for the best taste. It’s great on its own, but a dollop of sour cream adds a nice touch. Enjoy it with a light vinaigrette salad for a complete meal. You can find the full recipe to try this delightful dish! {{image_4}} You can change the cheese in this recipe. Try mozzarella for a milder taste. Feta brings a nice tang. You can also mix in any cheese you love. For veggies, try zucchini, bell peppers, or even corn. Fresh herbs like thyme or rosemary add great flavor too. To make a gluten-free version, swap the all-purpose flour with a gluten-free blend. Look for blends that contain brown rice flour or almond flour. These will keep the texture light and fluffy. You can also use corn flour for a more cornmeal-rich taste. If you love heat, add sliced jalapeños to the tomato mix. You can also drizzle some hot sauce on top before serving. For extra flavor, mix in spices like cayenne pepper or smoked paprika. These will give your cobbler a nice kick! To keep your cobbler fresh, store it in an airtight container. Place it in the fridge right after it cools. It will stay good for about three days. If you want to keep it longer, freeze it. To freeze the cobbler, cut it into portions. Wrap each piece tightly in plastic wrap and place it in a freezer bag. You can freeze it for up to three months. To reheat, let it thaw in the fridge overnight. Then, bake it in the oven at 350°F (175°C) until warmed through for best results. You can get creative with leftovers! Try making a breakfast casserole by adding eggs and cheese. You can also use the cobbler as a savory base for a salad. Just crumble it up and mix it with greens and your favorite dressing. A Cornmeal Cheddar Tomato Cobbler is a savory dish. It combines fresh tomatoes, cornmeal, and cheddar cheese. The dish features a soft, cornbread-like topping. You layer the topping over cooked tomatoes. This creates a warm, hearty meal. The flavors blend well together. The cheese adds a rich taste, while tomatoes provide brightness. Each bite offers a mix of textures. You can serve it as a side or a main dish. Yes, you can prepare the cobbler ahead of time. Cook the tomato mixture and store it in the fridge. Make the cornbread batter separately. You can refrigerate the batter too. When you are ready, combine them and bake. This method saves time on busy days. The cobbler stays fresh for about three days in the fridge. If your cobbler turns out too dry, add more moisture. You can drizzle extra buttermilk or milk over the top. Another option is to mix in a bit of olive oil. This helps keep the dish moist. Always check the baking time and oven temperature. Overbaking can lead to dryness. Yes, this dish is naturally vegetarian. All the main ingredients are plant-based. If you want a vegan version, swap the cheese with a plant-based option. You can also use non-dairy milk instead of buttermilk. This way, you keep the flavors without any animal products. Enjoy the same savory taste while meeting dietary needs. Cornmeal cheddar tomato cobbler is a tasty, easy dish to make. You need ripe tomatoes, cornmeal, cheddar cheese, and a few seasonings. Sauté the tomatoes, mix the batter, and bake for a warm treat. Try the tips for perfecting your dish and explore different variations. Remember to store leftovers properly so you can enjoy them later. This dish is versatile and can fit your tastes or diet needs. It's a great choice for gatherings or family meals. Enjoy sharing this simple yet delicious recipe!

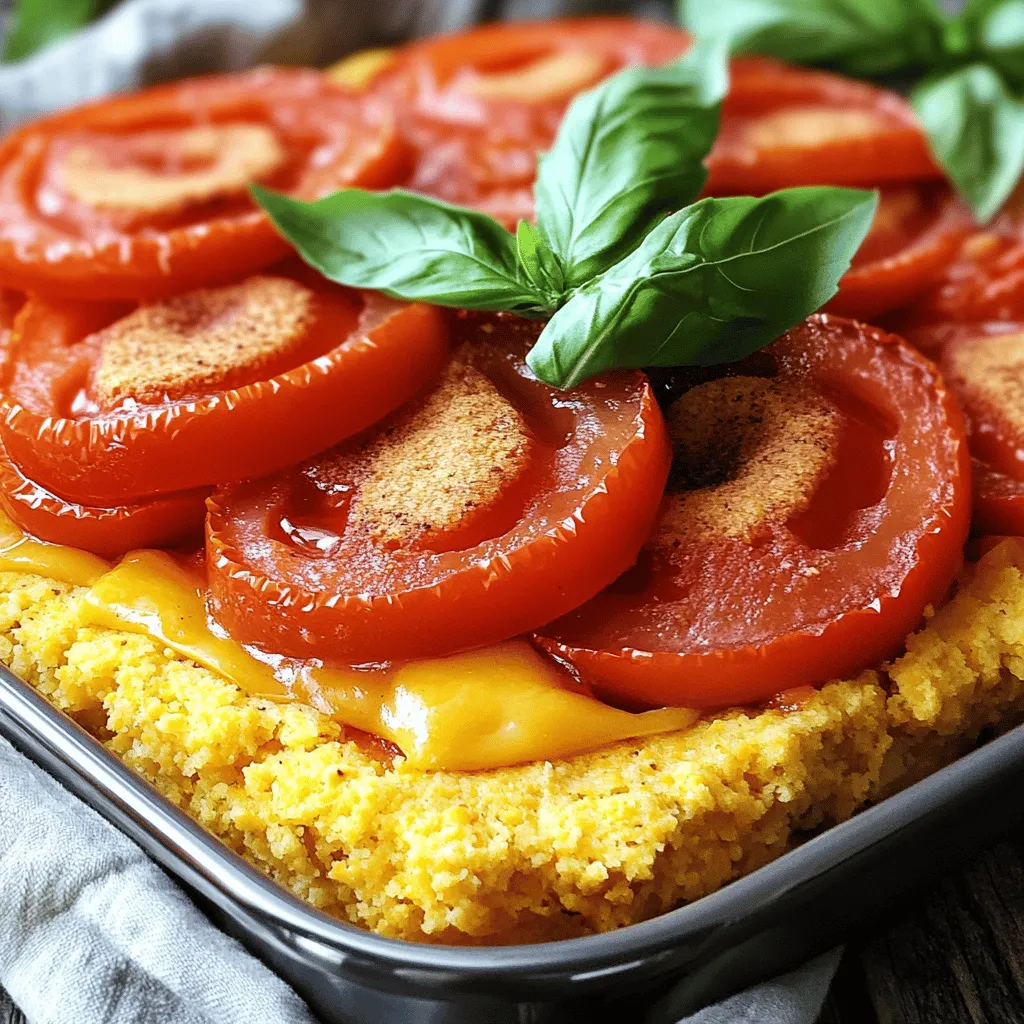
If you’re looking for a simple, savory dish that bursts with flavor, you’ve found it! My Cornmeal Cheddar Tomato Cobbler is a treat for your taste buds. With ripe tomatoes, …

Read more

Categories Dinner

Tomato Mozzarella Pie Flavorful and Simple Delight

June 26, 2025 by Chef Miles
- Pre-made pie crust: You can use a store-bought crust or make your own. A store-bought crust saves time. It also gives a nice, flaky base. If you choose homemade, use flour, butter, and cold water for the best results. - Types of tomatoes: I recommend using ripe tomatoes. Varieties like Roma or heirloom are great choices. These tomatoes have rich flavors and juicy textures. Choose tomatoes that feel heavy for their size. - Importance of fresh mozzarella: Fresh mozzarella is key for this pie. It melts beautifully and adds creaminess. Look for mozzarella packed in water for the best taste. Slice it thinly to layer easily. - List of seasonings: Use salt, pepper, garlic powder, and dried oregano. These simple spices enhance the dish. They bring out the tomato and cheese flavors. - Options for drizzling: A balsamic glaze can add a sweet touch. Drizzle it just before serving for a burst of flavor. It pairs well with the pie's freshness. - Suggested garnishes: Fresh basil leaves brighten the dish. They add a lovely color and aroma. Sprinkle them on top for an elegant finish. For the full recipe, check out the details above! Preheat your oven to 400°F (200°C). This high heat helps the pie crust bake evenly. If you use a frozen pie crust, let it thaw for a few minutes. Fit the crust into a 9-inch pie dish, pressing it down gently. Next, use a fork to prick the bottom. This step prevents the crust from puffing while it bakes. In a large bowl, combine four thinly sliced tomatoes with two tablespoons of olive oil. Add a generous pinch of salt, black pepper, half a teaspoon of garlic powder, and half a teaspoon of dried oregano. Gently toss the tomatoes and seasonings together. Make sure the tomatoes are well-coated to enhance their flavor. Start by placing half of the seasoned tomatoes in the pie crust. Next, add half of the sliced mozzarella cheese and half of the chopped basil. Repeat this layering process with the remaining tomatoes, mozzarella, and basil. Distributing the ingredients evenly is key. This way, every slice has a balanced taste. Carefully transfer the pie to the preheated oven. Bake it for 30 to 35 minutes. The pie is done when the tomatoes soften and release juices. The cheese should melt into a bubbly, slightly golden topping. Keep an eye on it to avoid burning. After baking, remove the pie from the oven. Let it cool for about 5 to 10 minutes. This resting time helps the pie set. You can drizzle balsamic glaze on top to add a tangy sweetness. Slice the pie into wedges and serve it warm. It’s also great at room temperature. For a lovely presentation, serve it on a rustic wooden board or a white platter, garnished with whole basil leaves. A side salad of mixed greens pairs well with this dish. For the full recipe, check out the recipe section above. To enhance the flavor of your tomatoes, choose ripe ones. Look for tomatoes that feel heavy for their size. Slice them thinly to let their juices mingle with the cheese and herbs. You can also add a pinch of sugar to balance acidity. For cheese, fresh mozzarella shines, but you can try burrata or fontina for a twist. Avoid overloading your pie crust. Too many toppings can make the pie soggy. Stick to a balanced layer of tomatoes and cheese. Also, remember to season well. A lack of salt and pepper can dull the flavors. Taste your tomato mix before layering it in the crust. For the best results, use a 9-inch pie dish. This size helps the pie cook evenly. A sharp knife or mandoline makes slicing tomatoes easy and quick. Keep a mixing bowl handy for combining your ingredients. Lastly, use a fork to prick the crust. This step helps it bake evenly and stay crisp. {{image_4}} You can swap out tomatoes for other veggies. Zucchini and bell peppers add nice flavor and texture. Just slice them thin and layer them like the tomatoes. You can also try different herbs. Thyme and rosemary give a fresh twist. Mix them in with the other herbs for a new taste. Want a gluten-free pie? Use a gluten-free crust. Many stores carry good options. If you want a vegan dish, you can use plant-based cheese. Look for brands that melt well. They can replace fresh mozzarella without losing taste. Serve this pie as an appetizer or a main dish. It works great in both roles. If you serve it as a main, pair it with a light salad. A side of mixed greens enhances the meal. This pie also tastes great at room temperature, making it perfect for picnics. For the full recipe, check out the details above. To store leftover Tomato Mozzarella Pie, let it cool first. Once cool, slice it into wedges. Place the slices in an airtight container. You can also wrap them in plastic wrap or foil. This keeps the pie fresh and tasty. Store it in the fridge for up to three days. For longer storage, you can freeze the pie. Just make sure to wrap it tightly to avoid freezer burn. For reheating, the oven gives the best results. Preheat your oven to 350°F (175°C). Place the pie slices on a baking sheet. Heat for about 10-15 minutes or until warm. This method keeps the crust crispy. If you use a microwave, it’s faster but can make the crust soft. Heat on a microwave-safe plate for about 30 seconds. If you want to keep it crispy, try the oven method instead. Enjoy your Tomato Mozzarella Pie warm! You can store Tomato Mozzarella Pie in the fridge for up to three days. If you freeze it, it can last for about three months. Make sure to wrap it well to keep it fresh. Yes, you can use canned tomatoes, but they may change the pie's texture. Fresh tomatoes offer a crisper bite and a burst of flavor that canned tomatoes cannot match. This pie pairs well with several side dishes. Consider serving it with a fresh garden salad, garlic bread, or roasted vegetables. These sides will enhance the pie's flavors. You can prep the pie a day ahead. Assemble it, but do not bake it. Cover it well and refrigerate. When you're ready, bake it straight from the fridge. This makes meal time easy. Yes, this pie works great for meal prep. You can portion it out after baking. Reheat slices in the oven or microwave. This keeps the pie tasty and ready to enjoy. For the full recipe, check out the detailed instructions above. This blog post explored how to make a delicious Tomato Mozzarella Pie. We covered essential ingredients, from pie crust choices to key seasonings. You learned the step-by-step process, from preparing the oven to tasty variations. I shared tips for perfecting flavor, avoiding common mistakes, and effective storage methods. Now, with this knowledge, you can create your own tasty pie. Enjoy experimenting with flavors for a meal everyone will love. Happy cooking!

If you’re searching for a dish that’s both simple and bursting with flavor, look no further! This Tomato Mozzarella Pie combines fresh ingredients and easy steps to create a delightful …

Read more

Categories Dinner

Gordon Ramsay Pickled Onions Tasty and Simple Recipe

June 26, 2025 by Chef Miles
To make Gordon Ramsay’s pickled onions, you will need: - 2 large red onions, carefully peeled and thinly sliced - 1 cup apple cider vinegar - 1 cup water - 1 tablespoon granulated sugar - 1 tablespoon coarse sea salt - 1 teaspoon whole black peppercorns - 1 teaspoon mustard seeds - 1 teaspoon red pepper flakes (adjust based on desired spice level) - 2 cloves fresh garlic, lightly crushed If you don't have some ingredients, here are easy swaps: - Use white vinegar instead of apple cider vinegar for a sharper taste. - Swap granulated sugar with honey for a natural sweetness. - Coarse sea salt can be replaced with kosher salt. - For a milder flavor, try using yellow onions instead of red. To keep your pickled onions fresh: - Choose firm onions without any soft spots. - Store in a clean glass jar with a tight lid. - Keep the jar in the fridge for the best flavor and crunch. - Use the onions within 2-4 weeks for the best taste. - After they are ready, always make sure they are submerged in the brine. Using these tips, you can ensure your pickled onions stay fresh and flavorful! For the full recipe, check out the detailed steps to enjoy this zesty treat. Start with two large red onions. Peel them carefully to avoid waste. Use a sharp knife or mandoline to slice them thinly. Aim for even slices, which helps in pickling. Place the sliced onions in a bowl. Set them aside while you make the brine. Grab a medium saucepan for the brine. Add one cup of apple cider vinegar and one cup of water. Sprinkle in one tablespoon of granulated sugar and one tablespoon of coarse sea salt. Heat the mixture over medium heat. Stir gently until the sugar and salt dissolve completely. Next, add one teaspoon of whole black peppercorns and one teaspoon of mustard seeds. If you like spice, toss in one teaspoon of red pepper flakes. Add two lightly crushed garlic cloves, too. Let this mixture simmer for 2-3 minutes to blend the flavors. Remove the saucepan from heat and let the brine cool for a few minutes. This step helps the onions stay crisp. In a clean, sterilized jar, layer the sliced onions. Carefully pour the warm brine over them. Ensure the onions are completely submerged. Allow the jar to cool to room temperature before sealing it tightly. Finally, place the jar in the fridge. Let it sit for at least 24 hours before enjoying your pickled onions. To pickle onions perfectly, start by cutting them thin. Thin slices soak up the brine well. Use a mandoline slicer for even cuts. This tool makes the job quick and easy. Once cut, let them breathe in a bowl. This step helps them soften before pickling. For best results, use fresh onions. Their crispness adds to the crunch in your dish. Spice is personal, and you should adjust it to your taste. Gordon's recipe calls for red pepper flakes. Start with one teaspoon for a mild kick. If you want more heat, add more flakes. You can also try adding sliced jalapeños for a fresh twist. Remember, you can always add spice, but you can't take it away. So, start small and taste as you go. You can bring new life to your pickled onions by adding extra ingredients. Try fresh herbs like thyme or dill for a fragrant touch. You can also add a few slices of ginger for a zing. Another option is to include a splash of fruit juice. Pineapple or orange juice can add sweetness and depth. Mix and match to find your perfect blend. For more ideas, check the Full Recipe for inspiration. {{image_4}} You can switch the apple cider vinegar for other types. White vinegar works well if you want a sharper taste. Rice vinegar offers a milder flavor that is sweeter. Each type of vinegar gives a unique twist to your onions. Feel free to experiment until you find your favorite. There are many ways to boost the taste of your pickled onions. Adding fresh herbs like thyme or dill will add a fresh hint. You can also try adding a few slices of fresh ginger for warmth. Another option is to include a bay leaf, which enhances the overall depth. Adjust the spices based on what you enjoy most. Pickled onions can change with the seasons. In summer, add fresh peaches or berries for a fruity touch. In fall, consider adding cinnamon sticks or cloves for warmth. These seasonal twists make your pickled onions exciting all year round. Have fun creating new flavors that match the time of year. To store pickled onions, place them in a clean jar. Make sure the onions are fully submerged in the brine. Seal the jar tightly and keep it in the fridge. This helps keep them fresh and crisp. Always use a clean spoon when scooping out onions. This prevents any bacteria from getting into the jar. Pickled onions can last in the fridge for about two to four weeks. They may lose some crunch over time, but they will still taste great. Check for mold or any off smells before using them. If they smell bad or look strange, it's best to throw them away. You can reuse the brine for a new batch of onions. Just strain out any old bits before adding new onions. However, the flavor might change slightly. If you want a stronger taste, feel free to add more spices or vinegar. This is a great way to cut down on waste while still enjoying tasty pickled onions! Pickled onions can last up to two weeks in the fridge. After that, they may lose their crunch. Keep them in a sealed jar to keep them fresh. You can also freeze pickled onions for longer storage. They will change texture but still taste great. Yes, you can use white onions. They will taste a bit different but still work well. White onions have a sharper flavor compared to red onions. If you want a milder taste, soak them in water for a bit before pickling. Pickled onions are great on many dishes, such as: - Tacos - Sandwiches - Salads - Burgers - Charcuterie boards Their tangy flavor adds a nice kick and brightens up your meals. Absolutely! You can customize your pickled onions with various spices. Some great options include: - Coriander seeds - Dill seeds - Bay leaves Feel free to experiment with spices to find your favorite flavor. Pickling onions is fun and rewarding. We covered the key ingredients, substitutions, and tips for freshness. I shared step-by-step instructions for brining and chilling the onions. You learned how to enhance flavors and adjust spice levels. We also explored variations, storage tips, and answered common questions. Pickled onions are a versatile topping that can boost any meal. Try making your own and enjoy the fresh taste!

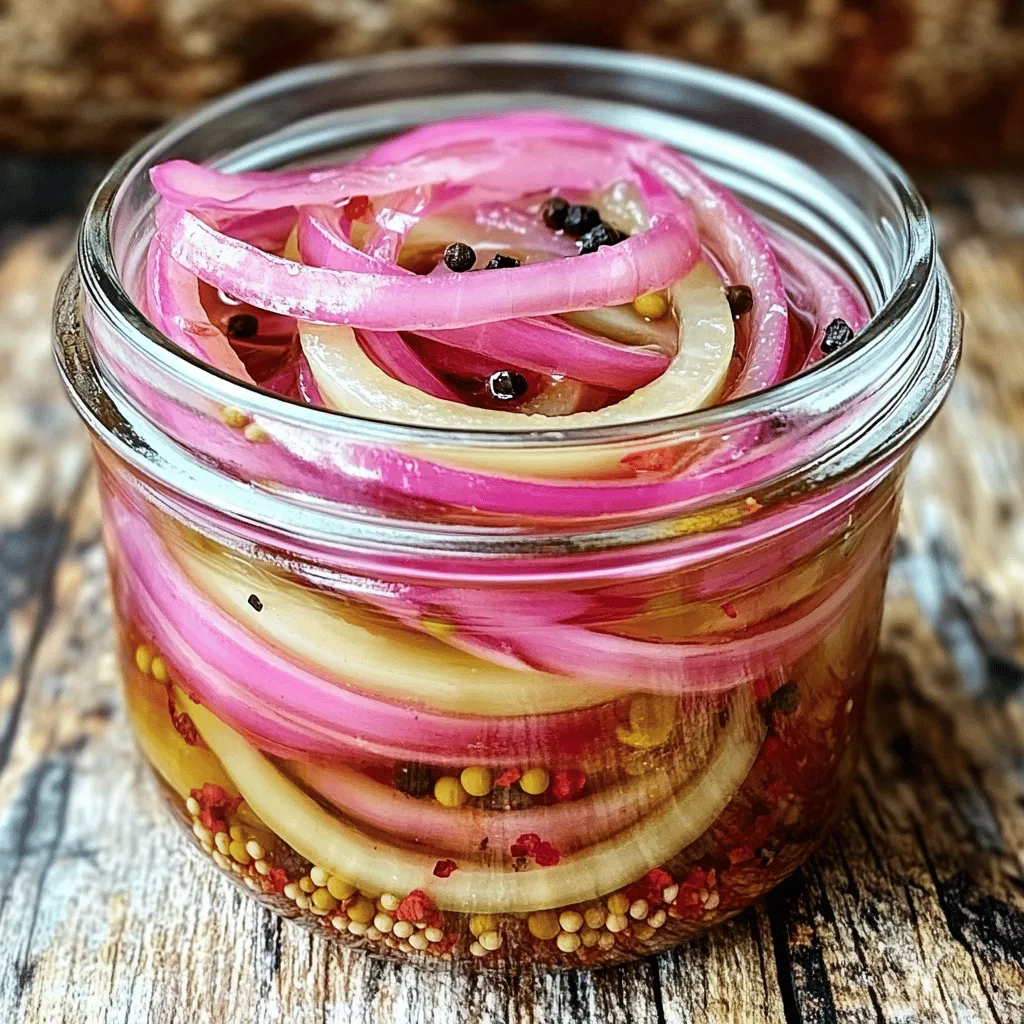
If you love adding zing to your meals, you’ll adore this recipe for Gordon Ramsay pickled onions! These tasty bites are quick to make and bring a burst of flavor …

Read more

Categories Appetizers

Paleo Southwest Frittata Wholesome and Flavorful Meal

June 26, 2025 by Chef Miles
- 8 large eggs - 1/2 cup almond milk - 1 red bell pepper, diced - 1 green bell pepper, diced - 1 small onion, finely chopped - 1 cup fresh spinach, roughly chopped - 1 cup cherry tomatoes, halved - 1 jalapeño, seeded and minced - 1 teaspoon ground cumin - 1 teaspoon smoked paprika - Salt and pepper, to taste - 2 tablespoons extra virgin olive oil - Fresh cilantro, chopped for garnish Choosing the right ingredients makes your frittata shine. I love using fresh veggies. They add color and crunch. Look for ripe tomatoes and bright peppers. Their flavors stand out in every bite. Special Considerations Using fresh ingredients is key for this recipe. Fresh veggies have more flavor and nutrients. You can use frozen spinach if fresh isn't available. If you have nut allergies, swap almond milk for coconut milk or regular milk. These options still keep your frittata creamy. Remember, the goal is to enjoy a tasty meal that fits your needs. For more details, check the Full Recipe. You’ll see how simple it is to create a delicious frittata! 1. First, preheat your oven to 375°F (190°C). This step ensures the frittata cooks evenly. 2. Next, grab a large mixing bowl. Whisk together 8 large eggs, 1/2 cup almond milk, 1 teaspoon of ground cumin, 1 teaspoon of smoked paprika, salt, and pepper. Mix until the mixture is smooth and a bit frothy. 3. Heat 2 tablespoons of extra virgin olive oil in a large, oven-safe skillet over medium heat. When hot, add 1 small, finely chopped onion. Sauté for about 4 minutes, until it turns translucent and fragrant. 4. Now, add 1 diced red bell pepper, 1 diced green bell pepper, and 1 minced jalapeño to the skillet. Keep sautéing for 3-4 minutes, stirring frequently. The peppers should soften during this time. 5. Gently fold in 1 cup of roughly chopped spinach and 1 cup of halved cherry tomatoes into the skillet. Cook for another 2 minutes, stirring until the spinach wilts and the tomatoes warm through. 6. Pour the egg mixture evenly over the sautéed vegetables in the skillet. Use a spatula to mix gently, making sure the vegetables blend well with the eggs. 7. Let the frittata cook on the stovetop for about 2-3 minutes. You will see the edges start to set. 8. Carefully transfer the skillet to your preheated oven. Bake for 15-20 minutes, or until the center is firm and the top turns golden. 9. After baking, remove the skillet from the oven. Allow the frittata to cool for a few minutes. Then, gently lift it out onto a cutting board. 10. Garnish with freshly chopped cilantro for a burst of flavor. Slice the frittata into wedges, and it’s ready to serve. Enjoy your wholesome Paleo Southwest Frittata! To make sure your frittata doesn’t stick to the skillet, use a good non-stick skillet. Heat the skillet and add olive oil before adding the veggies. This helps create a barrier. Use a spatula to gently lift the edges while cooking. Cooking times can change based on skillet size. A larger skillet will cook faster than a small one. Keep an eye on your frittata as it cooks. The edges should set while the center remains a bit soft. This usually takes about 2-3 minutes on the stovetop, followed by 15-20 minutes in the oven. The best way to serve the frittata is warm and cut into wedges. A colorful platter makes it look nice. You can also top it with fresh cilantro for color. Accompaniments like salsa or sliced avocado add great flavor. The cool creaminess of avocado pairs well with the spicy frittata. You can even serve it with a side salad for extra crunch. The main ingredients in this frittata bring a lot of health benefits. Eggs are packed with protein, while bell peppers offer vitamins A and C. Spinach adds iron and fiber. This meal fits well into the Paleo diet. It uses whole foods and avoids grains or processed items. Eating this way can help with energy levels and overall health. The colorful veggies make it a nutritious choice, too! {{image_4}} You can change up the vegetables in your frittata. Try adding zucchini or mushrooms for a new twist. Both options give a nice texture and flavor. You can also add proteins like crispy bacon or grilled chicken. These swaps will make your frittata even more filling and delicious. To spice things up, adjust the seasonings. Add more cumin or a pinch of cayenne for extra heat. If you miss cheese, you can sprinkle some on top for a non-Paleo option. Just remember, cheese can change the dish's texture, so use it sparingly. This frittata is naturally gluten-free and dairy-free. If you want a vegetarian version, simply skip the meats. You can also add more veggies like sweet potatoes or broccoli for extra nutrition. These changes keep the meal healthy while still being tasty. After you enjoy your Paleo Southwest Frittata, store leftovers in the fridge. Use an airtight container to keep it fresh. I recommend glass containers because they don’t hold smells. If you have a lot left, slice the frittata into wedges before storing. This makes it easy to grab a piece later. To reheat, the oven is best. Preheat your oven to 350°F (175°C) and place the frittata on a baking sheet. Heat for about 10 minutes or until warm. If you’re short on time, use a microwave. Place a slice on a plate and cover it with a damp paper towel. Heat for 1-2 minutes, checking often to avoid overcooking. This keeps the texture nice and soft. The frittata lasts about 3-4 days in the fridge. Always check for signs that it’s no longer good. If it smells off or has a strange texture, throw it out. Keeping an eye on your food helps prevent waste and keeps your meals safe. What is a frittata and how does it differ from an omelette? A frittata is an Italian dish made with eggs and other ingredients. It cooks slowly and is often baked in the oven. An omelette cooks quickly and is usually folded. Frittatas are thicker and can hold more fillings than omelettes. Can I make the frittata ahead of time? Yes, you can make the frittata ahead. Cook it, cool it, and store it in the fridge. Just reheat when ready to serve. This makes meal prep easy and saves time. What else can I add to a frittata? You can add many things! Try mushrooms, zucchini, or different herbs. Cooked meats like bacon or sausage also work well. Get creative with flavors that you love! Can I freeze the Paleo Southwest Frittata? Yes, you can freeze the frittata. After it cools, cut it into portions. Wrap each piece tightly in plastic wrap and place it in a freezer bag. It keeps well for up to three months. How can I adjust the recipe for more servings? To adjust the recipe, multiply the ingredients by the number of servings you need. Make sure your skillet is large enough to fit the extra mixture. You may need to bake it longer if it’s thicker. What are some good sides to serve with a frittata? You can serve fresh salad, avocado slices, or salsa on the side. These add flavor and balance to the meal. You can also pair it with sweet potatoes or fruit for a nice touch. Do I need a specific type of skillet for making a frittata? An oven-safe skillet is best for a frittata. Cast iron or non-stick pans work great. This helps ensure even cooking and makes it easy to transfer to the oven. How can I tell when my frittata is done cooking? Check the center of the frittata. It should feel firm and not jiggly. The top will also be golden brown. Use a toothpick to test if it comes out clean; then it’s ready! This blog post gives you a clear guide to making a delicious frittata. We covered a list of fresh ingredients and tips for preparing and cooking. You learned about storage, variations, and common questions. Remember, using fresh ingredients makes your meal tastier. Feel free to experiment with your favorite veggies and flavors. Enjoy making this dish and share it with family and friends. Your kitchen will be filled with joy as you serve this tasty frittata!

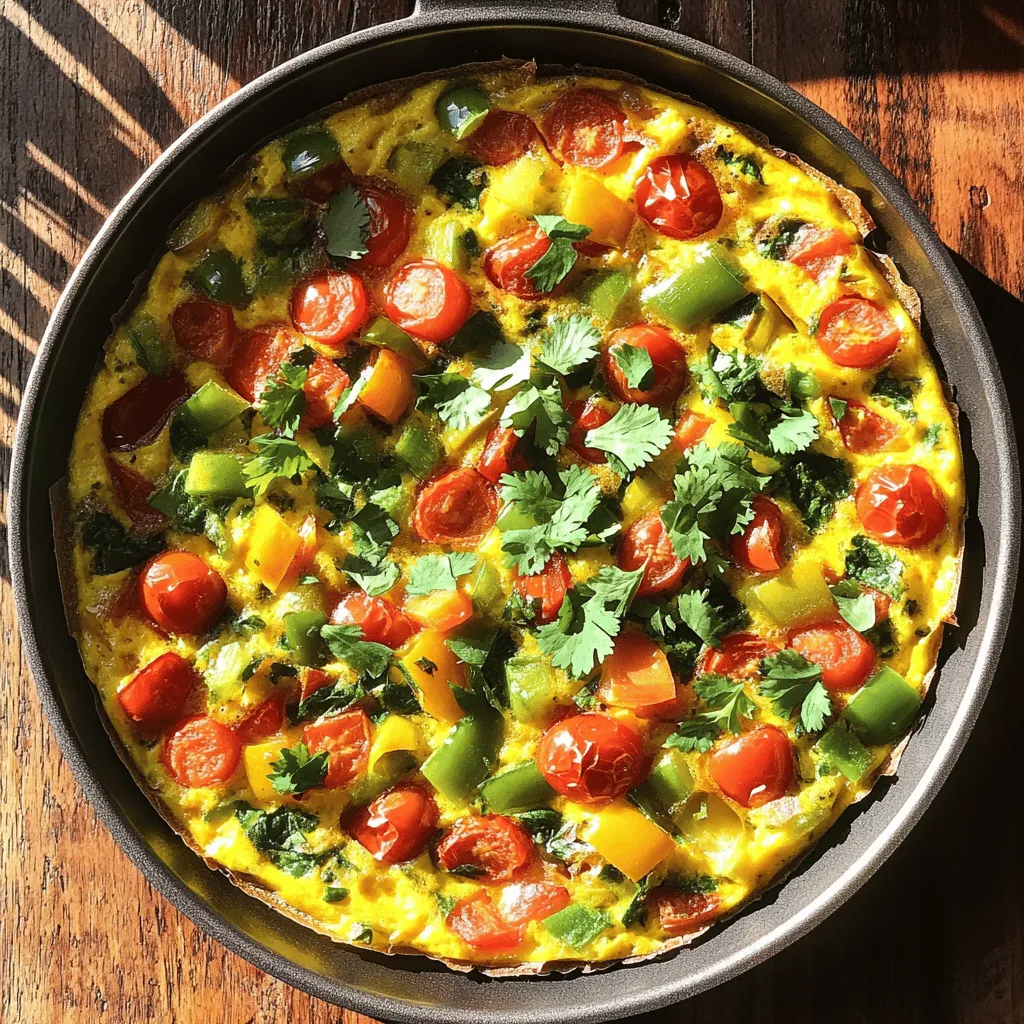
Looking for a delicious meal that’s packed with flavor and fits the Paleo diet? Meet the Paleo Southwest Frittata! This easy recipe combines fresh veggies, eggs, and spices to create …

Read more

Categories Breakfast
Older posts
Newer posts
← Previous Page1 … Page81 Page82 Page83 … Page112 Next →

MELTED RECIPES

where delicious ideas melt into life, from stovetop to backyard. Always warm, simple, and irresistibly satisfying. 🍳🔥🧀

PAGES

Home About Contact Privacy Policy Terms & Conditions Cookie Policy GDPR Policy Copyright Policy Disclaimer

CATEGORIES

Appetizers Desserts Salads Breakfast Dinner

Contact

  • Pinterest
  • Mail
Copyright © 2025 Melted Recipes. All rights reserved.