Garlic Herb Roasted Potatoes, Carrots & Zucchini Dish
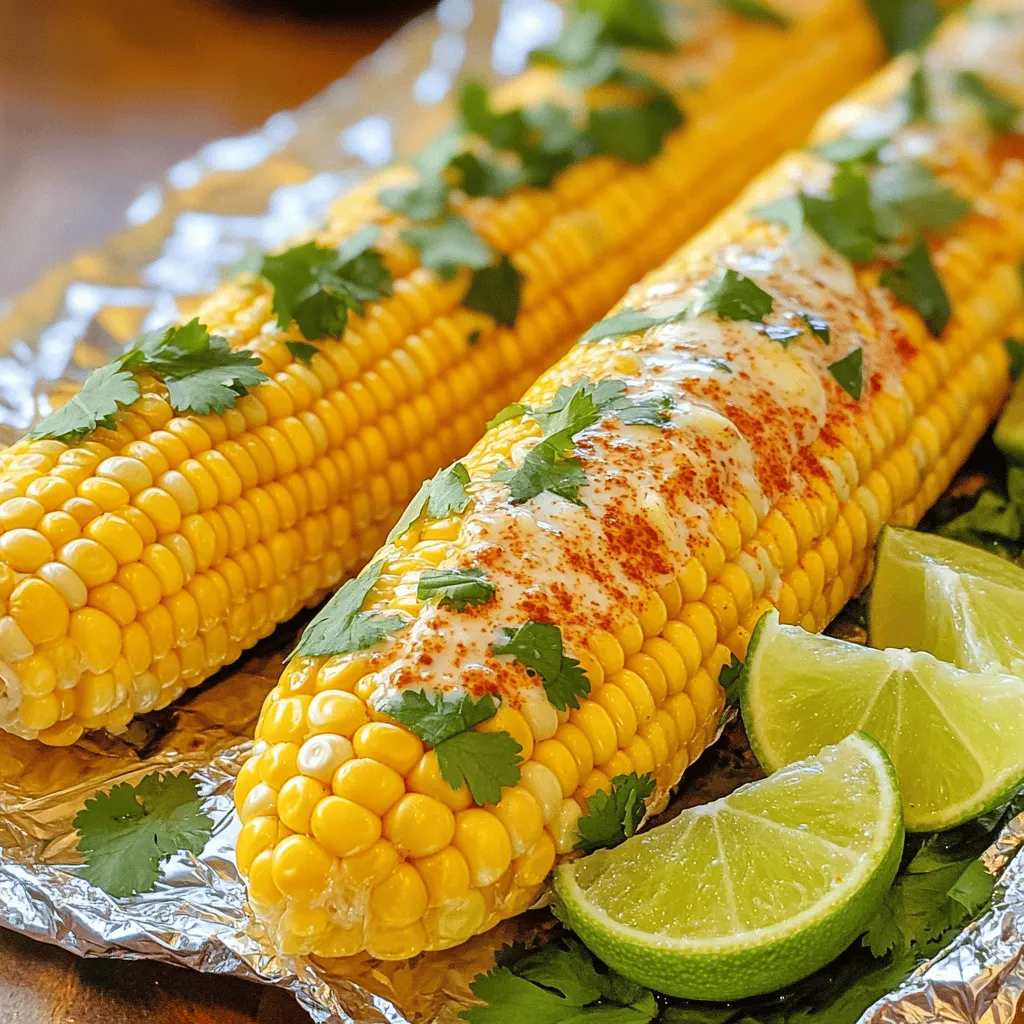
![In this dish, fresh and simple ingredients shine through. Each one brings its own flavor and texture. Here’s what you need for Garlic Herb Roasted Potatoes, Carrots & Zucchini: - Potatoes: 4 medium, diced into 1-inch cubes - Carrots: 3 large, sliced into thin rounds - Zucchinis: 2 medium, chopped into half-moons - Garlic: 4 cloves, finely minced - Olive Oil: 3 tablespoons of extra virgin - Seasonings: 1 teaspoon each of dried oregano, dried thyme, and finely chopped fresh rosemary - Salt and Pepper: to taste - Garnish: Fresh parsley, finely chopped These ingredients create a colorful and tasty dish. The potatoes provide heartiness, while the carrots and zucchini add sweetness. Fresh garlic and herbs give it a delightful aroma. You can find the complete recipe in the Full Recipe section. Enjoy the fun of roasting these veggies together! Set your oven to 425°F (220°C). This is key for roasting. Combine diced potatoes, sliced carrots, and chopped zucchinis in a large bowl. Make sure they mix well for even cooking. In a separate bowl, whisk together garlic, olive oil, and seasonings. This blend adds flavor to your vegetables. Pour the herb mixture over the vegetables. Toss them well so every piece gets coated. Then, spread them out on a baking sheet. Bake for 25-30 minutes. Remember to stir halfway through. This helps them brown evenly and become tender. After roasting, sprinkle fresh parsley on top. This adds color and a bright taste just before serving. You can find more details in the [Full Recipe]. Enjoy your delicious Garlic Herb Roasted Potatoes, Carrots & Zucchini! To get the best results, I always make sure my vegetables are in a single layer on the baking sheet. This helps them roast evenly. If they are stacked or crowded, some pieces may steam instead of roast. Stir the veggies halfway through to ensure they brown nicely on all sides. Want to boost the flavor? Try adding fresh herbs like basil or dill. You can also sprinkle in a pinch of smoked paprika for a subtle kick. If you love heat, a dash of red pepper flakes works well too. Mix and match to find your favorite combo! Presentation is key for this dish. Serve the roasted vegetables in a large, shallow bowl. It looks beautiful and allows the colors to pop. Drizzle a bit of extra olive oil on top for a glossy finish. Pair these veggies with grilled chicken or fish for a complete meal. You can also serve them alongside a light salad for a refreshing contrast. Check out the Full Recipe for more tips! {{image_4}} You can mix things up with seasonal vegetables. Try adding: - Sweet potatoes for a touch of sweetness. - Bell peppers for color and crunch. - Brussels sprouts for a hearty bite. - Cauliflower for a nutty flavor. These veggies roast well and add variety. Each brings its own taste and texture, making your dish unique. Enhance your dish with different flavors. Consider these ideas: - Add Parmesan cheese for a salty kick. - Crumble feta cheese for a tangy touch. - Use fresh herbs like basil or cilantro instead of dried ones. - Experiment with spices like paprika or cumin for extra warmth. These twists can elevate your dish to new heights and keep it exciting. Making this dish vegan or gluten-free is easy. Here are some tips: - For vegan options, ensure your oil is pure and skip any cheese. - Gluten-free is simple since all vegetables are naturally gluten-free. - Use tamari instead of soy sauce if you want a savory note without gluten. These adjustments keep your meal tasty while meeting dietary needs. You can explore these variations in the full recipe to find your favorite mix! To store leftover roasted vegetables, let them cool down first. Place them in an airtight container. You can keep them in the fridge for about 3 to 4 days. This method keeps the veggies fresh and tasty. When you reheat them, use the microwave or oven. The oven can help keep them crispy. If you want to save roasted veggies for longer, freezing is a great option. To freeze, first let them cool completely. Then, spread the vegetables in a single layer on a baking sheet. Freeze them for about 1 to 2 hours. After that, transfer the veggies to a freezer-safe bag. Squeeze out as much air as you can. They will last for up to 3 months. To reheat, bake them straight from the freezer. This will give you that nice roasted texture again. The shelf life of garlic herb roasted potatoes, carrots, and zucchini varies by storage method. In the fridge, they last for about 3 to 4 days. If frozen, they can stay good for up to 3 months. Always check for any off smells or changes in texture before eating. The sooner you enjoy your leftovers, the better they will taste. For the full recipe, refer to the earlier section. Yes, you can swap vegetables in this dish. Good choices include bell peppers, sweet potatoes, or Brussels sprouts. When using different veggies, adjust cooking times. For example, bell peppers need less time, around 20 minutes. Sweet potatoes take about 30-35 minutes. Always cut your veggies to similar sizes for even cooking. To prepare this dish ahead, chop your vegetables and mix them with the herb mixture. Store them in a sealed container in the fridge for up to 24 hours. When ready to cook, spread the veggies on a baking sheet. Bake them as directed. This saves time and keeps your meal fresh. Garlic herb roasted potatoes, carrots, and zucchini fit well with many dishes. Serve them alongside grilled chicken or fish for a balanced meal. They also work nicely with a side salad or quinoa. You can even pair them with a hearty soup for a warm, filling dinner. Using fresh herbs can elevate your dish. They bring a brighter flavor. However, you will need more fresh herbs than dried. For example, use about three times the amount of fresh herbs. Fresh herbs also need different cooking times. Add them towards the end of roasting to keep their flavor vibrant. This recipe for roasted vegetables is simple and tasty. You learned how to prepare and roast potatoes, carrots, and zucchinis. Tossing them with garlic, olive oil, and herbs enhances the flavor. Following my tips ensures even cooking and a delightful presentation. You can even try different veggies or flavors, making each dish unique. With proper storage, leftovers stay fresh for later. Enjoy this healthy side dish with any meal!](https://meltedrecipes.com/wp-content/uploads/2025/06/990d1534-5373-49f7-bf4b-5c8127424946.webp)
Looking for a simple yet delicious side dish? My Garlic Herb Roasted Potatoes, Carrots & Zucchini will be your new favorite! This recipe combines fresh veggies, fragrant garlic, and mixed …
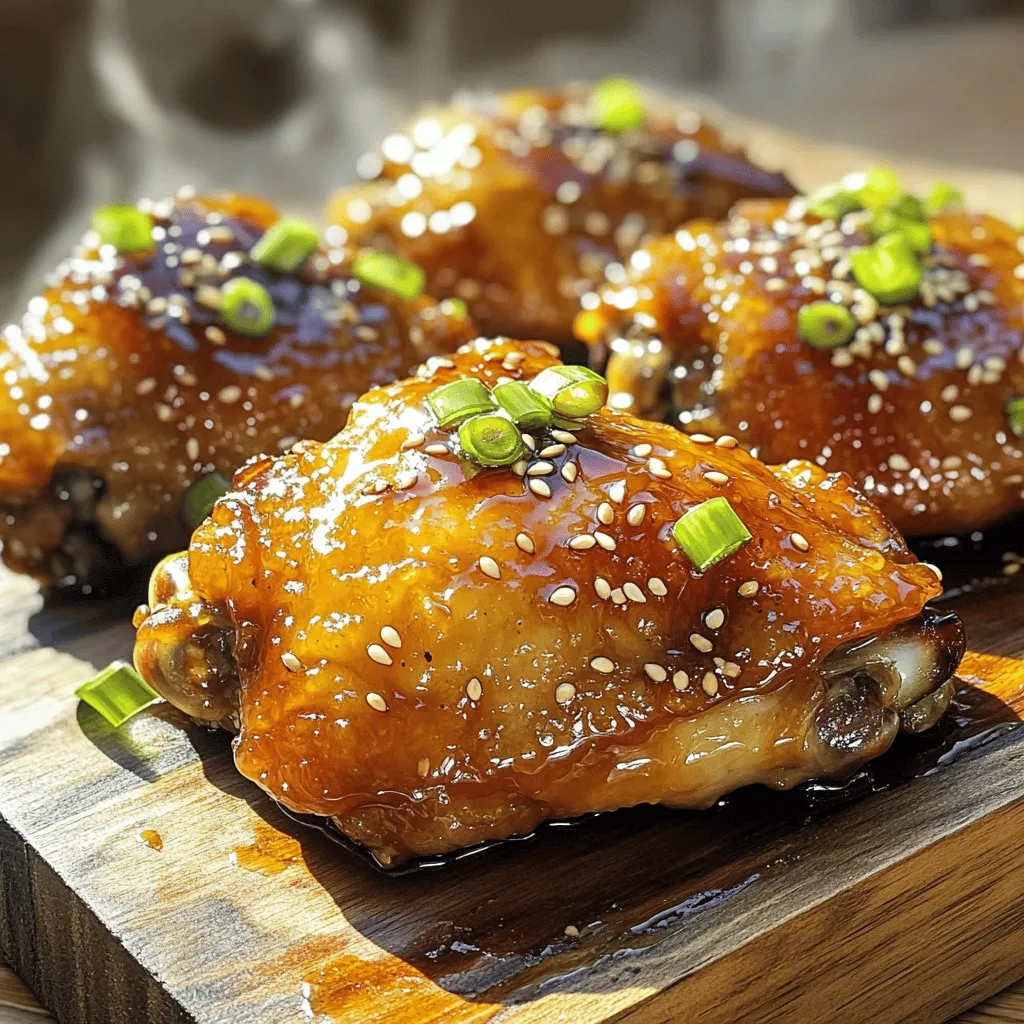
. Combine 1 cup of buttermilk, 1 tablespoon of hot sauce (optional), and the spices in a bowl. Use garlic powder, onion powder, smoked paprika, thyme, and oregano. Add a pinch of salt and black pepper to taste. Whisk until you mix everything well. This marinade adds flavor and tenderness to the chicken. Take your chicken thighs and submerge them in the marinade. Make sure they are fully covered. Cover the bowl with plastic wrap or a lid. Refrigerate for at least 2 hours. Letting the chicken sit in this mixture allows the flavors to soak in. You can marinate overnight for even more taste. Set up your dredging station. In a shallow dish, pour in 1 cup of all-purpose flour. Lightly season this flour with salt and pepper. Mix it gently to spread the seasoning. Next, pour vegetable oil into a large skillet, about 1 inch deep. Heat the oil over medium-high heat. Use a thermometer to check the temperature. You want it to reach around 350°F (175°C) for perfect frying. Now, take the marinated chicken out of the buttermilk. Let any extra liquid drip off. Dredge each thigh in the seasoned flour. Press lightly to make sure the coating sticks well. Carefully place the chicken in the hot oil, skin-side down. Do not overcrowd the pan. Fry in batches if needed. Cook for 7 to 8 minutes without moving the chicken. This helps create a nice golden brown crust. After that, gently flip the thighs over. Keep frying for another 7 to 8 minutes. Check that the internal temperature reaches 165°F (75°C). The skin should be crispy and golden. When done, remove the chicken from the skillet. Let excess oil drip off. Place the fried chicken on a cooling rack or a plate with paper towels. This helps soak up any remaining oil. For the full recipe, check out the complete guide! To get that golden crunch, marinating is key. I recommend at least two hours in the buttermilk mixture. This helps the chicken soak up all the flavors. If you can wait overnight, that’s even better! Frying temperature is also crucial. Heat your oil to 350°F (175°C). This keeps the chicken crispy and avoids sogginess. Use a thermometer to check the heat. If the oil is too cool, your chicken will soak up oil and turn greasy. For flavor, try mixing up your seasonings! Instead of just garlic and onion powder, add some cayenne for heat. You can also use smoked paprika for a deeper flavor. Fresh herbs can elevate your marinade. Try adding rosemary or basil for a fresh twist. Herbs not only add taste but also make your chicken look pretty. Fried chicken pairs well with many sides. Classic options include creamy coleslaw or fluffy biscuits. You could also serve it with mashed potatoes for a comforting meal. For presentation, place the fried chicken on a rustic wooden platter. Garnish with fresh herbs like parsley or thyme. Add lemon wedges on the side for a zesty touch. This makes your dish colorful and appealing. For the full recipe, check out my other sections! {{image_4}} To make fried chicken, you can use different cooking methods. Here’s how to do it: - Air Frying: Preheat your air fryer to 360°F (182°C). Dredge your chicken as usual. Place the chicken in a single layer in the basket. Air fry for about 25-30 minutes, flipping halfway. This method gives you a crunchy texture with less oil. - Oven-Baking: Preheat your oven to 425°F (220°C). Dredge the chicken and place it on a wire rack over a baking sheet. Bake for 35-40 minutes, or until golden brown. This method keeps it crispy without frying. Want to spice things up? Here are some fun flavor ideas: - Spicy Variations: Add different hot sauces to your marinade. You can try sriracha, buffalo sauce, or even a dash of cayenne pepper. This will give your chicken a nice kick. - Herb-Infused Alternatives: Use fresh or dried herbs like rosemary, basil, or dill in your marinade. This adds depth and flavor to your chicken. Mix and match to find your favorite combo. You don’t have to use chicken! Here are some tasty swaps: - Turkey: Use turkey thighs for a leaner option. Just make sure to adjust the cooking time. Turkey may take a bit longer to cook. - Tofu: For a plant-based choice, use firm tofu. Press it to remove excess water and cut it into thick slices. Marinate and dredge as you would chicken. Fry until golden brown for a yummy vegan dish. Feel free to check out the Full Recipe for more ideas! To store your fried chicken, let it cool first. Place it in an airtight container. This keeps moisture in and prevents the chicken from drying out. You can also wrap it tightly in foil or plastic wrap. This method works well too. Store it in the fridge for up to 3 days. When you want to reheat your chicken, the oven is best. Preheat your oven to 375°F (190°C). Place the chicken on a baking sheet. Heat for about 15 to 20 minutes. This method keeps the chicken crispy. You can also use an air fryer for a quicker option. Set it to 350°F (175°C) and heat for 8 to 10 minutes. Freezing fried chicken is a great way to save leftovers. After cooling, wrap each piece in plastic wrap. Then, place them in a freezer-safe bag or container. Make sure to remove as much air as possible. This helps prevent freezer burn. Fried chicken can last up to 3 months in the freezer. To thaw your fried chicken, move it to the fridge overnight. This slow method keeps it juicy. If you're in a hurry, you can use the microwave. Use the defrost setting for best results. After thawing, reheat it as mentioned above. Fried chicken stays fresh for different times based on storage. In the fridge, it lasts up to 3 days. If frozen, expect it to stay good for about 3 months. Always check for signs of spoilage, like off smells or changes in texture. Enjoy your crispy fried chicken from the [Full Recipe] with confidence! You should marinate chicken for at least 2 hours. This time gives the flavors a chance to soak in. If you can, marinate overnight. Longer marination makes the chicken tastier and juicier. The buttermilk breaks down proteins and keeps the meat moist. This step is key for great fried chicken. Yes, you can use skinless chicken thighs. However, this choice changes the flavor and texture. Skin adds crispiness and richness you won’t get with skinless meat. If you prefer skinless, add more seasoning to keep it flavorful. The cooking time may also be slightly shorter. The best oil for frying chicken is vegetable oil. It has a high smoke point, which is great for frying. Other good options include canola and peanut oil. Avoid oils with low smoke points like olive oil. These oils can burn and spoil the flavor of your chicken. Use a meat thermometer to check if your chicken is done. The internal temperature should reach 165°F (75°C). Insert the thermometer into the thickest part of the chicken. This ensures it cooks evenly and is safe to eat. If you don’t have a thermometer, cut into the chicken. It should be white, with no pink inside. Fried chicken pairs well with many sides. Classic choices include coleslaw, mashed potatoes, and cornbread. You can also serve it with pickles or biscuits. For drinks, sweet tea or lemonade works great. These sides and drinks balance the richness of the fried chicken. Feel free to mix and match to find your favorite combinations. For the full recipe, check out the details above! In this article, we explored how to make delicious fried chicken. We covered the key ingredients, how to prepare and marinate chicken, and tips for crispy texture. You also learned several cooking methods, variations in flavor, and storage tips. Remember, the right marinating time and frying temperature are crucial to great results. With these steps, you can enjoy tasty fried chicken any time. Try different flavors and sides to make it your own! Enjoy your cooking adventure!](https://meltedrecipes.com/wp-content/uploads/2025/06/c0b96b67-cd94-478e-8be0-c605ca782072.webp)
![- 1 pound fresh green beans, trimmed - 3 cloves garlic, peeled and smashed - 1 cup distilled white vinegar - 1 cup water - 2 tablespoons granulated sugar - 1 tablespoon salt - 1 teaspoon mustard seeds - 1 teaspoon red pepper flakes - 1 teaspoon black peppercorns - 1 bay leaf To make quick pickled green beans, you need fresh, vibrant ingredients. Start with one pound of green beans. Look for beans that are firm and bright green. Trim the ends off to ensure they fit nicely in your jars. Next, grab three cloves of garlic. Smash them gently with the flat side of a knife. This lets the garlic flavor seep into the beans as they pickle. Now, let's talk about the pickling liquid. You will need one cup of distilled white vinegar. This gives the pickles a nice tangy taste. Add one cup of water to balance the acidity. To sweeten the brine, include two tablespoons of granulated sugar. Finally, mix in one tablespoon of salt for flavor. Next, we add some excitement with flavor enhancements. Use one teaspoon of mustard seeds for a hint of spice. If you like heat, toss in one teaspoon of red pepper flakes. Add one teaspoon of black peppercorns for depth. Lastly, drop in one bay leaf to round out the taste. These ingredients come together to create a crunchy and flavorful treat. Follow the [Full Recipe] to see how these elements transform into a delightful snack! To start, I combine vinegar, water, sugar, and salt in a medium saucepan. I pour in 1 cup of distilled white vinegar and 1 cup of water. Then, I add 2 tablespoons of granulated sugar and 1 tablespoon of salt. I place the saucepan over medium heat. I stir the mixture until the sugar and salt dissolve. Once everything is mixed well, I let it come to a rolling boil. This step is key for building flavor. While the brine heats up, I prepare the green beans. I take 1 pound of fresh green beans and trim the ends. Then, I pack the beans tightly into clean jars. I like to arrange them straight for a nice look. I add 3 smashed garlic cloves, 1 teaspoon of mustard seeds, 1 teaspoon of red pepper flakes, 1 teaspoon of black peppercorns, and 1 bay leaf to each jar. These ingredients add a tasty kick! Once the brine cools slightly, I carefully pour it over the green beans in the jars. I make sure the beans are fully covered. If they float, I gently press down with the back of a spoon. This keeps them submerged. After filling the jars, I seal the lids tightly. I let them cool to room temperature before placing them in the fridge. For the best flavor, I let them pickle for at least 4 hours. However, I find they taste even better after a night in the fridge. For the full recipe, check the details above! To keep green beans crunchy, start with fresh beans. Select firm, bright green ones. Trim the ends before pickling. This helps the beans absorb the brine while staying firm. For cooling times, wait about 5 minutes after boiling the brine. This short pause prevents cooking the beans when added. To adjust spice levels, add more or less red pepper flakes based on your taste. If you want a milder flavor, reduce the amount. You can also add herbs for variation. Fresh dill or thyme can enhance the taste. Experiment with flavors to find your perfect balance. For serving suggestions, place the pickled green beans in a mason jar. It makes a lovely centerpiece. You can also serve them on a rustic cheese platter. Their vibrant colors create a feast for the eyes. Enhance visual appeal by adding cherry tomatoes or olives. This adds more color and texture to the table. {{image_4}} To make your quick pickled green beans spicier, add extra red pepper flakes. A teaspoon gives a mild heat. If you crave more spice, try two teaspoons. This kick enhances the flavor and adds depth. The garlic also gives a bold taste, complementing the pepper. I love to enjoy these with sandwiches or as a snack. Incorporating herbs like dill or thyme can change the flavor profile. Dill adds a fresh taste, while thyme provides warmth. You can add a few sprigs directly to the jars with the green beans. This variation pairs well with roasted meats or as a side dish. Experiment with the amount until you find your perfect mix. If you prefer a sweeter taste, modify the sugar in the brine. You can increase the sugar to three tablespoons for a richer sweetness. This blend pairs well with spicy foods, balancing the heat. It also makes a great addition to salads, giving them a unique twist. Enjoy the process of finding the right sweetness for your taste! For the complete recipe, check out the Full Recipe. Store your quick pickled green beans in the fridge. They last about two weeks. For the best taste, keep them in an airtight container. A glass jar works well. Always place the jar in the coldest part of your fridge. Avoid opening it often, as this can let warm air in. If you want to store them for longer, consider canning. Follow these steps for safe canning: - Use clean, sterilized jars. - Pack beans into jars with spices. - Pour hot brine over the beans, leaving space at the top. - Seal jars with lids and process them in a boiling water bath for 5–10 minutes. - Let them cool completely before storing. Check your pickled green beans for signs of spoilage. If you see mold or an off smell, discard them. If the brine is cloudy, it’s also a warning sign. Always trust your senses. If in doubt, throw them out! Quick pickled green beans last about two weeks in the fridge. After that, they may lose their crunch. Always check for any off smell or discoloration before eating. Yes, you can pickle many veggies! Try carrots, cucumbers, or radishes. Just adjust the pickling time based on the vegetable's size and texture. Each will give you a unique flavor. Serve pickled green beans chilled as a snack. They also add a nice crunch to salads or sandwiches. For a fun touch, place them in a cocktail or on a charcuterie board. No, you don’t need to sterilize jars for quick pickles. Just make sure they are clean. This keeps your beans safe and tasty. Yes, you can easily scale the recipe. Just keep the same ratio of ingredients. Whether you want more or less, adjust as needed for your gatherings. For the full recipe, check out Zesty Quick Pickled Green Beans. Quick pickling green beans is simple and fun. We covered the best fresh ingredients, the perfect brine mix, and ways to enhance flavor. Keeping your beans crunchy and choosing the right storage are key. You can even create unique variations to match your taste. Enjoy your pickling journey! Experiment with flavors and share your results with others. Your homemade pickles can add zest to meals and impress friends. Happy pickling!](https://meltedrecipes.com/wp-content/uploads/2025/06/b45cc0b0-d416-490f-88ee-35bce5aa93f7.webp)


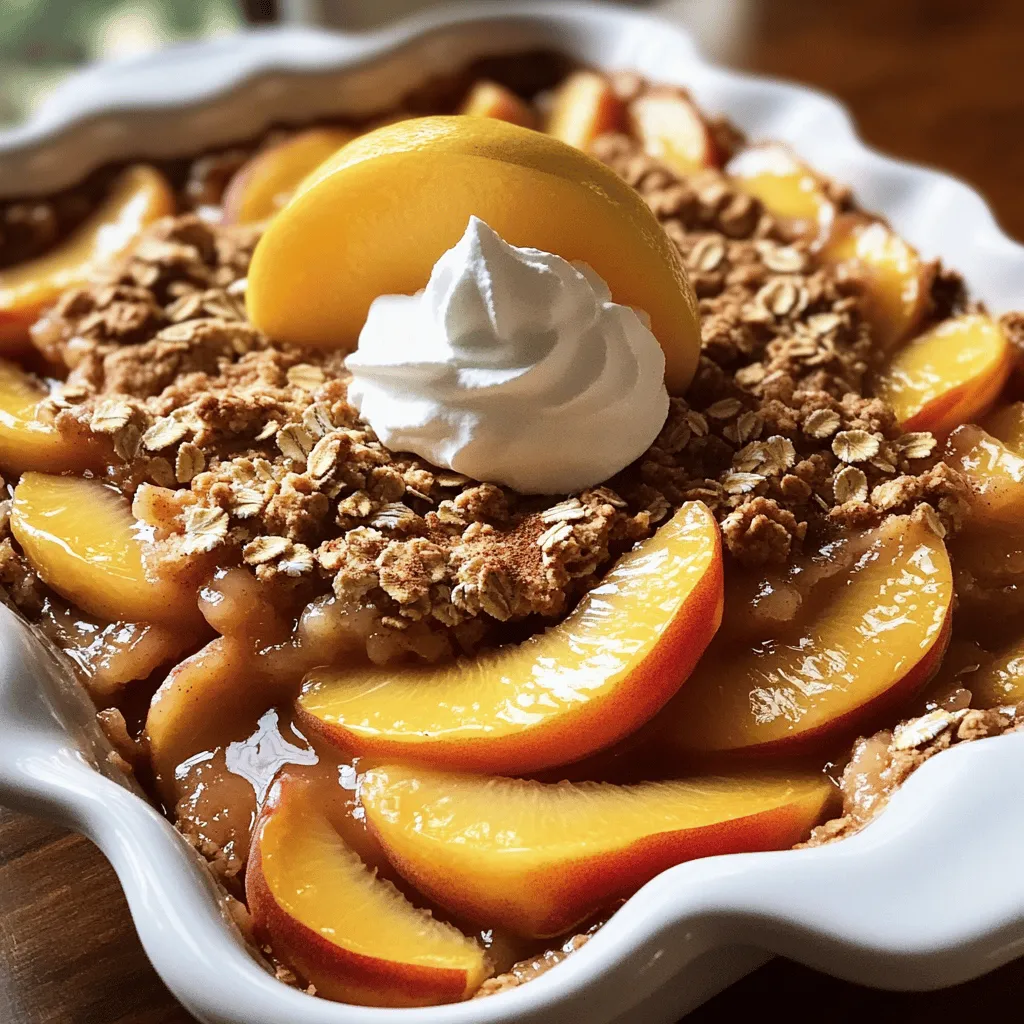

![For the best peach cobbler, you need fresh, ripe peaches. Here’s a full list of what you’ll need: - 4 cups fresh peaches, peeled and sliced into thin wedges - 1 cup granulated sugar, divided into ½ cup for the filling and ½ cup for the batter - 1 tablespoon freshly squeezed lemon juice - 1 teaspoon pure vanilla extract - 1 teaspoon ground cinnamon, plus more for garnish - 1 ½ cups all-purpose flour - 2 teaspoons baking powder - ½ teaspoon fine salt - ¾ cup milk, at room temperature - ½ cup unsalted butter, melted and slightly cooled - 1 teaspoon almond extract (optional, for an extra layer of flavor) - Vanilla ice cream, for serving (optional) Using fresh peaches gives the dish a sweet, juicy flavor. The sugar helps balance the tartness from the peaches. Lemon juice adds brightness, while vanilla and almond extracts bring depth. Ground cinnamon provides warmth and spice. If you want to serve your cobbler warm, vanilla ice cream makes a perfect addition. It melts into the cobbler and creates a creamy contrast to the warm fruit. You can find the full recipe above to help guide you through the steps. - Set your oven to 350°F (175°C). This helps your cobbler bake evenly. - Grease a 9x13 inch baking dish with butter or cooking spray to prevent sticking. - In a large bowl, toss 4 cups of sliced peaches with ½ cup of sugar. - Add 1 tablespoon of lemon juice, 1 teaspoon of vanilla extract, and 1 teaspoon of cinnamon. - Make sure every peach slice is covered well. - Transfer the peach mixture into the greased baking dish, spreading it out evenly. - In another bowl, combine 1 ½ cups of flour, 2 teaspoons of baking powder, ½ teaspoon of salt, and the remaining ½ cup of sugar. - Whisk until everything is mixed well. - Pour in ¾ cup of milk and ½ cup of melted butter into the dry mix. - Whisk gently until everything is just combined. - If you want more flavor, stir in 1 teaspoon of almond extract. - Carefully pour the batter over the peach filling in the baking dish. - Avoid stirring; the batter will rise and create a nice crust when baking. - Place the dish in the oven and bake for 45-50 minutes. - The cobbler should be puffed and golden brown. - Test doneness by inserting a toothpick into the center; it should come out clean. You can find the Full Recipe in the sections above for more details. Enjoy making your peach cobbler! Choosing the best peaches Use ripe, sweet peaches for the best flavor. Look for peaches that give slightly when you press them. They should smell sweet too. If you can find local peaches, they will taste amazing. You can also mix in some frozen peaches if fresh ones are out of season. Just thaw them and drain excess liquid. Tips for mixing the batter When you mix your batter, do it gently. Combine the wet and dry ingredients until just mixed. Overmixing can make your cobbler tough. You want a light, fluffy texture, so be careful. If you decide to add almond extract, do it at the end. This gives your cobbler a nice hint of flavor without overpowering the peaches. Serving techniques When serving peach cobbler, make it warm. Scoop portions into bowls and let guests add their own toppings. A simple yet inviting way to serve is to plate it with a scoop of vanilla ice cream on top. The warm cobbler and cold ice cream create a delightful mix. Additional toppings You can add a sprinkle of ground cinnamon for a cozy touch. Another great option is to drizzle a bit of honey over the top. If you want a bit of crunch, crushed nuts can also be a fun addition. Overmixing the batter As I mentioned, don’t overmix. This mistake can ruin the texture of your cobbler. The batter should be just combined. If you see some lumps, that’s okay. Baking time errors Keep an eye on your cobbler while it bakes. If you do not bake it long enough, the center may stay gooey. If you bake it too long, it can dry out. A toothpick should come out clean when it’s done, but the top should still be golden. This balance is key for a perfect peach cobbler. For more details on making this dish, refer to the Full Recipe. {{image_4}} You can use many fruits in your cobbler. If you want a twist, try these: - Apples: Crisp and sweet, they add great texture. - Pears: Soft and juicy, they blend well with peaches. - Berries: Blueberries or raspberries can add a tart kick. - Cherries: They bring a nice color and a hint of tartness. Mixing fruits can create fun combos. For a berry cobbler, mix peaches with blueberries or strawberries. Toss in chopped nuts for a crunchy surprise. Walnuts or pecans work well here. Want a healthier take? You can swap some ingredients. - Whole wheat flour: This makes the cobbler more nutritious. It gives a nutty taste. - Sugar substitutes: Try honey, maple syrup, or Stevia. These can reduce calories and add unique flavors. Adjust the sugar based on your taste. Start with less, and add more if needed. Spices and extracts can lift your cobbler. Here are some to try: - Ground ginger: It adds a warm, spicy kick. - Nutmeg: A pinch can enhance the sweet flavors. - Lemon zest: Brightens the taste with fresh citrus. For extracts, consider vanilla or almond. Just a few drops can change the whole dish. They make each bite more special. You can find many ways to make your peach cobbler unique. Explore flavors to suit your taste! For the full recipe, check here: [Full Recipe]. To keep your leftover cobbler fresh, use an airtight container. This helps prevent moisture loss and keeps flavors intact. Store it in the fridge for up to four days. If you want to enjoy it later, freezing is a great option. To reheat your cobbler, use the oven for the best results. Preheat it to 350°F (175°C). Place the cobbler in a baking dish and cover it with foil. Heat for about 15-20 minutes or until warm. This method helps keep the crust crisp. You can also use a microwave, but it may soften the crust. To freeze your cobbler, make sure it has cooled completely. Cut it into portions and wrap each piece tightly in plastic wrap. Place the wrapped pieces in a freezer bag. This method helps keep the cobbler fresh for up to three months. When ready to enjoy, thaw it overnight in the fridge. Reheat as mentioned above for the best texture. Look for a golden brown top. The cobbler should be puffed up and firm. Insert a toothpick into the center; it should come out clean. If the top is dark but the middle is wet, give it more time. Bake for 45-50 minutes for best results. Yes, you can prepare the filling a day in advance. Store it in the fridge until you're ready to bake. Mix the batter just before baking to keep it fluffy. If you need to, you can bake the cobbler and reheat it later, but fresh is best. Serve with a scoop of vanilla ice cream for a sweet treat. A dollop of whipped cream works well too. You can also pair it with a sprinkle of cinnamon for extra flavor. Fresh mint leaves add a nice touch as well. Yes, you can use canned peaches. Drain them well to avoid excess liquid. Use the same amount as fresh peaches. You might want to cut back on the sugar, as canned peaches are often sweeter. Adjust the spices to fit your taste. In this guide, we explored how to make a delicious peach cobbler. We covered the ingredients you need, step-by-step instructions, and key tips to perfect your dessert. You learned how to choose the best peaches and avoid common mistakes. Remember, this dish is versatile; you can substitute fruits and adjust flavors. Store leftovers properly to enjoy later. With these insights, you're ready to impress with your peach cobbler skills. Enjoy baking and sharing this treat!](https://meltedrecipes.com/wp-content/uploads/2025/06/2c19cc80-1ad6-42aa-904a-73ba872ea43d.webp)