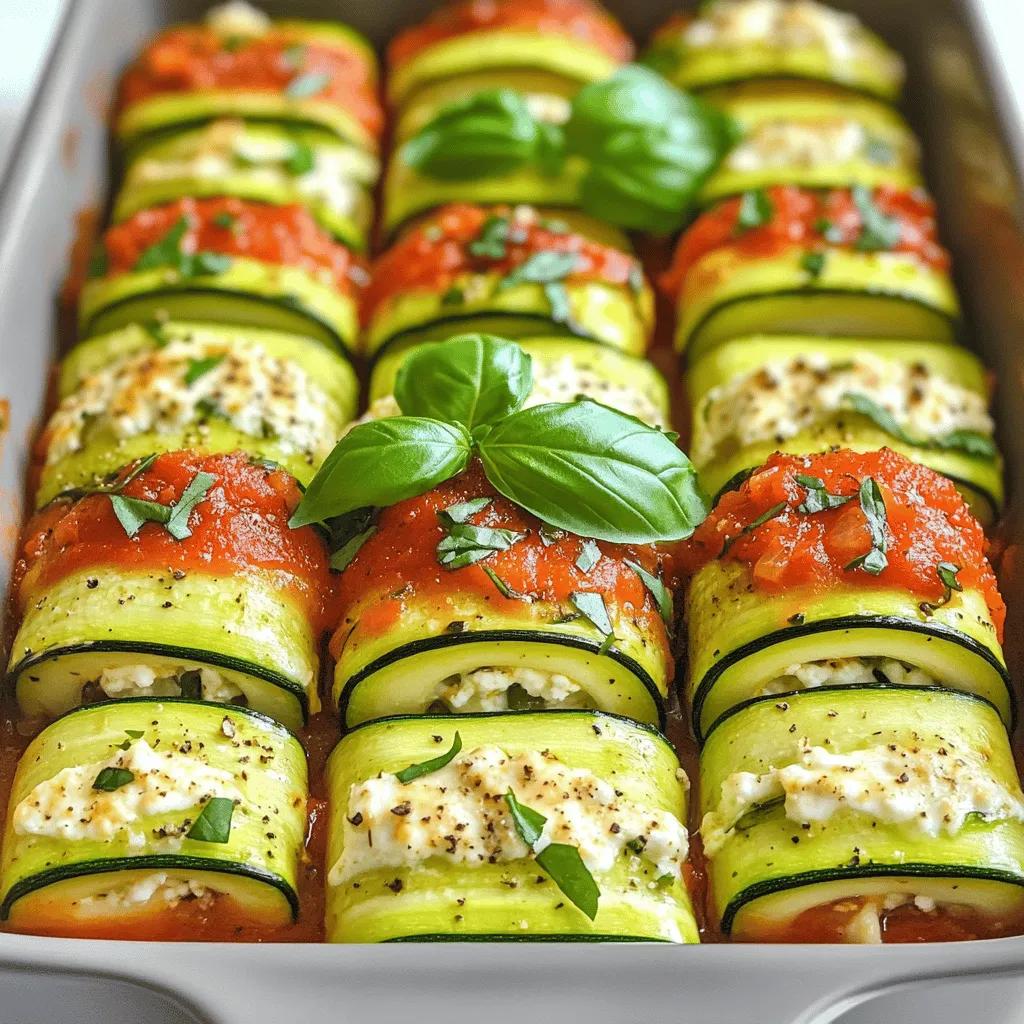
Jalapeno Popper Zucchini Boats Flavorful and Easy Dish
![- 4 medium zucchinis - 1 cup cream cheese, softened - 1/2 cup sharp shredded cheddar cheese - 1/4 cup crumbled feta cheese - 2 jalapeños, finely chopped - 1/4 cup fresh green onions, chopped - 1/2 teaspoon garlic powder - 1/2 teaspoon onion powder - Salt and pepper to taste - 1/2 cup panko breadcrumbs - Olive oil for drizzling When I make Jalapeno Popper Zucchini Boats, I start with fresh zucchinis. These are the stars of the dish. I slice them in half to create little boats, perfect for holding the filling. The filling is creamy and cheesy. I mix cream cheese, sharp cheddar, and feta for a rich taste. Next, I add finely chopped jalapeños for heat. You can remove the seeds if you want it milder. I also include fresh green onions for a touch of brightness. Garlic powder and onion powder give it depth. I sprinkle salt and pepper to make all the flavors pop. For the topping, I use panko breadcrumbs. They turn golden and crunchy when baked. A drizzle of olive oil helps them crisp up nicely. This combination creates a tasty dish that is also fun to eat. Each bite is a mix of creamy, cheesy, and spicy goodness. You can find the full recipe in the section below for all the details! - Preheat oven to 375°F (190°C). - Slice zucchini in half lengthwise and scoop out the flesh. Start by setting your oven to 375°F. This is the perfect temperature for baking. Next, take your zucchinis and cut them in half lengthwise. Use a spoon to scoop out the flesh. Leave about 1/4 inch of skin. This creates a sturdy boat for your filling. Place the zucchini halves cut-side up on a baking sheet lined with parchment paper. This helps with cleanup later. - Combine cheese and seasonings in a bowl. - Add jalapeños and green onions. Now for the filling! In a large bowl, mix the softened cream cheese, cheddar cheese, and feta cheese. Add the finely chopped jalapeños and green onions to the mix. Include garlic powder, onion powder, and a pinch of salt and pepper. Stir until everything blends together and looks creamy. This mixture is the heart of the dish. - Fill zucchini with mixture. - Top with breadcrumbs and drizzle olive oil. - Bake and cool before serving. It's time to assemble! Take your cheese mixture and fill each zucchini boat generously. Pack it in well, so it overflows a bit. Next, sprinkle panko breadcrumbs on top for that crunchy texture. Drizzle some olive oil over the breadcrumbs for extra crispiness. Now, place the baking sheet in your preheated oven. Bake for 25-30 minutes until the zucchini is tender and the breadcrumbs are golden brown. Once done, let them cool slightly before serving. Enjoy this flavorful dish! For the full recipe, check out the instructions above. To make the best Jalapeño Popper Zucchini Boats, avoid overcooking the zucchini. Overcooked zucchini can become mushy. Aim for a tender texture while keeping a slight crunch. Use fresh ingredients for maximum flavor. Fresh jalapeños and creamy cheeses create a tasty filling. Fresh green onions add a nice bite. These zucchini boats shine when paired with a dipping sauce. A cool ranch or spicy salsa can enhance the flavors. They are perfect for appetizers or as a side dish. Serve them at parties or family dinners for a fun treat. For an appealing look, garnish with finely chopped green onions. A sprinkle of fresh cilantro adds color and flavor. Serve the zucchini boats on a rustic wooden platter. This gives a charming, homey touch. Enjoy your dish while impressing your guests with both taste and style! {{image_4}} You can switch up the cheese in your jalapeño popper zucchini boats. If you want a different flavor, try these substitutes for cream cheese: - Greek yogurt for tanginess - Ricotta cheese for a lighter taste - Vegan cream cheese for dairy-free options For more depth, consider these cheese options: - Smoked gouda for a rich, smoky flavor - Pepper jack cheese for extra spice - Parmesan cheese for a salty kick Adjusting the heat is easy with jalapeños. Remove the seeds and membranes for a milder dish. If you want more heat, leave some seeds in. You can also use these spices for flavor: - Cayenne pepper for a fiery touch - Chili powder for a warm taste - Paprika for a smoky flavor without too much heat For a vegan version, use these cheese alternatives: - Cashew cheese for creaminess - Nutritional yeast for a cheesy flavor If you need gluten-free breadcrumbs, try: - Crushed cornflakes for crunch - Ground almonds for a nutty base Feel free to get creative! Each variation can bring a new twist to your zucchini boats. For the full recipe, check out the details above. To keep your Jalapeno Popper Zucchini Boats fresh, store them in the fridge. Place them in an airtight container. This keeps moisture in and air out. You can also wrap them tightly in plastic wrap. They will stay good for 3-4 days. When reheating, I suggest using the oven. Preheat it to 350°F (175°C). Place the boats on a baking sheet. Cover them with foil to keep them moist. Heat for about 10-15 minutes. This helps to keep the texture and flavor intact. Yes, you can freeze zucchini boats! However, they freeze best before cooking. To freeze, wrap each boat in plastic wrap. Then, place them in a freezer bag. They can last for up to 3 months. To thaw, place them in the fridge overnight. Cook them right after thawing for the best taste. Yes, you can make these ahead of time. Prepare the zucchini boats up to the point of baking. Once you fill them, cover them tightly with plastic wrap. Store them in the fridge for up to 24 hours. When ready, remove them from the fridge and bake as directed. This helps save time on busy days. To add more heat, keep the seeds in the jalapeños. You can also use hotter peppers like serranos. Adding a dash of cayenne pepper or red pepper flakes to the cheese mix boosts the spice level too. Mix in some hot sauce for a kick. You can adjust the spice to suit your taste. One common mistake is overcooking the zucchini. If overcooked, they turn mushy. Make sure to scoop out enough flesh but leave enough to hold the filling. Another pitfall is not seasoning the cheese mixture well. Taste it as you mix, and adjust salt and pepper as needed. Finally, don't skip the breadcrumbs; they add great crunch. For the complete Jalapeno Popper Zucchini Boats recipe, check out the [Full Recipe]. In this post, we explored the tasty world of Jalapeño Popper Zucchini Boats. We covered the key ingredients, step-by-step instructions, and useful tips for cooking and serving. Remember, fresh ingredients make a big difference. Adjust the heat to suit your taste and feel free to experiment with different cheeses. These boats are fun to make and great for sharing. Enjoy your cooking adventure, and don’t forget to check out the full recipe for more details!](https://meltedrecipes.com/wp-content/uploads/2025/06/dc947f9d-9bb2-432d-8bf1-2784af38706b.webp)
Are you ready to spice up your dinner routine? Jalapeno Popper Zucchini Boats offer a tasty twist on classic flavors. This crowd-pleaser combines creamy cheese and zesty jalapeños, all stuffed …
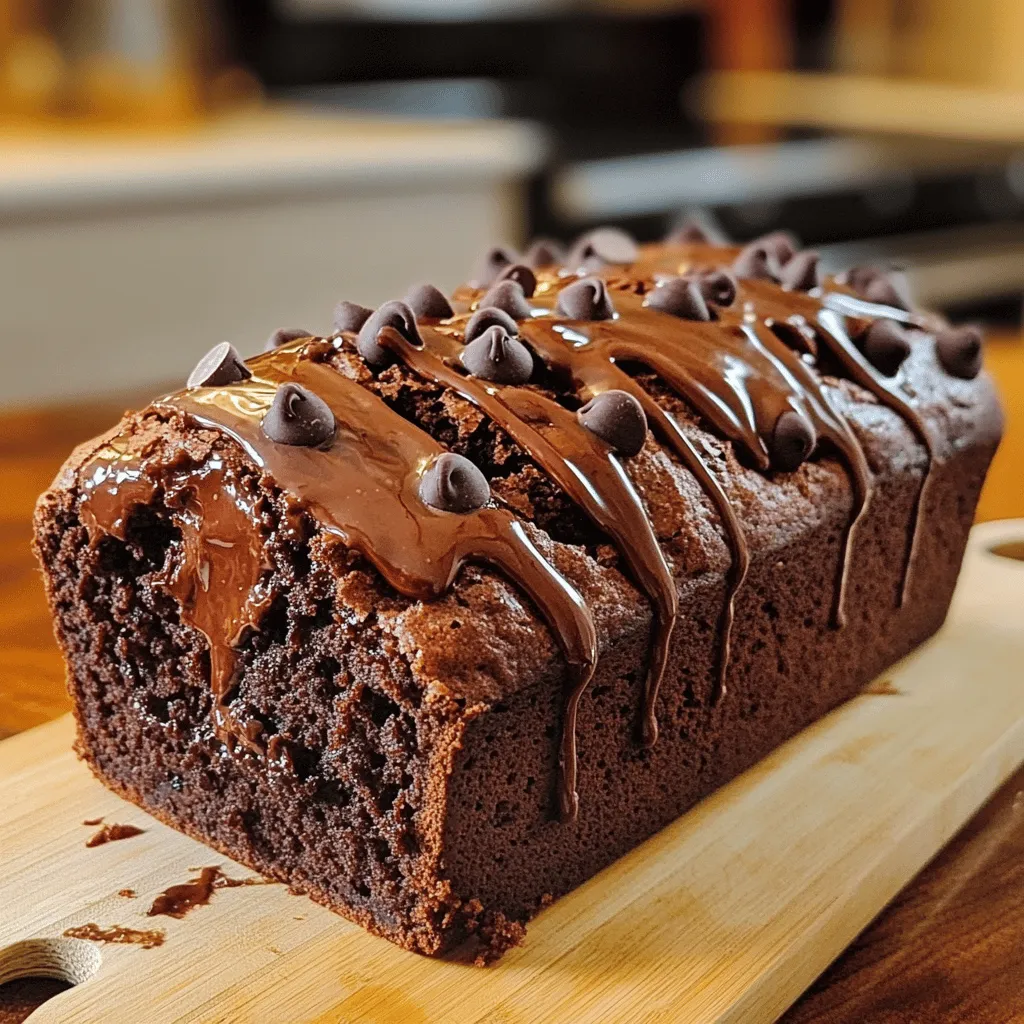
![- 1 cup finely grated zucchini (about 1 medium-sized zucchini) - 1/2 cup unsalted butter, melted and slightly cooled - 1 cup packed brown sugar - 1/4 cup granulated sugar - 1 large egg, at room temperature - 1 teaspoon pure vanilla extract - 1 1/2 cups all-purpose flour - 1/2 teaspoon baking powder - 1/2 teaspoon baking soda - 1/4 teaspoon fine sea salt - 1 cup butterscotch chips Each ingredient in this recipe plays a key role. The zucchini adds moisture and keeps the blondies soft. Butter gives rich flavor and helps them have a nice chewy texture. Brown sugar adds depth with its caramel notes, while granulated sugar brings sweetness. The egg binds everything together, creating a perfect blend. Vanilla extract enhances the overall flavor. Flour is the base that gives structure. Baking powder and baking soda help the blondies rise. Sea salt balances the sweetness and brings out the flavors. Finally, butterscotch chips add sweetness and a delightful chewy bite. You can boost the flavor with a few optional ingredients. Consider adding: - Chopped nuts like walnuts or pecans for crunch. - A sprinkle of cinnamon for warmth. - A dash of espresso powder to enhance the butterscotch flavor. These additions can make your blondies even more special. For the full recipe, check out the detailed instructions. Happy baking! Start by preheating your oven to 350°F (175°C). Take an 8x8-inch square baking pan. You can grease it lightly with butter or line it with parchment paper. Lining helps later when you want to remove the blondies easily. In a large mixing bowl, combine the melted butter, packed brown sugar, and granulated sugar. Use a whisk or spatula to mix until smooth. Then, add the large egg and pure vanilla extract. Whisk until the egg blends in well. This will give a creamy texture to your batter. Next, gently fold in the finely grated zucchini. This step adds moisture and keeps the blondies chewy. In a separate bowl, sift together the all-purpose flour, baking powder, baking soda, and fine sea salt. Gradually add this dry mix to the wet ingredients. Stir with a spatula until just combined. Be careful not to overmix. Overmixing can make the blondies tough. Finally, fold in the butterscotch chips, spreading them evenly throughout the batter. This step ensures each bite is sweet and tasty. Now, you are ready to pour the batter into the prepared baking pan. For the full recipe, refer to the section above. To make your butterscotch zucchini blondies chewy, focus on mixing. Avoid overmixing the batter. Overmixing adds air and can make them dry. Mix until just combined. Using melted butter also helps keep them moist. For even more chewiness, add an extra egg yolk. This brings richness and a softer texture. Watch out for a few common mistakes. First, don’t skip grating the zucchini finely. Large pieces can make the blondies uneven. Also, always measure your flour correctly. Too much flour can lead to dry blondies. It's best to spoon flour into the measuring cup and level it off. Lastly, make sure your oven is at the right temperature. An oven thermometer can help with this. To boost the flavor of your blondies, use high-quality butterscotch chips. They add sweetness and richness. You can also add a pinch of cinnamon or nutmeg for warmth. If you enjoy nuts, consider adding chopped walnuts or pecans. These add crunch and contrast to the soft texture. For a twist, try a splash of almond extract along with the vanilla. Each of these tips will make your blondies even more delightful. For the full recipe, visit the [Full Recipe]. {{image_4}} You can make these chewy butterscotch zucchini blondies gluten-free. To do this, swap the all-purpose flour for a gluten-free blend. Many brands work well in baking. Just check that your mix is designed for one-to-one substitution. This way, you still enjoy that delightful texture. For added crunch, try adding nuts like walnuts or pecans. Chop them finely and fold them in with the butterscotch chips. You can also experiment with coconut flakes or dried fruit like raisins. These additions not only enhance flavor but also provide more texture. Feel free to switch out the butterscotch chips for chocolate chips if you prefer. Dark or milk chocolate works great. You can even add spices like cinnamon or nutmeg to give your blondies a warm twist. A teaspoon of espresso powder could add a rich depth to the flavor too. For the full recipe details, check the [Full Recipe]. After baking the Chewy Butterscotch Zucchini Blondies, let them cool completely. Once cooled, cut them into squares. Store the blondies in an airtight container. This keeps them fresh and chewy. You can place parchment paper between layers to avoid sticking. Keep the container at room temperature for the best texture. When stored correctly, the blondies can last up to five days. If you notice any changes in texture or smell, it’s best to toss them out. For longer storage, consider freezing them, which can extend their life considerably. To freeze the blondies, wait until they are fully cooled. Wrap each square tightly in plastic wrap. Then, place them in a freezer-safe bag or container. Label the bag with the date. The blondies can stay good for up to three months in the freezer. When you’re ready to enjoy them, thaw them in the fridge or at room temperature. They may lose a bit of chewiness, but they will still taste delicious! For the full recipe, check out the earlier section. Yes, you can use frozen zucchini. Just make sure to thaw and drain it well. This helps remove excess moisture. If you skip this step, your blondies may become too soggy. Using frozen zucchini is a great way to save time and enjoy these blondies year-round. Blondies and brownies are both delicious treats. The main difference is in the flavor and ingredients. Blondies use brown sugar and vanilla, which gives them a sweet, caramel-like taste. Brownies usually have cocoa powder or melted chocolate, making them rich and chocolatey. Both are chewy, but blondies have a lighter color. You can tell when the blondies are done by checking the edges. They should be golden brown and slightly pull away from the pan. Insert a toothpick into the center; it should come out clean or with a few moist crumbs. This shows they are baked through but still soft and chewy. In this article, we explored the key ingredients for the perfect blondies. We detailed each ingredient's role and provided helpful tips for mixing and baking. I shared common mistakes to avoid and ways to add flavor through variations. Storing your blondies properly can keep them fresh longer. Remember, you can easily adapt this recipe to fit your tastes, whether you go gluten-free or add tasty mix-ins. Enjoy your baking, and have fun experimenting!](https://meltedrecipes.com/wp-content/uploads/2025/06/aabca3a3-955d-427c-b746-0033e02102e3.webp)
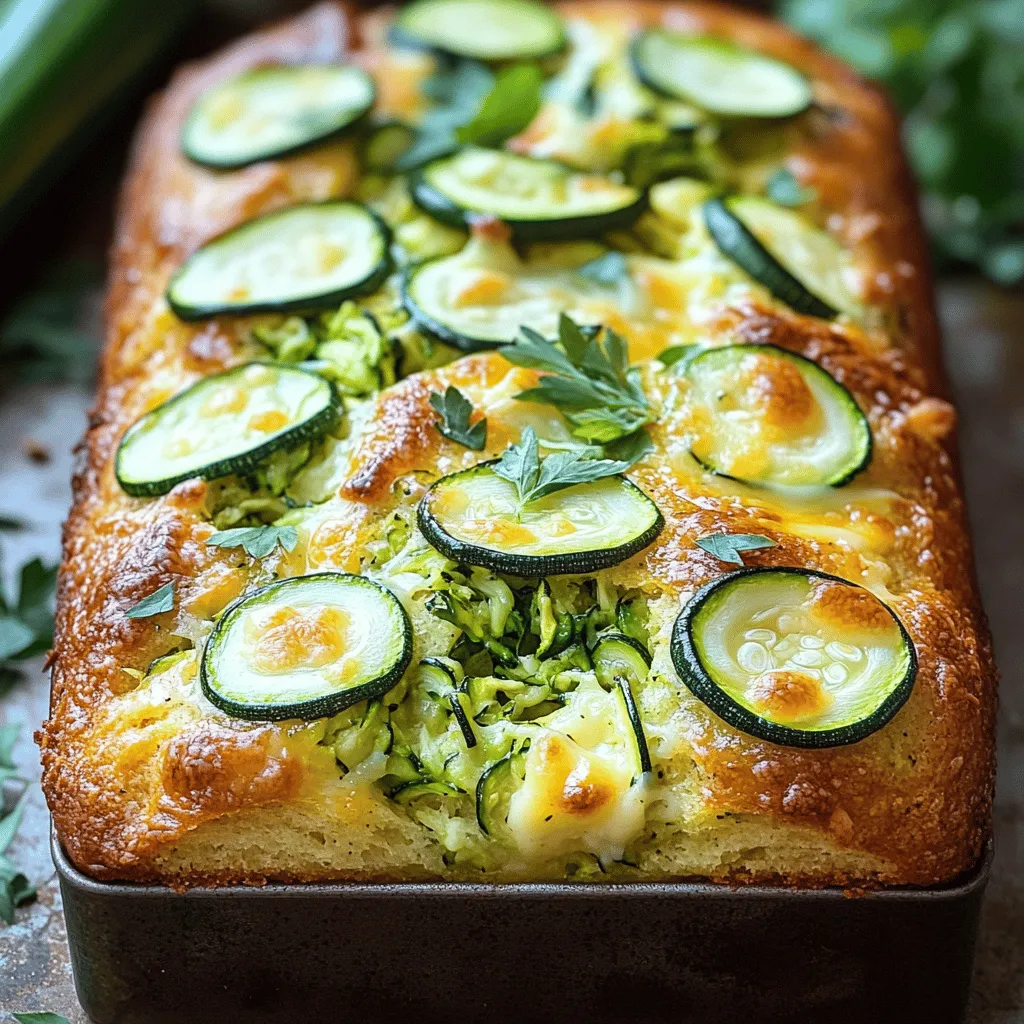
![To make Savory Cheesy Zucchini Quick Bread, gather these items: - 2 cups packed grated zucchini - 1 cup all-purpose flour - 1 cup shredded sharp cheddar cheese - 1/2 cup finely grated Parmesan cheese - 1/4 cup scallions, finely chopped - 2 large eggs - 1/4 cup extra virgin olive oil - 1 teaspoon baking powder - 1/2 teaspoon baking soda - 1 teaspoon garlic powder - 1 teaspoon onion powder - 1/2 teaspoon sea salt - Freshly ground black pepper, to taste You can swap some ingredients if needed. Use whole wheat flour for a nuttier taste. If you want less cheese, cut the cheddar in half. Greek yogurt can replace the olive oil for a healthier option. For a vegan version, use flax eggs instead of regular eggs. Want to make this bread your own? Here are some fun ideas: - Add chopped sun-dried tomatoes for a burst of flavor. - Mix in some fresh herbs like basil or dill for added freshness. - Toss in olives or nuts for a different texture. - Try adding cooked bacon or ham for a savory twist. These additions can enhance the taste and make your quick bread special. For full details on making this delicious bread, check out the Full Recipe. Start by preheating your oven to 350°F (175°C). This step is vital for even baking. Next, take a 9x5-inch loaf pan and lightly grease it with olive oil or cooking spray. This helps the bread come out easily after baking. Grate about 2 cups of zucchini. Place the grated zucchini in a medium bowl. Add a pinch of salt and mix well. Let it sit for about 10 minutes. This resting time helps draw out excess moisture. After ten minutes, use your hands or a clean kitchen towel to squeeze the zucchini. Remove as much liquid as you can. Transfer the squeezed zucchini to a large mixing bowl. In the bowl with the zucchini, add 2 large eggs and 1/4 cup of extra virgin olive oil. Whisk these together until smooth. In another bowl, mix 1 cup of all-purpose flour, 1 teaspoon of baking powder, 1/2 teaspoon of baking soda, 1 teaspoon of garlic powder, 1 teaspoon of onion powder, 1/2 teaspoon of sea salt, and some freshly ground black pepper. Whisk this dry mix until it is even. Now, slowly add the dry mix to the wet zucchini mixture. Stir gently with a spatula. A few lumps are okay, so don’t over-mix. Finally, gently fold in 1 cup of shredded sharp cheddar cheese, 1/2 cup of finely grated Parmesan cheese, and 1/4 cup of finely chopped scallions. When everything is well combined, pour the batter into your prepared loaf pan. Spread it evenly with a spatula. Now you’re ready to bake! Follow the steps in the [Full Recipe]. To keep your savory cheesy zucchini quick bread moist, start with the right zucchini. Use fresh, firm zucchini. Grate it finely and let it sit with salt for 10 minutes. This step pulls out extra moisture. After resting, squeeze the zucchini well. Remove as much liquid as you can. This way, your bread won’t end up soggy. Preheat your oven to 350°F (175°C) before you start mixing. This ensures even baking. Grease your loaf pan to prevent sticking. When you pour in the batter, spread it evenly. This helps the bread bake uniformly. If the top browns too fast, cover it with foil. This keeps it from burning while the inside cooks. Add depth to your quick bread by using sharp cheddar and Parmesan. These cheeses bring a rich flavor. You can also play with herbs or spices. Try adding rosemary or red pepper flakes for a kick. Scallions add a fresh crunch, but feel free to swap them for chives or even sun-dried tomatoes. {{image_4}} You can make this quick bread even more special by adding herbs. Consider using fresh basil, thyme, or dill. These herbs will add a fresh taste. Chop them finely and mix them into the batter with the cheeses. Spices can boost the flavor of your savory cheesy zucchini quick bread. Try adding a pinch of red pepper flakes for heat. You might also like smoked paprika for a deep flavor. Just sprinkle in the spices while mixing the dry ingredients. If you need a gluten-free version, swap all-purpose flour for a gluten-free blend. Make sure it works well for baking. You can also add a bit of xanthan gum to help the bread rise. This keeps it light and fluffy. For the full recipe, check out the complete steps and tips! After baking the Savory Cheesy Zucchini Quick Bread, let it cool completely. Wrap it in plastic wrap or place it in an airtight container. Store it in the fridge for up to five days. This keeps the bread fresh and moist. You can also slice it for easy access. To freeze the bread, slice it first. Wrap each slice in plastic wrap, then place them in a freezer bag. You can freeze it for up to three months. When you want to enjoy it, just take out a slice and let it thaw in the fridge overnight. This method keeps the flavor intact. To reheat, preheat your oven to 350°F (175°C). Place the slices on a baking sheet and heat for about 10-15 minutes. This method makes the bread warm and soft again. You can also use a microwave. Heat each slice for about 20-30 seconds. Enjoy it warm for the best taste! You can enjoy this bread with many tasty sides. Here are some ideas: - A light salad with mixed greens and a lemon vinaigrette. - A bowl of warm soup, like tomato or vegetable. - A dollop of sour cream or Greek yogurt on the side. - Sliced avocado for a creamy touch. - A sprinkle of fresh herbs, like parsley or chives. These pairings enhance the bread's flavors and add freshness. To check if the bread is done, use a toothpick. Stick it in the center of the loaf. If it comes out clean, your bread is ready. If not, bake it a bit longer. The top should be golden brown. You can also gently press the top; it should spring back. Yes, you can mix and match cheeses! Here are some options: - Mozzarella for a milder taste. - Feta for a salty kick. - Gruyère for a nutty flavor. - Pepper jack for some heat. Feel free to get creative! Each cheese brings its unique flavor to the bread. In this post, we explored the key ingredients and easy steps to make Savory Cheesy Zucchini Quick Bread. I shared tips for baking, adding flavors, and storage. You can try different cheeses and spices to make it your own. Remember to control moisture for the best texture. This recipe is simple and delicious, perfect for any meal. Enjoy your baking and make this recipe a staple in your kitchen!](https://meltedrecipes.com/wp-content/uploads/2025/06/63b58a60-dea0-4007-b03d-e51dbf17cf67.webp)

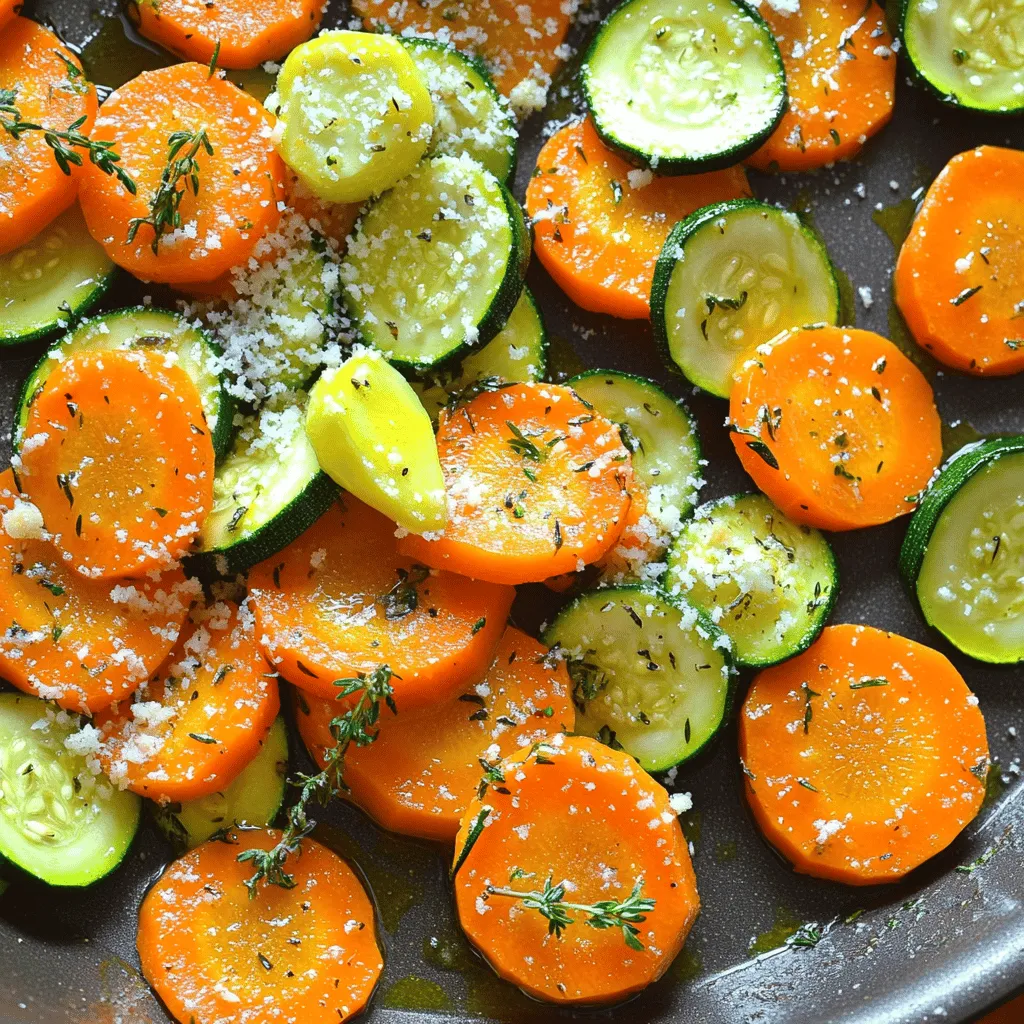
. {{image_4}} You can swap chicken cuts to fit your taste. Thighs add more flavor, while breasts stay lean. If you want a different texture, try bone-in pieces. They stay juicy and tender. Adding vegetables can also boost your dish. Broccoli, bell peppers, or zucchini work well. Just chop them small and add them to the skillet. They will cook in the garlic butter, soaking up flavor. Want to spice things up? Add chili flakes for heat. Start with a pinch and taste. You can always add more if you like it hot. Experimenting with herbs adds fun twists. Try basil or oregano for a fresh touch. Each herb brings its own unique flavor. Mix and match to find your favorite. You can choose how to cook your garlic butter chicken. Oven-baking gives even cooking. Set your oven at 375°F (190°C) and bake for about 25 minutes. This method keeps the chicken juicy. Stovetop cooking is quicker and gives a nice sear. Just follow the recipe steps. Grilling adds a smoky flavor. Preheat your grill and cook the chicken for 6-7 minutes per side. This method adds depth to the dish. For the [Full Recipe], check the earlier section. To keep your garlic butter chicken fresh, store it in the fridge. Place it in an airtight container. This dish lasts up to four days in the fridge. For longer storage, freezing is a great option. Let the chicken cool completely. Wrap it tightly in plastic wrap, then place it in a freezer-safe bag. It can stay frozen for up to three months. Reheating properly helps keep the chicken juicy and tasty. For the best flavor, use the stove. Heat a skillet over low heat. Add a little butter or oil. Place the chicken in the skillet and cover. Heat it for about 5-7 minutes, flipping halfway. If you prefer the microwave, use a microwave-safe dish. Add a splash of water to keep moisture. Cover the dish with a lid or plastic wrap. Heat on medium power for 2-3 minutes, checking often. Preparing garlic butter chicken ahead of time saves you effort on busy days. You can season and cook the chicken in advance. Store it in the fridge for easy meals later. For quick serving, slice the chicken and add it to salads or wraps. You can also serve it with rice or veggies for a complete meal. Check out the Full Recipe for more details on creating this flavorful dish! How do I know when my chicken is fully cooked? You can check the chicken's doneness by using a meat thermometer. The internal temperature should reach 165°F (75°C). If you don’t have a thermometer, cut into the thickest part of the chicken. The meat should be white, and the juices should run clear, not pink. Can I make garlic butter chicken ahead of time? Yes, you can make garlic butter chicken ahead of time. Cook it, allow it to cool, and store it in the fridge. When you are ready to eat, reheat it gently on the stove. This will keep the chicken juicy and flavorful. What sides go best with garlic butter chicken? Garlic butter chicken pairs well with many sides. Here are some great options: - Steamed vegetables like broccoli or green beans - Mashed potatoes or garlic mashed potatoes - Fluffy rice or quinoa - A simple green salad with a light vinaigrette Is garlic butter chicken a good option for meal prep? Yes, garlic butter chicken is perfect for meal prep. It holds well in the fridge and reheats nicely. You can portion it out with your favorite sides for quick lunches or dinners during the week. Is garlic butter chicken healthy? Garlic butter chicken can be part of a healthy diet when enjoyed in moderation. The chicken provides protein, while herbs and garlic add flavor without extra calories. Just be mindful of the butter and adjust portion sizes based on your health goals. What is the calorie count per serving? Each serving of garlic butter chicken contains about 400-450 calories. This can vary based on the amount of butter used and any sides served with it. Always check your specific ingredients for precise counts. This blog post covered how to make delicious garlic butter chicken. I shared key ingredients like chicken, butter, and herbs. You learned step-by-step instructions for cooking and finishing touches. Tips helped enhance flavor and avoid mistakes. Variations offered fun ingredient swaps and cooking methods. We also tackled storage and reheating tips for leftovers. In the end, this dish is simple, tasty, and perfect for any meal. Enjoy experimenting with it!](https://meltedrecipes.com/wp-content/uploads/2025/06/23904089-0642-418f-9770-edef0c1b7dd1.webp)
![To make these yummy cookies, gather these main ingredients: - 1 medium zucchini, finely grated and excess moisture thoroughly squeezed out - 1 cup all-purpose flour - 1/2 cup rolled oats - 1/2 teaspoon baking soda - 1/2 teaspoon baking powder - 1/4 teaspoon salt - 1/2 teaspoon ground cinnamon - 1/2 cup packed brown sugar - 1/4 cup granulated sugar - 1/2 cup unsalted butter, softened to room temperature - 1 large egg - 1 teaspoon pure vanilla extract - 1/2 cup semi-sweet chocolate chips These key items create a soft and chewy cookie. The zucchini adds moisture and a hint of nutrition without changing the flavor too much. You can also use these optional ingredients to make your cookies even better: - 1/4 cup chopped walnuts - A pinch of nutmeg or a splash of almond extract These additions can give your cookies a lovely crunch or a unique twist on flavor. Zucchini is not just for salads; it brings great health benefits to cookies: - Low in calories and high in water content - Packed with vitamins A and C - Adds fiber, which helps digestion Using zucchini makes these cookies a bit healthier, allowing you to enjoy them guilt-free. You can find the full recipe for these delightful cookies here: [Full Recipe]. First, preheat your oven to 350°F (175°C). This temperature is perfect for baking cookies. While the oven heats, get a baking sheet ready. Line it with parchment paper. This makes it easy to take off the cookies later. In a medium bowl, grab your flour, oats, baking soda, baking powder, salt, and cinnamon. Use a whisk to mix these together. Make sure they are fully combined. This step is important for even flavors in your cookies. Now, take a large bowl. Add the softened butter, brown sugar, and granulated sugar. Use an electric mixer on medium speed. Beat this mixture for about 2-3 minutes. It should turn light and fluffy. This helps give your cookies a nice texture. Next, add the egg and vanilla extract to the butter mixture. Beat until they mix well. After that, slowly add your dry ingredient mix. Stir on low speed until just combined. Be careful not to mix too much; otherwise, your cookies might be tough. It’s time to fold in the grated zucchini and chocolate chips. If you want, add chopped walnuts, too. The dough will feel thick and a bit sticky. This is a good sign that you have the right texture. Using a standard tablespoon, scoop the dough. Place it on the baking sheet, leaving about 2 inches between each scoop. This space lets the cookies spread. Bake them in the oven for 12-15 minutes. They should be lightly golden on the edges but still soft in the middle. After baking, let them cool on the sheet for 5 minutes before moving them to a wire rack. This helps them set nicely. For more details, check the Full Recipe. To start, choose a medium zucchini. Wash it well and cut off the ends. Use a box grater or a food processor to finely grate the zucchini. After grating, place the zucchini in a clean kitchen towel. Squeeze the towel tightly to remove excess moisture. This step is crucial. Too much water will make the cookies soggy. Aim for a dry mixture that still has a bit of moisture for flavor. When you mix the dough, use room temperature butter. This helps it cream better with the sugars. Beat the butter and sugars until light and fluffy. This step adds air and makes the cookies soft. Add the egg and vanilla next, mixing until smooth. Gradually add the dry ingredients, mixing on low speed. Overmixing can lead to tough cookies. Finally, gently fold in the zucchini and chocolate chips. This keeps the dough light and airy. Oven temperatures can vary. If your oven runs hot, check the cookies a minute or two early. For cooler ovens, you may need to add a minute or two. Look for lightly golden edges and a soft center. If using a dark baking sheet, reduce the temperature by 25°F. This helps prevent burning. Always trust your eyes and nose. The smell of fresh cookies is a good sign! For extra flavor, try adding spices like nutmeg or cloves. You can also mix in chopped nuts or dried fruit for a delightful twist. Adding rolled oats improves texture and gives the cookies a nice chew. For a richer taste, use dark chocolate chips. Experiment with these options to find your favorite combination. Remember, cooking is all about fun and creativity! {{image_4}} You can make gluten-free zucchini chocolate chip cookies easily. Use gluten-free flour instead of all-purpose flour. Brands like almond flour or coconut flour work well. Just note that these flours can change the cookie texture. You may need to add more liquid to keep the dough moist. To make vegan zucchini chocolate chip cookies, swap the egg for a flax egg. Mix 1 tablespoon of ground flaxseed with 2.5 tablespoons of water. Let it sit for a few minutes to thicken. Use dairy-free butter and vegan chocolate chips. These changes keep the cookies tasty and plant-based. Spice up your cookies with extra flavor! Adding a pinch of nutmeg or ginger can give a warm twist. Consider mixing in nuts like pecans or hazelnuts for crunch. Dried fruits, like raisins or cranberries, also work well. These additions make the cookies unique and fun. For the full recipe, check out the detailed cooking steps above! After baking, let the cookies cool on a wire rack. Once cool, place them in an airtight container. This keeps them soft and fresh for up to five days. You can also layer parchment paper between the cookies to prevent sticking. If you prefer, wrap them in plastic wrap before putting them in the container. To freeze your cookies, first let them cool completely. Then, place them in a single layer on a baking sheet. Freeze for about one hour until firm. After that, transfer the cookies to a freezer-safe bag or container. They can stay frozen for up to three months. When you're ready to enjoy, just thaw at room temperature. To reheat cookies, preheat your oven to 350°F (175°C). Place the cookies on a baking sheet and heat for about five to seven minutes. This warms them up and brings back their soft texture. You can also use the microwave. Heat for 10 to 15 seconds for a warm treat. Enjoy your cookies just like they were fresh out of the oven! For the full recipe, check the section above. Yes, you can use whole wheat flour or almond flour. Whole wheat gives a nutty taste. Almond flour adds moisture and is gluten-free. Just note that using different flours may change the cookie's texture. To prevent spreading, chill the dough before baking. You can also add extra flour if the dough seems too soft. Make sure your butter is softened, not melted. This helps the cookies keep their shape. These cookies stay fresh for about a week when stored in an airtight container. They stay soft and tasty if you keep them at room temperature. You can also freeze them for up to three months. Yes, frozen zucchini works well. Just make sure to thaw it and squeeze out excess water. This keeps your cookie dough from getting too wet. You can use dried fruits, nuts, or white chocolate chips. Peanut butter chips work great too! Each choice adds a unique flavor twist to the cookies. No, you don’t need to peel the zucchini. The skin adds nutrients and color. Just wash it well before grating. This way, you get all the benefits without extra work. For the full recipe, check out the details above. Zucchini chocolate chip cookies mix fun and healthy ingredients. We explored key components and optional add-ins. I shared simple steps to bake these tasty treats. You learned tips on grating zucchini and mixing dough right. Variations let you try gluten-free or vegan options. Finally, I covered how to store leftovers for later enjoyment. These cookies are easy to make and great for everyone. Enjoy your baking!](https://meltedrecipes.com/wp-content/uploads/2025/06/85ba3d98-f5be-481a-b993-6c51c8450cbe.webp)