Skip to content
Melted Recipes
  • Home
  • Appetizers
  • Desserts
  • Salads
  • Breakfast
  • Dinner
  • Privacy Policy
  • Contact
  • About

Chef Miles

Baked Garlic Lemon Pepper Chicken Simple and Tasty

July 2, 2025 by Chef Miles
To make this dish, gather the following items: - 4 boneless, skinless chicken breasts - 3 tablespoons extra virgin olive oil - 4 cloves of garlic, finely minced - Juice and zest of 1 large, juicy lemon - 1 teaspoon freshly ground black pepper - 1 teaspoon sea salt - 1 teaspoon dried oregano - 1 teaspoon dried thyme - ½ teaspoon red pepper flakes (optional for heat) - Fresh parsley, finely chopped, for garnish You can mix things up a bit. Try using chicken thighs instead of breasts for a juicier bite. You can also swap out olive oil for avocado oil if you prefer. If you want more flavor, add a splash of chicken broth to the marinade. For a twist, use lime instead of lemon. You can even throw in some chopped sun-dried tomatoes or olives for an extra kick! Using fresh ingredients makes all the difference. Fresh garlic gives a stronger taste than powdered. Fresh lemon juice brightens up the dish more than bottled juice. The herbs bring a vibrant flavor. When you use fresh items, your meal tastes better and looks more appealing. Trust me, this effort pays off in every bite! To make Baked Garlic Lemon Pepper Chicken, start by preheating your oven to 400°F (200°C). This step is key for even cooking. Next, grab a small bowl and mix together the olive oil, minced garlic, lemon juice, and lemon zest. Add black pepper, salt, oregano, thyme, and optional red pepper flakes. Stir this mix until it looks well combined. Now, take your chicken breasts and put them in a large bag or shallow dish. Pour the marinade over the chicken. Make sure each piece gets coated well. Seal the bag or cover the dish and place it in the fridge. Let it marinate for at least 30 minutes. If you have more time, marinate for up to 2 hours for richer flavor. After marinating, remove the chicken from the fridge. Place the chicken breasts on a baking sheet lined with parchment paper. Make sure they are spaced out. This helps them bake evenly. Put the baking sheet in your preheated oven and bake for 25-30 minutes. Check the internal temperature; it should reach 165°F (75°C). Once done, take the chicken out and let it rest for about 5 minutes. This step keeps the juices inside. Finally, sprinkle chopped parsley on top for a fresh touch before serving. - Prep Time: 10 minutes - Marination Time: 30 minutes to 2 hours - Cooking Time: 25-30 minutes - Total Time: 40 minutes These times help you plan your meal. You can prep ahead to make dinner quick and easy. Marination is important for flavor and tenderness. When you soak the chicken in the marinade, it absorbs all those tasty spices and lemon juice. This makes the chicken juicy and flavorful. The longer you marinate, the better the flavors blend into the meat. So, if you can, try to marinate for a longer time. It makes a big difference in taste! To keep chicken juicy, use a marinade. The mix of olive oil, garlic, and lemon gives moisture and flavor. Let the chicken soak in this mix for at least 30 minutes. Longer marinating makes it even better. After you bake, let the chicken rest for about 5 minutes. This keeps the juices inside. Baking at 400°F (200°C) is key. This heat cooks the chicken evenly, making it tender. Use parchment paper on your baking sheet. It helps with easy cleanup and prevents sticking. Space the chicken out. If they touch, they won't brown well. Check the chicken's temperature. It should reach 165°F (75°C) for safe eating. Serve the chicken with sides like roasted veggies or a fresh salad. The crispness of the veggies balances the chicken's flavor. For sauces, a light lemon sauce or a yogurt dip works great. You can also add a sprinkle of fresh herbs for a pop of color. For the full recipe, visit our dedicated page. {{image_4}} You can switch chicken with fish or plant-based proteins. Salmon works great here. It brings a rich taste that pairs well with lemon and garlic. Tofu is a fantastic choice for a vegan option. Press and cube the tofu, then marinate it just like the chicken. Bake it until it's firm and golden. You can mix flavors to suit your taste. Try adding fresh herbs like basil or cilantro. A splash of soy sauce can add a savory twist. For a spicy kick, use sriracha or a spicy marinade instead of red pepper flakes. You can also add honey for a sweet touch. Experiment with different combinations to find your favorite. Want more heat? Increase the red pepper flakes or add cayenne pepper. If you prefer milder flavors, skip the spicy seasonings. You can also balance heat with a touch of honey or sugar. This helps to round out the flavors. Play around with the seasonings until you get the heat level just right for you. For the full recipe, check the section above. To store leftover baked garlic lemon pepper chicken, let it cool first. Place it in an airtight container. Make sure to cover it well to keep it fresh. You can store it in the fridge for up to three days. If you want to keep it longer, consider freezing it. When reheating, the best method is in the oven. Preheat your oven to 350°F (175°C). Place the chicken on a baking sheet. Cover it with foil to keep it moist. Heat for about 15-20 minutes, or until it is warm throughout. You can also use a microwave, but the oven gives better results. To freeze your chicken, wrap each piece tightly in plastic wrap. Then, place the wrapped chicken in a freezer bag. Squeeze out as much air as possible before sealing. This way, you can keep it in the freezer for up to three months. When ready to eat, thaw it in the fridge overnight before reheating. For more details, check the Full Recipe. Yes, you can use skin-on chicken. It adds flavor and moisture. Just adjust cooking time. Skin-on chicken may take a bit longer to cook through. Ensure it reaches 165°F for safety. The best way to check is with a meat thermometer. Insert it into the thickest part. The temperature should read 165°F. If you don’t have one, cut into the chicken. The juices should run clear, and the meat should be white, not pink. If you're out of lemon, try using lime instead. It gives a nice, zesty flavor. You can also use vinegar, like apple cider or white wine vinegar. Just use less, as vinegar is stronger than lemon. For a sweeter twist, try orange juice. It adds a unique taste! For the full recipe, you can check out the detailed steps and ingredient list. This post covered how to make delicious baked garlic lemon pepper chicken. We discussed the best ingredients, cooking steps, and marination tips. You learned ways to make juicy chicken and tried different flavors. I also shared how to store leftovers for later meals. Cooking should be fun and easy. Use fresh ingredients to boost flavor, and don’t be afraid to get creative. Enjoy your time in the kitchen and impress others with your tasty meals!

Are you ready to elevate your dinner game? Let me introduce my Baked Garlic Lemon Pepper Chicken, a dish that’s simple yet bursting with flavor. With just a few fresh …

Read more

Categories Dinner

Pineapple & Zucchini Loaf Fresh and Flavorful Recipe

July 2, 2025 by Chef Miles
- 1 cup grated zucchini (approximately 1 medium zucchini) - 1 cup crushed pineapple, thoroughly drained - 1/2 cup coconut oil, melted - 1/2 cup packed brown sugar - 1/4 cup honey - 2 large eggs - 1 teaspoon pure vanilla extract - 1 1/2 cups all-purpose flour These key ingredients create a moist and tasty loaf. Grated zucchini adds moisture without strong flavor. Crushed pineapple brings sweetness and a tropical twist. Coconut oil gives it a rich texture. Brown sugar and honey add depth to the sweetness. Eggs bind everything together and help with rising. - 1/2 cup chopped walnuts or pecans - 1/2 cup unsweetened shredded coconut Adding nuts gives the loaf crunch and flavor. Walnuts or pecans work well here. If you like coconut, sprinkle in some unsweetened shredded coconut. It enhances the tropical taste and adds more texture. - 1 teaspoon ground cinnamon - 1/2 teaspoon ground nutmeg - 1 teaspoon baking powder - 1/2 teaspoon baking soda - 1/2 teaspoon salt Spices bring warmth and aroma to the loaf. Cinnamon is a classic choice, while nutmeg offers a subtle nutty flavor. Baking powder and baking soda help the loaf rise, making it soft and fluffy. Salt balances the sweetness and enhances flavors in your Pineapple & Zucchini Loaf. For the full recipe, check out the details above. 1. Start by preheating your oven to 350°F (175°C). 2. Prepare a 9x5-inch loaf pan. Grease it with coconut oil or line it with parchment paper. This step helps with easy removal later. 3. In a large bowl, mix the grated zucchini, crushed pineapple, melted coconut oil, brown sugar, honey, eggs, and vanilla. Stir until everything is well blended. 4. In another bowl, whisk together the flour, baking powder, baking soda, salt, cinnamon, and nutmeg. Make sure these dry ingredients are evenly mixed. 1. Gradually add the dry mix into the wet mix. Stir gently until just combined. Don't overmix; a few lumps are fine. 2. If you want to use nuts or coconut, fold them in now. This adds great texture and flavor to your loaf. 1. Pour the batter into your prepared loaf pan. Smooth the top with a spatula. 2. Bake the loaf for about 55-60 minutes. To check if it’s done, insert a toothpick into the center. It should come out clean. 3. Once baked, remove the loaf from the oven. Let it cool in the pan for about 10 minutes. After that, transfer it to a wire rack to cool completely before slicing. For the full recipe, refer to the main section. To get the best texture in your loaf, avoid overmixing the batter. When you mix the dry and wet ingredients, stir gently until they just combine. A few lumps are okay! Overmixing can make your loaf tough. Moisture levels are key too. Make sure to drain the crushed pineapple well. Extra liquid can make the loaf soggy. The grated zucchini adds moisture, but too much can affect the baking. You can boost the flavors with a few spices. Try adding a pinch of ginger or a dash of allspice for warmth. You can also add citrus zest for a bright kick. Using fresh pineapple gives a juicy texture and vibrant flavor. If you use canned pineapple, make sure it’s well-drained. The flavor may not be as fresh, but it works in a pinch. Serve the loaf sliced on a pretty platter. For a nice touch, sprinkle some shredded coconut or fresh mint leaves on top. This makes the loaf look inviting and fresh. When storing, wrap the loaf tightly to keep it fresh. You can use plastic wrap or foil. If you want to present it later, store it in a cool place. This helps maintain its flavor and texture. {{image_4}} You can make this loaf even more fun! Here are two easy ideas: - Adding citrus zest (lemon or orange): Just a teaspoon of zest brightens the flavor. It adds a fresh, tangy note. Mix it in with the wet ingredients. - Incorporating chocolate chips: Who doesn’t love chocolate? Add half a cup of chocolate chips to the batter. It gives a sweet surprise in each slice. Want to change it up for diet needs? Here are some tips: - Gluten-free flour alternatives: Use a gluten-free flour blend instead of all-purpose flour. This keeps the loaf tasty without gluten. - Vegan substitutions for eggs and dairy: Replace eggs with flax eggs or applesauce. For the coconut oil, you can use a plant-based butter. This way, everyone can enjoy it! Want to bake something different? You can try these formats: - Making muffins or mini loaves instead of a large loaf: Muffins bake quicker and are easy to grab. Fill muffin tins about two-thirds full and bake for about 20-25 minutes. Mini loaves are fun too! Just reduce the baking time to 30-40 minutes. These formats are great for gifts or snacks! Feel inspired? Now you have options to make this Pineapple & Zucchini Loaf your own. Check out the Full Recipe for more details! To keep your Pineapple & Zucchini Loaf fresh, wrap it well. Use plastic wrap or aluminum foil. You can also place it in an airtight container. This helps maintain moisture and flavor. If you store it at room temperature, it lasts for about three days. If you prefer to refrigerate it, it can last up to a week. Make sure to let it cool completely before wrapping. Freezing the loaf is a great way to save it for later. Slice the loaf before freezing. This makes it easier to thaw later. Wrap each slice in plastic wrap, then place them in a freezer bag. It will stay good for about three months in the freezer. To thaw, simply leave it in the fridge overnight or at room temperature for a few hours. The shelf life of the Pineapple & Zucchini Loaf is around three days at room temperature. In the fridge, it can last up to a week. Look for signs of spoilage like mold or an off smell. If it feels dry or hard, it’s best to toss it. Keeping an eye on these signs will help you enjoy your loaf at its best! The texture of this loaf is moist and soft. The grated zucchini adds a lovely moisture, while the crushed pineapple gives a sweet, juicy bite. When you slice into it, you’ll notice a tender crumb that feels light and airy. This balance makes every bite delightful. Yes, you can swap zucchini for other veggies or fruits. Carrots work well and add a sweet touch. You can also use mashed bananas for a different flavor. If you want a more tropical taste, try shredded coconut or even applesauce. Instead of using a toothpick, look for a golden-brown top. Gently press the center with your finger; it should spring back. You can also tap the pan lightly. If it sounds hollow, the loaf is done. This method keeps the loaf looking great and intact. Absolutely! You can bake the loaf a day in advance. Just let it cool completely and wrap it tightly. Store it in the fridge for freshness. You can also freeze it for up to three months. Just slice it first for easy thawing later. Check the full recipe for more tips! Pineapple and zucchini loaf is a tasty treat that’s easy to make. We discussed key ingredients like zucchini, pineapple, and coconut oil. I shared preparation steps to guide you in mixing and baking. You now have tips for texture, flavor, and presentation. Remember, you can create variations to fit diets or preferences. Try different spices and formats for a fun twist. With proper storage, this loaf stays fresh and delicious. Enjoy your baking journey and impress everyone with this delightful recipe!

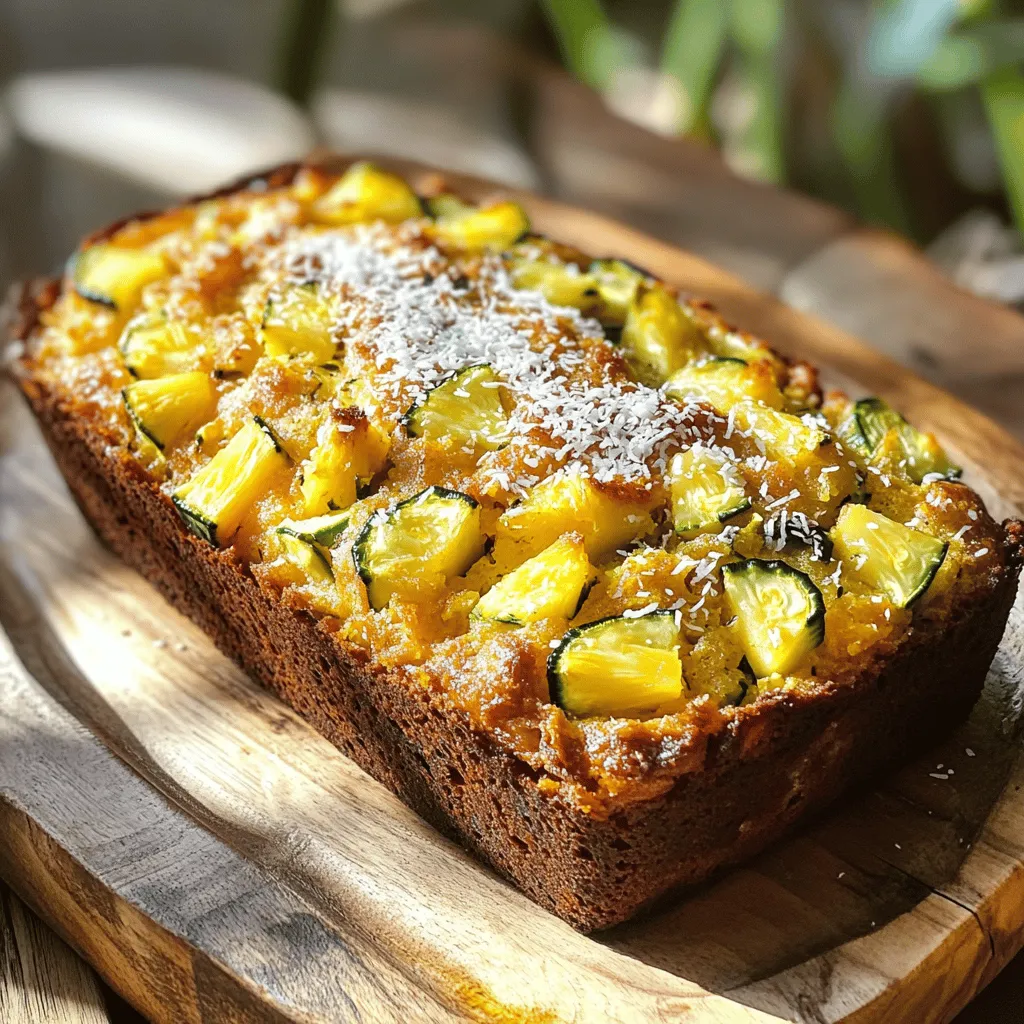
Are you ready to enjoy a treat that’s both fresh and healthy? My Pineapple & Zucchini Loaf recipe offers a delightful mix of flavors and textures. This loaf combines the …

Read more

Categories Desserts

Simply Zucchini Muffins Moist and Tasty Recipe

July 2, 2025 by Chef Miles
For the best Simply Zucchini Muffins, gather these key ingredients: - 2 cups grated zucchini (about 2 medium zucchinis) - 1½ cups all-purpose flour - 1 teaspoon baking soda - 1 teaspoon baking powder - ½ teaspoon salt - 1 teaspoon ground cinnamon - ½ teaspoon ground nutmeg - ¾ cup granulated sugar - ¼ cup packed brown sugar - 2 large eggs - ½ cup vegetable oil - 1 teaspoon vanilla extract You can add fun twists to your muffins with these optional ingredients: - ½ cup chopped walnuts or pecans for crunch - ½ cup chocolate chips for a sweet touch If you want to change things up, consider these substitutions: - Replace all-purpose flour with whole wheat flour for added fiber. - Use applesauce instead of vegetable oil for a lower fat option. - Swap granulated sugar for honey or maple syrup, but adjust the liquid in the recipe. - For a nut-free version, skip the nuts or use seeds instead. The full recipe includes these ingredients and guides you through each step. Enjoy making these moist and tasty muffins! First, set your oven to 350°F (175°C). This temperature is perfect for baking. Prepare your muffin tin by lining it with paper liners. If you don’t have liners, lightly grease each cup. This helps the muffins come out easily. Take 2 medium zucchinis and grate them. Place the grated zucchini in a bowl. Sprinkle a pinch of salt over it and let it rest for about 10 minutes. This step helps remove extra water. Too much moisture can make your muffins soggy. In a large bowl, whisk together the dry ingredients. Combine 1½ cups flour, 1 teaspoon baking soda, 1 teaspoon baking powder, ½ teaspoon salt, 1 teaspoon cinnamon, and ½ teaspoon nutmeg. Make sure there are no lumps. In another bowl, mix ¾ cup granulated sugar, ¼ cup brown sugar, 2 eggs, ½ cup vegetable oil, and 1 teaspoon vanilla extract. Blend well until smooth. Once the zucchini has rested, use a clean towel to squeeze out any extra water. Fold the zucchini into the wet mixture. This step ensures every muffin has a good zucchini flavor. Gradually add the dry mix to the wet mixture. Stir gently until just combined. Avoid overmixing to keep the muffins light. If you like, fold in ½ cup nuts or ½ cup chocolate chips. Use a spoon or scoop to fill the muffin cups. Fill each about ¾ full. This helps them rise nicely. Place the muffin tin in the oven and bake for 18-20 minutes. They are done when a toothpick comes out clean. Once baked, let the muffins cool in the tin for 5 minutes. Then, transfer them to a wire rack to cool completely. Enjoy your freshly baked muffins! For the full recipe, check out the recipe section. To keep your muffins moist, use fresh zucchini. Grate the zucchini just before mixing. Make sure to remove excess water by squeezing it with a towel. A little salt helps draw out moisture. This step is key to preventing soggy muffins. Overmixing can ruin your muffins. Mix the wet and dry ingredients until just combined. If you see lumps, that's okay! Also, don’t skip the resting time for the zucchini. This step helps improve texture. Lastly, fill your muffin cups only three-quarters full. This gives them room to rise without spilling over. You can boost flavor by adding spices like nutmeg or ginger. Try mixing in some chopped nuts for crunch. Chocolate chips add sweetness, especially for kids. For a fun twist, add dried fruits like raisins or cranberries. These small changes can make a big difference. Each bite will be even more delicious. For the full recipe, check the complete guide above. {{image_4}} You can make Simply Zucchini Muffins healthier by swapping ingredients. Use whole wheat flour instead of all-purpose flour. This adds fiber and nutrients. You can also cut the sugar. Try using half the amount of granulated sugar. Your muffins will still taste sweet and yummy. Add fun flavors to your muffins by mixing in spices or fruits. Try adding a teaspoon of ginger or cloves for a warm taste. You can also toss in fruits like blueberries or cranberries. They add sweetness and a pop of color. Experiment with different combinations to find your favorite mix! If you want nut-free muffins, skip the walnuts or pecans. Simply leave them out, and your muffins will still be great. To make them dairy-free, use plant-based milk. Almond milk or oat milk works well. You can also use a dairy-free yogurt for added moisture. For the full recipe, check out the detailed instructions to get started! You can store your zucchini muffins on the counter or in the fridge. If you keep them on the counter, place them in an airtight container. They stay fresh for about 2-3 days. If you want to keep them longer, put them in the fridge. They can last up to a week in the fridge. Just remember to let them cool completely before storing. Freezing zucchini muffins is a great way to keep them for later. Allow the muffins to cool completely first. Then, wrap each muffin in plastic wrap. Place the wrapped muffins in a freezer bag or container. They can last up to three months in the freezer. When you’re ready to enjoy one, just take it out and let it thaw at room temperature. Reheating your muffins is easy. For a quick warm-up, use the microwave. Heat one muffin for about 15-20 seconds. If you like a crispy top, try reheating in the oven. Preheat the oven to 350°F (175°C) and warm the muffins for about 5-10 minutes. This will bring back their fresh-baked taste. For the best experience, enjoy your muffins warm with a pat of butter. For the full recipe, check out the link! You can tell when the muffins are done by using a toothpick. Insert it into the center of a muffin. If it comes out clean or with a few moist crumbs, they are ready. You want to avoid any wet batter on the toothpick. This simple test helps ensure your muffins are baked perfectly. Yes, you can use frozen zucchini for this recipe. Just make sure to thaw it first and squeeze out the extra water. This step is key. Too much moisture can make your muffins soggy. So, drain it well to keep your muffins light and fluffy. If your muffins turn out too dry, you can add a bit of moisture back in. Consider spreading a thin layer of butter on each muffin. Alternatively, serve them with a dollop of cream cheese or yogurt. These toppings can help balance dryness and add flavor. Absolutely! You can make mini zucchini muffins with the same batter. Just adjust the baking time. Mini muffins usually take about 10-15 minutes to bake. Keep an eye on them to avoid overbaking. They will be a fun and cute treat! You can easily customize flavors in your muffins. Try adding different spices, like ginger or cloves, for a twist. You can also mix in fruits like blueberries or apples. Want some crunch? Toss in nuts or seeds. Be creative with your ingredients to suit your taste! For the full recipe, check out Simply Zucchini Muffins. These delicious zucchini muffins are easy to make and fun to tweak. You learned about the key ingredients, how to mix them, and many tips for success. You can create lighter, flavorful options and store them well for later enjoyment. Remember, you can easily adapt this recipe to suit your taste. Now, it’s time to bake and share these zucchini muffins with friends and family! Enjoy the process and the tasty results.

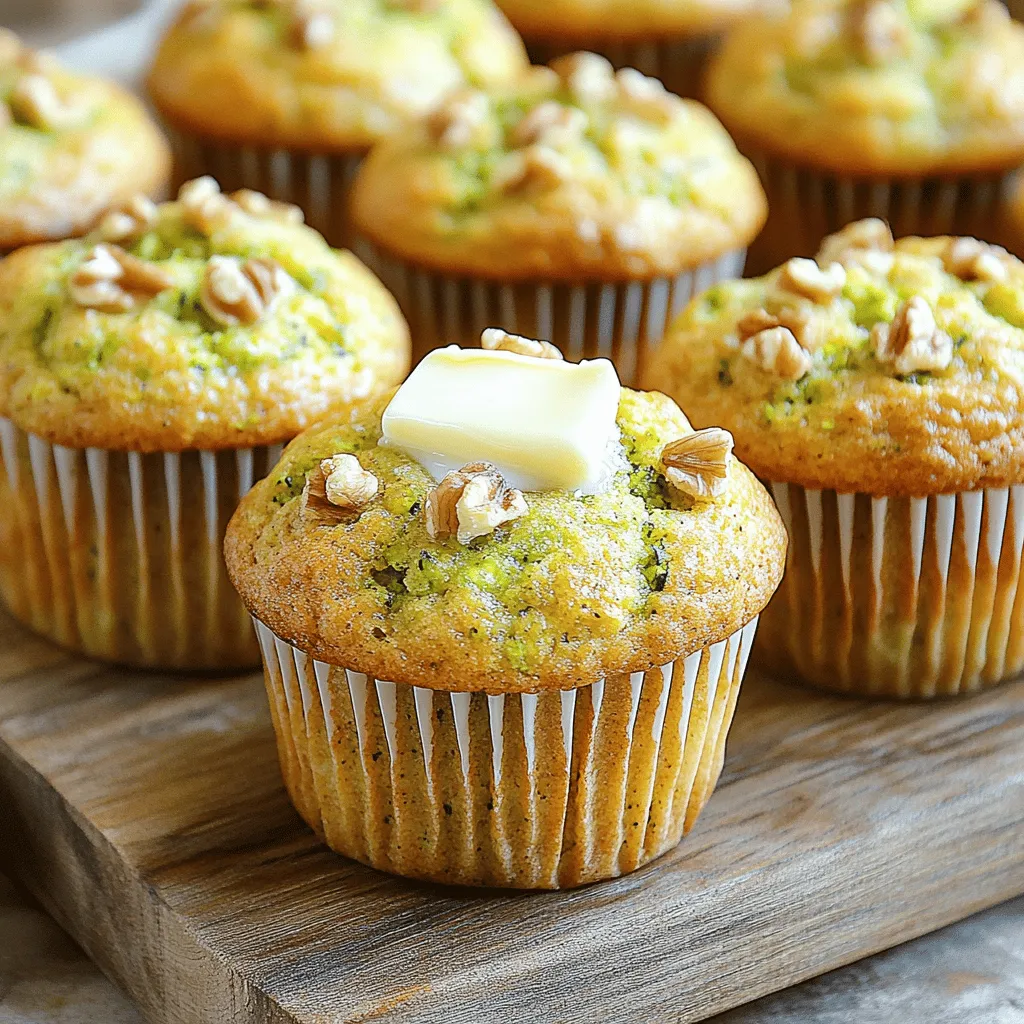
Are you ready to bake something delicious? My Simply Zucchini Muffins are moist, tasty, and easy to make! These muffins are packed with flavor and use simple ingredients you probably …

Read more

Categories Desserts

Sweet and Savory Honey Roasted Butternut Squash Dish

July 1, 2025 by Chef Miles
- 1 medium butternut squash, peeled and cut into 1-inch cubes - 3 tablespoons extra virgin olive oil - 3 tablespoons honey, preferably local - 1 teaspoon ground cinnamon - 1 teaspoon ground nutmeg - Salt, to taste - Freshly ground black pepper, to taste - 1/2 cup dried cranberries, preferably unsweetened - 1/2 cup pecans, roughly chopped - Fresh parsley, finely chopped, for garnish In this dish, each ingredient plays a vital role. The butternut squash brings a sweet, nutty flavor. The olive oil adds richness and helps with roasting. Honey gives the squash a lovely glaze and a caramelized touch. For spices, ground cinnamon and nutmeg enhance the sweetness. They add warmth and depth. Salt and pepper balance the sweet notes, making the dish savory. Optional add-ins like dried cranberries add a chewy texture and more sweetness. Chopped pecans bring crunch and earthiness. Fresh parsley is the finishing touch, adding color and freshness. You can find the full recipe to make this dish in the earlier sections. 1. Preheat your oven to 400°F (200°C). This heat helps roast the squash well. 2. Peel the butternut squash and cut it into 1-inch cubes. Keep the pieces uniform for even cooking. 1. In a large mixing bowl, add the butternut squash cubes. Pour in 3 tablespoons of extra virgin olive oil and 3 tablespoons of honey. 2. Sprinkle in 1 teaspoon of ground cinnamon and 1 teaspoon of ground nutmeg. Add salt and black pepper to taste. 3. Toss everything together. Make sure each cube is coated in the oil and honey mixture. 1. Spread the coated squash on a large baking sheet. Leave space between the cubes for better roasting. 2. Roast the squash for about 25-30 minutes. Halfway through, take the pan out and flip the pieces. This helps them brown evenly. 3. Five minutes before the squash is done, add 1/2 cup of dried cranberries and 1/2 cup of chopped pecans. This step adds great flavor and texture. 4. Once finished, remove the baking sheet from the oven and let it cool for a few minutes. This cooling time enhances the flavors. 5. Serve the roasted butternut squash on a dish. Garnish with finely chopped fresh parsley for a bright touch. For the full recipe, check out the detailed instructions provided above. When you pick a butternut squash, look for one that feels heavy. The skin should be smooth and tan. Avoid any that have soft spots or blemishes. To peel, use a sharp vegetable peeler. Cutting it can be tricky. First, slice off the ends. Then, cut it in half. Scoop out the seeds and then cube it. To make your dish special, think about adding spices. Try a pinch of cayenne for heat or ginger for warmth. You can also mix in a bit of brown sugar if you want it sweeter. Taste as you go. Adjust the sweetness level to match your preference. For great roasting, set your oven to 400°F (200°C). Roast the squash for 25 to 30 minutes. Remember to flip the pieces halfway through. This helps them cook evenly. To avoid sogginess, space the cubes apart. This allows moisture to escape and keeps them nice and crisp. For the full recipe, check out the Sweet and Savory Honey Roasted Butternut Squash instructions. {{image_4}} You can switch out honey for other sweeteners. Maple syrup works great if you want a richer flavor. Agave syrup is another option that is milder and less sticky. Both alternatives add a nice sweetness without changing the dish too much. If you want to try natural sweeteners, consider using coconut sugar or date syrup. They bring unique flavors and nutrients to your meal. If you want a different crunch, you can swap pecans for almonds or walnuts. Each nut adds its own flavor and texture. You could even mix different nuts for a fun twist. For a nut-free option, try adding seeds like pumpkin or sunflower seeds. They add a nice crunch and are packed with nutrients. This way, you keep the dish exciting and tailored to your taste. Don’t hesitate to get creative with veggies! You can mix in carrots or sweet potatoes for added sweetness and color. Roasted Brussels sprouts also pair well with butternut squash. For a fresh twist, toss in some greens like spinach or kale after roasting. This gives your dish a vibrant look and boosts its nutrition. Each addition enhances the flavor and makes your meal even more delightful. For the full recipe, check out the Sweet and Savory Honey Roasted Butternut Squash. To store leftovers, place your butternut squash in an airtight container. This keeps it fresh and tasty. You can store it in the fridge for up to four days. Make sure it cools down before sealing the container to avoid steam build-up. For freezing, let the squash cool completely first. Then, spread the cubes on a baking sheet. Freeze them until solid. Once frozen, transfer to a freezer-safe bag. This method prevents the pieces from sticking together. You can freeze the squash for up to three months. When you are ready to use it, move the bag to the fridge overnight to thaw. To reheat without losing texture, use the oven. Preheat it to 350°F (175°C) and spread the squash on a baking sheet. Heat for about 10-15 minutes. This method helps keep the squash crispy. You can also add a drizzle of honey while reheating. This enhances the flavor and adds sweetness. Enjoy your sweet and savory honey roasted butternut squash! For the full recipe, check the earlier section. Yes, you can use other types of squash. Some great substitutes for butternut squash include: - Acorn squash - Sweet dumpling squash - Kabocha squash - Delicata squash These squashes have similar textures and flavors that work well with the honey and spices. Each type adds its unique twist to the recipe, so feel free to experiment! You can tell the squash is done when it is tender and golden brown. Check for these signs: - A fork easily pierces the cubes. - The edges have a caramelized color. - The squash looks slightly shriveled. These signs ensure that your squash is perfectly roasted, enhancing its sweet and savory flavors. Absolutely! To make this dish vegan, simply replace the honey with maple syrup or agave nectar. Both options provide a sweet touch without using animal products. Just keep the other ingredients the same. Your dish will still taste amazing and stay true to the sweet and savory theme. For the full recipe, check out the Sweet and Savory Honey Roasted Butternut Squash section above. This blog post covered how to make a delicious roasted butternut squash dish. We looked at key ingredients like squash, olive oil, and honey. Then, we explored spices, optional add-ins, and step-by-step instructions. You learned tips for picking the best squash and variations to try. For the perfect roast, remember to watch your cooking times. Enjoy this dish fresh or as leftovers. With a few creative twists, you can make it your own. Happy cooking!

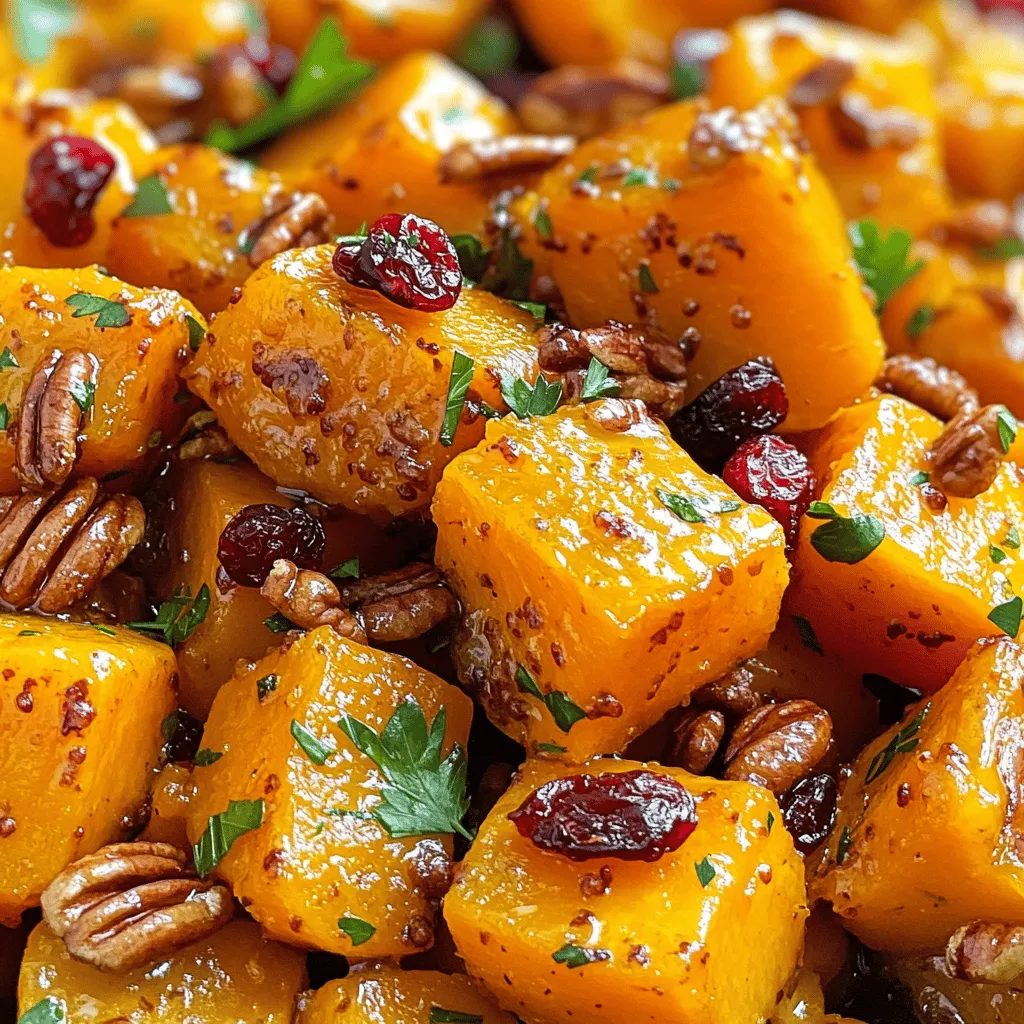
Want to impress your friends with a healthy and delicious dish? My Sweet and Savory Honey Roasted Butternut Squash is the answer! This recipe bursts with flavor from honey and …

Read more

Categories Dinner

Easy Zucchini Carrot Pancakes Quick and Flavorful Dish

July 1, 2025 by Chef Miles
To make these easy zucchini carrot pancakes, you need the following: - 1 medium zucchini, finely grated - 1 medium carrot, finely grated - 1 cup all-purpose flour - 1 teaspoon baking powder - 1/2 teaspoon baking soda - 1/2 teaspoon salt - 1 large egg - 3/4 cup milk (or choice of plant-based milk) - 1 tablespoon honey or maple syrup - 1/2 teaspoon garlic powder (optional) - 2 tablespoons olive oil (for frying) - Fresh herbs (such as parsley or chives, for garnish) Each ingredient plays a key role. The zucchini and carrot add moisture and flavor. I suggest using medium-sized veggies for balance. If you want a healthier twist, try whole wheat flour instead of all-purpose. For a gluten-free option, use almond or gluten-free flour. You can also adjust the milk type based on your diet. Garnishes make your dish pop! Fresh herbs like parsley or chives add a nice touch. You might drizzle extra honey or maple syrup on top for sweetness. A dollop of yogurt works well too, giving creaminess. If you want crunch, sprinkle sesame seeds on top. These small changes can elevate your pancakes from simple to stunning. For the full recipe, check out the details below. Start by taking a medium zucchini and a medium carrot. Grate them finely using a box grater. This can also be done with a food processor for speed. After grating, place the veggies in a clean dish towel. Twist the towel tightly and squeeze out as much moisture as you can. This step is key to keeping the pancakes from being soggy. The drier the veggies, the better your pancakes will turn out. In a large mixing bowl, combine the grated zucchini and carrot with 1 cup of all-purpose flour, 1 teaspoon of baking powder, 1/2 teaspoon of baking soda, and 1/2 teaspoon of salt. If you want a hint of flavor, add 1/2 teaspoon of garlic powder. In another bowl, whisk together 1 large egg, 3/4 cup of milk (or your choice of plant-based milk), and 1 tablespoon of honey or maple syrup. Mix until it is smooth. Then, pour the wet mixture into the dry ingredients. Fold it gently until just combined. Don’t worry if there are a few lumps; this is normal. Heat a non-stick skillet over medium heat. Add enough olive oil to lightly coat the bottom of the pan. For each pancake, pour about 1/4 cup of batter onto the skillet. Cook for 3-4 minutes, waiting for bubbles to form on the surface. When the underside is golden brown, carefully flip the pancakes. Cook for another 2-3 minutes until both sides are golden and cooked through. Once done, transfer the pancakes to a plate. Keep them warm while you cook the rest of the batter. Serve warm, topped with fresh herbs, and drizzle with more honey or maple syrup if desired. For the full recipe, check out the detailed instructions above. To avoid soggy pancakes, moisture control is key. After grating the zucchini and carrot, squeeze them in a clean dish towel. This step removes excess water. If you skip this, your pancakes may turn out wet and flat. Trust me, you want crispy edges and fluffy centers. Cooking at the right heat makes a big difference. Use medium heat for your skillet. If it’s too hot, the outside burns, while the inside stays raw. If it’s too low, the pancakes may take too long and turn dry. You want a nice golden color on both sides. These pancakes are great on their own but even better with toppings. Try serving them with yogurt or a dollop of sour cream. Fresh herbs like parsley or chives add a nice touch. For sweetness, drizzle honey or maple syrup over the top. You can even add sliced avocado for a creamy contrast. Check out the Full Recipe for more ideas and details! {{image_4}} You can easily make these pancakes gluten-free. Just swap the all-purpose flour with gluten-free flour blend. Look for a mix that has xanthan gum; it helps hold the pancakes together. This makes a light and tasty pancake that everyone can enjoy. Herbs and spices can add a burst of flavor. Try adding fresh herbs like basil or thyme for a garden touch. You can also use spices like cumin or paprika for a warm kick. A pinch of black pepper can bring out the taste of the zucchini and carrot. If you want to cut back on sugar, there are good options. You can replace honey or maple syrup with mashed bananas or unsweetened applesauce. These options add natural sweetness and moisture. They keep the pancakes soft and delicious without added sugar. For a full recipe, check out the Savory Zucchini and Carrot Pancakes 🥕🥞. After cooking, let the pancakes cool completely. Place them in an airtight container. You can stack them with parchment paper in between. This prevents sticking. Store the container in the fridge. Leftover pancakes can last up to three days. To reheat, you can use a skillet or microwave. For a skillet, heat on low for about two minutes on each side. This keeps them crispy. If using a microwave, place a damp paper towel over the pancakes. Heat for 30 seconds to one minute. This method keeps them moist. To freeze, first cool the pancakes. Then, place them in a single layer on a baking sheet. Freeze until firm, around one hour. Once frozen, transfer them to a freezer bag. Try to remove as much air as possible. The pancakes can last up to three months in the freezer. When ready to eat, simply reheat from frozen. You can use the skillet or microwave methods mentioned earlier. Enjoy your pancakes whenever you want! Check out the Full Recipe for details. Yes, you can use whole wheat flour in this recipe. Whole wheat adds a nutty flavor. It also boosts fiber content. If you use whole wheat flour, the pancakes may be denser. Start with a 1:1 ratio, but you may need to add a bit more liquid. If you need an egg substitute, there are several options. You can use 1/4 cup of unsweetened applesauce. Another choice is 1/4 cup of mashed banana. Both will help bind the ingredients well. You can also use a flax egg. To make this, mix 1 tablespoon of ground flaxseed with 2.5 tablespoons of water. Let it sit for a few minutes to thicken. To make these pancakes vegan, use plant-based milk and an egg substitute. Almond, soy, or oat milk all work well. For the egg, use one of the substitutes I mentioned above. This way, you can enjoy these tasty pancakes without eggs or dairy. You now know how to make delicious pancakes with fresh ingredients and simple steps. We've covered the best ingredients, cooking methods, and tips to make your pancakes perfect every time. Remember, you can try variations like gluten-free options or adding spices for extra flavor. Enjoy your pancakes warm or store leftovers for later. With these insights, you can impress anyone at breakfast. Keep experimenting, and you’ll find your own favorite twist on this classic dish!

Looking for a fun way to spice up breakfast? These Easy Zucchini Carrot Pancakes are your answer! Bursting with flavor, they blend veggies into a tasty treat everyone will love. …

Read more

Categories Breakfast

Japanese Steakhouse Hibachi Zucchini Flavor Boost

July 1, 2025 by Chef Miles
- 2 medium zucchinis - 1 tablespoon sesame oil - 1 tablespoon soy sauce - 1 teaspoon garlic, minced - 1 teaspoon ginger, freshly grated - Salt and pepper, to taste - 2 green onions, chopped - 1 tablespoon toasted sesame seeds - Optional: fresh lemon juice When making hibachi zucchini, I focus on fresh, simple ingredients. The key starts with the zucchinis. Choose medium-sized ones for the best texture. The sesame oil adds a lovely nutty flavor. Soy sauce brings in that umami punch we love. Next, I add garlic and ginger. Minced garlic gives a warm, savory note, while grated ginger adds brightness and spice. Salt and pepper are essential for taste, allowing the natural flavors to shine. Optional ingredients like green onions and toasted sesame seeds add a fresh crunch. If you like a zesty finish, squeeze some fresh lemon juice on top. This mix of flavors makes hibachi zucchini a delightful dish. For the full recipe, check out the details above. - Slicing zucchinis into half-moons Start by washing the zucchinis. Cut them into half-moons. Aim for about a quarter-inch thick slices. This size helps them cook evenly. - Mincing garlic and grating ginger Take one teaspoon of garlic and mince it finely. Next, grate one teaspoon of fresh ginger. Both add flavor and aroma to the dish. - Heating sesame oil in a skillet or hibachi grill Heat a large skillet or your hibachi grill. Pour in one tablespoon of sesame oil. Let it heat for about one minute until it shimmers. - Sautéing garlic and ginger Add the minced garlic and grated ginger to the hot oil. Stir for about 30 seconds. You want them to release their wonderful aroma. Be careful not to let them burn. - Adding zucchinis and tossing with flavors Now, introduce the sliced zucchinis to the skillet. Toss gently so all pieces coat with the garlic and ginger mixture. - Drizzling soy sauce and seasoning Drizzle one tablespoon of soy sauce over the zucchini. Season with salt and pepper to taste. This step is key for adding umami to the dish. - Cooking until tender and bright Stir-fry for about 5-7 minutes. Cook until the zucchini is tender but still slightly crunchy. This keeps the fresh flavor intact. For more detailed cooking steps, check the Full Recipe. Enjoy the delicious flavors you create! To get that perfect crunch in your zucchini, aim for a quick cook time. I find that 5-7 minutes is just right. Stir the zucchini often while cooking. This helps them cook evenly and keeps them from getting too soft. If you let them sit too long, they will lose that nice, crisp bite. You can easily change the flavor of your hibachi zucchini. Try adding extra spices like red pepper flakes or a dash of curry powder. You can also mix in different sauces. A splash of teriyaki sauce can add a sweet touch. Using different oils for roasting can change the taste too. Try using garlic-infused oil or olive oil for a new twist. Serving your dish well makes it more appealing. Use a bright bowl to showcase the vibrant colors of the zucchini. You can sprinkle extra green onions on top for a fresh look. Toasted sesame seeds add crunch and a nice finish. For a pop of color, add a lemon wedge on the side. These simple touches make a big difference in how your dish looks. Check out the Full Recipe to try it out! {{image_4}} You can easily add more veggies to your hibachi zucchini. Bell peppers bring color and crunch. Mushrooms add a nice umami flavor. Simply slice them thin and toss them in with the zucchini. Another great option is tofu. It absorbs flavors well and adds protein. Just cube it and cook it alongside the zucchinis. This makes your dish even more filling and satisfying. Hibachi zucchini pairs well with various proteins. Grilled chicken is a classic choice. Its mild flavor works great with the zucchini's taste. Shrimp is another excellent option. It cooks quickly and adds a seafood twist. For a hearty meal, try steak or pork. Both bring rich flavors that match well with the dish. Don't hesitate to mix and match your favorite proteins. You can also play with flavors from other cuisines. Try adding a bit of Italian by using fresh basil and balsamic glaze. This gives a sweet and tangy twist to your dish. For a Mexican flair, mix in some cumin and chili powder. Top with fresh cilantro for a bright touch. These creative twists keep the dish exciting and fun to make. Check out the Full Recipe for more inspiration on how to build your perfect hibachi zucchini! To keep your hibachi zucchini fresh, place it in an airtight container. Make sure to cool it completely before sealing. Store the container in the fridge. This method helps retain flavor and texture. Use glass or plastic containers that fit well. Avoid using metal containers, as they can react with the zucchini. When reheating, use a skillet over medium heat. Add a splash of water or oil to keep the zucchini moist. Stir occasionally until warmed through. This method prevents the zucchini from becoming mushy. You can also use the microwave, but do it in short bursts. Check often to avoid overcooking. Yes, you can freeze hibachi zucchini! Start by cooling it completely. Place the zucchini in a freezer-safe bag, removing as much air as possible. Label the bag with the date. To thaw, move the bag to the fridge overnight. Reheat in a skillet after thawing for best results. Avoid refreezing once thawed to keep the quality high. Hibachi-style cooking uses a special grill called a hibachi. This grill cooks food quickly over high heat. Chefs often use a flat surface to cook meats and vegetables. They rely on techniques like stir-frying and grilling. You get tasty, smoky flavors from this method. It is fun to watch the chef cook right in front of you. The whole experience feels lively and engaging. To spice up your hibachi zucchini, try adding red pepper flakes. You can also mix in a bit of sriracha or chili paste. Toss in some diced jalapeños for fresh heat. If you want a deeper flavor, add a dash of hot sesame oil. These options boost the flavor and add a kick that many enjoy. Hibachi zucchini pairs well with many great sides. Think fried rice or steamed vegetables for balance. Grilled shrimp or chicken also complements the dish well. You can serve it with a light salad to add freshness. Don’t forget dipping sauces like yum yum sauce or soy sauce for extra flavor. Yes, hibachi zucchini is healthy! Zucchini is low in calories and high in vitamins. It is packed with fiber, which is great for digestion. The dish uses little oil, making it a smart choice. You can enjoy a tasty meal without feeling guilty. To find a hibachi restaurant, use online maps or food apps. Search for “hibachi” or “Japanese steakhouse.” You can also ask friends for recommendations. Check reviews to find a spot with great food and service. Once you find a place, enjoy the fun cooking style! Hibachi zucchini is a simple dish that brightens any meal. You need fresh ingredients like zucchini, sesame oil, and soy sauce. This recipe lets you add your favorite flavors, too. Remember to cook the zucchini just right for a perfect crunch. You can also try different vegetables or proteins to make it unique. Now you have easy tips for storage and reheating, plus answers to common questions. Enjoy cooking with your new skills!

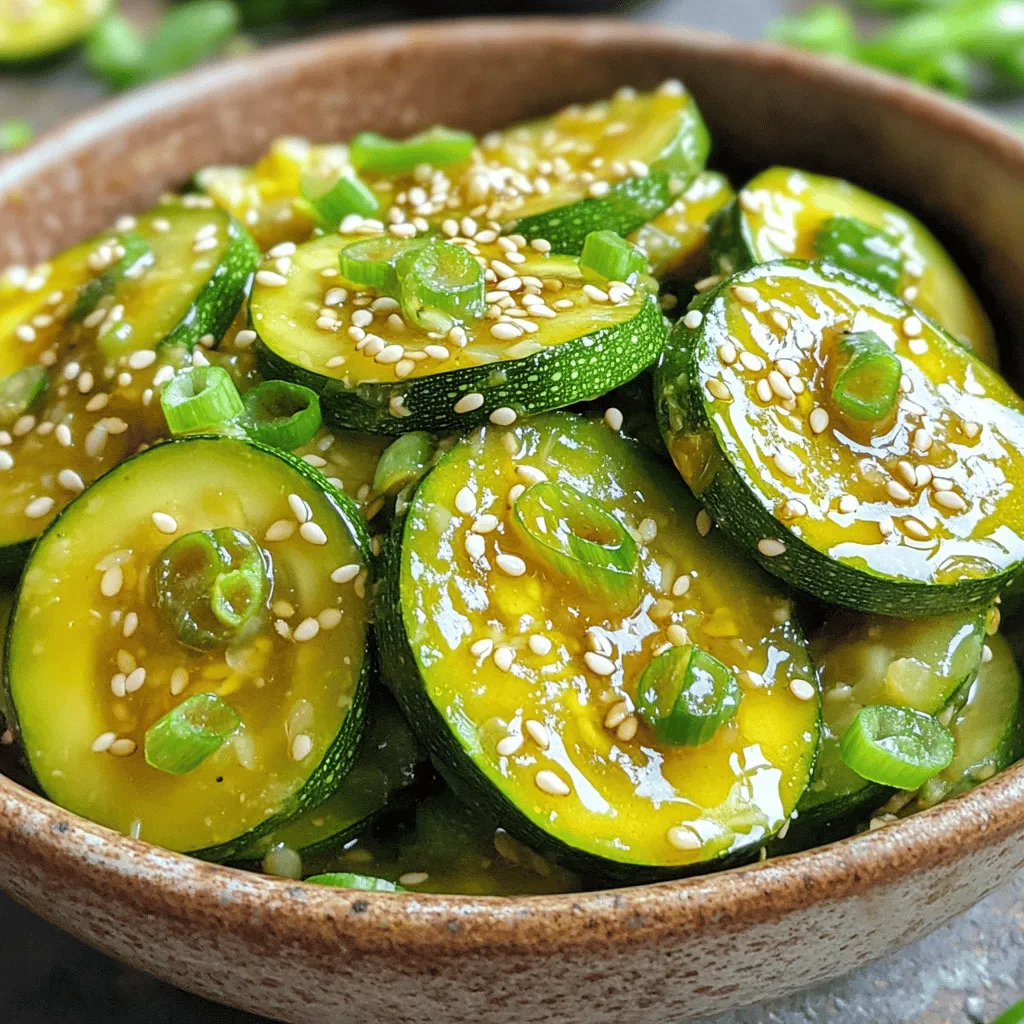
Looking to elevate your home cooking with a taste of the Japanese steakhouse? Dive into my easy guide to making hibachi zucchini that bursts with flavor! This dish is simple …

Read more

Categories Salads

Flavorful Asparagus with Zucchini Simple Roasted Dish

July 1, 2025 by Chef Miles
- 1 bunch of fresh asparagus - 2 medium zucchinis - Extra virgin olive oil - Garlic, lemon zest, smoked paprika - Salt and pepper - Freshly grated Parmesan cheese - Fresh parsley for garnish When I create a simple roasted dish like this, I start with fresh produce. The bright green asparagus is a great choice. I love how it adds a nice crunch. Zucchini brings a mild sweetness that balances the dish. Together, they make a perfect pair. Next, I focus on seasoning. Extra virgin olive oil helps the veggies cook evenly. I like to use three cloves of garlic for a punch of flavor. Fresh lemon zest brightens the taste, while smoked paprika adds a warm, smoky note. A sprinkle of salt and freshly cracked pepper completes the mix. I sometimes add Parmesan cheese. It gives a rich layer to the dish. Fresh parsley is a must for garnish. It adds color and a fresh taste. For the full recipe, check out the details above. You’ll find that making this dish is easy and rewarding. 1. Preheat the oven to 425°F (220°C). This high heat helps to caramelize the veggies, giving them a rich flavor. 2. Mix vegetables in a bowl. Take your fresh asparagus and sliced zucchinis, and add them to a large bowl. 1. Spread vegetables on a baking sheet. After mixing, pour the veggies onto a baking sheet. Make sure they are in a single layer. This helps them roast evenly. 2. Monitor roasting time. Place the sheet in the oven and roast for 15-20 minutes. Check often. The asparagus should be tender with crispy tips, while the zucchini will turn golden. 1. Adding Parmesan cheese. If you want extra richness, sprinkle freshly grated Parmesan cheese onto the veggies during the last 5 minutes of roasting. This gives a nice crust. 2. Garnishing with parsley. Once roasted, take the baking sheet out. Add coarsely chopped parsley on top. This brightens the dish and adds color. This dish is a simple roasted delight, perfect for any meal. For the complete details, see the Full Recipe. To get tender asparagus, choose fresh, bright green stalks. Snap off the tough ends. This helps them cook evenly. Roast them at a high temperature, around 425°F (220°C). This will give you crisp tips and soft stems. For zucchini, slice them into half-moons. This shape allows them to roast well. Spread them out in a single layer on your baking sheet. This prevents them from steaming. To boost flavor, consider adding spices. Try cayenne for heat or thyme for freshness. A pinch of red pepper flakes can also add a nice kick. You can pair this dish with grilled chicken or fish. It works well with pasta too. Serve it alongside a light salad for a complete meal. For a stunning presentation, use a colorful platter. Arrange the veggies in a circle or a line. It shows off the bright colors. You can also garnish with lemon wedges. This adds a pop of color and flavor. For special occasions, serve this dish in individual bowls. It makes each guest feel special. For the full recipe, check out the detailed instructions above. {{image_4}} If you want to mix things up, you can swap out the asparagus and zucchini for other veggies. Bell peppers add a sweet crunch. Cherry tomatoes bring a juicy pop. Both options work well with the same spices. If you're looking for a vegan dish, just leave out the Parmesan cheese. The flavors will still shine through without it. You can grill the vegetables for a smoky flavor instead of roasting them. Just toss them on the grill for about 10 minutes until they are tender. You can also use a stovetop method by sautéing the veggies in a pan. An air fryer is another great option. It cooks them quickly and gives a nice crisp finish. Want some heat? Sprinkle in red pepper flakes to kick up the spice. You can also swap herbs for a fresh twist. Try using basil for a sweet touch or thyme for an earthy flavor. Experimenting with these changes can take your dish to a new level. For the full recipe, check out the details above! To store leftovers, let the dish cool completely. Then, transfer it to an airtight container. This keeps the flavors fresh and tasty. Use a glass or plastic container with a tight lid. It helps prevent moisture loss and keeps it safe. Reheat leftovers in the oven for the best texture. Preheat your oven to 350°F (175°C). Place the vegetables on a baking sheet and cover them with foil. Heat for about 10-15 minutes until warm. You can also use a microwave. Heat on medium power for 2-3 minutes, stirring halfway through. Yes, you can freeze this dish! First, let it cool down completely. Then, place it in a freezer-safe bag or container. Remove as much air as possible to prevent freezer burn. To thaw, leave it in the fridge overnight. Reheat it after thawing for best flavor. How long does it take to cook asparagus? It takes about 15 to 20 minutes to cook asparagus in the oven. You want it tender yet crisp. Check for doneness by piercing with a fork. Can I use frozen vegetables for this recipe? Yes, you can use frozen vegetables. Just remember to thaw and drain them first. This helps avoid excess water during cooking. What are the health benefits of asparagus and zucchini? Asparagus is rich in vitamins A, C, E, and K. It also has fiber and folate. Zucchini is low in calories and high in vitamins. Together, they support heart health and aid digestion. How many calories per serving? This dish has about 120 calories per serving. This can vary based on added cheese and oil. It’s still a healthy choice for a side dish. How to adjust cooking time for larger quantities? If you double the recipe, increase the cooking time by a few minutes. Spread the veggies out to ensure even cooking. Can this recipe be prepared ahead of time? Yes, you can prep the veggies a day in advance. Just keep them in the fridge. Roast them fresh when you’re ready to serve. For the full recipe, check the recipe section. This blog post covered a delicious roasted vegetable recipe featuring fresh asparagus and zucchini. It included key ingredients, step-by-step instructions, and tips for perfect cooking. You learned how to enhance flavors and presented these veggies beautifully. Remember, you can try different ingredients and cooking methods for variety. Whether grilling or air frying, the key is to enjoy fresh produce. Follow storage tips to savor your creation later. Now, it’s time to get cooking and enjoy a healthy, tasty dish!

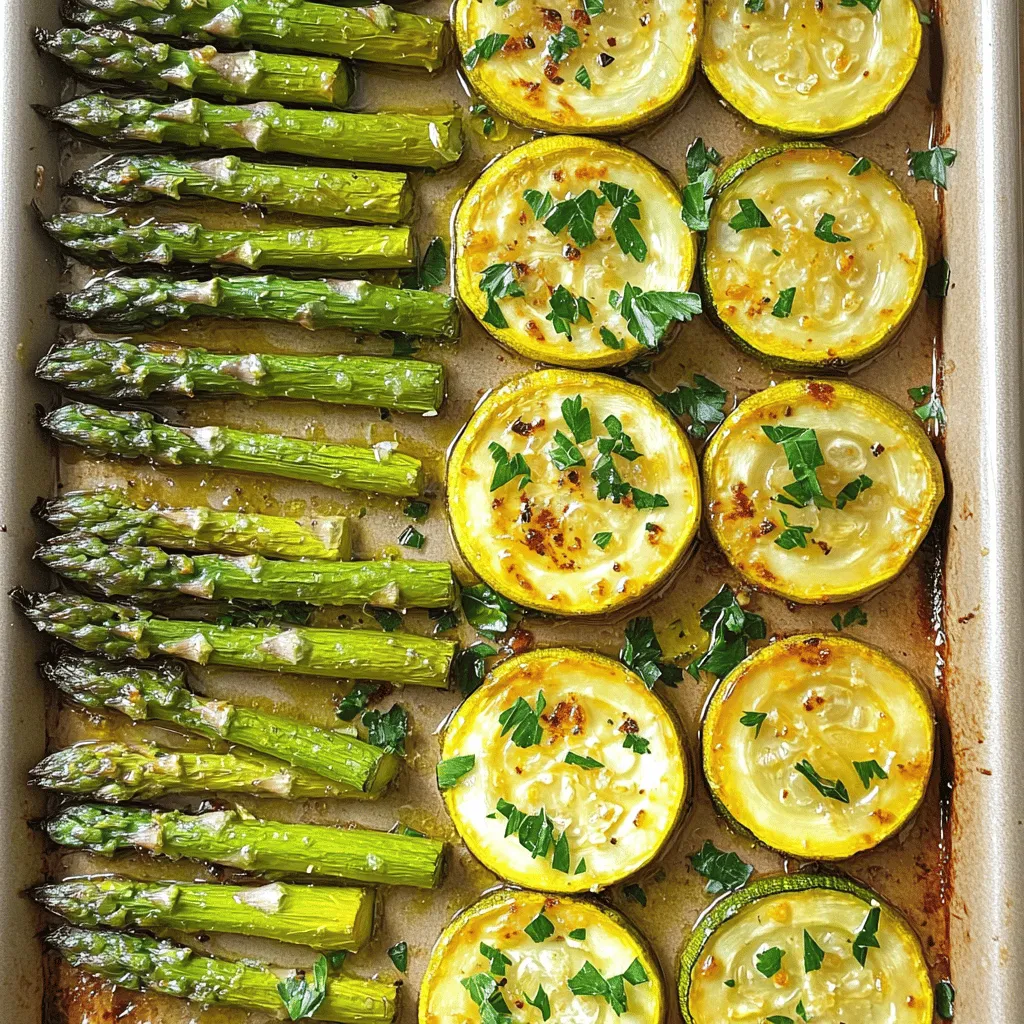
Looking for a simple, tasty dish? I’ve got just the thing for you! This Flavorful Asparagus with Zucchini recipe brings the fresh crunch of veggies to your table in minutes. …

Read more

Categories Salads

Mexican Zucchini Boats Flavorful and Healthy Dinner

July 1, 2025 by Chef Miles
Here is the list of ingredients you will need for Mexican Zucchini Boats: - 4 medium zucchinis - 1 cup cooked quinoa - 1 can (15 oz) black beans, rinsed and drained - 1 cup corn kernels (can be fresh or frozen) - 1 cup diced tomatoes (either canned or fresh) - 1 red bell pepper, finely diced - 1 teaspoon ground cumin - 1 teaspoon chili powder - 1 teaspoon garlic powder - Salt and freshly ground black pepper to taste - 1 cup shredded cheese (cheddar or a Mexican blend works well) - Fresh cilantro, roughly chopped, for garnish - Lime wedges, for serving These ingredients bring a mix of flavors and textures. You get the crunch from the zucchini, the creaminess from the cheese, and the hearty feel from the quinoa and beans. The spices, like cumin and chili powder, add warmth and depth. Each bite is a burst of fresh flavor. You can easily find these items at your local grocery store. If you want an easy recipe, check out the Full Recipe for step-by-step instructions. - Preheat your oven to 375°F (190°C). - Slice each zucchini in half lengthwise. - Scoop out the inner flesh to create a boat shape. First, I preheat the oven. This step makes sure the zucchini cooks evenly. Next, I slice the zucchini in half. I like to use a sharp knife for a clean cut. Then, I scoop out the flesh. I use a spoon for this part. I leave just enough flesh to keep the boat sturdy. - Combine cooked quinoa, black beans, corn, diced tomatoes, and diced red bell pepper. - Add reserved zucchini flesh and spices (cumin, chili powder, and garlic powder). - Mix until evenly combined. For the filling, I start with cooked quinoa. It adds great texture and protein. Then, I add black beans for more protein. Corn gives sweetness, while diced tomatoes add moisture. The red bell pepper adds crunch and a pop of color. I mix in the reserved zucchini flesh. Finally, I sprinkle in my spices. Cumin, chili powder, and garlic powder give a warm, savory flavor. I stir everything until it's well mixed. - Spoon the filling generously into each zucchini boat. - Arrange in a lined baking dish and sprinkle with cheese. - Tent with foil and bake for 25 minutes, then remove foil and bake for an additional 10 minutes. Now, I take my filling and spoon it into the zucchini boats. I fill them up nicely, pressing down a bit. Next, I arrange the boats in a lined baking dish. I sprinkle cheese on top for a yummy finish. I cover the dish with foil, so the boats stay moist while they bake. After 25 minutes, I remove the foil and let them bake for another 10 minutes. This helps the cheese melt and bubble, making it extra delicious. You can find the full recipe in the previous section to enjoy this healthy dinner! - Present on a colorful platter. - Garnish with cilantro and serve with lime wedges. When you serve your Mexican Zucchini Boats, a colorful platter makes it pop. Bright greens from the zucchini and fresh red from the bell peppers catch the eye. Adding lime wedges adds a fresh touch. Your guests will love to squeeze lime juice over their boats. - Tenting with foil for moisture retention. - Baking until cheese is melted and bubbling. To keep your zucchini moist, tent the baking dish with foil. This small step traps steam, ensuring your boats don’t dry out. Bake until the cheese is melted and bubbling. You want that ooey-gooey goodness that makes each bite exciting. - Suggest sides such as Mexican rice or a fresh salad. - Recommend sauces like salsa or guacamole. These zucchini boats pair well with sides like Mexican rice or a crisp salad. The rice adds a hearty bite, while the salad offers freshness. For sauces, consider salsa or guacamole. They add a creamy or tangy element that complements the flavors in the boats. For the full recipe, check out the details above. {{image_4}} You can easily change the protein in your zucchini boats. Use ground turkey or chicken instead of beans. This adds a nice flavor twist and makes it heartier. If you prefer grains, swap quinoa for brown rice or farro. Both grains bring a unique taste and texture. If you like heat, add jalapeños to the filling. They give a spicy kick that many enjoy. For a smoky flavor, try using smoked paprika. It adds a rich depth to the dish without overwhelming the other tastes. For a vegan option, just skip the cheese. Use plant-based fillings instead. You can also make gluten-free adjustments. Check all ingredients to ensure they meet your dietary needs. These swaps let everyone enjoy delicious Mexican zucchini boats. For more details, check the Full Recipe. To keep your Mexican Zucchini Boats fresh, place them in an airtight container. Make sure the container is sealed tightly to prevent air from getting in. Store them in the fridge for up to three days for the best taste and safety. For reheating, I recommend using the oven. Preheat it to 350°F (175°C). Place the zucchini boats in a baking dish, cover with foil, and heat for about 15 minutes. This method keeps them moist and helps the cheese stay gooey. You can also use a microwave, but the texture may not be as good. If you choose the microwave, heat in short bursts, checking often. You can freeze both uncooked and cooked zucchini boats. For uncooked ones, prepare as usual but do not bake. Wrap each boat tightly in plastic wrap, then place them in a freezer bag. They can last for up to three months. For cooked boats, let them cool completely before freezing. When you’re ready to enjoy, thaw them overnight in the fridge, then reheat in the oven. This way, they taste fresh and delicious. Mexican Zucchini Boats take about 50 minutes to make. You need 15 minutes to prep and 35 minutes to cook. Preheat your oven to 375°F (190°C). Once your boats are filled, bake them covered for 25 minutes. Then, remove the foil and bake for another 10 minutes. This gives you melted cheese and soft zucchini. Yes, you can prepare these boats ahead of time. You can fill the zucchini and store them in the fridge for up to one day. Just cover them with plastic wrap or foil. When you are ready to eat, pop them in the oven. Bake them as you would normally. This saves time on busy nights. If you want to swap quinoa, you have options. You can use brown rice or couscous instead. Both add a nice texture. You can also try farro or barley if you like something different. Each option gives a unique flavor and works well with the other ingredients. Yes, Mexican Zucchini Boats can be gluten-free. Just ensure that the quinoa and any other ingredients you use are gluten-free. Most canned beans and corn are fine. Always check the labels to be safe. This way, you can enjoy a tasty meal without gluten. Mexican Zucchini Boats are a fun and healthy dish filled with tasty ingredients. We covered the key steps, from prepping the zucchini to making the filling and baking them to perfection. You can customize them easily based on your taste, whether with different proteins or spice levels. Remember, they store well, so enjoy leftovers or make them ahead. This dish is both versatile and delicious, perfect for any meal! You’ll love the blend of flavors and how easy they are to prepare.

Looking for a fun, healthy dinner idea? Try these Mexican Zucchini Boats! Packed with flavor and nutrition, they’re easy to make and perfect for any night. You’ll fill fresh zucchini …

Read more

Categories Dinner

Cinnamon Zucchini Coffee Cake Delightful and Easy Recipe

July 1, 2025 by Chef Miles
- 2 cups grated zucchini - 1 ½ cups all-purpose flour - 1 cup granulated sugar - ½ cup packed brown sugar - ½ cup vegetable oil - 3 large eggs - 1 teaspoon vanilla extract - 1 teaspoon baking powder - 1 teaspoon baking soda - 1 teaspoon ground cinnamon - ½ teaspoon salt - ½ cup chopped walnuts or pecans - ½ cup powdered sugar (for icing) - 1 tablespoon milk (for icing) When making this Cinnamon Zucchini Coffee Cake, I love using fresh, grated zucchini. It adds moisture and a subtle flavor. You only need about two medium zucchinis for the recipe. The all-purpose flour and sugars create a sweet base that pairs well with the cinnamon. I often use both granulated and brown sugar. The brown sugar gives a deeper flavor and moisture. Vegetable oil keeps the cake soft. I prefer using it over butter for a lighter texture. You can’t forget the eggs! They bind everything together. The vanilla extract adds a warm, sweet aroma. Baking powder and baking soda help the cake rise. Ground cinnamon is the star of this cake, giving it that cozy taste. A pinch of salt balances the sweetness. If you want to add a crunchy texture, toss in some chopped walnuts or pecans. They complement the zucchini perfectly. For those who enjoy a sweet finish, make a simple icing with powdered sugar and milk. It’s optional but gives an extra layer of delight. You can find the Full Recipe for all the steps and tips to make this cake perfect! - Preheat the oven to 350°F (175°C). - Grease a 9x13 inch baking dish with butter or cooking spray. This helps the cake not to stick. - Combine grated zucchini, granulated sugar, brown sugar, vegetable oil, eggs, and vanilla extract in a bowl. - Use a whisk to blend them until smooth. The zucchini gives the cake moisture and flavor. - In another bowl, whisk together all-purpose flour, baking powder, baking soda, ground cinnamon, and salt. - This step helps distribute the leavening agents evenly. It ensures a nice rise in the cake. - Gradually add the dry mix to the wet mix. Stir gently until just combined. - If you want, fold in chopped walnuts or pecans for some crunch. But this step is optional. - Pour the batter into your greased baking dish. Spread it evenly with a spatula. - Bake for 30-35 minutes. To check if it's done, insert a toothpick into the center. It should come out clean. - While the cake bakes, prepare the icing if you want to use it. - Whisk together powdered sugar and milk until smooth. Adjust the thickness if needed. You can find the full recipe above to guide you through this process. - Ensure zucchini is well-drained for the best texture. This step helps keep the cake moist but not soggy. - Avoid overmixing the batter for a tender cake. Mix until just combined to keep it light and fluffy. - Experiment with spices like nutmeg or vanilla. These can add a warm depth to your cake. - Add chocolate chips for a richer flavor. They melt and create delightful pockets of sweetness. - Serve slices with garnishes like mint or a cinnamon dusting. This adds a fresh and vibrant look. - Use decorative plates for an appealing display. A nice plate can make your cake look even more inviting. For the full recipe, check the [Full Recipe]. {{image_4}} You can easily adapt this cake to fit your needs. For a gluten-free version, substitute the all-purpose flour with a gluten-free blend. This swap keeps the cake moist and tasty. If you want a vegan version, use applesauce instead of eggs. This will help bind the cake while adding a nice flavor. Want to switch things up? Try a chocolate cinnamon zucchini cake! Just add a bit of cocoa powder to the batter. This twist gives the cake a rich, deep flavor. For a fresh touch, you can also add lemon or orange zest. This citrus-infused version brightens the cake and adds a fun zing. This coffee cake shines when served with a dollop of whipped cream or a scoop of ice cream. The creaminess balances the spices well. Pair it with a hot cup of coffee or tea for a delightful afternoon treat. Enjoy it warm or at room temperature; it's great either way. For the full recipe, check out the [Full Recipe]. Keep the cake in an airtight container at room temperature for up to 3 days. This keeps it fresh and tasty. If you have leftovers, make sure to seal them well. A simple container works great for this. You can refrigerate the cake for up to a week. Just place it in an airtight container to keep it moist. If you want to store it longer, freeze the slices for up to 3 months. This is a great way to save some for later. To enjoy your frozen cake, thaw the slices overnight in the refrigerator. This helps the cake regain its texture and taste. Plus, it’s ready to eat the next day! Yes, but make sure to thaw and drain excess moisture. Frozen zucchini can work well in this recipe. When using frozen zucchini, always squeeze out the extra water. This keeps your cake from becoming too wet and helps it bake evenly. Insert a toothpick; it should come out clean or with a few moist crumbs. This simple test is your best friend in baking. If the toothpick comes out wet, give the cake a few more minutes. Be patient; it’s worth the wait! It pairs beautifully with coffee, tea, or a dollop of cream. The warm spices in the cake match perfectly with a hot drink. A drizzle of cream adds a nice touch, too. It makes for a cozy snack or a lovely breakfast treat. Reduce the sugar by a quarter cup for a less sweet version. You can easily adjust the sweetness to suit your taste. This way, you get all the flavor without it being too sugary. Don't forget, balancing flavors is key! For the full recipe, check out [Full Recipe]. This blog post highlights easy steps to make delicious Cinnamon Zucchini Coffee Cake. You learned about essential and optional ingredients, mixing methods, and baking tips. Variations allow for personal touches, and storage options keep your cake fresh. In my view, experimenting with flavors adds fun to baking. Enjoying this cake can brighten any day, whether for a gathering or a quiet moment. Embrace your creativity in the kitchen and share this tasty treat with others!

Ready to elevate your coffee break? This Cinnamon Zucchini Coffee Cake is a delicious way to use up that extra zucchini. With its perfect blend of spices and moisture-rich texture, …

Read more

Categories Desserts

Keto Zucchini Ricotta Cheesecake Delightful Low-Carb Treat

July 1, 2025 by Chef Miles
To make this tasty keto zucchini ricotta cheesecake, you need fresh and simple ingredients. Here’s what to gather: - 2 medium zucchinis, finely grated and excess moisture squeezed out - 1 cup creamy ricotta cheese - 2 large eggs, preferably at room temperature - 1/2 cup erythritol or your preferred keto-friendly sweetener - 1 teaspoon pure vanilla extract - 1 tablespoon fresh lemon juice - 1 teaspoon baking powder - 1 teaspoon ground cinnamon - A pinch of salt - 1/2 cup almond flour (optional for added structure) - Olive oil spray, for greasing the pan Each ingredient plays a key role. Zucchini adds moisture and a light texture. Ricotta gives creaminess, while the eggs help bind everything together. Sweeteners like erythritol keep it low-carb while still being sweet. You’ll need a few tools to create this cheesecake. Here’s a list of what to gather: - 9-inch springform pan - Mixing bowls - Whisk or spatula - Grater for zucchini - Measuring cups and spoons - Toothpick for testing doneness Having the right supplies makes the process smoother. A springform pan helps in easy removal of the cheesecake once it's baked. Choosing the right sweetener is key for keto baking. Here are some good options: - Erythritol - Stevia - Monk fruit sweetener - Allulose These sweeteners have low carbs and do not spike blood sugar. Each offers a unique taste, so feel free to experiment. Using the right sweetener helps make this cheesecake a true keto delight. Check out the Full Recipe for more details. First, preheat your oven to 350°F (175°C). This step is key. A hot oven helps the cheesecake rise and set properly. Next, grab a 9-inch springform pan. Spray it well with olive oil to stop the cheesecake from sticking. Make sure to cover all sides. In a big mixing bowl, add the grated zucchini, ricotta cheese, and eggs. Then, pour in the erythritol and vanilla extract. Squeeze in the fresh lemon juice for a zing. Toss in the baking powder, cinnamon, and salt. Use a whisk or spatula to mix everything until smooth. If you use almond flour, fold it in gently. This adds density and a nice texture. Pour the zucchini-ricotta mix into your pan. Smooth the top with a spatula. Place it in the oven and bake for 45-55 minutes. Check if it's done by inserting a toothpick in the center. It should come out clean. After baking, turn off the oven. Crack the door open and let it cool inside for about an hour. This helps prevent cracks. Once cooled, let it sit at room temperature. Then, cover and chill it in the fridge for at least 4 hours. For best results, leave it overnight. This waiting time allows flavors to blend well. Enjoy your delicious keto zucchini ricotta cheesecake! For a full recipe, refer back to the ingredients and instructions section. To get the best texture, start with fresh zucchini. Grate it finely and squeeze out the extra moisture. This step keeps your cheesecake from being too watery. The ricotta should be creamy and smooth, so mix it well with the eggs and other ingredients. If you want a denser cake, add almond flour. It gives a nice structure. Make sure to bake until the center is just set. A slight jiggle is okay; it will firm up as it cools. A common mistake is not squeezing enough moisture from the zucchini. Too much water can ruin your cheesecake. Always preheat your oven. If it’s not hot enough, the cake will not rise properly. Use a springform pan for easy removal. If you skip this, you may end up with a messy serving. Let the cheesecake cool in the oven after baking. This helps prevent cracks on the surface. Spices can make a big difference in flavor. Ground cinnamon is a must for warmth and depth. You can also try nutmeg or ginger for a fun twist. Adding lemon juice brightens the taste and balances the sweetness. If you like, mix in some cocoa powder for a chocolatey touch. For extra richness, a splash of almond extract works wonders. Play around with these spices to find your favorite flavor combo. For the complete guide and recipe, check the Full Recipe. {{image_4}} You can add fun flavors to your cheesecake by using different types of zucchini. For example, yellow squash gives a subtle sweetness. You might also try green zucchini with herbs like basil or mint. These changes can make your cheesecake unique. Just remember to squeeze out the moisture for the best texture. Ricotta is great, but you can switch it up. Cream cheese works well too. If you want a lighter feel, use cottage cheese instead. Goat cheese is another fun option for a tangy twist. Just ensure you adjust the sweetness based on the cheese you choose. Each cheese brings its own taste to the dish. If you need a nut-free version, skip the almond flour. You can use coconut flour instead, but use less. Start with a quarter cup and mix well. This helps keep the cheesecake creamy while staying low-carb. You can also add a bit of ground flaxseed for extra texture and fiber. Enjoy this nut-free delight with confidence! For the full recipe, check out the Keto Zucchini Ricotta Cheesecake section above. After baking your keto zucchini ricotta cheesecake, cooling is key. I let it cool in the oven with the door slightly ajar. This helps prevent cracks and keeps the texture smooth. Once it’s at room temperature, cover it well. Place it in the fridge for at least four hours. Overnight is even better. This lets the flavors meld beautifully. If you have leftovers, freezing is a great option. First, let the cheesecake cool completely. Then, wrap it tightly in plastic wrap. I recommend using two layers to keep out air. Next, place it in a freezer-safe container. It can last up to three months in the freezer. When you want a slice, just thaw it in the fridge overnight. For storing your cheesecake, I prefer using airtight containers. Glass containers work well as they don't absorb odors. If you use plastic, make sure it's BPA-free. Choose a container that fits the shape of your cheesecake. This keeps it from getting squished and maintains its lovely form. For the best results, always label your container with the date to track freshness. You can find the full recipe above to enjoy this delightful treat! Yes, you can make this cheesecake without almond flour. Just skip it in the recipe. The zucchini and ricotta will still give it a nice texture. The cheesecake will be a bit softer, but it will still taste great. If you want more structure, try adding coconut flour instead. Use a bit less since it absorbs more moisture. Yes, you can use other cheeses. Cream cheese is a good option. It will change the taste a bit, but it will still be creamy. You can also mix ricotta with cottage cheese. This gives a lighter texture. Just remember that the flavor will shift slightly with these swaps. This cheesecake lasts for about five days in the fridge. Make sure you cover it well to keep it fresh. Use plastic wrap or an airtight container. If you want it for longer, you can freeze it. Just slice it first, then wrap each piece well. This way, you can enjoy a slice anytime you want. For the full recipe, check out the instructions above! You learned how to make a tasty Keto Zucchini Ricotta Cheesecake. We covered the main ingredients, baking steps, and tips to avoid mistakes. You also saw different ways to make this dessert your own. Proper storage helps keep it fresh, too. Remember, cooking is fun and full of choices. Enjoy making this cheesecake, and don’t be afraid to experiment with flavors!

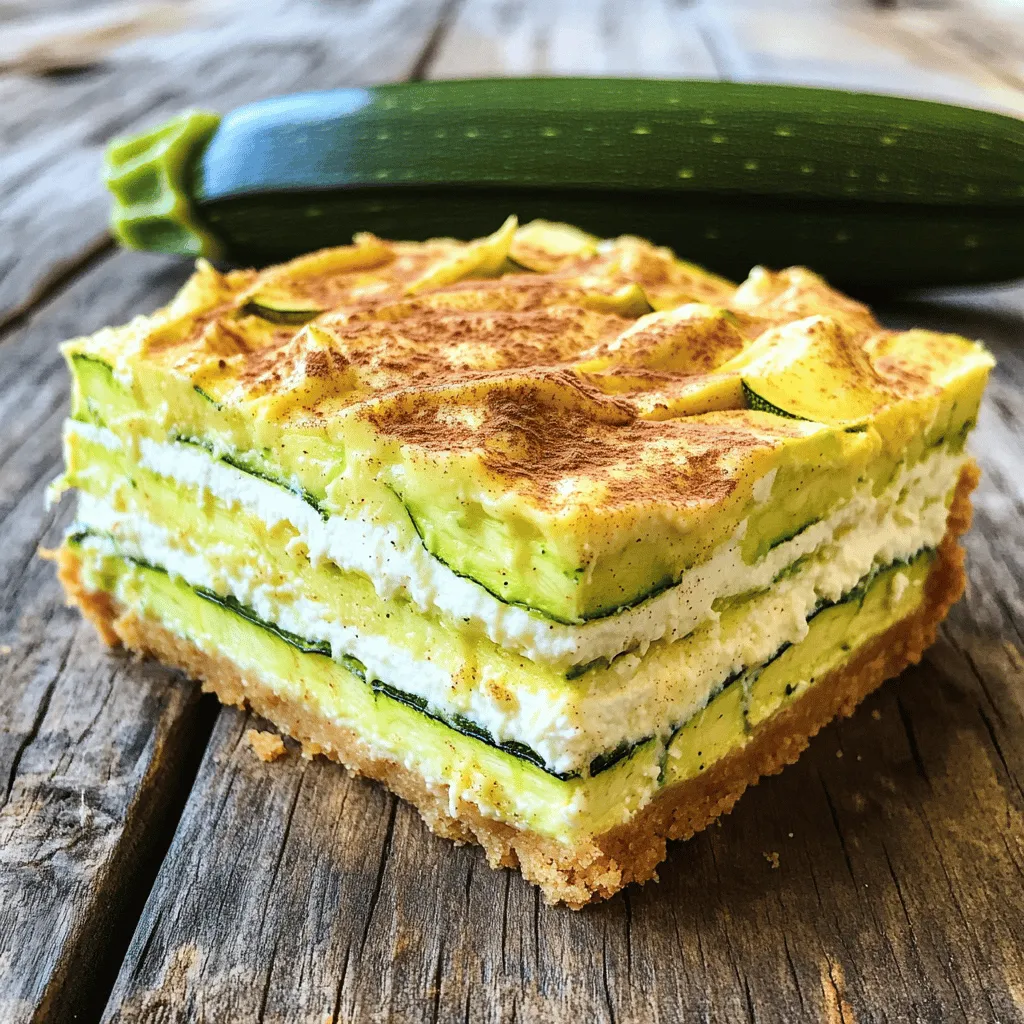
Craving a dessert that is both delicious and keto-friendly? Let me introduce you to the Keto Zucchini Ricotta Cheesecake. This low-carb treat is a game changer for anyone on a …

Read more

Categories Desserts
Older posts
Newer posts
← Previous Page1 … Page78 Page79 Page80 … Page112 Next →

MELTED RECIPES

where delicious ideas melt into life, from stovetop to backyard. Always warm, simple, and irresistibly satisfying. 🍳🔥🧀

PAGES

Home About Contact Privacy Policy Terms & Conditions Cookie Policy GDPR Policy Copyright Policy Disclaimer

CATEGORIES

Appetizers Desserts Salads Breakfast Dinner

Contact

  • Pinterest
  • Mail
Copyright © 2025 Melted Recipes. All rights reserved.