Skip to content
Melted Recipes
  • Home
  • Appetizers
  • Desserts
  • Salads
  • Breakfast
  • Dinner
  • Privacy Policy
  • Contact
  • About

Chef Miles

Fudgy Cottage Cheese Protein Brownies Easy Delight

July 10, 2025 by Chef Miles
- 1 cup low-fat cottage cheese - 1/2 cup unsweetened cocoa powder - 1/2 cup almond flour - 1/2 cup honey or maple syrup - 1/4 cup coconut oil, melted - 2 large eggs - 1 teaspoon vanilla extract - 1/2 teaspoon baking powder - 1/4 teaspoon salt - Optional: 1/4 cup dark chocolate chips You need these ingredients to make fudgy cottage cheese protein brownies. Each item plays a key role in flavor and texture. The cottage cheese adds moisture and protein, making these brownies a healthy treat. Unsweetened cocoa powder gives a rich chocolate taste. Almond flour keeps them gluten-free while adding a nutty twist. Honey or maple syrup sweetens them up just right. Coconut oil makes the brownies moist and rich. The eggs act as a binder, keeping everything together. Vanilla extract brings out the flavors. Baking powder helps them rise a bit. Salt balances the sweetness and enhances the flavor. If you love chocolate, toss in some dark chocolate chips for extra yum! - Protein content: Each brownie has about 5 grams of protein. - Caloric breakdown: Each brownie is roughly 120 calories, depending on sweeteners. - Dietary restrictions: These brownies are gluten-free and can be made dairy-free with substitutions. This recipe is perfect for a healthy dessert. You get protein and a sweet taste without the guilt. If you want to enjoy a treat that fits into your meal plan, these brownies are the way to go! Check out the Full Recipe for all the delicious details. 1. First, preheat your oven to 350°F (175°C). 2. Next, prepare an 8x8-inch baking pan. Line it with parchment paper. Make sure some paper hangs over the sides. This helps lift the brownies out later. 3. Now, in a large mixing bowl, add 1 cup of low-fat cottage cheese. 4. Pour in 1/4 cup of melted coconut oil. 5. Add 1/2 cup of honey or maple syrup for sweetness. 6. Crack in 2 large eggs and add 1 teaspoon of vanilla extract. 7. Use an immersion blender or a food processor to mix everything until smooth. No lumps should remain. 1. In a separate bowl, whisk together 1/2 cup of unsweetened cocoa powder, 1/2 cup of almond flour, 1/2 teaspoon of baking powder, and 1/4 teaspoon of salt. 2. Gradually pour the dry mix into the wet mixture. 3. Use a spatula to fold it together gently. Be careful not to overmix. 4. If you want extra fudginess, fold in 1/4 cup of dark chocolate chips now. 1. Pour the brownie batter into your prepared baking pan. Spread it out evenly with the spatula. 2. Bake the brownies in the oven for 20-25 minutes. They are done when a toothpick comes out mostly clean. A few moist crumbs are okay. 3. Once baked, let them cool in the pan on a wire rack for about 10-15 minutes. 4. After they cool slightly, use the parchment paper to lift them out. 5. Let them cool completely on the rack before cutting into 16 squares. For the full recipe, check out the detailed instructions above. Enjoy making your fudgy cottage cheese protein brownies! To make your fudgy cottage cheese protein brownies perfect, focus on texture. The right texture is key. Use smooth cottage cheese for a creamy base. Blend it well with the eggs and oil. This ensures no lumps remain. The brownies should be soft yet firm but not dry. Avoid overmixing your batter. Gently fold the dry ingredients into the wet mix. Overmixing can make the brownies tough. Aim for a few flour streaks in your batter. This keeps them soft and fudgy. For a great look, dust the brownies with cocoa powder. You can also drizzle melted dark chocolate on top. Add fresh berries for color. This makes your brownies pop! Pair these brownies with beverages like almond milk or coffee. They also go well with yogurt. This adds protein and makes for a great snack! To keep your brownies fresh, store them in an airtight container. This helps them last longer. You can keep them at room temperature for a few days. For longer storage, place them in the fridge. They stay fresh for up to a week. You can also freeze them for later. Wrap each brownie in plastic wrap, then place it in a freezer bag. This keeps them tasty for up to three months. {{image_4}} You can easily change the taste of these brownies. First, try different sweeteners. While honey or maple syrup works well, you can use agave or stevia for a low-calorie option. Each sweetener adds its own twist. Next, think about adding nuts or fruits. Chopped walnuts, pecans, or even fresh berries can add nice textures and flavors. If you need gluten-free options, swap almond flour for oat flour. You can also use gluten-free flour blends. This keeps the brownies tasty while meeting dietary needs. For a vegan version, replace eggs with flax eggs. Mix one tablespoon of flaxseed meal with three tablespoons of water. Let it sit until it thickens. You can also use a plant-based yogurt instead of cottage cheese for creaminess. To make these brownies even more exciting, consider adding seeds or spices. Chia seeds or hemp seeds can boost nutrition without changing the taste much. For a spicy kick, add a pinch of cinnamon or a dash of cayenne pepper. Want to make it a dessert? Top with fresh whipped cream or a scoop of ice cream. You can also drizzle melted dark chocolate or peanut butter for added fun. Can I use regular cottage cheese instead of low-fat? Yes, you can use regular cottage cheese. It will add more creaminess. But, it may also increase the fat content. If you want a lighter treat, stick to low-fat. How can I make these brownies more fudgy? To make these brownies fudgier, add more chocolate. You can use an extra 1/4 cup of dark chocolate chips. You can also reduce the baking time by a minute or two. This keeps them moist and soft. Can I double the recipe? Yes, you can double the recipe. Just use a larger pan. A 9x13-inch pan works well for doubled amounts. Make sure to adjust the baking time too, as they may need a bit longer to cook through. How do I make these brownies in a different size pan? You can use different pan sizes. If you use a larger pan, the brownies will bake faster. If using a smaller pan, they may need more time. Always check with a toothpick to see if they are done. Best way to serve these brownies warm or cold? These brownies are great warm or cold. Warm brownies are soft and gooey. Cold brownies have a nice firm texture. Try both to see which you prefer! Can I freeze these brownies? Yes, you can freeze these brownies. Cut them into squares and wrap them well. Use plastic wrap or a freezer bag. They last for about three months. Thaw them in the fridge before enjoying. For the full recipe, check out Fudgy Cottage Cheese Protein Brownies. This recipe makes soft, fudgy brownies with a protein boost. You start by mixing cottage cheese with melted coconut oil, sweetener, eggs, and vanilla. Blend this until smooth. Next, whisk together cocoa powder, almond flour, baking powder, and salt. Combine both mixtures gently, adding dark chocolate chips if you want. Pour the batter into a prepared pan and bake at 350°F for 20-25 minutes. These brownies are high in protein thanks to the cottage cheese. They are a great treat for anyone looking to enjoy a healthy snack. Each brownie packs a great taste and keeps you full longer. Perfect for post-workout or a sweet afternoon snack. Enjoy every bite! For the complete recipe, check out the Full Recipe section. This blog post shared a simple recipe for fudgy protein brownies using cottage cheese. We covered tasty ingredients, nutritional facts, and step-by-step baking instructions. You learned helpful tips for the best texture and ways to serve your brownies. The article also explored fun variations like different flavors and dietary options. With this knowledge, you can enjoy a delicious treat that fits your health goals. Dive in and create your own batch today!

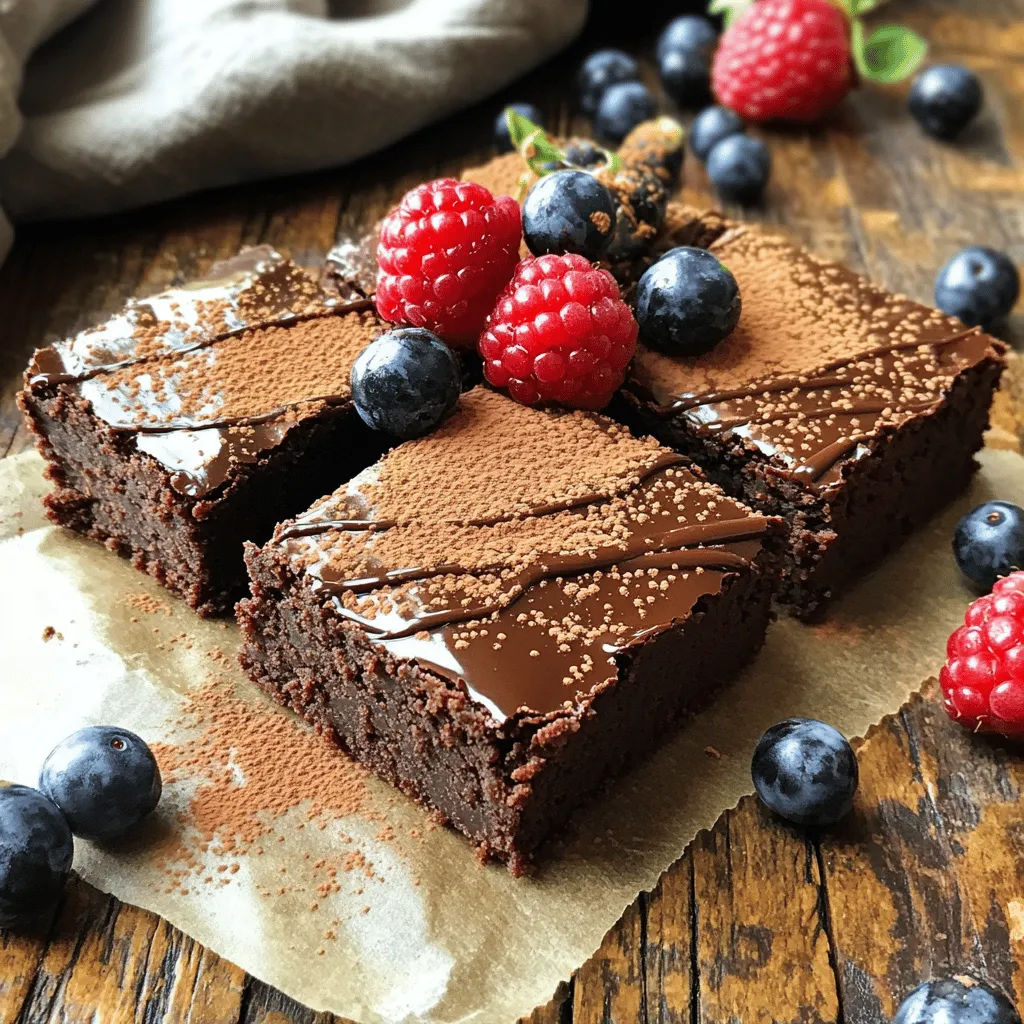
Craving something sweet but healthy? Let me introduce you to my Fudgy Cottage Cheese Protein Brownies. These brownies are not just delicious but also packed with protein. With just a …

Read more

Categories Desserts

Sautéed Zucchini and Mushrooms Flavorful Veggie Dish

July 10, 2025 by Chef Miles
- 2 medium zucchinis - 8 ounces of cremini mushrooms - 2 tablespoons extra virgin olive oil - 3 cloves of garlic - 1 teaspoon dried thyme - Fresh lemon juice, sea salt, black pepper - ¼ cup grated Parmesan cheese - Fresh parsley for garnish Sautéed zucchini and mushrooms are easy to make. You just need some fresh veggies and a few simple spices. First, grab your zucchinis and slice them into rounds. This keeps them tender and fun to eat. Next, take the cremini mushrooms. Clean and slice them too. They add a nice earthy taste. For cooking, you’ll need extra virgin olive oil. This oil gives the dish a smooth flavor. As for seasoning, garlic is a must. It adds a lovely aroma and taste. Dried thyme complements the veggies well. You can squeeze in some fresh lemon juice for a zesty kick. Don’t forget to sprinkle sea salt and black pepper for extra flavor. If you want to make the dish richer, add grated Parmesan cheese. It melts nicely and adds a creamy touch. Lastly, fresh parsley is great for garnish. It makes the dish colorful and fresh. Now you have all the ingredients ready. Check out the Full Recipe for step-by-step instructions on how to cook this delicious dish! - Heat olive oil in a skillet over medium heat. - Add the sliced cremini mushrooms. Sauté them for 5 minutes. Stir often until they are tender. - Now, add the sliced zucchini and minced garlic to the skillet. - Cook everything for about 5-7 minutes. Stir gently. You want the zucchini to be tender but still a bit crisp. - Stir in the dried thyme and fresh lemon juice. - Add sea salt and freshly cracked black pepper to taste. Mix well to blend all the flavors. - If you like, sprinkle grated Parmesan cheese on top for extra flavor. - Finish by removing the skillet from heat and adding chopped fresh parsley for color. For the full recipe, check out the instructions above. Enjoy your cooking adventure! To sauté vegetables like zucchini and mushrooms, use medium heat. This helps cook them evenly. Start with the mushrooms first. They need time to release their juices. Sauté them for about five minutes. You want them soft but not mushy. Next, add the zucchini and garlic. Stir gently for about five to seven minutes. This keeps the zucchini tender but still a bit crisp. Crispness adds a nice texture to the dish. To boost flavor, add some fresh herbs. Basil and oregano work great. You can also try a pinch of red pepper flakes for heat. Remember to season well. Use sea salt and black pepper to taste. Taste as you go. This helps you find the right flavor balance. Make your dish look great by using a nice bowl. Serve the sautéed zucchini and mushrooms warm. Drizzle a bit of extra virgin olive oil on top. This adds shine and flavor. Sprinkle some Parmesan cheese for a rich touch. You can also garnish with fresh parsley. It adds color and freshness. If you want it heartier, serve with crusty bread or quinoa. The visual appeal makes the meal inviting and tasty. {{image_4}} If you want to change up the main ingredients, consider these options: - Yellow squash can replace zucchini. It has a similar taste and texture. - Button mushrooms work well if you can't find cremini. They are milder but still tasty. - For a vegetarian twist, try adding eggplant instead of zucchini. It adds a rich flavor. - If you prefer a vegan dish, skip the Parmesan cheese or use a vegan alternative. To make this dish unique, try these spices: - Cumin adds warmth and depth. - Paprika gives a smoky flavor. - Red pepper flakes add a bit of heat. You can also mix in other vegetables, such as: - Bell peppers for sweetness. - Spinach for a fresh touch. - Carrots for a nice crunch. This dish pairs wonderfully with many sides. Here are some ideas: - Serve it with quinoa for a healthy grain option. - Crusty bread is perfect for sopping up flavors. For proteins, consider these: - Grilled chicken complements the veggies nicely. - Tofu is a great plant-based protein choice. - Shrimp adds a touch of elegance and flavor. For the full recipe, see the details above. After enjoying your sautéed zucchini and mushrooms, store any leftovers in the fridge. Place the veggies in an airtight container. This keeps them fresh for about 3 to 4 days. Try to cool the dish to room temperature first. This way, it won’t raise the fridge temperature and spoil other food. When you are ready to eat the leftovers, you can use a skillet or microwave. For the skillet, heat on medium-low for about 5 minutes. Stir often to keep the texture nice. If you choose the microwave, place the veggies in a bowl. Heat for 1 to 2 minutes. Stir halfway through to warm evenly. Be careful not to overcook them. You can also freeze sautéed zucchini and mushrooms. First, let them cool completely. Pack them in a freezer-safe bag or container. Remove as much air as possible to prevent freezer burn. They can last up to 3 months in the freezer. To use them, thaw in the fridge overnight. Then, reheat using the tips above. Enjoy your tasty dish anytime! For the full recipe, check it out in the previous section. Sautéed zucchini and mushrooms last about 3 to 5 days in the fridge. Store them in an airtight container. This keeps them fresh and tasty for your next meal. You can reheat them in a pan or microwave. Just remember that they may lose some texture after reheating. Yes, you can use frozen zucchini or mushrooms. However, fresh veggies taste better. Frozen veggies may have extra water when you cook them. Make sure to drain any excess water after cooking. This helps keep your dish from getting soggy. You can serve sautéed zucchini and mushrooms with many dishes. They pair well with grilled chicken or fish. You can also add them to pasta or rice for a filling meal. If you want something lighter, serve them with a fresh salad. For a heartier option, enjoy them with crusty artisan bread or over quinoa. Check out the Full Recipe for more ideas! This blog post walks you through a simple and tasty sautéed zucchini and mushrooms recipe. We covered key ingredients, step-by-step instructions, and helpful tips. You learned about variations and storage tips too. Cooking can be fun and rewarding. Try different ingredients to find what you love. Enjoy your creation, and don’t hesitate to share it with others!

If you’re looking for a tasty, healthy side dish, sautéed zucchini and mushrooms should be on your plate. This vibrant veggie recipe combines soft zucchini and earthy mushrooms, elevating any …

Read more

Categories Dinner

Chocolate Chip Zucchini Bread Moist and Easy Recipe

July 10, 2025 by Chef Miles
To make this tasty chocolate chip zucchini bread, you need these main ingredients: - 1 cup grated zucchini (about 1 medium zucchini) - 1 cup all-purpose flour - 1 cup whole wheat flour - 1 teaspoon baking powder - 1 teaspoon baking soda - 1/2 teaspoon salt - 1 teaspoon ground cinnamon - 1/2 cup brown sugar, packed - 1/2 cup granulated sugar - 1/2 cup vegetable oil - 2 large eggs - 1 teaspoon vanilla extract - 1 cup semi-sweet chocolate chips - 1/2 cup chopped walnuts (optional) These ingredients work together to create a moist and flavorful bread. If you need to make swaps, here are some ideas: - Use almond flour instead of all-purpose flour for a gluten-free option. - Replace brown sugar with coconut sugar for a lower glycemic index. - You can substitute applesauce for vegetable oil to cut fat. - Use dairy-free chocolate chips for a vegan version. These alternatives can still give you a delicious bread. Here are the tools that will help you make this bread: - A 9x5-inch loaf pan - Mixing bowls (one large, one medium) - Whisk - Spatula - Grater for zucchini - Measuring cups and spoons - Toothpick for testing doneness Having the right tools makes baking easier and more fun. For the full recipe, check out the details above. Start by preheating your oven to 350°F (175°C). This step is key for even baking. While the oven warms up, grab a 9x5-inch loaf pan. Grease it well or line it with parchment paper. This helps the bread come out easily after baking. In a medium bowl, whisk together the dry ingredients. Use 1 cup of all-purpose flour and 1 cup of whole wheat flour. Add 1 teaspoon of baking powder, 1 teaspoon of baking soda, and 1/2 teaspoon of salt. Finish with 1 teaspoon of ground cinnamon. Make sure everything is mixed well. Set this bowl aside for now. In a large mixing bowl, combine your wet ingredients. Start with 1/2 cup of packed brown sugar and 1/2 cup of granulated sugar. Next, add 1/2 cup of vegetable oil, 2 large eggs, and 1 teaspoon of vanilla extract. Whisk these ingredients together until the mixture is smooth. This creates a rich base for your bread. Now it's time for the star of the show! Gently fold in 1 cup of grated zucchini into the wet mixture. Stir until it blends in well. Next, slowly add the dry ingredients to the wet mix, folding carefully. You want to combine them without overmixing. A few lumps are okay! Finally, fold in 1 cup of semi-sweet chocolate chips. If you want, add 1/2 cup of chopped walnuts too. Pour your batter into the prepared loaf pan. Use a spatula to smooth out the top. Place the pan in your preheated oven. Bake for 55-65 minutes. Check if it’s done by inserting a toothpick into the center. It should come out clean or with a few moist crumbs. Once baked, remove the loaf from the oven and let it cool in the pan for about 10 minutes. Then, transfer it to a wire rack to cool completely before slicing. Enjoy your delicious chocolate chip zucchini bread! For more details, check the Full Recipe. To keep your chocolate chip zucchini bread moist, start with fresh zucchini. Grate the zucchini and squeeze out some water, but don't dry it completely. The moisture from the zucchini helps make your bread soft. Adding a little extra oil also helps. For more flavor, use half oil and half unsweetened applesauce. This trick adds moisture without making it greasy. Mixing the batter too much can make your bread tough. When you combine wet and dry ingredients, mix just until you see no dry flour. It's okay if the batter has some lumps. This gentle mixing keeps your bread light and fluffy. Remember, the chocolate chips and zucchini will also blend in as they bake. Store your leftover zucchini bread in an airtight container. It stays fresh at room temperature for up to three days. If you want it to last longer, wrap it in plastic wrap and place it in the fridge. For even longer storage, slice the bread, wrap each piece, and freeze them. This makes it easy to enjoy a slice later. {{image_4}} You can change up this recipe in fun ways. For example, add spices like nutmeg or ginger. These spices give your bread a warm flavor. Chopped nuts, like walnuts or pecans, also add a nice crunch. If you want extra sweetness, try adding raisins or dried cranberries. Just make sure to keep the total amount of add-ins to about one cup. If you need a gluten-free version, use a gluten-free flour blend. Look for one that has xanthan gum for the best texture. For a vegan option, replace eggs with flaxseed meal or applesauce. Use unsweetened applesauce, about 1/4 cup for each egg. Swap the vegetable oil with coconut oil or a neutral oil. These changes help keep the bread moist and delicious. When it's time to serve, slice the bread warm. You can dust it with powdered sugar for a nice touch. A dollop of cream cheese spread pairs well too. For a complete treat, serve with a hot cup of coffee or tea. You can also enjoy it with a scoop of vanilla ice cream on top for a fun dessert twist. This chocolate chip zucchini bread is perfect for breakfast or an afternoon snack! For the full recipe, check the detailed instructions above. After baking, let your chocolate chip zucchini bread cool completely. Wrap it in plastic wrap or store it in an airtight container. This helps keep it moist. You can store it at room temperature for up to three days. If you want to keep it longer, consider freezing it. To freeze your zucchini bread, first, cool it completely. Then, slice it into pieces. Wrap each slice in plastic wrap, then place them in a freezer bag. This way, you can grab one slice at a time. Your bread stays fresh for up to three months in the freezer. When ready to enjoy, you can thaw slices in the fridge overnight. To reheat your zucchini bread, take a slice or two and place them on a microwave-safe plate. Heat for about 10-15 seconds until warm. You can also use an oven. Preheat it to 350°F (175°C). Place the bread on a baking sheet and heat for about 5-10 minutes. Enjoy your warm, moist chocolate chip zucchini bread again! For the full recipe, check out the details above. To stop zucchini bread from getting soggy, you need to remove excess moisture from the zucchini. First, grate the zucchini and place it in a clean dish towel. Squeeze it gently to remove the extra water. This step is key for a nice, firm texture. Also, make sure to avoid adding too much liquid in your wet mixture. Yes, you can use frozen zucchini! Just thaw it first and squeeze out any water. Frozen zucchini works well in recipes like this one. The texture may change a bit, but it will still taste great. This is a simple way to use up leftover zucchini from last summer. To ensure even baking, always preheat your oven before placing your bread inside. Use an oven thermometer to check the temperature. It’s also wise to rotate your loaf halfway through baking. This helps it bake evenly. Lastly, use the right-sized pan to avoid uneven cooking. Chocolate chip zucchini bread lasts about 3 to 4 days at room temperature. Keep it in an airtight container to maintain moisture. If you want it to last longer, you can freeze it for up to 3 months. Just slice it before freezing for easy snacking later. For the full recipe, check out the earlier section! This blog post detailed how to make delicious zucchini bread with chocolate chips. We covered key ingredients, tools, and step-by-step instructions for baking. You learned tips to keep your bread moist and how to store leftovers properly. We also discussed variations, including gluten-free and vegan options. With these insights, you can create tasty bread that fits your needs. Enjoy baking and sharing this treat!

Are you ready to bake something delicious? Let me guide you through making Chocolate Chip Zucchini Bread that’s both moist and easy. This recipe will help you use up that …
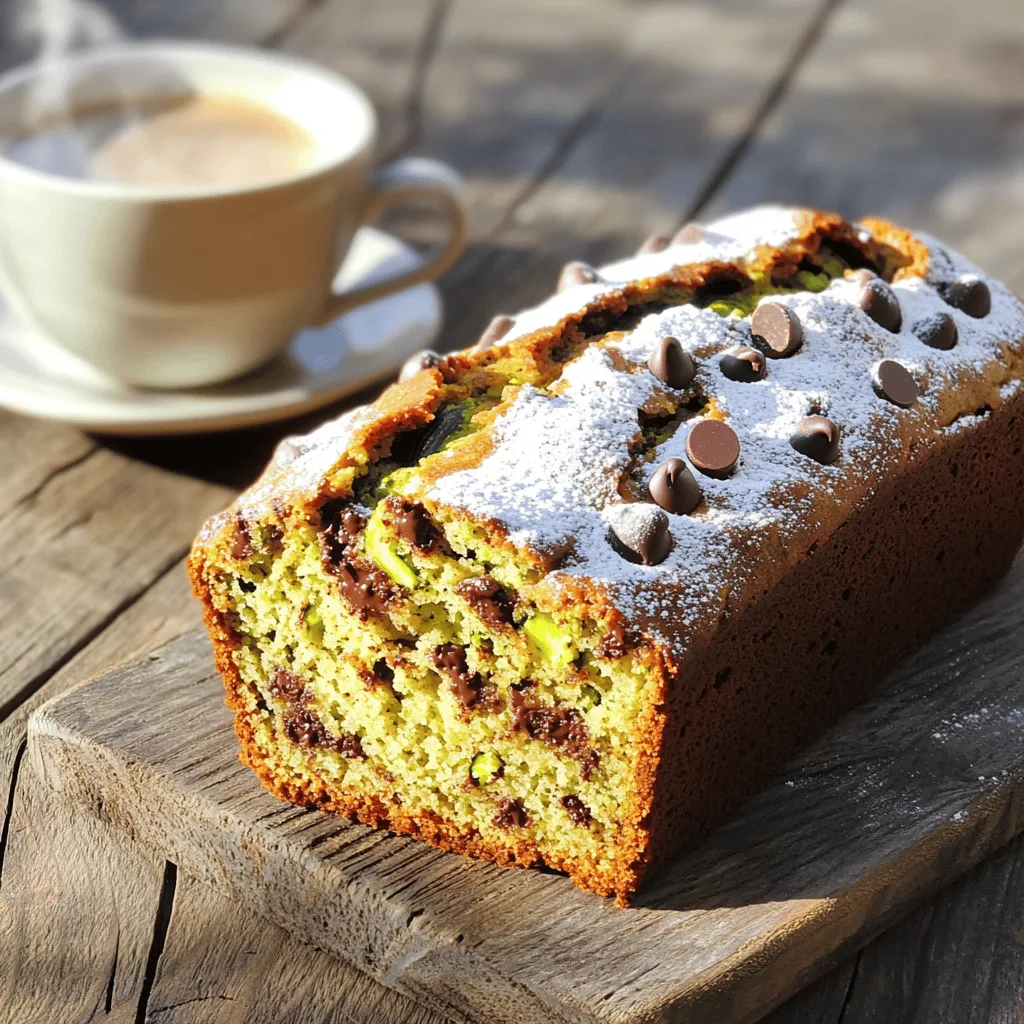
Read more

Categories Desserts

Keto Chocolate Zucchini Bundt Cake Deliciously Moist

July 10, 2025 by Chef Miles
- 2 cups finely shredded zucchini - 1 cup almond flour - 1/2 cup unsweetened cocoa powder The zucchini gives this cake a moist texture while keeping it low in carbs. I use finely shredded zucchini, which blends well into the batter. It helps add moisture without making the cake taste like veggies. Almond flour is my go-to for keto baking. It gives a nice nutty flavor and keeps the cake light. The unsweetened cocoa powder adds rich chocolate taste. - 1/2 cup granulated erythritol - 1/4 cup melted coconut oil I choose erythritol as a sweetener because it has zero carbs. It also does not spike your blood sugar. The melted coconut oil adds richness and helps keep the cake moist. Plus, it gives a light coconut flavor that pairs well with chocolate. - 3 large eggs - 1 teaspoon baking soda - 1/2 teaspoon salt The eggs help bind the cake and add structure. I always use large eggs at room temperature. This helps the batter mix better. Baking soda gives the cake a nice rise and fluffy texture. The salt enhances all the flavors, making the cake even more delicious. For the full recipe, check out [Full Recipe]. - Preheat your oven to 350°F (175°C). - Grease the Bundt pan with coconut oil or non-stick spray. Getting started is easy! First, preheat your oven. This step helps the cake rise and bake evenly. Next, grease your Bundt pan. Use coconut oil or a non-stick spray for the best results. This will make it easy to take the cake out later. - Combine zucchini and melted coconut oil, then incorporate eggs and vanilla. - In a separate bowl, blend dry ingredients and fold into the wet mixture. Now it’s time to mix! In a big bowl, add the shredded zucchini. Make sure to squeeze out the extra water first. Then, pour in the melted coconut oil. This adds a nice richness. Next, crack in the eggs and add the vanilla extract. Stir everything until it’s smooth. In another bowl, mix the dry ingredients. Combine almond flour, cocoa powder, erythritol, baking soda, baking powder, and salt. Stir until there are no lumps. Now, gently fold this mix into your wet ingredients. Be careful not to over-mix. You want a thick batter. If you like chocolate, add some sugar-free chocolate chips here! - Pour batter into the prepared pan and smooth the surface. - Bake for 30-35 minutes, checking with a toothpick for doneness. Pour the batter into the greased Bundt pan. Smooth the top with a spatula for even baking. Place the pan in your preheated oven. Bake for 30 to 35 minutes. Check the cake with a toothpick. It should come out clean or with just a few crumbs. After baking, let the cake cool in the pan for about 10 minutes. Then gently flip it onto a wire rack. This helps keep the cake nice and moist. For the full recipe, visit the link provided. - Squeeze out excess moisture from zucchini for a denser cake. - Use room temperature eggs for better incorporation of ingredients. To achieve the best texture in your Keto Chocolate Zucchini Bundt Cake, moisture control is key. Squeezing out the excess water from the zucchini ensures the cake won’t turn out soggy. I recommend using a clean kitchen towel or a fine mesh strainer for this. This simple step makes a huge difference. Next, let your eggs sit out for a bit. Room temperature eggs mix better and create a smooth batter. Cold eggs can lead to clumps in your mixture. - Consider adding sugar-free chocolate chips to the batter. - Dust with cocoa powder for presentation and a hint of extra chocolate flavor. For added richness, consider folding in sugar-free chocolate chips. They melt slightly as the cake bakes, creating delicious pockets of chocolate throughout. This little twist can elevate your cake's flavor. After baking, dust the top of the cake with cocoa powder. Not only does it look nice, but it also adds an extra layer of chocolate flavor. You can also sprinkle some chopped nuts for texture and crunch. - Adjust baking time based on your oven’s calibration or cake size. - Use an oven thermometer for accurate temperature readings. Baking times can vary based on your oven and the size of your Bundt pan. Always check your cake a few minutes before the suggested time. If you notice it’s cooking faster, you can adjust accordingly. Using an oven thermometer can help, too. Ovens can be off by a few degrees, which affects baking. Having accurate temperature readings leads to better results every time. For the full recipe, make sure to check the complete instructions and measurements! {{image_4}} You can make your Keto Chocolate Zucchini Bundt Cake even more exciting. Consider adding nuts like walnuts or pecans for a nice crunch. These add texture and a nutty flavor that pairs well with chocolate. Another great option is to add a teaspoon of instant coffee. This little boost enhances the chocolate flavor and makes it richer. If you don't have erythritol, no worries! There are many keto-friendly sweeteners to explore. Sweeteners like monk fruit or stevia can work well. Just remember to adjust the amount based on how sweet they are. Each sweetener has a different level of sweetness, so check the package for guidance. Want to make your cake dairy-free? You can swap eggs for flaxseed meal or applesauce. This way, you can enjoy the cake without dairy. If you have coconut flour on hand, you can use it instead of almond flour. But be careful! Coconut flour absorbs more liquid. You will need to adjust the liquid content to keep the cake moist. For the full recipe, check out the instructions provided earlier. You can store leftovers in an airtight container. This keeps the cake fresh for up to 3 days at room temperature. If it’s hot outside, refrigerate it to keep it moist. For longer storage, freeze slices wrapped in plastic wrap or foil. They stay good for up to 3 months. When you want to eat some, thaw them in the fridge overnight. This keeps the texture nice. To enjoy the cake warm, gently reheat slices in the microwave for about 10-15 seconds. If you prefer, warm them in the oven for a few minutes. This helps bring back the cake’s moisture and flavor. For the full recipe, check the details above. Yes, coconut flour can be used, but reduce the amount and adjust liquids. Coconut flour absorbs more moisture. Start with 1/4 cup and increase if needed. This ensures the cake stays moist and fluffy. Absolutely, the recipe is naturally gluten-free. Almond flour and cocoa powder both lack gluten. This makes the cake a great choice for those with gluten sensitivities. Yes, any variety of zucchini works, but avoid oversized ones as they may have more moisture. Smaller zucchinis tend to have a firmer texture. Always grate them finely to blend well in the batter. Consider a keto-friendly cream cheese frosting or chocolate ganache. For cream cheese frosting, mix softened cream cheese, sweetener, and vanilla. For ganache, melt sugar-free chocolate with heavy cream for a luscious topping. A toothpick inserted into the center should come out clean or with few crumbs. If it comes out wet, bake a few more minutes. This simple test helps ensure your cake is perfectly baked. For the full recipe, check the complete instructions to create this delicious treat! This blog post detailed how to make a delicious zucchini cake using simple ingredients. You learned about the essential ingredients, step-by-step instructions, and tips for perfecting your bake. Don't forget to try interesting variations and proper storage methods for leftovers. Zucchini cake is tasty and flexible for many diets. Bake it your way, and enjoy every slice!

Are you ready to indulge guilt-free? Meet the Keto Chocolate Zucchini Bundt Cake—a treat that’s both deliciously moist and perfectly low-carb. With simple ingredients like almond flour and shredded zucchini, …

Read more

Categories Desserts

Crustless Squash Pie Simple and Delicious Recipe

July 9, 2025 by Chef Miles
To make a crustless squash pie, gather the following ingredients: - 2 cups butternut squash, cooked and mashed - 1 cup cottage cheese - 3 large eggs - 1/2 teaspoon ground cinnamon - 1/4 teaspoon ground nutmeg - 1/4 cup pure maple syrup - 1 tablespoon vanilla extract - 1/4 teaspoon sea salt - 1/2 cup shredded sharp cheddar cheese (optional) - Fresh parsley for garnish These ingredients mix together to create a creamy, flavorful pie. Butternut squash is sweet and packed with nutrients. Cottage cheese adds protein and creaminess. Eggs help bind everything together. The spices give the pie warmth, while maple syrup adds natural sweetness. You can also add cheddar cheese for a rich twist. Fresh parsley on top makes the dish look lovely and adds a fresh taste. This crustless squash pie is simple yet satisfying. For the full recipe, check the section above! - Prepare the oven to 350°F (175°C). - Grease a 9-inch pie dish. - Combine 2 cups of cooked and mashed butternut squash, 1 cup of cottage cheese, and 3 large eggs. - Use a whisk or fork to blend until smooth. - Incorporate 1/2 teaspoon of ground cinnamon, 1/4 teaspoon of ground nutmeg, 1/4 cup of pure maple syrup, 1 tablespoon of vanilla extract, and 1/4 teaspoon of sea salt. - Optionally, fold in 1/2 cup of shredded sharp cheddar cheese for extra creaminess. - Pour the mixture into the pie dish and spread evenly. - Bake for 40-45 minutes. - Let cool for 10 minutes before slicing. - Garnish with chopped parsley for a fresh touch. For the full recipe, you can refer to the detailed steps above. Enjoy making this delicious crustless squash pie! Cooling the pie before cutting is key. This step lets it set properly. If you cut it too soon, the texture will be runny. Always wait at least 10 minutes after baking. Using fresh squash yields better flavor and texture. Fresh butternut squash has a rich taste. If you're short on time, frozen squash works too. Just make sure it’s thawed and drained well. You can add extra spices to boost flavor. Consider adding ginger or allspice for warmth. If you like it sweeter, try brown sugar or honey instead of maple syrup. This gives you room to adjust based on your taste. Serve slices warm on a colorful plate. A dollop of whipped cream or a scoop of yogurt adds a nice touch. Drizzle with more maple syrup for extra sweetness. Pair it with a light salad or roasted veggies. This complements the pie's flavor and adds a nice crunch. For a festive look, sprinkle fresh parsley on top before serving. {{image_4}} You can change up the cheese in this pie. Try using cream cheese for a rich taste. Feta cheese adds a tangy twist as well. For a dairy-free option, use cashew cheese or nutritional yeast. These choices keep the pie creamy while catering to different diets. Seasonal spices can elevate your crustless squash pie. Add pumpkin spice or ginger for a fall vibe. You can also mix in some fresh herbs like thyme or rosemary. If you want more veggies, consider adding spinach or zucchini. These will boost flavor and nutrition. To make this pie healthier, lower the sugar. Use mashed bananas or applesauce instead of maple syrup. You can also swap some cottage cheese for Greek yogurt to cut down on calories. For a gluten-free option, this recipe is already good to go! Enjoy a delicious pie without the crust. To keep your crustless squash pie fresh, let it cool first. Place it in an airtight container. You can also cover it tightly with plastic wrap. This keeps moisture in and bad smells out. Store it in the fridge for up to five days. If you have a lot of leftovers, consider cutting the pie into slices. This makes it easier to grab a piece later. To reheat your pie, use the oven for the best results. Preheat it to 350°F (175°C). Place a slice on a baking sheet. Cover it with foil to keep it moist. Heat for about 15-20 minutes. You can also use the microwave. Just heat it for 1-2 minutes, checking often. This is quicker but may change the texture a bit. For long-term storage, freezing is a great option. Wrap each slice tightly in plastic wrap. Then place them in a freezer-safe bag. This way, they stay fresh for up to three months. When you're ready to eat, remove a slice from the freezer. Thaw it in the fridge overnight. You can also reheat it straight from frozen. Just add a few extra minutes to your heating time. You can check if your pie is done by looking for certain signs. The edges should be set, but the center will have a slight jiggle. You can also insert a knife in the center. If it comes out clean, your pie is ready. This usually takes about 40 to 45 minutes in the oven. Yes, you can use other squashes if you want! Acorn squash or pumpkin work great in this recipe. Just make sure to cook and mash them like you do with butternut squash. Each type will give a different taste and texture, so feel free to experiment! Absolutely! This crustless squash pie is naturally gluten-free since it doesn't contain any flour. It uses simple ingredients like squash, eggs, and cottage cheese. If you have a gluten sensitivity, this recipe is a safe choice. Enjoy without worry! For the full recipe, refer to the detailed instructions above. This blog post explains how to make a delicious crustless butternut squash pie. We covered the key ingredients and shared easy steps for mixing and baking. You also learned tips for enhancing flavors and ensuring the best texture. Lastly, we discussed storage and variations to fit your taste. In summary, this pie is simple and tasty. With a dash of creativity, you can make it your own. Enjoy your cooking and find joy in each bite!

Crustless Squash Pie is a tasty twist on a classic dish. You’ll love how easy it is to make. With just a few simple ingredients, you can create a healthy …

Read more

Categories Desserts

Savory Summer Squash Cake Easy and Flavorful Recipe

July 9, 2025 by Chef Miles
- 2 cups grated fresh summer squash - 1 cup all-purpose flour - 1 teaspoon baking powder - 1/2 teaspoon baking soda - 1/2 teaspoon fine salt - 1/2 teaspoon ground cinnamon - 1/4 teaspoon ground nutmeg - 1/2 cup unsalted butter, softened - 1 cup granulated sugar - 2 large eggs, at room temperature - 1 teaspoon pure vanilla extract - Optional ingredients for variation: - 1/2 cup sweetened shredded coconut - 1/2 cup finely chopped walnuts or pecans Using fresh summer squash adds a unique touch to this cake. I love how it makes the cake moist and flavorful. Make sure to grate the squash finely. This helps it blend into the batter well. You can also play with the optional ingredients. Adding shredded coconut gives a fun tropical twist. Chopped walnuts or pecans add a nice crunch. When you gather the ingredients, ensure they are fresh. This will enhance the taste of your cake. You can find fresh summer squash at farmers' markets or grocery stores in the summer months. For the full recipe, just follow the steps outlined carefully. Enjoy the process of making this delightful cake! - Preheat oven to 350°F (175°C). - Prepare a 9-inch round cake pan by greasing and lining it. - Whisk together flour, baking powder, baking soda, salt, and spices until combined. - Cream softened butter with sugar until light and fluffy. - Add eggs one at a time, then mix in vanilla extract. - Gradually mix dry ingredients into wet mixture without overmixing. - Fold in grated summer squash and optional ingredients. - Pour batter into prepared pan and smooth the top. - Bake for 30-35 minutes until a toothpick comes out clean. - Cool in pan for 10 minutes before inverting onto a wire rack. This method ensures a moist and flavorful summer squash cake. For the full recipe, check out the details above. - Ensure correct oven temperature for optimal baking. - Avoid overmixing batter for a tender crumb. When you preheat your oven, set it to 350°F (175°C). A hot oven helps the cake rise well. If it is too cool, the cake may not bake evenly. Always use an oven thermometer to check the heat. Mixing the batter is crucial. When you combine the wet and dry ingredients, do it gently. Overmixing can make the cake dense and tough. Just mix until you see no dry flour. The batter should look slightly lumpy but well combined. - Dust with powdered sugar before serving. - Pair with vanilla ice cream and garnish with mint leaves. Serving your summer squash cake is fun! A light dust of powdered sugar adds sweetness and looks nice. For a creamier treat, serve with vanilla ice cream. The cold ice cream contrasts well with the warm cake. Add a few mint leaves for color and fresh taste. - Consider adding citrus zest for extra freshness. - Experiment with spices like ginger or allspice for depth. To boost the cake’s flavor, add citrus zest from lemons or oranges. This brightens the taste and adds a nice zing. You can also try spices like ginger or allspice. These spices give the cake warmth and complexity. Always taste as you go to find the perfect balance. For the full recipe, check the details above. Enjoy baking! {{image_4}} You can add a fun twist by using shredded coconut. It gives the cake a tropical flavor. This sweet addition makes the cake moist and flavorful. If you love coconut, don't skip this part. Just mix in half a cup of sweetened shredded coconut to the batter. It adds texture and a hint of sweetness that pairs well with the squash. For a nutty crunch, try adding nuts like almonds or hazelnuts. Use half a cup of finely chopped nuts in the batter. They add a nice texture and extra flavor. Nuts can also boost the nutritional value of your cake. Choose your favorite nuts or whatever you have in your pantry. This variation makes the cake even more satisfying and rich. If you prefer a vegan option, you can easily adapt this recipe. Replace the eggs with flax eggs. To make a flax egg, mix one tablespoon of ground flaxseed with three tablespoons of water. Let it sit for about five minutes to thicken. Also, use dairy-free butter instead of regular butter. This way, everyone can enjoy a slice of this delicious cake. Keep the cake covered at room temperature for up to 2 days. This way, it stays moist and fresh. I recommend using a cake dome or plastic wrap. If you want to keep it longer, move to the next step. Refrigerate for up to a week or freeze for up to 3 months. For refrigeration, place the cake in an airtight container. For freezing, wrap it tightly in plastic wrap, then place it in a freezer-safe bag. This helps to lock in moisture and flavor. Slow-thaw frozen cake in the refrigerator overnight before serving. This method keeps the cake from getting soggy. Once it's thawed, you can enjoy it as if it were fresh-baked! Yes, yellow squash can be substituted for a different flavor profile. Yellow squash has a mild taste similar to zucchini. It adds a slight sweetness to the cake. This swap makes the dish more colorful and fun. Canned or frozen squash can be used but may alter the texture slightly. If you choose canned squash, drain it well to remove excess moisture. Frozen squash will need to be thawed and drained. Both options will still give you a tasty cake, though fresh is best for texture. Insert a toothpick in the center; if it comes out clean, the cake is ready. This simple test helps ensure the cake is baked through. If the toothpick has batter on it, give the cake a few more minutes in the oven. Yes, cream cheese frosting or a simple glaze complements the cake well. The rich cream cheese adds a tangy flavor that balances the sweetness. A light glaze made from powdered sugar and milk also works well. Both options make the cake even more delightful. This blog post covered how to make a delicious summer squash cake. You learned about the ingredients, step-by-step instructions, and some helpful tips. We also explored fun variations and storage options. In closing, this cake is easy to make and fun to tweak. Enjoy making it your own, and share it with friends and family. Baking brings joy, so have fun with it!

Are you looking for a tasty treat that celebrates summer’s bounty? This savory summer squash cake recipe is easy to whip up and packed with flavor. Made with fresh summer …

Read more

Categories Desserts

Zucchini Apple Crumb Bread Irresistible Flavor Burst

July 9, 2025 by Chef Miles
Here is the detailed list of ingredients you will need for Zucchini Apple Crumb Bread: - 1 cup grated zucchini - 1 cup grated apple - 1 cup all-purpose flour - 1 cup whole wheat flour - 1 teaspoon baking soda - 1/2 teaspoon baking powder - 1 teaspoon ground cinnamon - 1/2 teaspoon nutmeg - 1/2 teaspoon salt - 1/2 cup granulated sugar - 1/2 cup packed brown sugar - 1/2 cup vegetable oil or melted coconut oil - 2 large eggs - 1 teaspoon vanilla extract - 1/2 cup chopped nuts (walnuts or pecans) - 1/2 cup oats for crumb topping Each ingredient plays a key role. The zucchini adds moisture, while apples bring a nice sweetness. The mix of flours gives a rich texture. Baking soda and powder help the bread rise. Cinnamon and nutmeg offer warm, cozy flavors. The sugars balance everything out, making it sweet but not too sweet. Eggs bind it all together, and nuts add crunch. Oats on top provide a delightful crumb that makes every bite special. For the full experience, you can check out the Full Recipe. - Preheat the oven to 350°F (175°C). - Grease and flour a 9x5 inch loaf pan. - In a large mixing bowl, combine the all-purpose flour, whole wheat flour, baking soda, baking powder, ground cinnamon, nutmeg, and salt. - In a separate bowl, mix together the granulated sugar, brown sugar, vegetable oil, eggs, and vanilla extract. - Fold in the grated zucchini and grated apple gently. - Gradually combine the dry and wet mixtures. Stir until just mixed, being careful not to overmix. - Transfer the batter to the prepared loaf pan. Smooth the top with a spatula. - For the crumb topping, mix oats with a pinch of cinnamon and a spoonful of sugar. Sprinkle this mixture on top of the batter. - Bake for 55-65 minutes. Check for doneness by inserting a toothpick into the center. If it comes out clean, the bread is ready. Enjoy making this Zucchini Apple Crumb Bread with these easy steps! For the full recipe, check out the details above. To avoid overmixing, mix just until the ingredients blend. A few lumps are okay. Overmixing can make the bread tough. Keep the mixing light and gentle. Ingredient temperature matters. Use eggs and oil at room temp. This helps the batter mix well. Cold ingredients can lead to a lumpy batter. Spices can boost flavor. Try adding a pinch of ginger or a dash of cloves. These spices give a warm taste. You can also add dried fruits like raisins or cranberries for extra sweetness. When choosing apples, go for tart ones. Granny Smith apples work great. They add a nice contrast to the sweet bread. Look for firm apples with bright skin. This ensures the best flavor. Check for doneness with a toothpick. Insert it in the center of the bread. If it comes out clean, the bread is ready. If it has wet batter, bake a bit longer. If the bread is too moist, bake it longer. Cover it with foil to avoid burning. Letting it sit in the pan for a few minutes helps too. Then, transfer it to a cooling rack. For the Full Recipe, check the complete details to get started on making this delicious bread! {{image_4}} - Gluten-free options: If you want a gluten-free bread, use almond flour or gluten-free all-purpose flour. This keeps the texture light and fluffy, just like the original. - Alternative sweeteners: You can swap granulated sugar with honey or maple syrup. Just use a bit less liquid in the recipe to balance it out. - Incorporating chocolate chips: Add 1/2 cup of chocolate chips to the batter for a sweet twist. They melt and create a rich, gooey texture. - Using different nut types: Try pecans or almonds instead of walnuts. Each nut brings a unique crunch and flavor that adds to the bread's charm. - Adding pumpkin for fall flavors: Substitute half the zucchini with pumpkin puree. This gives the bread a warm, cozy taste perfect for autumn. - Using different fruits as substitutes: Swap apples for pears or bananas. Each fruit adds its own flavor and sweetness, making each loaf special and exciting. For more ideas, check out the [Full Recipe] to explore new ways to enjoy this delightful bread! To keep your Zucchini Apple Crumb Bread fresh, follow these tips: - Refrigeration: Wrap the bread tightly in plastic wrap or foil. Store it in the fridge. This helps keep it moist and extends its life. - Freezing: If you want to freeze it, slice the bread first. Wrap each slice in plastic wrap, then place them in a freezer bag. This way, you can grab a slice any time! How long does your bread last? - Room Temperature: When kept at room temperature, the bread lasts about 3 to 5 days. Store it in a cool, dry place. - Signs of Spoilage: Look for mold or an off smell. If it feels dry or hard, it’s time to toss it. Want to enjoy your bread warm? Here’s how: - Best Methods: Use the oven to reheat. Preheat it to 350°F (175°C). Wrap the bread in foil and heat for about 10-15 minutes. This keeps it soft. - What to Avoid: Avoid using the microwave. It makes the bread tough and chewy. Stick to the oven for the best results. For the full recipe, check out the [Full Recipe]. To grate zucchini well, use a box grater or a food processor. Both tools work great. Aim for even pieces for uniform cooking. Cut the zucchini into smaller sections for easier grating. - Tips for uniform grating: - Choose a medium grater size. - Hold the zucchini firmly while grating. - Grate it just before using to keep it fresh. - Tools to use for grating: - Box grater: Simple and effective. - Food processor: Fast and saves time. Yes, you can make this zucchini apple crumb bread vegan. It’s easy to swap out some ingredients. - Suggested egg substitutes: - Use 1/4 cup unsweetened applesauce for each egg. - Try 1 tablespoon flaxseed meal mixed with 2.5 tablespoons water. - Adjustments for other ingredients: - Replace milk with almond or oat milk. - Use a plant-based oil like coconut oil or vegetable oil. You can increase sweetness without changing the texture much. - Recommendations for increasing sweetness: - Add a bit more brown sugar or granulated sugar. - Consider using honey or maple syrup, but reduce liquid slightly. - Tips for maintaining moisture balance: - Keep the ratio of dry to wet ingredients the same. - If adding more sugar, consider adding a bit more grated zucchini or apple to maintain moisture. This recipe lets you enjoy the delightful mix of flavors in every bite. For the full details, check out the Full Recipe! This article guided you through making a tasty bread using simple ingredients. We covered every step, from mixing to baking. You learned essential tips on enhancing flavor and making substitutions. Remember, you can customize this recipe to fit your taste. Whether you store it, reheat it, or share it, enjoy your delicious creation. Always keep experimenting with flavors and ingredients. Your baking journey can be fun and rewarding. Enjoy the process and share your results!

If you’re looking for a mouth-watering treat that combines fresh flavors and wholesome ingredients, you’re in the right place! This Zucchini Apple Crumb Bread packs a punch of deliciousness with …

Read more

Categories Desserts

Soft and Tender Zucchini Cheddar Biscuits Recipe

July 9, 2025 by Chef Miles
- 1 medium zucchini, grated and excess moisture squeezed out - 1 cup shredded sharp cheddar cheese - 2 cups all-purpose flour - 1 tablespoon baking powder - 1 teaspoon garlic powder - 1 teaspoon salt - 1/2 teaspoon black pepper - 1/4 cup unsalted butter, cold and cubed - 3/4 cup milk - 2 tablespoons fresh chives, chopped (optional) Each ingredient plays a key role in making these biscuits soft and flavorful: - Zucchini adds moisture and a subtle taste. It makes the biscuits tender. - Sharp cheddar cheese brings a rich, savory flavor that balances the zucchini. - All-purpose flour gives structure to the biscuits while keeping them light. - Baking powder helps the biscuits rise, making them fluffy. - Garlic powder adds depth and a bit of zing. - Salt enhances all flavors and balances the taste. - Black pepper provides a slight kick without being overwhelming. - Unsalted butter keeps the biscuits rich and flaky. - Milk hydrates the dry ingredients, creating a soft dough. - Chives offer a fresh, herbal note, brightening the flavor (optional). You can make these biscuits more inclusive with a few swaps: - Gluten-free flour can replace all-purpose flour for a gluten-free option. - Dairy-free cheese or nut-based cheese works well instead of cheddar if you're avoiding dairy. - Vegan butter can replace unsalted butter for a dairy-free version. - Plant-based milk can substitute regular milk to avoid dairy. Finding the right ingredients is essential for tasty zucchini cheddar biscuits. You can enjoy them while meeting dietary needs! First, gather all your ingredients. You will need: - 1 medium zucchini, grated and excess moisture squeezed out - 1 cup shredded sharp cheddar cheese - 2 cups all-purpose flour - 1 tablespoon baking powder - 1 teaspoon garlic powder - 1 teaspoon salt - 1/2 teaspoon black pepper - 1/4 cup unsalted butter, cold and cubed - 3/4 cup milk - 2 tablespoons fresh chives, chopped (optional) Start by preheating your oven to 400°F (200°C). Line your baking sheet with parchment paper. This helps prevent sticking. Grate the zucchini and squeeze out extra moisture. This step is key for a light biscuit. In a large bowl, mix the zucchini, cheddar cheese, flour, baking powder, garlic powder, salt, and black pepper. Stir well until everything is combined. Next, add the cold butter. You can use a pastry cutter or your fingers to mix it in. Aim for a crumbly texture with small chunks of butter visible. Now, slowly pour in the milk. Gently fold the mixture together. Stop mixing as soon as it comes together. Overmixing can make your biscuits tough. If you're using chives, add them now and fold gently. Transfer the dough to a floured surface. Pat it down into a rectangle about 1 inch thick. Use a round cutter or a glass to cut out biscuits. Place them 1 inch apart on your baking sheet. Bake in your preheated oven for 15-20 minutes. Watch for a golden brown top. After baking, remove the biscuits from the oven. Let them cool slightly on the baking sheet. This time helps them set and makes them easier to serve. Enjoy them warm for the best taste! To make soft and tender biscuits, keep your butter cold. Cold butter creates steam during baking. This steam makes the biscuits light and fluffy. Another tip is to mix gently. Overmixing can lead to tough biscuits. Combine your ingredients just until they come together. Lastly, don't skip chilling the dough. A little chill time helps the biscuits rise better. Zucchini adds moisture and flavor. First, grate the zucchini finely. Then, squeeze out excess water. This step is key. Too much moisture makes the biscuits soggy. You can also sauté the zucchini lightly. This step adds a nice depth of flavor. Just let it cool before adding to the dough. One common mistake is using warm butter. Warm butter won't create the right texture. Another mistake is not measuring ingredients correctly. Too much flour will make biscuits dry. Lastly, do not open the oven door too soon. This can cause the biscuits to deflate. Follow these tips for perfect biscuits every time. {{image_4}} You can use different cheeses for your biscuits. Try mozzarella for a milder taste. Feta adds a salty kick and a crumbly texture. If you want a stronger flavor, go for blue cheese. Each cheese changes the taste and texture. Feel free to mix them for a unique blend. Zucchini isn’t the only veggie you can use. Carrots add sweetness, while spinach gives a nice color and flavor. You can also try corn for some crunch. Fresh herbs like basil or parsley can brighten up your biscuits. Just chop them finely and mix them in with the dry ingredients. You can make these biscuits sweet too. Add some sugar and cinnamon for a tasty treat. Chopped apples or blueberries can bring a fruity twist. Sweet biscuits pair well with tea or coffee. On the other hand, savory biscuits are perfect for meals. Think about serving them with soups or salads. Each variation brings its own charm and taste to the table. To keep your zucchini cheddar biscuits fresh, store them in an airtight container. This helps prevent them from drying out. Place a piece of parchment paper between layers to avoid sticking. They stay fresh for up to three days at room temperature. If you want them to last longer, refrigeration is a good option. In the fridge, they can last about a week. When you’re ready to enjoy leftovers, reheating is key. Preheat your oven to 350°F (175°C). Place the biscuits on a baking sheet. Heat for about 10 minutes. This warms them up and makes them soft again. You can also use a microwave for quick reheating. Just heat for about 15-20 seconds. Be careful not to overheat, or they may become tough. Freezing is a great way to save your biscuits for later. First, let the biscuits cool completely. Then, place them in a single layer on a baking sheet. Freeze them for about two hours. After they are firm, transfer them to a freezer bag. Seal it tightly, removing as much air as possible. They will stay good for up to three months. To enjoy them later, thaw overnight in the fridge and then reheat. This way, you can enjoy fresh tasting biscuits anytime! You can tell the biscuits are done when they turn golden brown on top. This usually takes about 15 to 20 minutes in the oven. To be sure, you can also poke one with a toothpick. If it comes out clean, your biscuits are ready! Yes, you can make these biscuits ahead of time. You can prepare the dough and place it in the fridge for up to 24 hours. When you're ready, just cut and bake them. This saves time and gives you fresh biscuits whenever you want. These biscuits go great with soups, salads, and stews. They also make a nice side for grilled meats or a light brunch. You can even enjoy them with a bit of butter or jam for a tasty snack. For the full recipe, check the Soft and Tender Zucchini Cheddar Biscuits section above. It has all the steps and details you need to make these delicious biscuits! In this blog post, I covered key ingredients for zucchini cheddar biscuits. Each ingredient plays an important role in flavor and texture. I also provided tips on substitutions for allergens and detailed steps for prepping, mixing, and baking. Helpful tricks ensure tender biscuits and ways to mix in zucchini effectively. Finally, I shared storage tips to keep your biscuits fresh. These biscuits are a great addition to your table, offering many tasty options. Enjoy making them!

Welcome to my kitchen, where we’ll make Soft and Tender Zucchini Cheddar Biscuits! These biscuits are easy to whip up and bursting with flavor. You’ll love the way the zucchini …

Read more

Categories Appetizers

Chocolate Peanut Butter Zucchini Bread Delight

July 9, 2025 by Chef Miles
To make Chocolate Peanut Butter Zucchini Bread, gather these ingredients: - 1 cup finely grated zucchini (about 1 medium zucchini) - 1/2 cup creamy peanut butter - 1/2 cup unsweetened applesauce - 1/2 cup packed brown sugar - 1/4 cup granulated sugar - 2 large eggs - 1 teaspoon pure vanilla extract - 1 cup all-purpose flour - 1/2 cup unsweetened cocoa powder - 1 teaspoon baking soda - 1/2 teaspoon baking powder - 1/4 teaspoon salt - 1/2 cup chocolate chips (dark or semi-sweet) - 1/4 cup chopped walnuts or pecans (optional) You can swap some ingredients if needed: - Use almond butter or sunflower seed butter instead of peanut butter. - Replace unsweetened applesauce with mashed banana or yogurt for a different taste. - For lower sugar, try using coconut sugar or maple syrup. - Use whole wheat flour for a denser, nuttier bread. When picking zucchini, look for these signs: - Choose firm zucchinis with smooth skin. - Avoid any with blemishes, soft spots, or wrinkles. - Smaller zucchinis are often sweeter and more tender. - If possible, smell the zucchini; fresh ones have a mild, sweet scent. Using fresh zucchini makes your bread moist and flavorful. For the full recipe, refer to the main article. Start by preheating your oven to 350°F (175°C). This step is key for even baking. While the oven heats, prepare your 9x5 inch loaf pan. You can grease it or line it with parchment paper. Lining helps with easy removal later. Make sure your pan is ready before mixing the batter. In a large mixing bowl, combine the grated zucchini, creamy peanut butter, and applesauce. Add the packed brown sugar and granulated sugar. Crack in the two large eggs and pour in the pure vanilla extract. Mix these ingredients well with a whisk until the mixture is smooth. This helps blend the flavors together nicely. In a separate bowl, sift together the all-purpose flour, cocoa powder, baking soda, baking powder, and salt. Sifting adds air to the mix, making the bread light. Gradually add the dry ingredients to the wet mixture. Use a spatula to fold gently. Be careful not to overmix, as this can make the bread dense. Finally, fold in the chocolate chips and optional nuts, ensuring they spread throughout the batter. Now your batter is ready for the loaf pan! For the complete recipe, check the Full Recipe section. To keep your Chocolate Peanut Butter Zucchini Bread light, measure the flour carefully. Use a spoon to fluff the flour in its container, then spoon it into your measuring cup. Avoid packing it down. Overmixing the batter can also lead to density. Mix just until you see no dry flour. Trust me, a gentle touch is key! Having the right tools makes baking easy. You will need: - A 9x5 inch loaf pan - Mixing bowls (one large and one medium) - A whisk for the wet ingredients - A spatula for folding - A sifter for dry ingredients - A toothpick to check for doneness Using these tools helps you create a perfect loaf every time. Some mistakes can ruin your bread. Avoid using too much zucchini, as it can make the bread soggy. Remember to squeeze out excess moisture with a clean towel. Use fresh baking powder and soda for the best rise. Lastly, be sure to cool the bread completely before slicing. This helps it set and keeps it from crumbling. {{image_4}} Adding nuts to your Chocolate Peanut Butter Zucchini Bread can boost flavor and crunch. I love using walnuts or pecans. They add a nice texture and nutty taste. Simply fold in 1/4 cup of chopped nuts into the batter before baking. This small change makes a big difference. Want a gluten-free version? Swap the all-purpose flour for a gluten-free blend. Many blends work well in baking. Look for one that contains xanthan gum for the best results. This will help your bread rise and hold its shape. Your Chocolate Peanut Butter Zucchini Bread will still taste great! To make this bread vegan, replace the eggs with flax eggs. Use one tablespoon of ground flaxseed mixed with three tablespoons of water for each egg. Let it sit for a few minutes to thicken. You can also use almond milk or soy milk instead of applesauce if needed. Your Chocolate Peanut Butter Zucchini Bread will still be moist and flavorful! For the full recipe, check out the instructions above. To store your chocolate peanut butter zucchini bread, let it cool completely. Wrap it tightly in plastic wrap or aluminum foil. You can also place it in an airtight container. This helps keep it fresh for about three days at room temperature. If you want it to last longer, consider refrigerating it. This can extend its life up to a week, but the bread may lose some moisture. You can freeze your zucchini bread for up to three months. To do this, first, let it cool completely. Then, wrap it well in plastic wrap and aluminum foil. Label it with the date for easy tracking. When you’re ready to enjoy it, you can thaw it in the fridge overnight. For quicker thawing, place the wrapped loaf on the counter for a few hours. Reheating your bread is simple and quick. You can slice the bread and heat it in the microwave for about 15-20 seconds. If you prefer a crispy crust, use a toaster oven. Heat slices at 350°F for about 5 minutes. This way, you keep the delicious flavors alive and enjoy that fresh-baked taste again. Remember, you can always add more peanut butter or a scoop of ice cream on top for a tasty treat! Yes, you can use other nut butters. Almond butter works well and adds a nice flavor. Cashew butter is another great choice. Just remember, each nut butter has its own taste. This will change the final flavor of the bread. If you want a nut-free option, sunflower seed butter is a good alternative too. Just keep in mind the taste will vary from the original recipe. To keep your zucchini from being too watery, start by squeezing out the excess moisture. After grating your zucchini, place it in a clean kitchen towel. Twist the towel to wring out as much liquid as you can. This simple step helps avoid a soggy bread. Also, using medium-sized zucchini is best. They tend to have less water than larger ones. This bread pairs well with many items. A scoop of vanilla ice cream makes a nice, sweet treat. You can also serve it with a dollop of whipped cream for extra creaminess. For a fun twist, try adding fresh fruit like bananas or strawberries. A light drizzle of honey or maple syrup adds a nice touch too. Feel free to get creative and find what you enjoy best! You learned about making delicious Chocolate Peanut Butter Zucchini Bread. We covered key ingredients, how to prep, and mix for success. Tips helped avoid common mistakes and ensure great taste and texture. You also explored fun variations like gluten-free and vegan options. Finally, we discussed how to store and reheat your bread. Enjoy baking and sharing this treat with others. Happy baking!

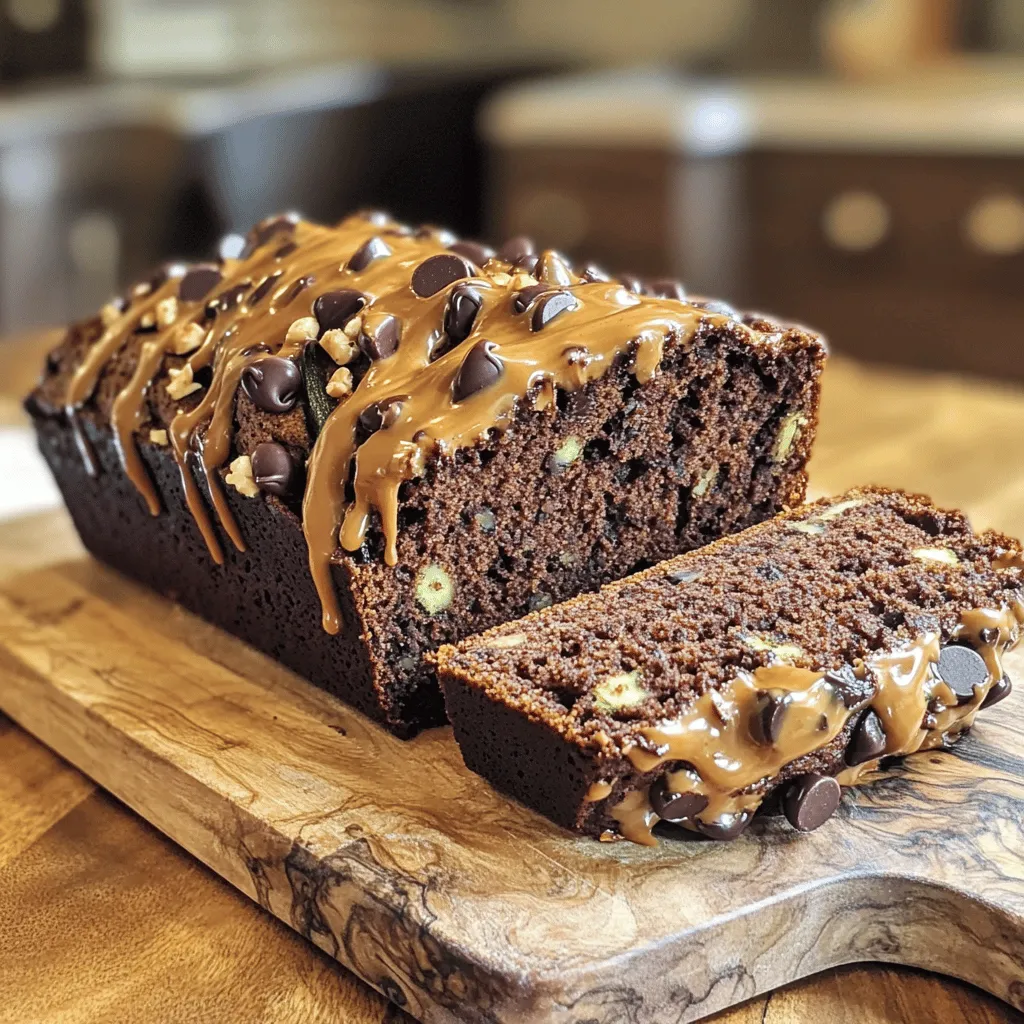
If you love chocolate and peanut butter, you’re in for a treat! I’m excited to share my recipe for Chocolate Peanut Butter Zucchini Bread Delight. This moist, tasty loaf brings …

Read more

Categories Desserts

Juicy Baked Chicken Breast Flavorful and Easy Recipe

July 9, 2025 by Chef Miles
- 2 large boneless, skinless chicken breasts - 2 tablespoons extra virgin olive oil - 1 teaspoon garlic powder - 1 teaspoon onion powder - 1 teaspoon smoked paprika - 1 teaspoon dried oregano - 1 teaspoon dried thyme - Salt and pepper - Juice of 1 fresh lemon - Chopped fresh parsley for garnish Gather these ingredients first. Fresh ingredients will give your chicken the best taste. The olive oil helps keep the chicken moist. The spices add great flavor to each bite. Using lemon juice gives a nice zing. Fresh parsley adds a pop of color and taste. For the chicken, I love using large, boneless, and skinless breasts. They cook evenly and stay juicy. The garlic and onion powder blend well for a savory kick. Smoked paprika adds a hint of smokiness that elevates the dish. Oregano and thyme bring herbal notes that balance the flavors. Don’t forget salt and pepper to enhance everything. These simple ingredients work together to make your chicken shine. When you combine them, you create a dish that is hard to resist. For the full recipe, check out the cooking instructions that follow. This dish is easy, flavorful, and perfect for any meal. 1. Preheat the oven to 400°F (200°C). This helps cook the chicken evenly. 2. In a small bowl, mix garlic powder, onion powder, smoked paprika, oregano, thyme, salt, and pepper. This spice blend adds great flavor. 3. Take the chicken breasts and pat them dry with paper towels. This step helps the chicken get a nice sear. 4. Drizzle olive oil over the chicken breasts. Make sure they are coated well. 5. Sprinkle the spice mix on both sides of the chicken. Rub it in gently to help the flavors stick. 1. Place the seasoned chicken in a baking dish. Lay them flat and don’t overlap them. 2. Squeeze fresh lemon juice over each chicken breast. This gives a bright taste. 3. Bake the chicken for 20-25 minutes. Use a meat thermometer to check. The chicken should reach 165°F (75°C) inside. 4. After baking, take the chicken out and let it rest for 5 minutes. This helps the juices stay inside. 1. To plate the baked chicken, slice it nicely and arrange it on a plate. 2. Serve over steamed veggies or with a light salad for a healthy balance. 3. Add a lemon wedge on the side. This makes it look nice and lets guests add extra flavor. For the complete recipe, check the [Full Recipe]. Patting the chicken dry is key. This step helps the seasoning stick and prevents steaming. If the chicken is wet, it won’t get nice and crispy on the outside. For best results, bake your chicken at 400°F (200°C). This temperature seals in moisture while cooking evenly. Bake for 20-25 minutes. Always check the chicken's internal temperature. It should reach 165°F (75°C) for safety. Citrus and herbs bring amazing flavor. Fresh lemon juice elevates the dish. Try using fresh herbs like rosemary or thyme for more taste. You can also marinate the chicken ahead of time. A simple mix of olive oil, lemon juice, and garlic works great. Let it sit in the fridge for at least 30 minutes. This soaking time makes the chicken tender and flavorful. Overcooking is a common mistake. If you bake the chicken too long, it can dry out. Use a meat thermometer to check doneness. Look for an internal temperature of 165°F (75°C). If you cut the chicken and the juices run clear, it’s ready. Let the chicken rest for 5 minutes after baking. This step allows juices to settle, keeping the chicken moist. For a full, detailed recipe, refer to the [Full Recipe]. {{image_4}} You can change the taste of your baked chicken easily. Adding different spices or marinades can create a new dish each time. Try cumin for a warm flavor or chili powder for a kick. You can also add some soy sauce or honey for a sweet glaze. Mixing herbs can also make a big difference. A blend of rosemary, basil, and thyme gives your chicken a fresh taste. Experiment with your favorites. The more you try, the more fun it is! Baking is great, but you can also grill or pan-sear your chicken. Grilling gives it a smoky flavor that many love. Just remember to watch the time, so it stays juicy. Pan-searing is fast and gives a nice crust. If you're in a hurry, use an air fryer. It cooks quickly and keeps the chicken juicy. Plus, it uses less oil, which is a bonus for health. You can get creative when serving your chicken. Turn it into a salad or wrap for a quick lunch. Just slice the chicken and mix it with greens and your favorite dressing. You can also add it to pasta dishes or stir-fries. It works well with veggies and sauces. Just toss everything together for a tasty meal. For the full recipe, don't forget to check out the instructions I shared! To keep your juicy baked chicken breast fresh, store it correctly. First, let the chicken cool down. Then, place it in an airtight container. This helps keep moisture in and prevents any bad smells. Make sure to refrigerate leftovers within two hours of cooking. Always use leftovers within three to four days for the best taste. If you want to save your chicken for longer, try freezing it. Wrap the chicken tightly in plastic wrap or foil. Then, place it in a freezer-safe bag. This way, it can last up to three months. Remember to label the bags with the date! When reheating your chicken, you want to keep it juicy. One great method is to use the oven. Preheat your oven to 350°F (175°C). Place the chicken in a baking dish, and cover it with foil. This keeps the moisture in. Heat for about 15-20 minutes, or until warm. Another option is using a microwave. Place the chicken on a microwave-safe plate. Add a splash of water and cover it with a lid. Heat in short bursts of 30 seconds to avoid drying it out. You can also get creative with leftovers! Chop the chicken and toss it in salads or wraps. You can even add it to pasta dishes for a quick meal. Knowing how long your chicken stays fresh is key. In the fridge, cooked chicken lasts about three to four days. If you freeze it, it stays good for about three months. Always check for signs of spoilage. If the chicken smells sour or looks off, it's best to discard it. You want to enjoy your meal, not risk your health! For more details on making this dish, check out the Full Recipe. To make chicken breast tender, you can use a few great techniques. First, pat the chicken dry with paper towels. This helps the spices stick better. Next, use a marinade with acid, like lemon juice or vinegar. This breaks down proteins and keeps the meat juicy. You can also bake the chicken gently. Cooking it at the right temperature helps keep it moist. The best temperature to bake chicken breast is 400°F (200°C). This heat cooks the chicken evenly and keeps it juicy. Make sure to use a meat thermometer. The chicken should reach an internal temperature of 165°F (75°C) to be safe to eat. Yes, you can marinate chicken overnight! Marinating adds flavor and moisture to the meat. Use a mix of oil, acid, and spices for the best results. Just make sure not to leave it too long in acidic marinades. This can make the chicken mushy. You can serve baked chicken with many tasty sides. Steamed vegetables, like broccoli or carrots, work well. A fresh salad with greens and a tangy dressing is also a great choice. You could also serve it with rice or quinoa for a hearty meal. Mashed potatoes or roasted sweet potatoes add comfort and flavor. Baking chicken breast at 400°F takes about 20-25 minutes. The exact time may change based on the size of the chicken breasts. Use a meat thermometer to check for doneness. The chicken should reach 165°F (75°C) in the thickest part. Let it rest for 5 minutes after cooking for the best taste. For the full recipe, you can check out the main article. Baking chicken breast can be simple and rewarding. We explored the ingredients, preparation, and cooking steps to achieve juicy chicken. Use the tips and variations to add your personal touch. Proper storage ensures you enjoy leftovers without waste. Remember to keep your chicken tender and watch for doneness. With these techniques, you can serve delicious meals again and again. Stay confident in your cooking journey!

Are you tired of dry, bland chicken? Let’s fix that with my juicy baked chicken breast recipe! This easy dish bursts with flavor and impresses everyone at your table. You’ll …

Read more

Categories Dinner
Older posts
Newer posts
← Previous Page1 … Page72 Page73 Page74 … Page113 Next →

MELTED RECIPES

where delicious ideas melt into life, from stovetop to backyard. Always warm, simple, and irresistibly satisfying. 🍳🔥🧀

PAGES

Home About Contact Privacy Policy Terms & Conditions Cookie Policy GDPR Policy Copyright Policy Disclaimer

CATEGORIES

Appetizers Desserts Salads Breakfast Dinner

Contact

  • Pinterest
  • Mail
Copyright © 2025 Melted Recipes. All rights reserved.