Skip to content
Melted Recipes
  • Home
  • Appetizers
  • Desserts
  • Salads
  • Breakfast
  • Dinner
  • Privacy Policy
  • Contact
  • About

Chef Miles

Rich Buttery Blueberry Breakfast Cake Delightful Treat

July 11, 2025 by Chef Miles
- 2 cups all-purpose flour - 1 cup unsalted butter - 1 cup granulated sugar - 2 large eggs - 2 cups fresh blueberries - 1/2 teaspoon baking powder - 1/2 teaspoon baking soda - 1/4 teaspoon salt - 1/2 cup sour cream - Zest of 1 large lemon - Powdered sugar for dusting When I make this rich buttery blueberry breakfast cake, I start with fresh, high-quality ingredients. Using 2 cups of all-purpose flour gives the cake structure. One cup of unsalted butter adds richness and moisture. Granulated sugar sweetens the cake perfectly. I always use two large eggs, as they help bind the ingredients well. The blueberries are the star of this recipe. I prefer fresh blueberries, but thawed and drained frozen ones work too. For baking, I add 1/2 teaspoon baking powder, 1/2 teaspoon baking soda, and 1/4 teaspoon salt to the mix. These baking essentials ensure the cake rises beautifully. Optional enhancements can take this cake over the top. I often include 1/2 cup of sour cream to add creaminess. The zest of one large lemon brightens the flavor, making it even more delightful. Finally, dusting the cake with powdered sugar gives it a lovely finish. You can find the full recipe to guide you through baking this delicious cake. - Preheat oven to 350°F (175°C). - Grease and flour the baking pan. Start by preparing your baking pan. I like to use a 9x13 inch pan. This size helps the cake bake evenly. Greasing and flouring the pan stops the cake from sticking. - Combine dry ingredients. - Beat butter and sugar until fluffy. - Add eggs, vanilla extract, and lemon zest. Next, grab a medium bowl. In this bowl, whisk together the flour, baking powder, baking soda, and salt. This mix is your dry base. In a larger bowl, beat the softened butter with the sugar. Mix until it's light and fluffy. This should take about 3-4 minutes. Now, add in the eggs one at a time. Ensure each egg mixes well before adding the next. Finally, stir in the vanilla extract and lemon zest. This adds a lovely flavor to your cake. - Alternate adding dry ingredients and sour cream. - Fold in blueberries gently. Now it's time to bring everything together. Begin adding your dry mix to the wet ingredients. Alternate this with the sour cream. Start and end with the flour mix. This keeps your cake light. After mixing, gently fold in the blueberries using a spatula. Be careful not to crush them. You want those juicy pockets of blueberries. - Pour batter into baking pan. - Bake for 35-40 minutes. - Cool before dusting with powdered sugar. Pour the batter into your prepared pan. Spread it evenly with a spatula. Then, bake in your preheated oven for about 35-40 minutes. Check for doneness with a toothpick. It should come out clean with a few moist crumbs. After baking, let the cake cool for about 10 minutes in the pan. Then, transfer it to a wire rack. Once cooled, you can dust the top with powdered sugar for a nice touch. Enjoy your Rich Buttery Blueberry Breakfast Cake! For the complete details, refer to the Full Recipe. To get the right texture, avoid overmixing the batter. Overmixing makes the cake dense. Remember to use room temperature ingredients. They mix better and help the cake rise nicely. Consider adding vanilla bean paste for more flavor depth. It gives a rich taste that makes the cake special. You can also experiment with lemon zest variations. A hint of lemon brightens the overall flavor. For a beautiful presentation, serve with fresh blueberries or a mint garnish. This adds color and freshness to your slices. Use decorative plates for serving. They make the dish look even more inviting. For the complete recipe, check the Full Recipe section. {{image_4}} You can switch blueberries for raspberries or blackberries. These fruits add fun flavors. You might also make a mixed berry breakfast cake. This gives you a colorful treat that is full of taste. Try using any combination of berries you enjoy. The cake will still be rich and buttery. If you want a gluten-free cake, use almond flour. It works well and keeps the cake moist. For those avoiding dairy, use coconut oil instead of butter. This change keeps the cake rich while meeting dietary needs. You can still enjoy a delicious treat without the usual ingredients. Add warmth to your cake with spices like cinnamon or nutmeg. These spices create a cozy vibe, perfect for breakfast. You can also mix in white chocolate chips for extra richness. They melt into the cake, giving you sweet pockets of flavor. Experiment with these ideas to find your favorite twist! You can keep the Rich Buttery Blueberry Breakfast Cake at room temperature for up to 3 days. Make sure to cover it well to keep moisture in. This will help keep the cake soft and tasty. For longer storage, refrigerate the cake for up to a week. If you want to save it even longer, freeze slices for up to 3 months. Wrap each slice in plastic wrap, then place it in a freezer bag. This keeps the cake fresh and ready for when you want a quick treat. To enjoy the cake warm, pop a slice in the microwave for a few seconds. This brings back the rich buttery flavor. However, I find it best served at room temperature. The taste and texture shine through when it's not too hot or too cold. To make a gluten-free version, use gluten-free flour blends. These blends work well in baked goods. They mimic regular flour while keeping your cake light and fluffy. Just replace the all-purpose flour with the blend in the recipe. Yes, you can use frozen blueberries. Just make sure they are thawed and drained. This step helps prevent excess moisture in your cake. It also keeps your cake from becoming too soggy. To check if the cake is done, use a toothpick. Insert it into the center of the cake. If it comes out clean with a few moist crumbs, it's ready. This ensures you have a perfectly baked breakfast cake. Yes, you can make this cake ahead of time. It stores well in the refrigerator for up to a week. You can also freeze it for up to three months. Thaw it in the fridge when you're ready to enjoy it again. Check out the Full Recipe for more details! This post shared how to make a rich, buttery blueberry breakfast cake. We covered key ingredients, baking steps, and how to enhance the flavor. Remember not to overmix for the best texture. Feel free to swap out fruits or adjust for dietary needs. This cake is not just tasty but also easy to store and reheat. Whether serving fresh or putting your twist on it, enjoy your baking!

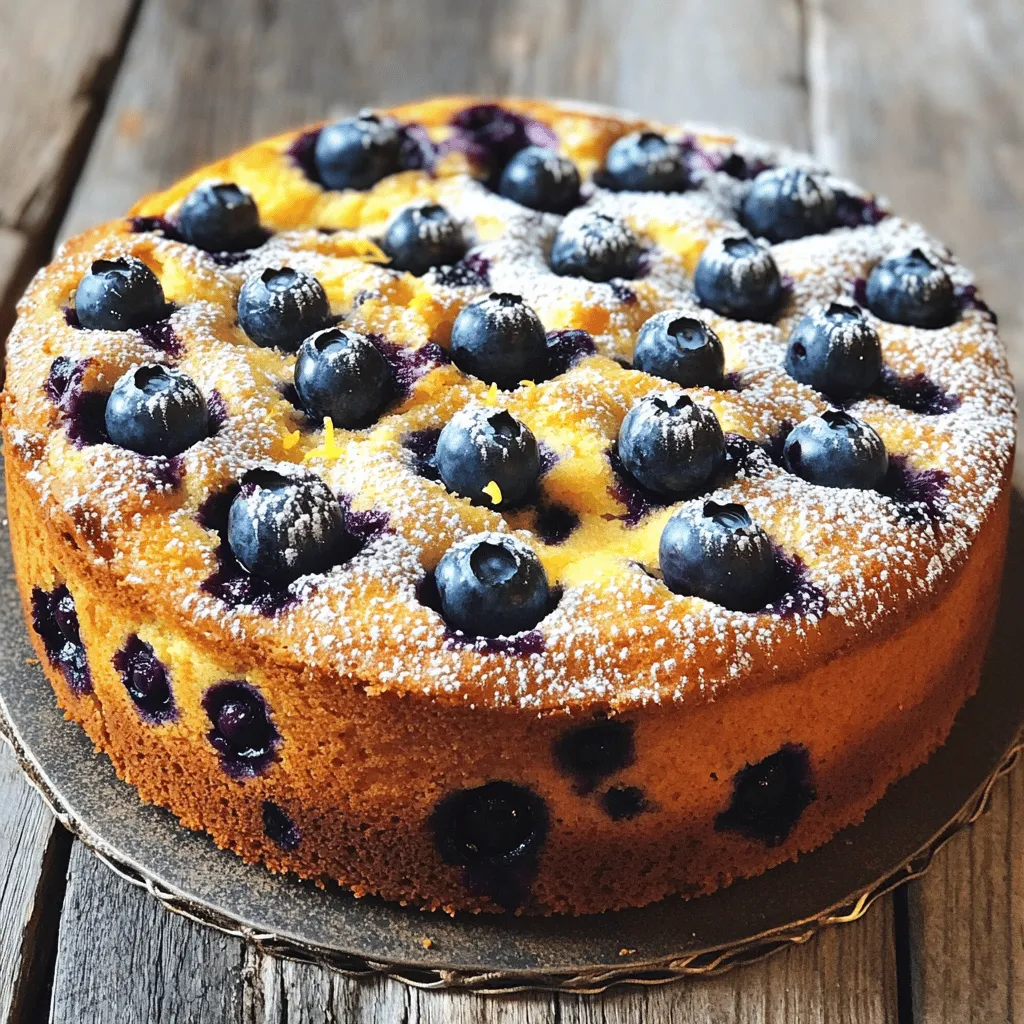
Are you ready to indulge in a breakfast treat that bursts with flavor? My Rich Buttery Blueberry Breakfast Cake combines simple ingredients into a delightful cake that’s perfect for any …

Read more

Categories Desserts

Cinnamon Apple Zucchini Bread Flavorful and Moist Recipe

July 11, 2025 by Chef Miles
- 1 cup finely grated zucchini - 1 cup unsweetened applesauce - 1 medium tart apple, peeled and diced You need zucchini for moisture. It adds softness and flavor. The applesauce gives sweetness. It also helps bind everything together. Use a tart apple, like Granny Smith, for a nice zing. - 2 large eggs - Brown sugar and granulated sugar - 1/2 cup vegetable oil Eggs help the bread rise and hold it together. The mix of brown and granulated sugar gives great flavor and sweetness. Vegetable oil keeps the bread moist. You can try coconut oil for a twist. - All-purpose flour - Baking soda and baking powder - Ground cinnamon and nutmeg, salt All-purpose flour forms the base. Baking soda and baking powder help it rise. Cinnamon and nutmeg add warmth and spice. Salt brings out all the flavors and balances the sweetness. For the full list of ingredients and their measurements, check the Full Recipe. First, preheat your oven to 350°F. This is important for even baking. Next, prepare your loaf pan. You can grease it lightly with butter or oil. Then, dust it with flour. Alternatively, line the pan with parchment paper. This makes it easy to remove the bread later. In a large bowl, combine the finely grated zucchini, applesauce, diced apple, eggs, brown sugar, and granulated sugar. Mix well until everything blends into a smooth mixture. Then, add the vegetable oil and vanilla extract. Stir again until all ingredients combine nicely. In another bowl, sift the all-purpose flour, baking soda, baking powder, ground cinnamon, ground nutmeg, and salt. Sifting helps aerate the flour and mix in the baking agents and spices evenly. Gradually add the dry mixture into the wet mixture. Use a spatula to fold them together gently. Be careful not to overmix; a few small lumps are fine. If you want, fold in the chopped walnuts or pecans. You can also add raisins or dried cranberries for sweetness. These add extra texture and flavor to your bread. Once combined, your batter is ready for baking. Pour the batter into your prepared loaf pan. Use a spatula to smooth out the top. Make sure the batter spreads evenly in the pan. Place the loaf pan in your preheated oven. Bake for 55-65 minutes. To check for doneness, insert a toothpick into the center. It should come out clean or with a few moist crumbs. Once baked, remove the loaf from the oven. Let it cool in the pan for about 10 minutes. Then, carefully transfer the bread to a wire rack to cool completely. This helps keep the bread moist and fluffy. Enjoy your delicious creation, and feel free to check out the Full Recipe for more details! Mixing is key to a great bread. Start with wet ingredients. Whisk them well to blend. Then, gradually fold in dry ingredients. Do this gently to avoid overmixing. Overmixing can make the bread tough. It’s okay if there are small lumps in the batter. They will bake out nicely. Adjust sweetness and spices to fit your taste. If you like sweeter bread, add a bit more sugar. For extra spice, increase the cinnamon or add nutmeg. Taste the batter before baking. This way, you can ensure it’s just right for you. Serving this bread is fun and easy. Slice it warm and spread a little butter on top. You can drizzle honey for a sweet touch. For extra flavor, sprinkle cinnamon sugar over the slices. This adds a nice crunch and aroma. Think about what to pair with your bread. It goes well with tea or coffee. A warm cup of chai or a strong brew complements it perfectly. You can even serve it as a dessert with a scoop of ice cream. Having the right tools makes baking easier. You’ll need a good mixing bowl and a whisk for the wet ingredients. A spatula helps fold in the dry mix. For baking, a sturdy 9x5-inch loaf pan works best. You can use non-stick pans or line them with parchment paper. This helps with easy removal. A toothpick is great for checking if the bread is done. Make sure to have one handy! For the best results, a stand mixer can save time. But, a hand mixer works just fine too. Enjoy the process and your delicious Cinnamon Apple Zucchini Bread! {{image_4}} You can easily change the flavor of your Cinnamon Apple Zucchini Bread. Try adding spices like ginger or cardamom for a warm twist. Ginger gives a nice kick, while cardamom adds a floral note. You can also swap in other fruits. Peaches and bananas work great and add sweetness. Just make sure to adjust the moisture in your mix if using really juicy fruits. If you need a gluten-free option, you can substitute all-purpose flour with a gluten-free blend. Many brands offer a simple 1:1 swap that works well. For those seeking vegan options, replace eggs with flaxseed meal or applesauce. Use coconut oil instead of vegetable oil for a rich taste. These changes keep your bread light and tasty without losing any flavor. To make your bread even more special, consider add-ins. Different nuts like almonds or pecans offer nice crunch and flavor. Chocolate chips are a fun touch for a sweet treat. If you want a tropical twist, add coconut flakes. Just fold these ingredients into the batter before baking. Each addition adds a unique burst of flavor and texture. Check the Full Recipe for detailed steps and ingredient amounts to create your own delicious variations. To keep your cinnamon apple zucchini bread moist, wrap it well. Use plastic wrap or aluminum foil. This helps to lock in moisture. Store it in an airtight container. A glass or plastic container works best. Avoid letting it sit out in the open air. This can dry it out quickly. For long-term storage, freezing is a great option. First, cool the bread completely. Next, wrap it tightly in plastic wrap. Then, place it in a freezer-safe bag. Make sure to remove as much air as possible. When you want to enjoy it, thaw it in the fridge overnight. For faster results, you can leave it on the counter for a few hours. At room temperature, the bread lasts about 3 to 5 days. Keep it in a cool, dry place. If you see mold or an odd smell, throw it away. These are signs of spoilage. Enjoy your cinnamon apple zucchini bread fresh for the best taste! For the full recipe, check the earlier section. To keep zucchini bread moist, use fresh, finely grated zucchini. The water in the zucchini helps create a soft texture. Make sure to measure the zucchini correctly. If you have too little, it can dry out. Avoid overbaking; check your bread a few minutes early. You want it to be just set in the center. Storing the bread in an airtight container also helps maintain moisture. Yes, you can substitute applesauce in this recipe. You could use mashed banana or pureed pumpkin instead. These alternatives will add their own unique flavors. Keep in mind that the texture may change slightly. Using mashed banana will make the bread taste sweeter. Pureed pumpkin will give it a warm, earthy flavor. If your bread turns out too dense, several factors could be at play. Overmixing the batter can lead to a tough texture. Make sure to mix just until combined. Another reason might be too much flour. Always measure flour accurately. Additionally, check your leavening agents like baking soda and baking powder to ensure they are fresh and active. You can use different types of flour in this recipe. Whole wheat flour is a great option for added fiber. Almond flour can be used for a gluten-free version. However, using different flours may change the texture and moisture. If you choose a gluten-free flour, you may need to adjust the liquid. This blog post covered how to make delicious zucchini bread. We discussed the must-have ingredients like zucchini and applesauce. I shared step-by-step instructions, including tips for mixing and baking. You learned about variations to suit your taste and how to store your bread properly. Remember, baking is about fun and creativity. Don’t hesitate to try different flavors or adjustments. Enjoy each bite of your tasty creation!

Are you ready to bake something special? This Cinnamon Apple Zucchini Bread is both flavorful and moist. You’ll love how simple it is to combine the freshness of zucchini and …

Read more

Categories Desserts

Baked Parmesan Yellow Squash Rounds Crispy Delight

July 11, 2025 by Chef Miles
- 2 medium yellow squash, sliced into 1/4-inch rounds - 1 cup freshly grated Parmesan cheese - 1/2 cup whole wheat breadcrumbs - 2 tablespoons extra-virgin olive oil - 1 teaspoon garlic powder - 1 teaspoon dried Italian herbs - Salt and freshly cracked black pepper, to taste - Fresh parsley for garnish If you want to switch things up, here are some easy swaps: - Alternative cheeses: You can use Pecorino Romano or cheddar for a different taste. - Gluten-free breadcrumbs options: Try almond flour or crushed rice crackers for a gluten-free option. - Fresh herbs vs. dried herbs: Fresh herbs add vibrant flavor. Use one tablespoon of fresh herbs for every teaspoon of dried herbs. These substitutions help you tailor the recipe to your taste. Enjoy experimenting with flavors! First, preheat your oven to 400°F (200°C). This step is key for crispiness. Next, line your baking sheet with parchment paper. This helps the rounds cook evenly and not stick. In a medium bowl, mix the dry ingredients. Combine the grated Parmesan cheese, whole wheat breadcrumbs, garlic powder, and dried Italian herbs. Add a pinch of salt and pepper. Stir well to blend all the flavors. Now, drizzle the olive oil over the sliced yellow squash rounds. Toss them gently to coat every slice. This oil helps the coating stick and adds flavor. Take each squash round and dip it into the cheese mixture. Press the mixture onto both sides of each slice. This step ensures a good coating for that crispy finish. Arrange the coated squash rounds on the baking sheet. Place them in a single layer, leaving space between each round. This allows hot air to circulate for even cooking. Bake in the preheated oven for 20 to 25 minutes. Watch closely for a golden brown color. You want a nice crispy texture on the outside. Once they are done, remove the rounds from the oven. Let them cool on the sheet for a few minutes. This cooling helps keep them crispy. For a lovely touch, transfer the baked rounds onto a serving platter. Sprinkle with finely chopped fresh parsley. This adds color and flavor to your dish. Enjoy your crispy delight! For the best results, choose a heavy-duty baking sheet. This helps your squash rounds cook evenly. Look for sheets that are non-stick or have a silicone coating. This allows easy release of the rounds. Parchment paper is key for achieving that crispy texture. It prevents sticking and helps with even browning. Plus, it makes cleanup a breeze. Always line your baking sheet with parchment before you start. To spice things up, consider adding extra seasonings. Try red pepper flakes for heat or smoked paprika for a deep flavor. You can also swap out the dried Italian herbs for fresh ones, like basil or thyme, to elevate the taste. Pair your baked squash rounds with sauces or dips. A tangy yogurt dip or a zesty marinara will complement the flavors nicely. This adds variety and makes your dish more exciting. Serve your baked rounds on a bright plate or wooden board. This adds a rustic touch and makes the dish pop. For a final flourish, sprinkle extra Parmesan on top, along with fresh parsley. Garnish with lemon zest for a fun twist. This adds a burst of color and fresh fragrance. Your guests will be impressed by both taste and look. {{image_4}} You can make baked Parmesan yellow squash rounds even more exciting. Adding different spices or herbs can change the taste. Try paprika for a smoky flavor. You can also use thyme for a fresh twist. Mixing in crushed red pepper flakes adds a nice kick. You can also incorporate other vegetables. Zucchini works well and has a similar texture. Eggplant rounds can add richness. Slice them thinly and follow the same steps. Mixing colors from various veggies makes the dish more vibrant and fun. If you want a vegan option, use nutritional yeast instead of Parmesan. It gives a cheesy flavor without dairy. Just sprinkle it on the squash rounds before baking. For low-carb alternatives, you can skip the breadcrumbs. Coat the squash in almond flour instead. This keeps the dish crispy while cutting down on carbs. You’ll still get a satisfying crunch. You can cook these squash rounds in an air fryer, which makes them extra crispy. Preheat the air fryer to 375°F (190°C). Cook for 10-12 minutes, shaking the basket halfway through. Grilling is another fun way to prepare them. Preheat your grill and place the rounds on a grill basket. Grill for about 5-7 minutes per side. This gives the rounds a nice smoky flavor with grill marks. For the full recipe, check out the instructions above. Enjoy trying these variations! To keep your baked Parmesan yellow squash rounds fresh, place them in an airtight container. This prevents moisture from making them soggy. Store in the fridge for up to 3 days. They taste best when eaten fresh, but leftovers can still be tasty. If you want to freeze them, here’s how. First, let the rounds cool completely. Next, place them on a baking sheet in a single layer and freeze for 1-2 hours. Once frozen, transfer them to a freezer bag. They can last for up to 2 months in the freezer. Keep in mind that the texture may change slightly after freezing. They may not be as crispy when reheated. To reheat your squash rounds and keep them crispy, use the oven. Preheat it to 375°F (190°C). Place the rounds on a baking sheet and heat for 10-12 minutes. You can also use an air fryer at 350°F (175°C) for about 5-7 minutes. This method gives you a nice crisp texture. Enjoy your delicious leftovers! You can tell when they are done by their color and texture. Look for a golden brown color. The edges should be crispy, while the center should be tender. This usually takes about 20-25 minutes in the oven. To check, you can gently poke a round with a fork. If it feels soft but firm, it's perfect! Yes, you can prep the squash rounds ahead of time. Slice and coat them in the breadcrumb mixture. Place them on the baking sheet, cover, and store in the fridge for up to a day. When you're ready to bake, just pop them in the oven. This saves time on busy days! These rounds pair well with many dishes. Try serving them alongside grilled chicken or fish for a complete meal. They also work great as a side dish with pasta or a fresh salad. You can even enjoy them as a tasty snack or appetizer! To make this recipe gluten-free, simply swap the whole wheat breadcrumbs for gluten-free breadcrumbs. You can find these in most stores. Ensure your Parmesan cheese is gluten-free as well. With these changes, you can enjoy the same crispy delight without gluten! Check out the Complete Recipe for Baked Parmesan Yellow Squash Rounds [here](#)
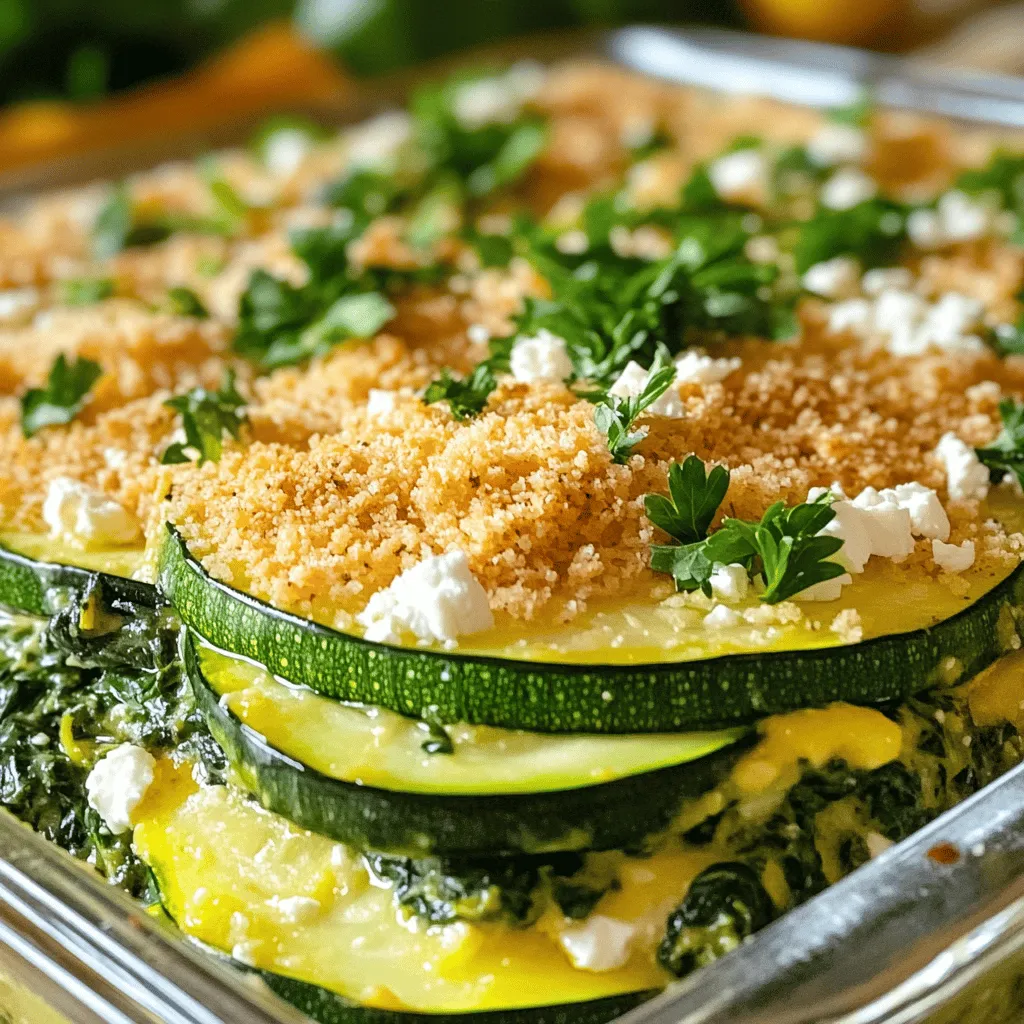
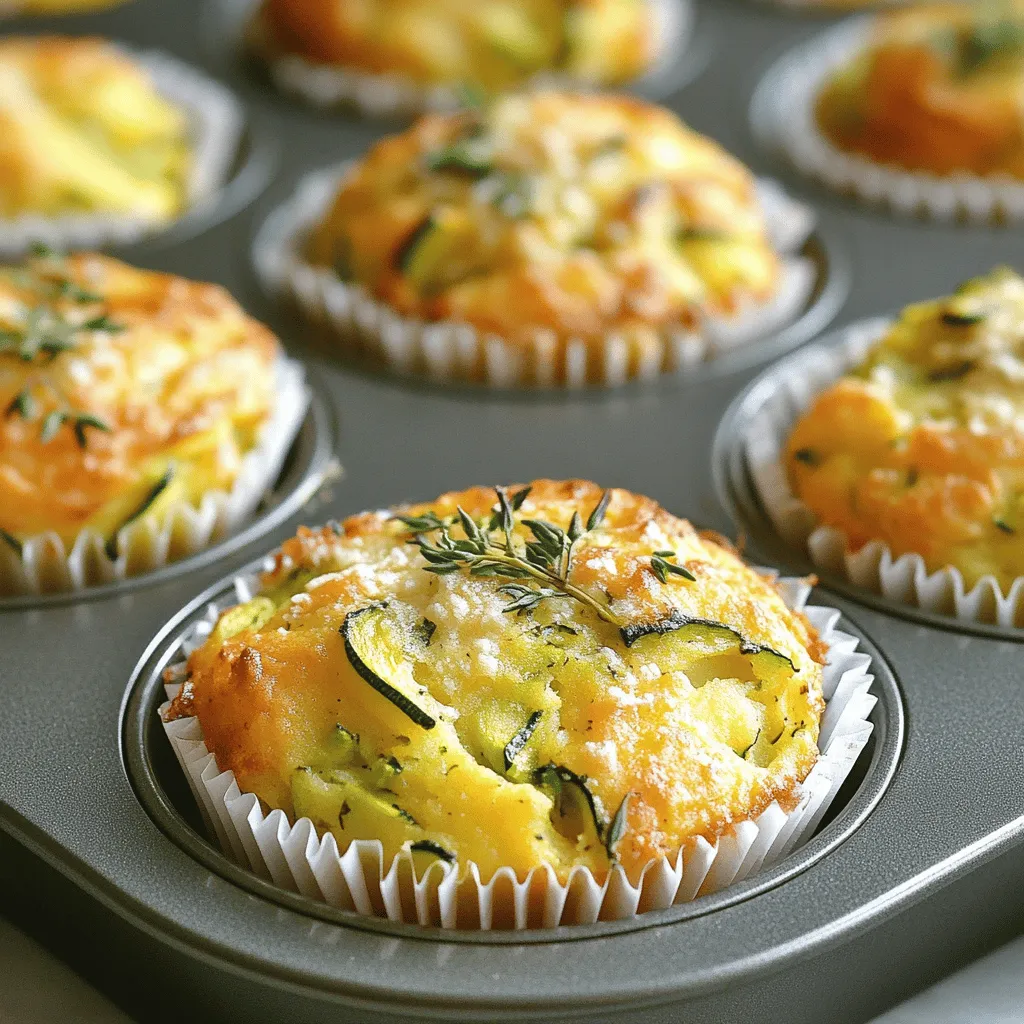
. Baked Parmesan Yellow Squash Rounds are easy and fun to make. We covered the main ingredients, step-by-step instructions, and helpful tips. You can adapt the recipe with various flavors and diets. Also, we discussed storing and reheating for later enjoyment. With these insights, you'll create a tasty dish that fits your needs. Don't hesitate to try new flavors or methods. Enjoy every bite and share this recipe with friends!

Are you ready to elevate your vegetable game? Baked Parmesan Yellow Squash Rounds offer a crispy delight that’s both tasty and healthy. With just a few simple ingredients, you can …

Read more

Categories Appetizers

Lemon Blueberry Bread Fresh and Flavorful Delight

July 11, 2025 by Chef Miles
To make Lemon Blueberry Bread, you need fresh and simple ingredients. Here are the essentials: - 2 cups all-purpose flour - 1 cup granulated sugar - 1 tablespoon baking powder - 1/2 teaspoon salt - 1/2 cup unsalted butter, softened - 2 large eggs, at room temperature - 1/2 cup buttermilk (or substitute with 1/2 cup milk + 1/2 tablespoon vinegar) - Zest of 1 lemon (about 1 tablespoon) - 1/4 cup fresh lemon juice - 1 cup fresh blueberries (frozen ones work too, if thawed and drained) - 1 teaspoon pure vanilla extract For a lovely glaze, consider these optional ingredients: - 1/2 cup powdered sugar - 2 tablespoons lemon juice If you need alternatives, here are some ideas: - Use whole wheat flour for a healthier option. - Replace granulated sugar with coconut sugar for a low-glycemic option. - Swap buttermilk for plain yogurt if needed. By mixing and matching, you can make this recipe your own while still keeping it delicious. Check out the Full Recipe for exact steps! 1. Preheat your oven to 350°F (175°C). Grease a 9x5-inch loaf pan with cooking spray or line it with parchment paper. 2. Mix the dry ingredients. In a medium bowl, whisk together: - 2 cups all-purpose flour - 1 tablespoon baking powder - 1/2 teaspoon salt This helps to ensure a light texture. 3. Prepare the wet ingredients. In a large bowl, beat together: - 1/2 cup softened unsalted butter - 1 cup granulated sugar Mix these on medium speed until light and fluffy, about 3-4 minutes. 4. Add the eggs. Crack in 2 large eggs, one at a time. Blend well after each addition. Then stir in the zest of 1 lemon and 1 teaspoon vanilla extract. 5. Combine wet and dry mixtures. Gradually add the buttermilk and 1/4 cup fresh lemon juice into the wet mix. Blend until just combined. 6. Incorporate the dry mix. Slowly add the dry ingredients to the wet mixture. Fold gently with a spatula until no flour streaks are visible. 7. Add the blueberries. Carefully fold in 1 cup fresh blueberries. Use a gentle touch to avoid smashing them. Reserve some blueberries to sprinkle on top before baking. 8. Transfer the batter. Pour the mixture into the prepared loaf pan. Smooth the top and scatter the reserved blueberries evenly. 9. Bake the bread. Place the loaf in the oven and bake for 55-60 minutes. Check doneness by inserting a toothpick into the center. It should come out clean or with a few moist crumbs. 10. Cool the bread. Once baked, let it cool in the pan for about 10 minutes. Then, move it to a wire rack to cool completely. 11. Optional glaze: If you choose to add a glaze, mix 1/2 cup powdered sugar with 2 tablespoons lemon juice. Drizzle over the cooled bread for an extra sweet touch. This simple process creates a fresh and flavorful Lemon Blueberry Bread that you can enjoy anytime. Follow the Full Recipe for all details! - Best practices for measuring ingredients: Always use dry measuring cups for flour and sugar. Spoon the flour into your cup, then level it off with a straight edge. This way, you avoid packing it down, which can lead to dense bread. - Importance of room temperature for eggs and butter: Bring your eggs and butter to room temperature before mixing. This helps them blend smoothly. If you forget, you can warm the eggs in a bowl of warm water for a few minutes. - Techniques to avoid overmixing: When adding the flour to the wet mix, fold gently with a spatula. Stop mixing as soon as you no longer see dry flour. Overmixing can make your bread tough and chewy instead of light and fluffy. These tips help ensure your Lemon Blueberry Bread turns out fresh and flavorful. Follow the Full Recipe for the best results! {{image_4}} You can make Lemon Blueberry Bread even more fun by swapping out some ingredients. Here are my favorite ideas: - Different Fruits: You can use raspberries or strawberries instead of blueberries. Both fruits add a lovely tartness. You can also try blackberries for a different twist. They all work wonderfully with lemon. - Adding Spices or Nuts: Adding a teaspoon of cinnamon or nutmeg can give your bread a warm flavor. If you like crunch, consider adding chopped walnuts or almonds. They add texture and taste. - Gluten-Free or Dairy-Free Options: To make a gluten-free version, swap all-purpose flour for a gluten-free blend. For a dairy-free option, use almond milk or coconut milk instead of buttermilk. These swaps keep the bread moist and tasty. These variations let you customize your Lemon Blueberry Bread to fit your taste. Explore different flavors and find your favorite combination! For the full recipe, refer to the section above. To keep your Lemon Blueberry Bread fresh, store it in an airtight container. This prevents moisture loss and keeps it soft. You can also wrap it tightly in plastic wrap or foil. Place it in a cool, dry place. It will stay fresh for about three days. If you want to save it for longer, freeze your bread. Wrap it tightly in plastic wrap, then place it in a freezer bag. Be sure to remove as much air as possible. It can last up to three months in the freezer. When you're ready to enjoy it, thaw it overnight in the fridge. For reheating, slice the bread first. You can warm slices in the microwave for about 15-20 seconds. If you prefer a crisp crust, use a toaster or oven. Heat at 350°F (175°C) for about 5-10 minutes. Enjoy your Lemon Blueberry Bread fresh or warmed up for a delightful treat! For a complete guide, check the Full Recipe. You can tell if your bread is done by checking the color and texture. It should be golden brown on top and spring back when you touch it. Insert a toothpick into the center. If it comes out clean or with a few moist crumbs, your bread is ready. Remember, each oven is different. Keep an eye on your bread as it bakes! Yes, you can use frozen blueberries! Just make sure to thaw and drain them first. This helps prevent extra moisture in your bread. Gently fold them into the batter at the end. You’ll still get that juicy burst of flavor in every bite. If your bread turns out dense, it could be due to overmixing or too much flour. Make sure to measure your flour correctly. Use the spoon-and-level method for accuracy. Mix your batter until just combined. This keeps your bread light and airy. If you encounter a dense loaf, try slicing it thin and toasting it. It still tastes great! Lemon Blueberry Bread is a delightful treat that blends bright flavors and soft texture. We explored the key ingredients and their substitutes. I shared clear steps to mix and bake. Tips on measuring and storing will ensure your success. Experiment with different fruits and variations to find your favorite. Proper storage helps keep your bread fresh for longer. Enjoy making this tasty bread with confidence!

If you’re craving a sweet treat bursting with flavor, look no further! This Lemon Blueberry Bread is a fresh delight that combines bright citrus with juicy berries. In this article, …

Read more

Categories Desserts

Wholesome Blueberry Oatmeal Bars Simple and Tasty Treat

July 11, 2025 by Chef Miles
- 2 cups rolled oats - 1 cup whole wheat flour - 1/2 cup almond butter - 1/2 cup honey or pure maple syrup - 1 cup fresh or frozen blueberries These main ingredients form the heart of your wholesome blueberry oatmeal bars. The rolled oats give a chewy texture. Whole wheat flour adds fiber and nutrients. Almond butter provides healthy fats and binds the mixture. Honey or maple syrup sweetens it all naturally, while blueberries burst with flavor. - 1/4 cup chopped nuts (e.g., walnuts or almonds) - Optional spices for added flavor Nuts can add a nice crunch. They also boost protein. You can try adding cinnamon or nutmeg for extra warmth. Each add-in enhances your bars’ taste and texture. - 9x9 inch baking pan - Mixing bowls - Spatula and whisk The right tools help you make these bars easily. A 9x9 inch pan is perfect for baking. Mixing bowls are needed to combine your ingredients. A spatula helps you spread the mixture evenly, and a whisk makes mixing simple. For the full recipe, see the [Full Recipe]. - Preheat the oven to 350°F (175°C). - Line a 9x9 inch baking pan with parchment paper. Leave some paper hanging over the sides. This helps lift the bars out later. - In a large mixing bowl, add: - 2 cups rolled oats - 1 cup whole wheat flour - 1 teaspoon baking powder - 1 teaspoon ground cinnamon - 1/4 teaspoon salt - Whisk the dry ingredients together. Make sure they mix well. - In a different bowl, blend the wet ingredients: - 1/2 cup almond butter (or your choice of nut butter) - 1/2 cup honey or pure maple syrup - 1/2 cup unsweetened applesauce - Stir until the mixture is smooth. - Pour the wet mixture into the dry ingredients bowl. Mix gently until just combined. - Fold in: - 1 cup fresh or frozen blueberries - 1/4 cup chopped nuts (optional) - Be careful not to overmix. - Transfer the mixture to your prepared baking pan. - Spread it evenly, pressing down firmly. - Bake for 25-30 minutes. Look for golden edges. A toothpick should come out clean from the center. - Let the bars cool in the pan for 10 minutes. - Lift the bars out using the parchment paper. Move to a wire rack to cool completely. - Slice into 12 squares. These wholesome blueberry oatmeal bars are now ready to eat! For the full recipe, refer back to the ingredients section. Enjoy your tasty treat! To get the best texture and flavor, focus on your mixing. Mix the dry and wet ingredients separately first. This helps keep the oatmeal bars light and fluffy. When you combine them, stir gently. Overmixing can make your bars tough. For moisture, use fresh blueberries if you can. They add juice and flavor. If you use frozen ones, thaw them first. They can release too much water during baking. Adjust the applesauce a bit if your mixture seems dry. You want a thick but smooth batter. Presentation matters! Wrap your oatmeal bars in parchment paper. It adds a nice touch. You can also serve them on a wooden board. Drizzle a little honey on top for sweetness. These bars pair well with tea or coffee. The warm drinks balance the sweetness of the bars. You can also enjoy them with yogurt for a tasty breakfast. Making these bars ahead of time is easy. You can mix your dry ingredients a day before. Store them in an airtight container to keep them fresh. Bake your bars the night before you serve them. This way, they stay fresh and tasty. Let them cool completely before cutting. If you need to store them, keep them sealed to maintain their flavor. {{image_4}} You can switch up your nut butter. Try peanut butter, cashew butter, or sunflower seed butter. Each adds a unique flavor. For sweeteners, use agave syrup or brown sugar. Both can work well in this recipe. They will change the taste slightly, but still keep it delicious. Adding spices can make your bars pop. Try a pinch of nutmeg or ginger for warmth. You might also like to mix in dried fruits like cranberries or apricots. Another fun option is to add dark chocolate chips. They melt beautifully and add a sweet touch. Want gluten-free bars? Use gluten-free oats and a suitable flour mix. This will keep the texture nice. If you follow a vegan diet, swap the honey for maple syrup. You can also replace the almond butter with a seed butter. These changes keep your bars tasty and fit your needs. To keep your oatmeal bars fresh, store them at room temperature. Place them in an airtight container. This keeps them soft and moist. You can also wrap them in plastic wrap or parchment paper. They stay tasty for about 3 to 5 days this way. If you want a little crunch, try leaving them uncovered for a few hours. For longer storage, freezing is your best friend. Wrap each bar tightly in plastic wrap. Then place them in a freezer-safe bag or container. This prevents freezer burn and keeps them fresh. They can last up to three months in the freezer. Just remember to label the bag with the date. When you're ready to enjoy a bar, thaw it in the fridge overnight. For a quick fix, leave it at room temperature for an hour. If you prefer warm bars, you can reheat them. Use a microwave for about 15-20 seconds. This warms them up nicely without drying them out. Enjoy the warm, gooey goodness! You can tell the bars are done when the edges are golden brown. Also, insert a toothpick into the center. If it comes out clean, the bars are ready. If there’s batter on the toothpick, bake for a few more minutes. Keep an eye on them to avoid overbaking. Yes, you can easily make these bars gluten-free. Use gluten-free rolled oats and gluten-free flour instead of whole wheat flour. These swaps will keep the bars tasty and safe for those with gluten allergies. If your bars turn out dry, try adding more applesauce next time. You can also reduce the baking time slightly. Another idea is to include more nut butter. These changes can help keep the bars moist and chewy. These bars will last about a week at room temperature. If you store them in the fridge, they can last up to two weeks. Make sure to keep them in an airtight container to keep them fresh. In this blog post, I covered how to make delicious oatmeal bars. We went through the main ingredients, step-by-step instructions, and helpful tips. We also explored various ingredient swaps, dietary changes, and storage options. You can easily create a tasty treat that fits your needs. Remember, adjusting flavors and ingredients can make this recipe your own. Try experimenting to find what you love most. Enjoy the process and the tasty results!

Looking for a delicious and easy snack? You’ll love these Wholesome Blueberry Oatmeal Bars! They blend hearty oats with juicy blueberries for a treat packed with flavor. I’ll guide you …

Read more

Categories Desserts

Baked Zucchini Spinach and Feta Casserole Delight

July 11, 2025 by Chef Miles
Let's gather the ingredients for our Baked Zucchini Spinach and Feta Casserole. This dish is both tasty and healthy. Here’s what you need: - 3 medium zucchinis, thinly sliced - 2 cups fresh spinach, roughly chopped - 1 cup crumbled feta cheese - 1 cup creamy Greek yogurt - 3 large eggs - 1/2 cup freshly grated Parmesan cheese - 1 cup whole wheat breadcrumbs - 2 garlic cloves, finely minced - 1 teaspoon dried oregano - 1/2 teaspoon salt - 1/2 teaspoon freshly ground black pepper - 2 tablespoons olive oil - Fresh parsley, chopped, for garnish (optional) Each ingredient plays a special role. Zucchini brings moisture. Spinach adds nutrients. Feta gives a nice salty flavor. Greek yogurt and eggs bind everything together. Parmesan and breadcrumbs create a crispy top. Garlic, oregano, salt, and pepper enhance the taste. Make sure you have everything ready before you start. This will help you stay organized and make cooking smoother. For the full recipe, check the instructions above. Happy cooking! Set your oven to 350°F (175°C). This step gets your oven hot enough for a perfect bake. While it heats, grab a 9x9-inch baking dish and grease it with olive oil or cooking spray. In a large skillet, pour in 2 tablespoons of olive oil. Heat it over medium heat. Once hot, add 2 finely minced garlic cloves. Sauté the garlic for about 1 minute. You want it fragrant, not burnt. Add 3 thinly sliced zucchinis and 2 cups of roughly chopped spinach to the skillet. Stir the veggies for about 5-7 minutes. You want them soft and slightly wilted. Once done, take the skillet off the heat and let it cool a bit. In a large bowl, crack 3 large eggs. Whisk them until smooth. Then mix in 1 cup of creamy Greek yogurt, 1 teaspoon of dried oregano, 1/2 teaspoon of salt, and 1/2 teaspoon of freshly ground black pepper. Make sure everything is well combined. Gently fold the cooled vegetable mix into the egg mixture. Be careful not to break the zucchini too much. Next, add 1 cup of crumbled feta cheese, mixing it evenly throughout. In a separate bowl, mix 1 cup of whole wheat breadcrumbs with 1/2 cup of freshly grated Parmesan cheese. Set this aside for your casserole topping. Pour the combined zucchini and spinach mixture into your greased baking dish. Spread it out evenly. Finally, sprinkle the breadcrumb and Parmesan mixture over the top. Place the casserole in your preheated oven. Bake for 30-35 minutes. Look for a golden brown top and a set center. This shows it’s done. Once baked, carefully take it out of the oven. Let it cool for a few minutes. This makes it easier to slice into squares. If you want, add freshly chopped parsley on top for color and taste. Serve the casserole warm for a delicious meal. For the complete process, check the Full Recipe. When you pick zucchini, look for firm ones. The skin should be shiny and smooth. Avoid any that have soft spots or wrinkles. Smaller zucchinis are often sweeter. They also have fewer seeds. If you can, buy organic zucchini for better taste and health. To boost flavor, add spices like cumin or smoked paprika. Fresh herbs like basil or dill can also make a big difference. Try adding a pinch of red pepper flakes for heat. A splash of lemon juice before serving brings out the flavors too. Mixing in some sun-dried tomatoes can add a nice twist. To avoid a soggy casserole, make sure to drain excess moisture from the zucchini. After slicing, you can sprinkle salt on the zucchini and let it sit. This helps draw out water. Pat it dry with a paper towel before mixing. Use whole wheat breadcrumbs for crunch. They absorb moisture better than white ones. For the full recipe, check out the detailed instructions above. {{image_4}} You can easily add protein to your baked zucchini spinach and feta casserole. Chicken is a great choice. Cook and shred about 1 cup of cooked chicken. Fold it into the veggie mix for extra flavor. Ground turkey or beef also works well. Just brown it in the skillet before adding the vegetables. This addition makes your casserole more filling and hearty. You can swap cheese for different tastes. Try goat cheese for a tangy kick. Mozzarella will give a creamy texture and mild flavor. If you want a stronger taste, use aged cheddar. Each cheese brings a unique flavor to the dish. Experiment with different cheeses to find your perfect match! For a vegan version, you can replace dairy with plant-based options. Use silken tofu instead of eggs and Greek yogurt. Blend it until smooth to achieve a creamy texture. Swap feta with crumbled tofu or a vegan cheese alternative. This way, you enjoy the same delicious casserole without any animal products. To store leftovers, let the casserole cool first. Once it’s cool, cover it tightly with plastic wrap or aluminum foil. You can also use an airtight container. Place it in the fridge. The casserole stays fresh for about 3 to 4 days. This way, you can enjoy it again without losing flavor. If you want to freeze portions, slice the casserole first. Wrap each piece tightly in plastic wrap. Then, place the wrapped pieces in a freezer-safe bag or container. Be sure to label it with the date. The casserole can last in the freezer for up to 3 months. This is a great way to save some for later! When it’s time to eat, you can reheat the casserole. For best results, use the oven. Preheat the oven to 350°F (175°C). Place the casserole in an oven-safe dish and cover it with foil. Heat for about 20-25 minutes until warmed through. You can also use the microwave. Place a slice on a microwave-safe plate and heat for 1-2 minutes. Just be careful not to overcook it! Enjoy your Baked Zucchini Spinach and Feta Casserole again with all its tasty goodness. For the full recipe, check out the previous section. The casserole can last about 3 to 5 days in the fridge. Make sure to store it in an airtight container. This keeps flavors fresh and prevents drying out. Always let it cool before covering. Yes, you can use frozen spinach. It’s a great time-saver and easy to find. Just remember to thaw and drain it well. This step removes excess water. Too much moisture can make the casserole soggy. Fresh spinach offers a brighter flavor, but frozen works nicely too. You can tell the casserole is done when the top is golden brown. The edges should pull away slightly from the dish. A knife inserted in the center should come out clean. If it’s still wet, bake for a few more minutes. This casserole pairs well with a fresh salad or crusty bread. A light vinaigrette on the salad adds a nice touch. You can also serve it with grilled chicken or fish for protein. For a vegetarian meal, add some roasted veggies on the side. Check out the Full Recipe for more ideas on flavors! This blog post shared a tasty zucchini casserole recipe. You learned about the fresh ingredients, step-by-step cooking guide, and helpful tips. I emphasized variations and storage methods to fit your needs. In my view, this casserole is a great way to enjoy veggies. It’s simple and adaptable for any meal. I hope you try it and impress your family with this dish. Happy cooking!

Looking for a tasty dish that’s easy to make and packed with nutrients? This Baked Zucchini Spinach and Feta Casserole Delight is just what you need! With fresh ingredients like …

Read more

Categories Dinner

Savory Summer Squash and Corn Chowder Recipe

July 10, 2025 by Chef Miles
- 2 medium summer squashes, diced - 1 cup fresh or frozen corn kernels - 1 medium onion, finely chopped - 2 cloves garlic, minced - 4 cups vegetable broth - 1 cup creamy coconut milk - 1 tablespoon extra-virgin olive oil - 1 teaspoon thyme (fresh or dried) - Salt and pepper to taste - Fresh basil leaves, for garnish When you gather these ingredients, think about the bright colors and fresh flavors. The summer squash adds a lovely texture and sweetness. The corn brings a juicy pop with every bite. Onion and garlic form a strong, tasty base. They will make your kitchen smell amazing. The vegetable broth serves as a rich foundation. It enhances the taste of all the veggies. The creamy coconut milk adds a luscious touch. It gives the chowder depth and balances the flavors. Make sure to season well with thyme, salt, and pepper. These spices elevate the dish. Finally, fresh basil leaves add a burst of flavor and color. They make your chowder look and taste gourmet. For the full recipe, check out the Sunny Summer Squash & Corn Chowder. Enjoy the cooking process as much as the eating! - Step 1: Sauté onion and garlic Start by warming olive oil in a large pot over medium heat. When the oil shimmers, add the chopped onion. Cook it for about five minutes until it gets soft and clear. Then, add the minced garlic. Cook for one more minute, stirring so it does not burn. The smell will fill your kitchen and get you excited for what's next. - Step 2: Add summer squash and corn Next, toss in the diced summer squash and corn. Stir everything together. This helps the flavors mix well. Cook for around four minutes until the squash starts to soften. You want it to be tender but still hold its shape. - Step 3: Season with thyme, salt, and pepper Now, season your mixture with thyme, salt, and pepper. This step is key for creating depth in flavor. Stir to coat the vegetables evenly. Cook for three to four minutes. This will allow the seasonings to bloom and enhance the taste. - Step 4: Pour in vegetable broth and simmer Carefully pour in the vegetable broth. Raise the heat to bring it to a gentle boil. Once it starts to bubble, reduce the heat and let it simmer uncovered for about fifteen minutes. The squash should be soft enough to pierce with a fork. This simmering step is crucial for merging all those lovely flavors. - Step 5: Blend the chowder to desired consistency After simmering, take an immersion blender and blend the chowder right in the pot. Blend until it’s smooth but leave some chunks for texture. If you don’t have an immersion blender, transfer half to a regular blender, blend, and return it to the pot. This will give your chowder a nice creamy but chunky feel. - Step 6: Stir in coconut milk and adjust seasoning Finally, stir in the creamy coconut milk. Let the chowder heat through for about five minutes. Taste it and adjust the seasoning with more salt and pepper if needed. The coconut milk adds a rich and velvety texture, making your chowder even more delicious. Enjoy your savory summer squash and corn chowder! For more details, check the Full Recipe. To make the best chowder, focus on texture. Use fresh summer squash. It gives a nice bite. Cook it until just tender. This keeps the squash from getting mushy. Blend just enough to keep some chunks. This adds character to your chowder. Balancing flavors is key. Start with onion and garlic. They build a strong base. Add thyme for earthiness. Adjust salt and pepper to taste. Taste often during cooking. This helps you find the right balance. Fresh corn is great, but you can use frozen. It saves time and still tastes good. If you can't find corn, try canned corn. Just drain and rinse it well. For a vegan option, swap coconut milk with almond or soy milk. These give a lighter taste. You can also use cashew cream for a richer flavor. Choose vibrant bowls for serving. A splash of coconut milk on top makes it pretty. Fresh basil leaves add a nice touch. You can also sprinkle some chili flakes for heat. Pair your chowder with crusty bread. It soaks up the lovely broth. A fresh salad makes a perfect side. These options add color and crunch, enhancing your meal. For the full recipe, check out the Sunny Summer Squash & Corn Chowder. {{image_4}} You can boost your chowder by adding proteins. Beans or tofu are great choices for a vegetarian option. Simply stir in a cup of cooked beans or diced tofu during the simmering stage. If you prefer meat, add cooked chicken or seafood. Shredded rotisserie chicken works well and saves time. For seafood, shrimp or crab can add a lovely twist. To spice things up, try adding jalapeños. Just a few diced jalapeños can bring heat and flavor. If you want a fresh aroma, consider adding herbs. Fresh cilantro or dill can enhance the taste. You can also mix in a splash of lime juice for a zesty finish. To make this chowder vegan, ensure your vegetable broth is plant-based. Coconut milk is already vegan-friendly, adding creaminess without dairy. For gluten-free chowder, check that your broth and any added ingredients are gluten-free. This way, everyone can enjoy this tasty dish without worry. For more details, check the Full Recipe. After enjoying your chowder, let it cool down. Transfer it to an airtight container. Store it in the refrigerator for up to three days. For longer storage, freeze it. Use freezer-safe containers or bags. Leave some space for expansion, as liquids can expand when frozen. To reheat, use the stove or microwave. If using the stove, pour the chowder into a pot. Heat over low to medium heat. Stir often to keep it from sticking. If using a microwave, heat in short bursts, stirring in between. This keeps the flavor and texture intact. In the fridge, your chowder lasts about three days. If it smells sour or looks cloudy, discard it. Signs of spoilage include off smells and changes in color. Always trust your senses to keep food safe. What can I serve with corn chowder? Corn chowder pairs well with crusty bread. You can also serve it with a fresh salad. Both add nice textures. For a fun twist, try it with grilled cheese. The warm bread complements the chowder's creaminess. Can I make this chowder ahead of time? Yes, you can make this chowder ahead. It keeps well in the fridge for up to three days. Just reheat it on the stove before serving. The flavors actually deepen overnight! How healthy is summer squash chowder? Summer squash chowder is quite healthy. It has lots of veggies, which are low in calories. The coconut milk adds healthy fats, too. It's a great source of vitamins and nutrients. Are there ways to make it lower in calories? To lower the calories, use less coconut milk. You can use low-fat milk or broth instead. Also, cut back on the olive oil if you want. This way, you keep the flavor but reduce the fat. What to do if the chowder is too thick? If your chowder is too thick, add more broth. Start with half a cup and stir well. Let it simmer a bit to blend everything. This will bring it back to the right consistency. How can I add more flavor if it tastes bland? For more flavor, try adding more spices. A pinch of cayenne pepper can add heat. You can also squeeze in some lemon juice. Fresh herbs like parsley or cilantro can brighten the dish, too. In this article, we covered how to make a fresh summer squash and corn chowder. You learned about the main ingredients, especially the key veggies and creamy elements. We detailed each cooking step to build flavor. Helpful tips on variations, storage, and serving were shared, too. With these insights, you can create a delightful chowder for any meal. Enjoy experimenting with flavors and making it your own. This recipe will surely become a favorite!

If you’re looking for a comforting dish that captures the essence of summer, my Savory Summer Squash and Corn Chowder recipe is just what you need. This delicious chowder combines …

Read more

Categories Dinner

Parmesan Zucchini Potato Muffins Savory and Simple Dish

July 10, 2025 by Chef Miles
- Zucchini: 1 cup, finely grated - Potato: 1 cup, finely grated (approximately 1 medium potato) - Parmesan cheese: 1 cup, grated - All-purpose flour: 1 cup - Eggs: 2 large - Milk: 1/2 cup - Extra virgin olive oil: 1/4 cup - Baking powder: 1 teaspoon - Baking soda: 1/2 teaspoon - Garlic powder: 1 teaspoon - Salt and freshly cracked black pepper, to taste - Chopped fresh herbs (e.g., parsley or chives) for garnish These ingredients create a great mix of flavors. The zucchini and potato give the muffins a soft texture. Parmesan cheese adds a savory touch. The eggs and flour bind everything together. Olive oil keeps them moist. Baking powder and baking soda help them rise well. Seasoning and herbs make every bite tasty. When making these muffins, use fresh ingredients for the best taste. Grate the zucchini and potato finely to help with moisture control. This step is key for a firm muffin. You can find the full recipe to enjoy these delightful muffins. Preheat your oven to 375°F (190°C). Grab a muffin tin and line it with paper liners or grease it lightly with olive oil. This step helps the muffins come out easily. In a large bowl, combine the finely grated zucchini and potato. Use your hands or a clean towel to squeeze out any extra moisture. This helps the muffins stay firm. Next, add in the flour, grated Parmesan cheese, baking powder, baking soda, garlic powder, salt, and pepper. Mix these dry ingredients until they just blend with the vegetables. In another bowl, whisk together the eggs, milk, and olive oil until smooth. This mixture adds moisture and richness to the muffins. Carefully pour the wet mixture into the bowl with the dry ingredients. Stir gently until just combined. Do not overmix; it's okay if there are a few lumps. Overmixing can make the muffins tough. Spoon the batter into your prepared muffin tin, filling each cup about three-quarters full. This allows the muffins to rise nicely. Bake in the preheated oven for 20 to 25 minutes. They are done when they turn golden brown and a toothpick comes out clean from the center. Once baked, take the muffin tin out of the oven. Let the muffins cool in the tin for about 5 minutes. After that, gently transfer them to a wire rack to cool completely. Before serving, sprinkle some chopped fresh herbs on top for a burst of color and flavor. Enjoy these muffins warm or at room temperature! For the full recipe, check out the details above. To get the best texture in your muffins, you need to squeeze out excess moisture. Zucchini and potatoes hold a lot of water. If you skip this step, your muffins may turn out too soggy. After grating the zucchini and potato, take a clean kitchen towel. Wrap them up and squeeze firmly. Remove as much liquid as you can. This makes for a firmer muffin that holds its shape better. Don't be afraid to experiment with flavors! You can try using different cheeses like cheddar or feta. Adding herbs like thyme or rosemary can also change the taste. Each ingredient you swap can create a new muffin experience. Think of what flavors you love and mix them in. This way, you can make these muffins your own. When it's time to serve, add a sprinkle of extra Parmesan cheese on top. Fresh herbs like parsley or chives add a nice touch too. Pair these muffins with a warm bowl of soup or a crisp salad. They make a great side dish or a light meal. Enjoy them warm for the best flavor. Check out the Full Recipe for details on how to prepare this tasty dish! {{image_4}} You can easily make these muffins gluten-free. Just swap the all-purpose flour with a gluten-free flour blend. Look for blends that include a mix of rice flour, tapioca flour, and xanthan gum for the best results. This change keeps the muffins soft and tasty without the gluten. To make these muffins vegan, use flax eggs instead of regular eggs. Mix one tablespoon of ground flaxseed with three tablespoons of water. Let it sit for five minutes to thicken. For milk, choose any non-dairy milk you like, such as almond or oat milk. These swaps keep the muffins moist and delicious while making them plant-based. If you crave some heat, add a spicy twist to your muffins. Toss in chopped jalapeños or a pinch of red pepper flakes. This adds a lovely kick that pairs well with the cheesy flavor. Adjust the amount to suit your taste. You can always start small and add more if you want extra spice. Keep your Parmesan Zucchini Potato Muffins in an airtight container. They stay fresh at room temperature for up to 3 days. This way, you can enjoy them for breakfast or a quick snack. To freeze muffins, place them in a single layer on a baking sheet. Once frozen, transfer them to a freezer bag. This keeps them good for up to 3 months. When you want a muffin, just take one out and let it thaw. You can reheat your muffins in the microwave. Just heat them for about 15-20 seconds. Alternatively, use a toaster oven for a crispier texture. Simply toast until warm and enjoy! For the full recipe, check back to the beginning. - Follow the detailed step-by-step instructions provided above. - Yes, you can substitute vegetables like carrots or spinach for variation. This adds new flavors and colors. You could try sweet potatoes for a sweet twist. Mixing veggies keeps it fun! - These muffins pair well with salad, soup, or as a brunch item. A light green salad adds freshness. A warm soup makes it cozy. They are great for any meal! - They can last up to 3 days at room temperature or 3 months in the freezer. Store them in an airtight container. Thaw frozen muffins overnight for best results. - You can use any hard cheese or nutritional yeast for a dairy-free option. Cheddar or Pecorino can work well. Nutritional yeast gives a nice cheesy flavor without dairy. In this post, I covered how to make delicious Parmesan Zucchini Potato Muffins. We looked at key ingredients, step-by-step instructions, and tips for perfect texture and flavor. You can even try gluten-free or vegan options. These muffins are simple to make and packed with flavor. Store leftovers for later or serve them fresh. Enjoy this tasty treat, whether with soup, salad, or on their own. I hope you find joy in making and sharing these muffins!

Looking for a tasty and simple dish to impress your family? These Parmesan Zucchini Potato Muffins are the answer! Packed with flavor and easy to make, they combine fresh zucchini, …

Read more

Categories Appetizers

Sautéed Carrots and Zucchini Flavorful Side Dish

July 10, 2025 by Chef Miles
To make sautéed carrots and zucchini, gather these key ingredients: - 2 medium zucchinis, sliced into half-moons - 3 medium carrots, peeled and julienned - 1 red bell pepper, cored and thinly sliced - 1 small red onion, peeled and thinly sliced - 3 cloves garlic, minced - 2 tablespoons olive oil - 1 teaspoon dried thyme - 1/2 teaspoon smoked paprika - Salt and freshly ground black pepper, to taste - Fresh parsley, chopped (for garnish) - Zest of 1 lemon You can enhance the flavor of your sautéed carrots and zucchini with these optional ingredients: - A pinch of red pepper flakes for heat - 1 tablespoon of balsamic vinegar for sweetness - Fresh herbs like basil or oregano for freshness - A sprinkle of cheese, such as feta or parmesan, for richness Sautéed carrots and zucchini are not just tasty; they are also healthy. Here’s a quick look at the nutrition per serving: - Calories: Approximately 120 - Protein: 3 grams - Carbohydrates: 14 grams - Dietary Fiber: 4 grams - Sugars: 4 grams - Fat: 7 grams (mostly from olive oil) This dish is low in calories and high in fiber, making it a great choice for a light side. You can find the full recipe for this vibrant medley above. Enjoy cooking and sharing this healthy side! Start by grabbing a large skillet. Place it over medium heat. Pour in 2 tablespoons of olive oil. Let the oil heat for about 1 minute. It should shimmer but not smoke. This step is key for a nice sauté. Next, add the sliced red onion to the skillet. Stir it well and cook for about 2 minutes. You want the onion to soften and turn slightly clear. Now, add 3 minced garlic cloves. Sauté for 1 more minute. The garlic should smell great, but don’t let it burn. Now it’s time for the carrots. Add 3 julienned carrots to the skillet. Cook them for 3-4 minutes, stirring often. They should begin to soften but still have some crunch. Then, gently fold in the sliced zucchini and red bell pepper. Cook everything together for 5-7 minutes. You want the veggies tender but not mushy. Finally, season your dish. Sprinkle in 1 teaspoon of dried thyme, 1/2 teaspoon of smoked paprika, salt, and black pepper. Mix it all well. This is when the flavors come together beautifully. Don’t forget to finish by adding the zest of 1 lemon. Toss the veggies gently to mix in the zest. It adds a fresh, bright note to your dish. Transfer the colorful sautéed vegetables to a serving dish and top with chopped parsley for a lovely touch. This full recipe is perfect for a side or a main dish if served over quinoa. To sauté vegetables well, start with a hot pan. Heat your skillet over medium heat. Add the olive oil and let it warm up for about one minute. When you add the onions, they should sizzle. This sound means you're on the right track. Stir the onions until they soften. This takes about two minutes. Next, add garlic. Garlic cooks fast, so keep an eye on it. You want it fragrant, not burnt. After that, add the carrots. They take longer to cook, so give them a few minutes before adding the zucchini. Zucchini cooks quickly and should stay a bit crisp. Stir often for even cooking. One common mistake is overcrowding the pan. If you add too many vegetables, they will steam instead of sauté. This ruins the texture. Always use a large enough skillet for your vegetables. Another mistake is not using enough heat. If your pan is not hot enough, the veggies won’t brown. Also, don’t skip the seasoning. Adding salt and spices enhances the flavor. Lastly, don’t overcook your vegetables. They should be tender but still have a bite. Garnishing adds a nice touch to your dish. Fresh herbs like parsley or basil brighten up the plate. Lemon zest also adds a fresh kick. You can sprinkle some on top before serving. For a crunch, try adding toasted nuts or seeds. They give great texture and flavor. When serving, place your sautéed carrots and zucchini on a colorful plate. A vivid presentation makes the dish more appealing. Enjoy your meal with a side of lemon wedges for extra zing! For the full recipe, check the section above. {{image_4}} You can easily mix in other veggies for a unique taste. Try adding bell peppers, mushrooms, or snap peas. These vegetables cook quickly and add color to your dish. Just remember to cut them into similar sizes to ensure even cooking. You can also use seasonal vegetables like asparagus in the spring or butternut squash in the fall. Each addition makes the dish a bit different and exciting. Seasonal ingredients can make your sauté even better. In the summer, add fresh corn or cherry tomatoes. This gives a sweet burst of flavor. In the fall, consider adding diced sweet potatoes or autumn squash. These will create a warm and hearty dish. Using what's in season not only tastes good but also supports local farmers. It’s a win-win for your meals and your community. Herbs and spices can take your sautéed carrots and zucchini to the next level. For a fresh taste, try basil or dill. Use these right at the end of cooking. If you like a bit of heat, add red pepper flakes or a dash of cayenne. For a smoky flavor, smoked paprika works wonders. Don’t be shy! Experiment with different herbs and spices to find your favorite blend. This is a great way to make the dish your own. For the full recipe, check out the Vibrant Sautéed Carrots & Zucchini Medley. Once you've enjoyed your sautéed carrots and zucchini, store any leftovers in an airtight container. Keep it in the fridge for up to three days. Make sure the veggies cool down before sealing the container. This helps keep them fresh and tasty. To reheat, place the leftovers in a skillet over medium heat. Stir them occasionally for about five minutes. You can also use a microwave. Heat the vegetables in a bowl for one to two minutes. If using the microwave, cover the bowl to keep moisture in. You can freeze sautéed carrots and zucchini for later use. First, let the veggies cool completely. Then, scoop them into a freezer-safe bag or container. Remove as much air as possible, and label it with the date. These will stay good in the freezer for up to two months. When you're ready to eat, thaw them in the fridge overnight before reheating. This simple storage process helps you enjoy your vibrant sautéed carrots and zucchini even longer. For the full recipe, check out the Vibrant Sautéed Carrots & Zucchini Medley. Yes, you can prepare sautéed carrots and zucchini ahead of time. Cook the vegetables as described in the Full Recipe. Let them cool, then store them in an airtight container in the fridge. These veggies will stay fresh for about three days. When you are ready to serve, just reheat them in a skillet over low heat until warmed through. Sautéed carrots and zucchini pair well with many dishes. Here are some ideas: - Grilled chicken or fish for a light meal. - Quinoa or rice for a hearty side. - A fresh salad to add more greens. - Pasta with a light sauce for a colorful plate. These options create a balanced meal, making it easy to enjoy this tasty vegetable medley. Adding protein to sautéed carrots and zucchini is simple. You can mix in cooked chicken, shrimp, or tofu. Try these tips: - Dice cooked chicken or shrimp and mix it in during the last few minutes of cooking. - For tofu, sauté it separately until golden before adding it to the vegetable mix. - You can also sprinkle in some cooked beans like chickpeas or black beans for a plant-based option. These additions not only boost protein but also make your dish more filling. This blog post covered sautéing carrots and zucchini, from ingredients to storage tips. I shared steps to prepare these veggies and ways to avoid common mistakes. I also provided delicious variations and garnishing ideas. Remember, practice helps perfect your skills. Enjoy experimenting with flavors to make the dish your own. With patience and a little creativity, you can make a tasty meal that’s good for you too.

Looking for a tasty side dish that’s both colorful and nutritious? You’ve found it! Sautéed carrots and zucchini make for a delightful addition to any meal. With just a few …

Read more

Categories Dinner

Chocolate Zucchini Cake with a Cake Mix Delight

July 10, 2025 by Chef Miles
- 1 box chocolate cake mix - 2 medium zucchinis, finely grated (about 2 cups) - 3 large eggs - 1 cup vegetable oil - 1/2 cup semi-sweet chocolate chips - Powdered sugar for dusting Using a chocolate cake mix makes this recipe quick and fun. The zucchinis add moisture and a healthy twist. You can use any brand of chocolate cake mix you like. Look for a mix with a rich flavor. The zucchinis should be finely grated to blend well. This keeps the cake soft and tender. Eggs give the cake structure. They help it rise and hold together. Vegetable oil adds moisture and makes the cake rich. You can even use melted coconut oil for a unique taste. For extra chocolate flavor, try adding semi-sweet chocolate chips. They melt and create pockets of gooey goodness. Dusting the finished cake with powdered sugar makes it look pretty and adds a touch of sweetness. This Chocolate Zucchini Cake with a Cake Mix is perfect for any occasion. Check out the Full Recipe for more details! 1. First, preheat your oven to 350°F (175°C). This step is key for a great bake. 2. Next, prepare your baking dish. Grease it well and lightly dust it with flour. You can use a 9x13 inch dish or two round 9-inch pans, depending on what you like best. 3. In a large mixing bowl, combine the chocolate cake mix and the finely grated zucchini. This adds moisture and a secret veggie boost! 4. Now, add three large eggs, one cup of vegetable oil, and one teaspoon of pure vanilla extract. 5. Then, pour in one cup of granulated sugar, half a teaspoon of salt, and one teaspoon of baking powder. Use a whisk or a spatula to mix everything until just combined. 6. Be careful not to over-mix! This can change the cake's texture and make it less fluffy. 7. If you love chocolate, gently fold in half a cup of semi-sweet chocolate chips. This is optional but highly tasty! 1. Carefully pour the batter into your prepared baking dish. If you are using round pans, divide the batter evenly. 2. Use a spatula to smooth the top if needed. 3. Place the dish or pans in your preheated oven and bake for 30 to 35 minutes. 4. To check if the cake is done, insert a toothpick into the center. It should come out clean or have a few moist crumbs. 5. Once the baking time is up, let the cake cool in the pan for about 10 minutes. 6. After that, carefully remove the cake from the pan. Transfer it to a wire rack to cool completely. 7. For a nice finish, dust the top with powdered sugar just before serving. This adds a sweet touch! You can find the full recipe above. Enjoy this delightful chocolate-zucchini treat that’s perfect for any occasion! How to avoid over-mixing: Mixing too much can make your cake tough. I suggest stopping when you see no dry cake mix left. A few lumps are fine. They will bake out. This gives your cake a tender crumb. Ensuring even baking: To make sure your cake bakes evenly, rotate your pan halfway through baking. This helps it cook evenly all around. Also, avoid opening the oven door too soon. Doing so can cause the cake to sink. Dusting with powdered sugar: Once the cake cools, dust it lightly with powdered sugar. This adds a sweet touch and makes it look fancy. Use a fine mesh sieve for a nice even layer. Serving suggestions: Serve slices with whipped cream or vanilla ice cream. You could also add fresh berries on the side. This adds color and flavor to your plate. For more ideas, check the Full Recipe for fun ways to serve! {{image_4}} You can make this chocolate zucchini cake even better with fun add-ins. Here are some ideas: - Nuts: Adding nuts like walnuts or pecans brings a nice crunch. Chop them up and fold them in gently. This adds texture and flavor to your cake. - Different types of chocolate chips: You can switch up the chocolate chips too. Use dark chocolate, white chocolate, or even mint chocolate chips. Each type will change the taste and look of your cake. The frosting can change your cake’s look and taste. Here are some great options: - Cream cheese frosting: This frosting is creamy and slightly tangy. It pairs well with the sweet chocolate. Make it by mixing cream cheese, butter, and powdered sugar. - Chocolate ganache options: A rich chocolate ganache makes your cake feel fancy. To make ganache, heat cream and pour it over chocolate. Stir until smooth, then spread it on the cooled cake. These variations can help you create your perfect chocolate zucchini cake. Feel free to mix and match to find your favorite! For the complete recipe, check out the [Full Recipe]. To keep your chocolate zucchini cake fresh, let it cool completely. After it cools, wrap it tightly in plastic wrap. This keeps the cake moist and tasty. You can also place it in an airtight container. A glass or plastic container works best. Make sure to store the cake in a cool, dry place. If your kitchen is warm, the fridge is a great option. It will last up to five days in the fridge. Just remember to allow it to come to room temperature before serving. Want to save some cake for later? Freezing is a great option! First, cut the cake into slices. This makes it easy to grab a piece later. Wrap each slice in plastic wrap. Then, place the wrapped slices in a freezer bag. Make sure to remove as much air as possible before sealing. Label the bag with the date. You can freeze the cake for up to three months. When you're ready to eat a slice, take it out and let it thaw in the fridge overnight. You can enjoy your chocolate zucchini cake whenever you like! For the full recipe, check out the guide above. How moist is the chocolate zucchini cake? The chocolate zucchini cake is very moist. The grated zucchini adds moisture, making each bite soft and rich. This cake stays fresh and delicious for days. It's perfect for a sweet treat anytime. Can I replace zucchini with another fruit or vegetable? Yes, you can! If you don't have zucchini, try using applesauce or grated carrots. Both options will keep the cake moist. Each choice will give a unique flavor, so feel free to experiment. What to do if the cake is too dense? If your cake is too dense, check if you over-mixed the batter. Over-mixing can lead to a heavy texture. Next time, mix just until combined. Also, ensure you measure the zucchini correctly; too much zucchini can affect the cake's rise. How to tell if the cake is done baking? To check if the cake is done, insert a toothpick into the center. If it comes out clean or with a few moist crumbs, the cake is ready. If the toothpick has wet batter, bake it for a few more minutes. Always trust the toothpick test! This blog post covered how to make a delicious chocolate zucchini cake. We discussed the main and optional ingredients, from cake mix to chocolate chips. You learned simple steps for mixing and baking, along with tips to ensure perfect results. We also explored fun variations and storage methods. Enjoy experimenting with this recipe. Your friends and family will love this twist on classic cake. Remember, creativity is key in the kitchen. Happy baking!

Are you ready to bake a chocolate cake that’s both delicious and a bit healthier? This Chocolate Zucchini Cake with a Cake Mix is perfect for anyone looking for a …

Read more

Categories Desserts
Older posts
Newer posts
← Previous Page1 … Page71 Page72 Page73 … Page113 Next →

MELTED RECIPES

where delicious ideas melt into life, from stovetop to backyard. Always warm, simple, and irresistibly satisfying. 🍳🔥🧀

PAGES

Home About Contact Privacy Policy Terms & Conditions Cookie Policy GDPR Policy Copyright Policy Disclaimer

CATEGORIES

Appetizers Desserts Salads Breakfast Dinner

Contact

  • Pinterest
  • Mail
Copyright © 2025 Melted Recipes. All rights reserved.