Skip to content
Melted Recipes
  • Home
  • Appetizers
  • Desserts
  • Salads
  • Breakfast
  • Dinner
  • Privacy Policy
  • Contact
  • About

Chef Miles

Amazing Italian Cream Cake Delightful and Simple Recipe

July 18, 2025 by Chef Miles
- 2 cups all-purpose flour - 1 teaspoon baking soda - 1 teaspoon baking powder - 1/2 teaspoon salt - 1 cup unsalted butter, softened to room temperature - 2 cups granulated sugar - 4 large eggs, separated into yolks and whites - 1 teaspoon pure vanilla extract - 1 cup buttermilk, at room temperature - 1 cup shredded coconut, lightly toasted - 1 cup pecans, finely chopped - 1/2 cup cream cheese, softened - 2 cups powdered sugar, sifted - 1/4 cup milk, more if needed for consistency - 1 teaspoon pure vanilla extract (for frosting) When I make Italian cream cake, I always use fresh ingredients. This makes a big difference in flavor. The butter should be soft. It mixes better with sugar. The eggs need to be separated. This helps the cake rise. I love using buttermilk. It adds a nice tang. The shredded coconut gives a chewy texture. I toast the coconut for extra flavor. Chopped pecans add crunch and richness. For the frosting, I use cream cheese. It makes the cake taste creamy and smooth. Make sure to sift the powdered sugar. This helps to avoid lumps. Having the right tools is key to success. Use an electric mixer for smooth batter. Good measuring cups help keep track of amounts. Cake pans should be well-greased. This keeps the cake from sticking. If you want the full recipe, check out the complete guide to making this cake! First, preheat your oven to 350°F (175°C). This ensures your cake bakes evenly. Next, grease and lightly flour three 9-inch round cake pans. This step helps prevent sticking. Set your pans aside while you prepare your dry ingredients. In a medium mixing bowl, sift together the all-purpose flour, baking soda, baking powder, and salt. Sifting makes sure there are no lumps. Combine these well and set aside for later. In a large mixing bowl, cream the softened butter and granulated sugar. Use an electric mixer on medium speed. Mix this for about 3-5 minutes. You want it light and fluffy. Now, add the egg yolks one at a time. Make sure to mix well after each addition. Stir in the vanilla extract until it is fully mixed. Gradually add the dry mixture to the butter mixture. Alternate this with the buttermilk. Start with one-third of the flour, then half the buttermilk. Repeat this, ending with the flour. Mix until just combined; do not over-mix. Gently fold in the shredded coconut and chopped pecans until they are evenly spread throughout the batter. In a clean bowl, beat the egg whites on high speed until stiff peaks form. Carefully fold the beaten egg whites into the batter in three parts. Be gentle to keep the air in the batter. Evenly divide the batter among the prepared cake pans. Bake in the preheated oven for 25-30 minutes. Check with a toothpick; it should come out clean. Once baked, let the cakes cool in the pans for about 10 minutes. Then, transfer them to wire racks to cool completely. To make the best Italian Cream Cake, measure your ingredients carefully. Accurate measurements ensure the right texture. Use a kitchen scale for the best results. Mixing technique is key too. Cream the butter and sugar until fluffy. This step adds air, making your cake light and soft. When you add dry and wet ingredients, mix gently. Over-mixing can make the cake dense. The frosting should be smooth and creamy. To reach this, beat the cream cheese until it is soft. Gradually add the powdered sugar and milk. Adjust the milk for the right consistency. It should spread easily but not run off the cake. When frosting, use a spatula to apply an even layer. Start with the top, then work your way down the sides. Presentation is important for a stunning cake. Place slices on decorative plates. Add a sprinkle of toasted coconut on top. This gives a nice crunch and look. You can also add pecan halves for a touch of elegance. A simple garnish makes your cake stand out and look inviting. {{image_4}} You can switch up the flavors to keep things fresh. For a rich twist, try making a chocolate Italian cream cake. Simply add cocoa powder to the batter. This will give your cake a deep, chocolatey taste that blends well with the cream cheese frosting. If you like a bright, zesty flavor, add lemon zest to the batter. A tablespoon of fresh lemon zest can brighten up the cake. It adds a fun, tangy kick that pairs well with the sweetness of the frosting. You can easily make this cake fit different diets. For a gluten-free version, use a gluten-free flour blend. Make sure the blend has a good mix of starches and fibers. This way, you'll keep that light texture we love in Italian cream cake. If you're looking for vegan adaptations, replace the eggs with flaxseed meal. Mix one tablespoon of flaxseed meal with three tablespoons of water for each egg. Use almond milk instead of buttermilk and a vegan butter for the frosting. This way, everyone can enjoy this cake! While cream cheese frosting is amazing, you can explore other options. For a lighter feel, use whipped cream. Just whip heavy cream until soft peaks form. Add a bit of sugar to sweeten it up and a splash of vanilla for flavor. If you want something richer, try chocolate ganache. Heat cream and pour it over chopped chocolate. Let it sit, then stir until smooth. This will give your cake a luxurious, glossy finish. For the full recipe, refer to the main section. To keep your Italian cream cake fresh, wrap it well. Use plastic wrap or foil. Store it in the fridge for up to five days. For longer storage, slice the cake and freeze it. Place slices in a freezer bag. This helps keep them fresh for up to three months. Make sure to label the bag with the date. Your cake will stay fresh for about five days in the fridge. If you freeze it, it can last up to three months. Check for signs of spoilage. If you see mold or an off smell, it's time to toss it. A dry texture or changes in color are also signs that the cake is no longer good. To refresh your cake texture, use the oven. Preheat it to 350°F (175°C). Place the cake, wrapped in foil, in the oven for about 10 minutes. This warms it without drying it out. For slices, just microwave them for 10-15 seconds. This will keep the cake moist and tasty. You can easily make buttermilk at home. Mix one cup of milk with one tablespoon of vinegar or lemon juice. Let this sit for five minutes. This will give you a tangy flavor similar to buttermilk. You can also use plain yogurt or sour cream mixed with water as another option. Yes, you can make this cake a day in advance. Just bake it, cool it, and store it in an airtight container. You can frost it on the day you want to serve it. This makes it easier to plan for parties or gatherings. Yes, you can use fondant to decorate this cake. Just make sure the frosting is thick enough to support the fondant. You can roll the fondant out and place it over the cake. This will add a smooth look without changing the taste. Italian cream cake has roots in the Southern United States. It blends Italian flavors with Southern traditions. The cake often includes coconut and pecans, which reflect the ingredient availability in the South. This cake has become popular for celebrations and special occasions. You can tell the cake is done when a toothpick inserted in the center comes out clean. The edges should also pull away slightly from the pan. The top will look golden and will spring back when lightly touched. These signs help ensure a perfectly baked cake. This blog post outlined how to make an Italian cream cake. You learned about the right ingredients, useful tools, and easy steps. The tips shared help create the perfect texture and smooth frosting. If you want to switch things up, explore variations and dietary adaptations. Now it's time to bake and enjoy your creation! Happy baking!

Are you ready to indulge in a slice of heaven? This Amazing Italian Cream Cake combines rich flavors and textures with a simple recipe that anyone can master. With ingredients …

Read more

Categories Desserts

Chocolate Zucchini Muffins Easy and Delicious Recipe

July 18, 2025 by Chef Miles
- 1 medium zucchini, finely grated - 1 cup all-purpose flour - 1/2 cup unsweetened cocoa powder - 1/2 teaspoon baking soda - 1/2 teaspoon baking powder - 1/4 teaspoon salt - 1/2 cup granulated sugar - 1/2 cup light brown sugar, packed - 2 large eggs - 1/4 cup vegetable oil - 1 teaspoon vanilla extract - 1/2 cup semi-sweet chocolate chips (plus extra for topping) Gathering the right ingredients is key for great Chocolate Zucchini Muffins. Start with a medium zucchini. Grate it finely so it blends well in the batter. You'll need one cup of all-purpose flour for the base. Cocoa powder adds rich flavor, so grab half a cup of unsweetened cocoa powder. Baking soda and baking powder help the muffins rise, so have half a teaspoon of each. A pinch of salt, about a quarter teaspoon, enhances the flavors. For sweetness, use half a cup each of granulated and packed light brown sugar. This mix gives a nice depth of flavor. Don't forget two large eggs to bind everything together. You will also need a quarter cup of vegetable oil for moisture and a teaspoon of vanilla extract for aroma. Finally, grab half a cup of semi-sweet chocolate chips, plus a few extra for topping. This recipe is all about balance and taste, and these ingredients work together beautifully. For detailed instructions, check out the Full Recipe. 1. Preheat the oven: Set your oven to 350°F (175°C). This heat will cook the muffins perfectly. 2. Prepare the muffin tin: Line a standard muffin tin with cupcake liners. You can also spray the cups with non-stick cooking spray. This keeps the muffins from sticking. 1. Combine zucchini with sugars: In a large bowl, mix the grated zucchini with granulated sugar and light brown sugar. Use a spatula to blend them well. This step adds moisture and sweetness. 2. Sift and whisk dry ingredients: In another bowl, sift together the flour, cocoa powder, baking soda, baking powder, and salt. Whisk these to mix. This helps the muffins rise. 3. Mix wet ingredients with zucchini: Pour the eggs, vegetable oil, and vanilla extract into the zucchini mix. Stir until everything is smooth. This forms the base of your muffin batter. 1. Combine wet and dry mixtures: Gradually add the dry mix to the wet zucchini mix. Gently fold the batter with a spatula. Be careful not to overmix; this keeps them fluffy. 2. Fold in chocolate chips: Carefully add semi-sweet chocolate chips to the batter. Make sure to leave some for the top of the muffins. This adds extra chocolatey goodness. 3. Portion batter and bake: Scoop the batter evenly into the muffin cups, filling each about three-quarters full. Top with extra chocolate chips. Bake in the preheated oven for 18-20 minutes. Check with a toothpick; it should come out clean. Follow the [Full Recipe] to ensure you don’t miss any steps. - Mix carefully to keep muffins soft. Overmixing makes them tough. - Bake in a preheated oven for even cooking. A steady heat helps the muffins rise. - Use whole wheat flour for added fiber. It gives a nutty taste. - Try applesauce instead of some sugar. It keeps muffins moist and sweet. - Add cinnamon for warmth. It pairs well with chocolate. - Toss in nuts or seeds for crunch. Walnuts or chia seeds work great. Explore the [Full Recipe](#) for more details and tips! {{image_4}} You can make small changes to make these muffins healthier. One option is to use whole wheat flour instead of all-purpose flour. Whole wheat flour adds more fiber and nutrients. It gives the muffins a nutty flavor that pairs well with the chocolate. Another great swap is replacing oil with unsweetened applesauce. This keeps the muffins moist while cutting down on fat. Plus, applesauce adds a subtle sweetness. Your muffins will still taste great! Want to mix things up? Try adding different types of chocolate. You could use dark chocolate chips for a richer taste. White chocolate chips also work if you prefer a sweeter bite. You can also incorporate fruits like mashed bananas or chopped nuts. Bananas add natural sweetness and moisture. Nuts give a nice crunch and extra protein. Get creative with seasonal flavors! In the fall, add some pumpkin puree to the batter. Pumpkin and chocolate make a lovely pair. For summer, try mixing in fresh berries. Blueberries or strawberries can brighten the muffins. They also add a burst of flavor that feels refreshing. Feel free to explore these variations to make the recipe your own. Enjoy the process! You can find the full recipe above. To keep your chocolate zucchini muffins fresh, cool them properly. After baking, let them sit in the pan for about five minutes. This helps them set without getting soggy. Then, transfer the muffins to a wire rack. Cooling them completely allows air to circulate. Once cool, place the muffins in an airtight container. This keeps them moist and prevents them from drying out. You can stack them gently, but avoid squishing them. Freezing muffins is a great way to enjoy them later. To freeze, first make sure they are completely cool. Wrap each muffin in plastic wrap. Then, place the wrapped muffins in a freezer bag. Squeeze out as much air as you can. This prevents freezer burn. When you want to eat one, just take it out. Thaw the muffin at room temperature or pop it in the microwave for a few seconds. It will taste fresh! At room temperature, these muffins last about three days. Keep them in a cool place away from sunlight. If you want them to last longer, consider refrigerating them. In the fridge, they can stay good for about a week. Just remember to store them in an airtight container to keep them soft. Enjoy your chocolate zucchini muffins all week long with these simple tips! Yes, you can! Carrots work well in this recipe. They add sweetness and moisture. You can also try using finely grated pumpkin. Just make sure to keep the moisture content balanced. To make these muffins gluten-free, use a gluten-free flour blend. Brands like Bob’s Red Mill or King Arthur Flour have great options. You may also need to add a binding agent, like xanthan gum, to help with texture. If you don’t have zucchini, try using grated carrots or applesauce. Both add moisture and flavor. You can also use mashed bananas, which will slightly change the taste but still keep it delicious. To make these muffins vegan, replace the eggs with flax eggs. Mix one tablespoon of flaxseed meal with two and a half tablespoons of water. Let it sit until it thickens. You can also use a plant-based oil instead of vegetable oil. This recipe shows how to make tasty zucchini muffins. We covered the needed ingredients and step-by-step prep. Tips can help you improve your baking. You can also try fun variations and learn how to store muffins well. Now, you can bake delicious muffins that your friends and family will love! Use this guide to explore and enjoy your cooking journey. Baking can be fun and rewarding, so get started today!

Craving a sweet treat that’s also healthy? Look no further! My easy Chocolate Zucchini Muffins hide the rich taste of chocolate behind a soft, moist texture. You won’t even notice …

Read more

Categories Desserts

Grilled Sesame Chicken Simple and Flavorful Recipe

July 18, 2025 by Chef Miles
- 4 boneless, skinless chicken thighs - 3 tablespoons sesame oil - 2 tablespoons low-sodium soy sauce - 1 tablespoon honey - 2 tablespoons rice vinegar - 2 garlic cloves, finely minced - 1 inch piece of fresh ginger, grated - 1 teaspoon sesame seeds, toasted - 2 green onions, thinly sliced (for garnish) - Salt and freshly cracked pepper, to taste - Additional vegetables for grilling (bell peppers, zucchini) - Fresh herbs (cilantro, basil) for garnish - Calories: 290 - Protein: 23g - Carbs: 6g - Fats: 20g In this recipe, we use chicken thighs for their rich flavor and tenderness. The sesame oil and low-sodium soy sauce add depth to the dish without too much salt. Honey gives a nice sweetness, while rice vinegar adds tang. Fresh garlic and ginger bring warmth and aroma. Toasted sesame seeds add crunch and a lovely finish. You can also add grilled vegetables like bell peppers or zucchini for extra flavor and color. Fresh herbs like cilantro or basil can brighten up the dish and give it a fresh twist. For a nutritious meal, this recipe offers a good balance of protein and healthy fats. Each serving provides a hearty amount of protein, making it ideal for a satisfying dinner. You can find the full recipe in the earlier section. To make the marinade, start by whisking together a few key ingredients. In a large mixing bowl, combine 3 tablespoons of sesame oil, 2 tablespoons of low-sodium soy sauce, 1 tablespoon of honey, and 2 tablespoons of rice vinegar. Next, add 2 finely minced garlic cloves and 1 inch of freshly grated ginger. Whisk until everything mixes well. This marinade gives the chicken a rich and tasty flavor. Taste it and adjust the salt and freshly cracked pepper to your liking. Now it's time to marinate the chicken. Take 4 boneless, skinless chicken thighs and place them in the bowl with the marinade. Be sure each piece is fully covered. Cover the bowl with plastic wrap and put it in the fridge for at least 30 minutes. If you want more flavor, leave it for 1 to 2 hours. The longer it sits, the better it gets! Before grilling, preheat your grill to medium-high heat. Aim for around 375°F (190°C). After marinating, take the chicken thighs out and let any extra marinade drip off. Keep the leftover marinade for later. Grill the chicken for about 6 to 7 minutes on each side. You want the internal temperature to reach 165°F (75°C) to ensure it is fully cooked. Keep a close eye to prevent burning. While the chicken grills, take the reserved marinade and bring it to a gentle boil in a small saucepan. Let it simmer until it thickens slightly. This will be a delicious glaze to drizzle on your chicken. Once the chicken is done, let it rest for 5 minutes on a plate. This helps keep it juicy. After resting, slice the chicken or serve it whole, drizzle the thickened sauce on top, and finish with toasted sesame seeds and sliced green onions. Enjoy your meal! To avoid charring, keep an eye on the grill. Adjust the heat as needed. Use a medium-high setting, around 375°F (190°C). This will help cook the chicken evenly without burning it. To check for doneness, use a meat thermometer. Insert it into the thickest part of the chicken. It should read 165°F (75°C) when fully cooked. This ensures juicy, safe-to-eat chicken. To add more flavor, try adding spices like red pepper flakes or five-spice powder. Fresh herbs like cilantro can also boost the taste. For a sweet touch, add more honey or even a splash of orange juice. These simple tweaks make a big difference. For a beautiful platter, arrange the grilled chicken slices in a fan shape. Add a side of steamed rice or a fresh salad for color. Drizzle the sauce around the edges of the plate for flair. Top with toasted sesame seeds and green onions for a pop of color. This makes each plate inviting and tasty. You can find the full recipe in the earlier section. {{image_4}} You can make grilled sesame chicken even more exciting. Adding sesame seeds gives a nice crunch. You can also try other Asian spices. Consider using five-spice powder or chili flakes for heat. These spices will boost the flavor profile. You can also mix in some hoisin sauce for extra sweetness. Feel free to experiment with different combinations. If you want a lighter meal, try baking or air frying. Baking keeps the chicken moist and tender. Set your oven to 400°F (200°C) and cook for about 20-25 minutes. For air frying, set your air fryer to 375°F (190°C) for about 15-18 minutes. Both methods cut down on fat while keeping flavor intact. You’ll enjoy a healthier twist on this classic dish. If you need gluten-free options, look for gluten-free soy sauce. Brands like Tamari or coconut aminos work well. These alternatives offer similar taste without gluten. You can also swap honey for maple syrup if needed. Adjusting ingredients ensures everyone can enjoy this meal. Don't hesitate to make these swaps for a better fit! After making your grilled sesame chicken, let it cool. Place the leftovers in an airtight container. This keeps the chicken fresh for up to three days. Make sure to store it in the fridge right away. The sooner you refrigerate, the better the taste will be when you eat it later. If you want to keep your grilled chicken longer, freezing is a great option. Wrap each piece in plastic wrap, then place it in a freezer bag. This helps avoid freezer burn. The chicken can stay good for up to three months. When you’re ready to eat, take it out of the freezer. Place it in the fridge overnight to thaw. This way, it stays juicy and tasty. To reheat your grilled sesame chicken, avoid the microwave if you can. Instead, use your oven or a skillet. Preheat the oven to 350°F (175°C). Place the chicken on a baking sheet and cover it with foil. Heat for about 10-15 minutes until warm. If using a skillet, add a tiny bit of oil and heat over medium. This brings back the flavor without drying it out. Enjoy your tasty leftovers! You need to check the internal temperature. The chicken thighs should reach 165°F (75°C). This ensures they are safe to eat. Use a meat thermometer to check this easily. If you do not have one, cut into the chicken. The juices should run clear, not pink. Yes, you can use chicken breasts. They cook faster and have less fat. This means you should grill them for about 5-6 minutes per side. The flavor will be slightly different, as thighs are juicier. If you want a richer taste, stick to thighs. Steamed rice pairs well with this dish. You can also serve it with a fresh salad. Other good options include stir-fried vegetables or grilled corn. These sides balance the chicken's flavors nicely. You can marinate the chicken for 30 minutes to 2 hours. Marinating longer gives it more flavor. However, do not marinate for more than 24 hours. The chicken can become too soft and mushy. Yes, you can prepare the marinade in advance. Store it in a sealed container in the fridge. It stays good for up to 3 days. This makes meal prep easier. Just remember to shake it well before using. For the full recipe, check the ingredients and steps to create your grilled sesame chicken! This article covered how to make delicious Grilled Sesame Chicken. You learned the key ingredients, steps to prepare the marinade, and grilling tips. I shared ways to enhance flavors and alternative cooking methods. Remember, you can tweak the recipe with your favorite veggies or herbs. Enjoy your grilling adventure and feel free to share your results. Perfecting this dish will impress your friends and family. Grab your ingredients and start cooking!

Are you ready to elevate your dinner routine? This Grilled Sesame Chicken recipe combines juicy chicken thighs with a simple, flavorful marinade that packs a punch. With just a handful …

Read more

Categories Dinner

Caprese Chicken Delight Quick and Easy Recipe

July 18, 2025 by Chef Miles
For the Caprese Stuffed Chicken Delight, gather these items: - 4 boneless, skinless chicken breasts - 1 cup cherry tomatoes, halved - 1 cup fresh mozzarella balls, quartered - 1 cup fresh basil leaves, chopped - 2 tablespoons balsamic glaze - 2 tablespoons olive oil (plus extra for searing) - 2 cloves garlic, minced - Salt and freshly ground pepper to taste - 1 teaspoon dried oregano - 1 teaspoon Italian seasoning If you can’t find certain ingredients, here are some substitutes: - Chicken breasts can be swapped with chicken thighs for more flavor. - Use regular mozzarella if fresh isn’t available. - Swap cherry tomatoes with grape tomatoes or diced tomatoes. - Replace fresh basil with dried basil if needed. - If you lack balsamic glaze, a mix of balsamic vinegar and honey works well. Each serving of Caprese Stuffed Chicken provides essential nutrients: - Calories: Approximately 300 - Protein: 40g - Fat: 15g - Carbohydrates: 6g - Fiber: 1g - Sugars: 2g This dish is a great option for a healthy meal. The fresh ingredients ensure a burst of flavor and nutrition. For the full recipe, visit the provided link. 1. Preheat your oven to 375°F (190°C). 2. In a bowl, mix halved cherry tomatoes, quartered mozzarella balls, chopped basil, olive oil, minced garlic, and balsamic glaze. Add salt, pepper, oregano, and Italian seasoning. Stir well and set aside. 3. Take each chicken breast and make a pocket on one side with a sharp knife. Do not cut all the way through. 4. Fill each chicken pocket with the caprese mixture. Make sure to distribute it evenly. 5. Season the outside of the chicken breasts with salt, pepper, and a sprinkle of Italian seasoning. 6. Heat a large oven-safe skillet over medium-high heat. Add a splash of olive oil and heat until it shimmers. 7. Carefully add the chicken breasts to the skillet. Sear each side for 3-4 minutes until golden-brown. 8. Transfer the skillet to your preheated oven. Bake for 20-25 minutes until the chicken is cooked through. It should reach an internal temperature of 165°F (75°C). 9. Once done, take the skillet out and let the chicken rest for a few minutes. This helps keep the juices inside. For the full recipe, check out the Caprese Stuffed Chicken Delight. To make the best Caprese chicken, start with fresh ingredients. Use ripe cherry tomatoes and creamy mozzarella. Always let the chicken rest after cooking. This keeps it juicy. Searing the chicken first adds flavor and texture. Keep the heat medium-high to get the perfect crust. Feel free to mix up the filling. Try adding spinach or sun-dried tomatoes for a twist. You can also swap mozzarella for goat cheese or feta. If you like spice, add sliced jalapeños or red pepper flakes. Use fresh herbs like thyme or parsley instead of basil for a different taste. For a beautiful plate, slice the chicken into thick medallions. Fan them out on a platter. Drizzle balsamic glaze over the top. Sprinkle fresh basil leaves for color. Pair with a salad or garlic bread for a complete meal. These touches will impress your guests. Check the Full Recipe for more ideas! {{image_4}} You can add a twist with pesto. Use basil pesto instead of fresh basil. Mix it with the other ingredients for a rich flavor. The pesto gives a nice herbal taste. It also adds creaminess to the filling. Just spread it inside the chicken pocket. You will love this herby kick. Grilling is a great way to cook Caprese chicken. Simply season the chicken and grill it. Use medium heat for even cooking. You can add the filling directly on top while grilling. The cheese melts beautifully. This method gives a smoky flavor that enhances the dish. It’s perfect for summer cookouts. For a low-carb version, skip the stuffing. Instead, top the chicken with tomatoes and cheese. Drizzle with olive oil and balsamic glaze. Bake or grill until the cheese melts. This version is still full of flavor. It’s great for those watching their carbs. Enjoy the taste without the extra carbs! For the full recipe, check the Caprese Stuffed Chicken Delight. To store leftover Caprese chicken, first let it cool down. Place the chicken in an airtight container. You can keep it in the fridge for up to three days. For best taste, eat it within two days. When you are ready to eat leftovers, preheat your oven to 350°F (175°C). Place the chicken in an oven-safe dish. Cover it with foil to keep it moist. Heat for about 15-20 minutes or until hot. You can also microwave it for quick reheating. Just cover it to avoid drying out. You can freeze Caprese chicken for later. Wrap each piece tightly in plastic wrap, then place it in a freezer bag. It will stay fresh for about three months in the freezer. To enjoy it, thaw it in the fridge overnight. Then, reheat it in the oven or microwave. This keeps the flavors intact. Enjoy your meal even after some time! You can serve Caprese Chicken with many tasty sides. Here are some ideas: - Mixed greens salad - Garlic bread - Roasted vegetables - Quinoa or rice - Pasta with olive oil These sides will add flavor and balance to your meal. They also complement the fresh tastes of the chicken. Yes, you can prepare Caprese Chicken in advance. You can stuff the chicken, season it, and store it in the fridge. Just keep it covered. It stays fresh for up to 24 hours. When you are ready, sear and bake it as usual. This makes meal prep easy and quick. To check if the chicken is done, use a meat thermometer. The internal temperature should reach 165°F (75°C). If you don’t have a thermometer, cut into the chicken. The meat should be white and the juices should run clear. This ensures your chicken is safe and delicious. For the complete recipe, check out the Full Recipe. You learned about the ingredients and how to make Caprese Chicken. We covered tips for better cooking and variations to try. I also shared storage info to help you keep leftovers fresh. Remember, cooking can be simple and fun. Enjoy different flavors while knowing you can customize this dish. With practice, your Caprese Chicken will impress every time you make it. Take these tips, and start cooking!

If you love simple and tasty meals, then you’re in for a treat! This Caprese Chicken recipe is quick, easy, and packed with flavors. It’s perfect for busy weeknights or …

Read more

Categories Dinner

Refrigerator Dilly Beans Simple and Flavorful Recipe

July 18, 2025 by Chef Miles
- 1 pound fresh green beans - 1 cup distilled white vinegar - 1 cup water - 2 tablespoons kosher salt - 3 cloves garlic, peeled and lightly crushed - 1 tablespoon dill seeds - 1 teaspoon red pepper flakes - 1 teaspoon whole black peppercorns - 2 fresh bay leaves - 1 teaspoon mustard seeds - Fresh dill sprigs - Additional red pepper flakes To make refrigerator dilly beans, gather all your ingredients first. Fresh green beans are key here. Look for beans that are bright green and firm. Trim the ends to make them neat. The vinegar and water create a tangy brine that gives the beans their flavor. Next, garlic adds a nice punch. Crush it lightly to release its oils. Dill seeds are essential for that classic dill flavor. If you want a kick, the red pepper flakes can be adjusted to your taste. Whole black peppercorns, bay leaves, and mustard seeds round out the flavor profile. For extra flair, consider garnishing with fresh dill sprigs. If you like heat, sprinkle some additional red pepper flakes on top just before serving. These ingredients work together to create a simple yet flavorful recipe that’s perfect for anyone. Check out the Full Recipe for more details on how to prepare these delicious refrigerator dilly beans. - Bring salted water to a boil - Add green beans and cook for 2-3 minutes Start by bringing a pot of salted water to a rolling boil. This step is key, as it helps the beans keep their bright green color and crispness. I add the fresh green beans to the boiling water and let them cook for 2 to 3 minutes. When they turn bright green, they are ready! - Transfer beans to ice water - Drain and set aside Next, I quickly transfer the beans to a bowl filled with ice water. This stops the cooking right away. After about 5 minutes in the ice bath, I drain the beans well and set them aside. This step ensures they stay crunchy when you enjoy them later. - Combine vinegar, water, and salt in a saucepan - Heat until salt dissolves and liquid boils For the pickling liquid, I mix together 1 cup of distilled white vinegar, 1 cup of water, and 2 tablespoons of kosher salt in a medium saucepan. I heat this mixture on medium heat, stirring until the salt fully dissolves. Once it reaches a boil, it’s time for the next step! - Add garlic and spices to the boiling liquid - Simmer for 5 minutes I then add 3 crushed cloves of garlic and my spices: 1 tablespoon of dill seeds, 1 teaspoon of red pepper flakes, 1 teaspoon of whole black peppercorns, 2 fresh bay leaves, and 1 teaspoon of mustard seeds to the boiling liquid. I let this simmer for about 5 minutes, allowing the flavors to meld together. The aroma is really something special! - Pack the cooled beans into clean jars - Leave space at the top for liquid Now it’s time to pack the jars. I take two clean quart-sized jars and tightly pack the cooled green beans inside. I leave some space at the top for the pickling liquid. This helps to ensure the beans stay submerged and soak up all the good flavors. - Pour hot pickling liquid over the beans - Seal jars and cool at room temperature Lastly, I carefully pour the hot pickling liquid over the beans, making sure they are completely covered. After sealing the jars tightly, I let them cool at room temperature until they are no longer warm. You can find the full recipe for these delicious Refrigerator Dilly Beans in one place! Enjoy your crunchy treat after they have pickled for at least 24 hours. To keep your refrigerator dilly beans crunchy, start with blanching. Blanching means quickly cooking the beans in boiling water. This makes them bright green and helps lock in their crispness. - Bring salted water to a rolling boil. - Add green beans for 2-3 minutes. - Stop cooking by moving them to ice water right after. If you want extra crunch, try adjusting the blanching time. Cook them for just 2 minutes instead of 3. This slight change helps keep them firm and fresh. You can make your dilly beans even better with extra spices. Think about adding mustard seeds for a tangy touch. Try a pinch of coriander seeds for a fresh twist. Balancing sweetness and acidity is key too. If you want them sweeter, add a bit of sugar. For more tang, increase the vinegar. Taste as you go to find your perfect blend. These refrigerator dilly beans work great as a side dish. Serve them at picnics or barbecues for a tasty crunch. You can also use them in salads or sandwiches for added flavor. Try pairing them with meats like grilled chicken or fish. They also shine in a cheese platter. For a fun twist, chop them up and mix into a pasta salad for an exciting kick. {{image_4}} You can make your refrigerator dilly beans even more fun with flavor twists. Here are two popular options: - Sweet Refrigerator Dilly Beans: Add 1/4 cup of sugar to the pickling liquid. This gives your beans a nice balance of sweet and tangy. You can also add some sliced carrots for extra color and crunch. - Spicy Refrigerator Dilly Beans: Increase the red pepper flakes to 2 teaspoons. You can also add a sliced jalapeño for a kick. This adds heat and makes the beans exciting for spice lovers. Switching up some ingredients can make your dilly beans unique. Here’s how: - Using different types of vinegar: While distilled white vinegar works great, you can try apple cider vinegar for a fruity taste. Rice vinegar also adds a mild sweetness. Each vinegar changes the overall flavor. - Substituting herbs and spices: If you love fresh herbs, try thyme or oregano instead of dill. You can also add coriander seeds for a different taste. Mixing herbs gives your beans a fresh twist. You can change your refrigerator dilly beans based on what’s in season. Here are some ideas: - Incorporating seasonal vegetables: Add sliced cucumbers, radishes, or bell peppers to your jars. They add color and flavor, making the dish more vibrant. Use what’s fresh at your market for the best taste. - Adjustments for holiday entertaining: For holiday gatherings, consider using festive spices like cloves or cinnamon sticks. They add warmth and a hint of sweetness, perfect for winter meals. Refrigerator dilly beans last about 2 to 4 weeks. To enjoy them at their best, store them in the fridge right after making them. Look for signs of spoilage, like changes in color, texture, or smell. If the beans feel slimy or develop mold, it's time to toss them. You can freeze pickled beans, but it changes their crunch. If you prefer that crisp bite, stick with refrigeration. To seal jars properly, ensure they are clean and dry. Always fill them with hot pickling liquid to create a strong seal. For the best flavor, eat your beans within the first week. After that, they will still taste good but may lose some brightness. If you have older beans, try chopping them into salads or adding them to sandwiches. They can also add a punch to tacos or serve as a snack with dips. For the full recipe, check out the details above. Enjoy your crunchy refrigerator dilly beans! Refrigerator dilly beans need at least 24 hours to pickle. However, I suggest waiting a week for the best flavor. The beans will absorb the brine over time, making them more tasty. The longer they sit, the better they get! I do not recommend using canned green beans. Fresh beans have a crunch that canned beans lack. Canned beans are softer and can change the texture of your pickles. For best results, always use fresh green beans. You do not have to sterilize jars for refrigerator dilly beans. Unlike shelf-stable pickles, these stay in the fridge. Just wash the jars with hot soapy water. Rinse them well before packing your beans. Refrigerator dilly beans are great with many dishes. They make a fresh side for grilled meats. You can also serve them with sandwiches or as a snack. They work well at picnics or barbecues, adding a nice crunch. Yes, you can adjust the spice level easily. If you want less heat, use fewer red pepper flakes. For more spice, add extra flakes or even some sliced jalapeños. Customize the heat to suit your taste! Refrigerator dilly beans are easy to make. We covered the main ingredients, like green beans and spices. I shared step-by-step instructions for pickling. You can try many flavor and seasonal variations too. Remember, crispness comes from proper blanching and cooling. Enjoy your tasty beans as snacks or side dishes. Make adjustments to spice them up as you like. Happy pickling!

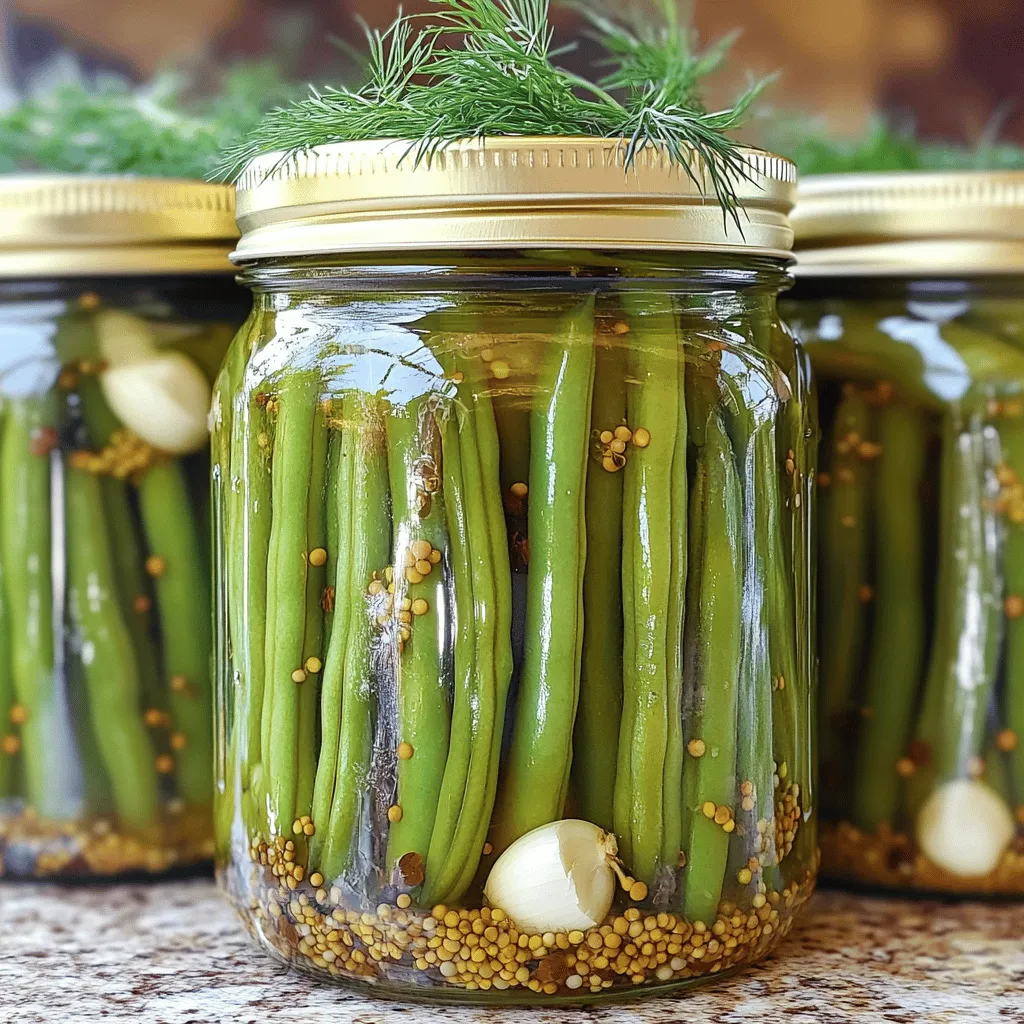
Looking for a quick and tasty way to enjoy fresh green beans? My simple Refrigerator Dilly Beans recipe is a game-changer. With just a few common ingredients and straightforward steps, …

Read more

Categories Appetizers

The Tasty Cherry Almond Cake Masterpiece Recipe

July 18, 2025 by Chef Miles
To make the best cherry almond cake, gather these simple ingredients: - 1 cup fresh or frozen cherries, pitted and halved - 1/2 cup slivered almonds - 1 1/2 cups all-purpose flour - 1 cup granulated sugar - 1/2 cup almond flour - 1/2 cup unsalted butter, softened - 3 large eggs, at room temperature - 1 teaspoon almond extract - 1 teaspoon vanilla extract - 1 teaspoon baking powder - 1/2 teaspoon sea salt - 1 cup buttermilk (or 1 cup milk with 1 teaspoon vinegar) These ingredients create a moist and flavorful cake that shines with cherry and almond notes. If you can’t find fresh cherries, frozen ones work well. Just make sure they are pitted and halved. You can also swap almond flour with regular flour if needed. If you want a dairy-free version, try using almond milk instead of buttermilk. - Frozen cherries: Use the same amount as fresh. - All-purpose flour: Can replace almond flour if necessary. - Almond milk: Use this in place of buttermilk for dairy-free. These swaps keep the cake tasting great while making it easier for you. To elevate your cherry almond cake, consider these tasty toppings: - Powdered sugar: Dust lightly on top for a sweet touch. - Whole cherries: Add a few on top for decoration. - Slivered almonds: Sprinkle on top before baking for extra crunch. - Whipped cream: Serve with a dollop for added richness. - Vanilla ice cream: A scoop pairs perfectly with a warm slice. These options add delightful flavors and textures to your cake, making it even more enjoyable. For the full recipe, check out The Ultimate Cherry Almond Cake . Start by preheating your oven to 350°F (175°C). This step is key to getting a nice rise. Next, grab a 9-inch round cake pan. Grease it with some softened butter. Dust it lightly with flour, or use parchment paper for easy removal. This helps the cake come out perfectly. In a large mixing bowl, add the softened butter and granulated sugar. Use an electric mixer on medium speed. Beat the mixture until it is light and fluffy, which should take about 3 to 5 minutes. This step adds air to the batter, making your cake fluffy. After that, add the eggs one at a time. Mix well after each addition. Then, add the almond and vanilla extracts. Blend until combined. In a separate bowl, whisk together the all-purpose flour, almond flour, baking powder, and sea salt. Make sure everything is mixed well. Gradually add this dry mix to your wet ingredients. Alternate with the buttermilk, starting and ending with the dry mix. Mix gently until just combined. Avoid overmixing to keep it light. Now, gently fold in the halved cherries and slivered almonds. Use a spatula and be careful not to overwork the batter. Pour the batter into the prepared cake pan. Smooth the top with a spatula. If you like, sprinkle a few slivered almonds on top. Bake in your preheated oven for 30 to 35 minutes. Check for doneness by inserting a toothpick into the center. If it comes out clean, your cake is ready! Once done, let it cool in the pan for about 10 minutes. Then, move it to a wire rack to cool completely. For the complete recipe, refer to the Full Recipe. Enjoy your baking! To bake a great cherry almond cake, avoid these common mistakes: - Not measuring ingredients properly: Use measuring cups and spoons for accuracy. This ensures your cake has the right texture. - Using cold eggs: Cold eggs can shock the batter. Always use room-temperature eggs for better mixing. - Overmixing the batter: Mix just until combined. Overmixing makes the cake tough, not fluffy. - Skipping the flour dusting: Grease and flour your pan well. This helps the cake come out cleanly without sticking. Mixing the batter well is key to a perfect cake. Here are some tips: - Cream butter and sugar: Beat until light and fluffy. This step adds air, making your cake soft. - Add eggs one by one: Mix after each egg. This helps them blend evenly into the batter. - Alternate dry and wet ingredients: Add dry ingredients and buttermilk in turns. This keeps the batter smooth and prevents lumps. - Fold in cherries and almonds gently: Use a spatula to fold them in. This keeps them intact and evenly spread. Even baking is vital for a lovely cake. Follow these tips: - Preheat your oven: Always preheat to the right temperature. This helps your cake rise evenly. - Use the right pan: A 9-inch round pan works best. It helps the cake bake evenly. - Check for doneness: Insert a toothpick in the center. If it comes out clean, your cake is ready. - Rotate the pan: Halfway through baking, rotate the pan. This helps it bake evenly on all sides. Using these tips, your cherry almond cake will be a masterpiece! For a detailed guide, check the Full Recipe. {{image_4}} You can change the taste of your cherry almond cake easily. Want a citrus twist? Add lemon or orange zest to the batter. Use about one tablespoon of zest for a bright flavor. The citrus pairs well with the cherries and almonds. If you crave chocolate, swap out some flour for cocoa powder. Use 1/4 cup cocoa powder and reduce the flour by the same amount. This will give you a rich chocolate cherry almond cake. You will love how the flavors blend! Making a gluten-free cherry almond cake is simple. Just replace all-purpose flour with a gluten-free blend. Look for a mix that has xanthan gum in it. This helps mimic the structure of wheat flour. Use the same amount as the recipe calls for. Your cake will still be soft and tasty! Want to make mini cakes or cupcakes? Use a cupcake tin instead of a cake pan. Fill each cup about halfway with batter. Bake for 18-20 minutes. Check with a toothpick to see if they are done. This makes a fun treat for parties or snacks! For a personal touch, add frosting or a glaze. You could even drizzle melted chocolate on top. Enjoy these little bites of cherry almond goodness! For the full recipe, check out The Ultimate Cherry Almond Cake. To keep your Cherry Almond Cake fresh, wrap it well. Use plastic wrap or aluminum foil. You can also place it in an airtight container. Store it at room temperature for up to three days. If you have more cake, refrigerate it. It will stay good for about a week. Just remember, cold air can dry it out. So, wrapping is key! Freezing the cake is a great way to save it for later. Let the cake cool completely before freezing. Once cooled, cut it into slices. Wrap each slice tightly in plastic wrap. Then, place the wrapped slices in a freezer bag. Label the bag with a date. Your cake can stay fresh in the freezer for up to three months. When you're ready to enjoy it, just pull out a slice! To warm up your Cherry Almond Cake, preheat your oven to 350°F. Unwrap the cake and place it on a baking sheet. Bake for about 10 to 15 minutes. This will help bring back some moisture and warmth. For a quicker method, you can microwave a slice for about 20-30 seconds. Just make sure to cover it with a damp paper towel. This keeps it from becoming too dry. Enjoy each bite of your tasty masterpiece! For more details, check the Full Recipe. Yes, you can use frozen cherries. They work well in this cake. Just thaw them first and drain any excess liquid. This step helps keep the batter from getting too wet. Frozen cherries give you that sweet, tart flavor just like fresh ones! If you don’t have almond flour, you can use other flours. Some good choices are: - Finely ground oats - Sunflower seed flour - Cashew flour These will change the flavor a bit, but they will still taste great! To make your cake moist, try adding a few things: - Use buttermilk instead of regular milk. It makes the cake tender. - Add an extra egg. This helps with moisture. - Mix in a bit of yogurt. It adds creaminess and flavor. These tips will help you achieve a soft and moist cake! I love serving this cake warm or at room temperature. You can also: - Dust the top with powdered sugar for a sweet touch. - Add a scoop of vanilla ice cream or whipped cream. - Garnish with whole cherries and slivered almonds for a pretty look. These additions make each slice feel special. For the full recipe, check out the detailed instructions above. This blog post covered everything you need for the best Cherry Almond Cake. We discussed key ingredients, tips for mixing, and baking steps. You can try different flavors or adjust for gluten-free needs. Remember to avoid common mistakes to ensure success. Store leftovers properly for lasting freshness. With these tips, you can enjoy a tasty cake anytime. Now, go bake and share your delicious creation with friends!

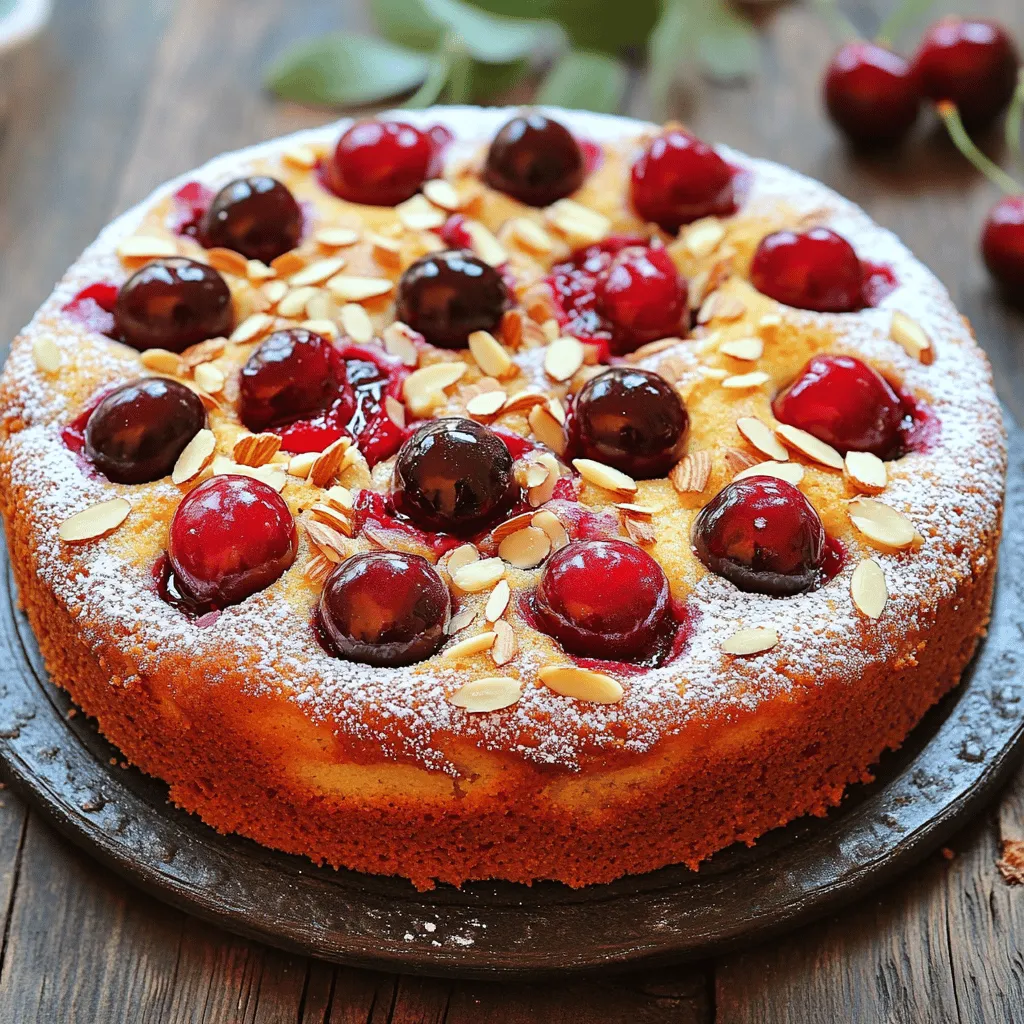
Are you ready to bake a show-stopping treat? My Cherry Almond Cake is a masterpiece that’s easy to make and full of flavor. With its sweet cherries and nutty almond …

Read more

Categories Desserts

Creamy Honey Pepper Chicken Mac and Cheese Delight

July 18, 2025 by Chef Miles
- 2 cups elbow macaroni - 1 pound boneless, skinless chicken breasts - 1 cup heavy cream - 1 cup sharp cheddar cheese - 1 cup mozzarella cheese The base of this dish starts with elbow macaroni. I love it for its shape and texture. The chicken adds protein and flavor. Make sure to use boneless and skinless chicken breasts. Heavy cream makes the sauce rich and smooth. Sharp cheddar and mozzarella combine for that perfect cheesy goodness. - Garlic powder, smoked paprika, black pepper, and salt - 1/3 cup honey and 2 tablespoons Dijon mustard Seasonings bring life to the dish. Garlic powder adds depth, while smoked paprika brings a hint of smokiness. Black pepper adds a kick, and salt balances the flavors. Honey adds sweetness, and Dijon mustard gives a tangy twist. - Fresh parsley for garnish Fresh parsley is my go-to for garnish. It adds a pop of color and a hint of freshness. Just chop it finely and sprinkle it on top before serving. For the full recipe, click here. Start by boiling a large pot of salted water. This helps the pasta flavor. Add 2 cups of elbow macaroni. Cook it for 7-9 minutes, or until it is al dente. You want it firm but not hard. Once done, drain the pasta in a colander. Set it aside while you prepare the other ingredients. Next, heat 2 tablespoons of olive oil in a large skillet over medium-high heat. Once the oil is hot, add 1 pound of diced chicken. Season it with 1 teaspoon each of garlic powder, smoked paprika, black pepper, and salt. Cook the chicken for about 5-7 minutes. Stir occasionally until it turns golden brown. This step adds great flavor. Once cooked, remove it from the heat and set it aside. In the same skillet, lower the heat and pour in 1 cup of heavy cream. Let it simmer gently. Stir often to avoid burning the cream. Gradually add 1 cup of sharp cheddar cheese and 1 cup of mozzarella cheese. Stir until the cheeses melt and form a creamy sauce. Then, mix in 1/3 cup of honey and 2 tablespoons of Dijon mustard. These give the sauce a unique taste. Taste the sauce and adjust with more salt or pepper if needed. Now, fold the cooked macaroni and the sautéed chicken into the cheese sauce. Make sure everything is well-coated. This step is key to getting every bite full of flavor. Once mixed, transfer your creamy mac and cheese to a serving dish. For a nice touch, sprinkle with finely chopped parsley. This adds color and freshness to the dish. For the full recipe, check the details above. To cook pasta just right, use a large pot of salted water. Bring it to a boil before adding the macaroni. Look for the package time, usually 7-9 minutes, to get it al dente. This means the pasta should be firm, not mushy. Once done, drain it well and set it aside. To keep cheese from clumping, stir the heavy cream gently as it heats. Add the cheese slowly while stirring constantly. This helps the cheese melt smoothly into the sauce. You can adjust the sweetness by adding more honey, if you like it sweeter. For spice, add a pinch of cayenne or red pepper flakes. This will give your dish a nice kick. When serving, drizzle some honey over the top. This adds a beautiful shine and a sweet touch. Consider adding a sprinkle of smoked paprika or black pepper for extra flavor. For plating, serve the mac and cheese in deep bowls. This makes it look rich and inviting. Top with a drizzle of honey and a sprinkle of fresh parsley. For an elegant touch, pair each bowl with a side of crusty bread. You can also add a light salad for some freshness. This makes your meal not only tasty but also visually appealing. {{image_4}} You can switch out the chicken for shrimp or turkey. Shrimp cooks quickly and adds a nice flavor. Just sauté it like the chicken. Turkey is leaner and works well too. It keeps the dish hearty. If you prefer a vegetarian option, try using plant-based proteins. Tofu or tempeh can soak up the creamy sauce. This makes a filling meal without the meat. Different cheeses can change the taste of this dish. You can mix sharp cheddar with gouda or fontina. Each cheese brings a unique flavor. For a fun twist, try using flavored cheeses. Jalapeño cheddar or smoked cheese can give it a kick. Experiment with your favorites to find your best combo. If you need gluten-free options, use rice or corn pasta. Both alternatives cook well and taste great. Whole grain pasta is another choice. It adds a nutty flavor and more fiber. You can also change the shape of the pasta. Cavatappi or penne will hold the sauce well. Each shape gives a new texture to the dish. For the full recipe, check out the details above. To store your creamy honey pepper chicken mac and cheese, let it cool first. Place it in an airtight container. This way, it stays fresh and tasty. It can last in the fridge for about three to four days. Just make sure to check for any odd smells or changes in texture before eating. If you want to freeze this dish, follow these steps. First, let it cool completely. Then, use a freezer-safe container. Leave some space at the top, as it may expand. You can freeze it for up to three months. When you are ready to eat it, take it out and place it in the fridge overnight to thaw. You can reheat your mac and cheese in two ways: in the microwave or on the stovetop. For microwaving, use a microwave-safe dish. Heat it in short bursts to avoid burning. Stir in between to keep it creamy. If you use the stovetop, heat it over low heat. Stir in a splash of milk or cream to help keep it smooth. This way, your dish stays as creamy and delicious as when you first made it. You can use whole milk or half-and-half instead of heavy cream. They lighten the dish but keep it creamy. For a richer taste, try using a mix of whole milk and cream cheese. This gives a similar texture to heavy cream. Yes! You can prepare the mac and cheese a day in advance. Just cook it and store it in the fridge. When ready to eat, heat it gently on the stovetop or in the oven. You may need to add a splash of milk to keep it creamy. Add some crushed red pepper flakes or a dash of hot sauce. You can also use pepper jack cheese instead of cheddar. This will give your dish extra heat and flavor. Adjust to your taste for the best results. Absolutely! Use plant-based cream and cheese alternatives. You can also swap out chicken for tofu or chickpeas. Check labels to ensure they are vegan. This way, you still enjoy a creamy and tasty meal. Serve it with a fresh green salad or steamed veggies. Garlic bread makes a great side too. For a light touch, try coleslaw or roasted Brussels sprouts. These sides balance the richness of the mac and cheese perfectly. This blog post covers all you need to know for Creamy Honey Pepper Chicken Mac and Cheese. We explored the key ingredients, from elbow macaroni to cheese and chicken. I offered step-by-step instructions, tips for better flavor, and variations for different diets. You can easily adapt this dish to your tastes or dietary needs. Make it your own with different proteins or cheeses. Enjoy this creamy meal fresh or stored for later. Happy cooking!

Craving comfort food? Let’s whip up a dish that’s rich, creamy, and sure to please! In this blog post, I’ll show you how to make Creamy Honey Pepper Chicken Mac …

Read more

Categories Dinner

Figs in a Blanket Irresistible Bite-Sized Treats

July 18, 2025 by Chef Miles
- 12 fresh, ripe figs - 6 slices of prosciutto or salami (vegetarian option: marinated artichoke hearts) - 1 cup goat cheese, softened - 1 tablespoon honey, plus extra for drizzling - 1 tablespoon fresh thyme leaves - 1 sheet of puff pastry, thawed - 1 egg, beaten - Sea salt for sprinkling Figs are sweet and juicy, making them perfect for this dish. You can use fresh figs or dried ones, but fresh figs shine in this recipe. The prosciutto or salami wraps around the fig, adding a nice salty taste. If you want a vegetarian option, marinated artichoke hearts work great. Goat cheese gives a creamy texture and rich flavor. Honey adds a touch of sweetness, balancing the saltiness of the meat. Fresh thyme leaves bring a lovely herb touch, enhancing the taste. Puff pastry makes everything flaky and delicious. This recipe is versatile, so feel free to mix and match ingredients. You’ll love how simple it is to make these bites. You can find the full recipe to guide you through each step. - Preheat your oven to 400°F (200°C). - Get your prosciutto or salami ready. If you want a vegetarian option, slice marinated artichoke hearts into thin strips. This will help them wrap around the figs easily. - Take a slice of prosciutto or salami. Place a whole fig at one end. If using artichokes, layer the strips around the figs. - Spread a little goat cheese over the fig. Drizzle a teaspoon of honey on top. Add a few fresh thyme leaves for a burst of flavor. - Roll out the thawed puff pastry on a lightly floured surface. Make sure it is flat. - Cut the pastry into squares, about 3 inches on each side. These will wrap around your figs. - Place each wrapped fig on a lined baking sheet. - Brush the pastry with the beaten egg. This gives it a nice golden color. Sprinkle a pinch of sea salt over the tops for a touch of flavor. - Bake for 15-20 minutes, until the pastry puffs up and turns golden brown. - Let the figs cool a bit before serving. This way, you avoid burning your tongue. Enjoy these delightful bites warm for the best taste! Check the Full Recipe for more details. To achieve the best flavor, select ripe figs. Their sweetness pairs well with salty prosciutto or creamy goat cheese. If using artichoke hearts, choose marinated ones for extra flavor. Adding honey and thyme brings out the fig's natural taste. For flaky and golden pastry, keep the puff pastry cold before baking. Roll it out gently on a floured surface. Cut the pastry into even squares. This helps each piece puff up nicely. Brush with egg wash for a shiny finish. A light sprinkle of sea salt adds to the taste. Serve figs in a blanket warm for the best flavor. Arrange them on a pretty platter for a nice touch. Drizzle extra honey on top for a delicious shine. Fresh thyme sprigs can make your dish pop visually. Pair these treats with a sweet dip like yogurt or a tangy balsamic glaze. They also go well with a light wine or sparkling drink. Enjoy your tasty bites with friends and family! For the full recipe, check out the main article. {{image_4}} You can change the cheese used in figs in a blanket. Brie or cream cheese work well. They add a smooth, creamy taste. If you want a lighter option, try ricotta. You can also swap out the meats. Instead of prosciutto or salami, use turkey or chicken. For a vegetarian choice, marinated artichoke hearts shine. They bring a tangy flavor that matches beautifully with figs. To add crunch, consider nuts or dried fruits. Chopped walnuts or pecans give a great texture. They also add a nutty taste that balances the sweetness of figs. Herbs and spices can enhance flavor too. Try rosemary or basil for a fresh twist. A sprinkle of cinnamon adds warmth. You can even experiment with chili flakes for a spicy kick. After you enjoy your figs in a blanket, you may have some left. Let them cool to room temperature first. Placing hot food in a container can trap steam. This steam makes your food soggy. Use an airtight container to keep them fresh. This helps keep moisture out. You can also use plastic wrap over a plate if you don't have a container. Store them in the fridge for up to three days. To enjoy your figs again, reheating is key. The best method is to use the oven. Preheat your oven to 350°F (175°C). Place the figs on a baking sheet. Heat for about 10 minutes. This keeps them crispy and tasty. You can also use an air fryer. Set it to 350°F (175°C) and reheat for 5 minutes. This method works well to maintain the crunch. Avoid microwaving, as it can make the pastry soft. Can I make figs in a blanket ahead of time? Yes, you can make these tasty bites ahead of time. Prepare them, then chill in the fridge. Bake them just before serving. This keeps them fresh and warm for your guests. What’s the best way to serve these for parties? Serve figs in a blanket warm on a big platter. Arrange them in a circle for a pretty display. Drizzle with extra honey on top. Add some fresh thyme for a pop of color. Are figs in a blanket healthy? Figs in a blanket can be a healthy treat. Figs are high in fiber and vitamins. The goat cheese adds some protein, while prosciutto offers flavor. What is the calorie count per serving? Each serving has about 100 calories. This can vary based on the cheese and meat you use. Check measurements for accuracy if you need precise counts. Can I use gluten-free puff pastry? Yes, gluten-free puff pastry works well. It may change the texture a bit, but the taste stays good. Just make sure it's fully thawed before using. How can I make this dairy-free? To make it dairy-free, swap goat cheese for a dairy-free cheese. Use a creamy nut cheese as a great option. You can still enjoy all the flavors! This post shared how to make delicious figs in a blanket. You learned about the ingredients and how to prepare them. I provided tips to create a flaky pastry and suggested variations to try. Storing and reheating leftovers ensures you keep enjoying this treat. Figs in a blanket are versatile and fun to make. Whether for a party or a snack, they impress anyone. Don’t hesitate to experiment with flavors and ingredients for your perfect dish. Happy cooking!

Are you ready to impress your guests with a fun and delicious treat? “Figs in a Blanket” are bite-sized bites that pack a flavor punch. With fresh figs, savory prosciutto, …

Read more

Categories Appetizers

Crock Pot Cubed Steak Tender and Flavorful Dish

July 18, 2025 by Chef Miles
- 4 cubed steaks - 1 cup beef broth - 1 medium onion - 1 cup fresh mushrooms - 2 cloves garlic - Worcestershire sauce - Onion powder - Garlic powder - Smoked paprika - Salt and pepper - Fresh parsley To make the best crock pot cubed steak, gather your ingredients first. The cubed steaks are key to this dish. They are tender cuts of meat that absorb flavors well. The beef broth adds depth, keeping the meat moist. Onions and mushrooms give a sweet and earthy taste. Garlic boosts the flavor even more. Seasoning is simple but crucial. Worcestershire sauce adds a savory touch. Onion powder and garlic powder enhance the taste without adding bulk. Smoked paprika gives a hint of smokiness, while salt and pepper bring everything together. For a lovely finish, fresh parsley on top makes the dish pop. You can find the full recipe later, but this list covers all you need to create a hearty, flavorful meal. Searing the cubed steaks Start by heating 2 tablespoons of extra virgin olive oil in a large skillet over medium-high heat. While the oil warms, season both sides of the cubed steaks. Use salt, freshly cracked black pepper, onion powder, garlic powder, and smoked paprika. These spices add great flavor. Once the oil is hot, carefully place the steaks in the skillet. Sear them for about 2-3 minutes on each side. The goal is to get a nice golden-brown crust. After searing, take the steaks out and set them aside on a plate. Seasoning tips for maximum flavor To enhance the taste, make sure to season the meat well. Don’t hold back on the spices. A good rule is to use about 1 teaspoon of each spice per steak. This way, every bite will be packed with flavor. Cooking onions and mushrooms In the same skillet, add the thinly sliced onion and sliced mushrooms. Cook these for about 5 minutes. Stir them often to avoid burning. You want them to soften and caramelize a bit. This adds a rich taste to the dish. Adding garlic for depth of flavor After the onions and mushrooms are ready, add 2 finely minced cloves of garlic. Stir it in for about a minute. Garlic will give the dish an amazing aroma and depth of flavor. Layering technique for even cooking Now, it’s time to combine everything in the crock pot. First, layer the seared cubed steaks evenly at the bottom. Then, pour the sautéed onions and mushrooms over the steaks. Make sure they cover the meat well. This layering helps with even cooking. Pouring broth and seasonings In a separate bowl, mix 1 cup of rich beef broth with 1 teaspoon of Worcestershire sauce. Stir this mixture well. Then, pour it over the meat and vegetables in the crock pot. This adds moisture and flavor to the dish. Setting the temperature and cook time Cover the crock pot and set it to low heat. Let it cook for 6-8 hours. This slow cooking will make the steaks tender and full of flavor. Tips for checking tenderness To check if the cubed steak is tender, use a fork. If it easily pulls apart, it is ready. If not, let it cook a bit longer. This slow method ensures you get the best taste and texture. You can find the full recipe for this delicious dish [here](#). Enjoy your cooking! To get the best flavor, sear your meat first. Heat olive oil in a skillet. Season your cubed steaks with salt, black pepper, onion powder, garlic powder, and smoked paprika. Sear them for 2-3 minutes on each side until they turn golden-brown. This step locks in moisture and adds flavor. To prevent dryness, cook on low heat in the crock pot for 6-8 hours. This slow cooking makes the steaks tender and juicy. To boost flavor, consider adding fresh herbs and spices. Rosemary, thyme, or bay leaves pair well with beef. Adjust the seasoning based on your taste. If you like it spicy, add a pinch of cayenne pepper. For a milder taste, reduce the garlic and onion powder. Taste the broth before serving to ensure it meets your preference. For a nice serving, use a rustic plate. Place the cubed steak in the center and spoon the rich gravy and vegetables over the top. A sprinkle of fresh parsley brightens the dish. Pair it with creamy mashed potatoes or fluffy rice. They soak up the gravy well, making each bite delicious. This presentation not only looks good but also makes the meal more enjoyable. {{image_4}} You can switch up the protein in this dish. Try using chicken thighs or pork chops. These cuts can bring their own flavor to the meal. If you want a vegetarian option, use hearty mushrooms or tofu. Both can soak up all the great flavors. The broth you choose can change the taste. Beef broth offers richness, but chicken or vegetable broth works too. You can add fresh herbs like thyme or rosemary for more depth. Adding vegetables like carrots or bell peppers makes it colorful and healthy. If you want to try a different method, use an Instant Pot. You can cook the cubed steak in about an hour. Just follow the same steps but set the pot to high pressure. For oven cooking, place the dish in a covered pot at 300°F. Cook for about 2-3 hours until the meat is tender. For the full experience, check out the Full Recipe to bring these ideas to life! To store leftover cubed steak, first cool it quickly. Place it in a shallow dish. This helps it cool faster. Use airtight containers for best results. Glass or plastic containers work well. Make sure to seal them tightly. Leftovers last about three to four days in the fridge. When reheating, aim to keep the flavor intact. You can use the microwave or stovetop. For the microwave, place the steak in a safe dish. Add a splash of broth to keep it moist. Cover it with a lid or plastic wrap. Heat in short bursts, checking often. On the stovetop, use a pan over low heat. Add a little broth and cover it. This keeps the meat tender. To freeze leftovers, let them cool completely. Then, cut the steak into smaller pieces. Place the steak in freezer-safe bags. Remove any air before sealing. Label the bags with the date. You can freeze cubed steak for up to three months. When ready to eat, thaw it in the fridge overnight. Reheat slowly to maintain the rich flavors. For the best taste, avoid reheating in the microwave. Instead, use the stovetop method mentioned earlier. This way, you’ll enjoy your delicious meal again! You can pair crock pot cubed steak with many side dishes. Here are some ideas: - Creamy mashed potatoes - Fluffy rice - Steamed green beans - Roasted carrots - Fresh salad - Cornbread These sides complement the rich flavors of the steak and gravy. They also help soak up the delicious juices. Yes, you can use frozen cubed steak. Just follow these tips: - Thaw it first: This helps it cook evenly. - Increase cooking time: Frozen meat takes longer to cook. Add 1-2 hours to the total time. Make sure the steak reaches a safe internal temperature before serving. Cubed steak needs about 6-8 hours on low heat. Cooking times may vary based on your crock pot. - Check for tenderness: The steak should be fork-tender when done. - Adjust time as needed: If it’s not tender yet, let it cook longer. The low and slow method makes the meat juicy and flavorful. Yes, this recipe is great for meal prep. Here’s how to handle it: - Storage: After cooking, let it cool. Store in airtight containers in the fridge for up to 3 days. - Reheat: Use the microwave or a skillet to reheat. Add a splash of broth to keep it moist. You can easily enjoy delicious meals throughout the week with this recipe. For the complete recipe, check out the Full Recipe. This blog post guides you through making a flavorful crock pot cubed steak. You learned about the key ingredients, from cubed steaks to fresh mushrooms. I shared step-by-step instructions for preparing, cooking, and enhancing flavors. You also found tips for storage and meal prep. With the right techniques, you can create delicious meals that impress. Enjoy exploring variations to make the recipe your own. Have fun cooking!

Are you ready to transform dinner into a tender, flavorful experience? In this guide, I’ll show you how to make the best Crock Pot cubed steak. With simple ingredients and …

Read more

Categories Dinner

Zucchini Cake Delightful Moist and Easy Recipe

July 18, 2025 by Chef Miles
To make a delicious zucchini cake, you need these main ingredients: - 2 cups grated zucchini (about 2 medium zucchinis) - 1 ¾ cups all-purpose flour - 1 teaspoon baking powder - ½ teaspoon baking soda - ½ teaspoon salt - 1 teaspoon ground cinnamon - 1 cup granulated sugar - ½ cup packed brown sugar - ½ cup vegetable oil - 3 large eggs - 2 teaspoons vanilla extract - Zest of 1 lemon These ingredients create a moist and fluffy cake that bursts with flavor. You can add some optional ingredients to change up your zucchini cake: - 1 cup chopped walnuts - ½ cup mini chocolate chips - ½ cup shredded coconut These additions can give your cake a fun twist. You can mix and match based on your taste. If you need to swap out some ingredients, here are a few ideas: - Use coconut oil instead of vegetable oil for a richer flavor. - Substitute applesauce for some of the oil to make it lighter. - For a gluten-free option, use a gluten-free all-purpose flour blend. These substitutions allow you to customize the recipe. You can fit your dietary needs while keeping the taste delicious. For the full recipe, refer to the Zesty Lemon Zucchini Cake section. Start by washing the zucchinis. Next, trim the ends and grate them. You need about 2 cups of grated zucchini. It’s best to use a box grater or a food processor. The zucchini gives moisture to your cake. You don't have to peel the zucchini. The skin adds color and nutrients. Once grated, set it aside to let some moisture drain. In a large bowl, mix the grated zucchini with granulated sugar, brown sugar, and vegetable oil. Stir them well until the sugars blend in. Then, crack in the eggs and add vanilla extract. Whisk until smooth. Next, gently fold in the lemon zest for a fresh taste. In another bowl, whisk together flour, baking powder, baking soda, salt, and cinnamon. Slowly add this dry mix to the wet ingredients. Stir just until combined. Avoid over-mixing to keep the cake light. If you want added crunch, fold in walnuts now. Pour the batter into a greased 9x13 inch baking pan. Spread it evenly for even baking. Bake at 350°F (175°C) for 30 to 35 minutes. A toothpick should come out clean when inserted in the center. Once done, let the cake cool in the pan. This step is key for moisture. While it cools, make the frosting. Mix cream cheese and butter until smooth, then add powdered sugar and lemon juice. Frost the cooled cake with this creamy mixture for a tangy finish. Enjoy your delightful zucchini cake! For the full recipe, check out the detailed instructions. To achieve a moist zucchini cake, you need to use fresh zucchini. Grate it finely and do not squeeze out the moisture. The water in the zucchini keeps the cake soft. Adding both granulated and brown sugar enhances the cake's moisture too. The brown sugar adds a richer flavor and moisture due to its molasses content. Vegetable oil works well, as it keeps the cake tender. You can also add yogurt for extra moisture. One common mistake is over-mixing the batter. This can make your cake tough. Mix your ingredients until just combined. Another mistake is not measuring the flour properly. Too much flour dries the cake out. Always spoon flour into your measuring cup and level it off. Finally, avoid skipping the cooling step. Frosting a warm cake can melt the frosting and ruin your hard work. Decorating your zucchini cake can be simple yet fun. Once frosted, you can add a sprinkle of lemon zest on top for a pop of color. Sliced fresh lemons or edible flowers can also add a nice touch. Chopped walnuts not only enhance flavor but also create a nice crunch. You can even drizzle a bit of lemon glaze for extra sweetness. For a seasonal twist, try adding some fresh berries on the side. For the full recipe, check out the details above! {{image_4}} You can make a gluten-free zucchini cake easily. Replace all-purpose flour with a good gluten-free blend. Make sure it has xantham gum for texture. This swap keeps the cake moist and fluffy. You may need to adjust the baking time slightly. Check for doneness with a toothpick, just like in the original recipe. To make a vegan version, swap eggs for flax eggs. Mix 1 tablespoon of ground flaxseed with 2.5 tablespoons of water for each egg. Use plant-based milk instead of regular milk. Opt for coconut oil or a neutral oil in place of vegetable oil. These changes keep the cake moist and tasty without any animal products. Spices can really boost the flavor of your zucchini cake. Consider adding nutmeg, ginger, or cardamom for a warm touch. A teaspoon of each can add a nice kick. You can also mix in chocolate chips or dried fruit for extra sweetness. Experimenting with spices makes your cake unique and exciting. For the full recipe, check the Zesty Lemon Zucchini Cake section above. To keep your zucchini cake fresh, let it cool completely. Place it in an airtight container. You can also cover it tightly with plastic wrap. Store it at room temperature for up to three days. If you want to keep it longer, the fridge is a good option. Just remember to keep it sealed to prevent drying out. Freezing is a great way to save leftover zucchini cake. First, let the cake cool. Cut it into slices for easy access later. Wrap each slice tightly in plastic wrap. Then, place the slices in a freezer-safe bag or container. You can freeze it for up to three months. When you’re ready to enjoy, just pull out a slice from the freezer. To reheat your zucchini cake, take it out of the fridge or freezer. If it's frozen, let it thaw in the fridge overnight. For quick reheating, use a microwave. Heat each slice for about 15-20 seconds. If you prefer the oven, set it to 350°F (175°C). Heat for about 10-15 minutes. This will help keep the cake moist and tasty. Enjoy it warm for a delightful treat! Yes, you can use unpeeled zucchini in the cake. The skin adds color and nutrition. Just wash the zucchini well before grating it. This keeps the nutrients and flavor intact. To boost flavor, add spices like nutmeg or ginger. You can also mix in cocoa powder for a chocolate twist. Adding a bit of orange zest can give a fresh taste too. Another idea is to use flavored extracts, like almond or coconut. Zucchini cake pairs well with a scoop of vanilla ice cream or a dollop of whipped cream. Fresh fruits like berries or peaches also make great toppings. You can serve it with a cup of tea or coffee for a delightful treat. For a more festive touch, try serving it with a drizzle of caramel sauce. Try this Zesty Lemon Zucchini Cake for a moist and tasty dessert. For the complete recipe, check out the Full Recipe section. In this article, we explored the key ingredients for zucchini cake, both main and optional. I shared step-by-step instructions from prep to baking. You learned tips for a moist cake and common mistakes to avoid. We also discussed fun variations like gluten-free and vegan options. Lastly, I included storage tips to keep your cake fresh. Zucchini cake can be simple and delicious. With these tips and tricks, you can create a treat everyone will love. Now, it's time to bake and enjoy!

Are you ready to enjoy a sweet twist on a classic dessert? My Zucchini Cake is not only moist but also easy to make! This recipe is packed with flavor …

Read more

Categories Desserts
Older posts
Newer posts
← Previous Page1 … Page65 Page66 Page67 … Page113 Next →

MELTED RECIPES

where delicious ideas melt into life, from stovetop to backyard. Always warm, simple, and irresistibly satisfying. 🍳🔥🧀

PAGES

Home About Contact Privacy Policy Terms & Conditions Cookie Policy GDPR Policy Copyright Policy Disclaimer

CATEGORIES

Appetizers Desserts Salads Breakfast Dinner

Contact

  • Pinterest
  • Mail
Copyright © 2025 Melted Recipes. All rights reserved.