Easy No-Bake Cheerio and Peanut Butter Bars Recipe
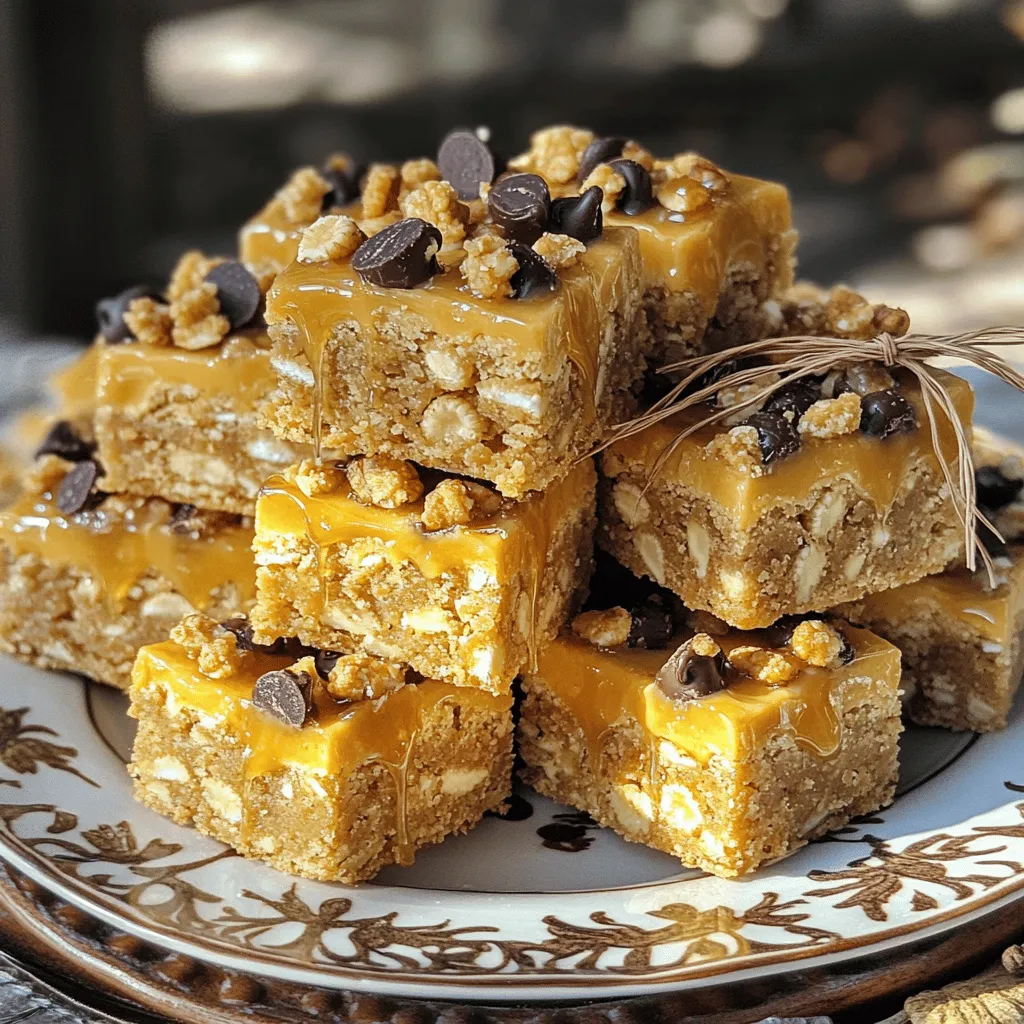
Are you looking for a quick, tasty treat? These Easy No-Bake Cheerio and Peanut Butter Bars are your answer! With just a few simple ingredients like Cheerios, creamy peanut butter, …
Are you looking for a quick, tasty treat? These Easy No-Bake Cheerio and Peanut Butter Bars are your answer! With just a few simple ingredients like Cheerios, creamy peanut butter, …
![- 2 tablespoons extra virgin olive oil - 1 medium onion, finely diced - 3 cloves garlic, minced - 1 pound boneless, skinless chicken breasts, cut into bite-sized pieces - 1 can (15 oz) great northern beans, thoroughly drained and rinsed - 1 can (4 oz) diced green chilies - 1 teaspoon ground cumin - 1 teaspoon chili powder - ½ teaspoon smoked paprika - 4 cups low-sodium chicken broth - 1 cup corn kernels (fresh, frozen, or canned) - 1 cup heavy cream - Salt and freshly ground black pepper, to taste - Fresh cilantro leaves and ripe avocado slices, for garnish Gathering these ingredients is the first step to making white chicken chili. Each item adds a unique flavor and texture. The olive oil brings richness, while the onion and garlic offer a great base. Chicken breasts provide the heartiness we crave in a chili. The beans and corn add creaminess and a touch of sweetness. Spices like cumin, chili powder, and smoked paprika create warmth and depth. The chicken broth keeps everything moist and flavorful. Finally, heavy cream makes the chili rich and smooth. Don’t forget the garnishes! Fresh cilantro and avocado slices make the dish pop. They add a fresh touch and make it more inviting. For the full recipe and instructions, check out the [Full Recipe]. - Heat the olive oil in a large pot over medium heat. - Add the finely diced onion and sauté for about 5 minutes. The onion should become soft and clear. - Next, add the minced garlic. Sauté it for 1 minute until it smells good. - Now, add the diced chicken to the pot. Sprinkle in ground cumin, chili powder, smoked paprika, salt, and pepper. - Cook the chicken for 5 to 7 minutes until it is brown on all sides. - Gently fold in the drained great northern beans and diced green chilies. - Pour in the low-sodium chicken broth and bring it to a gentle simmer. - Let it cook uncovered for about 20 minutes. Stir it occasionally. - After 20 minutes, add the corn kernels and heavy cream. Stir well to combine. - Allow it to simmer for an additional 10 minutes. This makes the chili thick and creamy. - Carefully taste the chili and adjust the seasoning if needed. Add more salt or pepper to your liking. - Serve the chili hot in bowls. Top each bowl with fresh cilantro and ripe avocado slices. - For an extra touch, serve tortilla chips on the side for crunch. This adds texture to your meal. For the complete recipe, check [Full Recipe]. To make your white chicken chili shine, avoid burning the garlic. When you sauté garlic, it should be fragrant but not brown. If it burns, it can make your chili taste bitter. Always stir the garlic for a minute before adding other ingredients. Next, simmer your chili to reach the thickness you want. A longer simmer allows flavors to meld beautifully. If you want a thicker chili, let it cook uncovered for a while. This helps steam escape and thickens the mix just right. Garnish your chili with fresh cilantro and ripe avocado slices. They add color and flavor that brighten each bowl. You can also serve it with tortilla chips. The crunch of the chips pairs well with the creamy chili. It makes for a fun and tasty scoop! Adjust the spices to match your taste. If you like it spicier, add more chili powder or cumin. Taste as you go to find your ideal balance. For a creamy consistency, be sure to mix in the heavy cream slowly. Stir it in well to ensure it blends perfectly. If your chili is too thick, a splash of chicken broth can help. This keeps it creamy without losing flavor. Enjoy your cooking! For the full recipe, check out the Creamy White Chicken Chili section above. {{image_4}} You can easily modify this white chicken chili for different diets. For a vegetarian or vegan version, swap the chicken for mushrooms or jackfruit. Use vegetable broth instead of chicken broth. For gluten-free options, check that your broth and spices are gluten-free. This way, everyone can enjoy a bowl of comforting chili without worry. To make your chili pop with flavor, try adding different chili peppers. Jalapeños can add heat, while poblanos bring a mild, smoky taste. You can also include more vegetables. Bell peppers, zucchini, or spinach can enhance the dish. They add texture and nutrition, making it even better! This chili fits any season. In winter, add warming spices like cinnamon or nutmeg. These spices create a cozy vibe. In summer, brighten it up with fresh herbs. Basil, cilantro, or even mint can give a refreshing twist. Using seasonal ingredients can make your chili feel new and exciting every time you make it. To store leftover chili, let it cool down first. Use an airtight container to keep it fresh. You can store it in the fridge for up to three days. When you want to reheat it, pour it into a pot. Heat it over medium heat, stirring often. This helps it warm evenly. You can also use a microwave-safe bowl if you prefer the microwave. Heat it in short bursts, stirring in between. If you want to keep the chili longer, freezing is a great choice. First, let it cool completely. Then, place it in freezer-safe bags or containers. Remove as much air as possible to prevent freezer burn. It can last for about three months in the freezer. When you are ready to eat it, take the chili out of the freezer. The best way to thaw it is in the fridge overnight. If you need it fast, you can thaw it in the microwave. Just remember to stir it often. When reheating, check the texture. If it seems too thick, add a little broth or water to get it just right. For more cooking tips, check out the Full Recipe for creamy white chicken chili! What can I substitute for heavy cream in white chicken chili? You can use half-and-half or whole milk. For a dairy-free option, try coconut milk or cashew cream. These will give you a creamy texture without heavy cream's richness. How do I make white chicken chili thicker? To thicken your chili, you can mash some of the beans. Alternatively, add a cornstarch slurry. Mix cornstarch with water and stir it in while cooking. Can I use canned chicken? Yes, using canned chicken is a great time-saver. Just drain and add it to your chili. It cuts down on prep time but may alter the texture slightly. How long can I store white chicken chili in the fridge? Store it in an airtight container for up to four days. Make sure to let it cool before putting it in the fridge. Can I make it spicier? Absolutely! Add extra chili powder or diced jalapeños for more heat. You can also use hot green chilies instead of mild ones. How to enhance the flavor of white chicken chili? To boost the flavor, add fresh lime juice or zest. Fresh herbs like cilantro or parsley also enhance the dish. A dash of hot sauce or smoked paprika adds depth. For the full recipe, check out the [Full Recipe]. You now have a complete guide to making white chicken chili. We covered all the key ingredients and step-by-step cooking instructions. Remember to adjust spices and try different veggie options. Don’t forget tips on storing and reheating leftovers. The flexibility of this dish means you can make it your own. Whether you want it spicy or mild, the choice is yours. Enjoy your delicious, creamy chili and make it a go-to recipe for any time!](https://meltedrecipes.com/wp-content/uploads/2025/07/89466853-fbac-4b91-ade5-c0f8bda27767.webp)
Are you ready to warm your soul with a comforting bowl of White Chicken Chili? This recipe blends tender chicken, creamy goodness, and zesty spices, creating a dish that’s perfect …

Craving a warm, cozy drink without the guilt? This Healthy Pumpkin Spice Latte is your solution! With simple ingredients like pumpkin puree and almond milk, you can savor that classic …
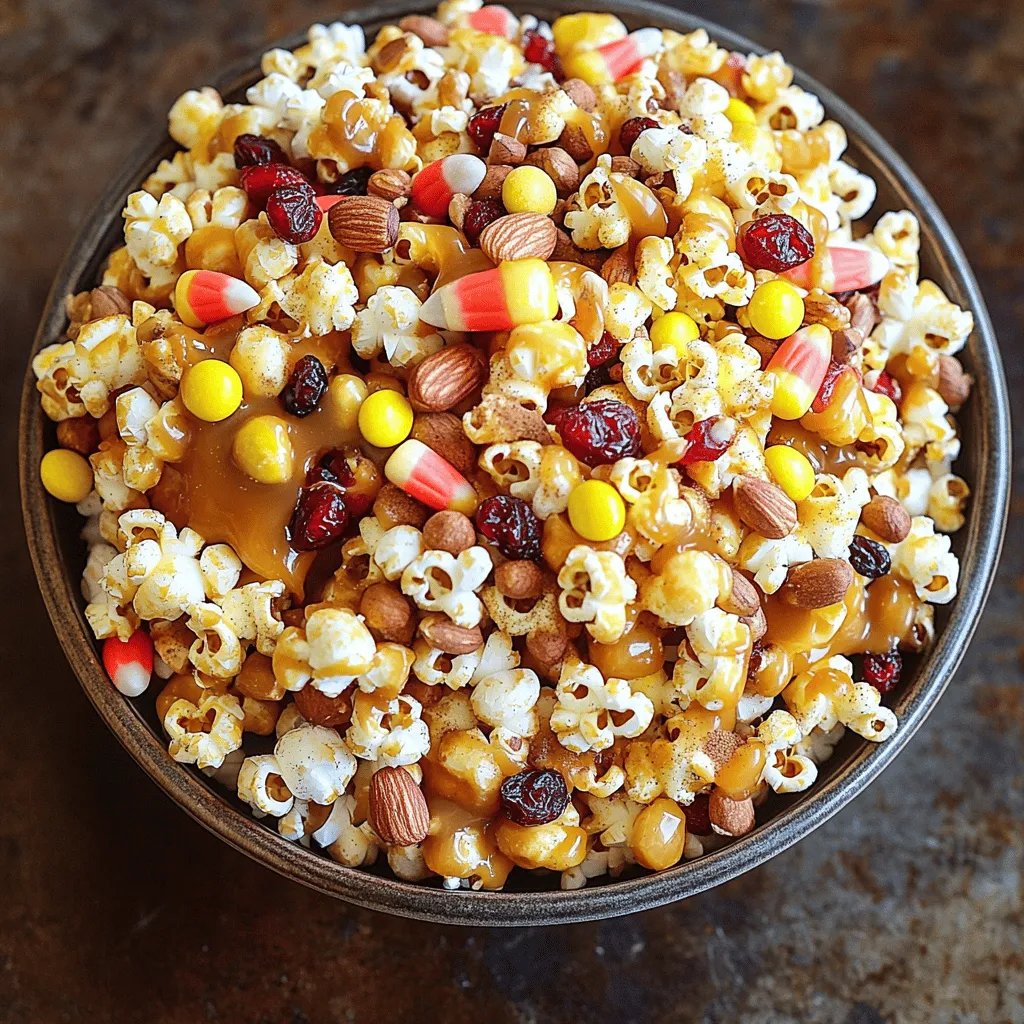
Get ready to celebrate fall with a tasty treat! My Fall Harvest Caramel Corn Mix combines popcorn, nuts, and sweet spices for an irresistible snack. You can whip it up …

Are you ready to dive into a sweet treat that combines the best of toffee and apple pie? My Toffee Apple Pie is a delightful dessert that will wow your …

Grilled Cheese Roll-Ups are the perfect snack for any time of day! They’re fun, easy to make, and kids love them. I’ll show you how to turn simple ingredients into …
. Start by boiling a large pot of salty water. Use about a tablespoon of salt for great flavor. Once the water bubbles, add the elbow macaroni. Cook it until it is al dente, which usually takes about 7 to 9 minutes. When done, drain the macaroni and set it aside for later. In a large saucepan, melt the unsalted butter over medium heat. Once it is all melted, sprinkle in the all-purpose flour. Whisk it well for about 2 minutes to create a light roux. You want it to bubble a bit but not brown. Next, gradually pour in the whole milk while whisking. This helps keep the sauce smooth and free of lumps. Keep cooking and stirring until the sauce thickens, taking about 3 to 5 minutes. Now it's time to add the cream cheese. Lower the heat to a gentle simmer, then mix in the softened cream cheese. Stir until it melts and the sauce is nice and smooth. Next, mix in the sharp cheddar and mozzarella cheese. Continue to stir until all the cheese melts into a rich sauce. Then add the garlic powder, onion powder, smoked paprika, and season with salt and pepper to taste. If you want extra flavor, fold in cooked ground beef or diced pickles at this stage. Finally, gently fold the cooked macaroni into the cheese sauce. Make sure every piece is coated in that cheesy goodness! To make a great cheese sauce, avoid lumps when you add milk. Start by whisking in the milk slowly. This keeps the sauce smooth. Stir continuously, and don't rush. If you do this right, you will have a creamy base. Choosing the right cheese is also key. Sharp cheddar gives a bold flavor. Mozzarella adds stretch and creaminess. Cream cheese makes it rich. Together, they create a great blend for your Monster Mac and Cheese. Make your dish eye-catching with fun serving ideas. You can serve the mac and cheese in mini loaf breads. Hollowed-out bell peppers also work great. These ideas make your meal fun and unique. Garnishes can add color and freshness. Chopped parsley on top brightens the dish. Extra crispy fried onions add a nice crunch. These touches make your meal look and taste even better. Baking is the final step for the best texture. You want a golden brown topping. This adds a nice crunch to each bite. Use a shallow baking dish for even cooking. A 9x13 inch pan works well. It allows the top to get crispy while the inside stays creamy. This is the secret to the perfect Monster Mac and Cheese. {{image_4}} You can easily make a vegetarian version of Monster Mac and Cheese. Start by substituting the ground beef with your favorite veggies. Spinach and tomatoes work great! This change adds color and nutrients. The creamy cheese sauce pairs perfectly with the fresh flavors of the vegetables. If you enjoy some heat, try adding jalapeños or hot sauce. This spicy twist gives your mac and cheese a fun kick. You can also use pepper jack cheese for an extra layer of flavor. The creaminess will balance the spice, making each bite exciting. For a smoky flavor, mix in some BBQ sauce. This adds a sweet and tangy taste that contrasts well with the cheese. Pair your Monster Mac and Cheese with smoked cheeses for added depth. The combination creates a unique dish that stands out at any gathering. Feel free to explore these variations to keep your meals fun and delicious. You can start with the [Full Recipe] for the base and then customize it to your liking! To keep your Monster Mac and Cheese fresh, place it in the fridge. Make sure it cools down first. Use an airtight container to prevent drying out. If you have a lot of leftovers, divide them into smaller portions. This way, you can grab what you need later without wasting food. When reheating, the best method is the oven. Preheat it to 350°F (175°C). Place the mac and cheese in an oven-safe dish. Cover it with foil to keep moisture in. Heat for about 20 minutes until warm. You can also use the microwave if in a hurry. Heat in 30-second bursts, stirring in between, until hot. If you want to freeze Monster Mac and Cheese, let it cool completely first. Use a freezer-safe container or bag. Make sure to remove as much air as possible. Label it with the date. It can last in the freezer for up to three months. When ready to eat, thaw it overnight in the fridge before reheating. To make Monster Mac and Cheese, follow these key steps: 1. Cook the Pasta: Boil salted water and add elbow macaroni. Cook until al dente, then drain. 2. Make the Cheese Sauce: Melt unsalted butter in a pan. Sprinkle in flour and whisk for about 2 minutes. 3. Add Milk: Slowly pour in whole milk while whisking. Stir until thickened. 4. Incorporate Cream Cheese: Lower heat and mix in softened cream cheese until smooth. 5. Melt Cheeses: Stir in shredded sharp cheddar and mozzarella until melted. 6. Season: Add garlic powder, onion powder, and smoked paprika. Mix in cooked ground beef or pickles if desired. 7. Combine: Fold cooked macaroni into the cheese sauce. 8. Bake: Pour into a greased dish, top with fried onions, and bake at 350°F for 20-25 minutes. Yes, you can! Here are some great substitutes for elbow macaroni: - Penne: Its tube shape holds sauce well. - Fusilli: The spirals trap cheese for extra flavor. - Shells: These hold cheese inside, making each bite cheesy. - Cavatappi: The corkscrew shape adds fun and texture. For the best flavor and texture, try these cheese combinations: - Sharp Cheddar: Offers a strong flavor that stands out. - Mozzarella: Adds stringiness and a creamy base. - Cream Cheese: Creates a smooth and rich texture. - Gruyère: Adds nuttiness and depth. Achieving a creamy consistency is easy with these tips: - Use whole milk: It adds richness compared to lower-fat options. - Melt cheese slowly: Stir gently to avoid clumps. - Add cream cheese: It helps bind everything together and adds creaminess. - Don’t overbake: Bake just until bubbly and golden for the best texture. For the complete process, check out the Full Recipe. Monster Mac and Cheese is a fun dish that's easy to make. We covered ingredient choices, from main cheeses like cheddar and mozzarella to add-ins like ground beef. You learned how to make a creamy sauce and tips for avoiding lumps. We also explored variations, so you can spice things up. Lastly, remember how to store and reheat leftovers for the best taste. Now, get ready to enjoy this cheesy delight! With your newfound skills, you’ll impress family and friends. Let's dig in!](https://meltedrecipes.com/wp-content/uploads/2025/07/90d5b32b-f44b-4fa3-a3d0-c11a80f43881.webp)
If you love mac and cheese, get ready for a treat! Monster Mac and Cheese is a cheesy comfort meal that goes beyond the ordinary. With sharp cheddar, creamy mozzarella, …
![- 2 cups all-purpose flour - 1/4 cup granulated sugar - 1 tablespoon baking powder - 1/2 teaspoon baking soda - 1 teaspoon ground cinnamon - 1/2 teaspoon ground ginger - 1/4 teaspoon ground cardamom - 1/4 teaspoon ground cloves - 1/4 teaspoon salt - 1/2 cup unsalted butter, cold and cubed - 3/4 cup buttermilk - 1/4 cup brewed chai tea, cooled - 1 teaspoon vanilla extract - 1 egg, lightly beaten (for brushing) - 1 cup powdered sugar - 2 tablespoons brewed chai tea, cooled - 1 tablespoon maple syrup - Pinch of cinnamon To make these homemade chai scones, you need basic ingredients from your kitchen. The all-purpose flour gives the scones structure. Sugar adds sweetness, while baking powder and baking soda help them rise. The chai tea and spices infuse the scones with warm, cozy flavors. Butter is key. Use cold, cubed butter for flakiness. Buttermilk adds moisture and a slight tang. The vanilla extract enhances the flavor. Don't forget the egg, which gives the scones a lovely golden finish. For the glaze, use powdered sugar for sweetness. Brewed chai tea adds flavor, while maple syrup brings a rich, sweet touch. A pinch of cinnamon ties everything together. You can find the full recipe [here]. 1. Preheat your oven to 400°F (200°C). Line a baking sheet with parchment paper. 2. In a large bowl, mix the all-purpose flour, sugar, baking powder, baking soda, cinnamon, ginger, cardamom, cloves, and salt. Whisk until smooth. 3. Add the cold, cubed butter to the flour mixture. Use a pastry cutter or your fingers to mix the butter into the flour. You want it to look like coarse crumbs. This step is key for flaky scones. 1. In another bowl, mix the buttermilk, cooled brewed chai tea, and vanilla extract. Gradually add the wet mix to the dry mix. Fold gently until just combined. Don't over-knead; we want light scones. 2. Dust a clean surface with flour. Take the dough and shape it into a ball. Pat it down into a disc about 1 inch thick. 3. Cut the disc into 8 equal wedges. Place the wedges on the baking sheet, leaving space between them. Brush the tops with the beaten egg for a golden finish. 1. Bake the scones for 15-18 minutes. They should turn golden brown. Insert a toothpick in the center to check; it should come out clean. 2. While the scones bake, make the Maple Chai Glaze. In a small bowl, whisk together powdered sugar, cooled chai tea, maple syrup, and a pinch of cinnamon until smooth. 3. Once the scones are out of the oven, let them cool for a few minutes. Drizzle the glaze over the warm scones. Enjoy the sweet, spicy flavor! For the complete recipe, check out the Full Recipe section. To make scones that are light and flaky, you must use cold butter. Cold butter creates steam when baking, which helps the scones rise and become airy. If your butter is warm or melted, your scones will turn out dense. Another key tip is to avoid over-kneading the dough. When you mix the wet and dry ingredients, fold them gently. Mix just until you see no dry flour. Overworking the dough can lead to tough scones. When making the Maple Chai Glaze, adjust the sweetness to suit your taste. If you like it sweeter, add more powdered sugar. For a stronger chai flavor, add more brewed chai tea. You can also play with different flavors in your glaze. Try adding a splash of vanilla or a hint of nutmeg for a twist. If you want to try a different glaze, consider using a lemon glaze or a simple icing made with milk and powdered sugar. Both will add a unique flavor to your scones. For serving, arrange the warm scones on a pretty platter. Drizzle the glaze over each scone for a beautiful look. A light dusting of powdered sugar or a sprinkle of cinnamon can add an extra touch. Pair these scones with a hot cup of chai or coffee. The flavors blend perfectly, making every bite delightful. Enjoy your homemade chai scones with maple chai glaze! For more details, check out the Full Recipe. {{image_4}} You can easily change the flavor of your scones. Adding nuts or dried fruits gives a nice crunch and sweetness. Try chopped walnuts, almonds, or dried cranberries for an extra twist. These flavors pair well with chai spices. Infusing other spices can also create unique scones. Consider adding cardamom or nutmeg for a different taste. You can mix and match spices to find your favorite blend. It’s fun to experiment and discover new flavors. If you need a gluten-free version, you can use almond flour or a gluten-free blend. These options work well and keep the scones fluffy. Just remember to adjust wet ingredients. You may need a bit more liquid, as gluten-free flours absorb more moisture. For a vegan choice, swap out dairy with plant-based ingredients. Use coconut oil or vegan butter instead of regular butter. You can replace buttermilk with almond milk mixed with vinegar. This creates a similar tangy flavor. To make the egg wash, you can use a mixture of plant milk and a bit of maple syrup. This gives the scones a nice glaze without using eggs. To keep your homemade chai scones fresh, store them in an airtight container. This helps to lock in moisture and flavor. Place a piece of parchment paper between layers if stacking. This prevents them from sticking together. Keep the container in a cool, dry place. Avoid direct sunlight or heat, as this can dry them out. To enjoy warm scones again, you can reheat them in the oven. Preheat your oven to 350°F (175°C). Place the scones on a baking sheet and cover them loosely with aluminum foil. Heat for about 5 to 10 minutes. This method restores their freshness. Avoid heating in the microwave. It can make the scones tough and dry. Homemade chai scones stay good for about 2 to 3 days at room temperature. If you want to keep them longer, freezing is a great option. Wrap each scone tightly in plastic wrap and then place them in a freezer bag. They can last up to 3 months in the freezer. To thaw, leave them in the fridge overnight or let them sit at room temperature for a few hours. Enjoy these delightful scones by following the full recipe. To make scones fluffy, start with cold ingredients. Always use cold butter. This keeps the butter solid in the dough. When baking, the butter melts and creates steam, which helps the scones rise. Mix the dough gently. Overworking it can lead to tough scones. Aim for a light touch when combining wet and dry ingredients. - Use cold butter - Mix gently - Avoid over-kneading You can use regular tea, but the flavor will change. Chai offers rich spices like cinnamon and cardamom. If you use black tea, add spices to mimic chai's taste. This can enhance your scones' flavor profile. Try adding a pinch of cinnamon or ginger for a boost. - Regular tea lacks chai's spices - Add spices to black tea - Adjust to taste If you don’t have buttermilk, don't worry! You can make your own with simple ingredients. Mix milk with vinegar or lemon juice. Let it sit for about 5 minutes. This creates a tangy substitute. You can also use plain yogurt or sour cream. Both will work well in this recipe. - Mix milk with vinegar or lemon juice - Use plain yogurt - Try sour cream as an alternative You learned how to make tasty scones using simple ingredients. We covered the steps from mixing dough to adding a sweet glaze. Remember to keep your butter cold for flaky scones. You can also try different flavors or make them vegan. Store scones properly to keep them fresh. With these tips, you can create delicious scones for any occasion. Enjoy baking and sharing them with friends and family!](https://meltedrecipes.com/wp-content/uploads/2025/07/d5c23176-015a-499e-ae84-2db2dc72db46.webp)
Get ready to elevate your baking game with my recipe for Homemade Chai Scones with Maple Chai Glaze! These warm, spiced scones are soft and flaky, bursting with chai flavors …
![- 2 ripe bananas, thoroughly mashed - 1/2 cup natural peanut butter, creamy or crunchy - 1/4 cup honey (or maple syrup for a vegan-friendly choice) - 2 large eggs (or 2 tablespoons flaxseed meal mixed with 6 tablespoons water for a vegan option) - 1 teaspoon pure vanilla extract - 1 cup whole wheat flour - 1/2 teaspoon baking soda - 1/2 teaspoon baking powder - 1/4 teaspoon fine sea salt - 1/2 cup rolled oats - 1/2 teaspoon ground cinnamon (optional) - 1/4 cup dark chocolate chips or chopped nuts (optional) These ingredients come together to create a tasty, healthy muffin. The ripe bananas add natural sweetness and moisture. Peanut butter gives a rich flavor and protein. Honey or maple syrup keeps it sweet without added sugars. The eggs help bind everything together, or you can use flaxseed for a vegan option. Whole wheat flour makes the muffins wholesome. Baking soda and baking powder help them rise, while salt enhances the taste. Oats add texture and fiber. Ground cinnamon gives warmth, and the optional chocolate chips or nuts add extra flavor and fun. Feel free to mix and match these ingredients. You can find the full recipe to guide your cooking process. First, preheat your oven to 350°F (175°C). This step helps muffins bake evenly. Next, prepare your muffin tin. You can use paper liners or lightly grease the cups with cooking spray or oil. This will help the muffins come out easily after baking. In a large mixing bowl, mash two ripe bananas. Use a fork or spatula for this. Then, add 1/2 cup of natural peanut butter. Mix until smooth and creamy. Next, add in 1/4 cup of honey (or maple syrup for vegan). Crack in two large eggs, or use flaxseed meal for vegan. Finally, add 1 teaspoon of pure vanilla extract. Stir well until everything blends together. In a separate bowl, whisk together the dry ingredients. You will need 1 cup of whole wheat flour, 1/2 teaspoon of baking soda, 1/2 teaspoon of baking powder, and 1/4 teaspoon of fine sea salt. If you like, add 1/2 teaspoon of ground cinnamon. Mix these dry ingredients until they are evenly combined. Slowly add this mixture to your wet banana mix. Use a spatula to gently fold them together. It’s okay if there are a few lumps; do not over-mix. Using a spoon or an ice cream scoop, fill each muffin cup about three-quarters full. Leave some space at the top so they can rise. If you want, gently fold in 1/4 cup of dark chocolate chips or nuts into the batter before filling the cups. This adds extra flavor and crunch. Place the muffin tin in your preheated oven. Bake for 18 to 22 minutes. Check if they are done by inserting a toothpick into the center of a muffin. If it comes out clean or with a few moist crumbs, they are ready. After baking, let the muffins cool in the tin for about 5 minutes. Then, carefully transfer them to a wire rack. Let them cool completely before serving. This cooling step helps keep muffins moist and tasty. Enjoy these delightful treats! For the complete recipe, check the [Full Recipe]. To keep your muffins moist, use ripe bananas. Overripe bananas add natural sweetness and moisture. Mash them well to ensure they blend smoothly. Adding peanut butter also helps maintain moisture. It binds the ingredients and adds a creamy texture. Avoid overbaking your muffins. Keep an eye on the oven, so they stay soft inside. Mix your wet ingredients first. Blend the mashed bananas and peanut butter well. Then add honey, eggs, and vanilla. Make sure everything is smooth. For dry ingredients, whisk them in a separate bowl. Gently fold the dry mix into the wet mix. Avoid over-mixing; a few lumps are fine. Over-mixing can make the muffins tough. Try adding dark chocolate chips for a sweet touch. They melt beautifully and create a rich flavor. You can also mix in chopped nuts for crunch. Walnuts or pecans work great. If you're feeling adventurous, add dried fruits like cranberries or raisins for extra sweetness. These add-ins make your muffins even more delicious and fun! For more ideas, check the Full Recipe. {{image_4}} To make these muffins gluten-free, swap the whole wheat flour for a gluten-free blend. Look for a mix that has xanthan gum to help with texture. You can also use almond flour or oat flour. These options add a nice flavor and keep the muffins soft. Just remember, gluten-free flours may absorb more liquid. You might need to adjust the liquid in the recipe slightly. If you want to cut down on sugar, use ripe bananas. They add natural sweetness. You can also replace honey with unsweetened applesauce. This will keep the muffins moist while lowering sugar. Another option is to use stevia or monk fruit sweetener. These sweeteners have fewer carbs and calories. Adjust to taste, as they can be sweeter than sugar. You can change the flavor of these muffins in many ways. Add spices like nutmeg or ginger for warmth. You can also mix in dried fruits like raisins or cranberries for a chewy bite. For a richer taste, try adding cocoa powder for chocolate peanut butter muffins. A dash of espresso powder can boost the chocolate flavor too! Don't forget to sprinkle some chopped nuts or seeds on top for crunch. Each choice makes these muffins your own! For the full recipe, refer to the main article. Storing your peanut butter banana muffins properly keeps them fresh and tasty. Place the muffins in an airtight container. This helps keep moisture in, so they stay soft. You can also use a zip-top bag. Make sure to press out the air before sealing. Store them at room temperature for 2 to 3 days. If you want them to last longer, consider freezing. Freezing muffins is a great way to save them for later. First, let the muffins cool completely. Wrap each muffin in plastic wrap or foil. Then, place them in a zip-top freezer bag. This helps prevent freezer burn. You can freeze the muffins for up to 3 months. When you are ready to enjoy one, just take it out and let it thaw at room temperature. Reheating your muffins is simple. You can use the microwave or the oven. For the microwave, place a muffin on a plate and heat it for 15-20 seconds. If you prefer the oven, preheat it to 350°F. Place the muffins on a baking sheet and warm them for about 5-10 minutes. This will help revive their fresh taste and soft texture. Enjoy your delicious treat! You can make these muffins vegan by using flaxseed meal instead of eggs. Mix 2 tablespoons of flaxseed meal with 6 tablespoons of water. Let it sit for a few minutes to thicken. You can also switch honey for maple syrup to keep it vegan. Yes, you can use almond butter instead of peanut butter. This will change the flavor but still provide creaminess. Almond butter gives a nice nutty taste and works well in this recipe. To make the muffins less sweet, reduce the amount of honey or maple syrup. You might cut it down to 2 tablespoons. You can also skip the optional chocolate chips. This keeps the muffins tasty without too much sweetness. These muffins last for about 3 to 5 days at room temperature. Store them in an airtight container. If you want them to last longer, you can freeze them for up to 3 months. Yes! You can add fruits like blueberries or chopped apples. Nuts like walnuts or pecans also add great crunch. Just make sure to fold them in gently so they mix well. You can find the full recipe for these delightful muffins [here](Full Recipe). Enjoy the process of baking and the tasty results! These muffins are simple to make and full of flavor. We covered the key ingredients, nutritional info, and even options for customization. Step-by-step instructions help you bake perfect muffins every time. Remember, using fresh ingredients keeps them moist. Don't forget to explore variations, storage tips, and answers to common questions. By following these tips, you’ll create delicious treats that everyone will enjoy. Happy baking!](https://meltedrecipes.com/wp-content/uploads/2025/07/36dbeaaf-0070-4fd3-b3cd-64e7a559bb9d.webp)
Get ready for a delicious twist on a classic! These Healthy Peanut Butter Banana Muffins are perfect for breakfast or a snack. Made with ripe bananas and natural peanut butter, …
![- 1 pound ground turkey - 1/2 cup breadcrumbs - 1/4 cup feta cheese, crumbled - 1/4 cup grated Parmesan cheese - 1/4 cup fresh parsley, finely chopped - 1 cup cherry tomatoes, halved - 1 cucumber, sliced into rounds - 2 cups mixed greens (like arugula or spinach) You start with ground turkey, which is lean and packed with protein. It’s the base for your meatballs. Feta cheese adds a tangy flavor that makes the meatballs taste great. I love using fresh parsley for a burst of color and taste, too. Cherry tomatoes and cucumbers bring freshness to the lunchbox. Mixed greens add crunch and make your meal feel light. - 1 teaspoon garlic powder - 1 teaspoon onion powder - 1/2 teaspoon salt - 1/4 teaspoon freshly ground black pepper - 1/2 teaspoon dried oregano The spices are key to flavor. Garlic powder and onion powder give depth to the meatballs. Salt and pepper enhance everything, while oregano adds an earthy touch. These spices work together to create a tasty bite with every mouthful. - You can try adding chopped spinach or bell peppers for extra veggies. - A dash of red pepper flakes can add some heat. - Serve with hummus or tzatziki for dipping. Feel free to play with your ingredients! You can customize your lunchbox by adding whatever you like. Try different cheeses, or mix in other spices. These options let you create a unique meal each time. Preheat your oven to 400°F (200°C). This step is key for perfect meatballs. While the oven heats, line a baking sheet with parchment paper. This helps the meatballs cook evenly and prevents sticking. In a large mixing bowl, combine the ground turkey, breadcrumbs, crumbled feta, grated Parmesan, chopped parsley, garlic powder, onion powder, salt, and black pepper. Use your hands or a spatula to mix until everything is blended well. This is where the magic begins! Now, take small portions of the mixture and roll them into meatballs about one inch wide. Place each meatball on the lined baking sheet. Make sure they have space between them. This allows hot air to circulate and cook them evenly. Drizzle the meatballs with a bit of olive oil. This helps them brown nicely. Place the baking sheet in the preheated oven and bake for 20-25 minutes. Check for a golden brown color and ensure they reach an internal temperature of 165°F (74°C). Remember to turn them halfway through baking for even cooking. While the meatballs bake, wash your vegetables. In a medium bowl, mix halved cherry tomatoes and sliced cucumber. Drizzle with olive oil and sprinkle dried oregano. Toss gently so they are coated well. To assemble your lunchbox, take a container and place a handful of mixed greens on one side. Next, add the cooked meatballs, and then top with the seasoned tomatoes and cucumber. Just before you eat, drizzle balsamic vinegar over everything. This adds a nice tangy flavor. For a beautiful presentation, separate each food item. Garnish with fresh parsley for a pop of color. Enjoy your delicious Turkey Meatball & Feta Lunchbox! For the complete recipe, check out the [Full Recipe]. - Ensure even cooking by spacing meatballs well on the baking sheet. - Turn meatballs halfway through baking for a uniform crisp. To achieve crispy meatballs, drizzle them lightly with olive oil before baking. This helps them brown nicely. If you want extra crunch, broil them for the last few minutes. Just keep an eye on them to avoid burning. - Prepare meatballs in advance for easy meals throughout the week. - Store leftovers in airtight containers to keep them fresh. When you meal prep, make a double batch of meatballs. You can freeze half for quick dinners later. Label your containers with the date. This helps you keep track of how fresh your food is. - Pair your turkey meatballs with fresh veggies for a balanced meal. - Use a mix of flavors and textures for a delightful lunchbox. For the lunchbox, add a side of cherry tomatoes and cucumber. The crunch contrasts well with the tender meatballs. Drizzle balsamic vinegar over the greens for added flavor. This makes the meal fun and tasty. You can find the full recipe in the main article! {{image_4}} You can easily switch up the meat in this recipe. Ground chicken works well. It gives a lighter flavor. Ground beef is another choice. It brings a richer taste and texture. For a vegan option, try lentils or chickpeas. You can mash them for a similar texture. These alternatives keep the meal tasty and fulfilling. Want to change the flavor? You can add spices or herbs to the mix. Try paprika for a smoky kick. A touch of cumin adds warmth. Fresh herbs like basil or dill bring freshness. You can also swap out the feta cheese. Try goat cheese for a tangy twist. Or use mozzarella for a milder taste. This lunchbox pairs well with many sides. For veggies, consider roasted bell peppers or steamed broccoli. They add color and nutrients. You could also add some carbs like whole grain pita or brown rice. Dips like tzatziki or hummus work great too. They add flavor and keep it fun to eat. To store leftovers, place them in an airtight container. Make sure to cool the meatballs before sealing. This keeps moisture in and prevents drying. Store in the fridge for up to three days. When reheating, use a microwave or oven. Heat until the meatballs reach 165°F. This ensures they are safe to eat. For freezing meatballs, let them cool completely first. Place them in a single layer on a baking sheet. Freeze until solid, then transfer to a freezer-safe bag. Label the bag with the date. Use within three months for best taste. To thaw, move them to the fridge overnight. Reheat in the oven or microwave until hot. Cooked turkey meatballs last about three days in the fridge. If stored properly, frozen meatballs can last up to three months. Check for signs of spoilage, like a sour smell or color change. If you notice any, it’s best to discard them. Keeping track of dates helps you avoid waste. To check if your turkey meatballs are done, use a meat thermometer. The internal temperature should reach 165°F (74°C). This ensures they are safe to eat. The meatballs should also look golden brown on the outside. If they are firm to the touch, they are likely cooked through. Always cut one open to check if it is no longer pink. This way, you can be sure you serve safe and tasty meatballs. Yes, you can easily prepare this turkey meatball recipe ahead of time. Mix the meatball ingredients and shape them into balls. Store them in the fridge for up to 24 hours. This makes meal prep easy. You can also bake the meatballs in advance. Just store them in an airtight container in the fridge. They will stay fresh for about three days. Reheat them gently in the oven or microwave before serving. If you don’t have feta cheese, there are several great alternatives. You can use goat cheese for a similar tangy flavor. Cream cheese can also work well, giving a creamy texture. For a dairy-free option, try using nutritional yeast. This gives a cheesy flavor without the dairy. Another option is to use shredded mozzarella or cheddar, which will melt nicely in the meatballs. You can add a kick to your turkey meatball and feta lunchbox easily. Try mixing in some red pepper flakes for heat. Fresh herbs like basil or cilantro can brighten up the dish. A squeeze of lemon juice adds a fresh, zesty flavor. You might also want to drizzle some hot sauce or a spicy vinaigrette over the salad. These small changes can bring your lunchbox to life and make it even more exciting! This blog post covered everything you need for turkey meatballs with feta. You learned about key ingredients, from ground turkey to various spices. I shared step-by-step instructions, along with tips for meal prep and cooking. You also discovered fun variations and how to store leftovers. In conclusion, with simple methods and tasty flavors, these meatballs can enhance your lunches. By experimenting with ingredients, you can make them your own. Happy cooking and enjoy your delicious creations!](https://meltedrecipes.com/wp-content/uploads/2025/07/1ffbe7ef-556c-4e3a-b69e-08a4fddd5c9a.webp)
Looking for a quick and tasty lunch that packs a protein punch? You’re in the right place! My Turkey Meatball & Feta Lunchbox is simple, delicious, and perfect for busy …