Skip to content
Melted Recipes
  • Home
  • Appetizers
  • Desserts
  • Salads
  • Breakfast
  • Dinner
  • Privacy Policy
  • Contact
  • About

Chef Miles

Pumpkin Rolls Delightful and Easy Baking Recipe

July 23, 2025 by Chef Miles
- 2 cups all-purpose flour - 1 cup canned pumpkin puree - 1/4 cup packed brown sugar - 1/4 cup granulated sugar - 1/2 cup warm milk (around 110°F or 43°C) - 1/4 cup unsalted butter, melted and slightly cooled - 1 packet (2 1/4 teaspoons) active dry yeast - 1 teaspoon ground cinnamon - 1/2 teaspoon ground nutmeg - 1/2 teaspoon ground ginger - 1/2 teaspoon salt - 1/4 cup chopped pecans or walnuts (optional, for added crunch) When you gather these ingredients, you set the stage for a delicious treat. The all-purpose flour gives the rolls their structure. Canned pumpkin puree adds moisture and flavor, making each bite soft and rich. Brown sugar adds a caramel-like sweetness, while granulated sugar balances the flavors. Warm milk is key for activating the yeast. It helps the rolls rise and become fluffy. Unsalted butter brings richness to the dough, and the active dry yeast makes everything light and airy. The spices, like cinnamon, nutmeg, and ginger, fill your kitchen with warm scents. They bring out the best in pumpkin. If you want a bit of crunch, add chopped nuts. They add texture and a nice surprise in every bite. For the full recipe, check out the detailed instructions. This recipe not only pleases the taste buds but also fills your home with cozy aromas. Start by mixing warm milk with the active dry yeast. Use about 1/2 cup of warm milk at 110°F (43°C). Stir until the yeast dissolves. Now, set this aside for about 5-10 minutes. You want to see it get frothy. This means your yeast is alive and ready to create fluffy rolls. In a large bowl, mix together the dry ingredients and wet ingredients. Combine 2 cups of all-purpose flour, brown sugar, granulated sugar, and spices. Add 1 cup of canned pumpkin puree, melted butter, and the beaten egg. Then, mix it all gently. Be careful not to overmix. You want a sticky dough that holds together but is not too dry. Transfer the sticky dough to a floured surface. Knead it for about 5-7 minutes. This helps develop gluten, which gives your rolls a nice texture. Once the dough feels smooth and elastic, place it in a greased bowl. Cover it with a damp cloth. Let it rise in a warm spot for 1-1.5 hours. You’ll know it’s ready when it has doubled in size. This step is key for light, fluffy rolls. To get the best texture, you must not overmix your dough. When you mix too much, you ruin the soft, fluffy nature of the rolls. You want to combine the ingredients just until they are mixed. This keeps the dough light and airy. For kneading, use a firm but gentle touch. Knead the dough for about 5-7 minutes. This helps build gluten, which gives your rolls structure. You want the dough to feel smooth and elastic. If it feels sticky, sprinkle a little flour, but don’t add too much. Even baking is key to great pumpkin rolls. Make sure your oven is preheated to 350°F (175°C) before placing the rolls inside. This helps them bake evenly. Turn the pan halfway through baking to ensure all sides cook well. To check for doneness, look for a golden-brown color on top. You can also tap the bottom of a roll. If it sounds hollow, it’s ready. If not, give it a few more minutes. Drizzle your pumpkin rolls with a simple glaze made from powdered sugar and a splash of milk. This adds a sweet touch that pairs well with the spiced flavor. Serving them warm enhances their cozy aroma. These rolls are perfect for fall gatherings or as a sweet breakfast treat. They make a great addition to holiday meals or cozy family brunches. Enjoy them fresh from the oven for the best experience. You can find the Full Recipe for more details! {{image_4}} You can easily make gluten-free pumpkin rolls with simple swaps. Use gluten-free flour blends instead of all-purpose flour. A great option is a blend of rice flour, tapioca flour, and potato starch. Look for brands like Bob’s Red Mill or King Arthur Flour. These mixes often have the right balance for good texture. - Almond flour - Coconut flour - Oat flour (ensure it’s certified gluten-free) To make vegan pumpkin rolls, swap out dairy and eggs. Instead of milk, use almond milk or oat milk. For butter, try coconut oil or vegan butter. Replace the egg with 1/4 cup unsweetened applesauce or a flax egg. Mix one tablespoon of flaxseed meal with three tablespoons of water and let it sit for a few minutes. To keep your dough light, add an extra teaspoon of baking powder. This will help the rolls rise well. Knead the dough gently to keep it airy. For festive flavors, add seasonal spices like allspice or clove to the dough. You can also mix in dried cranberries or orange zest for a twist. This adds a nice holiday touch to your rolls. To make your rolls extra special, drizzle them with a cream cheese icing or a simple glaze. You can sprinkle some chopped nuts or festive sprinkles on top for color. Serve them on a beautiful platter at your holiday gathering. For the full recipe, check out the Pumpkin Spice Delight Rolls section above! To keep your pumpkin rolls fresh, store them in an airtight container. Place parchment paper between layers to prevent sticking. This method helps maintain their soft texture. The rolls stay fresh for about 3 days at room temperature. If you want to keep them longer, refrigerate for up to a week. Freezing is a great way to enjoy pumpkin rolls later. First, let them cool completely. Wrap each roll in plastic wrap and then place them in a freezer bag. This method keeps out air and prevents freezer burn. You can freeze the rolls for up to 2 months. To enjoy them, thaw in the fridge overnight. Reheat in the oven at 350°F for about 10 minutes. If you have leftover rolls, get creative! Try making bread pudding by tearing the rolls into pieces and soaking them in a mix of eggs and milk. You can also slice them for breakfast sandwiches or French toast. Want a fun treat? Make pumpkin roll trifle by layering pieces with whipped cream and spices. These ideas let you enjoy the rolls long after baking. You can tell if yeast is active by looking for bubbles. When you mix warm milk with yeast, let it sit for 5-10 minutes. If it becomes frothy, your yeast is alive. If it doesn’t foam, your yeast may be old. You should buy fresh yeast and try again. - Signs of active yeast: - Bubbles form on the surface - Mixture expands in size - Troubleshooting tips: - Ensure your milk is warm, not hot - Check the expiration date on the yeast packet Yes, you can make the dough ahead. Let it rise, then chill it in the fridge. This slows down the fermentation process. You can also let the dough rise overnight. - Overnight rising options: - Let the dough rise in the fridge for 12-24 hours - Bring it back to room temperature before baking - Storing uncooked dough: - Wrap it tightly in plastic wrap - Store in an airtight container Pumpkin rolls pair well with many foods and drinks. They taste great with coffee or tea. You can also serve them with cream cheese frosting or a scoop of vanilla ice cream. - Complementary dishes and beverages: - Coffee or chai tea - Cream cheese frosting or whipped cream - Pairing suggestions for gatherings: - Serve at breakfast or brunch - Great for holiday parties or cozy get-togethers For the full recipe, check out the detailed steps above. You learned about making delicious pumpkin rolls. We covered key ingredients like canned pumpkin and warm milk. I shared how to activate yeast and prepare the dough. We also explored tips for perfect texture and baking. You can even try variations for gluten-free or vegan options. Remember, storing leftovers properly keeps them fresh longer. Use the creative ideas for your day-old rolls. Now, go enjoy baking these tasty treats for your next gathering!

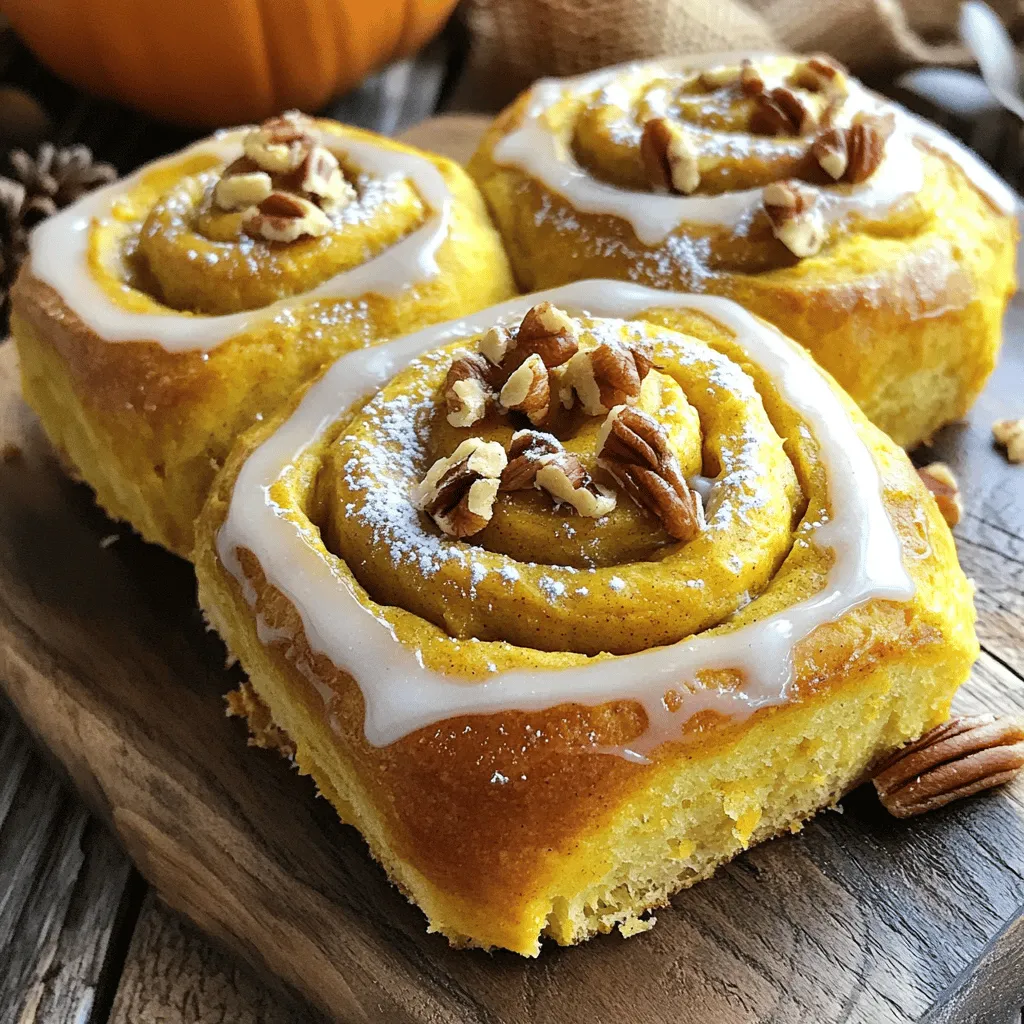
Are you ready to enjoy a warm, sweet treat this fall? My delightful pumpkin rolls recipe is easy to follow and perfect for any occasion. With simple ingredients like canned …

Read more

Categories Desserts

Mini Pumpkin Pie Cups Tasty and Simple Dessert Recipe

July 23, 2025 by Chef Miles
To make Mini Pumpkin Pie Cups, you need a few simple ingredients. Here’s the list to get you started: - 1 cup pumpkin puree - 1/2 cup sweetened condensed milk - 1/4 cup brown sugar - 1 teaspoon ground cinnamon - 1/2 teaspoon ground nutmeg - 1/4 teaspoon ground ginger - 1/4 teaspoon salt - 1 large egg - 1 package (1 sheet) of pre-made pie crusts or homemade - Whipped cream for topping - Cinnamon sticks for garnish This combination creates a smooth and creamy filling that is both sweet and spiced. Each ingredient plays a role in building flavor. Pumpkin puree gives rich texture. Sweetened condensed milk adds creaminess and sweetness. The spices, like cinnamon and nutmeg, bring warmth to each bite. Using pre-made pie crusts saves time, but homemade can add a personal touch. Don't forget the whipped cream! It makes every cup feel festive. Finally, the cinnamon sticks are not just for looks; they add a nice aroma and extra flavor. For the full recipe, check out the detailed instructions. Enjoy making these bite-sized treats! - Preheat the oven to 375°F (190°C). This step is key for even baking. - Prepare the pie crusts in a mini muffin tin. Roll out a pre-made pie crust on a floured surface. - Using a round cookie cutter, cut out circles. Press each circle into the mini muffin cups. Make sure they fit snugly. - Mix the filling ingredients thoroughly in a large bowl. Combine pumpkin puree, sweetened condensed milk, brown sugar, ground cinnamon, ground nutmeg, ground ginger, salt, and one large egg. Whisk until smooth. - Fill the cups with the pumpkin mixture. Pour the filling into each pie shell, filling them about three-quarters full. - Bake for 15-20 minutes. Check for doneness by inserting a toothpick into the center of one pie. It should come out clean when they are set. - Cool the mini pumpkin pie cups properly. Let them sit in the pan for about 5 minutes. Then, move them to a wire rack to cool completely. - Top with whipped cream and garnish with cinnamon sticks. This adds a nice touch and makes them look great. Enjoy your mini pumpkin pie cups as a tasty fall dessert! For the full recipe, check the section above. To achieve the perfect crust texture, use chilled pie dough. This helps it keep its shape. When rolling out the dough, keep it about 1/8 inch thick. This thickness helps create a crispy crust. Press the dough firmly into the muffin tin. Make sure there are no air pockets. This ensures even baking. For a smoother filling, mix the ingredients well. Start with the pumpkin puree and sweetened condensed milk. Then, add the sugars and spices. Whisk until no lumps remain. I like to use a hand mixer for a super smooth texture. Adding the egg last helps blend everything nicely. When serving mini pumpkin pie cups, presentation matters. Arrange them on a beautiful platter. You can drizzle caramel sauce over them for a sweet touch. This makes them look extra special. For larger gatherings, pair them with hot drinks. Coffee, tea, or even spiced cider work well. They add warmth and comfort to your dessert table. These cups also make great party favors. Just place them in small boxes for guests to take home. For the full recipe, check the section above. Enjoy making these mini treats! {{image_4}} You can make these mini pumpkin pie cups even better with some easy swaps. If you want a healthier option, try using alternative sweeteners. Some great choices include honey or maple syrup. They add lovely flavor while cutting down on refined sugar. For those who are dairy-free, there are options for the filling. You can use coconut milk instead of sweetened condensed milk. This gives a rich taste and creamy texture without dairy. To make your mini pumpkin pie cups stand out, think about adding chocolate or other spices. A sprinkle of cocoa powder will bring a nice twist to the classic flavor. You could also try adding a pinch of allspice or cardamom for an extra kick. Topping your mini pies with flavored whipped cream can also add fun. Try adding vanilla or maple syrup to the whipped cream before you dollop it on top. This simple change gives a burst of flavor that pairs well with the pumpkin filling. For the full recipe of these delightful treats, check out the details above! After enjoying your mini pumpkin pie cups, store any leftovers in the fridge. Place them in an airtight container. This helps keep them fresh. Ideally, eat them within three to four days for the best taste. If you want to keep them fresh longer, cover them with plastic wrap before sealing. You can also freeze mini pumpkin pie cups for later. To do this, let them cool completely first. Then, place them in a single layer on a baking sheet. Freeze them for about two hours. Once frozen, transfer them to a freezer bag. This way, they won’t stick together. To reheat, take them out and let them thaw in the fridge overnight. Then, warm them in the oven at 350°F (175°C) for about 10 minutes. Enjoy your tasty treat anytime! For the full recipe, check the section above. Mini pumpkin pie cups last about 3 to 4 days in the fridge. Store them in an airtight container. If you want them to last longer, you can freeze them. They can stay fresh in the freezer for up to 2 months. Yes, you can use fresh pumpkin! Just cook the pumpkin until soft, then mash it. Be sure to drain any excess water. This will help you get the right texture for your mini pumpkin pie cups. For a lighter option, you can use coconut milk or almond milk. You can also blend silken tofu with some sweetener. This will give you a creamy texture without the added sugar. To make mini pumpkin pie cups gluten-free, use a gluten-free pie crust. You can find pre-made options in stores. Alternatively, you can make your own crust using gluten-free flour. In this blog post, we covered how to make mini pumpkin pie cups. We discussed the key ingredients like pumpkin puree and sweetened condensed milk. Then, I shared step-by-step instructions for preparing, baking, and cooling. We also explored tips for perfecting your pies and offered fun serving suggestions. Finally, I covered variations, storage, and answered common questions. These mini treats are easy to make and delicious to share. Enjoy your baking!

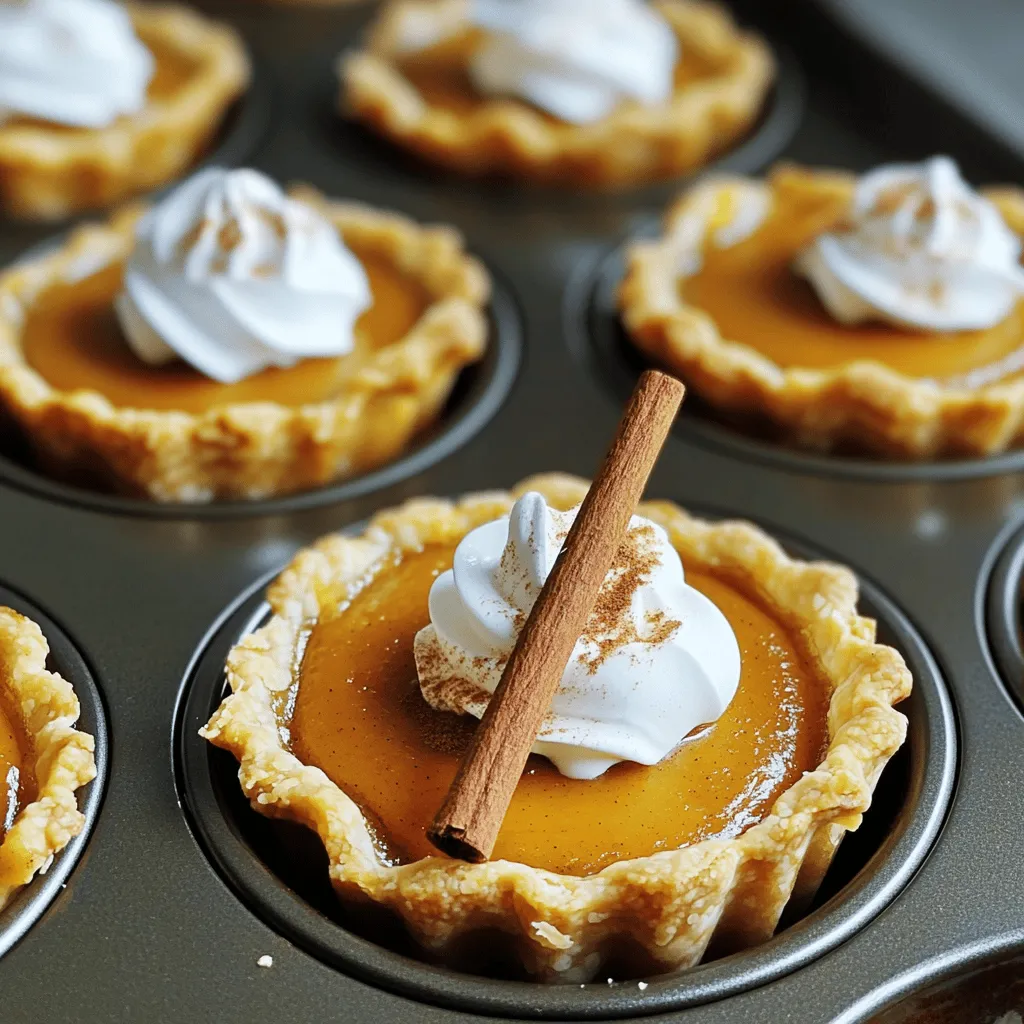
Looking for a sweet treat that’s easy to make? These Mini Pumpkin Pie Cups are perfect! You’ll enjoy a creamy pumpkin filling in a flaky crust—simple and delicious. Whether you’re …

Read more

Categories Desserts

Empanadas with Cheese Delicious and Simple Recipe

July 23, 2025 by Chef Miles
Dough Ingredients: - 2 cups all-purpose flour - 1/2 teaspoon salt - 1/2 cup unsalted butter, cold and diced - 1/4 cup cold water Cheese Filling Ingredients: - 1 cup shredded mozzarella cheese - 1/2 cup crumbled feta cheese - 1/4 cup finely chopped green onions Optional Ingredients for Added Flavor: - 1/2 teaspoon chili flakes for a hint of spice The dough is simple yet essential. It gives the empanadas their crisp, flaky texture. Using cold butter helps keep the dough light. The filling is where the magic happens. The blend of mozzarella and feta creates a creamy, rich taste. The green onions add a fresh crunch. If you like a bit of heat, the chili flakes can spice things up. This recipe is flexible. You can swap cheeses or add veggies to make it your own. For the full recipe, check out the Cheesy Delight Empanadas. To make the dough, start by mixing the flour and salt in a bowl. Use your hands or a fork to blend well. Next, add cold, diced butter to the mixture. You want to break the butter into small pieces. Keep mixing until the dough looks like coarse crumbs. Now, slowly add cold water, mixing just until the dough sticks together. It should feel soft but not sticky. Wrap the dough in plastic wrap and chill it in the fridge for at least 30 minutes. This step helps the dough become firm and easier to roll out. In a new bowl, combine the shredded mozzarella, crumbled feta, and chopped green onions. Mix well to ensure every bite has flavor. If you want some heat, add chili flakes to the mix. Adjust the amount based on your spice preference. Stir the mixture until all ingredients are evenly combined. This step is crucial, as it ensures every empanada is filled with cheesy goodness. Once your dough is chilled, take it out and roll it on a floured surface. Aim for about 1/8 inch thick. Use a round cutter or the edge of a small bowl to cut out circles. Each circle should be around 4 inches in diameter. Spoon about 1 tablespoon of the cheese filling onto each circle. Next, fold the dough over to make a half-moon shape. Press the edges tightly to seal. For extra flair, use a fork to crimp the edges. This not only seals them but also adds a nice touch. Before baking, preheat your oven to 375°F (190°C). Prepare a baking sheet by lining it with parchment paper. This prevents sticking and makes cleanup easy. Place the filled empanadas on the sheet. Brush the tops lightly with the beaten egg for a golden finish. Bake them for about 20-25 minutes. You want them to puff up and turn golden brown. Keep an eye on them, as that’s when they are at their best. To avoid soggy dough, start with cold butter. Keep the butter in the fridge before use. Mix the butter into the flour until it looks like crumbs. This helps to create a flaky texture. For a crispy texture, don’t skip the egg wash. Brush the tops with beaten egg for a golden finish. Bake them on parchment paper to prevent sticking. This helps the bottoms stay crisp while baking. To ensure even cooking, space your empanadas well on the baking sheet. Leave room for hot air to circulate. Rotate the baking sheet halfway through baking for uniform heat. For dips, I love serving empanadas with salsa or guacamole. The fresh flavors really complement the cheesy filling. You can also try sour cream or a zesty yogurt dip. To present them at gatherings, arrange them on a large platter. Garnish with fresh herbs like cilantro or parsley. This adds color and makes the dish more inviting. When it comes to drinks, pair your empanadas with a light beer or a fruity soda. A crisp white wine also works well. These drinks enhance the flavors of the empanadas nicely. For the full recipe, check out the details above. {{image_4}} You can change up the cheese in your empanadas. Try using sharp cheddar for a tangy taste. Cream cheese adds a rich and creamy texture. You can even mix different cheeses for more flavor. Adding vegetables will make your empanadas healthier. Spinach, bell peppers, or mushrooms work well. They add nutrients and color to your dish. You can chop them finely and mix them in with the cheese. For heartier empanadas, consider adding proteins. Cooked chicken or ground beef makes them filling. You can also use beans for a vegetarian option. Just make sure to season the filling well. If you love spice, add chili flakes to your filling. This gives your empanadas a nice kick. You can also use jalapeños for more heat. Adjust the amount based on your taste. Herbs can enhance the aroma and flavor of your empanadas. Fresh parsley, cilantro, or oregano work wonders. Just chop them finely and mix them with the cheese. For dessert lovers, sweet empanadas are a treat. Use sweetened cream cheese or fruit fillings like berries. Dust them with powdered sugar after baking for a lovely finish. Enjoy experimenting with these variations! You can create endless flavors with your empanadas. For a full recipe, check out the [Full Recipe]. To keep your leftover empanadas fresh, place them in an airtight container. This helps prevent them from drying out. You can store them in the fridge for up to three days. If you want to save them longer, freezing is the best method. To freeze empanadas, first let them cool completely. Then, place them on a baking sheet in a single layer. This prevents them from sticking together. Once frozen, transfer them to a freezer bag or container. Be sure to remove as much air as possible. They can last for up to three months in the freezer. For reheating, the oven works best. Preheat it to 350°F (175°C). Place the empanadas on a baking sheet and cover them loosely with foil. Heat for about 15-20 minutes. Remove the foil for the last five minutes to crisp up the crust. Empanadas usually last in the fridge for about three days. Check for any signs of spoilage, like an off smell or mold. If you see either of these, it’s best to throw them away. To avoid waste, try to only make what you can eat in a few days. If you have extras, freezing is a great option. You’ll still enjoy their delicious taste later. Always remember to label your containers with the date, so you know when to use them. To make empanadas from scratch, you need to prepare both the dough and the filling. 1. Prepare the Dough: Start with 2 cups of all-purpose flour and 1/2 teaspoon of salt. Mix them in a bowl. Cut in 1/2 cup of cold, diced unsalted butter. The mixture should look like coarse crumbs. Gradually add 1/4 cup of cold water until the dough forms. Wrap it in plastic and chill for at least 30 minutes. 2. Make the Filling: In another bowl, mix 1 cup of shredded mozzarella and 1/2 cup of crumbled feta. Add 1/4 cup of chopped green onions. If you like spice, add chili flakes. Mix well. 3. Roll Out the Dough: Roll the chilled dough to about 1/8 inch thick. Use a round cutter to make circles. 4. Fill the Empanadas: Place 1 tablespoon of filling in each circle. Fold the dough to make a half-moon. Press the edges together and crimp with a fork. 5. Bake: Preheat the oven to 375°F (190°C). Brush the empanadas with an egg wash and bake for 20-25 minutes until golden brown. Yes, you can use pre-made dough for empanadas. Pros: It saves time and effort. Store-bought dough can be very convenient, especially if you're in a hurry. Cons: The flavor might not be as fresh. Homemade dough often tastes better and allows for customization. You also have control over the thickness and texture. The best cheese for empanadas depends on flavor and texture. - Mozzarella: Mild and stretchy, it melts well. - Feta: Adds a tangy flavor and crumbly texture. - Cheddar: Sharp and flavorful, great for a richer taste. - Queso Blanco: Soft and creamy, perfect for a smooth filling. Mixing cheeses can create a unique flavor that enhances your empanadas. You can easily prep empanadas in advance for convenience. - Make and Freeze: Assemble the empanadas but do not bake. Place them on a baking sheet and freeze until firm. Once frozen, transfer them to a bag. This way, you can bake them later. - Refrigerate: You can also store unbaked empanadas in the fridge. They will last for about a day or two. Make sure to cover them well to prevent drying out. When you're ready to cook, just bake them from frozen or chilled. Follow the baking instructions from the Full Recipe for the best results. Empanadas with cheese are simple to make and fun to eat. We covered key ingredients for the dough and filling, along with optional flavors to try. I shared step-by-step instructions, from preparing the dough to baking. You learned tips for perfecting your empanadas and how to store leftovers. Explore different cheese options and flavor profiles to elevate your dish. With practice, you’ll create delicious empanadas that wow your family and friends. Enjoy making and sharing this tasty treat!

Craving a cheesy treat? You’re in the right place! In this simple and delicious recipe for empanadas with cheese, I’ll guide you through every step. From preparing the perfect dough …

Read more

Categories Appetizers

Honey Butter Sweet Potato Cornbread Delight Recipe

July 23, 2025 by Chef Miles
Gathering the right ingredients is key to making Honey Butter Sweet Potato Cornbread. Here’s what you need: - 1 cup mashed sweet potatoes (roughly 2 medium sweet potatoes, cooked and mashed) - 1/2 cup unsalted butter, melted and slightly cooled - 1/3 cup honey (preferably local) - 1 large egg, beaten - 1 cup buttermilk (or substitute with regular milk plus 1 tablespoon white vinegar) - 1 cup cornmeal (preferably yellow for color) - 1 cup all-purpose flour - 1 tablespoon baking powder - 1/2 teaspoon baking soda - 1/2 teaspoon salt - 1 cup corn kernels (fresh, frozen, or canned, drained) - 1 teaspoon ground cinnamon (optional for a warm spice) Using fresh and high-quality ingredients makes a big difference. Sweet potatoes add a natural sweetness and a soft texture. Local honey brings out rich flavors and supports local farms. If you want, you can swap buttermilk with regular milk and vinegar. Cornmeal gives the cornbread its classic texture. Don't forget the corn kernels for a fun pop of sweetness! 1. Preheat the oven. Set it to 400°F (200°C) and grease your baking pan. Use butter or non-stick spray. 2. Mix the wet ingredients. In a large bowl, combine the mashed sweet potatoes, melted butter, honey, beaten egg, and buttermilk. Stir until smooth. 3. Prepare the dry mix. In another bowl, whisk together cornmeal, flour, baking powder, baking soda, salt, and optional cinnamon. Make sure there are no lumps for a light cornbread. 1. Combine mixtures. Gradually add the dry mix into the wet ingredients. Fold gently to combine, but do not overmix. This keeps the cornbread light. 2. Add corn kernels. Carefully fold in the corn kernels. This adds a sweet bite to each piece. 3. Prepare for baking. Pour the batter into the greased pan. Use a spatula to level the top. 4. Bake the cornbread. Place in the oven for 25-30 minutes. It is ready when golden brown and a toothpick comes out clean. Follow the Full Recipe for more details on this delightful dish. Enjoy the process and the wonderful smells that fill your kitchen! To make the best honey butter sweet potato cornbread, you need to focus on a few key points: - Avoid overmixing for light texture: When you mix the wet and dry ingredients, do it gently. Overmixing can make the cornbread dense. You want a light, fluffy texture that melts in your mouth. - Use fresh ingredients for the best flavor: Fresh sweet potatoes and local honey make a big difference. They add rich flavors that store-bought items can't match. Always choose the freshest options you can find. Serving your cornbread is just as important as making it. Here are a couple of great ideas: - Drizzle with honey and butter before serving: This adds a sweet touch that pairs wonderfully with the cornbread. It makes every bite feel special and indulgent. - Garnish with fresh herbs or a sprinkle of cinnamon for visual appeal: A small amount of fresh herbs like thyme or a light dusting of cinnamon can brighten the dish. It makes your cornbread look as good as it tastes. For the complete method, check out the Full Recipe to ensure you have all the steps down! {{image_4}} You can easily change some ingredients to make this cornbread your own. Here are a couple of ideas: - Substitute whole wheat flour for all-purpose flour: This swap adds fiber and gives a nuttier flavor. - Try adding jalapeños for a spicy kick: This gives your cornbread a fun twist and a bit of heat. Enhancing flavors can truly elevate your cornbread experience. Here are some options you might enjoy: - Add cheese to the batter for a savory twist: Cheese like cheddar or pepper jack melts beautifully and adds richness. - Use maple syrup instead of honey for a different sweetness: Maple syrup brings a unique flavor that pairs well with sweet potatoes. For the full recipe, check out my detailed guide above. You can keep Honey Butter Sweet Potato Cornbread at room temperature. Just cover it well. It will stay fresh for up to 2 days. This makes it easy to grab a piece for a quick snack. If you want to store it longer, put it in the fridge. It will last for up to a week there. For even more time, freeze the cornbread. It stays good for up to 3 months in the freezer. To thaw, just leave it on the counter or warm it in the oven. Enjoy it fresh from the oven, even after a long freeze! You can serve this cornbread with many dishes. Here are some tasty ideas: - Chili: The sweet taste balances well with spicy chili. - Fried Chicken: A classic combo that never fails. - BBQ Ribs: The sweetness pairs great with smoky flavors. - Salads: A fresh salad adds a nice crunch. - Soups: Pair with a warm soup for comfort. These options create a fun and tasty meal with your cornbread. Yes, you can make this recipe vegan with some simple swaps. Here’s how: - Egg Substitute: Use flaxseed meal or chia seeds mixed with water. - Butter Substitute: Replace with coconut oil or vegan butter. - Buttermilk Substitute: Mix regular plant milk with vinegar or lemon juice. These changes keep the flavor and texture, making it vegan-friendly. Reheating cornbread keeps it tasty. Here are the best methods: - Oven: Preheat your oven to 350°F. Wrap cornbread in foil and heat for about 10-15 minutes. - Microwave: Place a slice on a plate and cover it with a damp paper towel. Heat for 20-30 seconds. - Skillet: Heat a pan on low. Add a little butter, then warm the slice for about 2-3 minutes. These methods ensure your cornbread stays soft and flavorful. For more details, check the Full Recipe. This blog post covered a delicious recipe for Honey Butter Sweet Potato Cornbread. You learned about the key ingredients and step-by-step instructions for making it. I shared tips to perfect your cornbread and delicious serving suggestions. You also discovered variations to customize the recipe and storage tips for leftovers. In summary, this cornbread is not just flavorful; it’s easy to make and versatile. Try it, and enjoy a tasty dish that suits your taste!

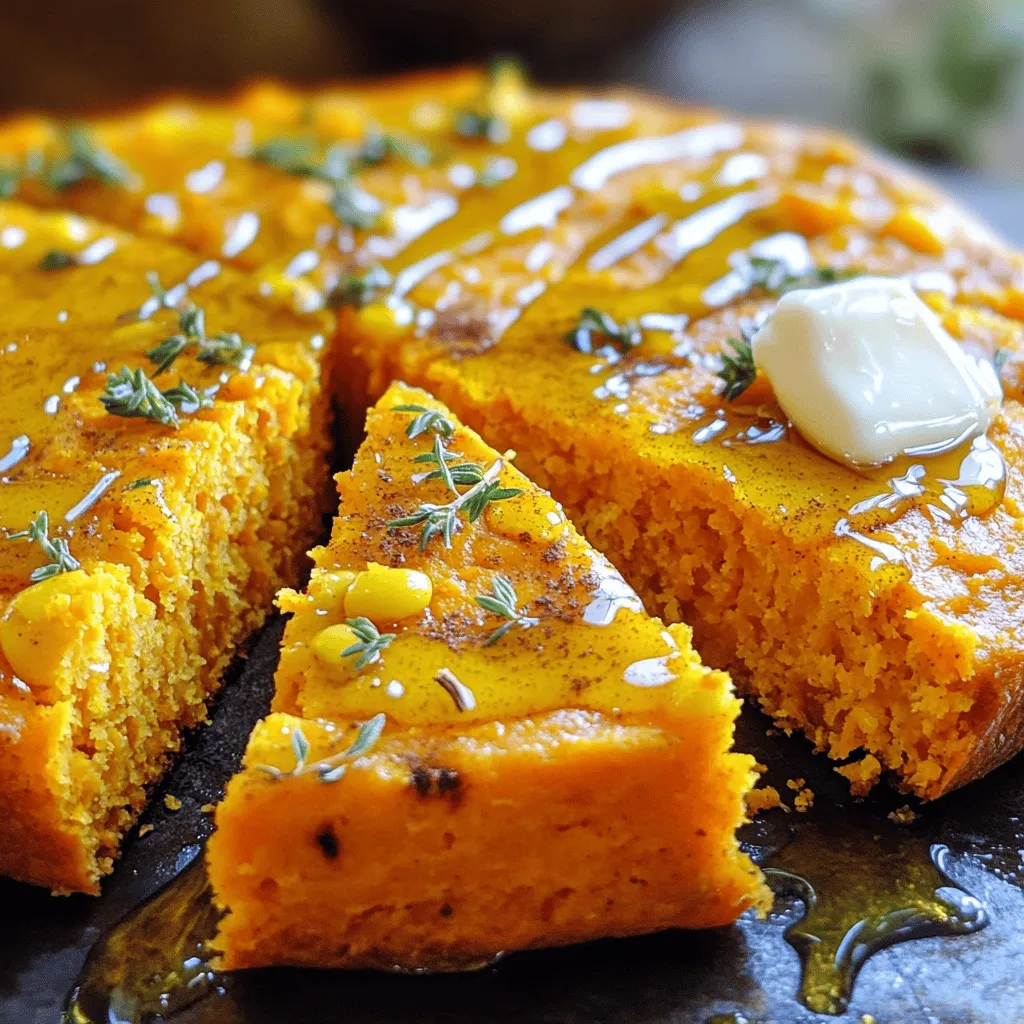
If you’re craving a warm, sweet treat, you’ve found it! My Honey Butter Sweet Potato Cornbread combines the earthy taste of sweet potatoes with a hint of honey for pure …

Read more

Categories Dinner

A Very Special Chili Recipe Flavorful and Easy

July 23, 2025 by Chef Miles
To make my very special chili, gather these ingredients: - 1 lb ground beef or ground turkey - 1 can (15 oz) kidney beans, thoroughly drained and rinsed - 1 can (15 oz) black beans, thoroughly drained and rinsed - 1 can (28 oz) crushed tomatoes with herbs - 1 medium onion, finely chopped - 2 cloves garlic, minced - 1 bell pepper, diced (choose any vibrant color for freshness) - 2 tablespoons chili powder - 1 teaspoon ground cumin - 1 teaspoon smoked paprika for a smoky depth - 1 teaspoon dried oregano - 1 teaspoon salt, or to taste - 1/2 teaspoon freshly ground black pepper - 1 tablespoon extra virgin olive oil - 1 tablespoon apple cider vinegar to brighten flavors - Fresh cilantro leaves and diced avocado for garnish You can switch some ingredients if needed. Here are a few ideas: - Ground turkey can replace ground beef for a lighter option. - If you prefer fresh beans, use cooked ones instead of canned. - Any type of canned tomatoes works; just avoid sweetened ones. - Use onion powder if you lack fresh onion. - For spice, add jalapeños or cayenne instead of chili powder. - Use lime juice instead of apple cider vinegar for a different zing. To make this chili shine, choose fresh and high-quality ingredients: - Pick lean ground meat for a better taste and texture. - Buy canned beans with no added sugar or preservatives. - Choose ripe tomatoes for a rich flavor. - Select colorful bell peppers for sweetness and nutrition. - Fresh herbs add a burst of flavor, so use them when possible. - Always taste as you cook; it helps to adjust flavors. You can find the full recipe for this tasty chili above. Gather all your ingredients before you start. This makes cooking easy and fun. Chop the onion, garlic, and bell pepper. Measure out your spices. Rinse and drain the beans. This should take about 10 minutes. 1. Heat the olive oil in a large pot over medium heat. 2. Add the chopped onion, garlic, and bell pepper. Cook for 5 minutes. Stir them often until soft. 3. Increase the heat slightly and add the ground beef or turkey. Brown it for about 7-10 minutes. Use a wooden spoon to break it apart. 4. Once the meat is brown, add the chili powder, cumin, smoked paprika, oregano, salt, and black pepper. Stir for 2 minutes to toast the spices. 5. Pour in the crushed tomatoes and the rinsed beans. Mix everything well. 6. Add the apple cider vinegar and stir again. Bring the chili to a boil. 7. Lower the heat and cover the pot. Let it simmer for at least 30 minutes. For better flavor, let it simmer for an hour. Stir occasionally. After simmering, taste your chili. Adjust the salt or pepper if needed. Serve hot in bowls. Top with fresh cilantro and creamy avocado. Enjoy! You can find the full recipe above. To boost your chili's taste, try these tips: - Use fresh herbs like cilantro for bright notes. - Add a splash of lime juice before serving. - Consider a dash of hot sauce for extra heat. - Let the chili sit overnight in the fridge. The flavors deepen and blend beautifully. - If you love smoky flavors, add a bit more smoked paprika. Having the right tools makes cooking easier. Here are my must-haves: - A large pot or Dutch oven for even cooking. - A wooden spoon for stirring. It prevents scratching your pot. - A sharp knife for chopping veggies efficiently. - Measuring spoons for precise spice control. - A timer to keep track of simmering time. How you serve your chili can make it even more special: - Use rustic, deep bowls for a cozy look. - Add a wedge of lime for a fresh touch. - Top with shredded cheese for a rich flavor that melts. - Garnish with diced avocado and fresh cilantro for color. - Consider serving with crusty bread or cornbread on the side. For the full recipe, see the section above. Enjoy your cooking adventure! {{image_4}} You can make a tasty vegetarian chili that still packs a punch. Swap the ground beef or turkey for 1 pound of chopped mushrooms or lentils. Use the same spices and beans to keep flavor strong. Add more veggies like zucchini or corn for texture and sweetness. This version is just as hearty and satisfying as the original. Do you like your chili hot, or do you prefer it mild? You can control the heat easily. For a spicy kick, add diced jalapeños or a dash of cayenne pepper. If you want it mild, skip the spicy peppers and use a sweeter bell pepper. Remember that spices can build over time, so taste as you go. Beans add texture and protein to chili. If you're not a fan of kidney or black beans, try pinto beans or chickpeas. You can also skip the beans altogether for a meatier dish. Just add an extra cup of veggies to maintain a good balance. Each type of bean brings its unique flavor, so experiment to find your favorite. For the complete recipe, check out the Full Recipe. After cooking, let your chili cool down. Once cool, place it in an airtight container. Store it in the fridge for up to four days. The flavors blend better as it sits. Make sure you cover it well to avoid spills and odors. You can freeze chili for longer storage. Allow it to cool first, then put it in freezer-safe bags or containers. Remove as much air as possible before sealing. This chili stays good for up to three months in the freezer. When ready to eat, thaw it in the fridge overnight. To reheat chili, use a pot on the stove over medium heat. Stir often to heat it evenly. For a quick option, use the microwave. Heat in short bursts, stirring in between. Make sure it's hot all the way through before serving. If it thickens too much, add a splash of broth or water to loosen it. Enjoy your chili just like the first time! For the full recipe, check out the Ultimate Firehouse Chili Recipe! This chili recipe is special because it blends rich flavors and textures. I use ground beef or turkey to create a hearty base. The mix of kidney and black beans adds protein and fiber. Crushed tomatoes with herbs give it a bright and fresh taste. I also add spices like chili powder and smoked paprika for warmth. The splash of apple cider vinegar brightens the whole dish. This recipe is easy to make and perfect for any occasion. You can store this chili in the fridge for about 3 to 4 days. Make sure to keep it in an airtight container. If you want to keep it longer, freeze it. In the freezer, it can last for up to 3 months. To reheat, simply thaw in the fridge overnight and warm it on the stove or in the microwave. Yes, you can easily modify the spice level! If you like it mild, use less chili powder. For more heat, add cayenne pepper or more chili powder. You can also add fresh jalapeños or hot sauce while cooking. Taste as you go to find your perfect level of spice. Absolutely! This chili recipe is great for meal prep. It stores well and tastes even better the next day. You can make a big batch and divide it into portions. Pack it for lunch or enjoy it for dinner throughout the week. With the right storage, you’ll have a delicious meal ready whenever you need it. You can find the Full Recipe above for easy reference. This blog post covered everything you need for a great chili. We explored key ingredients and easy swaps. I shared tips for quality and flavor, plus essential cooking steps. You learned presentation tricks, storage info, and fun variations. Chili can be simple and quick, yet so tasty. Feel free to customize your dish according to your taste. Enjoy making this recipe your own. Dive in, and savor every bite!

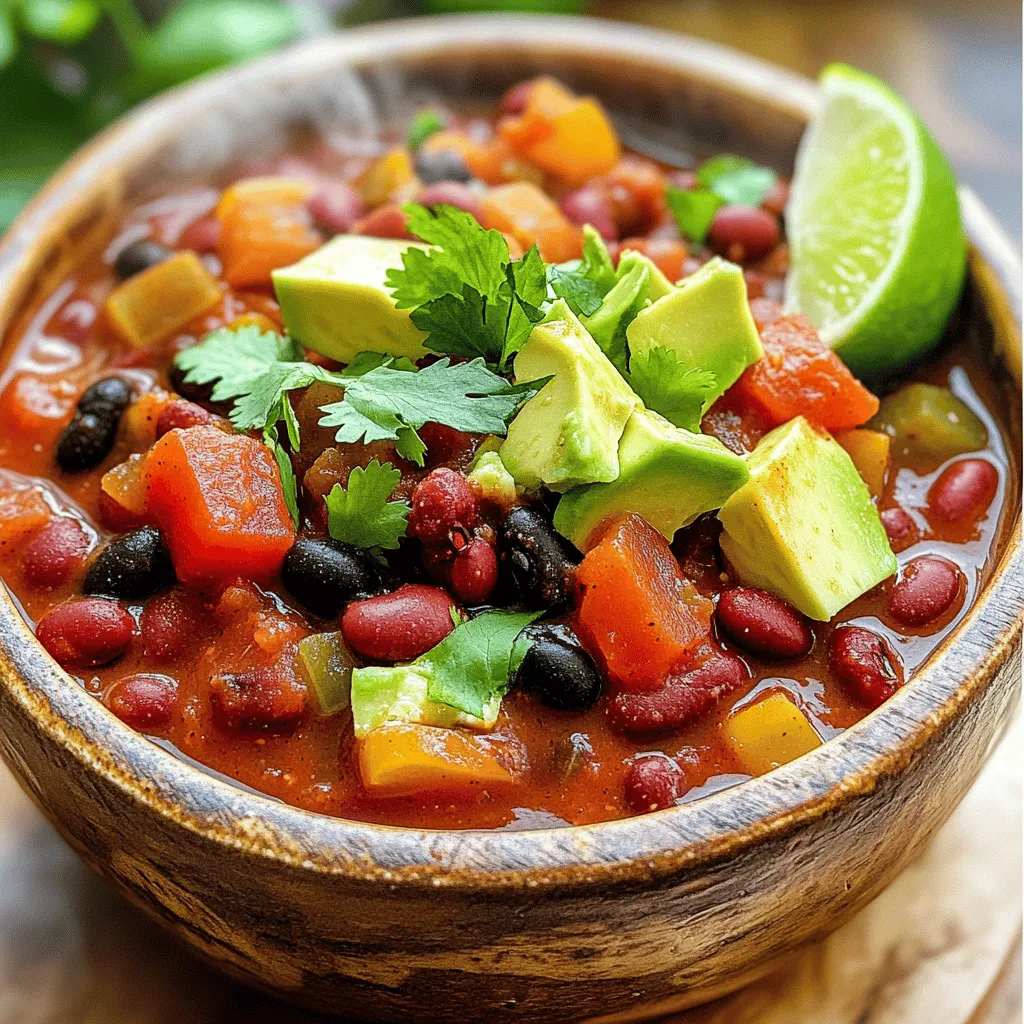
Chili is the ultimate comfort food, and I have a very special recipe just for you. It’s flavorful, easy to make, and perfect for any occasion. Whether you’re a chili …

Read more

Categories Dinner

Maple Brown Sugar Overnight Oats Healthy Start Today

July 22, 2025 by Chef Miles
For the perfect Maple Brown Sugar Overnight Oats, gather these simple ingredients: - 1 cup rolled oats - 1 ½ cups almond milk (or any milk of your preference) - 2 tablespoons pure maple syrup - 1 tablespoon packed brown sugar - 1 teaspoon pure vanilla extract - ½ teaspoon ground cinnamon - A pinch of salt - ½ cup chopped pecans (or walnuts for a different flavor) - Fresh fruit for topping (such as sliced bananas, seasonal berries, or diced apples) Using these ingredients, you can create a wholesome breakfast that is both tasty and filling. Each item plays a key role. The oats provide fiber, while the nuts add healthy fats. Maple syrup and brown sugar give sweetness, making this dish delightful. If you want to make it creamy, almond milk works great. You can also try whole milk or oat milk if you prefer. Don't forget the fresh fruit! It not only adds color but also boosts nutrition. For the full recipe, follow along with the steps in the next section. Enjoy your healthy start today! - Mix the Ingredients Start by gathering all your ingredients. In a large bowl, combine 1 cup of rolled oats, 1 ½ cups of almond milk, 2 tablespoons of pure maple syrup, and 1 tablespoon of packed brown sugar. Add 1 teaspoon of pure vanilla extract, ½ teaspoon of ground cinnamon, and a pinch of salt. Use a whisk or spoon to blend everything well. This mix is the base for your overnight oats. - Divide into Containers After mixing, take your oat mixture and divide it into two jars or airtight containers. Make sure to leave a little space at the top. This space is for toppings you'll add later. It’s important to use containers that seal well to keep your oats fresh overnight. - Refrigerate Overnight Secure the lids on the jars and place them in the fridge. Let them chill overnight or for at least 4 hours. This soaking time allows the oats to absorb the almond milk and flavors. You’ll wake up to creamy oats ready to enjoy! - Stir Before Serving In the morning, take the jars out of the fridge. Give the oats a good stir to mix any settled ingredients. If the oats seem too thick, add a splash of milk to reach your desired creaminess. This step ensures every bite is smooth and tasty. - Add Toppings Now comes the fun part! Top each jar with a handful of chopped pecans or walnuts for a crunchy contrast. You can also add fresh fruit like sliced bananas, seasonal berries, or diced apples for extra flavor. These toppings not only boost taste but also make your oats look pretty! For the full recipe, check out the details above. Enjoy your healthy start! - Adjusting Liquid Levels: If your oats seem too thick, add more milk. Start with a little and mix well. This helps you find the right texture you love. For creamier oats, use more milk or yogurt. If you prefer them thicker, cut back on the liquid. - Stirring Techniques: Stir well before serving. This mixes the ingredients and keeps the oats smooth. If you notice clumps, give it a good mix. You can also use a fork to break them up. This ensures even flavor in every bite. - Additional Sweetener Options: While maple syrup and brown sugar are great, you can try honey or agave. Each adds a unique taste. If you want less sugar, use ripe bananas for natural sweetness. They mash well and blend into the oats. - Spice Variations: Cinnamon is a classic, but you can add more spices. Try nutmeg or ginger for a warm kick. A dash of cocoa powder gives a chocolatey twist. Another option is to mix in some pumpkin spice for a seasonal touch. Each spice changes the flavor profile for a fun twist. {{image_4}} If you want a nut-free dish, use seeds instead of nuts. Seeds like sunflower or pumpkin can add great crunch. They also bring healthy fats and protein. Just sprinkle a handful on top of your oats. This keeps it tasty and safe for those with nut allergies. You can give your oats a fun twist. Try adding chocolate or cocoa powder for a rich taste. Just mix in one tablespoon when you combine your ingredients. It adds a sweet touch that feels like dessert. Another way to enhance flavor is by adding nut butters. A scoop of peanut butter or almond butter adds creaminess. It also gives extra protein. Simply stir it into the oats before refrigerating. These small changes make your Maple Brown Sugar Overnight Oats even more exciting. You can create your own version every time! For the full recipe, check out the Maple Brown Sugar Overnight Oats section. To keep your maple brown sugar overnight oats fresh, use airtight containers. These containers lock in moisture and prevent your oats from drying out. Make sure to fill each jar, but leave some space at the top for toppings. This practice helps keep the oats from getting soggy. Store the jars in the fridge for up to five days. Check for any change in smell or texture before eating. If the oats smell off or look strange, it’s best to toss them. Enjoy your oats while they’re still fresh for the best taste. You can freeze overnight oats for longer storage. To freeze, pour the oats into a freezer-safe container. Leave some room for expansion as they freeze. Seal the container tightly to avoid freezer burn. When you want to eat them, move the container to the fridge overnight to thaw. If you need it quicker, place the container in cold water for about an hour. Stir well before serving and add your favorite toppings for a delicious meal. You can store overnight oats in the fridge for up to five days. They stay fresh in airtight containers. I recommend eating them within this time for the best taste. If you notice any off smells or textures, it’s best to discard them. Yes, you can use many types of milk. Almond milk works well, but you can also try oat milk, soy milk, or cow's milk. Each choice brings its own flavor and texture. Experiment to find what you like best! Overnight oats are very healthy. They are rich in fiber, which helps with digestion. They also provide protein and healthy fats, especially if you add nuts. The oats keep you full longer, which can help with weight management. Absolutely! You can make a big batch of maple brown sugar overnight oats for the week. Just divide the mixture into jars before refrigerating. Keep the jars sealed and grab one each morning for a quick breakfast. Fruits add great flavor and texture. I love using sliced bananas, seasonal berries, or diced apples. You can also try peaches or mangoes. Fresh fruit not only tastes good but also boosts the nutrition of your meal. You learned how to make tasty maple brown sugar overnight oats. We covered the key ingredients, easy steps, and storage tips. Remember, you can switch ingredients based on your taste. Try new fruits, nuts, or spices for fun flavors. Overnight oats are perfect for busy mornings and meal prep. Enjoy a healthy, quick breakfast that you can make your own! You now have a great start for many delicious mornings ahead.

Start your day with a delicious twist! Maple Brown Sugar Overnight Oats are quick, tasty, and packed with nutrients. Imagine waking up to creamy oats sweetened just right, with hints …

Read more

Categories Breakfast

Apple Bread with Cinnamon Pecan Crunch Delightful Recipe

July 22, 2025 by Chef Miles
- 2 cups all-purpose flour - 1 cup granulated sugar - 1 teaspoon baking soda - 1 teaspoon baking powder - 1 teaspoon ground cinnamon - ½ teaspoon salt - 2 large eggs - ½ cup vegetable oil - 1 cup applesauce - 1 teaspoon vanilla extract - 1 ½ cups peeled and diced apples (approximately 2 medium apples) - ½ cup pecans, chopped - 2 tablespoons brown sugar - 1 teaspoon ground cinnamon (for topping) In this recipe, we use a mix of dry and wet ingredients to create a fluffy apple bread. The dry ingredients are the base and include flour, sugar, baking soda, baking powder, cinnamon, and salt. These work together to form the structure of the bread. For the wet ingredients, we need eggs, vegetable oil, applesauce, and vanilla extract. The eggs help bind everything, while the oil keeps it moist. Applesauce adds natural sweetness and flavor, and vanilla gives a lovely aroma. The add-ins are where the magic happens. We use diced apples for a burst of flavor and texture. Chopped pecans add crunch and richness. The brown sugar and cinnamon topping gives a sweet, crunchy finish that makes this bread irresistible. You can find the full recipe above to see how to bring everything together for a delightful treat. - Preheat the oven to 350°F (175°C). - Grease a 9x5-inch loaf pan with cooking spray or butter. Start by getting your oven ready. Set it to 350°F (175°C). This is the perfect temperature for baking our apple bread. Now, grab a 9x5-inch loaf pan. Grease it well with some cooking spray or butter. This step keeps your bread from sticking. - Sift and combine all dry ingredients in a large mixing bowl. Next, let’s mix the dry ingredients. In a large bowl, sift together the flour, sugar, baking soda, baking powder, ground cinnamon, and salt. This ensures everything mixes well. It also adds air, helping our bread rise. - Whisk together eggs, vegetable oil, applesauce, and vanilla extract. - Fold wet ingredients into dry ingredients carefully. Now, we’ll move to the wet ingredients. In another bowl, crack your eggs. Whisk them with the vegetable oil, applesauce, and vanilla extract. Mix until smooth. Then, gently fold this wet mix into the dry mix. Be careful not to overmix. This keeps the bread fluffy. - Fold in diced apples. - Create and combine the cinnamon pecan topping mixture. Next, it’s time to add the apples. Fold in the diced apples gently. They give our bread a lovely flavor and texture. Now, let’s make the crunchy topping. In a small bowl, mix the chopped pecans, brown sugar, and ground cinnamon. Combine until everything is well mixed. - Layer the batter and topping in the loaf pan and bake. Now, we are ready to assemble! Pour half of the batter into the prepared loaf pan. Smooth it out evenly. Sprinkle half of the cinnamon pecan topping over this layer. Then, add the rest of the batter on top. Finish by adding the remaining topping. Place the loaf pan in the oven and bake for 55-65 minutes. - Allow cooling time before slicing and serving. After baking, take the bread out. Let it cool in the pan for about 10 minutes. Then, move it to a wire rack to cool completely. Wait until it’s cool before slicing. This helps it hold its shape better when you cut it. Enjoy your delicious apple bread with cinnamon pecan crunch! For the full recipe, check the earlier section. To avoid overmixing, mix until just combined. Overmixing makes the bread dense. Use a spatula to gently fold the ingredients together. This keeps your bread light and fluffy. For checking doneness, insert a toothpick into the center. It should come out clean. If it has wet batter, bake a few more minutes. Every oven is different, so keep an eye on it! You can serve this bread warm or at room temperature. Drizzle honey or maple syrup on top for extra sweetness. A sprinkle of cinnamon adds a nice touch. You can also serve it with whipped cream or a scoop of vanilla ice cream. This makes the dish feel special! If your bread is dense, check your mixing method. Make sure you didn’t overmix. Also, make sure to measure your ingredients accurately. Too much flour can lead to a heavy loaf. For uneven baking, check your oven temperature. An oven thermometer can help. If the outside browns too fast, cover it with foil while it bakes. This helps the inside cook evenly. {{image_4}} To make this apple bread gluten-free, you can swap the all-purpose flour for a gluten-free blend. Look for a blend that contains xanthan gum for the best texture. You can also use almond flour or oat flour, but remember they have different flavors. If you want lower sugar options, try using coconut sugar or honey. These options give a nice taste and can be healthier than regular sugar. You can also reduce the total sugar by one-third without losing much flavor. Spice up your apple bread by adding nutmeg or ginger. Just a little bit can change the whole taste. Nutmeg adds warmth, while ginger gives a slight kick. You can also mix in dried fruits like cranberries or raisins. They add sweetness and chewiness. For a special treat, throw in chocolate chips. They melt and make the bread extra delightful. You can change the shape of your apple bread. Instead of a loaf, try making muffins or mini loaves. This way, they bake faster and are easy to share. Each muffin can be a perfect portion, great for kids or snacks. For full details on the recipe, check out the Full Recipe. Keep your apple bread at room temperature for up to three days. Store it in an airtight container or wrap it tightly in plastic wrap. This keeps it fresh and moist. If you notice it getting stale, you can warm it in the oven for a few minutes to revive its texture. To extend freshness, you can store the bread in the fridge. Wrap it in plastic wrap or place it in an airtight container. This method can keep your apple bread fresh for about a week. However, refrigeration can change the bread's texture, making it a bit denser. Freezing is a great option if you want to keep your apple bread longer. First, let it cool completely. Then, wrap the bread tightly in plastic wrap and aluminum foil to prevent freezer burn. You can freeze it for up to three months. To enjoy, thaw it in the fridge overnight or at room temperature for a few hours. Reheat slices in a toaster or oven for a warm treat. For the full recipe, check the earlier section! You can use mashed bananas or puréed pears. Both options keep the bread moist. If you want a richer flavor, try using yogurt. Yogurt adds creaminess and a nice tang. Just remember, these swaps may change the taste a little bit. Yes, you can! Try adding chopped walnuts or almonds for extra crunch. Diced pears or even dried cranberries work well too. They add sweetness and a fun twist. Just ensure that any added fruit does not make the batter too wet. If you store the apple bread at room temperature, it lasts about three days. Keep it in an airtight container to keep it fresh. For longer storage, place it in the fridge, where it can stay good for about a week. If you freeze it, it can last up to three months. Just wrap it well to avoid freezer burn. You now have a simple way to make delicious apple bread. We covered ingredients, steps, and tips to ensure a great bake every time. Remember, using fresh apples and avoiding overmixing will improve texture. Feel free to experiment with add-ins and enjoy this treat with family or friends. With the right storage, you can keep the bread fresh for days. Happy baking!

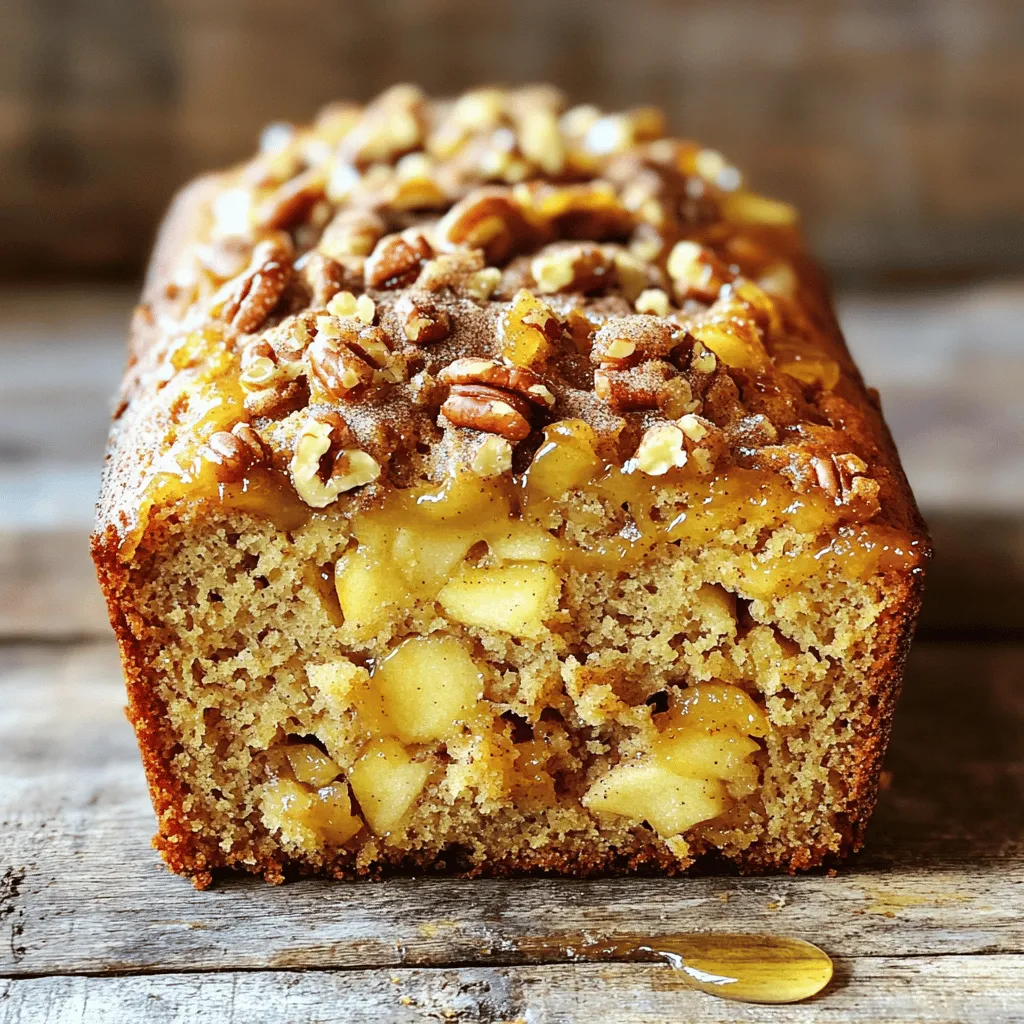
If you love warm, comforting flavors, you’re in for a treat! This Apple Bread with Cinnamon Pecan Crunch recipe combines sweet apples, warm spice, and crunchy pecans. It’s not just …

Read more

Categories Desserts

Black Velvet Halloween Cake Rich and Spooky Delight

July 22, 2025 by Chef Miles
To make your Black Velvet Halloween Cake, gather these must-have items: - 2 cups all-purpose flour - 1 ½ cups granulated sugar - ¾ cup unsweetened cocoa powder - 1 teaspoon baking soda - 1 teaspoon baking powder - ½ teaspoon salt - 1 cup buttermilk, at room temperature - ½ cup vegetable oil - 2 large eggs - 2 teaspoons vanilla extract - 1 cup boiling water - 1 cup heavy whipping cream - ½ cup powdered sugar - 1 teaspoon vanilla extract (for the whipped cream) You can add a few fun twists with these options: - Black gel food coloring (for a deeper color) - Edible glitter or Halloween-themed sprinkles for decoration Ensure you have the right tools for a smooth baking process: - Two 9-inch round cake pans - Mixing bowls (large and small) - Whisk or electric mixer - Rubber spatula - Measuring cups and spoons - Toothpick (for testing doneness) - Wire rack (for cooling) - Sturdy serving plate (for presentation) This list will help you create a spooky and delicious cake. For full details on how to bake and assemble, check the Full Recipe. Start by preheating your oven to 350°F (175°C). Grease two 9-inch round cake pans. Lightly flour the pans to keep the cake from sticking. In a large bowl, sift together the flour, sugar, cocoa powder, baking soda, baking powder, and salt. This step makes sure all dry ingredients mix well. In another bowl, whisk the buttermilk, vegetable oil, eggs, and vanilla extract. Mix until it is smooth. Slowly add this wet mix to the dry ingredients. Stir gently with a spatula. Be careful not to overmix. Next, carefully add the boiling water to the batter. It will be very thin. If you want a darker shade, add a few drops of black gel food coloring. Now, evenly divide the batter between the two prepared pans. Bake in the oven for 30-35 minutes. To check if they are done, insert a toothpick in the center. If it comes out clean, the cakes are ready. Once baked, let them cool in the pans for about 10 minutes. After that, transfer the cakes to a wire rack. Allow them to cool completely before frosting. While the cakes cool, it's time to make the whipped cream. In a mixing bowl, beat the heavy cream with powdered sugar and vanilla extract. Keep beating until soft peaks form. This will create a light and fluffy frosting. Once the cakes are cool, place one layer on a sturdy serving plate. Spread a generous layer of whipped cream on top. Then, gently place the second layer on top. Cover the entire cake with the remaining whipped cream. Smooth it out with a spatula. For a spooky touch, decorate with edible glitter or Halloween sprinkles. This cake will surely be a hit at your Halloween gathering! For the complete details, check the Full Recipe. To make the best whipped cream, use cold ingredients. Start with heavy whipping cream from the fridge. Add powdered sugar and vanilla extract to the bowl. Use a hand mixer or stand mixer on medium speed. Beat until soft peaks form, about 2-3 minutes. Watch it closely so you don’t overbeat. Overbeating can turn it into butter. A perfect whipped cream is light and fluffy. It adds a nice touch to your cake. Keeping your Black Velvet Halloween Cake moist is key. Use buttermilk; it adds richness and moisture. Don’t skip the boiling water in the recipe. It helps dissolve the cocoa powder and keeps the cake soft. Make sure to bake just until done; this prevents dryness. Insert a toothpick into the center; it should come out clean but not dry. Let the cake cool completely before frosting. This step locks in moisture. Get creative with your cake decoration! Use edible glitter for a spooky shimmer. Halloween-themed sprinkles add fun colors and shapes. Try placing plastic spiders or ghosts on top for a frightful touch. You can also pipe extra whipped cream around the base. A black cake stand makes the cake pop. Consider using faux cobwebs or small pumpkins around the display. These ideas make your cake a showstopper at any Halloween party. For the full recipe, check below. {{image_4}} If you want to change up the frosting, go for cream cheese frosting. It adds a nice tang to the sweet cake. You can also try chocolate ganache for a rich, glossy finish. Another fun option is a buttercream made with orange zest. This gives a bright burst of flavor and ties into the Halloween theme. To make the cake even more special, consider adding flavor extracts. A teaspoon of almond extract gives a sweet, nutty taste. If you prefer something fruity, lemon zest adds a fresh twist. You can also mix in mini chocolate chips for extra texture. These small changes can make your cake unique for any spooky celebration. You can easily adapt this recipe for different cake sizes. For a sheet cake, use a 9x13-inch pan. Bake for about 40-45 minutes. If you want cupcakes, fill each liner half full. Bake them for 18-20 minutes. Adjusting the size lets you serve more guests or create fun cake pops. Each variation still captures the rich flavors of the Black Velvet Halloween Cake. For the full recipe, check the details above. To keep your leftover Black Velvet Halloween Cake fresh, store it in an airtight container. This helps to keep the cake moist and tasty. If you don’t have a container, cover the cake with plastic wrap. Place it in the fridge if you plan to eat it later. The cake can stay good for about 3 to 5 days in the fridge. If you want to save the cake for later, freezing is a great option. First, let the cake cool completely. Wrap each layer in plastic wrap tightly. Then, place the wrapped layers in a freezer bag or a sealed container. This way, the cake can last for up to three months in the freezer. When it's time to enjoy your frozen cake, take it out of the freezer. Leave it wrapped and let it thaw in the fridge overnight. This helps the cake stay moist. If you’re in a hurry, you can thaw it at room temperature for a few hours. Just remember not to rush it in the microwave, as this can make the cake dry. For the best taste, frost it after thawing. You can find the Full Recipe to refresh your memory on how to make it again! Black Velvet Cake is a rich, dark dessert. It combines cocoa powder with a soft, moist texture. The cake has a deep black color, often enhanced by food coloring. It is similar to red velvet but with cocoa's unique flavor. This cake is perfect for Halloween due to its spooky look. I love how the dark cake contrasts with the bright whipped cream frosting. It makes for a stunning centerpiece at any spooky celebration. Yes, you can make this cake ahead of time! I recommend baking the cake layers a day or two before your event. Let the layers cool completely, then wrap them tightly in plastic wrap. Store them in the fridge to keep them fresh. You can also freeze the layers for up to a month. Just make sure to let them thaw in the fridge before frosting. This way, you save time on the big day! If you want to reduce the sweetness, you have a few options. First, cut back on the granulated sugar in the cake recipe. You can also decrease the powdered sugar in the whipped cream. Another idea is to add a pinch of salt to balance the flavors. You can make a cream cheese frosting instead, as it usually has less sugar than whipped cream. This gives a nice tang that offsets the sweetness. Enjoy your cake your way! You now have all you need to make a delicious Black Velvet Cake. We explored the essential and optional ingredients, shared step-by-step baking instructions, and provided tips for perfecting your whipped cream. We also discussed variations and storage methods to keep your cake fresh. Remember, you can customize this cake to fit any occasion. Whether for Halloween or a special event, make it your own! Enjoy your baking journey, and have fun with each bite you take.

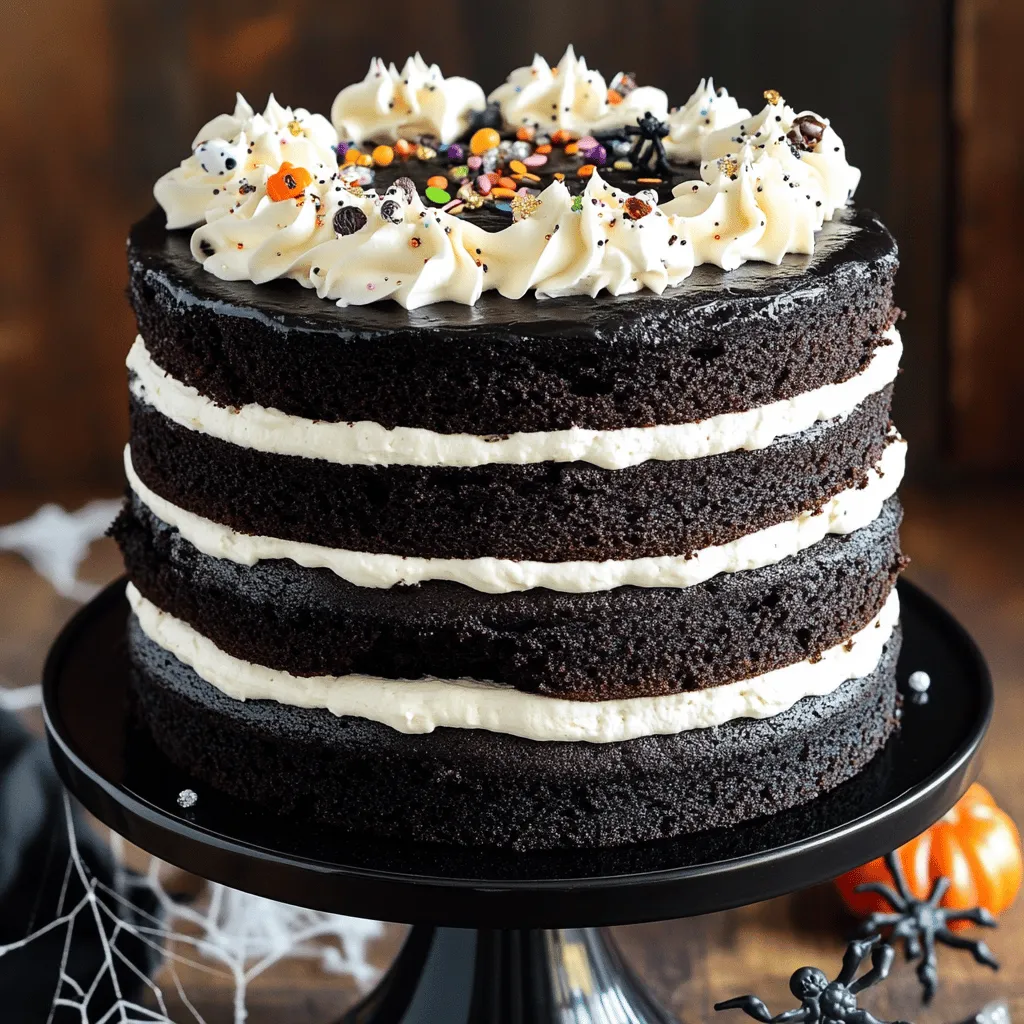
Get ready to impress at your Halloween party with the spooktacular Black Velvet Halloween Cake! This rich and dark treat sets the perfect spooky mood while delighting your taste buds. …

Read more

Categories Desserts

Apple Cider Cheesecake Rich and Flavorful Delight

July 22, 2025 by Chef Miles
- Main Ingredients - 3 packages (8 oz each) cream cheese, softened - 1 cup granulated sugar - 1 teaspoon pure vanilla extract - ½ cup apple cider - 3 large eggs, room temperature - 1 teaspoon ground cinnamon - ¼ teaspoon ground nutmeg - 2 cups diced apples (such as Honeycrisp or Granny Smith) - 1 tablespoon fresh lemon juice - Crust Ingredients - 1 ½ cups graham cracker crumbs - ½ cup unsalted butter, melted - 1 tablespoon sugar - Optional Toppings - Whipped cream - Caramel sauce - Extra apple slices for garnish Every ingredient plays a key role in making the apple cider cheesecake rich and flavorful. The cream cheese gives it a smooth texture. The apple cider adds a cozy taste that reminds me of fall. The spices, like cinnamon and nutmeg, bring warmth to each bite. When I make the crust, I use graham cracker crumbs mixed with melted butter and sugar. This combo gives the cheesecake a crunchy base that contrasts with the creamy filling. For toppings, I enjoy adding whipped cream and caramel sauce. They make each slice look special and taste even better. You can also add apple slices for a fresh touch. For the full recipe, check out the details below. Start by preheating your oven to 325°F (160°C). This step is key for even baking. Next, grab a medium bowl. Combine 1 ½ cups of graham cracker crumbs, ½ cup of melted unsalted butter, and 1 tablespoon of sugar. Mix until the crumbs look wet. Now, press this mixture into the bottom of a 9-inch springform pan. Make sure it’s even and compact. This forms a solid base for your cheesecake. In a large bowl, beat 3 packages of softened cream cheese with a hand mixer. Mix until smooth and creamy. Gradually add in 1 cup of granulated sugar. Mix until it’s fully blended. Stir in 1 teaspoon of pure vanilla extract and ½ cup of apple cider. This gives the filling its rich flavor. Add 3 large eggs, one at a time. Mix well after each egg. Now, fold in 1 teaspoon of ground cinnamon and ¼ teaspoon of ground nutmeg. These spices add warmth to the filling. Finally, fold in 2 cups of diced apples and drizzle 1 tablespoon of fresh lemon juice over them. This keeps the apples fresh and bright. Pour the creamy filling over your cooled crust. Use a spatula to smooth the top. Now, place the cheesecake in the oven and bake for 55-60 minutes. It’s done when the edges look firm, but the center still jiggles a bit. After baking, turn off the oven and crack the door open. Let the cheesecake cool in the oven for 1 hour. Then, cool it to room temperature. Transfer it to the fridge for at least 4 hours, or overnight. This chilling time helps it set. When ready to serve, run a knife around the edge of the pan. Release the springform and slice it up. Enjoy your wonderful Apple Cider Cheesecake! For the complete process, check out the Full Recipe. To make your apple cider cheesecake truly shine, follow these tips: - Use room temperature ingredients: This helps your cheesecake mix smoothly. Let the cream cheese and eggs sit out for about 30 minutes before using them. - Don’t skip the cooling steps: Cool the cheesecake slowly in the oven. This prevents cracks and helps it set properly. - Choose the right apples: Use a mix of sweet and tart apples. Honeycrisp and Granny Smith work well together. - Add a little lemon juice: This keeps the apples fresh and brightens the flavor. Here are common pitfalls to watch out for: - Overmixing the batter: This can add too much air, causing cracks. Mix just until combined. - Skipping the water bath: A water bath can help the cheesecake bake evenly and stay moist. - Not chilling enough: Chill your cheesecake for at least four hours. Overnight is even better for the best texture. Serving your cheesecake can be just as fun as making it. Here are some ideas: - Garnish with whipped cream: A dollop of whipped cream adds creaminess. - Drizzle with caramel sauce: This adds sweetness and a nice visual touch. - Top with apple slices: Thin apple slices can enhance the presentation and flavor. - Serve with a scoop of ice cream: Vanilla ice cream complements the flavors nicely. For more detailed steps, check the Full Recipe for the perfect apple cider cheesecake. {{image_4}} Apple cider cheesecake shines in fall. Use fresh cider for a crisp taste. In winter, add spices like ginger and cloves. For spring, swap apples with fresh berries. This change brings bright flavors to your dessert. In summer, try peaches or cherries for a refreshing twist. Each season offers unique fruits to enhance your cheesecake. You can mix flavors into your cheesecake. For a caramel twist, swirl in caramel sauce before baking. Want something nutty? Add chopped walnuts or pecans into the filling. A chocolate version? Mix in cocoa powder for a rich taste. For a tangy hit, try a splash of lemon zest. Each flavor variation makes your cheesecake a new experience. Graham crackers are great, but other crusts work well too. Try using crushed Oreos for a chocolate kick. A nut crust with almonds or pecans adds a crunchy texture. For gluten-free options, use almond flour or gluten-free cookies. You can also make a crust with crushed pretzels for a salty-sweet combo. Each crust brings a different flavor and texture to your apple cider cheesecake. For more details, check the full recipe for Apple Cider Cheesecake Delight. Storing your leftover cheesecake is simple. First, cover it tightly with plastic wrap or aluminum foil. This keeps the cheesecake moist and fresh. Place it in the fridge where it can last up to five days. If you slice it, make sure each piece is wrapped well. If you want to keep your cheesecake longer, freezing is an option. To freeze, let it cool completely, then slice it. Wrap each slice in plastic wrap tightly. After that, place the wrapped slices in a freezer bag or container. Your cheesecake can stay frozen for up to three months. Just remember to label the bags with the date. When you’re ready to enjoy your cheesecake again, thaw it in the fridge overnight. This helps it stay creamy. If you need it faster, leave it on the counter for about an hour. Avoid using the microwave, as it can change the texture. For a warm slice, gently heat each piece in the oven at a low temperature for a few minutes. Enjoy your delicious Apple Cider Cheesecake Delight! If you don't have apple cider, you can use apple juice. It gives a similar flavor. You could also mix apple juice with a bit of lemon juice. This adds a nice tartness. If you want a deeper flavor, consider using unsweetened apple sauce. The cheesecake is done when the edges look firm. The center should still jiggle slightly. You can also check by inserting a toothpick. If it comes out mostly clean, your cheesecake is ready. Yes, you can make this cheesecake ahead of time. It tastes even better the next day! Just let it cool completely and then refrigerate it. You can store it for up to a week. Apple cider cheesecake pairs well with warm spices. Think cinnamon, nutmeg, and ginger. Caramel sauce adds a sweet touch. A dollop of whipped cream can lighten it up too. You can even serve it with roasted nuts for crunch. We discussed the key ingredients, step-by-step instructions, and helpful tips for making cheesecake. You can elevate your dessert with fun variations and smart storage tips. Remember, avoiding common mistakes is crucial for the best result. With the right flavor pairings, your cheesecake can impress any guest. I encourage you to try my tips and make your perfect cheesecake. Your effort will shine through in every bite. Enjoy creating and sharing this delicious treat!

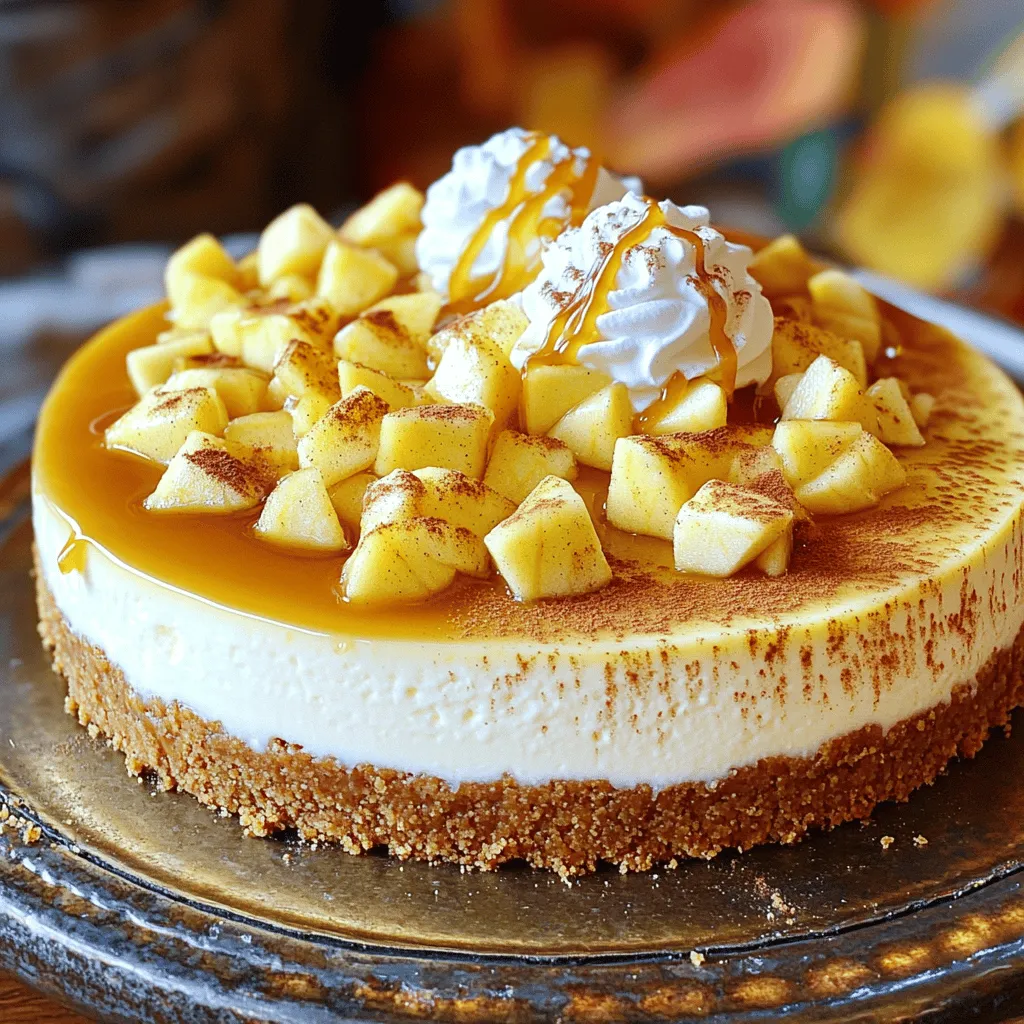
Are you ready for a dessert that captures fall’s essence? This Apple Cider Cheesecake is rich and flavorful, perfect for any gathering. You’ll learn how to craft a creamy filling …

Read more

Categories Desserts

Pumpkin French Toast Simple and Delicious Recipe

July 22, 2025 by Chef Miles
- 4 slices of thick bread (brioche or challah recommended) - 1 cup pumpkin puree (canned or homemade) - 2 large eggs - 1/2 cup milk (dairy or plant-based) - 1 teaspoon pure vanilla extract - 1 teaspoon pumpkin pie spice - 1 tablespoon brown sugar - Butter or oil for frying - Maple syrup and whipped cream for serving When making Pumpkin French Toast, use good quality ingredients. I love thick bread like brioche or challah. They soak up the pumpkin mix well and create a soft texture. Next, pumpkin puree is key. You can use canned puree or make your own. If you make it, roast the pumpkin until soft, then blend it until smooth. This gives your dish a fresh taste. Eggs bind everything together. They add richness and help the bread crisp up nicely. Milk adds creaminess. You can use dairy or plant-based milk, depending on your taste. Vanilla extract and pumpkin pie spice add warmth and flavor. You can make your spice blend with cinnamon, nutmeg, and ginger if you like. For those who want a sweeter touch, brown sugar is an option. It enhances the flavor of the pumpkin. Finally, you'll need butter or oil for frying. This helps the toast get that golden brown crust. Don’t forget maple syrup and whipped cream for serving! They elevate the dish and add a delicious finish. For the full recipe, check the link above. Enjoy your cooking! Start by gathering your ingredients. In a medium bowl, combine the pumpkin puree, eggs, milk, vanilla extract, pumpkin pie spice, and a pinch of salt. If you want it sweeter, add brown sugar. Use a whisk to mix everything well until it becomes smooth. This mixture will give your French toast a rich, pumpkin flavor. Next, preheat a non-stick skillet over medium heat. Add a small amount of butter or oil to the skillet and let it melt. This will help your toast cook evenly and prevent sticking. Take each slice of your thick bread and dip it into the pumpkin mixture. Make sure both sides get coated, but do not soak them too long. Let any extra mixture drip back into the bowl. Carefully place the coated bread slices onto the hot skillet. Cook each slice for about 3-4 minutes on each side, until they turn golden brown and crispy. Once you cook a slice, remove it from the skillet and keep it warm on a plate. Repeat this for the rest of the slices. When you're done cooking, it’s time to serve. Stack the pumpkin spice French toast on plates and drizzle with maple syrup. Add whipped cream if you like. For a pretty touch, you can sprinkle some extra pumpkin pie spice on top. Enjoy your delicious creation! Check the full recipe for more tips. For the best pumpkin French toast, use thick bread like brioche or challah. These breads soak up the pumpkin mix well. Their soft texture gives a nice bite. If you pick thinner bread, it may burn faster or become too soggy. Aim for slices about one inch thick. This thickness helps the bread cook evenly and hold onto the flavor. Set your skillet to medium heat for even cooking. If it’s too hot, the outside cooks fast, but the inside stays wet. To avoid sogginess, dip each slice quickly in the pumpkin mixture. You want it coated, but not soaked. Let any extra mixture drip off before placing it in the pan. This step keeps it from becoming mushy. Add fun toppings to make your dish pop. Maple syrup is a classic choice that adds sweetness. You can also use whipped cream for a rich finish. For extra flair, sprinkle some pumpkin pie spice on top. Pair your French toast with seasonal sides, like crispy bacon or fresh fruit. These sides balance the sweetness and add color to your plate. For the full recipe, check out the details provided earlier. {{image_4}} You can easily change up the flavor of your Pumpkin French Toast. Adding chocolate chips or nuts makes it even better. Chocolate chips give a sweet twist. Nuts add a nice crunch. You can mix them into the batter or sprinkle them on top before serving. Try using different spices too. Instead of pumpkin pie spice, you can use cinnamon, nutmeg, or ginger. Each spice brings its own taste. Mix and match to find your favorite combination. If you need gluten-free options, choose gluten-free bread. Many brands offer tasty choices. This way, everyone can enjoy this dish. You can also use dairy-free milk to make it vegan. Almond milk or oat milk works well. Just substitute the regular milk in the recipe. You can serve Pumpkin French Toast in savory ways too. Add cheese or fresh herbs for a fun twist. This makes it a tasty brunch option. If you are hosting a gathering, turning it into a casserole is a great idea. Layer the bread in a baking dish and pour the pumpkin mixture over it. Bake until golden brown. This way, you can serve many guests at once. For the full recipe, check the recipe section above. To store your Pumpkin French Toast, place it in an airtight container. Make sure it cools down first. This helps keep it fresh. In the fridge, it lasts about three days. If you want to eat it later, freezing is a good option. To reheat without losing texture, use an oven or toaster oven. Preheat to 350°F (175°C) and place the French toast on a baking sheet. Heat it for about 10 minutes. This keeps it warm and crisp. You can also use a skillet over medium heat. Just add a little butter to keep it from sticking. To freeze leftovers, wrap each slice tightly in plastic wrap. Then, place them in a freezer bag. This helps prevent freezer burn. They can stay in the freezer for up to two months. When ready to eat, thaw in the fridge overnight. You can also use the microwave for quick thawing. Just be careful not to overheat. Yes, you can prep Pumpkin French Toast ahead of time. Start by mixing the pumpkin mixture as directed in the Full Recipe. Store it in the fridge for up to 24 hours. This helps the flavors meld well. You can also coat the bread slices in the mixture and cover them with plastic wrap. Just cook them when you're ready to eat. This makes busy mornings easier. Serving Pumpkin French Toast is fun and creative. You can stack the slices high on a plate. Drizzle warm maple syrup over them for a sweet touch. Add whipped cream for a rich flavor. For a festive look, sprinkle extra pumpkin pie spice on top. You can also serve it with fresh fruit like sliced bananas or berries. These toppings add color and taste. Using fresh pumpkin is great, but it changes the taste and texture. Fresh pumpkin has a lighter flavor than canned puree. It also needs more prep time. You must cook and mash the pumpkin before using it. If you choose fresh, make sure it is well-cooked and smooth. This way, it blends nicely into the mixture. To sum up, making Pumpkin French Toast is both fun and simple. You learned about the key ingredients, like thick bread and pumpkin puree. I shared easy steps to prepare and cook this dish perfectly. You saw tips for choosing the right bread and ideas for serving your toast. Don’t forget the fun variations to fit different diets and tastes. With this guide, you'll impress anyone you serve. Enjoy every bite of your homemade Pumpkin French Toast!

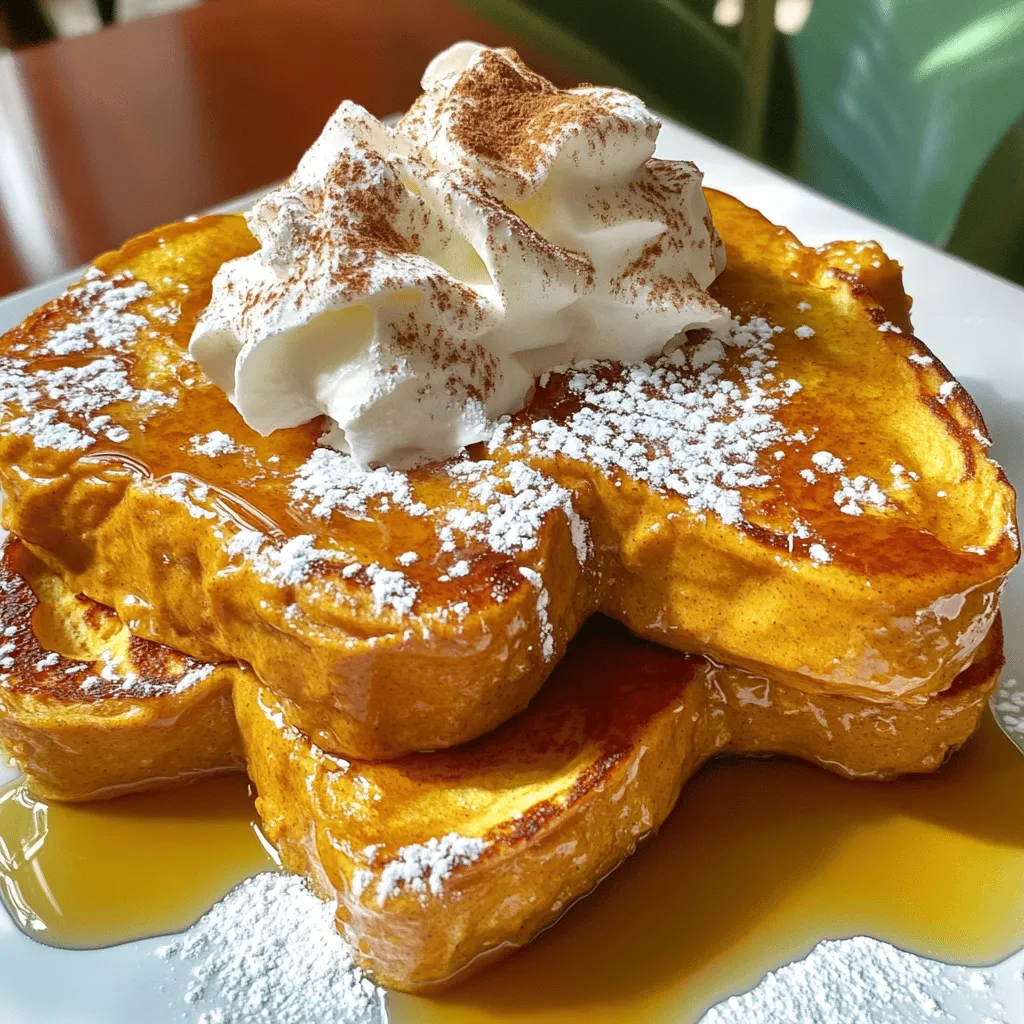
Get ready to enjoy autumn on your plate! This Pumpkin French Toast recipe is simple and delicious, perfect for cozy mornings. With thick slices of bread soaked in a creamy …

Read more

Categories Breakfast
Older posts
Newer posts
← Previous Page1 … Page61 Page62 Page63 … Page113 Next →

MELTED RECIPES

where delicious ideas melt into life, from stovetop to backyard. Always warm, simple, and irresistibly satisfying. 🍳🔥🧀

PAGES

Home About Contact Privacy Policy Terms & Conditions Cookie Policy GDPR Policy Copyright Policy Disclaimer

CATEGORIES

Appetizers Desserts Salads Breakfast Dinner

Contact

  • Pinterest
  • Mail
Copyright © 2025 Melted Recipes. All rights reserved.