Skip to content
Melted Recipes
  • Home
  • Appetizers
  • Desserts
  • Salads
  • Breakfast
  • Dinner
  • Privacy Policy
  • Contact
  • About

Chef Miles

Cheesy Hot Dog Bites Quick and Easy Snack Idea

July 31, 2025 by Chef Miles
- 6 hot dogs, sliced into bite-sized pieces - 1 cup shredded sharp cheddar cheese - 1 cup all-purpose flour - 2 teaspoons baking powder The main ingredients create a tasty base for cheesy hot dog bites. The hot dogs bring a savory bite, while cheddar cheese melts beautifully, adding richness. The flour and baking powder help bind everything together, giving the bites their fluffy texture. - 1/2 teaspoon garlic powder - 1/2 teaspoon smoked paprika - 1/2 teaspoon salt Spices and seasonings enhance flavor. Garlic powder adds a nice depth. Smoked paprika gives a hint of warmth and smokiness, while salt boosts all the flavors. This blend makes each bite pop with taste. - 1/2 cup whole milk - 1 large egg, beaten - 1/4 cup unsalted butter, melted Wet ingredients keep the bites moist. Whole milk adds creaminess, while the egg helps bind everything. Unsalted butter gives a rich flavor and keeps the bites tender. All together, they create a perfect batter. For the full recipe, check out the instructions above. First, preheat your oven to 375°F (190°C). This ensures the bites cook evenly. Next, prepare a baking sheet by lining it with parchment paper. This helps prevent sticking and makes cleanup easier. In a large mixing bowl, combine the all-purpose flour, baking powder, garlic powder, smoked paprika, and salt. Whisk these dry ingredients well. This step ensures even seasoning throughout the bites. In a separate medium bowl, whisk together the whole milk, beaten egg, and melted unsalted butter. Mix until smooth and well combined. Now, pour this mix into the bowl with dry ingredients. Stir gently until just combined. Do not overmix, as this can make the bites tough. Next, fold in the shredded sharp cheddar cheese. Make sure it’s evenly distributed in the batter. Then, gently incorporate the sliced hot dog pieces. Fold them in carefully to ensure they are well coated. Using a small cookie scoop or spoon, drop rounded portions of the mixture onto the prepared baking sheet. Leave space between each bite for even cooking. Place the baking sheet in the oven and bake for about 15-20 minutes. They are done when golden brown and a toothpick comes out clean. After baking, let them cool for a few minutes before serving. Enjoy your cheesy hot dog bites! For the complete recipe, check the Full Recipe. To get soft, fluffy bites, avoid overmixing the batter. When you combine the wet and dry ingredients, stir gently. It’s okay if there are a few lumps. Overmixing makes the dough tough, which you don’t want. Aim for a smooth mix without disturbing the air bubbles. This helps create a light texture in each bite. Presentation matters! Arrange the cheesy hot dog bites on a bright platter. This makes them look even more appetizing. You can add small bowls of mustard and ketchup for dipping. To make your dish pop, sprinkle fresh parsley on top. This adds color and freshness, making it a fun treat for guests. Dipping sauces can elevate your cheesy hot dog bites. Mustard and ketchup are classic choices. They bring a nice tang and sweetness. You can also try ranch dressing for a creamy dip. If you like spice, sriracha or hot sauce can add a kick. Serve different options to please all your guests! {{image_4}} You can switch up the cheese for a new taste. Try using mozzarella for a stretchy, gooey bite. Pepper jack adds a nice kick with its spicy flavor. If you prefer a stronger taste, use aged cheddar or gouda. Mixing different cheeses can also create a delightful blend. Experiment to find your favorite combination! Adding vegetables can boost the flavor and nutrition of your cheesy hot dog bites. Diced jalapeños bring heat and a crunchy texture. Bell peppers add sweetness and color. You can also try finely chopped onions or spinach for extra health benefits. Just fold them into the batter with the hot dogs. It’s an easy way to make the dish more exciting. If you want to mix it up, use different proteins. Turkey hot dogs work great for a leaner option. Veggie dogs are perfect for those who prefer plant-based meals. They can also add a unique flavor. Feel free to get creative with your choice of protein! It’s all about what you enjoy. For the full recipe, check the earlier section! To keep your cheesy hot dog bites fresh, follow these tips: - Refrigerate: Place leftovers in an airtight container. They stay good for about 3-4 days. - Freeze: If you want to store them longer, freeze the bites. Use a freezer-safe bag or container. They last up to 2 months in the freezer. Reheating is simple! For the best texture and flavor: - In the Oven: Preheat your oven to 350°F (175°C). Place the bites on a baking sheet. Heat for about 10-15 minutes until warm. - In the Microwave: Place bites on a microwave-safe plate. Heat for 30 seconds to 1 minute. Check to avoid overcooking. These methods keep your cheesy hot dog bites tasty and enjoyable! For the full recipe, click here. Cheesy hot dog bites can last in the refrigerator for up to three days. To keep them fresh, store them in an airtight container. If you want to maintain their crunch, place a paper towel in the container to absorb extra moisture. This helps keep them tasting great. Yes, you can make cheesy hot dog bites ahead of time. Prepare the batter and fill the baking sheet, but do not bake them right away. Cover the tray with plastic wrap and place it in the fridge. When you're ready, just pop them in the oven. They might need a few extra minutes to bake from cold. You can serve cheesy hot dog bites with a variety of dips. Mustard and ketchup are classic choices. You can also try ranch dressing or barbecue sauce for a twist. Pair them with fresh veggies or a simple salad for a complete meal. Absolutely! Cheesy hot dog bites are a hit with kids. Their fun shape and cheesy flavor make them perfect for little hands. They are great for parties, after-school snacks, or family movie nights. Kids enjoy dipping them in sauces too, which adds to the fun. Yes, you can make a gluten-free version of cheesy hot dog bites. Simply swap the all-purpose flour with a gluten-free flour blend. Make sure it is a blend that works well for baking. This way, everyone can enjoy these tasty bites! For the full recipe, check out my detailed instructions above! Cheesy hot dog bites mix simple ingredients for tasty fun. We covered main ingredients such as hot dogs, cheese, and spices. You learned how to prepare, bake, and serve these treats with helpful tips. Variations let you get creative with flavors and textures. Storing leftovers and reheating ensures you enjoy every bite later. Whether for kids or a snack yourself, these bites are sure to please. Try them out and customize to your liking!

Looking for a quick and tasty snack? You’ve found it! Cheesy hot dog bites are fun to make and even better to eat. With just a few simple ingredients and …

Read more

Categories Appetizers

Ginger Coffee Boost Healthy Energy and Flavor

July 31, 2025 by Chef Miles
- Freshly Brewed Coffee: Start with two cups of your favorite coffee. Freshness matters for a rich flavor. - Grated Ginger: Use one tablespoon of fresh ginger. This adds a spicy kick to your drink. - Sweeteners and Spices: I like to use two tablespoons of brown sugar, half a teaspoon of cinnamon, and a quarter teaspoon of nutmeg. These enhance the overall taste. - Milk or Plant-based Alternatives: You can use one cup of regular milk or any plant-based milk you prefer. This adds creaminess. - Whipped Cream and Garnishes: A dollop of whipped cream on top makes it special. You can also add a small piece of candied ginger for flair. - Fine-mesh sieve: This helps filter out the ginger and spices for a smooth coffee. - Saucepan: Use this to heat your coffee and mix in the flavors. - Milk frother or whisk: These tools froth the milk, making it light and airy. To learn how to combine these ingredients into a delicious cup, check out the Full Recipe. To make ginger coffee, start by gathering your ingredients. You need freshly brewed coffee, grated ginger, brown sugar, ground cinnamon, and ground nutmeg. 1. Combining Ingredients in a Saucepan Pour 2 cups of fresh coffee into a small saucepan. Next, add 1 tablespoon of finely grated ginger, 2 tablespoons of brown sugar, 1/2 teaspoon of ground cinnamon, and 1/4 teaspoon of ground nutmeg. This mix creates a warm and spicy flavor. 2. Heating and Blending Flavors Heat your mixture over medium-low heat. Stir it gently and keep an eye on it. You want it hot, but not boiling. This step helps the flavors blend well together, making your coffee rich and fragrant. Next, it’s time to filter and froth. 1. Pouring Through a Sieve Once heated, pour your coffee through a fine-mesh sieve into a large mug. This step removes the grated ginger and spices, leaving you with a smooth blend. It’s important for a clean taste. 2. Frothing the Milk for Creaminess In another saucepan, warm up 1 cup of milk or your favorite plant-based alternative over low heat. Be careful not to boil it. Use a whisk or milk frother to froth the milk until it’s creamy and light. This makes your drink feel special. Now for the fun part! 1. Mixing Coffee and Milk Gradually pour the frothed milk into your mug of spiced coffee. Use a spoon to stir gently. This mixes the flavors and creates a lovely texture. 2. Adding Whipped Cream and Garnish If you want a treat, add a dollop of whipped cream on top. For an elegant touch, finish with a small piece of candied ginger. It adds sweetness and looks great in your cup. You can find the full recipe in the recipe section. Enjoy your ginger coffee! To make your ginger coffee just right, start by adjusting sweetness and spice levels. You can change the amount of brown sugar based on your taste. If you like it sweet, go for two tablespoons. For less sweetness, one tablespoon works well. As for spice, add more ginger if you enjoy a stronger kick. A good rule is one tablespoon of grated ginger per cup of coffee. Next, focus on ideal ginger-to-coffee ratios. I recommend using two cups of coffee for a robust flavor. This amount pairs well with one tablespoon of fresh ginger. If you want to make a larger batch, keep this ratio in mind. It helps the flavors blend nicely. When it comes to brewing, the French press or drip coffee maker works well. The French press gives a richer taste since it steeps longer. On the other hand, a drip coffee maker is quick and easy. Just use fresh ground coffee for the best flavor. You can also try other methods to enhance flavor. For example, steeping ginger in hot water first creates a strong ginger tea. Then, mix this with brewed coffee. This method boosts the ginger flavor. Serving plays a big role in the experience. Use clear glass mugs to show off your drink. The layers of coffee and milk look beautiful! You can also add a dollop of whipped cream on top. It adds creaminess and makes it look fancy. To enhance aroma, consider adding a sprinkle of cinnamon on top. This tiny touch elevates the scent. When you take a sip, the warm spices will greet you. Enjoying every aspect of your ginger coffee makes it a true treat. For those who want to dive deeper, check out the Full Recipe for more tips on perfecting your ginger coffee. {{image_4}} What are the benefits of ginger? Ginger packs a powerful punch. It has antioxidants that fight free radicals. These antioxidants help keep your body healthy. Ginger also has anti-inflammatory properties. It can ease pain and swelling in your body. How does ginger help digestion and immunity? Ginger acts like a friend to your stomach. It can soothe nausea and improve digestion. It helps your body absorb food better. Plus, ginger can boost your immune system. It helps you fight off colds and viruses. Can ginger have side effects? Like all good things, too much ginger can be bad. It may upset your stomach if you consume it excessively. You might feel heartburn or nausea. Listen to your body and enjoy in moderation. When should you avoid ginger coffee? If you are pregnant or have certain health issues, be cautious. Consult your doctor if you are unsure. Always put your health first. What do nutritionists say about ginger? Many nutritionists praise ginger for its health benefits. They recommend it for those looking to spice up their coffee. They also note its role in making coffee healthier. Are there misconceptions about ginger? Some people think ginger only adds heat. In reality, it enhances flavors and offers health perks too. Ginger coffee can be a delicious way to enjoy these benefits. For a delightful experience, try my Ginger Spice Coffee recipe [Full Recipe]. This drink combines the warmth of ginger with the rich taste of coffee, creating a perfect morning boost. You can enhance ginger coffee by adding spices like cardamom or clove. These spices add warmth and depth. Cardamom brings a sweet, floral note. Clove adds a rich, warm flavor. Try a pinch of each to see what you like best. Using different coffee beans or strengths also changes the flavor. A light roast coffee gives a bright taste, while a dark roast offers bold flavors. If you prefer a stronger drink, use more coffee grounds. This will boost the flavor and the caffeine kick. You can make iced ginger coffee for hot days. Just brew the coffee and let it cool. Then add ice and your ginger mix. This drink is refreshing and perfect for summer. Using coffee concentrate is another quick method. Brew a strong batch, then mix it with ginger and milk. This saves time and still delivers that great ginger flavor. If you want a quick fix, several store-bought ginger coffee brands are available. Look for brands that use real ginger for the best taste. I recommend trying brands like Ginger Brew or Spiced Coffee Co. They have great reviews and make it easy to enjoy ginger coffee at home. What is Ginger Coffee? Ginger coffee is a warm drink made by mixing coffee with fresh ginger. It has a spicy, sweet flavor that wakes up your senses. You can make it easily at home. Just follow the Full Recipe for a delightful drink. How can I make it stronger? To make your ginger coffee stronger, use more coffee or add extra ginger. You can also brew your coffee longer for a bolder taste. Experiment with these options until you find your perfect strength. Can I drink ginger coffee every day? Yes, you can drink ginger coffee daily if you enjoy it. Ginger has health benefits, like boosting your immune system. Just be mindful of your ginger intake. Too much can lead to stomach upset. Does ginger coffee help with digestion? Absolutely! Ginger helps soothe the stomach and can ease nausea. Drinking ginger coffee may support digestion and comfort your tummy after meals. It’s a great choice for those who struggle with digestive issues. How long can you store ginger coffee? You can store ginger coffee in the fridge for about 3 days. Just remember to keep it in an airtight container. Reheat it gently on the stove or in the microwave before enjoying. Can I use powdered ginger instead of fresh? Yes, you can use powdered ginger if fresh is not available. Use about 1/4 teaspoon of powdered ginger for each tablespoon of fresh ginger. The flavor will be different, but it can still be tasty. Ginger coffee combines the warmth of coffee with ginger's zing. You learned how to prepare it, from key ingredients to final touches. The health benefits add to its appeal, while variations offer new flavors. Remember to balance sweetness and ginger strength to suit your taste. Whether you brew it hot or cold, ginger coffee is a delightful treat. Enjoy exploring this unique beverage, and make it your own!

Are you ready to supercharge your mornings with a delicious twist? Ginger coffee combines the rich flavors of your favorite brew with the zing of fresh ginger. Not only does …

Read more

Categories Breakfast

Strawberry Vinaigrette Fresh and Flavorful Dressing

July 31, 2025 by Chef Miles
- 1 cup fresh strawberries, hulled and sliced - 2 tablespoons honey or maple syrup (to taste) - 1/4 cup apple cider vinegar - 1/4 cup extra virgin olive oil - 1 teaspoon Dijon mustard - Salt and black pepper to taste Using fresh strawberries adds natural sweetness and vibrant color. They are rich in vitamins and antioxidants. Apple cider vinegar gives a tangy bite and aids digestion. Extra virgin olive oil offers healthy fats and a smooth texture. Honey or maple syrup adds sweetness without refined sugar. Dijon mustard brings depth and a hint of spice, making your dressing more complex. You can swap strawberries for other fruits like raspberries or peaches for a new twist. If you need a vegan option, use maple syrup instead of honey. For vinegar, white wine or balsamic vinegar works well too. If you don’t have Dijon mustard, try regular mustard or omit it for a simpler flavor. First, gather fresh strawberries. You want ripe, sweet ones for the best taste. Hull them, meaning you remove the green tops. Then, slice the strawberries into small pieces. This helps them blend easily. Place these strawberries into your blender or food processor. Now, add the sweetener. You can use honey or maple syrup, based on what you like. Next, pour in the apple cider vinegar. This adds a nice tang. Then, include the Dijon mustard for an extra kick. Season with a pinch of salt and a few cracks of black pepper. Blend this mixture on high speed. Stop to scrape down the sides as needed. This ensures everything mixes well. While the blender runs, slowly drizzle in the extra virgin olive oil. This step helps create a creamy texture. Blend until the vinaigrette is smooth and well combined. Taste your vinaigrette. You might want to add more salt, pepper, or sweetness. Adjust to your liking for the best balance. Once satisfied, transfer the dressing to a clean jar. Seal it tight and refrigerate for at least 30 minutes. This resting time lets the flavors meld. Before serving, shake or stir the vinaigrette to mix any separated ingredients. Enjoy your fresh and flavorful strawberry vinaigrette with salads or grilled vegetables! To make your strawberry vinaigrette pop, use ripe strawberries. Ripe berries are sweet and juicy. You can also mix in different fruits like raspberries or blueberries. This adds layers of flavor. A splash of lemon juice brightens the taste too. Don’t forget the balance between sweet and tangy. Adjust the honey or maple syrup to suit your taste. A smooth vinaigrette is key. Start blending the strawberries well before adding oil. Gradually drizzle in the olive oil while blending. This helps emulsify the mix. If it’s too thick, add a tiny bit of water. If too thin, blend in more oil slowly. The goal is a creamy texture that clings to salad leaves. This vinaigrette shines on fresh salads. It pairs well with greens like spinach and arugula. Toss in nuts, cheese, or herbs for extra flavor. It also works great on grilled chicken or fish. Try it as a dip for fresh veggies. The sweet and tangy notes enhance many dishes. For a full recipe, check the main section. {{image_4}} You can easily change your strawberry vinaigrette by adding balsamic vinegar. This gives a rich, sweet note. To make this, simply swap half of the apple cider vinegar for balsamic vinegar. Blend it all together as you would with the original recipe. You’ll get a lovely depth of flavor that pairs well with salads and grilled meats. Herbs can take your strawberry vinaigrette to the next level. Fresh basil or mint adds a bright taste. Try adding a handful of chopped herbs when blending. Start with a teaspoon of herbs, then taste it. You can add more if you like. This small change makes your dressing unique and fresh. You can switch up the sweetener to match your taste. Instead of honey or maple syrup, try agave nectar or coconut sugar. Each sweetener brings its own flavor. For a sugar-free option, use stevia or erythritol. Just remember to adjust the amount based on the sweetness you prefer. Each option allows you to customize your vinaigrette. For the complete recipe, check out the Full Recipe section. To keep your strawberry vinaigrette fresh, store it in a clean jar or airtight container. Make sure the lid is on tight to avoid air getting in. Place it in the fridge right after making it. This helps the flavors blend and stay bright. Always give it a good shake before serving. In the fridge, your vinaigrette can last up to one week. However, for the best taste, use it within five days. After that, the strawberries may lose their flavor and freshness. Check for any changes in smell or color before using it. If it smells off, it’s best to toss it. Freezing strawberry vinaigrette is not the best option. The texture may change when thawed, and it might separate. If you do freeze it, pour it into an ice cube tray for easy portions. When you're ready to use it, thaw cubes in the fridge overnight. Shake well before serving to mix the ingredients again. You can serve Strawberry Vinaigrette with many dishes. It pairs well with salads, especially those with spinach or mixed greens. Try it on a fruit salad for a sweet twist. It also works great with grilled chicken or fish. You can drizzle it over roasted vegetables for added flavor. The bright taste of strawberries makes any dish pop! Yes, you can make Strawberry Vinaigrette ahead of time. In fact, letting it sit helps the flavors blend. Store it in an airtight jar in the fridge. It’s best to let it chill for at least 30 minutes before serving. You can keep it for up to a week. Just shake or stir it before you use it again. Strawberry Vinaigrette can be a healthy choice. It uses fresh strawberries, which are full of vitamins. Olive oil provides healthy fats that support heart health. The honey or maple syrup adds natural sweetness but can be adjusted. With no heavy creams or artificial ingredients, this dressing is a light option for meals. Enjoy it guilt-free! You can easily adjust the sweetness of your vinaigrette. If it tastes too tart, add more honey or maple syrup. Start with small amounts and blend again. Taste it after each addition to find the right balance. If it’s too sweet, add a splash more vinegar to balance it out. This way, you can make it just right for your palate. We explored how to make a tasty strawberry vinaigrette, starting with ingredients. You learned about ingredient benefits and smart substitutions. I detailed the steps for preparing the strawberries, blending, and final adjustments. Helpful tips showed you flavor pairings and storage. Variations included balsamic and herb options for extra zest. In closing, making strawberry vinaigrette is easy and fun. It's a great way to jazz up salads or dishes. Enjoy experimenting with flavors and find what you love best!

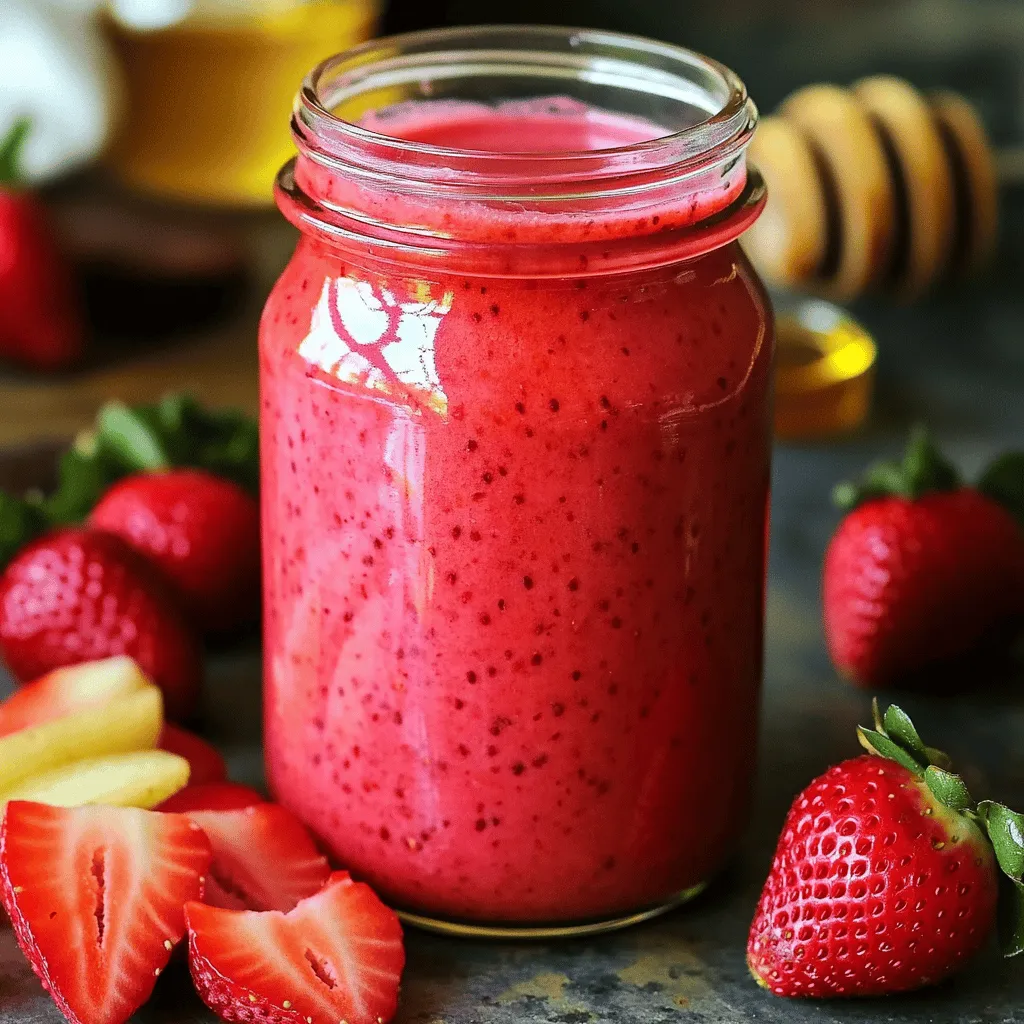
Are you ready to elevate your salads with a burst of flavor? Strawberry Vinaigrette is the vibrant dressing you need! I’ll guide you through simple steps to create this fresh …

Read more

Categories Salads

Canned Spaghetti Sauce Flavorful and Simple Recipe

July 30, 2025 by Chef Miles
This savory canned spaghetti sauce is both simple and delicious. You can make it in about 35 minutes. This recipe serves 4 to 6 people, perfect for family dinners or meal prep. To make this tasty sauce, you will need: - 2 cans (14.5 oz each) of crushed tomatoes - 1 can (6 oz) of tomato paste - 1 medium onion, finely chopped - 4 cloves of garlic, minced - 1 teaspoon of dried oregano - 1 teaspoon of dried basil - 1 teaspoon of sugar - ½ teaspoon of red pepper flakes (optional, for heat) - Salt and pepper to taste - 2 tablespoons of olive oil - ¼ cup of fresh parsley, finely chopped - ¼ cup of fresh basil, finely chopped - 1 bay leaf When choosing your ingredients, I recommend using high-quality brands for the best flavor. For crushed tomatoes, look for brands like San Marzano or Muir Glen. For tomato paste, Contadina is a great option. Fresh herbs can often be found at local farmers' markets, which ensures they are fresh and full of flavor. Use extra virgin olive oil for the best taste in your sauce. To create your canned spaghetti sauce, start with a clean kitchen. Gather all your ingredients. First, heat the olive oil in a large saucepan over medium heat. When the oil shimmers, add the chopped onion. Sauté for about 5 minutes until it turns translucent. Stir occasionally to keep it from sticking. Next, add the minced garlic and sauté for one more minute. This step brings out the garlic's great smell. Now, pour in the crushed tomatoes and tomato paste. Stir until everything mixes well. Add in the dried oregano, dried basil, sugar, and red pepper flakes if you like heat. Don't forget a pinch of salt and pepper. Stir again to blend the spices into the sauce. Toss in the bay leaf and raise the heat until it simmers. Then, lower the heat and let it cook for 20-25 minutes. Stir every few minutes to avoid sticking. After this time, the sauce should thicken nicely. Finally, remove the bay leaf. Stir in the fresh parsley and basil. This adds brightness and freshness to your sauce. Taste it. Adjust the salt and pepper if needed. Your sauce is now ready! Using visuals can make cooking easier. Picture the shimmering oil in the pan before adding onions. Imagine the vibrant colors of the crushed tomatoes mixing with the onion and garlic. You want a thick, rich sauce at the end. Check the texture as it simmers. If you want to share your cooking journey, snap a few pictures while you cook! It’s fun to see the process and share with friends. - Prep Time: 10 minutes - Cooking Time: 25 minutes - Total Time: 35 minutes This timeline helps you plan your meal. In just over half an hour, you can create a delicious sauce. Serve it over your favorite pasta for a simple and tasty dinner. For the full recipe, check out the details above. Enjoy your cooking adventure! To make your sauce thick and rich, let it simmer. Simmering helps reduce liquid. Keep the heat low to let flavors blend well. Stir often to avoid burning. If the sauce is too thick, add a splash of water. A bit of olive oil can also help. To enhance flavor, try adding fresh herbs. Fresh basil and parsley bring brightness. You can also add a dash of balsamic vinegar for depth. If you like heat, toss in more red pepper flakes. A splash of red wine can add richness too. One mistake is not cooking the onions enough. They should be soft and sweet. Avoid adding salt too early; it can make the tomatoes tough. Don’t forget to remove the bay leaf before serving. Lastly, taste your sauce before serving. Adjust seasoning as needed. For a full experience, check the Full Recipe. {{image_4}} You can easily change up your canned spaghetti sauce based on the season. In spring, add fresh asparagus or peas. Summer favorites like zucchini or bell peppers can add great texture. In fall, consider stirring in roasted pumpkin or butternut squash for a cozy twist. Winter is perfect for hearty greens like kale or Swiss chard. These swaps keep your sauce fresh and exciting. Making your sauce gluten-free is simple. Just check your canned goods for gluten-free labels. You can also swap regular pasta for gluten-free pasta. For a vegan version, skip the cheese and use vegetable broth instead of chicken broth if you decide to add one. This way, everyone can enjoy a tasty meal. Canned spaghetti sauce isn’t just for pasta. You can use it in many dishes! Try it on pizza or as a base for a hearty vegetable stew. You can even use it for stuffed peppers or in a lasagna. Mix it with meat for a quick meatball sub. The options are endless! For more ideas, check out the Full Recipe for inspiration. After you cook your spaghetti sauce, let it cool. Transfer it to a clean, airtight container. This helps keep your sauce fresh. Store the sauce in the fridge. Use it within four to five days for the best taste. If you plan to keep it longer, freezing is a better option. Unopened canned spaghetti sauce lasts a long time. Typically, it can stay good for one to two years. Check the can for a "best by" date. Once you open it, the sauce lasts about five to seven days in the fridge. Always smell the sauce before using it. If it smells off, toss it out. Freezing is a great way to save leftover sauce. Pour your cooled sauce into freezer bags or containers. Leave some space at the top for expansion. Label the bags with the date. You can freeze it for up to six months. When ready to use, thaw it in the fridge overnight. Reheat it on the stove or in the microwave. Stir it well to ensure even heating. Enjoy your homemade spaghetti sauce whenever you like! For the full recipe, check out the previous section. Some top brands are Rao's, Prego, and Hunt's. Rao's has a rich taste. Prego offers many flavors. Hunt's is known for its budget-friendly options. Each brand has unique flavors. Try a few to find your favorite! Once you open canned spaghetti sauce, keep it in the fridge. Use it within 5 to 7 days. Store it in an airtight container. This helps keep it fresh. If you don't use it soon, freeze it! Yes! Canned spaghetti sauce is very versatile. Use it in casseroles, meatloaf, or as a pizza sauce. You can even use it in soups or stews. It adds great flavor to many dishes! You can easily boost the flavor of canned sauce. Here are some tips: - Add fresh herbs like basil or parsley. - Sauté garlic and onion in olive oil first. - Mix in red pepper flakes for some heat. - Add a splash of red wine for depth. - Stir in grated cheese for richness. These simple steps will make your sauce taste homemade. For a full recipe, check the savory canned spaghetti sauce with fresh herbs. Enjoy your cooking! This post explored how to choose, cook, and enjoy canned spaghetti sauce. We covered a full recipe overview, a detailed list of ingredients, and tips to enhance flavor. You learned about common mistakes and seasonal swaps to make the dish your own. In the end, mastering these steps and tips helps you create easy, tasty meals. Your journey in cooking can lead to many delicious discoveries. Enjoy your cooking adventure!

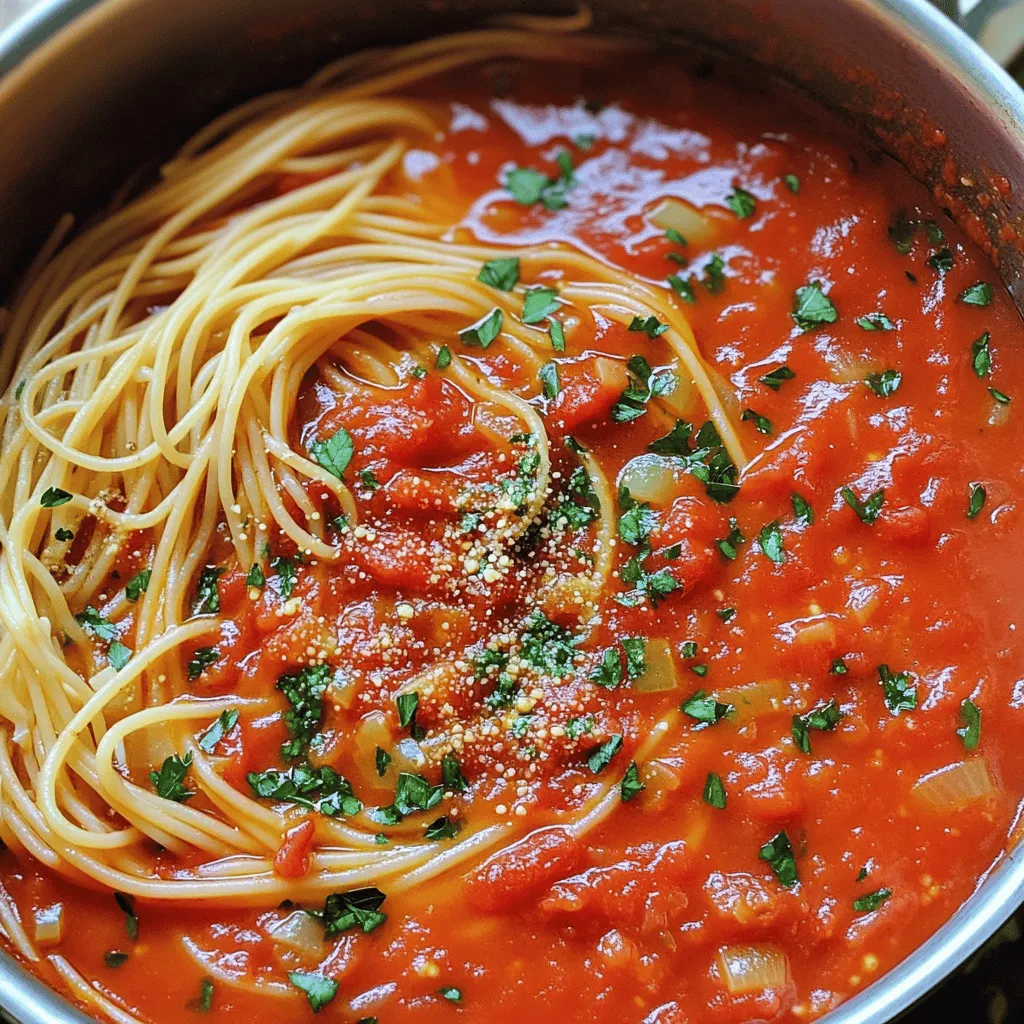
Are you looking for a quick and tasty way to elevate your meals? Canned spaghetti sauce can be a game changer! With just a few simple ingredients, you can whip …

Read more

Categories Dinner

Super Easy Frozen Applesauce Recipe for Family Fun

July 30, 2025 by Chef Miles
- 6 medium apples (Granny Smith or Honeycrisp recommended) - 1/2 cup water - 1/4 cup brown sugar - 1 teaspoon ground cinnamon (optional) - 1 tablespoon freshly squeezed lemon juice You will need a few key ingredients to make frozen applesauce. Start with six medium apples. I like to use Granny Smith or Honeycrisp. These apples give the right mix of tartness and sweetness. You will also need half a cup of water. This helps the apples cook down nicely. Next, grab a quarter cup of brown sugar. You can adjust this based on how sweet you want your applesauce. If you enjoy warm flavors, add in one teaspoon of ground cinnamon. It’s optional, but it really enhances the taste. Finally, you will need one tablespoon of freshly squeezed lemon juice. This brightens the flavor and keeps the apples from browning. - Large, heavy-bottomed pot - Potato masher or immersion blender - Freezer-safe containers or bags To make this applesauce, you will need a few tools. A large, heavy-bottomed pot works best. This pot helps cook the apples evenly without burning them. You will also need a potato masher or an immersion blender. These tools help you achieve your desired texture. Don’t forget freezer-safe containers or bags. These are perfect for storing your applesauce. Make sure they seal tightly. That way, your applesauce stays fresh in the freezer. For the full recipe, check out the details above! First, peel and chop the apples into small pieces. I love using Granny Smith or Honeycrisp apples for their great taste. Next, combine the chopped apples with 1/2 cup of water in a large pot. This will help the apples cook evenly and create a nice sauce. Set the pot over medium heat. Cover it with a lid and let the apples simmer for about 15 to 20 minutes. Remember to stir occasionally. You want the apples to become tender and soft so they mash easily. Once the apples are soft, take the pot off the heat. Let it cool for a minute. Now, you can puree the apples using a potato masher for a chunky texture or an immersion blender for a smooth finish. After blending, stir in 1/4 cup of brown sugar. You can add more if you like it sweeter. If you want, sprinkle in some ground cinnamon for extra flavor. Enjoy your applesauce! You can find the [Full Recipe] for more details. To get the right texture, think about your blending method. Use a potato masher for a chunky and rustic applesauce. It keeps the applesauce thick and hearty. If you want it smooth, an immersion blender works best. It gives a creamy finish with no lumps. After blending, taste your applesauce. You can always adjust the texture by blending a bit more. Spice up your applesauce with a touch of nutmeg or vanilla. Just a pinch can make a big difference. Nutmeg adds warmth, while vanilla gives a sweet aroma. You can also try different sweeteners. Honey or maple syrup can replace brown sugar. These options can give your applesauce a unique twist. Cooling your applesauce quickly helps preserve its color and taste. Stir it every few minutes to speed up the cooling process. To avoid browning, add a tablespoon of lemon juice as soon as you cook the apples. The acidity keeps the applesauce looking fresh. For even faster cooling, place the pot in a sink filled with ice water. This method cools down the applesauce while you prepare other dishes. {{image_4}} You can easily change the flavor of your applesauce. Try adding fruits like pears or berries. These fruits can bring new tastes and colors to your dish. For a unique twist, experiment with flavorings like vanilla or nutmeg. Just a pinch of nutmeg can make your applesauce warm and cozy. Adding a splash of vanilla can create a sweet aroma that everyone loves. If you want a healthier option, consider using honey or maple syrup. These natural sweeteners can enhance the flavor without adding too much sugar. You can also adjust the sweetness based on the apple variety you use. Some apples, like Honeycrisp, are sweeter than others, so you might need less sweetener. Always taste your applesauce before deciding how much to add. There are many fun ways to enjoy your applesauce. You can eat it as a snack on its own. It pairs wonderfully with breakfast items like pancakes or oatmeal. You can also use it in desserts, like cakes or muffins, to add moisture and flavor. Serve it chilled or warm; both options are delicious! To freeze your applesauce, use freezer-safe containers or bags. Make sure you leave space at the top. This space lets the applesauce expand as it freezes. Seal the containers tightly to keep air out. This will help prevent freezer burn. You can freeze applesauce for up to six months. After that, the flavor may fade. When you want to enjoy your applesauce, thaw it in the fridge overnight. This method keeps the applesauce cool and safe. You can also thaw it in a bowl of warm water for a quick option. When reheating, use a pot on low heat. Stir often to avoid hot spots. If you want a smooth texture, use a blender after reheating. Homemade applesauce can last three to four days in the fridge once thawed. To tell if your applesauce is spoiled, check for off smells or strange colors. If you see mold, throw it away. Always store applesauce in a clean, airtight container. This helps keep it fresh longer. To make frozen applesauce, follow these steps: 1. Peel and chop 6 medium apples. 2. Combine the apples with 1/2 cup water in a large pot. 3. Heat on medium and cover the pot. 4. Simmer for 15-20 minutes, stirring until apples are soft. 5. Remove from heat and let sit for 1 minute. 6. Use a potato masher or immersion blender to puree the apples. 7. Stir in 1/4 cup brown sugar, 1 teaspoon cinnamon, and 1 tablespoon lemon juice. 8. Let the mixture cool to room temperature. 9. Transfer to freezer-safe containers, leaving space at the top. 10. Seal, label, and freeze. This simple method yields about 4 cups of delicious applesauce. You can find the full recipe for more details. Yes, you can use many types of apples. However, some varieties work better. - Granny Smith: These apples are tart and add great flavor. - Honeycrisp: They are sweet and juicy, making the applesauce tasty. - Fuji: Sweet and firm, they also blend well. Mixing different apples can give you a unique flavor. You can use natural sweeteners to make sugar-free applesauce. Here are some options: - Honey: A natural sweetener, use it in small amounts. - Maple syrup: This adds a lovely flavor; use sparingly. - Stevia: A zero-calorie option, just a little goes a long way. For sugar-free applesauce, taste as you go. Adjust sweetness based on the apple variety. The sweeter the apple, the less sweetener you need. In this blog post, we explored how to make delicious applesauce from scratch. You learned about essential ingredients and the tools needed to create it. We discussed step-by-step instructions, tips for the best texture, and ways to enhance its flavor. You can experiment with different apple varieties and sweeteners. Remember to store your applesauce properly for long-lasting enjoyment. Enjoy your homemade treat as a snack or dessert! Each step brings you closer to a tasty reward that’s worth the effort.

If you’re looking for a fun, easy way to enjoy homemade applesauce, you’ve come to the right place! This Super Easy Frozen Applesauce Recipe for Family Fun uses just a …

Read more

Categories Desserts

Caramel Apple Cookies from Scratch Easy and Delicious

July 30, 2025 by Chef Miles
- 2 cups all-purpose flour - 1 teaspoon baking soda - 1/2 teaspoon salt - 1 teaspoon ground cinnamon - 1/2 cup unsalted butter - 1 cup packed brown sugar - 1/2 cup granulated sugar - 1 large egg - 1 teaspoon pure vanilla extract - 1 cup diced apple - 1/2 cup caramel bits - 1/2 cup chopped walnuts or pecans (optional) For a great cookie, select quality ingredients. Fresh apples give the best flavor. I like using Granny Smith for a tart bite. You can also mix in other apple varieties for added flavor. - Gluten-free flour alternatives: Use almond flour or a gluten-free blend. - Dairy-free butter options: Coconut oil or vegan butter can work well. - Sugar alternatives for healthier cookies: Try using coconut sugar or stevia. When you make these swaps, remember that textures may change a bit. Always check your dough as you mix. You want it to be soft but not too sticky. For the full recipe, check the details above. Happy baking! - Preheat your oven to 350°F (175°C). - Line a baking sheet with parchment paper. This helps cookies not stick. - In a bowl, combine 2 cups of all-purpose flour, 1 teaspoon of baking soda, 1/2 teaspoon of salt, and 1 teaspoon of ground cinnamon. - Whisk these together until they are mixed well and set aside. - Take another bowl and cream together 1/2 cup of softened unsalted butter, 1 cup of packed brown sugar, and 1/2 cup of granulated sugar. - Mix until the blend is light and fluffy, which takes about 2-3 minutes. - Next, add in 1 large egg and 1 teaspoon of pure vanilla extract. Mix until smooth. - Gradually add the dry mix to the wet mix. Stir on low speed until just combined. - It's alright if you see a few flour streaks. - Now, gently fold in 1 cup of diced apple and 1/2 cup of caramel bits. If you want, add 1/2 cup of chopped walnuts or pecans for crunch. - Use a cookie scoop or tablespoon to drop dough onto the prepared baking sheet. - Space each cookie about 2 inches apart. - Bake in the oven for 12-15 minutes. Look for golden edges and slightly soft centers. - The cookies will firm up as they cool. Following these steps will lead you to delicious homemade caramel apple cookies. For the complete recipe, check out the Full Recipe section. For the best cookie texture, you may need to adjust the baking time. Start checking your cookies at 12 minutes. If the edges are golden brown, they are ready. The centers will look a bit soft, but they will firm up as they cool. Using room temperature ingredients is key. When butter and eggs are at room temperature, they mix better. This helps create a light and fluffy dough. Softened butter blends easily with sugars, adding air to your mix. To boost flavor, consider adding spices or extracts. A pinch of nutmeg can make a great addition. You can also use almond extract for a unique twist. Different types of apples can change the taste too. Tart apples like Granny Smith add a nice contrast to the sweet caramel. Sweeter apples, such as Fuji or Honeycrisp, will give a different balance. Try mixing different apples for a fun flavor profile. For a beautiful presentation, serve these cookies warm on a rustic wooden board. This adds charm and makes them inviting. Drizzling warm caramel sauce over the cookies can elevate your dish even more. It adds shine and extra sweetness. Garnish with a few slices of fresh apple for color and freshness. This makes your cookies look as good as they taste! {{image_4}} You can make your caramel apple cookies even better with some fun add-ins. Try adding dried fruits like raisins or cranberries for a chewy bite. They bring a nice contrast to the sweet caramel and apple. You can also mix in chocolate chips for extra sweetness. The rich taste of chocolate pairs well with the apples, making every bite a treat. Let’s spice things up! Adding a pinch of nutmeg or allspice can bring a warm flavor. These spices work well with the apple and caramel. You can also add citrus zest, like lemon or orange. A little zest gives your cookies a bright, fresh taste. It makes them stand out and adds a lovely aroma. Want to change things for your diet? You can make a vegan version of these cookies. Swap the butter for coconut oil and use a flax egg instead. This keeps the cookie moist while being plant-based. If you are into health, you can try low-sugar options. Use a sugar substitute, like stevia or monk fruit, to cut down on sugar. These changes help you enjoy cookies while sticking to your dietary goals. For the full recipe, check out the Caramel Apple Delights section. To keep your caramel apple cookies fresh, store them in an airtight container. This will help prevent them from drying out. You can also use plastic wrap or a resealable bag. Make sure to press out as much air as possible before sealing. Store your cookies at room temperature for up to one week. If you want to keep them longer, consider freezing them. You can freeze both the cookie dough and the baked cookies. If you freeze the dough, scoop it into balls and place them on a baking sheet. Freeze them for a few hours, then transfer to a bag. This way, you can bake fresh cookies anytime. To freeze baked cookies, let them cool completely. Then, wrap them tightly in plastic wrap or foil. Place the wrapped cookies in a freezer-safe container. They will stay good for up to three months. When you are ready to enjoy your frozen cookies, thaw them in the fridge for a few hours. You can also warm them in the oven for a few minutes to regain their fresh-baked taste. For the best texture, avoid microwaving them. For these cookies, I recommend using sweet and tart apples. Good choices include: - Granny Smith - Honeycrisp - Fuji - Gala These apples add a nice crunch and balance the sweet caramel. Granny Smith gives a tartness that pairs well with the sweet cookie dough. Honeycrisp adds a juicy sweetness. Yes, you can make these cookies ahead of time. Here’s how: - Dough Storage: You can keep the cookie dough in your fridge for up to 3 days. Just wrap it tightly. - Baked Cookies: Store baked cookies in an airtight container at room temperature for up to a week. For the best taste, I suggest baking them fresh. But if you need to plan ahead, dough or cookies will work fine. You can tell when the cookies are done by looking for these signs: - The edges should be golden brown. - The centers may look slightly soft, which is okay. To test doneness, gently touch the center of a cookie. If it springs back, it's ready. If it leaves an indent, give it a minute more in the oven. Perfectly baked cookies will be warm and chewy! These cookies combine simple ingredients for maximum flavor and texture. We explored basic steps to make them, added tasty variations, and shared storage tips. You can also adjust for dietary needs or preferences. Remember, the best cookies come from experimenting and having fun. Use this guide to create your perfect batch. Enjoy the warmth and delight these cookies bring to any gathering!

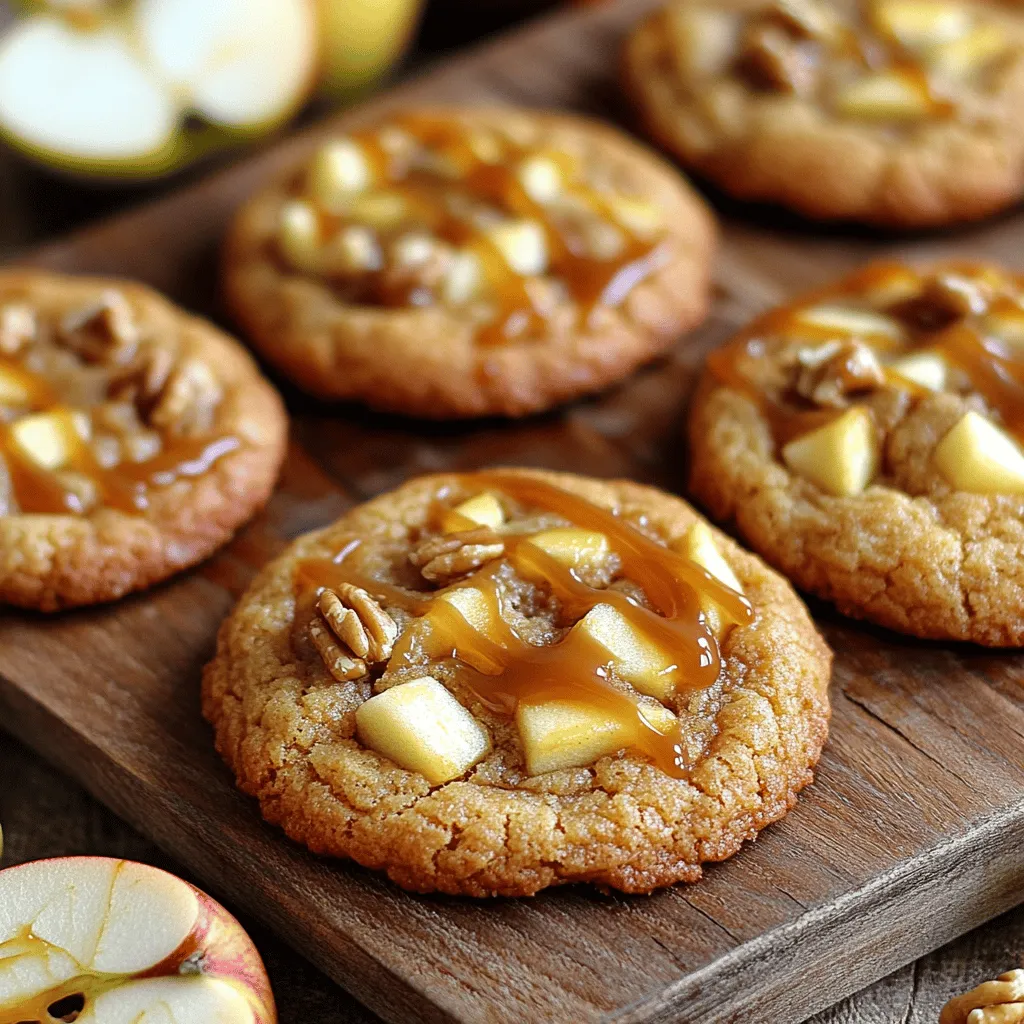
Looking for a sweet treat that combines the flavors of autumn with the joy of baking? You’re in for a treat! My Caramel Apple Cookies from Scratch are easy to …

Read more

Categories Desserts

Halloween Popcorn Delight Simple and Fun Recipe

July 30, 2025 by Chef Miles
- 10 cups of popped popcorn - 1 cup dark chocolate chips - 1/2 cup white chocolate chips - 1/2 cup candy corn - 1/2 cup mini marshmallows - 1/2 cup crushed Halloween-themed cookies - 1 tablespoon coconut oil - Sea salt to taste - Optional: colorful sprinkles - Microwave-safe bowls - Baking sheet - Parchment paper - Mixing bowls Gathering the right ingredients is key to making Halloween popcorn that delights all. You want to start with ten cups of freshly popped popcorn. You can use an air popper, stovetop, or microwave. Just make sure your popcorn is light and fluffy. Next, grab one cup of dark chocolate chips and half a cup of white chocolate chips. These will give you that rich chocolate flavor we all love. For extra sweetness, add half a cup of candy corn and half a cup of mini marshmallows. These little treats will make your popcorn fun and festive. Don't forget the crunch! Add half a cup of crushed Halloween-themed cookies like Oreos. They will add texture and a spooky touch. You’ll also need one tablespoon of coconut oil. This will help melt the chocolate smoothly. Finally, sprinkle some sea salt for balance. If you want a pop of color, throw in some colorful sprinkles as an optional touch. Now, let’s talk about the equipment. You will need microwave-safe bowls to melt the chocolate. A baking sheet lined with parchment paper will help your popcorn cool and set. Mixing bowls are essential for combining all your tasty treats. Having everything ready makes cooking easier and more fun! - Step 1: Pop the Popcorn Start by popping your popcorn. Use either an air popper, stovetop, or microwave. You need about 10 cups of popped popcorn. Once it pops, place it in a large bowl to cool. - Step 2: Melt the Chocolates In two separate bowls, put the dark chocolate chips and white chocolate chips. Add 1/2 tablespoon of coconut oil to each bowl. Microwave them for 30 seconds at a time. Stir after each time until the chocolate is smooth. - Step 3: Drizzle the Chocolate Take a spoon and drizzle the melted dark chocolate over your popcorn. Mix it gently with a spatula or your hands. Do the same with the white chocolate for a colorful look. - Step 4: Fold in Ingredients Now, it’s time to mix in the fun stuff! Fold in the candy corn, mini marshmallows, and crushed Halloween cookies. Mix until every piece is coated in chocolate. - Step 5: Sprinkle with Sea Salt To make the flavors pop, add a sprinkle of sea salt. This salty touch balances the sweet taste. Adjust it to fit your liking. - Step 6: Add Sprinkles If you want a festive look, fold in some colorful sprinkles. This is optional, but it adds a fun touch. - Step 7: Cool and Set Spread your popcorn mix on a baking sheet lined with parchment paper. Let it cool for about 15-20 minutes. You can put it in the fridge for faster results. - Step 8: Serve Once the chocolate hardens, break the popcorn into clusters. Serve them in fun bowls or bags for your Halloween party. Enjoy your spooky treat! This easy recipe will give you a fun Halloween snack. For the complete recipe, check out the full recipe section. - Use fresh popcorn kernels: Fresh kernels pop better. They give you light and fluffy popcorn. Old kernels may not pop well and can ruin the fun. - Ensure chocolate is smooth: Melt chocolate slowly. This keeps it creamy and easy to drizzle. Lumpy chocolate can spoil the look and taste of your popcorn. - Adjusting Sea Salt to Taste: Start with a little sea salt. You can always add more later. The right amount gives a nice balance to the sweet chocolate. - Perfecting Chocolate Drizzle Technique: Use a spoon to drizzle chocolate. Move it back and forth over the popcorn. This creates a beautiful pattern and covers the popcorn evenly. - Microwaving in intervals: Heat chocolate in 30-second bursts. This prevents the chocolate from burning. Stir it well after each interval. - Using proper bowls: Use microwave-safe bowls for melting. Glass or ceramic works best. Avoid using plastic as it may melt. These tips will help you make the best Halloween popcorn. For the full recipe, check the details above! {{image_4}} You can switch up your Halloween popcorn with different flavors. Here are some fun ideas: - Halloween Caramel Popcorn: Use caramel sauce instead of chocolate. Cook sugar and butter until it melts. Pour it over the popcorn and mix well. Let it cool for a crunchy treat. - Spicy Cheddar Halloween Popcorn: Toss popcorn with melted butter and sprinkle with cheddar cheese powder. Add a pinch of cayenne pepper for some heat. It's a savory twist for those who enjoy a kick. - Pumpkin Spice Popcorn: Mix pumpkin spice seasoning with melted white chocolate. Drizzle this over the popcorn. The warm spices make it perfect for fall. If you have dietary needs, there are easy swaps: - Gluten-free options: Use certified gluten-free popcorn and candies. Ensure all ingredients are gluten-free to keep it safe for everyone. - Vegan substitutions: Replace chocolate with dairy-free chocolate chips. You can also use maple syrup instead of caramel for a vegan twist. Make your popcorn pop at parties with these fun ideas: - Popcorn bags for parties: Use small paper bags. Fill them with popcorn and tie with a ribbon. They are easy for guests to grab and enjoy. - Halloween-themed bowls: Serve popcorn in spooky bowls. Look for bowls shaped like pumpkins or skulls. This adds a festive feel to your snack table. These variations and ideas can make your Halloween popcorn extra special! For the full recipe, check out the [Full Recipe]. To keep your Halloween popcorn fresh, use airtight containers. Glass jars or plastic containers work great. They prevent air from getting in and keep popcorn crunchy. Avoid using paper bags, as they allow moisture in. Always let the popcorn cool before sealing it up. This helps prevent sogginess. Halloween popcorn stays fresh for about one week. Store it in a cool, dry place for best results. If you notice soft spots or a stale smell, it’s time to toss it. You want to enjoy this treat while it’s still tasty and crispy. If your popcorn loses its crunch, don’t worry! You can revive it easily. Preheat your oven to 250°F. Spread the popcorn on a baking sheet in a single layer. Heat for about 5-10 minutes. Check it often to avoid burning. Once done, let it cool before enjoying. This method brings back that delightful texture. For more fun ideas, check out the Full Recipe! The best way to pop popcorn is by using an air popper, stovetop, or microwave. Each method works well. For stovetop, heat oil in a large pot, add kernels, and cover. Shake often until popping slows. For microwave, use a microwave-safe bowl with a lid. Follow package instructions for best results. Yes, you can use different types of chocolate. Feel free to swap dark chocolate for white chocolate or milk chocolate. Each type adds its own flavor. Experiment to find your favorite mix. Each chocolate brings a nice taste to the popcorn. To make this recipe nut-free, avoid any nuts in your mix. Use nut-free chocolate chips and check labels for any hidden nuts. Stick with the other fun ingredients. Candy corn, marshmallows, and cookies are great options. This recipe yields about eight servings. Each serving is a fun, tasty treat. Perfect for sharing at a Halloween party or with friends. Adjust the portion size if you want more or fewer servings. Yes, you can make Halloween Popcorn ahead of time. Store it in an airtight container. This keeps it fresh and tasty. You can make it a day or two before your event. Just remember to let it cool completely before storing. In this post, we explored how to make tasty Halloween popcorn. We discussed key ingredients like popcorn, chocolate, and candy. I shared step-by-step instructions to make it easy. Plus, I offered tips to enhance flavor and presentation. You can even try fun variations and find storage solutions. Now, get ready to enjoy your snack at Halloween parties and beyond! This sweet treat will surely delight fans of all ages.

Looking for a tasty and fun treat this Halloween? You’re in the right spot! My Halloween Popcorn Delight recipe is simple, quick, and full of festive flavors. With just a …

Read more

Categories Desserts

Green Chile Cheeseburger Soup Hearty Comfort Meal

July 30, 2025 by Chef Miles
To make Green Chile Cheeseburger Soup, gather these items: - 1 pound ground beef - 1 medium onion, finely diced - 2 cloves garlic, minced - 2 medium potatoes, peeled and cut into small cubes - 4 cups beef broth (preferably low-sodium) - 1 can (4 oz) diced green chiles, undrained - 1 teaspoon ground cumin - 1 teaspoon chili powder - 1 cup sharp cheddar cheese, freshly shredded - 1 cup whole milk - 2 tablespoons extra virgin olive oil - Salt and freshly ground black pepper to taste - Fresh cilantro leaves, for garnish (optional) - Sour cream, for a creamy finish (optional) Using fresh and high-quality ingredients makes all the difference. I recommend: - Ground beef: Choose lean beef to reduce grease. Look for 80/20 or 85/15 blends. - Onion and garlic: Fresh onions and garlic enhance the flavor. Avoid dried or jarred options. - Potatoes: Use firm potatoes. Russet or Yukon gold works best. - Broth: Low-sodium beef broth allows for better control of salt. - Cheese: Always shred cheese yourself for better meltability. Pre-shredded cheese has additives. Do you have dietary needs? Here are some easy swaps: - Ground beef: Use ground turkey or chicken for a lighter option. - Dairy-free: Substitute milk with almond milk or oat milk and use vegan cheese. - Gluten-free: Ensure the broth and spices are gluten-free. - Vegetarian: Leave out the meat and add more beans or veggies like corn or bell peppers. These swaps keep the soup tasty and satisfying while fitting your needs. For the full recipe, check out the details! Start by gathering all your ingredients. This makes cooking easier and more fun. Chop the onion finely and mince the garlic. Cube the potatoes into small pieces. This helps them cook faster. Set everything aside. 1. Heat two tablespoons of olive oil in a large pot over medium heat. 2. Add the diced onion and sauté for about five minutes. You want them soft and clear. 3. Next, stir in the minced garlic and the pound of ground beef. Use a wooden spoon to break up the meat. Cook until the beef turns brown, about seven to eight minutes. 4. Drain any excess fat if needed. This keeps your soup lighter. 5. Now, add the potatoes, beef broth, green chiles, cumin, and chili powder. Stir well. 6. Bring the mixture to a boil. Then reduce the heat and cover. Let it simmer for 15 to 20 minutes until the potatoes are tender. 7. Once the potatoes are cooked, lower the heat again. Stir in the milk and cheddar cheese. Mix until the cheese melts. 8. Taste your soup and add salt and pepper if needed. 9. Serve hot in bowls. You can top it with cilantro and sour cream for extra flavor. To get the best flavor, use fresh ingredients. Fresh herbs and cheese make a big difference. If you want a thicker soup, let it simmer longer without the lid. For a creamier texture, add more cheese or milk. Taste often while cooking. Adjust the spices to your liking. Enjoy your hearty comfort meal! One big mistake is not browning the beef well. This gives the soup depth. If you rush this step, you miss out on flavor. Another mistake is adding too much salt too early. Each ingredient has its own flavor. Wait to season until you taste the finished soup. Lastly, don’t skip the fresh herbs. They add brightness and freshness that make a big difference. To boost the taste, try adding a splash of lime juice. This simple addition brightens the dish. You can also mix in some smoked paprika for a smoky twist. Using freshly shredded cheese instead of pre-packaged makes it creamier. If you love spice, toss in some cayenne pepper or red pepper flakes. These spices add warmth without overpowering the soup. Serve your Green Chile Cheeseburger Soup in rustic bowls. Top with extra cheese and fresh cilantro for a pop of color. Pair it with warm, crusty bread for dipping. You can also add a dollop of sour cream for creaminess. For a fun twist, serve it with tortilla chips for crunch. This soup is not just a meal; it’s a cozy experience. Enjoy it with family or friends for a truly comforting time. {{image_4}} To make this soup vegetarian, swap the beef for a meat alternative. Use 1 pound of plant-based ground beef. You can also try lentils or black beans. They add great texture and protein. For a hearty base, stick with the onion, garlic, and potatoes. Use vegetable broth instead of beef broth. The flavor will remain rich and tasty. Want to boost protein or add veggies? Consider adding 1 can of drained chickpeas. They add protein and a nice bite. You can also toss in some frozen corn or diced bell peppers. They bring color and sweetness. If you like greens, stir in some spinach or kale near the end. They wilt quickly and add nutrients. If you love heat, add more green chiles. You can also include jalapeños for extra spice. Consider a splash of hot sauce for a kick. For more flavor, try adding fresh herbs like cilantro or parsley. They brighten the soup and enhance the taste. You can also sprinkle some smoked paprika for a smoky twist. Adjust the spices to your liking for a perfect bowl every time! After enjoying your Green Chile Cheeseburger Soup, store any leftovers right away. Let the soup cool to room temperature first. Then, transfer it to an airtight container. Make sure to keep the lid tight to avoid spills and keep it fresh. Label the container with the date. This way, you’ll know when to eat it. Your soup will stay good for about 3 to 4 days in the fridge. When you're ready to enjoy the soup again, take out the amount you want. Pour it into a pot. Heat it on medium-low. Stir often to prevent sticking. If the soup seems thick, add a splash of milk or broth. This keeps it creamy and delicious. You can also use the microwave. Heat it in 30-second bursts, stirring in between. This helps it heat evenly. If you want to save some for later, freezing is a great option. Use freezer-safe containers and leave some space at the top. The soup will expand as it freezes. It can last up to 3 months in the freezer. When you’re ready to eat, take it out and let it thaw in the fridge overnight. After thawing, reheat it as mentioned above. Enjoy the full flavor of your soup even after freezing! You can pair this soup with warm, crusty bread. It’s perfect for dipping! A fresh salad adds a nice crunch and balances the flavors. You might also enjoy tortilla chips for extra texture. For a fun twist, try serving it with jalapeño cornbread. Each option enhances the soup's rich taste. Yes, you can use a slow cooker for this soup. Start by browning the beef, onion, and garlic in a skillet. This step adds more flavor. Then, transfer everything to the slow cooker. Add the rest of the ingredients, except for the cheese and milk. Cook on low for 6-8 hours or high for 3-4 hours. Stir in the cheese and milk just before serving for a creamy finish. Yes, you can freeze the full recipe. Let the soup cool completely before freezing. Store it in airtight containers or freezer bags. It will keep well for up to three months. When ready to eat, thaw in the fridge overnight. Reheat on the stove and add cheese and milk for a creamy texture. Enjoy the flavors all over again! This blog post covered all you need for the perfect green chile cheeseburger soup. You learned about ingredients, quality, cooking steps, and tips to avoid mistakes. We also explored some tasty variations and how to store leftovers well. Final thoughts: Enjoying this soup is easy with the right prep and flavors. Try your own twists, and you'll love it even more!

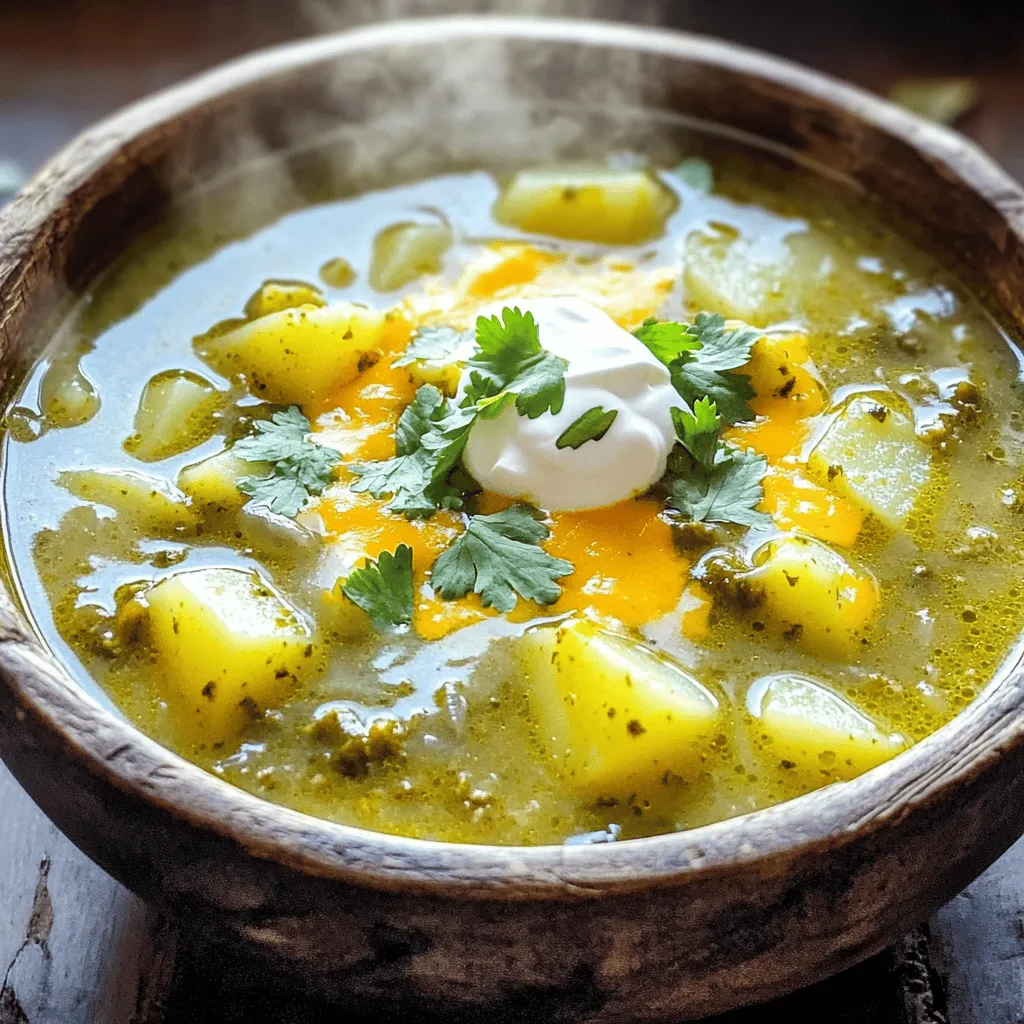
Warm up your dinner routine with my delicious Green Chile Cheeseburger Soup! This hearty comfort meal combines all the rich flavors of a classic cheeseburger, making it perfect for chilly …

Read more

Categories Dinner

Epic Beef and Mushroom Pie Comfort Food Delight

July 30, 2025 by Chef Miles
- 1 lb (450g) beef chuck, cut into 1-inch cubes - 8 oz (225g) button mushrooms, sliced - 1 large onion, finely chopped - 2 medium carrots, diced - 3 cloves of garlic, minced For this pie, I use beef chuck because it becomes tender when cooked slowly. Button mushrooms add a nice umami flavor and a bit of texture. Chopped onions and diced carrots bring sweetness and color. Garlic adds a great aroma and depth to the filling. - 3 tablespoons olive oil - 2 tablespoons all-purpose flour - 2 cups beef broth - 1 tablespoon Worcestershire sauce I love using olive oil for its rich flavor. All-purpose flour helps thicken the filling to a perfect consistency. Beef broth serves as the base of the sauce, giving it a hearty taste. Worcestershire sauce adds a tangy kick that enhances the overall flavor. - 1 teaspoon dried thyme - 1 teaspoon dried rosemary - Salt and freshly cracked black pepper to taste - 1 egg, beaten (for egg wash) Thyme and rosemary bring an earthy aroma and flavor to the pie. I always season with salt and pepper to taste because it makes a big difference. Brushing the crust with a beaten egg gives it a lovely golden color when baked. This recipe combines these simple ingredients into a comforting dish that warms the heart. For the full recipe, refer to the detailed instructions provided. - Preheat the oven to 400°F (200°C). - Chop the beef, mushrooms, onion, and carrots. - Mince the garlic and set all aside. - Heat 2 tablespoons of olive oil in a skillet. - Sear the beef cubes for 5-7 minutes until browned. - Remove beef and set it aside on a plate. - In the same skillet, add the onion and carrots. - Sauté for 5 minutes, stirring often. - Add the mushrooms and garlic, cooking for 3-4 more minutes. - Sprinkle flour over the vegetables and stir for 1 minute. - Gradually add beef broth while stirring to avoid lumps. - Mix in Worcestershire sauce, thyme, and rosemary. - Return the beef to the skillet and stir well. - Let it simmer on low for 15 minutes until thickened. - Taste and adjust seasoning as needed. - Roll out the pie crust to fit a 9-inch pie dish. - Pour the beef and mushroom filling into the crust evenly. - Place another crust on top, sealing the edges well. - Cut slits in the top for steam to escape. - Brush the top with beaten egg for a golden finish. - Bake for 25-30 minutes until golden brown. For the complete recipe, you can refer to the Full Recipe section. To achieve a golden crust, first, make sure your oven is at the right temperature. Preheat to 400°F (200°C). Use an egg wash before baking. It helps give the crust that lovely shine. For a crunchy texture, brush the crust lightly. You can choose between homemade and store-bought pie crust. Homemade crust gives you control over the ingredients. It can taste fresher and flakier. Store-bought is quick and easy, perfect for busy days. Either option works well, so pick what fits your schedule. To boost the flavor, consider adding spices like paprika or cumin. Fresh herbs like parsley or chives can also add a nice touch. Just sprinkle them in the filling while it simmers. If your filling seems too runny, add a bit more flour. Stir it in slowly until it thickens. You want a nice, hearty filling that holds together when you slice the pie. Pair your pie with simple sides. A light green salad works great. It adds freshness and crunch. Creamy mashed potatoes also match well with the rich flavors. This pie shines during family dinners or casual gatherings. It's perfect for chilly nights or cozy weekends. Serve it warm for the best taste. If you want a fun twist, try serving it with a tangy sauce on the side. {{image_4}} You can swap out beef for ground beef or other meats. Ground beef cooks faster and gives a different texture. You might also try lamb or turkey for a unique twist. For a vegetarian option, use lentils and mushrooms. This mix still gives a hearty feel without any meat. Lentils add protein and a nice bite, while mushrooms give that earthy taste. Add cheese for a creamy twist. Cheddar melts well and adds rich flavor. You can also sneak in other vegetables. Spinach or peas work great for color and nutrition. For international flavors, think about adding soy sauce or ginger. These can give your pie an Asian flair. Mixing in spices like cumin or coriander can also change the whole vibe. You can make mini versions of this pie for fun, individual servings. Use small pie dishes or muffin tins for these. Just remember, mini pies need less time in the oven. Bake them for about 15-20 minutes until golden. This way, you have a perfect portion for everyone, and they look cute on the table! To keep your Epic Beef and Mushroom Pie fresh, store it in the fridge. Use an airtight container or cover it well with plastic wrap. This helps avoid drying out. The pie stays good for about 3 to 4 days. Always check for any off smells before eating leftovers. You can freeze the pie before or after baking. If freezing before baking, wrap it in plastic wrap tightly. Then, place it in a freezer bag to prevent freezer burn. It keeps well for up to 3 months. To freeze after baking, let it cool first. Wrap it the same way and store. For reheating, thaw the pie in the fridge overnight. Then, bake it in a 350°F (175°C) oven for about 30 minutes. This helps heat it through without burning the crust. Making this pie ahead of time is a smart way to save time. You can prepare the filling in advance and store it in the fridge for up to 2 days. Portion the filling into containers for quick access. This way, you can assemble the pie whenever you want a hearty meal. Another option is to make mini versions of the pie. These freeze well and are great for quick lunches or dinners. Just reduce the baking time and enjoy your Epic Beef and Mushroom Pie anytime! What is the best way to reheat leftover pie? To reheat your pie, preheat the oven to 350°F (175°C). Place the pie on a baking sheet. Cover it with foil to keep it moist. Heat for about 20-25 minutes, or until warm. This method keeps the crust nice and crispy. Can I make this pie gluten-free? Yes, you can! Use a gluten-free pie crust. For the filling, swap regular flour for a gluten-free blend. Ensure your beef broth and Worcestershire sauce are gluten-free, too. How to thicken the filling if it's too runny? If your filling is runny, add a bit more flour. Mix one tablespoon of flour with cold water to make a slurry. Stir this into the simmering filling until it thickens. You can also let it simmer longer to reduce the liquid. Can I add other vegetables to the filling? Absolutely! You can add peas, corn, or green beans. Just make sure to chop them small. This adds color and nutrition to your pie. How do I know when the pie is fully cooked? Look for a golden-brown crust. You can also insert a knife into the filling. It should come out hot, and the filling should bubble. If it does, your pie is ready! What can I use instead of beef broth? You can use chicken broth or vegetable broth. This will change the flavor slightly but still taste great. Even water can work in a pinch, though it's less flavorful. Alternatives to Worcestershire sauce? Try soy sauce or balsamic vinegar as substitutes. They add a nice umami flavor. You can also mix soy sauce with a bit of vinegar for a similar taste. The beef and mushroom pie is a delightful dish full of flavor. We explored the main ingredients, pantry staples, and seasonings that create this meal. You learned how to cook the filling, assemble the pie, and ensure a perfect crust. The tips on variations and storage help you customize and preserve your pie. Now, it's your turn to enjoy this classic recipe. Make it your own and share it with others!

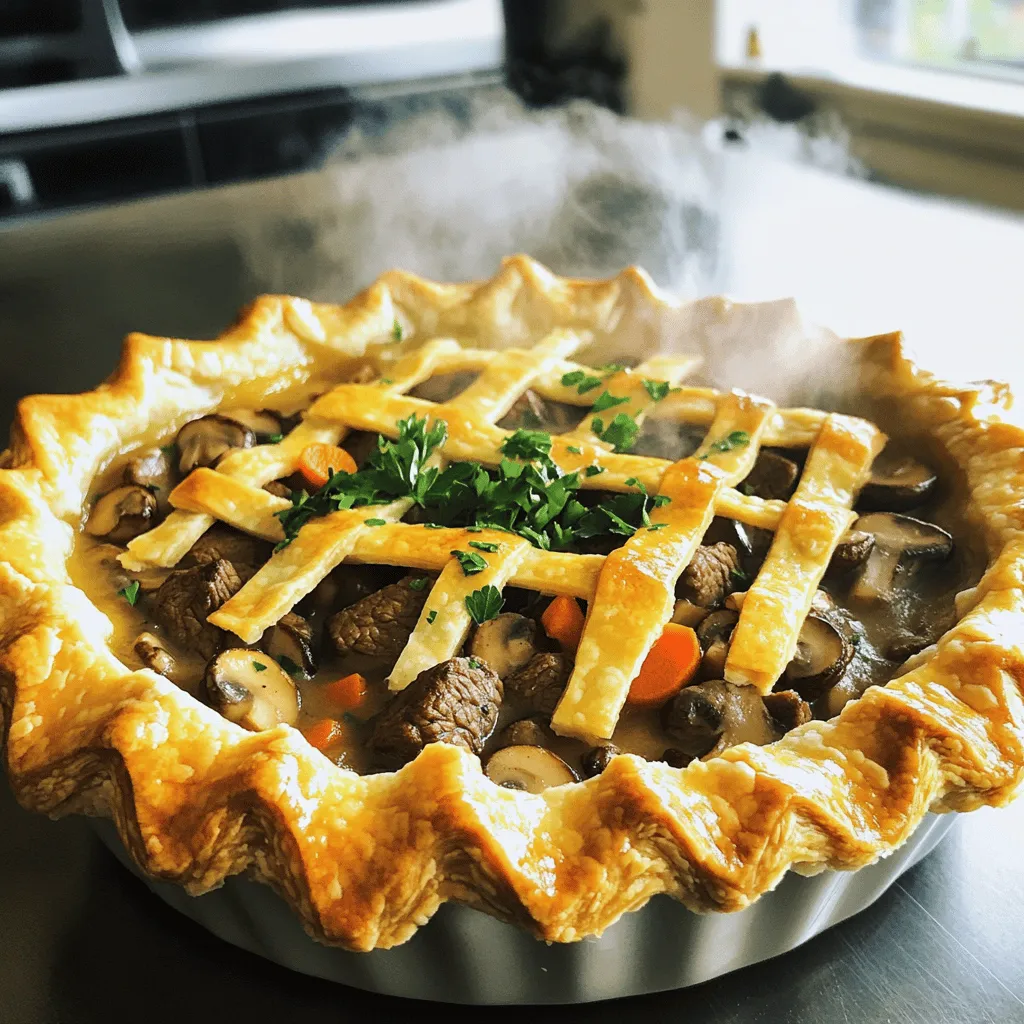
Craving comfort food that warms the heart and fills the belly? Look no further than this Epic Beef and Mushroom Pie! This dish combines tender beef, earthy mushrooms, and savory …

Read more

Categories Dinner

Apple Cinnamon Cookies Irresistible Flavor Delight

July 30, 2025 by Chef Miles
To create tasty apple cinnamon cookies, you need some key ingredients. Here they are: - 1 cup all-purpose flour - 1/2 teaspoon baking soda - 1/2 teaspoon baking powder - 1 teaspoon ground cinnamon - 1/4 teaspoon salt - 1/2 cup unsalted butter, softened (ideally at room temperature) - 1/2 cup brown sugar, packed tightly - 1/4 cup granulated sugar - 1 large egg, at room temperature - 1 teaspoon vanilla extract - 1 medium apple, peeled, cored, and finely diced (recommended: tart variety like Granny Smith) - 1/2 cup old-fashioned rolled oats These ingredients blend together to form a soft, chewy cookie filled with the warm flavor of cinnamon and fresh apples. You can take your cookies to the next level with optional ingredients. Consider adding: - 1/4 cup chopped walnuts or pecans for added crunch - A sprinkle of nutmeg for a warm spice - 1/2 cup chocolate chips for a sweet twist These ingredients add texture and flavor, making your cookies even more delightful. To bake your cookies, gather a few simple kitchen tools: - Mixing bowls (one large and one small) - Measuring cups and spoons - A whisk for the dry ingredients - A spatula or wooden spoon for mixing - A baking sheet lined with parchment paper - An oven to bake your cookies Having the right equipment makes the baking process smooth and enjoyable. With these essential tools and ingredients, you are ready to create apple cinnamon cookies that will impress everyone. For the complete cooking instructions, refer to the Full Recipe. Start by preheating your oven to 350°F (175°C). This temperature helps the cookies bake evenly. While the oven warms up, line a baking sheet with parchment paper. This step keeps the cookies from sticking and makes cleanup easier. In a small bowl, combine the dry ingredients. Use 1 cup of all-purpose flour, 1/2 teaspoon of baking soda, 1/2 teaspoon of baking powder, 1 teaspoon of ground cinnamon, and 1/4 teaspoon of salt. Whisk these together to mix well. In a large bowl, cream together 1/2 cup of softened unsalted butter, 1/2 cup of brown sugar, and 1/4 cup of granulated sugar. Beat until light and fluffy, about 2-3 minutes. Then, add 1 large egg and 1 teaspoon of vanilla extract. Mix until smooth. Slowly add the dry ingredients to the wet mix. Stir gently until the dough starts to come together. Don’t overmix! Finally, fold in 1 diced medium apple, 1/2 cup of rolled oats, and nuts if you want a little crunch. Using a tablespoon or cookie scoop, drop the dough onto the prepared baking sheet. Leave about 2 inches between each scoop. This space lets the cookies spread as they bake. Bake them in the preheated oven for 10-12 minutes. Look for lightly golden edges and a soft center. When they are ready, take them out and let them cool on the baking sheet for 5 minutes. Then, move the cookies to a wire rack to cool completely. These Apple Cinnamon Cookies are a true delight. For the full recipe, check the section above. Enjoy the warm, cozy flavors! To get the best texture, you want a soft and chewy cookie. Here are some tips: - Use room temperature butter. Softened butter helps the cookies spread well. - Don't overmix the dough. Mix just until combined for a tender bite. - Chill the dough. If you have time, chill your dough for 30 minutes. This helps the flavors meld and gives a better texture. - Watch baking time closely. Remove cookies when the edges are golden. The centers will firm up as they cool. You can easily adjust this recipe for different diets: - Gluten-free: Swap all-purpose flour for a gluten-free blend. - Dairy-free: Use coconut oil or a dairy-free butter substitute. - Nut-free: Omit nuts or use seeds like sunflower seeds instead. - Sugar-free: Replace sugars with a sugar substitute suitable for baking. Many people make simple errors when baking cookies. Here are some to watch out for: - Using cold ingredients. Always use room temperature eggs and butter. - Not measuring correctly. Use dry measuring cups for flour, packing it down lightly. - Overbaking. Cookies will continue to cook after removing them from the oven. - Skipping parchment paper. This can lead to sticking and uneven baking. For the full recipe, refer to the Apple Cinnamon Delight Cookies section. Happy baking! {{image_4}} You can make apple cinnamon cookies even better with chocolate chips. Just add 1/2 cup of semi-sweet or dark chocolate chips to the dough. This makes each bite a sweet surprise. The chocolate blends well with the warm spices and apple bits. It adds a rich flavor that many people love. Think of it as a fun twist on a classic recipe. If you need a gluten-free option, you can swap out the flour. Use 1 cup of gluten-free all-purpose flour instead. Make sure it has a binding agent like xanthan gum. This keeps your cookies from falling apart. You can also replace oats with gluten-free oats. This way, everyone can enjoy these tasty cookies without worry. Fall spices can change the taste of your cookies. Consider adding nutmeg or allspice to your mix. Just use 1/4 teaspoon of each along with the cinnamon. This gives your cookies a warm, cozy flavor. You can also add a splash of maple syrup to enhance the autumn vibe. It creates a sweet, rich taste that pairs perfectly with apples. For the full recipe, check out the Apple Cinnamon Delight Cookies. To keep your apple cinnamon cookies fresh, store them properly. Use an airtight container. This keeps air out and moisture in. If you stack cookies, add parchment paper between layers. This prevents them from sticking together. Keep the container in a cool, dry place. Avoid direct sunlight and heat sources. If you follow these steps, your cookies will stay tasty for days. When stored correctly, apple cinnamon cookies last about one week. If you notice them getting soft, they need to be eaten soon. You can also check for any signs of spoilage. If they smell odd or look bad, it’s time to toss them. For the best flavor, enjoy them within a few days. Freezing cookies is a great option for later. To freeze, let the cookies cool completely. Place them in a single layer on a baking sheet. Freeze them for one hour. Once solid, transfer them to a freezer bag. Remove as much air as possible before sealing. You can freeze the cookies for up to three months. When you're ready to eat, just thaw them at room temperature. You can even warm them in the oven for a few minutes. Enjoy the fresh taste again! For the full recipe, check out the Apple Cinnamon Delight Cookies. Yes, you can use different types of apples. Each apple brings its own taste. Tart apples like Granny Smith work best. They balance the sweetness in cookies. You can also try sweeter apples, like Honeycrisp. Just remember, the flavor changes with each type. Experiment with your favorites! To make chewy cookies, focus on a few key steps. First, use more brown sugar. It adds moisture. Second, avoid overbaking the cookies. Just bake until the edges are golden. Lastly, add an extra egg yolk for richness. This will give you soft, chewy bites every time. These cookies pair well with many treats. Try serving them warm with a scoop of vanilla ice cream. The cold ice cream complements the warm cookies. You can also serve them with hot apple cider. For a twist, add a drizzle of caramel sauce. It enhances the apple flavor and adds sweetness. For the full recipe, refer back to the earlier section. In this blog post, we explored the essential ingredients, step-by-step instructions, and tips for perfect apple cinnamon cookies. I shared ways to enhance flavor and common mistakes to watch out for. Remember, you can customize these cookies to fit your tastes and dietary needs. You can also store them or freeze them for future snacking. Now, you have the tools to bake delicious cookies that your friends and family will love. Enjoy your baking journey and share these treats with others!

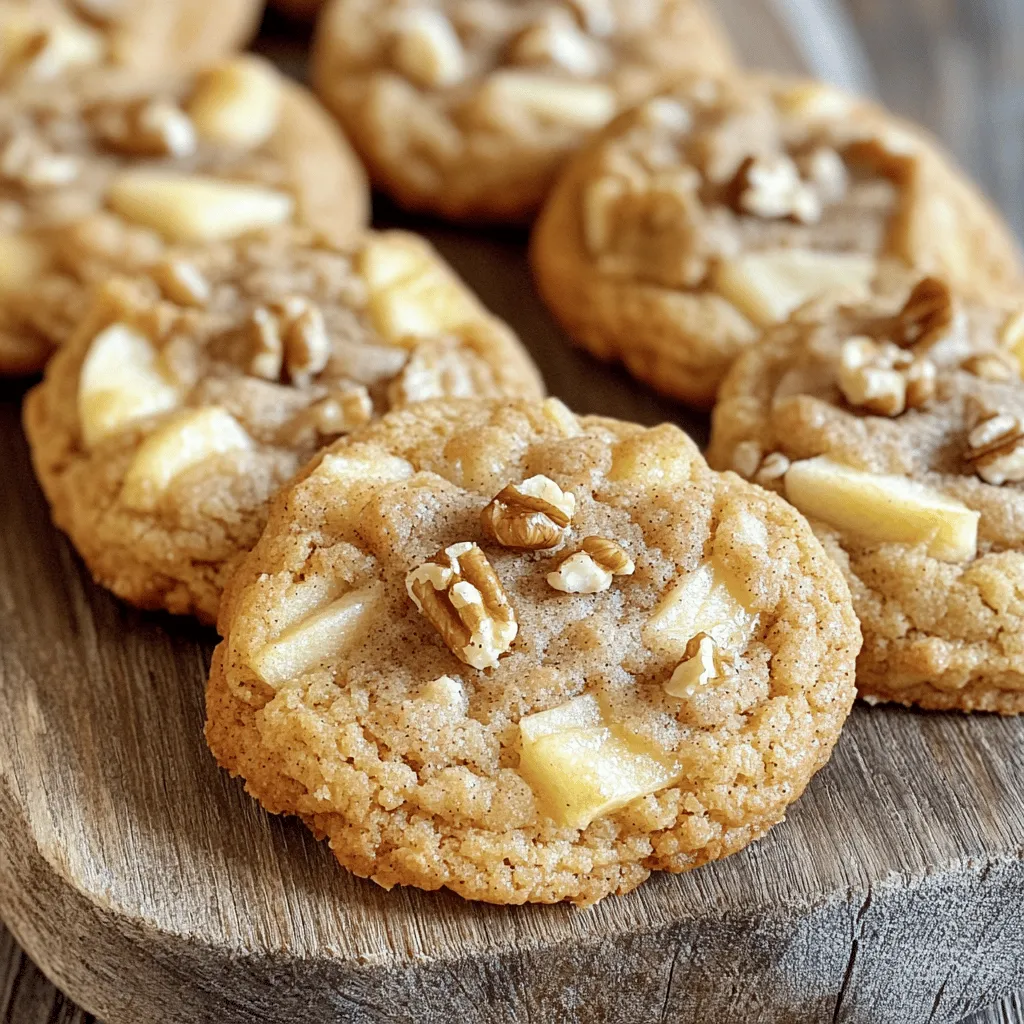
Are you ready to enjoy some warm, sweet goodness? Apple Cinnamon Cookies are a treat that you won’t be able to resist. With their soft texture and a mix of …

Read more

Categories Desserts
Older posts
Newer posts
← Previous Page1 … Page54 Page55 Page56 … Page113 Next →

MELTED RECIPES

where delicious ideas melt into life, from stovetop to backyard. Always warm, simple, and irresistibly satisfying. 🍳🔥🧀

PAGES

Home About Contact Privacy Policy Terms & Conditions Cookie Policy GDPR Policy Copyright Policy Disclaimer

CATEGORIES

Appetizers Desserts Salads Breakfast Dinner

Contact

  • Pinterest
  • Mail
Copyright © 2025 Melted Recipes. All rights reserved.