Skip to content
Melted Recipes
  • Home
  • Appetizers
  • Desserts
  • Salads
  • Breakfast
  • Dinner
  • Privacy Policy
  • Contact
  • About

Chef Miles

Spice Cake Bundt with Maple Frosting Delight

August 2, 2025 by Chef Miles
The dry ingredients are the base of our spice cake. Here’s what you need: - 2 cups all-purpose flour - 1 ½ teaspoons baking powder - 1 teaspoon baking soda - 1 teaspoon ground cinnamon - 1 teaspoon ground nutmeg - ½ teaspoon ground ginger - ½ teaspoon ground cloves - ½ teaspoon salt These dry items create the cake’s structure and flavor. The spices bring warmth, while the flour gives it body. Now, let’s move on to the wet ingredients. These are key for moisture and sweetness: - ¾ cup unsalted butter, softened to room temperature - 1 cup brown sugar, packed tightly - ½ cup granulated sugar - 3 large eggs, at room temperature - 1 teaspoon pure vanilla extract - 1 cup buttermilk, at room temperature The butter and sugars create a rich base. Eggs add lift, while buttermilk gives a tender crumb. The vanilla adds a lovely aroma. You can boost the texture with some optional add-ins. Consider these: - 1 cup chopped walnuts or pecans These nuts add a nice crunch and depth of flavor. They complement the spices well. If you love nuts, don’t skip this step! For the full recipe, check the details above. Start by preheating your oven to 350°F (175°C). This temperature ensures your cake bakes evenly. While the oven heats, prepare your Bundt pan. Generously grease it with butter or cooking spray. Then, dust it lightly with flour. This step helps the cake release easily after baking. Next, you’ll mix the batter. In a medium bowl, whisk together your dry ingredients: flour, baking powder, baking soda, cinnamon, nutmeg, ginger, cloves, and salt. Set this bowl aside. In a larger bowl, cream softened butter with brown and granulated sugars. Use an electric mixer for about 3 to 4 minutes. This step makes the mixture light and fluffy. Then, add eggs one at a time, mixing well after each addition. Stir in the vanilla extract. Now, it’s time to combine the mixtures. Gradually add the dry ingredients to the butter mixture, alternating with buttermilk. Start and end with the dry mix. If using nuts, gently fold them in now. Pour the batter into your prepared Bundt pan. Smooth the top with a spatula for even baking. Place the pan in the oven and bake for 45 to 50 minutes. Check doneness by inserting a toothpick into the center. It should come out clean. Once baked, let the cake cool in the pan for about 10 minutes. After that, invert the pan onto a wire rack to release the cake completely. Let it cool down fully before frosting. For a detailed guide, check the Full Recipe. To get the best texture in your spice cake, measure your ingredients well. Use a scale for accuracy. Spoon flour into your measuring cup and level it off with a knife. This helps avoid too much flour, which can make the cake dry. When mixing, blend the wet and dry ingredients just until combined. Overmixing can create a tough cake, which is not what you want. For your maple frosting, you want it to be just right. If the frosting is too thick, add a bit more milk, one teaspoon at a time. If it’s too runny, add more powdered sugar until you reach the desired consistency. You want it spreadable but not so thin that it runs off the cake. This balance makes your frosting perfect for drizzling or spreading. A beautiful presentation makes your cake even more inviting. Place the Bundt cake on a nice serving plate. Dust the top with a little ground cinnamon for a pop of color. You can also add a handful of chopped nuts for extra texture. For a special touch, serve each slice with a dollop of whipped cream or a scoop of vanilla ice cream. This makes your cake not just tasty but also a feast for the eyes. {{image_4}} If you want a gluten-free spice cake, you have options. You can use almond flour or coconut flour as great alternatives. Both will give your cake a nice texture. Just remember to adjust the liquid since these flours absorb more moisture. You can also try gluten-free all-purpose flour blends, which often work well without changes to the recipe. Want to add a twist? You can mix in different spices like cardamom or allspice. These spices can add depth and warmth. You could also use orange zest for a bright flavor. For the frosting, consider adding a pinch of cinnamon or a splash of vanilla extract. Each change will make your cake unique and tasty. Making mini Bundt cakes is easy! Just use a mini Bundt pan instead of a full-size one. Fill each cavity about two-thirds full with batter. Bake for 20-25 minutes, checking for doneness with a toothpick. Let them cool for a few minutes before removing. These little cakes are perfect for parties or gifts. You can drizzle the maple frosting on top for a fun touch. For the full recipe, check the section above! To keep your Spice Cake Bundt fresh, store it in an airtight container. If you don’t have one, wrap the cake tightly with plastic wrap. Keep it at room temperature for up to three days. If you want it to last longer, refrigerate it. Just remember to let it cool completely before wrapping. Freezing is a great way to extend the cake's shelf life. First, slice the cake into individual pieces. Wrap each slice in plastic wrap. Then, place the wrapped slices in a freezer bag. This helps prevent freezer burn. When you’re ready to enjoy, take a slice out and let it thaw in the fridge overnight. To warm up your slices, preheat your oven to 350°F. Place the slices on a baking sheet. Heat them for about 10 minutes. You can also use a microwave for quick warming. Just place a slice on a microwave-safe plate and heat for 15-20 seconds. Enjoy your cake warm for the best flavor! Yes, you can swap the maple frosting for other flavors. Cream cheese frosting adds tanginess. Chocolate frosting gives a rich taste. You can also try vanilla or caramel frostings. Each option adds its own twist to the cake. Choose what you love most! If you lack buttermilk, don't worry! You can make a quick substitute. Mix one cup of milk with one tablespoon of vinegar or lemon juice. Let it sit for five minutes. This creates a buttermilk effect. You can also use plain yogurt or sour cream, thinned with a bit of milk. The Spice Cake Bundt with Maple Frosting lasts about three to five days at room temperature. Keep it in an airtight container. Watch for signs of spoilage like a dry texture or odd smell. If you want to keep it longer, you can freeze it. Wrap it well in plastic wrap and foil. This blog post detailed how to make a delicious Spice Cake Bundt with Maple Frosting. We covered the essential dry and wet ingredients, along with optional add-ins. You learned the step-by-step process from prepping the oven to baking and cooling the cake. Tips for texture, frosting, and presentation can help you shine in the kitchen. We also explored variations and proper storage. Enjoy your baking adventure. With these insights, you’ll create a cake that impresses every time. Happy baking!

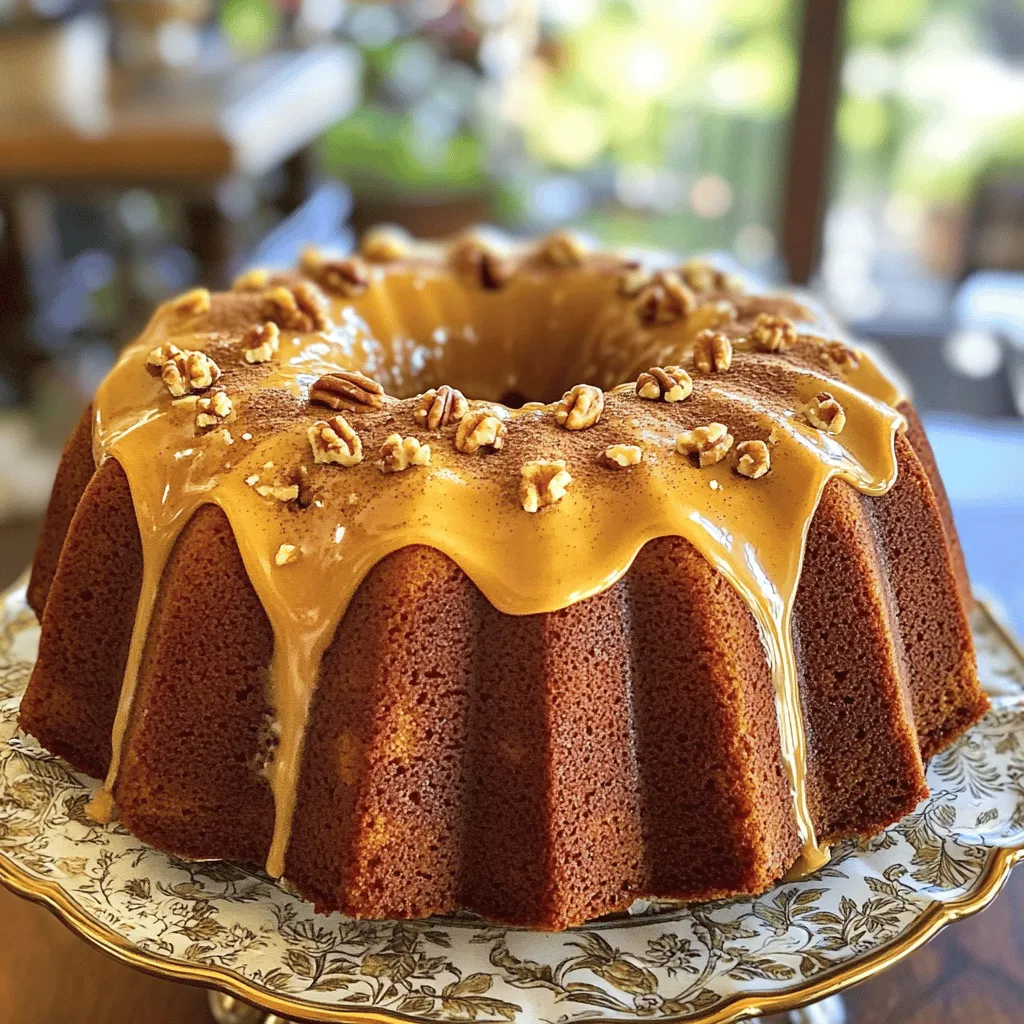
Get ready to delight your taste buds with a warm, cozy treat! My Spice Cake Bundt with Maple Frosting is not just a dessert; it’s a celebration of flavors. With …

Read more

Categories Desserts

Apple Bread with Cinnamon Pecan Crunch Delight

August 2, 2025 by Chef Miles
- 2 cups all-purpose flour - 1 teaspoon baking powder - 1/2 teaspoon baking soda - 1/2 teaspoon salt - 1 teaspoon ground cinnamon In baking, dry ingredients are key. They create the base for the bread. Start with all-purpose flour for the right texture. The baking powder and baking soda help the bread rise. Salt adds flavor, while ground cinnamon brings warmth. - 1/2 cup granulated sugar - 1/4 cup brown sugar, packed - 1/2 cup unsalted butter, softened - 2 large eggs - 1 teaspoon vanilla extract Next, we mix the wet ingredients. The sugars add sweetness and moisture. Softened butter helps create a fluffy texture. Eggs act as a binder, holding everything together. Vanilla extract adds a lovely aroma and flavor. - 1 cup unsweetened applesauce - 1 1/2 cups peeled, diced apples (about 2 medium apples) - 1/2 cup chopped pecans Finally, we add special ingredients. Unsweetened applesauce adds moisture and apple flavor. Diced apples provide texture and freshness. Chopped pecans add crunch in the batter and on top. For the full recipe, check out the link provided. Start by preheating your oven to 350°F (175°C). This step helps the bread bake evenly. Next, prepare a 9x5-inch loaf pan. Grease it with butter or line it with parchment paper. This way, you can easily take the bread out later. In a medium mixing bowl, whisk together the dry ingredients. Combine 2 cups of all-purpose flour, 1 teaspoon baking powder, 1/2 teaspoon baking soda, 1/2 teaspoon salt, and 1 teaspoon ground cinnamon. Set this mixture aside for later use. In a large mixing bowl, beat 1/2 cup of softened unsalted butter with 1/2 cup of granulated sugar and 1/4 cup of brown sugar. Use an electric mixer for this task. Mix until the blend is light and fluffy. This usually takes about 2-3 minutes. Next, crack 2 large eggs into the bowl, adding them one at a time. Mix well after each egg. Then, add in 1 teaspoon of vanilla extract. This gives the bread a nice flavor. Now, pour in 1 cup of unsweetened applesauce. Stir gently until the mixture is smooth and well combined. This step adds moisture and sweetness to the bread. Slowly add the dry ingredients to the wet mixture in the large bowl. Stir gently with a spatula or wooden spoon. Mix until just combined, but be careful not to overmix. This keeps the bread soft. Carefully fold in 1 1/2 cups of diced apples and 1/2 cup of chopped pecans. Use a spatula to ensure they are evenly mixed into the batter without breaking the fruit. In a small bowl, mix together 1/2 cup of chopped pecans, 1/4 cup of packed brown sugar, and 1/2 teaspoon of ground cinnamon. Pour in 2 tablespoons of melted butter and stir until the pecans are well coated. This will create a crunchy topping. Pour the batter into your prepared loaf pan. Smooth the top with a spatula. Evenly sprinkle the cinnamon pecan crunch topping over the batter. Bake in the oven for 55-65 minutes. To check doneness, insert a toothpick into the center. If it comes out clean, the bread is ready. The top should look golden brown and smell amazing. For the full recipe, check out the details above. - Always check for doneness with a toothpick. Insert it into the center. If it comes out clean, your bread is ready. - Adjust baking time based on your oven type. Some ovens heat differently. Keep an eye on your bread to avoid overbaking. - You can add spices like nutmeg or ginger for more depth. These spices pair well with apples and cinnamon. - Consider incorporating dried fruits or chocolate chips. Dried cranberries or dark chocolate can add a sweet surprise in every bite. - For a nice presentation, slice the bread and arrange it on a rustic wooden board. It looks inviting and homemade. - Drizzle a little honey over the slices. This adds a touch of sweetness that complements the bread. - Offer a side of cream cheese spread. It pairs well with the warm bread and adds a creamy texture. - Finish by garnishing with a light dusting of cinnamon on top. It gives a beautiful touch and enhances the aroma. You can find the full recipe to guide you through this delicious process. {{image_4}} To make this apple bread gluten-free, you can easily substitute the all-purpose flour with gluten-free flour. Many brands offer a blend that works well in baking. Just be sure to check the label for any added ingredients. This keeps the bread soft and moist, just like the original. If you want a vegan version, you can replace the eggs with flaxseed meal or applesauce. For each egg, mix 1 tablespoon of flaxseed meal with 2.5 tablespoons of water. Let it sit for a few minutes until it thickens. Also, swap the unsalted butter for plant-based butter. These changes keep the flavor rich and delicious. You can also mix in other fruits for fun flavors! Bananas add moisture and sweetness, while pears bring a soft texture. Feel free to experiment and find your favorite combination. This way, each loaf can have a unique twist, making it special every time you bake it. For the full recipe, check out the detailed instructions above. To keep your apple bread fresh, store it at room temperature. Wrap the bread in plastic wrap or place it in an airtight container. This helps keep the moisture in. If you plan to eat it within three days, this method works great. You can also place it in a paper bag. This keeps the crust nice and crisp. For longer storage, freeze your apple bread. First, wrap it tightly in plastic wrap. Then, place it in a freezer bag. Make sure to remove as much air as possible. You can freeze it for up to three months. When you're ready to enjoy it, just thaw it overnight in the fridge. To warm up your apple bread, preheat your oven to 350°F. Place the slices on a baking sheet. Heat them for about 10 minutes. This helps restore the bread's soft texture. You can also use a microwave for quick reheating. Heat a slice for 15-20 seconds, but be careful not to let it get too hot. Enjoy your warm apple bread with a little butter or cream cheese. For more details, refer to the Full Recipe. Can I use other types of apples? Yes, you can use many apple types. I love using Granny Smith for their tartness. Honeycrisp adds a sweet crunch. You can even mix different apples for more flavor. What can I substitute for eggs in the recipe? If you need an egg replacement, try applesauce or mashed bananas. Use 1/4 cup of either for each egg. This keeps your bread moist and adds sweetness. Why did my bread not rise? If your bread did not rise, check the freshness of your baking powder and baking soda. Old leavening agents may lose their power. Also, ensure you mix well but do not overmix the batter. How to fix dense bread texture? Dense bread can happen if you overmix the batter. Mix until just combined. Also, check your measurements. Too much flour can lead to density. Use a kitchen scale for accuracy. What to pair with apple bread for dessert? Apple bread pairs well with vanilla ice cream or whipped cream. A drizzle of caramel sauce adds a nice touch. You can also serve it with a dollop of cream cheese spread. Can apple bread be served warm? Absolutely! Serving apple bread warm enhances its flavors. Just warm it in the oven for a few minutes before serving. Enjoy the cozy aroma and soft texture. In this blog post, I covered the key ingredients for a delicious apple bread, from dry and wet components to additional mix-ins. I shared step-by-step instructions to help you bake perfectly every time. I also provided tips for variations, storage, and answers to common questions. Overall, making apple bread is simple and fun. With a few ingredients and easy steps, you can create a warm, tasty treat that everyone will love. Enjoy the process and share your tasty results!

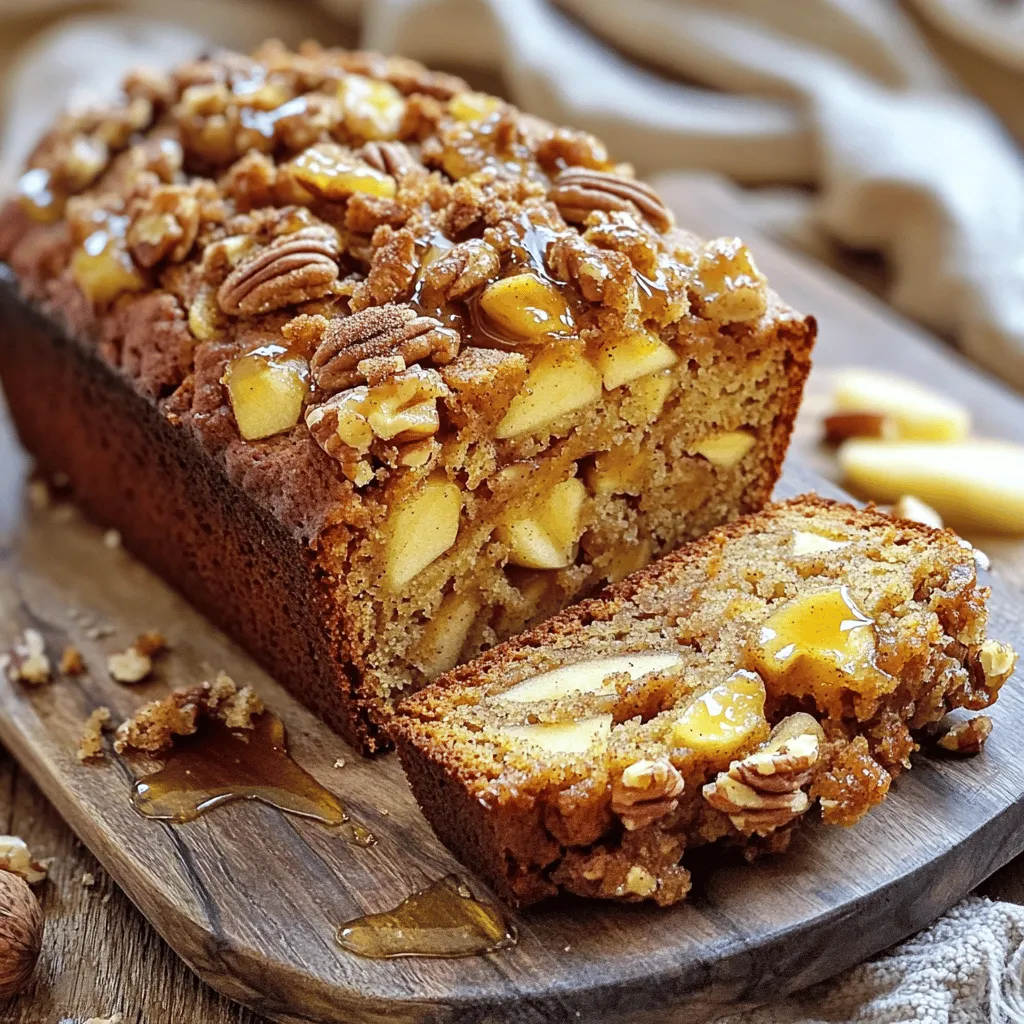
Welcome to my kitchen! Today, I’m excited to share my favorite Apple Bread with Cinnamon Pecan Crunch recipe. This bread is moist, sweet, and loaded with apples and nuts. Perfect …

Read more

Categories Desserts

Sweet & Spicy Pineapple Chili Flavorful and Fun Dish

August 2, 2025 by Chef Miles
To create a sweet and spicy pineapple chili, gather these fresh and flavorful ingredients: - 1 can (15 oz) black beans, drained and rinsed - 1 can (15 oz) kidney beans, drained and rinsed - 1 can (15 oz) diced tomatoes, undrained - 1 cup frozen corn - 1 fresh pineapple, peeled, cored, and diced into bite-sized pieces - 1 large red bell pepper, chopped into 1-inch pieces - 1 small red onion, diced finely - 2 cloves garlic, minced - 2 tablespoons olive oil - 1 tablespoon chili powder - 1 teaspoon ground cumin - 1 teaspoon smoked paprika - ½ teaspoon cayenne pepper (adjust based on spice preference) - Salt and freshly ground black pepper to taste - 2 tablespoons honey or maple syrup for sweetness - Fresh cilantro leaves for garnish Each ingredient plays a vital role in bringing the sweet and spicy flavors to life. The black and kidney beans add protein and texture, while the pineapple brings a lovely sweetness. The spices create warmth, making each bite a delightful experience. I love using fresh ingredients because they enhance the dish's vibrant taste. 1. Cooking the base mixture Start by heating 2 tablespoons of olive oil in a large saucepan over medium heat. Add 1 small diced red onion and 1 large chopped red bell pepper. Sauté these for about 5 minutes. You want the onion to be clear and fragrant. 2. Adding fresh pineapple Next, add 1 fresh pineapple that you’ve peeled, cored, and diced into bite-sized pieces. Cook this mix for 3 to 4 minutes. Stir occasionally until the pineapple turns golden and caramelizes. 3. Incorporating beans and tomatoes Now, stir in 1 can of drained black beans, 1 can of drained kidney beans, and 1 can of undrained diced tomatoes. Also, add 1 cup of frozen corn. Mix all these well to combine everything evenly. 4. Seasoning and sweetening Season the chili with 1 tablespoon of chili powder, 1 teaspoon of ground cumin, 1 teaspoon of smoked paprika, and ½ teaspoon of cayenne pepper. Add salt and pepper to taste. Then, drizzle in 2 tablespoons of honey or maple syrup. Stir until the spices and sweetener blend into the mixture. 1. Adjusting the heat and flavors Lower the heat to simmer the chili. Let it cook for 20 to 25 minutes. Stir occasionally to keep it from sticking and to help the flavors blend well. 2. Cooking time and techniques As the chili cooks, the flavors meld together beautifully. The pineapple adds a sweet touch, while the spices kick up the heat. 3. Final adjustments before serving After simmering, taste the chili. If you want it spicier, add more cayenne pepper. Once the chili is thickened, turn off the heat. Let it rest for a few minutes to enhance the flavors before serving. For the full recipe, be sure to check the detailed steps above! Enjoy your sweet and spicy creation! To get the best flavor, focus on three main areas: spice levels, sweetness, and sautéing. Adjusting spice levels: Start with half a teaspoon of cayenne pepper. Taste it, then add more if you like extra heat. Remember, you can always add spice, but you can't take it out! Sweetening methods: Honey or maple syrup enhances the chili's sweetness. Use two tablespoons to balance the heat. For a twist, try brown sugar or agave syrup. Sautéing techniques: Sauté the onions and peppers until they are soft. This brings out their natural sweetness. Cook them for about five minutes. Add garlic last to avoid burning it. Presentation matters! Serve your chili in bright bowls. Top with fresh cilantro for a visual spark. A lime wedge adds a refreshing twist. Best side dishes to pair: Crispy tortilla chips are a great match. They add crunch and texture. You might also enjoy cornbread or a light salad on the side. Garnish for enhanced flavor: Sprinkle chopped green onions or a dollop of sour cream for creaminess. These add depth and balance to the spicy chili. Enjoy experimenting with your own toppings! {{image_4}} If you want to mix things up, consider different beans. You can use pinto beans or cannellini beans for a new taste. Each type adds its own flair to the chili. For the fresh pineapple, you can use canned pineapple chunks. Just be sure to drain it well. This option saves time and still brings sweetness to the dish. If you're feeling adventurous, try mango for a fun twist. If you crave more heat, add jalapeños or serrano peppers. These spicy options will kick up the flavor. You can also increase the cayenne pepper to suit your taste. Making this chili vegan is easy. Simply skip the honey and use maple syrup instead. This keeps it sweet without animal products. For gluten-free chili, check your spices. Most are gluten-free, but always read labels. If you use canned beans, ensure they're labeled gluten-free. If you're watching sugar intake, reduce the sweetener. You can even skip it altogether. The natural sweetness of the pineapple may be enough for you. For more ideas, check out the Full Recipe. This allows you to explore every option and find what works best for you. - Use an airtight container for best results. - Let the chili cool down before sealing. - Store in the fridge for up to 5 days. - Freeze in a freezer-safe container. - Leave some space for expansion. - It can last up to 3 months in the freezer. - For stovetop reheating, use a saucepan over low heat. - Stir often to keep flavors intact. - For microwave reheating, cover with a lid to avoid splatters. - Heat for 1-2 minutes, stirring halfway through. I find that knowing how to store and reheat your Sweet & Spicy Pineapple Chili makes it easier to enjoy later. This dish is perfect for meal prep, and it tastes even better the next day! What to do if the chili is too spicy? If your chili is too spicy, add more sweeteners like honey or maple syrup. You can also mix in extra beans or corn to balance the heat. If it is still too hot, serve it with sour cream or yogurt. This cools down the spice nicely. Can I make this dish in advance? Yes, you can make Sweet & Spicy Pineapple Chili ahead of time. Store it in an airtight container in the fridge. It will taste even better the next day as the flavors blend. Just reheat it on the stove or in the microwave when you are ready to serve. What can I serve with Sweet & Spicy Pineapple Chili? This chili pairs well with rice or quinoa. You can also serve it with tortilla chips for crunch. A fresh salad or some cornbread makes for a great side too. Full Recipe access for details For the full recipe and step-by-step guide, check the full recipe section above. Variations for different tastes You can change the flavor by using different beans. Black beans and pinto beans work well. If you want it sweeter, add more pineapple or a splash of orange juice. For a spicier kick, use jalapeños or hot sauce. Tips for enhancing flavor further To enhance the flavor, sauté the garlic until it’s fragrant but not burnt. This gives a nice depth. Adding fresh lime juice just before serving brightens the dish. Try topping it with avocado or cheese for extra creaminess. This blog post breaks down how to make a tasty Sweet & Spicy Pineapple Chili. We explored ingredients like black beans, fresh pineapple, and spices. I shared steps for cooking, simmering, and perfecting your chili. Don't forget the tips on adjustments and serving ideas. In summary, making chili is easy and fun. You can try new flavors and variations, too. Enjoy your cooking journey!

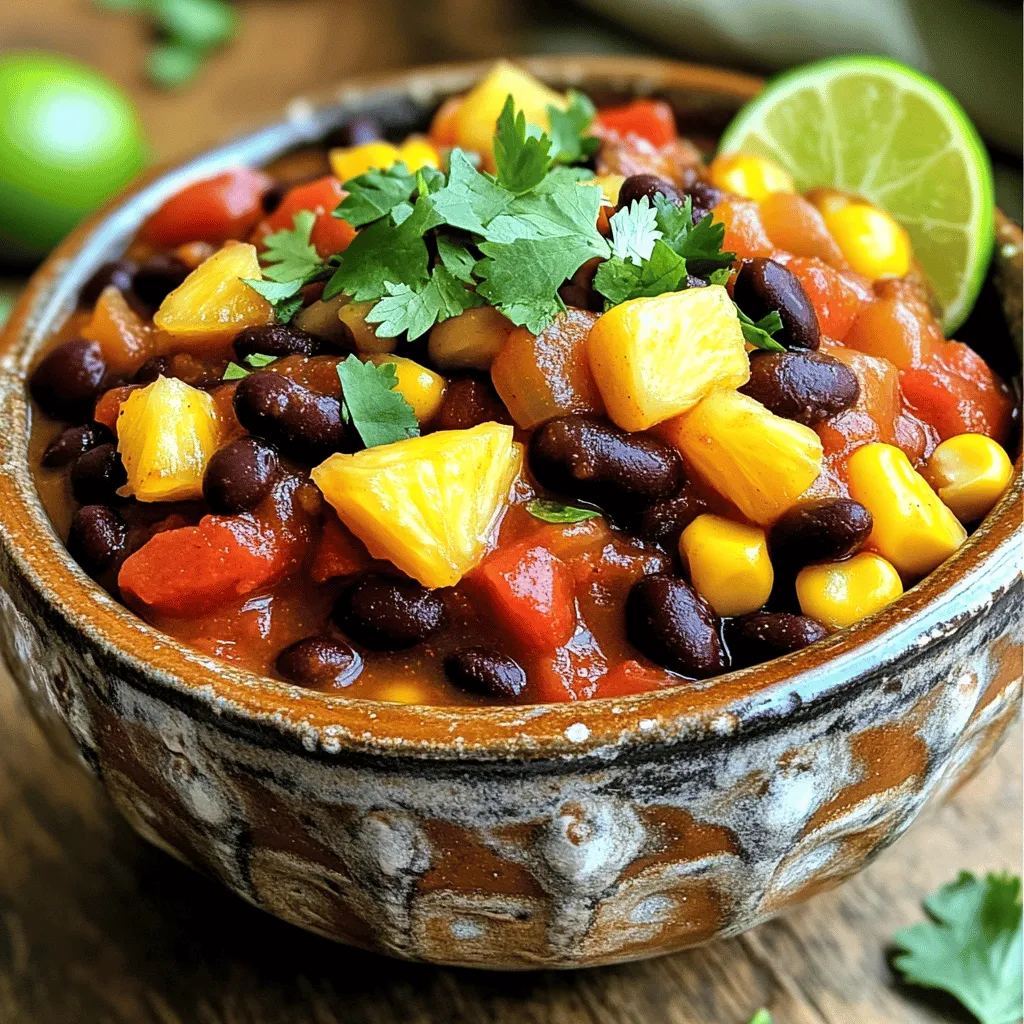
Are you ready to spice up your meal with a vibrant twist? Dive into my Sweet & Spicy Pineapple Chili, a dish bursting with flavor and fun! This recipe combines …

Read more

Categories Dinner

Cheese Enchiladas with Chili Gravy Easy and Delicious

August 2, 2025 by Chef Miles
- 10 corn tortillas - 2 cups shredded cheddar cheese - 1 cup shredded Monterey Jack cheese - 1 small onion, finely chopped - 2 cloves garlic, minced - 1 teaspoon ground cumin - 1 teaspoon smoked paprika - 2 cups enchilada sauce (store-bought or homemade) - 1 tablespoon olive oil - Salt and pepper to taste - Fresh cilantro, chopped (for garnish) To make cheese enchiladas with chili gravy, you need a few key ingredients. First, the corn tortillas are the base. They hold all the cheesy goodness inside. Then, we use cheddar and Monterey Jack cheese for that rich, melty taste. Next, we add some flavor with finely chopped onion and minced garlic. These boost the taste profile. Ground cumin and smoked paprika give it a warm, earthy flavor. For the sauce, you can use store-bought or homemade enchilada sauce. This is where the magic happens. The sauce ties everything together, making the dish moist and flavorful. You'll also need olive oil to cook the aromatics, along with salt and pepper for seasoning. Finally, fresh cilantro adds a bright touch when serving, making the dish pop visually and flavor-wise. For the full recipe, check out the detailed instructions on how to prepare this delicious meal! - Preheat the Oven: Set your oven to 375°F (190°C). This step is key for even cooking. - Sauté the Aromatics: In a skillet, heat the olive oil over medium heat. Once hot, add the chopped onion. Cook for 3-4 minutes until it turns translucent. Then, add the minced garlic and sauté for one more minute. - Add Garlic and Spices: Stir in the ground cumin and smoked paprika. Let them cook for a minute, mixing well. This adds great flavor to the filling. - Combine Cheese Mixture: In a large bowl, mix the shredded cheddar and Monterey Jack cheeses. Add half of the sautéed onion mix. Season with salt and pepper to taste. This creates a rich and creamy filling. - Assemble the Enchiladas: Pour half of the enchilada sauce into a shallow dish. Take a corn tortilla, scoop some cheese mixture into the center, and roll it up. Place it seam-side down in the dish. Repeat this with all tortillas. - Top with Sauce and Cheese: Pour the remaining enchilada sauce over the rolled tortillas. Make sure each one is covered. Sprinkle the leftover cheese mixture on top for extra cheesy goodness. - Bake to Perfection: Place the dish in your preheated oven. Bake for 20-25 minutes. You want the cheese to melt and bubble, with edges turning golden. These steps make the process easy and fun. For a full recipe with all details, check out the [Full Recipe]. To prevent tortillas from breaking, heat them briefly in a skillet. This makes them soft and pliable. You can also wrap them in a damp cloth and microwave for about 30 seconds. This helps keep them from cracking when you roll them. When choosing enchilada sauce, homemade sauce has a fresher taste. You can control the spice level and ingredients. Store-bought sauce is quick and still tasty. If you choose it, look for one with simple ingredients and no added sugars. Pair your enchiladas with sides like fluffy rice, seasoned beans, or a fresh salad. These sides balance the richness of the cheese. For the best look, serve enchiladas on a colorful plate. Drizzle extra sauce on top and add a sprig of cilantro for a pop of color. Use a 9x13-inch baking dish for even cooking. A non-stick dish helps with easy removal. A large skillet makes sautéing the onion and garlic simple. You will also need a mixing bowl for the cheese filling. A spatula is handy for assembly and serving. For easy rolling, have a plate ready to hold the filled tortillas. For the full recipe, check out the detailed instructions and ingredient list. {{image_4}} You can switch up the cheese in your enchiladas. Try using Oaxaca cheese for a melty texture. Pepper Jack adds a nice kick with its spice. If you want to change the protein, you can use chicken, beef, or even beans. They all work well and add flavor. For a healthier twist, consider using whole wheat tortillas. They have more fiber and nutrients than regular ones. You might also opt for gluten-free tortillas if you need a different option. Low-fat cheese is another great swap. It still melts well and cuts some calories. To give your enchiladas a new flavor, add spices like chili powder or cumin. This can change the taste and make it more exciting. You can also make vegetarian or vegan enchiladas. Just swap cheese for a plant-based option and use more veggies. These options still taste great and are fun to make. For the full recipe, be sure to check the earlier sections. To keep your cheese enchiladas fresh, store any leftovers in the fridge. Place them in an airtight container. This helps to lock in moisture and flavor. If you don’t have a container, wrap them tightly with plastic wrap. This method also works well. If you want to save enchiladas for later, freezing is a great option. First, let them cool completely. Then, wrap each enchilada in plastic wrap. After that, place them inside a freezer bag. Remove as much air as you can before sealing. For reheating, let them thaw overnight in the fridge. Heat them in the oven at 350°F (175°C) until hot. This keeps the texture nice and cheesy. Cheese enchiladas can last in the fridge for about 3 to 4 days. If you freeze them, they can last up to 3 months. Always check for signs of spoilage. If the cheese looks moldy or the sauce smells off, it’s best to toss them out. Enjoy your enchiladas while they’re fresh for the best taste! For the complete recipe, check the Full Recipe section. How to make cheese enchiladas with chili gravy from scratch? To make cheese enchiladas with chili gravy, you need to start with the tortillas. Use corn tortillas for the best flavor. Next, fill each tortilla with a mix of shredded cheddar and Monterey Jack cheese. Roll them up tight and place them in a baking dish. Pour chili gravy over the top. Bake at 375°F (190°C) for about 20-25 minutes until bubbly. For the full steps, check the Full Recipe. Can I make enchiladas ahead of time? Yes, you can prepare enchiladas ahead of time. Assemble them, cover them with sauce, and then store in the fridge. They can sit for up to 24 hours before baking. This saves time on busy nights. What’s the best way to reheat enchiladas? The best way to reheat enchiladas is in the oven. Preheat it to 350°F (175°C). Place the enchiladas in a baking dish and cover with foil. Heat for about 15-20 minutes. This keeps them soft and cheesy. What can I use instead of corn tortillas? If you can’t find corn tortillas, you can use flour tortillas. They will change the flavor and texture a bit, but they work well. You can also try gluten-free tortillas if needed. Can I substitute chicken broth for enchilada sauce? You can use chicken broth, but it will not give the same flavor. It can help moisten the enchiladas if you mix it with some spices. Consider adding chili powder or cumin for a better taste. Are cheese enchiladas gluten-free? Traditional cheese enchiladas are not gluten-free due to corn tortillas. However, you can use gluten-free tortillas to make them suitable for a gluten-free diet. Can I make this recipe low-carb? You can make low-carb enchiladas by using zucchini or cauliflower tortillas. You can also reduce the cheese or use a low-fat cheese to cut carbs. You now have a complete guide to making delicious cheese enchiladas. We covered the key ingredients, preparation steps, and tips for getting it just right. You learned how to get the flavors perfect and how to store leftovers too. Whether you want to make this dish simple or add your own twist, the options are endless. Enjoy creating a meal that’s fun, tasty, and sure to impress. Dive in and start cooking; your homemade enchiladas await!

Are you ready to whip up a batch of cheese enchiladas with chili gravy that’ll take you straight to flavor town? This easy recipe combines gooey cheddar and Monterey Jack …

Read more

Categories Dinner

Easy Baked Ham and Cheese Pinwheels Tasty Snack Treat

August 2, 2025 by Chef Miles
To make easy baked ham and cheese pinwheels, gather these items: - 1 package of refrigerated puff pastry (contains 2 sheets) - 8 oz deli ham, thinly sliced - 8 oz cream cheese, softened to room temperature - 1 cup fresh spinach, finely chopped - 1 cup sharp cheddar cheese, shredded - 1 teaspoon garlic powder - 1 teaspoon onion powder - Salt and pepper to taste - 1 large egg, for egg wash I love using brands like Pillsbury for puff pastry. Their dough puffs up nicely. For ham, I suggest Boar's Head or Oscar Mayer for great flavor. You can try different cheeses too. Gouda or mozzarella can add a fun twist. If you want a kick, add a spicy cheese. If you need to make changes, here are some easy swaps: - Use gluten-free puff pastry if you need it. - Swap the ham for turkey or chicken for a lighter option. - For a vegan version, use dairy-free cream cheese and a plant-based meat substitute. - You can replace the cheddar with a vegan cheese alternative. These swaps keep the taste while meeting your needs. 1. Preheat your oven to 400°F (200°C). This heat helps the pinwheels puff up nicely. 2. Line a baking sheet with parchment paper. This keeps the pinwheels from sticking. 3. On a floured surface, roll out one sheet of puff pastry into a rectangle, about ¼ inch thick. A smooth surface helps with rolling. 4. In a bowl, mix the softened cream cheese with the chopped spinach, garlic powder, onion powder, salt, and pepper. Stir until smooth. 5. Spread half of the cream cheese mixture over the puff pastry. Cover it all the way to the edges. 6. Layer thin slices of deli ham over the cream cheese. Then, sprinkle shredded cheddar cheese on top for added flavor. 7. Starting from one edge, roll the pastry tightly into a log shape. Keep the filling inside as you roll. Repeat with the second sheet of pastry and remaining filling. 8. Use a sharp knife to cut each log into 1-inch thick rounds. Keep the cuts even for uniform baking. 9. Place the pinwheels on the baking sheet, leaving about 2 inches between each one. This space allows them to puff up. 10. In a small bowl, beat the egg. Brush a light layer of egg wash on top of each pinwheel for a golden crust. 11. Bake in the oven for 15-20 minutes. Watch them closely to avoid overbaking. They should be puffed and golden brown when done. - Present the warm pinwheels on a nice platter. - You can garnish with fresh parsley for color. - Serve with a small bowl of honey mustard for dipping. You can find the full recipe for Cheesy Ham & Spinach Pinwheels available for more details. To roll your pinwheels well, start with the right dough. Use puff pastry that is cold but not frozen. Roll out the pastry on a floured surface. Aim for a rectangle about ¼ inch thick. Spread your filling evenly, reaching the edges. When rolling, keep it tight but not too tight. This helps to keep the filling intact. A golden-brown crust makes your pinwheels look amazing. To achieve this, brush the tops with an egg wash before baking. This gives them a nice shine. Bake at 400°F (200°C) for 15-20 minutes. Watch them closely during the last few minutes. If they look golden, they are ready. A perfect crust will be crispy and flaky. One mistake is using cold filling. Cold filling makes rolling hard and can cause the dough to crack. Make sure your cream cheese is softened. Another mistake is not spacing the pinwheels on the baking sheet. They need space to puff up. Lastly, don't skip the egg wash. It is key for that lovely crust. Following these tips will lead to tasty and beautiful snacks. For the full recipe, refer to the above section. {{image_4}} You can get creative with the filling in your pinwheels. Try using turkey instead of ham for a lighter taste. For a spicy kick, add jalapeños or pepper jack cheese. You can also swap in roasted red peppers or sun-dried tomatoes for a burst of flavor. If you love a cheesy bite, mix in some mozzarella or gouda. The options are endless! Spices can change the whole taste of your pinwheels. Add dried herbs like oregano or basil to your cream cheese mix. A pinch of paprika can give a nice warmth. If you enjoy garlic, use fresh minced garlic instead of powder. Experimenting with flavors can lead to a unique twist on this classic snack. You can make these pinwheels vegetarian by using a plant-based cream cheese. Swap the ham for grilled veggies like zucchini or bell peppers. For a vegan version, use vegan cheese and skip the egg wash. A sprinkle of nutritional yeast can add a cheesy flavor without dairy. These adjustments keep the recipe tasty for everyone! For the full recipe, refer to the Cheesy Ham & Spinach Pinwheels. To keep your pinwheels fresh, place them in an airtight container. Make sure they cool completely before storing. This step helps prevent sogginess. Store them in the fridge for up to three days. If you want to keep them longer, freezing is a great option. To reheat the pinwheels, use an oven for the best results. Preheat your oven to 350°F (175°C). Place the pinwheels on a baking sheet. Heat them for about 10-15 minutes. This will help restore their crispiness. You can also use a microwave, but be aware that the texture may change. You can freeze the pinwheels before or after baking them. If freezing before baking, wrap each pinwheel tightly in plastic wrap. Place them in a freezer bag for extra protection. They can last up to three months in the freezer. When ready to bake, just let them thaw in the fridge overnight and bake as per the Full Recipe. If you freeze them after baking, reheat them straight from the freezer as mentioned above. Yes, you can make these pinwheels ahead of time. Prepare the pinwheels and slice them. Place them on a baking sheet and cover them tightly with plastic wrap or foil. Store them in the fridge for up to 24 hours. When ready to bake, just remove the wrap and bake as directed. This saves time when you have guests. Ham and cheese pinwheels pair well with many sides. Here are a few ideas: - Fresh veggie sticks like carrots and celery - Fruit slices, such as apples or grapes - A light salad with mixed greens - Dipping sauces like honey mustard or ranch These sides add balance and brighten your meal. You can tell pinwheels are fully cooked by their color and texture. Look for a golden-brown crust on top. The edges should be crisp and firm. You can also check the inside with a knife. The cheese should be melted, and the ham should be hot. If unsure, bake them a bit longer. Enjoy the warm, gooey goodness! In this post, we explored all you need to know for making ham and cheese pinwheels. We covered ingredients, baking steps, and serving tips. Plus, I shared variations and storage advice for leftovers. Remember, perfecting your pinwheels takes practice. By avoiding common mistakes, you can enjoy great results. Don’t hesitate to try new flavors or ingredients. Happy cooking!

Craving a snack that’s quick to make and full of flavor? Easy Baked Ham and Cheese Pinwheels are the perfect treat! With just a few simple ingredients, you can whip …

Read more

Categories Appetizers

Roasted Tomato Salsa Flavorful and Fresh Dip Recipe

August 1, 2025 by Chef Miles
- 4 large ripe tomatoes, halved - 1 red onion, quartered - 2 cloves of garlic, unpeeled - 1 jalapeño pepper, halved and deseeded I love using large ripe tomatoes for this salsa. They add a rich, sweet flavor. The red onion gives a nice crunch and a bit of sweetness. Garlic cloves are key for depth. I often roast them unpeeled to keep their taste mellow. Jalapeño adds heat, but you can adjust it by removing the seeds. - 2 tablespoons extra virgin olive oil - Sea salt and freshly cracked black pepper, to taste - 1/4 cup fresh cilantro, finely chopped - Juice from 1 fresh lime Extra virgin olive oil helps to enhance the flavors. I always use sea salt and freshly cracked black pepper for the best taste. Fresh cilantro adds a bright touch. The lime juice balances the salsa with a zesty kick. These simple seasonings make a huge difference in flavor. For the full recipe, check out the recipe section. Enjoy the freshness of this roasted tomato salsa! Preheat your oven to 400°F (200°C). A hot oven helps the veggies roast well. Next, take a large baking sheet and arrange the vegetables. Place the halved tomatoes, quartered red onion, unpeeled garlic cloves, and jalapeño halves on it. Drizzle everything with extra virgin olive oil. Make sure to season with sea salt and cracked black pepper for flavor. Put the baking sheet in the oven. Roast the vegetables for about 25 to 30 minutes. You’ll know they are ready when the tomatoes blister and become soft. The onions should caramelize, getting a nice golden color. This roasting brings out the sweet and rich flavors that make the salsa special. Once roasted, take the baking sheet out of the oven and let it cool for a few minutes. If you want a milder garlic taste, peel the garlic cloves now. Carefully transfer the roasted vegetables to a food processor. Add the chopped cilantro and the lime juice. Pulse the mixture until you reach the consistency you like—smooth or chunky. Taste your salsa and adjust the seasoning if needed. A little more salt, pepper, or lime juice can enhance the flavor. For the best taste, serve the salsa right away or chill it for at least an hour. This resting time allows the flavors to blend. Enjoy your vibrant roasted tomato salsa with tortilla chips or as a topping for your favorite meals. For complete details, check the Full Recipe. To make your roasted tomato salsa shine, focus on seasoning and acidity. Start by tasting your salsa after blending. If it needs more kick, add a pinch of salt or a splash of lime juice. Lime juice brightens flavors and balances heat. Adjust to your taste, and don't hesitate to experiment! Allowing flavors to meld is key. If you can, let the salsa sit for at least an hour in the fridge. This resting time helps the ingredients blend and deepen their taste. You’ll notice a big difference once you give it time to rest. When serving your salsa, choose a bright bowl to show off its vibrant colors. You can place it in a shallow dish that lets guests scoop easily. Serve with crispy tortilla chips for a delicious pairing. For garnishing, sprinkle some fresh cilantro on top. You can also add lime wedges on the side. It adds a nice touch and gives guests an option to add more lime. One mistake to avoid is over-roasting the vegetables. Keep an eye on them in the oven. If the tomatoes become too charred, they can taste bitter. You want them soft and a little caramelized, not burnt. Another mistake is skipping the resting time after roasting. When you blend the salsa right away, the flavors won’t have time to mix. Always let your roasted veggies cool a bit before blending, and let the salsa rest afterward. This extra step makes a huge difference in taste. For the full recipe, check out Roasted Tomato Salsa ! {{image_4}} You can make your salsa spicy by adding more jalapeños or other peppers. I often use serrano peppers for more heat. You can also keep the seeds in the jalapeños. This will make your salsa even hotter. Adjust the amount to fit your taste. When you blend the roasted veggies, taste as you go. This way, you can find the perfect spice level for you. To give your salsa a smoky kick, try adding smoked paprika or chipotle peppers. Smoked paprika adds a warm, rich flavor without too much heat. Chipotle peppers bring both heat and smokiness. You can use chipotle in adobo sauce for a more intense flavor. Just remember to start small. You can always add more but can’t take it back once it’s in! Adding fruit can make your salsa unique and sweet. Mango or pineapple works great for this. Dice the fruit into small pieces and mix it in after blending the roasted veggies. The sweetness balances the acidity of the tomatoes. This twist is perfect for summer parties. It pairs well with grilled meats or fish. For the full recipe, check out the details above. To store your roasted tomato salsa, place it in an airtight container. Make sure it cools completely before sealing it. This helps keep it fresh. Store it in the fridge for up to one week. Check for changes in color or smell before using. If it looks or smells off, toss it out. Freezing roasted tomato salsa is simple. First, let it cool completely. Then, pour it into a freezer-safe container. Leave some space at the top for expansion. You can also use ice cube trays for single servings. This way, you can thaw only what you need. Salsa can last up to three months in the freezer. When ready to use, thaw it in the fridge overnight or use the microwave. Roasted tomato salsa lasts about a week in the fridge and three months in the freezer. You can use it in many ways. Serve it with tortilla chips or use it as a topping for tacos. It also makes a great addition to grilled meats and veggies. You can even mix it into pasta for added flavor. For the full recipe, check the earlier section. To make your roasted tomato salsa spicier, add more jalapeños. You can also include other hot peppers like serranos or habaneros. If you want a deeper heat, try adding red pepper flakes or cayenne pepper. Start with small amounts, taste as you go, and adjust until you reach your desired spice level. Yes, you can use canned tomatoes, but it will change the flavor and texture. Canned tomatoes may be softer and more watery than fresh ones. If you choose to use canned, select high-quality, whole tomatoes for the best taste. Drain them well and roast them to enhance their flavor. Roasted tomato salsa pairs well with many dishes. Serve it with tortilla chips for a tasty snack. It also works great as a topping for tacos, grilled chicken, or fish. You can add it to bowls with rice, beans, or even pasta. Use it to brighten up your breakfast eggs, too! Yes, roasted tomato salsa is healthy! It is low in calories and packed with vitamins. Tomatoes are rich in antioxidants, especially lycopene, which is good for heart health. The salsa also contains healthy fats from olive oil and fiber from vegetables. Just be mindful of the amount of salt you use. Roasting ripe tomatoes and fresh ingredients creates a tasty salsa. You learned how to prepare, season, and roast the veggies. Blending them correctly gives you the perfect texture. Remember to adjust flavors and avoid over-roasting. Try fun variations like fruity twists for different tastes. Store your salsa properly for longer freshness. Roasted tomato salsa enhances many dishes, making meals more exciting. With practice, you’ll master this recipe and impress everyone! Enjoy all the delicious ways to use your salsa creation.

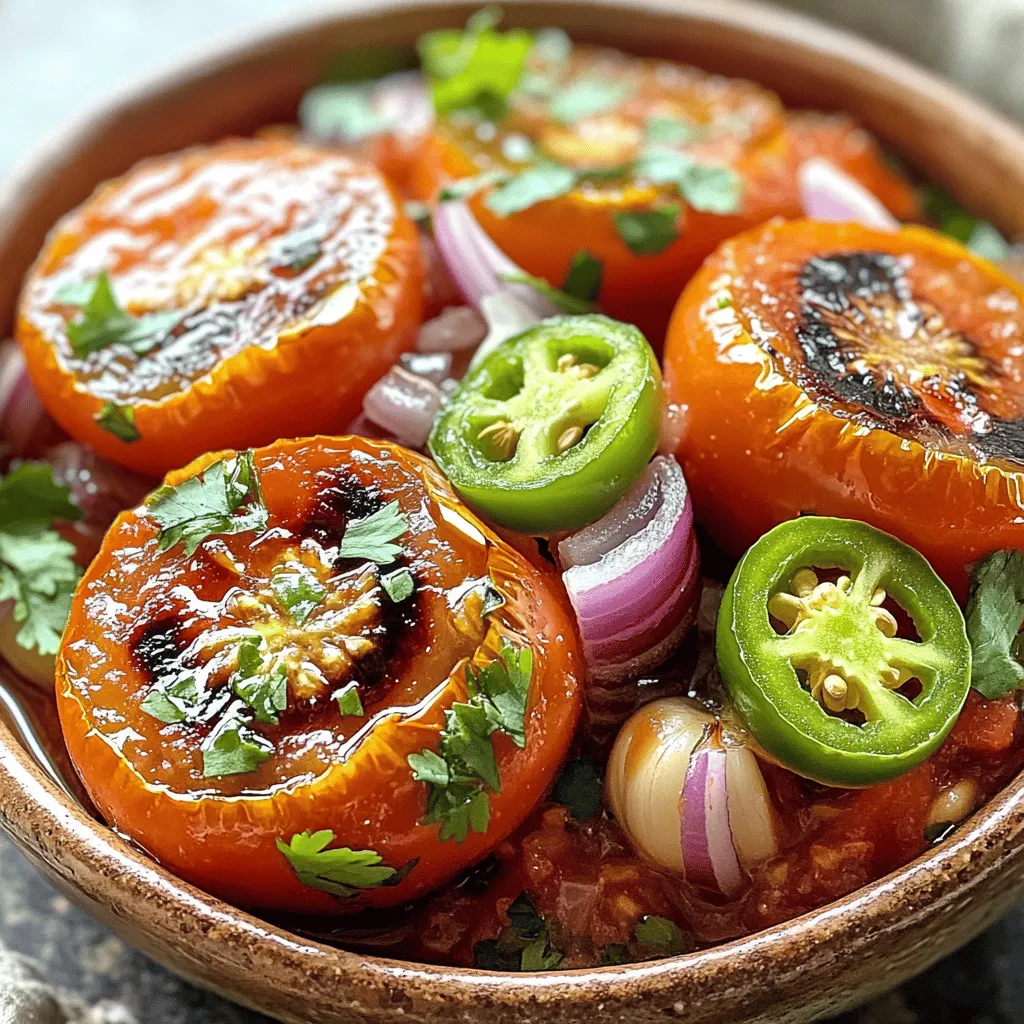
Are you ready to elevate your snack game with a vibrant Roasted Tomato Salsa? This fun and fresh dip packs in the flavor you crave using simple ingredients. You’ll learn …

Read more

Categories Appetizers

Mini Caramel Apple Cheesecake Bites Sweet and Easy Delight

August 1, 2025 by Chef Miles
- 1 cup graham cracker crumbs - 4 tablespoons unsalted butter, melted - 2 tablespoons granulated sugar - 8 oz cream cheese, softened - 1/2 cup powdered sugar - 1 teaspoon vanilla extract - 1/2 cup sour cream - 1 small apple, peeled and finely diced - 1/2 teaspoon ground cinnamon - 1/4 cup caramel sauce (for drizzling) - Optional: chopped nuts (such as pecans or walnuts) To make mini caramel apple cheesecake bites, you need simple ingredients. First, you start with graham cracker crumbs for the crust. The melted butter and sugar help bind it together. Next, cream cheese forms the base of the cheesecake filling. It gives a rich, creamy texture. You then mix in powdered sugar for sweetness and vanilla extract for flavor. Sour cream adds a nice tang. The star of this recipe is the apple. A small, finely diced apple brings freshness and crunch. Ground cinnamon adds warmth and spice. Lastly, you drizzle caramel sauce on top for that sweet finish. You can also add chopped nuts if you want some crunch. These ingredients come together to create a delightful treat. For the full recipe, check out the instructions I provide later. Enjoy each bite of this easy-to-make dessert! 1. Preheat your oven to 350°F (175°C). Line a mini muffin tin with paper liners. 2. In a bowl, mix together: - 1 cup graham cracker crumbs - 4 tablespoons unsalted butter, melted - 2 tablespoons granulated sugar Stir until it looks like wet sand. 3. Take about 1 tablespoon of the mixture and press it into each muffin liner. Bake for 5 minutes. Let the crusts cool for a bit. 1. In another bowl, beat: - 8 oz cream cheese, softened Use an electric mixer until it's smooth. 2. Slowly add: - 1/2 cup powdered sugar - 1 teaspoon vanilla extract - 1/2 cup sour cream Mix until creamy. 3. Gently fold in: - 1 small apple, peeled and finely diced - 1/2 teaspoon ground cinnamon Make sure they are well mixed. 1. Spoon the cheesecake mixture into the muffin cups, filling each almost to the top. 2. Bake for about 15 minutes. They should be set in the middle. 3. Let them cool completely in the tin. After cooling, chill them in the fridge for at least 2 hours before serving. Enjoy these delightful Mini Caramel Apple Cheesecake Bites, drizzled with caramel just before serving! For the complete recipe, refer to the [Full Recipe]. To get the best texture for your mini cheesecakes, make sure your cream cheese is soft. This helps it mix smoothly. Beat the cream cheese until it’s creamy and fluffy. For even baking, fill each muffin cup evenly. Keep the oven door closed while baking to prevent temperature drops. Want to change things up? You can add chocolate chips to the filling for a sweet twist. Different spices, like nutmeg or allspice, can add warmth too. If you want a lighter option, use low-fat cream cheese. You can also swap regular sugar for sugar substitutes to reduce calories. To serve your mini cheesecakes, arrange them on a pretty platter. Drizzle extra caramel sauce over each bite for a beautiful look. For a fun touch, sprinkle chopped nuts on top. You can also add a dusting of cinnamon or place a slice of apple beside each cheesecake. These small details make a big difference! {{image_4}} You can give your mini caramel apple cheesecake bites a fun twist for each season. For fall, try a pumpkin spice version. Just add pumpkin puree and pumpkin spice to your cheesecake mix. This will give it a warm, cozy flavor that everyone loves. In summer, you might want something fresh. A berry-infused variation is perfect! Use fresh strawberries or blueberries instead of apples. Mix them into the cheesecake for a bright and fruity taste. You can even swirl in some berry sauce for extra flair. If you have dietary needs, you can still enjoy these treats. For a gluten-free crust, use gluten-free graham cracker crumbs. They taste just as good! If you're vegan, swap the cream cheese for a plant-based alternative. You can also use coconut cream for a rich texture. Use maple syrup instead of powdered sugar for sweetness. These changes keep the flavor while fitting your diet. When it's time to serve, think about what to pair with your bites. Coffee or tea makes a great drink choice. The warmth of these drinks complements the cool cheesecake. You can also add sides. A dollop of whipped cream on top adds a creamy touch. A fruit salad on the side brightens up the plate with color and taste. These small additions will make your dessert table pop! Check out the Full Recipe for more details on making these delicious bites! To keep your mini caramel apple cheesecake bites fresh, store them in an airtight container. This way, they won't dry out or absorb unwanted smells from the fridge. They stay good for up to five days when properly stored. Just make sure to place a piece of parchment paper between layers if stacking. If you want to save some bites for later, freezing is a great option. First, let them cool completely. Then, wrap each cheesecake bite tightly in plastic wrap and place them in a freezer-safe bag. They can last for about three months in the freezer. When you're ready to enjoy them, move them to the fridge overnight to defrost. This keeps their texture and taste just right. Yes, you can! I suggest using tart apples like Granny Smith or Honeycrisp. These apples give a nice balance of sweet and tart flavors. If you prefer sweeter bites, Fuji or Gala apples work well too. Just make sure to peel and finely dice them for the best texture. These mini bites last about 4 to 5 days in the fridge. Store them in an airtight container to keep them fresh. If you want to keep them longer, freeze them. Just remember to let them thaw in the fridge before serving. Absolutely! You can prepare the cheesecake bites a day in advance. Just bake and chill them in the fridge. Drizzle the caramel sauce right before serving. This way, they stay fresh and look nice. You have options! You can use crushed cookies like Oreos or vanilla wafers for a twist. For a gluten-free version, try almond flour or gluten-free cookies. These alternatives will still give you that crunchy base you need for the cheesecake bites. You learned how to make mini caramel apple cheesecake bites. We covered ingredients, steps, and tips. Remember, the key is in the crust and creamy filling. You can customize the recipe for any season or diet. These treats make a perfect dessert or snack. Store extras in the fridge or freeze for later. Enjoy making these delicious bites whenever you want a sweet treat!

Are you ready for a sweet treat that’s easy to make? Mini Caramel Apple Cheesecake Bites combine creamy cheesecake and fresh apples for a delightful dessert. With just a few …

Read more

Categories Desserts

Iced Pumpkin Oatmeal Cookies Perfectly Delicious Treat

August 1, 2025 by Chef Miles
- 1 cup rolled oats - 1 cup all-purpose flour - 1/2 cup canned pumpkin puree - 1/2 cup unsalted butter, softened - 1/2 cup brown sugar, tightly packed - 1/2 cup granulated sugar The main ingredients give the cookies their unique flavor and texture. The rolled oats add chewiness and heartiness. All-purpose flour provides structure. Pumpkin puree brings moisture and a subtle sweetness. The sugars balance the flavors, while butter adds richness. - 1 cup powdered sugar - 2 tablespoons milk (or almond milk) - 1/2 teaspoon vanilla extract The icing adds a sweet and creamy touch. Powdered sugar helps create a smooth glaze. Milk thins it out, while vanilla adds a lovely aroma. You can adjust the thickness by adding more milk or sugar. - 1/2 cup chopped pecans Pecans are a tasty option for extra crunch. They add a nice nutty flavor. Feel free to skip them if you prefer simpler cookies. You can also try other nuts or chocolate chips for variety. For the full recipe, check the detailed steps provided earlier. First, preheat your oven to 350°F (175°C). This helps the cookies bake evenly. While the oven warms up, line a baking sheet with parchment paper. This will stop the cookies from sticking. Next, grab a medium mixing bowl. Combine 1 cup of rolled oats, 1 cup of all-purpose flour, 1/2 teaspoon of baking soda, 1 teaspoon of baking powder, 1 teaspoon of ground cinnamon, 1/2 teaspoon of ground nutmeg, and 1/4 teaspoon of salt. Whisk these ingredients together until they blend well. Set this dry mixture aside for later. In a large mixing bowl, cream together 1/2 cup of softened unsalted butter, 1/2 cup of brown sugar, and 1/2 cup of granulated sugar. Use an electric mixer or a whisk to beat them until the mixture looks light and fluffy. This should take about 3-5 minutes. Now, add 1/2 cup of canned pumpkin puree, 1 large egg, and 1 teaspoon of vanilla extract to the creamed mixture. Mix well until everything combines smoothly. Then, gradually stir in the dry mixture. Use a spatula or wooden spoon for this step. If you want, fold in 1/2 cup of chopped pecans for extra flavor. Using a cookie scoop or spoon, drop rounded dollops of dough onto the lined baking sheet. Make sure to space them about 2 inches apart so they can spread while baking. Place the sheet in your preheated oven and bake for 12-15 minutes. Check for doneness; the edges should be lightly golden, and the centers should remain soft. While the cookies bake, prepare the icing. In a small bowl, combine 1 cup of powdered sugar, 2 tablespoons of milk (or almond milk), and 1/2 teaspoon of vanilla extract. Whisk until the icing is smooth and creamy. If it’s too thick, add a bit more milk, one teaspoon at a time, until it’s just right. Once the cookies cool completely, drizzle or spread the icing on top. This adds a delicious finish to your iced pumpkin oatmeal cookies. For the full recipe, refer to the recipe section above. To get the right texture in your cookies, use room temperature butter. Cold butter makes dough tough and hard to mix. Soft butter blends easily with sugars, creating a light and fluffy base. Aim for a dough that is thick but still holds its shape. If your dough feels too dry, add a splash of milk. If it’s too wet, sprinkle in a bit more flour. Icing can make your cookies look special. You can drizzle or spread the icing on top. For drizzling, use a fork or a piping bag. Hold it high above the cookie for a nice effect. If you prefer spreading, use a knife or spatula. Spread the icing evenly for a smooth finish. Let the icing set for a few minutes before enjoying your cookies. Cooling is key for great cookies. Remove them from the oven when they are lightly golden. Let them sit on the baking sheet for about 5 minutes. This helps them firm up. After that, transfer the cookies to a wire rack. Let them cool completely before icing. This prevents the icing from melting into the cookie. Enjoy making these iced pumpkin oatmeal cookies! For the full recipe, check out the complete guide. {{image_4}} You can change the spices in your iced pumpkin oatmeal cookies to create new flavors. For a warm twist, add ground ginger or ground cloves. These spices bring a nice kick and can make the cookies even more special. You can also use allspice for a unique taste. Experiment with the spice mix to find what you like best. If you need gluten-free cookies, swap all-purpose flour for a gluten-free blend. Many brands offer great mixes that work well. For a vegan version, replace the butter with coconut oil or vegan butter. Use flax eggs instead of a regular egg. Mix one tablespoon of ground flaxseed with three tablespoons of water. Let it sit until it thickens. You can add more fun to your cookies with different mix-ins. Try using chopped walnuts or almonds instead of pecans. For a sweet touch, add chocolate chips. Dark chocolate works especially well with pumpkin flavors. You can also top the cookies with a sprinkle of chopped nuts or a drizzle of chocolate for a tasty finish. For the full recipe, check the complete instructions above. To keep your cookies fresh for a few days, store them in an airtight container. Place parchment paper between layers to avoid sticking. Keep the container at room temperature for the best taste. This way, your cookies stay soft and delicious for up to five days. If you want to save cookies for later, freezing is a great option. To freeze, let the cookies cool completely first. Then, place them in a single layer on a baking sheet. Freeze for about two hours. After that, transfer them to a freezer-safe bag. This method helps keep them fresh for up to three months. When you're ready to enjoy them, simply take out the desired number of cookies. Let them thaw at room temperature for about 30 minutes. You can also warm them in the oven at 350°F (175°C) for a few minutes for that fresh-baked taste. For icing, store any extra in an airtight container in the fridge. This helps keep it fresh for up to a week. When you’re ready to use it again, just stir it well. If it’s too thick, add a splash of milk to reach your desired consistency. Enjoy your iced pumpkin oatmeal cookies anytime! You can find the full recipe for these delicious treats above. To make iced pumpkin oatmeal cookies, follow these steps: 1. Preheat your oven to 350°F (175°C) and line a baking sheet with parchment paper. 2. In a mixing bowl, whisk rolled oats, flour, baking soda, baking powder, cinnamon, nutmeg, and salt. Set aside. 3. In another bowl, cream together softened butter, brown sugar, and granulated sugar until fluffy. 4. Add pumpkin puree, egg, and vanilla extract to the butter mixture and blend well. 5. Gradually mix the dry ingredients into the wet ingredients. Optionally, fold in chopped pecans. 6. Drop rounded dollops of dough on the baking sheet, spaced apart. 7. Bake for 12-15 minutes until lightly golden on the edges. 8. Cool cookies on a wire rack. Drizzle icing on each one after cooling. This quick overview gives you the basics to create these delicious cookies. For the full recipe, check the recipe section above. Yes, you can use fresh pumpkin. Fresh pumpkin puree brings a unique taste. To make it, cook and mash your pumpkin. Aim for a smooth texture similar to canned puree. Remember to drain any excess moisture. This step helps maintain the right dough consistency. Using fresh pumpkin can make your cookies more flavorful and vibrant. Iced pumpkin oatmeal cookies shine at gatherings. Serve them on a festive platter. Pair them with warm apple cider or a glass of milk. For a fun twist, enjoy them with a scoop of vanilla ice cream. They also make a great snack with coffee or tea. The flavors blend beautifully, making for a delightful treat. We explored how to make iced pumpkin oatmeal cookies. You learned about the key ingredients, tips for texture, and variations you can try. Baking these treats is fun and can lead to tasty results. Remember to store them well for freshness. Enjoy your time baking, and don't hesitate to experiment with flavors. Each batch can be a new favorite. Happy baking!

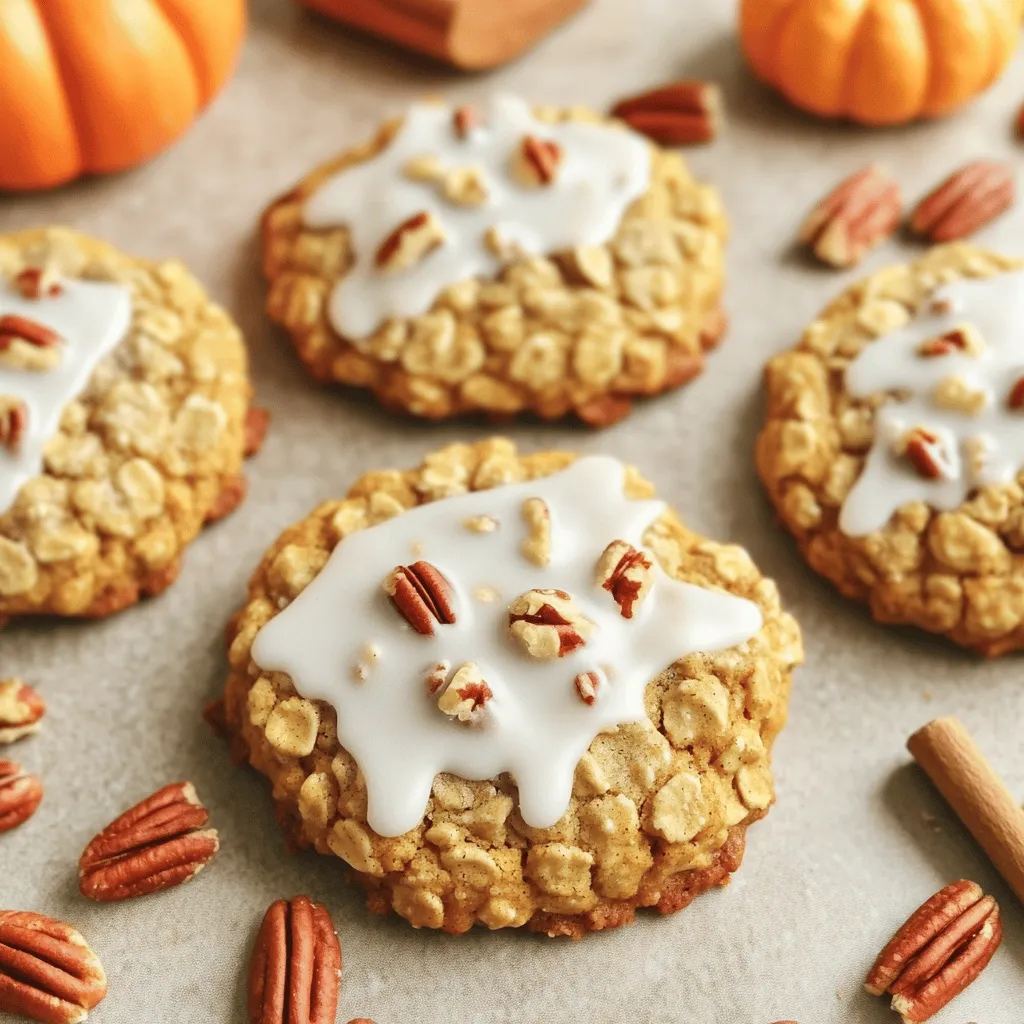
Have you ever craved a sweet treat that screams fall? Iced pumpkin oatmeal cookies are that perfect blend of cozy flavors and chewy texture. With simple ingredients like pumpkin puree …

Read more

Categories Desserts

Easy Kids’ Lunch Pizza Roll Ups Delightful Recipe

August 1, 2025 by Chef Miles
- 4 large tortillas - 1 cup pizza sauce - 2 cups shredded mozzarella cheese - 1 cup sliced pepperoni - 1/2 cup bell peppers, finely chopped - Grated Parmesan cheese for topping - 1 teaspoon Italian seasoning - 1/4 teaspoon garlic powder - Olive oil for brushing Creating Easy Kids' Lunch Pizza Roll Ups is fun! You start with large tortillas as a base. They hold all the tasty fillings. The pizza sauce adds a rich and tangy flavor. I like using a full cup, but you can add less if you prefer. Next, sprinkle two cups of mozzarella cheese. It melts beautifully and pulls apart in cheesy strands. Kids love that! You can personalize your roll-ups with optional ingredients. Sliced pepperoni adds a classic taste, while bell peppers bring color and crunch. If you want an extra cheesy touch, top with grated Parmesan. Don’t forget the seasonings! Italian seasoning gives a warm flavor, and garlic powder adds depth. A light brush of olive oil before baking helps everything turn golden. These ingredients make for a tasty and colorful lunch that kids will enjoy. For the Full Recipe, check out the instructions section! - Preheat the oven to 400°F (200°C). - Prepare a clean, flat surface for assembly. First, we need to get our oven ready. Preheating helps the roll-ups cook evenly. A clean surface is key for making assembly easy. - Lay a tortilla flat and spread pizza sauce. - Add cheese, pepperoni, and optional bell peppers. Next, grab a large tortilla and lay it flat. Spread 1/4 cup of pizza sauce on it. Make sure to leave some space at the edges. This keeps the sauce from spilling out when you roll it. Now sprinkle 1/2 cup of shredded mozzarella cheese over the sauce. Add some pepperoni slices and bell peppers if you want a crunchy bite. - Sprinkle with seasonings and roll tightly. - Arrange on a baking sheet, brush with oil, and bake. Now comes the fun part! Sprinkle a pinch of Italian seasoning and garlic powder over the toppings. Then, start rolling the tortilla tightly from one edge. Once you have a nice log shape, place it seam-side down on a baking sheet. Brush the tops with olive oil for a golden color. If you like, add some grated Parmesan cheese on top for extra flavor. Bake these tasty roll-ups in your preheated oven for 15-20 minutes. You want them golden brown and the cheese bubbly. After that, let them cool for a bit before slicing them into pinwheels. Enjoy your Easy Kids' Lunch Pizza Roll Ups! You can find the Full Recipe in the earlier section. To make sure your pizza roll-ups do not spill, seal the edges well. After rolling, press the edges to keep everything inside. You can also adjust the ingredient amounts to fit your taste. If you love cheese, add more mozzarella! Prefer less sauce? Just drizzle a little. You can prepare pizza roll-ups in advance. Just roll them up as usual and place them in the fridge. They stay fresh for about a day. When you want to eat them, preheat your oven and bake. To keep them crispy, cover them with foil for the first few minutes. Then, uncover to let them brown. Pair your roll-ups with a small bowl of pizza sauce for dipping. You can add a side salad or fruit to complete the meal. For creative presentation, cut the roll-ups into pinwheels. Arrange them on a colorful plate to make lunchtime fun. Kids will love the look and taste! For precise details on making these tasty roll-ups, check out the Full Recipe. {{image_4}} You can change the cheese and sauce to fit your taste. Try cheddar or pepper jack instead of mozzarella. For a twist, use barbecue sauce or pesto. Mix in some feta for a fun flavor. You can also swap meats. If your kids love ham, use it instead of pepperoni. Cooked chicken or turkey works well too. Want more veggies? Add spinach or mushrooms. These changes keep meals exciting and new. If gluten is a concern, choose gluten-free tortillas. Many brands offer tasty options. You can find them at most grocery stores. For a vegetarian meal, skip the meat and load up on veggies. Zucchini and olives add great flavor. If you want vegan roll-ups, use non-dairy cheese. There are many good brands available now. These swaps keep everyone happy at mealtime. Explore global tastes with your pizza roll-ups. For a Mexican flair, add black beans and corn. Use taco seasoning instead of Italian spices. Top with salsa for extra zest! For Italian vibes, include sun-dried tomatoes and basil. You can also sprinkle some oregano for a true Italian touch. Try adding some spices like cumin or smoked paprika for a unique spin. These ideas bring the world to your kitchen. Check the Full Recipe for more tips and tricks on creating your own delightful variations! To store leftover pizza roll-ups, place them in an airtight container. This keeps them fresh. You can also wrap them in plastic wrap. They stay good in the fridge for about 3 to 4 days. If you want to keep them longer, consider freezing. To freeze pizza roll-ups, let them cool completely first. Then, wrap each roll-up in plastic wrap. Place them in a freezer-safe bag or container. This way, they can last for up to 2 months in the freezer. To reheat frozen roll-ups, place them in the oven at 350°F (175°C) for about 20 minutes. This keeps them warm and crispy. Always follow food safety rules. Wash your hands before handling food. Make sure your fridge is at 40°F (4°C) or below. This helps to keep food safe. If you see any signs of spoilage, throw it away. Keep your kitchen clean to avoid any foodborne illness. To make pizza roll-ups crispy, follow these tips: - Preheat your oven to 400°F (200°C). - Brush the tops with olive oil before baking. - Bake until golden brown, around 15-20 minutes. - Place the roll-ups seam-side down on the baking sheet. These steps help crisp the outside while keeping the inside cheesy and gooey. Yes, you can use whole wheat tortillas. They add a nutty flavor and extra fiber. Whole wheat is a healthier choice. Many kids enjoy the taste, too. You can easily swap them for regular tortillas in this recipe. Kids love dipping sauces! Here are some fun options: - Marinara sauce for a classic pizza taste. - Ranch dressing for a creamy contrast. - Garlic sauce for a zesty twist. Feel free to try what your kids like best! Pizza roll-ups take about 15-20 minutes to bake at 400°F (200°C). Keep an eye on them. You want them golden and crispy. Check for bubbling cheese inside to know they’re ready. Absolutely! Adding veggies boosts nutrition and flavor. Consider these options: - Spinach for added greens. - Mushrooms for a savory touch. - Zucchini for extra moisture and taste. Feel free to mix and match your family's favorites! In this blog post, we explored how to create delicious pizza roll-ups. I shared key ingredients, from tortillas to toppings, and provided step-by-step instructions. We discussed tips to perfect your roll-ups and variations to suit different tastes. Remember, you can easily make these ahead and store them for later. Enjoy experimenting with flavors and serving options. Dive into this fun recipe, and let your creativity shine in the kitchen!

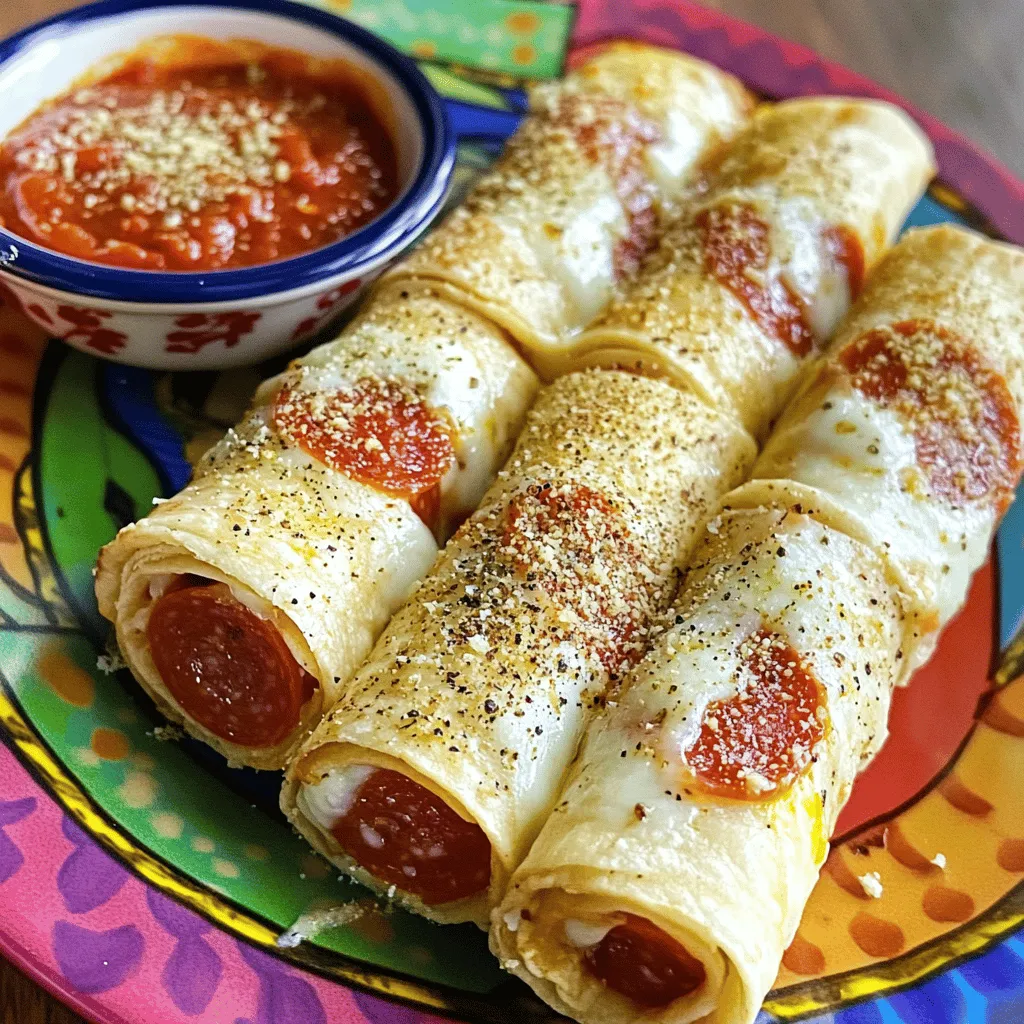
Are you looking for a fun and easy lunch that your kids will love? Try my Easy Kids’ Lunch Pizza Roll Ups! These tasty treats are simple to make and …

Read more

Categories Appetizers

Pumpkin Cheesecake Snickerdoodles That Delight

August 1, 2025 by Chef Miles
Creating Pumpkin Cheesecake Snickerdoodles requires a mix of simple and special ingredients. Here’s what you need: Dry Ingredients: - 1 cup all-purpose flour - 1/2 teaspoon baking soda - 1/2 teaspoon baking powder - 1/2 teaspoon ground cinnamon - 1/4 teaspoon ground nutmeg - 1/4 teaspoon salt Wet Ingredients: - 1/2 cup unsalted butter, softened - 1/2 cup granulated sugar - 1/4 cup brown sugar, packed - 1 large egg - 1 teaspoon pure vanilla extract - 1/2 cup canned pumpkin puree Special Ingredients for Cheesecake Filling: - 1/4 cup cream cheese, softened - 2 tablespoons powdered sugar - 1 teaspoon pumpkin spice (or a mix of cinnamon, ginger, and nutmeg) - 1 tablespoon granulated sugar (for rolling) - 1 teaspoon ground cinnamon (for rolling) These ingredients blend to create a cookie that is both soft and creamy. The pumpkin puree adds moisture and flavor, while the spices give it a warm, cozy taste. The cream cheese filling makes each bite a delightful surprise. Check the Full Recipe for detailed instructions on how to bring these ingredients together. First, you need to preheat your oven to 350°F (175°C). This step is crucial for even baking. While the oven heats, line a baking sheet with parchment paper. This helps the cookies not to stick and makes cleanup easy. In a medium mixing bowl, combine the dry ingredients. Start with 1 cup of all-purpose flour. Add 1/2 teaspoon of baking soda, 1/2 teaspoon of baking powder, 1/2 teaspoon of ground cinnamon, 1/4 teaspoon of ground nutmeg, and 1/4 teaspoon of salt. Use a whisk to blend them well. Set this mixture aside for later. In a large mixing bowl, take 1/2 cup of softened unsalted butter. Add 1/2 cup of granulated sugar and 1/4 cup of brown sugar. Use a hand mixer to beat them together. Mix for about 3 to 4 minutes. The mixture should become light and fluffy, which helps create soft cookies. Next, add in 1 large egg, 1 teaspoon of pure vanilla extract, and 1/2 cup of canned pumpkin puree. Beat this mixture well until it is smooth and all the ingredients blend together. This step adds flavor and moisture to your cookies. Now, scoop about 1 tablespoon of the cookie dough into your hand. Lightly flatten it. Place a small dollop of the cream cheese filling in the center. Carefully fold the dough around the filling to form a smooth ball. Repeat this with all the dough and filling. Place the cookie dough balls on the prepared baking sheet. Make sure to leave space between them. Bake your cookies in the oven for 10 to 12 minutes. Look for edges that are set and tops that start to crack. This shows they are ready to come out. For the full recipe, you can refer to the instructions above. To prevent sticking, always use a well-floured surface. Sprinkle flour on your hands too. If the dough gets too sticky, chill it for about 30 minutes in the fridge. This helps firm it up. Never skip this step if you want neat cookies. Avoid overmixing your dough. Mix just until the dry ingredients blend with the wet. Overmixing can make your cookies tough. A light hand keeps your snickerdoodles soft and chewy. For a smooth consistency in the cheesecake filling, start with softened cream cheese. Cold cream cheese makes lumps that are hard to mix out. Beat the cream cheese first, then gradually add powdered sugar. This method helps create a creamy texture. Add pumpkin spice last for even distribution. Garnishing makes your cookies look even better. Stack the cooled snickerdoodles on a pretty plate. Lightly dust them with powdered sugar or cinnamon for a sweet touch. For an extra treat, serve them with whipped cream on the side. This adds a delightful flair and enhances the flavor! For the full recipe, check out the [Full Recipe]. {{image_4}} You can change the spices in these cookies for new flavors. Instead of using just cinnamon, try adding ginger for a kick. You might also swap nutmeg with allspice for a different taste. If you want to add some crunch, consider mixing in chopped nuts or chocolate chips. These small changes can make your pumpkin cheesecake snickerdoodles even more fun! If you need gluten-free snickerdoodles, use a gluten-free flour blend. Make sure the blend has a good rise. This will keep your cookies soft and tasty. For a vegan option, replace the egg with a flax egg. Just mix one tablespoon of ground flaxseed with three tablespoons of water, and let it sit for a bit. You can also use vegan cream cheese for the filling. These cookies go great with many drinks. Enjoy them with a warm cup of chai or a glass of cold milk. You could also serve them with coffee for a cozy treat. For a festive touch, try adding a scoop of vanilla ice cream on the side. This combo makes a lovely dessert for gatherings or a fun night in. For short-term storage, keep your pumpkin cheesecake snickerdoodles in an airtight container. Store them at room temperature for up to three days. If you want to enjoy them longer, freezing is a great option. To freeze, wrap each cookie tightly in plastic wrap. Place them in a freezer-safe bag or container. They’ll stay fresh for up to three months. These snickerdoodles stay fresh for about three days at room temperature. If you freeze them, they can last for three months. Just remember to thaw them before serving. They taste best when they are soft and warm. Enjoy your treats at their best! For the full recipe, check back to the section above. Yes, you can prepare the dough in advance. To do this, follow these steps: - Make the cookie dough as usual. - Form the dough into balls. - Place the balls on a lined baking sheet. - Freeze them for about 1-2 hours. - Once frozen, transfer the dough balls to a zip-top bag. - Store them in the freezer for up to three months. When you're ready to bake, just take them out and bake them straight from the freezer. Add a minute or two to the baking time. If you don't have pumpkin puree, here are some great substitutes: - Butternut squash puree - Sweet potato puree - Applesauce (for a sweeter cookie) These alternatives will keep your snickerdoodles moist and tasty. To check if your snickerdoodles are done, look for these signs: - Edges should be set and slightly golden. - Tops will show small cracks. - The cookies will look soft but not wet. Let them cool on the sheet for a few minutes before moving them. Yes! You can use other cheeses if you prefer. Here are some options: - Mascarpone cheese for a sweeter taste - Ricotta cheese for a lighter texture - Neufchâtel cheese as a lower-fat option These alternatives will change the flavor but still keep your filling creamy and delicious. For the full recipe, check out the detailed instructions. In this post, we covered the key ingredients for snickerdoodles and cheesecake filling. You learned how to prep, mix, and bake these tasty treats. We also discussed tips for the best dough and presentation, plus variations for dietary needs. Remember to store your cookies properly to keep them fresh. With this guide, you can create delicious snickerdoodles with ease. Now, it's time to try these recipes and enjoy every bite!

If you love cookies and want to elevate your baking game, get ready for Pumpkin Cheesecake Snickerdoodles that delight! These sweet treats blend the rich flavor of pumpkin with creamy …

Read more

Categories Desserts
Older posts
Newer posts
← Previous Page1 … Page52 Page53 Page54 … Page113 Next →

MELTED RECIPES

where delicious ideas melt into life, from stovetop to backyard. Always warm, simple, and irresistibly satisfying. 🍳🔥🧀

PAGES

Home About Contact Privacy Policy Terms & Conditions Cookie Policy GDPR Policy Copyright Policy Disclaimer

CATEGORIES

Appetizers Desserts Salads Breakfast Dinner

Contact

  • Pinterest
  • Mail
Copyright © 2025 Melted Recipes. All rights reserved.