Skip to content
Melted Recipes
  • Home
  • Appetizers
  • Desserts
  • Salads
  • Breakfast
  • Dinner
  • Privacy Policy
  • Contact
  • About

Chef Miles

The Best Crumbl Pumpkin Pie Cookies Easy and Delicious

August 6, 2025 by Chef Miles
To make the best Crumbl pumpkin pie cookies, gather these key ingredients: - 1 cup unsalted butter, softened to room temperature - 1 cup packed brown sugar - 1/2 cup granulated sugar - 1 large egg, at room temperature - 1 teaspoon pure vanilla extract - 1 cup pure pumpkin puree (ensure it's not pumpkin pie filling) - 2 1/2 cups all-purpose flour - 1 teaspoon baking soda - 1 teaspoon baking powder - 2 teaspoons ground cinnamon - 1 teaspoon ground nutmeg - 1/2 teaspoon ground ginger - 1/4 teaspoon fine salt - 1 cup white chocolate chips - 1/2 cup chopped pecans (optional, for added crunch) When picking ingredients, focus on freshness. Use pure pumpkin puree, not pie filling. Pure pumpkin gives a rich flavor. Look for butter that is creamy and smooth. For sugar, choose light brown sugar for a deeper taste. Quality spices elevate the dish. Always check expiration dates on your spices. Need to make adjustments? For gluten-free options, use a gluten-free flour blend. This works well in cookie recipes. For a vegan alternative, swap the egg for a flax egg or applesauce. Replace butter with coconut oil or a vegan butter substitute. These changes help everyone enjoy the cookies! For the full recipe, refer to the beginning of this section. To start, gather your ingredients. You need butter, sugars, an egg, and pumpkin puree. First, soften the butter to room temperature. In a large bowl, add the butter, brown sugar, and granulated sugar. Use an electric mixer to cream these together. Beat until the mix is light and fluffy, which takes about 2 to 3 minutes. Next, crack the egg into the bowl and add the vanilla extract. Mix until everything blends well. Now, fold in the pumpkin puree gently until smooth. In another bowl, whisk together the flour, baking soda, baking powder, cinnamon, nutmeg, ginger, and salt. Whisking is key here. It breaks up lumps and makes sure all the spices mix well. This step gives your cookies their great flavor. Once it's well combined, you'll slowly add this dry mix to the pumpkin mixture. Stir gently until just combined. Avoid overmixing to keep the cookies soft and tender. Now, it’s time to bake! Preheat your oven to 350°F (175°C). Prepare two baking sheets with parchment paper to prevent sticking. Scoop large balls of cookie dough and place them on the sheets. Leave about 2 inches between each ball. Bake for 12 to 15 minutes. The edges should be lightly golden, but the centers may look a bit soft. They will firm up as they cool. Once out of the oven, let them cool on the sheets for about 5 minutes. Then, transfer the cookies to wire racks to cool completely. Enjoy these delicious treats! For the full recipe, check out the details above. To get a soft and chewy cookie, avoid overmixing the dough. When you mix the wet and dry ingredients, stir gently. This keeps the cookies tender. Also, make sure your oven is set to the right temperature. I suggest preheating to 350°F (175°C). Baking at this temperature ensures even cooking. Take them out when the edges look golden, but the middle seems soft. They will firm up as they cool. To make these cookies even tastier, add more spices. Try using a pinch of allspice or cloves. These spices can give a warm, rich flavor. You can also mix in some chocolate chips or nuts. White chocolate chips add a nice sweetness. Chopped pecans give a great crunch if you want extra texture. Feel free to be creative and find your perfect combo! When serving your cookies, use a colorful platter. It makes them pop! For a fun touch, sprinkle some cinnamon on top. You can also add small decorative pumpkins or fall leaves around the cookies. This adds to the cozy autumn vibe. These little details make your cookie display inviting and fun for gatherings. {{image_4}} You can easily change the flavors in these pumpkin pie cookies. For a twist, try using dark chocolate chips instead of white chocolate. The rich cocoa flavor pairs well with pumpkin. You can also add dried cranberries or chopped apples for a fruity touch. These additions give the cookies a new taste and texture. Toppings can elevate your cookies. Cream cheese frosting is a great choice. It adds a smooth and sweet layer on top. You might also drizzle caramel sauce for a sweet finish. Another idea is to sprinkle chopped nuts or toasted coconut flakes on top. Each topping brings a new flavor and look to your cookies. Think outside the box when serving these cookies. You can make ice cream sandwiches. Just place a scoop of vanilla ice cream between two cookies. This is a fun and tasty treat! You could also create a milkshake using cookie crumbs. Blend some cookies with ice cream and milk for a delicious drink. These serving ideas make your cookies stand out at any gathering. For the complete recipe, check out [Full Recipe]. To keep your Crumbl pumpkin pie cookies fresh, use an airtight container. This helps lock in moisture and flavor. You can also freeze the dough before baking. Just scoop the dough into balls, place them on a baking sheet, and freeze. Once frozen, transfer the dough balls into a freezer bag. This way, you can bake fresh cookies anytime! When stored properly, these cookies will last about one week at room temperature. Check for signs of freshness. If they feel hard or dry, they might be past their prime. You can also refrigerate them, which can extend their life to about two weeks. But remember, they might lose some softness in the fridge. To enjoy your cookies warm again, preheat the oven to 350°F (175°C). Place the cookies on a baking sheet and heat for about five minutes. This will help restore their softness. Avoid using the microwave, as it can make them chewy and dry out. Enjoy your cookies as if they were just baked! These cookies stand out for their rich pumpkin pie flavor. The blend of spices—cinnamon, nutmeg, and ginger—gives them warmth. The white chocolate chips add sweetness and creaminess. Each bite is like a hug in cookie form. You won't find many cookies that combine these tastes as well as these do. Yes, you can prepare the dough in advance. If you want to save time, chill the dough for up to two days in the fridge. This also helps the flavors meld. You can even freeze the dough for up to three months. Just scoop the dough balls onto a baking sheet before freezing. Once frozen, store them in a bag. When you're ready to bake, just add a few extra minutes to the baking time. To achieve that soft, chewy texture, avoid overmixing the dough. Mix the wet and dry ingredients just until combined. Overmixing can lead to tough cookies. Keep a close eye on the baking time; the cookies should look slightly underbaked in the center. They will continue to firm up as they cool. This method will ensure you get that perfect crumbl texture. For more details, check out the Full Recipe. Now you have all you need to make delicious pumpkin pie cookies. Start with quality ingredients like real pumpkin puree and fresh spices. Follow the step-by-step instructions to prep your dough and bake perfectly. Use the tips to achieve the right texture and enhance flavors. Don't forget to explore unique variations and creative serving ideas. Store your cookies properly, so they stay fresh. With these insights, you can make treats that impress everyone. Enjoy baking and sharing these delightful cookies!

Get ready to fall in love with cookies! I’m sharing my favorite recipe for Crumbl Pumpkin Pie Cookies that are both easy to make and delicious to eat. With warm …

Read more

Categories Desserts

Creamy Chicken Tortilla Soup Hearty and Comforting Dish

August 6, 2025 by Chef Miles
To make Creamy Chicken Tortilla Soup, you'll need some simple yet flavorful ingredients. Here’s the list: - 2 tablespoons olive oil - 1 medium onion, diced - 3 cloves garlic, minced - 1 bell pepper (red or yellow), diced - 2 medium carrots, diced - 1 jalapeño, minced (adjust based on desired spice level) - 1 teaspoon ground cumin - 1 teaspoon smoked paprika - 6 cups chicken broth - 2 cups cooked chicken, shredded - 1 cup corn kernels (fresh or frozen) - 1 can (15 oz) black beans, drained and rinsed - 1 cup heavy cream - Salt and pepper to taste - 1 cup cherry tomatoes, halved - 1 cup cilantro, chopped - Tortilla strips for garnish - Avocado slices for garnish - Lime wedges for serving These ingredients work together to create a rich and comforting soup. The olive oil helps to sauté the veggies, while the chicken broth forms the soup’s base. The combination of spices, like cumin and smoked paprika, adds depth. I love using shredded chicken for heartiness and black beans for protein. The heavy cream brings creaminess, while the fresh garnishes make it bright and fun. You can find the full recipe in the earlier sections. - Sautéing onions and garlic: Start by heating 2 tablespoons of olive oil in a large pot over medium heat. Add 1 diced onion and 3 minced garlic cloves. Cook for about 3-4 minutes. You want the onion to turn translucent and the garlic to smell great. - Adding vegetables and spices: Next, toss in 1 diced bell pepper and 2 diced carrots. If you like heat, add 1 minced jalapeño. Stir this mix for about 5 minutes. The veggies should soften a bit. Now, add 1 teaspoon each of ground cumin and smoked paprika. Stir for 30 seconds to wake up the spices. - Incorporating chicken broth and chicken: Carefully pour in 6 cups of chicken broth. Stir it all together. Bring the pot to a boil, then lower the heat to let it simmer for 10 minutes. This step helps the flavors blend. After that, add 2 cups of shredded cooked chicken. Stir well and let it all simmer for another 10 minutes. - Adding corn and black beans: Now, it’s time to make it hearty! Add 1 cup of corn kernels and 1 can (15 oz) of black beans that you’ve drained and rinsed. Stir everything in and let it simmer for about 5 more minutes. - Incorporating cream and seasoning: Slowly pour in 1 cup of heavy cream while stirring. Let the soup simmer gently on low heat for about 5 minutes. Season it with salt and pepper to taste. This adds richness to the soup. - Folding in cherry tomatoes and cilantro: Just before serving, fold in 1 cup of halved cherry tomatoes and 1 cup of chopped cilantro. This adds freshness and color. Serve the soup hot, topped with crispy tortilla strips and avocado slices. Add lime wedges for a zesty kick. For the complete recipe, check the Full Recipe. - How to enhance flavors with spices I love using spices to boost flavor. Ground cumin and smoked paprika add warmth and depth. Toast them briefly in the pot before adding liquids. This step brings out their best flavors. - Adjusting spice levels with jalapeño If you want a kick, add jalapeño. For mild soup, remove the seeds. For more heat, keep some seeds. Remember, you control the spice! - Techniques for creamy texture To get that rich, creamy texture, add heavy cream last. Stir it in slowly. Let the soup simmer gently. This keeps it smooth and luscious. - Best garnishes for presentation Garnishing makes soup shine! Top it with crispy tortilla strips. A few slices of avocado add creaminess. Fresh cilantro brightens the dish. - Pairing ideas This soup pairs great with rice or crusty bread. Try serving it with a side of tortilla chips for crunch. Your guests will enjoy it! - How to serve for parties or gatherings For gatherings, serve in a big pot. Provide bowls and spoons for easy access. Let everyone customize their bowls with their favorite toppings. It's fun and interactive! {{image_4}} You can change the proteins in this soup. Try adding shrimp or turkey for a twist. Both bring different tastes and textures. If you want a vegetarian option, skip the chicken. Use more beans instead. Black beans, kidney beans, or chickpeas are great choices. This makes the soup hearty and filling without meat. Sometimes, you might want a lighter soup. Swap heavy cream for coconut milk. It adds a nice flavor and is dairy-free. You can also switch up the veggies. Instead of just corn, add zucchini or spinach. Both options add nutrients and taste. Feel free to mix and match ingredients to find your favorite version. For more details, check the Full Recipe. To keep your creamy chicken tortilla soup fresh, store it properly. Use an airtight container. This helps prevent spills and keeps odors in check. Make sure it cools down a bit before sealing. You can keep the soup in the fridge for about 3 to 4 days. If you want to enjoy it later, freezing is a great option. To freeze the soup, let it cool completely. Pour it into freezer-safe bags or containers. Leave some space at the top. The soup will expand as it freezes. When you’re ready to eat, thaw the soup in the fridge overnight. To reheat, warm it on the stove over low heat. Stir it well to mix it evenly. This way, you'll enjoy the creamy goodness again! Can I make creamy chicken tortilla soup in a slow cooker? Yes, you can. Start by sautéing the onion, garlic, and spices in a pan. Then, add them to the slow cooker with the broth, chicken, and veggies. Cook on low for 6-8 hours. Add the cream at the end, just before serving. What are the best toppings for tortilla soup? Some great toppings are crispy tortilla strips, sliced avocado, and fresh cilantro. You can also add lime wedges and cheese for extra flavor. Consider jalapeños for a spicy kick! How can I make this soup spicier? To spice it up, add more jalapeño or use a hotter pepper. You can also add red pepper flakes or hot sauce to taste. Adjust according to your heat preference for the perfect kick! Is creamy chicken tortilla soup healthy? Yes, it can be healthy. The soup has protein from chicken and beans. It also has fresh veggies that add vitamins and fiber. Just watch the cream and salt to keep it lighter. What are the calorie counts per serving? Each serving of creamy chicken tortilla soup has about 350-400 calories. This can vary based on the toppings and cream you use. For a lighter option, reduce the cream or serve with fewer toppings. For the full recipe, check the [Full Recipe]. In this blog post, we explored making creamy chicken tortilla soup with easy steps and tips. We covered the basic ingredients, clear cooking instructions, and flavorful variations. You can enhance flavors, choose different proteins, and find the best ways to serve and store your soup. Remember, cooking should be fun and creative! Enjoy experimenting with this soup to make it your own.

Craving something warm and satisfying? You’ll love my Creamy Chicken Tortilla Soup! This hearty dish combines tender chicken, vegetables, and a touch of spice in a rich, creamy base. Perfect …

Read more

Categories Dinner

Air Fryer Apple Pie Bombs Sweet and Simple Treat

August 6, 2025 by Chef Miles
To make apple pie bombs, you need a few key items. Here’s what to gather: - 1 can refrigerated crescent roll dough - 2 medium apples, peeled and diced - 1/4 cup brown sugar - 1 teaspoon ground cinnamon - 1 teaspoon vanilla extract - 1 tablespoon butter, melted These ingredients create a sweet and warm filling that shines in each bite. You also need some basic baking items to boost flavor and texture: - 1/4 cup granulated sugar (for coating) - 1 tablespoon ground cinnamon (for coating) The sugar and cinnamon mix gives the bombs a nice sweetness and warmth. For extra flair, consider these additions: - Powdered sugar for dusting - Vanilla ice cream for serving - Caramel sauce for drizzling These toppings add a fun touch and make your apple pie bombs even more delightful. For the full recipe, check out my detailed instructions! First, gather all your ingredients. You need: - 1 can refrigerated crescent roll dough - 2 medium apples, peeled and diced - 1/4 cup brown sugar - 1 teaspoon ground cinnamon - 1 teaspoon vanilla extract - 1 tablespoon butter, melted - 1/4 cup granulated sugar (for coating) - 1 tablespoon ground cinnamon (for coating) Next, preheat your air fryer to 350°F (175°C). This ensures it's hot and ready for your apple pie bombs. In a bowl, mix the diced apples, brown sugar, cinnamon, and vanilla. Stir well until the apples are coated. Set this bowl aside. Now, unroll the crescent roll dough on a clean surface. Carefully separate it into triangles. Take one triangle and place a tablespoon of the apple mixture at the wide end. Don’t overfill; this keeps them neat. Fold the dough over the apple filling. Pinch the seams tightly to seal them. This step is key to prevent leaks during cooking. Brush the outside of each bomb with melted butter. This helps them turn golden and crispy. Mix the granulated sugar and cinnamon in a small bowl. Roll each bomb in this mixture to coat them fully. This adds sweetness and flavor. Place the apple pie bombs in the air fryer basket. Make sure they are in a single layer and not touching. Depending on your air fryer size, you might need to cook in batches. Air fry for 8 to 10 minutes. They should puff up and turn a lovely golden brown. Keep an eye on them to ensure even cooking. Once done, gently remove them and let them cool for a few minutes. Enjoy your sweet and simple treat! When you work with crescent roll dough, keep it cold. Cold dough is easier to shape. Unroll it gently to avoid tearing. If it tears, pinch it back together. Space out the triangles to give each one room. This helps with even cooking. To get a nice golden crust, brush the dough with melted butter. This adds flavor too. For a sweeter touch, roll the bombs in the cinnamon-sugar mix right after cooking. This gives them a delightful crunch. The apples should be tender but not mushy. Cook them just right for the best taste. If the dough leaks filling, you may have overfilled it. Always use about one tablespoon of apple mixture. If they seem undercooked, air fry them a bit longer. Keep an eye on them to avoid burning. If they don’t puff up, check your air fryer temperature. It should be at 350°F (175°C) for the best results. For full cooking details, refer to the Full Recipe. {{image_4}} You can change up the filling to keep it fun. Try using pears, peaches, or cherries. Each fruit brings a unique flavor. You can also mix fruits, like apples and cranberries, for a tart twist. For a creamier filling, add a spoonful of cream cheese or a sprinkle of nuts. You can control how sweet or spicy your apple pie bombs taste. If you like them sweet, add more brown sugar. For a little kick, mix in some nutmeg or ginger. Taste your filling before sealing it. This way, you can make it just right for you. If you want to switch up the dough, use puff pastry or biscuit dough. Puff pastry will give you a flakier bite. Biscuit dough offers a thicker texture. Both options work well in the air fryer. Just make sure to adjust cooking times if the dough cooks differently. For the full recipe, check out the details above. After you enjoy your air fryer apple pie bombs, store any leftovers in an airtight container. This keeps them fresh and tasty. Place the container in your fridge. They will stay good for about 2-3 days. If you want to keep them longer, consider freezing them instead. When you're ready to eat the leftovers, I recommend reheating them in the air fryer. Set the air fryer to 350°F (175°C) and heat for about 3-5 minutes. This method keeps the outside nice and crispy. If you use a microwave, the bombs may get soggy, which is not ideal. If you want to store your apple pie bombs for a longer time, freezing is a great option. After cooking, let them cool completely. Then, wrap each bomb tightly in plastic wrap. Place the wrapped bombs in a freezer bag, and they can last up to 3 months. When you're ready to enjoy, just thaw them in the fridge overnight before reheating. This makes for an easy and tasty treat anytime! For the full recipe, check out the details above. Yes, you can prepare the filling ahead of time. Just store it in the fridge. I suggest you make the bombs fresh for the best taste. The dough may get soggy if you wait too long. You will know the bombs are done when they are golden brown. They should puff up nicely and feel firm to the touch. If you see a nice color, they are ready to eat! These bombs taste great on their own, but you can add some fun! Serve them with a scoop of ice cream. Caramel sauce is also a tasty choice. A sprinkle of powdered sugar adds a nice touch for presentation as well. For the full recipe, check the details above! You learned how to make tasty apple pie bombs from scratch. We covered essential ingredients, step-by-step cooking, and smart tips to make them shine. I shared fun variations and how to store leftovers. Don't forget you can adjust flavors to fit your taste. Whether it's a sweet treat or a special dessert, these bombs are sure to impress. Enjoy your baking adventure!

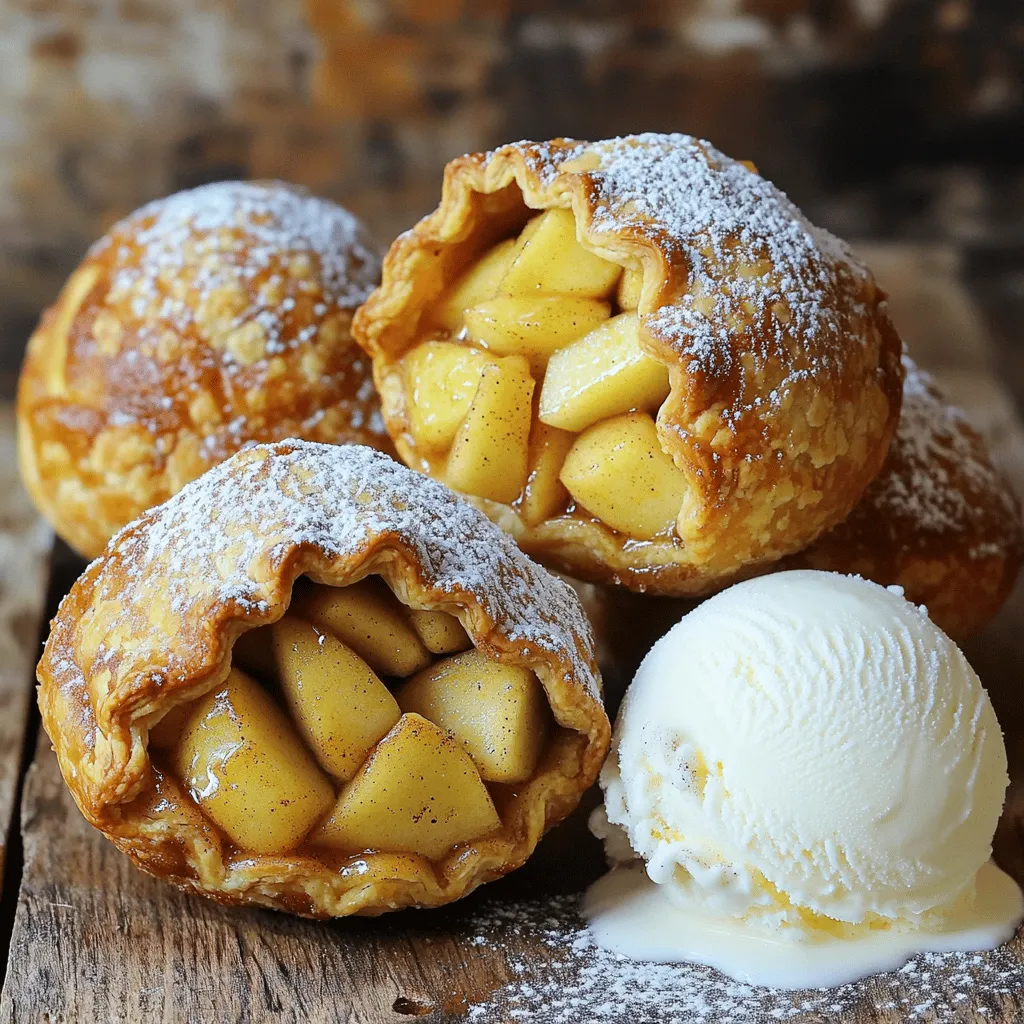
Get ready for a sweet treat that you can whip up in no time! Air Fryer Apple Pie Bombs are fun, easy, and full of flavor. You’ll love how simple …

Read more

Categories Desserts

Tortilla Pizza Rolls Tasty and Fun Snack Idea

August 4, 2025 by Chef Miles
- Large flour tortillas - Shredded mozzarella cheese - Sliced pepperoni - Sliced black olives To make Tortilla Pizza Rolls, you need some key ingredients. Start with large flour tortillas. They are soft and easy to roll. Next, grab shredded mozzarella cheese. This cheese melts well and tastes great. You cannot forget about sliced pepperoni. It adds a nice, savory flavor. Sliced black olives give a salty, rich touch. Together, these ingredients create a tasty base for your rolls. - Finely chopped bell peppers (red, green, or yellow) - Italian seasoning - Olive oil - Marinara sauce (for dipping) You can customize your rolls with optional ingredients. Finely chopped bell peppers add crunch and color. You can choose red, green, or yellow to brighten your dish. Italian seasoning brings a hint of herbs. Drizzling olive oil on the rolls helps them brown nicely. Don’t forget marinara sauce for dipping! It makes each bite even better. - Salt and pepper to taste - Additional toppings or spices Seasoning is key to great flavor. Add salt and pepper to taste. This simple step brings out all the other flavors. You can also include your favorite toppings or spices. Want a spicy kick? Add some chili flakes! A sprinkle of garlic powder can also enhance the taste. Feel free to experiment and find your perfect mix. For the full recipe, check out the details above. - Preheat the oven to 400°F (200°C). - Lay out the flour tortillas on a flat surface. - Distribute mozzarella cheese and toppings evenly. - Sprinkle with Italian seasoning, salt, and pepper. - Roll the tortillas tightly and slice into pieces. - Arrange on a baking sheet and drizzle with olive oil. - Bake for 12-15 minutes until golden brown and cheese melts. Making Tortilla Pizza Rolls is simple and fun! As you prepare, feel free to get creative with your toppings. You can add veggies or even different meats. Each roll is a little pizza, making it a great snack for kids and adults alike. Enjoy dipping them in marinara sauce for extra flavor! For the full recipe, check out the section above. To roll tortillas well, start by placing the filling in the center. Leave some space at the edges. This helps keep the filling inside. Roll tightly but gently to avoid tearing the tortilla. You can also use a bit of cheese at the edge to help seal the roll. This little trick works wonders! Baking times may differ with ovens. For most, 12-15 minutes at 400°F (200°C) works great. If your oven runs hot, check the rolls at 10 minutes. You want them golden brown and the cheese melted. Dipping sauces make Tortilla Pizza Rolls even better! Marinara sauce is a classic choice. You might also try ranch dressing or a spicy salsa for a twist. For a fun presentation, stack the rolls in a tall glass or arrange them on a colorful platter. Add a small bowl of sauce in the center. Garnish with fresh herbs, like basil or parsley, for a pop of color. You can swap out cheese for a lighter option, like mozzarella cheese made from part-skim milk. For a dairy-free version, try vegan cheese. If you want to make it vegetarian, skip the pepperoni and add more veggies. Spinach, mushrooms, or zucchini work well. For gluten-free options, use gluten-free tortillas. They taste great and keep the fun alive! {{image_4}} You can get creative with your fillings. Here are some fun ideas: - Veggie-packed options: Use spinach, mushrooms, or zucchini. These add great flavor and nutrition. - Meat alternatives: Try using turkey pepperoni or chicken. These give a new twist on the classic flavor. Mix quesadilla with pizza for a tasty treat. Start with lots of cheese. Add salsa, jalapeños, or even black beans. This gives you a cheesy, spicy delight. You can also use different types of cheese like cheddar or pepper jack for a kick. Dipping sauces can bring your Tortilla Pizza Rolls to the next level. Here are some easy homemade ideas: - Marinara: Heat canned tomatoes, garlic, and herbs for a quick sauce. - Pesto: Blend fresh basil, garlic, and olive oil for a green twist. - Spicy ranch: Mix ranch dressing with hot sauce. It’s creamy and zesty. - Garlic aioli: Combine mayo with minced garlic and lemon juice. This adds a rich flavor to your rolls. Feel free to switch up your fillings and dips. The full recipe offers endless possibilities for fun flavors! To keep your tortilla pizza rolls fresh, store them in the fridge. Place them in an airtight container. This helps avoid sogginess and keeps the rolls tasty. If you want to save them for longer, freezing works well too. Wrap each roll in plastic wrap, then put them in a freezer bag. This keeps them safe from freezer burn. When you're ready to eat the leftover rolls, reheating is key. You can use an oven or an air fryer for the best results. Preheat your oven to 350°F (175°C) and bake for about 10 minutes. This method keeps the rolls crispy. If using an air fryer, set it to 350°F (175°C) and heat for 5-7 minutes. Both methods help maintain texture and flavor. In the fridge, your tortilla pizza rolls stay fresh for about 3-4 days. After that, check for signs of spoilage. If they smell off or have a slimy texture, it's time to discard them. Always trust your senses; better safe than sorry! Yes, you can prepare Tortilla Pizza Rolls ahead of time. This saves time when you are ready to eat. Store the pre-made rolls in an airtight container. Keep them in the fridge for up to two days. If you want to save them for longer, freeze them. Wrap each roll tightly in plastic wrap and place them in a freezer bag. This way, they stay fresh and tasty. Tortilla Pizza Rolls can easily be made gluten-free. Look for gluten-free tortillas at your store. These are often made from corn or other grains. You can also use lettuce wraps for a fresh twist. This way, you can enjoy the flavors without gluten. If you don’t have marinara sauce, don’t worry! You can use many other sauces. Try ranch dressing for a cool dip. Barbecue sauce adds a sweet, smoky flavor. You can also use pesto for a herby touch. Experiment with your favorite sauces to find the best pairings for your rolls. To make your Tortilla Pizza Rolls crispy, follow a few simple steps. First, make sure to roll them tightly. This keeps the filling inside and helps them cook evenly. Next, brush the outside of the rolls with olive oil. This helps achieve a golden brown color. Bake them at a high temperature, like 400°F (200°C), for 12-15 minutes. For extra crunch, broil them for the last minute. Enjoy that satisfying crunch with each bite! Tortilla pizza rolls are easy to make and highly customizable. We covered key ingredients like tortillas, cheese, and pepperoni. You can adapt the recipe with veggies and sauces to suit your taste. Baking tips help achieve the perfect crunch, while storage info keeps leftovers fresh. Enjoy these tasty treats with your favorite dips or get creative with fillings. Tortilla pizza rolls are a fun snack or meal that everyone will love. Let your imagination guide you, and savor each bite!

Looking for a fun and tasty snack? Tortilla Pizza Rolls are the answer! They’re easy to make, and you can customize them to fit your taste. With simple ingredients like …

Read more

Categories Appetizers

Pepperoni Pizza Muffins Tasty and Easy Recipe

August 4, 2025 by Chef Miles
- 1 ½ cups all-purpose flour - 1 tablespoon baking powder - ½ teaspoon salt - 1 teaspoon dried oregano - 1 teaspoon garlic powder - 1 cup shredded mozzarella cheese - ½ cup mini pepperoni slices - 1 large egg - ¾ cup milk - ¼ cup olive oil - ½ cup marinara sauce (plus extra for dipping) Each ingredient plays an important role in making your muffins tasty. - All-purpose flour gives structure. It helps the muffins rise and hold together. - Baking powder is a leavening agent. It helps the muffins become light and fluffy. - Salt boosts flavor. It enhances the taste of all the other ingredients. - Dried oregano and garlic powder add great flavor. They give your muffins a pizza taste. - Shredded mozzarella cheese gives a melty, gooey texture. It makes every bite delicious. - Mini pepperoni slices add the classic pizza flavor. They bring a satisfying crunch. - Egg acts as a binder. It helps hold everything together. - Milk adds moisture. It keeps the muffins soft and tender. - Olive oil adds richness. It keeps the muffins moist. - Marinara sauce is for dipping. It adds a fun twist and extra flavor. You can swap some ingredients if needed. - Flour: Use whole wheat flour for a healthier option. - Dairy: Substitute almond milk for a dairy-free choice. - Cheese: Try cheddar or a dairy-free cheese if you have an allergy. - Pepperoni: Use veggie pepperoni for a vegetarian option. - Egg: Replace the egg with a flax egg if you need a vegan version. - Always check for allergens in packaged ingredients. Start by preheating your oven to 400°F (200°C). This helps the muffins rise well. Next, grab your muffin tin. You can use paper liners or grease the cups with oil. This step keeps the muffins from sticking to the tin. Make sure to coat the cups well for easy removal. In a large bowl, add 1 ½ cups of all-purpose flour. Then, mix in 1 tablespoon of baking powder, ½ teaspoon of salt, 1 teaspoon of dried oregano, and 1 teaspoon of garlic powder. Whisk these dry ingredients together. This ensures even flavor and no lumps. Once mixed, fold in 1 cup of shredded mozzarella cheese and ½ cup of mini pepperoni slices. This adds taste and texture to your muffins. In a separate bowl, whisk 1 large egg, ¾ cup of milk, and ¼ cup of olive oil. Mix until smooth. Pour this wet mixture into the dry ingredients. Stir gently until just combined. Be careful not to overmix, as this can make the muffins tough. Use a spoon or scoop to fill each muffin cup about ¾ full. To add more flavor, place a small dollop of marinara sauce on top of the batter. Bake the muffins for 15-18 minutes. They are done when golden brown and a toothpick comes out clean. Let them cool for 5 minutes in the tin before moving them to a wire rack. Enjoy your tasty Pepperoni Pizza Muffins! For the full recipe, check out the guide above. To get fluffy muffins, don't overmix the batter. Mix until just combined. This keeps the air bubbles in the batter. Also, make sure your baking powder is fresh. Old baking powder can make your muffins dense. Lastly, fill each muffin cup only ¾ full. This allows the muffins to rise well. For extra flavor, add more herbs like basil or thyme. You can also toss in some crushed red pepper for heat. If you like garlic, use fresh minced garlic instead of garlic powder. Try adding a bit of grated Parmesan cheese for a savory twist. Don't forget to top each muffin with marinara sauce before baking. This adds a tasty surprise! Serve your Pepperoni Pizza Muffins warm. They taste best fresh from the oven. Pair them with extra marinara sauce for dipping. This makes a fun snack or meal. You can also serve them with a side salad for a complete meal. For a twist, add a sprinkle of fresh basil on top for a pop of color and flavor. {{image_4}} You can easily make a vegetarian version of these muffins. Instead of mini pepperoni, use sliced mushrooms, bell peppers, or olives. You can also add fresh spinach for a healthy boost. These ingredients work well with the cheese and spices in the recipe. They give a nice flavor and a bit of texture. Make sure to chop the veggies small. This helps them mix well into the batter. If you need a gluten-free recipe, substitute all-purpose flour with gluten-free flour. Many brands offer blends that work well in muffins. Check the label to ensure they contain xanthan gum or use a separate gluten-free binder. The rest of the ingredients can stay the same. Just keep an eye on the baking time. Gluten-free muffins may need a bit longer to cook, so always check with a toothpick. For a spicy kick, try adding jalapeños or crushed red pepper flakes. Mix them into the batter for a bold flavor. You can also swap regular pepperoni for spicy pepperoni. This adds heat without changing the texture. If you like cheese, consider adding pepper jack cheese instead of mozzarella. It melts well and gives an extra punch. Adjust the amount based on your spice level. Enjoy experimenting with these fun variations! To keep your pepperoni pizza muffins fresh, store them in an airtight container. This will help lock in moisture and flavor. You can keep them at room temperature for up to three days. If you want to store them longer, the fridge is the way to go. Just remember to let them cool completely before placing them in the container. When it's time to enjoy your muffins again, reheating is key. You can use a microwave for quick heating. Place a muffin on a microwave-safe plate and heat for about 15-20 seconds. If you prefer a crispy outside, use an oven. Preheat it to 350°F (175°C) and heat the muffins for about 5-7 minutes. This way, they will be warm and tasty! Freezing is a great option if you want to save muffins for later. Wrap each muffin tightly in plastic wrap. Then place them in a freezer bag to avoid freezer burn. They can stay fresh for up to three months. When you're ready to eat, take a muffin out and let it thaw at room temperature. You can also reheat it straight from the freezer. Just add a little extra time in the oven or microwave. Enjoy your tasty treats anytime! Yes, you can make these muffins ahead of time. Bake them and let them cool completely. Store them in an airtight container. They taste great for up to three days. Reheat them in the microwave for a quick snack. You can also freeze them for up to three months. Just thaw them overnight in the fridge before reheating. These muffins last about three days at room temperature. If you keep them in the fridge, they can last about a week. To keep them fresh, store them in an airtight container. Check for any signs of mold or staleness before eating. If you freeze the muffins, they can last up to three months without losing flavor. Absolutely! You can use different types of cheese in these muffins. Cheddar, pepper jack, or even feta can add unique flavors. Just remember that some cheeses melt better than others. Experiment with your favorite cheeses to find the best taste. Mixing different cheeses can also create a fun flavor twist. Pepperoni pizza muffins are easy and fun to make. We covered the key ingredients, their roles, and tasty substitutions. You learned step-by-step how to mix and bake the muffins for great texture. I shared tips for flavor and serving ideas. Plus, explore fun variations like vegetarian or gluten-free options. Using the right storage methods helps keep your muffins fresh. Remember, these muffins are a treat that you can prep ahead. Enjoy every bite of your delicious creations!

Looking for a fun and easy recipe? I’ve got you covered with these Pepperoni Pizza Muffins! They pack all the flavor of your favorite pizza in a handy muffin form. …

Read more

Categories Appetizers

Gordon Ramsay’s Carrot Cake Fluffy and Flavorful Treat

August 4, 2025 by Chef Miles
For the perfect Gordon Ramsay carrot cake, you need simple ingredients. Here’s what you’ll need to gather: - 2 cups all-purpose flour - 2 cups granulated sugar - 1 cup vegetable oil - 4 large eggs - 2 cups finely grated carrots - 1 cup crushed pineapple, drained - 1 teaspoon vanilla extract - 1 teaspoon baking powder - 1 teaspoon baking soda - 1 teaspoon ground cinnamon - ½ teaspoon ground nutmeg - ½ teaspoon salt - 1 cup chopped walnuts or pecans (optional) These ingredients work together to create a cake that is both fluffy and flavorful. The grated carrots give moisture and sweetness. The crushed pineapple adds a nice touch of tartness. You can skip the nuts if you prefer a smooth texture. For the full recipe, check the details above. - Preheat your oven to 350°F (175°C). - Lightly grease two 9-inch round cake pans with cooking spray or butter. - Line the bottoms with parchment paper to help with easy removal. - In a large mixing bowl, combine the all-purpose flour, granulated sugar, baking powder, baking soda, ground cinnamon, ground nutmeg, and salt. - Whisk these dry ingredients well until they blend and are free of lumps. - In another bowl, whisk together the vegetable oil and eggs until smooth. - Add the vanilla extract, finely grated carrots, and drained crushed pineapple. Stir until mixed well. - Gradually add the wet mixture to the dry ingredients. - Use a gentle folding motion to combine them. Avoid overmixing to keep the cake fluffy. - If you want, fold in the chopped walnuts or pecans for added crunch. - Evenly distribute the batter between the prepared pans. - Use a spatula to smooth the tops for even baking. - Place the cake pans in the preheated oven. - Bake for 30-35 minutes. Check doneness by inserting a toothpick into the center. It should come out clean. - Let the cakes cool for about 10 minutes in their pans. - Gently remove them and transfer to a wire rack to cool completely. - Once the cakes are cool, generously apply cream cheese frosting between the layers and on the top and sides. - For a fun touch, garnish with additional chopped nuts or whimsical carrot decorations. This method ensures a delightful, fluffy carrot cake that’s perfect for any occasion. For more details, you can check out the Full Recipe. - Set your oven to 350°F (175°C) for the right heat. - Bake the cake for 30-35 minutes for a fluffy texture. - Insert a toothpick in the center to check if it’s done. If it comes out clean, it’s ready. - Mixing is key. Be gentle when combining wet and dry ingredients. Overmixing can make your cake tough. - Use a smooth cream cheese frosting for a rich flavor. - Spread a generous layer between the cake layers and over the top. - Warm your spatula slightly for a smooth application. This helps it glide over the frosting nicely. - Measure ingredients carefully. Too much or too little can ruin the cake. - Keep an eye on baking time. Overbaking can dry the cake out, while underbaking leaves it gooey. - Make sure to drain the crushed pineapple well. Excess moisture can change the cake's texture. {{image_4}} You can change the taste of the cake easily. Adding spices like ginger or nutmeg gives a warm flavor. A splash of orange juice or lemon zest brightens the cake. This adds a fresh twist. If you want more crunch, try different nuts. Pecans, almonds, or even hazelnuts work well. You can also add raisins or coconut for extra texture. If you need a gluten-free option, use almond flour or a gluten-free blend. Make sure to check the flour’s label for safety. For a vegan version, swap the eggs with flax eggs. You can mix one tablespoon of flaxseed meal with three tablespoons of water. Let it sit for five minutes until it thickens. Use plant-based oil instead of vegetable oil. You don’t have to stick to a big cake. Mini carrot cakes or cupcakes are fun for parties. They bake faster and are easy to serve. You may also try a layered cake. Stack the layers high with frosting in between. Alternatively, a sheet cake is simple to make and serve. Just bake it in one pan and slice it into squares. To keep your carrot cake fresh, store it at room temperature for a short time. Wrap it in plastic wrap or place it in an airtight container. This helps maintain its moisture. Avoid placing it in direct sunlight or heat. If you want to keep it longer, use the refrigerator. In the fridge, the cake stays fresh for about a week. Make sure to cover it well to prevent it from drying out. The cool air helps it last longer and keeps flavors intact. Freezing carrot cake is easy and keeps it tasting great. First, let the cake cool completely. Wrap it tightly in plastic wrap. Then, place it in a freezer bag or a container. This helps prevent freezer burn. You can freeze it for up to three months. When you are ready to enjoy it, take it out and let it thaw in the fridge overnight. This keeps it moist. Once thawed, you can frost it or serve it as is. In the refrigerator, carrot cake can last about a week. Check it for any signs of spoilage. If you see mold or an off smell, it’s best to throw it away. If the cake feels dry or crumbly, it may have gone bad. Always check its freshness before serving. Enjoy your delicious carrot cake while it’s at its best! For the full recipe, see the previous section. Gordon Ramsay’s carrot cake stands out due to its perfect balance of flavors. The mix of finely grated carrots and crushed pineapple creates a moist texture. The addition of spices like cinnamon and nutmeg gives it a warm, comforting taste. Ramsay also uses a careful mixing method to avoid overmixing, ensuring a fluffy cake. This attention to detail makes it a crowd favorite! Yes, you can prepare this carrot cake ahead of time. Bake the cake layers and let them cool completely. Wrap them tightly in plastic wrap and store them in the fridge. You can also make the cream cheese frosting in advance. Just store it in a container in the fridge. Frost the cake the day you plan to serve it for the best taste and look. Carrot cake pairs well with various drinks. A nice cup of coffee or tea complements it perfectly. You can also serve it with a scoop of vanilla ice cream for a tasty treat. If you want something lighter, fresh fruit or a fruit salad can also work well alongside the cake. To keep your carrot cake moist, use fresh grated carrots and crushed pineapple. The oil in the recipe helps add moisture too. Avoid overbaking by checking the cake with a toothpick. If it comes out clean, the cake is done. Letting the cake cool properly also helps retain its moisture. While pineapple adds sweetness and moisture, you can skip it if needed. You could use applesauce or even mashed banana as alternatives. These options will change the flavor slightly but still keep the cake moist. Adjust your sugar if needed, as these fruits are sweeter than pineapple. We covered how to make a delicious carrot cake from scratch. You learned the key ingredients, step-by-step instructions, and helpful tips. Remember to check for doneness and store it properly. You can also try variations to fit your taste or dietary needs. Baking this cake is not just about the flavors; it’s about the joy of sharing. With these insights, you are ready to create a perfect carrot cake that everyone will love. Happy baking!

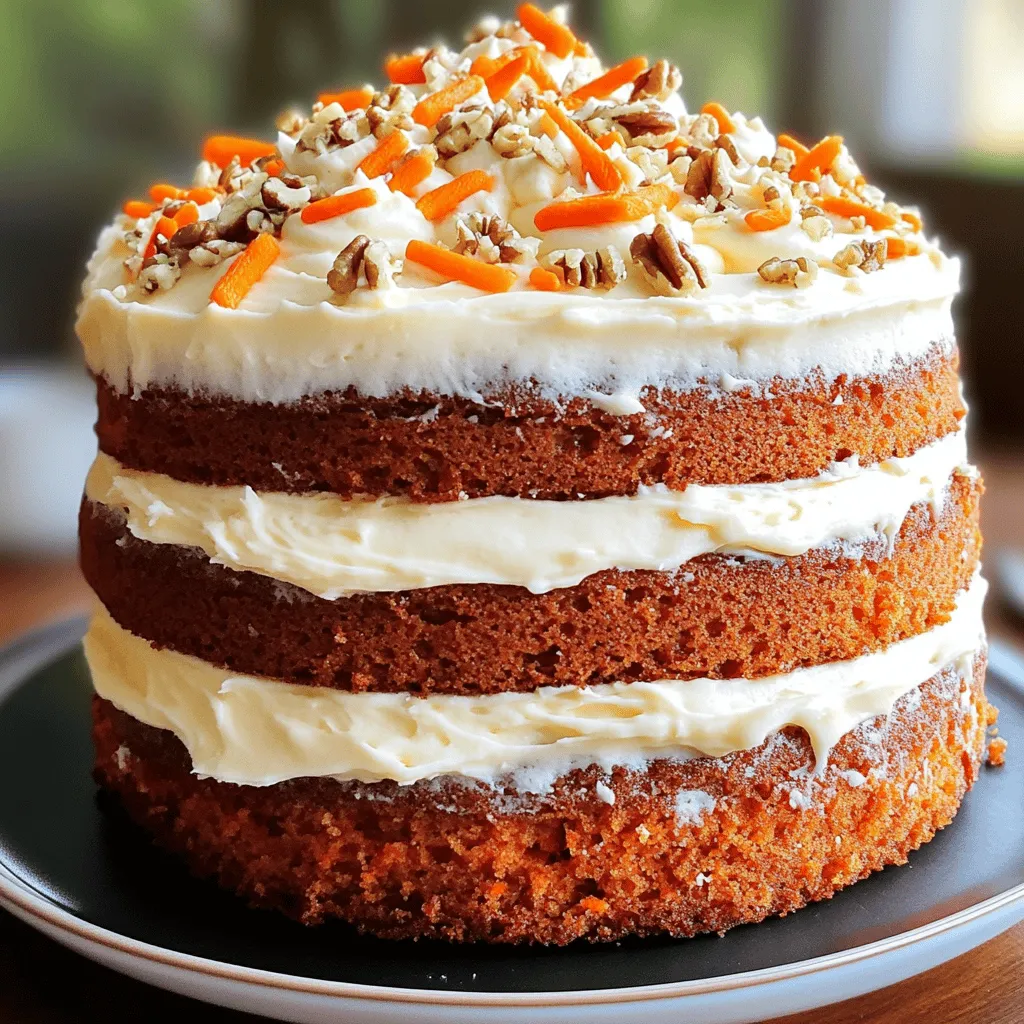
Are you ready to bake a cake that is both fluffy and flavorful? Gordon Ramsay’s Carrot Cake brings together simple ingredients for a delicious dessert that everyone will love. This …

Read more

Categories Desserts

Quick & Easy Hatch Chile Enchilada Sauce Recipe

August 4, 2025 by Chef Miles
- 5-6 fresh Hatch chiles, roasted and peeled - 2 tablespoons olive oil - 1 medium onion, finely chopped - 3 cloves garlic, minced - 1 teaspoon ground cumin - 1 teaspoon smoked paprika - 2 cups vegetable broth - 1 tablespoon lime juice - Salt and pepper to taste - 1 teaspoon sugar (optional) - Baking sheet - Medium saucepan - Immersion blender (optional) - Plastic wrap - Prep Time: 10 min - Cook Time: 25 min - Total Time: 35 min - Servings: 4 cups This recipe for quick and easy Hatch Chile enchilada sauce is simple. You need fresh Hatch chiles for the best flavor. These chiles are mild but full of taste. Roasting them brings out their sweet, smoky notes. I suggest using a baking sheet to roast them evenly. You can also prepare your cooking tools ahead. A medium saucepan is essential for mixing ingredients. An immersion blender can help you achieve a smooth texture. If you don’t have one, a regular blender works too. Just let the sauce cool a bit before blending. The sauce makes about 4 cups. This is perfect for several meals. You can use it for enchiladas, tacos, or even as a dip. The lime juice adds a bright kick. If you like it sweeter, a teaspoon of sugar can balance the flavors. For the full recipe, you can check the detailed steps later on. Enjoy the process and get creative! - Roast the chiles until blistered and charred. - Steam and peel the skins, then remove seeds. Start by preheating your oven to 400°F. Place the fresh Hatch chiles on a baking sheet. Roast them for 15 to 20 minutes. Turn them occasionally. Look for blistered and charred skins. Once they are done, put them in a bowl. Cover the bowl tightly with plastic wrap. This helps steam the chiles for about 10 minutes. When they are cool enough to handle, peel off the skins. Remove the seeds and chop the chiles finely. - Sauté onions and garlic in olive oil. - Add spices and chopped chiles. In a medium saucepan, heat 2 tablespoons of olive oil over medium heat. Add the finely chopped onion. Cook for about 5 minutes. Stir often until the onion is soft and clear. Next, add 3 cloves of minced garlic. Cook for another minute. Make sure the garlic smells nice but does not burn. Now, mix in the chopped Hatch chiles, 1 teaspoon of ground cumin, and 1 teaspoon of smoked paprika. Cook this for 2 to 3 minutes. This lets the flavors blend well together. - Simmer with vegetable broth. - Adjust seasoning and blend to desired consistency. Pour in 2 cups of vegetable broth. Turn up the heat to bring it to a gentle simmer. Let it cook for 10 to 15 minutes. Stir occasionally. The sauce should thicken and become rich in flavor. After that, remove the saucepan from the heat. Stir in 1 tablespoon of fresh lime juice. Taste the sauce and add salt and pepper as needed. If you like, add 1 teaspoon of sugar to balance the acidity. For a smooth sauce, use an immersion blender. Blend until you reach your desired consistency. You can also leave it slightly chunky if you prefer more texture. For the full recipe, check out Quick & Easy Hatch Chile Enchilada Sauce. To roast your chiles evenly, place them on a baking sheet. Turn them often while they roast. This way, all sides get blistered and charred. You can also use a grill or broiler for roasting. If you use a grill, set it to medium heat. For a broiler, keep it on high and watch closely. Both methods work well to bring out great flavor. Want to change the heat? To make your sauce spicier, add more roasted chiles. For a milder sauce, remove the seeds and membranes. You can also swap Hatch chiles for other chiles. Try jalapeños for heat or poblanos for a milder taste. Store your enchilada sauce in an airtight container. It keeps well in the fridge for up to one week. To reheat, pour it into a saucepan. Heat it over low heat, stirring often. This helps to keep the flavor rich and vibrant. If you have leftovers, use them in soups or as a dip. {{image_4}} You can make this sauce even better! Try adding chopped tomatoes or tomatillos. These will add freshness and a nice tang. Just toss them in with the chiles when cooking. You can also mix in herbs like cilantro or oregano. Fresh herbs will brighten the sauce. Dried herbs can work too, but use less. Experiment with spices as well. Try adding chili powder for more heat or coriander for a hint of sweetness. Want to make it gluten-free? This recipe is already good for you! Just check your broth for gluten. For a vegan version, use vegetable broth and skip any animal products. You can also make a low-sodium sauce. Simply choose low-sodium broth and use less salt. This helps keep it tasty without the extra sodium. There are many ways to enjoy this sauce! Of course, it’s perfect for enchiladas. Just pour it over your rolled tortillas, add cheese, and bake. You can also use it as a dip. Serve it with tortilla chips or fresh veggies. It pairs well with rice or beans too. Try drizzling it over grilled chicken or fish for a zesty kick. The flavors work in many dishes! For the full recipe, check out the Quick & Easy Hatch Chile Enchilada Sauce! You can store the enchilada sauce in the fridge for up to one week. To keep it fresh, use an airtight container. Glass jars or plastic containers work great. Make sure the lid seals tightly to prevent air from getting in. To freeze the sauce, pour it into freezer-safe bags or containers. Leave some space at the top to allow for expansion. When you want to use it, thaw the sauce in the fridge overnight or warm it gently in a pot. The sauce can last up to three months in the freezer. You can use leftover enchilada sauce in many ways. It makes a great dip for chips or veggies. Try adding it to soups or stews for extra flavor. You can also drizzle it over grilled meats or roasted veggies. The possibilities are endless! Yes, you can use dried Hatch chiles, but the flavor will change. Fresh chiles have a vibrant taste, while dried chiles are deeper and smokier. If you use dried chiles, soak them in hot water for about 30 minutes. This will help soften them before blending. The sauce might not be as bright, but it will still be tasty. If you want a thicker sauce, try these tips: - Simmer longer: Cook the sauce for a few extra minutes to reduce it. - Add a thickener: You can mix in a bit of cornstarch or flour. Mix one tablespoon with cold water first, and then stir it in. - Blend less: If you blend the sauce, stop before it gets too smooth. A little texture can help it feel thicker. This sauce is not just for enchiladas! Here are some fun ideas: - Pour it over tacos for a spicy kick. - Use it as a topping for burritos or quesadillas. - Serve it as a dip with tortilla chips or veggies. - Drizzle it over grilled chicken or fish for extra flavor. Feel free to explore and get creative with this sauce! For the complete recipe, check out the Full Recipe section. In this article, we covered how to create a delicious enchilada sauce using fresh Hatch chiles. You learned about the ingredients, cooking tools, and step-by-step instructions. We also explored tips for roasting chiles, adjusting spice levels, and storage ideas. Finally, we discussed ways to customize the sauce and various dishes to pair it with. Enjoy making this sauce and tasting the flavors it brings to your meals!

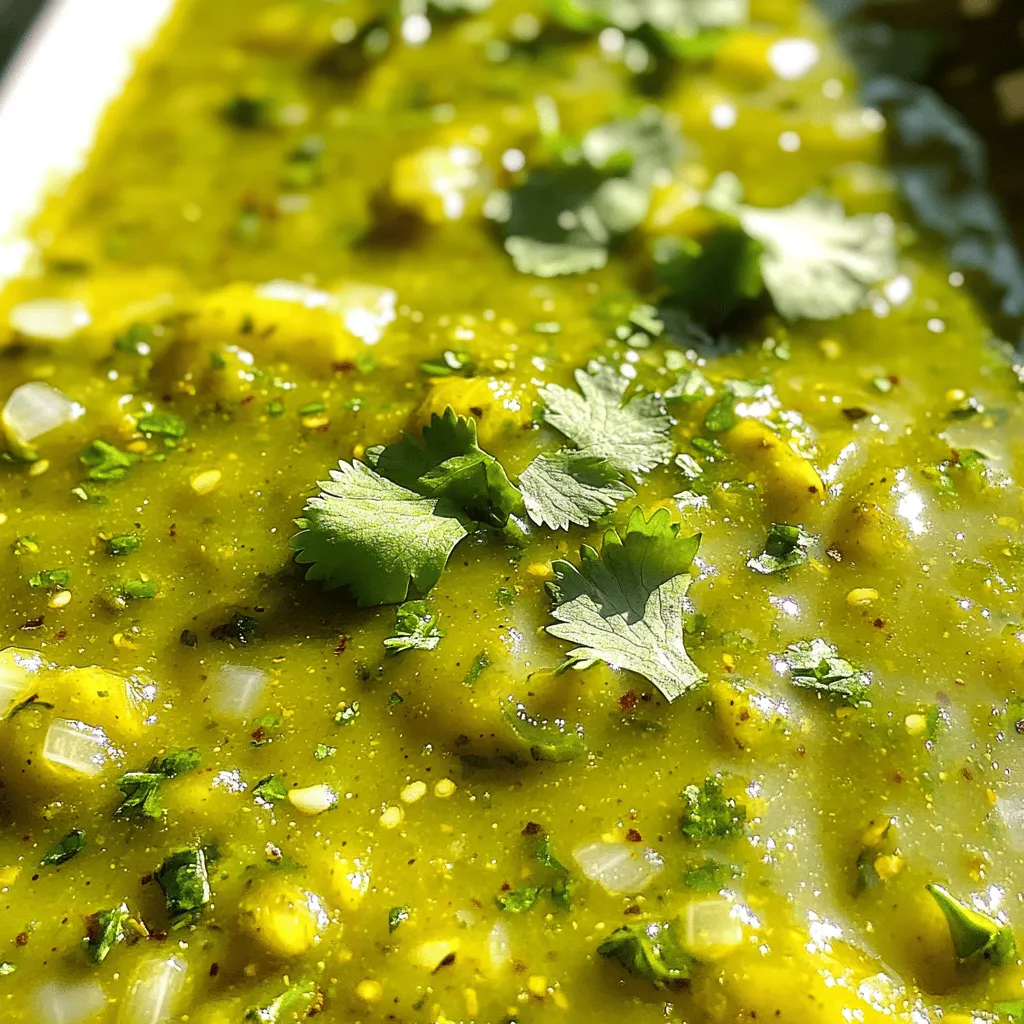
Are you tired of store-bought enchilada sauces that lack flavor? I’ve got the perfect solution for you! This Quick & Easy Hatch Chile Enchilada Sauce recipe will elevate your meals …

Read more

Categories Dinner

Old-Fashioned Baked Apple Slices with Vanilla Ice Cream

August 4, 2025 by Chef Miles
To create your Old-Fashioned Baked Apple Slices with Vanilla Ice Cream, you will need fresh, simple ingredients. Each one plays a vital role in crafting this classic dessert. Here’s what you’ll need: - 4 medium apples (e.g., Granny Smith or Honeycrisp) - 1/4 cup packed brown sugar - 1 teaspoon ground cinnamon - 1/4 teaspoon ground nutmeg - 1 tablespoon fresh lemon juice - 2 tablespoons unsalted butter, melted - 1 cup rolled oats - 1 cup vanilla ice cream (for serving) These ingredients combine to form a warm, sweet dish. The apples bring a natural tartness, while the spices add depth. The rolled oats give a nice crunch on top, making each bite satisfying. The cold vanilla ice cream contrasts beautifully with the warm baked apple slices, creating a delightful experience. For the full recipe, be sure to check the detailed instructions to bring this dish to life! - Preheat oven to 350°F (175°C). - Lightly grease a 9x13-inch baking dish. - Take 4 medium apples, peeled, cored, and sliced. - In a bowl, mix apple slices with 1/4 cup brown sugar, 1 teaspoon cinnamon, and 1/4 teaspoon nutmeg. - Add 1 tablespoon lemon juice and 2 tablespoons melted butter. - Toss gently until all apples are coated. - Transfer the apple mixture into the greased baking dish. - In the same bowl, combine 1 cup rolled oats with a pinch of cinnamon and some brown sugar. - Sprinkle this oat mixture over the apples evenly. - Bake in the preheated oven for 25-30 minutes. - Check if apples are soft and topping is golden brown. For the full recipe, check the earlier section. Enjoy the warm apples topped with creamy vanilla ice cream! Choose the right apples for baking. I suggest using Granny Smith or Honeycrisp apples. They offer a nice balance of sweetness and tartness. Granny Smith apples are tart, while Honeycrisp apples are sweet and crisp. Mixing these two types gives great flavor and texture. To get that perfect crunchy topping, use rolled oats. You can add a bit of brown sugar to the oats for extra sweetness. Mixing in a pinch of cinnamon enhances the flavor. Ensure the melted butter is evenly mixed into the oats. This helps create a golden, crunchy topping that pairs well with the soft apples. When serving, scoop warm baked apple slices onto a plate. Top each serving with a generous scoop of vanilla ice cream. The warm apples and cool ice cream create a delightful contrast. For an extra treat, drizzle warm caramel sauce on top. You can also sprinkle chopped nuts, like pecans or walnuts, for added crunch. For the full recipe, check the above section. {{image_4}} You can make baked apple slices even better. Consider adding nuts or dried fruits for texture and flavor. Here are some great options: - Chopped pecans - Sliced almonds - Walnuts - Raisins - Dried cranberries These ingredients add crunch and a fruity burst. Just mix them in with your apples before baking. Want to change things up? You can swap ingredients for healthier options. Instead of butter, try coconut oil or applesauce. For sugar, consider honey or maple syrup. These swaps keep your dish delicious while adding new flavors. While vanilla ice cream pairs perfectly, you can explore other flavors. Here are some delicious options: - Cinnamon ice cream - Caramel swirl ice cream - Butter pecan ice cream - Chocolate ice cream Each of these choices brings a new twist to your baked apple slices. Don't be afraid to experiment! For the full recipe, check out the main article. To keep your baked apple slices fresh, place them in an airtight container. Make sure they cool to room temperature first. This helps prevent moisture buildup. Store them in the fridge for up to three days. If you want to enjoy them later, consider freezing instead. When you are ready to eat your leftovers, preheat your oven to 350°F (175°C). Place the apple slices in a baking dish. Cover them with foil to keep them from drying out. Heat for about 10 minutes. This method helps keep the slices soft and flavorful. You can also reheat them in the microwave for one to two minutes, but the oven gives better results. If you want to freeze your baked apple slices, let them cool completely first. Arrange them in a single layer on a baking sheet. Freeze until solid, then transfer them to a freezer-safe bag. They will last for about three months in the freezer. When you're ready to eat, thaw them in the fridge overnight. Then, reheat as mentioned above. Enjoy this delightful treat whenever you crave it! For the full recipe, check out the earlier section. Yes, you can use other fruits! Pears work great. Peaches add a nice sweetness. You could also try plums or berries for a different twist. Each fruit brings unique flavors to your dish. Baked apple slices last about 3-5 days in the fridge. Store them in an airtight container. They will still taste good but may lose some texture over time. You can prepare the apples a day ahead. Slice them and mix with sugar and spices. Cover and store in the fridge. Bake them right before serving for fresh flavors. If you want a dairy-free option, try coconut or almond ice cream. Sorbet is also a good choice if you prefer something lighter. You can even use yogurt for a tangy twist. You learned how to make a delicious baked apple dish. We discussed the right ingredients, including apples, sugar, and oats. I shared step-by-step instructions to guide you through the process. Tips on picking the best apples and topping texture helped enhance your dish. You also found storage tips and flavors for swapping ingredients. Remember, baking should be fun. Experiment with toppings or ice cream. Enjoy your tasty treat and share it with others!

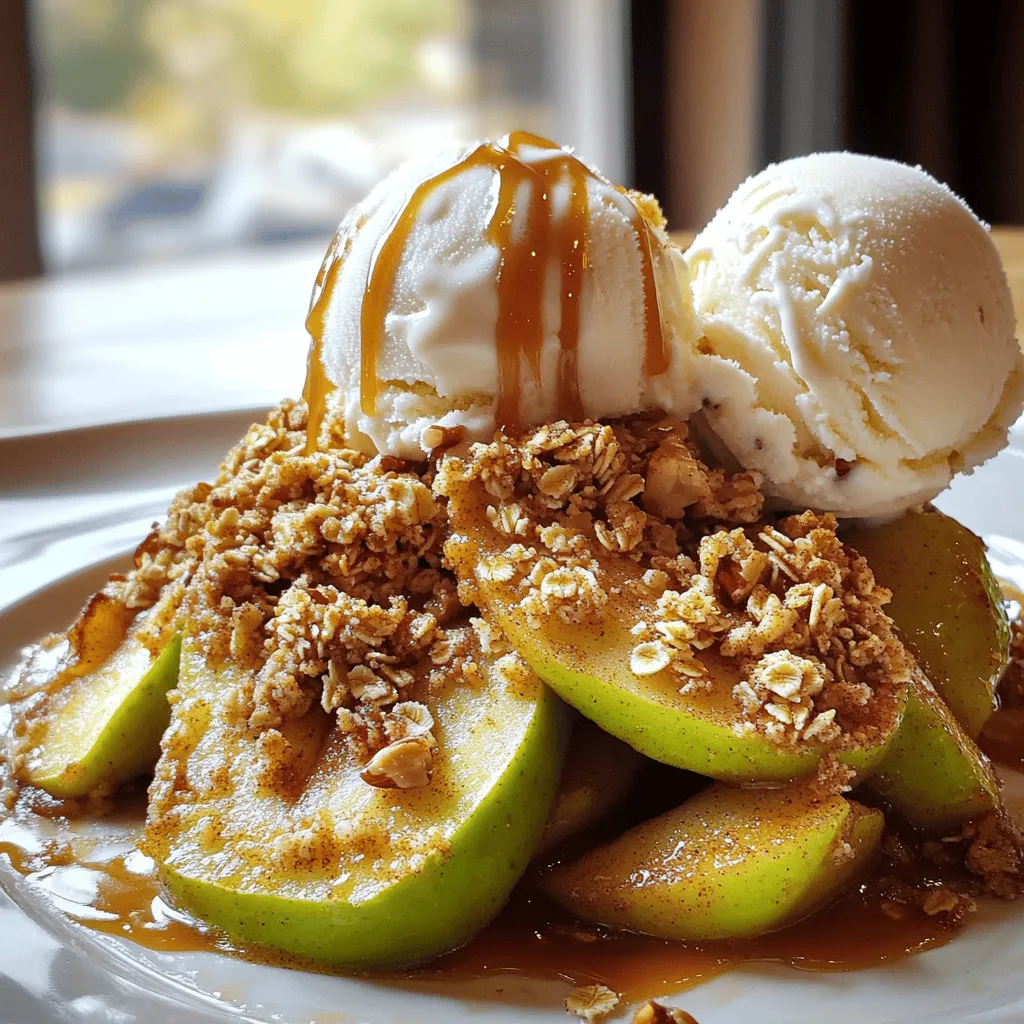
Craving a warm and comforting dessert? Let me share my recipe for Old-Fashioned Baked Apple Slices with Vanilla Ice Cream. This classic dish combines sweet apples with warm spices and …

Read more

Categories Desserts

Huckleberry Crumb Bars Delightful and Easy Recipe

August 4, 2025 by Chef Miles
You can use fresh or frozen huckleberries for this recipe. Fresh huckleberries taste bright and sweet. They give your crumb bars a lovely burst of flavor. If you cannot find fresh ones, frozen huckleberries work well too. They are picked at their peak and frozen quickly. This keeps their taste and nutrients intact. Just make sure to thaw them before use. Here are the dry ingredients you will need for Huckleberry Crumb Bars: - 1 cup all-purpose flour - 1 cup rolled oats - 1/2 teaspoon baking powder - 1/4 teaspoon sea salt - 1/2 teaspoon ground cinnamon These ingredients form the base of the crumb mixture. The flour and oats give the bars a nice texture. The baking powder helps them rise a bit, while salt and cinnamon add depth to the flavor. To make your crumb bars even more tasty, you can add these flavor enhancers: - 1/2 cup granulated sugar (plus extra for huckleberries) - 1 tablespoon freshly squeezed lemon juice - 1 teaspoon pure vanilla extract - 1/2 cup unsalted butter, melted The sugar sweetens the huckleberries and balances their tartness. Lemon juice adds a bright note, enhancing the huckleberry flavor. Vanilla extract gives a warm, sweet aroma. The melted butter binds everything together, making it rich and delicious. You can find the full recipe in the detailed instructions above. First, preheat your oven to 350°F (175°C). This ensures even baking. Next, take a 9x9 inch baking pan. Lightly grease it or line it with parchment paper. This step helps when you remove the bars later. In a bowl, combine 2 cups of huckleberries with 1/4 cup of granulated sugar. Add 1 tablespoon of lemon juice and 1 teaspoon of vanilla extract. Toss the huckleberries gently. Set this aside so they can soak up the flavors. In another large bowl, mix together 1 cup of all-purpose flour, 1 cup of rolled oats, 1/2 teaspoon of baking powder, 1/4 teaspoon of sea salt, and 1/2 teaspoon of cinnamon. Then, pour in 1/2 cup of melted butter. Stir with a fork until the mixture looks crumbly. Save about 1 cup of this for the topping later. Press the remaining crumb mixture into the bottom of your prepared pan. Make it firm and even. Next, spread the huckleberry mix over the top. Make sure it covers the crumb base well. Finally, sprinkle the reserved crumb mixture over the huckleberries. Place the pan in your preheated oven. Bake for 30-35 minutes. You want the top to be golden brown and the berries to bubble. After baking, take the pan out of the oven. Let it cool for at least 10 minutes. Then, transfer the bars to a wire rack. Allow them to cool completely. Once cool, cut into squares and enjoy this delightful treat! To get a great crumb texture, use cold butter. Cold butter helps create those nice, crumbly bits. When you mix the butter with dry ingredients, do not overwork it. The mixture should look like coarse crumbs. This technique ensures that the bars stay light and airy. For even baking, make sure to spread the batter evenly in the pan. Use a spatula to smooth the top before baking. This helps the heat circulate well. Keep an eye on the time, as ovens can vary. If the edges brown too quickly, cover them with foil. Serve the huckleberry crumb bars warm or at room temperature. They taste great on their own or with a scoop of vanilla ice cream. A sprinkle of powdered sugar on top adds a nice touch. You can also serve them with fresh huckleberries for a pretty plate. For the full recipe, check out the complete guide above! {{image_4}} You can easily switch huckleberries for other fruits. Blueberries, raspberries, or blackberries all work well. Each fruit brings its own flavor and unique taste. When using these fruits, keep the amount the same. For example, use 2 cups of blueberries instead of huckleberries. This keeps the recipe simple and delicious. If you need gluten-free bars, swap out the all-purpose flour for gluten-free flour. This change will keep your crumb bars safe for those with gluten issues. You can also use certified gluten-free oats to ensure no cross-contamination. Your bars will still taste amazing, and everyone can enjoy them. For a fun twist, add nuts or chocolate chips to the crumb mixture. Chopped walnuts or pecans add great crunch and flavor. You can also mix in 1 cup of chocolate chips for a sweet surprise. Just fold them into the crumb mixture before pressing it into the pan. This little change will make your crumb bars even more special and enjoyable. Feel free to explore these variations and make the recipe your own. You can find the full recipe in the earlier sections. Enjoy your baking! To keep your huckleberry crumb bars fresh, store them in an airtight container. This helps prevent them from drying out. You can keep them at room temperature for up to three days. If you want them to last longer, refrigerate them. They will stay good for about a week in the fridge. Freezing is a great option if you want to save some bars for later. First, cut the bars into squares. Place the squares in a single layer on a baking sheet. Freeze them until solid, about two hours. Next, transfer them to a freezer bag or container. They can last up to three months in the freezer. Just remember to label the bag with the date. To enjoy your huckleberry crumb bars warm, you can reheat them easily. Preheat your oven to 350°F (175°C). Place the bars on a baking sheet and cover them loosely with foil. Heat for about 10-15 minutes until they are warm. You can also use a microwave. Heat each square for about 15-20 seconds. Enjoy the warm, gooey goodness! You can tell when the bars are done by looking at the top. It should be lightly golden brown. You will also see the huckleberries bubbling. If you insert a toothpick, it should come out clean from the crumb topping. Yes, you can use blueberries instead of huckleberries. Blueberries will still give you that sweet and tart flavor. Just make sure to adjust the sugar if needed. The texture will remain similar, and the bars will still be delightful. You can store Huckleberry Crumb Bars for up to five days at room temperature. Keep them in an airtight container to maintain freshness. If you want to store them longer, you can freeze them. These bars are great on their own, but you can serve them with a scoop of vanilla ice cream. Whipped cream or a drizzle of warm caramel sauce also adds a nice touch. Pair them with a cup of tea or coffee for a cozy treat. You can find the full recipe for Huckleberry Crumb Bars in the earlier section. It includes all the ingredients and steps you need to make this delicious treat. Enjoy the process and happy baking! We explored huckleberry crumb bars from top to bottom. You learned about fresh versus frozen huckleberries and how to enhance flavors. I provided step-by-step instructions to bake the perfect bars, along with tips to achieve the best texture. We also discussed variations, storage, and answered common questions. In the end, baking these bars is fun and rewarding. Enjoy sharing them with friends and family!

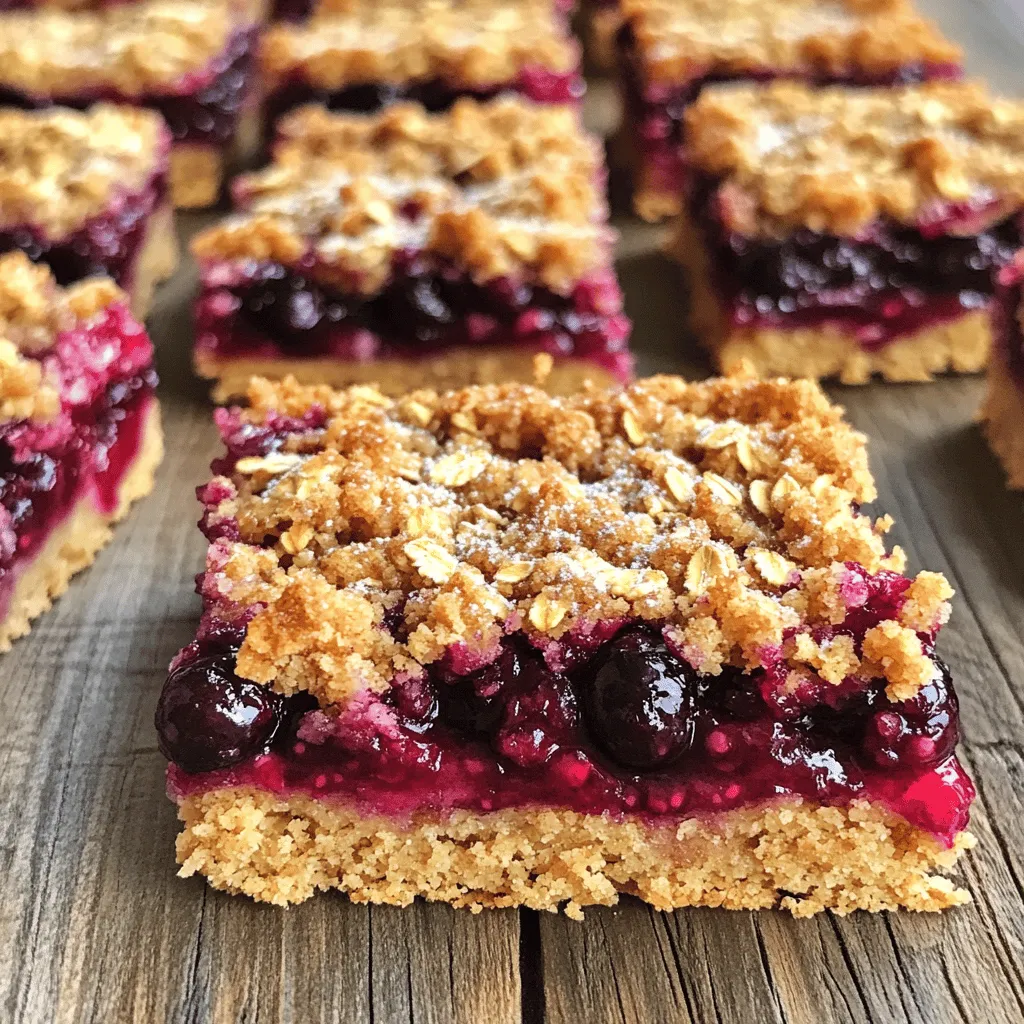
If you’re craving a sweet treat that’s both simple and delicious, you’ve come to the right place! These Huckleberry Crumb Bars are easy to make and bursting with flavor. In …

Read more

Categories Desserts

Perfect Apple Pie Cookies Simple and Flavorful Treat

August 3, 2025 by Chef Miles
For these perfect apple pie cookies, gather the following: - 2 cups all-purpose flour - 1/2 cup granulated sugar - 1/2 cup packed brown sugar - 1 teaspoon ground cinnamon - 1/4 teaspoon ground nutmeg - 1/2 teaspoon salt - 1/2 cup unsalted butter, cold and cubed - 1 large egg - 1 tablespoon pure vanilla extract - 4 medium apples, peeled and diced (Granny Smith or Honeycrisp recommended) - 2 tablespoons fresh lemon juice - 1 tablespoon cornstarch - 1/4 cup raisins (optional) - 1 egg (for egg wash) - Extra sugar for sprinkling Use the right apples for tasty filling. I suggest Granny Smith or Honeycrisp. They add a nice tartness. Lemon juice helps keep apples from browning and adds brightness. Cornstarch thickens the filling, making it less runny. You can also add raisins for extra sweetness, but they are optional. To create a lovely glaze on your cookies, you need one egg for the wash. This gives them a nice shine. Sprinkle extra sugar on top for a sweet finish. It adds crunch and looks great. Make sure to check the [Full Recipe] to explore the steps in detail! Start by mixing the diced apples with lemon juice and spices. This step adds freshness and flavor. Use about 4 medium apples, like Granny Smith or Honeycrisp, for best results. In a bowl, combine: - 4 medium apples, peeled and diced - 2 tablespoons fresh lemon juice - 1 tablespoon cornstarch - 1/2 cup granulated sugar - 1/2 cup packed brown sugar - 1 teaspoon ground cinnamon - 1/4 teaspoon ground nutmeg Toss everything until the apples are well-coated. Let the mixture sit for about 10 minutes. This waiting time helps the flavors combine and develop a tasty filling. Next, it’s time to make the cookie dough. In a large mixing bowl, whisk together the dry ingredients: - 2 cups all-purpose flour - 1/2 teaspoon salt - 1 teaspoon ground cinnamon - 1/2 cup granulated sugar - 1/2 cup packed brown sugar Now, incorporate cold butter into this blend. Use 1/2 cup of unsalted butter, cold and cubed. You can use a pastry cutter or your fingers. Mix until the texture resembles coarse crumbs, leaving some pea-sized pieces. In a separate small bowl, mix one large egg with 1 tablespoon of pure vanilla extract. Gradually mix this into the flour mixture, stirring until a dough starts to form. If the dough seems too crumbly, add a teaspoon of cold water at a time until it holds together. Chilling the dough is crucial for the best texture. Shape the dough into two discs and wrap them tightly in plastic wrap. Refrigerate for at least 30 minutes. This helps the butter firm up, creating a flakier cookie. Once chilled, preheat your oven to 350°F (175°C). Prepare a baking sheet by lining it with parchment paper. On a floured surface, roll out one disc of chilled dough to about 1/8-inch thickness. Make sure to keep it even for proper baking. Now, let’s assemble the cookies. Use a round cookie cutter or a glass to cut out circles of dough, about 3 inches in diameter. Place half of these circles on your prepared baking sheet. Spoon about one tablespoon of the apple filling into the center of each circle. Be careful not to overfill, as this can lead to messy cookies. Take another dough circle and place it on top of each filled circle. Use a fork to press down the edges securely, sealing them well. Create a few small slits in the top of each cookie. This allows steam to escape during baking. For a nice finish, beat another egg and brush the mixture gently over the tops of the sealed cookies. Sprinkle a bit of extra sugar on top for sweetness. Finally, bake the cookies in your preheated oven for 15-20 minutes. They should be golden brown and fragrant. Enjoy the delicious aroma filling your kitchen! For the complete recipe, check out the Full Recipe section. Using cold ingredients is key for your cookie texture. Start with cold butter, as it helps the cookies stay thick. When you mix butter with flour, aim for a coarse crumb. Some larger bits of butter add flakiness. Dough consistency matters too. It should feel soft but not sticky. If it’s too crumbly, add a bit of cold water. Just a teaspoon at a time works best. After mixing, chill your dough for at least 30 minutes. This step is crucial for good texture. To boost flavors, add spices like nutmeg and vanilla. These small touches make a big difference. You can also try adding a pinch of allspice for warmth. Adjust sweetness based on your taste. If you prefer less sugar, reduce it by a tablespoon. Adding lemon juice brightens the apple flavor. The balance of sweet and tart keeps each bite exciting. Don’t forget to taste your filling before sealing the cookies! If you need gluten-free cookies, use almond flour or a gluten-free blend. These options work well but may change texture slightly. For healthier cookies, consider using coconut sugar or honey instead of regular sugar. Both sweeteners add a unique taste. Just remember, these alternatives may change the dough's moisture. Adjust with a bit of flour if needed. For the full recipe, refer to the complete guide to perfect apple pie cookies! {{image_4}} You can change the taste of your apple pie cookies by using different apple types. Granny Smith apples give a tart flavor, while Honeycrisp apples add sweetness. You can also mix apple types for a balanced taste. Adding nuts or chocolate chips can give a fun twist. Try walnuts or pecans for crunch. Chocolate chips can turn these cookies into a dessert treat. This version is great for those who love chocolate and apples together. Seasonal changes can inspire new flavors. In fall, add pumpkin spice to the dough for a warm, cozy taste. This spice mix can bring out the best in your apple filling. In summer, consider berry-filled cookies. Use fresh berries like blueberries or raspberries. They add a juicy burst of flavor. Mixing berries with apples can create a delightful cookie. If you follow a vegan diet, swap the egg for a flaxseed egg. Mix one tablespoon of ground flaxseed with three tablespoons of water. Let it sit for a few minutes until it thickens. For low-carb options, use almond flour instead of all-purpose flour. You can also use a sugar substitute like erythritol. This way, you can enjoy sweet cookies while keeping carbs low. For the full recipe, check out the link above. To keep your apple pie cookies fresh, store them in an airtight container. This helps maintain their soft texture and flavor. I find that a cookie jar works well if you plan to eat them within a few days. If you want to keep them longer, consider using a plastic container with a tight seal. Avoid placing cookies in the fridge, as this can make them dry. Instead, store them at room temperature. If you layer the cookies, place parchment paper between each layer to prevent sticking. Freezing cookies is a great way to enjoy them later. Here’s how to do it: 1. Before Baking: Shape the cookies and place them on a baking sheet. Freeze them for about 30 minutes until solid. Then, transfer them to a freezer bag. This keeps them from sticking together. 2. After Baking: Allow the cookies to cool completely. Wrap them in plastic wrap and place them in a freezer-safe container. Seal tightly to avoid freezer burn. To thaw, simply remove the cookies from the freezer and let them sit at room temperature for about 30 minutes. This helps them regain their soft texture. When stored properly, your apple pie cookies can last up to one week at room temperature. Keep an eye out for any signs of spoilage. If you notice a change in smell, texture, or color, it’s best to discard them. Fresh cookies should smell sweet and have a nice golden-brown look. If your dough is sticky, you can adjust the moisture levels. Here are some tips: - Add more flour a little at a time. - Chill the dough for at least 30 minutes. - Use cold butter to help keep the dough firm. - If needed, add a teaspoon of cold water to help bind it. These steps help create a dough that is easy to work with. Yes, you can use pre-made pie crust. Here are the pros and cons: Pros: - Saves time and effort. - Consistent results if you choose a good brand. Cons: - Flavor may not match homemade. - Texture might be less flaky. If you’re short on time, store-bought can work well, but I recommend making your own for the best taste. For baking, I recommend using Granny Smith or Honeycrisp apples. - Granny Smith: Tart flavor, holds shape well. - Honeycrisp: Sweet and juicy, adds a nice balance. These apples blend well with spices and provide great texture in your cookies. To get a flakier texture, follow these tips: - Use cold butter and keep it in chunks. - Avoid over-mixing the dough; mix just until combined. - Chill your dough before rolling it out. These techniques help create that delightful flakiness that everyone loves. You've learned how to create delicious apple cookies using simple ingredients and steps. We discussed the key elements of apple filling, cookie dough, and the importance of texture. Remember to experiment with different flavor profiles and dietary adaptations to suit your needs. Proper storage and freezing tips will keep your cookies fresh for longer. With these techniques and variations, you can bake cookies that everyone will love. Enjoy your baking adventure and let your creativity shine!

Craving the warm, comforting taste of apple pie? Look no further! These Perfect Apple Pie Cookies blend the classic dessert’s flavors into bite-sized delights. With simple ingredients and straightforward steps, …

Read more

Categories Desserts
Older posts
Newer posts
← Previous Page1 … Page50 Page51 Page52 … Page113 Next →

MELTED RECIPES

where delicious ideas melt into life, from stovetop to backyard. Always warm, simple, and irresistibly satisfying. 🍳🔥🧀

PAGES

Home About Contact Privacy Policy Terms & Conditions Cookie Policy GDPR Policy Copyright Policy Disclaimer

CATEGORIES

Appetizers Desserts Salads Breakfast Dinner

Contact

  • Pinterest
  • Mail
Copyright © 2025 Melted Recipes. All rights reserved.