Skip to content
Melted Recipes
  • Home
  • Appetizers
  • Desserts
  • Salads
  • Breakfast
  • Dinner
  • Privacy Policy
  • Contact
  • About

Chef Miles

Pumpkin Cream Cheese French Toast Bake Delightful Recipe

October 18, 2025 by Chef Miles
- 1 (14 oz) loaf of challah or brioche bread, cut into 1-inch cubes - 1 cup canned pumpkin puree - 8 oz cream cheese, softened at room temperature - 4 large eggs - 2 cups whole milk - 1/2 cup packed brown sugar - 1 teaspoon pure vanilla extract - 1 teaspoon ground cinnamon - 1/2 teaspoon ground nutmeg - 1/4 teaspoon ground ginger - 1/4 teaspoon sea salt - 1/2 cup chopped pecans (optional, for added crunch) - Maple syrup, for drizzling upon serving The main ingredients give this dish its rich and creamy texture. The bread soaks up all the flavors. Canned pumpkin puree adds a sweet, earthy taste. Cream cheese makes it smooth and creamy. For flavor, we use eggs and whole milk. They create a custard that binds the bake. Brown sugar adds sweetness while spices like cinnamon and nutmeg bring warmth. Ginger gives a little kick. Sea salt balances the sweet notes. If you want extra crunch, pecans are a great choice. They add texture and a nutty flavor. Drizzling maple syrup on top adds sweetness when serving. - Preparing the Baking Dish: Start by preheating your oven to 350°F (175°C). Grease a 9x13 inch baking dish with non-stick spray or butter. This step helps the bake not stick. - Cubing the Bread: Take your challah or brioche bread and cut it into 1-inch cubes. The cubes should be even for better soaking. Spread them evenly in the greased dish. - Mixing Cream Cheese and Pumpkin: In a large bowl, beat the softened cream cheese until smooth. Add the canned pumpkin puree and mix until blended well. - Adding Sugars and Spices: Next, add brown sugar, eggs, vanilla extract, cinnamon, nutmeg, ginger, and salt. Blend until you have a creamy mixture. - Layering the Bread and Cream Mixture: Pour the creamy pumpkin mixture over the bread cubes. Make sure each piece is coated well. Toss gently with a spatula or your hands. If using pecans, sprinkle them on top for crunch. - Preparing the Egg and Milk Mix: In a separate bowl, whisk the remaining eggs with milk and a sprinkle of cinnamon. This mix adds richness to the bake. Pour it evenly over the bread and cream cheese mix. - Soaking Period: Room Temp vs. Overnight: Let the mixture rest for at least 20 minutes at room temperature. For a deeper flavor, cover and refrigerate it overnight. This helps the bread soak up all the flavors. - Baking Instructions: Cover the baking dish with foil and place it in the preheated oven. Bake for 30 minutes, then remove the foil. Bake for another 15-20 minutes until golden brown and set. - Cooling and Slicing the Bake: Once baked, let it cool for a few minutes. Then slice into squares for serving. - Toppings and Garnishes: Serve warm, drizzled with maple syrup. For an extra touch, dust with cinnamon or add a dollop of whipped cream. Enjoy! - Recommended Soaking Times: Soaking the bread for at least 20 minutes is key. This time lets the bread soak up the creamy pumpkin mix. If you want even more flavor, cover it and let it sit in the fridge overnight. This extra soak allows the spices to deepen and the bread to become very soft. - Oven Temperature Tips: Preheat your oven to 350°F (175°C). This temperature is perfect for baking. It cooks the inside well while giving the top a nice golden crust. If you see the top browning too fast, cover it with foil to prevent burning. - Ideal Pairings with Pumpkin Cream Cheese French Toast Bake: Serve this dish warm with maple syrup drizzled on top. A sprinkle of powdered sugar adds a sweet touch. Fresh fruit like sliced bananas or berries on the side brightens the plate. For a nutty crunch, add a handful of chopped pecans. - Presentation Ideas: Slice the bake into squares and serve on individual plates. A dollop of whipped cream on top makes it look fancy. Garnish with a sprinkle of cinnamon for color and a touch of flavor. This makes every bite special and inviting. {{image_4}} You can change this dish in fun ways. Adding chocolate chips makes it sweet and rich. You could also add fresh fruit like apples or bananas. They will add a fresh taste and a nice texture. Different types of bread can change the feel of the bake too. While challah or brioche works great, you can try sourdough or whole wheat. Each type brings a unique taste. Just make sure it is sturdy enough to soak up the mix. If you need gluten-free options, use gluten-free bread. There are many tasty kinds available. Just check the label to ensure it works for your diet. For a dairy-free version, swap the whole milk for almond or oat milk. Use a dairy-free cream cheese too. These changes keep the creamy texture while making it suitable for those who avoid dairy. To keep your Pumpkin Cream Cheese French Toast Bake fresh, store it properly. - Refrigeration Guidelines: Place leftovers in an airtight container. They stay good for up to 3 days in the fridge. Make sure to cool it first before sealing. - Freezing Tips: If you want to save some for later, wrap portions tightly in plastic wrap. Then, place them in a freezer bag. You can freeze it for up to 2 months. Just remember to label the bag with the date. When you are ready to enjoy your leftovers, reheating is key. - Oven vs. Microwave: The oven gives the best results. Preheat it to 350°F (175°C). Place the bake in a baking dish and cover it with foil. Heat for about 15-20 minutes until warm. If you use the microwave, cut a piece and heat it for 30-60 seconds. Check to make sure it heats evenly. Can I make this recipe ahead of time? Yes, you can prepare this bake the night before. Just soak the bread and mixture in the fridge. The next day, you bake it fresh. Is it necessary to use challah or brioche bread? While challah and brioche give the best texture, you can use other bread. French bread or even Texas toast works well too. What can I do with leftover pumpkin puree? Leftover pumpkin puree is great in smoothies, pancakes, or muffins. You can also freeze it for later use. Can I use different types of cheese? You can try mascarpone or ricotta for a twist. These cheeses will add a different flavor to your bake. How can I make this vegan-friendly? To make it vegan, use plant-based cream cheese and milk. Substitute eggs with flax eggs or silken tofu blended smooth. You’ve learned how to make a delicious Pumpkin Cream Cheese French Toast Bake. We covered the best ingredients, steps for preparation, and tips for serving. Remember, soaking time and the choice of bread can change everything. Try variations to fit your taste. Storing and reheating your leftovers will keep the flavor alive. I hope you feel excited to create this tasty dish! Enjoy the cozy flavors this recipe brings to your kitchen.

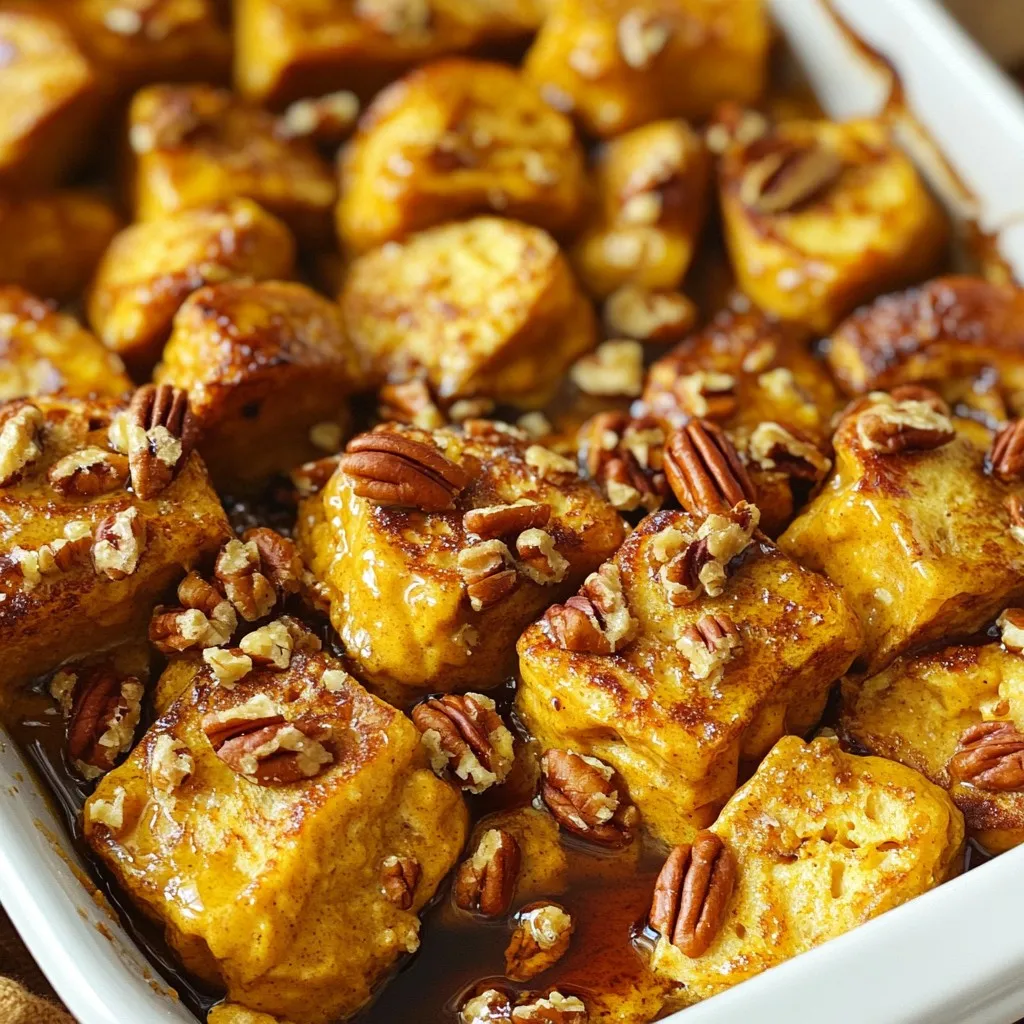
Are you ready to indulge in a tasty fall treat? This Pumpkin Cream Cheese French Toast Bake is a must-try recipe. You’ll savor rich pumpkin flavor mixed with creamy cheese, …

Read more

Categories Breakfast

Air Fryer Crispy Chicken Caesar Wraps Recipe Easy

October 18, 2025 by Chef Miles
- 2 boneless, skinless chicken breasts - 1 cup breadcrumbs (preferably panko for extra crunch) - 2 tablespoons olive oil - 1 teaspoon garlic powder - 1 teaspoon onion powder - 1 teaspoon paprika - 1/2 cup Caesar dressing (store-bought or homemade) - 1/4 cup freshly grated Parmesan cheese - 1 cup romaine lettuce, chopped - 4 large flour tortillas - Optional: cherry tomatoes, halved for garnish Gathering these ingredients is the first step to making your crispy chicken Caesar wraps. The chicken breasts provide a lean protein base. Panko breadcrumbs are key for achieving that extra crispy texture we all love. Olive oil helps those breadcrumbs stick while adding flavor. For the spices, garlic powder, onion powder, and paprika will bring your chicken to life. The Caesar dressing adds creaminess and tang to the wraps. I like to use freshly grated Parmesan cheese for an added burst of flavor. Don’t forget the romaine lettuce! It gives your wraps a fresh crunch. We use large flour tortillas to hold everything together. If you want to make it colorful, consider adding cherry tomatoes. They add a nice pop and a hint of sweetness. Make sure you have all these items ready before you start cooking. Preparation is key for a smooth cooking experience. 1. Preheat the Air Fryer: Set your air fryer to 400°F (200°C). This makes the chicken crispy. 2. Prepare the Chicken Breasts: Take 2 boneless, skinless chicken breasts. Pat them dry with paper towels. This step helps get that crunchy texture. 3. Season the Chicken: In a bowl, mix garlic powder, onion powder, paprika, salt, and pepper. Rub this mix all over the chicken. This adds great flavor. 1. Coat the Chicken: Drizzle 2 tablespoons of olive oil over the chicken. Make sure it’s well-coated. Then, press 1 cup of breadcrumbs onto the chicken. Use panko for extra crunch. 2. Air Fry the Chicken: Place the chicken in the air fryer basket. Cook in a single layer. Fry for 12-15 minutes. Flip the chicken halfway through. You want a golden brown color and an internal temperature of 165°F (75°C). Let it rest before slicing into strips. 1. Spread Caesar Dressing: Take 4 large flour tortillas. Spread 1 tablespoon of Caesar dressing on each one. Cover it evenly. 2. Add Lettuce and Chicken: Place chopped romaine lettuce and the sliced chicken on each tortilla. 3. Final Touches: Sprinkle 1/4 cup of grated Parmesan cheese on top. If you like, add halved cherry tomatoes for a fresh touch. Drizzle a bit more Caesar dressing for extra flavor. 4. Wrap it Up: Fold in the sides of each tortilla. Roll it tightly from the bottom upwards. Use toothpicks to hold them if needed. 5. Serve: Cut each wrap in half diagonally. Arrange them nicely on a platter. Consider adding a small bowl of Caesar dressing for dipping. Enjoy your delicious wraps! - Use panko breadcrumbs for the best crunch. - Press breadcrumbs onto the chicken firmly. This helps them stick well. - Preheat your air fryer to 400°F (200°C) before cooking. This gives you a nice, crispy finish. - Chicken breast size affects cooking time. Smaller pieces cook faster. - Always check the chicken for doneness. The internal temperature should reach 165°F (75°C). Use a meat thermometer for accuracy. - Add spices like Italian seasoning or cayenne for extra kick. - Fresh herbs like parsley or basil can brighten the wraps. - Serve with a side of fresh veggies or a simple salad to balance the meal. {{image_4}} You can change the protein in your wraps for fun. - Using grilled or sautéed shrimp: Shrimp cooks fast and adds a sweet taste. Just lightly season and sauté or grill until pink. This gives your wraps a fresh twist. - Substituting with tofu for a vegetarian option: Firm tofu is a great meat substitute. Press it to remove excess water, then cut it into strips. Marinate it in your favorite sauce before cooking. This adds a nice flavor and texture. Caesar dressing is classic, but you can try other options. - Other dressing options beyond Caesar: Ranch or blue cheese dressings work well too. You can even try a honey mustard for a sweet kick. Experiment to find your favorite. - Homemade dressing recipe: Make your own Caesar dressing! Use 1 cup of Greek yogurt, 2 tablespoons of lemon juice, 1 tablespoon of Worcestershire sauce, and 1 teaspoon of garlic powder. Mix well, and you have a creamy dressing packed with flavor. Add more to your wraps to make them exciting. - Ideas for extra vegetables or toppings: Consider adding sliced bell peppers, cucumbers, or avocado for crunch. These add freshness and color to your meal. - Cheese alternatives: Try feta or mozzarella instead of Parmesan. Each cheese brings a unique taste that can change your wrap game. To keep your wraps fresh, store them in an airtight container. Wrap each one in plastic wrap or aluminum foil to prevent them from drying out. You can store them in the fridge for up to 3 days. This way, you can enjoy a quick meal later in the week. If you want to freeze your wraps, wrap each one tightly in plastic wrap and then place them in a freezer bag. Make sure to remove as much air as possible. They can last in the freezer for up to 2 months. When you are ready to eat, thaw them in the fridge overnight. Reheat in the air fryer at 350°F for about 5-7 minutes to crisp them up again. You can get creative with leftover ingredients. Use the chicken for a salad or in a pasta dish. The romaine lettuce can be tossed into a fresh salad. Pair your wraps with some fresh fruit or a side of crunchy veggies for a complete meal. If you want to add more flavor, serve with extra Caesar dressing on the side for dipping. Cooking chicken in an air fryer takes about 12 to 15 minutes. The time depends on the thickness of the chicken breasts. Thicker pieces may need a bit longer. Always check the internal temperature; it should reach 165°F (75°C) for safe eating. Yes, you can make these wraps ahead of time. Prepare the chicken and let it cool. Store the chicken and wraps separately in the fridge. When ready to eat, assemble them fresh. This helps keep the wraps from getting soggy. If you need a gluten-free option, use corn tortillas or lettuce leaves. Both work well and add a nice twist to the wraps. You can also try whole wheat tortillas for a healthier choice. This blog post guides you through making delicious air-fried chicken wraps. We covered the main ingredients, step-by-step instructions, handy tips, and creative variations. Use fresh chicken and tasty spices for best results. Consider different proteins and dressings to mix things up. Store leftovers properly to enjoy them later. With these tips, you can create satisfying meals that will impress everyone. Enjoy your cooking and happy eating!

Looking for an easy, tasty meal? Try my Air Fryer Crispy Chicken Caesar Wraps! These wraps pack crispy chicken, fresh romaine, and creamy Caesar dressing into a soft tortilla. You’ll …

Read more

Categories Dinner

Savory Spicy Garlic Chili Crisp Noodles Recipe

October 18, 2025 by Chef Miles
- 200g of noodles (rice, egg, or wheat) - 3 tablespoons chili oil - 5 cloves garlic, finely minced - 1 tablespoon fresh ginger, finely minced - 1 tablespoon soy sauce - 1 tablespoon rice vinegar - 1 tablespoon sesame oil - 1 tablespoon honey or agave syrup - 2 green onions, thinly sliced - 1 teaspoon sesame seeds - Fresh cilantro leaves To create Spicy Garlic Chili Crisp Noodles, you need a few key items. First, pick your noodle type. I often use rice noodles, but egg or wheat also work great. You will need 200 grams of noodles for two servings. Then, grab three tablespoons of chili oil. This oil gives the dish its signature heat. Next, use five cloves of garlic, finely minced. Garlic adds depth and flavor. Fresh ginger, one tablespoon, is important too. It brings a zesty note to the sauce. For the sauce, mix in one tablespoon each of soy sauce and rice vinegar. These add savory and tangy flavors. For garnishing, sesame oil adds richness. Use one tablespoon of it. A tablespoon of honey or agave syrup balances the spice. Thinly slice two green onions for a fresh crunch. Sprinkle one teaspoon of sesame seeds for some texture. Finally, fresh cilantro leaves make a nice touch. Each ingredient enhances the overall taste and makes the dish pop. - Bring salted water to a boil. This step is key. The salt helps flavor the noodles. - Cook noodles until al dente. This means they should be firm but not hard. - Drain and set aside. Let them sit while you prepare the sauce. - Combine chili oil, garlic, ginger, and other ingredients. This creates a rich base for your dish. - Whisk until well blended. You want everything to mix well for full flavor. - Adjust spice levels if desired. If you like heat, add more chili oil to taste. - Heat chili oil and sauté garlic until fragrant. This step brings out a lovely aroma. - Add drained noodles and sauce. Make sure to get all that sauce on the noodles. - Toss to coat noodles thoroughly. Use tongs to mix well and ensure every noodle shines. - Add sliced green onions and sesame seeds. These add bright color and crunch. - Season with salt and pepper. Taste as you go to get it just right. - Transfer to serving bowls and garnish. Fresh cilantro leaves finish the dish nicely. Enjoy every bite! To get the best texture, avoid overcooking the noodles. Al dente noodles have a nice bite that adds to the dish. Here are some tips for choosing the right noodle type: - Rice noodles: Great for a light dish. They soak up flavors well. - Egg noodles: Chewy and hearty. They add richness to your meal. - Wheat noodles: Versatile and easy to find. They hold sauces well. You can elevate the taste of your noodles with extra spices or sauces. Here are some suggestions: - Red pepper flakes: Add more heat if you like. - Soy sauce: A splash can deepen the savory flavor. - Fish sauce: For a unique twist, try a few drops. Adjust the sweetness and spice levels to your liking. If you want it sweeter, add more honey or agave syrup. To kick up the heat, increase chili oil carefully. Make your dish look as good as it tastes! Here are some creative serving suggestions: - Serve in elegant bowls or on a large platter for sharing. - Add a sprinkle of cilantro on top for color and freshness. Pair your noodles with side dishes or drinks. A simple cucumber salad can balance the spice. Enjoy with a cold drink, like iced tea or a light beer, to cool your palate. {{image_4}} You can easily boost your Spicy Garlic Chili Crisp Noodles with protein. Adding chicken or shrimp brings a savory touch. Just cook them before adding to the noodles. If you prefer plant-based options, tofu is a great choice. Choose firm tofu for the best texture. Simply sauté it until golden before mixing it in. For a vegan version, always check your sauces. Some may contain animal products. Adding veggies makes your dish colorful and healthy. Seasonal vegetables like bell peppers, carrots, or snap peas work well. You can also use frozen vegetables for convenience. Just make sure to thaw them first. When stir-frying, keep the heat high for a quick cook. This helps keep veggies crisp and bright. Add them right before the noodles to keep them fresh. Don’t be afraid to shake things up! Different oils can change the taste. Try using olive oil for a lighter flavor or peanut oil for a nutty twist. Vinegars also vary; rice vinegar is great, but a splash of apple cider vinegar gives a nice zing. Fresh herbs like basil or cilantro can add a new layer of flavor. Adding aromatics like scallions or lemongrass can make your dish stand out even more. To store your Spicy Garlic Chili Crisp Noodles, place them in an airtight container. This helps keep them fresh. You can store them in the fridge. They last up to three days. After that, the noodles may lose their texture. If you want to freeze the noodles, separate them from the sauce. Place each in a freezer-safe bag or container. You can freeze the noodles for up to one month. The sauce can also freeze well for the same time. When you're ready to eat, thaw the noodles in the fridge overnight. For the sauce, you can microwave it or heat it on the stove. To reheat your noodles, use the microwave or a skillet. If using a skillet, add a splash of water to keep them moist. Heat on low and stir often. This helps maintain the texture. To refresh the flavors, add a bit of soy sauce or chili oil. This gives the dish a fresh kick. Enjoy your tasty leftovers! You can use many types of noodles for this dish. Each type brings a unique texture and flavor. Here are some options: - Rice noodles: These are light and soak up flavors well. - Egg noodles: They add a rich taste and hold up nicely in the sauce. - Wheat noodles: These have a firm bite and are great for stir-frying. Choose the one you like best or have on hand. Each type works well with the spicy garlic sauce. Yes, you can easily make this dish vegan. Here’s how: - Honey: Replace honey with agave syrup or maple syrup for sweetness. - Chicken broth: Use vegetable broth instead of chicken broth, if your recipe includes it. - Soy sauce: Most soy sauces are vegan, but check the label to be sure. These swaps keep the flavors bold while making the dish plant-based. The spice level can vary based on your taste. The recipe includes chili oil, which gives it heat. You can control the spice by: - Adding less chili oil: Start with 1 tablespoon if you prefer mild heat. - Increasing chili oil: Add more if you love spice. - Mixing in fresh chilis: For extra kick, add sliced fresh chilis. This way, you can customize the heat to your liking. These noodles pair well with many dishes. Here are some great options: - Steamed vegetables: Broccoli or bok choy add color and nutrients. - Fried tofu: This adds protein and a nice texture contrast. - Spring rolls: They make a crunchy and fresh side. These sides complement the noodles and make for a complete meal. Enjoy experimenting! You now have all the tools needed to make Spicy Garlic Chili Crisp Noodles. With key ingredients and a step-by-step guide, creating this dish is easy. Remember to adjust the spice to fit your taste and add proteins or veggies for extra flavor. Proper storage keeps leftovers fresh, while reheating tips maintain texture. Enjoy experimenting with variations to make this recipe your own! Dive into your kitchen and savor each bite of your delicious creation.

If you crave a quick, bold dish that packs a punch, you’re in the right place. My Savory Spicy Garlic Chili Crisp Noodles are easy to make and bursting with …

Read more

Categories Dinner

Caramel Apple Overnight Oats Simple and Tasty Meal

October 18, 2025 by Chef Miles
- 1 cup rolled oats - 1 ½ cups almond milk - 1 medium apple, diced - 2 tablespoons caramel sauce - 1 tablespoon chia seeds The main ingredients create a hearty base. Rolled oats give you a good texture. Almond milk adds creaminess. Diced apples bring sweetness and crunch. Caramel sauce makes it a treat. Chia seeds add a nice pop and some health benefits. - 1 teaspoon ground cinnamon - 1 tablespoon maple syrup - Chopped nuts for topping Add-ins boost flavor and texture. Ground cinnamon gives warmth and spice. Maple syrup sweetens it just the right amount. Nuts add crunch and healthy fats. You can mix and match these to fit your taste. - Extra apple slices - Drizzling caramel sauce For serving, add more apple slices for freshness. A drizzle of caramel on top makes it extra special. These simple touches make your oats even more appealing. Enjoy every bite! 1. In a mixing bowl, mix these base ingredients well: - 1 cup rolled oats - 1 ½ cups almond milk - 1 medium apple, diced - 1 tablespoon chia seeds (optional) - 1 teaspoon ground cinnamon - 1 tablespoon maple syrup - A pinch of salt This mix creates a tasty and creamy base for your oats. 2. Next, drizzle 2 tablespoons of caramel sauce over the oat mixture. Use a spatula to gently fold in the caramel. Make sure to save some caramel for later. 3. Now, divide the mixture into two mason jars. This helps with serving later. Seal the jars tightly to keep the oats fresh. 4. Place the jars in the refrigerator overnight. You can also refrigerate them for at least 4-6 hours. This soaking time makes the oats soft and flavorful. 5. In the morning, take the jars out of the fridge. Give the oats a good stir. If you like it creamier, add a splash of almond milk to your taste. 6. Before serving, top the oats with these extras: - Chopped nuts, like walnuts or pecans - Extra apple slices - A drizzle of the reserved caramel sauce These toppings add crunch and sweetness, making your meal even better. - Choosing the right apple variety: I love using Honeycrisp apples. They are sweet and crunchy. You can also try Fuji or Gala apples for a similar taste. The right apple makes a big difference in flavor. - Adjusting sweetness with maple syrup: Maple syrup adds a nice touch. Start with one tablespoon, then taste. If you want more sweetness, add a little more. - The role of chia seeds: Chia seeds help thicken the oats. They absorb liquid and create a creamy texture. If you want a heartier meal, include one tablespoon. - Recommendations for milk types: Almond milk works great, but you can use any milk. Try oat milk or coconut milk for a fun twist. Each type adds its own flavor. - How long to prepare in advance: You can make these oats the night before. Prep them in just ten minutes. This lets flavors blend overnight. - Ideal refrigeration time: Refrigerate the jars for at least 4-6 hours. Overnight is best. This gives the oats time to soak up the milk and become soft. {{image_4}} You can change the flavor of your caramel apple overnight oats easily. Here are some fun ideas: - Adding different fruits: Try using berries, bananas, or pears. Each fruit adds a unique taste. - Incorporating nut butters: Peanut butter or almond butter can add creaminess and a rich flavor. Want to make it fit your diet? Here are some choices: - Using dairy-free options: Almond milk works great, but you can use oat milk or coconut milk too. - Low-sugar substitutes: Use sugar-free caramel or a natural sweetener like stevia instead of maple syrup. Seasonal changes can inspire new flavors in your oats: - Fall-inspired additions: Add pumpkin puree or spice up with nutmeg. These flavors celebrate autumn. - Summer fruit variations: Swap in peaches or mango for a refreshing taste in warmer months. Experiment with these ideas to make your overnight oats even more delightful! Store your caramel apple overnight oats in an airtight container. This keeps them fresh longer. I recommend using mason jars for a fun touch. Your oats will stay good in the fridge for up to three days. After that, they may lose their taste and texture. You can freeze your overnight oats for later use. To freeze, place the mixture in a safe container. Leave some space at the top, as oats expand when frozen. Thaw them overnight in the fridge before eating. You can warm them up in the microwave or enjoy them cold. Mason jars are great for more than just overnight oats. You can repurpose them for salads or snacks. This helps reduce waste and is good for the planet. Opt for glass containers when possible. They are durable and eco-friendly. Overnight oats are a simple way to prepare oatmeal. You combine rolled oats with liquid. The oats soak up the liquid overnight. This softens them and makes them ready to eat. You can add fruits, nuts, or sweeteners. The best part? You can customize them to fit your taste! Yes, you can use instant oats. However, they cook faster and may turn mushy. Rolled oats offer a chewy texture. They hold up better when soaked overnight. If you prefer a softer bite, go for instant oats. Just know they may not provide the same experience. To make this recipe vegan, simply swap almond milk with any plant-based milk. You can choose oat milk, soy milk, or coconut milk. For the caramel sauce, look for a vegan version or make your own. Use maple syrup instead of honey for sweetness. Absolutely! Overnight oats are perfect for meal prep. Prepare several jars at once for quick breakfasts. Store them in airtight containers. They last in the fridge for up to five days. Just give them a good stir before eating. Enjoy them cold or warm them up if you prefer. In this post, I covered key ingredients and steps for making delicious overnight oats. I shared tips for flavor, texture, and storage, ensuring a great result every time. You can customize your oats with different fruits, sweeteners, or toppings. Keep your oats fresh in the fridge or even freeze them for later. Experiment with variations that suit your taste. With these ideas, you’ll enjoy tasty, healthy breakfasts that fit your lifestyle. Now, it's time to get creative in your kitchen and make your perfect bowl of overnight oats!

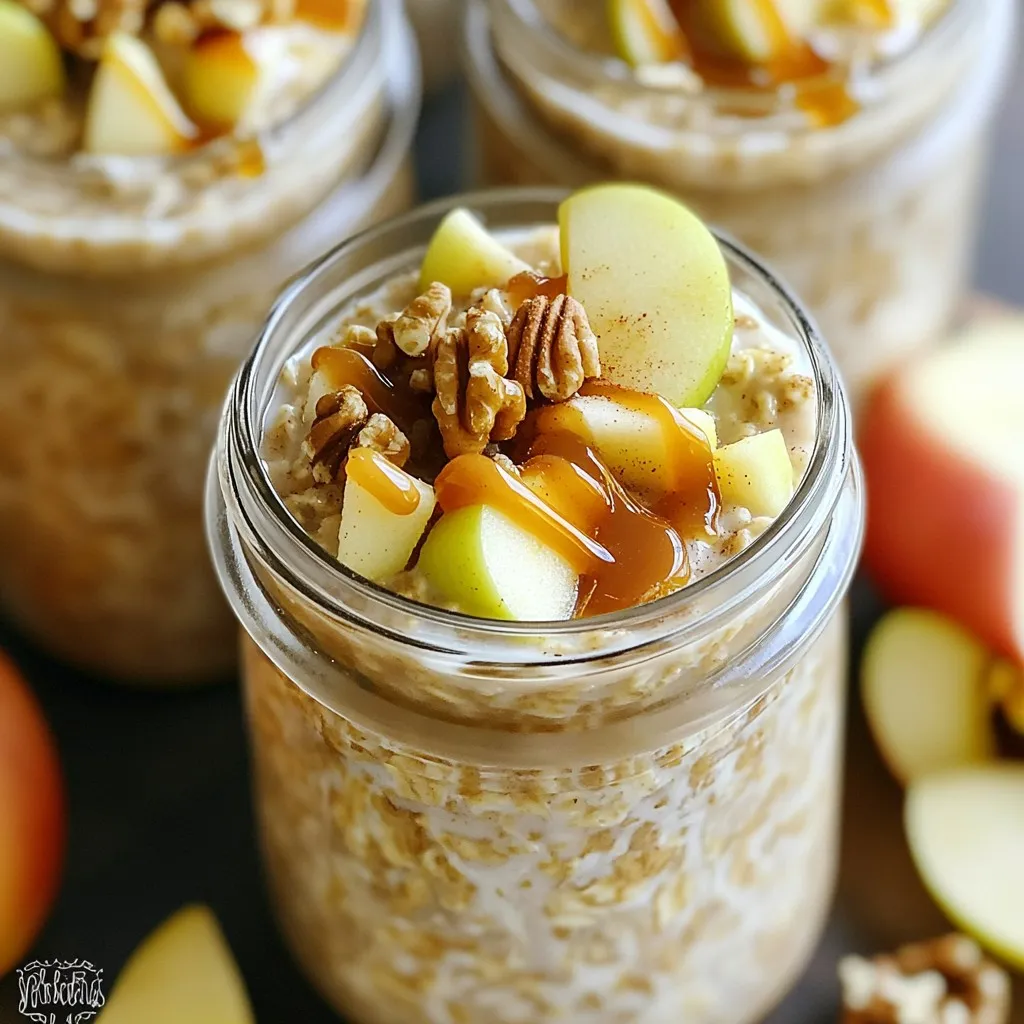
Are you ready to start your day with a tasty treat? Caramel Apple Overnight Oats are a simple way to enjoy breakfast. With just five main ingredients, you can create …

Read more

Categories Breakfast

One-Pot Mushroom Spinach Risotto Creamy Delight

October 18, 2025 by Chef Miles
- 1 cup Arborio rice - 1 cup fresh mushrooms, sliced (cremini or shiitake for best flavor) - 2 cups fresh spinach, roughly chopped - 1 medium onion, finely diced - 2 cloves garlic, minced - 4 cups vegetable broth - 3 tablespoons olive oil - 1/2 cup grated Parmesan cheese (or nutritional yeast) - Salt and black pepper to taste Gather these ingredients to make a creamy delight. The Arborio rice is key. It gives the risotto its creamy texture. Fresh mushrooms add a rich, earthy flavor. I suggest cremini or shiitake for the best taste. Spinach brightens the dish and adds nutrients. The aromatics are crucial too. The onion gives a sweet base, while the garlic adds depth. Olive oil helps to sauté, bringing out all the flavors. Next, the vegetable broth is your liquid hero. It brings moisture and richness to the dish. The Parmesan cheese melts into the risotto. It adds a lovely creaminess and umami flavor. If you want a vegan option, use nutritional yeast instead. Lastly, don’t forget salt and black pepper. These are essential for balancing the flavors. - Start by heating 3 tablespoons of olive oil in a large pot over medium heat. - Add 1 medium onion, finely diced. Cook for about 5 minutes until it turns soft and clear. - Next, add 2 cloves of minced garlic and 1 cup of sliced mushrooms. Cook for 3-4 minutes until the mushrooms soften and smell great. - Now it's time to add 1 cup of Arborio rice to the pot. Stir well to coat each grain with oil. - Toast the rice for 1-2 minutes while stirring. This step adds a nice depth of flavor. - Gradually pour in 2 cups of vegetable broth. Let it simmer gently while you stir often. - After about 10 minutes, when most of the broth is absorbed, add more broth, one cup at a time. - Keep stirring as you add the remaining broth. This usually takes 20-25 minutes total. Stirring helps create the creamy texture we love. - When the rice is tender but still has a slight bite, fold in 2 cups of chopped spinach and 1/2 cup of grated Parmesan cheese. - Stir until the spinach wilts and the cheese melts. Taste your risotto and season with salt and black pepper as needed. - Finally, let your risotto rest for a couple of minutes. This helps it thicken and brings all the flavors together. To get that creamy risotto, stir often. Stirring helps release the starch from the rice. This starch is key for creaminess. When you add broth, let the rice soak it up fully. Wait until most of the liquid is gone before adding more. This will take about 20-25 minutes. Each cup of broth needs time for absorption. Want to boost the flavor? Try adding fresh herbs like thyme or basil. A pinch of nutmeg adds warmth too. If you want a vegan dish, use nutritional yeast instead of cheese. It gives a nice cheesy taste without dairy. You can also sprinkle in some red pepper flakes for heat. Serve your risotto in warm bowls for a cozy feel. A sprinkle of fresh parsley adds color. You can also top with extra Parmesan cheese for richness. For a fancy touch, drizzle a bit of olive oil on top. This gives a nice shine and depth to the dish. {{image_4}} For a vegan option, swap out the cheese for nutritional yeast. This gives a cheesy taste without using dairy. You can also change the broth to a vegan option, if needed. For those needing gluten-free meals, use gluten-free vegetable broth. It works well and keeps the dish tasty. You can use different types of mushrooms. Try portobello or oyster mushrooms for unique flavors. If you want to switch up the greens, kale or arugula can be great choices. They add a different taste and texture. Just chop them roughly and mix them in as you would with spinach. Want more protein? Add cooked chicken or tofu. They blend well with the risotto. You can also add other veggies like peas, bell peppers, or zucchini. Just chop them up and toss them in with the mushrooms for more color and flavor. To keep your leftover risotto fresh, store it in an airtight container. Let it cool first before sealing. This helps prevent bacteria growth. You can safely eat the risotto for up to three days. Be sure to check for any off smells or changes in color before reheating. If you want to freeze the risotto, place it in a freezer-safe container. Leave some space at the top, as it will expand. Risotto can last up to three months in the freezer. When you’re ready to eat it, let it thaw in the fridge overnight. This makes reheating easier and safer. You can reheat risotto on the stovetop or in the microwave. For the stovetop, add a splash of vegetable broth or water. Stir it often to help restore creaminess. For the microwave, place the risotto in a bowl with a little extra liquid. Heat in short bursts, stirring in between, until warm. This keeps your risotto from drying out. Cooking risotto takes about 30 to 40 minutes. Here’s how it breaks down: - Prep time: 10 minutes to gather and chop ingredients. - Cooking time: 20 to 30 minutes for stirring and adding broth. - Resting time: A couple of minutes to thicken. Yes, you can use different rice, but Arborio rice is best. It has a high starch content that makes risotto creamy. Other options include: - Carnaroli: Creamier than Arborio. - Vialone Nano: Absorbs liquid well and stays firm. - Short-grain rice: Will work, but results may vary. Mushroom spinach risotto pairs well with several dishes. Here are some ideas: - Green salad: A fresh, crisp salad adds a nice contrast. - Grilled chicken: This adds protein and balances flavors. - Garlic bread: Perfect for soaking up any extra sauce. - Roasted vegetables: Adds color and nutrients to your meal. This post explained how to make a tasty mushroom spinach risotto. We covered the key ingredients, like Arborio rice and fresh veggies. You learned easy steps to achieve perfect creaminess and how to add your own twist. Remember to try different mushrooms or greens for a fun touch. Proper storage and reheating keep your leftovers just as good. Enjoy cooking this dish and share your results!

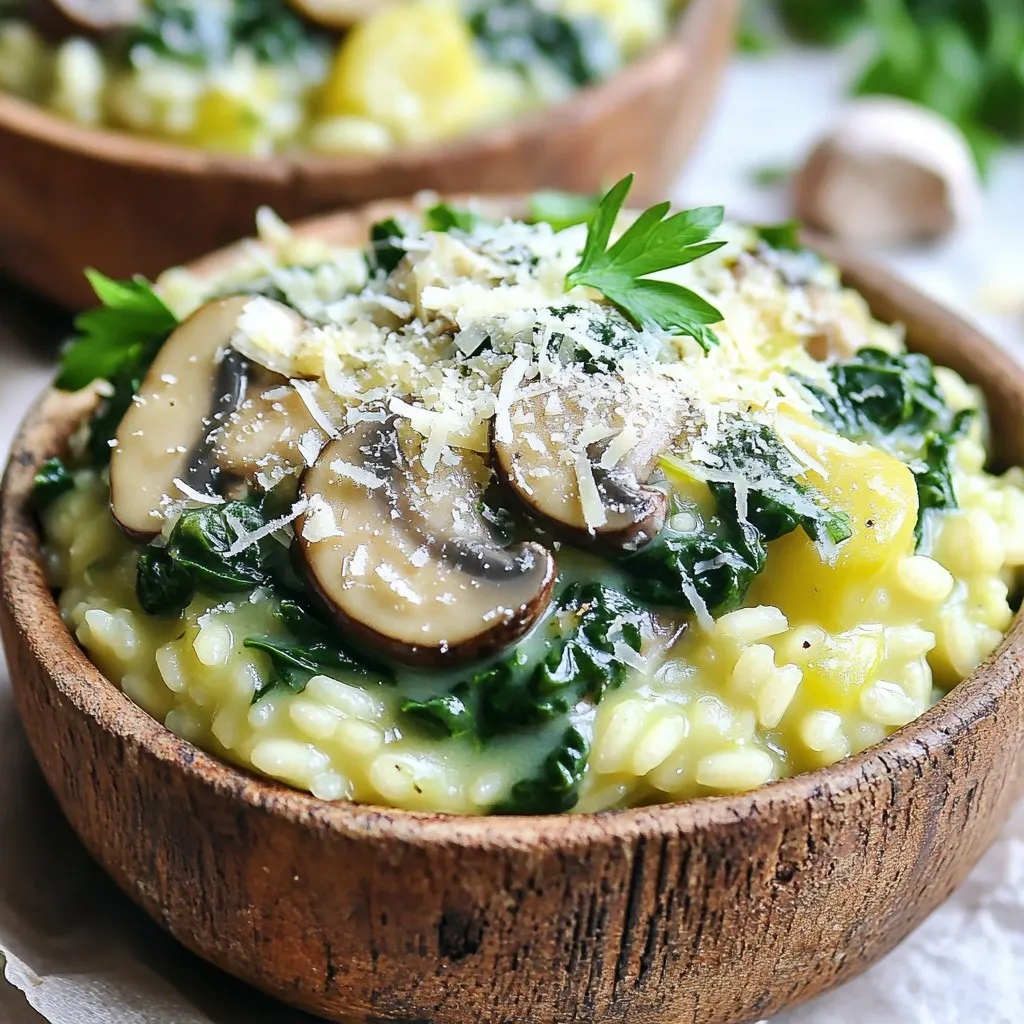
Welcome to your new favorite comfort dish: One-Pot Mushroom Spinach Risotto! This creamy delight combines fresh mushrooms and spinach to create a rich, satisfying meal—all in one pot. Whether you’re …

Read more

Categories Dinner

Slow Cooker Teriyaki Beef & Broccoli Flavorful Delight

October 18, 2025 by Chef Miles
- 2 pounds beef chuck, cut into 1-inch cubes - 1 cup low-sodium soy sauce - 1/2 cup honey - 1/4 cup rice vinegar - 1 tablespoon fresh ginger, minced - 2 cloves garlic, minced - 1 tablespoon sesame oil - 1 teaspoon red pepper flakes (optional) - 4 cups broccoli florets, fresh or frozen - 1 tablespoon cornstarch - 2 tablespoons water - Sesame seeds for garnish - Cooked rice for serving When I cook, I always start with quality ingredients. For this dish, beef chuck shines through. This cut is juicy and tender when cooked slowly. The soy sauce adds a salty kick, while honey brings sweetness. Rice vinegar balances the flavors perfectly. Aromatics like ginger and garlic give depth. Minced ginger adds warmth, while garlic gives a strong flavor. Sesame oil introduces a nutty taste, and red pepper flakes can spice things up. Broccoli adds a fresh crunch to this dish. It’s nice to use fresh, but frozen works too. Cornstarch thickens the sauce, giving it the right texture. Water helps mix it in smoothly. Don’t forget sesame seeds for garnish! They add a lovely crunch. Serve everything over warm rice. This meal is both hearty and packed with flavor. To start, grab a medium bowl. Whisk together the soy sauce, honey, rice vinegar, minced ginger, minced garlic, and sesame oil. This sauce is the heart of your dish. It adds sweet and savory notes that make the beef shine. Next, take your cubed beef chuck and place it in the slow cooker. Pour the teriyaki sauce over the beef. Make sure each piece is well-coated. This step ensures that the beef absorbs all those tasty flavors as it cooks. Now it’s time to cook. Cover the slow cooker with its lid. You can choose to cook on low for 6 to 8 hours. If you’re in a hurry, cook on high for 3 to 4 hours. Either way, the beef will become tender and juicy. About 30 minutes before serving, add the broccoli florets to the slow cooker. Gently stir them in with the beef. This allows the broccoli to soak up some of that delicious teriyaki sauce while keeping its bright color. In a small bowl, mix the cornstarch and water to create a smooth slurry. Add this mixture to the slow cooker about 15 minutes before the dish is done. This step will thicken the sauce, making it rich and perfect for serving. Once the cooking time is up, it’s time to serve. Spoon the tender beef and broccoli over warm cooked rice. Don’t forget to garnish each bowl with sesame seeds. They add a nice crunch and look great on the plate. When making teriyaki beef, the best cut of meat is beef chuck. It has enough fat, which makes it tender. Cut the beef into 1-inch cubes. This size helps it cook evenly. You can also use brisket or round, but chuck is my top choice for flavor and tenderness. To get the best teriyaki taste, balance the sweetness and tang. You can add more honey for sweetness. If you prefer a tangy flavor, increase the rice vinegar. Taste the sauce as you mix. Adjust it until you find your perfect blend. Adding a pinch of red pepper flakes gives a nice kick, too! Broccoli should stay bright and crispy. Add it to the slow cooker about 30 minutes before serving. This timing helps the broccoli cook without becoming mushy. Stir it gently with the beef to mix the flavors. For extra color, you can use fresh broccoli florets instead of frozen. This keeps it vibrant and appealing. {{image_4}} You can swap beef for chicken or tofu. Chicken thighs work well for a juicy bite. Simply cut them into pieces and follow the same steps. For tofu, use firm or extra-firm tofu. Press it to remove extra water, then cut it into cubes. Add the tofu to the slow cooker with the sauce. It will soak up the flavors nicely. While broccoli is a star, you can add other veggies too. Carrots, bell peppers, and snap peas pair great with teriyaki. Slice them thin for quick cooking. Add these vegetables about 30 minutes before the dish is done. This keeps them bright and crunchy. If you need a gluten-free option, use tamari as a soy sauce substitute. It has a similar taste without gluten. For thickening, arrowroot powder works instead of cornstarch. Mix it with water just like you would with cornstarch. This keeps the sauce thick and rich, just like you want! To store leftovers safely, let the teriyaki beef and broccoli cool to room temperature. Then, transfer it to an airtight container. Make sure to seal it tightly. Store in the fridge for up to four days. When you are ready to eat, check for any signs of spoilage before reheating. To freeze your teriyaki beef and broccoli, place the cooled dish in a freezer-safe container. Leave some space at the top for expansion. You can freeze it for up to three months. For best results, label the container with the date. When you want to enjoy it, thaw it overnight in the fridge. Reheat the teriyaki beef and broccoli on the stove or in the microwave. If using the stove, warm it over medium heat in a pan. Stir often to keep it from burning. If you use the microwave, heat it in short bursts. Stir between intervals to ensure even warming. Add a splash of water if it looks too dry. This keeps the flavor and texture just right. To add some heat, use red pepper flakes. You can add one or two teaspoons based on your taste. If you want more spice, try fresh sliced chili peppers. You could also add a dash of hot sauce to the teriyaki sauce. Start with a small amount and taste as you mix. This way, you can control the spice level just right for you. Yes, you can use frozen beef. Just remember to thaw it first. This helps the meat cook evenly. Slow cooking frozen beef may take longer. It can lead to uneven cooking. Thawing ensures the beef absorbs all the teriyaki flavor. If you’re in a hurry, you can cook it from frozen. Just adjust the time. Cook on high for 4 to 5 hours instead. This dish pairs well with cooked rice. You can use either white or brown rice. For a twist, try serving it with noodles. A simple green salad also complements the flavors. You might like steamed dumplings as a side too. Just keep your sides light. This way, the teriyaki flavor shines through. This recipe for Slow Cooker Teriyaki Beef & Broccoli is simple and delicious. We covered main ingredients, aromatic seasonings, and the cooking steps to make this dish shine. You learned tips to choose the best beef and adjust flavors. Also, we explored variations and smart storage methods. Now it’s time to enjoy your tasty meal and impress family or friends. With these tips, you can make a dish that everyone will love!

Are you ready to impress your family with a delicious meal that cooks itself? My Slow Cooker Teriyaki Beef & Broccoli is packed with flavor and easy to make. With …

Read more

Categories Dinner

Salted Maple Pecan Cookie Bars Easy and Tasty Treat

October 18, 2025 by Chef Miles
- 1 cup unsalted butter, softened to room temperature - 1 cup packed brown sugar - 1/2 cup granulated sugar - 1/2 cup pure maple syrup - 2 large eggs - 2 teaspoons pure vanilla extract - 3 cups all-purpose flour - 1 teaspoon baking soda - 1/2 teaspoon fine salt - 1 cup pecans, roughly chopped - 1/2 teaspoon flaky sea salt, for topping You can use salted butter if you prefer a salty-sweet combo. Just skip the flaky sea salt on top. If you need a nut-free option, try sunflower seeds or pumpkin seeds instead of pecans. They offer a nice crunch and flavor. For a vegan twist, swap the eggs for flax eggs. Mix 1 tablespoon of ground flaxseed with 2.5 tablespoons of water for each egg. Using high-quality ingredients makes a big difference in taste. Fresh butter adds creaminess, while pure maple syrup gives a rich flavor. Opt for fresh pecans for the best crunch and nutty taste. Quality ingredients not only enhance flavor but also elevate the overall texture of your cookie bars. When you choose the best, your treats will shine! First, preheat your oven to 350°F (175°C). This is key for even baking. Line a 9x13 inch baking dish with parchment paper. Leave some paper hanging over the sides. This helps lift the bars out later. In a large bowl, mix 1 cup of softened butter with 1 cup of brown sugar and 1/2 cup of granulated sugar. Use an electric mixer to beat until it’s light and fluffy. This takes about 3-4 minutes. Next, add in 1/2 cup of pure maple syrup, 2 large eggs, and 2 teaspoons of vanilla extract. Mix it all until smooth. In another bowl, whisk together 3 cups of all-purpose flour, 1 teaspoon of baking soda, and 1/2 teaspoon of fine salt. Gradually add this dry mix to the wet ingredients. Stir just until combined, being careful not to overmix. Finally, fold in 1 cup of roughly chopped pecans. Press the dough evenly into the lined baking dish. Use a spatula to smooth the top. Now, place the dish in your preheated oven. Bake for 20-25 minutes. Keep an eye on the edges—they should turn golden brown. To check for doneness, insert a toothpick into the center. If it comes out clean, the bars are ready. As soon as they are out of the oven, sprinkle the top with 1/2 teaspoon of flaky sea salt. This adds a perfect touch of flavor. Let the bars cool in the pan for 15-20 minutes. To know if your cookie bars are done, look at the edges. They should be golden brown. If you insert a toothpick, it should come out clean. If it has wet batter, bake a little longer. Remember, every oven is different, so keep checking! Once they cool a bit, lift them out of the pan using the parchment paper. Place the bars on a wire rack to cool completely before slicing. Enjoy your salted maple pecan cookie bars! When making salted maple pecan cookie bars, avoid these common mistakes: - Overmixing the dough: Mix just until combined. Overmixing makes the bars tough. - Skipping the parchment paper: This helps lift the bars out easily. Don’t skip it! - Not measuring ingredients accurately: Use proper measuring cups for best results. To get soft and chewy cookie bars, follow these tips: - Use room temperature butter: This helps create a light and fluffy mix. - Don’t overbake: Check at 20 minutes. The edges should be golden, and a toothpick should come out clean. - Cool before slicing: Let the bars cool completely for the best texture and easy cutting. These cookie bars shine when served right. Here are some ideas: - Drizzle with extra maple syrup: This adds a sweet touch and looks nice. - Top with whole pecans: This gives a nice crunch and a lovely look. - Pair with a scoop of vanilla ice cream: The warm bars and cold ice cream are a treat! {{image_4}} You can swap pecans for other nuts. Try walnuts, almonds, or hazelnuts. Each nut brings a different flavor and crunch. You can also add chocolate chips or dried fruit for a twist. This makes the bars fun and unique. Want a different taste? Add spices like cinnamon or nutmeg for warmth. A splash of almond extract gives a nice twist as well. You can even mix in some citrus zest for brightness. Each change will make your cookie bars special and tasty. To make these cookie bars gluten-free, use a gluten-free flour blend. This will keep the bars soft and chewy. For vegan options, swap eggs for flax eggs or applesauce. Use a plant-based butter and maple syrup to stay true to flavors. These changes make the recipe fit many diets without losing taste. To keep your salted maple pecan cookie bars fresh, store them in an airtight container. You can layer the bars with parchment paper to avoid sticking. They will stay fresh at room temperature for up to five days. If you want to keep them longer, consider refrigerating them. Freezing these cookie bars is simple and effective. Cut the bars into squares first. Then, wrap each piece tightly in plastic wrap. Place the wrapped bars into a freezer-safe bag or container. They can last in the freezer for up to three months. When you are ready to enjoy them, just thaw in the fridge overnight. To reheat, place a bar on a microwave-safe plate. Heat for about 10-15 seconds. This warms the bars without making them dry. You can also warm them in the oven. Preheat the oven to 350°F (175°C). Place the bars on a baking sheet and heat for about five minutes. Enjoy them warm for a soft, gooey treat! Yes, you can! If you want a sweeter taste, use all brown sugar. This adds a rich flavor. You can also mix brown sugar with coconut sugar. This gives a nice twist. Just remember, it may change the texture a bit. Look for golden edges. The center should look set and not jiggly. A toothpick test works well. Insert a toothpick into the middle. If it comes out clean, they are done! You can get creative! Try adding chocolate chips or white chocolate chunks. Dried fruit like cranberries or cherries add a nice touch too. Drizzle extra maple syrup on top for a sweet finish. Yes, you can! Bake the bars and let them cool completely. Then, wrap them tightly in plastic wrap. Store them in the fridge for up to one week. You can also freeze them for up to three months. Just make sure to thaw them in the fridge before serving. We covered key points about making great cookie bars. You learned about the best ingredients, step-by-step instructions, and tips to avoid common mistakes. Quality ingredients make a big difference. Consider variations for unique flavors and dietary needs. Storage tips help keep your cookie bars fresh longer. Remember, you can mix and match ingredients to suit your taste. Enjoy baking and experimenting with your favorite treats!

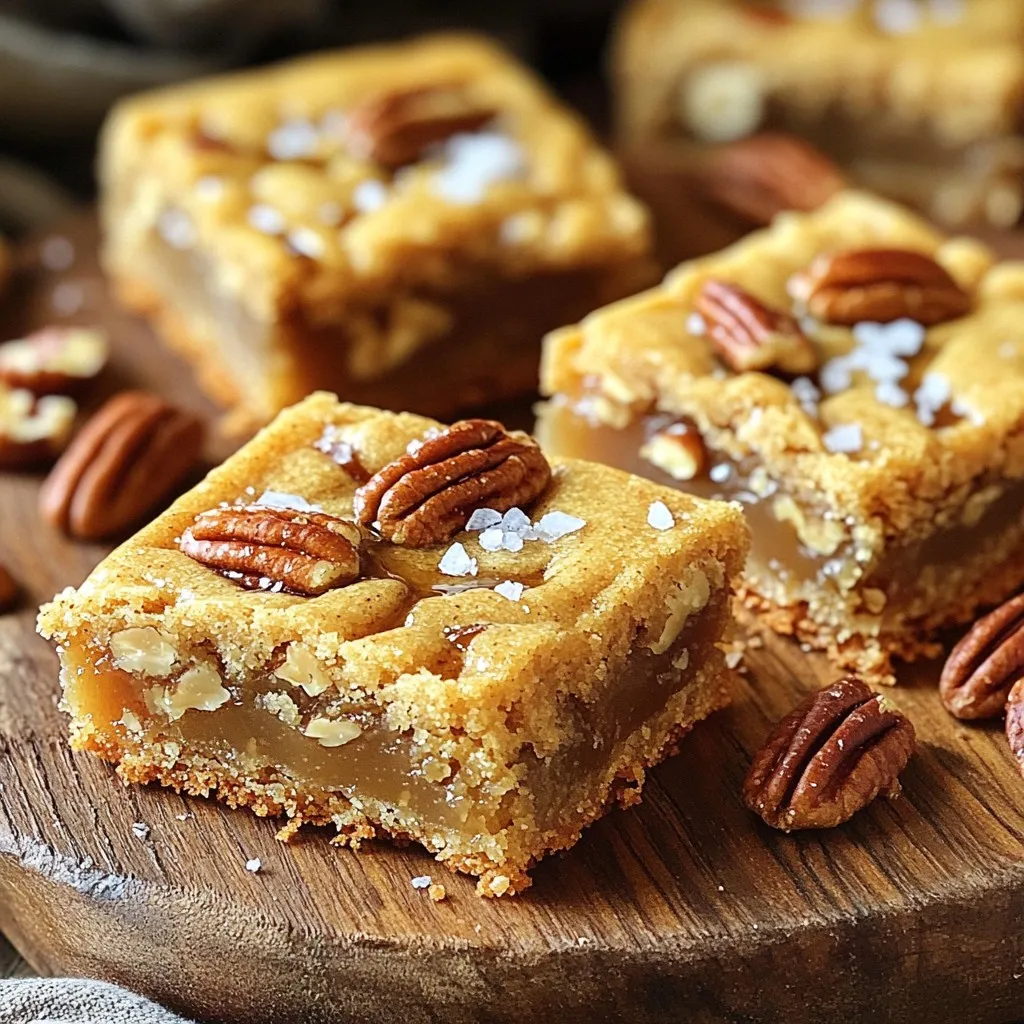
Get ready to indulge in a sweet and crunchy delight with my Salted Maple Pecan Cookie Bars! This easy treat combines rich maple flavor with crunchy pecans and a hint …

Read more

Categories Desserts

Minute Honey Butter Ramen Quick and Tasty Meal

October 15, 2025 by Chef Miles
- 2 packs of instant ramen noodles - 2 tablespoons unsalted butter - 2 tablespoons honey - 1 teaspoon garlic powder - 1 teaspoon soy sauce - 1 green onion, finely chopped - 1/2 teaspoon sesame seeds (optional for garnish) - Salt and pepper to taste You can add extra flavors with simple garnishes. Use chopped green onions for freshness. Sesame seeds add a nice crunch. You can also try a lime wedge for a zesty touch. These small additions make your dish look and taste even better. If you run out of something, don't worry! You can swap ingredients easily. Use olive oil instead of butter if needed. Maple syrup works well if you don’t have honey. You can also use fresh garlic instead of garlic powder. If you want a different taste, try tamari instead of soy sauce for a gluten-free option. These swaps still keep the dish tasty and enjoyable. First, grab a medium pot. Fill it with water and bring it to a boil. Once the water bubbles, add the instant ramen noodles. Cook them for 3 to 4 minutes. You want them tender but still a bit firm. This is called al dente. When they're ready, drain the noodles in a colander. Save about 1/4 cup of the cooking water. This water helps later. While your noodles cook, it's time to make the honey butter sauce. Take a small saucepan and put it on low heat. Add 2 tablespoons of unsalted butter and 2 tablespoons of honey. Stir them together as the butter melts. Keep stirring until the mix is smooth. This step is key to blend flavors. Now, add 1 teaspoon of garlic powder and 1 teaspoon of soy sauce. Stir well and let it simmer for one minute. Once done, remove it from the heat. Now comes the fun part. Put the drained noodles back into the pot. Pour the honey butter sauce over the noodles. Use the reserved cooking water to adjust the sauce. You want it saucy but not too runny. Toss the noodles gently to coat them evenly. Taste your dish and add salt and pepper as needed. Remember, the soy sauce adds salt, so be careful. Lastly, serve the honey butter ramen in bowls. Top with chopped green onions and sesame seeds for crunch. Enjoy your quick and tasty meal! To get the right sauce for your Minute Honey Butter Ramen, you can tweak it easily. If your sauce is too thick, add a little of the reserved cooking water. This helps thin it out and makes it coat the noodles better. Start with a tablespoon and mix well. Keep adding until it feels just right. You can make this dish even better with a few simple tricks. Try adding a pinch of chili flakes for heat. If you like a fresh taste, squeeze some lime juice over the noodles before serving. A bit of grated ginger can add a nice kick too. Don’t hesitate to experiment with different toppings like crushed peanuts or fresh herbs. Using the right tools can make cooking easier. A medium pot is perfect for boiling your noodles. You’ll also need a colander to drain them without a mess. For the sauce, a small saucepan works best. Lastly, a good set of tongs can help you mix the noodles and sauce without breaking them. These tools will help you create a delicious dish with ease. {{image_4}} You can make Minute Honey Butter Ramen even better by adding proteins. Chicken is a great choice. Simply cook the chicken first, then add it to the noodles. Tofu is another option. Use firm tofu for the best texture. Cut it into cubes and pan-fry until golden. Then, toss it in with the noodles. Both options add flavor and make this dish more filling. While the honey butter sauce is tasty, you can switch it up. Try adding sriracha for a spicy kick. Mix a tablespoon into the honey butter sauce for heat. You can also use teriyaki sauce. Simply replace the soy sauce with teriyaki. This change gives a sweet and savory twist. Experimenting with sauces lets you find your favorite flavor. The classic instant ramen noodles work well, but there are many choices. You can use udon noodles for a thicker bite. Cook them according to package instructions before adding the sauce. Rice noodles are another option. They are gluten-free and have a nice chew. Cook them in boiling water, then mix them with the honey butter sauce. Choosing different noodles can change the entire dish. Enjoy exploring these options! After enjoying your Minute Honey Butter Ramen, store any leftovers in an airtight container. Let the noodles cool before sealing them. This helps keep their taste fresh. Place the container in the fridge. Use the leftovers within two days for the best flavor. To reheat, add the noodles to a pot over low heat. Add a splash of water to keep them moist. Stir gently until warm. You can also use a microwave. Place the noodles in a bowl with a bit of water. Cover and heat for one minute. Check if they are warm and stir well. Freezing is not ideal for this dish. The texture of the noodles can change when thawed. If you must freeze, place the cooled noodles in a freezer bag. Squeeze out as much air as possible. Use within one month for the best taste. When ready to eat, thaw in the fridge overnight before reheating. Yes, you can use other noodles! Spaghetti, udon, or soba work well too. Just cook them as per their package instructions. Each type brings its own texture and taste. Experiment with your favorites for fun variations. This recipe is not gluten-free as it uses instant ramen noodles. However, you can swap the noodles for gluten-free options, like rice noodles. Always check the label to ensure it fits your diet. Enjoy your dish without worry! To spice up your ramen, add chili flakes or sriracha. A splash of hot sauce during cooking brings heat. You can also toss in sliced jalapeños for extra kick. Adjust the spice level to your taste for a fun twist. This article covered essential ingredients, step-by-step cooking, and helpful tips. You learned how to adjust flavors and use various noodles. We discussed storage and answered common questions about the recipe. In your kitchen, you can create a tasty dish that fits your needs. Experiment with variations and enjoy your cooking adventure. Remember, cooking should be fun and rewarding. Happy cooking!

Craving a quick and tasty meal? You’ll love Minute Honey Butter Ramen! This dish combines sweet honey butter with rich noodles for a flavor explosion in every bite. It’s easy …

Read more

Categories Dinner

No-Bake Chocolate Espresso Cheesecake Delight

October 15, 2025 by Chef Miles
- 1 1/2 cups chocolate cookie crumbs - 5 tablespoons unsalted butter, melted - 16 oz cream cheese, softened to room temperature - 1 cup powdered sugar - 1/2 cup sour cream - 1/2 cup heavy whipping cream - 1 tablespoon instant espresso powder - 1 teaspoon vanilla extract - 8 oz dark chocolate, melted and cooled slightly - Optional: chocolate shavings and espresso beans for garnish - Chocolate cookie crumbs: 1 1/2 cups - Unsalted butter: 5 tablespoons - Cream cheese: 16 oz - Powdered sugar: 1 cup - Sour cream: 1/2 cup - Heavy whipping cream: 1/2 cup - Instant espresso powder: 1 tablespoon - Vanilla extract: 1 teaspoon - Dark chocolate: 8 oz You can add a beautiful touch with: - Chocolate shavings - Espresso beans These ingredients create a creamy, rich cheesecake with a bold espresso flavor. The crust is made from chocolate cookie crumbs mixed with melted butter. This gives a tasty base that pairs well with the filling. The cream cheese adds creaminess, while the sour cream balances with a slight tang. The dark chocolate and espresso powder make this dessert truly special. You can enjoy it plain or with some lovely garnishes for a nice finish. To start, you need to make the crust. In a medium bowl, mix 1 ½ cups of chocolate cookie crumbs with 5 tablespoons of melted butter. Stir this well. You want every crumb to be coated in butter. This creates a moist mix. Next, grab a 9-inch springform pan. Pour the crumb mixture into the pan. Use the back of a measuring cup or your fingers to press it down. You should have a nice, even layer. Now, place the crust in the fridge to chill while you make the filling. For the filling, take a large bowl and add 16 ounces of softened cream cheese. Use an electric mixer to beat it on medium speed. Aim for a creamy texture. This should take about 2-3 minutes. Then, slowly sprinkle in 1 cup of powdered sugar. Mix on low speed. You want no lumps! Next, add in ½ cup of sour cream. Blend it until smooth. Now, in a small bowl, dissolve 1 tablespoon of instant espresso powder in hot water. Pour this into the cream cheese mix, along with 1 teaspoon of vanilla extract. Mix until just combined. Then, gradually fold in 8 ounces of melted dark chocolate. Use a spatula to blend until the color is uniform. In another bowl, whip ½ cup of heavy cream until stiff peaks form. This takes about 3-5 minutes. Be careful not to over-whip! Gently fold the whipped cream into the chocolate espresso filling in three parts. Make sure to incorporate it well until you see no streaks. Now it's time to assemble! Pour the rich filling over the chilled crust. Use a spatula to smooth the top evenly. Cover the springform pan tightly with plastic wrap. Put it in the fridge for at least 4 hours. This helps the cheesecake set well. Once set, carefully remove the sides of the springform pan. For a touch of flair, you can garnish with chocolate shavings and espresso beans before serving. Enjoy your no-bake chocolate espresso cheesecake! To create a smooth and creamy cheesecake, start with room-temperature cream cheese. Cold cream cheese can lead to lumps. Beat the cream cheese until it is silky before adding other ingredients. When folding in whipped cream, do it gently to keep the air in. This helps create a light texture. Chill the cheesecake for at least four hours. This time allows it to set properly. One common mistake is not chilling the crust enough. A warm crust can make the filling too soft. Another error is overmixing the filling. This can add too much air and change the texture. Avoid adding hot melted chocolate directly to the cream cheese. Let it cool slightly to prevent melting the filling. Lastly, don’t skip the espresso powder. It adds depth and richness to the flavor. You will need a 9-inch springform pan for this cheesecake. A medium mixing bowl is great for the crust. Use a large mixing bowl for the filling. An electric mixer helps achieve a smooth texture quickly. A spatula is handy for folding ingredients together. Finally, keep plastic wrap on hand to cover the cheesecake while it chills. {{image_4}} You can switch things up with fun flavors. Try adding orange zest for a citrusy kick. A pinch of cinnamon can give your cheesecake a warm spice. You might also mix in some mint extract for a fresh taste. Each twist makes the cheesecake unique and delightful. To make this cheesecake gluten-free, use gluten-free chocolate cookies for the crust. For a vegan option, swap cream cheese for a plant-based cheese. Use coconut cream instead of heavy cream. Replace powdered sugar with a vegan sweetener. These adjustments keep the taste great while fitting diet needs. Toppings can change the look and taste of your cheesecake. Try fresh berries for a fruity touch. Shaved chocolate makes it look fancy and adds richness. You can also use crushed nuts for crunch. Drizzle with caramel or chocolate sauce for added sweetness. To keep your no-bake chocolate espresso cheesecake fresh, store it in the fridge. First, cover the cheesecake tightly with plastic wrap. This keeps moisture in and odors out. Place it on a flat surface to avoid any shifts. It’s best to eat the cheesecake within a few days for the best taste. If you have leftovers, you can freeze the cheesecake. Slice it into individual pieces for easy serving later. Wrap each slice in plastic wrap and then place them in a freezer-safe container. This way, you will protect it from freezer burn. When you’re ready to eat, thaw it in the fridge overnight for the best texture. The shelf life of your no-bake cheesecake is around 5 to 7 days in the fridge. However, if properly frozen, it can last up to 2 months. Just remember, the sooner you enjoy it, the better the flavor and texture. Yes, you can use milk chocolate or semi-sweet chocolate. Each type gives a different taste. Milk chocolate makes it sweeter, while semi-sweet brings a nice balance. You can also try white chocolate for a unique twist. Just keep in mind that the flavor will change. The cheesecake needs to chill for at least four hours. This time helps it set properly. If you can, chill it overnight. This extra time makes it even better. A well-chilled cheesecake is creamy and firm. You can use Greek yogurt or cream cheese instead of sour cream. Greek yogurt gives a similar tangy flavor. Cream cheese will make the filling richer and thicker. Both options work well in this recipe. To check if the cheesecake is set, gently touch the top. It should feel firm, not jiggly. If it still wobbles, give it more chilling time. Once set, you can easily cut and serve it. This guide covered all aspects of making a no-bake chocolate espresso cheesecake. You learned about key ingredients, simple steps, and helpful tips to create the perfect dessert. I shared fun variations to suit different tastes. Remember to store your cheesecake properly to keep it fresh. With practice, you'll make a delicious cheesecake every time. Enjoy impressing family and friends with your baking skills!

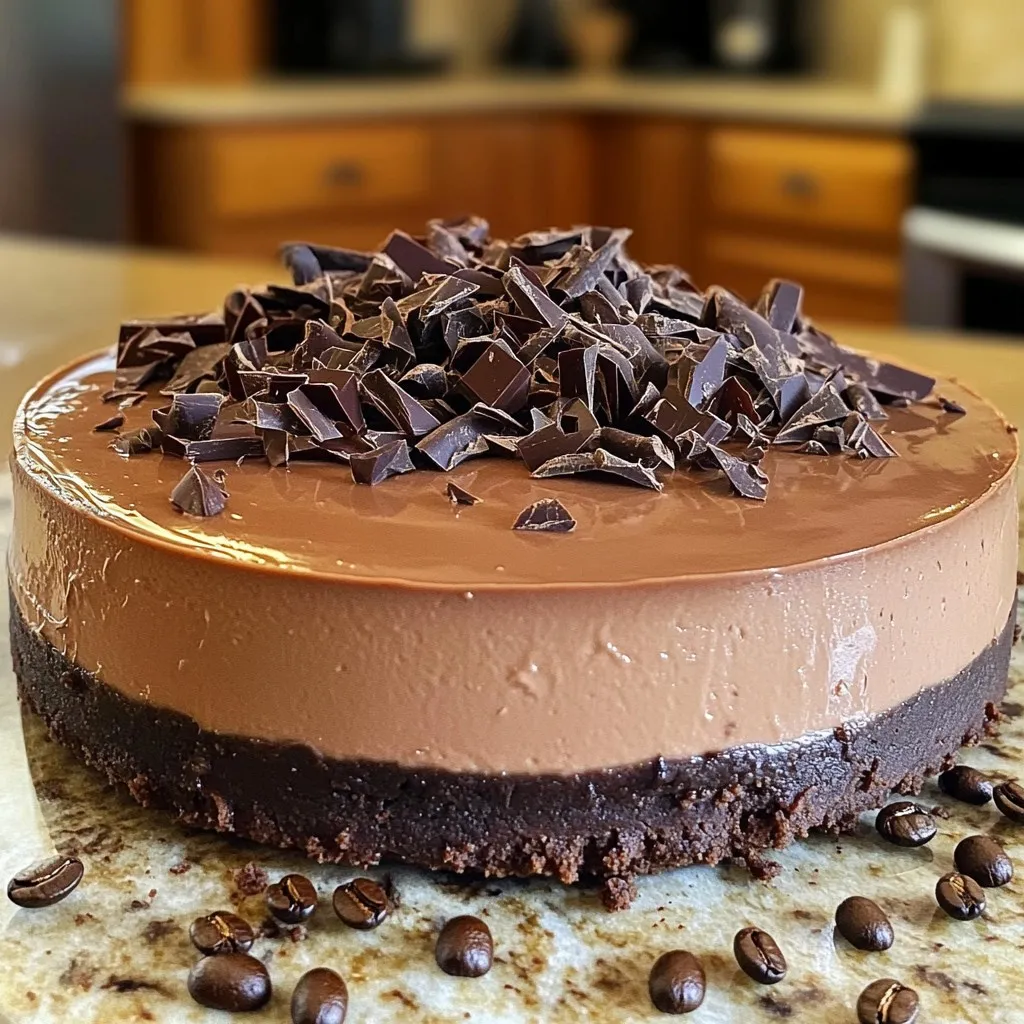
Craving something sweet yet easy to make? Dive into the rich world of my No-Bake Chocolate Espresso Cheesecake Delight. This treat combines the bold flavors of chocolate and espresso for …

Read more

Categories Desserts

Sheet Pan Lemon Dijon Chicken & Veggies Delight

October 15, 2025 by Chef Miles
- 4 bone-in chicken thighs, skin-on - 2 tablespoons Dijon mustard - 3 tablespoons olive oil, divided - 1 lemon, zested and juiced - 1 teaspoon garlic powder - 1 teaspoon onion powder - 1 teaspoon smoked paprika - Salt and black pepper, to taste - 2 cups baby potatoes, halved - 1 cup cherry tomatoes, halved - 1 cup green beans, trimmed - Fresh parsley, for garnish Olive oil and seasoning are key to this dish. Olive oil adds flavor and helps with cooking. It also helps the chicken skin get crispy. Choosing skin-on chicken thighs is important. The skin keeps the chicken moist. It adds great flavor when roasted. The skin will turn golden and crispy. This adds a nice texture to your meal. Make sure to season your veggies well with salt and pepper. This helps them absorb flavor while they roast. Using fresh, seasonal vegetables makes the dish even better. Enjoy the bright colors and fresh tastes! First, grab a mixing bowl. In it, whisk together these ingredients for the marinade: - 2 tablespoons Dijon mustard - 2 tablespoons olive oil - Juice and zest from 1 lemon - 1 teaspoon garlic powder - 1 teaspoon onion powder - 1 teaspoon smoked paprika - Salt and black pepper to taste Mix them well until smooth. The marinade adds bold flavors to the chicken and veggies. Marinate the chicken for at least 15 minutes. This time helps the flavors soak in well. Next, take a large sheet pan. Place the halved baby potatoes in the center. Drizzle them with 1 tablespoon of olive oil. Sprinkle with salt and smoked paprika. Toss them gently to coat. Now, place the marinated chicken thighs around the potatoes, skin-side up. Keep space between each piece. This helps them cook evenly. Finally, scatter the halved cherry tomatoes and green beans around the chicken and potatoes. Drizzle the remaining marinade over everything. Toss the veggies gently to coat them. Set your oven to 425°F (220°C) and let it preheat. Once hot, put the sheet pan in the oven. Bake for 35-40 minutes. Look for the chicken to be golden brown and fully cooked. The internal temperature should reach 165°F (74°C). The veggies will be tender and flavorful. Stir the veggies halfway through cooking for even roasting. You can make your marinade even better! Try adding honey or maple syrup for sweetness. A splash of soy sauce gives a savory touch. If you love heat, add a pinch of red pepper flakes. If you have leftover marinade, use it safely. Do not pour it over cooked food right away. Instead, heat it in a pan to kill any germs. This way, you can enjoy all that great flavor without worry. To get crispy chicken skin, pat the skin dry with a paper towel before cooking. This helps remove moisture. Also, make sure the chicken is skin-side up in the oven. This position allows the fat to render and crisp up the skin. For perfectly roasted veggies, cut them into even sizes. This helps them cook at the same rate. Toss them in oil and spices before baking. Stir them halfway through cooking to ensure even roasting. You can serve this dish in two ways. For a rustic feel, leave it right on the sheet pan. Let your guests serve themselves. It makes for a casual, fun meal. For a more elegant look, plate individual servings. Drizzle some pan juices over each dish, adding color and flavor. Finish with fresh parsley for a pop of green. It makes your meal look beautiful and inviting. {{image_4}} You can swap chicken thighs for other cuts. Chicken breasts or drumsticks work well. Breasts cook faster, so check them sooner. Drumsticks add more flavor but may take longer. Keep an eye on cooking times. You want the chicken juicy and tender. Feel free to add more veggies. Bell peppers and zucchini are great choices. They bring color and flavor. If you choose softer vegetables, like zucchini, reduce cooking time. Aim for about 25-30 minutes instead. Crunchy veggies like carrots or Brussels sprouts may need a bit more time. Just check for tenderness as they cook. You can get creative with flavors. Try different mustards like spicy brown or honey mustard. Each adds a unique twist. Citrus fruits like lime or orange can brighten the dish too. For heat, add red pepper flakes or cayenne. This adds depth and makes the dish exciting. Use spices to suit your taste and have fun! To keep your Sheet Pan Lemon Dijon Chicken and veggies fresh, store them in a sealed container. It will help keep moisture in and prevent drying out. Place the dish in the fridge within two hours of cooking. This meal lasts about three to four days in the fridge. Make sure to label the container with the date you made it. When you’re ready to enjoy the leftovers, you can reheat them in the oven or microwave. For the oven, preheat it to 350°F (175°C). Place the chicken and veggies on a baking sheet and cover with foil. Heat for about 20 minutes, or until warm. The foil helps keep the chicken juicy. If using a microwave, place the food in a microwave-safe dish. Heat in one-minute bursts, stirring in between, until hot. If you want to save this dish for later, you can freeze it too. First, let the chicken and veggies cool completely. Then, place them in a freezer-safe bag or container. Remove as much air as possible to prevent freezer burn. This meal can last up to three months in the freezer. When ready to eat, thaw it overnight in the fridge. To reheat, follow the same oven or microwave instructions as above. Yes, you can use boneless chicken. Boneless chicken cooks faster and is easier to eat. However, bone-in chicken gives more flavor and keeps the meat moist. If you choose boneless chicken, reduce the cooking time by about 10 minutes. If you dislike Dijon mustard, there are good alternatives. You can use yellow mustard, honey mustard, or even a mix of mayonnaise and lemon juice. Each option changes the flavor a bit, so pick one that you like. To check chicken doneness, use a meat thermometer. The safe internal temperature is 165°F (74°C). You can also look for clear juices and no pink meat. The skin should be golden brown and crispy for the best taste. This recipe combines simple ingredients with easy steps to create a tasty meal. You learned how to prepare marinated chicken with vibrant veggies, ensuring they roast perfectly. Remember, marinating adds depth to flavors, and using fresh herbs can elevate your dish. Try different veggies and spices for unique twists. Storing leftovers properly helps maintain taste, so don’t waste any! Cooking should be fun, so experiment and enjoy the process. Your next great meal is just a recipe away!

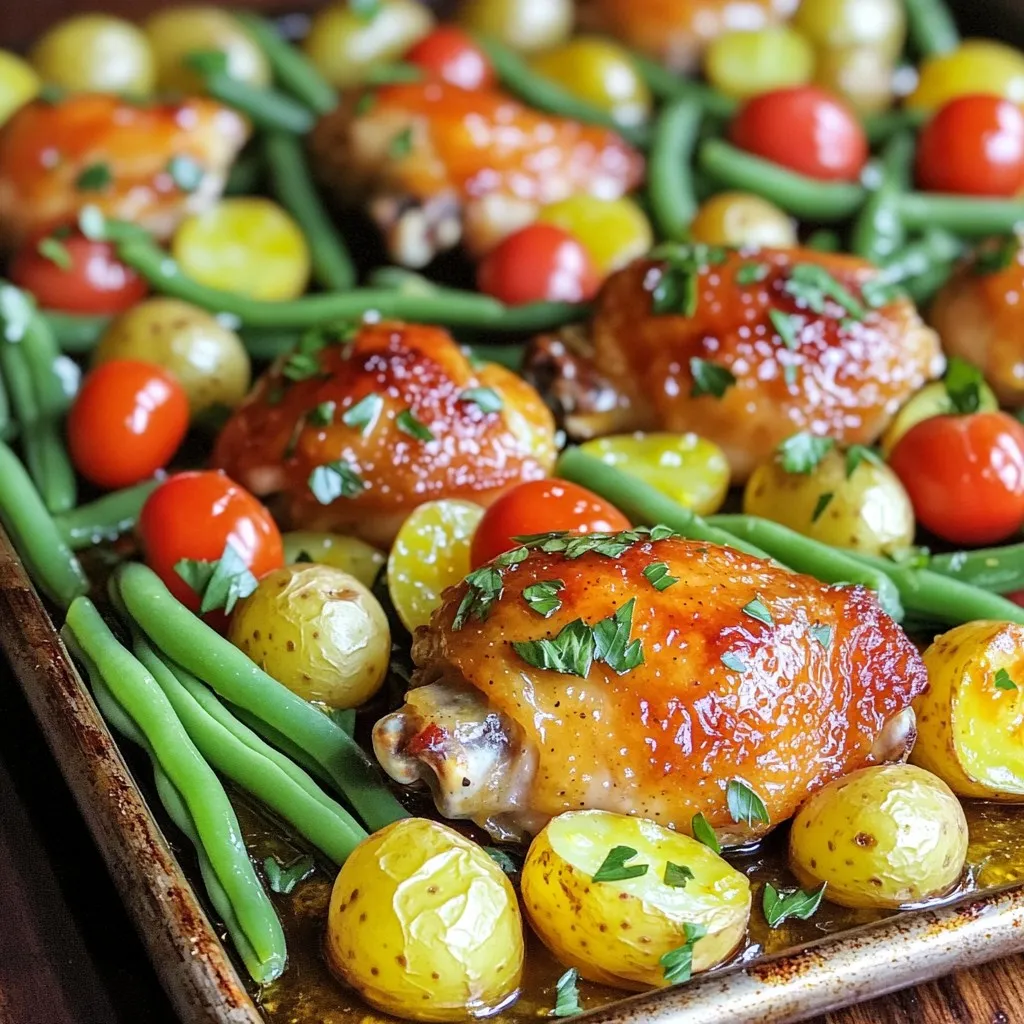
Ready for a quick, savory meal that’s packed with flavor? My Sheet Pan Lemon Dijon Chicken & Veggies Delight brings together juicy chicken thighs and colorful vegetables, all baked to …

Read more

Categories Dinner
Older posts
Newer posts
← Previous Page1 … Page4 Page5 Page6 … Page110 Next →

MELTED RECIPES

where delicious ideas melt into life, from stovetop to backyard. Always warm, simple, and irresistibly satisfying. 🍳🔥🧀

PAGES

Home About Contact Privacy Policy Terms & Conditions Cookie Policy GDPR Policy Copyright Policy Disclaimer

CATEGORIES

Appetizers Desserts Salads Breakfast Dinner

Contact

  • Pinterest
  • Mail
Copyright © 2025 Melted Recipes. All rights reserved.