Pumpkin Protein Muffins Healthy and Simple Recipe
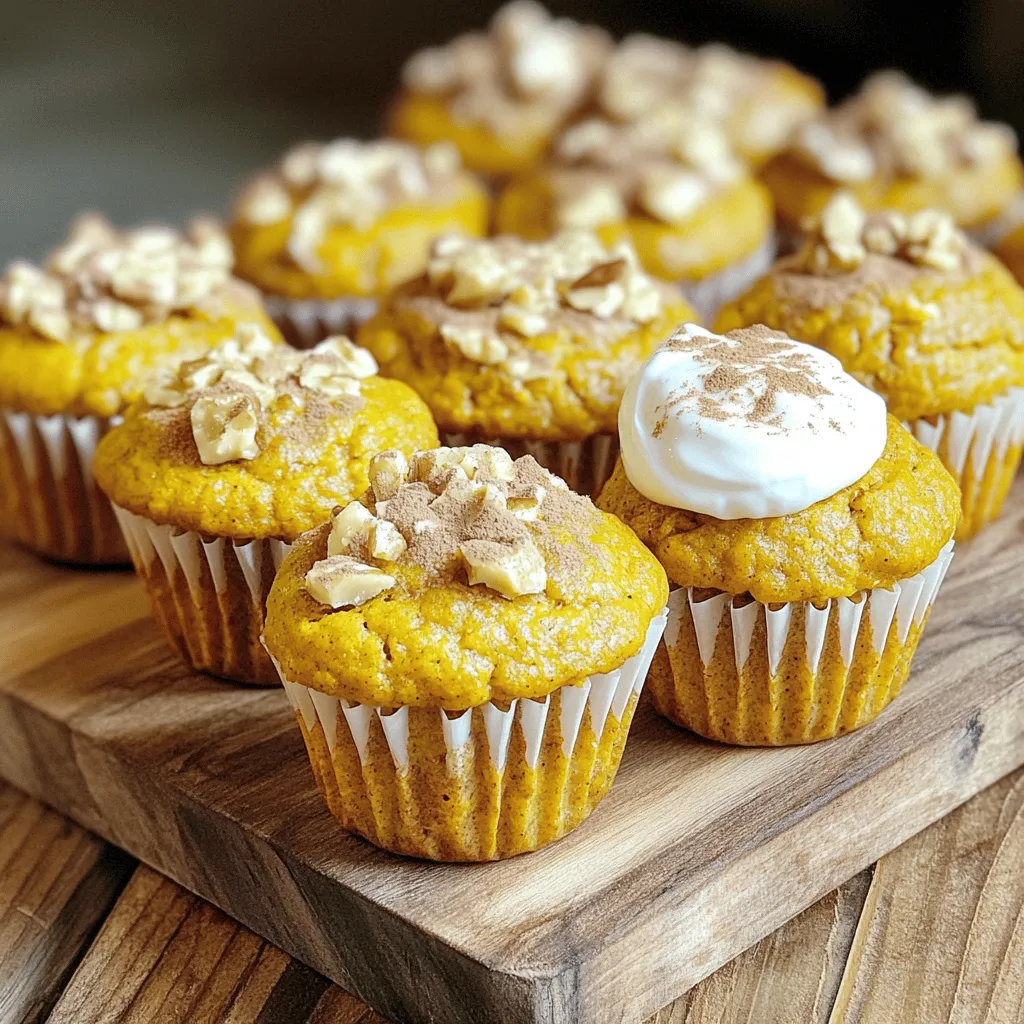
Looking for a delicious snack that’s also healthy? You’ll love my Pumpkin Protein Muffins! These simple muffins are packed with nutrients and flavor. I’ll show you all the ingredients you …

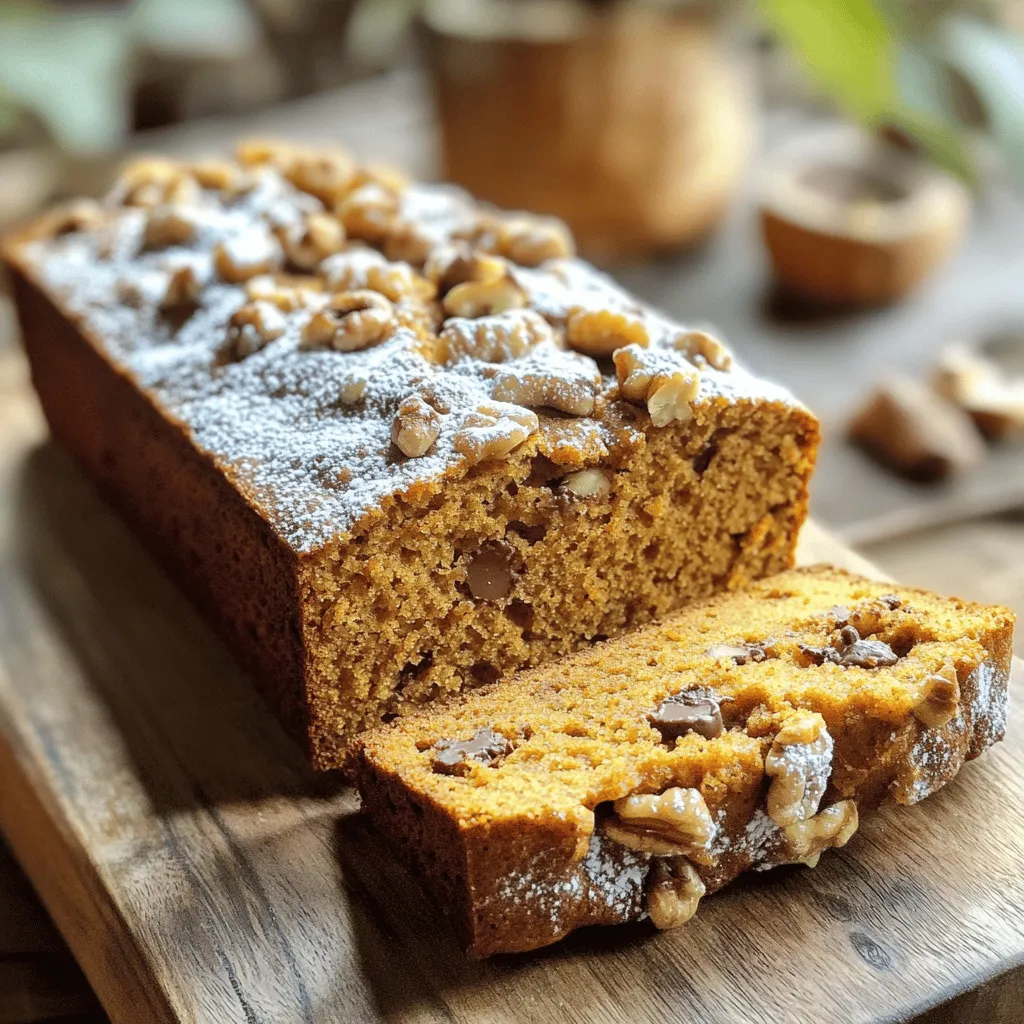
![To make the Harry Potter Butterbeer Cake, you need some tasty ingredients. Here’s what you will need: - 2 cups all-purpose flour - 1 ½ cups granulated sugar - 1 tablespoon baking powder - ½ teaspoon salt - 1 cup buttermilk, at room temperature - ½ cup unsalted butter, melted and slightly cooled - 3 large eggs, at room temperature - 2 teaspoons vanilla extract - 1 teaspoon butterscotch extract - 1 cup butterscotch chips - 1 cup heavy cream, chilled - ¼ cup powdered sugar - 1 teaspoon vanilla extract (for whipped cream topping) - Additional butterscotch sauce, for drizzling Each ingredient plays an important role in making the cake taste great. For example, the all-purpose flour gives structure. The sugar adds sweetness, while the buttermilk keeps the cake moist. The extracts bring that magical butterbeer flavor, and the butterscotch chips add delightful bursts of sweetness. This cake is not just for Harry Potter fans. It's a fun treat for everyone. You can even use this full recipe to impress your friends and family. Enjoy baking! Start by preheating your oven to 350°F (175°C). While it heats, take two 9-inch round cake pans. Grease them with butter and dust with flour. Tap out any extra flour to avoid sticking. In a big bowl, whisk together the dry ingredients. Combine 2 cups of all-purpose flour, 1 ½ cups of granulated sugar, 1 tablespoon of baking powder, and ½ teaspoon of salt. Mix until there are no lumps. In another bowl, mix the wet ingredients. Add 1 cup of buttermilk, ½ cup of melted butter, and 3 eggs. Also, stir in 2 teaspoons of vanilla extract and 1 teaspoon of butterscotch extract. Whisk until smooth. Now, slowly pour the wet mix into the dry mix. Use a spatula to stir gently. Be careful not to over-mix. This can change the cake's texture. Next, fold in 1 cup of butterscotch chips. Make sure they spread evenly in the batter. Pour the batter into the prepared pans. Smooth the tops with a spatula. Place the pans in the oven and bake for 25-30 minutes. To check if they're ready, insert a toothpick in the center. If it comes out clean, they are done. Once baked, let the cakes cool in the pans for 10 minutes. Then, transfer them to a wire rack to cool fully. While your cakes cool, prepare the whipped cream. In a mixing bowl, combine 1 cup of chilled heavy cream, ¼ cup of powdered sugar, and 1 teaspoon of vanilla extract. Beat it with an electric mixer until soft peaks form. Be careful not to whip it too much. When the cakes are cool, place one layer on a serving plate. Spread a good amount of whipped cream on top. Then, carefully place the second layer on top. Decorate by spreading more whipped cream on the second layer. Finally, drizzle butterscotch sauce over it. For a special touch, sprinkle more butterscotch chips on top. Enjoy this magical treat from the full recipe! To achieve a perfect cake texture, always measure your ingredients accurately. Use a kitchen scale for the best results. When mixing the dry and wet ingredients, mix just until combined. Over-mixing can lead to a dense cake. Let your ingredients sit at room temperature before mixing. This helps the batter blend well and rise properly. Having the right tools makes baking easier and more fun. Here are some must-haves: - Mixing bowls (various sizes) - Whisk and spatula - Measuring cups and spoons - 9-inch round cake pans - Electric mixer for whipping cream - Toothpick to check cake doneness A stunning presentation makes your cake even more special. After assembling, add a generous layer of whipped cream on top. Drizzle butterscotch sauce over the whipped cream for a sweet touch. Sprinkle extra butterscotch chips on top for texture. Serve each slice with a side of whipped cream and a drizzle of sauce. This makes an enchanting treat that looks as good as it tastes. For the full recipe, check out the details above! {{image_4}} You can add a twist to the classic Butterbeer cake by making it chocolatey. To do this, swap out half of the all-purpose flour for cocoa powder. This will give your cake a rich chocolate flavor that pairs well with the butterscotch. You can still follow the [Full Recipe] for the rest of the ingredients. The result? A delightful chocolate Butterbeer cake that feels magical! If you need a gluten-free option, you can use a gluten-free flour blend instead of all-purpose flour. Make sure the blend has xanthan gum in it. This will help the cake rise and hold its shape. The butter and butterscotch flavors will shine through just as brightly. Your friends will never guess it's gluten-free! While the whipped cream topping is great, you can try other frostings too. Cream cheese frosting adds a tangy flavor that complements the cake well. For a richer option, use a butterscotch frosting by mixing butterscotch chips with butter and powdered sugar. This gives the cake a decadent touch. Each variation brings a new taste experience to your Butterbeer cake! To store leftover cake, first, let it cool completely. Then, wrap each slice in plastic wrap. Place the wrapped slices in a cake box or airtight container. This helps keep the cake moist and fresh. You can store it in the fridge for up to five days. If you don't want to eat it all right away, consider freezing some portions. Freezing is a great way to save Butterbeer cake for later. Slice the cake before freezing. Wrap each slice tightly in plastic wrap, then place them in a freezer bag. Make sure to remove as much air as possible before sealing. Label the bag with the date. The cake can last up to three months in the freezer. When you're ready to enjoy, just take out a slice! To reheat the cake, you can use the microwave. Place a slice on a microwave-safe plate. Heat it for about 10 to 15 seconds. If you prefer, you can use the oven. Preheat the oven to 350°F (175°C). Wrap the slice in foil and warm it for about 10 minutes. This keeps the cake moist. After reheating, add some fresh whipped cream and butterscotch sauce for extra delight. Butterbeer cake has a sweet and rich flavor. It blends butterscotch and vanilla well. You’ll enjoy a moist cake with creamy whipped topping. The butterscotch chips add bursts of flavor. Each bite feels like a warm hug. Yes, you can make this cake ahead of time. Bake the cakes and cool them completely. Wrap them tightly in plastic wrap. Store in the fridge for up to three days. You can also freeze the cakes for longer storage. This cake lasts about three to four days at room temperature. If you store it in the fridge, it can last up to a week. Be sure to keep it covered to maintain freshness. You can make a buttermilk substitute easily. Mix one cup of milk with one tablespoon of vinegar or lemon juice. Let it sit for five minutes. This mixture will work well in the recipe. Absolutely! This recipe is perfect for a layered cake. Just bake two layers as the recipe shows. Then, stack them with whipped cream in between. It creates a stunning dessert for any occasion. Butterbeer comes from the Harry Potter series. It is a popular drink among wizards. The drink is served at the Three Broomsticks Inn in Hogsmeade. It is a blend of butterscotch and cream flavors, making it delightful! For the full recipe to create this magical Butterbeer Cake, refer to the Full Recipe. You learned how to make a delicious Butterbeer Cake. We covered key ingredients, steps, and tips. Baking this cake is fun and easy. You can also try fun variations, like gluten-free options. Don’t forget to store leftovers properly. Enjoying this cake will impress your friends and family. I hope you feel ready to bake and share this tasty treat!](https://meltedrecipes.com/wp-content/uploads/2025/08/065955af-a408-4ab8-a43b-18041bc81625.webp)
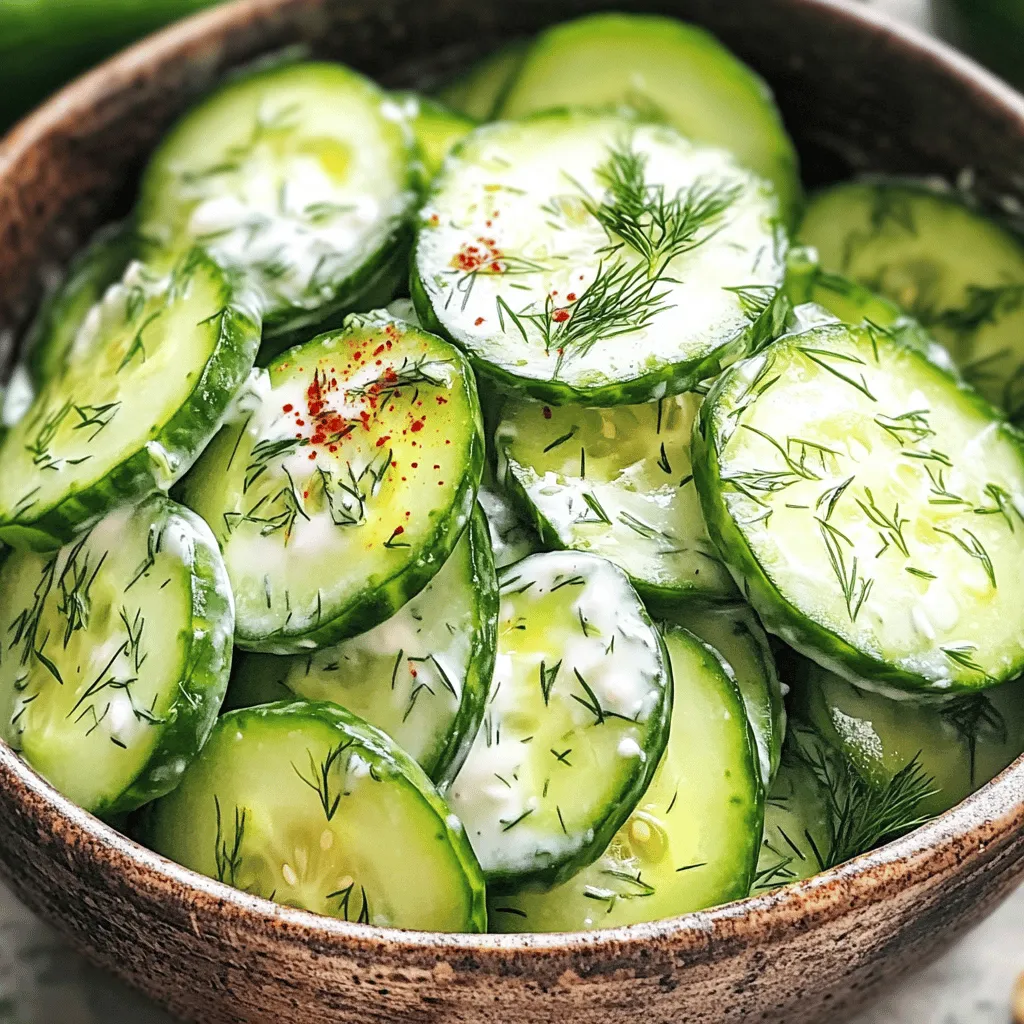
![To make Tik Tok Korean Cucumber Salad, you need fresh and simple ingredients. Here’s the list: - 2 medium cucumbers, washed and thinly sliced - 1 teaspoon salt - 2 tablespoons sesame oil - 1 tablespoon soy sauce - 1 tablespoon rice vinegar - 2 teaspoons gochugaru (Korean red pepper flakes) - 1 tablespoon sugar - 1 garlic clove, finely minced - 2 green onions, finely chopped - 1 tablespoon sesame seeds, plus extra for garnish These ingredients come together to create a crunchy and flavorful salad. The cucumbers provide a refreshing base, while the dressing brings the heat and tang. I love using gochugaru for a spicy kick. It really makes this dish pop. The sesame oil adds a nutty flavor, and the sugar balances the spice. The garlic gives it depth, while the green onions add a fresh taste. Don’t forget the sesame seeds—they add a nice crunch. This recipe is quick and easy, perfect for a light meal or side dish. You can find the full details on how to prepare this salad in the [Full Recipe]. Enjoy the burst of flavors in every bite! - Start by slicing the cucumbers thinly. Use two medium cucumbers. - Place them in a bowl and sprinkle one teaspoon of salt over them. - Toss the cucumbers gently so all slices get some salt. - Let them rest for 30 minutes. This step helps draw out excess moisture. - After resting, rinse the cucumbers well under cold water. - Drain and pat them dry with a clean paper towel. - In a small bowl, add two tablespoons of sesame oil. - Pour in one tablespoon of soy sauce and one tablespoon of rice vinegar. - Add two teaspoons of gochugaru, one tablespoon of sugar, and one minced garlic clove. - Whisk these ingredients together until the mixture is smooth. - Add the drained cucumbers to the bowl with the dressing. - Toss them gently to coat each cucumber slice. - Then, mix in two finely chopped green onions and one tablespoon of sesame seeds. - Stir carefully to keep the cucumbers intact. - Let the salad sit at room temperature for at least 10 minutes. - This resting time helps the flavors blend and enhances the taste. - You can serve the salad chilled or at room temperature. - Garnish with extra sesame seeds for a nice touch. For the full recipe, check out Crispy Kickin' Korean Cucumber Salad. For the best Tik Tok Korean cucumber salad, use Persian or English cucumbers. These types are crisp and less bitter. Thin slicing is key. It allows the cucumbers to soak up the flavor. Slice them about a quarter-inch thick for the right texture. Adjust spice levels with gochugaru to fit your taste. Start with two teaspoons, then add more if you like heat. You can also add extra toppings. Try crushed peanuts for crunch or shredded carrots for sweetness. Both will give your salad a nice extra layer of flavor and texture. {{image_4}} You can add proteins to your salad for a heartier dish. Tofu works well for a vegan option. Simply cube the tofu and toss it in with the cucumbers. For a meatier choice, grilled chicken adds great flavor. Slice the chicken thin and mix it in. This turns your salad into a full meal. Switching up the dressing can change the taste of your salad. You might try using olive oil instead of sesame oil. Olive oil adds a different richness that many enjoy. For vinegars, rice vinegar is common, but try apple cider vinegar for a tangy twist. Each change creates a new flavor experience. Feel free to add seasonal veggies to your salad. Radishes bring a crunchy bite, while carrots add sweetness. Slice them thin and mix them in with the cucumbers. These additions not only change the taste but also boost the nutrition. You can customize the salad based on what’s fresh and available. For the full recipe, check out the detailed instructions above! To keep your Tik Tok Korean cucumber salad fresh, store it in the fridge. Use an airtight container to lock in flavors and moisture. Glass containers work great, as they don't retain odors. If you use plastic, make sure it is BPA-free. Your salad stays tasty for about 3 days in the fridge. After that, the cucumbers lose their crunch and may become soggy. Always check for any off smells or changes in color before eating leftovers. I do not recommend freezing cucumber salad. Freezing changes the texture of cucumbers, making them mushy. Instead, enjoy this salad fresh for the best taste and crunch. If you want to prepare ahead, try making the dressing separately and mix it with fresh cucumbers later. Tik Tok Korean Cucumber Salad is a fresh, crunchy dish. It features thinly sliced cucumbers mixed with a flavorful sauce. The sauce includes sesame oil, soy sauce, and gochugaru. This salad is known for its bold flavors and bright colors. It makes a great side dish or snack, perfect for any meal. Let the salad rest for at least 10 minutes. This time allows the flavors to blend. You can also let it sit longer for a stronger taste. Just keep it at room temperature during this time. This step enhances the overall flavor and makes it even tastier. Yes, you can prepare this salad ahead of time. Make it up to a day in advance. Store it in an airtight container in the fridge. The cucumbers will stay fresh, and the flavor will deepen. Just remember to toss it gently before serving. This keeps the salad looking nice and appetizing. You can easily swap some ingredients. For a gluten-free option, use tamari instead of soy sauce. If you're vegan, the recipe is already vegan-friendly. You can also add other veggies like carrots or radishes. Feel free to get creative while keeping the essence of the salad intact. For the full recipe, check out the Crispy Kickin' Korean Cucumber Salad. In this article, we covered how to make Tik Tok Korean Cucumber Salad. We listed the ingredients, detailed each step, and shared helpful tips. You learned about storing leftovers and tweaking the recipe. This salad is quick, fresh, and perfect for any meal. Whether you choose to enhance it with proteins or try different dressings, there are many ways to enjoy it. Now, gather your ingredients and dive into this easy, tasty recipe. Enjoy your delicious creation!](https://meltedrecipes.com/wp-content/uploads/2025/08/82ea7a65-18eb-4680-9f82-4cad52d4e6dc.webp)