Pumpkin Spice Milk Creamy and Cozy Fall Drink

As the leaves start to change, it’s time to cozy up with a comforting drink. Pumpkin Spice Milk is creamy, warm, and the perfect treat for fall. In this guide, …
As the leaves start to change, it’s time to cozy up with a comforting drink. Pumpkin Spice Milk is creamy, warm, and the perfect treat for fall. In this guide, …

Looking for a delicious dish that packs a flavor punch? Fiesta Lime Chicken with Avocado is the answer! This easy recipe blends marinated chicken with a fresh avocado salad, bringing …

Are you ready to elevate your salad game? This Mexican Corn Salad, a fresh and flavorful delight, will wow your taste buds. With sweet corn, vibrant veggies, and a creamy …
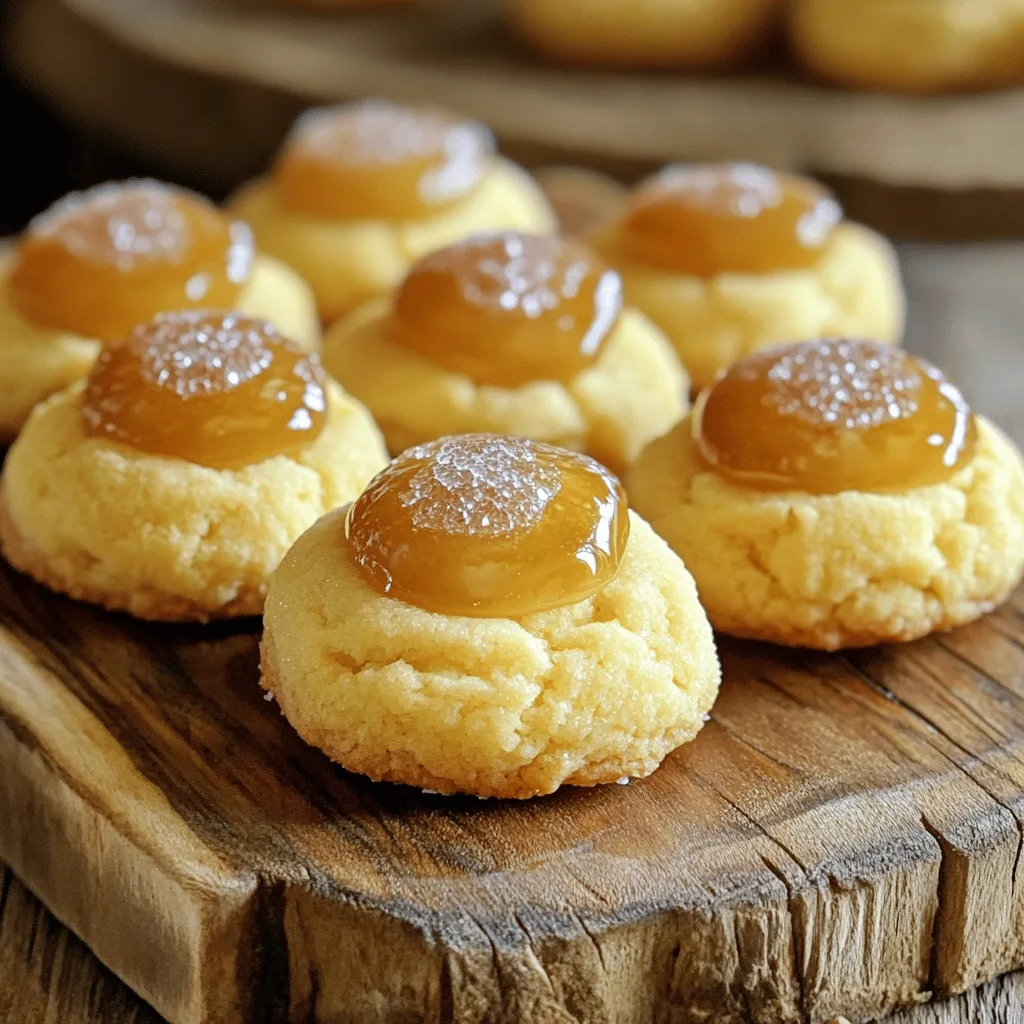
Crème Brûlée Cookies are a sweet treat that combines the classic dessert’s creamy goodness with the joy of cookies. You’ll love how easy they are to make, with just a …
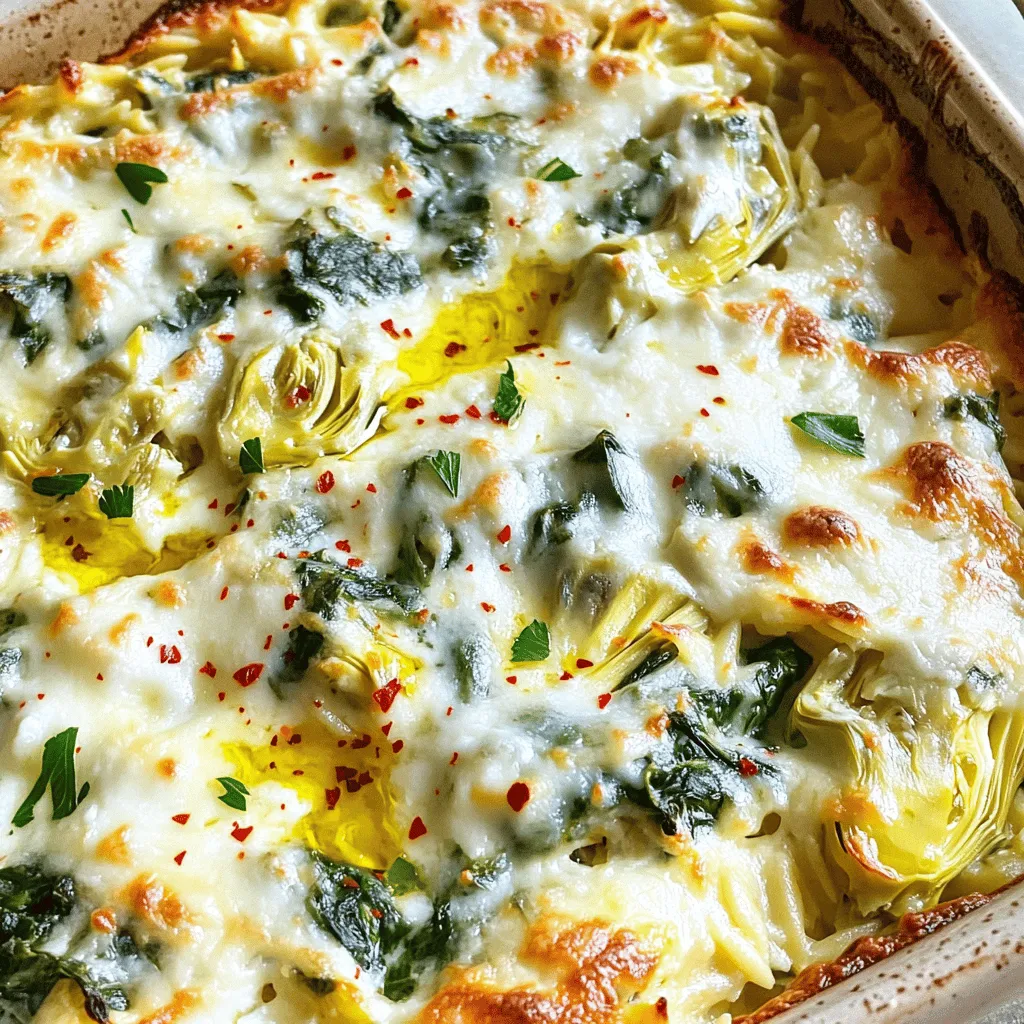
Are you craving a dish that’s both comforting and delicious? Look no further than this Cheesy Spinach Artichoke Orzo Bake! Packed with creamy cheeses, fresh spinach, and tasty artichokes, this …
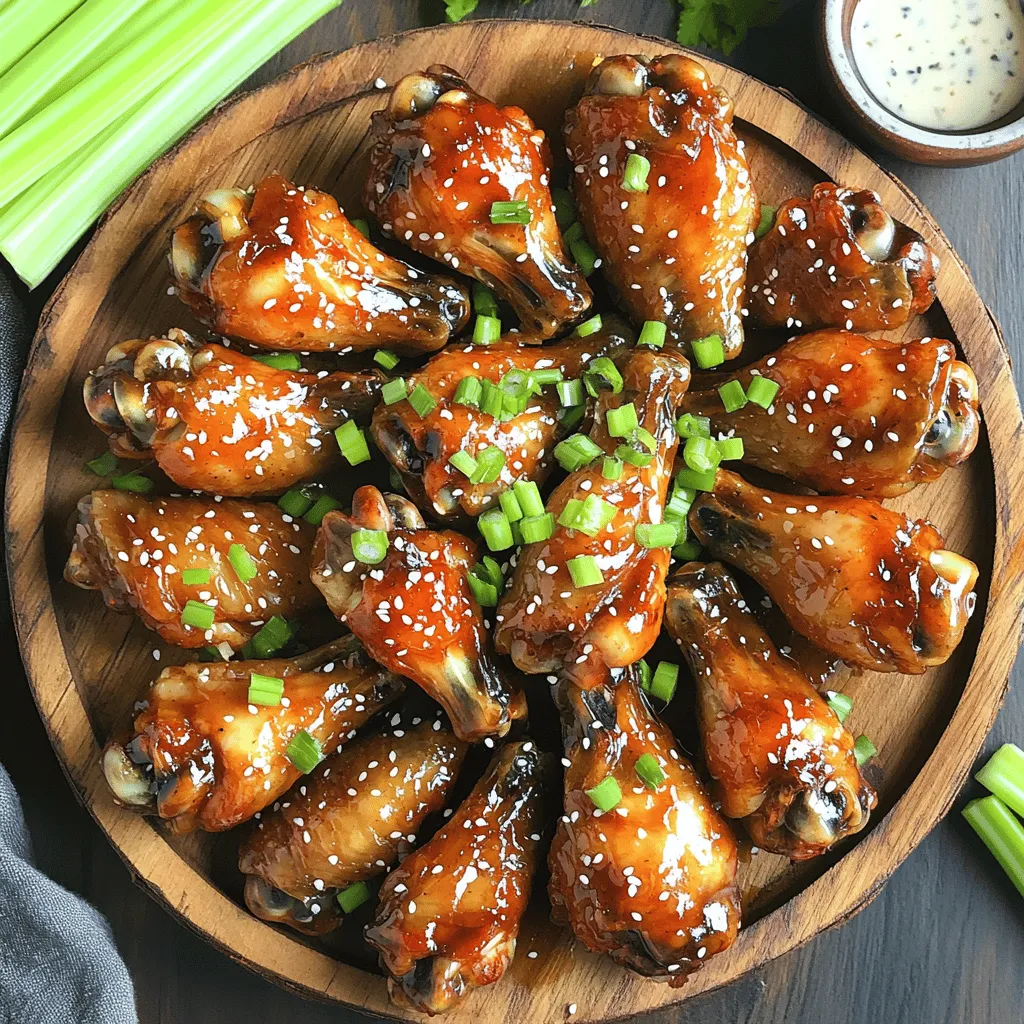
Get ready to impress your friends with Air Fryer Honey Garlic Chicken Wings! These wings are sweet, sticky, and packed with flavor. You’ll love how simple they are to make, …
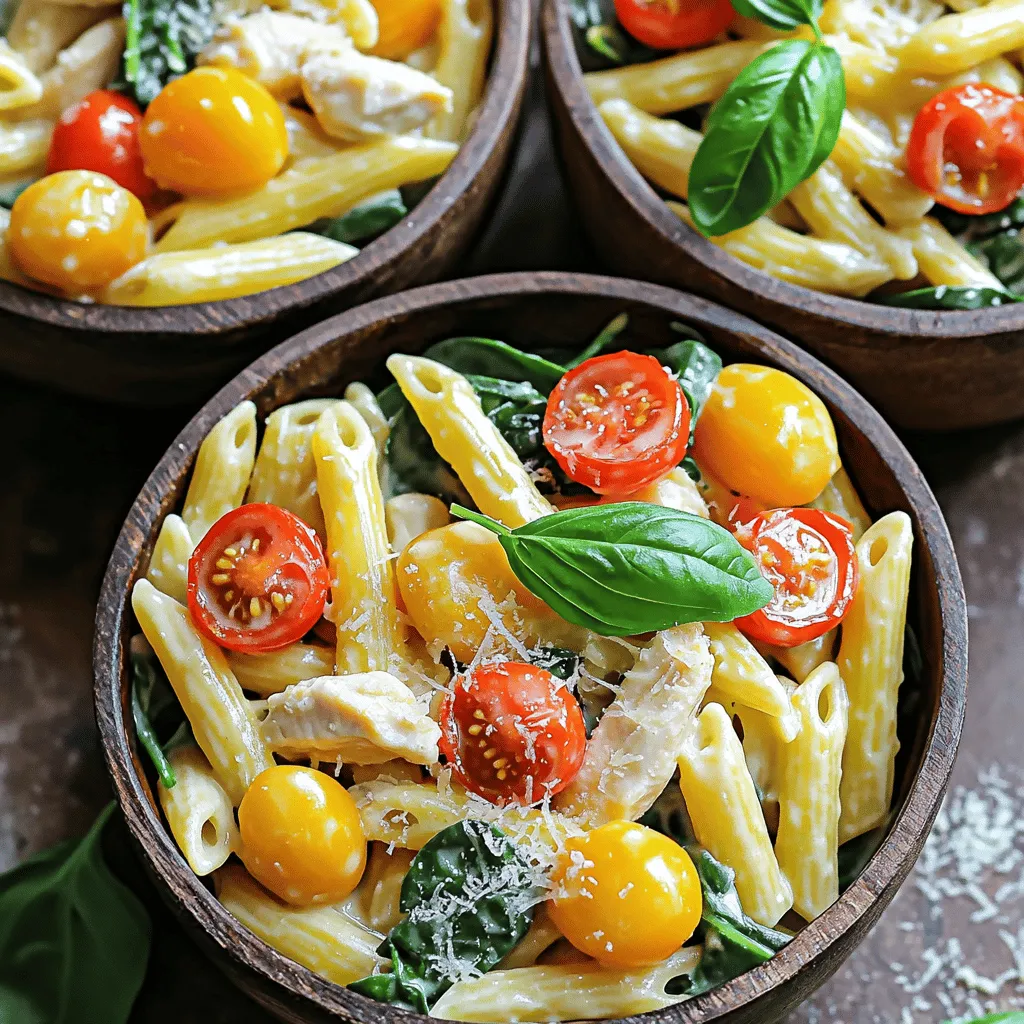
Craving a meal that’s both flavorful and easy? Let me introduce you to my One-Pot Creamy Tuscan Chicken Pasta! This delightful dish combines juicy chicken, fresh veggies, and a rich, …
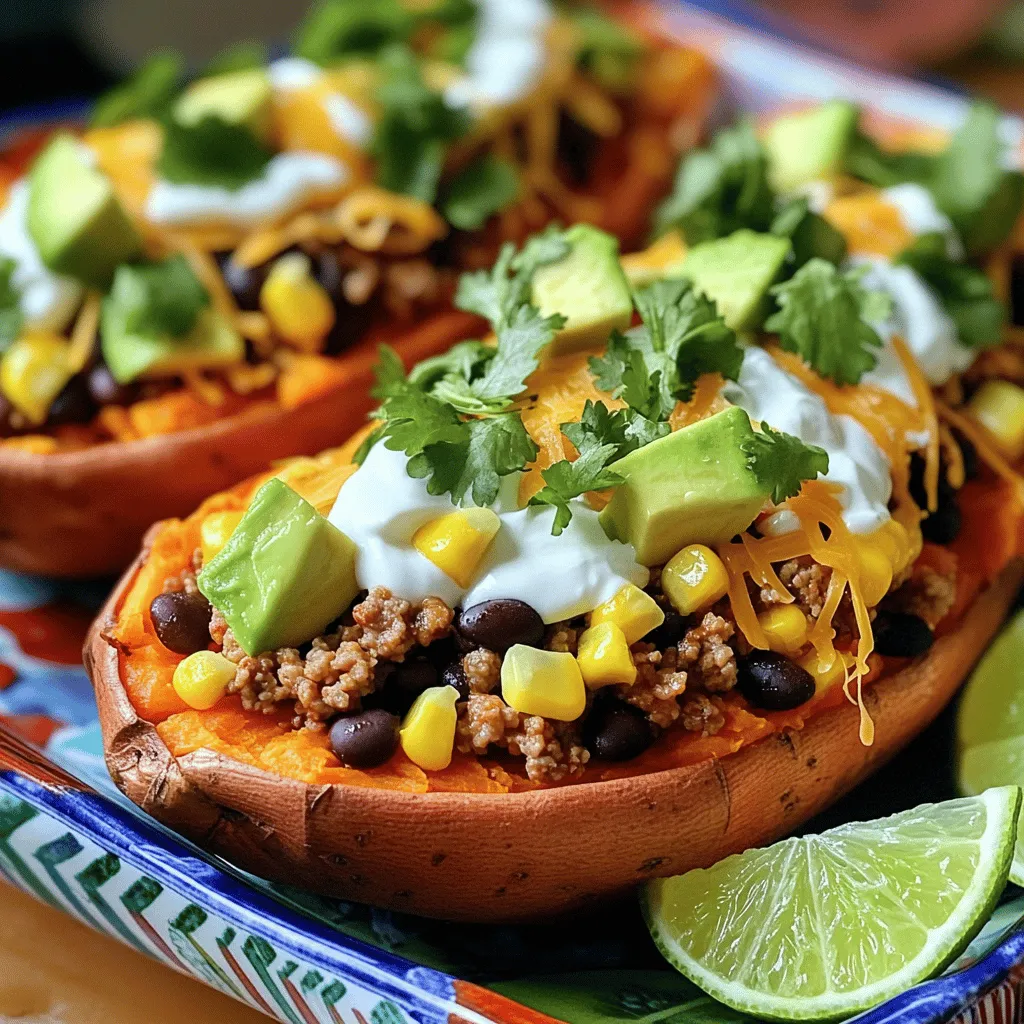
Are you ready to spice up your dinner routine? Taco Stuffed Sweet Potatoes bring bold flavors and simplicity to your table. Packed with nutrition and taste, this dish is fun …

Welcome to the world of Chai Latte Cupcakes, where each bite is packed with cozy flavor! Imagine warm spices and sweet cream cheese frosting coming together in a delicious treat. …
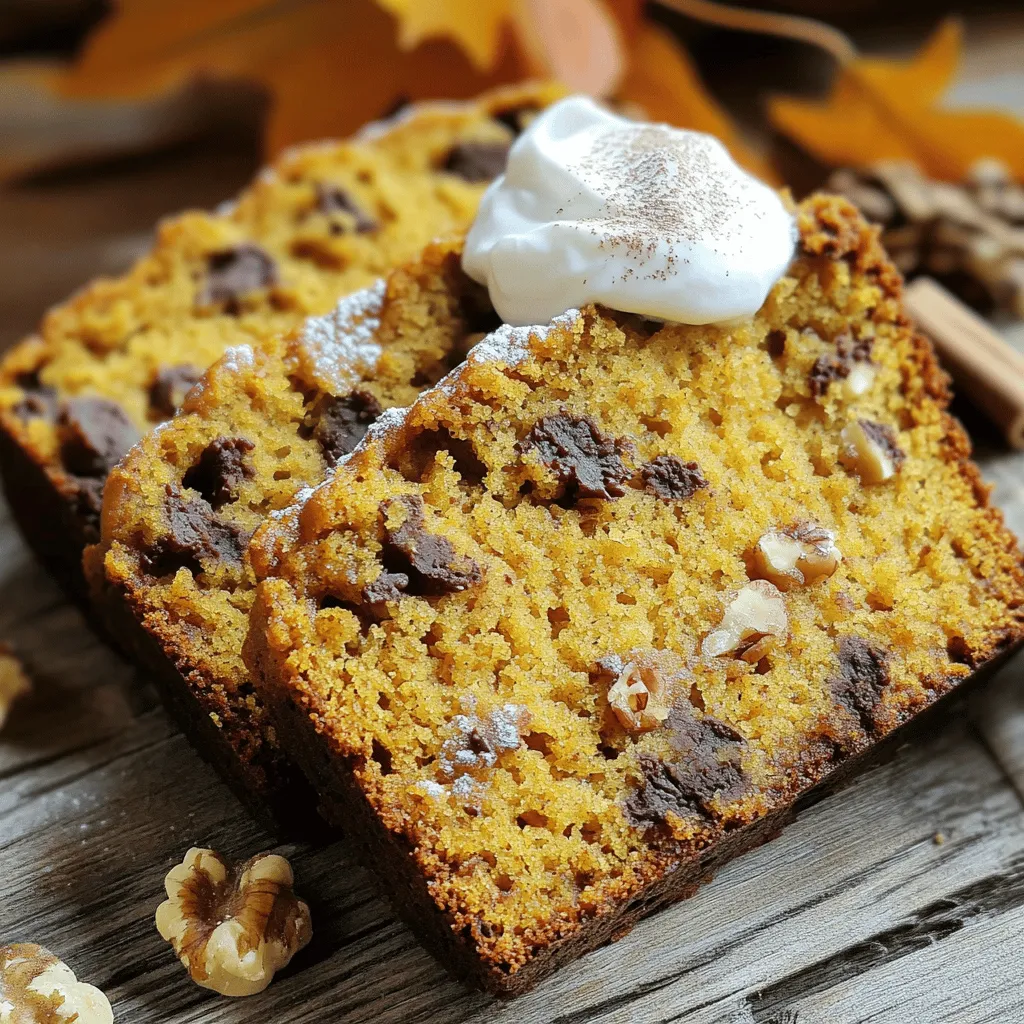
If you’re craving a cozy treat that’s also healthy, look no further! My Healthy Pumpkin Bread is simple to make, delicious, and sure to please. With wholesome ingredients like pumpkin …