Skip to content
Melted Recipes
  • Home
  • Appetizers
  • Desserts
  • Salads
  • Breakfast
  • Dinner
  • Privacy Policy
  • Contact
  • About

Chef Miles

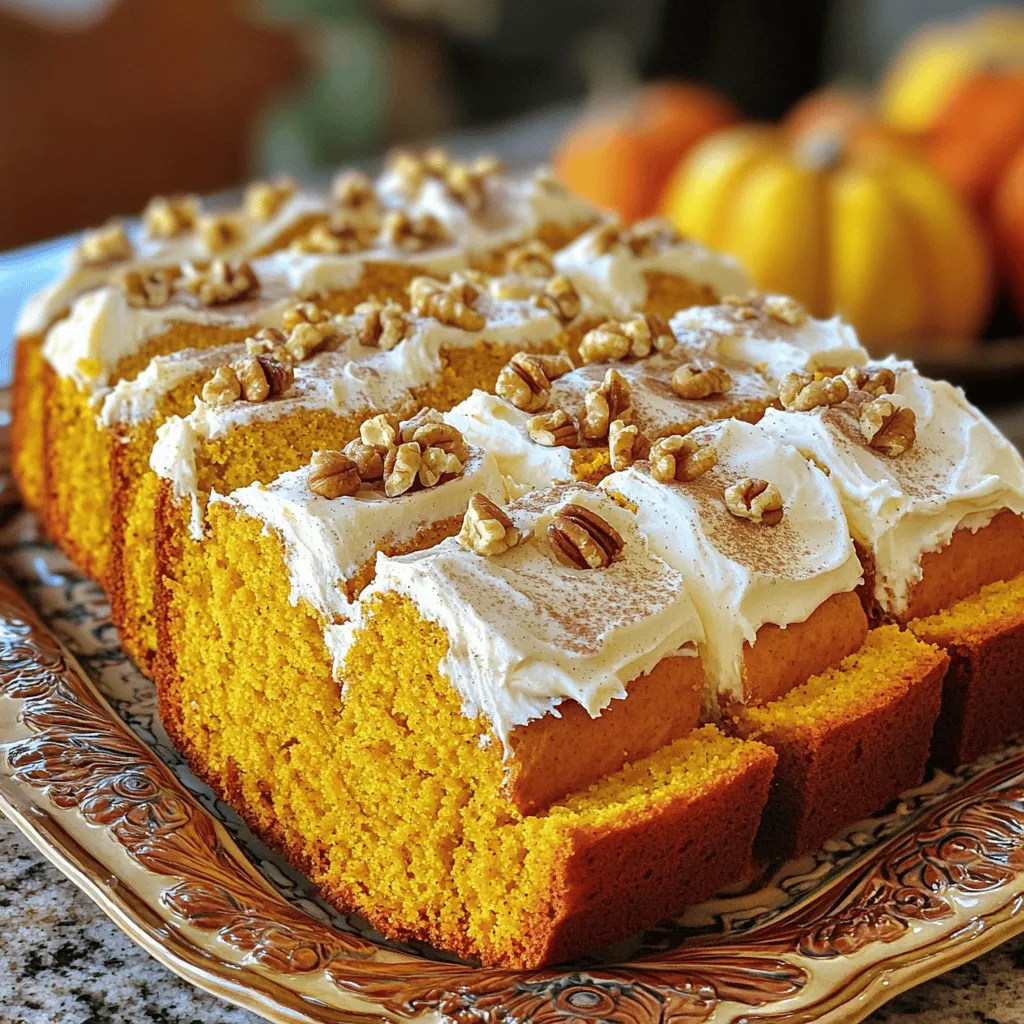
Spiced Chai Snickerdoodle Bars Irresistibly Flavorful

August 15, 2025 by Chef Miles
- 2 ½ cups all-purpose flour - 1 teaspoon baking soda - ½ teaspoon salt - 2 teaspoons ground cinnamon - 1 teaspoon ground ginger - ½ teaspoon ground cardamom - ½ teaspoon ground cloves For these bars, I start with all-purpose flour as the base. This helps create a soft, chewy texture. Next, I add baking soda and salt. The baking soda helps the bars rise. The salt makes the flavors pop. Then come the spices. I use: - Cinnamon - Ginger - Cardamom - Cloves These spices make the bars taste like a warm hug. Cinnamon gives warmth, while ginger adds a little bite. Cardamom and cloves bring a unique twist that you will love. - 1 cup unsalted butter, softened - 1 ½ cups granulated sugar - ½ cup packed brown sugar - 2 large eggs - 1 tablespoon pure vanilla extract For the wet ingredients, I use unsalted butter. It makes the bars rich and creamy. I mix it with granulated and brown sugar. This creates a sweet, fluffy mixture. Next, I add eggs. They help bind everything together. The vanilla extract adds a lovely aroma. It makes the bars even more inviting. - ¼ cup granulated sugar (for rolling) - 1 tablespoon ground cinnamon (for rolling) For the topping, I mix granulated sugar with ground cinnamon. This mixture gives the bars a sweet, spiced crust. It adds a delightful crunch to each bite. First, preheat your oven to 350°F (175°C). This ensures even baking. Next, prepare a 9x13 inch baking pan. You can grease it lightly with butter or line it with parchment paper. Lining makes it easy to remove the bars later. In a medium bowl, whisk together 2 ½ cups of all-purpose flour, 1 teaspoon of baking soda, and ½ teaspoon of salt. Then, add the spices: 2 teaspoons of ground cinnamon, 1 teaspoon of ground ginger, ½ teaspoon of ground cardamom, and ½ teaspoon of ground cloves. Mix until well combined and set aside. This blend gives the bars their warm flavor. In a large bowl, cream 1 cup of softened unsalted butter with 1 ½ cups of granulated sugar. Use a hand mixer or stand mixer on medium speed for 2-3 minutes. The mixture should be light and fluffy. Then, add 2 large eggs, one at a time, mixing well after each addition. Stir in 1 tablespoon of pure vanilla extract and ½ cup of packed brown sugar. Mix until all ingredients are well combined. Gradually fold the dry mixture into the wet mixture. Use a spatula or mix on low speed until a soft dough forms. Avoid overmixing, as this can make the bars tough. Spread the dough evenly in the prepared baking pan. Use a spatula to smooth the surface. In a small bowl, combine ¼ cup of granulated sugar with 1 tablespoon of ground cinnamon. Sprinkle this mixture generously over the dough. Bake the bars for 25-30 minutes. They are done when the edges are golden brown. A toothpick inserted in the center should come out clean or with a few moist crumbs. Once baked, remove the pan from the oven. Let it cool completely in the pan on a wire rack. After cooling, cut the bars into squares for serving. Enjoy these delicious treats with a hot cup of chai! Do not overmix the dough. Overmixing can make your bars tough. Mix just until you see no dry flour. This ensures a soft and chewy texture. When you fold the dry ingredients into the wet mix, be gentle. Use a spatula for best results. You can swap unsalted butter for coconut oil. This change adds a unique flavor. For sugars, you can use coconut sugar instead of granulated sugar. If you want a warmer taste, brown sugar works well. You can also replace some spices. Use nutmeg or allspice if you run out of cinnamon or ginger. Serve your snickerdoodle bars on a rustic wooden platter. This adds charm. Dust the top lightly with cinnamon for extra flair. Pair them with a hot cup of chai for a cozy experience. You can also add a scoop of vanilla ice cream for a tasty twist. {{image_4}} You can make these bars even more fun! Try adding: - 1 cup chocolate chips for a sweet twist. - ½ cup chopped nuts for crunch. These add-ins mix well with the spices, giving you new flavors to enjoy. If you need a gluten-free option, use: - 2 ½ cups gluten-free all-purpose flour. This swap works well in the recipe. The bars will still taste great and have a nice texture. Change up the flavors based on the season. In fall, add: - 1 teaspoon pumpkin spice to the dough. This gives the bars a warm, cozy flavor. You can also use crushed candy canes for a festive touch during winter. To keep your Spiced Chai Snickerdoodle Bars fresh, store them in an airtight container. You can place them at room temperature for up to three days. If you prefer the fridge, they can last for about a week. Just make sure they are cool before sealing them up. This helps avoid sogginess. If you want to save some for later, freezing is a great option. Cut the bars into squares. Wrap each piece tightly in plastic wrap. Then, place the wrapped bars in a freezer-safe bag. You can freeze them for up to three months. When you’re ready to enjoy, just thaw them in the fridge overnight. To enjoy your bars warm, you can reheat them in the oven. Preheat it to 350°F (175°C). Place the bars on a baking sheet for about 5-10 minutes. This will make them soft and gooey again. You can also use the microwave, heating them for about 15-20 seconds. This is perfect for a quick treat! Spiced Chai Snickerdoodle Bars are a warm, sweet treat. They mix classic snickerdoodle flavors with chai spices. This means you get a cozy blend of cinnamon, ginger, cardamom, and cloves. Each bite bursts with flavor, making them unique and delightful. The soft texture and sweet topping complete the experience. Yes, you can make these bars ahead of time. Bake the bars and let them cool completely. Cut them into squares and store them in an airtight container. They stay fresh for about a week. You can also freeze them for up to three months. Just thaw them at room temperature before enjoying. You’ll know the bars are done when the edges turn golden brown. A toothpick inserted in the center should come out clean or with a few moist crumbs. If the toothpick is wet with batter, bake them a few more minutes. Keep an eye on them to avoid overbaking. Pair these bars with a hot cup of chai for the perfect match. The spices in both bring out the flavors. You can also enjoy them with coffee or milk. For a sweet treat, serve them with vanilla ice cream or whipped cream. These pairings enhance the overall experience. These Spiced Chai Snickerdoodle Bars blend warm spices with a sweet base. Start with your dry and wet ingredients, mix carefully, and then bake to perfection. I shared tips for substitutions and ways to make them your own, along with storage and serving ideas. In the end, this treat is not just tasty but also fun to customize. Whether for a special occasion or a cozy night, they bring joy. Happy baking, and enjoy sharing your delicious results!

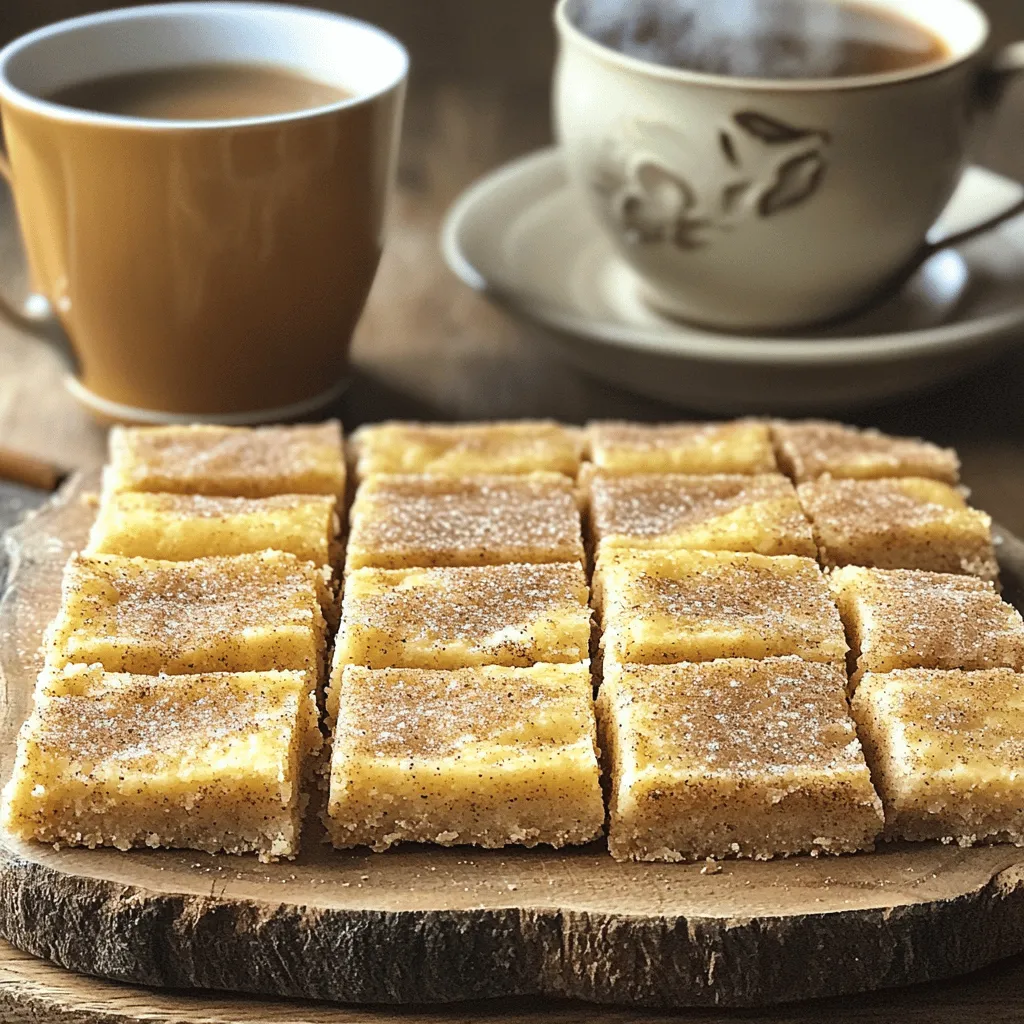
Are you ready to indulge in the warm, cozy flavors of Spiced Chai Snickerdoodle Bars? These bars combine the comforting spice of chai with the classic taste of snickerdoodles. Each …

Read more

Categories Desserts

Delectable Pumpkin Bread with Cream Cheese Frosting

August 15, 2025 by Chef Miles
For the dry ingredients, you will need: - 2 cups all-purpose flour - 1 teaspoon baking soda - 1 teaspoon baking powder - 1 teaspoon ground cinnamon - 1/2 teaspoon ground nutmeg - 1/4 teaspoon ground ginger - 1/2 teaspoon salt These ingredients create a warm, spiced base for your bread. The flour provides structure, while the baking soda and baking powder help it rise. The spices add that cozy fall flavor we all love. For the wet ingredients, gather: - 1 cup granulated sugar - 1 cup packed brown sugar - 1 cup vegetable oil - 4 large eggs - 2 cups pure pumpkin puree (canned or fresh) - 1 teaspoon vanilla extract These ingredients will make your pumpkin bread rich and moist. The sugars add sweetness, while the oil keeps it tender. Eggs and pumpkin puree create a lovely texture and flavor, with vanilla giving an extra hint of warmth. For the cream cheese frosting, you’ll need: - 8 oz cream cheese, softened - 1/4 cup unsalted butter, softened - 2 cups powdered sugar - 1 teaspoon vanilla extract - 1-2 tablespoons milk (to adjust consistency) This frosting is smooth and creamy. The cream cheese offers tanginess, and the butter adds richness. Powdered sugar sweetens it just right. Adjust the milk until you reach the perfect spreading consistency. 1. Preheat your oven to 350°F (175°C). This step helps your bread rise evenly. 2. Prepare your loaf pans. Grease and lightly flour two 9x5 inch pans. You can also line them with parchment paper to make the bread easy to remove. 3. Mix the dry ingredients. In a medium bowl, whisk together: - 2 cups all-purpose flour - 1 teaspoon baking soda - 1 teaspoon baking powder - 1 teaspoon ground cinnamon - 1/2 teaspoon ground nutmeg - 1/4 teaspoon ground ginger - 1/2 teaspoon salt Set this bowl aside. 4. Combine the wet ingredients. In a large bowl, mix together: - 1 cup granulated sugar - 1 cup packed brown sugar - 1 cup vegetable oil Use a whisk or mixer to blend until smooth. 5. Add eggs and pumpkin. Crack in 4 large eggs. Then, add 2 cups of pure pumpkin puree and 1 teaspoon vanilla extract. Beat this mixture until it’s smooth. 6. Combine wet and dry mixtures. Gradually mix the dry ingredients into the wet mixture. Stir until just combined. If you want, fold in 1/2 cup of chopped walnuts or pecans. 1. Distribute the batter. Pour the batter into the two prepared loaf pans. Fill each pan about two-thirds full. 2. Bake. Place the pans in your preheated oven. Bake for 60-70 minutes. To check for doneness, insert a toothpick into the center of the bread. It should come out clean when done. 3. Cool the bread. Once baked, take the loaves out of the oven. Let them cool in the pans for about 10 minutes. Then, transfer them to wire racks to cool completely. 1. Combine cream cheese and butter. In a medium bowl, beat together: - 8 oz cream cheese, softened - 1/4 cup unsalted butter, softened Mix until the texture is creamy and smooth. 2. Add powdered sugar. Gradually mix in 2 cups of powdered sugar at low speed. Then, add 1 teaspoon vanilla extract. Adjust the consistency with 1-2 tablespoons of milk. Beat until fluffy. 3. Frost the loaves. Once the bread is cool, spread the cream cheese frosting on top. Let it drip slightly over the edges for a lovely finish. Measuring ingredients is key. Accurate measurements make a big difference. Use dry measuring cups for flour and sugar. Level off with a knife for precision. Avoid overmixing your batter. Stir gently when combining wet and dry ingredients. Mix just until you see no dry flour. Overmixing can make your bread tough. Spreading cream cheese frosting is an art. Use a spatula for a smooth finish. Start in the center and work your way out. Let the frosting cascade over the edges for a lovely look. To enhance the visual appeal, add toppings. Chopped nuts or a dusting of cinnamon work well. They add color and texture to your bread. A beautiful presentation makes every bite special. Cut your bread into thick slices. This makes for a hearty serving. Arrange the slices on a pretty platter to impress your guests. For drinks, pair it with spiced chai or hot apple cider. These warm flavors complement the pumpkin perfectly. Enjoy your delightful bread with friends and family! {{image_4}} You can make your pumpkin bread even better by adding nuts. Walnuts and pecans work well. They add a nice crunch and flavor. To add them, chop about half a cup. Gently fold them into the batter before you pour it into the loaf pans. This will ensure they spread evenly throughout the bread. You can also toast the nuts first for extra flavor. Just watch them closely to avoid burning. Want to spice things up? You can add more flavors to your pumpkin bread. Besides cinnamon, consider using allspice or cloves for depth. You can also add a pinch of cardamom for a unique twist. If you like a bit of heat, try adding a dash of cayenne pepper. This will give your bread a warm kick. Another option is to mix in some vanilla bean paste for a richer taste. Feel free to experiment until you find your favorite combination. If you want to change up the frosting, there are many options. You can add a touch of maple syrup to the cream cheese frosting for a new flavor. You could also mix in some cocoa powder to make chocolate cream cheese frosting. If you prefer a lighter option, consider whipped cream topping. For a dairy-free choice, use coconut cream instead of cream cheese. Just whip it until fluffy and sweeten to taste. These variations will keep your pumpkin bread exciting and fresh. To keep your pumpkin bread fresh, store it in an airtight container. Place it at room temperature for up to three days. If you want it to last longer, wrap it tightly in plastic wrap first. This helps to keep the moisture in. If you live in a humid area, it's best to refrigerate the bread. Just remember to let it come to room temperature before serving. Freezing pumpkin bread is easy and smart. Start by letting it cool completely. Then, wrap each loaf in plastic wrap. After that, place them in a freezer bag or airtight container. Make sure to squeeze out any air. This will help it stay fresh for about three months. When you're ready to enjoy it, thaw it overnight in the fridge. You can also reheat slices in the microwave for a warm treat. Stored pumpkin bread can last up to a week at room temperature. If kept in the fridge, it will stay fresh for about ten days. The cream cheese frosting, however, should be used within five days. If you freeze the bread with frosting, use it within two months for the best taste. Always check for any signs of spoilage before enjoying your delicious creation! To check if your pumpkin bread is ready, use a toothpick. Insert it into the center of the loaf. If it comes out clean or with just a few crumbs, your bread is done. This method works well to avoid underbaking or overbaking. Timing can vary, so keep an eye on your bread from 60 minutes onward. Yes, you can make pumpkin bread without eggs! Here are some great substitutes: - Flaxseed meal: Mix 1 tablespoon of flaxseed meal with 2.5 tablespoons of water. Let it sit for a few minutes to thicken. - Applesauce: Use 1/4 cup of applesauce to replace one egg. It adds moisture and sweetness. - Mashed bananas: One ripe banana can replace one egg. It gives a subtle flavor too. You can boost the flavor of your pumpkin bread with these ideas: - Nuts: Add chopped walnuts or pecans for a nice crunch. - Chocolate chips: Toss in some semi-sweet or dark chocolate chips for a sweet twist. - Dried fruit: Raisins or cranberries add a chewy texture and a bit of tartness. - Extra spices: Try adding a pinch of cloves or allspice for depth. To keep your pumpkin bread light and fluffy, follow these tips: - Don’t overmix the batter: Mix just until combined. Overmixing can lead to a heavy loaf. - Use the right flour: Make sure to use all-purpose flour. Too much whole wheat flour can make it dense. - Measure ingredients correctly: Use the spoon-and-level method for flour. Too much flour can weigh down your bread. You learned how to make delicious pumpkin bread from start to finish. We covered ingredients, methods, and tips. The key steps include mixing dry and wet ingredients, baking correctly, and perfecting your frosting. Don't hesitate to try variations, like adding nuts or spices, to elevate your bread. Store it properly to keep it fresh. With these insights, you can bake pumpkin bread that impresses friends and family. Enjoy your baking journey and delight in every slice!

Get ready to indulge in the warm flavors of fall with my delectable pumpkin bread topped with cream cheese frosting. This recipe combines cozy spices and sweet pumpkin for a …

Read more

Categories Desserts

Slow Cooker Chicken Korma Flavorful and Simple Dish

August 15, 2025 by Chef Miles
- 1.5 lbs boneless, skinless chicken thighs, cut into bite-sized pieces - 1 can (13.5 oz) coconut milk - 1 cup plain yogurt - 2 tablespoons korma curry paste - 1 tablespoon ground turmeric - 2 teaspoons garam masala - 1 teaspoon ground cumin - 1 teaspoon ground coriander - 1 teaspoon chili powder (optional) - 1 large onion, finely chopped - 3 cloves garlic, minced - 1 tablespoon fresh ginger, grated - 2 tablespoons tomato paste - Salt to taste I love using boneless, skinless chicken thighs. They stay tender and juicy during cooking. Coconut milk and yogurt mix to create a creamy sauce. The korma curry paste adds a rich flavor. You can adjust the spice level by using more or less curry paste. - Fresh cilantro, chopped - Toasted almonds or cashews Fresh cilantro brightens the dish. Toasted nuts add a nice crunch. You can sprinkle these on top just before serving. - Cooked basmati rice Basmati rice is the perfect base for this dish. It soaks up the sauce and balances the flavors. You can also serve it with warm naan or a side salad for extra texture. Start by adding one large, finely chopped onion into your slow cooker. Then, add three minced garlic cloves and one tablespoon of grated fresh ginger. Mix these ingredients well. This will create a strong, tasty base for your dish. Next, take 1.5 pounds of boneless, skinless chicken thighs. Cut them into bite-sized pieces. Carefully add the chicken on top of the onion mix. Make sure to spread the pieces evenly. This helps the chicken cook well and soak up all the flavors. Now, grab a separate bowl. In this bowl, mix one can of coconut milk, one cup of plain yogurt, and two tablespoons of tomato paste. Add two tablespoons of korma curry paste, one tablespoon of ground turmeric, two teaspoons of garam masala, one teaspoon of ground cumin, and one teaspoon of ground coriander. If you like it spicy, add one teaspoon of chili powder. Stir until the mixture is smooth and mixed well. Pour the creamy sauce over the chicken in the slow cooker. Use a spatula to gently stir. Make sure each piece of chicken is well coated with the sauce. This step is key for rich flavor in every bite. Cover the slow cooker with its lid. You can cook on low for 6-8 hours or set it to high for 3-4 hours. Both options will make the chicken tender and flavorful. After cooking, check the sauce. If it is too thin, remove the lid and cook on high for an extra 30 minutes. This lets some moisture escape. Taste the sauce and add salt if needed. This step ensures your dish is just right before serving. - Ideal cooking times: Cook your chicken korma on low for 6-8 hours. If you're short on time, set your slow cooker to high for 3-4 hours. - Signs of perfectly cooked chicken: Look for tender chicken that easily pulls apart with a fork. The sauce should be thick and creamy, with no raw flavors. - Suggestions for added spices and flavors: You can boost the flavor by adding a pinch of cinnamon or a dash of cardamom. Fresh chili peppers can add heat. Adjust the korma curry paste based on your spice preference. - Serving suggestions for an elegant presentation: Serve the korma in individual bowls. Top each serving with fresh cilantro and a sprinkle of toasted almonds or cashews. A wedge of lime adds a pop of color and flavor. Pair it with fluffy basmati rice for a complete meal. {{image_4}} If you want a vegetarian twist on Chicken Korma, you can use tofu or chickpeas. Both options soak up the flavors well. You can also try using hearty vegetables like cauliflower or potatoes. These ingredients provide a satisfying texture. Just ensure you adjust the cooking time to avoid overcooking. Adjusting the spice in your korma is easy. If you like it mild, use less korma curry paste. You can also skip the chili powder. For a hotter dish, add more curry paste or a pinch of cayenne. Taste as you go so you get the heat just right for you. If you need alternatives for yogurt or coconut milk, there are great options. For yogurt, try using cashew cream or almond yogurt. These add creaminess without dairy. If you want a coconut milk swap, use almond milk or soy milk. Just remember, these swaps might change the korma’s flavor a bit, but they can still be tasty! After you've enjoyed your chicken korma, store any leftovers in the fridge. Use an airtight container to keep the flavors fresh. Make sure to cool the dish to room temperature before sealing it. This helps to prevent any condensation, which can lead to sogginess. Aim to eat your leftovers within three to four days for the best taste. If you want to save some korma for later, freezing is a great option. First, let the dish cool completely. Then, transfer it to a freezer-safe container or a heavy-duty freezer bag. Press out as much air as you can to avoid freezer burn. When you’re ready to eat, thaw it overnight in the fridge. Reheat it gently on the stove or in the microwave until it's hot throughout. Properly stored chicken korma can last in the fridge for up to four days. If frozen, it will stay good for about three months. After this time, the quality might drop, and it may not taste as fresh. Always check for any signs of spoilage before eating. Enjoy your korma at its best! Chicken Korma is a rich, creamy dish with roots in India. It has a mix of spices that give it a warm, inviting flavor. The main ingredients include chicken, yogurt, and coconut milk. This dish balances savory and sweet notes, making it popular worldwide. It often features spices like turmeric, cumin, and garam masala, which add depth and warmth to the dish. Korma's history is tied to Mughal cuisine, known for its use of nuts and cream. Yes, you can! If you don’t have a slow cooker, you can use a stovetop pot. Cook the chicken over medium heat for about 30 to 40 minutes. Start by sautéing the onion, garlic, and ginger in oil. Then add the chicken and sauce mixture. Let it simmer until the chicken is tender. You can also use an Instant Pot. Just cook it on high pressure for 10 minutes. This way, you still get a delicious Chicken Korma. To change the spiciness, you can adjust the amount of korma curry paste. Start with a small amount and taste as you go. You can also add chili powder for extra heat. If your dish gets too spicy, add more coconut milk or yogurt to tone it down. Remember, you can always add more heat, but it’s hard to take it away once it’s in! Serve Chicken Korma over a bed of fluffy basmati rice. This pairs well with the creamy sauce. You can also offer naan bread for a fun twist. For added texture, top with fresh cilantro and toasted almonds or cashews. You might also add a wedge of lime for a burst of freshness. This makes your dish look elegant and taste even better! You now have all the tools to make a delicious Chicken Korma. This dish starts with tender chicken thighs and a creamy sauce made from coconut milk and yogurt. By mixing in korma curry paste and spices, you'll create rich flavors. Don’t forget the garnishes like cilantro and nuts for extra flair. Cooking tips, variations, and storage info help you adapt the recipe to your needs. Whether you keep it classic or try vegetarian options, you can enjoy this meal anytime. Happy cooking!

Looking for a tasty meal that’s easy to make? Slow Cooker Chicken Korma is your answer! With rich flavors from coconut milk and korma paste, this dish will impress everyone. …

Read more

Categories Dinner

Pumpkin Cheesecake Cookies Perfect for Fall Treats

August 15, 2025 by Chef Miles
- 1 cup all-purpose flour - 1/2 teaspoon baking soda - 1/2 teaspoon baking powder - 1/4 teaspoon salt - 1/2 teaspoon ground cinnamon - 1/4 teaspoon ground nutmeg - 1/4 teaspoon ground ginger These dry ingredients come together to create a flavorful base for your cookies. The spices add warmth and comfort, perfect for fall. - 1/2 cup unsalted butter, softened - 1/2 cup brown sugar, packed - 1/4 cup granulated sugar - 1 large egg - 1 teaspoon vanilla extract - 1/2 cup canned pumpkin puree The wet ingredients add moisture and sweetness. Butter makes the cookies rich, while pumpkin puree gives a soft texture and a hint of fall flavor. - 4 oz cream cheese, softened - 2 tablespoons powdered sugar - 1 tablespoon maple syrup - Optional: chopped walnuts or pecans This cream cheese filling is the star of the cookie. It brings a sweet and tangy taste that balances the spiced pumpkin. If you like, add nuts for some crunch. - Preheat oven to 350°F (175°C). - Line baking sheet with parchment paper. - In a bowl, whisk together: - 1 cup all-purpose flour - 1/2 teaspoon baking soda - 1/2 teaspoon baking powder - 1/4 teaspoon salt - 1/2 teaspoon ground cinnamon - 1/4 teaspoon ground nutmeg - 1/4 teaspoon ground ginger This mix adds flavor and helps the cookies rise. - In a large bowl, cream together: - 1/2 cup unsalted butter, softened - 1/2 cup brown sugar, packed - 1/4 cup granulated sugar Beat until light and fluffy. This takes about 2-3 minutes. - Next, add: - 1 large egg - 1 teaspoon vanilla extract Mix until smooth. - Now, gently stir in: - 1/2 cup canned pumpkin puree Combine well. - Gradually add the dry mix to the wet mix. Stir until just combined. A few lumps are okay! - In a separate bowl, mix together: - 4 oz cream cheese, softened - 2 tablespoons powdered sugar - 1 tablespoon maple syrup Use a hand mixer until smooth. - Use a spoon to drop rounded tablespoons of dough onto the baking sheet. Space them about 2 inches apart. - Create a small indentation in each cookie with your thumb. Fill it with half a teaspoon of the cream cheese mix. - Optionally, sprinkle chopped walnuts or pecans on top for crunch. - Bake in the oven for 12-15 minutes. The edges should be golden, and the centers should look set. - After baking, let them cool on the sheet for a few minutes. Then, transfer to a wire rack to cool completely. Using room temperature ingredients is key. When butter and cream cheese are warm, they mix better. This helps create a smooth batter. Cold ingredients can lead to lumps. Also, avoid overmixing when combining the wet and dry ingredients. Mix until just combined. A few lumps are okay. Overmixing can make your cookies tough. Aim for a soft, fluffy texture. You can boost the flavor with spices. Try adding a pinch of cloves or allspice for warmth. Vanilla extract adds richness too. You might love the taste! Adding nuts like walnuts or pecans gives a nice crunch. Chop them up and sprinkle them on top of the cream cheese filling. This adds texture and flavor. Arrange your cookies on a pretty platter. This makes them inviting. Dust them lightly with powdered sugar for a sweet touch. It looks festive and adds charm. Pair these cookies with a warm cup of coffee or tea. The warm drinks balance the sweet flavors. This creates a cozy snack time, perfect for fall! {{image_4}} To make these cookies gluten-free, swap out the all-purpose flour for almond flour. Almond flour gives a nutty taste and keeps the cookies moist. It is a great choice for those who avoid gluten. For a vegan option, replace the butter with coconut oil. You can use a flax egg instead of the large egg. Just mix one tablespoon of ground flaxseed with three tablespoons of water. Let it sit for a few minutes until it thickens. These swaps keep the cookies tasty and friendly for vegan diets. Adding chocolate chips or white chocolate can make these cookies even more fun. Just fold in about half a cup of chips when you mix the dough. The chocolate adds a sweet contrast to the pumpkin flavor. You can also experiment with different cream cheese fillings. Try mixing in a bit of orange zest or maple syrup for a new twist. This can give each bite a unique flavor and keep everyone guessing. Have fun with these variations to create your perfect fall treat! To keep your pumpkin cheesecake cookies fresh, place them in an airtight container. Line the bottom with parchment paper to absorb moisture. You can also separate layers with parchment paper. This method helps avoid squished cookies. Store the container at room temperature for the best flavor and texture. Freezing these cookies is easy. Allow them to cool completely before freezing. Place the cookies in a single layer on a baking sheet. Freeze for about an hour, then transfer them to a freezer-safe bag. Squeeze out excess air and seal tightly. To thaw, just leave them at room temperature for about 30 minutes. These cookies stay fresh for about a week at room temperature. If you freeze them, they can last up to three months. Keep an eye on the texture and taste. If they lose their flavor, it’s time to toss them. Enjoy your cookies while they’re at their best! You can make the cookie dough a day in advance. Just store it in the fridge. When you are ready, scoop and bake them. You can also bake the cookies ahead. Let them cool and store in an airtight container. They stay fresh for up to five days. Yes, you can use fresh pumpkin! Just roast and mash the pumpkin first. Make sure to remove excess water. Canned pumpkin is more convenient, but fresh can taste great too. These cookies pair well with warm drinks. Try serving them with coffee, tea, or hot chocolate. They also taste amazing with a scoop of vanilla ice cream. Add some whipped cream on top for extra fun! Absolutely! These cookies are perfect for sharing during holidays. They look festive and taste fantastic. You can pack them in cute boxes or on platters. Friends and family will love them as gifts or treats at gatherings. These cookies blend spices, pumpkin, and cream cheese for a perfect treat. We covered ingredients, steps, and tips to make them shine. You can also try fun variations to suit your taste. Remember to store them well for lasting freshness. These cookies will surely be a hit at your next gathering or holiday event. Get ready to share a delicious treat with everyone around you!

Fall is here, and what better way to celebrate than with pumpkin cheesecake cookies? These treats combine the rich flavors of pumpkin and cream cheese into a soft, chewy delight. …

Read more

Categories Desserts

Blackberry Hot Chocolate Rich and Cozy Indulgence

August 15, 2025 by Chef Miles
- 1 cup milk (your choice: dairy or any non-dairy alternative) - 2 tablespoons unsweetened cocoa powder - 2 tablespoons sugar (adjust based on your sweetness preference) - 1/2 cup fresh blackberries (plus a few extra for garnish) - 1/4 teaspoon pure vanilla extract - A pinch of sea salt These main ingredients come together to create a rich and creamy hot chocolate. The blackberries add a fruity twist, balancing the chocolate's richness. You can choose your favorite type of milk. Dairy milk gives a classic taste, while almond or oat milk can add a nutty flavor. - Whipped cream (for a luscious topping) - Dark chocolate shavings (for a decadent garnish) Toppings can elevate your drink. Whipped cream adds creaminess and a soft texture. Dark chocolate shavings provide a rich finish and a touch of elegance. You can also add extra blackberries for color and flavor. If you're looking for dairy-free options, use almond, coconut, or oat milk. For a lower-sugar version, swap sugar with a natural sweetener like stevia or monk fruit. You can also use carob powder instead of cocoa for a caffeine-free choice. Adjust the ingredients to suit your taste and health needs. To make the blackberry syrup, start by taking a small saucepan. Add 1/2 cup of fresh blackberries and 2 tablespoons of sugar. Place the saucepan over medium heat. Cook for 3-4 minutes. Use a fork to gently mash the blackberries as they heat. This helps release their juicy goodness. When the blackberries soften, remove the saucepan from heat. Strain the mixture through a fine sieve into a bowl. This removes the seeds and leaves you with smooth syrup. Set this sweet blackberry syrup aside for later. Next, in the same saucepan, pour in 1 cup of milk. You can use dairy or any non-dairy milk. Heat it over medium-low heat. Be careful not to boil the milk. Once it feels warm, stir in 2 tablespoons of unsweetened cocoa powder. Add a pinch of sea salt to enhance the flavor. Whisk the mixture continuously until it becomes smooth and well combined. This step is key for a rich taste. Once your milk is warm and cocoa is mixed in, it's time to combine flavors. Add the reserved blackberry syrup and 1/4 teaspoon of pure vanilla extract to the warm milk. Whisk everything together for about 2-3 more minutes. After that, carefully pour the luscious blackberry hot chocolate into two mugs. Fill them generously! Top each mug with a swirl of whipped cream. For a fancy touch, add a few whole blackberries and sprinkle dark chocolate shavings on top. You can also place the mugs on decorative saucers. Consider adding chocolate-covered blackberries on the side for extra delight. Enjoy this cozy treat! To make the best blackberry hot chocolate, start with fresh blackberries. The flavor is brighter and bolder. Use high-quality cocoa powder for a rich taste. Choose whole milk for a creamier texture, but feel free to use any milk you like. A pinch of sea salt enhances the chocolate flavor. It balances the sweetness perfectly. Always taste your drink before serving. Adjust the sugar if you want it sweeter. One common mistake is boiling the milk. Heat it gently to avoid burning. When making the blackberry syrup, don’t rush the mashing process. You want to extract all the juice. Skipping the straining step can lead to a gritty texture. Always strain the syrup to remove seeds. Finally, don’t forget to whisk well when combining the flavors. This keeps the drink smooth and creamy. To boost creaminess, consider adding a splash of heavy cream or half-and-half. You can also blend in a bit of nut butter for extra richness. For a frothy texture, use a milk frother before serving. This adds air and makes the drink light. Topping with whipped cream adds a luxurious finish. Don’t skip the dark chocolate shavings; they add both flavor and texture. {{image_4}} You can play with flavors in your blackberry hot chocolate. Try adding a dash of cinnamon or nutmeg for warmth. A splash of orange zest brightens the drink wonderfully. You might also enjoy the richness of a spoonful of peanut butter or almond butter. These add-ins blend well with the chocolate and blackberries, making each sip exciting. Experiment and find your favorite mix! If you want a dairy-free option, use almond milk or oat milk. Both options work great and still taste amazing. For the sweetener, maple syrup or agave is a good choice. These alternatives keep the drink rich and creamy without dairy. You won’t miss the milk at all! Seasonal flavors can make your blackberry hot chocolate special. In fall, add pumpkin spice for a cozy vibe. During winter, use peppermint extract for a fresh twist. For spring, mix in a bit of lavender for a floral touch. Each season brings its own charm, making your drink feel festive and fun. Enjoy the flavors of the season with this warm treat! You can store leftover blackberry hot chocolate in an airtight container. Let it cool to room temperature before sealing. Place it in the fridge for up to three days. This keeps the flavors fresh and tasty. To reheat, pour the hot chocolate into a saucepan. Use low heat and stir gently. Avoid boiling, as this can change the texture. Heat until warm, then serve with whipped cream and fresh blackberries. You can also use the microwave. Heat in short bursts, stirring in between. For the best taste, enjoy your blackberry hot chocolate within three days. After this, the flavors may fade. If you notice any change in smell or appearance, it’s best to toss it. Always prioritize freshness for that cozy experience! You can use carob powder as a great substitute for cocoa powder. Carob has a sweet flavor and a similar texture. You can also try dark chocolate, melted. Just use less sugar since it is sweet. If you want a lighter taste, consider using vanilla powder. This will give a nice twist to your hot chocolate. Yes, you can use frozen blackberries in this recipe. Just make sure to thaw them first. The flavor will still be rich and tasty. You might need to cook them a bit longer to release the juices. This way, you will get that lovely blackberry syrup. Frozen blackberries are a great option when fresh ones are not in season. Adjusting the sweetness is easy. Start with the basic two tablespoons of sugar. If you like it sweeter, add more sugar a little at a time. You can also use honey or maple syrup for natural sweetness. Taste as you go. This way, you can find the perfect balance for your hot chocolate. Blackberry hot chocolate combines rich flavors with simple steps for a delightful treat. We covered key ingredients, easy preparation, and tips for the best taste. Remember, you can customize it to fit your needs, ensuring everyone can enjoy it. Don't forget to store leftovers properly for later enjoyment. With the right tweaks, this drink can fit any season or preference. I encourage you to try different variations and have fun experimenting. Enjoy your cozy creation!

Picture this: a warm mug of blackberry hot chocolate, rich and cozy, wrapping you in comfort. This delightful drink combines sweet blackberries with luscious chocolate, creating a perfect treat for …

Read more

Categories Desserts

Mexican Street Corn Pasta Salad Flavorful and Easy Recipe

August 15, 2025 by Chef Miles
To make your Mexican Street Corn Pasta Salad, gather these simple ingredients. They add great flavor and texture to the dish. - Pasta Options: 8 oz of fusilli or penne works best. - Fresh or Canned Corn: Use 2 cups of fresh corn kernels or 1 can of corn, drained and rinsed. - Vegetables: You need 1 diced red bell pepper, 1 small finely chopped red onion, and 1 minced jalapeño. Adjust the jalapeño for spice level. - Cheese Choices: Crumble 1/2 cup of cotija cheese or use feta as a substitute. - Dressing Components: Mix 1/4 cup of mayonnaise, 2 tablespoons of fresh lime juice, and 1 teaspoon of chili powder for a zesty dressing. - Seasoning Essentials: Add salt and pepper to taste. This mix of flavors and textures makes each bite exciting. The fresh corn gives sweetness, while the jalapeño adds a nice kick. The creamy cheese balances the salad perfectly. To start, fill a pot with salted water. Bring it to a boil. Once boiling, add 8 oz of pasta. I suggest using fusilli or penne. Cook the pasta until it is al dente, which usually takes about 8-10 minutes. After cooking, drain the pasta in a colander. Spread it out on a baking sheet so it cools quickly. You can use fresh corn or canned corn for this salad. If you choose fresh corn, preheat your grill to medium-high heat. Grill the corn for 3-4 minutes, turning it until it gets a nice char. Once grilled, let it cool briefly, then cut the kernels off the cob. If you prefer canned corn, just drain and rinse it. This step is much quicker! In a large mixing bowl, combine the cooled pasta with the corn kernels. Next, add 1 diced red bell pepper, 1 finely chopped small red onion, and 1 minced jalapeño. If you like it spicy, keep the seeds. If not, remove them. For extra creaminess, sprinkle in 1/2 cup of crumbled cotija cheese. In a separate bowl, whisk together 1/4 cup of mayonnaise, 2 tablespoons of fresh lime juice, and 1 teaspoon of chili powder. Add a pinch of salt and pepper to taste. Once smooth, drizzle this dressing over the pasta mixture. Gently toss everything until well combined. Finally, fold in 1/4 cup of roughly chopped fresh cilantro for a burst of flavor. For the best taste, chill the salad in the refrigerator. I recommend at least 30 minutes to let the flavors meld together. - Ensuring Pasta is Al Dente Cook your pasta until it is al dente. This means it should still have a slight bite when you chew it. Boil salted water and follow the package instructions closely. After draining, spread the pasta on a baking sheet to cool it down. This helps keep it from getting mushy. - Grilling Corn for Maximum Flavor If you're using fresh corn, grilling it adds great flavor. Preheat your grill to medium-high heat. Grill the corn for about 3-4 minutes. Turn it often until it gets a light char. This gives your salad a smoky taste. If you use canned corn, you can skip this step. - Alternatives for Mayonnaise If you want a lighter salad, you can swap out mayonnaise for Greek yogurt. It keeps the creaminess but adds protein. You could also use avocado or a vegan mayo for a different twist. - Other Cheese Options Cotija cheese is traditional, but feta works well too. If you want a dairy-free option, try using a vegan cheese. It still gives a nice salty flavor to your dish. - Adding More Spices or Herbs Feel free to boost the flavor. You can add more chili powder, cumin, or even smoked paprika. Fresh herbs like parsley or basil can add brightness, too. Experiment until you find your favorite mix! - Serving Suggestions for Freshness For a refreshing touch, serve your salad with lime wedges. Guests can squeeze fresh lime over their portions. This adds a zesty kick and enhances the overall flavor. You can also garnish with extra cilantro or cotija cheese for a beautiful finish. {{image_4}} You can make this salad spicy by adding more jalapeño. Just slice it thinner for more heat. If you like, try adding other spices too, like cayenne pepper or smoked paprika. These spices will enhance the flavor and heat. Adjust to your taste. If you're vegan, you can still enjoy this pasta salad. Swap the mayonnaise for a vegan option like avocado or plant-based mayo. This keeps it creamy and delicious. Use dairy-free cheese alternatives instead of cotija. Look for brands that melt well for better flavor. Seasonal veggies or fruits can change this salad. In summer, add fresh tomatoes or zucchini for a fresh twist. In fall, consider roasted butternut squash or even apples for sweetness. Each season brings new flavors and colors. Get creative and use what’s fresh! To keep your Mexican Street Corn Pasta Salad fresh, use air-tight containers. These containers stop air from getting in and keep the salad tasty. In the refrigerator, the salad lasts about 3 to 5 days. If you want to freeze it, I recommend not freezing the salad. The texture of ingredients like pasta and corn changes when frozen. When you reheat, do it gently. Use a microwave on low power. This helps keep the pasta from getting mushy. You can also add a splash of lime juice to refresh the flavors. Enjoy your leftovers without losing the great taste! Yes, you can make this salad a day ahead. Just follow these best practices for meal prep: - Prepare the salad and chill it for a few hours or overnight. - Store it in an air-tight container to keep it fresh. - Before serving, give it a quick stir to mix the ingredients again. The original recipe uses pasta, which is not gluten-free. However, you can easily choose alternative pasta options: - Use gluten-free pasta made from rice or corn. - Check the label to ensure it is certified gluten-free. This salad is great on its own, but here are some pairing suggestions for a complete meal: - Serve it as a side dish with grilled chicken or fish. - It goes well with tacos or burritos for a fun meal. - Add a light soup for a comforting dinner option. You can adjust the spice level by changing a few ingredients: - Use less jalapeño for a milder flavor. - Add more chili powder for extra heat. - Consider including diced bell peppers for crunch without the spice. This blog post covered how to make a delicious Mexican Street Corn Pasta Salad. We explored the key ingredients, like pasta and fresh corn, and detailed easy step-by-step instructions for cooking and mixing. I shared tips for perfecting flavors and variations, such as vegan and spicy options. In closing, this salad is versatile and suits every palate. Don’t hesitate to get creative with your own twists. Enjoy making it!

Are you ready to elevate your salad game? Our Mexican Street Corn Pasta Salad is a thrilling twist on a classic dish that bursts with flavor. You’ll discover a simple, …

Read more

Categories Salads

Pumpkin Cold Foam Tasty Recipe for Fall Drinks

August 15, 2025 by Chef Miles
- 1 cup heavy whipping cream - 2 tablespoons pumpkin puree - 1 tablespoon powdered sugar - 1 teaspoon vanilla extract - ½ teaspoon pumpkin spice mix - ¼ cup milk (dairy or non-dairy) - Additional pumpkin spice for sprinkling - Whipped cream for topping To make pumpkin cold foam, gather your ingredients. The heavy whipping cream gives your foam a rich base. You will need pumpkin puree for that warm fall flavor. Powdered sugar adds sweetness, while vanilla extract gives a nice aroma. Pumpkin spice mix brings in the classic flavors of fall. Finally, choose your milk. You can go with dairy or a non-dairy option. If you want to make your drink extra special, consider garnishing it. A sprinkle of pumpkin spice on top will look beautiful and give more flavor. You could also add a dollop of whipped cream for extra creaminess. These little touches make a big difference. Now, you are ready to create a tasty pumpkin cold foam to enjoy in your favorite drinks! - Mixing the Ingredients Start by taking a medium mixing bowl. Add 1 cup of heavy whipping cream, 2 tablespoons of pumpkin puree, 1 tablespoon of powdered sugar, 1 teaspoon of vanilla extract, and ½ teaspoon of pumpkin spice mix. Use a whisk to mix everything well. Make sure each ingredient blends smoothly. - Whipping to Soft Peaks Next, grab a hand mixer or a whisk. Beat the mixture on medium speed. Keep mixing until soft peaks start to form. Do not over-whip! You want to keep the foam light and airy, not turn it into butter. - Setting Aside the Foam Once your foam reaches the right consistency, gently set it aside. This foam will be the star of your drink! - Preparing the Milk Base In a separate glass, pour ¼ cup of your favorite milk over a generous amount of ice. This will create a cool base for your drink. You can use dairy or non-dairy milk, whichever you prefer. - Adding Ice Make sure the ice fills the glass well. This will keep your drink nice and cold. - Topping with Pumpkin Cold Foam Now, take your pumpkin cold foam. Use a spoon to carefully dollop it over the milk. Let it float beautifully on top. For extra flair, sprinkle a small pinch of pumpkin spice over the foam. Enjoy your drink right away, and savor the rich flavors! To make great foam, start with cold cream. Cold cream whips up better and faster. Use a medium bowl for mixing. Add your heavy whipping cream, pumpkin puree, powdered sugar, vanilla, and pumpkin spice mix. Whisk these ingredients well. For whisking, you can use a hand mixer or a whisk. If using a hand mixer, set it to medium speed. Beat the mixture until soft peaks form. Soft peaks look like small waves that hold shape. Be careful not to whip too long. Over-whipping can turn your foam into butter. You want it light and airy. To adjust sweetness, start with the recipe's sugar. Taste the foam and add more sugar if needed. You can use honey or maple syrup as alternatives. These natural sweeteners add a nice touch. For spice blends, try different mixes. You can add ground cinnamon, nutmeg, or ginger. If you want more warmth, add a pinch of clove or allspice. Mixing spices can give your foam a unique twist. Enjoy experimenting to find your favorite flavor! {{image_4}} You can make your pumpkin cold foam even more fun by changing the flavors. - Different Spice Mixes: If you want to switch things up, try different spices. You can use allspice, cardamom, or even vanilla bean. Each spice adds a unique twist to your drink. - Adding Chocolate or Caramel: If you love sweet flavors, add chocolate or caramel. Simply drizzle some sauce into the foam. It gives a rich taste that pairs well with pumpkin. You can also mix cocoa powder into the foam for a chocolatey treat. If you prefer plant-based options, you have choices for your pumpkin cold foam. - Using Almond or Oat Milk: Almond and oat milk work great in this recipe. Both give a creamy texture without dairy. They also add their unique flavor notes to the drink. - Non-Dairy Whipping Options: You can find non-dairy whipping creams at many stores. They whip up nicely, just like heavy cream. Look for brands that use coconut or soy for a great result. Experimenting with these variations makes your pumpkin cold foam fun and tasty. Enjoy your creations! To keep your pumpkin cold foam fresh, store it in the fridge. Use an airtight container to prevent it from absorbing smells. This method helps maintain its light and airy texture. Make sure the container is clean and dry before adding the foam. I suggest using glass jars or plastic containers with tight lids. These options seal well and keep your cold foam safe. If you have a smaller amount, a small jar works great. Just remember to label your containers with the date. This way, you can keep track of how long it has been stored. You can use leftover cold foam in many ways. Try adding it to coffee, hot chocolate, or even smoothies. This foam adds a tasty twist to your drinks. You can also use it as a topping for desserts like cakes or pancakes. When reusing cold foam, think about flavors. Mix in chocolate syrup or caramel for a new taste. You can also stir in a bit of milk to create a thinner foam. This gives you more options when you want to enjoy a delicious drink. To make pumpkin cold foam vegan, swap heavy cream with a non-dairy option. Good choices include coconut cream or a vegan whipping cream. For the milk, use almond, oat, or soy milk. These substitutes ensure your foam remains rich and creamy without dairy. Yes, you can use canned pumpkin puree. It saves time and adds great flavor. Look for pure pumpkin puree, not pumpkin pie filling. This ensures you control sweetness and spices. For a smoother texture, blend it well before adding to the foam. Pumpkin cold foam stays fresh for about 2 to 3 days. Store it in an airtight container in the fridge. To enjoy the best taste, use it soon after making. If you see separation, just whisk it gently before serving. This blog post explored how to make pumpkin cold foam. You need simple ingredients like heavy whipping cream, pumpkin puree, and powdered sugar. I shared step-by-step instructions to whip up the foam and assemble the drink. Tips for perfecting the texture and flavor help you elevate your drink. You can also experiment with variations and storage ideas to enjoy pumpkin foam longer. Try this treat to enjoy a cozy, tasty drink anytime!

Fall is here, and that means it’s time for cozy drinks! In this post, I’ll show you how to make a rich and tasty Pumpkin Cold Foam. With just a …

Read more

Categories Desserts

Creamy Apple Crumble Cheesecake Delightful Dessert Recipe

August 15, 2025 by Chef Miles
To make the creamy apple crumble cheesecake, gather these ingredients: - 1 ½ cups graham cracker crumbs - ½ cup unsalted butter, melted - 1 tablespoon granulated sugar - 2 cups cream cheese, softened - 1 cup granulated sugar - 3 large eggs - 1 teaspoon vanilla extract - ½ cup sour cream - 2 cups apples, peeled and diced - 1 teaspoon ground cinnamon - ½ teaspoon ground nutmeg - ½ cup rolled oats - ¼ cup packed brown sugar - ¼ cup all-purpose flour - Pinch of salt These simple ingredients bring together the rich, creamy cheesecake and the delightful crumble. The graham cracker crumbs form a crisp base. The melted butter binds them, adding richness. Cream cheese is the star here, giving the cheesecake its creamy texture. Eggs help set the cheesecake while vanilla and sour cream add depth. The apples bring a fresh, fruity flavor, enhanced by cinnamon and nutmeg. For the crumble, rolled oats, brown sugar, flour, and a pinch of salt create a crunchy topping. Each ingredient plays a key role in making this dessert a hit. First, preheat your oven to 325°F (163°C). This is the perfect temperature for baking our cheesecake. Next, take a 9-inch springform pan and lightly grease it with cooking spray. This step helps to prevent the cheesecake from sticking. In a medium mixing bowl, mix 1 ½ cups of graham cracker crumbs, ½ cup of melted unsalted butter, and 1 tablespoon of granulated sugar. Stir until it resembles wet sand. Then, press this mixture evenly into the bottom of the pan. Bake for 10 minutes and let it cool completely. Now, let’s make the filling. In a large mixing bowl, beat 2 cups of softened cream cheese with an electric mixer. Keep mixing until it’s smooth and creamy. Gradually add 1 cup of granulated sugar. Mix until it’s fluffy. Then, add 3 large eggs one at a time, mixing on low speed after each addition. Stir in 1 teaspoon of vanilla extract and ½ cup of sour cream. Mix until everything is silky smooth. Time to add some apples! In a separate bowl, mix 2 cups of diced apples with 1 teaspoon of ground cinnamon and ½ teaspoon of ground nutmeg. This gives the apples a nice warm flavor. Gently fold the spiced apples into the cheesecake batter. Make sure they are evenly mixed in. Then, pour the cheesecake mixture over the cooled graham cracker crust. Use a spatula to spread it evenly. Let’s create the crumble topping! In another bowl, mix ½ cup of rolled oats, ¼ cup of packed brown sugar, ¼ cup of all-purpose flour, and a pinch of salt. Stir until it’s well combined. Evenly sprinkle this topping over the cheesecake layer. This will add a nice crunch. Bake the cheesecake in the preheated oven for 55 to 65 minutes. The center should be set but still jiggle slightly when shaken. Once baked, remove it from the oven and let it cool on a wire rack for at least 1 hour. This cooling step is important for the texture. After cooling, transfer the cheesecake to the refrigerator. Chill for at least 4 hours, but overnight is best. This helps the flavors meld and sets the cheesecake. When ready to serve, carefully take off the sides of the springform pan. Slice the cheesecake into 10 even pieces. For a pretty touch, sprinkle some cinnamon on each slice and add a few thin apple slices on the side. Enjoy your creamy apple crumble cheesecake! To make your cheesecake smooth, beat the cream cheese well. Start with softened cream cheese for the best results. Mix until creamy, then add sugar slowly. This helps avoid lumps. When you add eggs, mix each one in just until combined. This keeps air from getting in and makes cracks less likely. Bake your cheesecake at a low temperature. A gentle bake helps it cook evenly, reducing cracks. You can make your cheesecake special by adding spices. Try mixing in a bit of ginger or cardamom for a unique twist. If you want to change the fruit, go for berries or pears. Just remember to adjust the spices to match the fruit you choose. This way, you can create your own flavor masterpiece! When you serve your cheesecake, think about garnishes. A sprinkle of cinnamon adds a nice touch. Thin apple slices on the side make it look fresh and pretty. For drinks, pair it with a warm cup of tea or a sweet cider. These choices enhance the flavors and make each bite more enjoyable. {{image_4}} You can make mini cheesecakes using muffin tins. This method is fun and perfect for parties. Simply line the muffin tin with cupcake liners. Prepare the crust as usual and press it into each liner. Adjust the bake time to about 20 to 25 minutes. They are done when the center is just set. Let them cool, then chill before serving. For a gluten-free version, substitute the graham cracker crumbs. You can use almond flour or gluten-free cookie crumbs instead. These options add nice flavor and texture. When making the crumble topping, use a gluten-free flour alternative like coconut flour. This way, everyone can enjoy the dessert! Want a vegan cheesecake? Use plant-based ingredients. For the cream cheese, try cashew cream or a store-bought vegan cream cheese. Replace the eggs with flaxseed meal mixed with water. Use 1 tablespoon of flaxseed meal and 2.5 tablespoons of water for each egg. Adjust baking techniques by lowering the temperature to 300°F (150°C) and baking slightly longer. This helps achieve a creamy texture without dairy! To store leftovers, place the cheesecake in an airtight container. This helps keep it fresh. You can also cover it tightly with plastic wrap. It’s best to chill the cheesecake for at least four hours before serving. But if you have time, letting it chill overnight is even better. If you want to freeze the cheesecake, first let it cool completely. Then, slice it into pieces. Wrap each slice in plastic wrap. Place the wrapped slices in a freezer-safe bag or container. This way, you can enjoy them later without losing flavor. When you want to eat a slice, take it out and let it thaw in the fridge. This usually takes a few hours. In the fridge, the cheesecake lasts about five days. Look for signs of spoilage, like an off smell or a change in texture. If the cheesecake feels slimy or dry, it’s best to throw it away. Enjoy this delicious dessert while it’s still fresh! You can use Greek yogurt or ricotta cheese. These options provide a creamy texture. You might also try mascarpone for a richer flavor. Just remember, the taste may slightly change. Yes, you can make this cheesecake a day or two in advance. It actually tastes better after chilling. Just cover it well and keep it in the fridge until you are ready to serve. Cracking happens for a few reasons. The oven may be too hot, or you might have overmixed the batter. To prevent this, bake at a lower temperature and mix gently. Also, cool it slowly in the oven after baking. Absolutely! Pears or peaches work well too. You can even use berries for a fun twist. Just make sure to adjust the spices to suit the fruit you choose. The cheesecake is done when it has a slight jiggle in the center. It should not be liquidy. You can also check if the edges are set and slightly puffed. This blog shared all the steps to make a tasty apple cheesecake. You learned about the ingredients, how to prepare the crust and filling, and tips for the best texture. Variations like mini versions and vegan options give you more choices. Follow the tips for storage and serving suggestions to enjoy your cheesecake longer. I hope you feel ready to bake this delicious treat. Just remember, practice makes perfect! Happy baking!

Craving a dessert that combines creamy cheesecake and warm spiced apples? You’re in the right place! Our Creamy Apple Crumble Cheesecake is the perfect treat for any occasion. With a …

Read more

Categories Desserts

S’mores Hand Pies Simple and Delicious Dessert Treat

August 15, 2025 by Chef Miles
To create S'mores Hand Pies, you need a few simple ingredients. Here's what you will need: - 2 cups all-purpose flour - 1/2 teaspoon salt - 1 teaspoon sugar - 1 cup unsalted butter, chilled and diced - 4-6 tablespoons ice water - 1 cup chocolate chips (semi-sweet or milk chocolate) - 1 cup mini marshmallows - 1/2 cup graham cracker crumbs - 1 egg (for egg wash) - Optional: powdered sugar for dusting These ingredients come together to form a delightful treat. The all-purpose flour gives the pies structure. The salt enhances the flavors, while sugar adds sweetness. Chilled unsalted butter makes the crust flaky. Ice water helps bind the dough without warming it. Chocolate chips and mini marshmallows create the classic S'mores flavor. Graham cracker crumbs mimic the taste of traditional S'mores. The egg wash gives the pies a lovely golden finish. If you like, dust them with powdered sugar for a sweet touch. Now, let’s get cooking and enjoy these tasty bites! To make the dough, first mix the dry ingredients. In a large bowl, combine 2 cups of all-purpose flour, 1/2 teaspoon of salt, and 1 teaspoon of sugar. This blend gives your hand pies a nice flavor. Next, add 1 cup of chilled, diced unsalted butter. Use a pastry cutter or your fingers to work the butter into the dry mix. It should look like coarse crumbs. Slowly add 4 to 6 tablespoons of ice water, one tablespoon at a time. Stir until the dough holds together. Wrap the dough in plastic wrap and chill it in the fridge for at least 30 minutes. This step is key for a flaky crust. While the dough chills, it’s time to preheat your oven. Set the temperature to 375°F (190°C). This temperature ensures a golden, crisp finish. Prepare a baking sheet by lining it with parchment paper. This will prevent the pies from sticking and make cleanup easier. After chilling, divide the dough in two. Roll out one half on a floured surface until it is about 1/8 inch thick. Use a round cutter, about 10 cm in diameter, to cut circles from the dough. Repeat this with the second half of the dough. Aim for even circles to make sure the hand pies bake evenly. Now, it’s time to fill your hand pies. On one half of each dough circle, sprinkle about 1 teaspoon of graham cracker crumbs. Next, add around 1 tablespoon of chocolate chips and a few mini marshmallows. Make sure to leave a small border around the edges. This space is important for sealing the pies. To seal the pies, wet the edges of the dough circles with a bit of water. Fold the other half over the filling and press the edges firmly. Use a fork to crimp the edges for a nice design and to ensure they stay closed. This step is crucial to keep the filling inside during baking. Place the hand pies on the prepared baking sheet. Beat 1 egg in a small bowl and brush it over the tops of the pies. This egg wash gives them a beautiful golden color. Bake the pies in the preheated oven for 20 to 25 minutes, or until they turn golden brown. Once baked, let them cool for a few minutes before serving. You can dust them with powdered sugar for extra sweetness. Enjoy your delightful S'mores hand pies! - Keep your dough cold. Cold butter makes flaky crusts. - Chill the dough for at least 30 minutes. - Flour your surface well before rolling. This stops sticking. - Roll the dough to 1/8 inch thick. This gives the right texture. - Use a round cutter to make even circles. - Choose chocolate chips carefully. Semi-sweet or milk chocolate works best. - Use a 1:1 ratio of chocolate to graham cracker crumbs. - Add mini marshmallows for that classic S'mores flavor. - Aim for about 1 tablespoon of filling per pie. This keeps it balanced. - Prepare the dough a day early. Store it in the fridge. - You can freeze the dough for up to three months. - Assemble the hand pies in advance. Freeze them before baking. - When ready, bake from frozen, adding a few extra minutes. {{image_4}} You can change the flavor of S'mores hand pies easily. Try different chocolates like dark or white. Each type brings a new taste. You can also add fruit or nuts. Think of bananas or strawberries for sweetness. Chopped nuts add a nice crunch. Mix and match to find your favorite combo! If you need gluten-free options, swap regular flour for almond or oat flour. These flours work well in pie dough. For a vegan version, use plant-based butter and a flax egg instead of regular egg. Just mix ground flaxseed with water to create your egg substitute. Make your hand pies look fun when serving. Place them on a rustic wooden board. Add extra chocolate chips and mini marshmallows on top for a great look. You can also serve them with dips. A chocolate sauce or a fruity dip adds flavor and fun. Enjoy experimenting with these ideas! To keep your S'mores hand pies fresh, use simple methods. You can refrigerate or freeze them. For refrigeration, place the hand pies in an airtight container. They will stay good for 3-4 days in the fridge. If you want them to last longer, freeze them. Wrap each pie in plastic wrap, then place them in a freezer bag. This helps prevent freezer burn. For reheating, the oven works best. Preheat it to 350°F (175°C). Place the pies on a baking sheet and heat for about 10-15 minutes. This ensures they stay crisp and tasty. The shelf life of S'mores hand pies depends on how you store them. In the fridge, they last about 3-4 days. If frozen, they can remain fresh for 2-3 months. Always check for any signs of spoilage before eating. Look for an off smell or visible mold. If you see any, it’s best to throw them away. Keeping an eye on your pies ensures you enjoy them at their best. S'mores Hand Pies are mini desserts filled with chocolate, marshmallows, and graham cracker crumbs. They take inspiration from the classic campfire treat. The idea of combining these flavors dates back to the 1920s when s'mores first became popular in the U.S. They are fun to eat and easy to share. Yes, you can prepare S'mores Hand Pies in advance. To do this, follow these steps: - Prepare the dough and chill it as directed. - Shape the pies and seal them tightly. - Place them on a baking sheet and freeze them. - When you are ready to bake, let them thaw in the fridge overnight. This way, you can enjoy fresh hand pies without all the work at once. If you don’t have graham cracker crumbs, here are some options: - Crushed digestive biscuits provide a similar flavor. - Vanilla wafers add a sweet twist. - Oatmeal cookies can give a unique texture. All these options can work well with the chocolate and marshmallows. To boost the chocolate flavor in S'mores Hand Pies, consider these ideas: - Use dark chocolate chips for a richer taste. - Mix in peanut butter chips for a creamy layer. - Add a sprinkle of cocoa powder to the filling for more depth. These changes can elevate your hand pies to a new level. Absolutely! S'mores Hand Pies are perfect for parties. Here are some ideas for serving: - Arrange them on a rustic wooden board for a charming display. - Garnish with extra chocolate chips and mini marshmallows on top. - Offer dipping sauces, like chocolate or caramel, for added fun. They make a delightful treat that everyone will enjoy! This blog post detailed how to make S'mores Hand Pies from scratch. We covered ingredients, step-by-step instructions, and helpful tips for success. I shared variations, storage tips, and answered common questions. Now, you can create delicious treats for any occasion. Whether you enjoy classic flavors or want to try something new, these hand pies are sure to please. Enjoy baking and sharing your tasty creations!

S’mores Hand Pies are a fun twist on a classic treat. Imagine gooey chocolate, fluffy marshmallows, and crunchy graham crackers all wrapped in flaky pastry. They’re perfect for a quick …

Read more

Categories Desserts

Street Corn Salad Cups Refreshing and Easy Recipe

August 15, 2025 by Chef Miles
- 4 fresh ears of corn, husked and grilled - 1 cup sweet cherry tomatoes, halved - 1 ripe avocado, diced - 1/2 cup red onion, finely chopped - 1/2 cup cotija cheese, crumbled - 1/4 cup fresh cilantro, roughly chopped - Juice of 2 juicy limes - 2 tablespoons high-quality olive oil - 1 teaspoon chili powder - Salt and freshly ground pepper to taste - Small lettuce leaves (such as butter or romaine) or sturdy tortilla chips for serving Using fresh ingredients makes a big difference in this dish. Fresh corn adds sweetness and crunch. Ripe avocados give a creamy texture. Sweet cherry tomatoes bring a burst of flavor. When you use fresh produce, you get the best taste and nutrition. The colors also pop, making the dish more appealing. If you can’t find an ingredient, don’t worry! Here are some easy swaps: - Use canned corn if fresh corn is not available. - Swap cotija cheese with feta or goat cheese. - Try lime juice from a bottle, but fresh is best. - If you want less heat, skip the chili powder or use paprika. - For a different crunch, use diced bell peppers instead of red onion. These changes keep the spirit of the dish while letting you use what you have. Enjoy your cooking adventure! To start, heat your grill to medium-high. Take four fresh ears of corn and husk them. Place the corn directly on the grill. Cook for 10 to 12 minutes. Turn them often to get a nice char. When done, remove the corn from the grill and let it cool a bit. Once cool, slice the kernels off the cob and put them in a large mixing bowl. Now, it’s time to add the fun stuff! In the bowl with the corn, add 1 cup of halved sweet cherry tomatoes. Then, dice 1 ripe avocado and toss it in. Next, finely chop 1/2 cup of red onion and add it too. Crumble 1/2 cup of cotija cheese and sprinkle it in. Lastly, add 1/4 cup of roughly chopped fresh cilantro. You’ll love how colorful this mix looks! For the dressing, grab a small bowl. In it, whisk together the juice of 2 limes, 2 tablespoons of high-quality olive oil, and 1 teaspoon of chili powder. Add a pinch of salt and freshly ground pepper. Mix until it becomes smooth and well-blended. This tangy dressing will make your salad pop! Now, let’s put it all together. Drizzle your dressing over the corn mixture. Use a spatula to gently toss everything. Be careful to keep the avocado pieces intact. Next, take small lettuce leaves or sturdy tortilla chips. Spoon generous amounts of the salad mixture into each one. This makes it easy to enjoy! For a nice touch, sprinkle extra cotija cheese and fresh cilantro on top. Your Street Corn Salad Cups are ready to impress! To grill corn just right, start with fresh ears. Husk them well. Heat your grill to medium-high. Place the corn directly on the grates. Turn them every few minutes. Aim for a nice char in about 10-12 minutes. When done, let the corn cool before cutting off the kernels. This step makes your salad full of flavor. If you have leftover salad, store it in an airtight container. Keep it in the fridge. It stays fresh for about two days. Just remember, the avocado may brown over time. To slow this down, add a little lime juice on top before sealing the container. This keeps your salad looking bright and tasty. You can change the flavors in your salad to suit your taste. Want it spicy? Add more chili powder or some diced jalapeños. Love herbs? Try adding fresh dill or parsley. For a sweeter touch, mix in some diced mango or pineapple. The options are endless. Get creative and make it your own! {{image_4}} You can boost your Street Corn Salad Cups by adding proteins. Chicken or shrimp work well. Grilled chicken adds a smoky taste. For a fresh twist, try diced rotisserie chicken. If you like seafood, grilled shrimp is a great choice. It adds a nice contrast to the sweet corn. For a heartier option, use black beans. They give protein and fiber. Just rinse and mix them in. If you want vegetarian options, skip the meat and add more veggies. Grilled zucchini or bell peppers add great flavor. You can also add chickpeas for extra protein. For vegan options, replace cotija cheese with avocado or nutritional yeast. Both give a creamy texture without dairy. This keeps your salad fresh and light. The dressing can change the whole flavor of your salad. Instead of lime, try lemon juice for a different twist. A bit of honey can add sweetness. For a spicy kick, mix in some hot sauce or sriracha. If you prefer a creamier dressing, mix yogurt or avocado with lime juice. This adds a rich texture. Play with flavors to find your favorite mix! Store any leftover salad in an airtight container. This keeps the flavors fresh. If you use lettuce cups, remove the salad before storing. The lettuce can wilt quickly. Leftover salad stays good for about 2 days in the fridge. To keep your salad fresh, add the dressing just before serving. This helps the ingredients stay crisp. If you have extra tomatoes or avocado, store them separately. They can spoil fast when mixed in. You don't need to reheat this salad. It tastes best cold. If you want to serve it warm, try grilling the corn again. Just be careful not to overcook it. You can also use the salad as a topping for grilled meats or tacos. This adds a fresh touch to any meal! Yes, you can prepare the salad ahead of time. Just keep the salad mixture in the fridge. It tastes great cold. However, I recommend waiting to assemble the cups until right before serving. The lettuce or chips can get soggy if you wait too long. These salad cups pair well with many dishes. Try serving them with grilled chicken or fish. They also go great with tacos or quesadillas. For a lighter meal, serve them with a fresh green salad. You can even enjoy them as a snack on their own! To add heat, use more chili powder. You can also add diced jalapeños or hot sauce. Adjust the flavors to your taste. Just remember to start small and taste as you go. You can always add more spice if needed. This salad is not only tasty but also healthy! Here are some benefits of the key ingredients: - Corn: High in fiber and vitamins. - Avocado: Good source of healthy fats and potassium. - Tomatoes: Packed with vitamins C and K, plus antioxidants. - Red Onion: Contains antioxidants and may boost heart health. - Cilantro: Rich in vitamins A and K, plus it adds flavor. - Cotija Cheese: Adds calcium and protein. This mix offers fiber, vitamins, and healthy fats, making it a great choice for a meal or snack! You learned key steps to make tasty Street Corn Salad Cups. Fresh ingredients boost flavor and nutrition. I shared tips on grilling corn and storing leftovers. You also explored fun variations and possible protein additions. Try customizing the flavors to fit your taste. This dish is versatile and simple. With these ideas, you can enjoy Street Corn Salad Cups anytime you want. Enjoy creating your own version!

Are you ready to whip up something fresh and tasty? Street Corn Salad Cups are not only easy to make, but they also burst with flavor that will delight your …

Read more

Categories Salads
Older posts
Newer posts
← Previous Page1 … Page41 Page42 Page43 … Page113 Next →

MELTED RECIPES

where delicious ideas melt into life, from stovetop to backyard. Always warm, simple, and irresistibly satisfying. 🍳🔥🧀

PAGES

Home About Contact Privacy Policy Terms & Conditions Cookie Policy GDPR Policy Copyright Policy Disclaimer

CATEGORIES

Appetizers Desserts Salads Breakfast Dinner

Contact

  • Pinterest
  • Mail
Copyright © 2025 Melted Recipes. All rights reserved.