Mouthwatering Shrimp Tacos with Lime Crema Recipe
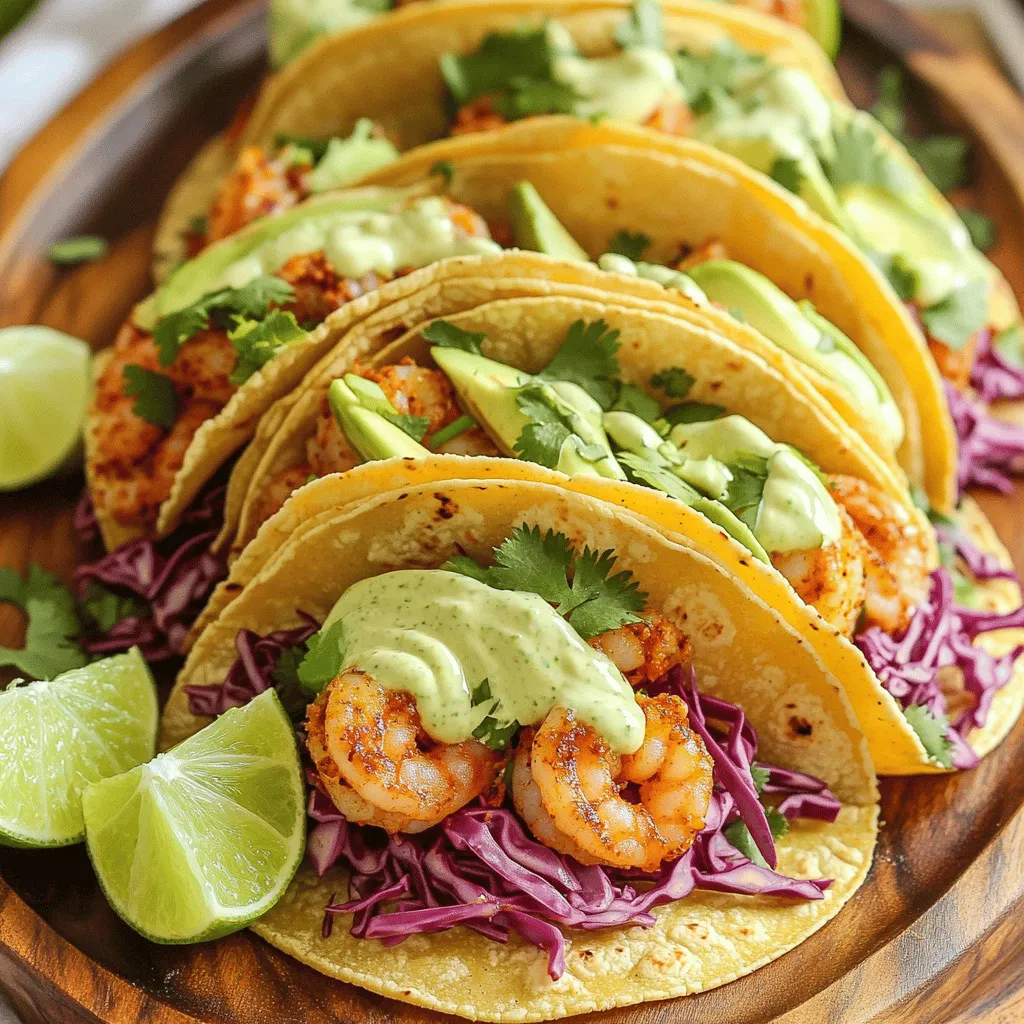
Are you ready to spice up your dinner routine? These shrimp tacos with lime crema are quick, tasty, and perfect for any taco night! Imagine biting into tender shrimp, zesty …
Are you ready to spice up your dinner routine? These shrimp tacos with lime crema are quick, tasty, and perfect for any taco night! Imagine biting into tender shrimp, zesty …
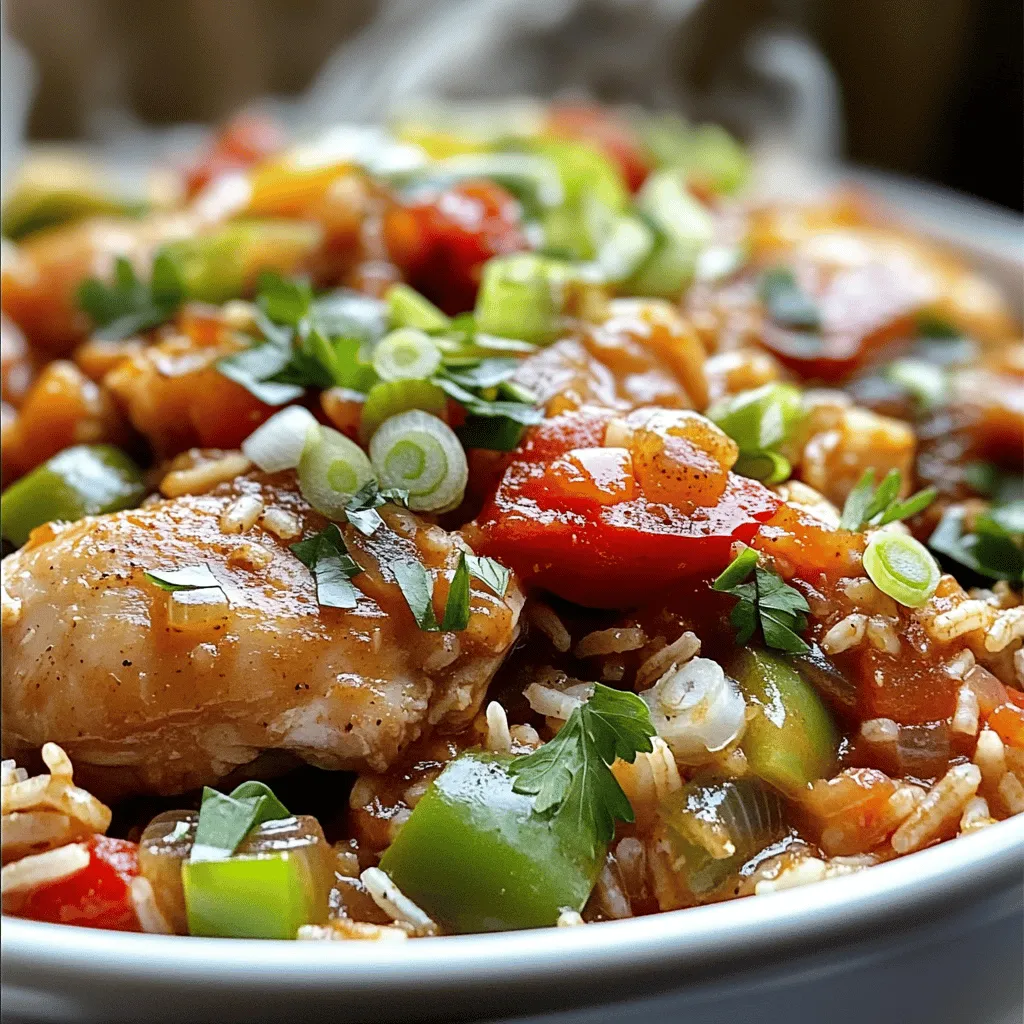
Looking for a meal that’s both flavorful and easy? Try my Slow Cooker Chicken Jambalaya! This dish brings together tender chicken, seasoned veggies, and rice, all simmered to perfection. It’s …
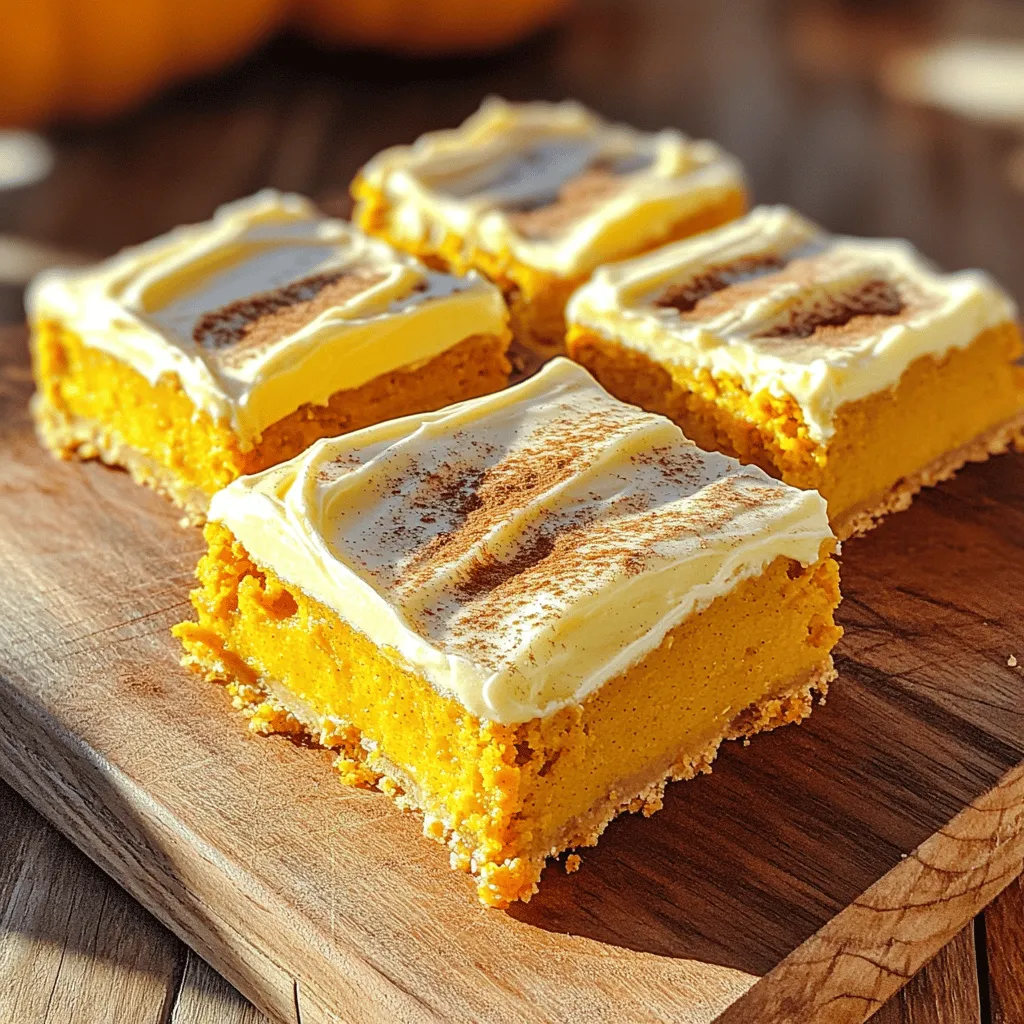
Fall is here, and it’s time for a treat that speaks to the season—Frosted Pumpkin Bars! In this blog post, I’ll guide you through making these delicious bars that burst …
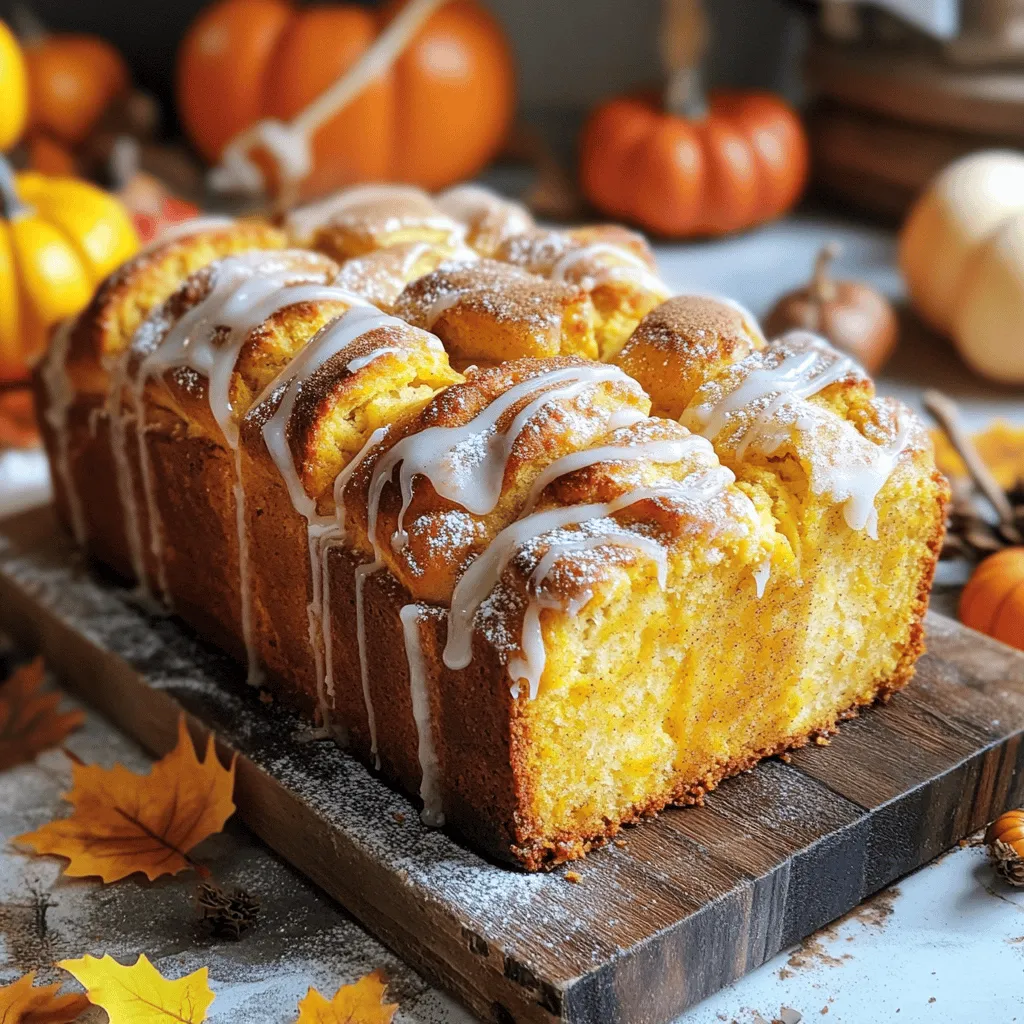
Fall is here, and nothing embodies the season quite like Pumpkin Spice Pull-Apart Bread. This warm, gooey delight is perfect for sharing or enjoying alone on chilly evenings. With its …
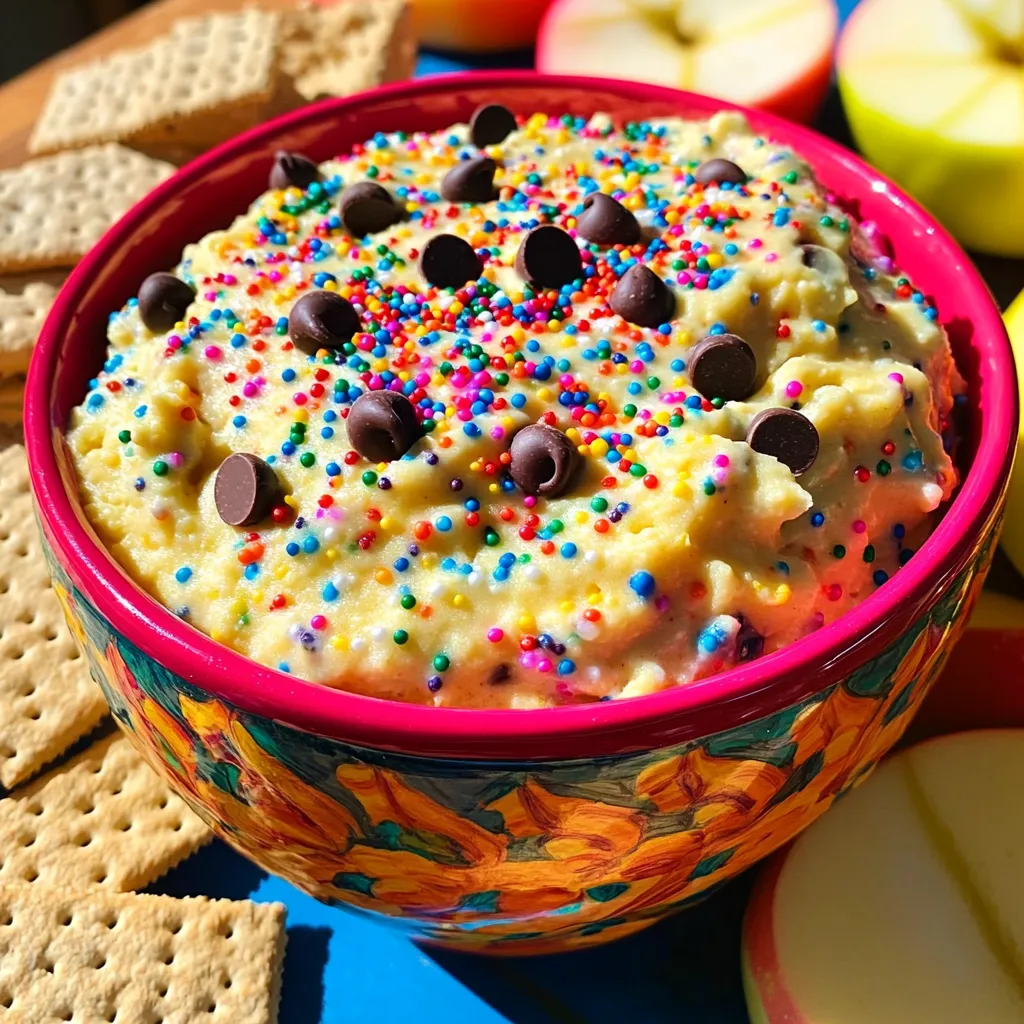
Craving something sweet and fun? Funfetti Cookie Dough Dip is the perfect treat! It’s creamy, colorful, and easy to make. With a few simple ingredients like flour, butter, and sprinkles, …
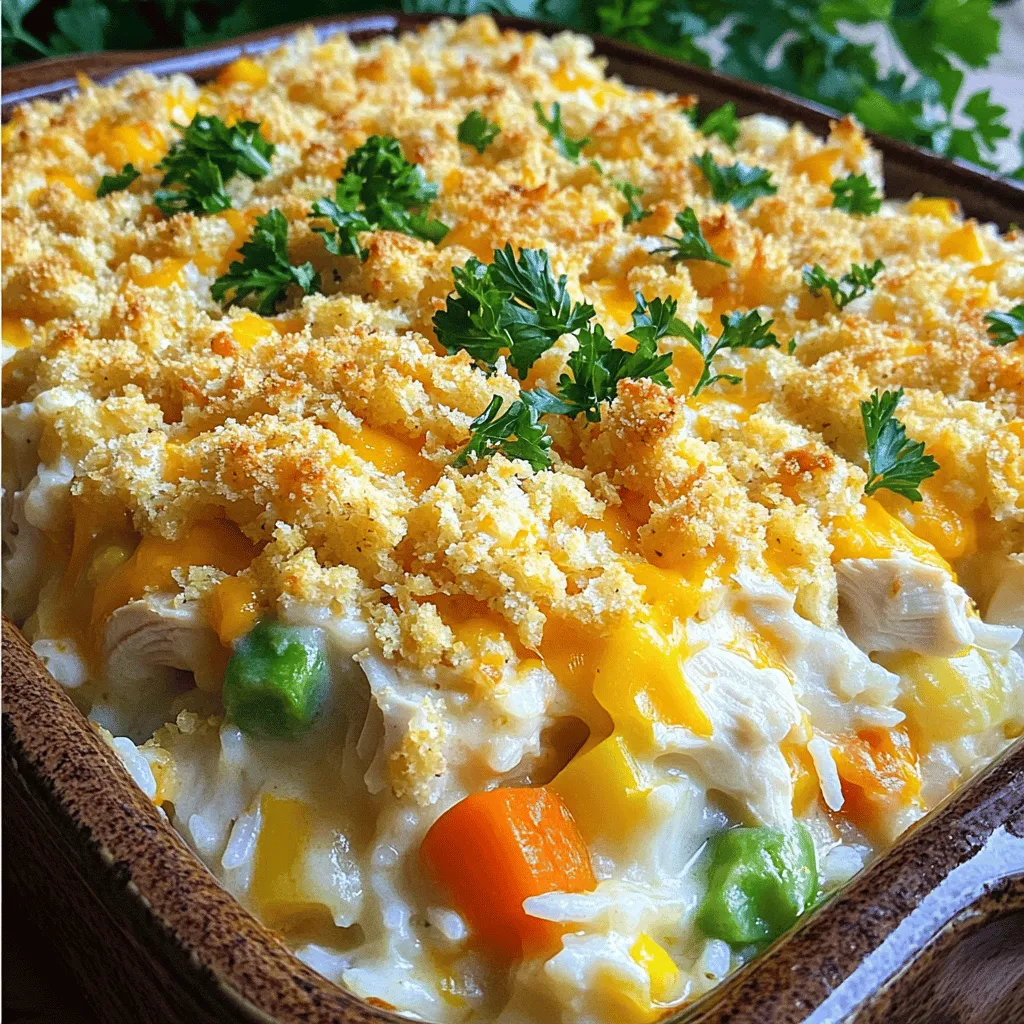
If you’re searching for a dish that’s both delightful and hearty, look no further than Million Dollar Chicken Casserole. This comforting meal is simple to make and packed with flavor. …
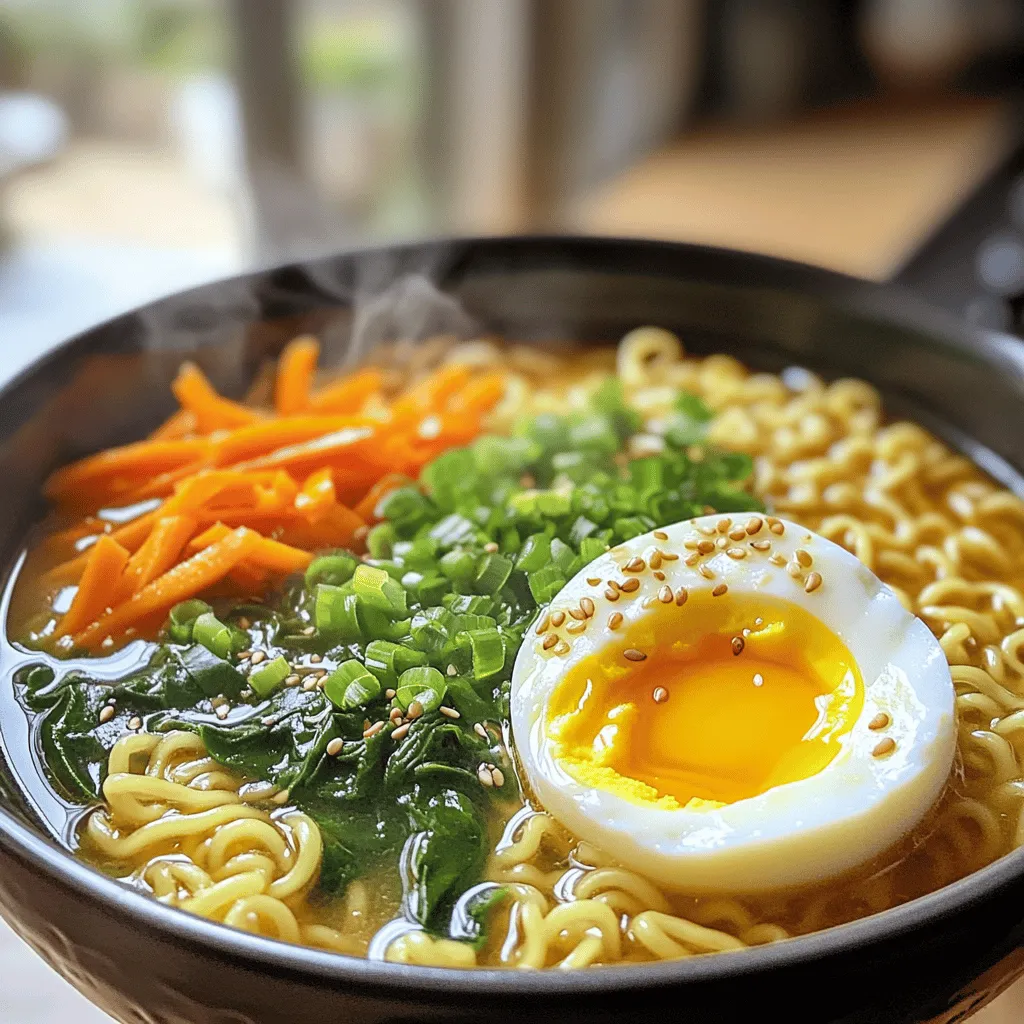
Are you ready to spice up your dinner plans? TikTok Spicy Garlic Ramen is a simple yet delicious dish that brings the heat and flavor you crave. With just a …
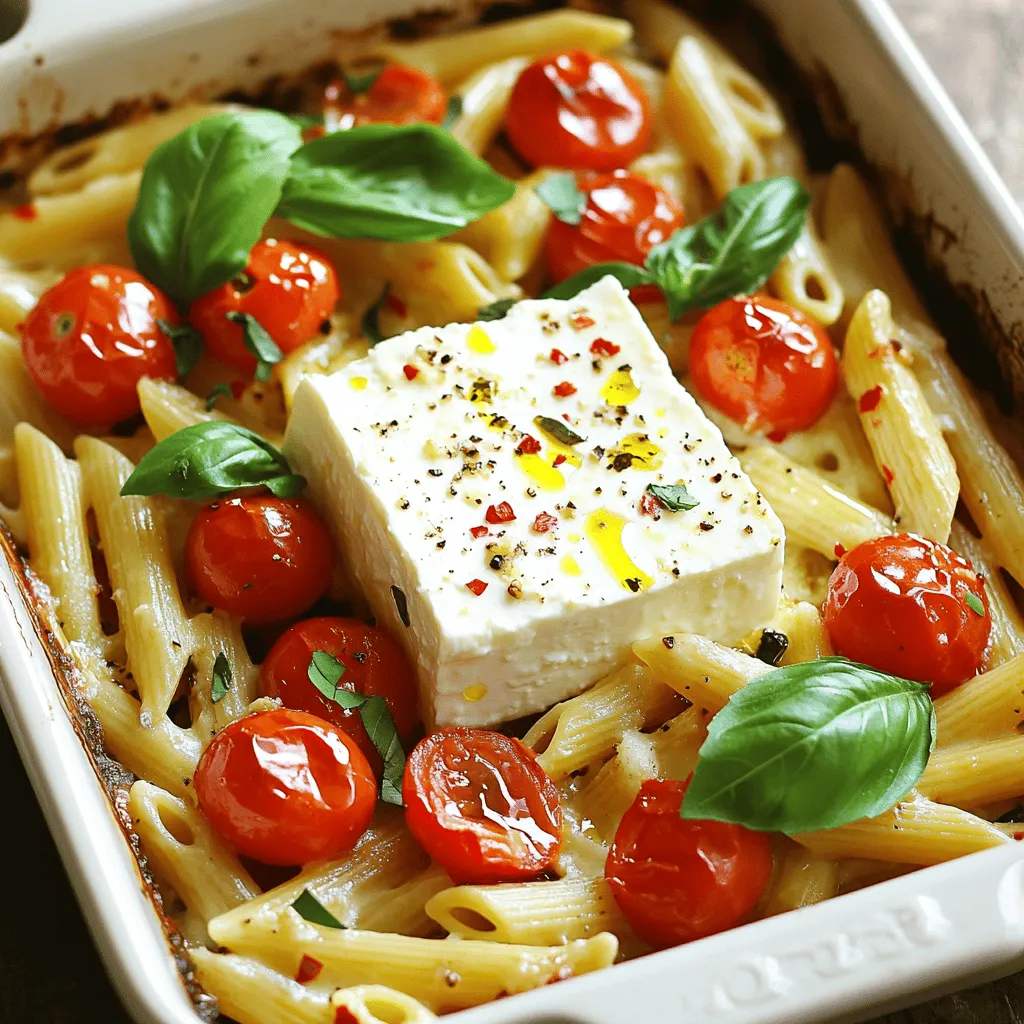
Baked feta pasta took the internet by storm, and it’s not hard to see why! This simple dish brings together creamy feta, juicy tomatoes, and perfectly cooked pasta for a …
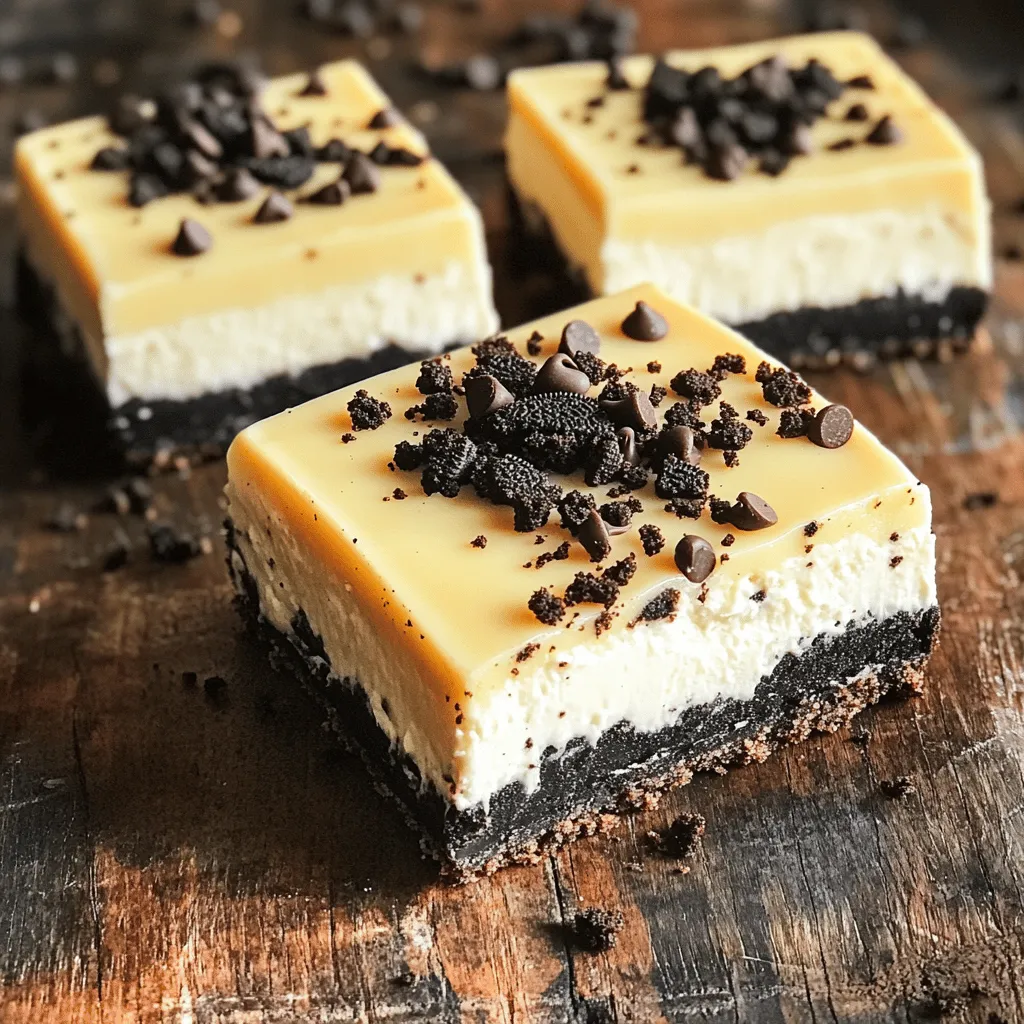
Are you craving a sweet treat that’s simple and delicious? Look no further! In just a few easy steps, you can whip up No-Bake Oreo Cheesecake Bars that will impress …
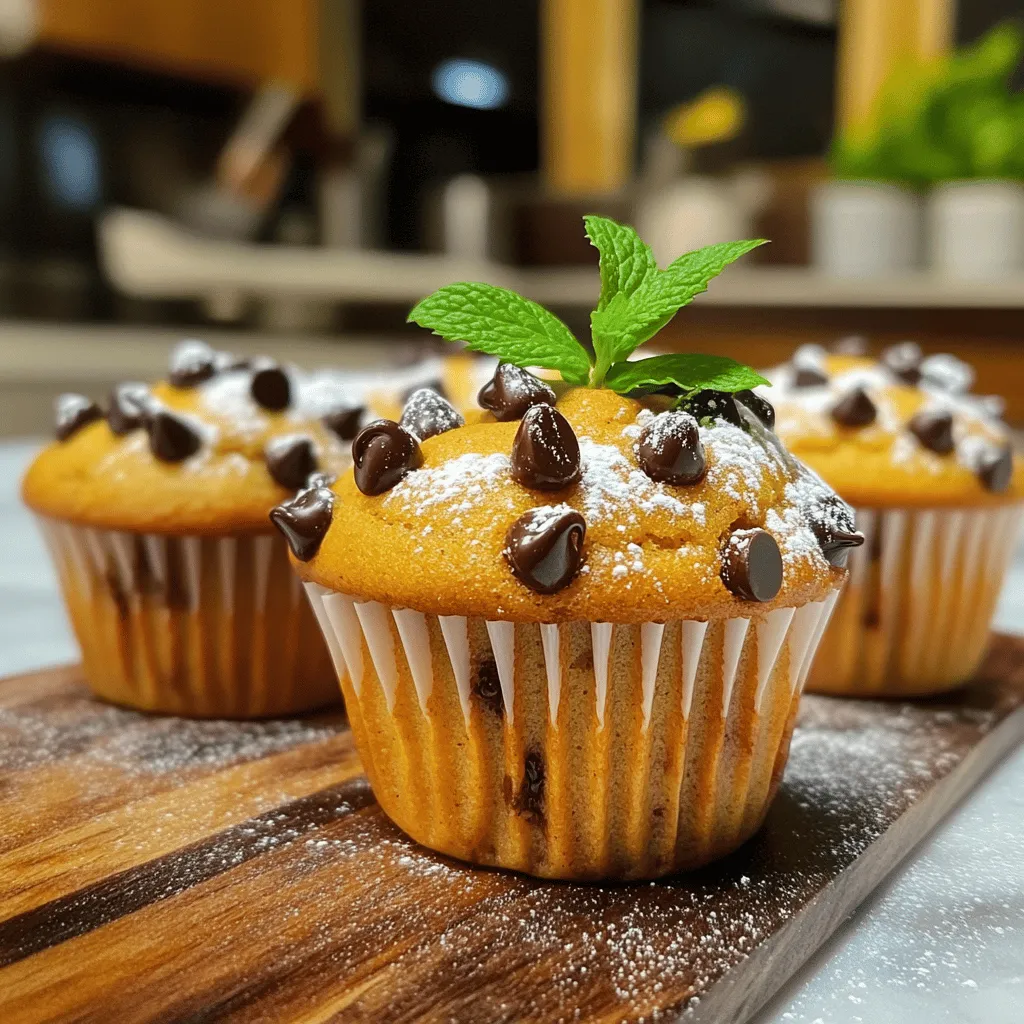
Are you ready to make the best Pumpkin Chocolate Chip Muffins? These treats are easy, tasty, and perfect for any season. In this article, I will guide you through simple …