Skip to content
Melted Recipes
  • Home
  • Appetizers
  • Desserts
  • Salads
  • Breakfast
  • Dinner
  • Privacy Policy
  • Contact
  • About

Chef Miles

Cowboy Butter Chicken Linguine Flavorful Pasta Dish

August 26, 2025 by Chef Miles
- 8 oz linguine pasta - 2 chicken breasts, cut into bite-sized pieces - 4 tablespoons cowboy butter - 2 cloves garlic, minced - 1 teaspoon smoked paprika - ½ teaspoon chili powder - 1 cup cherry tomatoes, halved - 1 cup corn kernels (fresh or frozen) - 1 cup heavy cream - ½ cup grated Parmesan cheese - Salt and pepper to taste - Fresh parsley, chopped (for garnish) Using fresh ingredients makes a big difference. Fresh chicken gives a better taste. Choose bright, firm cherry tomatoes for sweetness. If you can, use fresh corn for a crunchier texture. Fresh parsley adds a burst of color and flavor. These tips help the dish shine. Cowboy butter is the star of this dish. Here’s what you need: - ½ cup softened butter: This makes the base creamy. - 1 tablespoon minced garlic: Garlic adds a punch of flavor. - 1 tablespoon finely chopped parsley: This gives a fresh taste. - 1 teaspoon lemon juice: Lemon juice brightens the mix. - Pinch of salt: It enhances all the flavors. - Sprinkle of red pepper flakes: This adds a little heat. Mix these well and refrigerate until you need it. Cowboy butter brings everything together in this meal. Start by boiling a large pot of salted water. This helps add flavor to the pasta. Once the water boils, add 8 oz of linguine pasta. Cook it according to the package instructions, usually around 8-10 minutes. You want the pasta to be al dente, which means it should be firm but not hard. After cooking, drain the pasta. Remember to save ½ cup of pasta water for later. Next, grab a large skillet. Heat 2 tablespoons of cowboy butter over medium heat. Once melted, add 2 chicken breasts, cut into bite-sized pieces. Season the chicken with salt, pepper, 1 teaspoon of smoked paprika, and ½ teaspoon of chili powder. Cook the chicken for about 5-7 minutes. Stir it occasionally until the chicken is golden brown and cooked through. Once done, set the chicken aside on a plate. In the same skillet, add the remaining 2 tablespoons of cowboy butter. Melt it and then add 2 cloves of minced garlic. Sauté the garlic for about 30 seconds until it is fragrant. Next, toss in 1 cup of halved cherry tomatoes and 1 cup of corn kernels. Cook these for 2-3 minutes, until the veggies soften and smell great. Lower the heat to a simmer. Pour in 1 cup of heavy cream. Gradually mix in ½ cup of grated Parmesan cheese. Stir until the sauce is smooth and creamy. If the sauce is too thick, add some reserved pasta water until it reaches your desired consistency. Carefully return the cooked chicken to the skillet, tossing it in the sauce. Add the drained linguine and mix everything together until the pasta is well coated. To serve, portion the Cowboy Butter Chicken Linguine onto plates. For a pop of color and flavor, sprinkle fresh chopped parsley on top. You can also add a bit more grated Parmesan cheese and a lemon wedge on the side for a zesty finish. Enjoy this hearty dish with family and friends! To get juicy chicken, start with bite-sized pieces. Use medium heat to cook them. This helps the chicken cook evenly. Season it well with salt, pepper, smoked paprika, and chili powder. These flavors deepen as the chicken browns. Aim for a golden color, which takes about 5-7 minutes. Remove it from the heat once it’s cooked through. This step ensures your chicken stays moist and tasty in the final dish. Making a creamy sauce is all about balance. Start with melted cowboy butter. Then, add minced garlic and cook it briefly to release its aroma. Next, toss in the cherry tomatoes and corn. This adds sweetness and texture. Pour in heavy cream slowly, stirring to prevent lumps. Finally, mix in grated Parmesan cheese. If the sauce is too thick, add reserved pasta water little by little. This helps you reach the perfect creamy consistency. Seasoning makes a huge difference in flavor. Use smoked paprika and chili powder for warmth. Adjust salt and pepper to your taste. Fresh parsley adds brightness when you garnish the dish. You can also use a squeeze of lemon to enhance the flavors. A hint of acidity can make the dish pop. Don’t be afraid to taste as you go. This helps you create a well-balanced Cowboy Butter Chicken Linguine that everyone will love. {{image_4}} You can swap chicken with other proteins. Shrimp works well and cooks fast. You can use diced turkey for a lighter option. For a vegetarian twist, try chickpeas or tofu. Both add protein and soak up flavors nicely. Feel free to mix in various veggies. Bell peppers add a sweet crunch. Spinach or kale gives a nice green boost. Zucchini or mushrooms can add an earthy note. Experimenting with seasonal veggies keeps the dish fresh. For a gluten-free version, use gluten-free pasta. Many brands offer good alternatives. To make it dairy-free, replace heavy cream with coconut cream. Nutritional yeast can replace Parmesan for a cheesy flavor without dairy. These swaps keep the dish delicious for everyone! Store leftover Cowboy Butter Chicken Linguine in an airtight container. Let the dish cool to room temperature first. Once cooled, seal it tightly. This way, it stays fresh for up to three days. Keep it in the fridge to maintain quality. To reheat, use the microwave or stove. If using the microwave, place a serving in a bowl. Add a splash of water or cream to keep it moist. Heat in 30-second bursts until warm. If using the stove, add the pasta to a pan over low heat. Stir gently and add a bit of cream or water to avoid drying out. You can freeze Cowboy Butter Chicken Linguine for up to three months. Place it in a freezer-safe container. Make sure to leave some space for expansion. To thaw, move it to the fridge overnight before reheating. You can also use the microwave for quick thawing. Just remember to stir often as it heats. You can make a quick swap with regular butter. Mix it with garlic, parsley, and a dash of lemon juice. This gives a nice flavor. You can also use herb-infused butter if you want an extra kick. Just adjust the amount to your taste. Yes, this dish works great for meal prep. Cook it in advance and store it in airtight containers. It keeps well in the fridge for a few days. Just reheat it before serving. This makes it easy for busy days. Absolutely! While linguine is a great choice, you can use any pasta you like. Try penne, fettuccine, or even gluten-free pasta. Just adjust the cooking time based on the type you choose. Each pasta gives a different texture. To add spice, increase the chili powder in the recipe. You can also add red pepper flakes for more heat. If you enjoy fresh flavors, toss in some diced jalapeños or hot sauce. Adjust the spice level to fit your taste. Cowboy Butter Chicken Linguine lasts about 3 to 4 days in the fridge. Store it in an airtight container to keep it fresh. If you want to keep it longer, consider freezing it. Just remember to thaw it before reheating. This blog post covered how to make Cowboy Butter Chicken Linguine. We explored the key ingredients and shared step-by-step instructions. I provided helpful tips for cooking chicken and making a creamy sauce. You learned about variations you can try, like using different proteins or veggies. I also included storage tips and answered common questions. In summary, this dish is easy and full of flavor. Enjoy making it your own!

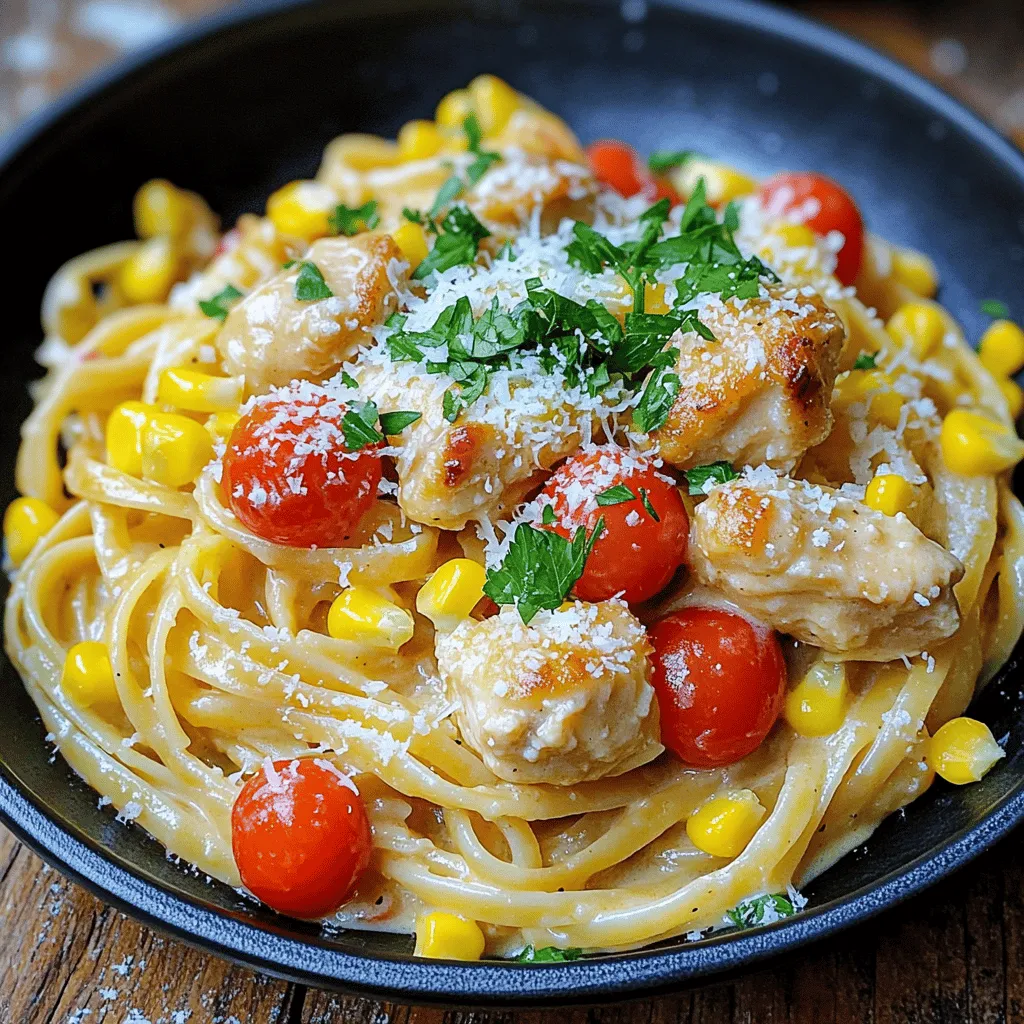
If you love a tasty pasta dish, you’re in for a treat! Cowboy Butter Chicken Linguine combines juicy chicken and rich, creamy sauce for a flavorful meal. I’ll guide you …

Read more

Categories Dinner

Creamy Pepperoncini Chicken Skillet Flavorful and Easy

August 26, 2025 by Chef Miles
- 4 boneless, skinless chicken breasts - 1 cup pepperoncini peppers, sliced (jarred) - 1 cup heavy cream - 1 cup chicken broth - 1 tablespoon Italian seasoning - 2 tablespoons olive oil - 1 cup grated Parmesan cheese - 3 cloves garlic, minced - Salt and pepper to taste These ingredients create a creamy, zesty dish that shines on any table. The chicken provides a base that absorbs all the flavors. Pepperoncini peppers add a delightful tang. The heavy cream and Parmesan cheese make the sauce rich and smooth. - Large skillet - Wooden spoon - Meat thermometer - Cutting board - Sharp knife - Measuring cups and spoons Using these tools helps you cook with ease. A large skillet ensures even cooking. A meat thermometer checks if the chicken is done. A sharp knife makes cutting easy. - Fresh parsley, chopped - Extra grated Parmesan cheese - Crushed red pepper flakes Garnishes add color and flavor. Fresh parsley brightens the dish. More cheese boosts the creaminess. Crushed red pepper flakes can add a spicy kick if you like heat. Start with the chicken breasts. First, season them well. Use salt, pepper, and Italian seasoning. This step boosts the flavor. Let the chicken sit for a few minutes. This helps the spices soak in. Next, heat olive oil in a large skillet over medium-high heat. Once the oil is hot, add the seasoned chicken breasts. Cook them for 6-7 minutes on each side. You want them golden brown and no longer pink inside. When done, take the chicken out and set it aside on a plate. Now, let’s make the sauce. In the same skillet, reduce the heat to medium. Add minced garlic and sauté for 1-2 minutes. You’ll smell the garlic soon! Next, throw in the sliced pepperoncini peppers and sauté for one more minute. Pour in the chicken broth and bring it to a gentle simmer. Use a wooden spoon to scrape the tasty bits from the skillet. After this, stir in the heavy cream. Cook for about 3-4 minutes until it thickens a bit. Finally, return the chicken to the skillet. Make sure it is submerged in the sauce. Sprinkle grated Parmesan cheese over the top. Let it simmer for another 2-3 minutes until the cheese melts. Adjust the seasoning if needed. Enjoy this creamy goodness! To cook the chicken just right, aim for 6-7 minutes per side. This timing ensures a golden crust. Use a meat thermometer for best results. The chicken should reach 165°F in the center. If you don’t have a thermometer, cut into the meat. It should be white, with no pink spots. Seasoning is key to great flavor. I love using salt, pepper, and Italian seasoning. Generously coat both sides of the chicken. This simple step adds depth. Don’t forget to taste the sauce before serving. Adjust the salt and pepper as needed for your taste buds. For a thicker sauce, let it simmer longer. Add more cream for a richer texture. If you prefer a lighter sauce, use less cream or more chicken broth. Stir well to mix in all flavors. This flexibility helps you create the perfect sauce for your meal. {{image_4}} You can easily swap chicken for other proteins. Try using turkey cutlets for a leaner option. Pork chops also work well; just adjust the cooking time. If you prefer beef, thinly sliced steak can add a rich flavor. Remember, thicker cuts may need longer cooking times. Ensure every protein is cooked through before serving. For a vegetarian twist, use tofu or seitan. Choose firm tofu for a better texture. Drain and press the tofu to remove excess water. Cut it into cubes, then brown them in the skillet. If using seitan, sauté it until golden and add it to the sauce. Both options soak up the creamy sauce well and still deliver a hearty meal. Adding vegetables can boost nutrition and flavor. Bell peppers, spinach, or zucchini are great choices. Simply sauté them with the garlic and pepperoncini. They add color and crunch to the dish. You can also toss in some cooked broccoli or green beans before serving. This makes the meal more balanced and vibrant. To store your creamy pepperoncini chicken, let it cool first. Place the chicken and sauce in an airtight container. Make sure to seal it well to keep out air. In the fridge, it will stay fresh for up to four days. Always label the container with the date. This helps you track how long it has been stored. If you want to save the chicken for later, freezing works great. Use a freezer-safe container or heavy-duty freezer bags. Make sure to remove as much air as possible. You can freeze it for up to three months. When you’re ready to eat, thaw it in the fridge overnight. This keeps the flavors intact. To reheat, place the chicken in a skillet over low heat. Add a splash of chicken broth or cream to keep it moist. Stir occasionally to heat evenly. You can also microwave it. Use a microwave-safe dish and cover it with a damp paper towel. Heat in short intervals to avoid drying it out. Enjoy your delicious chicken again! Yes, you can use other peppers. Bell peppers add sweetness. Jalapeños bring heat. Banana peppers offer a mild tang. Each type changes the dish's flavor. Feel free to experiment with your favorites. Just keep the flavor balanced. Creamy Pepperoncini Chicken Skillet goes well with many sides. Try serving it over rice or pasta. Both soak up the sauce nicely. You can also pair it with a fresh salad. Roasted vegetables add color and nutrition. For a cozy meal, serve with crusty bread. Yes, this recipe is great for meal prep. It stores well in the fridge. Divide it into containers for easy lunches. Just reheat when you're ready to eat. The flavors improve after a day in the fridge. Enjoy it throughout the week! This blog covered how to make a delicious Creamy Pepperoncini Chicken Skillet. We looked at key ingredients, helpful tools, and optional garnishes. Then, I shared easy steps for cooking and creating a rich sauce. You learned tips to ensure perfect chicken and tweak flavors to your liking. We explored variations, like using tofu or adding veggies, along with smart storage tips. Remember, cooking is fun and flexible. Enjoy this dish and make it your own!

If you’re looking for a quick and tasty meal, you’ve found it! My Creamy Pepperoncini Chicken Skillet is full of flavor and easy to make. This dish combines tender chicken …

Read more

Categories Dinner

Classic Beef Stew with Carrots & Potatoes Delight

August 26, 2025 by Chef Miles
- 2 lbs beef chuck - 4 carrots - 4 medium potatoes - 1 large onion - 3 garlic cloves - 4 cups beef broth - 2 teaspoons dried thyme - 2 bay leaves - 1 tablespoon Worcestershire sauce - 2 tablespoons tomato paste - 2 tablespoons vegetable oil - Salt and freshly ground black pepper When I make classic beef stew, I love using fresh, quality ingredients. The beef chuck is my first choice. It has great flavor and becomes tender when cooked. I cut it into 1-inch cubes, which helps it cook evenly. Next, I add vegetables. I use four carrots, sliced into rounds. They add sweetness and color. I also dice four medium potatoes. They soak up all the tasty broth. You can't forget the onion and garlic! I always use one large onion, diced, and three minced garlic cloves for depth of flavor. For the liquid, I choose four cups of beef broth. It gives the stew richness. Dried thyme adds an earthy taste, while two bay leaves bring a lovely aroma. A tablespoon of Worcestershire sauce gives it a nice kick. Finally, I mix in two tablespoons of tomato paste for extra body. I cook everything in two tablespoons of vegetable oil. It helps to brown the beef and sauté the onions. I season with salt and freshly ground black pepper to taste. With these ingredients, I create a hearty, comforting stew that warms the soul. It's a classic dish that brings everyone together. - Dicing the beef and vegetables Start by cutting the beef chuck into 1-inch cubes. This size helps the meat cook evenly. Next, dice the onion and mince the garlic. Slice the carrots into round pieces and peel and dice the potatoes. Having all your ingredients ready makes cooking smooth. - Searing the beef cubes Heat 2 tablespoons of vegetable oil in a large pot over medium-high heat. Once the oil shimmers, add the beef cubes in batches. Sear them for about 5 to 7 minutes. Turn the pieces to brown all sides. This step adds flavor and locks in juices. Remove the beef from the pot and set it aside on a plate. - Sautéing onions and garlic Using the same pot, add the diced onion. Cook for about 3 to 4 minutes until the onion is soft and clear. Then add the minced garlic and cook for 1 minute. This makes the kitchen smell great and builds a flavor base. - Combining ingredients in the pot Return the browned beef to the pot. Add in the sliced carrots and diced potatoes. Stir to mix everything well. This ensures all the flavors blend together nicely. - Simmering the stew Carefully pour in 4 cups of beef broth. Be sure to scrape any browned bits from the bottom of the pot. Those bits are packed with flavor! Add 2 teaspoons of dried thyme, 2 bay leaves, 1 tablespoon of Worcestershire sauce, and 2 tablespoons of tomato paste. Season with salt and pepper. Stir everything to combine. Bring the stew to a gentle boil, then reduce the heat to low. Cover the pot and let it simmer for about 2 hours. Stir occasionally to prevent sticking. The beef will become tender, and flavors will meld beautifully. - Adjusting seasoning Once the stew has simmered, taste it and adjust the seasoning. Add more salt and pepper if needed. This step is vital to ensure every bite is full of flavor. - Garnishing with parsley Finally, ladle the stew into deep bowls. Garnish each bowl with freshly chopped parsley. This adds a pop of color and freshness to your delicious beef stew. Using fresh herbs boosts the taste of your beef stew. I love adding fresh thyme or parsley right before serving. Fresh herbs add a bright note that dried herbs can't match. Another way to enhance flavor is by adding a splash of red wine. Red wine adds depth and richness to the stew. Choose a wine you enjoy drinking; it will shine in your dish. Simmering is very important for a great stew. It allows the beef to become tender. Low and slow cooking breaks down the tough fibers in the meat. You want to simmer for at least two hours for the best results. Browning the beef properly is key too. Make sure to sear the meat in batches. This keeps the pot hot, ensuring a good crust forms. That crust adds amazing flavor to your stew. Pair your beef stew with crusty bread. The bread soaks up the rich sauce perfectly. It makes for a complete meal you will love. Serve the stew hot in deep bowls. A sprinkle of fresh parsley on top makes it look nice. You can also add a side salad for a fresh contrast. Enjoy your delicious meal! {{image_4}} You can change up the beef in your stew. Try using different cuts like brisket or round. These cuts can add unique flavors and textures. You might also want to add other veggies. Peas, green beans, or mushrooms work great. They add color and nutrients to your dish. If you need a gluten-free stew, skip the Worcestershire sauce. Check for gluten-free alternatives in stores. You can also use a slow cooker for your beef stew. Just brown the meat first. Then add all the ingredients to the slow cooker. Cook on low for about 6-8 hours. To give your stew a regional flair, add spices. Paprika, cumin, or Italian herbs can change the taste. You can also try adding beer or stout. These drinks add depth and richness. Use them to replace some beef broth for a fun twist. To keep your beef stew fresh, cool it to room temperature first. Then, transfer it into airtight containers. This helps prevent freezer burn and keeps flavors intact. Store the containers in your fridge. They should stay good for up to four days. If you want to keep it longer, freezing is a great option. Pour the cooled stew into freezer-safe bags or containers. Squeeze out excess air before sealing. This method saves space and preserves quality. When it's time to enjoy your leftovers, reheating needs care. The best ways are on the stove or in the microwave. If using the stove, pour the stew into a pot and heat on low. Stir often to prevent sticking. In the microwave, use a microwave-safe bowl. Heat in short bursts, stirring in between. This helps ensure even heating. Avoid boiling the stew, as it can make the meat tough. In the fridge, your beef stew lasts about four days. After that, it may start to spoil. Signs to watch for include an off smell, changes in color, or mold. If you see any of these signs, it's best to throw it out. Proper storage is key to enjoying your delicious beef stew safely. To thicken beef stew, you can use cornstarch or flour. Mix a tablespoon of cornstarch with cold water. Stir this mixture into the stew a little at a time. Cook for a few minutes until it thickens. If you prefer flour, mix it with some water first. Then, add it to the stew and stir well. Another way to thicken is to reduce the cooking liquid. Cook the stew uncovered for a while. This will help evaporate some liquid and make it thicker. Yes, you can make beef stew in advance. It actually tastes better the next day! To do this, cook the stew as usual. Once it cools, store it in an airtight container. Keep it in the fridge for up to three days. To reheat, warm it on the stove over low heat. Stir often to avoid sticking. If needed, add a splash of beef broth to loosen it up. Yes, you can freeze beef stew. This is a great way to save leftovers. To freeze, let the stew cool completely. Pack it into freezer-safe containers. Leave some space at the top for expansion. It can last up to three months in the freezer. When you are ready to eat it, thaw it in the fridge overnight. To reheat, warm it on the stove over low heat or use the microwave. Stir well to ensure it heats evenly. This blog post covers the key ingredients and steps to make a delicious beef stew. You learned how to prepare the meat and veggies, enhance flavors, and explore variations. Whether you want to serve it fresh or store leftovers, I shared useful tips to make your stew great. With these insights, you can create a meal that warms hearts and fills bellies. Take your time, enjoy the process, and savor every bite. Your beef stew will impress everyone at the table!

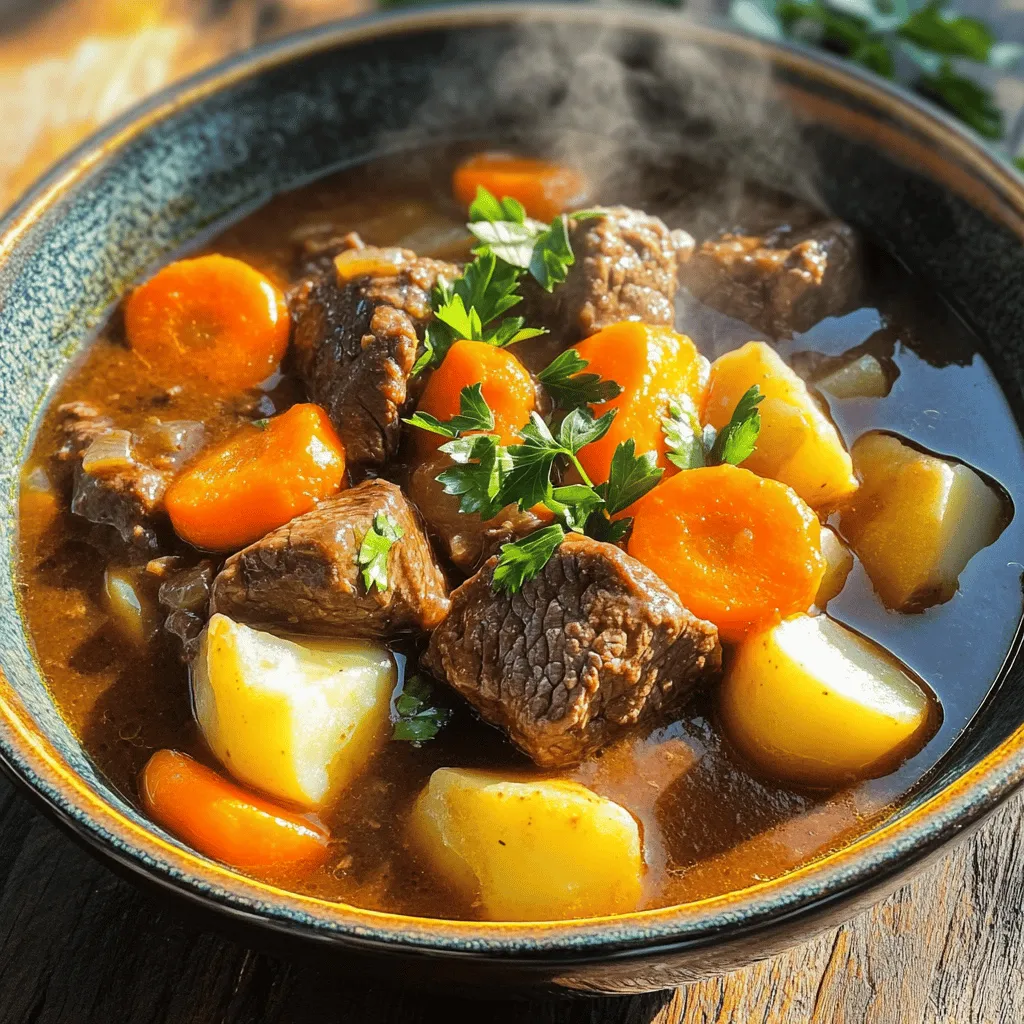
Welcome to “Classic Beef Stew with Carrots & Potatoes Delight.” If you’re craving a warm, hearty meal, this stew is your answer! Packed with tender beef, fresh carrots, and creamy …

Read more

Categories Dinner

Hearty Chicken Enchilada Crockpot Casserole Recipe

August 26, 2025 by Chef Miles
- 2 cups cooked chicken, shredded - 1 can (15 oz) black beans, drained and rinsed - 1 can (15 oz) corn, drained - 1 can (10 oz) enchilada sauce - 1 can (14.5 oz) diced tomatoes with green chilies - 1 teaspoon ground cumin - 1 teaspoon chili powder - 2 cups shredded cheese (a blend of cheddar and Monterey Jack) - 8 small corn tortillas, cut into strips - 1/2 cup fresh cilantro, chopped - 1 avocado, diced - Sour cream (optional, for serving) You can swap cooked chicken for shredded rotisserie chicken for ease. If you want more fiber, try using pinto beans instead of black beans. For a lighter option, use low-fat cheese. You can also choose gluten-free tortillas if needed. If you like it spicy, add jalapeños or extra chili powder. To start, grab a large mixing bowl. Add 2 cups of shredded chicken. Next, pour in the black beans, corn, enchilada sauce, and diced tomatoes. Make sure to drain the beans and corn first. Then, add 1 teaspoon of ground cumin and 1 teaspoon of chili powder. These spices add great flavor. Stir all the ingredients gently until they are mixed well. You want everything coated in the sauce. This mixture is the heart of your casserole. Now, prepare your crockpot. Lightly spray the inside with cooking spray. This helps the casserole not stick. Place half of the corn tortilla strips evenly at the bottom. This creates a solid base. Next, take half of your chicken mixture and spoon it over the tortilla strips. Spread it out gently. Then, sprinkle half of the shredded cheese over this layer. Repeat the layering process. Add the remaining tortilla strips, followed by the rest of the chicken mixture. Finally, top it off with the remaining cheese. This layering creates a delicious, cheesy casserole. Secure the lid on the crockpot. Set the heat to LOW for 4-5 hours or HIGH for 2-3 hours. You want to cook until the cheese is melted and bubbly. This will make the casserole warm and inviting. After the cooking time is up, turn off the crockpot and let it rest for about 10 minutes. This resting time helps the layers settle. It makes serving easier and more enjoyable. To make a perfect Hearty Chicken Enchilada Crockpot Casserole, start with good quality chicken. Shredded chicken works best here. Use a rotisserie chicken for more flavor. Choose fresh corn tortillas for the best texture. Layer the casserole evenly to ensure even cooking. Spray the crockpot with cooking spray to prevent sticking. One common mistake is overcooking the casserole. Keep an eye on the cooking times. Cooking too long makes the tortillas mushy and the cheese can burn. Avoid using too much sauce, as it can make the dish soggy. Ensure you drain beans and corn well; excess liquid can ruin the casserole. To boost flavor, use spices like cumin and chili powder. Add a squeeze of lime for brightness. Fresh cilantro as a garnish adds color and freshness. For a kick, consider adding jalapeños to the mix. You can also sprinkle some additional cheese on top during the last 30 minutes of cooking for a melty finish. {{image_4}} You can make this dish vegetarian by swapping out the chicken. Use a mix of beans, like black beans and pinto beans. Add extra veggies, such as bell peppers, zucchini, or mushrooms. These will give you a hearty and tasty option. Use the same enchilada sauce and spices for flavor. Don’t forget to add cheese or a dairy-free option if needed. Adjust the heat level to your liking. For a spicy kick, add diced jalapeños or chipotle peppers in adobo sauce. You can also use a spicier enchilada sauce. If you prefer mild flavors, stick with regular enchilada sauce and skip the spicy peppers. You can also reduce the chili powder for a gentler taste. To make this casserole gluten-free, use corn tortillas instead of flour ones. Check the labels to ensure your enchilada sauce is gluten-free. Many brands offer gluten-free options. You can also add more vegetables to maintain a hearty texture, so everyone can enjoy this dish without worry. To store your Hearty Chicken Enchilada Crockpot Casserole, let it cool down first. Use an airtight container for best results. You can keep it in the fridge for up to four days. Make sure to cover the casserole well. This keeps it fresh and tasty. When you’re ready to enjoy leftovers, preheat your oven to 350°F (175°C). Place the casserole in an oven-safe dish. Cover it with aluminum foil to keep it moist. Bake for about 20-25 minutes. You can also reheat it in the microwave. Use a microwave-safe bowl and heat for 2-3 minutes. Stir halfway for even heating. To freeze the casserole, cool it completely. Then, wrap it tightly in plastic wrap. After that, place it in a freezer-safe container. It can last for up to three months in the freezer. When you’re ready to eat, thaw it overnight in the fridge. Reheat it as mentioned above. Enjoy your delicious meal anytime! Yes, you can use frozen chicken. Just make sure to cook it fully. If you use frozen chicken, you may need to increase the cooking time. I recommend cooking on HIGH for 4-5 hours. This way, the chicken fully cooks and absorbs all the tasty flavors. To make this dish dairy-free, simply skip the cheese. You can use a dairy-free cheese alternative or omit it entirely. Adding more spices and fresh herbs can boost flavor. You might also try adding avocado for creaminess. This casserole pairs well with many sides. Here are some ideas: - Rice, either white or brown - Refried beans for extra protein - A fresh salad with lime dressing - Tortilla chips for crunch - Corn on the cob for sweetness We covered all the key parts of making a Hearty Chicken Enchilada Casserole. I shared the important ingredients, cooking steps, and tips to avoid mistakes. We also explored tasty variations for different diets. Don’t forget proper storage for leftovers and reheating. This dish is easy to make and great for gatherings. With a few simple steps, you’ll create a meal that everyone will love. Enjoy cooking and sharing this delicious casserole!

Looking for a warm, filling dish that practically cooks itself? This Hearty Chicken Enchilada Crockpot Casserole is your answer! With layers of chicken, cheese, and spicy enchilada sauce, it’s a …

Read more

Categories Dinner

Soft Pumpkin Cookies with Cinnamon Frosting Delight

August 26, 2025 by Chef Miles
- 1 cup canned pumpkin puree - 1/2 cup unsalted butter, softened - 1 cup brown sugar, packed - 1/2 cup granulated sugar - 1 large egg - 2 teaspoons vanilla extract - 2 cups all-purpose flour - 1 teaspoon baking soda - 1 teaspoon baking powder - 1 teaspoon ground cinnamon - 1/2 teaspoon ground nutmeg - 1/4 teaspoon ground ginger - 1/4 teaspoon salt - 1/2 cup unsalted butter, softened - 2 cups powdered sugar - 1 teaspoon ground cinnamon - 2 tablespoons milk - 1 teaspoon vanilla extract You can swap canned pumpkin with fresh pumpkin puree. Just make sure to cook and blend it well. If you want a dairy-free option, use vegan butter. You can also use coconut sugar instead of brown sugar for a different flavor. For a gluten-free treat, try using a gluten-free flour blend. Keep in mind that this can change the cookie's texture. Start by preheating your oven to 350°F (175°C). This step is key to getting soft cookies. Line a baking sheet with parchment paper to stop the cookies from sticking. In a large bowl, mix together 1/2 cup of softened butter, 1 cup of packed brown sugar, and 1/2 cup of granulated sugar. Use an electric mixer or a whisk to beat this mix until it is light and fluffy. Next, add in 1 cup of canned pumpkin puree, 1 large egg, and 2 teaspoons of vanilla extract. Mix until everything blends well. In a separate bowl, whisk together 2 cups of all-purpose flour, 1 teaspoon of baking soda, 1 teaspoon of baking powder, 1 teaspoon of ground cinnamon, 1/2 teaspoon of ground nutmeg, 1/4 teaspoon of ground ginger, and 1/4 teaspoon of salt. This helps to spread the spices evenly in your cookies. Gradually add the dry mix to the wet mix. Stir gently until just combined; it’s okay if there are a few lumps. Now, it’s time to shape the cookies. Use a cookie scoop or a tablespoon to drop rounded balls of dough onto the lined baking sheet. Make sure to leave at least 2 inches between each ball. This space allows them to spread while baking. Bake in the preheated oven for 10 to 12 minutes. Look for lightly golden edges and soft centers. When done, let them cool on the baking sheet for about 5 minutes. Then, transfer them to a wire rack to cool completely. While your cookies cool, let’s make the cinnamon frosting. In a mixing bowl, beat 1/2 cup of softened butter until creamy. Gradually add 2 cups of powdered sugar and 1 teaspoon of ground cinnamon. Mix until combined. Then, add 2 tablespoons of milk and 1 teaspoon of vanilla extract. Beat this mix until it becomes fluffy and spreadable. Once your cookies are fully cooled, spread a generous layer of frosting on each one. Enjoy the soft, sweet, and spiced flavors! To make soft pumpkin cookies, use canned pumpkin puree. It adds moisture and flavor. Mix the butter and sugars until light and fluffy. This step adds air, making cookies soft. Don't overmix the dough when adding dry ingredients. A few lumps are fine. Bake the cookies just until the edges turn golden. This keeps them soft in the middle. For the best cinnamon frosting, start with softened butter. Beat it until creamy. Gradually add powdered sugar and cinnamon. Mixing slowly helps avoid a sugar cloud. Use milk to adjust the consistency. You want the frosting spreadable but not runny. Once cookies cool, use a knife or spatula to spread frosting evenly. A generous layer makes each bite delightful. Cool the cookies on a wire rack after baking. This prevents sogginess and keeps them soft. If you frost too soon, the warm cookies can melt the frosting. Wait until the cookies are completely cool. This keeps the frosting fluffy and intact. Enjoy your cookies with a warm drink for a cozy treat! {{image_4}} You can add different flavors to your pumpkin cookies. Try replacing some pumpkin with mashed banana or applesauce. Both options keep cookies soft and moist. You can also add a splash of almond extract for a nutty twist. If you like it spicy, mix in some cloves or allspice for a bold taste. To make these cookies a bit healthier, swap regular flour for whole wheat flour. This adds fiber and nutrients. You can also use coconut oil instead of butter for a dairy-free option. If you want less sugar, try using maple syrup or honey instead of granulated sugar. Adjust the amount based on your taste preference. Get creative with your frosting! Instead of just cinnamon, add some cocoa powder for a chocolate twist. You can also sprinkle chopped nuts or mini chocolate chips on top for texture. For a fruity touch, add some dried cranberries or chopped pecans. These add crunch and flavor to each bite. To keep your soft pumpkin cookies fresh, place them in an airtight container. Line the bottom of the container with parchment paper. This helps absorb moisture and keeps the cookies soft. You can stack the cookies, but add another layer of parchment paper between them. Store at room temperature for up to 5 days. You can freeze these cookies easily. First, let them cool completely. Then, place them in a single layer on a baking sheet. Freeze for about 1 hour until firm. Once frozen, transfer them to a freezer bag. For the frosting, store it in a separate airtight container. Both cookies and frosting can last up to 3 months in the freezer. When stored properly, soft pumpkin cookies maintain their quality for about 5 days at room temperature. If frozen, they can last up to 3 months without losing flavor. To enjoy them at their best, thaw cookies in the fridge or at room temperature before serving. They taste just as good after freezing! Yes, you can. If you want to skip the pumpkin, use applesauce or mashed bananas. These will keep the cookies soft. The flavor will change, but they will still taste good. Just remember to use the same amount as the pumpkin. The best way to frost soft cookies is to wait until they cool completely. This prevents the frosting from melting. Use a knife or a spatula to spread the frosting gently. You can also use a piping bag for a more fun look. Just make sure the frosting is fluffy and easy to spread. Adjusting the spice level is easy! If you like more spice, add extra cinnamon or nutmeg. You can also add a pinch of cloves for a warm kick. If you want less spice, reduce the amounts. Taste the dough before baking to find the right balance for you. This blog post covers every step to make soft pumpkin cookies. You learned about the key ingredients and how to prepare the dough. The tips helped you bake soft cookies and apply frosting easily. You can explore fun variations and creative toppings to customize your cookies. Remember, proper storage keeps them fresh longer. Enjoy baking and sharing these treats; they’re sure to impress everyone!

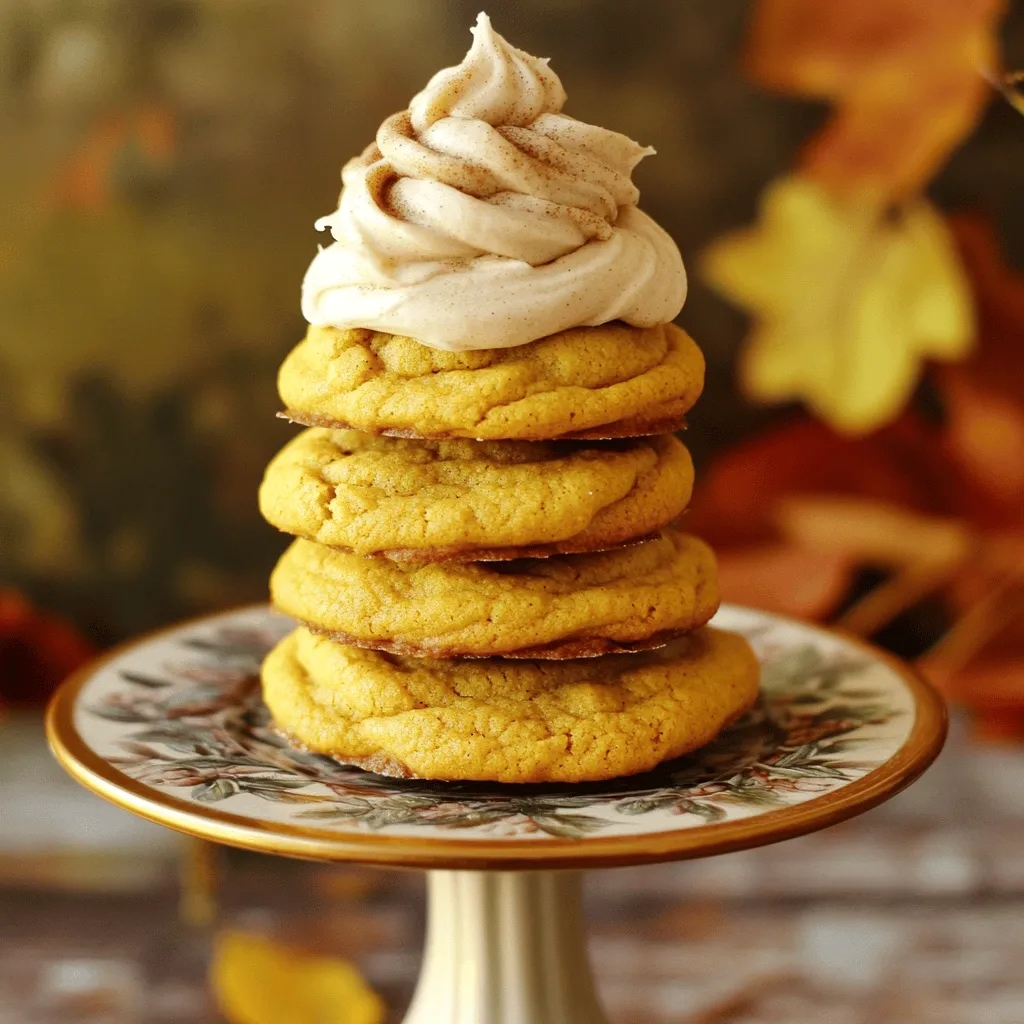
Get ready to indulge in soft pumpkin cookies topped with creamy cinnamon frosting! These delightful treats are perfect for fall gatherings or cozy nights at home. I’ll share simple steps, …

Read more

Categories Desserts

Super Moist Pumpkin Bread Perfect for Fall Flavor

August 26, 2025 by Chef Miles
To make this super moist pumpkin bread, you will need: - 1 cup canned pumpkin puree - 1/2 cup vegetable oil - 1/2 cup unsweetened applesauce - 1 cup brown sugar, packed firmly - 1/2 cup granulated sugar These ingredients work together to create a rich and moist texture. The pumpkin puree adds flavor and moisture. The oils do the same, while the sugars create sweetness. For the dry mix, gather: - 2 cups all-purpose flour - 1 teaspoon baking soda - 1/2 teaspoon baking powder - 1/2 teaspoon salt - 1 teaspoon ground cinnamon - 1/2 teaspoon ground nutmeg - 1/2 teaspoon ground ginger These dry ingredients help the bread rise and give it a warm, spicy flavor. Sifting them ensures they mix well and makes your bread light. You can customize your pumpkin bread with: - 1/2 cup chopped walnuts or pecans - 1/2 cup chocolate chips These add-ins give extra texture and flavor. Nuts add crunch, while chocolate chips make it sweet and fun! First, preheat your oven to 350°F (175°C). This is the perfect temperature for baking. Next, take a 9x5-inch loaf pan. Grease it well with oil. You can also line it with parchment paper. This will help the bread come out easily. In a large bowl, mix the pumpkin puree, vegetable oil, and applesauce. Add the packed brown sugar and granulated sugar. Use a whisk to mix everything until it’s smooth. This step makes the bread moist and sweet. Now, crack three large eggs into the bowl. Add one egg at a time, mixing well after each. The batter should look creamy and well blended. In another bowl, sift together the all-purpose flour, baking soda, and baking powder. Add the salt, ground cinnamon, ground nutmeg, and ground ginger. Sifting helps mix these dry ingredients evenly. This step ensures every bite of your bread has great flavor. Now, gently fold the dry ingredients into the wet mixture. Use a spatula for this. Mix until just combined. A few lumps are okay. Overmixing can make the bread tough. This step is key for that soft, moist texture. Pour the batter into the greased loaf pan. Use a spatula to smooth the top. This helps it bake evenly. Place the pan in the preheated oven. Bake for 60-65 minutes. Check if it’s done by inserting a toothpick into the center. If it comes out clean, your bread is ready. Once baked, remove the bread from the oven. Let it cool in the pan for about 10 minutes. This makes it easier to take out. After that, transfer it to a wire rack. Let it cool completely before slicing. Enjoy the delightful aroma of your fresh pumpkin bread! To get that perfect moist pumpkin bread, ingredient ratios matter. Use the right balance of pumpkin puree, oil, and applesauce. These keep the bread soft and tender. Baking time and temperature also play a big role. Bake at 350°F (175°C) for 60 to 65 minutes. Check with a toothpick; a few moist crumbs are okay. This ensures the bread stays moist inside. Adding spices or extracts boosts the flavor. I love using ground cinnamon, nutmeg, and ginger. They bring warmth to the bread. You can also add vanilla extract for a sweet touch. Always use fresh ingredients for the best taste. Fresh pumpkin puree is great, but canned works well, too. Just make sure it's pure pumpkin! Serve your pumpkin bread warm for the best flavor. A slice with butter melts into the soft bread. For a special twist, sprinkle cinnamon on the butter. This adds extra warmth. Pair your bread with a nice cup of tea or coffee. It's perfect for cozy fall afternoons. Enjoying the bread fresh out of the oven is a delightful experience! {{image_4}} You can make pumpkin bread even more fun by changing the spices. Try adding cloves for a warm, rich flavor. You can also switch up the extracts. Vanilla or almond extracts add a nice twist to the taste. If you need gluten-free options, swap out the all-purpose flour for a gluten-free blend. Many blends work well and keep the bread moist. For vegan versions, use flax eggs or chia seeds instead of regular eggs. Replace the oil with coconut oil for a nice flavor. As seasons change, pumpkin bread can too! Try adding cranberries or diced apples for a fruity burst. For special occasions, decorate the bread with festive toppings or spices. You can even create mini loaves for gifts during the holidays. To keep your pumpkin bread fresh, you should store it correctly. After it cools, wrap it in plastic wrap. You can also place it in an airtight container. This helps keep moisture in and prevents it from drying out. Store it in the fridge for the best results. If you want to keep your pumpkin bread longer, freezing is a great option. First, let the bread cool completely. Then, wrap it tightly in plastic wrap. After that, place it in a freezer bag. Remove as much air as possible to avoid freezer burn. When you're ready to enjoy it, simply take it out and thaw it at room temperature. Pumpkin bread stays fresh for about 5 to 7 days in the fridge. If you freeze it, it can last for up to 3 months. Check for signs of spoilage, like mold or an off smell. If you see any, it's best to discard the bread. You can store pumpkin bread for about 3 to 5 days. Keep it in an airtight container at room temperature. This helps keep it fresh. If you want it to last longer, you can refrigerate it for up to two weeks. Always make sure it cools completely before storing it. This prevents moisture from building up, which can cause mold. Yes, you can substitute fresh pumpkin for canned pumpkin puree. Fresh pumpkin gives a more vibrant taste. However, it requires more work. You must cook and puree the pumpkin first. Canned pumpkin is ready to use and saves time. Both options have their pros and cons. To check if your pumpkin bread is done, use a toothpick. Insert it into the center of the loaf. If it comes out clean or with a few moist crumbs, your bread is ready. If it has wet batter on it, bake it a bit longer. This simple test helps ensure you get moist, delicious bread. Yes, you can make pumpkin bread in advance. Bake it and let it cool completely. Then, wrap it tightly in plastic wrap. Store it in an airtight container. This way, it stays fresh for a few days. You can also freeze it for up to three months. Just remember to thaw it before serving. In this blog post, we walked through the essential ingredients for making delicious pumpkin bread. We explored the steps, from prepping your oven to cooling your bread. You learned key tips for moisture, flavor enhancement, and variations to try. Remember, baking is both an art and a science. Follow the steps closely for best results. Enjoy your pumpkin bread warm with butter, and don’t hesitate to get creative with flavors. Happy baking!

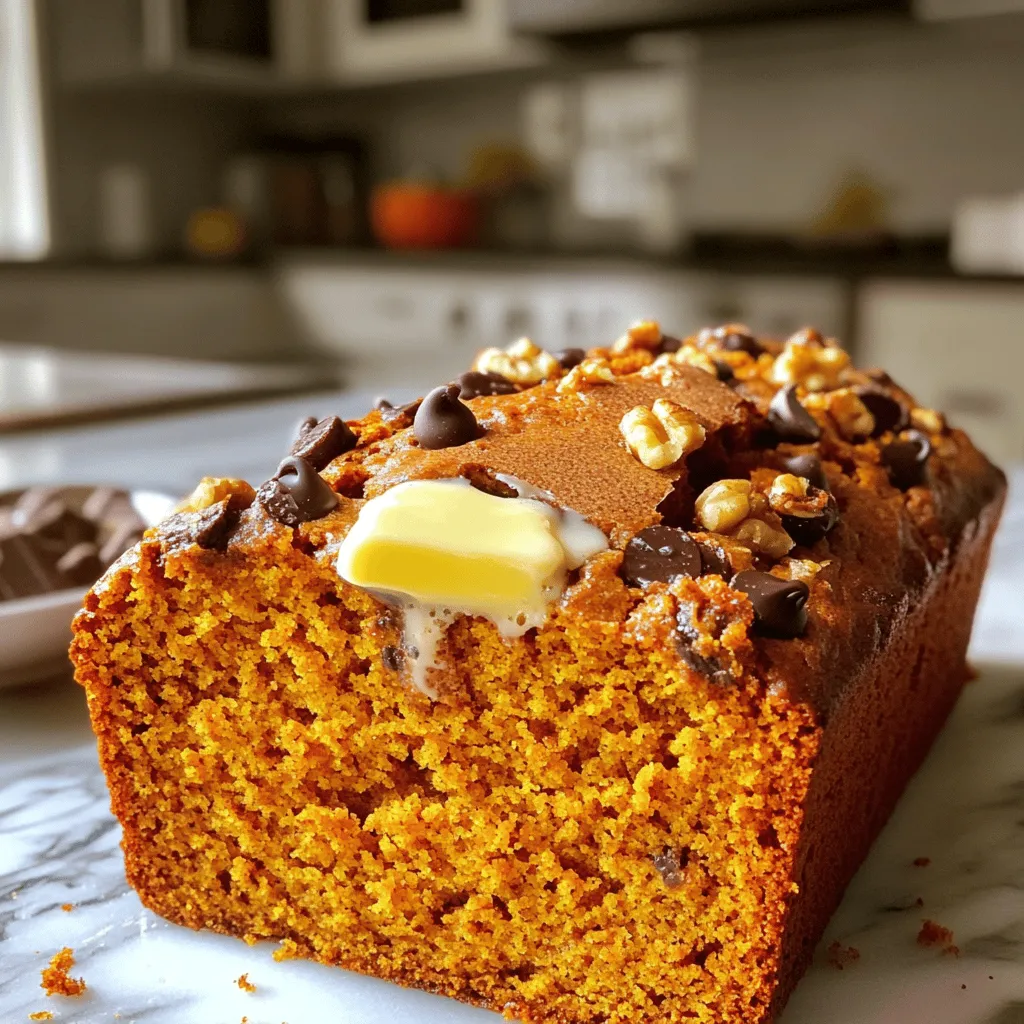
Are you ready to embrace the flavors of fall? This Super Moist Pumpkin Bread recipe will fill your kitchen with warmth and coziness. Made with simple ingredients like canned pumpkin, …

Read more

Categories Desserts

Delicious Apple Crumble Cheesecake Easy and Tasty Recipe

August 26, 2025 by Chef Miles
- 2 cups graham cracker crumbs - 1/2 cup unsalted butter, melted - 1/4 cup granulated sugar - 4 packages (8 oz each) cream cheese, softened - 1 cup granulated sugar (for cheesecake filling) - 1 teaspoon pure vanilla extract - 4 large eggs, at room temperature - 4 medium apples, peeled, cored, and thinly sliced - 1 teaspoon ground cinnamon - 1/4 teaspoon ground nutmeg - 1/4 cup packed light brown sugar - 1/2 cup rolled oats - 1/2 cup chopped walnuts or pecans - 1/4 cup all-purpose flour You can swap some ingredients in this recipe. If you need a gluten-free option, use gluten-free graham cracker crumbs. For a dairy-free cheesecake, try vegan cream cheese. Replace granulated sugar with coconut sugar for a healthier option. If you have allergies to nuts, you can skip the walnuts or pecans altogether. When choosing apples, go for firm and crisp varieties. Honeycrisp and Granny Smith are great for this recipe. They give a nice balance of sweetness and tartness. Look for apples with smooth skin and no bruises. If you can, pick them in the fall season for the best flavor. Fresh apples make the cheesecake taste brighter and more delicious. To make the crust, grab a large mixing bowl. Combine 2 cups of graham cracker crumbs, 1/2 cup of melted unsalted butter, and 1/4 cup of granulated sugar. Mix these well until the crumbs look moist. Next, press the mixture into a 9-inch springform pan. Make sure it is even and compact. Once done, set the crust aside for now. In a separate large bowl, use a hand mixer or stand mixer. Beat 4 packages of softened cream cheese until it is smooth and creamy. Slowly add 1 cup of granulated sugar while mixing. Once blended, add in 1 teaspoon of pure vanilla extract and mix until combined. Now, add 4 large eggs, one at a time, mixing on low speed. This helps keep the filling creamy. Do not overmix. First, take half of the cheesecake mixture and pour it over your crust. Spread it evenly across the top. Next, take half of the apple filling, which you made earlier, and layer it over the cheesecake. Now, pour the rest of the cheesecake mixture on top of the apples. Finally, add the remaining apple filling on top of the cheesecake. This creates a lovely layered look that makes your cheesecake extra special. To make a perfect Apple Crumble Cheesecake, pay close attention. Here are some tips: - Don’t overmix the eggs. Mix each egg until just blended. Overmixing can make the cheesecake dense. - Use room temperature cream cheese. Cold cream cheese will not blend well. It can lead to lumps in your filling. - Pre-bake the crust. A short bake helps it set and stay firm. This avoids a soggy bottom. - Check the oven temperature. An oven that is too hot can crack your cheesecake. Use an oven thermometer for accuracy. Presentation matters! Here are ways to make your cheesecake beautiful: - Use a sharp knife for slicing. Dip it in hot water, then wipe it dry. This creates clean edges. - Top with whipped cream. A dollop adds a nice touch. You can also sprinkle cinnamon for color. - Add caramel sauce. Drizzle warm caramel over each slice for extra sweetness. This creates a lovely contrast to the tart apples. - Serve with vanilla ice cream. The cold ice cream pairs wonderfully with the warm cheesecake. Here are the tools you’ll need to make this cheesecake: - 9-inch springform pan: This allows easy release of the cheesecake. - Mixing bowls: Have a few on hand for different layers. - Hand mixer or stand mixer: This helps blend your ingredients smoothly. - Spatula: Great for spreading the cheesecake and layers evenly. - Measuring cups and spoons: Accurate measurements are key to success. - Sharp knife: For slicing the cheesecake cleanly. These tips will help you create a stunning Apple Crumble Cheesecake every time! {{image_4}} You can easily make this cheesecake gluten-free. Use gluten-free graham cracker crumbs for the crust. Check the labels to ensure they are truly gluten-free. Instead of all-purpose flour in the crumble topping, use almond flour or coconut flour. These options add flavor and keep the texture right. Feel free to be creative! You can swap apples for pears or peaches. Both fruits pair well with cinnamon and nutmeg. If you want a tropical twist, try adding diced pineapple or mango. Mixing in berries like blueberries or raspberries will also add a pop of color and flavor. Just adjust the sugar to balance the tartness of the fruit. For toppings, think outside the box! You could drizzle chocolate sauce or caramel sauce over each slice. Adding a layer of whipped cream makes it even richer. You might also sprinkle some toasted coconut or chopped nuts on top. If you like a crunch, try adding crushed cookies or granola for extra texture. To store leftover cheesecake, cover it tightly with plastic wrap. You can also use a cake dome or an airtight container. This helps keep the cheesecake fresh. Place it in the refrigerator. It will stay good for about 5 days. If you want to enjoy it later, freezing is a great option. Freezing is simple. First, let the cheesecake cool completely. Slice it into portions for easy serving. Wrap each slice in plastic wrap. Then place the wrapped slices in a freezer-safe bag or container. Be sure to label it with the date. The cheesecake can be frozen for up to 3 months. When you’re ready to eat, just thaw it in the fridge overnight. If you want to warm the cheesecake, you can do so carefully. Preheat your oven to 300°F (150°C). Place the cheesecake on a baking sheet. Heat it for about 10-15 minutes. This will bring out the flavors. You can also use the microwave. Just heat a slice for about 15-20 seconds. Be careful not to overheat it, or it may get too soft. Enjoy your cheesecake warm or cold! Apple crumble cheesecake can last for about 5 days in the fridge. To keep it fresh, cover it tightly with plastic wrap or foil. This helps prevent it from drying out or absorbing other smells from the fridge. Yes, you can make this cheesecake ahead of time. It is best to chill it overnight. This gives the flavors time to meld. You can serve it the next day for a great dessert. You can use mascarpone or ricotta cheese as a substitute for cream cheese. Both options offer a creamy texture. They also provide a slightly different flavor, which can add a nice twist to your cheesecake. Yes, you can make a dairy-free version. Use dairy-free cream cheese or cashew cream. For the butter in the crust, opt for a dairy-free spread. These substitutes will keep the cheesecake creamy and delicious. Cheesecakes can crack for a few reasons. Overmixing the batter can add too much air. Another reason is baking at too high a temperature. To avoid cracks, bake at a low temperature and let it cool slowly in the oven. This blog post covered how to make a tasty Apple Crumble Cheesecake. I shared the ingredients you need, substitutions you can use, and tips for choosing the right apples. We walked through the steps for preparing the crust, filling, and layering. I included useful tips to help avoid mistakes and make your dessert look great. If you want to try variations, I shared ideas for gluten-free options and new toppings. Finally, I covered how to store leftovers and answered common questions. Now, you can enjoy this dessert with confidence!

Craving something sweet and comforting? You’re in the right place! My delicious apple crumble cheesecake combines creamy goodness with crispy topping. This easy recipe will satisfy your taste buds while …

Read more

Categories Desserts

Churro Saltine Toffee Delightful Sweet Treat Recipe

August 26, 2025 by Chef Miles
- 40 Saltine crackers - 1 cup unsalted butter (2 sticks) - 1 cup packed light brown sugar - 2 teaspoons pure vanilla extract - 1 teaspoon ground cinnamon - 1/4 teaspoon sea salt - 1 cup semi-sweet chocolate chips - 2 tablespoons granulated sugar To create Churro Saltine Toffee, you need simple, accessible ingredients. The Saltine crackers serve as a crisp base. The unsalted butter adds richness. Brown sugar brings sweetness and depth to the caramel. Vanilla extract enhances flavor, while ground cinnamon gives that classic churro taste. Sea salt balances the sweetness perfectly. Semi-sweet chocolate chips melt beautifully, creating a smooth layer. Finally, granulated sugar combines with cinnamon for a delightful topping. Gather these ingredients before you start. This way, you’ll have everything ready for a fun cooking session. The mix of flavors and textures makes this treat so special. You’ll enjoy every step of the process! - Preheat oven to 400°F (200°C). - Line a baking sheet with parchment paper. - Lay Saltine crackers in a single layer. - Melt butter, stir in sugar and spices. - Boil and thicken the mixture. To make the caramel, start by melting one cup of unsalted butter in a medium saucepan over medium heat. After the butter melts, add one cup of packed light brown sugar, two teaspoons of pure vanilla extract, one teaspoon of ground cinnamon, and a quarter teaspoon of sea salt. Stir everything together well until it begins to boil. This mixture will thicken and turn a rich caramel color in about 3 to 4 minutes. Keep stirring to prevent burning. - Pour caramel over crackers, bake. - Spread melted chocolate and sprinkle cinnamon sugar. Once the caramel is ready, carefully pour it over the arranged Saltine crackers. Use a spatula to spread it evenly, ensuring all crackers are well-coated. Bake the toffee in the preheated oven for 5 to 7 minutes. The toffee should bubble and darken slightly. After baking, remove the baking sheet and sprinkle one cup of semi-sweet chocolate chips over the hot toffee. Wait about 2 minutes for the chocolate to soften, then spread it smoothly across the top. In a small bowl, mix two tablespoons of granulated sugar with the remaining ground cinnamon. Sprinkle this mixture over the melted chocolate for that churro flavor. - Cool at room temperature, refrigerate to set. - Break into pieces for serving. Allow the toffee to cool at room temperature for about 15 to 20 minutes. Then, place it in the refrigerator for at least one hour to set completely. Once firm, break the toffee into pieces and enjoy the delightful flavors of churro saltine toffee! - Watch the boiling time closely. You want the caramel to thicken just right. Too long, and it burns. Too short, and it won’t set. Aim for 3-4 minutes once boiling. - Ensure even coating of caramel. As you pour the hot mixture over the Saltines, spread it out gently. Use a spatula to cover all the crackers. This step is key to a balanced taste. - Let chocolate chips sit for optimal spreading. After pulling the toffee from the oven, sprinkle the chocolate chips on top. Let them sit for about 2 minutes to soften. This makes spreading easier. - Tips for a smooth chocolate layer. Use a spatula to spread the melted chocolate evenly. This gives a nice finish to your treat. Aim for a thin, even layer for the best taste. - Arranging pieces on a plate. Once set, break the toffee into pieces. Place them artfully on a nice plate. A good arrangement makes the treat more inviting. - Dusting options for added appeal. Lightly dust the pieces with extra cinnamon. This adds a beautiful touch and enhances the churro flavor. Enjoy the visual as much as the taste! {{image_4}} You can change the flavor of your churro saltine toffee easily. Try adding nuts like pecans or almonds for a nice crunch. You can also mix in dried fruits, such as raisins or cranberries, to add sweetness. For a spicy kick, sprinkle in a bit of cayenne or chili powder. Just a pinch can give your treat a fun twist! The type of chocolate you use can change the taste. You can use milk chocolate for a sweeter flavor, or dark chocolate for a richer taste. If you're a fan of white chocolate, you can swap it in. Top it with crushed nuts or a drizzle of caramel for extra flair! If you need a gluten-free option, look for gluten-free crackers. Many brands offer tasty alternatives that work well. Just check the label to ensure they are safe. You can easily adapt this recipe to meet your dietary needs without losing any flavor. Enjoy your churro saltine toffee worry-free! To keep your churro saltine toffee fresh, use an airtight container. This helps keep moisture out and preserves the crunch. A glass or plastic container works well. Store it at room temperature, away from direct sunlight and heat. This ensures the flavors stay vibrant. Churro saltine toffee stays fresh for about one week at room temperature. If you want to keep it longer, freezing is a great option. To freeze, wrap it tightly in plastic wrap and place it in a freezer-safe bag. This way, it can last up to three months. When you’re ready to enjoy, let it thaw at room temperature. Churro Saltine Toffee is a sweet treat made from Saltine crackers, caramel, and chocolate. This dessert mixes the crunch of crackers with a buttery caramel layer. It has roots in the classic toffee but adds a twist of churro flavor with cinnamon and sugar. The combination creates a delicious snack that everyone loves. Yes, you can make Churro Saltine Toffee ahead of time. Prepare it and store it in an airtight container. This treat will stay fresh for about a week. If you want to make it even earlier, you can freeze it. Just cut it into pieces before freezing. Thaw it in the fridge when you're ready to eat. Absolutely! If you don’t have Saltine crackers, try using graham crackers or Ritz crackers. Each type of cracker will give a different taste. Graham crackers add a hint of sweetness, while Ritz crackers add a buttery flavor. Get creative with your choices! To make this recipe healthier, you can reduce the sugar in the caramel. Try using less brown sugar or a sugar substitute. You can also use dark chocolate, which has less sugar than milk chocolate. For a nutty twist, add chopped nuts instead of chocolate for a crunchy topping. Churro Saltine Toffee is a fun and easy treat you can make at home. We covered the key ingredients, step-by-step instructions, and helpful tips to get the best results. You learned about variations, storage, and even answered common questions. Now, you can customize this tasty snack to fit your style and preferences. Enjoy experimenting with flavors and impress your friends and family with your delicious creations. With this recipe, you can share joy and sweetness in every bite. Happy baking!

Are you ready to try a sweet treat that will blow your mind? Churro Saltine Toffee mixes the crunch of Saltines with warm, gooey caramel and chocolate. It’s easy to …

Read more

Categories Desserts

Soft Pumpkin Cookies with Cream Cheese Icing Delight

August 26, 2025 by Chef Miles
- 2 cups all-purpose flour - 1 teaspoon baking powder - 1 teaspoon baking soda - 1 teaspoon ground cinnamon - ½ teaspoon ground nutmeg - ½ teaspoon salt To start, gather your dry ingredients. The all-purpose flour gives the cookies structure. Baking powder and baking soda help them rise. The spices, ground cinnamon and nutmeg, add warmth and flavor. Lastly, salt balances the sweetness. - ½ cup unsalted butter, softened - 1 cup brown sugar, packed - ½ cup granulated sugar - 1 cup pure pumpkin puree - 1 large egg - 1 teaspoon vanilla extract Next, prepare your wet ingredients. Softened unsalted butter makes the cookies rich. Brown sugar adds moisture and a deeper flavor, while granulated sugar gives sweetness. Pure pumpkin puree keeps the cookies soft and adds a lovely orange hue. The egg binds everything, and vanilla extract enhances the taste. - 4 ounces cream cheese, softened - ½ cup unsalted butter, softened - 2 cups powdered sugar - 1 teaspoon vanilla extract - 1 tablespoon milk, as needed For the icing, start with softened cream cheese and unsalted butter. They create a smooth base. Powdered sugar sweetens the icing, while vanilla extract offers flavor. If the icing is too thick, add milk for a creamy consistency. This icing perfectly complements the soft pumpkin cookies. - Preheat your oven to 350°F (175°C). - Line two baking sheets with parchment paper. This helps cookies not stick. - In a large bowl, cream together ½ cup of unsalted butter, 1 cup of brown sugar, and ½ cup of granulated sugar. Mix until smooth and creamy. - Add in 1 cup of pure pumpkin puree, 1 large egg, and 1 teaspoon of vanilla extract. Mix until everything blends well. - In another bowl, combine 2 cups of all-purpose flour, 1 teaspoon of baking powder, 1 teaspoon of baking soda, ½ teaspoon of ground cinnamon, ½ teaspoon of ground nutmeg, and ½ teaspoon of salt. Whisk these dry ingredients together. - Gradually add the dry mixture to the wet mix. Stir gently until everything is just combined. Be careful not to overmix. This keeps the dough soft. - Use a cookie scoop to drop rounded tablespoons of dough onto the baking sheets. Leave space between each scoop. - Bake for 12-15 minutes. You know they’re done when the edges look set and the tops feel soft but not wet. - Once baked, cool cookies on the baking sheet for about 5 minutes. Then, move them to a wire rack to cool completely. Now, you’re ready for the icing! To get the best texture for your soft pumpkin cookies, avoid overmixing. When you add the dry mixture to the wet ingredients, mix just until combined. Overmixing can make your cookies tough. Signs of a well-baked cookie include edges that look set and a soft, slightly firm top. When you touch the cookie, it should feel soft but not raw. Trust your instincts; if they look good, they likely are! For the cream cheese icing, you want a smooth and spreadable consistency. Start with softened cream cheese and butter. Beat them together until creamy. Gradually mix in the powdered sugar for a lump-free blend. If the icing is too thick, add a tablespoon of milk and mix until smooth. To spread icing evenly, use a small offset spatula or the back of a spoon. Start in the center and gently push the icing towards the edges. This will help you cover the cookie without making a mess. To make your cookies look inviting, arrange them on a decorative plate. You can sprinkle a light dusting of ground cinnamon over the icing for a festive touch. For seasonal flair, add mini pumpkins or colorful fall leaves around the plate. This extra effort makes your cookies even more special! {{image_4}} Want to mix things up? You can add chocolate chips or nuts to your cookies. Chocolate chips give a sweet touch that pairs well with pumpkin. Nuts add crunch and depth. Try walnuts or pecans for a nice twist. You can also play with spices. Instead of just cinnamon and nutmeg, consider ginger or allspice to create a warm flavor. If you need to avoid gluten, you can use gluten-free flour. Almond flour or a gluten-free blend works well. Just make sure to adjust the amount slightly, as these flours absorb moisture differently. For vegan options, swap out the cream cheese with a vegan cream cheese. You can also use coconut milk or almond milk to keep the icing creamy. You can get creative with icing. Instead of plain cream cheese icing, try adding lemon zest for a fresh twist. You can also use flavored icing, like maple or caramel, to enhance the pumpkin taste. For a fun finish, sprinkle colored sprinkles on top. This adds a lively touch and makes the cookies more festive. To keep your soft pumpkin cookies fresh, use an airtight container. This will lock in moisture and keep them soft. You can store them at room temperature for up to five days. If you want them to last longer, consider putting them in the fridge. Just remember that the cold can make them a bit firmer. You can freeze the cookies either before or after icing. If you freeze them before icing, let them cool completely first. Place the cookies in a single layer on a baking sheet and freeze for one hour. Once frozen, transfer them to a freezer bag. If you choose to freeze them after icing, make sure the icing has set. Place them between layers of parchment paper in a container. To thaw, leave them at room temperature for about an hour. These cookies stay fresh for five days at room temperature. If stored in the fridge, they can last up to a week. Look for signs of spoilage like a dry texture or an off smell. If they lose their fluffy feel or develop any mold, it’s time to toss them. Yes, you can use fresh pumpkin. First, you need to cook it. Cut a sugar pumpkin in half and remove the seeds. Bake the halves cut-side down at 350°F for about an hour. Let it cool, then scoop out the flesh and puree it until smooth. This method gives a fresher taste. Just make sure to measure out one cup for the recipe, just like you would with canned pumpkin. If you don’t have cream cheese, you can use mascarpone cheese. It has a similar taste and texture. Greek yogurt is another option, but it will be tangier. For a dairy-free choice, try using silken tofu blended until smooth. You may need to add a bit of lemon juice for flavor. Each option gives a unique twist to the icing. To keep your cookies soft, avoid overmixing after adding the flour. Just mix until combined. Use the right amount of pumpkin; it helps keep cookies moist. Also, bake them until the edges are set but the tops are still soft. Let them cool on the sheet for a few minutes before moving them. This helps them stay soft while firming up. You now have everything you need to make delicious pumpkin cookies. We covered key ingredients, step-by-step instructions, and must-know tips. Remember, the right texture comes from careful mixing and baking times. Feel free to experiment with flavors or dietary options, too. Store your cookies properly to keep them fresh longer. Enjoy baking, sharing, and savoring these seasonal treats!

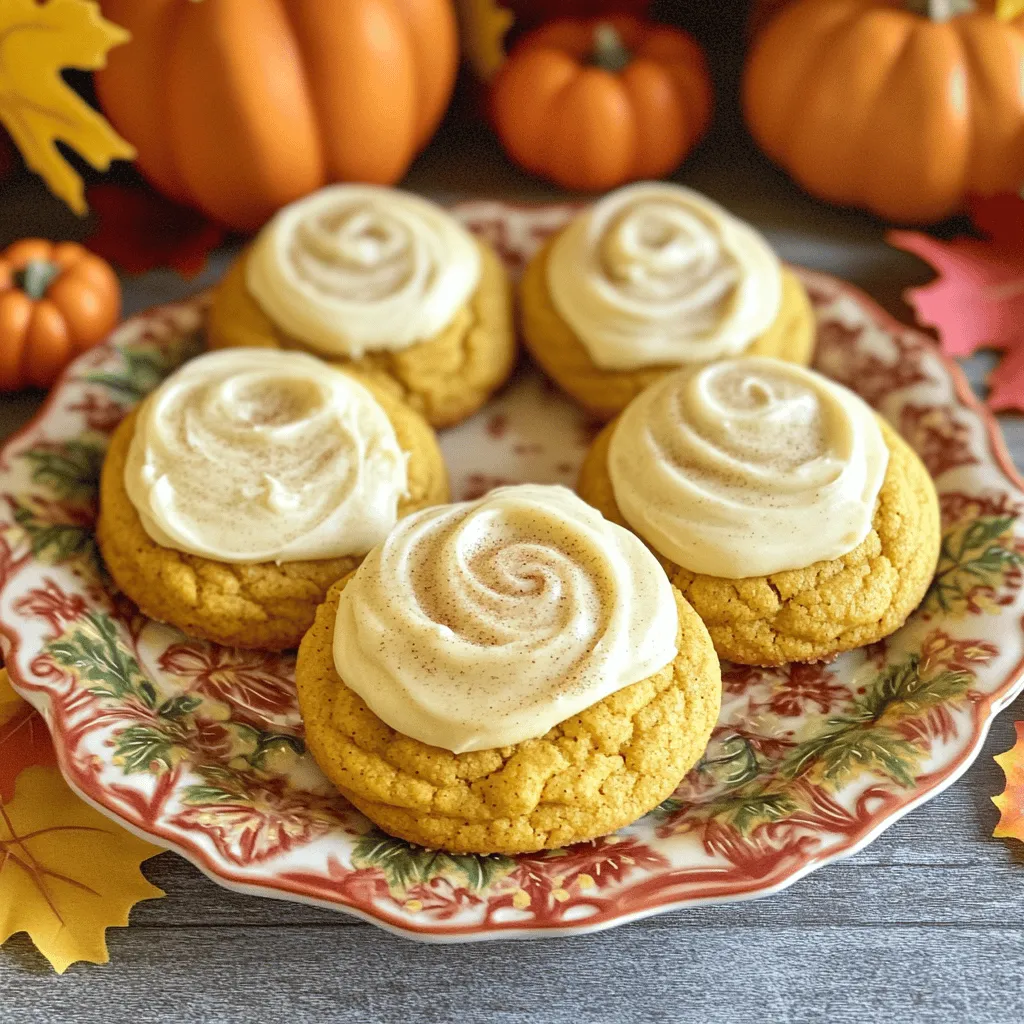
If you crave a sweet and soft treat this fall, you’ll love my Soft Pumpkin Cookies with Cream Cheese Icing. These cookies blend warm spices with creamy icing for the …

Read more

Categories Desserts

Cajun Steak Tips Rigatoni Flavorful Dinner Delight

August 26, 2025 by Chef Miles
- 1 lb steak tips (sirloin or flank steak) - 12 oz rigatoni pasta - 2 tablespoons Cajun seasoning - 2 tablespoons olive oil - 1 red bell pepper, diced - 1 green bell pepper, diced - 1 medium onion, chopped - 3 cloves garlic, minced - 1 cup heavy cream - 1 cup shredded Parmesan cheese - Salt and pepper to taste - Fresh parsley, chopped (for garnish) Cajun Steak Tips Rigatoni brings bold flavors to your dinner table. The steak tips are the star, tender and juicy. I often use sirloin or flank steak for this dish. Both cuts work well and add great taste. Rigatoni pasta adds a nice bite and holds the sauce well. The Cajun seasoning gives a spicy kick. I like to use about two tablespoons for a balanced flavor. For veggies, I choose a mix of colorful bell peppers, onion, and garlic. The red and green bell peppers add sweetness and crunch. The onion brings a nice depth, while garlic adds aromatic goodness. Creaminess comes from heavy cream and shredded Parmesan cheese. Together, they create a rich, smooth sauce. I finish it with salt, pepper, and fresh parsley for a pop of color. Gather these ingredients, and you're on your way to a flavorful dinner delight! First, grab a mixing bowl and put the steak tips in it. Add two tablespoons of Cajun seasoning. Mix the steak well to coat all pieces. Let the steak marinate for 15 minutes. This step makes the steak super tasty. While the steak marinates, fill a large pot with water and add some salt. Bring the water to a rolling boil. Add the rigatoni pasta and cook it until it is al dente, which usually takes about 10-12 minutes. Before draining, save one cup of the starchy pasta water. This water helps later. Heat two tablespoons of olive oil in a large skillet over medium-high heat. Once hot, add the marinated steak tips. Sear them for about 4-5 minutes, turning them to brown all sides. When done, take the steak out and set it aside. In the same skillet, add the chopped onion, diced red and green bell peppers. Sauté for about 5 minutes until they are soft. Then, add three minced garlic cloves and cook for one more minute. Next, reduce the heat to medium-low. Pour in one cup of heavy cream and stir it into the veggies. Allow the mixture to simmer for 2-3 minutes. This helps the sauce thicken nicely. Now, add the cooked rigatoni and seared steak tips to the skillet. Toss everything together well. Add one cup of shredded Parmesan cheese and mix until melted. If the sauce seems too thick, use the reserved pasta water a little at a time until it reaches your desired creaminess. Taste and adjust with salt and pepper if needed. Marinating the steak tips is key. This step allows the Cajun seasoning to soak in. I suggest marinating for at least 15 minutes. If you have more time, let it sit longer for deeper flavor. For perfect steak searing, use a hot skillet. Heat the olive oil until it shimmers. Add the steak tips in a single layer. Don’t overcrowd the pan; this helps create a nice crust. Sear each side for about 4-5 minutes. To avoid overcooking rigatoni, boil in salted water. Follow package directions for cooking time. Keep an eye on the pasta to ensure it cooks to al dente. This means it should be firm but not hard. Reserving pasta water helps create a creamy sauce. The starchy water adds a silky texture. Save at least one cup of it before draining the pasta. Garnishing with parsley and Parmesan adds flavor and color. After plating, sprinkle freshly chopped parsley on top. Add an extra dusting of Parmesan cheese for a rich finish. For serving, consider a large bowl or individual plates. This makes it easy for everyone to enjoy. Present it hot for the best taste experience. {{image_4}} You can swap steak for chicken or shrimp. Chicken adds a mild flavor that pairs well with the spicy Cajun seasoning. Simply cut boneless chicken into bite-sized pieces and follow the same steps. Shrimp cooks quickly and brings a lovely sweetness. Just sauté it for a few minutes until it turns pink. For a vegetarian option, consider using mushrooms or tofu. Both absorb flavors well. Cube the tofu and sauté it until golden. For mushrooms, use a mix of cremini and portobello for a meaty texture. Want milder Cajun steak tips rigatoni? Reduce the amount of Cajun seasoning. Start with just one tablespoon and taste as you go. This way, you can control the heat. If you love spice, add chili flakes to the cream sauce. A pinch goes a long way. Start small and adjust to your heat preference. You can change the creaminess of the sauce easily. Use half-and-half instead of heavy cream. This will lighten the dish but still keep it rich. For cheese lovers, try adding different cheeses. Gouda or mozzarella can make the sauce extra creamy. Just stir in the cheese until melted and smooth. To store your leftovers, use airtight containers. Glass or plastic containers work well. Keep the Cajun Steak Tips Rigatoni in the fridge. You can enjoy it for up to 3 days. Make sure to cool it down first before sealing it. For reheating, the best method is using the stove. Add a splash of water or cream to keep it creamy. Heat it slowly over medium-low heat. Stir often to prevent sticking. You can also use a microwave. Just cover it loosely and heat in short bursts. Stir in between to ensure even heating. Yes, you can freeze Cajun Steak Tips Rigatoni. Use airtight containers or freezer bags for best results. Make sure to remove excess air. It can last up to 2 months in the freezer. To thaw, leave it in the fridge overnight before reheating. This helps maintain quality and flavor. Yes, you can easily make Cajun Steak Tips Rigatoni spicier. Here are a few ways to add heat: - Use more Cajun seasoning. Start with an extra teaspoon. - Add red pepper flakes for a kick. Sprinkle them in while cooking. - Include diced jalapeños. Sauté them with the vegetables for extra flavor. This dish pairs well with several side options. Consider: - Garlic bread for a crunchy bite. - A fresh green salad for a light contrast. - Roasted vegetables to enhance the meal with more flavors. Yes, Cajun Steak Tips Rigatoni is great for meal prep. Here are some tips: - Cook the pasta and steak in advance. Store them separately. - Assemble the dish when you're ready to eat. Keep the cream sauce separate to maintain texture. - Use airtight containers for storage. This helps keep it fresh longer. Absolutely! If you want to switch up the pasta, try these options: - Penne for a similar shape and texture. - Fusilli for a fun twist that holds sauce well. - Gluten-free pasta if you have dietary restrictions. Just adjust cooking times as needed. This blog post detailed a delicious Cajun Steak Tips Rigatoni recipe. We covered the key ingredients, from steak tips to fresh vegetables and Parmesan. I shared step-by-step instructions for marinating, cooking, and creating a creamy sauce. You'll also find tips for saving time, adjusting spice levels, and presenting your dish. Explore variations and storage options to elevate your meal. I hope you feel inspired to try this dish and make it your own. Happy cooking!

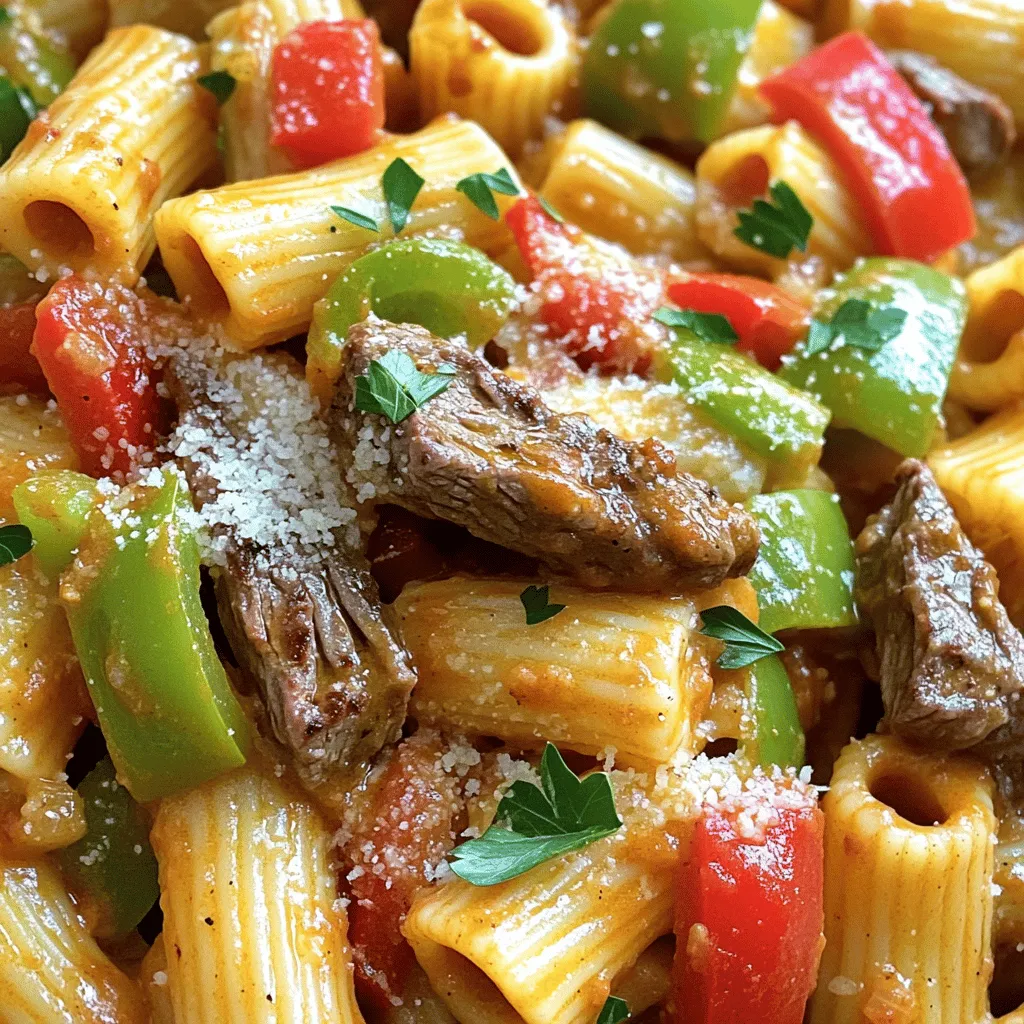
Are you ready to spice up your dinner routine? My Cajun Steak Tips Rigatoni is a flavorful delight that will impress your family and friends. This dish combines tender steak …

Read more

Categories Dinner
Older posts
Newer posts
← Previous Page1 … Page36 Page37 Page38 … Page113 Next →

MELTED RECIPES

where delicious ideas melt into life, from stovetop to backyard. Always warm, simple, and irresistibly satisfying. 🍳🔥🧀

PAGES

Home About Contact Privacy Policy Terms & Conditions Cookie Policy GDPR Policy Copyright Policy Disclaimer

CATEGORIES

Appetizers Desserts Salads Breakfast Dinner

Contact

  • Pinterest
  • Mail
Copyright © 2025 Melted Recipes. All rights reserved.