Skip to content
Melted Recipes
  • Home
  • Appetizers
  • Desserts
  • Salads
  • Breakfast
  • Dinner
  • Privacy Policy
  • Contact
  • About

Chef Miles

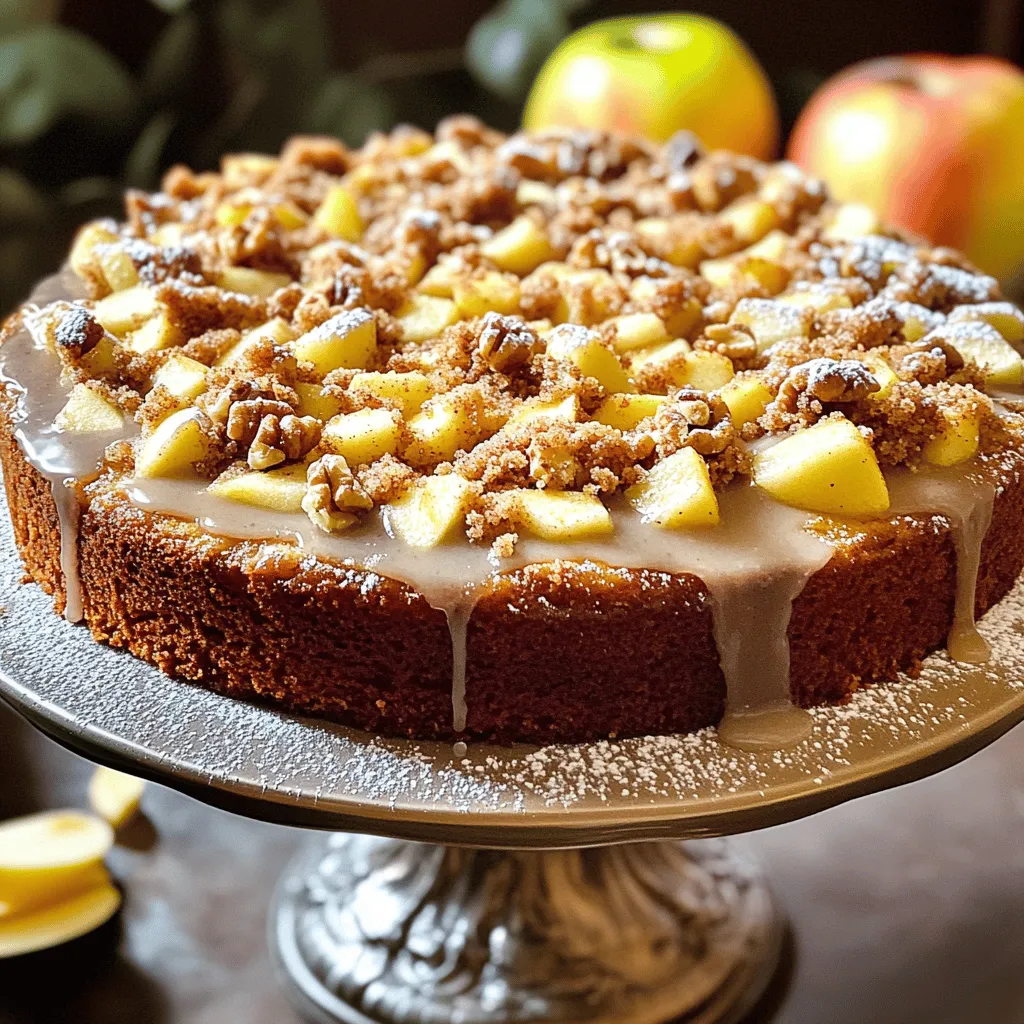
Milky Way Cheesecake Brownies Irresistible Dessert Treat

August 28, 2025 by Chef Miles
- 1 cup unsalted butter, melted - 1 cup granulated sugar - 1 cup brown sugar, packed - 4 large eggs - 1 teaspoon vanilla extract - 1 cup all-purpose flour - 1/2 cup unsweetened cocoa powder - 1/2 teaspoon baking powder - 1/4 teaspoon salt - 4 Milky Way bars, coarsely chopped - 16 oz cream cheese, softened to room temperature - 1/2 cup granulated sugar - 1 teaspoon vanilla extract - 2 large eggs - 2 Milky Way bars, finely chopped The key to making Milky Way cheesecake brownies lies in using the right ingredients. You want the best flavors to shine through. Start with unsalted butter. It gives control over the saltiness. Use both granulated and brown sugars for sweetness and richness. The eggs add structure and moisture to the brownies. The vanilla extract enhances the overall flavor. For the dry mix, all-purpose flour, cocoa powder, baking powder, and salt are essential. The cocoa powder brings in that rich chocolate taste, while the baking powder gives the brownies a lift. Don't forget the Milky Way bars! They add a sweet, caramel flavor. For the cheesecake layer, you need cream cheese. It brings a creamy texture. The sugar and vanilla extract sweeten it, while the eggs help bind it. The finely chopped Milky Way bars in the cheesecake layer add a nice surprise. Gather all these ingredients, and you're set to create a delicious dessert! - Preheat the oven to 350°F (175°C). - Grease or line a 9x13 inch baking pan. - Combine melted butter with sugars. - Mix in eggs and vanilla. - Add dry ingredients and Milky Way chunks. - Beat cream cheese until smooth. - Incorporate sugar, vanilla, and eggs. - Fold in finely chopped Milky Way bars. - Layer brownie batter and cheesecake mixture. - Swirl the two layers together. - Bake for 35-40 minutes. - Cool in the pan for 30 minutes. - Chill in the refrigerator for 2-3 hours. - Cut into squares and serve. - Avoid overmixing the brownie batter. This keeps them fudgy and rich. - Use room temperature ingredients for even mixing. Cold eggs or butter can cause lumps. - Make sure cream cheese is properly softened. This helps it blend smoothly. - Chill the cheesecake layer longer for better firmness. A firm layer holds up well. - Dust with cocoa powder or powdered sugar. This adds a nice touch. - Drizzle with chocolate sauce and sprinkle Milky Way pieces. This makes it look amazing! {{image_4}} You can add a nice crunch by using nuts. I love to use walnuts or pecans. Just chop them coarsely and fold them into the brownie batter. They will add great texture and flavor. The nuts work well with the creamy cheesecake layer. Plus, they bring a bit of healthy fat to the dessert. Don’t be afraid to mix things up! You can swap out Milky Way bars for other candy bars. Try Snickers for a nutty twist or Twix for a caramel kick. Each candy will give a new flavor to your brownies. You can even mix in some Reese’s Peanut Butter Cups for a fun, sweet surprise. If you need a gluten-free treat, this recipe can easily adapt. Just switch the all-purpose flour with a gluten-free flour blend. Make sure to check the blend for a good texture. The brownies will still turn out rich and delicious. Everyone can enjoy them, no matter their dietary needs! To keep your Milky Way cheesecake brownies fresh, store them in an airtight container. This will lock in the moisture and keep them soft. Place a piece of parchment paper between layers to avoid sticking. These brownies last about a week in the fridge. Just make sure the container is sealed tight. For longer storage, you can freeze them. They will stay fresh for up to three months in the freezer. Just wrap them well in plastic wrap before placing them in a freezer-safe bag. To enjoy these brownies warm, reheat them in the microwave. Heat them for about 10-15 seconds. This will help keep the cheesecake layer creamy. If you prefer a crispy edge, put them in the oven at 350°F for 5-10 minutes. Enjoy the gooey goodness! Yes, you can use other types of chocolate. Dark chocolate or milk chocolate can work well. Just keep in mind the sweetness level. If you use a sweeter chocolate, reduce the sugar in the recipe slightly. You can also try chocolate chips for a fun twist. They add great texture and melt beautifully. To check if the brownies are done, look for these signs: - The edges will pull away from the pan. - The top will look set and slightly shiny. - Insert a toothpick in the center. It should come out with moist crumbs, not wet batter. If you see wet batter, bake them a few more minutes. Yes, you can make these brownies ahead of time! They keep well in the fridge for up to a week. Just make sure to store them in an airtight container. For best results, chill them overnight before serving. This helps the flavors meld and the cheesecake layer firm up nicely. You can also freeze them for longer storage. Just cut them into squares and wrap them well. This blog post covered how to make rich Milky Way brownies with a cheesecake layer. We discussed ingredients, step-by-step instructions, and helpful tips. Each layer brings a unique taste and texture that delights everyone. Remember to store them properly for the best flavor. With these easy steps, you can impress your friends and family. Now, get baking and enjoy your delicious treats!

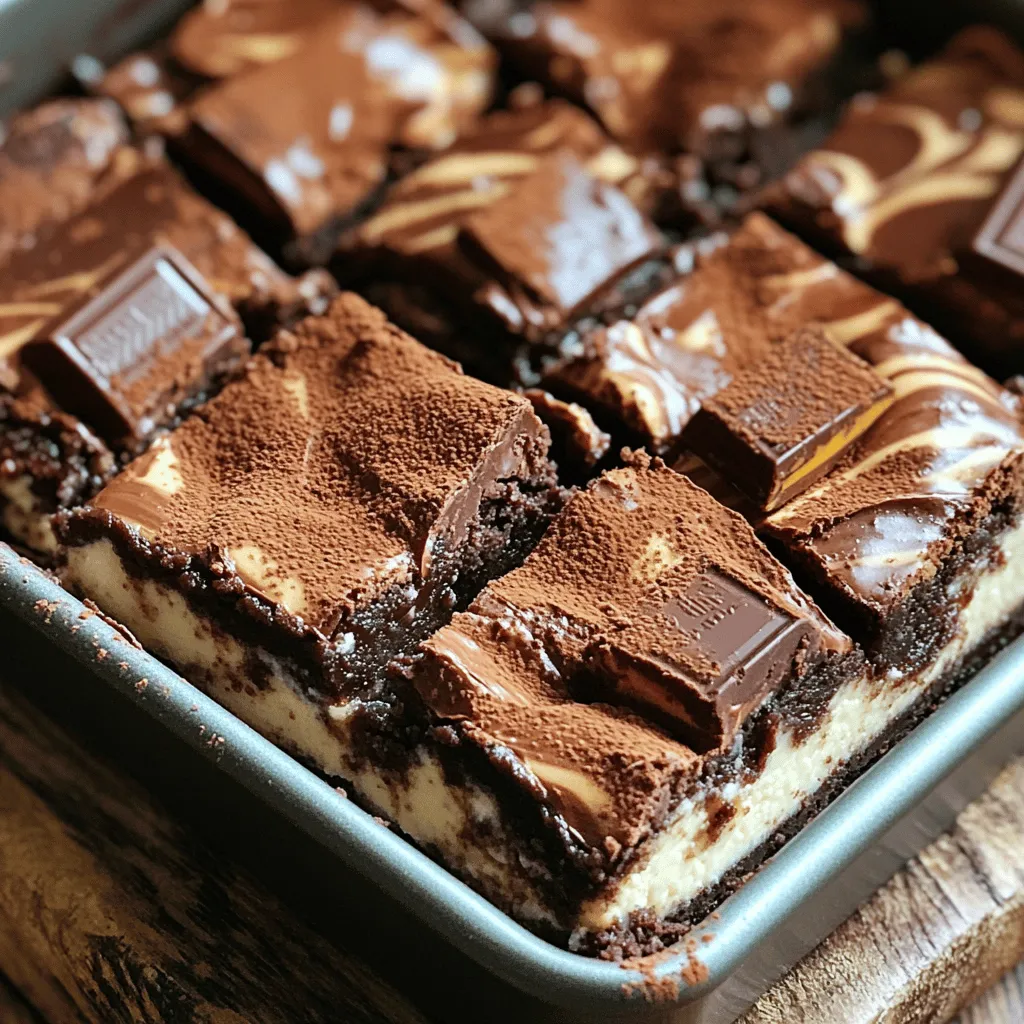
Craving something sweet? Let me introduce you to Milky Way Cheesecake Brownies! These rich, chewy brownies are layered with a creamy, dreamy cheesecake that features real Milky Way candy bars. …

Read more

Categories Desserts

Overnight Apple Cinnamon Rolls Soft and Delicious Treat

August 28, 2025 by Chef Miles
To make Overnight Apple Cinnamon Rolls, you need a good set of ingredients. Here’s what you will need: - 4 cups all-purpose flour - 1 packet (2 ¼ teaspoons) instant yeast - ½ cup milk, warmed to about 110°F (43°C) - ¼ cup granulated sugar - ½ cup unsalted butter, softened to room temperature - 2 large eggs - 1 teaspoon vanilla extract - ½ teaspoon salt - 2 large apples, peeled, cored, and diced into small pieces - 1 tablespoon lemon juice - 1 tablespoon ground cinnamon - ½ cup brown sugar, packed - ½ cup chopped walnuts (optional) Each item plays a key role in creating soft and delicious rolls. The all-purpose flour gives the dough structure. Instant yeast makes the rolls rise well. Warm milk helps activate the yeast. Sugar adds sweetness and helps with browning. Butter gives richness, while eggs provide moisture. Salt balances the flavors. Apples bring a fresh taste, and cinnamon adds warmth. Brown sugar creates a lovely caramel flavor. Walnuts can add a crunchy texture if you like. Gathering these ingredients will set you up for a fantastic baking experience. Make sure your apples are fresh for the best taste. Enjoy the process of making these delightful rolls! 1. In a large bowl, combine the warm milk, sugar, and instant yeast. Let it sit for 5 minutes. You want it to look frothy. This shows the yeast is ready. 2. In another bowl, whisk together the softened butter, eggs, and vanilla. Mix until smooth. 3. Slowly add this mixture to the frothy yeast. Stir until it's well blended. 4. Next, add the flour and salt to the wet mix. Stir until a dough forms. 5. Transfer the dough to a floured surface. Knead it for about 5 to 7 minutes until it's smooth and elastic. 1. Shape the dough into a ball and place it in a greased bowl. 2. Cover the bowl with a damp cloth. Let it rise in a warm spot for 1 to 2 hours. The dough should double in size. 1. While the dough rises, prepare the apple filling. In a medium bowl, mix diced apples with lemon juice, cinnamon, and brown sugar. 2. If you like, add chopped walnuts for extra crunch. This adds a nice texture to the rolls. 1. Once the dough has risen, punch it down gently to release air. 2. Roll the dough out on a floured surface into a rectangle, about 12 by 18 inches. 3. Evenly spread the apple filling over the dough. Leave a small margin at the edges. 4. Starting from the long side, roll the dough tightly into a log. Pinch the seam to seal. 5. Slice the log into 12 equal pieces. 1. Place the sliced rolls in a greased baking dish. Make sure they are spaced apart. 2. Cover the dish with plastic wrap and refrigerate overnight. This allows the flavors to blend well. 1. The next morning, preheat your oven to 375°F (190°C). 2. Take the rolls out of the fridge. Let them sit at room temperature for 30 minutes as the oven heats. 3. Bake the rolls for 25 to 30 minutes until they are golden brown. 1. For a sweet touch, prepare a glaze. Mix 1 cup of powdered sugar with 2 tablespoons of milk until smooth. 2. Drizzle the glaze over the warm rolls just before serving. This adds a lovely finish to your treats. To make sure your yeast works, check its freshness. - Look for the expiration date on the packet. - You can test it by mixing it with warm milk and sugar. If it bubbles up after 5 minutes, it’s good to use. When proofing yeast, keep these tips in mind: - Use milk or water that is warm, but not hot. - Too much heat can kill the yeast. Aim for around 110°F (43°C). Rolling dough can be tricky, but with practice, you can master it. - Start by lightly flouring your surface. This helps prevent sticking. - Roll from the center outwards, applying even pressure. To avoid tearing, follow these steps: - Keep the dough at an even thickness. - If the dough resists, let it rest for a few minutes before trying again. Adding spices can make your filling even more delicious. - Mix in a pinch of nutmeg for warmth. - Consider adding ginger for a spicy kick. For extra toppings, try these ideas: - Drizzle icing made from powdered sugar and milk over the rolls. - Top with chopped nuts for added crunch. {{image_4}} You can change the fruit in these rolls. Instead of apples, try pears or berries. Pears give a sweet flavor, while berries add a tart touch. You can also mix in dried fruits like raisins or cranberries. Both add a chewy texture and unique taste. If you want gluten-free rolls, substitute all-purpose flour with a gluten-free blend. Look for a mix that works for baking. For vegan options, use plant-based butter and flax eggs instead of regular eggs. These swaps keep the rolls soft and tasty. Want to switch up the flavors? Add different extracts like almond or maple. These will enhance the taste of your rolls. You can also experiment with nuts and toppings. Try pecans or almonds for crunch, or drizzle with caramel for extra sweetness. To keep your rolls fresh at room temperature, place them in an airtight container. This helps maintain their soft texture. They will stay good for about two days. For best results, eat them within this time. If you want to keep them longer, refrigeration is your best bet. Wrap the rolls in plastic wrap, then place them in a sealable bag. They can last up to a week in the fridge. When ready to eat, let them warm up to room temperature. You can freeze unbaked rolls for later use. After slicing the rolls, place them in a single layer on a baking sheet. Freeze them until firm, then transfer to a freezer-safe bag. They can last up to three months in the freezer. When you're ready to bake, let them thaw in the fridge overnight. For baked rolls, cool them completely before freezing. To reheat, place them in a preheated oven at 350°F (175°C) for about 10-15 minutes. This helps them regain their soft, fresh taste. These rolls can last about two days at room temperature. In the fridge, they can stay good for a week. If you freeze them, enjoy them within three months. Watch out for any signs of spoilage. Mold or an off smell means it's time to toss them. Always check before eating to ensure they are safe. To help the dough rise quickly, keep it warm. You can place the bowl in a sunny spot or near a warm oven. A good rule is to aim for about 80°F (27°C). If you have a proofing drawer, that works great too. The warmer air helps the yeast grow faster, making your dough fluffy. Yes, you can make these rolls nut-free. Just skip the walnuts in the filling. You can add more apples or some raisins for extra flavor and texture. This way, you keep the rolls delicious while making them safe for those with nut allergies. If you need a dairy-free option, you can use almond milk or oat milk. These substitutes work well in baking. Coconut milk is another great choice, giving a slight sweetness. Just make sure the milk you choose is unsweetened for the best taste. Yes, you can bake the rolls directly from the fridge. Just take them out and let them sit for about 30 minutes to come to room temperature. This helps them rise a bit more. Then, you can bake them as per the instructions. Enjoy the warm, gooey goodness! To keep the rolls fresh, place them in an airtight container. If they are still warm, let them cool first. You can store them at room temperature for a few days. For longer storage, put them in the fridge. Just reheat before serving to enjoy their soft texture again. In this blog post, we covered how to make delicious apple cinnamon rolls, from the ingredients needed to the final baking steps. You learned tips for ensuring perfect dough and how to customize your rolls with different fruits or dietary needs. These rolls are simple to prepare and a treat for any occasion. Remember to experiment with flavors and enjoy fresh rolls. Happy baking!

Ready for a delicious treat that you can prepare the night before? These Overnight Apple Cinnamon Rolls blend sweet, warm apples with gooey, cinnamon goodness. Imagine waking up to a …

Read more

Categories Desserts

Pumpkindoodle Cookies Delightful Fall Treat Recipe

August 28, 2025 by Chef Miles
To make these tasty Pumpkindoodle Cookies, you will need: - 1 cup pumpkin puree - 1/2 cup granulated sugar - 1/2 cup packed brown sugar - 1/2 cup unsalted butter, softened - 1 large egg - 1 teaspoon pure vanilla extract - 2 cups all-purpose flour - 1 teaspoon baking soda - 1 teaspoon ground cinnamon - 1/2 teaspoon ground nutmeg - 1/4 teaspoon ground ginger - 1/4 teaspoon salt - 1/2 cup cinnamon sugar (for rolling) These ingredients create a soft and flavorful cookie with a hint of fall. You can customize your cookies with these fun add-ins: - Chopped nuts (like pecans or walnuts) - Chocolate chips for a sweet twist - Cream cheese frosting for a rich touch - A sprinkle of sea salt to enhance flavors These options let you play with flavors and textures, making each batch unique. Check your pantry for these common items: - Granulated sugar - Brown sugar - All-purpose flour - Baking soda - Ground spices like cinnamon and nutmeg - Vanilla extract Using these pantry staples makes it easy to whip up Pumpkindoodle Cookies anytime. Start by gathering your ingredients. You will need: - 1 cup pumpkin puree - 1/2 cup granulated sugar - 1/2 cup packed brown sugar - 1/2 cup unsalted butter, softened - 1 large egg - 1 teaspoon pure vanilla extract - 2 cups all-purpose flour - 1 teaspoon baking soda - 1 teaspoon ground cinnamon - 1/2 teaspoon ground nutmeg - 1/4 teaspoon ground ginger - 1/4 teaspoon salt - 1/2 cup cinnamon sugar (for rolling) Preheat your oven to 350°F (175°C). Line a baking sheet with parchment paper. This helps the cookies not stick. In a large bowl, combine softened unsalted butter, granulated sugar, and brown sugar. Use a hand mixer or stand mixer to cream them. Mix until the mixture is light and fluffy. Next, add pumpkin puree, egg, and pure vanilla extract. Mix well until you see no lumps. In a separate bowl, whisk together all-purpose flour, baking soda, ground cinnamon, ground nutmeg, ground ginger, and salt. This step helps distribute the flavors evenly. Slowly add the dry mix into the wet mix. Stir gently until just combined. Don't overmix; it can change the cookie's texture. Use a cookie scoop or spoon to portion the dough into balls. Roll each ball in cinnamon sugar until fully coated. This gives a sweet finish to each cookie. Place the coated balls on the baking sheet, leaving space between them. Bake the cookies for 10-12 minutes. Look for lightly golden edges. The centers may seem soft, but they will firm up as they cool. Let the cookies sit on the baking sheet for about 5 minutes. Then, transfer them to a wire rack to cool completely. Enjoy your delicious pumpkindoodle cookies! To get the best texture, start with softened butter. This helps the sugars blend well, making a nice cream. Mix until it’s light and fluffy. When you add the flour, stir gently. Overmixing can make your cookies tough. Aim for a soft dough that feels a bit sticky. One mistake I see often is using cold butter. Cold butter won't cream properly, leading to dense cookies. Another pitfall is rolling the dough too small. Make sure to use enough dough for each cookie to puff up nicely. Lastly, don’t skip cooling on the rack. This step helps the cookies hold their shape. To boost the flavor, try adding chocolate chips or nuts. White chocolate or pecans pair well with pumpkin. You can also add a hint of maple syrup for extra sweetness. If you enjoy spice, consider adding allspice or cloves. These small changes can elevate your cookies to a new level. {{image_4}} To make gluten-free Pumpkindoodle cookies, swap the all-purpose flour for a gluten-free blend. Many blends work well, but look for one that includes xanthan gum for better texture. Use 2 cups of this blend just like regular flour. The cookies will still be soft and tasty. For a vegan version of these cookies, replace the egg with a flax egg. To make a flax egg, mix 1 tablespoon of ground flaxseed with 2.5 tablespoons of water. Let it sit for a few minutes until it thickens. Use vegan butter instead of unsalted butter, and make sure your vanilla extract is alcohol-free. Feel free to get creative with flavors! Add chocolate chips, chopped nuts, or dried fruit to the dough. For a spicier twist, add more ginger or a pinch of cloves. You can even experiment with flavored extracts like almond or maple. Each variation brings a new taste to your delicious cookies! To keep your pumpkindoodle cookies fresh, store them in an airtight container. This helps lock in moisture. Place parchment paper between layers to avoid sticking. Keep the container at room temperature for up to a week. If you want them to last longer, consider freezing. Freezing pumpkindoodle cookies is easy. First, let them cool completely. Then, place them in a single layer on a baking sheet. Freeze for about an hour until firm. After that, transfer the cookies to a freezer bag. Be sure to remove as much air as possible. They can stay frozen for up to three months. To maintain freshness, avoid exposing cookies to air. If you live in a humid area, add a slice of bread to the container. The bread helps absorb moisture. Also, keep the cookies away from strong smells in your kitchen. They can absorb unwanted odors. Enjoy your delicious pumpkindoodle cookies at their best! Yes, you can use fresh pumpkin. Just cook and puree it first. Fresh pumpkin adds a nice taste. Make sure to drain any excess moisture. This helps keep your cookies from getting too wet. Check the edges of the cookies. They should be golden brown. The centers may look soft. This is fine as they will firm up while cooling. If you press gently, they should bounce back. These cookies pair well with warm apple cider. You can also serve them with a scoop of vanilla ice cream. A cup of tea or coffee works great too. Enjoying them warm enhances their flavor. Yes, you can add nuts or chocolate chips. Chopped walnuts or pecans add crunch. Chocolate chips give a sweet twist. Just mix in about half a cup when you add the dry ingredients. Store your cookies in an airtight container. They stay fresh for about one week. You can also keep them at room temperature. For longer storage, use the freezer method. Yes, you can make the dough ahead. Chill it in the fridge for up to three days. When ready, scoop and roll the cookies. This saves time on busy baking days. You can save leftover cinnamon sugar. Store it in a small jar with a lid. Use it for topping other baked goods or oatmeal. It adds a sweet touch to many dishes. In this article, I shared how to make tasty Pumpkindoodle cookies. You learned about the main ingredients and optional toppings. I gave you clear steps for prepping, mixing, and baking. Useful tips helped you avoid common mistakes and improve texture. We explored gluten-free and vegan options too. Finally, I covered how to store and freeze your cookies. Enjoy these cookies fresh or share them with friends!

Fall is here, and it’s time to fill your kitchen with the warm scent of Pumpkindoodle Cookies! These soft and chewy treats blend classic snickerdoodle flavors with the rich taste …

Read more

Categories Desserts

Minute Creamy Tortellini Soup Quick and Easy Delight

August 28, 2025 by Chef Miles
- 1 package refrigerated cheese tortellini - 4 cups vegetable broth (preferably low-sodium) - 1 cup heavy cream - 1 cup fresh spinach, chopped - 1 medium carrot, finely diced - 1 small onion, finely diced - 2 cloves garlic, minced - 1 teaspoon dried Italian herbs - Salt and pepper to taste - 2 tablespoons olive oil - Grated Parmesan cheese for garnish In this recipe, you will use simple yet flavorful ingredients. The cheese tortellini serves as the star, bringing a delightful texture. A good vegetable broth adds depth and warmth. Heavy cream makes the soup rich and creamy. Fresh spinach not only adds color but also nutrients. The carrot and onion provide sweetness and crunch. Garlic and herbs work together to create a fantastic aroma. Salt and pepper are key for balancing the flavors. For added richness, drizzle olive oil on top before serving. Grated Parmesan cheese gives a salty kick, enhancing the overall taste. You can mix and match garnishes based on your likes. Enjoy! 1. Heat 2 tablespoons of olive oil in a large pot over medium heat. 2. Add 1 small diced onion and 1 finely diced medium carrot. 3. Sauté for about 3-4 minutes. Wait until the onion turns soft and clear. 1. Stir in 2 minced cloves of garlic and 1 teaspoon of dried Italian herbs. 2. Cook these for about 1 minute until the smell fills your kitchen. 1. Gradually pour in 4 cups of vegetable broth, stirring gently. 2. Bring the mixture to a gentle simmer over medium heat. 3. Add 1 package of refrigerated cheese tortellini. Cook according to package instructions, usually 4-5 minutes. 1. Lower the heat and slowly stir in 1 cup of heavy cream. 2. Add 1 cup of chopped fresh spinach until it wilts and brightens the soup. 1. Season with salt and pepper to your taste. 2. Serve hot in bowls, topped with grated Parmesan cheese for extra flavor. To get that rich creaminess, add the cream slowly. This helps it blend well. Keep your heat low while you mix in the cream. High heat can cause it to boil, which is not what we want. Boiling can ruin the texture and flavor of the soup. You can boost the taste with extra herbs. Try adding fresh basil or parsley for a bright kick. A pinch of red pepper flakes can add warmth. For garnishing, feel free to swap out Parmesan with feta or goat cheese. Each brings a unique twist to the flavor. To save time, pre-chop your vegetables. This way, you can toss them in the pot quickly. Using pre-prepared tortellini cuts down on cooking time. Look for fresh or frozen options. They cook quickly and taste great, making your soup ready in a flash. {{image_4}} You can boost your soup with protein. Shredded chicken makes a great addition. It adds heartiness and flavor. Simply stir in cooked chicken after adding the cream. For a meaty touch, try sausage. Cook the sausage in the pot before adding the onion. This way, the soup gains a rich flavor. If you prefer plant-based options, use chickpeas or lentils. They add protein without meat. Simply stir them in with the tortellini. This way, you keep the soup filling and tasty. You can switch up the vegetables in your soup. If spinach isn't your favorite, try kale or Swiss chard. Both add a nice texture and taste. For a sweeter touch, use peas or corn. They cook quickly and bring a pop of color. Seasonal vegetables can change your soup's flavor. In fall, add diced butternut squash. In winter, try adding Brussels sprouts. These options keep your soup fresh and exciting year-round. Using homemade broth can elevate your soup. It adds depth and richness. If you don’t have time, a good low-sodium store broth works too. To spice things up, add red pepper flakes or hot sauce. A pinch of red pepper adds warmth without overwhelming the dish. You can easily adjust the heat to your taste. These tweaks make your Minute Creamy Tortellini Soup unique every time you make it. To keep your Minute Creamy Tortellini Soup fresh, cool it down first. Then, spoon it into airtight containers. Use glass or BPA-free plastic containers for the best results. This soup will stay good in the fridge for up to 3 days. You can reheat this soup on the stovetop or in the microwave. For the stovetop, warm it over low heat. Stir often to keep it even. If using the microwave, heat in short bursts. Stir after each burst to avoid hot spots. To keep the creaminess, add a splash of extra cream while reheating. For freezing, do not add cream yet. Cool the soup and pour it into freezer-safe containers. Leave some space at the top for expansion. You can freeze it for up to 3 months. When ready to eat, thaw it overnight in the fridge. Reheat gently and stir in the cream for a rich finish. Minute Creamy Tortellini Soup stays fresh for about 3 to 4 days in the fridge. Store it in an airtight container. Look for signs of spoilage like off smells or changes in color. If you see any mold, throw it away. Yes, you can make this soup dairy-free. Use coconut milk or cashew cream instead of heavy cream. Both options add a nice creaminess. Just check that your tortellini is also dairy-free. This soup goes well with crusty bread or a fresh salad. A simple green salad with lemon dressing can brighten the meal. You can also pair it with garlic bread for a tasty side. You can prep the ingredients ahead. Chop the veggies and store them in the fridge. You can also cook the soup without adding cream. Just add the cream when you're ready to serve for that fresh taste. In this blog post, I shared how to make a rich and creamy tortellini soup. You learned about essential ingredients like tortellini, broth, and cream. I explained easy steps to prepare the soup, from sautéing veggies to seasoning. You can add protein or change the vegetables for your taste. Remember to store leftovers correctly and reheat them for the best texture. Enjoy this comforting dish that warms your soul. Your kitchen will smell wonderful, and every spoonful will delight you!

Welcome to your new favorite dish: Minute Creamy Tortellini Soup! In just a few simple steps, you can create a warm, creamy delight perfect for any night. Packed with flavor …

Read more

Categories Dinner

Pumpkin Pecan Cobbler Heavenly Dessert Delight

August 28, 2025 by Chef Miles
- 1 can (15 oz) pure pumpkin - 1 cup packed brown sugar - 1 cup evaporated milk - 3 large eggs, beaten - 2 teaspoons pumpkin pie spice - 1 teaspoon vanilla extract - 1 cup all-purpose flour, sifted - 1 teaspoon baking powder - 1/2 teaspoon salt - 1 cup chopped pecans, toasted - 1/2 cup unsalted butter, melted - Whipped cream, for serving I love using pure pumpkin in this recipe. It gives a rich, smooth flavor. Brown sugar adds sweetness and a hint of caramel. Evaporated milk makes the cobbler creamy. Beaten eggs help bind all the ingredients together. Pumpkin pie spice is key here. It brings warmth with cinnamon, nutmeg, and ginger. Vanilla extract adds a lovely aroma. Sifted all-purpose flour helps create a light texture. Baking powder makes the cobbler rise. A pinch of salt balances the sweetness. Toasted pecans add crunch and flavor. I always toast them for extra taste. Finally, serve with whipped cream for a delightful finish. This dessert looks and tastes amazing! - Preheat the oven to 350°F (175°C). - Grease a 9x13-inch baking dish with butter or cooking spray. Start by getting the oven ready. This helps your cobbler bake evenly. Greasing the dish stops the cobbler from sticking. - Combine pumpkin, brown sugar, and evaporated milk. - Add eggs, pumpkin pie spice, and vanilla extract. In a large bowl, mix the pure pumpkin, brown sugar, and evaporated milk. Use a whisk to make it smooth. Then, add the beaten eggs, pumpkin pie spice, and vanilla. Stir until it’s all mixed well. - Whisk flour, baking powder, and salt. - Combine wet and dry mixtures. In another bowl, whisk together the flour, baking powder, and salt. This step makes sure everything is mixed evenly. Slowly add the dry mix to the wet mix. Stir gently until just combined. Don’t overmix; you want a light texture. - Fold in pecans and melted butter. - Pour into baking dish. Now, it’s time to add the fun! Fold in the toasted pecans and melted butter carefully. This adds great flavor and crunch. Pour the batter into the greased baking dish. Spread it out evenly with a spatula. - Bake for 30-35 minutes. - Cool before serving. Place the cobbler in the preheated oven. Bake for 30 to 35 minutes. Check it with a toothpick. It should come out clean or with a few moist crumbs. Once baked, let it cool for about 10-15 minutes. This helps the flavors mix well before you serve. To get the best texture in your pumpkin pecan cobbler, avoid overmixing. When you blend the wet and dry ingredients, mix just until they come together. Overmixing can make your cobbler dense. After baking, allow the cobbler to rest for 10-15 minutes. This time helps the flavors settle, making every bite rich and delicious. I love serving this cobbler warm. A scoop of whipped cream on top makes it even better. The cream adds a sweet touch that pairs perfectly with the spices. For a nice crunch and extra flavor, sprinkle some toasted pecans on top. This little detail elevates the dish and makes it look stunning. Be careful not to skip ingredient measurements. Accurate measuring ensures your cobbler turns out just right. Also, don’t forget to grease your baking dish. A well-greased dish helps the cobbler come out easily and prevents sticking. These simple steps make a big difference in your final dish. {{image_4}} You can easily adjust some ingredients for your pumpkin pecan cobbler. If you don't have pumpkin pie spice, try using nutmeg or cinnamon instead. Both spices add warm flavors. For a different nutty taste, swap out pecans for walnuts. Walnuts bring a nice crunch and work well in this dessert. If you need a gluten-free version, don't worry! Just use a gluten-free flour blend. This swap keeps the texture light and fluffy. It tastes great, and everyone will enjoy it, even those who avoid gluten. For a dairy-free option, you can replace the evaporated milk with coconut milk. Coconut milk adds a subtle sweetness and a rich creaminess. It pairs well with pumpkin and spices, making your cobbler just as delicious. After you bake your Pumpkin Pecan Cobbler, let it cool. Then, store it in the refrigerator. You can keep it fresh for up to 3 days. Just cover it with plastic wrap or foil to keep it moist. If you want to save it for later, you can freeze the cobbler. Wrap it tightly in plastic wrap, then place it in a freezer bag. It will stay good for up to 2 months. To reheat, let it thaw in the fridge overnight. Then, warm it in the oven at 350°F (175°C) for about 15-20 minutes. This way, it will taste almost fresh again. Using airtight containers is key for storage. This prevents the cobbler from drying out. Avoid storing it uncovered. Air can make it stale quickly. Keeping it sealed helps maintain its delicious flavor and texture. You can pair this cobbler with many tasty options. Here are some suggestions: - Whipped cream: A dollop on top makes it even better. - Vanilla ice cream: The cold ice cream melts into the warm cobbler. - Caramel sauce: Drizzle some for extra sweetness. - Coffee or tea: These drinks balance the sweet flavors. Yes, you can prepare the cobbler in advance. Here are some tips: - Make it a day early: Bake and cool it. Store it in the fridge. - Reheat before serving: Warm it in the oven at 350°F for 10-15 minutes. - Store leftovers: Keep any extras in an airtight container for up to three days. This recipe serves about eight people. Here’s how to portion: - Cut into squares: Each square is a nice serving. - Adjust as needed: If serving a crowd, double the recipe. You can test for doneness easily. Follow these tips: - Toothpick test: Insert a toothpick in the center. It should come out clean or have a few moist crumbs. - Look for browning: The top should be golden brown and firm to touch. - Timing matters: Bake for 30-35 minutes, but check around 30 minutes for best results. In this post, I covered how to make a delicious Pumpkin Pecan Cobbler. We explored the ingredients needed, the step-by-step instructions, and helpful tips for perfect results. Don’t forget to experiment with variations to suit your taste. Proper storage will keep your cobbler fresh longer too. Enjoy serving this sweet treat with friends and family for any occasion. Your kitchen will smell amazing, and the satisfaction will be worth it. Happy baking!

Craving a dessert that combines the warm flavors of fall? Look no further than my Pumpkin Pecan Cobbler. This heavenly treat brings together pure pumpkin, crunchy pecans, and a touch …

Read more

Categories Desserts

One-Pan Beef & Broccoli Quick and Easy Meal Guide

August 28, 2025 by Chef Miles
- 1 pound flank steak, thinly sliced against the grain - 4 cups broccoli florets - 3 cloves garlic, minced - 1 tablespoon fresh ginger, grated - 1/4 cup low-sodium soy sauce - 1 tablespoon cornstarch - 1 tablespoon honey - 1/2 teaspoon red pepper flakes (optional, for heat) - Cooked jasmine rice - 2 tablespoons sesame seeds, for garnish For this dish, the flank steak adds a rich flavor and great texture. The broccoli florets provide a crunchy bite and vibrant color. Garlic and ginger bring warmth and depth to the meal. The marinade ingredients are key to making the beef tender and tasty. Low-sodium soy sauce gives a savory base, while cornstarch helps thicken the sauce. Honey adds a hint of sweetness, and red pepper flakes can kick up the heat if you like spice. For serving, fluffy jasmine rice balances the flavors. The sesame seeds add a lovely crunch on top. This mix of ingredients makes for a quick and satisfying meal that you can whip up in no time. Enjoy cooking! First, combine the flank steak, soy sauce, cornstarch, and honey in a bowl. Mix well to coat the beef. This step is key. Marinating for about 15 minutes helps add flavor and tenderness. Next, heat a large skillet or wok over medium-high heat. Add 1 tablespoon of sesame oil. Once hot, add the marinated beef in a single layer. Sear the beef for 3-4 minutes. Browning gives the beef a great flavor. Remove it from the skillet and set aside. In the same skillet, add the remaining tablespoon of sesame oil. Toss in the minced garlic and grated ginger. Stir constantly for 30 seconds until fragrant. Then, add the broccoli florets. Stir-fry for about 5 minutes. Cook until the broccoli is bright green and tender-crisp. Return the beef to the skillet with any juices. If you like some heat, add red pepper flakes. Stir everything together and cook for another 2-3 minutes until the beef is fully cooked. Enjoy this colorful dish over jasmine rice, topped with sesame seeds for a lovely crunch. To make your beef and broccoli taste just right, adjust the flavors. Start with soy sauce. If you want it saltier, add more soy sauce. For a sweeter touch, mix in extra honey. To ensure your beef is tender, slice it thin. Cutting against the grain helps. Marinate it for at least 15 minutes. This step makes a big difference in texture. For stir-frying, use a large skillet or wok. A non-stick pan works well too. These pans heat quickly and help cook the beef evenly. Keep your cooking temperature high. This method helps sear the meat and keep it juicy. When the pan is hot, add the beef in one layer. This keeps it from steaming. Plating is important. Serve your beef and broccoli over fluffy jasmine rice. The rice adds a nice base. For garnish, sprinkle sesame seeds on top. You can also add chopped green onions for color. These touches make your dish look even better and more inviting. {{image_4}} You can use different proteins in this dish. Instead of flank steak, try chicken, pork, or tofu. These options work well with the flavors. For vegetarians, use firm tofu or tempeh. Both soak up the sauce and add protein to your meal. Adding extra veggies boosts nutrition. Try bell peppers, snap peas, or carrots for color and crunch. You can also use seasonal veggies, like asparagus in spring or squash in fall. These choices keep the dish fresh and exciting. Want it milder? Skip the red pepper flakes. You can also add sweet bell peppers for flavor without heat. For more spice, add sriracha or chili paste. This way, you can make the dish just how you like it. To keep your One-Pan Beef & Broccoli fresh, store leftovers right. Follow these tips: - Cool down the stir-fry to room temperature. - Use air-tight containers to keep moisture in and air out. - Label containers with the date. Use leftovers within 3 to 4 days for best taste. Reheating should keep your meal tasty and fresh. Here are ways to do it right: - Use a microwave for quick reheating. Heat in short bursts to avoid overcooking. - A skillet works well too. Add a splash of water or broth to keep it moist. - To keep the beef tender, reheat on low heat. This helps maintain texture and flavor. Freezing is a great option for long-term storage. Here’s how: - Place cooled stir-fry in a freezer-safe container or bag. - Remove as much air as possible to avoid freezer burn. - Beef and broccoli can freeze for up to 3 months. When ready to eat, thaw in the fridge overnight. You can also use the microwave for faster thawing. Just be sure to reheat thoroughly before serving. Yes, you can make One-Pan Beef & Broccoli ahead. Here are some meal prep tips: - Cook the beef and broccoli: Prepare the dish as usual, then let it cool. - Store in containers: Divide the stir-fry into meal prep containers. This helps with portion control. - Refrigerate: Keep the containers in the fridge for up to three days. - Reheat before serving: When ready to eat, just reheat in a pan or microwave. Add a splash of water to keep it moist. You can serve many great sides with beef and broccoli. Here are some ideas: - Jasmine rice: This is the classic pairing. The rice soaks up the sauce well. - Brown rice: A healthier option that adds a nutty flavor. - Noodles: Try udon or rice noodles for a fun twist. - Steamed vegetables: Carrots or snap peas add more color and crunch. To make One-Pan Beef & Broccoli gluten-free, follow these substitutions: - Use tamari: Replace the low-sodium soy sauce with gluten-free tamari. It has a similar flavor. - Cornstarch: This ingredient is already gluten-free, so you can keep it in the recipe. - Check labels: Always ensure other ingredients are gluten-free, especially sauces and condiments. In this article, we covered how to make a delicious beef and broccoli dish. We went over the key ingredients, such as flank steak, broccoli, and garlic. We detailed the marinating and cooking steps for the beef, plus tips to make it tender. You can adjust flavors, swap proteins, and add extra veggies. Don't forget to store leftovers properly! This recipe is flexible and fun to make. I hope you feel inspired to try it out and add your twist! Enjoy your cooking adventures!

Looking for a quick, tasty meal? My One-Pan Beef & Broccoli will delight your taste buds and save you time! With juicy flank steak and crisp broccoli, this recipe is …

Read more

Categories Dinner

Sweet Chili Crockpot Meatballs Easy and Flavorful Recipe

August 28, 2025 by Chef Miles
- 1 lb ground beef (or a blend of beef and pork) - 1/2 cup fresh breadcrumbs - 1/4 cup finely grated Parmesan cheese - 1/4 cup thinly sliced green onions (reserve some for garnishing) - 1 large egg, lightly beaten - 2 cloves garlic, finely minced - 1/2 teaspoon sea salt - 1/4 teaspoon freshly cracked black pepper - 1 cup sweet chili sauce - 1 tablespoon soy sauce - 1 tablespoon rice vinegar - 1 tablespoon sriracha sauce (adjust for spice preference) - Toasted sesame seeds for garnishing You can swap ground beef for ground turkey or chicken for a lighter option. If you need a gluten-free recipe, use gluten-free breadcrumbs. No Parmesan? Try Pecorino Romano or nutritional yeast for a vegan touch. For a milder flavor, reduce the sriracha or skip it entirely. You can also add chopped herbs like cilantro or parsley for freshness. Using fresh ingredients makes a big difference. Fresh breadcrumbs add better texture and taste. Fresh garlic gives a strong flavor that dried garlic can’t match. Green onions add a nice crunch and brightness. When you use fresh ingredients, you get a more vibrant dish. It is worth the extra effort to find quality items. They enhance the overall taste and enjoyment of your sweet chili crockpot meatballs. Start by gathering your ingredients. You need ground beef, fresh breadcrumbs, Parmesan cheese, and green onions. You also need a large egg, minced garlic, sea salt, and black pepper. In a big bowl, mix the ground beef with the breadcrumbs, cheese, green onions, egg, garlic, salt, and pepper. Use your hands or a spatula to combine everything. Mix until just combined; don’t overmix. Overmixing makes tough meatballs. Now, it’s time to shape the meatballs. Take small amounts of the mixture and roll them into balls about one inch wide. This size helps them cook evenly. You should make 20 to 24 meatballs, depending on how large you want them. Put them on a baking tray lined with parchment paper to keep them from sticking. Next, you need to make the sauce. In a separate bowl, whisk together sweet chili sauce, soy sauce, rice vinegar, and sriracha. Taste the sauce and adjust it if you want more spice. Prepare your crockpot by lightly spraying the bottom with cooking spray or a bit of olive oil. Place the meatballs in the crockpot. Pour the sauce over them. Make sure each meatball gets coated. Cover the crockpot. Cook on low for 4 to 5 hours or on high for 2 to 3 hours. The meatballs are done when they are cooked through and tender. Once cooked, carefully remove the meatballs using a slotted spoon. Place them on a serving platter. Drizzle extra sauce over them for more flavor. Before serving, sprinkle on some toasted sesame seeds and reserved green onions for extra color and taste. To make sure your meatballs stay tender, mix the meat gently. If you overmix, they may turn tough. I like to combine ground beef and pork for more flavor. This mix adds zest and keeps the meatballs juicy. Aim for small balls, about one inch wide. This size helps them cook evenly. The sauce makes these meatballs shine. Mix sweet chili sauce, soy sauce, rice vinegar, and sriracha in a bowl. Taste the sauce before pouring it over the meatballs. Adjust the sriracha to fit your spice level. A little more sriracha brings a nice kick! Drizzle extra sauce over the meatballs when serving for added flavor. These meatballs are great as an appetizer or a meal. Serve them warm, with rice or noodles. The rice soaks up the delicious sauce well. You can also garnish with green onions and sesame seeds for a pop of color. Pair with a fresh salad for a complete meal. These tips will help you impress your guests! {{image_4}} You can swap ground beef for other meats. Try ground turkey or chicken for a lighter option. For a richer flavor, use a mix of beef and pork. Each meat brings its unique taste. This allows you to find the perfect match for your family. If you prefer a plant-based dish, use lentils or chickpeas. You can mash them and mix with breadcrumbs and spices. Add finely chopped veggies for more texture. Use a vegan sweet chili sauce to keep it plant-friendly. This way, everyone can enjoy the meal together. Adjust the heat with sriracha in the sauce. Add more for a fiery kick or less for mild flavor. Taste the sauce before pouring it over the meatballs. You can also add red pepper flakes for extra spice. Customize it to fit your taste buds. Keep experimenting until you find the right balance. After you enjoy your sweet chili meatballs, store any leftovers in a safe way. First, let the meatballs cool down to room temperature. Next, place them in an airtight container. This helps keep them fresh. You can store them in the fridge for up to three days. If you want to save them longer, consider freezing. Freezing meatballs is easy and great for meal prep. To freeze, first arrange the meatballs on a baking sheet. Make sure they are not touching each other. Place the sheet in the freezer for about an hour. This helps them freeze individually. Once frozen, transfer the meatballs to a freezer bag. Remove as much air as possible. Label the bag with the date. They can last for up to three months in the freezer. When you're ready to eat the meatballs, reheating is simple. For the best flavor, heat them on the stove or in the oven. If using the stove, place the meatballs in a skillet with a splash of sauce. Heat on medium until warm. If using the oven, preheat it to 350°F. Place the meatballs in a baking dish with some sauce. Cover with foil and heat for about 15-20 minutes. You can also use the microwave for a quick option. Just place them in a microwave-safe dish and cover. Heat in short bursts until warm. Enjoy your delicious meatballs again! Yes, you can bake these meatballs in the oven. Preheat your oven to 400°F. After forming the meatballs, place them on a baking tray lined with parchment paper. Bake for about 20-25 minutes. Make sure they are cooked through and browned. Oven cooking gives a nice crisp outside while keeping them juicy inside. Serve them with the sweet chili sauce for the same great flavor. You can store cooked meatballs in the fridge for about 3-4 days. Place them in an airtight container. Make sure they cool down before sealing. This helps keep them fresh. If you want to enjoy them later, consider freezing them. Just remember to label your container so you know when you made them. These meatballs are great on their own, but they pair well with many sides. Here are some ideas: - Steamed rice: It absorbs the sweet chili sauce well. - Noodles: Any type of noodles adds a nice touch. - Fresh veggies: A simple salad or stir-fried veggies work great. - Skewers: Serve them on skewers for a fun appetizer. - Toasted sesame seeds: A sprinkle adds crunch and flavor. Feel free to mix and match these sides to find your favorite! We explored how to make delicious meatballs in a crockpot. You learned about key ingredients and substitutions. Fresh ingredients are vital for the best flavor. The step-by-step guide showed you how to prepare and cook meatballs with ease. Tips were shared to ensure tenderness and boost taste. Variations allow you to customize for diets or spice levels. Lastly, proper storage keeps your meatballs fresh for later. Now, you're ready to create your own delightful meatballs! Enjoy experimenting in the kitchen.

Ready for a tasty dish that’s easy to make and packed with flavor? My Sweet Chili Crockpot Meatballs are the perfect choice! You’ll enjoy tender meatballs simmered in a sweet …

Read more

Categories Appetizers

Slow Cooker Honey Garlic Chicken Flavorful Delight

August 28, 2025 by Chef Miles
- 4 boneless, skinless chicken thighs - 1/2 cup honey - 1/4 cup soy sauce (or tamari for gluten-free) - 4 cloves garlic, finely minced - 1 tablespoon fresh ginger, finely grated - 1 tablespoon sesame oil - 1/2 teaspoon crushed red pepper flakes These main ingredients bring together sweet, savory, and a hint of spice. The chicken thighs are tender and soak up all the flavors. Honey adds sweetness, while soy sauce gives it a nice saltiness. Garlic and ginger add depth and aroma to the dish. Lastly, sesame oil brings a warm nutty flavor. - 1 cup broccoli florets, fresh or frozen - 1 cup bell peppers, sliced (mix of colors for vibrancy) - 3 green onions, thinly sliced (for garnish) - Toasted sesame seeds (for garnish) Adding vegetables not only makes the dish colorful but also healthy. Broccoli is full of nutrients, and bell peppers add sweetness and crunch. Green onions and sesame seeds enhance the visual appeal and add extra flavor. - Salt and freshly ground black pepper, to taste Seasoning the chicken is key to flavor. A good sprinkle of salt and freshly ground black pepper enhances all the other tastes. Adjust the seasoning to your liking, making sure every bite is delicious. First, grab a medium bowl. In this bowl, whisk together the following ingredients: - 1/2 cup honey - 1/4 cup soy sauce - 4 cloves garlic, finely minced - 1 tablespoon fresh ginger, finely grated - 1 tablespoon sesame oil - 1/2 teaspoon crushed red pepper flakes Mix them well until combined. This sauce is the heart of your dish. It brings sweetness and a kick of flavor. Next, take your chicken thighs. Season both sides with salt and pepper. This step adds great taste. Place the chicken in the bottom of the slow cooker. Try to arrange them in a single layer. This helps cook them evenly. Now, pour the honey garlic sauce over the chicken. Make sure each piece is well coated. Cover the slow cooker securely with its lid. Set it to cook on low for 4-6 hours or on high for 2-3 hours. You want the chicken to be tender and fully cooked. Thirty minutes before the cooking time ends, add vegetables. Toss in 1 cup of broccoli florets and 1 cup of sliced bell peppers. Gently stir to mix them with the chicken and sauce. Be careful not to break the chicken apart. When the chicken is done, use two forks to shred it right in the slow cooker. Mix it with the sauce and vegetables. This creates a delicious, well-blended dish that looks great on your plate. To make the dish more spicy, add more crushed red pepper flakes. Start with a little, then taste as you go. This way, you control the heat. Fresh ingredients always give the best flavor. If you use frozen broccoli or bell peppers, make sure to add them later in cooking. This helps keep their texture. Timing is key when adding vegetables. Add them about 30 minutes before the chicken is done. This keeps them bright and crunchy. Always check the chicken's internal temperature. It should reach 165°F (75°C) to be safe to eat. Use a meat thermometer for accuracy. Serve the chicken over rice or quinoa for a filling meal. Both soak up the sauce well. You can also try noodles for a different touch. For garnishing, sprinkle sliced green onions and toasted sesame seeds on top. This adds color and a nice crunch. {{image_4}} You can swap chicken thighs for chicken breasts or drumsticks. Chicken breasts cook faster and are leaner. Drumsticks add a nice, juicy flavor. Both options work well with the honey garlic sauce. Just adjust the cooking time slightly. Breasts may need less time, while drumsticks could take a bit longer. Want to change the flavor? Use different sweeteners like maple syrup or agave instead of honey. Each sweetener adds a unique taste. You can also switch soy sauce with coconut aminos for a gluten-free option. This choice is great for those with dietary needs. Experiment with the ratios to find the flavor you love. Feel free to mix in other vegetables. Carrots, snap peas, or zucchini can add variety. Just remember to cut them into similar sizes for even cooking. You can also use frozen veggies if fresh ones aren't available. They work just as well and save time. To store leftovers, let the chicken cool first. Place it in an airtight container. This keeps the chicken fresh for up to four days. Always label the container with the date. If you want to enjoy this dish later, refrigeration is key. For best results, reheat in the microwave or on the stove. If using the microwave, heat in short bursts. This helps retain the flavor and texture. On the stove, add a splash of water or broth. This keeps the chicken moist and delicious. To freeze, place cooled chicken in a freezer-safe bag. Remove as much air as possible to prevent freezer burn. It can last up to three months in the freezer. When ready to eat, thaw overnight in the fridge. Then reheat as described above for the best taste. Yes, you can use frozen chicken thighs. Just add an extra hour to the cooking time. This way, the chicken cooks fully and stays juicy. Make sure to check that the internal temperature reaches 165°F (75°C). This ensures food safety and keeps the flavors locked in. You can store leftovers in the fridge for up to four days. Place them in an airtight container to keep them fresh. If you want to keep them longer, freeze them for up to three months. Just remember to label the container with the date. Yes, this recipe is gluten-free if you use tamari instead of regular soy sauce. Tamari is a type of soy sauce made without wheat. It gives the same great flavor as soy sauce. Always check the label to ensure it meets your dietary needs. This blog post covered a tasty slow-cooked chicken dish. We explored main ingredients like chicken thighs, honey, and garlic. I shared step-by-step instructions for a simple cooking process. You learned useful tips for flavor, timing, and serving ideas. For those seeking variety, I offered ideas for alternate proteins and vegetables. Remember to store leftovers correctly and enjoy them later. Embrace these dishes as healthy and easy options for dinner. Happy cooking!

If you’re looking for a meal that is easy, tasty, and a crowd-pleaser, you’re in the right place! This Slow Cooker Honey Garlic Chicken is a flavorful delight that’s perfect …

Read more

Categories Dinner

Caramel Apple Cheesecake Dip Tasty Fall Favorite

August 28, 2025 by Chef Miles
- Cream cheese - Powdered sugar - Vanilla extract - Sour cream - Ground cinnamon - Apples - Caramel sauce - Crushed graham crackers To make this dip, you will need some key items. Start with cream cheese. Use eight ounces, softened for easy mixing. Next, grab half a cup of powdered sugar. This will make the dip sweet and smooth. Don’t forget one teaspoon of vanilla extract. It adds a lovely flavor. You will also need half a cup of sour cream. Full-fat gives the best taste and creaminess. For a warm spice, use half a teaspoon of ground cinnamon. You can add more for garnish later. Then, choose one large apple. I recommend Granny Smith or Honeycrisp for that perfect mix of tart and sweet. Next, you need a quarter cup of caramel sauce. This is for mixing in and for drizzling on top. Finally, have some crushed graham crackers ready. They add a nice crunch and are great for dipping. Gather these ingredients, and you are ready to create a delicious fall treat! 1. Start by taking 8 oz of cream cheese. Make sure it is soft. I usually leave it out for about an hour. 2. In a medium bowl, beat the cream cheese using a hand mixer. Mix it until smooth, about 1-2 minutes. 3. Gradually add 1/2 cup of sifted powdered sugar. Keep mixing until the sugar blends in well. 4. Next, add 1 teaspoon of pure vanilla extract and 1/2 cup of sour cream. Mix until everything is well combined. 1. Now, sprinkle in 1/2 teaspoon of ground cinnamon. This adds a warm spice that makes the dip special. 2. Gently fold in one large diced apple. I like using Granny Smith or Honeycrisp for the best taste. Make sure the apples are mixed evenly. 1. Carefully swirl in 1/4 cup of caramel sauce. Reserve some for drizzling on top later. This creates a lovely marbled look. 2. Spoon the dip into a nice serving bowl. Drizzle the reserved caramel sauce on top. 3. For a finishing touch, sprinkle a bit of extra cinnamon or crushed graham crackers on the dip. Serve this dip with fresh apple slices, pretzel sticks, or extra graham crackers. Arrange everything nicely on a platter. Enjoy the delicious mix of flavors! To get the best creamy dip, use room temperature cream cheese. Cold cream cheese does not blend well. It stays lumpy and ruins the texture. Let it sit out for about 30 minutes before mixing. Sifting powdered sugar is also key. This step removes lumps. It makes your dip smooth and light. A smooth dip is nice to eat and looks great too. You can add more spices or flavors to this dip. Try mixing in a pinch of nutmeg for warmth. A splash of maple syrup adds a sweet twist. Experiment with a bit of ginger for a zesty kick. Don’t be afraid to get creative. The goal is to make the dip your own! Serving your dip well makes it even more fun. Use a nice bowl that matches your table. After spooning the dip in, drizzle caramel sauce on top. This makes it look fancy and inviting. Sprinkle some ground cinnamon on top for color. You can also add crushed graham crackers for texture. Serve your dip with fresh apple slices, pretzel sticks, or extra graham crackers. Arrange everything on a platter. A beautiful display draws people in and makes them want to try your dip! {{image_4}} While apples shine in this dip, you can mix it up! Try using pears for a sweet twist. They add a soft texture and a mild flavor. If you like berries, consider diced strawberries or crushed raspberries. They bring a bright color and tangy taste that pairs well with the sweet dip. For a more tropical vibe, diced pineapple can work too. Just make sure to keep the fruit fresh and crisp. Each fruit choice transforms the dip into a new delight! Caramel makes this dip special, but there are other options. You can drizzle chocolate sauce for a rich flavor. White chocolate adds a sweet touch that complements the dip nicely. For a crunchy topping, use crushed nuts like pecans or walnuts. They add a great crunch and flavor contrast. If you want to keep it simple, dust some extra ground cinnamon or cocoa powder on top. These options can make the dip look pretty while adding a little extra flavor. If you need a gluten-free dip, just swap the graham crackers for gluten-free ones. There are many tasty options available. For a vegan version, use dairy-free cream cheese and coconut whipped cream. These alternatives keep the dip creamy and delicious. Make sure your caramel sauce is vegan if you go that route. There are many brands that offer vegan options. These simple swaps let everyone enjoy this tasty dip, no matter their diet. To keep your Caramel Apple Cheesecake Dip fresh, store it in an airtight container. Place the container in the fridge. This dip stays good for 3 to 5 days. Always use a clean spoon to avoid contamination. If the dip thickens after a day or two, a little sour cream can help bring back its creamy texture. If your dip loses its smoothness, don’t worry. You can revive it easily. Take it out of the fridge and let it sit for about 10 minutes. Then, stir it well with a spoon. If it still seems thick, add a splash of sour cream. Mix until you reach your desired creaminess. Yes, you can freeze this dip! However, it may change in texture when thawed. To freeze, place the dip in a freezer-safe container. Leave some space at the top for expansion. It can stay in the freezer for up to 3 months. When you're ready to enjoy it, thaw it in the fridge overnight. Stir well before serving. Caramel Apple Cheesecake Dip lasts about 3 to 5 days in the fridge. To keep it fresh, store it in an airtight container. Ensure the dip is cooled before sealing. This helps prevent any moisture from forming inside. Always check for signs of spoilage, like off smells or changes in texture. Yes, you can make this dip ahead of time. I recommend preparing it the day before your event. Just make sure to store it in the fridge until you are ready to serve. When you prepare it ahead, the flavors have time to blend, enhancing the taste. Just give it a good stir before serving to mix everything back together. You can serve this dip with many tasty options. Here are some great ideas: - Fresh apple slices - Salty pretzel sticks - Extra crushed graham crackers - Vanilla wafers - Cinnamon sugar pita chips Arrange these dippers on a platter for a beautiful display. Everyone will enjoy choosing their favorite to pair with the creamy dip! This blog post covered how to make a tasty Caramel Apple Cheesecake Dip. We went through the main ingredients and step-by-step instructions to create a creamy dip full of flavor. I shared tips for texture, flavor variety, and presentation to make it special. We also explored different fruit options and storage methods to keep your dip fresh. Remember, this dip is perfect for sharing, so gather your friends and enjoy! Your next gathering will be a hit with this simple treat.

Fall is here, and that means it’s time for warm, cozy flavors! Today, I’m sharing my favorite recipe: Caramel Apple Cheesecake Dip. This sweet treat combines creamy cheesecake with crunchy …

Read more

Categories Desserts

Apple Crumb Cake with Cinnamon Drizzle Delight

August 26, 2025 by Chef Miles
- 2 cups all-purpose flour - 1/2 cup granulated sugar - 1/2 cup packed brown sugar - 1 tsp baking powder - 1/2 tsp baking soda - 1/2 tsp salt - 1 tsp ground cinnamon - 1/2 cup unsalted butter, softened at room temperature - 2 large eggs, at room temperature - 1 cup buttermilk, at room temperature - 2 medium apples, peeled and diced (approximately 2 cups) - 1/2 cup chopped walnuts or pecans (optional) - 1 cup all-purpose flour - 1/2 cup packed brown sugar - 1/2 tsp ground cinnamon - 1/4 cup unsalted butter, melted - 1/2 cup powdered sugar - 1 tbsp milk (plus more if needed) - 1/2 tsp ground cinnamon This cake brings together sweet apples and a rich crumb. The cinnamon drizzle adds a touch of warmth. Each ingredient plays a key role in creating the perfect balance. Enjoy the process of mixing and baking. Your kitchen will smell amazing! Start by preheating your oven to 350°F (175°C). This step is key. It ensures even baking. While your oven heats, prepare a 9x13 inch baking pan. Grease it well with butter or non-stick spray. This keeps your cake from sticking. In a large bowl, combine the dry ingredients. Mix 2 cups of all-purpose flour, 1/2 cup of granulated sugar, 1/2 cup of packed brown sugar, 1 tsp of baking powder, 1/2 tsp of baking soda, 1/2 tsp of salt, and 1 tsp of ground cinnamon. Whisk these together until smooth. In another bowl, cream 1/2 cup of softened butter. Use a hand mixer or whisk until fluffy. Add 2 large eggs, one at a time. Mix well after each egg. Pour in 1 cup of buttermilk, stirring until smooth. Slowly add the flour mix. Fold gently until just combined. This helps keep the cake light. In a small bowl, mix 1 cup of flour, 1/2 cup of packed brown sugar, and 1/2 tsp of ground cinnamon. Add 1/4 cup of melted butter and mix until it looks like coarse crumbs. Set this aside for later. Pour your cake batter into the prepared pan. Spread it out evenly. Sprinkle the crumb topping generously over the batter. Place the pan in your preheated oven. Bake for 40-45 minutes. To check for doneness, insert a toothpick in the center. It should come out clean when the cake is done. While the cake bakes, make the cinnamon drizzle. In a small bowl, whisk together 1/2 cup of powdered sugar, 1 tbsp of milk, and 1/2 tsp of ground cinnamon. If it’s too thick, add a bit more milk. Once the cake cools for 10-15 minutes, drizzle the glaze over the top. Enjoy the sweet aroma! To make a crumb topping that stands out, use cold butter. This keeps the crumbs from getting too soft. Mix the flour, brown sugar, and cinnamon first. Then, add melted butter. Stir until the mix looks like coarse crumbs. Do not overwork it! You want those big, crunchy pieces. Sprinkle it evenly over the batter before baking. This gives the cake a lovely texture. You can swap ingredients to suit your taste. Instead of apples, try pears or berries. For extra spice, add nutmeg or ginger to the batter. If you like more crunch, sprinkle in some oats with the crumb topping. Want a nutty flavor? Use almond flour instead of all-purpose flour. These small changes can make a big difference in flavor. For a stunning presentation, place the cake on a pretty cake stand. A dusting of powdered sugar adds a touch of elegance. You can also drizzle extra cinnamon glaze over the top. Add fresh apple slices or a scoop of vanilla ice cream on the side. This not only looks great but also adds a refreshing contrast to the warm cake. Enjoy your creation! {{image_4}} You can use many types of apples in this cake. Each type brings its own taste. I love using Granny Smith apples. They add a nice tartness that balances the sweetness. Honeycrisp apples are also great. They are sweet and juicy, perfect for baking. You can try Fuji apples for extra sweetness. If you prefer a softer texture, go with McIntosh apples. Mix different apples for a more complex flavor. If you want a nut-free cake, just skip the nuts. The cake will still be delicious. You can add extra apples to keep the texture. Apples keep the cake moist and tasty. You can also add a bit of extra cinnamon for flavor. This will help make up for the missing nuts. Everyone can enjoy this cake without nuts! For a gluten-free cake, swap the all-purpose flour. Use a gluten-free flour blend instead. Make sure it's a one-to-one swap for best results. You may need to add an extra egg for binding. This helps keep the cake moist and fluffy. Always check labels to ensure all ingredients are gluten-free. Enjoy a tasty cake that everyone can eat! To store leftover cake, let it cool completely. Then, wrap it tightly in plastic wrap. This keeps the cake fresh. You can also place it in an airtight container. Store it at room temperature for up to three days. If you want it to last longer, the fridge is a good option. You can freeze Apple Crumb Cake for later. First, let the cake cool completely. Then, slice it into individual pieces. Wrap each piece in plastic wrap, and then in aluminum foil. This protects it from freezer burn. Place the wrapped cake in a freezer bag or container. It can last up to three months in the freezer. To enjoy the cake warm, preheat your oven to 350°F (175°C). Place the cake slices on a baking sheet. Heat them for about 10 minutes. You can also use the microwave. Heat each slice for about 20-30 seconds. Make sure to check that it’s warm but not too hot. Enjoy that warm cinnamon flavor with each bite! Yes, you can use other fruits. Pears or berries work well. Just keep the amount the same. Make sure to cut them into small pieces. This keeps the texture nice and even. To check if the cake is done, use a toothpick. Insert it into the center of the cake. If it comes out clean, the cake is ready. It usually takes 40 to 45 minutes to bake. You can make this cake ahead of time. Just bake it and let it cool. Cover it well and store it at room temperature. It stays fresh for about three days. You can also freeze it for longer storage. Serve the cake warm or at room temperature. Drizzle it with cinnamon glaze for extra flavor. You can also add a scoop of vanilla ice cream on top. This adds a lovely creamy touch. If you want, garnish with fresh apple slices for a nice look. We covered all you need to know for making apple crumb cake. We listed the key ingredients, detailed easy steps for baking, and shared tips for a tasty topping. Plus, we explored variations for dietary needs and how to store leftover cake. In the end, this dessert can be simple and fun to make. Enjoy baking, and don’t forget to share your creation with friends!

If you love the warm, cozy flavors of fall, my Apple Crumb Cake with Cinnamon Drizzle Delight is for you. This cake brings together tender apples, a crunchy topping, and …

Read more

Categories Desserts
Older posts
Newer posts
← Previous Page1 … Page35 Page36 Page37 … Page113 Next →

MELTED RECIPES

where delicious ideas melt into life, from stovetop to backyard. Always warm, simple, and irresistibly satisfying. 🍳🔥🧀

PAGES

Home About Contact Privacy Policy Terms & Conditions Cookie Policy GDPR Policy Copyright Policy Disclaimer

CATEGORIES

Appetizers Desserts Salads Breakfast Dinner

Contact

  • Pinterest
  • Mail
Copyright © 2025 Melted Recipes. All rights reserved.