Skip to content
Melted Recipes
  • Home
  • Appetizers
  • Desserts
  • Salads
  • Breakfast
  • Dinner
  • Privacy Policy
  • Contact
  • About

Chef Miles

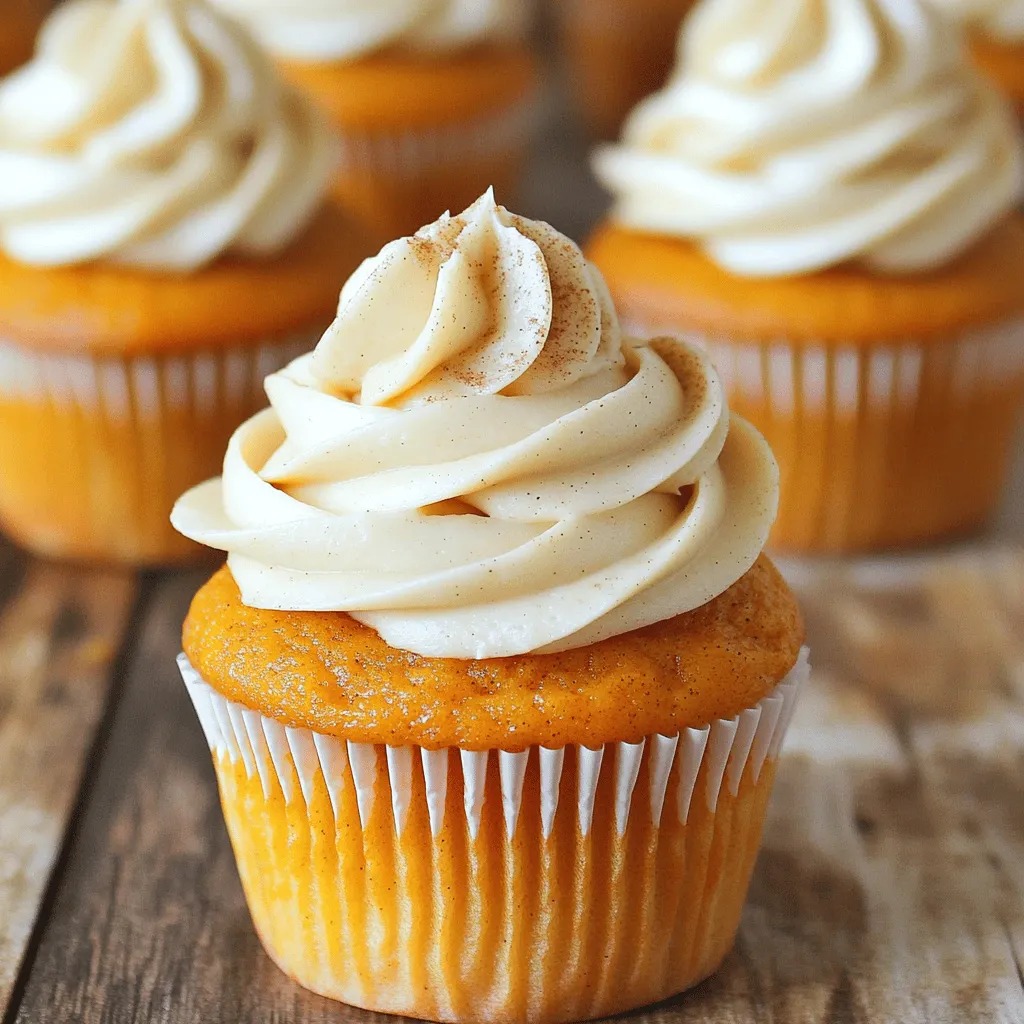
Pumpkin Sugar Cookies with Cream Cheese Frosting Delight

September 2, 2025 by Chef Miles
- 2 ½ cups all-purpose flour - 1 teaspoon baking powder - 1 teaspoon baking soda - 1 tablespoon pumpkin pie spice - ½ teaspoon salt I start with the dry ingredients. All-purpose flour is the base of these cookies. Baking powder and baking soda help them rise. Pumpkin pie spice adds that warm fall flavor. Lastly, a pinch of salt balances the sweet. - 1 cup unsalted butter, softened to room temperature - 1 cup granulated sugar - 1 large egg - 1 cup canned pumpkin puree - 1 teaspoon vanilla extract Next, we mix the wet ingredients. Unsalted butter gives the cookies a rich taste. Granulated sugar sweetens the dough nicely. The egg binds everything together. Canned pumpkin puree keeps the cookies moist and adds flavor. Finally, vanilla extract enhances the overall taste. - 8 oz cream cheese, softened to room temperature - ½ cup unsalted butter, softened to room temperature - 4 cups powdered sugar - 1 teaspoon vanilla extract - A pinch of ground cinnamon for garnish Now, let’s make the cream cheese frosting. Cream cheese and butter create a creamy base. Powdered sugar sweetens it up. A touch of vanilla extract adds flavor. Lastly, a sprinkle of ground cinnamon makes it look pretty and adds extra warmth. 1. Preheat the Oven: Start by preheating your oven to 350°F (175°C). This ensures your cookies bake evenly. 2. Prepare Baking Sheets: Line two baking sheets with parchment paper. This helps prevent the cookies from sticking. 3. Mix Dry Ingredients: In a mixing bowl, whisk together 2 ½ cups of all-purpose flour, 1 teaspoon of baking powder, 1 teaspoon of baking soda, 1 tablespoon of pumpkin pie spice, and ½ teaspoon of salt. Set this mixture aside for later. 1. Cream Together Butter and Sugar: In a large bowl, use an electric mixer to beat 1 cup of softened unsalted butter and 1 cup of granulated sugar. Mix for about 3-4 minutes until fluffy. 2. Incorporate Egg and Pumpkin: Next, add 1 large egg, 1 cup of canned pumpkin puree, and 1 teaspoon of vanilla extract to the butter mixture. Mix until smooth. 3. Combine Wet and Dry Ingredients: Gradually mix the dry ingredients into the wet mixture. Stir until just combined. Do not over-mix to keep the cookies soft. 1. Scoop Cookie Dough: Use a cookie scoop or two tablespoons to place rounded balls of dough onto the prepared baking sheets. Space them about 2 inches apart. 2. Bake the Cookies: Put the sheets in the oven and bake for 10-12 minutes. The edges should be lightly golden, and the centers may look slightly underbaked. 3. Cool Completely: Let the cookies cool on the baking sheets for 5 minutes. Then, move them to a wire rack to cool completely before frosting. 1. Beat Cream Cheese and Butter: In a medium bowl, mix 8 oz of softened cream cheese and ½ cup of softened unsalted butter. Beat until smooth. 2. Gradually Add Powdered Sugar and Vanilla: Slowly add 4 cups of powdered sugar while mixing. Stir in 1 teaspoon of vanilla extract to finish the frosting. 1. Spread Frosting on Cooled Cookies: Once the cookies are completely cool, use a spatula or butter knife to spread a layer of frosting on each cookie. 2. Garnish with Ground Cinnamon: Add a pinch of ground cinnamon on top of each frosted cookie for extra flavor and a lovely finish. To get the best pumpkin sugar cookies, avoid over-mixing the dough. Over-mixing can make the cookies tough. Mix just until you see no flour. Adjust baking times based on your oven. Each oven can be different. Start with 10 minutes and check for lightly golden edges. If they look too soft, add a minute or two. This keeps your cookies soft and chewy. For frosting, use a spatula or a butter knife. These tools help spread the cream cheese frosting evenly. You can also use a piping bag for a fun design. To make smooth frosting, beat the cream cheese and butter well. Gradually add powdered sugar to avoid lumps. If it feels too thick, add a splash of milk to thin it out. For presentation, arrange the cookies on a nice platter. You can add fall decorations like small gourds or leaves. This adds a warm touch to your dessert table. Pair these cookies with warm drinks. A cup of spiced tea or cider works great. The flavors of pumpkin and spice will delight your taste buds! {{image_4}} You can make your pumpkin sugar cookies even more exciting by adding chocolate chips. Just mix in about 1 cup of semi-sweet chocolate chips into the dough before baking. This gives a rich, sweet contrast to the pumpkin flavor. Using different spices can also change the taste. Consider adding nutmeg or ginger for a warm twist. You can even try cardamom for a unique flavor that pairs well with pumpkin. If you need a gluten-free option, swap the all-purpose flour for a gluten-free blend. Just make sure it’s a 1:1 substitute. This way, everyone can enjoy these tasty cookies. For vegan substitutions, replace the egg with a flax egg. Mix 1 tablespoon of ground flaxseed with 2.5 tablespoons of water. Let it sit for a few minutes to thicken. Use vegan butter instead of regular butter in the dough and frosting. Your cookies will still be delicious! Incorporating nuts can add great texture. Chopped pecans or walnuts work well. Just fold in about ½ cup when mixing the dough. They add a nice crunch to each bite. Holiday-themed decorating ideas can make these cookies extra special. Use colored sprinkles or edible glitter for fun designs. You could also use cookie cutters to create festive shapes. Think pumpkins, leaves, or even stars! These touches make your cookies a hit at any gathering. To keep your pumpkin sugar cookies fresh, use airtight containers. These containers stop air from getting in, which helps keep cookies soft. You can use a large plastic container or a glass jar with a tight lid. For longer shelf life, freezing works great. Place cookies in a single layer on a baking sheet. Freeze them for about two hours. Then, pack them in a freezer bag. Be sure to squeeze out all the air. They can stay fresh for up to three months in the freezer. To store leftover cream cheese frosting, place it in an airtight container. Keep it in the fridge for up to one week. You can also freeze it for up to three months. Just let it thaw in the fridge before using. When reusing frosting, check its texture. If it feels too thick, mix in a little milk to make it smooth again. This helps you spread it easily on new cookies or even cupcakes. Your pumpkin sugar cookies can stay fresh for about one week at room temperature. Store them in an airtight container to keep them soft. Watch for signs of spoilage. If you see any mold or an off smell, it’s time to toss them. Cookies that feel hard or dry may not be as tasty, so enjoy them while they’re fresh! Can I use fresh pumpkin instead of canned? Yes, you can! Fresh pumpkin works well. Be sure to cook and mash it until smooth. Drain any excess water before using it in your recipe. This will help keep your cookies soft. What’s the best way to soften butter quickly? You can cut the butter into small pieces. Place it in a bowl and leave it at room temperature for about 15-20 minutes. You can also microwave it on low for about 10 seconds. Just be careful not to melt it. How do I know when the cookies are done baking? Check the edges of the cookies. They should look lightly golden. The centers might still look soft, and that’s okay! They will firm up as they cool. Can I make these cookies ahead of time? Absolutely! You can make the dough one day in advance. Chill it in the fridge. You can also bake the cookies a day ahead and frost them just before serving. What other frostings work well with pumpkin sugar cookies? You can try a maple frosting for a nice fall twist. Cream cheese frosting is classic, but vanilla or caramel frosting works too. Get creative and find what you love! This blog post covered how to make delicious pumpkin sugar cookies from scratch. We explored the best ingredients, step-by-step instructions, and tips for perfecting your cookies and frosting. Remember, small changes in spices or textures can make a big difference. Keep experimenting with flavors and decorations. Whether you stick to the classic recipe or try new variations, your cookies will surely impress. Enjoy baking and sharing these treats with everyone!

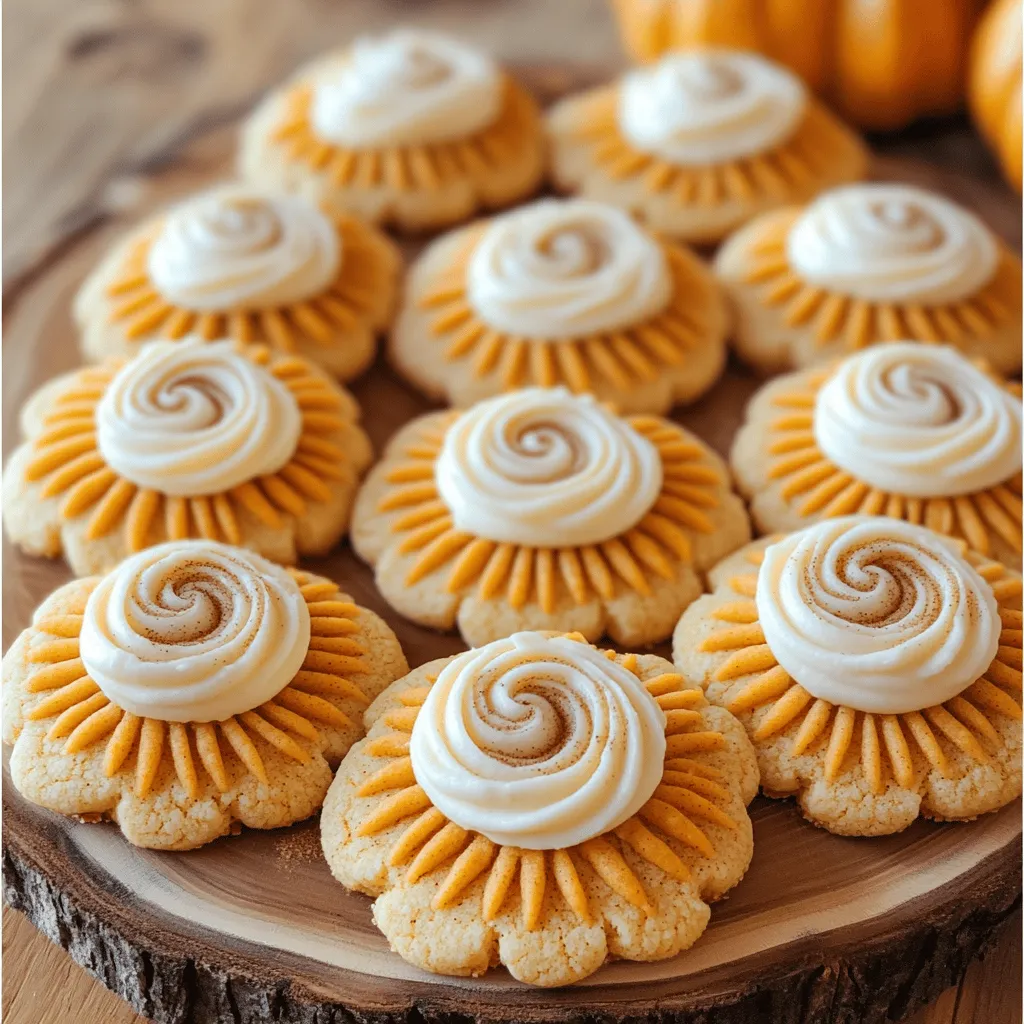
Ready to elevate your fall baking with a delightful twist? Pumpkin Sugar Cookies with Cream Cheese Frosting are the perfect treat for any occasion! These soft, flavorful cookies are infused …

Read more

Categories Desserts

Turkey Meatballs in Pumpkin Sage Sauce Delightfully Easy

September 2, 2025 by Chef Miles
- 1 lb ground turkey - 1/2 cup breadcrumbs - 1/4 cup grated Parmesan cheese - 1 large egg - 2 cloves garlic, minced - 1 tsp onion powder - 1 tsp salt - 1/2 tsp black pepper - 1/4 tsp red pepper flakes (optional) - 1 cup pumpkin puree - 1 cup chicken broth - 1/4 cup heavy cream - 1 tbsp fresh sage, chopped (or 1 tsp dried sage) - 1 tbsp olive oil When making turkey meatballs in pumpkin sage sauce, these ingredients are key. Each one builds flavor and texture. Ground turkey gives a lean base. Breadcrumbs keep the meatballs tender. Parmesan adds a nice saltiness. - Red pepper flakes can add some heat. - Use dried sage if fresh isn’t available. These optional ingredients let you customize the dish. You can choose how spicy or herbal you want it. - Try using garlic powder for extra flavor. - Italian seasoning can enhance the taste. - Fresh herbs like thyme or rosemary also work well. These seasonings can bring new life to your turkey meatballs. I love how a simple change can make a dish feel fresh. Mixing in different spices opens up new flavor profiles. First, grab a big bowl. Add 1 pound of ground turkey. Then, mix in 1/2 cup of breadcrumbs and 1/4 cup of grated Parmesan cheese. Crack 1 large egg into the bowl. Toss in 2 cloves of minced garlic, 1 teaspoon of onion powder, 1 teaspoon of salt, and 1/2 teaspoon of black pepper. If you like spice, add 1/4 teaspoon of red pepper flakes. Use your hands or a spoon and mix gently. Be careful not to overmix. This keeps your meatballs tender. Now, preheat your oven to 400°F (200°C). While it warms up, scoop out some of the turkey mixture. Roll it into balls about 1 inch wide. Place them on a baking sheet lined with parchment paper. Make sure they have space in between. You should make about 24 meatballs. Once the oven is hot, bake them for 20 to 25 minutes. They should turn golden brown and reach an internal temperature of 165°F (74°C). While the meatballs bake, let's make the sauce. In a large skillet, heat 1 tablespoon of olive oil over medium heat. Add 1 cup of pumpkin puree, 1 cup of chicken broth, and 1/4 cup of heavy cream. Stir everything until it blends well. Bring the mix to a gentle simmer. After that, stir in 1 tablespoon of chopped fresh sage. If you don't have fresh sage, use 1 teaspoon of dried. Let the sauce cook for about 5 minutes. Stir it occasionally until it thickens slightly. When the meatballs are done, take them out of the oven. Carefully move them into the skillet with the sauce. Gently swirl the meatballs in the sauce. Let them simmer together for 5 more minutes. This helps the meatballs soak up those tasty flavors. Now, it’s time to serve your dish. Place the warm turkey meatballs on a plate. Sprinkle some extra grated Parmesan cheese on top. You can also add fresh sage leaves for a nice touch. Enjoy your meal! - Use fresh ingredients for the best flavor. Fresh garlic and sage shine in this dish. - Mix the meatball ingredients gently. Overmixing can make them tough. - Form uniform meatballs, about 1 inch wide. This helps them cook evenly. - Bake until golden brown. This adds flavor and texture to the meatballs. - Add a pinch of nutmeg for warmth. Nutmeg pairs well with pumpkin and sage. - Stir in a splash of balsamic vinegar. This will add a nice tang to the sauce. - For a spicy kick, include more red pepper flakes. Adjust to your taste preference. - Serve meatballs in a shallow bowl. This lets the sauce shine and looks nice. - Garnish with extra Parmesan. A sprinkle of cheese adds color and flavor. - Add fresh sage leaves on top. This not only looks great but boosts the herbal taste. {{image_4}} You can easily make turkey meatballs gluten-free. Instead of regular breadcrumbs, use gluten-free breadcrumbs. Many stores offer these options. You can also use ground oats or almond flour. These choices keep the texture light and tasty. To make this dish dairy-free, swap out the Parmesan cheese. Nutritional yeast adds a cheesy flavor without dairy. For the heavy cream, use coconut cream or a dairy-free cream alternative. These swaps keep the sauce creamy and delicious. If you want a different protein, consider using ground chicken or lean beef. Both work well in this recipe. For a vegetarian option, use lentils or chickpeas. Mash them lightly and combine with the spices. This way, you can enjoy the same flavors in a meat-free dish. After you enjoy your turkey meatballs in pumpkin sage sauce, store leftovers in the fridge. Place them in an airtight container. This helps keep them fresh. They will last about 3 to 4 days. If you want to enjoy them later, check that they cool down first before sealing the container. This way, moisture does not build up. You can freeze turkey meatballs too! To do this, let them cool completely. Then, place them in a freezer-safe bag or container. Make sure to remove as much air as possible. This helps prevent freezer burn. They can stay frozen for up to 3 months. When you are ready to eat, defrost in the fridge overnight. To reheat turkey meatballs, you have a few options. The oven is a great choice. Preheat it to 350°F (175°C). Place the meatballs in a baking dish and cover with foil. Heat for about 15 to 20 minutes. You can also use the microwave. Heat them in a microwave-safe dish for 1 to 2 minutes. Make sure to check that they are hot all the way through. Enjoy! Yes, you can use ground turkey breast. It has less fat than regular ground turkey. This option makes the meatballs leaner. Just keep in mind, they may be a bit drier. Adding a little more cream or sauce can help with moisture. To thicken the sauce, you can simmer it longer. Let it cook until it reduces. Another option is to mix a little cornstarch with water and stir it in. This quick method thickens the sauce nicely without changing the flavor. Several sides match well with these meatballs. Consider serving them with: - Mashed potatoes - Rice - Quinoa - Fresh green salad - Roasted vegetables These options balance the rich sauce and add texture to your meal. Leftovers can last in the fridge for about 3 to 4 days. Store them in an airtight container. If you want to keep them longer, consider freezing them. They can last for up to 3 months in the freezer. Just thaw and reheat when ready to enjoy! This post covered all you need to create delicious turkey meatballs in pumpkin sage sauce. We discussed the key ingredients, step-by-step instructions, and tips for the best results. Variations for diets like gluten-free and dairy-free were also included. Plus, we explored storage info and answered your most common questions. With these insights, you can impress anyone at your next meal. Enjoy cooking and make it your own!

Get ready to make a flavorful dish that’s both simple and satisfying! My Turkey Meatballs in Pumpkin Sage Sauce combines juicy turkey with creamy pumpkin and fragrant sage for a …

Read more

Categories Dinner

Roasted Tomato Basil Soup Flavorful and Simple Recipe

September 2, 2025 by Chef Miles
- 2 lbs ripe tomatoes, halved - 1 medium onion, quartered - 4 cloves garlic, unpeeled - 3 tablespoons olive oil - 1 teaspoon salt - 1/2 teaspoon freshly ground black pepper - 1 teaspoon dried oregano - 4 cups vegetable broth - 1 cup fresh basil leaves, tightly packed - 1 tablespoon balsamic vinegar - Additional fresh basil leaves for garnish - Optional: Crusty bread for serving The key elements in this roasted tomato basil soup make it rich and tasty. First, the ripe tomatoes bring sweetness and flavor. For the best taste, choose tomatoes that are juicy and firm. The onion adds depth, while unpeeled garlic gives a nice, mellow flavor when roasted. Olive oil adds richness, and salt and pepper balance the taste. The dried oregano adds a hint of earthiness. Vegetable broth gives the soup its base. Fresh basil leaves bring a bright flavor and aroma. Balsamic vinegar adds a touch of sweetness and tang. Lastly, crusty bread is perfect for dipping. - Alternative tomatoes for roasting: You can use roma or heirloom tomatoes for a different taste. - Fresh vs. dried herbs: Fresh herbs enhance flavor. You can use dried if fresh is not available. - Options for vegetable broth: Homemade broth works great. Store-bought is fine too. Choosing the right ingredients can change the flavor profile of your soup. Don't hesitate to try different kinds of tomatoes or herbs to find what you like best! First, set your oven to 400°F (200°C). This high heat helps to roast the tomatoes perfectly. Next, grab a large baking sheet. It should be big enough to hold all your veggies without crowding them. Now, arrange the halved tomatoes, quartered onion, and unpeeled garlic cloves on the baking sheet. Make sure they are in a single layer for even roasting. Drizzle 3 tablespoons of olive oil over the vegetables. Then, sprinkle 1 teaspoon of salt, 1/2 teaspoon of black pepper, and 1 teaspoon of dried oregano on top. Toss everything gently with your hands. Place the baking sheet in the oven and roast for about 30 to 35 minutes. The tomatoes will soften and get a bit charred, bringing out their sweet flavor. Once roasted, take the baking sheet out of the oven. Let it cool for a few minutes. Carefully peel the garlic cloves. Add the roasted tomatoes, onions, and garlic to a blender. Pour in 4 cups of vegetable broth. Blend it all on high until you get a smooth texture. Now, in a medium pot over medium heat, combine the blended mix with 1 cup of fresh basil leaves and 1 tablespoon of balsamic vinegar. Stir well to mix everything together. Let the soup simmer for about 10 minutes. This helps the flavors blend nicely. After simmering, taste the soup. Adjust the seasoning if you think it needs more salt or black pepper. Enjoy your delicious roasted tomato basil soup! To get the best flavor in your soup, roasting is key. Here are some tips: - Optimal caramelization: Spread the tomatoes and onion evenly on the baking sheet. This helps them cook uniformly. The edges should brown slightly to bring out sweetness. - Checking doneness: Look for soft tomatoes that collapse easily. The skin should show some char. A fork should pierce through with little resistance. The right blender makes a big difference in your soup's texture. - Immersion blender vs. regular blender: An immersion blender is easy to use in the pot. It saves time and fewer dishes. A regular blender gives a smoother finish but requires transferring hot soup. - Avoiding lumps in the soup: Blend until completely smooth. If using a regular blender, blend in small batches. This prevents overflow and ensures even mixing. Pairing your soup with the right sides enhances the meal. - Best accompaniments: Crusty bread is a classic choice. It’s perfect for dipping. A fresh salad adds a nice crunch and balance to the meal. - Garnishing ideas for presentation: Top your soup with fresh basil leaves. A drizzle of olive oil can add richness. Consider a sprinkle of black pepper for a nice touch. {{image_4}} To make a creamy version of this soup, add cream or a dairy-free alternative. Heavy cream gives a rich taste, while coconut milk or cashew cream works well for dairy-free. Start by blending the soup first. After blending, pour in about one cup of cream. Stir it in and let the soup warm up. This will make it smooth and rich, perfect for a cozy meal. If you crave heat, try adding chili peppers or spices. You can use fresh jalapeños or crushed red pepper flakes. Add them to the veggies before roasting. This way, the heat blends with the sweetness of the tomatoes. Adjust the roasting time if you add whole chili peppers. You may want to roast them a bit longer to soften fully. This version packs a flavorful punch. This soup is easy to make vegan and gluten-free. The main recipe is already vegan. Use vegetable broth and avoid any dairy. For gluten-free options, serve the soup with gluten-free bread or crackers. Just check labels to ensure they are certified gluten-free. Enjoy this tasty soup without worry, no matter your diet! To store leftover roasted tomato basil soup, use airtight containers. Glass or plastic containers work well. Let the soup cool before sealing. Place it in the fridge. It stays fresh for about 3 to 5 days. If you want to freeze the soup, use freezer-safe bags or containers. Leave some space at the top for expansion. Freeze it within two hours of cooking for best results. To reheat, thaw overnight in the fridge. Heat it on the stove over low heat until warm. Stir well to bring back the creamy texture. For freshness, store the soup in the fridge. Check for signs of spoilage before eating. Look for off smells or mold. If you see any, throw it away. For frozen soup, use it within three months for best flavor. To thicken your soup, you have a few great options. First, you can cook it longer. This helps the water evaporate and intensifies the flavor. Another method is to add some chopped potatoes or carrots while blending. They blend well and add body to the soup. Lastly, consider adding a bit of cornstarch mixed with water. Stir it in during the simmering step for a smooth finish. Yes, you can use canned tomatoes. They are a great alternative and save time. Use about 2 cans of diced tomatoes for this recipe. Drain excess liquid to avoid a watery soup. Canned tomatoes often have great flavor, but fresh tomatoes add a special touch. If you have fresh ones, use them when in season for the best taste. Making this soup takes about 50 minutes. You will spend around 15 minutes preparing the ingredients. Roasting the vegetables takes about 30 to 35 minutes. After blending, you will simmer the soup for 10 minutes. This simple timing makes it easy to plan your meal. Yes, Roasted Tomato Basil Soup is healthy. Tomatoes are rich in vitamins C and K. They also contain antioxidants like lycopene, which helps fight cancer. Basil adds more vitamins and minerals, plus it has anti-inflammatory properties. The olive oil provides healthy fats. Overall, this soup is a nutritious choice for any meal. In this blog post, we explored how to make a delightful Roasted Tomato Basil Soup. We covered the key ingredients, including tomatoes, garlic, and herbs. I shared tips for roasting and blending to achieve the best texture. You can also try variations, like creamy or spicy versions. Don't forget about storing leftovers or freezing for later. With the right techniques and ingredients, you can create a delicious dish that warms your soul. Enjoy every comforting bowl!

Are you ready to turn fresh, juicy tomatoes into a comforting bowl of Roasted Tomato Basil Soup? This easy and flavorful recipe will wow your taste buds without keeping you …

Read more

Categories Dinner

Hobo Ground Beef & Potato Casserole Savory Twist

September 2, 2025 by Chef Miles
- 1 lb (450g) ground beef - 4 medium potatoes, thinly sliced - 1 onion, finely chopped - 2 cups frozen mixed vegetables (like carrots, peas, and corn) - 1 can (10.5 oz or 300g) cream of mushroom soup - 1 cup beef broth - 1 teaspoon garlic powder - 1 teaspoon paprika - Salt and black pepper to taste - 2 cups shredded cheddar cheese - Fresh parsley, chopped, for garnish When making Hobo Ground Beef & Potato Casserole, focus on using quality ingredients. The ground beef gives a rich flavor. Choose fresh potatoes for the best texture. Thin slices cook evenly, blending well with the beef. Onions add a nice sweetness, enhancing the overall taste. Frozen mixed vegetables save time and add color. Using cream of mushroom soup makes the dish creamy. Beef broth adds depth to the flavor. Garlic powder and paprika spice things up. Adjust salt and pepper to your liking for a perfect taste. For a cheesy finish, add shredded cheddar on top. Fresh parsley gives a pop of color and freshness. This dish is easy to make and great for family meals. Enjoy the savory twist this casserole brings to your table! 1. Preheat Oven: Set your oven to 350°F (175°C). This helps cook the casserole evenly. 2. Prepare Ingredients: Gather all your ingredients. Slice the potatoes thinly and chop the onion finely. This will speed up cooking. 1. Brown the Beef and Onions: In a large skillet over medium heat, add the ground beef and chopped onion. Cook until the beef is browned and the onion turns soft, about 5-7 minutes. Use a slotted spoon to drain any excess fat. 2. Add Vegetables and Seasonings: Mix in the frozen vegetables, garlic powder, paprika, salt, and pepper. Sauté for 5 more minutes. This helps the flavors blend and thaws the veggies. 1. Layering the Potatoes: In a greased 9x13 inch baking dish, place half of the sliced potatoes evenly at the bottom. Lightly season with salt and pepper. 2. Pouring the Soup Mixture: Spread the beef and vegetable mix over the first potato layer. Then pour half of the creamy soup mixture over the beef. Sprinkle half of the cheese on top. 3. Baking Instructions: Add the remaining potato slices as the next layer, season with salt and pepper, and pour the rest of the soup mixture over them. Cover the dish tightly with aluminum foil. Bake for 45 minutes. Remove the foil, add the rest of the cheese, and bake uncovered for another 15 minutes. The cheese should be melted and bubbly, and the potatoes tender. How to Prevent Sticking To stop your casserole from sticking, use a greased baking dish. I recommend using a bit of butter or cooking spray. Make sure to grease the bottom and sides well. This simple step helps your casserole come out easily. Ensuring Even Cooking Cut your potatoes thinly and uniformly. This way, they cook at the same rate. Layer them evenly in the dish, too. Stir the beef and vegetable mix often while cooking. This helps all flavors blend well. Alternative Seasonings If you want to change the flavor, try different seasonings. Italian herbs like oregano and basil work well. You can also use chili powder for a little kick. Experiment with what you have on hand! Cheese Variations Cheddar cheese is great, but don’t stop there! Try adding Monterey Jack or mozzarella for a creamier texture. You can even mix multiple cheeses for a richer taste. Just sprinkle them on top before the final baking stage. Best Side Dishes This casserole pairs well with a fresh salad. A simple green salad with light dressing can balance the flavors. You can also serve it with crusty bread for a heartier meal. Presentation Ideas Serve the casserole in individual bowls for a homey touch. Add a sprinkle of fresh parsley on top for color. This small detail makes it look fancy without much effort! {{image_4}} You can switch up the meat in this dish. Ground turkey is a great choice. It is lean and has a mild taste. This change makes the casserole lighter but just as tasty. You can use the same amount as ground beef. If you want a vegetarian version, skip the meat entirely. Instead, add more veggies to fill the dish. Try using mushrooms, bell peppers, and zucchini. These ingredients bring flavor and texture without meat. Seasonal vegetables can enhance your casserole. In spring, use fresh asparagus or peas. In the fall, add sweet potatoes or squash. These swaps can bring new flavors and colors to your dish. You can also swap ingredients based on what you have. If you don't have mixed veggies, use broccoli, green beans, or corn. Just make sure to chop them into small pieces for even cooking. If you want to try different creamy bases, there are options. You can use cream of chicken or cream of celery soup. These will change the flavor but keep the dish creamy. For a homemade creamy mixture, blend sour cream with milk and a bit of flour. This gives you a nice base that you can control. You can adjust the taste to your liking, making it more unique. - How to Store Leftover Casserole After enjoying your Hobo Ground Beef & Potato Casserole, let it cool. Once cooled, cover it tightly with plastic wrap or foil. You can also place it in an airtight container. This keeps it fresh and safe. - Best Practices for Reheating To reheat, place the casserole in the oven at 350°F (175°C). Cover it with foil to keep it moist. Heat for about 20-25 minutes, or until warm. If you want a crispy top, remove the foil for the last 5 minutes. - Freezing Unbaked Casserole To freeze an unbaked casserole, assemble it in a freezer-safe dish. Cover it tightly with plastic wrap and foil. This helps prevent freezer burn. You can freeze it for up to 3 months. - Freezing Baked Casserole If you have leftovers from a baked casserole, let it cool first. Then, slice it into portions. Place each portion in a freezer-safe container. This makes it easy to grab a meal later. You can freeze it for up to 3 months too. - How Long It Lasts in the Fridge Your leftover casserole can last in the fridge for about 3-4 days. Make sure it stays covered to keep it fresh. - Freezer Storage Time In the freezer, your casserole can stay good for up to 3 months. Just remember to label it with the date, so you know when to use it. How can I make it spicier? To add spice, you can mix in diced jalapeños or a few dashes of hot sauce. You can also use spicy sausage instead of ground beef. Another idea is to add red pepper flakes when cooking the beef. These options will give your casserole a nice kick! Can I use fresh vegetables instead of frozen? Yes, you can use fresh vegetables! Just chop them up and sauté them with the beef and onions. Fresh veggies may need a bit more time to cook, so add them early in the process. This will keep the flavors bright and fresh. Can I halve the recipe? Absolutely! To halve the recipe, just use half the amount of each ingredient. This works well if you want to make a smaller dish. Adjust your baking time, as a smaller casserole may cook faster. How to cook for larger gatherings? To serve more people, simply double the recipe. Use a larger baking dish to fit all the ingredients. You may need to increase the baking time, so check for doneness. This dish is great for feeding a crowd! Can I make this in a slow cooker? Yes! To make this in a slow cooker, layer all the ingredients as you would in the oven. Cook on low for 6-8 hours or on high for 3-4 hours. This method makes the casserole very tender and flavorful. How to modify for oven-free cooking? If you don’t have an oven, you can use a stovetop method. Cook the beef and veggies in a large skillet. Layer the potatoes in the skillet, add the soup mixture, and cover. Cook on low heat until the potatoes are soft, about 30-40 minutes. This article covered all you need to know for a great casserole. We discussed key ingredients, step-by-step cooking, and helpful tips. I shared variations to fit your diet and guide on storing leftovers. With these insights, you can feel confident when making this dish. Remember, cooking is fun, so make it your own and enjoy!

Looking for a hearty, budget-friendly meal? Try my Hobo Ground Beef & Potato Casserole! This dish combines simple ingredients like ground beef, potatoes, and mixed veggies for comfort and flavor. …

Read more

Categories Dinner

Nut-Free Banana Oat Energy Bites Easy and Healthy Snack

September 2, 2025 by Chef Miles
- 2 ripe bananas, well-mashed - 1 cup rolled oats - 1/4 cup honey or maple syrup - 1/4 cup unsweetened coconut flakes - 1/4 cup mini chocolate chips - 1/2 teaspoon vanilla extract - 1/2 teaspoon ground cinnamon - A pinch of sea salt - Optional: 1 tablespoon chia seeds or ground flaxseeds Each energy bite has about 70 calories. You get 1.5 grams of protein, 2 grams of fiber, and 10 grams of carbs. The healthy fats come mainly from coconut flakes and optional seeds. These bites are great for a quick energy boost. You can swap honey for maple syrup to make it vegan. If you want a nut-free option, use dairy-free chocolate chips. For a gluten-free choice, ensure your oats are labeled gluten-free. If you can't find coconut flakes, you can skip them or use a different dried fruit, like raisins. The chia seeds or flaxseeds add fiber and omega-3s, but they are optional. Making Nut-Free Banana Oat Energy Bites is simple and quick. You will need just 10 minutes to prep. Most of the time involves chilling. Gather your ingredients and find a large mixing bowl. 1. Start by placing the ripe, well-mashed bananas into a large mixing bowl. 2. Pour in your choice of honey or maple syrup. Mix them with a fork until smooth. 3. Add the vanilla extract and ground cinnamon. Stir until all ingredients blend well. 4. Gradually add the rolled oats, unsweetened coconut flakes, and mini chocolate chips. Mix everything until evenly distributed. 5. If you want, fold in chia seeds or ground flaxseeds for extra nutrition. 6. Keep mixing until all ingredients are combined, and the mixture holds together. 7. With damp hands or a small cookie scoop, form the mixture into 1-inch balls. 8. Place the formed bites on a parchment-lined baking sheet. Make sure they are spaced apart. 9. Chill the baking sheet in the refrigerator for at least 30 minutes. This helps the bites firm up. 10. Once set, transfer the bites to an airtight container for easy storage. - Use slightly damp hands to prevent sticking when forming the balls. - Make sure to pack the mixture firmly to hold its shape. - If you use a cookie scoop, it helps to create even-sized bites. - Experiment with different sizes; smaller bites make great snacks for kids! To make the best nut-free banana oat energy bites, start with ripe bananas. They add natural sweetness and creaminess. Mash them well to avoid lumps. This creates a smooth base. Use rolled oats for a chewy texture. Avoid quick oats, as they may become too soft. Combine all ingredients gently for even flavor. Chill the bites well to help them firm up. This step makes them easier to handle. One common mistake is using unripe bananas. They do not provide enough sweetness. Mixing too vigorously can make the oats mushy. Aim for a gentle fold to keep the texture right. Skipping the chilling step can lead to bites that fall apart. Avoid using too much liquid, or your mixture will be too wet. Balance ingredients like honey or syrup carefully for the best taste. You can easily customize your energy bites. For a different flavor, add spices like nutmeg or cardamom. Consider mixing in dried fruits like cranberries or raisins for added sweetness. You might try different sweeteners, like agave syrup or brown rice syrup. If you want more crunch, add seeds like pumpkin or sunflower seeds. Adjust the chocolate chips based on your taste. You can even omit them for a healthier option. {{image_4}} You can easily make these bites dairy-free. Use dairy-free chocolate chips instead of regular ones. Also, check if your honey is vegan if you want a completely dairy-free option. Maple syrup is a great choice here too. It adds sweetness without any dairy. Want to boost nutrition? Add chia seeds or ground flaxseeds. Just one tablespoon adds fiber and omega-3s. You can also mix in some dried fruit like cranberries or raisins. These will add natural sweetness and chewy texture. Nuts are also an option, but remember, this recipe is nut-free. Spice up your energy bites with different flavors. Add a pinch of nutmeg or allspice for warmth. You can also try a splash of almond or coconut extract for a sweet twist. If you like a chocolate kick, mix in cocoa powder. These small changes can make your bites extra special and fun! To keep your Nut-Free Banana Oat Energy Bites fresh, place them in an airtight container. This helps lock in moisture and flavor. Store the container in the fridge. The cool temperature keeps the bites firm and tasty. Enjoy them for a quick snack any time! You can also freeze these energy bites if you want to save some for later. First, place the formed bites on a baking sheet. Make sure they are not touching each other. Freeze them for about 1 hour until firm. Then, transfer the frozen bites to a freezer-safe bag or container. They will stay good for up to 3 months. Just thaw them in the fridge when you are ready to enjoy. These energy bites are best eaten within one week when stored in the fridge. After that, they may lose their taste and texture. For the frozen ones, just remember to check the date. If you notice any changes in smell or texture, it’s best to toss them. Always use clean hands or utensils when handling the bites to keep them safe and fresh. Yes, ripe bananas work great in this recipe. They are sweeter and mash easily. This sweetness helps bind the energy bites together. Plus, ripe bananas bring a rich flavor that makes each bite tasty. If you have overripe bananas, use them! They add a wonderful creaminess to the mix. You can use agave nectar or brown rice syrup instead. Both add sweetness without altering the taste. If you want a sugar-free option, try using mashed dates or a sugar-free syrup. Each choice will still keep your bites delicious and enjoyable. Feel free to experiment and find what you like best! To make these energy bites vegan, simply swap honey for maple syrup or agave nectar. Both options are plant-based and work well. Ensure any chocolate chips you use are dairy-free too. You can also add seeds, like chia or flax, for extra nutrition. Enjoy your tasty vegan snack! You’ve learned about the key ingredients for energy bites, their nutrition, and substitutions. We covered step-by-step cooking instructions and tips for perfecting your bites. I shared useful tricks to boost flavor, avoid common mistakes, and ways to customize recipes. You now know variations and proper storage for freshness. Energy bites are easy, fun, and adaptable. Try them out today and enjoy the many benefits!

Are you looking for a healthy snack that’s easy to make and packed with flavor? Nut-Free Banana Oat Energy Bites are perfect for you! They require simple ingredients and just …

Read more

Categories Desserts

Pumpkin Cupcakes with Pumpkin Frosting Delight

September 2, 2025 by Chef Miles
- 1 cup all-purpose flour - 1 teaspoon baking powder - 1 teaspoon baking soda - 1 teaspoon ground cinnamon - 1/2 teaspoon ground nutmeg - 1/4 teaspoon ground ginger - 1/4 teaspoon salt - 1/2 cup granulated sugar - 1/2 cup packed brown sugar - 1/2 cup vegetable oil - 1 cup pumpkin puree - 2 large eggs - 1 teaspoon vanilla extract - 1/2 cup unsalted butter - 2 cups powdered sugar - 1/4 cup pumpkin puree - 1/2 teaspoon ground cinnamon - 1/4 teaspoon vanilla extract - A pinch of salt Each ingredient plays a role in creating the best pumpkin cupcakes. The dry ingredients help the cupcakes rise and stay fluffy. The flour gives structure. Baking powder and baking soda are key for leavening. The spices bring warmth and flavor. For the wet ingredients, the sugars add sweetness and moisture. Vegetable oil keeps the cupcakes tender. Pumpkin puree adds richness and that lovely pumpkin taste. Eggs bind everything and provide a nice texture. Vanilla extract enhances all the flavors. The frosting takes these cupcakes to a new level. The unsalted butter is creamy and rich. Powdered sugar sweetens the frosting and gives it a smooth texture. Adding more pumpkin puree keeps the theme alive. Ground cinnamon in the frosting ties it all together. A pinch of salt balances the sweetness. These ingredients work in harmony to create a treat that is moist, flavorful, and perfect for any autumn gathering. You will love how they come together! - Preheat your oven to 350°F (175°C). Line a cupcake tin with paper liners. - In a medium bowl, combine the all-purpose flour, baking powder, baking soda, ground cinnamon, ground nutmeg, ground ginger, and salt. Whisk until there are no clumps. - In a large bowl, mix granulated sugar, brown sugar, and vegetable oil. Stir until smooth and creamy. - Add pumpkin puree, eggs, and vanilla extract to the sugar mixture. Beat until well mixed. - Slowly add the dry mixture into the wet mixture. Stir gently until just combined. - Carefully spoon the batter into the cupcake liners. Fill each liner about two-thirds full. - Bake for 18-20 minutes. To check doneness, insert a toothpick in the center. It should come out clean. - Let the cupcakes cool in the tin for a few minutes. Then transfer them to a wire rack. Allow them to cool completely before frosting. - Achieving the perfect cupcake rise: Fill each cupcake liner about two-thirds full. This allows room for the cupcakes to rise without spilling over. The batter will expand as it bakes, creating a nice dome shape. - Avoiding overmixing the batter: Mix the wet and dry ingredients until just combined. Stir gently until no flour streaks remain. Overmixing can lead to dense cupcakes. - Tips for achieving creamy frosting: Start with softened butter. Beat it until smooth before adding powdered sugar. This helps create a fluffy texture. Gradually add in the other ingredients to maintain that creaminess. - Best techniques for frosting cupcakes: Use a piping bag for a neat look. A simple round tip works well. You can also use a spatula to spread frosting if you prefer a more rustic look. - Decorative garnishing suggestions: Sprinkle a bit of ground cinnamon on top of the frosted cupcakes. You can also add a small piece of candied ginger for extra flavor and flair. - Enhancing visual appeal: Arrange cupcakes on a decorative plate. This adds charm and makes them more inviting. {{image_4}} You can switch up the frosting in fun ways. A cream cheese frosting works well. It adds a tangy flavor that pairs great with pumpkin. To make it, mix 8 ounces of cream cheese with 1/2 cup of softened butter. Add 2 cups of powdered sugar and a splash of vanilla. Beat until smooth. Another option is maple frosting. This gives a sweet, fall twist. Mix 1/2 cup of softened butter with 2 cups of powdered sugar. Add 1/4 cup of maple syrup and a pinch of salt. Beat until creamy and spread it on your cupcakes. You can also add fun mix-ins to your cupcakes. Chocolate chips make them extra sweet. Just fold in 1/2 cup of semi-sweet chocolate chips into the batter. Nuts are another great addition. Chopped walnuts or pecans will add a nice crunch. Mix in 1/2 cup of chopped nuts right before you fill the cupcake liners. For a fruity twist, try dried fruits. Raisins or cranberries can add a chewy texture. Just add 1/2 cup of dried fruit to the batter for a pop of flavor. Want to switch the flavor? Turn these into spice cupcakes. Add 1/2 teaspoon of allspice and 1/4 teaspoon of ground cloves to the dry ingredients. This will boost the warmth of the spices. If you need a gluten-free option, substitute the all-purpose flour with a gluten-free blend. Most blends work well in this recipe. Just follow the package instructions for the correct amount. This way, everyone can enjoy these tasty treats! To keep your pumpkin cupcakes fresh, store them in an airtight container. This method keeps moisture in and prevents them from drying out. You can also place parchment paper between the layers to avoid sticking. These cupcakes stay fresh for up to four days at room temperature. If you live in a hot climate, store them in the fridge to keep them cool. If you want to save some for later, freezing is a great option. Start by letting the cupcakes cool completely. Wrap each cupcake in plastic wrap. This keeps air out and prevents freezer burn. Place the wrapped cupcakes in a freezer-safe bag. They can last about three months in the freezer. When you're ready to enjoy one, take it out and let it thaw at room temperature for about an hour. For any leftover pumpkin frosting, store it in an airtight container in the fridge. It stays fresh for about one week. If you want to reuse it later, just give it a good stir before using. If the frosting is too thick, add a teaspoon of milk to loosen it up. You can also spread the frosting on graham crackers for a quick treat! You know the cupcakes are done when a toothpick comes out clean. Insert the toothpick into the center of a cupcake. If it pulls out with no batter, they are ready. Baking takes about 18 to 20 minutes in a preheated oven at 350°F. Keep an eye on them as they bake. Overbaking can dry them out. Yes, you can use homemade pumpkin puree! Just make sure it is smooth and not too watery. If your puree is too wet, it may change the batter’s consistency. To make homemade puree, roast a fresh pumpkin, scoop out the flesh, and blend it until smooth. You can substitute eggs with applesauce or mashed banana. Use 1/4 cup of unsweetened applesauce for each egg. This keeps the cupcakes moist and adds a hint of sweetness. You can also use flaxseed meal mixed with water. Combine 1 tablespoon of flaxseed meal with 2.5 tablespoons of water. These cupcakes can be stored for up to 3 days at room temperature. Keep them in an airtight container. If you want to keep them longer, you can refrigerate them. They will last about a week in the fridge. Just remember to bring them back to room temperature before serving. Yes, you can make mini cupcakes! Simply adjust the baking time. Mini cupcakes usually take about 12 to 15 minutes to bake. Fill each mini liner about two-thirds full with batter. Check for doneness with a toothpick as well. Enjoy these bite-sized treats! You now have a simple guide for making delicious pumpkin cupcakes. We covered the key ingredients, including the spices that give them flavor. You learned how to mix the batter and the best baking tips too. Remember to enjoy the process and feel free to try different frostings or mix-ins. These cupcakes are great for sharing or keeping for later. With these instructions, you can bake with confidence. Get started and enjoy each tasty bite!

Get ready to savor the fall with my Pumpkin Cupcakes with Pumpkin Frosting Delight! These treats combine the warm flavors of cinnamon and nutmeg with moist pumpkin goodness. You’ll learn …

Read more

Categories Desserts

Pumpkin Chocolate Chip Muffins Tasty Fall Delight

September 2, 2025 by Chef Miles
To make the best pumpkin chocolate chip muffins, you need simple and fresh ingredients. Here’s what you'll need: - 1 cup canned pumpkin puree - 1/2 cup vegetable oil - 2 large eggs - 1/2 cup brown sugar, packed - 1/2 cup granulated sugar - 1 teaspoon vanilla extract - 1 1/2 cups all-purpose flour - 1 teaspoon baking soda - 1 teaspoon baking powder - 1/2 teaspoon ground cinnamon - 1/4 teaspoon ground nutmeg - 1/4 teaspoon ground ginger - 1/4 teaspoon salt - 1 cup semi-sweet chocolate chips - Optional: 1/2 cup chopped nuts (such as walnuts or pecans) Using canned pumpkin puree makes this recipe easy. You can find it in any store. The vegetable oil keeps the muffins moist, while eggs help them rise. The sugars add sweetness and a lovely texture. Next, we have the flour, baking soda, and baking powder. These are key for a good rise. The spices bring warmth and flavor. Cinnamon, nutmeg, and ginger create that cozy fall taste. The chocolate chips are the star of the show! They melt slightly and add sweetness. If you like nuts, add walnuts or pecans for crunch. This mix of ingredients makes every muffin a tasty delight. Set your oven temperature to 350°F (175°C). This is the perfect heat for baking. Get your muffin tin ready by using paper liners or a light coat of cooking spray. This helps the muffins come out easily. In a large bowl, combine the canned pumpkin puree, vegetable oil, brown sugar, granulated sugar, eggs, and vanilla extract. Whisk these ingredients together until smooth. Ensure there are no lumps for the best texture. In a different bowl, whisk together the all-purpose flour, baking soda, baking powder, ground cinnamon, ground nutmeg, ground ginger, and salt. Mixing these well helps the flavors spread evenly. Slowly add the dry mixture into the wet mixture. Use a spatula or wooden spoon to stir gently until just combined. Avoid overmixing to keep the muffins light and fluffy. A few lumps are okay. Then, fold in the semi-sweet chocolate chips and nuts if you want. Scoop the batter into each muffin cup, filling them about three-quarters full. This gives them room to rise. Bake the muffins for 18-20 minutes. Check if they are done by inserting a toothpick into one. It should come out clean or with a few moist crumbs. After baking, let the muffins cool in the tin for about 5 minutes. Then, move them to a wire rack to cool completely. Enjoy these tasty muffins warm, maybe with some butter or cream cheese for an extra treat! To make your muffins light and fluffy, avoid overmixing. When you mix the wet and dry ingredients, stir just until combined. A few lumps are okay. This keeps your muffins airy. Also, use room temperature ingredients. When eggs and oils are at room temperature, they blend better. This step helps the muffins rise nicely. For a richer taste, consider adding spices or extracts. Cinnamon and nutmeg boost the fall flavor. You can also try vanilla or almond extract for depth. Using quality chocolate chips is key too. Good chocolate melts beautifully and adds sweetness. Aim for semi-sweet chips for a nice balance. Serve your muffins warm for the best experience. A smear of butter makes them even better. You can also sprinkle a bit of cinnamon on top. This adds a lovely touch and enhances their look. For a charming display, arrange them on a platter. Your guests will love both the taste and the presentation! {{image_4}} You can make these muffins dairy-free easily. For oil, substitute it with unsweetened applesauce. This swap not only cuts out dairy but also keeps the muffins moist. When it comes to chocolate chips, choose non-dairy options. Many brands offer delicious vegan chocolate chips. This way, everyone can enjoy these tasty treats. If you need a gluten-free version, it is simple to adapt this recipe. Just swap the all-purpose flour with a gluten-free flour blend. Look for blends that include xanthan gum. This helps mimic the texture of traditional muffins. Always check the brand for the best results. Want to add more flavor? Consider adding dried fruits like cranberries or raisins. These fruits add sweetness and a nice chew. You can also experiment with different nuts. Walnuts or pecans work great. They add crunch and a nutty taste to the muffins. Mixing in these extras can make each muffin unique and flavorful. To keep your pumpkin chocolate chip muffins fresh at room temperature, place them in an airtight container. This helps maintain their moisture and flavor. You can stack the muffins carefully to save space. Ensure the container is sealed tightly. This method keeps the muffins soft for about three days. If you want to save muffins for later, freezing is your best option. To freeze them, first, let the muffins cool completely. Then, wrap each muffin in plastic wrap. After that, place them in a freezer-safe bag or container. This keeps them fresh for up to three months. When you’re ready to enjoy them, take the muffins out and let them thaw in the fridge overnight. For a quick reheat, pop them in the microwave for about 15-20 seconds. Muffins stay fresh for about three days at room temperature. They can last up to three months in the freezer. Always check for any signs of spoilage before eating. If they look or smell off, it's best to toss them. Yes, you can use fresh pumpkin. First, select a small sugar pumpkin. Cut it in half and scoop out the seeds. Place the halves cut-side down on a baking sheet. Roast at 350°F (175°C) for about 45 minutes. When soft, scoop out the flesh and puree it. This fresh puree adds a great taste! You have many options! Consider these mix-ins: - Dried cranberries for a tart flavor. - Chopped nuts like walnuts or pecans for crunch. - White chocolate chips for a sweet twist. - Coconut flakes for added texture. Feel free to mix and match! Check for doneness with a toothpick. Insert it into the center of a muffin. If it comes out clean or with a few moist crumbs, they are done. The tops should look golden brown and slightly springy. Don't open the oven too early, or they may sink! Yes, mini muffins are easy to make! Use a mini muffin tin. Fill each cup about halfway with batter. Bake for about 12-15 minutes. Remember to check doneness with a toothpick, just like with regular muffins. Enjoy bite-sized goodies! These pumpkin chocolate chip muffins are easy to make and fun to enjoy. We covered the key ingredients, simple steps, and handy tips for perfect results. Remember, you can customize your muffins with different flavors and mix-ins. Store extras for later or share them with friends. With this guide, you can bake delicious muffins that please everyone. Your kitchen will smell amazing, and the taste will impress. Happy baking!

If you crave a cozy fall treat, pumpkin chocolate chip muffins are a must-try! With their soft texture and sweet chocolate bits, they capture autumn’s essence. In this article, I’ll …

Read more

Categories Desserts

Cake Mix Pumpkin Bread Quick and Easy Recipe

September 2, 2025 by Chef Miles
- 1 box (15.25 oz) yellow cake mix - 1 cup canned pumpkin puree - 1/2 cup vegetable oil - 3 large eggs For this pumpkin bread, the main ingredients are simple and easy to find. The yellow cake mix gives the bread a light texture. Canned pumpkin puree adds moisture and flavor. Vegetable oil keeps the bread soft, while eggs provide structure. - 1 teaspoon ground cinnamon - 1/2 teaspoon ground nutmeg - 1/4 teaspoon ground ginger - 1/4 teaspoon salt Spices bring warmth and depth to the bread. Ground cinnamon is a must, giving that classic fall taste. Nutmeg adds a sweet, nutty flavor. Ginger gives a bit of zing, while salt enhances all the flavors. - 1/2 cup chopped walnuts or pecans - 1/2 cup chocolate chips You can customize your bread with fun add-ins! Chopped walnuts or pecans add a great crunch. If you like a sweeter touch, chocolate chips can make it even more delicious. Feel free to mix and match these for your perfect pumpkin bread! - Preheat oven to 350°F (175°C). - Grease a 9x5-inch loaf pan with vegetable oil or cooking spray. - In a bowl, combine the yellow cake mix, canned pumpkin puree, vegetable oil, and eggs. - Blend these ingredients until smooth using a hand mixer or a whisk. - Add ground cinnamon, nutmeg, ginger, and salt to the batter. - Stir gently until the spices mix well. - If you like, fold in chopped walnuts or chocolate chips for extra flavor. - Pour the batter into the prepared loaf pan. - Bake for 50-60 minutes. - To check for doneness, insert a toothpick into the center; it should come out clean or with just a few moist crumbs. - Ensure all your ingredients are at room temperature. This helps the batter mix smoothly. - Be cautious not to overmix. Stir gently until just combined. This keeps the bread tender. - You can substitute with different spices or extracts. Try adding vanilla or allspice for a twist. - Add more nuts or different types of chocolate. Pecans or dark chocolate can give a nice crunch. - Serve the bread warm with cream cheese or butter. This adds a rich, creamy layer to each bite. - Pair it with coffee or tea for maximum enjoyment. The warm drink complements the bread perfectly. {{image_4}} You can make this pumpkin bread healthier with a few simple swaps. - Use whole wheat cake mix instead of yellow. - Substitute the oil with unsweetened applesauce. These changes add fiber and cut down on fat, making your bread a bit lighter. Plus, the applesauce keeps it moist. You won’t even notice the difference! Want to switch things up? Try adding different flavors! - Create a chocolate pumpkin bread by using chocolate cake mix instead of yellow. - Add dried fruits like cranberries or raisins for sweetness. - You can also throw in some seeds like sunflower or pumpkin seeds for crunch. These options make your pumpkin bread fun and unique! Feel free to play with textures and tastes by adding more ingredients. - Consider different nuts like almonds, pecans, or hazelnuts. - You can also experiment with seasonal spices like allspice or clove. These little touches can change your pumpkin bread from good to great! Keep your cake mix pumpkin bread in an airtight container. It stays fresh for up to 5 days. This method helps keep the bread moist and tasty. If you plan to eat it within the week, this is a great option. For longer storage, freeze your slices. They can last for up to 3 months in the freezer. Wrap each slice in plastic wrap, then place them in a freezer bag. When you're ready to enjoy, thaw the slices in the refrigerator or microwave. This way, you can have a delicious treat ready for any occasion. When reheating, you can warm the slices in the oven or microwave. If you use the oven, set it to 350°F (175°C) for about 10 minutes. This method keeps the bread soft and warm. You can also enjoy it cold as a refreshing snack. The flavors are still great, and it’s perfect for a quick bite! Yes, alternatives like spice or chocolate cake mixes work well. If you love the warmth of spices, try a spice cake mix. For a fun twist, use chocolate cake mix. Both will add a unique touch to your pumpkin bread. To make this recipe vegan, substitute the eggs with flax eggs. To do this, mix 1 tablespoon of ground flaxseed with 2.5 tablespoons of water. Let it sit for a few minutes to thicken. Also, use a plant-based oil instead of vegetable oil. These swaps keep the bread moist and delicious. Insert a toothpick into the center; it should come out clean or with a few moist crumbs. This test is simple and effective. If the toothpick is wet, give it a few more minutes in the oven. Absolutely, just use two loaf pans and adjust baking time if necessary. Doubling the recipe is perfect for sharing or meal prep. Just keep an eye on the baking time, as larger amounts might need a little longer to bake. Enjoy your baking journey! To sum up, this blog post shared a simple recipe for spiced pumpkin bread. You learned about key ingredients, steps for preparing, and tips for perfecting texture. We explored options for variations and storage methods. Enjoy this bread warm or cold, with lots of add-in choices. Remember, baking can always be fun and rewarding. Experiment with flavors and share your version with family and friends. Try it out, and enjoy every bite of your homemade delight!

Looking for a quick and easy way to enjoy the flavors of fall? My Cake Mix Pumpkin Bread recipe combines the rich taste of pumpkin with the simplicity of yellow …

Read more

Categories Desserts

One-Pot Cowboy Spaghetti Easy and Flavorful Meal

September 1, 2025 by Chef Miles
- 12 oz spaghetti - 1 lb ground beef - 1 medium onion, diced - 2 cloves garlic, minced - 1 bell pepper, diced - 1 can (14 oz) diced tomatoes - 1 cup beef broth - 1 cup frozen corn - 1 can (15 oz) black beans, rinsed and drained - 2 tablespoons taco seasoning - 1 teaspoon smoked paprika - Salt and pepper to taste - 2 tablespoons olive oil - Shredded cheddar cheese for topping - Fresh cilantro for garnish The key to a great dish lies in the ingredients. You start with spaghetti as the base. It cooks right in the pot, soaking up all the flavors. Then, you need ground beef for a hearty protein. It gives the meal depth and richness. Next, add a medium onion and garlic. They provide a wonderful aroma and flavor. A bell pepper adds color and sweetness. Use any color you prefer; they all work well. Don't forget the diced tomatoes. They add moisture and tang. The beef broth enhances the meaty flavor and helps the spaghetti cook. Frozen corn gives a touch of sweetness and texture. For the beans, use black beans. They are nutritious and filling. Taco seasoning and smoked paprika bring warmth and spice. Adjust salt and pepper to your taste. Finally, drizzle in olive oil to keep everything moist. Top with shredded cheddar cheese for creaminess. Finish with fresh cilantro for a bright touch. Each ingredient plays a role in making this dish easy and flavorful! Start by heating olive oil in a large pot over medium heat. Once the oil is hot, add the diced onion. Sauté the onion for about three to four minutes. You want it soft and see-through. Next, stir in the minced garlic and diced bell pepper. Cook for another two minutes. This will make your kitchen smell great! Now it’s time to add the ground beef. Break it apart with a spoon as you add it to the pot. Cook the beef for about five to seven minutes. Stir it often until it turns brown and is no longer pink. If there's a lot of fat, drain it from the pot to keep things light. Once the beef is browned, sprinkle in the taco seasoning and smoked paprika. Don’t forget to add salt and pepper to taste. Mix it all well so the spices coat the meat. Cook for one more minute. This step adds a lot of flavor! Next, pour in the canned diced tomatoes, beef broth, frozen corn, and black beans. Then add the uncooked spaghetti. Make sure to stir everything well. Check that the spaghetti is fully submerged in the liquid. This helps it cook evenly. Bring the mixture to a rolling boil. Once it's boiling, reduce the heat to a gentle simmer. Cover the pot and let it simmer for about 12 to 15 minutes. Stir occasionally to prevent sticking. You’ll know it’s done when the spaghetti is tender. After cooking, take the pot off the heat. Let the dish rest for a few minutes to thicken up. For a cheesy finish, stir in half of the shredded cheddar cheese until it melts. This will give your cowboy spaghetti a creamy touch! To boost the taste of One-Pot Cowboy Spaghetti, add spices like cumin or chili powder. A pinch of cayenne will give it a kick. You can also mix in fresh herbs like oregano or thyme for more depth. After cooking, let the dish rest for a few minutes. This resting time helps all the flavors meld together, making each bite even better. When sautéing, keep the heat medium to avoid burning the onion and garlic. Stir often to cook them evenly. For perfect pasta texture, cook the spaghetti until it is al dente. This means it should be soft but still firm to the bite. Remember, the pasta will continue to cook a bit after you remove it from heat. Top your Cowboy Spaghetti with shredded cheddar cheese for creaminess. Fresh cilantro adds color and a burst of flavor. You can serve it with cornbread or a side salad for a complete meal. For a fun cowboy theme, consider adding cowboy beans or grilled corn on the cob. {{image_4}} You can easily switch the ground beef for ground turkey or chicken. Both options are leaner but still tasty. If you want a vegetarian dish, use lentils or mushrooms. They add great texture and flavor. If you're looking for a healthier choice, try whole wheat spaghetti. It gives more fiber and a nutty taste. For gluten-free options, use gluten-free spaghetti or any short pasta. Bowtie or penne works well in this dish, too, and is fun to eat. Feel free to add more veggies! Zucchini, spinach, or carrots can boost nutrition and flavor. You can also use seasonal produce like bell peppers in summer or squash in fall. This way, you can change it up and keep meals fresh and exciting. To store leftovers, let the spaghetti cool first. Then, transfer it to an airtight container. This helps keep it fresh. You can store it in the fridge for up to 3 days. After that, it might lose its taste and texture. To freeze One-Pot Cowboy Spaghetti, use a freezer-safe container. Make sure to leave some space at the top, as it will expand. The dish can stay good in the freezer for up to 3 months. When you’re ready to eat it, thaw it overnight in the fridge. You can reheat the spaghetti in two ways: the microwave or the stovetop. For the microwave, place it in a bowl and cover it. Heat in 1-minute bursts until hot. On the stovetop, gently warm it in a pan over low heat. Add a splash of beef broth or water to keep it moist. Stir often to prevent sticking. One-Pot Cowboy Spaghetti takes about 30 minutes to cook. You spend 10 minutes prepping the ingredients. Cooking takes about 20 minutes. This quick meal fits into a busy schedule. Yes, you can make this dish ahead of time. Cook the spaghetti and let it cool. Store it in an airtight container in the fridge for up to three days. To reheat, add a splash of broth to keep it moist. You can use ground turkey or chicken for a leaner choice. For a vegetarian option, try lentils or black beans. Both options keep the dish hearty and satisfying. To add heat, include diced jalapeños or crushed red pepper flakes. You can also use a spicier taco seasoning. Start with a little, then taste and adjust as needed. Yes, you can add more vegetables! Try zucchini, spinach, or mushrooms. Just chop them small and add them with the garlic and bell pepper. This adds flavor and nutrition. This blog post covered a tasty One-Pot Cowboy Spaghetti recipe. We explored the ingredients, cooking methods, tips, and storage info. You learned how to create a dish full of flavor and fun. Try different meats and veggies to make it your own. Remember to let it rest for better taste. Enjoy making this dish and impressing your friends. Cooking can be a joy, and this meal is an easy way to start. Now, grab your ingredients and get cooking!

Craving a hearty, easy meal? Look no further! One-Pot Cowboy Spaghetti is packed with flavor and can be made in just one pot. With simple ingredients like ground beef, diced …

Read more

Categories Dinner

Crumbl Copycat Caramel Apple Cookies Easy Recipe

September 1, 2025 by Chef Miles
To make Crumbl Copycat Caramel Apple Cookies, gather these ingredients: - 1 cup unsalted butter, softened to room temperature - 1 cup packed brown sugar - 1/2 cup granulated sugar - 1 large egg - 1 teaspoon pure vanilla extract - 2 1/2 cups all-purpose flour - 1 teaspoon baking soda - 1/2 teaspoon baking powder - 1/2 teaspoon salt - 1 teaspoon ground cinnamon - 1 cup grated apple (about 1 medium apple, skin removed) - 1/2 cup caramel sauce (store-bought or homemade) - 1/2 cup chopped walnuts or pecans (optional) - 1/2 cup semi-sweet or milk chocolate chips (optional) If you lack some ingredients, here are smart swaps: - Replace unsalted butter with margarine or coconut oil. - Use light brown sugar instead of dark for a milder flavor. - For a vegan option, use a flax egg in place of the large egg. - Apples can vary; try Granny Smith for tartness or Fuji for sweetness. - Substituting caramel sauce with honey can offer a different taste. Using fresh ingredients makes a big difference. Fresh apples add a crisp flavor that dried or old fruit cannot match. Quality butter enhances the cookies’ texture and taste. Fresh spices, like cinnamon, bring out the best in each bite. This focus on freshness ensures your cookies are not only tasty but also enjoyable to share. Always check your ingredients before you start baking. First, set your oven to 350°F (175°C). This is a good temperature for baking. Next, take a baking sheet and line it with parchment paper. This helps the cookies not stick. In a large bowl, add 1 cup of softened butter, 1 cup of brown sugar, and 1/2 cup of granulated sugar. Grab an electric mixer and beat the mix on medium speed. You want it to be light and fluffy. This usually takes about 3 minutes. Now, crack 1 large egg into the bowl. Pour in 1 teaspoon of pure vanilla extract next. Keep mixing until everything is smooth. In another bowl, whisk together 2 1/2 cups of flour, 1 teaspoon of baking soda, 1/2 teaspoon of baking powder, 1/2 teaspoon of salt, and 1 teaspoon of ground cinnamon. Gradually add the dry mix to the wet ingredients. Mix on low speed until just combined. Don’t overmix! It can change the cookie's texture. Now, gently fold in 1 cup of grated apple and 1/2 cup of caramel sauce. If you like, add 1/2 cup of chopped walnuts or pecans and 1/2 cup of chocolate chips. Use a tablespoon to scoop out cookie dough and place them on your baking sheet. Keep them 2 inches apart. Bake in the oven for 10-12 minutes. The edges should be lightly golden, and the centers soft. After baking, let them cool on the sheet for 5 minutes. Then, move them to a wire rack to cool completely. Enjoy your cookies! When baking Crumbl Copycat Caramel Apple Cookies, avoid these pitfalls: - Overmixing the Dough: Mix just until combined. Too much mixing makes tough cookies. - Not Measuring Ingredients Properly: Use a scale or measuring cups. This ensures the right texture. - Using Cold Butter: Softened butter creams well with sugar. Cold butter won’t mix properly. - Baking on an Unlined Sheet: Always line your baking sheet. It prevents sticking and makes clean-up easy. To get that soft and chewy texture, follow these steps: - Use Room Temperature Ingredients: This includes butter and egg. They mix better for a smooth dough. - Bake Until Just Set: Look for lightly golden edges. The centers should appear soft and slightly underbaked. - Cool on a Wire Rack: This allows air to circulate. It helps maintain the cookie's ideal texture. For a flavor boost, consider these spices: - Nutmeg: Add a pinch for warmth. It pairs well with apple and caramel. - Allspice: This adds a hint of clove and cinnamon. It enriches the cookie's flavor. - Ginger: A small amount brings a nice zing. It complements the sweetness of caramel. Feel free to experiment with these tips. They can help you create cookies that impress! {{image_4}} You can change up your Crumbl copycat caramel apple cookies with fun toppings. Here are some ideas: - Drizzle melted chocolate on top for a sweet touch. - Sprinkle sea salt for a salty-sweet mix. - Add crushed graham crackers for a crunchy base. - Use dried fruit like cranberries or raisins for added chewiness. - Try different nuts like almonds or pecans for variety. Each change can give your cookies a new flavor. Get creative and find your favorite mix-ins! Want to make these cookies gluten-free? It's easy! Here’s how: - Swap the all-purpose flour for a gluten-free blend. - Make sure the baking powder is gluten-free as well. - Check all packaged ingredients to ensure they are gluten-free. This way, you can enjoy the same delicious cookies without gluten! If you want a vegan version, here’s what to do: - Replace the butter with coconut oil or vegan butter. - Use a flax egg instead of a large egg. To make this, mix 1 tablespoon of ground flaxseed with 3 tablespoons of water. Let it sit for 5 minutes to thicken. - Choose a vegan caramel sauce or make your own with coconut milk and sugar. These swaps keep the flavor and texture while making it vegan-friendly! After baking your Crumbl Copycat Caramel Apple Cookies, let them cool completely. Once cool, place them in an airtight container. This keeps them fresh and moist. You can store them at room temperature for up to five days. If you want to keep them longer, consider freezing. Freezing cookies is simple and effective. First, ensure the cookies are fully cooled. Then, wrap each cookie in plastic wrap. Place them in a freezer-safe bag or container. This method prevents freezer burn. You can freeze the cookies for up to three months. When ready to enjoy, thaw them at room temperature. Reheating cookies can bring back their fresh-baked taste. Preheat your oven to 350°F (175°C). Place cookies on a baking sheet. Heat for about 5-7 minutes. This warms them up and softens any firmness. For a quick option, you can use a microwave. Heat each cookie for about 10-15 seconds. Enjoy those warm, gooey bites! To soften butter, take it out of the fridge. Let it sit at room temp for about 30 minutes. You can also cut it into small pieces to speed up the process. If you're in a hurry, use a microwave. Heat it for just a few seconds. Watch closely to avoid melting. Yes, you can use different apples. Sweet apples like Fuji or Gala work well. Tart apples like Granny Smith add a nice balance. Just make sure to peel and grate them. This helps blend the flavor into the dough. To keep cookies soft, do not overbake them. Look for lightly golden edges and soft centers. Let them cool on the baking sheet for a few minutes before moving. You can also add a bit more brown sugar for moisture. If you need a substitute for caramel sauce, try using dulce de leche. It has a similar sweet and creamy taste. You can also make your own caramel with sugar, butter, and cream. This way, you control the flavor and texture. These cookies stay fresh for about a week at room temp. Store them in an airtight container to keep them soft. If you want them to last longer, freeze them. They can stay good for up to three months in the freezer. Yes, you can make the dough ahead of time. Chill it in the fridge for up to 24 hours. If you want to save it longer, freeze the dough. Just thaw it in the fridge before baking. This makes for easy cookie prep when you’re ready to bake. This blog post covered key points for baking cookies. We explored essential ingredients, tips for substitutions, and the importance of freshness. I shared step-by-step instructions, common mistakes, and how to achieve the perfect cookie texture. You learned about variations for different diets and smart storage methods. Baking cookies can be fun and rewarding. With the right approach, you can make delicious treats every time. Enjoy your baking journey and share your creations!

Craving something sweet and delicious? You’ve come to the right place! My Crumbl Copycat Caramel Apple Cookies recipe is easy to follow and will bring fall flavors right to your …

Read more

Categories Desserts
Older posts
Newer posts
← Previous Page1 … Page30 Page31 Page32 … Page112 Next →

MELTED RECIPES

where delicious ideas melt into life, from stovetop to backyard. Always warm, simple, and irresistibly satisfying. 🍳🔥🧀

PAGES

Home About Contact Privacy Policy Terms & Conditions Cookie Policy GDPR Policy Copyright Policy Disclaimer

CATEGORIES

Appetizers Desserts Salads Breakfast Dinner

Contact

  • Pinterest
  • Mail
Copyright © 2025 Melted Recipes. All rights reserved.