Skip to content
Melted Recipes
  • Home
  • Appetizers
  • Desserts
  • Salads
  • Breakfast
  • Dinner
  • Privacy Policy
  • Contact
  • About

Chef Miles

Bang Bang Salmon Bites Crunchy and Flavorful Delight

June 4, 2025 by Chef Miles
- 1 lb salmon fillet, skin removed, and cut into bite-sized cubes - 1 cup panko breadcrumbs - 1/2 cup all-purpose flour - 2 large eggs, beaten - 1 teaspoon smoked paprika - 1/2 teaspoon garlic powder - Salt and pepper to taste These core ingredients give the salmon bites their crunchy texture and rich flavor. The salmon fillet is fresh and tender. Panko breadcrumbs create a delightful crunch. The flour helps the coating stick, while the eggs bind everything together. Smoked paprika adds a nice depth, and garlic powder brings in warmth. - 1/2 cup mayonnaise - 2 tablespoons sweet chili sauce - 1 tablespoon Sriracha - 1 tablespoon freshly squeezed lime juice The Bang Bang sauce is what makes the dish pop! Mayonnaise provides a creamy base, while sweet chili sauce adds sweetness. Sriracha brings heat, and lime juice gives a zesty kick. Mix these together for a smooth sauce that pairs perfectly with the salmon bites. - Fresh cilantro - Additional spice or seasoning options Garnishes can elevate your dish. Fresh cilantro adds color and freshness. You can also use extra spices to fit your taste. A sprinkle of chili flakes can add more heat if you like. For the full recipe, check out the details above. Preheating the Oven First, heat your oven to 400°F (200°C). This temperature helps get the salmon bites crunchy. Line a baking sheet with parchment paper. This prevents sticking and makes cleanup easy. Preparing the Coating Mixtures Get three shallow bowls ready. In the first bowl, mix together flour, smoked paprika, garlic powder, salt, and pepper. In the second bowl, pour in the beaten eggs. The third bowl holds the panko breadcrumbs. This setup keeps the coating process smooth. Coating the Salmon Take a salmon piece and dip it into the flour mix. Make sure it’s fully coated. Then, dip the salmon in the eggs, letting the extra drip off. Finally, coat it in the panko. Press gently to make the coating stick. Repeat for each piece of salmon. Arranging on the Baking Sheet Place the coated salmon bites on the prepared baking sheet. Make sure they are in a single layer. Leave space between them for even baking. Baking Process Put the baking sheet in the oven. Bake for about 12-15 minutes. The bites should turn golden brown and be cooked through. Check that they flake easily with a fork. Whisking Ingredients Together While the salmon cooks, make the bang bang sauce. In a bowl, whisk together mayonnaise, sweet chili sauce, Sriracha, and lime juice. Blend until smooth and creamy. Adjusting Seasonings Taste the sauce and adjust the seasoning if needed. You can add more Sriracha for heat or more lime juice for brightness. Set the sauce aside until the salmon is ready. For the complete recipe, check out the Full Recipe. Ensuring Even Coating To get a great crunch, coat each salmon cube well. Start with the flour mix, then dip in eggs, and finish with panko. Make sure to press the panko onto the fish. This helps it stick better. Preventing Sticking To stop your salmon bites from sticking, use parchment paper on your baking sheet. Arrange the bites with space in between them. This allows hot air to flow and keeps them from sticking together. Baking vs. Frying Baking is healthier and easier. It gives you a nice crunch without the mess of oil. Frying can add a richer taste but can be greasy. Choose what fits your taste and mood. Checking Doneness To check if your bites are done, gently press them with a fork. They should flake easily. The inside should be opaque and not raw. If you're unsure, use a thermometer. The ideal temperature for salmon is 145°F (63°C). Pairing with Dipping Sauces The bang bang sauce is a must! It adds a creamy, spicy kick. You can also try sweet chili sauce or a zesty lime sauce. Serve sauces in small bowls for dipping. Ideal Side Dishes Serve the salmon bites with fresh veggies or a light salad. Rice or quinoa also pairs well. These sides balance the flavors and make a complete meal. {{image_4}} You can easily amp up the flavors of your Bang Bang Salmon Bites. Here’s how: - Adding Extra Spices: Try adding cayenne pepper for heat or smoked paprika for depth. A pinch of cumin can also bring a warm, earthy taste. - Incorporating Herbs: Fresh herbs like dill or parsley can brighten the dish. You could mix chopped cilantro into the bang bang sauce for an extra kick. If you want to switch things up, you can use different proteins: - Substituting with Chicken: Chicken breast works well. Just cut it into bite-sized pieces and follow the same coating and baking steps. - Plant-Based Options: Tofu or tempeh can replace salmon for a veg-friendly version. Press and cube them, then coat and bake like the salmon. How you present your Bang Bang Salmon Bites can change the vibe: - Creative Presentation Ideas: Arrange the bites on a colorful platter. Use small bowls for the bang bang sauce and garnishes. - Appetizer vs. Main Dish: Serve these bites as a fun appetizer at parties. For a meal, pair them with rice or a fresh salad. For the full recipe, check out the earlier sections. Storing Leftovers After you enjoy your Bang Bang salmon bites, store leftovers in an airtight container. Let them cool to room temperature first. Place a paper towel at the bottom to absorb extra moisture. This keeps them fresh longer. Store in the fridge for up to three days. Freezing Salmon Bites For longer storage, freeze your salmon bites. Place them in a single layer on a baking sheet. Freeze until solid, then transfer to a freezer bag. This method prevents them from sticking together. They can last up to three months in the freezer. Oven vs. Microwave For the best taste, reheat in the oven. Preheat your oven to 375°F (190°C). Place the salmon bites on a baking sheet. Bake for about 10 minutes or until heated through. If using a microwave, heat in short bursts. This can make them soggy. Maintaining Crispy Texture To keep that crispy texture, try not to cover them while reheating. Air circulation helps maintain their crunch. If you use the microwave, place a paper towel over the plate to help absorb moisture. How Long do They Last? If stored properly, Bang Bang salmon bites last three days in the fridge. In the freezer, they can last up to three months. Signs of Spoilage Look for changes in color or texture. If they smell off or feel slimy, do not eat them. Always trust your senses when checking for spoilage. Bang Bang sauce comes from Asian cuisine, mainly Thai and Chinese. It blends sweet, spicy, and creamy flavors. Many believe it got its name from a popular dish served in American restaurants. The sauce became a favorite for its tasty kick and smooth texture. Yes, you can use frozen salmon. Just make sure to fully thaw it first. This helps the fish cook evenly and stay juicy. Pat it dry with a paper towel to remove excess moisture. This step ensures the coating sticks better. To make these salmon bites gluten-free, swap all-purpose flour with gluten-free flour. Use gluten-free panko breadcrumbs for the crispy coating. Check the labels on all sauces, especially the sweet chili sauce, to confirm they are gluten-free. Enjoy the same great taste without the gluten. Leftover Bang Bang sauce is a treat! Store it in an airtight container in the fridge for up to a week. Use it as a dip for veggies or spring rolls. You can also drizzle it over grilled chicken or salads for a flavor boost. Yes, you can meal prep Bang Bang Salmon Bites! Prepare and bake them ahead of time. Let them cool, then store in a container in the fridge for up to three days. Reheat them in the oven to keep them crispy. Enjoy a quick, tasty meal whenever you want! For the full recipe, check out the complete details above. In this blog post, we explored how to make Bang Bang Salmon Bites. You learned the key ingredients, including salmon, panko, and the tasty Bang Bang sauce. I shared step-by-step instructions for preparing and cooking these bites. Tips for perfecting your dish and variations to try were also included. These salmon bites are simple and fun to make. Enjoy them as an appetizer or main dish!

Are you ready to treat your taste buds? Bang Bang Salmon Bites are here to steal the show! This crunchy, flavorful delight blends crispy salmon with a spicy kick from …

Read more

Categories Appetizers

Garlic Parmesan Cheeseburger Bombs Easy Bake Recipe

June 4, 2025 by Chef Miles
- 1 lb (450g) ground beef - 1 cup (100g) shredded cheddar cheese - 1/2 cup (120g) cream cheese, softened at room temperature - 1/2 cup (50g) grated Parmesan cheese - 1 teaspoon garlic powder - 1 teaspoon onion powder - 1 teaspoon Worcestershire sauce - 1 package of refrigerated biscuit dough (8-count) You need good quality ground beef for these bombs. It gives the best flavor. Adding cheddar cheese makes the filling creamy and rich. Cream cheese helps bind everything together for a smooth texture. Parmesan brings a nice salty kick. Garlic and onion powder add depth. Worcestershire sauce boosts the savory flavor. The biscuit dough wraps all this goodness perfectly. - 2 tablespoons melted butter - 2 tablespoons fresh parsley, finely chopped (for garnish) - Dipping sauces You can brush the tops with melted butter. This gives them a golden brown color. Fresh parsley adds a nice touch of green and freshness. Dipping sauces like ketchup or ranch make great pairings. They add extra flavor and fun for dipping. - Mixing bowl - Baking sheet - Parchment paper A mixing bowl helps combine the filling well. Use a baking sheet to hold the bombs while they bake. Parchment paper keeps them from sticking. This means cleaner bombs and an easier cleanup. For the full recipe, check the complete details on how to make Garlic Parmesan Cheeseburger Bombs. 1. Preheat your oven to 375°F (190°C). This temperature will give the bombs a nice, golden color. 2. Line a baking sheet with parchment paper. This step helps the bombs not stick while baking. 3. In a large bowl, combine the ground beef, shredded cheddar cheese, cream cheese, and grated Parmesan cheese. 4. Add garlic powder, onion powder, Worcestershire sauce, and salt and pepper. 5. Use your hands or a spatula to mix everything well. You want a smooth, tasty filling. 1. Open the biscuit dough package and separate each biscuit. 2. Flatten each biscuit into a circle about 4 inches wide. You can use your fingers or a rolling pin for this. 3. Spoon about 1 tablespoon of the cheeseburger filling into the center of each biscuit. 4. Fold the edges of the biscuit over the filling. Pinch them together to seal. Make sure no filling can escape. 5. Place the sealed bombs seam-side down on your lined baking sheet, leaving space between each one. 1. Brush the tops of the bombs with melted butter. This adds flavor and helps them brown. 2. Optionally, sprinkle more grated Parmesan cheese and garlic powder on top for extra taste. 3. Bake in the preheated oven for 12-15 minutes. They should be golden brown and cooked inside. 4. The meat should reach 160°F (70°C) to be safe. 5. Let the bombs cool for a few minutes after baking. Garnish with fresh parsley for a pop of color. You can find the full recipe in the recipe section above. Enjoy making these tasty Garlic Parmesan Cheeseburger Bombs! To make the best cheeseburger bombs, mix your filling well. Combine the ground beef, cheeses, and spices until smooth. This ensures each bite is packed with flavor. Use your hands or a spatula for even mixing. For sealing the biscuits, flatten each dough piece to about four inches wide. Add a tablespoon of filling in the center. Fold the edges over the filling and pinch them tightly. Make sure there are no gaps. This keeps the cheesy goodness inside while baking. You can easily boost the flavor of your cheeseburger bombs. Add spices like smoked paprika or chili powder for a kick. Fresh herbs like basil or thyme also work great. They add a nice twist to the classic taste. If you want to switch up the cheese, try using pepper jack or gouda. Each cheese brings a different taste and melts beautifully. Experimenting with cheese can lead to exciting new flavors. Presentation matters when serving your bombs. Arrange them on a rustic wooden platter for a cozy feel. Garnish with fresh parsley for color and aroma. This simple touch makes your dish look fancy. For dips, ketchup is a classic choice. You can also try ranch dressing or spicy mustard. Each dip enhances the flavors and adds variety to each bite. Don't hesitate to explore different dips to find your favorite. For the full recipe, check out the details above. Enjoy your cooking adventure! {{image_4}} You can swap ground beef for ground turkey or chicken. This change makes the bombs lighter. If you want a different taste, try mixing cheeses. Blend mozzarella or gouda with the cheddar and Parmesan. Each cheese brings its own unique flavor. If you're gluten-free, look for gluten-free biscuit dough. Many brands make tasty options now. For vegetarian bombs, replace the meat with a mix of mushrooms and beans. This keeps the dish hearty without losing flavor. Want a spicy kick? Add jalapeños to the meat mix. You can also sprinkle in cayenne pepper or hot sauce. For a twist, try different seasoning blends like taco or barbecue spices. Each option gives the bombs a fun new taste. Explore the Full Recipe for more ideas and tips! To store your leftover Garlic Parmesan Cheeseburger Bombs, first let them cool. Place them in an airtight container. This keeps them fresh and tasty. You can store them in the fridge for up to three days. If you want them to last longer, freezing is a great option. To freeze the cheeseburger bombs, wrap each one tightly in plastic wrap. Then, place them in a freezer bag. Squeeze out extra air to prevent freezer burn. They can last for up to three months in the freezer. When you want to enjoy them, take them out and thaw them in the fridge overnight. When it’s time to eat, there are a few ways to reheat your bombs. You can use an oven, which keeps them crispy. Preheat the oven to 350°F (175°C). Place the bombs on a baking sheet and heat for about 10-15 minutes. You can also use an air fryer for a quick reheating. This gives them a nice crunch. Avoid using the microwave, as it can make them soggy. For the best taste, enjoy them warm! Garlic Parmesan Cheeseburger Bombs are tasty bites filled with ground beef and cheese. You wrap seasoned beef and creamy cheese in biscuit dough. When baked, they turn golden brown and crispy. The garlic and Parmesan add a rich flavor that many love. They are perfect for parties or a fun family meal. Yes, you can make these bombs ahead of time. Prepare them up to the baking step, then store them in the fridge. Cover them tightly with plastic wrap or foil. You can keep them in the fridge for about 24 hours. When ready, just bake them straight from the fridge. They may need an extra minute or two to bake. You can serve these bombs with many sides and drinks. Here are some ideas: - French fries - Potato salad - Fresh salad - Veggie sticks with dip For drinks, try: - Soda - Beer - Lemonade These options pair well and make your meal even more enjoyable. For the full recipe, check out the earlier section! In this post, we explored how to make delicious cheeseburger bombs. We covered the main ingredients needed, like ground beef and cheeses, and discussed kitchen tools for easy prep. You learned step-by-step instructions for mixing, assembling, and baking. Plus, I shared tips for flavor and variations to suit diets. Storing and reheating leftovers was also covered. Now, you can enjoy these tasty bites anytime. They’re fun to make and share! Enjoy serving them with your favorite dips and sides.

If you love burgers and garlic, you’re in for a treat! Garlic Parmesan Cheeseburger Bombs are easy to make and delicious. With just a few simple ingredients like ground beef, …

Read more

Categories Appetizers

Tortilla Espanola – Spanish Egg and Potato Omelet Delight

June 4, 2025 by Chef Miles
To make a great tortilla española, you'll need these key ingredients: - 4 large eggs - 2 medium potatoes, peeled and thinly sliced - 1 medium onion, finely chopped - ½ cup olive oil (plus 1 tablespoon reserved) - Salt, to taste - Freshly ground black pepper, to taste Each ingredient plays a vital role in the dish. The eggs give the tortilla its rich base. Potatoes add heartiness, while onions bring sweetness. Olive oil adds flavor and helps with cooking. Salt and pepper are essential for seasoning. Once your tortilla is ready, you can make it even better with these garnishes: - Fresh parsley - Additional toppings Fresh parsley brightens up the dish and adds color. You can also try toppings like sliced olives or a sprinkle of cheese for extra flavor. These little touches make the tortilla look and taste special. For a detailed guide on how to bring it all together, check out the Full Recipe. Start by heating olive oil in a large skillet over medium heat. Use enough oil to cover the bottom. Once the oil shines, add thinly sliced potatoes and chopped onions. Season them with a pinch of salt. Cook gently for about 15-20 minutes. Stir occasionally, so they cook evenly. You want the potatoes to be soft and golden. Proper seasoning is key. It enhances the flavor and brings out the best in the dish. In a large bowl, crack the eggs and whisk them well. Make sure there are no streaks left. Add salt and freshly ground black pepper to taste. Mix it well so the seasoning spreads evenly. Once the eggs are ready, fold in the cooked potatoes and onions. Be gentle; keep some potato texture. This adds to the charm of the tortilla. Return the skillet to medium heat and add the extra tablespoon of olive oil. Once it heats up, pour the egg mixture into the skillet. Tilt the skillet so the mixture spreads evenly. Cook for about 5-7 minutes. The edges will start to set and pull away from the skillet. Gently shake the skillet to prevent sticking. To flip the tortilla, place a large plate over the skillet, then invert it. Slide the tortilla back into the skillet. Cook for another 5-7 minutes until it’s golden on both sides. This method gives you a beautiful, fluffy tortilla. For more details, refer to the [Full Recipe]. To make your Tortilla Española just right, focus on cooking times. Cook the potatoes and onions for about 15-20 minutes. They should be soft, not mushy. Use medium heat to ensure they cook evenly. Stir gently to avoid breaking the potatoes. For the eggs, cook them until just set. This keeps the tortilla fluffy and moist. If you have extra tortilla, store it in the fridge. Place it in an airtight container. It will last for up to three days. You can also wrap it in plastic wrap. When you want to reheat, use the skillet over low heat. This warms it gently and keeps the texture nice. You can also microwave it for a quicker option, but be careful not to overcook it. When serving your tortilla, it’s great warm or at room temperature. Pair it with a simple green salad or some crusty bread. This adds freshness and crunch. For a nice touch, sprinkle fresh parsley on top before serving. Cut it into wedges for easy sharing. Enjoy this delightful dish with friends or family! For more details, check the Full Recipe. {{image_4}} When making tortilla espanola, you can explore many fun twists. Let’s dive into some great options! You can add many Spanish ingredients to your tortilla. Here are a few ideas: - Chorizo: This spicy sausage adds a great kick. - Peppers: Red or green bell peppers bring sweetness and color. - Cheese: A sprinkle of manchego or queso fresco makes it creamy. - Spinach: Fresh spinach adds a healthy green touch. Each region in Spain has its own version. For example, in Galicia, they often use more onion. In the Basque Country, you might find added herbs like thyme. These regional twists make every bite unique! If you're looking to make it vegetarian, simply skip the meat. You can add more veggies like mushrooms or zucchini for flavor. For gluten-free options, tortilla espanola is already naturally gluten-free! Just ensure that any added ingredients, like chorizo or cheese, don't have gluten. These variations and adjustments let everyone enjoy this tasty dish! For the full recipe, check out the complete guide above. - Calories per serving: About 250 calories - Macronutrient breakdown: - Protein: 10g - Carbohydrates: 18g - Fat: 18g The Spanish Tortilla is not just tasty; it’s also a good source of nutrients. Each serving has a nice balance of protein, carbs, and healthy fats. This dish can fit well into a balanced diet. - Benefits of eggs: Eggs are a complete protein. They provide essential amino acids, which help build and repair tissues. They also contain vitamins A, D, and B12. These are key for good vision, strong bones, and energy. - Advantages of olive oil and potatoes: Olive oil is rich in monounsaturated fats. It can help lower bad cholesterol levels. Potatoes give you energy and fiber. They are also high in vitamins C and B6. These nutrients support your immune health and brain function. Together, these ingredients make the Tortilla Española a wholesome choice. You get a tasty meal that’s also good for you. For the full recipe, check out the Spanish Tortilla Delight 🥔. What kitchen tools do I need? To make a perfect tortilla española, you need a few simple tools: - A large skillet - A mixing bowl - A whisk or fork - A large plate for flipping - A spatula These tools help you cook the tortilla and mix the ingredients well. Can I use different vegetables? Yes, you can use different vegetables! While potatoes and onions are traditional, feel free to add: - Bell peppers - Spinach - Zucchini These veggies will add color and flavor to your dish. Just be sure to cook them until tender. What to do if the tortilla falls apart? If your tortilla falls apart, don’t worry! Here’s how to fix it: - Use a lower heat next time. - Make sure to let the edges set well before flipping. - If it breaks, you can turn it into a scramble. Just mix it up and serve! How to fix overcooked eggs? If your eggs are overcooked, they may be dry. To fix this: - Serve with a dollop of creamy sauce or aioli. - Add a splash of olive oil on top for moisture. These tips help make the dish more enjoyable. Preparing in advance You can make tortilla española ahead of time! Just follow these steps: - Cook and cool the tortilla. - Slice it into wedges. - Store it in an airtight container in the fridge. Best storage methods For best results: - Keep it in the fridge for up to three days. - Reheat in a skillet or microwave before serving. This way, you can enjoy this dish anytime! For the full recipe, check out the Spanish Tortilla Delight section. In this post, we explored how to make a delicious Tortilla Española. We covered the key ingredients like eggs, potatoes, and onions. I shared step-by-step instructions for cooking and highlighted tips for perfect texture. We also discussed variations for dietary needs and provided nutritional insights. Making this dish is fun and rewarding. You can enjoy it for any meal. With practice, you’ll impress your friends and family. Dive in and savor your homemade Tortilla Española!

Are you ready to embark on a culinary adventure? Tortilla Española, the classic Spanish egg and potato omelet, is both simple and delightful. In this post, I’ll guide you through …

Read more

Categories Dinner

Rainbow Orzo Salad Vibrant and Fresh Side Dish

June 3, 2025 by Chef Miles
- 1 cup orzo pasta - 1 cup cherry tomatoes, halved - 1 cup cucumber, diced - 1 bell pepper (any color), diced - 1 cup corn kernels (fresh or frozen) - 1/2 cup red onion, finely chopped - 1/4 cup Kalamata olives, sliced (optional) - 1/4 cup feta cheese, crumbled - 1/4 cup fresh parsley, chopped For this rainbow orzo salad, I love using fresh, bright ingredients. Each one adds color and flavor. Orzo pasta is the base. It cooks quickly and has a nice bite. I often use cherry tomatoes for sweetness. They burst with flavor in every bite. Cucumbers add a crisp texture, while bell peppers bring crunch and color. Sweet corn adds a lovely pop, whether fresh or frozen. Red onion gives a hint of sharpness. If you like, add Kalamata olives for a briny touch. Feta cheese adds creaminess and a salty bite, while parsley finishes with freshness. - 1/4 cup extra virgin olive oil - 2 tablespoons fresh lemon juice - 1 teaspoon honey - Salt and freshly cracked black pepper to taste The dressing is key to this salad. I use extra virgin olive oil for its rich flavor. Fresh lemon juice brightens every bite. Honey adds a hint of sweetness, balancing the acidity. A sprinkle of salt and fresh black pepper enhances all the flavors. This dressing brings the salad together and makes it shine. For the full recipe, check out the complete guide above. First, fill a pot with water and add a pinch of salt. Bring the water to a boil over medium-high heat. Stir in the orzo pasta and cook it until it's al dente. Check the package for timing, as it can vary. Once done, drain the orzo and rinse it under cold water. This stops the cooking process and cools it down quickly. In a large bowl, mix the cooled orzo with the chopped vegetables. Add the halved cherry tomatoes, diced cucumber, diced bell pepper, corn kernels, and finely chopped red onion. If you like olives, toss in the sliced Kalamata olives too. Use a spatula to gently combine everything, ensuring the veggies and orzo are well mixed. Grab a smaller bowl and whisk together the dressing ingredients. Combine the extra virgin olive oil, fresh lemon juice, honey, salt, and pepper. Keep whisking until the mixture is smooth and well mixed. This dressing will bring all the flavors together. Now, drizzle the dressing over the orzo mixture. Use your spatula to toss everything gently. Ensure all the ingredients are coated well without breaking the orzo. This step adds a burst of flavor to every bite. Carefully fold in the crumbled feta cheese and chopped parsley. This adds a creamy texture and a fresh taste. Then, taste the salad. Adjust the seasoning by adding more salt or pepper if needed. For the best flavor, let the salad rest at room temperature for at least 15 minutes. This time allows the flavors to mingle beautifully. For the full recipe, check the recipe section above. To make the orzo just right, rinse it after cooking. Rinsing stops the cooking. It also keeps the orzo from sticking together. This step is key for a fluffy salad. Serve your Rainbow Orzo Salad fresh for the best taste. Let it rest for at least 15 minutes. This time lets the flavors blend well. For a beautiful presentation, use a large, colorful bowl. You can also layer the salad in mason jars. This makes it fun and easy for picnics or lunch. Taste your salad before serving. If it needs more flavor, adjust the seasonings. Add salt or pepper to suit your palate. Remember, you can always add more, but you can’t take it out! {{image_4}} You can easily change up the veggies in your Rainbow Orzo Salad. Try adding fresh spinach for a peppery bite. Zucchini also works great and adds a nice crunch. If you want it dairy-free or vegan, skip the feta cheese. You can replace it with avocado for creaminess or use tofu for protein. These swaps keep the salad light and fun. While the original dressing is yummy, you can experiment with different flavors. Balsamic vinaigrette adds a sweet tang, perfect for summer days. If you love herbs, a fresh pesto dressing can brighten the salad. These options let you tailor the taste to match your mood or meal. Want to make your salad heartier? Add grilled chicken for a protein kick. Chickpeas are a great plant-based choice, adding fiber and texture. For seafood lovers, shrimp makes a tasty addition. These proteins not only boost nutrition but also make the salad more filling and satisfying. To keep your Rainbow Orzo Salad fresh, store it in an airtight container. Place it in the fridge right after serving. This salad tastes best within three days. If you notice any wilting or off smells, it's time to toss it. You can freeze this salad, but it may change texture. To maintain freshness, freeze only the orzo and veggies separately. Store them in freezer-safe bags. When ready to eat, thaw them in the fridge overnight. Reheat as needed before serving. To refresh the salad after refrigeration, add a splash of olive oil and lemon juice. Stir gently to combine. This will help revive the flavors and make the salad taste fresh again. If it looks dry, you can also add a bit of water or additional dressing to enhance moisture. For the full recipe, check the earlier sections! Rainbow Orzo Salad stays fresh for about 3 to 5 days in the fridge. To keep it fresh, store it in an airtight container. Look for signs like wilted veggies or a sour smell. If you spot these, it’s time to toss it. Yes, you can use whole grain orzo. Whole grain orzo adds more fiber and nutrients. It has a nuttier taste than white orzo. This makes your Rainbow Orzo Salad even healthier. Absolutely! Rainbow Orzo Salad is great for meal prep. You can make it ahead and store it in portions. Keep the dressing separate until you are ready to eat. This will help keep the salad crisp and fresh. You can serve this salad with grilled chicken, shrimp, or chickpeas. It also pairs well with roasted veggies or a piece of fish. For a complete meal, add a slice of crusty bread or a light soup. You can find the full recipe to get started on this delicious side dish! This Rainbow Orzo Salad is colorful, fresh, and easy to make. We explored the main ingredients and how to mix them just right. We showed how to make a tasty dressing that adds punch to the salad. Remember to let it sit for a while to enhance flavors. Try adding different veggies or proteins for a fun twist. Use these tips to enjoy a vibrant meal any time. Enjoy this salad fresh and share it with friends!

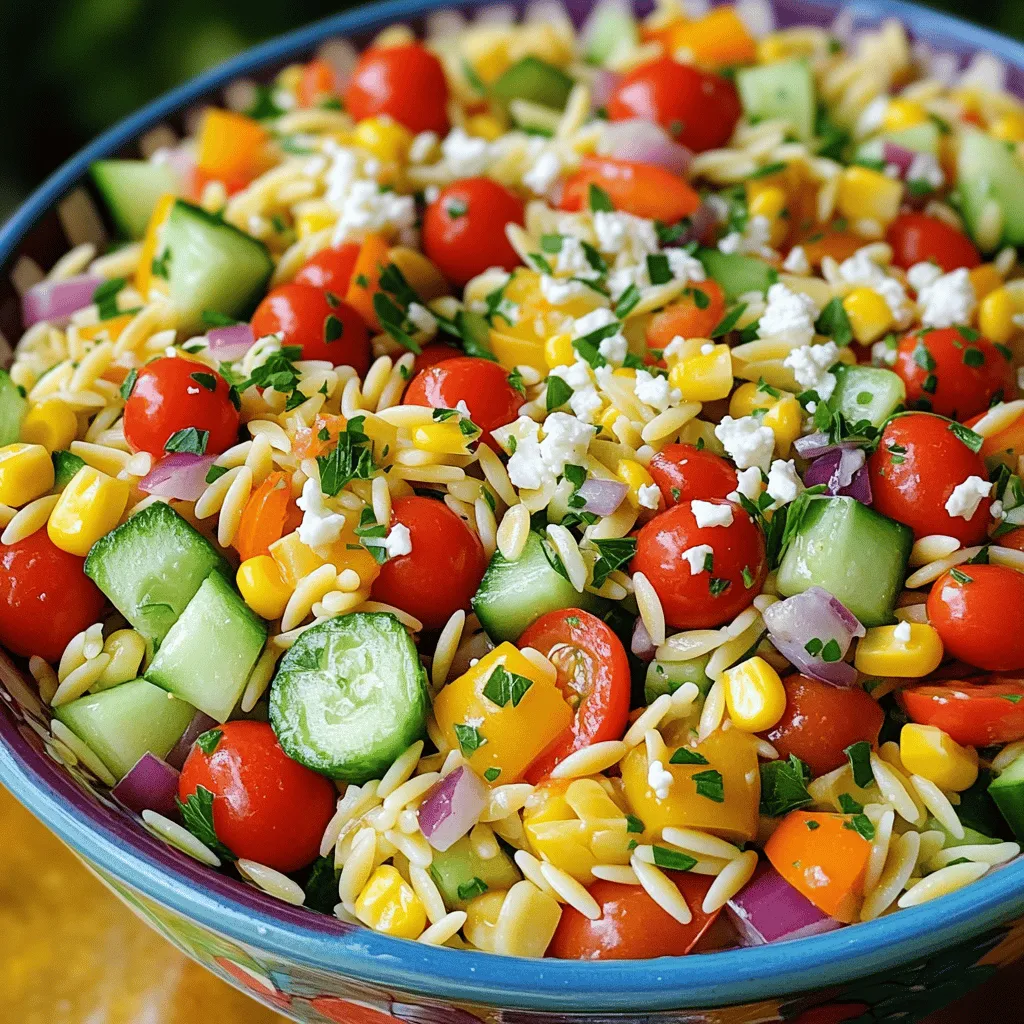
Dive into the colorful world of Rainbow Orzo Salad! This fresh and vibrant side dish not only pleases the eye but also packs a punch of flavor. With easy steps …

Read more

Categories Salads

Air-Fryer Asian BBQ Cauliflower Wings Delight

June 3, 2025 by Chef Miles
- 1 large head of cauliflower, cut into bite-sized florets - 1 cup all-purpose flour - 1 cup plant-based milk (such as almond or soy) - 1/2 cup Asian BBQ sauce - 1 teaspoon garlic powder - 1 teaspoon onion powder - 1 teaspoon smoked paprika - 1 cup panko breadcrumbs - Sesame seeds - Chopped green onions To make your Air-Fryer Asian BBQ Cauliflower Wings, you need a few simple components. First, the cauliflower serves as the star of the dish. It gives you that bite and texture. Next, flour and plant-based milk create a nice batter. The Asian BBQ sauce adds rich flavor, making your wings tasty. For seasonings, garlic powder, onion powder, and smoked paprika bring warmth and depth. Panko breadcrumbs give the wings their crunch. Lastly, sprinkle on sesame seeds and chopped green onions for garnish. These give a fresh touch to your dish. Remember, you can find the full recipe above for precise measurements and instructions. Enjoy making this fun and flavorful dish! Start by cutting the cauliflower into bite-sized florets. This size helps them cook evenly. Next, mix the dry ingredients in a large bowl. Combine 1 cup of flour, 1 teaspoon of garlic powder, 1 teaspoon of onion powder, 1 teaspoon of smoked paprika, salt, and pepper. Whisk until everything is well mixed. Now it’s time to make the batter. Gradually pour 1 cup of plant-based milk into the dry mixture. Whisk it well to get a smooth, lump-free batter. This batter coats the cauliflower wings perfectly. Take each floret and dip it into the batter. Make sure it’s fully covered. Let any extra batter drip off. Then, roll the floret in 1 cup of breadcrumbs. Panko breadcrumbs work best for a crunchier texture. Repeat this for all the florets. Preheat your air fryer to 375°F (190°C) for about 5 minutes. This step is key for crispy wings. Place the cauliflower wings in a single layer in the basket. If needed, cook in batches. This helps avoid overcrowding. Lightly spray the wings with cooking spray for extra crispiness. Air fry for 15-18 minutes, flipping halfway. Look for a golden brown color to know they are done. While the wings cook, mix your BBQ glaze. In a small bowl, combine 1/2 cup of Asian BBQ sauce, 1 tablespoon of sesame oil, and 1 tablespoon of soy sauce. Stir until fully blended. This glaze adds great flavor to the wings. After cooking, transfer the wings to a large bowl. Drizzle the BBQ glaze over them and toss gently. Make sure each piece is well-coated in sauce. To finish, return the wings to the air fryer for another 3-5 minutes. This step caramelizes the glaze for a sticky, tasty finish. For the full recipe, check out the detailed instructions above. To get the best crispy wings, start with the right batter consistency. You want it thick enough to coat but not too thick. If you mix it perfectly, it will stick well to the cauliflower. Use a whisk to combine your dry and wet ingredients until smooth. Frying in batches is key too. If you crowd the air fryer, your wings won’t crisp up. Make sure to leave space between each floret. This allows hot air to circulate and cook evenly. To amp up the taste, consider adding spices to the batter. A pinch of cayenne or some black pepper can elevate the flavor. Experiment with different spices to find your favorite mix. You can also use homemade sauce options. Making your own sauce lets you control the flavor. Try mixing your favorite ingredients for a unique twist. Pair your cauliflower wings with sides that complement their flavor. A fresh salad or some crunchy veggies work well. You can also serve them with a dipping sauce for an extra kick. For presentation, arrange the wings on a platter with fresh lettuce leaves. This adds color and makes your dish stand out. Garnish with sesame seeds and chopped green onions for a beautiful finish. {{image_4}} For a gluten-free version, swap regular flour with gluten-free flour. It works just as well. You can use almond flour or coconut flour for a different flavor. For breadcrumbs, choose gluten-free panko or crushed rice crackers. These options keep the crunch without gluten. If you love heat, add hot sauce to the glaze. Just mix in about one tablespoon for a nice kick. You can also sprinkle chili flakes into the batter. This gives the wings a spicy crunch that pairs perfectly with the BBQ sauce. To make these wings lighter, reduce the oil in the recipe. Instead of using a lot of oil, you can use a light spray. For sweeteners in the glaze, consider maple syrup or agave. Both add sweetness without extra calories. These changes keep the flavor while making it healthier. For the complete recipe, check out the Full Recipe. To keep your cauliflower wings fresh, refrigerate leftovers right away. Place them in an airtight container. This helps prevent them from getting soggy. Make sure they cool down before sealing the container. For extra crunch, store them separately from the sauce. To keep the wings crispy, avoid stacking them. Lay them flat in the container. You can also place a paper towel inside to absorb excess moisture. This little tip helps maintain that delicious crunch. To reheat, the air fryer is your best choice. Preheat it to 375°F (190°C). Place the wings in a single layer. Heat them for about 5 to 7 minutes. This keeps them crispy and tasty. If you need to reheat in the oven, set it to the same temperature. Bake the wings for about 10 minutes. This method also works well, but the air fryer wins for crispiness. The microwave can make them soft, so I don’t recommend it. If you want to prep for freezing, do it before cooking. After you coat the cauliflower, place the wings on a baking sheet. Freeze them for about an hour. Once they are firm, transfer them to a freezer bag. This prevents them from sticking together. For the best way to store before cooking, use parchment paper between layers. This keeps them separate. When you're ready to cook, no need to thaw. Just cook them straight from the freezer. Enjoy the same great taste! Find the full recipe for these wings to get started. Air-fryer cauliflower wings last about 3-5 days in the fridge. Store them in an airtight container. They taste best when fresh, so enjoy them soon! Yes, you can use frozen cauliflower. Just thaw it first and pat it dry. This step helps the batter stick better for a nice crunch. Cauliflower wings pair well with many sides. Try serving them with: - Rice or quinoa - Fresh vegetables - A simple salad - Dipping sauces like ranch or extra BBQ sauce To add heat, mix in some hot sauce or chili flakes. You can also use spicy Asian BBQ sauce for a kick. Adjust the spice level to your taste! The batter gives the wings a crunchy coating. While you can skip it, the wings may lack that crispy texture. The batter also helps the sauce stick better. Yes, you can prep the cauliflower and batter ahead of time. Store them separately in the fridge. When you're ready, coat the cauliflower and air fry them for a quick meal. For the full recipe, check out the earlier sections. In this blog post, we explored how to make tasty air-fryer cauliflower wings. We covered the key ingredients, including cauliflower, flour, and Asian BBQ sauce. I shared tips on achieving the perfect batter and how to coat and air fry the wings. We discussed variations like gluten-free options and how to store leftovers. To sum up, you can enjoy a healthy snack or meal that’s simple to make. With a few tweaks, these wings can fit any diet. Now, grab your ingredients and have fun experimenting with this recipe!

Looking for a tasty plant-based treat? Try my Air-Fryer Asian BBQ Cauliflower Wings! These delicious wings combine crunchy cauliflower and sweet Asian BBQ sauce for a perfect bite. They’re easy …

Read more

Categories Appetizers

Cheesecake Fruit Salad Refreshing and Flavorful Treat

June 3, 2025 by Chef Miles
- 1 cup fresh strawberries, hulled and sliced - 1 cup plump blueberries, washed - 1 cup kiwi, peeled and diced - 1 cup pineapple, diced - 1 cup cream cheese, softened - 1/2 cup Greek yogurt, plain - 1/4 cup powdered sugar - 1 teaspoon pure vanilla extract - Zest of 1 fresh lemon - 1/4 cup crushed graham crackers - Fresh mint leaves for garnish When making this cheesecake fruit salad, fresh fruits are vital. I love using strawberries, blueberries, kiwi, and pineapple. They bring bright colors and sweet flavors. Strawberries add a juicy burst, while blueberries offer a slight tang. Kiwi brings a lovely tartness, and pineapple provides sweetness. Each fruit complements the creamy cheesecake mixture beautifully. The cheesecake mixture is where the magic happens. I use softened cream cheese and Greek yogurt for a rich texture. Mixing these two creates a smooth base. I add powdered sugar for sweetness and vanilla for flavor. The lemon zest brightens the mix and gives it a fresh kick. This mixture coats the fruit and makes each bite creamy and delightful. For a crunchy topping, I use crushed graham crackers. They add a nice texture contrast to the creamy fruit salad. Fresh mint leaves are the final touch. They not only look pretty but also add a refreshing scent. You can find the complete recipe above. Enjoy making this delicious and colorful treat! 1. Start by taking a large mixing bowl. Add the softened cream cheese and Greek yogurt into the bowl. 2. Use a hand mixer or a whisk to blend them. Mix until the texture is smooth and creamy. 3. Next, add the powdered sugar, vanilla extract, and lemon zest into the bowl. Continue mixing until all ingredients are well combined. 1. Grab a separate medium-sized bowl. Place the fresh fruits in this bowl. 2. Carefully toss the strawberries, blueberries, kiwi, and pineapple together. Use a spatula to mix gently. Be cautious not to mash any of the soft fruit. 1. With gentle hands, fold the cheesecake mixture into the bowl of mixed fruits. 2. Use a spatula to combine them carefully. Ensure the creamy mixture coats the fruit without breaking them apart. 3. When fully mixed, transfer the vibrant fruit salad into a serving dish or parfait bowls. For the full recipe, refer to the previous section. Enjoy creating your Cheesecake Fruit Salad! To get the best creamy texture, always use room temperature cream cheese. Cold cream cheese is hard to mix. A smooth blend makes the salad taste better. Adjust the powdered sugar based on your taste. If you like it sweeter, add more sugar. If you prefer less sweetness, reduce it. This way, you can customize the flavor to your liking. Choosing the right fruits is key. Use the best seasonal fruits for the best taste. Fresh berries, ripe kiwi, and juicy pineapple work well. If you want to swap fruits, you can. Try peaches, mangoes, or even grapes. The goal is to use fruits that you enjoy. Mixing different colors also makes the salad more appealing. Presentation matters when serving food. Use clear glass bowls to show off the colorful fruits. This makes the salad look fresh and inviting. A nice garnish can elevate your dish. Add fresh mint leaves for a pop of green. You can also add extra fruit slices on top. This not only looks great but adds more flavor. {{image_4}} To make your cheesecake fruit salad even better, try adding extracts. Almond or coconut extracts bring a fun twist. You can also use spices like cinnamon or nutmeg. These spices add warmth and depth to the flavors. Switching up the fruits keeps things fresh. Try using seasonal fruits like peaches or mangoes. They bring sweetness and a tropical vibe. You can also mix different berries. A blend of strawberries, blueberries, and raspberries gives a beautiful look and taste. If you want a lighter version, use low-fat cream cheese or yogurt. This keeps the dish creamy without all the fat. You can also add nuts or seeds for extra crunch. Chopped almonds or sunflower seeds work great and boost nutrition. For the full recipe, visit the Cheesecake Delight Fruit Salad section. To store leftover cheesecake fruit salad, place it in an airtight container. This keeps it fresh and prevents odors from other foods. Glass containers work well since they don’t stain or hold smells. Make sure the lid fits tightly to create a good seal. You can keep cheesecake fruit salad in the fridge for up to three days. After this time, it may lose its freshness. Signs that the salad has gone bad include a sour smell or a change in color. If the fruit looks mushy or the cream mixture separates, it’s best to toss it out. You can freeze cheesecake fruit salad, but the texture may change. The fruits can become mushy when thawed. If you want to freeze it, scoop portions into freezer-safe bags. To thaw, place the bag in the fridge overnight. This helps maintain some texture. Enjoy your salad within a week for the best taste! Yes, you can prepare Cheesecake Fruit Salad ahead of time. This salad tastes even better after chilling. Make the cheesecake mixture and cut the fruits the day before. Keep them in separate containers in the fridge. Just mix them together right before serving. This way, the fruit stays fresh and crisp. The best fruits for Cheesecake Fruit Salad are strawberries, blueberries, kiwi, and pineapple. These fruits add a sweet and tart balance. You can also use peaches, mangoes, or raspberries for variety. Choose any seasonal fruit that you enjoy. The key is to mix colors and flavors for a vibrant dish. To create a vegan Cheesecake Fruit Salad, swap cream cheese and yogurt for vegan options. Use cashew cream or coconut yogurt instead. For sweetness, maple syrup or agave works well. Make sure to use vegan graham crackers for the topping. This way, you can enjoy the same creamy and fruity delight without animal products. In this blog post, we explored how to make a delicious Cheesecake Fruit Salad. We covered fresh fruits, a creamy cheesecake mixture, and tasty toppings. I shared step-by-step instructions and helpful tips to perfect your salad. Remember, you can mix and match fruits or flavors to suit your taste. With the right ingredients, this dish can be a hit for any occasion. Enjoy creating this sweet, creamy treat that everyone will love!

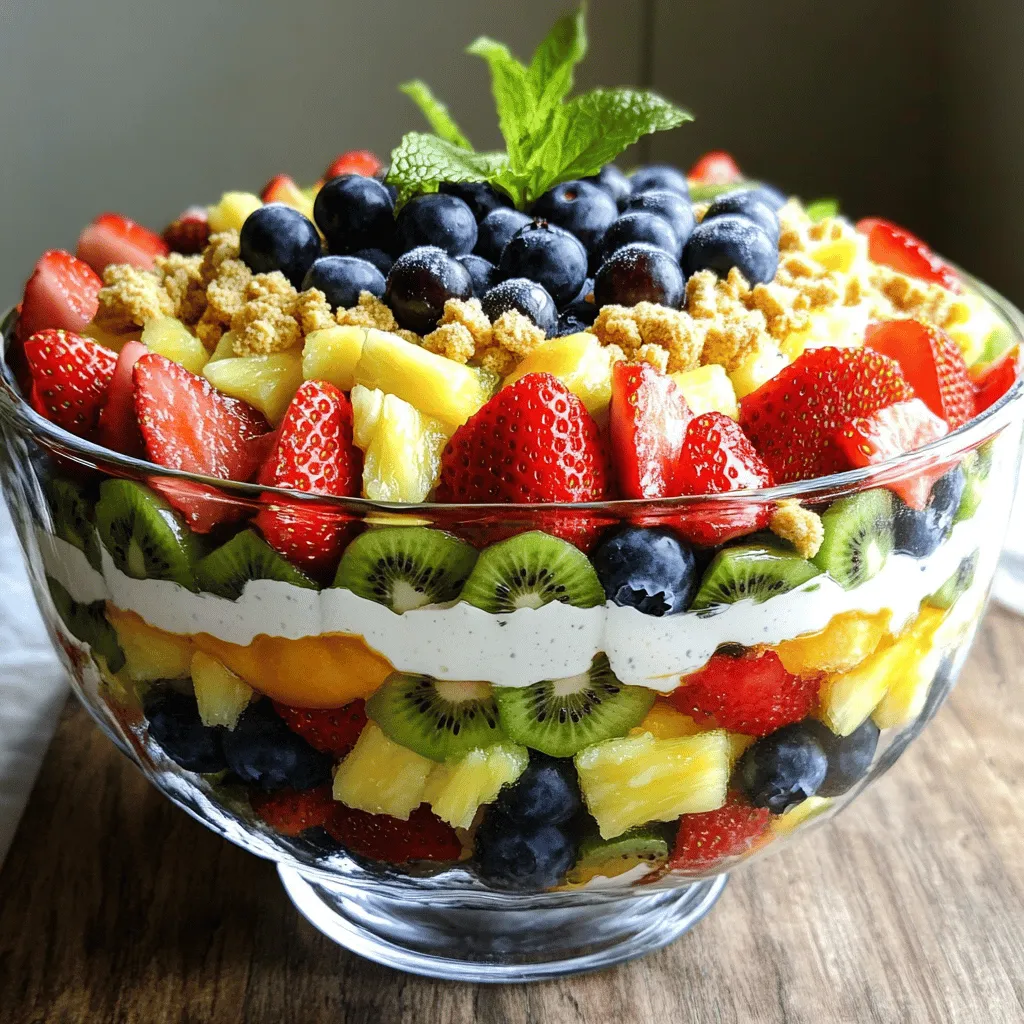
Looking for a sweet treat that’s easy and refreshing? Look no further than Cheesecake Fruit Salad! This colorful dish combines fresh fruits with a creamy cheesecake mixture that’s perfect for …

Read more

Categories Desserts

Air Fryer Taco Bombs Flavorful and Easy to Make

June 3, 2025 by Chef Miles
- 1 can refrigerated crescent roll dough - 1 pound ground beef or turkey - 1 packet taco seasoning - 1 cup shredded sharp cheddar cheese - ½ cup finely diced onions - ½ cup diced ripe tomatoes - ¼ cup sliced jalapeños (optional for heat) These main ingredients form the tasty base of your taco bombs. The crescent roll dough serves as a flaky shell, while the seasoned meat and cheese bring the bold taco flavor. Fresh onions and tomatoes add crunch and color, and jalapeños spice things up if you like heat. - Extra spices for flavor enhancement - Toppings for serving like salsa and guacamole Feel free to play with your spices! Adding extra chili powder or cumin can boost the flavor. When serving, salsa and guacamole make great partners. They add freshness and creaminess that pairs well with the crispy bombs. - Gluten-free alternatives for crescent roll dough - Vegetarian options for meat substitution For gluten-free eaters, look for gluten-free crescent roll dough. You can also swap the ground meat for black beans or lentils for a tasty vegetarian option. Both ways ensure everyone enjoys these delicious treats. Set your air fryer to 350°F (175°C). Preheating helps cook the taco bombs evenly. This step makes sure you get that crispy outside while keeping the filling warm and tasty. Start by heating a medium skillet on medium heat. Add 1 pound of ground beef or turkey. Cook it until it's brown, breaking it apart with a spatula. This should take about 5-7 minutes. After browning, drain any extra fat. This keeps your taco bombs from being greasy. Now, mix in 1 packet of taco seasoning and follow the water amount on the packet. Stir well and cook for 2-3 more minutes until hot. Lay out your crescent roll dough on a floured surface. Carefully unroll it and cut it into triangles. Place a spoonful of the meat mixture in the center of each triangle. Then, top it with 1 cup of shredded cheddar cheese, ½ cup of diced onions, ½ cup of diced tomatoes, and ¼ cup of sliced jalapeños if you want some heat. To seal, fold the corners over the filling. Pinch the seams tightly to create a sealed shape. This prevents any filling from leaking out while cooking. Arrange the taco bombs in the air fryer basket. Make sure to leave space between each bomb for air to flow. You may need to cook in batches. Set the timer for 8-10 minutes. Check them halfway through to see if they are golden brown. If needed, adjust the time. Once done, carefully take them out and place them on a plate. Enjoy your tasty Air Fryer Taco Bombs! Check the Full Recipe for more details. - Overfilling the taco bombs: It’s easy to want to add more filling, but this can lead to messy bombs. Stick to a small spoonful of meat and cheese. This keeps them from bursting open while cooking. - Not sealing properly: Make sure to pinch the seams tightly. If there are gaps, the filling can ooze out. A good seal makes for the perfect bite. - How to adjust cooking time based on air fryer models: Different air fryers heat in unique ways. Start with 8 minutes, but check them at 7 minutes. If they need more time, add a minute or two. - Tips for achieving the perfect golden color: Lightly spray the taco bombs with cooking spray before cooking. This helps them turn a lovely golden brown. Flip them halfway through for even cooking. - Best plating practices for serving: Arrange the taco bombs on a nice plate. Keep them warm until you serve. This makes them look great and keeps them tasty. - Suggestions for garnishing: Add some chopped cilantro on top for a pop of color. Serve with bowls of salsa and guacamole for dipping. This adds flavor and makes your dish look even better. For the full recipe, check out the details above and enjoy making these tasty Air Fryer Taco Bombs! {{image_4}} You can switch up the meat in your taco bombs. Try ground chicken or beef for a twist. For a meatless option, use black beans or lentils. Both choices taste great with taco seasoning. Cheese is another area to explore. Instead of sharp cheddar, use pepper jack for a spicy kick. You can also try mozzarella for a milder flavor. Each cheese adds a unique taste to your taco bombs. Dipping sauces make taco bombs even better. Salsa is a classic choice. It adds freshness and zing. Creamy guacamole is another favorite. You can also serve sour cream for smoothness. Want to make your own dip? Mix yogurt with lime juice and cilantro for a refreshing sauce. This simple homemade dip pairs well with the flavors of your taco bombs. Add spices from around the world to your taco bombs. Try cumin and coriander for a Middle Eastern twist. A dash of curry powder gives a warm flavor. You can also adapt the recipe to fit different cuisines. For a Mexican flair, add chipotle peppers. To go Italian, use Italian sausage and sprinkle with oregano. Each spice opens up new taste possibilities and keeps your meals exciting. To keep your taco bombs fresh, place them in an airtight container. This helps maintain their crunch. Store them in the fridge for up to three days. After that, the texture may change. To re-crisp your taco bombs, use the air fryer. Set it to 350°F (175°C) and heat for 3-5 minutes. This method helps avoid sogginess. You can also use the oven, but the air fryer is best for keeping them crispy. You can freeze taco bombs either before or after cooking. If you freeze them raw, assemble them and place in a single layer on a baking sheet. Once frozen solid, transfer them to a freezer bag. To reheat, cook from frozen in the air fryer for about 10-12 minutes at 350°F (175°C). If cooked first, thaw them overnight in the fridge before reheating. This keeps them safe and tasty. Yes, you can prepare taco bombs in advance. Here are some tips: - Prepare the Filling: Cook and season the meat ahead of time. Store it in the fridge. - Assemble and Chill: You can assemble taco bombs and keep them in the fridge. Wrap them well to avoid drying out. - Freeze for Later: For longer storage, freeze the assembled taco bombs. Place them on a baking sheet, freeze until solid, then transfer to a freezer bag. You can get creative with fillings! Here are some popular options: - Beans: Black beans or refried beans add protein and flavor. - Cheese Varieties: Try Monterey Jack or pepper jack for a spicy kick. - Veggies: Bell peppers, corn, or zucchini can add crunch and sweetness. - Meats: Swap ground beef for chicken, pork, or even shrimp. Customize your taco bombs to suit your taste buds! To ensure perfect taco bombs, look for these signs: - Golden Brown Color: They should be golden and look crispy on the outside. - Filling Bubbles: You might see some filling bubbling out, which is a good sign. - Internal Temperature: Use a meat thermometer. The center should reach 165°F (74°C). Checking these signs will help you serve perfect taco bombs every time! In this blog post, we explored how to make delicious Air Fryer Taco Bombs. We covered key ingredients, including dough, meat, and spices. I shared step-by-step instructions and tips to avoid mistakes. You learned how to store leftovers and even variations to suit your taste. Taco bombs are fun and easy to make. They are great for parties or quick meals. Try customizing them with different fillings and dips. I hope you enjoy making your own tasty creations!

Are you ready to impress your taste buds with a fun twist on tacos? Air Fryer Taco Bombs are here to save your weeknight dinner! They’re easy to make with …

Read more

Categories Appetizers

Lemon Cream Cheese Muffins Simple and Tasty Recipe

June 3, 2025 by Chef Miles
To make delicious lemon cream cheese muffins, gather these ingredients: - 1 ½ cups all-purpose flour - ½ cup granulated sugar - 1 tablespoon freshly grated lemon zest (from about 1 medium lemon) - 1 teaspoon baking powder - ½ teaspoon baking soda - ½ teaspoon fine sea salt - 4 ounces cream cheese, softened - 1 large egg, at room temperature - ¼ cup unsalted butter, melted - ½ cup plain Greek yogurt, preferably full-fat - ¼ cup fresh lemon juice (from about 2 medium lemons) - 1 teaspoon pure vanilla extract - Optional: Powdered sugar for dusting Each ingredient plays a key role in flavor and texture. Here are some notes: - Flour: I use all-purpose flour. You can try whole wheat flour for added fiber. - Sugar: Granulated sugar gives sweetness. You can use brown sugar for a richer flavor. - Lemon Zest and Juice: Fresh zest and juice add brightness. Bottled juice lacks the same taste. - Cream Cheese: Use full-fat cream cheese for the best creaminess. Neufchâtel is a lighter option. - Greek Yogurt: This adds moisture. You can swap it with sour cream if needed. - Butter: Unsalted butter allows you to control the salt. You can use coconut oil for a dairy-free option. Fresh ingredients make a big difference. Here’s how to pick the best: - Lemons: Choose firm, bright lemons. They should feel heavy for their size. This shows they are juicy. - Eggs: Look for eggs that are clean and uncracked. Check the sell-by date for freshness. - Cream Cheese: Buy cream cheese close to its expiration date for the best flavor. - Yogurt: Look for full-fat yogurt with no added sugars. This helps keep muffins rich. Using fresh ingredients gives you the best lemon cream cheese muffins. For the full recipe, follow the steps carefully. Enjoy baking! Start by preheating your oven to 350°F (175°C). Line a muffin tin with paper liners or grease the cups to prevent sticking. In a medium bowl, mix the dry ingredients: all-purpose flour, granulated sugar, lemon zest, baking powder, baking soda, and sea salt. Whisk them together until no lumps remain. In a larger bowl, beat the softened cream cheese with a hand mixer until smooth. Gradually add the melted butter and mix until well combined. Next, add the egg, Greek yogurt, fresh lemon juice, and vanilla extract to the cream cheese mixture. Whisk until smooth. Now, carefully fold the dry ingredients into the wet mixture using a spatula. Be gentle to keep the muffins light. The batter should still have some lumps. Fill each muffin cup about two-thirds full with batter. This allows room for them to rise while baking. Place the muffin tin in the preheated oven and bake for 18 to 22 minutes. The tops should turn lightly golden. Use a toothpick to check if they are done; it should come out clean when inserted into the center. After baking, let the muffins cool in the tin for about five minutes. Then, carefully transfer them to a wire rack to cool completely. If you like, dust the tops with powdered sugar for a sweet touch. For a lovely display, serve them on a tiered cake stand. You can add lemon slices or curls of lemon zest for extra flair. This simple and tasty recipe makes for a delightful treat! For the full recipe, check out the complete instructions! To keep your muffins tender and moist, use room temperature ingredients. This means letting your egg and cream cheese sit out before mixing. The yogurt also adds moisture. If your yogurt is too thick, you can add a splash of milk. Also, avoid overmixing the batter. Mix just until the dry and wet ingredients come together. This helps keep the muffins light and fluffy. One common mistake is forgetting to measure ingredients correctly. Use dry measuring cups for flour and sugar, and liquid measuring cups for yogurt and lemon juice. Another mistake is baking at the wrong temperature. Always preheat your oven before baking. Lastly, don’t skip the cooling time. Letting muffins cool on a wire rack prevents sogginess. To boost lemon flavor, use fresh lemons instead of bottled juice. The zest adds a bright taste and lovely aroma. Grate the zest finely for the best results. For even more flavor, consider adding a splash of lemon extract. If you want a sweeter taste, you can mix in a bit of lemon curd. For a full guide, check out the Full Recipe for Lemon Cream Cheese Muffins. {{image_4}} You can give lemon cream cheese muffins a fun twist. Here are some great ideas: - Blueberries: Add 1 cup of fresh or frozen blueberries. They pair well with lemon. - Chopped nuts: Walnuts or pecans add a nice crunch. Use about ½ cup. - Chocolate chips: For a sweet touch, mix in ½ cup of white or dark chocolate chips. - Dried fruits: Try adding ½ cup of dried cranberries or apricots for a chewy texture. These add-ins make the muffins more exciting and flavorful. Feel free to mix and match based on your taste. If you have dietary needs, you can still enjoy these muffins. For gluten-free muffins, substitute all-purpose flour with a 1:1 gluten-free blend. Make sure it contains xanthan gum for better texture. For a dairy-free option, replace cream cheese with dairy-free cream cheese. You can also use coconut yogurt instead of Greek yogurt. These swaps keep the muffins moist and tasty. You can change the flavor of your muffins to match the seasons. In spring, add fresh strawberries or raspberries for a fruity kick. In fall, try pumpkin puree and spices like cinnamon and nutmeg for a cozy treat. In winter, consider adding chopped cranberries and a hint of ginger to warm up your taste buds. These variations make every batch special and fun to bake. For the full recipe, check out the complete guide above! To keep your Lemon Cream Cheese Muffins fresh, store them in an airtight container. This helps lock in moisture and keeps them soft. You can leave them at room temperature for up to three days. If you want to keep them longer, consider refrigerating them. Just make sure to wrap them in plastic wrap to prevent drying. Freezing muffins is a great way to save them for later. Allow the muffins to cool completely first. Next, wrap each muffin in plastic wrap. Place them in a freezer bag or container. They can last up to three months in the freezer. When you're ready to enjoy, just take out what you need. To reheat your muffins, you can use the microwave or the oven. For the microwave, place a muffin on a plate and heat for about 15-20 seconds. Check if it's warm enough. If using the oven, preheat it to 350°F (175°C). Wrap the muffin in foil and heat for 10 minutes. This keeps them soft and tasty. Enjoy your delicious, fresh muffins! For the complete recipe, check the Full Recipe. You can try using ricotta or mascarpone. Both will give a creamy texture. However, they have different flavors. Ricotta is lighter, while mascarpone is richer. Adjust the sugar if using mascarpone, as it's sweeter. Overall, cream cheese gives the best flavor in these muffins. To make these muffins healthier, consider these simple swaps: - Use whole wheat flour instead of all-purpose flour. - Substitute Greek yogurt with a low-fat version. - Reduce the sugar by up to half. - Add fruits like blueberries or nuts for fiber and nutrients. These changes keep the muffins tasty while adding health benefits. To freshen stale muffins, place them in a microwave with a cup of water. Heat for 10 to 15 seconds. The steam helps restore moisture. Alternatively, you can wrap them in a damp paper towel and microwave them. For a crunchy top, bake them in the oven at 350°F for about 5 minutes. This method gives them a fresh taste. Remember, fresh muffins always taste best! For more ideas, check out the Full Recipe. This article shared tips for great muffins, covering ingredients, preparation, baking, and storage. Remember, fresh ingredients matter for the best flavor. Follow step-by-step instructions for the perfect muffin batter and baking. Use the tips to avoid common mistakes for moist muffins. Explore variations for your unique taste and store them for later. With these insights, you can bake muffins that impress. Enjoy your baking journey and the delightful treats ahead!

If you’re craving a bright burst of flavor, my Lemon Cream Cheese Muffins will hit the spot! This simple recipe blends zesty lemon with rich cream cheese for a delightfully …

Read more

Categories Desserts

Berry Spinach Salad with Pecans Fresh and Tasty Dish

June 3, 2025 by Chef Miles
- 5 cups fresh baby spinach, thoroughly washed and dried - 1 cup mixed berries (combination of strawberries, blueberries, and raspberries) - 1/2 cup pecans, gently toasted - 1/4 cup feta cheese, crumbled - 1/4 red onion, finely sliced - 1/4 cup balsamic vinaigrette dressing I love using fresh baby spinach for its crisp texture and vibrant color. Mixed berries add sweetness and a burst of flavor. Toasted pecans bring a nice crunch and rich taste. Feta cheese gives a creamy touch, while red onion adds a bit of bite. The balsamic vinaigrette ties everything together perfectly. - Honey for sweetness - Salt and pepper If you want to add a hint of sweetness, honey works great. A dash of salt and pepper can enhance the salad's flavor even more. - Number of servings: 4 servings - Portion recommendations: Serve about 1 1/2 cups per person. This salad is perfect for sharing or as a light meal for four. Each serving is filling and packed with nutrients. If you want to make it a main dish, consider adding grilled chicken or quinoa for extra protein. For the full recipe, check out the reference above. Toasting pecans brings out a deep, rich flavor. Use a dry skillet and set it on medium heat. Add the pecans and stir often for about 5-7 minutes. You want them golden brown and fragrant. Watch them closely to prevent burning. If they start to smoke, remove them right away. Start by washing the spinach. Place it in a large bowl and fill it with cold water. Swirl the leaves to remove dirt. Lift the spinach out and let it drain in a colander. Pat it dry with a clean towel or use a salad spinner. For the berries, rinse them under cold water. Gently pat them dry too. If you use strawberries, slice them into small pieces. This makes them easier to eat and mix well. Layer your salad for the best look and taste. First, add the spinach to a large bowl. Next, sprinkle the berries over the spinach. Follow this with the toasted pecans. Add the sliced red onion and crumbled feta cheese on top. Drizzle the balsamic vinaigrette dressing over everything. If you like sweetness, you can add honey here. Finally, toss the salad gently. Use tongs or your hands to mix well, coating all the ingredients. Taste it and add salt and black pepper as needed. Enjoy this fresh and tasty dish! You can find the Full Recipe for more details. To make your Berry Spinach Salad even better, try different dressings. You can use lemon vinaigrette or honey mustard for a sweet twist. Adding protein can make it heartier. Grilled chicken or chickpeas makes a great choice. Feel free to switch out the nuts or cheese. Almonds or walnuts can work well too. Try goat cheese instead of feta for a different taste. You can also mix in seasonal fruits. Apples in fall or peaches in summer add freshness. When serving, consider a large bowl or individual plates. A big bowl is great for family meals. For a fancy touch, use small plates. Garnish each serving with whole berries or extra pecans. This adds color and looks nice. For the full recipe, check out the details in the main article. {{image_4}} You can change this salad based on the season. In summer, use fresh berries like strawberries, blueberries, and raspberries. They add sweetness and a burst of color. For winter, try adding citrus fruits like oranges or pomegranate seeds. They give a nice zing. You can also mix in roasted root vegetables, like sweet potatoes, for warmth. If you follow a vegan diet, skip the feta cheese. You can use avocado or chickpeas instead for creaminess and protein. For gluten-free options, ensure your vinaigrette is gluten-free. You can make your dressing with olive oil, vinegar, and herbs. Check labels on any toppings to avoid gluten. Feel free to add more fruits or veggies. Sliced apples or pears work great. They add a nice crunch. You can also include nuts like walnuts or almonds for extra texture. Experiment with different dressings too. Try a honey mustard or a citrus vinaigrette. Each will give a new taste to your salad. Enjoy exploring these variations to keep your meals interesting! For the full recipe, see [Full Recipe]. To store leftover salad, place it in an airtight container. This keeps it fresh and prevents wilting. Use a container that fits the salad snugly. I recommend glass or BPA-free plastic containers. These materials help preserve the taste and texture. The salad stays fresh in the refrigerator for about 2-3 days. After that, the spinach can become soggy. Watch for signs of spoilage, like brown leaves or a slimy texture. If it smells off, it’s best to toss it. You don’t need to reheat this salad. Instead, freshen up leftovers by adding a splash of balsamic vinaigrette. This revives the flavors. Always store dressings separately to prevent sogginess. This way, you can enjoy a crisp salad later. You can find the full recipe for the Berry Spinach Salad with Pecans online. To make this salad, follow these key steps: 1. Toast the pecans: Use a dry skillet over medium heat for 5-7 minutes. 2. Prepare the greens: Add washed baby spinach to a large bowl. 3. Prepare the berries: Rinse mixed berries and slice strawberries if needed. 4. Add ingredients: Sprinkle toasted pecans, red onion, and feta cheese over the spinach. 5. Dress the salad: Drizzle balsamic vinaigrette and optional honey. 6. Toss and season: Mix gently and add salt and pepper to taste. 7. Serve immediately: Enjoy fresh for the best flavor. Yes, you can use frozen berries. Thaw them first to avoid excess moisture. Pat them dry with a paper towel. This helps keep the salad from getting soggy. Frozen berries might be softer, so handle them gently. They work well, especially in winter. Balsamic vinaigrette is ideal, but you can try other options. Lemon vinaigrette adds a fresh zing. Honey mustard dressing gives a sweet and tangy flavor. A creamy dressing, like ranch, can also work if you prefer a richer taste. Yes, this salad is healthy. Spinach is rich in vitamins A and C. Berries provide antioxidants and fiber. Pecans add healthy fats and protein. Feta cheese offers calcium and flavor. Overall, this dish is balanced and nutritious. You can prep some parts in advance. Wash and dry the spinach a day earlier. Store it in the fridge in a sealed container. You can also toast the pecans ahead of time. Keep them in an airtight container. Combine everything just before serving to maintain freshness. To wrap up, the Berry Spinach Salad with Pecans is easy and tasty. You learned the main ingredients, like spinach, berries, and pecans. I shared how to toast nuts and combine everything well. With tips for flavor and storage, you can enjoy this salad at any time. Don't be afraid to make it your own with different fruits and nuts. This dish is not only healthy, but it's also a fun way to enjoy fresh ingredients. Try it, and you may find your new favorite salad!

Are you ready to whip up a fresh and tasty dish? This Berry Spinach Salad with Pecans is the perfect blend of flavors and textures. With vibrant berries, crunchy pecans, …

Read more

Categories Salads

Crispy Garlic Air Fryer Broccoli Simple Side Dish

June 3, 2025 by Chef Miles
To make crispy garlic air fryer broccoli, gather these ingredients: - 1 lb fresh broccoli florets - 3 tablespoons olive oil - 4 cloves garlic, minced - 1/2 teaspoon red pepper flakes (optional) - 1 teaspoon garlic powder - 1 teaspoon onion powder - Salt and pepper to taste - Zest of 1 lemon - 2 tablespoons grated Parmesan cheese (optional) If you don't have some ingredients, here are options: - Use avocado oil instead of olive oil for a different flavor. - Substitute fresh garlic with garlic paste or powder if you're in a pinch. - Try nutritional yeast instead of Parmesan for a vegan option. - Use lemon juice if you don't have zest. When picking broccoli, look for these signs of freshness: - Choose bright green florets with no yellow spots. - Stems should feel firm and not bend easily. - Fresh broccoli should smell sweet, not bitter. - If possible, buy organic to avoid pesticides. These tips help you select the best broccoli for your dish. For the full recipe, check the steps to bring your crispy garlic air fryer broccoli to life! First, rinse 1 pound of fresh broccoli florets under cool water. Make sure to wash them well to remove any dirt. Next, dry the broccoli thoroughly using a kitchen towel or paper towels. This step is very important. Drying helps the broccoli get crispy when cooked. In a large bowl, combine 3 tablespoons of olive oil and 4 minced garlic cloves. If you like some heat, add 1/2 teaspoon of red pepper flakes. Next, include 1 teaspoon of garlic powder and 1 teaspoon of onion powder. Don’t forget a pinch of salt and pepper! Mix everything until well combined. This mixture is key for great flavor. Now it’s time to coat the broccoli. Add the dry broccoli florets to the bowl with the garlic mixture. Gently toss the florets until they are fully covered in the oil and spices. Make sure each piece gets some of that tasty mix. This step ensures that every bite will be bursting with flavor. For the full recipe, check the details above. Preheating your air fryer is key for crispy broccoli. I set mine to 375°F (190°C). Give it about 3-5 minutes to heat up. This step helps the broccoli cook evenly and get that nice crunch. When I air fry, I arrange the broccoli in one layer. This leaves space between the florets. Good air flow is essential. I also shake the basket halfway through cooking. This ensures all sides get that perfect golden color. Cook the broccoli for 10-12 minutes. Keep an eye on it; you want it vibrant and crispy. If you like extra crunch, check it a minute or two sooner. Tossing in lemon zest and Parmesan after cooking adds flavor and a nice finish. For more tips, check the Full Recipe. {{image_4}} To make your broccoli extra crispy, start with fresh florets. Dry them well after washing. Any moisture will steam the broccoli, making it soggy. Toss the florets in olive oil and seasonings evenly. This helps them cook well. When you place them in the air fryer, ensure they are in a single layer. If they overlap, they won't get as crispy. Shake the basket halfway through to help them cook evenly. To bring out the garlic flavor, use fresh garlic cloves. Minced garlic gives a stronger taste than garlic powder. You can even roast the garlic before adding it to the mix. This adds a sweet, rich taste. Adding lemon zest at the end brightens the garlic flavor and gives a fresh twist. If you want more heat, add red pepper flakes to the garlic mix. Crispy garlic air fryer broccoli is a great side dish for any meal. Serve it alongside grilled chicken or fish for a balanced plate. It also pairs well with pasta dishes or as a topping on salads. For extra flair, sprinkle more Parmesan cheese on top or add toasted nuts for crunch. Enjoy it hot for the best taste! You can change the flavor of your crispy garlic air fryer broccoli easily. Try adding spices like cumin or paprika for a smoky taste. A dash of soy sauce can give it an umami kick. You can also use fresh herbs like thyme or rosemary for a garden-fresh flavor. Mix and match to find your favorite blend! Broccoli is great, but you can mix in other veggies for variety. Cauliflower, carrots, or bell peppers work well with this recipe. Just chop them into similar sizes as the broccoli florets. This way, they cook evenly. You can create a colorful veggie medley that’s tasty and visually appealing. If you want a vegan dish, skip the Parmesan cheese. You can use nutritional yeast instead. It adds a cheesy flavor without dairy. You can also try adding a splash of lemon juice for brightness. This keeps your dish light and vibrant. For more creaminess, consider using tahini or a vegan cheese alternative. Enjoy the same great taste with a plant-based twist! It takes about 10-12 minutes to cook broccoli in an air fryer. Cooking times can vary based on the size of the florets. I recommend checking for doneness at the 10-minute mark. The broccoli should be bright green and crispy. Yes, you can use frozen broccoli, but it will change the texture. Frozen broccoli often has more water, so it may not get as crispy. If you use frozen broccoli, cook it a bit longer. Start with 12-15 minutes and check for crispiness. Crispy garlic air fryer broccoli pairs well with many dishes. Here are some ideas: - Grilled chicken or fish - Pasta with olive oil and garlic - Quinoa or rice dishes - Tofu stir-fries - A fresh salad These options create a balanced meal that is both healthy and tasty. For the full recipe, check out the earlier section. To sum it up, we explored how to make crispy garlic air fryer broccoli. We covered ingredient choices, cooking steps, and tips for the best results. You learned how to achieve crispiness and enhance flavor. Finally, we offered variations and answered your common questions. Use these tips for a delicious dish that pleases everyone. Try new seasonings and veggies to keep it fun. Enjoy your cooking and savor every bite!

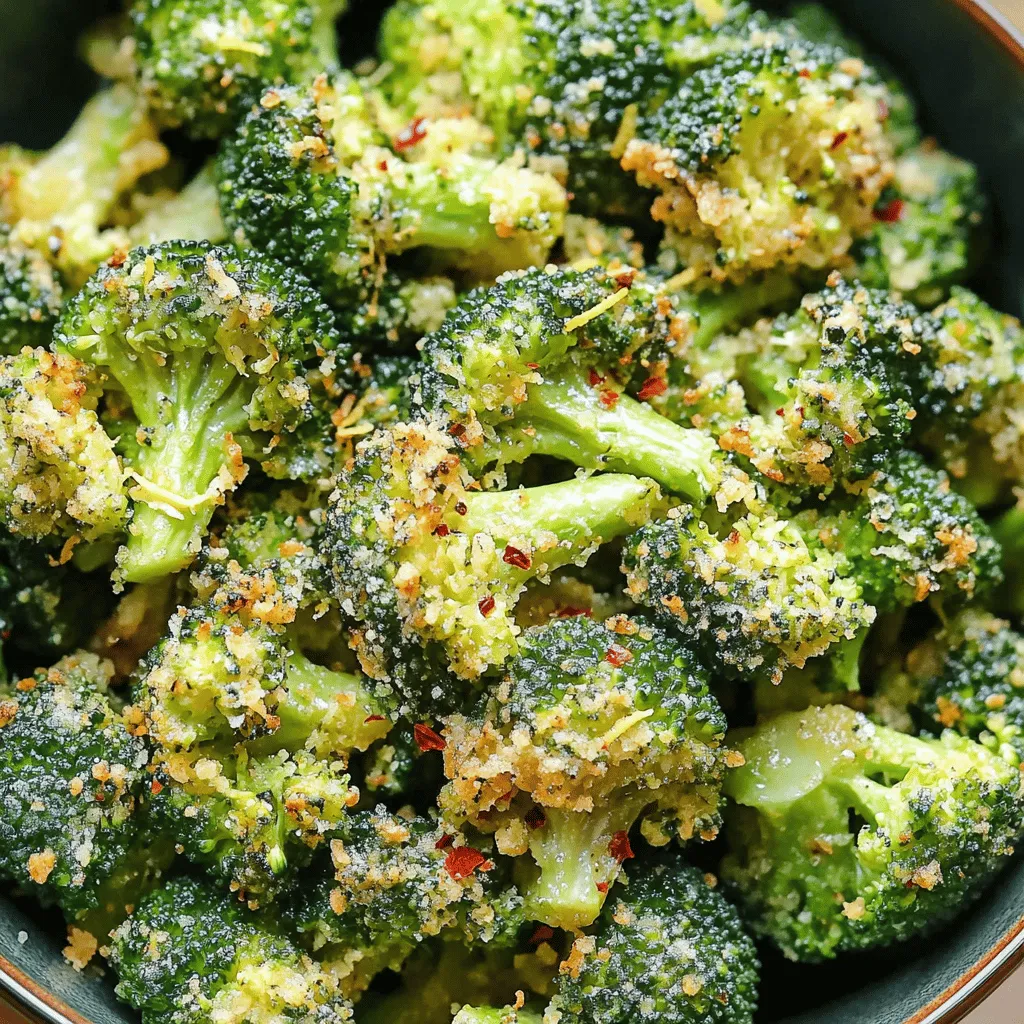
Are you ready to elevate your dinner game? Crispy Garlic Air Fryer Broccoli is a simple side dish that packs a flavor punch. In just a few easy steps, you’ll …

Read more

Categories Appetizers
Older posts
Newer posts
← Previous Page1 … Page99 Page100 Page101 … Page110 Next →

MELTED RECIPES

where delicious ideas melt into life, from stovetop to backyard. Always warm, simple, and irresistibly satisfying. 🍳🔥🧀

PAGES

Home About Contact Privacy Policy Terms & Conditions Cookie Policy GDPR Policy Copyright Policy Disclaimer

CATEGORIES

Appetizers Desserts Salads Breakfast Dinner

Contact

  • Pinterest
  • Mail
Copyright © 2025 Melted Recipes. All rights reserved.