Chocolate Peppermint Thumbprint Cookies Delightful Treat

WANT TO SAVE THIS RECIPE?

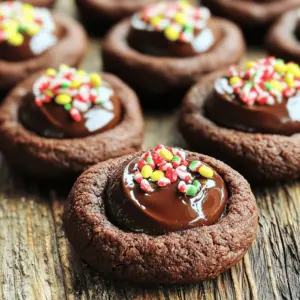
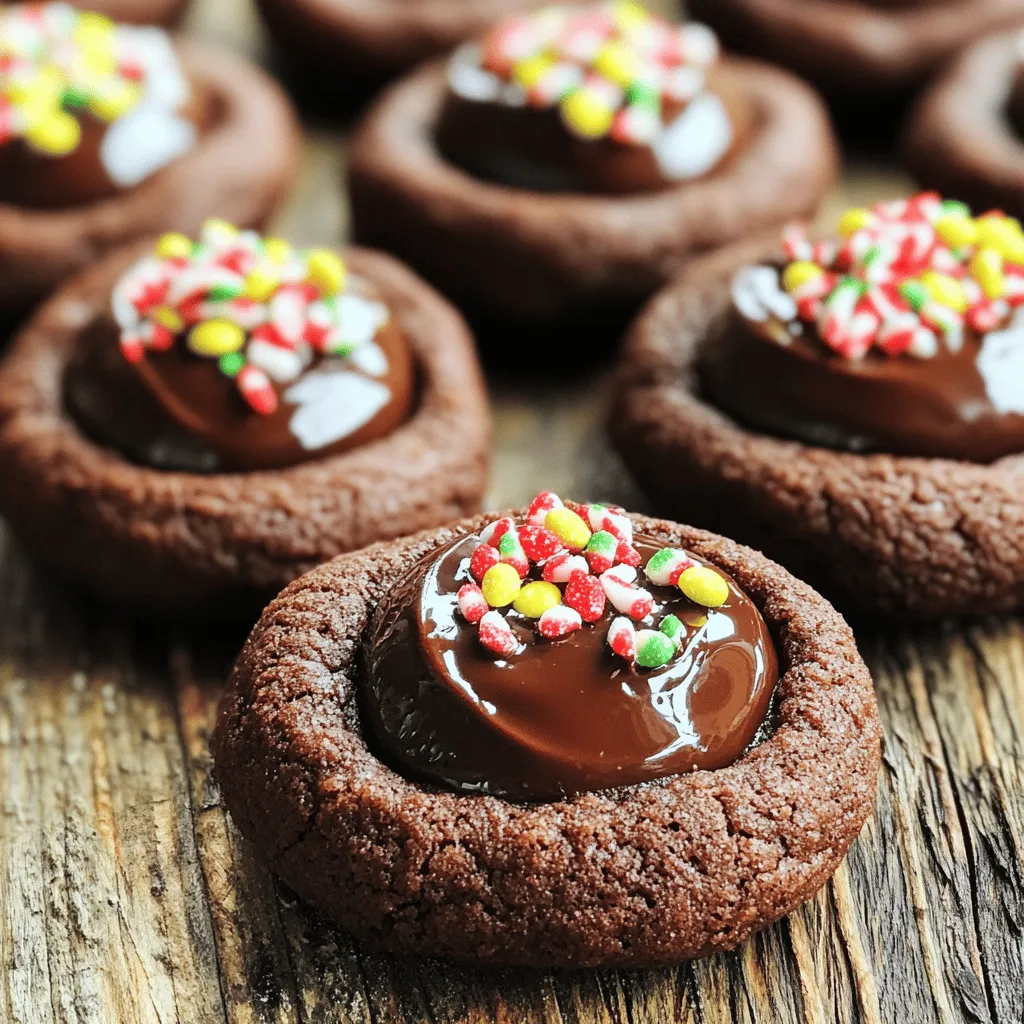
If you love chocolate and peppermint, you’re in for a treat! Our Chocolate Peppermint Thumbprint Cookies are a delightful blend of flavors that will make your taste buds dance. With a soft texture and a sweet surprise inside, these cookies are perfect for any occasion. Get ready to impress your family and friends with this easy recipe. Let’s dive into the ingredients and make some magic happen!

Ingredients

To create these delightful Chocolate Peppermint Thumbprint Cookies, gather the following ingredients:

– 1 cup unsalted butter, softened to room temperature

– 1 cup granulated sugar

– 1 teaspoon pure vanilla extract

– 1 teaspoon pure peppermint extract

– 2 cups all-purpose flour

– 1/2 cup unsweetened cocoa powder

– 1/2 teaspoon baking powder

– 1/4 teaspoon salt

– 1/2 cup chocolate chips (for filling)

– Crushed peppermint candies (for garnish)

These ingredients work together to create a rich, chocolatey base with a refreshing peppermint twist. The butter gives the cookies a soft texture, while the sugar adds sweetness. Both extracts enhance the flavor, making each bite a festive treat. The flour and cocoa provide the structure and chocolate depth. The baking powder helps them rise, and the salt balances the sweetness. Finally, the chocolate chips melt in the center, creating a lovely filling, and the crushed peppermint candies add a crunchy finish.

Step-by-Step Instructions

Preheat and Prepare

First, preheat your oven to 350°F (175°C). This step is key for even baking. Next, line a baking sheet with parchment paper. This helps to prevent sticking and makes cleanup easy.

Mix Wet Ingredients

In a large bowl, combine 1 cup of softened butter and 1 cup of granulated sugar. Beat them together until fluffy. This should take around 3-5 minutes. Next, add 1 teaspoon of vanilla extract and 1 teaspoon of peppermint extract. Mix until everything is smooth and well combined.

Combine Dry Ingredients

In another bowl, whisk together 2 cups of all-purpose flour, 1/2 cup of unsweetened cocoa powder, 1/2 teaspoon of baking powder, and 1/4 teaspoon of salt. This helps to evenly distribute the dry ingredients. Slowly add this dry mixture into the wet ingredients. Mix on low speed until a soft dough forms.

Chill Dough

Cover the dough with plastic wrap and chill it in the fridge for 30 minutes. Chilling the dough makes it easier to handle and shape.

Shape Cookies

After chilling, scoop out tablespoon-sized portions of the dough. Roll them into balls and place them on the baking sheet, spacing them about 2 inches apart. Use your thumb or the back of a small spoon to press down in the center of each ball, creating a small indentation.

Bake and Fill

Bake the cookies in the oven for 10-12 minutes. Keep an eye on them; the edges should look set, while the centers may still be a bit soft. When you take them out, fill each indentation with a few chocolate chips. The warmth will melt the chips slightly. Let the cookies cool for about 5 minutes before moving them to a wire rack. Once cooled, sprinkle the tops with crushed peppermint candies for a festive touch.

Tips & Tricks

Ensuring Perfect Cookies

To make the best Chocolate Peppermint Thumbprint Cookies, start with room temperature butter. Soft butter mixes better with sugar. It helps create a light and fluffy dough. Next, chill the dough for about 30 minutes. Chilling makes the dough easier to handle. It also helps the cookies keep their shape while baking.

Baking Tips

Watch the baking time closely. You want chewy centers, not hard cookies. Bake them for 10 to 12 minutes. When the edges set and the centers look soft, it’s time to take them out. Also, be sure to rotate the baking sheet halfway through. This step ensures even baking for all the cookies.

Serving Suggestions

These cookies pair perfectly with hot chocolate or coffee. The rich chocolate and mint flavors complement warm drinks well. For a festive touch, serve them on a colorful platter. Add some holiday decorations for a special look. Your guests will love this delightful treat!

Variations

Flavor Enhancements

You can make these cookies even more fun. Try using different extracts. Almond or orange extracts work well. They add a nice twist to the flavor. You can also add cocoa nibs. These little bits give extra texture and a nice crunch. They pair perfectly with the smooth chocolate filling.

Dietary Alternatives

If you need a gluten-free option, almond flour is a great choice. It gives the cookies a lovely nutty flavor. For those who follow a vegan diet, you can use substitutes. Replace butter with coconut oil and use flax eggs instead of regular eggs. This way, everyone can enjoy these tasty treats!

Storage Info

How to Store

To keep your Chocolate Peppermint Thumbprint Cookies fresh, store them in an airtight container at room temperature. This method maintains their soft texture and rich flavor. If you want to keep them longer, refrigerate them for extended freshness. Just remember to let them come back to room temperature before enjoying!

Freezing Instructions

You can freeze unbaked dough for later use. Just scoop the dough into balls and place them on a baking sheet. Freeze until solid, then transfer to a freezer bag. When you want cookies, bake them directly from the freezer. For baked cookies, store them in freezer bags. This keeps them fresh for up to three months.

Shelf Life

For the best quality, consume your cookies within one week. They taste best when fresh! To maintain their freshness, keep them sealed in an airtight container. Avoid humidity, as it can make them soft or stale. Enjoy every bite of these delightful treats!

FAQs

Can I use milk chocolate instead of chocolate chips?

Yes, you can use milk chocolate. It will make the cookies sweeter. Just adjust the amount to match your taste preferences. If you like a richer flavor, dark chocolate is also a great choice.

Can I make these cookies in advance?

Absolutely, you can make these cookies in advance. Once baked, store them in an airtight container. This keeps them fresh for days. You can also freeze the dough if you want to bake later. Just thaw it in the fridge before baking.

How do I prevent cookies from spreading during baking?

To prevent spreading, chill the dough well. This helps keep the shape while baking. If the dough is too warm, cookies may spread out too much. Always ensure your dough is properly chilled before baking.

These peppermint chocolate cookies are simple and fun to make. You start with basic ingredients and follow easy steps. Chilling the dough helps shape perfect cookies. Remember to keep an eye on baking time for the best results. You can experiment with flavors and store them well for lasting freshness. Enjoy these treats with hot drinks for a cozy experience. I hope you try this recipe and delight in every bite. Happy baking!

To create these delightful Chocolate Peppermint Thumbprint Cookies, gather the following ingredients: - 1 cup unsalted butter, softened to room temperature - 1 cup granulated sugar - 1 teaspoon pure vanilla extract - 1 teaspoon pure peppermint extract - 2 cups all-purpose flour - 1/2 cup unsweetened cocoa powder - 1/2 teaspoon baking powder - 1/4 teaspoon salt - 1/2 cup chocolate chips (for filling) - Crushed peppermint candies (for garnish) These ingredients work together to create a rich, chocolatey base with a refreshing peppermint twist. The butter gives the cookies a soft texture, while the sugar adds sweetness. Both extracts enhance the flavor, making each bite a festive treat. The flour and cocoa provide the structure and chocolate depth. The baking powder helps them rise, and the salt balances the sweetness. Finally, the chocolate chips melt in the center, creating a lovely filling, and the crushed peppermint candies add a crunchy finish. First, preheat your oven to 350°F (175°C). This step is key for even baking. Next, line a baking sheet with parchment paper. This helps to prevent sticking and makes cleanup easy. In a large bowl, combine 1 cup of softened butter and 1 cup of granulated sugar. Beat them together until fluffy. This should take around 3-5 minutes. Next, add 1 teaspoon of vanilla extract and 1 teaspoon of peppermint extract. Mix until everything is smooth and well combined. In another bowl, whisk together 2 cups of all-purpose flour, 1/2 cup of unsweetened cocoa powder, 1/2 teaspoon of baking powder, and 1/4 teaspoon of salt. This helps to evenly distribute the dry ingredients. Slowly add this dry mixture into the wet ingredients. Mix on low speed until a soft dough forms. Cover the dough with plastic wrap and chill it in the fridge for 30 minutes. Chilling the dough makes it easier to handle and shape. After chilling, scoop out tablespoon-sized portions of the dough. Roll them into balls and place them on the baking sheet, spacing them about 2 inches apart. Use your thumb or the back of a small spoon to press down in the center of each ball, creating a small indentation. Bake the cookies in the oven for 10-12 minutes. Keep an eye on them; the edges should look set, while the centers may still be a bit soft. When you take them out, fill each indentation with a few chocolate chips. The warmth will melt the chips slightly. Let the cookies cool for about 5 minutes before moving them to a wire rack. Once cooled, sprinkle the tops with crushed peppermint candies for a festive touch. To make the best Chocolate Peppermint Thumbprint Cookies, start with room temperature butter. Soft butter mixes better with sugar. It helps create a light and fluffy dough. Next, chill the dough for about 30 minutes. Chilling makes the dough easier to handle. It also helps the cookies keep their shape while baking. Watch the baking time closely. You want chewy centers, not hard cookies. Bake them for 10 to 12 minutes. When the edges set and the centers look soft, it’s time to take them out. Also, be sure to rotate the baking sheet halfway through. This step ensures even baking for all the cookies. These cookies pair perfectly with hot chocolate or coffee. The rich chocolate and mint flavors complement warm drinks well. For a festive touch, serve them on a colorful platter. Add some holiday decorations for a special look. Your guests will love this delightful treat! {{image_4}} You can make these cookies even more fun. Try using different extracts. Almond or orange extracts work well. They add a nice twist to the flavor. You can also add cocoa nibs. These little bits give extra texture and a nice crunch. They pair perfectly with the smooth chocolate filling. If you need a gluten-free option, almond flour is a great choice. It gives the cookies a lovely nutty flavor. For those who follow a vegan diet, you can use substitutes. Replace butter with coconut oil and use flax eggs instead of regular eggs. This way, everyone can enjoy these tasty treats! To keep your Chocolate Peppermint Thumbprint Cookies fresh, store them in an airtight container at room temperature. This method maintains their soft texture and rich flavor. If you want to keep them longer, refrigerate them for extended freshness. Just remember to let them come back to room temperature before enjoying! You can freeze unbaked dough for later use. Just scoop the dough into balls and place them on a baking sheet. Freeze until solid, then transfer to a freezer bag. When you want cookies, bake them directly from the freezer. For baked cookies, store them in freezer bags. This keeps them fresh for up to three months. For the best quality, consume your cookies within one week. They taste best when fresh! To maintain their freshness, keep them sealed in an airtight container. Avoid humidity, as it can make them soft or stale. Enjoy every bite of these delightful treats! Yes, you can use milk chocolate. It will make the cookies sweeter. Just adjust the amount to match your taste preferences. If you like a richer flavor, dark chocolate is also a great choice. Absolutely, you can make these cookies in advance. Once baked, store them in an airtight container. This keeps them fresh for days. You can also freeze the dough if you want to bake later. Just thaw it in the fridge before baking. To prevent spreading, chill the dough well. This helps keep the shape while baking. If the dough is too warm, cookies may spread out too much. Always ensure your dough is properly chilled before baking. These peppermint chocolate cookies are simple and fun to make. You start with basic ingredients and follow easy steps. Chilling the dough helps shape perfect cookies. Remember to keep an eye on baking time for the best results. You can experiment with flavors and store them well for lasting freshness. Enjoy these treats with hot drinks for a cozy experience. I hope you try this recipe and delight in every bite. Happy baking!

Chocolate Peppermint Thumbprint Cookies

Indulge in the festive spirit with these delightful Chocolate Peppermint Thumbprint Cookies! This easy recipe combines rich chocolate and refreshing peppermint for a unique treat perfect for any holiday gathering. With simple ingredients and straightforward steps, you'll create cookie wonders that everyone will love. Don't miss out on this delicious holiday baking adventure—click through to explore the full recipe and make these tasty cookies today!

Ingredients
  

1 cup unsalted butter, softened to room temperature

1 cup granulated sugar

1 teaspoon pure vanilla extract

1 teaspoon pure peppermint extract

2 cups all-purpose flour

1/2 cup unsweetened cocoa powder

1/2 teaspoon baking powder

1/4 teaspoon salt

1/2 cup chocolate chips (for filling)

Crushed peppermint candies (for garnish)

Instructions
 

Preheat your oven to 350°F (175°C) and prepare a baking sheet by lining it with parchment paper.

    In a large mixing bowl, combine the softened butter and granulated sugar. Beat them together using a hand or stand mixer on medium speed until the mixture is light, fluffy, and pale in color. This should take about 3-5 minutes.

      Pour in the vanilla and peppermint extracts, continuing to beat the mixture until fully integrated and smooth.

        In a separate bowl, whisk together the all-purpose flour, cocoa powder, baking powder, and salt until evenly mixed. Slowly incorporate this dry mixture into the butter-sugar blend, mixing on low speed until a soft, cohesive dough forms.

          Cover the dough with plastic wrap and chill it in the refrigerator for about 30 minutes. This will make it easier to handle and shape.

            After chilling, remove the dough from the fridge. Scoop out tablespoon-sized portions and gently roll them into balls. Place these balls on the prepared baking sheet, ensuring they are spaced about 2 inches apart.

              Use your thumb or the back of a small spoon to press down gently in the center of each ball to create a small indentation.

                Bake the cookies in the preheated oven for 10-12 minutes. Keep an eye on the edges; they should appear set while the centers may look slightly soft.

                  While the cookies are still warm, fill each indentation with a few chocolate chips. The heat will help the chocolate chips melt slightly, forming a delectable filling as they cool.

                    Let the cookies rest on the baking sheet for approximately 5 minutes, allowing them to firm up slightly before transferring them to a wire rack to cool completely.

                      Once the cookies have cooled to room temperature, generously sprinkle the tops with crushed peppermint candies to add a festive and crunchy touch.

                        Prep Time: 30 minutes | Total Time: 1 hour | Servings: 24 cookies

                          WANT TO SAVE THIS RECIPE?