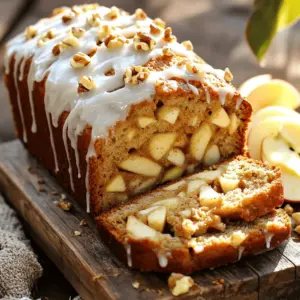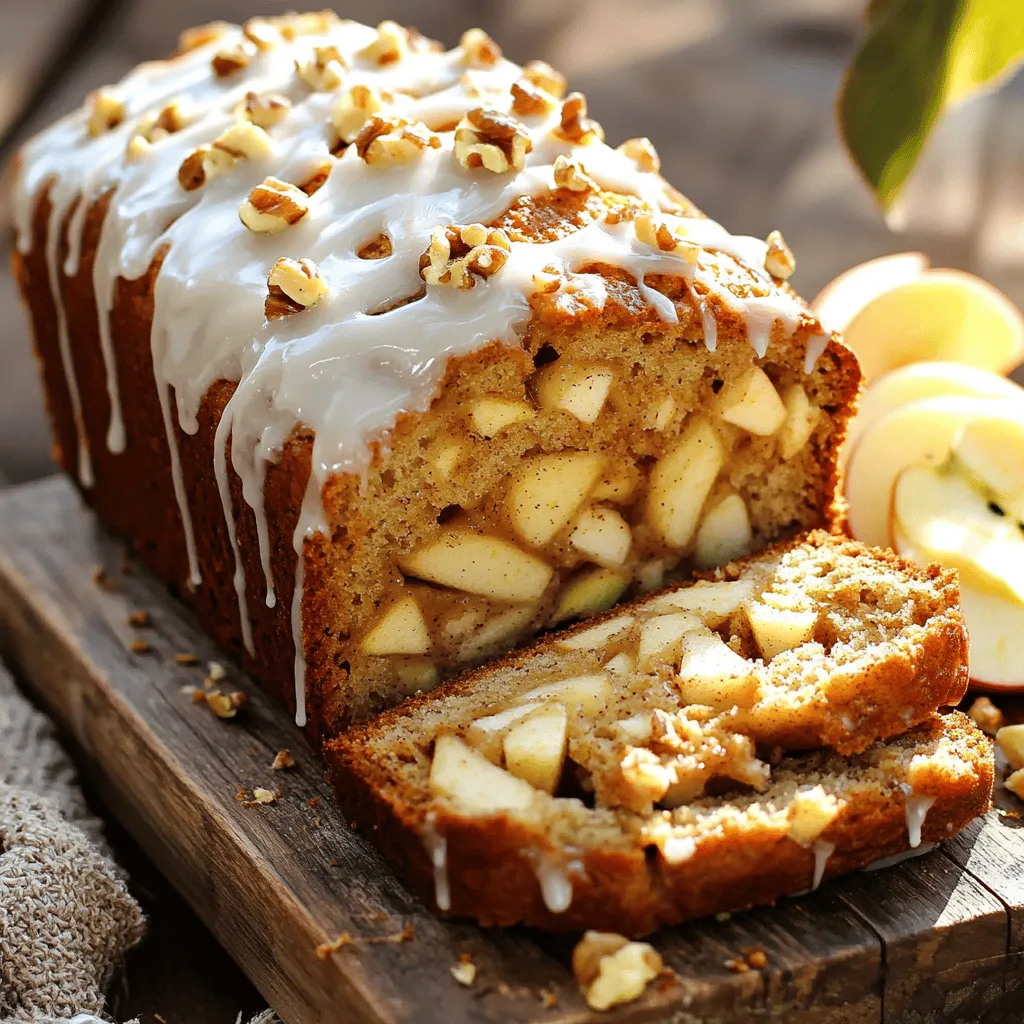
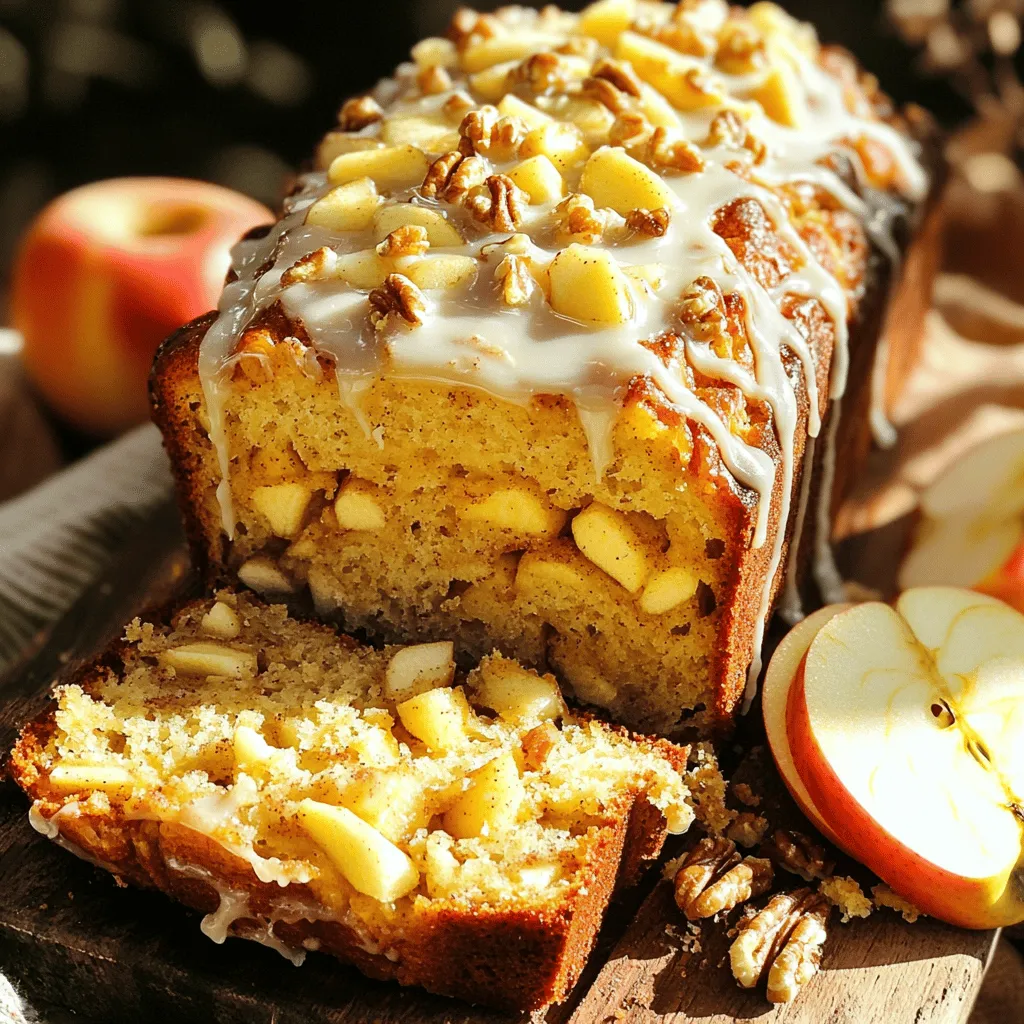
You’re about to dive into the delicious world of Glazed Apple Fritter Bread. Imagine warm bread, packed with sweet apples and a shiny glaze that makes your mouth water. This recipe is simple and fun, perfect for a cozy breakfast or an afternoon treat. I’ll guide you step-by-step, making sure you get it just right. Ready to impress your taste buds? Let’s get baking!
Ingredients
Dry Ingredients
– 2 cups all-purpose flour
– 1 tablespoon baking powder
– 1/2 teaspoon salt
– 1 teaspoon ground cinnamon
– 1/4 teaspoon ground nutmeg
Wet Ingredients
– 1/2 cup granulated sugar
– 1/2 cup unsalted butter, melted and slightly cooled
– 2 large eggs, at room temperature
– 1 teaspoon vanilla extract
Add-ins
– 1 cup apples, peeled, cored, and diced
– 1/2 cup walnuts, chopped (optional)
– 1/2 cup powdered sugar (for the glaze)
– 2 tablespoons milk (for the glaze)
To create this tasty Glazed Apple Fritter Bread, you need a mix of dry and wet ingredients. Start with the dry ones. You need all-purpose flour, baking powder, salt, ground cinnamon, and ground nutmeg. These spices give the bread a warm, cozy flavor.
Next, gather the wet ingredients. You’ll need granulated sugar, melted unsalted butter, eggs, and vanilla extract. These will make the batter rich and sweet.
For the fun part, add-ins include diced apples. They bring natural sweetness and moisture. If you like, add walnuts for a nice crunch. Lastly, prepare the glaze with powdered sugar and milk. This sweet layer will top off your bread perfectly.
Step-by-Step Instructions
Preparation Steps
1. Preheat your oven to 350°F (175°C).
2. Grease a 9×5 inch loaf pan well. This helps the bread come out easily.
3. In a medium bowl, mix together:
– 2 cups all-purpose flour
– 1 tablespoon baking powder
– 1/2 teaspoon salt
– 1 teaspoon ground cinnamon
– 1/4 teaspoon ground nutmeg
Set this dry mix aside for later.
Combining Ingredients
1. In a large bowl, combine:
– 1/2 cup granulated sugar
– 1/2 cup unsalted butter, melted and slightly cooled.
Whisk them together until smooth and creamy.
2. Add 2 large eggs to the butter mix. Mix well after each egg.
3. Stir in 1 teaspoon vanilla extract for a nice flavor boost.
Finalizing the Batter
1. Gradually mix the dry ingredients into the wet ingredients. Stir gently until just combined.
2. Carefully fold in:
– 1 cup apples, peeled, cored, and diced
– 1/2 cup walnuts, chopped (optional)
This step ensures an even mix of fruit and nuts.
Baking
1. Pour the batter into your greased loaf pan. Smooth the top with a spatula.
2. Place the pan in the oven. Bake for 50-60 minutes.
3. Check doneness by inserting a toothpick in the center. It should come out clean or with a few crumbs.
Glazing and Cooling
1. While the bread bakes, prepare the glaze. In a small bowl, whisk together:
– 1/2 cup powdered sugar
– 2 tablespoons milk
Adjust the thickness by adding more milk if needed.
2. Once the bread bakes, cool it in the pan for 10 minutes.
3. Transfer the bread to a wire rack to cool completely.
4. Drizzle the glaze over the top once cooled. Let it soak in for more flavor.
Tips & Tricks
Achieving Perfect Texture
To get the best texture in your glazed apple fritter bread, it’s key to not over-mix the batter. When you mix too much, your bread can turn out tough. You want a light, fluffy loaf. Use a gentle hand when combining the wet and dry ingredients. It’s also important to use room temperature ingredients. This helps them blend better. Cold eggs or butter can lead to a lumpy batter.
Flavor Enhancements
You can boost the flavor of your bread by adding extra spices or extracts. A pinch of allspice or a dash of almond extract can make a big difference. You can also serve your bread in fun ways. Try pairing it with a scoop of vanilla ice cream. A drizzle of warm maple syrup will take it to the next level, too.
Troubleshooting Common Issues
If your bread is too dense, it might be from over-mixing or too much flour. Make sure to measure your flour correctly. Spoon it into the measuring cup and level it off. If your glaze is too thick, just add a bit more milk. You want a smooth, pourable glaze. Adjust it until it’s just right for drizzling.
Variations
Flavor Variations
You can easily change the flavor of your glazed apple fritter bread. Try using different fruits, like pears or cranberries. These fruits add new tastes and fun textures. You can also switch up the nuts. Instead of walnuts, consider pecans or hazelnuts. If you love chocolate, add chocolate chips to the batter. Each option brings a unique twist that makes your bread special.
Dietary Adjustments
If you need gluten-free options, replace all-purpose flour with a gluten-free blend. This way, everyone can enjoy the bread. For vegan substitutes, use applesauce or mashed bananas instead of eggs. You can also swap in coconut oil or vegan butter for the butter. These changes help more people enjoy this tasty treat without missing out.
Serving Variations
Pair your glazed apple fritter bread with drinks for a delightful experience. A warm cup of coffee or tea complements the sweet flavors well. For special occasions, think about how you present your bread. Slice it and arrange it on a wooden board. Drizzle extra glaze on top and add thin apple slices as a garnish. A small cup of warm maple syrup for dipping can make it even better.
Storage Info
Short-Term Storage
To keep your Glazed Apple Fritter Bread fresh at room temperature, wrap it in plastic wrap. Placing it in an airtight container works well too. This helps to lock in moisture and flavor. Store it in a cool, dry place, away from direct sunlight. It will stay fresh for about 2-3 days. If you notice it getting dry, consider slicing it and toasting a piece for a warm treat.
Long-Term Storage
For long-term storage, freezing is your best option. Wrap the bread tightly in plastic wrap, then place it in a freezer-safe bag. This helps prevent freezer burn. Your bread can last up to 3 months in the freezer. When you’re ready to enjoy it again, let it thaw in the fridge overnight. To reheat, simply pop slices in the toaster or warm them in the oven at 350°F for about 10-15 minutes.
Signs of Spoilage
To tell if the bread has gone bad, check for mold or an off smell. If the bread feels hard or dry, it may not taste good. Take a look for any discoloration on the crust or inside. If any of these signs appear, it’s best to discard the bread. Enjoying it fresh is always the best option!
FAQs
How long does Glazed Apple Fritter Bread last?
Glazed Apple Fritter Bread lasts for about 2-3 days at room temperature. Make sure to keep it in a sealed container. If you store it in the fridge, it can last up to a week. Just remember that refrigeration may change the texture a bit.
Can I make Glazed Apple Fritter Bread ahead of time?
Yes, you can prepare Glazed Apple Fritter Bread ahead of time. Make the batter a day before and store it in the fridge. Just remember to let it sit at room temperature for about 30 minutes before baking. You can also bake it in advance and glaze it later. This way, you have a fresh treat ready for guests.
What can I use instead of walnuts?
If you need a nut-free option, you can skip the walnuts altogether. You could also use sunflower seeds or pumpkin seeds for crunch. If you want more flavor, try adding dried fruits like raisins or cranberries. These alternatives can give a nice taste without any allergens.
Can I make this recipe without eggs?
Yes, you can make Glazed Apple Fritter Bread without eggs. Use flaxseed meal or chia seeds as a substitute. Mix 1 tablespoon of either with 3 tablespoons of water. Let it sit for a few minutes to thicken. This will help bind the ingredients like eggs do. You can also use applesauce; 1/4 cup can replace one egg.
This recipe for Glazed Apple Fritter Bread combines simple dry and wet ingredients with delicious add-ins. We covered step-by-step instructions to help you bake the perfect loaf. Remember to check for doneness and follow tips for texture and flavors.
Incorporate your favorite fruits or try different nuts to make it unique. Storing this bread correctly will keep it fresh and tasty. With just a bit of care, you can enjoy this treat for days. Now, get in the kitchen and start baking!