Are you ready to bake up some delicious Bakery Style Chocolate Chip Muffins? This simple recipe brings that warm, cozy bakery feel right to your kitchen. With just a few easy steps and ingredients you likely already have at home, you’ll impress everyone with soft, fluffy muffins packed with gooey chocolate. Let’s dive into the world of bakery-style baking! You won’t want to miss this!
Ingredients
Dry Ingredients
– 2 cups all-purpose flour
– 1 cup granulated sugar
– ½ cup light brown sugar, lightly packed
– 1 tablespoon baking powder
– ½ teaspoon baking soda
– ½ teaspoon salt
Wet Ingredients
– 1 cup buttermilk (or substitute with 1 cup milk mixed with 1 tablespoon vinegar)
– 2 large eggs
– ½ cup unsalted butter, melted and allowed to cool slightly
– 2 teaspoons pure vanilla extract
Add-ins
– 1 ½ cups semisweet chocolate chips
– Optional: coarse sugar for topping
Gather these ingredients before you start. This makes the process smooth. Measure everything accurately. This helps your muffins rise perfectly and taste amazing. Use fresh baking powder and soda for the best results.
When mixing wet and dry ingredients, use separate bowls. This ensures everything blends well. The buttermilk gives a nice tang. If you use the vinegar and milk mix, let it sit for five minutes. This creates a good substitute for buttermilk.
For the chocolate chips, I recommend using high-quality semisweet chips. They melt beautifully and add rich flavor. You can also reserve some for the top of the muffins. This will make them look more appealing.
If you want a crunchy top, sprinkle some coarse sugar on the muffins before baking. It adds texture and sweetness. These simple ingredients come together to create a delightful treat you’ll love!
Step-by-Step Instructions
Preparing the Muffin Batter
1. First, preheat your oven to 400°F (200°C). This makes sure the muffins bake evenly and rise nicely.
2. Next, prepare your muffin tin. You can line it with paper liners or spray it with cooking spray. This helps the muffins come out easily.
3. In a large bowl, mix 2 cups of all-purpose flour, 1 cup of granulated sugar, ½ cup of brown sugar, 1 tablespoon of baking powder, ½ teaspoon of baking soda, and ½ teaspoon of salt. Whisk these dry ingredients well. Make sure there are no lumps.
4. In another bowl, whisk together 1 cup of buttermilk (or your milk and vinegar mix), 2 large eggs, ½ cup of melted unsalted butter, and 2 teaspoons of vanilla extract. Mix until everything is smooth.
Combining Ingredients
1. Make a well in the center of your dry mix. Pour the wet mixture into this well.
2. Use a spatula or wooden spoon to stir gently. Mix just until everything is combined. It’s okay if there are a few lumps. This helps keep the muffins fluffy.
3. Carefully fold in 1 ½ cups of semisweet chocolate chips. Save a handful to top the muffins later.
Baking the Muffins
1. Use a cookie scoop or measuring cup to fill each muffin liner almost to the top.
2. Sprinkle the saved chocolate chips on top. If you want, add a pinch of coarse sugar for a sweet crunch.
3. Place the muffin tin in your preheated oven. Bake for 18-22 minutes. Check for doneness by inserting a toothpick into the center. It should come out clean or with a few moist crumbs.
4. After baking, let the muffins cool in the pan for about 5 minutes. Then, move them to a wire rack to cool completely.
Tips & Tricks
Achieving Bakery-Quality Muffins
To get those perfect bakery-style muffins, avoid overmixing the batter. When you mix too much, the muffins can become tough. Stir gently until the wet and dry ingredients blend. You want some lumps. They help keep the muffins soft.
Measuring ingredients accurately is key. Use dry measuring cups for flour and sugar. Spoon flour into the cup, then level it off with a knife. This method ensures you don’t pack in too much flour. Accurate measuring leads to the best muffin texture.
Enhancing Flavor and Texture
Using high-quality chocolate chips can make a big difference. Choose semisweet or dark chocolate chips for a rich flavor. Good chocolate melts beautifully and adds a lovely texture. You can also mix in milk chocolate for a sweeter muffin.
Optional toppings can add extra crunch. A sprinkle of coarse sugar on top before baking gives a sweet, sparkly finish. It adds a nice contrast to the soft muffin. You can also try adding nuts or oats for a different texture.
Presentation Ideas
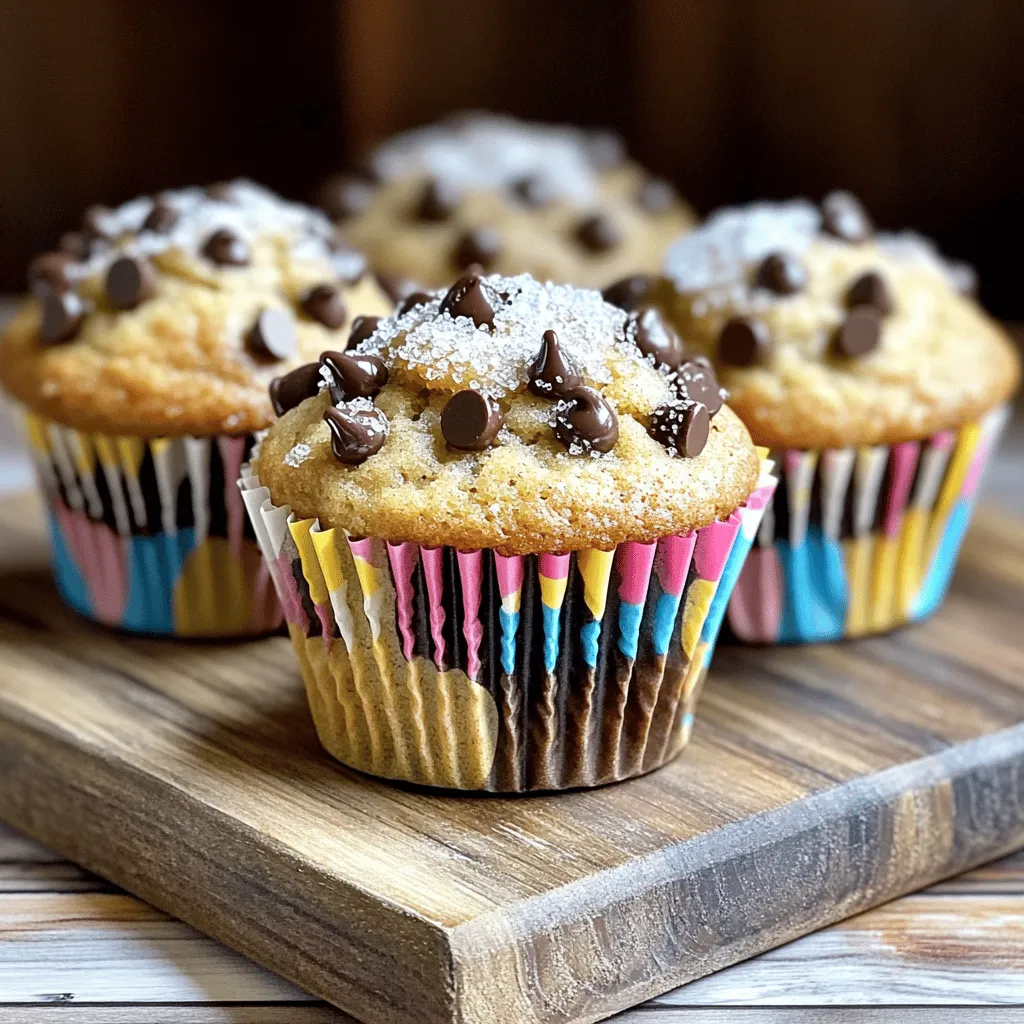
Serve the muffins warm for the best experience. Warm muffins taste fresh and inviting. You can dust them with powdered sugar for a fun touch, too. This simple step makes them look fancy.
For a creative display, arrange muffins on a rustic wooden board. Let colorful paper liners peek out to catch the eye. You can even use a cake stand to elevate the muffins. This makes your treats feel special and adds to the bakery-style charm.

Variations
Flavor Variations
You can make your muffins even more fun! Adding nuts or dried fruit gives a nice crunch and flavor. Try walnuts, pecans, or raisins. Each bite will surprise you. For a twist, swap chocolate chips for white chocolate or butterscotch. This change can make the muffins taste sweeter and different.
Dietary Modifications
If you want gluten-free muffins, use a gluten-free flour blend. Many blends work well in baking. You can also make these muffins vegan. Use flax eggs instead of regular eggs. Just mix one tablespoon of ground flaxseed with three tablespoons of water. Let it sit for five minutes to thicken. For the buttermilk, use plant-based milk with vinegar. This keeps your muffins soft and tasty.
Seasonal Twists
Each season brings new flavors to enjoy. In fall, add pumpkin spice to the batter for a warm flavor. Just a teaspoon will do! In summer, try adding seasonal fruits like blueberries or chopped peaches. They add freshness and sweetness. These twists keep your muffins exciting all year long!
Storage Info
Keeping Muffins Fresh
To keep your bakery-style chocolate chip muffins fresh, store them at room temperature. Place them in an airtight container for up to three days. This way, they stay soft and tasty. If you want to keep them longer, consider refrigerating or freezing. For freezing, wrap each muffin tightly in plastic wrap. Then, place them in a freezer-safe bag. They can last up to three months in the freezer.
Reheating Tips
When it’s time to enjoy your muffins again, you can reheat them in two ways. The microwave is quick. Heat each muffin for about 15-20 seconds. If you want a crispier top, use the oven. Preheat it to 350°F (175°C) and bake for about 5-10 minutes. To revive muffins after storage, sprinkle a few drops of water on them before reheating. This adds moisture back into the muffin.
Shelf Life
Fresh muffins usually last about three days at room temperature. If stored properly in the fridge, they can stay good for about a week. Watch for signs of spoilage. If you see mold or if they smell off, it’s best to toss them. Fresh muffins should feel soft and springy to the touch. If they feel hard or dry, it’s time to say goodbye.
FAQs
Can I use regular milk instead of buttermilk?
Yes, you can use regular milk. Just mix 1 cup of milk with 1 tablespoon of vinegar. Let it sit for 5 minutes to sour. This gives you a great substitute for buttermilk. It helps keep the muffins moist and fluffy.
How can I prevent muffins from sticking to the liners?
To stop muffins from sticking, use good-quality liners. Lightly spray them with cooking spray for extra protection. You can also grease the muffin tin with butter or oil before adding the liners. This adds a nice touch and makes it easier to remove the muffins.
Can I make the muffin batter ahead of time?
You can prepare the muffin batter ahead of time. Store it in the fridge for up to 2 hours. However, I recommend baking the muffins fresh for the best taste. If you wait too long, muffins may become dense, and they may not rise well.
Why are my muffins dense?
Dense muffins can happen for a few reasons. Overmixing the batter is a common mistake. It develops the gluten too much. Also, make sure to measure your flour correctly. Too much flour can make muffins heavy. Use a spoon to scoop flour into a measuring cup, then level it off.
In this post, we explored the key ingredients for muffins and detailed each step of the process. I shared helpful tips on achieving bakery-quality muffins and suggested fun variations to try. Remember, using the right ingredients and techniques brings out the best flavor and texture. Store your muffins properly to keep them fresh. With these insights, you can confidently create delightful muffins at home. Enjoy the joy of baking and sharing your tasty treats!
